Normal view

There are new articles available, click to refresh the page.
Before yesterdayMain stream

Sonic’s Big Dill Burger Copycat

27 August 2025 at 11:39

Sonic’s Big Dill Burger Copycat Recipe

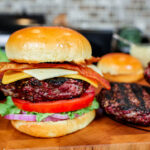
Fire up the griddle for this Big Dill Smash Burger—seasoned beef patties, tangy Dilly Ranch mayo, and pickle flavor stacked Sonic copycat style.

WHAT MALCOM USED IN THIS RECIPE

Print
Sonic’s Big Dill Burger Copycat

Sonic’s Big Dill Burger Copycat


5 Stars 4 Stars 3 Stars 2 Stars 1 Star

No reviews

Description

This Big Dill Smash Burger is my take on Sonic’s classic—crispy-edged beef patties, plenty of pickle flavor, and a tangy Dilly Ranch mayo that brings it all together.


Ingredients

For the Smash Burgers:

  • 2 lbs 80/20 ground beef (roll into 3oz balls)
  • Killer Hogs Steak Rub (or your favorite burger seasoning)
  • Slices of American cheese
  • Grilling oil
  • Hamburger buns
  • Shredded lettuce
  • Thick-cut dill pickles (we used Grillo’s Classic Dill Pickle Chips)
  • Fried pickle chips (we used Fresh Gourmet Crispy Dillies)

For the Dilly Ranch Mayo:

  • 1 cup Blue Plate mayo
  • 3 tsp Ranch seasoning (about ½ a packet)
  • 12 tsp fresh chopped dill
  • 2 Tbsp dill pickle juice (from the pickle chip jar)

Instructions

  1. Make the Dilly Ranch Mayo
    1. Mix mayo, Ranch seasoning, fresh dill, and pickle juice in a small bowl. Stir until smooth and let chill in the fridge for a few hours to let the flavors come together.
  2. Prep the Beef
    1. Form the ground beef into 3oz balls. Don’t pack them tight—keep them loose for a better smash.
  3. Smash and Sear
    1. Heat a flat-top griddle or cast iron over medium-high heat. Lightly oil the surface.
    2. Place the beef balls on the hot griddle and let them sit for about 1 minute—just long enough to form a light crust.
    3. Flip the balls over and smash them hard with a spatula or burger press.
    4. Season with Killer Hogs Steak Rub.
    5. Cook for 2–3 minutes, then flip again.
    6. Season the other side, add a slice of American cheese, and cook for another 1–2 minutes until the cheese is fully melted.
  4. Build the Stack
    1. Stack two patties for each burger.
  5. Toast the Buns
    1. Place your buns cut-side-down on the griddle for about 30 seconds until toasted and golden.
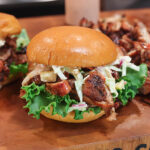
  6. Assemble the Burger
    1. Bottom bun → double smash patties – Top with fried pickle chips – Add shredded lettuce and thick-cut pickles – Spread Dilly Ranch Mayo on the top bun – Close it up and serve

This Big Dill Smash Burger recipe is my take on the Sonic favorite—seasoned ground beef smashed on a hot griddle until the edges get crispy, then layered with melted cheese, tangy pickles, and a homemade dill ranch mayo. It’s the ultimate copycat Sonic smash burger, loaded with bold pickle flavor and perfect for anyone who loves a juicy grilled burger with a twist.

Malcom Reed
Connect on Facebook
Follow me on TikTok
Subscribe to my YouTube Channel
Follow me on Instagram

Buy Killer Hogs Products Here

The post Sonic’s Big Dill Burger Copycat appeared first on HowToBBBQRight.

Open Fire Tri Tip

27 August 2025 at 11:25

Open Fire Tri Tip

I’m not trimming… I want to keep all the fat on this Tri Tip for flavor. Smother it in TX Brisket Rub (or classic salt & pepper), drop it straight over glowing coals on a Santa Maria grill—press it into the grate to carve a deep sear. Flip every few minutes. Then lift it to indirect heat until the probe reads 125–130°F. Twenty-minute rest, slice against the grain; simplicity and smoke rule.

WHAT MALCOM USED IN THIS RECIPE

Print
open fire tri tip

Open Fire Tri Tip


5 Stars 4 Stars 3 Stars 2 Stars 1 Star

No reviews

Description

Cook tri-tip Santa Maria-style right over the coals for big flavor and a smoky crust. This open-fire tri-tip recipe keeps it simple—just bold seasoning, live fire, and a juicy medium-rare finish.


Ingredients

  • 1 whole Tri-Tip roast (untrimmed)
  • Killer Hogs TX Brisket Rub (or salt and coarse black pepper)

Instructions

  1. Don’t Trim a Thing
    Leave all the fat and sinew on that big, beautiful tri-tip. That’s how Mr. Al Frugoni—the king of live fire—does it, and we’re sticking to it.
  2. Season Heavy
    Hit it generously with TX Brisket Rub (or your favorite salt & pepper blend). Don’t be shy—we want a big crust.
  3. Build the Fire
    Start a fire using wood splits and lump charcoal. Once you’ve got a solid coal bed, rake the coals under your cooking grate and let it heat up.
  4. Sear Over High Heat
    Place the tri-tip directly over the hot coals and press it into the grate for good contact. Flip every 3–4 minutes to build a deep sear and bark on both sides.
  5. Finish Over Medium Heat
    Once seared, move it a bit higher above the coals or to indirect heat. Keep flipping every few minutes until the internal temp hits 125–130°F for medium-rare.
  6. Rest and Slice
    Let it rest for 20 minutes. Then slice it against the grain—split it down the middle crook first, since the grain runs different ways.


This tri-tip is all about cooking beef the old-school way—over a live fire. Season it heavy with salt and pepper, then drop it straight over hot coals on a Santa Maria grill to build that smoky crust. Flip it often, ease it up off the heat, and cook to a juicy medium-rare. Rest it, slice it thin against the grain, and you’ve got bold flavor, tender beef, and a recipe built for the backyard fire pit or grill.

Malcom Reed
Connect on Facebook
Follow me on TikTok
Subscribe to my YouTube Channel
Follow me on Instagram

Buy Killer Hogs Products Here

The post Open Fire Tri Tip appeared first on HowToBBBQRight.

Smoked Brisket Bacon Burgers

3 June 2025 at 14:21

Smoked Brisket Bacon Burgers

This ain’t your average backyard burger. We’re talking real deal, smoked low and slow, ground brisket mixed with bacon fat flavor bombs. Stack it high with cheese and toppings — and don’t forget a toasted bun to soak up all that juice.

WHAT MALCOM USED IN THIS RECIPE

Print
Smoked Brisket Bacon Burgers

Smoked Brisket Bacon Burgers


5 Stars 4 Stars 3 Stars 2 Stars 1 Star

No reviews

Description

Ground brisket WITH raw bacon to make the best smoked burgers. These brisket bacon burgers are rich, smoky, and packed with flavor. The brisket gives you that beefy bite and the bacon brings in a smoky saltiness that puts ’em over the top. You might wanna wear a bib — these burgers are juicy!


Ingredients

  • 16 lb whole packer brisket (untrimmed)
  • 23 lbs bacon ends & pieces (or thick-cut bacon)
  • Killer Hogs Steak Rub (or salt, pepper, garlic)
  • Burger buns (toasted)
  • Sliced cheese
  • Pickles
  • Red onion slices
  • Lettuce
  • Tomato slices
  • Big Malc’s Burger Sauce (or your favorite burger sauce)

Big Malc’s Burger Sauce

  • ½ cup Blue Plate mayonnaise (or your favorite mayo)

  • 1 tablespoon yellow mustard

  • ¼ cup sweet pickle relish (juice and all)

  • 1 tablespoon freshly grated onion (with juice)

  • ½ teaspoon Killer Hogs TX Rub (or a mix of coarse salt & black pepper)

  • ½ teaspoon paprika (for color)

  • 1–2 teaspoons red wine vinegar (just a drizzle)


Instructions

  1. Prep the Brisket and Bacon
    1. Cut the brisket into 1½ to 2-inch chunks, separating the flat from the point if needed.
    2. Keep the fat on — you want a good lean-to-fat ratio for juicy burgers.
    3. Cut bacon into similar-sized pieces so it runs through the grinder easily.
    4. Chill the meat in the freezer for 20 minutes before grinding.
  2. Grind the Meat
    1. Alternate brisket and bacon as you feed it through the grinder to evenly mix.
    2. Grind the meat with the large plate first then if you want a finer grind, repeat the grind process
    3. Chill the ground brisket-bacon mix in the refrigerator until ready to form patties.
  3. Form the Burger Patties
    1. Weigh out about 8 oz portions and loosely form into balls.
    2. Use a burger press or hand-form into patties. Use parchment or a Ziploc bag for easy cleanup.
    3. Make a slight dimple in the center to prevent the patties from puffing up too much.
  4. Season the Burgers
    1. Season the outside of each patty with Killer Hogs Steak Rub or your favorite burger seasoning.
    2. Remember the bacon adds salt, so don’t overdo it.
  5. Fire Up the Smoker
    1. Set your pit to 275°F using Royal Oak briquettes for a coal bed then add wood splits for heat.
    2. Place burgers directly on the grates and smoke for about 45 minutes, flipping after 30.
    3. Cook to an internal temp of 145°F for a juicy medium finish.
  6. Build Your Burger
    1. Toast your buns and spread Big Malc’s Burger Sauce on both sides.
    2. Layer on: Pickles, Red onion, Lettuce, Tomato, Double cheese (cheddar + Swiss), Smoked brisket bacon patty
    3. Crown it with the top bun and get ready to lean in.

You could fry up a burger in a pan… or you could do it right and smoke a brisket bacon burger that hits like a steakhouse sandwich on steroids. Get you a cold drink, grab two hands, and get ready to lean in — it’s a juicy one.

Malcom Reed
Connect on Facebook
Follow me on TikTok
Subscribe to my YouTube Channel
Follow me on Instagram

Buy Killer Hogs Products Here

The post Smoked Brisket Bacon Burgers appeared first on HowToBBBQRight.

Savory Smoked Pork Belly

23 April 2025 at 17:34

Melt-In-Your-Mouth Smoked Pork Belly

I’ve cooked pork belly a lot of different ways… pork belly burnt ends… sweet and pulled… deep fried… but this method is savory, smokey and melt in yo’ mouth! It has a real pit smoked flavor and it’s nothing short of delicious!

Tender, Juicy, and Packed with Flavor!

WHAT MALCOM USED IN THIS RECIPE

Print
smoked pork belly

Savory Smoked Pork Belly


5 Stars 4 Stars 3 Stars 2 Stars 1 Star

No reviews

Description

I love bold, smoky, melt-in-your-mouth pork belly… and this one does not disappoint. It’s fatty and delicious and tastes like real pit-smoked pork belly.


Ingredients

  • 5 lb pork belly, cut in half
  • 2 tbsp Killer Hogs Hot Sauce
  • 2 tbsp yellow mustard
  • Killer Hogs Hot Rub (to taste)
  • Killer Hogs TX Brisket Rub (to taste)
  • 1/4 cup apple cider vinegar
  • 1/4 cup water

Instructions

  1. Prepare the Pork Belly: Pat the pork belly dry with paper towels and cut it in half for more even cooking.
  2. Apply the Binder: Coat each piece of pork belly with Killer Hogs Hot Sauce and yellow mustard to help the seasoning stick.
  3. Season Generously: First, apply a good layer of Killer Hogs Hot Rub, then follow with a layer of Killer Hogs TX Rub for extra depth of flavor.
  4. Preheat the Smoker: Set up your smoker for indirect heat and bring the temperature to 275-300°F.
  5. Smoke the Pork Belly: Place the pork belly pieces on the smoker and cook for about 2 hours.
  6. Prepare the Spritz: Mix 1/4 cup apple cider vinegar and 1/4 cup water in a spray bottle.
  7. Spritz Regularly: After the first 30 minutes, begin spritzing the pork belly every 30 minutes to keep it moist and enhance the bark.
  8. Check the Internal Temperature: Continue smoking until the internal temperature reaches 202-208°F.
  9. Rest the Pork Belly: Remove the pork belly from the smoker and let it rest for at least 20-30 minutes. For even better results, rest it in a dry cooler for an hour.
  10. Slice and Serve: Slice the pork belly to your preferred thickness and enjoy!

Malcom Reed
Connect on Facebook
Follow me on TikTok
Subscribe to my YouTube Channel
Follow me on Instagram

Buy Killer Hogs Products Here

The post Savory Smoked Pork Belly appeared first on HowToBBBQRight.

Jerk Chicken Sandwich

5 April 2024 at 11:25

Jerk Chicken Sandwich

With this recipe, you can turn cheap, boneless, skinless chicken thighs into a big ol’ delicious $20 Jerk Chicken Sandwich. Or get some slider buns and make a Jerk Chicken Sandwich bar…


This one is so good because you start with some chicken thighs – they go directly into a jerk marinade. Then get a charcoal grill fire up with some Royal Oak (setup with a two-zone fire). After the chicken soaks for at least 1 hour, it can go directly onto to grill – over the hot coals.


This is when I season the chicken thighs with Jerk Seasoning – right over the fire – because it smells so good! Once the chicken cooks a little, it’s time to glaze it with a Jerk Sauce until chargrilled and caramelized.


To make the Jerk Chicken Sandwich, slice the chargrilled Jerk Chicken and put on a toasted brioche bun with Island Slaw and a Calypso Sauce.

WHAT MALCOM USED IN THIS RECIPE:

Print
Jerk Chicken Sandwich

Jerk Chicken Sandwich


5 Stars 4 Stars 3 Stars 2 Stars 1 Star

No reviews

Description

Chargrilled SPICY Jerk Chicken Sandwich


Ingredients

  • 34lbs boneless skinless thighs

Jerk Marinade

  • 3 green onions chopped
  • 2 scotch bonnet peppers (more if you like it hot!)
  • 2 Tablespoons dark brown sugar
  • 1/4 cup lime juice
  • 1/4 cup soy sauce
  • 1/4 cup olive oil
  • 1 Tablespoon salt
  • 1/2 Tablespoon black pepper
  • 1 heaping Tablespoon Malcom’s Jammin’ Jerk Seasoning

Jerk Glaze

  • 1/2 cup Ketchup
  • 3 Tablespoons dark brown sugar
  • 2 Tablespoons honey
  • 2 Tablespoons fresh squeezed lime juice
  • 2 Tablespoons red wine vinegar
  • 1 Tablespoon soy sauce
  • 1 Tablespoon Malcom’s Jammin’ Jerk Seasoning
  • 1 tsp salt
  • 1 teaspoon black pepper
  • 2 dashes cayenne pepper
  • 2 dashes white pepper

For the Jerk Chicken Sandwiches

  • 1 pack of hamburger buns (lightly toasted)
  • Green leaf lettuce
  • Dill pickle slices
  • Island Slaw (recipe below)
  • Calypso Sauce (recipe below)

Island Slaw

  • 4 Tablespoons Blue Plate Mayo
  • 2 Tablespoons dijon mustard
  • 1/4 cup red wine vinegar
  • 1 teaspoon salt
  • 1 teaspoon cracked black pepper
  • 1 bag of cole slaw mix
  • 2 green onions chopped
  • 1/4 cup diced red onion
  • 1 Tablespoon finely diced scotch bonnet pepper
  • 1 cup fresh pineapple chopped

Calypso Sauce

  • 1/2 cup Blue Plate Mayo
  • 1/4 cup ketchup
  • 2 TBS scotch bonnet pepper hot sauce
  • dash of white pepper
  • season to taste with salt & black pepper

Instructions

  1. Place the boneless skinless chicken thighs in a large ziplock bag. Combine the marinade ingredients and pour over the chicken. Close the bag and gently toss to coat each thigh. Place the bag in the refrigerator for at least 1 hour.
  2. Prepare a 2 zone charcoal grill – hot side and indirect side.
  3. Add the marinated chicken to the hot side of the grill working in batches. Season with additional jerk seasoning right on the grill.
  4. Flip and turn the chicken often until internal temp reaches 165.
  5. Brush each piece with the jerk glaze – recipe above.
  6. Continue to cook until the thighs reach 175 internal – it should be slightly charred and sticky from the glaze.
  7. After a short rest slice the thighs into small strips.

Island Slaw Directions

  1. In a small bowl combine the mayo, Dijon, red wine vinegar, salt and pepper. Mix until smooth.
  2. Place the bag of Cole slaw mix in a large mixing bowl. Add the green onion, diced red onion, scotch bonnet pepper, and pineapple.
  3. Toss it together using tongs and add the dressing mixture.
  4. Mix the slaw with tongs and cover with plastic wrap. Store in the refrigerator until ready to serve.

To build the sandwiches: Spread the calypso sauce on the top and bottom bun Layer on the dill pickle slices and lettuce. Pile on the jerk chicken and island slaw then the top half of the bun.

Malcom Reed
Connect on Facebook
Follow me on TikTok
Subscribe to my YouTube Channel
Follow me on Instagram

Buy Killer Hogs Products Here

The post Jerk Chicken Sandwich appeared first on HowToBBBQRight.

Crispy Air Fryer Chicken 65

1 February 2024 at 17:24
A white plate with an array of crispy chicken 65 topped with cilantro and lemon.

Restaurant-Style Air Fryer Chicken 65 is a must-try chicken starter in my book! It’s crispy and spicy on the outside while being delightfully succulent inside. This healthier twist on the classic Indian appetizer is irresistibly delicious – watch it gobbled up before your eyes in no time! Chicken 65 – the story behind its name...

The post Crispy Air Fryer Chicken 65 appeared first on Simple Indian Meals.

WalMart Prime Rib

13 December 2022 at 11:33
WalMart Prime Rib

WalMart Prime Rib

For this recipe I picked up a nice, boneless, 5lb Prime Rib Roast from WalMart for about $66… and I turned it into something that is worthy of that Holiday Table. I seasoned it with beefy flavors, garlic and onions and then smoked it on a pellet smoker with Hickory pellets until it was medium rare (120 internal).

WHAT MALCOM USED IN THIS RECIPE: Print

WalMart Prime Rib


Description

Smoked Prime Rib cooked with an herb-crust on the Pellet Smoker using Hickory Pellets.


Ingredients


Instructions

  1. Prepare pellet grill for indirect smoking at 250°F using hickory pellets.
  2. Trim excess fat from prime rib roast and use butcher twine to secure the shape of the roast.
  3. Mix together Killer Hogs TX Brisket Rub, Chimi Churri, Garlic and Onion in a small bowl. 
  4. Drizzle the outside with olive oil for a binder. Season with a layer of Swine Life Prime Beef Rub. Then generously rub the outside of the prime rib roast with the TX Brisket seasoning mixture. 
  5. Place the prime rib on the smoker – use an internal meat probe to monitor internal temps. When temperature in the center of the roast reaches 120°F, remove from smoker and allow prime rib to rest for at least 20-30 minutes before slicing.

Keywords: prime rib, prime rib roast, walmart meat, walmart prime rib, smoked prime rib, prime rib on the grill, how to smoke a prime rib

Have a Question About This Recipe?

Connect with us in our HowToBBQRight Facebook group for recipe help, to share your pictures, giveaways, and more!

The post WalMart Prime Rib appeared first on HowToBBBQRight.

Fried Catfish

11 August 2022 at 13:26
Fried Catfish

Fried Catfish

Mississippi pond raised Catfish Filets – fried Southern Style with a thin, crispy fish breading. Print

Fried Catfish


Description

Catfish filets, fried with a thin and crispy batter, for a traditional Southern-Style Fried Catfish.


Ingredients


Instructions

  1. Split catfish filets in half lengthwise and pat dry with paper towel. Place filets on wire rack.
  2. Season fillets lightly with AP and King Craw on both sides and air dry for 10-15 minutes.
  3. Add cornmeal to a gallon size ziplock bag and season with 1/2 Tablespoon AP and 1/2 Tablespoon of King Craw. Shake to combine.
  4. Add filets to the seasoned cornmeal and toss to coat. Shake off excess in the bag and place back on wire rack. Work in batches not to over crowd the bag. Let the filets air dry again for 10-15.
  5. Prepare a deep fryer with peanut oil for frying at 350-375°F. Drop filets a few at a time in the hot oil and fry for 8-10 minutes or until frying slows and the filets float to the top. Don’t overcrowd the fryer of the fish can stick together.
  6. Drain the filets and place on a baking sheet lined with butcher paper.
  7. Serve hot with plenty of tartar sauce, lemon wedges, and hot sauce.

Keywords: catfish, fried catfish, Southern style catfish

Frying catfish really is easy, it’s all about technique. For starters, you want smaller, thin filets of catfish to start – so your catfish cooks evenly and is crispy. Next you need to let the catfish filets dry really well – using a rack works best. The more moisture you can remove from the catfish, the crispier you will get the fish when it fries. Next comes the seasoning… I like to add a base layer of salt & pepper and then top that lightly with a cajun seasoning. For this recipe, I’m using my Killer Hogs AP Seasoning and Malcom’s King Craw – but you can use any all purpose seasoning or any cajun seasoning you like. Just make sure to go light when seasoning these catfish filets. After seasoning, it’s time to bread this fish. I like to keep it dry and simple here… I take 2 cups of cornmeal, place it in a ziplock bag, season it with my AP and King Craw and mix it together really well. Then you can add 2-4 fillets to the bag, shake the bag and then place your lightly breaded catfish back on the rack to dry for another 15 minutes before frying. Now comes the easy part – drop your catfish in 350-375 oil (I like to use peanut oil) and fry for around 8 minutes. You can tell the catfish is done when the frying slows down and the fillet floats to the top. Just don’t overcrowd the pot while frying your fish – it’s best to work in batches. And that’s it! Let the fish drain and serve it up with some homemade tartar sauce (recipe below)… this is how you cook perfectly fried catfish! Tartar Sauce Recipe
  • 2 cups Blue Plate Mayonnaise
  • 1/2 cup sweet onion (finely minced)
  • 1/2 cup dill relish (drained)
  • Juice from 1/2 lemon
  • 2 teaspoons Killer Hogs Hot Sauce
  • 2 teaspoon sugar (optional)
  • Pinch of salt & pepper to taste
Combine all ingredients in a bowl until incorporated, cover with plastic wrap and refrigerate for at least one hour before serving. The sugar does not make the tartar sauce sweet, but it does give it balance (but can be omitted for a sugar-free option). Tartar sauce can be kept up to a week in the refrigerator.   Malcom Reed Connect on Facebook Follow me on TikTok Subscribe to my YouTube Channel Follow me on Instagram

Have a Question About This Recipe?

Connect with us in our HowToBBQRight Facebook group for recipe help, to share your pictures, giveaways, and more!

The post Fried Catfish appeared first on HowToBBBQRight.

Firecracker Pork Belly Bites

14 July 2022 at 13:09
Pork Belly Bites

Firecracker Pork Belly Bites

Pork belly cut into bites, smoked with a psicy seasoning and glazed with a sweet and spicy firecracker sauce.

Print
Pork Belly Bites

Firecracker Pork Belly Bites


Description

Pork Belly Burnt Ends smoked with a sweet and spicy Firecracker Sauce


Ingredients

Firecracker Glaze:

  • 1/2 cup brown sugar
  • 1/2 cup Killer Hogs Hot Sauce
  • 1 Tablespoon apple cider vinegar
  • 1 teaspoon kosher salt
  • 1 teaspoon crushed red pepper flakes

Combine ingredients in a small bowl and microwave for 1-2 minutes stirring often to melt the sugar.


Instructions

  1. Prepare pellet grill for indirect cooking at 275 degrees using hickory pellets.
  2. Cut pork belly into cube size portions, coat with mustard, and season on all sides with Killer Hogs Hot Rub.
  3. Spray a raised cooking rack with vegetable oil and place pork belly pieces on the rack. Cook on the pellet grill for 2 hours.
  4. Place each piece of pork belly in a half-size aluminum pan and add brown sugar, honey, hot sauce, and Frank’s Red Hot seasoning.
  5. Cover the pan with aluminum foil and place back on the pit for 1 hour.
  6. Remove the pan from the grill, carefully remove each pork belly burnt end from the hot liquid in the pan and transfer to a small baking pan.
  7. Glaze each piece with the Firecracker Glaze and place back on the pit for 2-3 minutes or until the glaze sets.
  8. Remove the pan from the grill and serve with extra glaze for dipping.

Keywords: Firecracker Pork Belly Bites, Spicy pork belly, spicy pork belly burnt ends, pork belly, pork belly burnt ends, burnt ends, pork belly bites

Malcom Reed
Connect on Facebook
Follow me on TikTok
Subscribe to my YouTube Channel
Follow me on Instagram

Have a Question About This Recipe?

Connect with us in our HowToBBQRight Facebook group for recipe help, to share your pictures, giveaways, and more!

The post Firecracker Pork Belly Bites appeared first on HowToBBBQRight.

Grilled Grinder Sandwich

26 May 2022 at 18:55
Grilled Grinder Sandwich

Grilled Grinder Sandwich

Viral TikTok Grinder Sandwich done my way… I created this recipe using a Grilled Pork Tenderloin and using a Grinder Slaw instead of the grinder salad… it’s delicious! WHAT MALCOM USED IN THIS RECIPE: Print
Grilled Grinder Sandwich

Grilled Grinder Sandwich


Description

Grilled Grinder Sandwich with a Cabbage Grinder Slaw


Ingredients

  • 2 pork tenderloins
  • 2 Tablespoons olive oil
  • 2 Tablespoons Killer Hogs AP Seasoning
  • 2 Tablespoon Italian Seasoning
  • 1 loaf French bread
  • 4 Tablespoons Garlic Butter
  • 68 slices provolone cheese
  • 1 tomato thinly sliced

Grinder Slaw Recipe

  • 1 10-12oz bag shredded cabbage
  • 1 small red onion thinly sliced
  • 1/2 cup sliced pepperoncini peppers
  • 1 cup mayonnaise
  • 1 Tablespoons red wine vinegar
  • 1 Tablespoon sub oil
  • 2 teaspoons Killer Hogs AP Seasoning (you can sub salt, pepper and garlic to taste)

Instructions

  1. Combine the shredded Cole slaw, red onion, pepperoncini, Mayo, red wine vinegar, & sub oil in a bowl. Season with AP seasoning and place in refrigerator for at least an hour.
  2. Trim any fat or sinew from pork tenderloins and pat dry with paper towel. Combine AP seasoning and Italian seasoning in a dredge shaker and generously coat each tenderloin
  3. Prepare charcoal grill for 2 zone grilling – hot and cool side.
  4. Place each tenderloin on the cooking grate over the hot side of the grill. Cook for 1 minute each side then turn until all 4 sides have some color.
  5. Move the tenderloins to the cool side and continue to cook until internal temperature reaches 135-140 degrees. Total cook time is about 15 minutes.
  6. Remove the tenderloin from the grill and loosely cover with foil. Rest at room temperature for 10 minutes.
  7. Split the French bread in half lengthwise and spread garlic butter on each side. Toast the bread lightly in the oven on broil or on the grill.
  8. Slice the pork tenderloin into thin medallions. To build the grinder sandwich: place a couple slices of provolone on the bread followed by thin slices of the pork. Top with more cheese and place back in the oven or on the grill just long enough to melt the cheese. Top with the grinder slaw and slices of tomato along with the top half of French bread.

Keywords: Grilled grinder sandwich, bbq grinder sandwich, pork tenderloin grinder sandwich, pork tenderloin sandwich, grinder sandwich, grinder salad, grinder slaw, grilled pork tenderloin, how to grill pork tenderloin

Have a Question About This Recipe?

Connect with us in our HowToBBQRight Facebook group for recipe help, to share your pictures, giveaways, and more!

The post Grilled Grinder Sandwich appeared first on HowToBBBQRight.

Lemon Pepper Chicken Quarters

28 April 2022 at 15:07
Lemon Pepper Chicken Quarters

Lemon Pepper Chicken Quarters

Chicken Leg Quarters Recipe with Lemon Pepper Flavors – and then grilled on the Weber Kettle and served with White BBQ Sauce. WHAT MALCOM USED IN THIS RECIPE: Print
Lemon Pepper Chicken Quarters

Lemon Pepper Chicken Quarters


Description

Chicken Leg Quarters seasoned with Lemon Pepper Stepper seasoning and grilled over charcoal on the Weber Kettle


Ingredients


Instructions

  1. Prepare weber kettle grill for grilling using a charcoal vortex for indirect grilling using briquette charcoal.
  2. Combine AP seasoning, lemon pepper, and dried herbs in small bowl and transfer to a dredge shaker.
  3. Pat dry and trim leg quarters, lightly coat both sides with olive oil, and season generously with the seasoning mixture.
  4. Arrange the leg quarters around the outer edge of the Weber grill for indirect cooking.
  5. Half the lemons and place on the grate for 4-5 minutes cut side down. Squeeze the grilled lemon juice into the melted butter and season with 1 Tablespoon of the seasoning mixture.
  6. Baste the leg quarters with the lemon butter mixture 20 minutes into the cook.
  7. Continue grilling the leg quarters until the internal temperature reaches a minimum of 175°F ( I prefer to take them to 190°F for more tender meat and crispy skin).
  8. Remove the leg quarters from the grill and drizzle with Killer Hogs MS White Sauce

Keywords: Lemon Pepper Chicken Quarters, Lemon Pepper Chicken Leg Quarters, Lemon Pepper Chicken Recipe, grilled lemon pepper chicken, grilled lemon pepper quarters, Chicken on the weber kettle

Malcom Reed
Connect on Facebook
Follow me on TikTok
Subscribe to my YouTube Channel
Follow me on Instagram

Have a Question About This Recipe?

Connect with us in our HowToBBQRight Facebook group for recipe help, to share your pictures, giveaways, and more!

The post Lemon Pepper Chicken Quarters appeared first on HowToBBBQRight.

Easy Haleem (with lamb/beef)

By: Fouzia
1 May 2020 at 19:38

Haleem is a delightful delicacy, a very popular one pot dish enjoyed by people not only in India and Pakistan but across the globe. It is made with pounded or broken wheat, barley, lentils and meat (lamb, beef or chicken) and ghee (clarified butter) in a flavourful combination of exotic spices slow cooked to perfection....

Read More

The post Easy Haleem (with lamb/beef) appeared first on Mamas Secret Recipes.

Mango Coconut Sticky Black Rice Porridge

By: Fouzia
29 March 2020 at 18:51

This sticky black rice porridge made with coconut milk, cream and sugar is a rich and creamy decadence with a sweet fruity floral fragrance that envelopes your mouth as if it is bathed in a perfume and just a spoonful of this delight is enough to give you that soothing feeling of relaxation and later...

Read More

The post Mango Coconut Sticky Black Rice Porridge appeared first on Mamas Secret Recipes.

Easy Shrimp Biryani, Nawabi Style!

By: Fouzia
10 December 2019 at 07:00

This delicious shrimp biryani prepared in the traditional South Indian Nawabi style, is a a quick one pot dish full of flavour and taste that is unique and loved by everyone. Biryani, a one pot dish Biryani is not a complicated dish with a whole array of innumerable spices and other ingredients put together and...

Read More

The post Easy Shrimp Biryani, Nawabi Style! appeared first on Mamas Secret Recipes.

Chickpea ‘Sundal’ Salad

By: Fouzia
27 March 2019 at 19:22

“Sundal” a south indian delicacy is a delicious salad which is mostly enjoyed as a snack especially at the beach.
Strolling along the shore at the Marina Beach (Chennai, India) on a hot summer evening, all you would crave for is this “sundal”. It is a tongue tingling melange of boiled dried yellow peas tossed with chopped pink onions, grated fresh coconut, green chillies, green mango, ginger, cilantro, salt and drizzled with freshly squeezed lemon juice, then infused with flavour by tempering with mustard seeds, dried red chillies, curry leaves and asafoetida. Such a popular street snack to enjoy at the beach and so yummy!

This ‘sundal’ is usually made with dried whole yellow peas called ‘battani’ in tamil. If you don’t find it in the stores the best alternative is chickpeas. I prefer using the dried chickpeas to the canned ones even though it is more time saving and convenient. Canned food has always been my last priority for most of the food items as you know it not only contains preservatives but most of its nutrients are lost during the canning process, therefore are not as flavourful and tasty as well. It probably takes the same time to dump the dried chickpeas into the instant pot, add water and close the lid as it takes to open a can of chickpeas and rinse before using them. Why not make good choices and reap the health benefits by incorporating wholesome foods in our diet and avoiding canned foods?

It is best to hydrate the chickpeas prior to cooking. If they are soaked all the way through, then they not only swell up and soften evenly but also in less amount of time. It is much easier cooking them in the Instant Pot as it not only saves time but is so convenient. You could also pressure cook them in the Instant pot without soaking them but it would take longer – between 45 minutes to an hour, while pre soaked chickpeas are al dente tender in 35 minutes. Slow cooking them in the Instant Pot retains all their water soluble nutrients such as vitamins, minerals and antioxidants. Pre soaking them and draining away the water does break down the complex sugars that produce gas but very slightly (upto 25%). I prefer not to drain out the soaking water to prevent the loss of the valuable nutrients.

With this ‘sundal’ are tagged so many memories too. Here is one …..
I remember, I still remember
the taste, the flavour
the whiff of the aroma
that hit our olfactory nerves
as we sat watching the waves
dancing in glee
bouncing on the shore
as if they were enjoying
our company!
Yes, I still remember
those little vendors
scooping out the ‘sundal’
with their little hands
while we sat waiting,
drooling with impatience
over this sensational concoction,
this melange of flavours
that stimulates your brain
and leaves you craving for it
over and over again!
But in all this ecstatic endeavour
little did we realize how hard
those little hands worked
to combat their dire needs
to help, support and provide
for their poverty stricken families.
They were little kids indeed
but burdened down
by so many responsibilities!!

chickpea sundal salad

Here’s the recipe:

Ingredients:
1 cup chickpeas
1/2 a medium onion
1-2 green chillies
1/4 cup cilantro chopped
1/4 cup coconut grated
1/3 cup green mango chopped or grated
1 inch piece of ginger julienned and chopped.
Juice of half a lemon
a pinch of asafoetida
a few curry leaves
1/4 tsp mustard seeds
1 tsp ghee(clarified butter)
1 – 2 dried red chilies


Instructions:
1. Soak the chickpeas overnight or at least for 8+ hours to hydrate them to the core.
2. Place the soaked chickpeas in the Instant Pot and Pressure cook on manual for 30 – 35 minutes till they are soft but al dente.  It is up to you to use the same water to cook or discard it. I prefer not to lose the valuable nutrients in the water so I use the same. Sauté till the chickpeas absorb all the water left in the Instant pot. If you forgot to soak them, just cover them up with boiling water and simmer on the stove till they are soft and tender. Or slow cook in the Instant pot.
3. Add to the boiled chickpeas, chopped onions, green chilli, ginger, cilantro, grated coconut, squeeze in the lemon juice and toss them we till they get mixed well.
4. Heat the ghee in a tadka (tempering) pan. When hot, crackle the mustard seeds, then add dried red chillies followed by curry leaves and asafoetida. Immediately pour the tempering over the chickpeas. Toss once more to mix well. Enjoy!

You may also like:

Spicy Carrot & Green Apple Salad

Egg Salad

Pineapple Kachumbar

Chickpea Sundal Salad

The post Chickpea ‘Sundal’ Salad appeared first on Mama's Secret Recipes.

Pheni Kheer | Karwa Chauth Fenia | Pheni ki Kheer Recipe | Sargi Special Pheni Kheer


Pheni Kheer

Pheni kheer is a must item in the Karwa Chauth Sargi thali or for any special occasion at my home or I usually make it for my big sweet tooth. 😁😁 It is prepared with milk, mild sweet and loaded with dry fruits. It is very light in taste, so easy to make and absolutely delicious dessert that you can served with your everyday meals.

Generally we get readymade Pheni disks in the sweet shops during the time of Karwa Chauth. It is a tradition to have Pheni on Karwa Chauth day along with other sargi items. 


At my In-laws place this Pheni kheer is made during saawan month and can be served as a sweet dish after heavy meals.

Pheni ki Kheer Recipe

What is Karwa Chauth and their significance behind the festival?

Karwa Chauth is a festival celebrated by Hindu women from the Northern and Western India on the fourth day after Purnima (a full moon) in the month of Kartika. On Karwa Chauth, married women, especially in North India, observe fast from sunrise to moonrise for the safety and longevity of their husbands.

Karwa Chauth Fenia

Being an Indian , I loved Indian traditions so much and their values behind the festivals are so beautiful and meaningful. I'll share you what we do during karwa chauth in details in other post but for now in short - 

we wake up early in the morning like around 4 a.m, make some delicious food for ourselves which include pheni ki kheer, fruits (like apple/coconut), some sweet like gulab jamun or rasgulla, a glass of water, tea/coffee, dry fruits, any stuffed paratha with curd. I know its sounds so funny that how can we eat this whole some meal in early morning😉 here's my sargi thali in below picture

Karwa Chauth Sargi Thali

Well let's go to the Feni Kheer, will share you about Karwa Chauth traditions in other post with some beautiful clicks. 

Pheni is a wonderful traditional milk based dessert which can either be served chilled or can be relished hot too. It is very easy to make and hardly takes few minutes to prepare. Do try this creamy and rich feniya ki kheer this festival for sure.

FENI KHEER RECIPE

PREP TIME : 5 mins

COOK TIME :10 mins

COURSE : Dessert, Karwa Chauth Special, Festival Special

CUISINE : North Indian Punjabi Cuisine

Ingredients:

Pheni/Fenia - 1/2 cup

Milk - 4 cup

Sugar - 1/4 cup sugar (adjust it to your taste)

Chopped Almonds - 12 to 14 pieces

10 Raisins

Instructions :

1. In a heavy bottom pan, bring the milk to a brisk boil. Lower the heat and add pheni....simmer the milk along with pheni for 5 to 10 minutes till it thickens a little. 

2. Once the milk has thickened a little, add the sugar and chopped dry fruits as of your choice and simmer for another couple of minutes.

3. Turn off the heat, transfer the pheni into another serving bowl. So the pheni is not over cooked on the same pan as it is very hot.

4. After cool down and keep it in refrigerator and serve cold or hot kheer as per your taste,  in my family including me everyone love pheni ki kheer as a cold dessert. 

5. Before serving Garnish with chopped almonds. Tadaa it's ready to serve...So creamy and rich dessert..

Feni Kheer Recipe

This post is little bit late, but I was waiting for the right time now I have got chance to share it with one of the important sweet in Sargi thali is PHENI KHEER and this kheer is the contribution of my A to Z season 2 challenge. This month letter is F earlier i knew only 1 ingredients that is Phalsa- dry berry which is not easily available in Bangalore easily. I was thinking to not to take participate in this month challenge luckily his PHENI box is in my fridge and when i read the word 😍😃 then my mind strike oh wow that;s another ingredients that's start with hindi letter PH or Fa. So I choose it and made this "RICH & CREAMY FENI KHEER"


Did you try this recipe? Click a picture and mention @jollyhomemaderecipes or tag #jollyhomemaderecipes in Instagram or Twitter


Subscribe to our YouTube Channel Click here to Subscribe our YouTube Channel and stay updated with our latest video recipes

PIN IT later for your future use


HAPPY COOKING & ENJOY💜💜

Missi roti recipe

23 November 2022 at 07:45

Missi roti recipe – A popular Punjabi roti recipe with a combination of gram flour, whole wheat flour, and spices. No onion no garlic Missi roti recipe with full video and step-by-step pictures.

Next to naan and Tandoori roti, missi roti is a popular Indian flatbread. It is a very popular dish in Punjabi and Rajasthani cuisine. Usually, we make Indian flatbread with whole wheat flour and the Naan is made using plain flour. This one is a mix of whole wheat flour and gram flour, also called kadalai maavu in Tamil and besan in Hindi.

We can pair this with any North Indian-style gravy or a simple dal. I tasted missi rotis in dhabas when we did a road trip from Delhi to Haridwar a few years back. Also, I tasted this in Jaipur many years back. They serve mini missi rotis, smeared with a generous dollop of butter on the top. It comes out soft but personally I feel, it should be served hot. I have posted a video on methi missi roti recipe in Jeyashris kitchen.

Also check out, how to make soft phulkas, Homemade stove -top Garlic naan, Aloo kulcha recipe, and Peshwai naan.


Missi roti recipe
Print

Missi Roti recipe

Popular Indian flatbread using whole wheat flour and gram flour
Course Dinner, Lunch, Main Course
Cuisine Indian
Keyword Indian flatbread, North indian recipe
Prep Time 30 minutes
Cook Time 20 minutes
Total Time 50 minutes
Servings 10 small rotis
Author Jeyashri suresh

Ingredients

  • ¾ cup gram flour | besan| kadalaimaavu
  • ½ cup whole wheat flour
  • 1 tsp cumin seeds
  • ¼ tsp ajwain seeds | omam
  • 1 tsp red chili powder
  • ¼ tsp turmeric powder
  • 1 tsp kasoori methi
  • 3 tbsp coriander leaves
  • Salt as needed
  • 1 tsp oil
  • Water to knead the dough
  • Butter or ghee to spread on the roti

Instructions

  • In a bowl add the gram flour, wheat flour, cumin seeds, ajwain, red chili powder, turmeric powder, kasoori methi, coriander leaves an salt.
  • Mix well and add water little by little and make a smooth dough.
  • Keep this covered for 10 minutes
  • Make equal lemon sized balls.
  • Take one dough ball and dust it with dry atta. You can use rice flour as well.
  • Roll this into a roti.
  • I used a lid to make into a perfect round as the edges were cracked. This is very common while making roti using gluten free flour.
  • Place the rolled roti on a hot tawa.
  • Cook on both sides.
  • Take out and show it on open flame for 2-3 seconds.
  • This step is to give a dhaba style tandoor touch.
  • Apply butter on both sides.
  • Serve hot.
  • Repeat the same for the rest of the dough.
  • Missi roti tastes well with simple dal or any paneer sabzi.

Video

Notes

1. Finely chopped onion can be added to the dough.
2. You can adjust the spices according to your taste.
3. Finely chopped green chili can be added instead of red chili powder.
4. Missi roti can be made gluten-free also, in that case, knead the dough with hot water.
  • In a bowl add the gram flour, wheat flour, cumin seeds, ajwain, red chili powder, turmeric powder, kasoori methi, coriander leaves an salt.
Missi roti
  • Mix well and add water little by little and make a smooth dough.
  • Add 1 tsp of oil and spread it over.
  • Keep this covered for 10 minutes
Missi roti recipe
  • Make equal lemon sized balls.
missi roti recipe
  • Take one dough ball and dust it with dry atta. You can use rice flour as well.
  • Roll this into a roti.
Missi roti
  • I used a lid to make into a perfect round as the edges were cracked. This is very common while making roti using gluten free flour.
missi roti
  • Place the rolled roti on a hot tawa.
  • Cook on both sides.
missi roti
  • Take out and show it on open flame for 2-3 seconds.
  • This step is to give a dhaba style tandoor touch.
missi roti
  • Apply butter on both sides.
  • Serve hot.
missi roti
  • Repeat the same for the rest of the dough.
  • Missi roti tastes well with simple dal or any paneer sabzi.
missi roti recipe

The post Missi roti recipe appeared first on Jeyashri's Kitchen.

❌
❌