The classic Greek lemon chicken is a must-try recipe if you love savory, citrusy and comforting flavors with your chicken having crispy skin and juicy meat!
If you are a blogger, irrespective of your domain, I am sure you would have also experienced blogger fatigue at times and I am not ashamed to confess that I am going through that exact same phase at the moment!
That’s the very reason behind the irregularities of my blog posts and I am fully aware that the frequency of my publishing must improve sooner than later!
However, while I fix & sort out my schedule, I must apologize to my loyal readers who still visit my page and have shown their immense love over the years!
End of year is always the best time to reflect on the time we have left behind and express gratitude for all the good things life has bestowed upon us!
With a heart full of nothing but thankfulness, I am here today to share a classic recipe from one of my favorite cuisines, the Mediterranean!
This classic Greek lemon chicken is absolutely gonna brighten up your days ahead once you give it a try in your kitchen! It is easy, quick with minimal prep and a perfect bang for the buck!
What is Greek lemon chicken?
Greek lemon chicken is a traditional baked chicken recipe made with bone-in and skin-on portions of chicken like chicken thighs or chicken drumsticks.
The unique USP of this Greek lemon chicken is its marinade which is a flavor-bomb thanks to all the fresh ingredients used in it.
Creamy, cheesy and decadent, this restaurant style creamy Tuscan chicken screams holidays more than anything I have made recently and I am so glad I could bring this to you right on time!
If you are at the last leg of finalizing your holiday menu, I would strongly urge you to keep a spot for my classic restaurant style creamy Tuscan chicken in your list!
This creamy Tuscan chicken is a cheesy chicken recipe with a burst of freshness from spinach and fresh basil that is just perfect to serve over your favorite pasta and an ideal holiday meal for everyone!
This is also a good option for a make-ahead dish as this freezes very well! You just need to thaw and reheat to make the sauce melty and glossy again!
What is creamy Tuscan chicken?
Interestingly enough this creamy Tuscan chicken is not a traditional Tuscan recipe from Italy! Then why is it called Tuscan chicken? Fair question!
Upon reading more about this quirky recipe, I finally deduced that this creamy Tuscan chicken is a modern Italian-American dish, most likely developed in the United States!
The name “Tuscan” chicken comes from the ingredients commonly associated with Tuscan-style cooking e.g. olive oil, garlic, sun-dried tomatoes, leafy greens like fresh spinach & basil and Parmesan.
However, authentic Tuscan cuisine is usually lighter and not cream-based. The creamy version is more of an Italian-American or modern comfort-food creation.
But calling it “Tuscan” chicken instantly evokes certain emotions within the food lovers and we all know how crucial the role of emotion is when it comes to food!
The warmth, countryside charm and Italian comfort, the qualities that foodies already loved, get instantly packed into that name inviting more and more food enthusiasts to try it and fall for it!
A few slices of crusty bread and this dipping oil bread dipping oil is a combo you need on your Holiday food tables. It comes together quickly and with simple ingredients, but will become your new favorite way to eat bread!
Ever since I tried a version of this bread dipping oil at a friend’s place a few months ago, I have been hooked! I have made this for every single gathering I have hosted since, and it’s been wiped clean each time!
This dipping oil is a quick and simple recipe that comes together in under 15 minutes. But it’s got tonnes of flavor from the roasted bell pepper, garlic, and seasonings. And my favorite part? It’s got a long shelf life! Especially helpful if you’re hosting as that’s one less thing to make on the day.
While it’s great for parties, this olive oil dip for bread is the kind of thing I would also make for a gossip session with a friend over chai or for myself on an evening when I want a fancy but easy snack. The options are truly endless.
Olive oil – forms the rich base of the dip. I would recommend using a quality one for the best flavor
Bell pepper – roasted until charred. Delivers body and a sweet, smoky flavor to the dish
Walnuts – bring lots of texture and a nutty flavor
Black olives – adds salty, savory flavor and texture
Balsamic vinegar – for a touch of tang and sweetness to add balance
Honey – the sweetness help soften the acidity and softens the acidity and rounds out the flavours.
Garlic – freshly grated for flavor and aroma. I would not recommend subbing for garlic powder as it won’t give the same flavor.
Orange peel – finely chopped for that beautiful citrusy brightness and lift. it’s an unexpected ingredient, but one I highly recommend
Seasonings – parsley and Italian seasoning for fresh, herby flavors
Salt
Customisation Ideas
Skip walnuts or replace them with almonds or pine nuts for a different texture
Add a pinch of chilli flakes if you like a little warmth
Replace honey with maple syrup for a deeper sweetness
Stir in a spoon of sun-dried tomatoes for extra intensity
Make it smoother by pulsing briefly in a mixer for a more spread-like texture
Serving Ideas
Serve with toasted bread cubes, sourdough, or focaccia
Spoon over grilled vegetables or roasted potatoes
Use it as a finishing drizzle for burrata or fresh mozzarella
Add to a grazing board with cheese, fruit, and nuts for an easy centrepiece
This roasted red pepper dipping oil is one of those recipes that is loved by every single person that tries it. Make it for your holiday party and watch it disappear in minutes!
This bread dipping oil will be the star of your Holiday food table. It comes together quickly and with simple ingredients, but every bite feels like a flavor explosion.
Set a wire mesh or jaali on the stove flame, place red bell pepper and roast on very low heat for 8-10 minutes. Keep turning as blisters are formed and roast until it is charred on all sides. Transfer to a bowl and keep covered for 5 minutes so they soften and can be peeled easily. Peel off the skin from the roasted peppers and finely chop them.
1 medium red bell pepper
Take oil in a bowl, add olives, walnuts, balsamic vinegar, honey, garlic, orange peel & chopped bell pepper. Season with parsley, italian seasoning and salt and mix well till all the ingredients come together.
¼ cup olive oil, ¼ cup sliced black olives, ⅛ cup chopped walnuts, 1 teaspoon balsamic vinegar, 1 teaspoon honey, 2-3 garlic cloves, 1 teaspoon finely chopped orange peel, ½ teaspoon parsley, ½ teaspoon italian seasoning, ⅛ teaspoon salt
Serve with bread cubes.
8 Bread slices cut into cubes
Notes
Dip can be made in advance and will stay good for 4-5 days when refrigerated in an airtight container.
This retro prawn cocktail is straight from the 80’s, but is a must on the Holiday food table even today! Plump, juicy prawns tossed in a pink rose marie sauce; this classic dish is easy to make and tastes 10/10!
This prawn cocktail is one of those dishes that instantly feels a little special, even though it’s incredibly easy to put together. It’s cool, creamy, fresh, and quietly indulgent and the kind of recipe I reach for when I want something elegant without spending too much time in the kitchen.
I love how adaptable it is. You can make it for a casual lunch, a dinner party starter, or even a festive spread when you want something light before the mains. Crisp lettuce, sweet prawns, creamy avocado, and that nostalgic rose marie sauce, simple ingredients, but they come together beautifully.
Prawns – I have used raw jumbo prawns as this size works best for this recipe. You can use pre-cooked prawns as well
Olive oil – to cook the prawns
Lettuceand cucumber – make for a fresh and crunchy base for the prawn cocktail
Avocado – adds richness and a buttery texture
Rose Marie sauce
Mayonnaise – forms the creamy backbone of the sauce.
Ketchup – adds sweetness and colour.
Worcestershire sauce – brings depth and umami.
Cayenne pepper or red chilli powder – adds gentle heat.
Lime juice – brightens and balances the richness.
Frequently Asked Questions
Can I use frozen prawns?
Yes. Thaw completely, pat dry, and cook or chill before assembling.
Is this recipe spicy?
No. The heat is very mild and can be adjusted or skipped entirely.
Can I make this ahead for a party?
You can prep the prawns and sauce ahead, but assemble only at serving time.
What can I use instead of Worcestershire sauce?
A few drops of soy sauce can work in a pinch, though the flavour will differ slightly.
Richa’s Top Tips
Don’t overcook the prawns. Prawns cook very quickly and overcooked prawns taste chewy and rubbery. Cook them until they’re just pink and and tender.
Chill the prawns and sauce before assembling for the best flavour and texture.
Pat prawns dry if using pre-cooked ones to avoid a watery cocktail.
Assemble just before serving to keep everything crisp and fresh.
Customisation Ideas
Add a little finely chopped celery for extra crunch.
Replace lime juice with lemon juice for a sharper finish.
Stir in a spoon of Greek yogurt to lighten the sauce slightly.
Add a pinch of smoked paprika for a subtle smoky note.
Storage Ideas
Avoid storing assembled cocktails as they tend to become watery and lose freshness.
Prawns: Cooked prawns can be stored in an airtight container in the refrigerator for up to 24 hours.
Sauce: The rose marie sauce keeps well refrigerated for 2–3 days when stored separately in an airtight jar.
Vegetables: Chop lettuce, cucumber, and avocado just before serving for best texture.
This prawn cocktail is proof that simple food can still feel thoughtful and elegant. With fresh ingredients and a well-balanced sauce, it’s the kind of dish that never really goes out of style.
This prawn cocktail recipe is straight from the 80’s. Crisp lettuce, plump, juicy prawns and an addictive cocktail sauce that’s perfect as a dipping sauce. Its an appetizer that will take everyone back in time!
900gramsRaw Jumbo Prawnstails on (Or freshly cooked prawns)
1teaspoonOlive Oilif using raw prawns
3cupsLettuceroughly chopped
2Avocadosdiced
1Cucumberdiced
Rose Marie Sauce
3/4cupMayonnaise
2tablespoonsKetchup
1tablespoonWorcestershire Sauce
1/2teaspoonCayenne Pepperor Red Chilli Powder
1teaspoonLime Juice
Instructions
If using raw prawns, heat olive oil in a skillet and cook the prawns for 3-4 minutes on each side till they turn pink. Sprinkle lightly with salt and refrigerate for 15-20 minutes.
In a bowl, whisk together all the ingredients for sauce and refrigerate.
When ready to assemble, add lettuce to the bottom of a glass, top with a few pieces of cucumber, avocado and finally prawns. Drizzle with the sauce and serve immediately.
Notes
Poaching prawns: If you prefer poaching prawns instead of cooking them, add salted boiling water to prawns in a bowl and let them sit for 5-6 minutes, till the prawns turn pink.
Fresh vs. Frozen Prawns: If you happen to stay by the sea, please buy your prawns as fresh as possible and peel them at home if you can. If you don’t, then buy your prawns frozen because they will be better than the prawns that are sold seemingly fresh. Frozen prawns are frozen within a few hours of catching them. Thaw them completely before cooking.
Refrigerating: I prefer serving these cold, but its best to chill each element separately rather than assembling them and then chilling, because the sauce can pool at the bottom. The sauce can be made 4-5 days ahead and refrigerated, and the prawns stay well refrigerated once cooked for a day.
Mayonnaise: I can’t stress how important it is to use good quality mayonnaise for this recipe, and no, you can’t substitute it with greek yogurt. Either make your own at home – it’s really easy, I promise and I have anInstagram video that shows you how to make mayo, or buy mayonnaise made with whole eggs.
This creamy veg canapés recipe is my go-to when I need something that looks fancy but is actually very easy to pull together. These look great on the holiday party food table, but are just as delicious and easy for those random snack cravings.
If there’s one thing I always want at a party, it’s snacks that look impressive but don’t leave me stressed in the kitchen. These creamy Veg Canapés are exactly that kind of recipe. They feel special enough for festive tables and get-togethers, but are insanely easy to put together. This is definitely a canapes recipe worth trying.
I love that this filling is packed with vegetables, held together by a soft, garlicky, creamy sauce that’s a total flavorbomb. You can make the mixture ahead of time, tweak the veggies based on what’s in your fridge, and assemble everything right before serving. It’s the kind of canapes recipe you make once and then quietly keep coming back to whenever you need an easy win.
Butter: Adds richness and creaminess to the filling; can be replaced with olive oil or a neutral nut butter for a vegan version.
Aromatics: Garlic and onions builds a sweet-savoury, aromatic base
Veggies: Carrots, beans, mushrooms, and broccoli for flavor, texture, and nutrition
Milk: Helps create that creamy sauce; you can use any unsweetened plant-based milk if you’re vegan
Salt: For seasoning
Italian seasoning: Adds a herby, well-rounded flavour. You can experiment and use any seasoning you like. Oregano, mixed herbs, chilli flakes, also taste great. mixed dried herbs or oregano alone work too
Mustard paste: Brings a slight heat and sharpness of flavor. A little goes a long way
Cream cheese: Makes the filling rich and smooth. Feel free to replace with hung curd for a lighter version
Canapé shells – Provide the crisp base for the filling
Black olive slices – Add a salty finish and visual contrast
Customisation Ideas
Change the veggies: Swap broccoli for corn, baby spinach, or zucchini. Just make sure everything is finely chopped so the filling stays creamy.
Make it cheesier: Add grated mozzarella, cheddar, or parmesan along with the cream cheese for a richer filling. This makes the canapes recipe even more indulgent.
Add a kick: Stir in chilli flakes, cracked black pepper, or a little paprika for gentle heat.
Herb twist: Fresh parsley, chives, or basil stirred in at the end add a lovely fresh note.
Make it vegan: Use olive oil instead of butter, plant-based milk, and vegan cream cheese for a vegan version.
Assemble these veg canapés right before serving to make sure they stay crisp until the end. This tip is a critical part of any canapes recipe.
If you try this recipe, be sure to send me pictures over on my IG @my_foodstory.com.
Crisp canapé shells filled with a soft, garlicky vegetable mixture make these Veg Canapés perfect for parties, festive spreads, or last-minute entertaining.
Heat butter in a wide pan, add garlic and onions and saute for 2 minutes on low till they turn translucent. Add carrots, beans, mushrooms, mix well and cook covered on low for 3 minutes till they are cooked to tender but not mushy. Add broccoli & saute for only a minute just until they are tender.
1 ½ tablespoons butter, 1 tablespoon finely chopped garlic, ½ cup chopped onions, ½ cup chopped carrots, ½ cup chopped beans, 200 gms mushrooms, ½ cup tiny broccoli florets
Add all purpose flour and saute for 2-3 minutes on low till the flour is cooked and smells slightly nutty. Add milk in parts and keep whisking into flour till it thickens, adding more milk as you go. This prevents the sauce from getting lumpy. Simmer on low whisking frequently for 2-3 minutes till the sauce thickens.
1 tablespoon all purpose flour, 1 cup milk
Season with salt, italian seasoning, mustard paste, mix well and cook for a minute. Add cream cheese, mix well and take off the heat. Transfer to a bowl and let it cool down.
Italian cream cake, also called Italian wedding cake, is a fabulously moist cake with flavors of coconut, pecans, and almond. It’s slathered with cream cheese frosting, and all the flavors come together beautifully. (soy-free and gluten-free options)
Italian wedding cake is normally much more decadent, with a cream cheese buttercream frosting with tons of sugar. I converted it into a lighter, vegan version.
Traditionally, Italian cream cake is supposed to be dense, but I aimed for a texture that’s still moist and fudgy, but with a little airiness. For the cream cheese frosting, I kept it less sweet, but you can always add more sugar if you prefer.
This cake it absolutely delicious and perfect for special occasions! It’s moist and fluffy with a rich texture and tangy, sweet cream cheese frosting. The toasted coconut and pecan toppings add texture and an incredible flavor.
The cake comes together quickly with everyday ingredients. If you don’t have almond extract, you can omit it. There’s still plenty of flavor without it!
Why You’ll Love Italian Wedding Cake
lightened up version of the traditional recipe, but still moist and decadent-tasting
delicious combination of textures and flavors – fluffy cake, creamy frosting, and toasty coconut and pecans on top
This sun-dried tomato roast makes a stunning centerpiece for any holiday table. Packed with umami and filled with a hearty blend of mushrooms and potatoes, it delivers deep flavor and satisfying texture in every slice. Completely vegan, gluten-free, and soy-free with an easy nut-free option.
This is my version of a vegan holiday roast. We make this “meat” mixture with some white beans and almond flour, and process it until smooth. I also add some sun dried tomatoes for that rich, umami flavor.
The mixture becomes like a pâté in the food processor, then we spread that onto parchment paper.
Next, make the stuffing with cooked mushrooms, potatoes, and herbs. Place that on top of the bean mixture, roll it up using the parchment, and bake it.
It turns into this delicious, amazing-smelling roast that’s full of herbs and deep umami flavor from the sun dried tomatoes. It’s just perfect!
It’s completely gluten-free, but if you prefer, you can use all-purpose flour instead of tapioca starch. It’s also soy-free, since many of you asked for a soy-free option after I made that very popular tofu holiday roast a few years ago.
You can easily adjust the flavors to your taste! Use fewer sun-dried tomatoes or different herbs, if you like. I usually serve it with a side salad, my simple vegan gravy, and some roasted vegetables for a perfect holiday or dinner plate.
Why You’ll Love Sun Dried Tomato Roast
umami-packed vegan holiday roast
savory mushroom-potato stuffing
make-ahead friendly vegan holiday entree
naturally gluten-free and soy-free with nut-free option
If you’ve ever wished you could make restaurant-style Garlic Naan at home without any stress, you’re going to love this recipe!
Making restaurant-style garlic naan at home is easier than you’d think. All you need is a few pantry staple ingredients and 30 minutes to recreate the best, homemade garlic naan. Since this is a no-yeast recipe, the dough needs almost no resting time, which means you can whip up a batch whenever the craving for it hits.
This recipe keeps things really easy, even if you’re new to making naan. And once you get the hang of it, you can switch things up to add a little chilli to turn it into a chilli-garlic naan, or try our no-yeast naan variation when you want something even quicker. can get the same restaurant-style charred bits and a smokey flavour on the stovetop.
Dry Ingredients: Maida, salt, sugar (helps tenderize, brown and balance flavors), and baking powder (for that signature naan fluffiness)make up the base of this naan.
Wet Ingredients: Milk and water help bring the dough together, and a little oil keeps it smooth and easy to roll.
Garlic Topping: Finely chopped garlic and coriander for that classic flavour.
Finishing: Melted butter brushed on top once the naan is cooked to give it that glossy, restaurant-style finish.
Richa’s Top Tips
Make sure the pan is hot enough, but not smoking before placing the rolled dough, or it won’t stick properly.
Once you make dough balls, leave them to rest on a greased plate or baking tray to prevent them from sticking to the plate or each other. Rest the dough properly: Those 30 minutes of resting time make a huge difference. The dough relaxes, becomes easier to roll, and cooks softer.
Roll it evenly (and not too thick): A thin, even naan puffs better on the tawa and cooks without turning chewy.
Use water to help it stick: Brushing the non-garlic side with water before placing it on the tawa ensures the naan sticks well and won’t fall off when you flip the pan.
Cook on medium heat: Too high and the naan burns before it cooks through, too low and it dries out. Medium heat gives the perfect puff and colour.
Press the garlic in gently: Lightly pressing the garlic onto the dough helps it stay put while cooking instead of falling off on the tawa.
Frequently Asked Questions
Why isn’t my naan puffing up?
This usually happens when the dough isn’t soft enough or the naan is rolled too thick or too thin. Make sure the dough is well-rested and roll it out evenly so it has room to puff on the tawa.
Can I use whole wheat flour instead of all-purpose flour?
You can swap part of the maida for atta, but using 100 percent whole wheat will make the naan denser and less soft. A half-and-half mix works best if you want a healthier version.
How do I make the naan soft and not chewy?
Keep the heat at medium, roll the dough thin, and don’t overcook it. Removing the naan as soon as it gets those golden brown spots keeps it soft.
Do I need a tandoor or oven for this recipe?
No, this stove-top method gives you the same smoky, charred effect without any special equipment.
Storage Tips
Fridge: Keep leftover naan wrapped in foil or in an airtight container for 2 days. Warm it on a tawa with a little butter to bring back the softness.
Freezer: Garlic naan freezes really well. Cool completely, stack with butter paper between each piece, wrap tightly, and freeze for up to a month.
Reheating: Heat on a tawa for 1–2 minutes until soft. Avoid the microwave for too long because it can make the naan chewy.
Serving Ideas
Garlic Naan goes with almost any creamy curry or sabzi, but here are some tried-and-loved pairings that turn it into a full, comforting meal:
With Chana Masala: A classic vegetarian pairing that never disappoints.
With Dal Tadka: Simple, wholesome, and perfect when you want something light but satisfying.
Customisation Ideas
Extra-Garlic Lover’s Naan: Mix grated garlic directly into the dough and brush the naan with garlic butter at the end for a double-hit of flavour.
Cheesy Garlic Naan: Right after flipping the naan and letting it puff, sprinkle shredded mozzarella or cheddar on the cooked side. It melts instantly and tastes like restaurant-style cheese naan.
Chilli-Garlic Twist: Mix finely chopped green chillies into the garlic topping before pressing it onto the dough. Adds heat without changing the recipe structure.
Herb Explosion: Swap coriander for fresh chives or parsley if you want a milder, fresher flavour profile.
Did You Know?
The word “naan” comes from the Persian word nān, which simply means “bread.” The earliest mentions of naan date back to 1300 AD in the writings of Indo-Persian poet Amir Khusrau. It was originally baked in royal Mughal kitchens—making naan the original food of emperors.
Now it’s over to you! Make a fresh, cozy, homemade garlic naan without special equipment using simple ingredients for that amazing restaurant-style flavour. Serve it hot, share it around, and watch how quickly it becomes a favourite.
Don’t forget to tag me on Instagram @my_foodstory when you make it. I’d love to see your fluffy naans!
Add all dry ingredients, maida, salt, sugar, baking powder in a bowl and mix well. Add 1 teaspoon oil, milk & water and knead for 7-8 minutes till you get a soft, smooth dough. Add oil on the surface of the dough & keep covered to rest for 30 minutes.
3 tablespoons milk, 1 pinch salt, 1 pinch sugar, 1 ½ + ⅛ teaspoon baking powder, 1 cup maida, 2 teaspoons sunflower oil, 3 tablespoons water
Herb butter: Take melted butter in a bowl, add coriander leaves. Mix and set aside.
Divide the dough into 3-4 balls. Take a ball of dough, place it on a rolling platform and roll into a round or oval shaped naan, about 6 inches long and ⅛ inch thick. Sprinkle chopped garlic and gently press with fingers.
1 tablespoon finely chopped garlic
Brush the non garlic side with water and place the water side on the hot tawa so that it sticks well to the tava (watch video for details). cook on high until bubbles form on top, about 1-2 minutes. Flip the tava over so that the naan is directly over the flames. Set the heat to medium and move the tava around till more bubbles form and naan is brown all over and charred around the edges.
2 tablespoons water
Alternatively, if the naan does not stick to the tava or slips out while frying, you may hold the naan with tongs and fry the naan over flames on either side till they turn brown.
Transfer the naan on a plate, brush with the herb butter and serve. Repeat the same process of making naan with the rest of the dough.
Video
Notes
If the dough is extremely sticky, add a teaspoon of flour at a time till it’s workable. The dough should be soft and pliable
Roll the naan thin so that it puffs up better
To make this in the oven, heat the oven to 220C or as high as your oven will go. Place the baking tray in the oven to get it nice and hot. Roll out the naan with all the toppings. Brush the other side with water and place it water-side down on the hot baking tray, being careful not to burn yourself. Now place the baking tray back in the oven. After 3-4 minutes once you see the naan puff up and see bubbles on top, turn on the broil function (or only the top element) and cook it for another 2-3 minutes till it browns a bit. Then take it out and brush it with butter.
These decadently delicious chocolate lava cookies use my soft, chewy, almond flour cookie dough and a flowy, chocolate ganache filling that oozes out when you break them in half! (gluten-free and soy-free with nut-free options)
It’s cookie season, and I wanted to make a decadent, chocolatey cookie. And what better idea than to convert molten lava cake into cookie form!
My motto is that baking should be super easy and flexible, so that even if you make a few measuring errors, things still turn out great. Nobody has time to whip up butter and sugar and all that, so I use my trusty almond flour cookie dough, which works every time.
To make this simple dough, you just add all the dry ingredients to a bowl, mix really well, add some melted coconut oil and maple syrup, mix again, and that’s it! You have a dough!
For this recipe, we’ll add cocoa powder to make a chocolate cookie dough. Then, we make a molten chocolate “lava bomb,” which is a melted chocolate ganache that goes inside the cookie. As the cookie bakes, it spreads and traps the chocolate ganache inside. When you break it open, it’s oozy, melty, and so delicious.
If you wanna live with just one pasta recipe for the rest of your life then that has to be the recipe of this marry me shrimp pasta! This is the undisputed winner of best pasta ever!
If you are looking for a fail-proof family friendly pasta recipe for the upcoming holiday season, then I have the absolutely right one for you today!
Look no further and lock this marry me shrimp pasta in your menu and trust me it will become the showstopper of your dinner table!
The spin-off of the iconic marry me chicken, this marry me shrimp pasta is no less in its glory and for shrimp lovers like me this is an ultimate pasta dish which will keep reappearing on our dinner table!
What is Marry Me Shrimp Pasta?
I was literally intrigued by the name of this pasta! So I had to research it! Legend has it that this pasta is so good that it could inspire a marriage proposal—hence the quirky name!
Well, the cooking enthusiast in me had to test it for herself if it is really THAT good! Even though I do not have any upcoming proposal ideas on my mind!
And I thank my stars I did!
This marry me shrimp pasta is one such phenomenal recipe that anyone can hardly resist its addictiveness no matter how hard she/he has programmed themselves not to overeat!
A creamy vegan cheese log coated in crunchy pecans and fresh herbs is perfect for holiday parties served with crackers and veggies. This recipe is super easy, delicious, and versatile! (gluten-free, soy-free and nut-free options)
This is a wow-worthy, super easy vegan cheese log that you can whip up for any party, potluck, or holiday gathering. It’s delicious, cheesy, and creamy with a fantastic pecan-herb crumb which adds wonderful texture and flavor.
The holiday cheese log pairs beautifully with all kinds of veggies, crudites, crackers, fruit, or even spicy jams and chutneys. It’s perfect on a charcuterie board served with mango chutney and paired with one of my cheese balls, like my Jalapeno popper cheese ball.
You can also use this creamy cheese as a spread for baguettes or bagels or even to make grilled cheese, quesadillas, or mac and cheese. For mac and cheese, just add some stock to a pan, heat it up with the cheese log to make a sauce, and toss in your cooked pasta of choice.
This vegan cheese log recipe is flexible and easy to adapt to your flavor profile. Try adding paprika and jerk seasoning, Cajun spices, or extra red pepper flakes for a spicy version.
Why You’ll Love this Vegan Cheese Log
creamy vegan cheese log coated in crunchy toasted pecans and fresh herbs
perfect for parties, potlucks, cheese boards, and charcuterie boards
easy to make and versatile! Try different base and seasoning options.
easy to make gluten-free, soy-free, and/or, nut-free
I fired up my stick burner for this one — real wood, real smoke, and a Cajun kick that just works on turkey. This recipe’s got a bunch of solid tips for cooking a juicy bird, no matter what flavors you like to use. If you’re after that true smoked turkey look and taste, this is how you do it.
Simple Cajun smoked turkey cooked over real wood and charcoal — full of smoke, spice, and tips for a juicy bird every time.
Ingredients
1 whole turkey, thawed
1 bottle Malcom’s Bird Brine
1 bottle Malcom’s King Craw Cajun Seasoning
Meat Bag (optional)
Water (enough to completely submerge turkey)
1 stick butter
1 cup chicken broth
1 stalk celery, cut into chunks
1 medium onion, quartered
1 head garlic, smashed
Cooking spray or oil (for coating the skin)
Chicken Rack (optional)
Instructions
Brine the Bird
Start with a completely thawed turkey. In a large Meat Bag or food-safe container, mix Malcom’s Bird Brine with 1 gallon of water. (For turkeys 12-14lbs or less, use 1/2 bottle. For turkeys over 14lbs, use entire bottle).
Submerge the turkey and add more water as needed to cover it completely. Tie the bag up tight and refrigerate for 24 hours.
Brining helps the meat stay juicy and pull flavor deep inside — it’s one step you don’t want to skip.
Prep the Turkey
After at least 24 hours, remove the turkey from the brine and pat it completely dry with paper towels.
Stuff the cavity with celery, onion, and garlic.
Tuck the wings and tie the legs so everything cooks evenly and the tips don’t burn.
Make the Injection (optional)
Mix 1 stick of butter, 1 cup chicken broth and about 2 tablespoons Malcom’s King Craw Cajun Seasoning.
Stir to combine. Inject the mixture into the breast, thighs, and wings, distributing evenly. Season the Skin
Spray or rub the outside of the turkey with cooking spray or oil — this helps crisp the skin and gives the seasoning something to stick to.
Generously coat the bird with Malcom’s King Craw Cajun Seasoning (or your fave turkey seasoning).
Smoke the Turkey
Fire up your smoker for indirect cooking and add your favorite wood (hickory and pecan work great). Run the pit around 275°F. Place the turkey on the smoker breast side up.
Protect the Turkey
When the skin has the color you want — that deep golden-brown Cajun look — spray the outside again with cooking spray and loosely tent with foil to prevent over-darkening.
Continue cooking until the breast hits 160°F internal and the dark meat reaches about 175°F.
Rest and Serve
Remove the turkey from the pit and let it rest for at least 20-30 minutes before carving. This lets the juices redistribute and keeps the meat tender.
Notes
Don’t skip the dry step. The drier the skin, the better it browns and crisps up.
Use a meat thermometer. It’s the only way to nail that perfect doneness.
Color control: On a stick burner, smoke runs heavy — so tent the turkey once the color looks good. You want mahogany, not black.
Flavor variations: Swap Malcom’s King Craw Cajun Seasoning for your favorite turkey seasoning — classic poultry blends, garlic and herb, or a buttery savory rub all work great with this same process.
Every turkey cooks a little different, but if you take your time and let the smoke do the work, you’ll end up with one you’re proud to carve. That’s the kind of bird everyone remembers.
Creamy, rich, and deeply savory, these mashed potatoes get a flavor upgrade with caramelized onions and a secret boost of plant-based protein from pureed white beans. The result is velvety, buttery comfort in every bite. A side that’s perfect for holidays or weeknights alike. (Gluten-free, nut-free, with a soy-free option.)
Everyone loves potatoes in every form, especially mashed potatoes around the holiday season. They’re a fixture at every meal, and we’re going to level them up times two.
This recipe levels up the flavor with caramelized onions, garlic, and herbs that add an amazing flavor to these mashed potatoes. And we’re going to add some pureed white beans for extra protein and heartiness.
You’ll get protein from the beans, nutritional yeast, and non-dairy milk. You can add even more protein by serving it with crispy lentils or tofu bacon bits.
No matter how you serve caramelized onion mashed potatoes they’re rich, hearty, and perfect for any holiday table or cozy dinner. Served here with my mushroom bourguignon.
Why You’ll Love Caramelized Onion Mashed Potatoes
creamy mashed potatoes
savory caramelized onion topping
sneaky protein
delicious holiday side dish
naturally gluten-free and nut-free with easy soy-free option
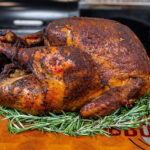
This smoked turkey is all about big flavor and perfect texture — juicy meat with crispy, bite-through skin. The secret isn’t complicated: a simple brine, a good dry, and steady heat on the pit.
Once the bird soaks up that flavor, I let the skin dry out, season it from top to bottom, and smoke it low and slow over pecan wood. The result is golden skin that crackles when you slice and meat so tender it practically drips juice.
Serve it hot off the board for Thanksgiving dinner and show off what a real smoked turkey should taste like.
Juicy, smoky, and crisped to perfection — this smoked turkey is everything a holiday bird should be. Tender, flavorful, and kissed with just the right amount of smoke — it’s turkey done right.
Ingredients
1 whole turkey (12–18 lbs), thawed
HowToBBQRight Ultimate Brine Kit
OR
1 bottle Malcom’s Bird Brine
1 bottle Killer Hogs AP Seasoning
1 bottle Malcom’s King Craw Cajun Seasoning
Meat Bag
Water (enough to completely submerge turkey)
1 stalk celery, cut into chunks
1 medium onion, quartered
1 apple, quartered
3 cloves garlic, smashed
Cooking spray or oil (for coating the skin)
Chicken Rack (optional)
Instructions
Brine the Turkey
Mix one bottle of Bird Brine with 1 gallon of water until dissolved. Place the turkey in a large brining bag or container and pour the brine mixture over the bird. Add enough cold water to completely submerge.
Seal the bag (or cover the container) and refrigerate for 24 hours. For larger turkeys (over 16 lbs), brine up to 48 hours.
Dry and Prep
Remove the turkey from the brine and discard the liquid. Pat the skin completely dry with paper towels—this is key to getting crispy skin.
Stuff the Cavity
Place the celery, onion, apple and garlic (use whatever aromatics you like) inside the cavity.
Tie the legs together and tuck the wing tips underneath so the turkey cooks evenly.
Oil and Season
Lightly coat the entire surface of the turkey with cooking spray or oil.
Season the backside first with a medium coat of Killer Hogs AP Seasoning, followed by a medium coat of Malcom’s King Craw Cajun Seasoning.
Flip the turkey onto a rack and repeat on the top side with the same layers of seasoning.
Smoke the Turkey
Preheat your smoker or grill to 275°F using pecan pellets (or your preferred wood).
Place the turkey on the pit, centered for even airflow, and cook until the internal temperature in the deepest part of the breast reaches 160°F.
Rest and Serve
Remove the turkey from the smoker and rest for 20 minutes. The internal temperature will carry over to about 165°F in the breast and 175°F in the dark meat.
That’s how you smoke a turkey that comes out juicy every single time — with golden, crispy skin and that rich, smoky flavor you can only get from cooking it low and slow. Keep it simple, trust the process, and you’ll carve into the best turkey you’ve ever put on the table.
The hearty soulful soup that will soothe your soul this winter while also serving you as a one pot meal is this restaurant style creamy corn and shrimp chowder!
Soup season has officially started and I can't keep calm! I mean, I love soup and that too those ones that double up as a one pot meal with all the goodness packed in a single bowl!
Today's recipe of creamy corn and shrimp chowder is exactly that dreamy soup recipe which will not only fill your tummy but also calm your soul on a chilly wintery night!
There is already a nip in the air in my city especially from evening onwards and I get drawn towards the hearty soups for my dinner during this winter-round-the-corner-but-not-there-yet season!
This shrimp chowder has been on my bucket list since ages and I finally served it on our dinner table last week after perfecting the recipe for you all and us too!
I'm sure you guys will love it as much as we did as soon as you give it a try; so what are you waiting for? Hurry up!
Let’s get cooking!
What is shrimp chowder?
If you are not familiar with chowder, let me then first decode it for ya!
Chowder is a soup primarily made of seafood with lots of veggies, potatoes being one of the key components. The soup broth of chowder is of creamy consistency thanks to milk and cream.
Even though the chowder broth is creamy, it is still quite light on your tummy and that’s a fantastic reason to include this insanely flavorful soup in your weekly meals this season!
The creamy corn and shrimp chowder is a one pot wonder which will serve you as a fancy and delicious dinner on the wintery nights!
This hearty soulful soup is full of incredible flavors, thanks to shrimps, rewarding you with a fancy meal right at the comfort of your home!
Spice-Rubbed Braised Tofu with Vegetables in a Savory Umami Sauce. A unique delicious holiday entree that all cooks in one pan! (gluten-free and nut-free with soy-free options)
I wanted to make a vegan braised meat-style dish for the holidays, so I came up with this one-skillet meal that’s rich, hearty, and incredibly flavorful. It features an amazing, aromatic spice rub that smells so meaty you’ll be surprised it’s entirely plant-based. The spice rub coats tofu that’s been frozen, thawed, and pressed, giving it a dense, chewy texture perfect for braising.
The base for the braise starts with crisped-up potatoes and carrots. After searing the vegetables, we make a deeply flavorful sauce with caramelized onions, lots of aromatics, and fresh herbs, and flavor boosters.
The tofu and vegetables braise together in this sauce, allowing the tofu to absorb all that flavor while developing a slightly crispy top and a tender, chicken-like interior.
We use an oven-safe pan to start the dish on the stovetop and finish it in the oven, where the vegetables become perfectly tender and the tofu gets a gorgeous golden top.
It’s fantastic served with rice, couscous, mashed potatoes or other mashed vegetables, bean purée, some crusty bakery bread, or a side salad.
A simple herb sauce adds a bright, fresh contrast, but you can enjoy it on its own, too. It’s full of amazing flavors with or without. The herb sauce just bumps up the flavor even more.
Why You’ll Love Braised Tofu and Vegetables
1-pan entree that’s perfect for the holiday table
flavorful braised vegetables in caramelized onion sauce
big pieces of crisp, herb-rubbed tofu
naturally gluten-free and nut-free with easy soy-free option
A cozy, hands-off, no sauté mushroom potato casserole that needs just 1 pan. Layers of rich mushroom gravy with beans and veggies, layered with crisp garlic herb potatoes that take only minutes to put together as the oven does all the work. (gluten-free with soy-free and nut-free options)
It’s fall, and it’s time for some comfort food. And what’s more comforting than this casserole, which has a stewy mushroom gravy with beans and veggies, topped with potatoes smothered in garlic butter? There are lots of fall herbs, like fresh thyme and sage, and it all comes together really quickly.
This is a super easy one-pan casserole. No need to sauté or stand around the kitchen for long periods of time cooking the onions and mushrooms. Everything goes right into the baking dish, and the oven does all the work.
Once the mushroom and onions are cooked, add the beans, herbs and stew ingredients and top them with some sliced potato and bake, and thats it. You get all the fall flavors and a dish that reminds of mashed potatoes and mushroom bourguignon w/o all the work.
It’s comforting, stewy, and perfect for a fall dinner with your family, served with a side salad, garlicky dinner rolls, or some crusty bakery bread. Or serve it however else you like!
Why You’ll Love Mushroom Potato Casserole
cozy, hearty, stewy beans and veggies in a rich, mushroom gravy
1-pan oven recipe, no standing at the stove!
very little active cooking time
No cooking the aromatics and potato separately
naturally nut-free with easy gluten-free and soy-free options
Chai tiramisu cake has a delicious, moist, chai-infused cake with layers of cardamom cream dusted with a cocoa-chai topping. It is an absolutely fabulous fusion dessert perfect for Diwali or any special occasion! (soy-free with gluten-free or nut-free option)
We’re actually making a super quick cake for this chai tiramisu, instead of using ladyfingers. The rich, creamy textures of the cake and cardamom cream give you the decadence of tiramisu without any eggs or dairy needed.
You can make this with vegan ladyfingers, if you can find those, or you can use vegan cake rusks. Cake rusks are like plain biscotti available in Indian stores, and they work well as a substitute for ladyfingers. Just soak them in the chai, and use them for layering. Or, you can make this simple cake with just a few ingredients.
I heard you about wanting a cake that used a cream topping that didn’t need a freezer to set. The cardamom cream for this chai tiramisu cake sets up thick and spreadable at room temperature, no freezer needed.
Whether you make the cake from scratch or use one of the substitutions, this incredibly delicious chai tiramisu is a hit at any dinner party. It also freezes well, so you can make it ahead. Just thaw it overnight in the fridge.
Why You’ll Love Chai Tiramisu
quick, easy, moist, delicious cake soaked in flavorful milk chai
rich, decadent cardamom cream that sets up with no freezer needed
Pillowy tortellini and a velvety tomato-cream broth, enriched with my easy homemade sausage spice mix. Bursting with bold Italian flavors and ready in just 30 minutes, it’s your new favorite irresistible soup.
I got some almond ricotta–stuffed tortellini, so I decided to make an amazing soup with it. This is a hearty, delicious, and easy tortellini soup recipe. It uses the usual suspects of an Italian-flavored soup: aromatics, carrot, celery, Italian herbs, and vegan sausage. Those flavors pair up with the tortellini, tomato purée, and some non-dairy cream.
It turns out absolutely delicious.
I make this spice mix which adds all the flavor of sausage to whatever plant based protein you choose. This spice mix combines smoked paprika, fennel seeds, garlic powder, black pepper, oregano, and pepper flakes, and it’s just so versatile and flavorful!
First make the spice mix, and then decide which protein you want to use for the sausage. You can use vegan sausage, lentils, walnuts, pecans, chickpeas, crumbled tofu, chopped up soaked soy curls, seitan, or whatever else you like.
Cook your protein of choice with some garlic and the spice mix, then add all the aromatics. Fold in the tomato sauce, tortellini, and some stock, then add non-dairy cream at the end. The tortellini cooks up in the same pan with the rest of the soup.
The soup comes together within 30 minutes in just 1 pan, and is creamy and satisfying!
Why You’ll Love Tortellini Soup
super easy 1-pot meal ready in 30 minutes
creamy, tomatoey broth with sausagey flavors and tender, cheesy tortellini
super versatile! Use whatever plant-based protein you like!
Easily made gluten-free, soy-free, and/or nut-free.
This vegan jalapeño popper cheese ball is super easy: no soaking or blending required! Just 10 minutes of prep time, and it’s ready in about 30 minutes. Perfect for parties with veggies or crackers. (Gluten free, soy free option)
Five reasons you should make this jalapeño popper cheese ball:
No soaking the nuts overnight.
No blending the nuts.
No straining a blended mixture.
Just 10 minutes of active time in the kitchen.
Uses just a few everyday ingredients.
It is just mind-blowingly delicious for the small amount of effort this recipe needs. You just make this flavor mixture that’s like a jalapeño dip with non-dairy yogurt, some brine from pickled jalapeños, and some spices. Then, mix in some almond flour and fresh and pickled jalapeños to create a dough. Shape it into a ball, and bake. That’s it!
Baking this vegan cheese ball helps the flavors meld together and takes a little bit of the bite out of the jalapeños. It just enhances the overall flavor and texture. The result is this fantastically delicious vegan cheese ball to serve with some crackers, veggies, crudités, or however else you like.
This is also such a versatile vegan cheese ball. There are lots of fun ways to serve it! You can make sandwiches with it by spreading it on some bread, and pairing it with some fresh tomatoes or other veggies or some crisp tofu. Or add dollops of this mixture to salads.
It also works great in mini quesadillas! Just spread some of the jalapeño popper cheese ball onto small tortillas with some grilled veggies, fold them over, and cook until crisp in the oven or on the stovetop. If you’re going to use it to make quesadillas, you don’t even need to bake the cheese ball, because cooking the quesadillas will cook the cheese mixture then.