Sometimes it makes sense to go with plain old batteries and off-the-shelf PVC pipe. That’s the thinking behind [Bertrand Selva]’s clever LoRaTube project.
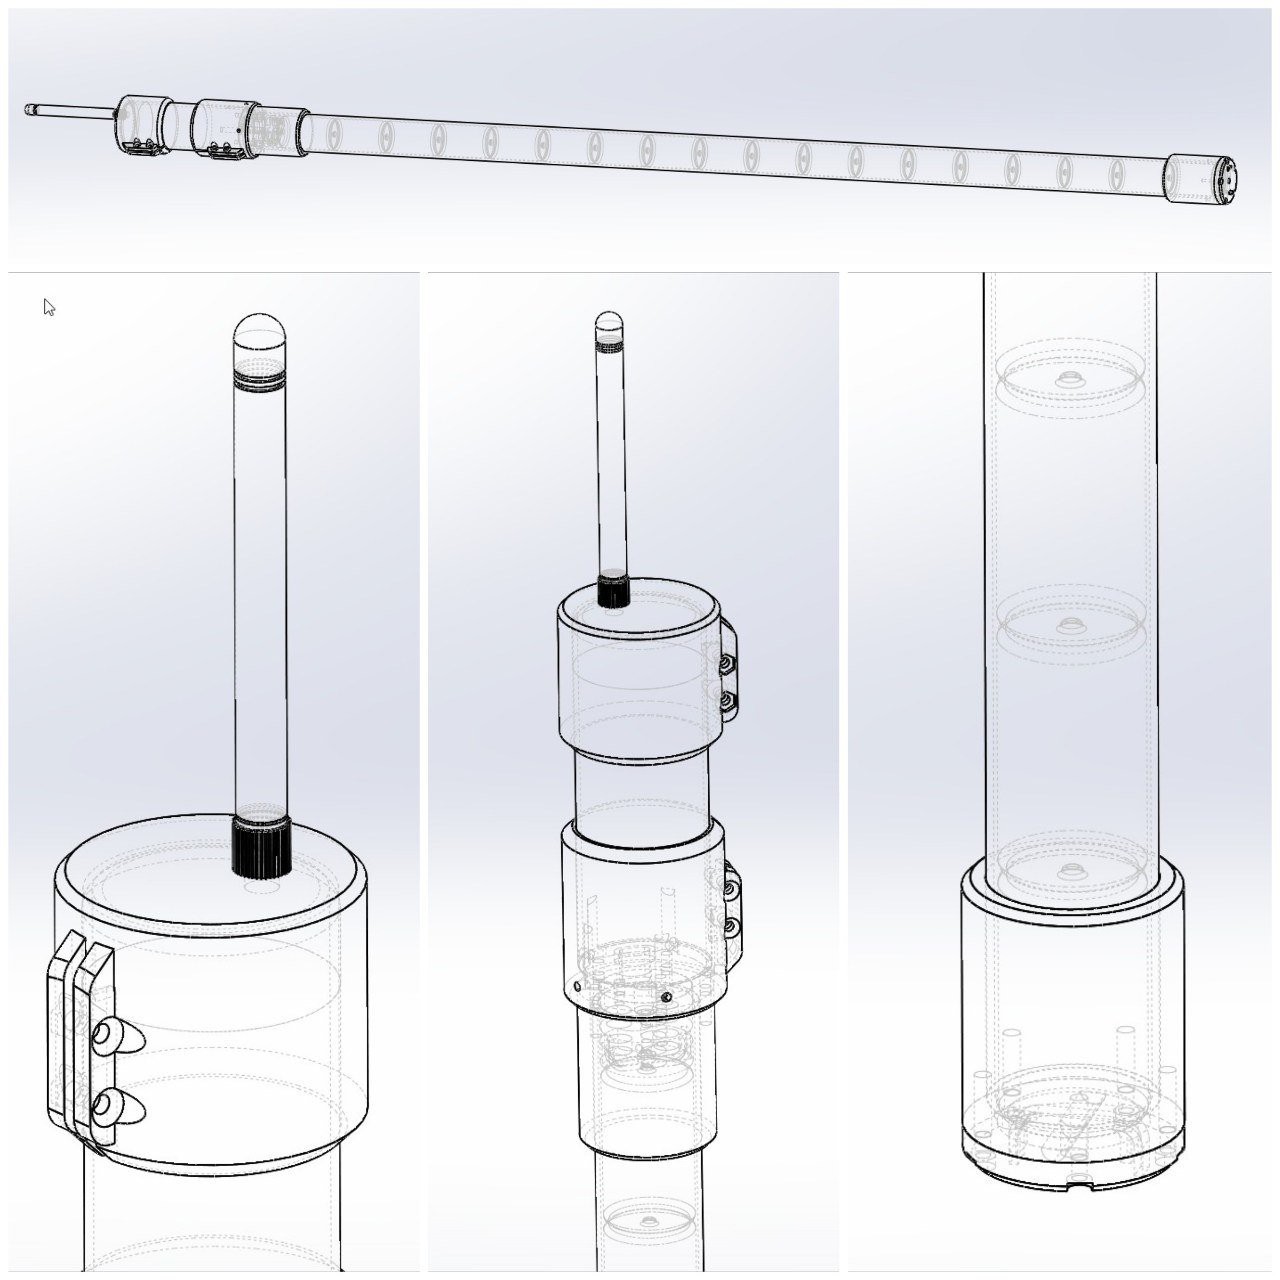
PVC pipe houses a self-contained LoRa repeater, complete with a big stack of D-size alkaline cells.
LoRa is a fantastic solution for long-range and low-power wireless communication (and popular, judging by the number of projects built around it) and LoRaTube provides an autonomous repeater, contained entirely in a length of PVC pipe. Out the top comes the antenna and inside is all the necessary hardware, along with a stack of good old D-sized alkaline cells feeding a supercap-buffered power supply of his own design. It’s weatherproof, inexpensive, self-contained, and thanks to extremely low standby current should last a good five years by [Bertrand]’s reckoning.
One can make a quick LoRa repeater in about an hour but while the core hardware can be inexpensive, supporting electronics and components (not to mention enclosure) for off-grid deployment can quickly add significant cost. Solar panels, charge controllers, and a rechargeable power supply also add potential points of failure. Sometimes it makes more sense to go cheap, simple, and rugged. Eighteen D-sized alkaline cells stacked in a PVC tube is as rugged as it is affordable, especially if one gets several years’ worth of operation out of it.
You can watch [Bertrand] raise a LoRaTube repeater and do a range test in the video (French), embedded below. Source code and CAD files are on the project page. Black outdoor helper cat not included.
Crypto firm Ripple recently achieved a major milestone, providing a bullish outlook for the XRP price. XRP is also seeing significant demand amid the launch of the U.S. spot ETFs, which could trigger a price surge for the altcoin.
Ripple Developments That Are Bullish For The XRP Price
In a press release, Ripple announced that its stablecoin RLUSD has gained recognition as an accepted Fiat-Referenced token by Abu Dhabi’s financial regulator. This enables the use of the stablecoin within the region’s financial markets. This marks a positive for the XRP price, as it could boost RLUSD’s demand, thereby increasing the demand for the altcoin as the native token of the XRP Ledger.
Notably, the on-chain analytics platform Sentora (formerly IntoTheBlock) recognized RLUSD as one of the fastest-growing stablecoins, with its market cap increasing by 38.8% over the last month. Meanwhile, this development follows Ripple’s completion of the Hidden Road deal, which also strategically boosts RLUSD demand and positively impacts the XRP price.
Meanwhile, crypto pundit SMQKE recently highlighted a U.S. Consumer Financial Protection Bureau report that acknowledged Ripple’s role in revolutionizing the cross-border payments industry through XRP. The report also suggested that Ripple’s payment system could be integrated into the traditional financial system, which would also be huge for the XRP price.
Notably, the report specifically alluded to Ripple’s growth and expanding partnerships, which could make its payment platform the go-to choice for cross-border remittances. Meanwhile, XRP serves as the bridge currency for the effective settlement of these transfers. It is worth mentioning that Ripple Chief Technology Officer (CTO) David Schwartz has also assured that stablecoins cannot replace XRP’s role as the bridge currency on the XRP Ledger (XRPL).
XRP’s Demand Is On The Rise
A CryptoQuant analysis revealed that the XRP reserves on Binance are plummeting, which could also trigger an XRP price surge. This development comes amid the launch of the U.S. XRP ETFs. The analysis suggested that institutional demand for the altcoin via these ETFs may have contributed to the decline in Binance’s reserves.
Binance’s XRP reserves are said to have been steadily decreasing since October and have now dropped to around 2.7 billion XRP, which is one of the lowest levels ever on the exchange. CryptoQuant revealed that roughly 300 million XRP have left the exchange since October 6. The analysis noted that this indicates that real demand is building, which is bullish for the XRP price.
Bitcoinist recently reported that institutions last week dumped Bitcoin, Ethereum, and Solana for XRP, which was one of the few majors to record inflows amid the broader outflows from crypto funds. If this demand trend for XRP continues, the CryptoQuant analysis stated the XRP price could enter a more structured phase amid expanding institutional interest.
At the time of writing, the XRP price is trading at around $$2.21, up in the last 24 hours, according to data from CoinMarketCap.
[Josh] aka [Ham Radio Crash Course] is demonstrating this build on his channel and showing every step needed to get something like this working. The first part is finding the correct LoRa module, which will be the bulk of the cost of this project. Unlike those used for most Meshtastic nodes, this one needs to be built for the 433 MHz band. The software running on this module is from TinyGS, which we have featured here before, and which allows a quick and easy setup to listen in to these types of satellites. This build goes much further into detail on building the antenna, though, and also covers some other ancillary tasks like mounting it somewhere outdoors.
With all of that out of the way, though, the setup is able to track hundreds of satellites on very little hardware, as well as display information about each of them. We’d always favor a build that lets us gather data like this directly over using something like a satellite tracking app, although those do have their place. And of course, with slightly more compute and a more directed antenna there is all kinds of other data beaming down that we can listen in on as well, although that’s not always the intent.
Aam ka Panna (Raw Green Mango Drink) is a refreshing mango drink that is made from raw green mangoes and some mild spices. This chilled drink is great for hot summer days as it has a very nice cooling effect.
Course Drinks
Cuisine Indian
Keyword Aamras, Amchora, Kairi Panna, Raw Mango Drink, Raw Mango Juice, Refreshing, Summer Drink
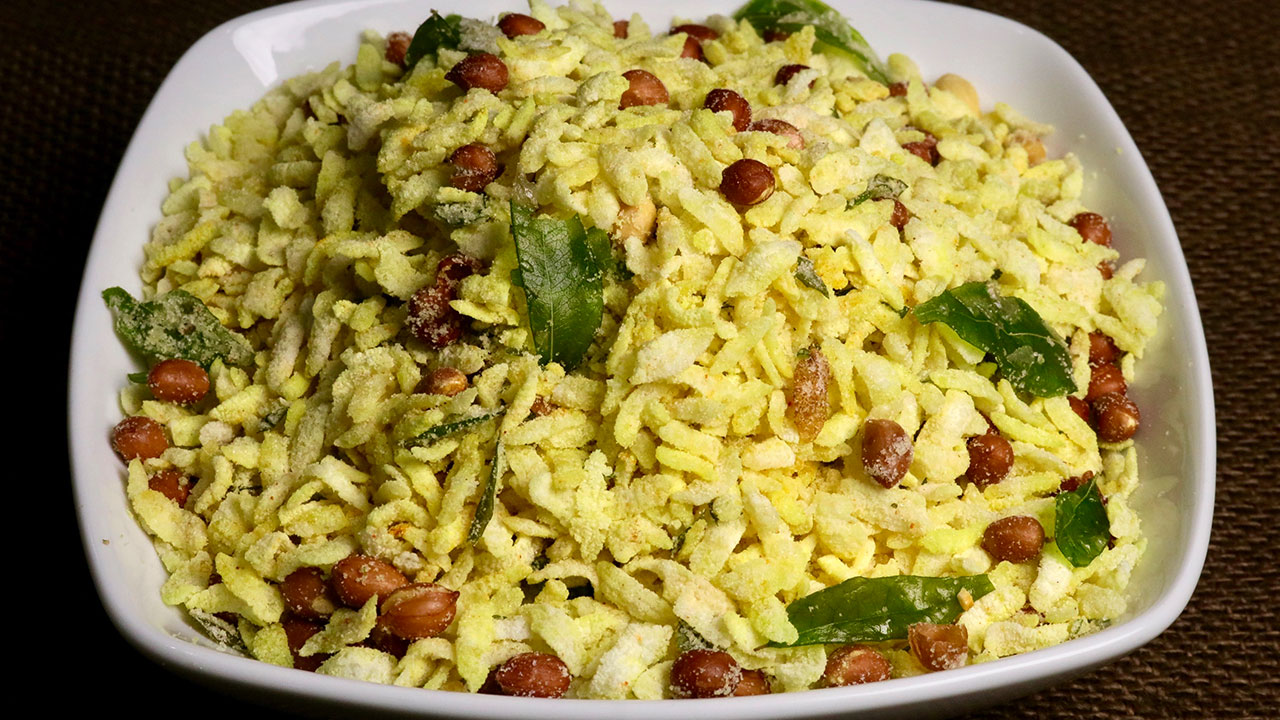
Khatta Meetha chivda is a popular tea time snack. This delicious sweet and salty snack can be enjoyed by all ages. Chivda is a flat rice, also known as poha.
Course Snack
Cuisine Indian
Prep Time 5minutes
Cook Time 20minutes
Total Time 40minutes
Servings 8people
Ingredients
2cupchivdaor poha available in different thickness, thick, medium, thin or nylon poha, I am using medium
Grind sugar, salt, citric acid and red chili powder together making sugar in to powder. And all the ingredients will be mixed evenly. Set aside.
Wash and pet dry curry leaves and let it air dry for at least 10 minutes or more.
In a frying pan take about 1” of oil and heat on medium heat. Oil should be moderately hot. Put about 1/4 cup of chivda in an oil, chivda should come up right away, (otherwise oil is not hot enough) as soon chivda comes up over oil, lower the heat to low and stir fry chivda till it doubles in size but remains white in color. Take out fried chivda in a strainer to drain out excess oil. Repeat the process and fry the remaining chivda.
In the same oil fry peanuts over low heat till they are light brown.
Fry the curry leaves until they are crisp.
Take another frying pan large enough to hold all the ingredients, put I teaspoon of oil in the pan over low heat. put turmeric stir and put chivda, keep mixing till it is mixed well and chivda will be light yellow turn off the heat and let the chivda come to room temperature.
Add peanuts, sugar mix, and crush the curry leaves over. Mix it gently until all the ingredients are incorporated well.
Notes
You can store the Khatta Meetha Chivda, in a air tight container for a month. Store it in an air-tight container and enjoy this scrumptious snack for up to 2 months...!!
From the Greek physa, a bladder, an allusion to the inflated calyx (Solanaceae). A genus of 100 or more species of which the two most well-known are P. alkekengi, the Bladder Cherry or Chinese Lantern Plant, with its brilliant, flame-coloured, air-filled calyces, and P. peruviana, the Cape Gooseberry, which is a greenhouse species. They are annual and perennial herbaceous plants, […]
The form and size of a herb garden is determined by the interest these plants hold for the individual. It can be a tiny border of commonly used culinary herbs such as mint, parsley, sage and thyme or an elaborate garden designed to house a wide collection of herbs. Many plants could legitimately be included in one of these large […]
The city of Aurora, Colorado hosted a grand opening on Tuesday for its brand new 77,000-square foot, nearly $42 million recreational facility that was funded entirely by tax revenue generated from legal marijuana sales.
Known as the “Southeast Recreation Center and Fieldhouse,” the facility boasts a slew of amenities, according to local news station KDVR: “A 23,000-square-foot fieldhouse with temperature controlled indoor environment; A full-sized field with professional-grade turf; An 8,000-square-foot multiuse gymnasium [that] will be able to accommodate one main basketball court, two cross basketball courts, two volleyball courts or three pickleball courts; A 1/9-mile long track elevated above the fitness area and gymnasium; A 7,600-square-foot fitness area with state-of-the-art equipment, including: A functional fitness area; An outdoor fitness space; A fitness studio; A large community room; [and a] natatorium, which in turn is comprised of: A 125,000-gallon swimming pool with a maximum depth of seven feet; A spa pool with water jets; A leisure pool that includes a 25-yard, four-lane lap pool, a lazy river, and a 20-foot-tall waterslide.”
The city broke ground on the facility in early 2021, and it is the second new recreational facility to open in Aurora in the last four years.
The other rec center, which opened in 2019, was also funded by taxes from marijuana sales, according to KDVR. The news outlet Westworld reported that the Aurora City Council in 2020 “approved increasing the city’s sales tax on recreational marijuana from 7.75 percent to 8.75 percent, with the additional revenues going to fund youth violence prevention projects.”
“We are excited to open our newest recreation center and fieldhouse,” Brooke Bell, the director of the Aurora Parks, Recreation and Open Space, said in a press release from the city earlier this month. “After an extensive community engagement process, the feedback received guided the creation of this exceptional facility; we look forward to the community enjoying the space they helped envision for years to come.”
In the press release, the city said that the Southeast Recreation Center is located “near several neighborhoods and the Aurora Reservoir,” and that “the center is a regional destination boasting the first indoor fieldhouse within the city in addition to a variety of other amenities and breathtaking views of the Colorado mountains.”
The construction of the two recreational facilities in Aurora serve as “proof of concept” for advocates who helped Colorado become one of the first two states to legalize recreational cannabis a little more than a decade ago when voters there approved Amendment 64.
Supporters of marijuana legalization have long contended that a regulated cannabis retail market could be an economic boon for state and local governments.
“Colorado did what no one had done before,” Colorado Gov. Jared Polis said at an event in October commemorating the 10th anniversary of the state’s legalization measure, as quoted by theDenver Gazette. “With voter [approval] of Amendment 64, we made history and therefore it is fitting that we are celebrating today 10 years here at History Colorado.”
Polis, a Democrat, has worked to strengthen the marijuana law. Last summer, he signed an executive order “to ensure that no Coloradan is subject to penalization for the possession, cultivation, or use of marijuana as this substance is legal in Colorado as a result of Amendment 64,” his office announced at the time.
“The exclusion of people from the workforce because of marijuana-related activities that are lawful in Colorado, but still criminally penalized in other states, hinders our residents, economy and our State. No one who lawfully consumes, possesses, cultivates or processes marijuana pursuant to Colorado law should be subject to professional sanctions or denied a professional license in Colorado. This includes individuals who consume, possess, cultivate or process marijuana in another state in a manner that would be legal under Colorado law,” Polis said in a statement.
Pakoras are an all-time favorite snack across India. It is basically a crisp fried appetizer prepared with onion, besan, rice flouralong with some spices. Which evening would not be delightful with a cup of masala chai and pakoras!
How about pakoras with chicken? Yes! Pakoras with chicken taste absolutely delicious and can be an amazing evening chicken snack for kids or when guests are home or for parties.
Chicken in minced form is usually called kheema which is nothing but ground meat. Use minced chicken in kebab recipes. A kind of Indian meatball is made by blending minced chicken with breadcrumbs, an egg and spices then placed on skewers, and baked. Minced chicken can also be stir-fried rapidly with vegetables, mushrooms, Chinese spices, and Chinese sauces, then stuffed into lettuce or cabbage leaves. Apart from making the very famous Indian chicken kheema recipe, here is a quick appetizer with ground chicken.
Ground Chicken may be easily available in the supermarket, however, you would be happy to know how easy it can be made at home without a meat-grinder. And without worrying of chicken becoming a paste. Here is the process to easily make ground chicken at home…
HOW TO MAKE GROUND CHICKEN AT HOME?
What you need:
A Food Processor or a Blender.
Skinless and boneless Chicken breasts or thighs.
Directions:
Rinse chicken in cold water and pat dry thoroughly.
Cut the chicken into 1-inch chunks.
Lay the chicken chunks in a single layer on a foil-lined baking sheet.
Place the baking sheet in the freezer for about 20-25 mins, the chicken should get firm but not frozen though.
Put the chunks into a food processor or blender, in batches of about 10 at a time and pulse them until it resembles ground chicken.
Use the ground chicken immediately or freeze until ready to use.
So, now you know how easily ground chicken can be made at home, so let’s get on to an easy appetizer preparation using this ground chicken.
It is very similar to our traditional onion pakoras but with additions of few spices to enhance the taste of ground chicken and prepared very similar to any other pakoras. Serve hot with a dash of chat masala on top along with tomato ketchup and green chutney.
Chicken Pakora can be an easy and quick appetizer for your weekend meal.
“Weekend meal with chicken pakora as appetizer”
Do give a try. Pakoras with chicken are yummier than ever! Kids would love to munch on these chicken snack for evening.
Crispy Chicken Pakora is a quick Indian appetizer made with ground chicken, onions, gram flour, and spices. Great for parties or an evening chicken snack for kids.
Course Appetizer, Snack
Cuisine Indian
Keyword chicken, pakora
Prep Time 10minutes
Cook Time 15minutes
Total Time 25minutes
Servings 4
Author KaviRuchi
Ingredients
1cupGround/Minced Chickenkheema
1Onionthinly sliced
4Green Chilifinely chopped
¼cupRice Flour
½cupBesan/Gram Flour
½tspGinger-Garlic Paste
½tspFennel Seeds
1tspChili Powder
1tspGaram Masala
2spring Curry Leavesfinely chopped
Saltas per taste
Oilto deep fry
Instructions
PREPARATION:
Thinly Slice 1 large Onion.
Finely chop 4 Green Chili and 2 springs of Curry leaves.
METHOD:
In a large mixing bowl, add thinly sliced onion and crumble to separate onion slices.
Next, add in finely chopped green chili and curry leaves.
Additionally add fennel seeds, chili powder, garam masala and ginger-garlic paste.
Add in the ground chicken and mix well.
Next, add besan(gram flour), rice flour and salt. Mix until everything is well combined to form a thick dough. The moisture from onions and chicken is enough to form a dough. Sprinkle little water only if required.
On high flame, heat oil a pan/kadai for deep frying.
Once the oil is hot, reduce the flame to medium and drop in small-ball sized dough mixtures into the hot oil one after other.
Do not overcrowd oil, as the chicken pakoras need enough space to cook and turn crispy.
Fry pakoras until they turn crispy and golden brown on medium flame, stir occasionally.
Finally, remove to a colander lined with a paper towel.
Follow the same procedure to fry the rest of the pakoras.
Serve hot with a cup of chai. Sprinkle some chat masala on top before serving.
Also, serve with tomato ketchup and green chutney for Kids evening snack.
Munch the crunchy chicken pakodas!!
Video
Notes
Add more or less of the green chilis mentioned in the recipe, according to spice level required(or skip if making for kids).
You could also add mint and coriander leaves to make more flavor full chicken pakodas.
Use could also use Corn flour in place of rice flour for crispy pakodas.
Do not add water, the moisture from onion and chicken is sufficient enough to form a dough. If needed sprinkle a very little amount of water.
Deep fry and use the dough mixture immediately for crispy pakodas, oozes water if stored for a long time.
Make sure to fry pakodas on medium flame, cooking on high flame might brown pakoras quickly but uncook chicken inside, also cooking on low flame makes chicken pakodas hard and chewy.
Enhance the flavor of your dishes with this homemade ginger garlic paste, as homemade is always best & healthy choice!!
Crispy on the outside and soft on the inside, these split green moong dal and fresh curry leaves pakoras are a match made in food heaven. The Bhaumick household doesn’t need a monsoon to make pakoras, a.k.a tele bhaja, bhajiya, vada, etc. We make them at least twice a week (if not more) as a must-have accompaniment with dal. On most days,…
Prawn bajji is a delicious and flavorful battered fried prawns spiced with a blend of Indian spices. It is crispy from outside and soft juicy from inside. A perfect party starter to impress your guest.
This prawn bajji is a spiced and delicious fritter prepared with large prawns. They are marinated in simple spices, then dipped in spiced gram flour batter and fried to perfection. These are so delicious afternoon snacks specially during rainy season. It also makes a great appetizer and a perfect side dish with your meal.
It is made with simple and easily available pantry ingredients and cooking them is just a matter of a few minutes. You can serve these delicious prawn fritters with chai or just like that with some sauce or spicy chutney.
This recipe for the prawn fritters is a typical South Indian recipe with lots of flavour and taste. You just can’t stop with one piece! People of all age group love this prawn bajji. In my home this prawn bajji is an all time hit, my hubby and son loves it very much so it’s a regular in home.
Vegetable bajji and egg bajji are very common and available in almost all the street food corners but bajji with prawns is something interesting and special.
I would recommend to use medium or large sized prawns. The jumbo prawns wouldn’t be a better choice for making bajji.
WHAT IS A BAJJI?
Bajji is a very popular street food of India. It is very popular and common in Tamil Nadu. You can see delicious bajjis in almost all street tea stalls and street food carts. It is an evening snack which is served along with tea. It is mostly made with vegetables most popularly with raw banana, potato, chilli, onion, cauliflower, brinjal and boiled egg.
I am a great fan of most of the street foods. Apart from the different bajji available I also love indulging in other street food like fried rice, noodles, chilli chicken and the manchurians.
INGREDIENTS FOR MAKING PRAWN BAJJI
PRAWN – Large peeled and deveined prawns are used.
OIL – Sunflower oil is used for deep frying the prawn bajji.
SPICES – Pepper, chilli powder is used in prawn marination. In batter spices used are turmeric powder, coriander powder, cumin powder, chilli powder and garam masala powder.
GINGER GARLIC – Ginger garlic paste is used in the recipe.
FLOUR – Mixture if gram flour (chickpea flour) and rice flour is used. Rice flour adds a more crispy outer to the bajji.
LEMON JUICE – Freshly squeezed lemon juice is used in the marination.
BAKING SODA – Baking soda is used to get a fluffy bajji. This is optional, you can omit it if you don’t want to use it.
SALT to taste.
WATER as required for making the batter.
HOW TO MAKE PRAWN BAJJI
This section shows how to make prawn bajji with step-by-step photos and details about the technique with video tutorial. For full ingredients measurements, see the recipe card below.
I made a simple video of prawn bajji for my readers which I have shared below. Please do watch and SUBSCRIBE to my channel if you haven’t yet. It will mean a lot to me and motivate me to come up with more videos for my readers. As always looking forward to your feedbacks!
PRAWN BAJJI VIDEO TUTORIAL
HERE’S A STEP BY STEP PICTORIAL INSTRUCTIONS TO MAKE PRAWN BAJJI:
Peel and devein the prawns. Wash in running water nicely and pat dry with clean kitchen towel.
Add in the prawns in a mixing bowl. To this add in the marination ingredients- crushed pepper, chilli powder, ginger garlic paste, salt to taste and lemon juice.
Mix well to combine and allow it to marinate for few minutes or 30 minutes.
In a mixing bowl add in the batter ingredients- gram flour, rice flour, turmeric powder, coriander powder, cumin powder, chilli powder, garam masala powder, salt as required and baking soda. Mix well to combine.
Add water little by little and make a semi-thick batter flowing consistency.
Meanwhile heat oil in a pan for deep frying.
Now dip the prawns onto the prepared batter and coat the prawns fully.
Drop in hot oil and fry the prawns in a medium flame until its golden and crisp from outside.
Remove and continue with the remaining prawns.
Serve hot with sauce or chutney of your choice along with fried chilli and onion rings.
TIPS & TRICKS: ● The most important part in this recipe is the batter consistency. It shouldn’t be too thick or too watery. It should be flowing consistency. ● Cooking soda is added for to get fluffy bajjis but do not add excess baking soda. ● Rice flour adds more crispness to the bajji. ● While making the batter, add water little at a time to avoid excess water which result in thin runny batter. ● Heat the oil to smaking hot and then reduce the heat before dropping the battered prawns. ● To check the oil temperature, just put a little drop of batter into the hot oil, it should immediately pop up and flood on the top and should not go down the oil. ● Use medium or large sized prawn for making prawn bajji. ● Do not fry the bajji over high flame, otherwise it will end up uncooked inside.
Prawn bajji is a delicious and flavorful battered fried prawns spiced with a blend of Indian spices. It is crispy from outside and soft juicy from inside. A perfect party starter to impress your guest.
Peel and devein the prawns. Wash in running water nicely and pat dry with clean kitchen towel.
Add in the prawns in a mixing bowl. To this add in the marination ingredients- crushed pepper, chilli powder, ginger garlic paste, salt to taste and lemon juice.
Mix well to combine and allow it to marinate for few minutes or 30 minutes.
In a mixing bowl add in the batter ingredients- gram flour, rice flour, turmeric powder, coriander powder, cumin powder, chilli powder, garam masala powder, salt as required and baking soda. Mix well to combine.
Add water little by little and make a semi-thick batter flowing consistency.
Meanwhile heat oil in a pan for deep frying.
Now dip the prawns onto the prepared batter and coat the prawns fully.
Drop in hot oil and fry the prawns in a medium flame until its golden and crisp from outside.
Remove and continue with the remaining prawns.
Serve hot with sauce or chutney of your choice along with fried chilli and onion rings.
Video
Notes
The most important part in this recipe is the batter consistency. It shouldn't be too thick or too watery. It should be flowing consistency.
Cooking soda is added for to get fluffy bajjis but do not add excess baking soda.
Rice flour adds more crispness to the bajji.
While making the batter, add water little at a time to avoid excess water which result in thin runny batter.
Heat the oil to smaking hot and then reduce the heat before dropping the battered prawns.
To check the oil temperature, just put a little drop of batter into the hot oil, it should immediately pop up and flood on the top and should not go down the oil.
Use medium or large sized prawn for making prawn bajji.
Do not fry the bajji over high flame, otherwise it will end up uncooked inside
Well, if you make this prawn bajji recipe I’ll be glad if you take out some time and rate the recipe and leave a feedback in the comments box below. You can also snap a photo and tag Akum Raj Jamir on Facebook and akumrajjamir on Instagram with hashtag #atmykitchen. I would love to see your creations.
Thank you so much for stopping by my blog. I hope you liked the recipe. Your valuable feedbacks are always welcome, I love hearing from you guys and always do my best to respond to each and every one of you.