The classic Greek lemon chicken is a must-try recipe if you love savory, citrusy and comforting flavors with your chicken having crispy skin and juicy meat!
If you are a blogger, irrespective of your domain, I am sure you would have also experienced blogger fatigue at times and I am not ashamed to confess that I am going through that exact same phase at the moment!
That’s the very reason behind the irregularities of my blog posts and I am fully aware that the frequency of my publishing must improve sooner than later!
However, while I fix & sort out my schedule, I must apologize to my loyal readers who still visit my page and have shown their immense love over the years!
End of year is always the best time to reflect on the time we have left behind and express gratitude for all the good things life has bestowed upon us!
With a heart full of nothing but thankfulness, I am here today to share a classic recipe from one of my favorite cuisines, the Mediterranean!
This classic Greek lemon chicken is absolutely gonna brighten up your days ahead once you give it a try in your kitchen! It is easy, quick with minimal prep and a perfect bang for the buck!
What is Greek lemon chicken?
Greek lemon chicken is a traditional baked chicken recipe made with bone-in and skin-on portions of chicken like chicken thighs or chicken drumsticks.
The unique USP of this Greek lemon chicken is its marinade which is a flavor-bomb thanks to all the fresh ingredients used in it.
Creamy, cheesy and decadent, this restaurant style creamy Tuscan chicken screams holidays more than anything I have made recently and I am so glad I could bring this to you right on time!
If you are at the last leg of finalizing your holiday menu, I would strongly urge you to keep a spot for my classic restaurant style creamy Tuscan chicken in your list!
This creamy Tuscan chicken is a cheesy chicken recipe with a burst of freshness from spinach and fresh basil that is just perfect to serve over your favorite pasta and an ideal holiday meal for everyone!
This is also a good option for a make-ahead dish as this freezes very well! You just need to thaw and reheat to make the sauce melty and glossy again!
What is creamy Tuscan chicken?
Interestingly enough this creamy Tuscan chicken is not a traditional Tuscan recipe from Italy! Then why is it called Tuscan chicken? Fair question!
Upon reading more about this quirky recipe, I finally deduced that this creamy Tuscan chicken is a modern Italian-American dish, most likely developed in the United States!
The name “Tuscan” chicken comes from the ingredients commonly associated with Tuscan-style cooking e.g. olive oil, garlic, sun-dried tomatoes, leafy greens like fresh spinach & basil and Parmesan.
However, authentic Tuscan cuisine is usually lighter and not cream-based. The creamy version is more of an Italian-American or modern comfort-food creation.
But calling it “Tuscan” chicken instantly evokes certain emotions within the food lovers and we all know how crucial the role of emotion is when it comes to food!
The warmth, countryside charm and Italian comfort, the qualities that foodies already loved, get instantly packed into that name inviting more and more food enthusiasts to try it and fall for it!
A one-pot soup meal made with leftovers and greens, this is great for a working day dinner or when you’ve got surprise guests
Part two of the Lettuce Series as I’ve dubbed it was about throwing things into a large pot to put together a soup – the kind that makes life a whole lot better (read: bearable) when your home has been invaded by painters and you are sneezing your head off courtesy allergies. The Chicken Lettuce Soup isn’t a planned recipe but it’s the kind that, after you’ve sampled, you realise needs to be shared with the world. Or the little pockets of the world this blog reaches.
The best thing about this soup is that the mothership liked it and trust me when I say, her liking food that has chicken (she’s developing a dislike for chicken and meat) and lettuce (read part one of the Lettuce Series) made me feel like a parent whose child has accomplished something major in life!
If you wanna make restaurant style classic chicken kalmi kabab, you are at the right page! This delicious yet easy chicken kalmi kabab is a must-have recipe in your repertoire! I love smoky kababs the most if you wanna know what’s my favorite Indian food! Well, historically the kababs may not have an Indian origin, […]
These smoked chicken wings, with crispy skin and juicy meat, make a crowd-pleasing appetizer. Perfect for game days, backyard parties, family gatherings, tailgating, or weeknight dinners. The 0-400 method is a simple technique that I’ve found consistently produces crispy wings without much fuss. This approach gives you restaurant-quality wings at home using ingredients I had […]
After sharing many air fryer chicken recipes, why am I calling this one the best ever juicy air fryer chicken? That’s simply because this juicy air fryer chicken turned out way better than my expectations even with a minimal set of ingredients!
If you are looking for a quick & easy recipe which is high in protein and can fit into your busy weekday schedule, then this juicy air fryer chicken is the one that you are looking for!
Let me tell you the story of how I discovered this phenomenal recipe!
I use my air fryer daily to whip up my weekday dinners, which is mainly protein & salad on the side, as it hardly requires any prep and then everything is taken care of by the trusty air fryer.
So I keep playing up with the flavors, sometimes barely adding any spice; just aromatics & seasonings!
During one such experiment, this juicy air fryer chicken materialized when I was racing against time to join the next meeting!
So all I could add to the marinade, other than aromatics, were only turmeric & red chilli powder! I was okay with it as it was just one of my daily weekday dinners and nothing fancy or blog-worthy!
But I turned out to be so wrong!
The yogurt marinated chicken thighs came out so tender, juicy and flavorful even though I didn't use too many spices, that I was shook as soon as I took my very first bite!
I instantly asked my better half too to do a taste test and he also got hooked to the juiciness of the chicken! So I was not biased, you see! LOL!
Hence it goes without saying that this juicy air fryer chicken must feature in our blog as I can’t deprive my readers of such a mind-blowing recipe!
This air fryer sesame chicken has been a life changing discovery! Being an avid fan of Asian chicken recipes, I was badly missing them as they are mostly all deep-fried which I am avoiding due to my fatloss targets; but not any more thanks to this incredible air fryer sesame chicken recipe!
The air fryer sesame chicken is a simple & quick high-protein yet low-calorie recipe which can be relished as a fulfilling meal with rice or as a quick snack on its own while you reminisce the festive memories!
What is air fryer sesame chicken?
Sesame chicken is an Asian-cuisine-inspired recipe that was invented in North America and has become super popular thanks to its flavor, taste and ease of prep!
Now like any other Asian stir fried recipe, a typical sesame chicken is also fried in a generous amount of oil before being tossed in the flavorful sauce.
The sauce! Yes, that’s the USP of this classic sesame chicken!
To recreate that same incredibly mouthwatering saucy sesame chicken dish without the load of oil, I have this air fryer sesame chicken for you today!
About 4 to 5 servings of chicken is air fried in just a couple of tablespoons of oil which means you can enjoy this restaurant style air fryer sesame chicken at home absolutely guilt-free!
One small tweak I did in my sesame chicken sauce is that I have reduced the sweet element in it. Many sesame chicken recipes have a generous amount of honey in it which I have completely omitted.
During my short stay in the US a few years ago, I realized that the Asian/Chinese dishes are more on the sweeter side there which is not what I am very fond of and neither is my better half.
So I just used a small amount of brown sugar for just that subtle hint of sweetness which complements the savoriness and tartness beautifully.
Crispy, crunchy, spicy and oh-so-delicious, these air fryer fried chicken presents themselves with all the glory of a classic crispy fried chicken but without the guilt of deep frying in loads of oil!
I can’t explain how happy I was when these crispy fried chicken came out of my air fryer for the very first time!
I was literally holding my breath and praying to the Air Frying God for churning out perfectly crispy chicken so that I can finally restart to enjoy this favorite chicken of mine without that load of guilt!
Thankfully my prayer was answered and I got a basket of freakingly unbelievable crispy air fryer fried chicken which are super crispy on the outside and juicy & succulent inside!
After I took my first bite, I simply stood there speechless looking at the crispy chicken in my hand and wondering which evil force had stopped me from trying this crazy delicious air fryer fried chicken until now?
What is Air Fryer Fried Chicken?
To put it simply, air fryer fried chicken is your same addictive takeaway style crispy fried chicken but instead of being deep fried in loads of oil, it is air fried with just sprays of oil!
But if you are worried that these air fryer fried chicken will not come out as addictive and as crunchy as the deep fried alternative, you are utterly mistaken my friend!
I insist you try making these crispy fried chicken in your air fryer as soon as you can and I can guarantee that you will come back here to thank me!
After going through many recipes of how to make crispy fried chicken in an air fryer, this recipe of air fryer fried chicken from Gimme Delicious struck the right chord with me.
I made these first to see if they really come out that crispy which sweeps us off our feet with their crazy crunch without being dry or chewy inside.
And you know what the outcome was if you have read this blog from the top! So, this recipe of air fryer fried chicken is a keeper which you can enjoy as a high protein meal, but occasionally!
A one-pot soup meal made with leftovers and greens, this is great for a working day dinner or when you’ve got surprise guests
Part two of the Lettuce Series as I’ve dubbed it was about throwing things into a large pot to put together a soup – the kind that makes life a whole lot better (read: bearable) when your home has been invaded by painters and you are sneezing your head off courtesy allergies. The Chicken Lettuce Soup isn’t a planned recipe but it’s the kind that, after you’ve sampled, you realise needs to be shared with the world. Or the little pockets of the world this blog reaches.
The best thing about this soup is that the mothership liked it and trust me when I say, her liking food that has chicken (she’s developing a dislike for chicken and meat) and lettuce (read part one of the Lettuce Series) made me feel like a parent whose child has accomplished something major in life!
Do let me know if you try this recipe! Leave a comment and don’t forget to tag me on Instagram at from.the.corner.table and hashtag it #fromthecornertable. I’d love to see it
For regular updates on recipes, recommendations on things to read and watch and ramblings that make sense, subscribe to the newsletter – you’ll find the form in the sidebar if viewing on a screen and at the bottom if viewing on the phone. Since spamming or flooding your inbox is a huge no for me, these newsletters go out only when I’ve put up a new post or sometimes, once in a month only.
Chicken Lettuce Soup
A one-pot soup meal made with leftovers and greens, this is great for a working day dinner
250 grams Smoked chicken (shredded/boneless)
200 grams Lettuce
1 Carrot
1 cup Cooked noodles/spaghetti (optional)
1 Onion
1/2 inch Ginger (grated)
6 cloves Garlic
3 tablespoon Olive Oil
3 Chicken stock cubes
Salt (as required)
Black pepper powder (as required)
1 litre Water
Peel and mince the onion and garlic cloves.
Peel and cut the carrot into cubes
In a large pot, heat olive oil.
Add onion, garlic, ginger and sauté till the onion is slightly translucent.
Throw in the carrots.
Pour in the water, add the chicken stock cubes, cover and simmer for 7-10 minutes, stirring frequently to ensure there are no stock cube lumps.
Cube or tear the cooked chicken and add to the simmering pot of soup.
Wash the lettuce well, tear and add to the soup.
Add the cooked noodles/spaghetti if using.
Check the seasoning and add salt and/or pepper if required.
Adjust the consistency of the soup with water if required.
Naga chicken curry is a naga traditional chicken recipe which is zero oil and prepared with a handful of ingredients with few simple cooking steps. In simple words it is a boil chicken recipe. The chicken is cooked with fermented bamboo shoot which is the key ingredient of the curry which makes the curry authentic and traditional. The ingredients used to make this naga style chicken curry are chicken, fermented bamboo shoot, potato (optional), green chillies, ginger, garlic, salt, water and local sichuan peppercorns ( a variety of sichuan peppercorn).
Naga chicken curry is yet another simple and classic dish from the Naga cuisine. Naga style chicken curry is a zero oil dish which means not a single amount of oil is used in cooking this chicken curry and that’s how we cook our dishes. Very tasty, flavorful, exotic and healthier as well. It is a simple and easy recipe with simple cooking process.
Chicken curry with fermented bamboo shoot is a common Naga speciality dish which is very famous and one of the most popular dish in Naga Cuisine. It is a traditional and authentic naga chicken recipe. This dish is savored in almost all Naga household.
Naga chicken curry is an absolutely favourite of the nagas. Infact it is loved by many north easterners. It is a very simple and super easy recipe. You have the ingredients in hand and you’ll master it in jiffy. It is a perfect curry with lovely flavors to have with piping hot steam rice. The unique and amazing aroma coming out of the fermented bamboo shoot and the magical sichuan peppercorns is just divine and to die for.
Naga cuisine uses bamboo shoot as a key ingredient in dishes cooked with fish, chicken, pork, beef or other meats and even in vegetarian dishes. Bamboo shoot enhances and intensifies the flavour of the dishes.
Traditional Naga Chicken Curry
Here I have used the pounded fermented bamboo shoot. You can use the whole fermented bamboo shoot which has can be shredded with hand into long thin strips. This is a naga special fermented bamboo shoot. You can also use the bamboo shoot extract in this recipe. There is also a traditional recipe of chicken with dry bamboo shoot which is a perfect side dish to have with your piping hot steam rice.
Fermented bamboo shoot is a traditional Naga delicacy and a key ingredient in many naga dishes. Infact bamboo shoot is a delicacy for many North East states. It is adored by almost all north easterners. Most Naga dishes are cooked with bamboo shoot (fresh, fermented, extract or dried) as a souring agent to the dishes; be it vegetarian or non-vegetarian dishes.
Fermented food plays a crucial part in Naga Cuisine. Some of the fermented food are fermented bamboo shoot, fermented dry fish, fermented crab meat, fermented soya bean (axone), fermented mustard leaves, zutho (rice beer) etc.
If you think that Indian cuisine is all about spicy and oily food, then you are missing out some information. Indian cuisine consists of a wide variety of regional and traditional cuisine. Nagaland, one of the northeastern state of India, is known for simplicity and variety of food from different tribes of the state. Naga food is considered to be healthy as most of the food are either boiled or steamed. The use of oil is very minimum. We usually dont use the Indian spices in our kitchen. Infact fresh herbs are used in our daily cooking.
It’s a known fact that Nagas love their food spicy and its true that most people find their food bland. This juxtaposition is often tackled by throwing in 1 or 2 raja mircha ka naga king chilly in any bland stew. The naga king chilly adds that extra zing in any dishes like meat, vegetables and chutneys. Though it is hot beyond words, raja mircha remains that one ingredient Nagas can’t do without.
Zero Oil Chicken Curry
INGREDIENTS FOR NAGA STYLE CHICKEN CURRY
● Chicken – I have used broiler chicken. Local/country chicken is best for this recipe. It takes the curry to another level and more healthier. ● Fermented bamboo Shoot – You can use shredded bamboo shoot or bamboo shoot extract/juice. ● Potato – You can add other vegetables like beans, carrot, cabbage or leafy vegetables. Again this may be optional ● Green chilly – Raja mircha ( naga king chilly) fans can add king chilly for the extra zing and hotness. ● Ginger ● Garlic ● Local sichuan peppercorns ● Salt ● Water
VARIATION OF NAGA CHICKEN CURRY
● You can totally skip the potato and sichuan peppercorns. ● You can add on others vegetables to the curry to make it more hearty and healthier. Mostly commonly used are squash (chow chow/chayote), beans, carrots, cabbage etc ● You can add green leafy vegetables like lai pata ( mustard greens), Mongmong tü (sichuan leaves) etc ● You can add coriander leaves, burmese coriander or fresh ginger leaves to the curry which enhances the flavor of the curry. ● Use fermented bamboo shoot for authentic taste but if you can’t source it, you can use canned bamboo shoot or even tomatoes. Taste and flavor will differ but those are the substitute ingredients.
If you’re fond of naga food, then this is surely the one to go for! It is lip-smacking good. I hope you’ll try this simple and easy naga style chicken recipe and if you do, please do share your thoughts about the recipe with me here.
Chicken Curry With Bamboo Shoot
I made a simple recipe video of this hearty naga chicken curry recipe for my readers which I have shared below. Please do watch and SUBSCRIBE to my channel if you haven’t yet. It will mean a lot to me and motivate me to come up with more videos for my readers. As always looking forward to your feedbacks!
500 gms chicken 2 tbsps fermented bamboo shoot 2 potatoes cubed 6-7 green chillies 2 inches ginger 8-10 garlic 1 tbsp local sichuan peppercorns roasted Salt as per taste Water as required
Step by step pictorial instructions to make naga chicken curry:
In a mortar pestle coarsely pound the green chillies. Remove and keep aside.
In the same mortar pestle coarsely pound the ginger & garlic and keep aside for later use.
Add the chicken in a pot. Add the pounded green chilly, fermented bamboo shoot and salt to taste. Add water immersing the chicken well. Turn on the flame. Cover the pot with lid and cook the chicken for about 10 minutes.
Add the potato chunks and continue to cook until the chicken and the potatoes are cooked completely approximately 15 minutes. Cooking time will differ depending on the variety of chicken used.
Adjust the curry consistency as per your requirement.
Add the pounded ginger garlic and dry roasted and crushed sichuan peppercorns. Mix well and cook for 3-5 minutes and take off the flame.
NOTES:
● This dish taste best with country chicken/local chicken. ● Use chicken with bone. ● Raja Mircha fans can add 1 or 2 raja mircha or as per your heat preference level. ● You can totally skip the potato and sichuan peppercorns. ● You can add on others vegetables to the curry to make it more hearty and healthier. Mostly commonly used are squash (chow chow/chayote), beans, carrots, cabbage etc ● You can add green leafy vegetables like lai pata ( mustard greens), Mongmong tü (sichuan leaves) etc ● You can add coriander leaves, burmese coriander or fresh ginger leaves to the curry which enhances the flavor of the curry. ● Do not over cook the chicken.
Well, if you make this naga chicken curry, please do leave a feedback in the comments box below or snap a photo and tag Akum Raj Jamir on Facebook and akumrajjamir on Instagram with hashtag #atmykitchen. I would love to see your creations.
Thank you so much for stopping by my blog. I hope you liked the recipe. Your valuable feedbacks are always welcome, I love hearing from you guys and always do my best to respond to each and every one of you.
A one-pot soup meal made with leftovers and greens, this is great for a working day dinner or when you’ve got surprise guests
Part two of the Lettuce Series as I’ve dubbed it was about throwing things into a large pot to put together a soup – the kind that makes life a whole lot better (read: bearable) when your home has been invaded by painters and you are sneezing your head off courtesy allergies. The Chicken Lettuce Soup isn’t a planned recipe but it’s the kind that, after you’ve sampled, you realise needs to be shared with the world. Or the little pockets of the world this blog reaches.
The best thing about this soup is that the mothership liked it and trust me when I say, her liking food that has chicken (she’s developing a dislike for chicken and meat) and lettuce (read part one of the Lettuce Series) made me feel like a parent whose child has accomplished something major in life!
Do let me know if you try this recipe! Leave a comment and don’t forget to tag me on Instagram at from.the.corner.table and hashtag it #fromthecornertable. I’d love to see it
For regular updates on recipes, recommendations on things to read and watch and ramblings that make sense, subscribe to the newsletter – you’ll find the form in the sidebar if viewing on a screen and at the bottom if viewing on the phone. Since spamming or flooding your inbox is a huge no for me, these newsletters go out only when I’ve put up a new post or sometimes, once in a month only.
Chicken Lettuce Soup
A one-pot soup meal made with leftovers and greens, this is great for a working day dinner
250 grams Smoked chicken (shredded/boneless)
200 grams Lettuce
1 Carrot
1 cup Cooked noodles/spaghetti (optional)
1 Onion
1/2 inch Ginger (grated)
6 cloves Garlic
3 tablespoon Olive Oil
3 Chicken stock cubes
Salt (as required)
Black pepper powder (as required)
1 litre Water
Peel and mince the onion and garlic cloves.
Peel and cut the carrot into cubes
In a large pot, heat olive oil.
Add onion, garlic, ginger and sauté till the onion is slightly translucent.
Throw in the carrots.
Pour in the water, add the chicken stock cubes, cover and simmer for 7-10 minutes, stirring frequently to ensure there are no stock cube lumps.
Cube or tear the cooked chicken and add to the simmering pot of soup.
Wash the lettuce well, tear and add to the soup.
Add the cooked noodles/spaghetti if using.
Check the seasoning and add salt and/or pepper if required.
Adjust the consistency of the soup with water if required.
When game day rolls around, nothing beats the craving for spicy, saucy buffalo wings. I used to think making them at home would be complicated and messy, but this baked version changed everything. These perfectly crispy baked buffalo wings get smothered in an easy homemade buffalo sauce that’s so simple to make – they’ll be […]
A surprisingly easy yet mindblowingly delicious recipe is on offer for you all today! These stunning lemony garlic parmesan chicken thighs cooked to perfection in an air fryer or baked in a conventional oven will be on repeat in your weekly meals !
I hope you all are having a great weekend so far and I am here now to make it even greater! How?
Of course by sharing another scrumptious recipe, garlic parmesan chicken thighs, that will make you stick to your healthy eating habits in your fitness/wellness journey!
Look at these attractive chicken thighs baked to perfection with crispy bits of garlic and parmesan sticking to them making them oh-so-tempting!
Who said healthy meals are boring!
Chicken thighs are already my weakness and with such a wonderful lemony-garlic-parmesan marinade it becomes absolutely irresistible!
What are garlic parmesan chicken thighs?
Let’s see if I can decode these garlic parmesan chicken thighs! This is not just another ordinary chicken thigh recipe and you will know why!
The secret of these garlic parmesan chicken thighs is in the marinade.
I know you need quite a few items to create this magical marinade, but trust me on this, you will be simply amazed when you taste the final result!
Loads of freshly grated or minced garlic & a generous amount of grated parmesan mixed with a good quality extra virgin olive oil & freshly squeezed lemon juice makes up the marinade.
This immensely flavorful marinating mixture topped with a couple of spices & herbs transforms the bland chicken into a feat of taste that seems almost incredible!
And that’s your garlic parmesan chicken thighs which you will keep coming back to every week!
To me, jerk chicken is something special. It’s smoky, spicy, sweet and packed with flavor. And it makes your whole backyard smell amazing when your cooking it!
Now, I’m no Jamaican pitmaster, but I did my best to stay true to the authentic Jerk Chicken I’ve had in the Caribbean. I started with a killer marinade, added just the right amount of char and even made a fiery dipping sauce to serve with it.
This spicy jerk chicken recipe is smoky, juicy, and packed with bold Caribbean flavors! Whether you’re grilling or smoking, I’ll show you how to make the BEST jerk chicken with the perfect balance of heat and sweetness.
Ingredients
For the Chicken & Marinade:
1 whole chicken, cut into quarters
1 bottle Walkerswood Jerk Marinade
1 tablespoon Malcom’s Jammin’ Jerk Seasoning
1 cup dark brown sugar
1 Scotch Bonnet or Habanero pepper, thinly sliced
1 bunch green onions, chopped (green parts for marinade, white parts for sauce)
4–5 cloves garlic, minced
Juice from 1/2 lemon
4 oz pineapple juice
1 tablespoon Scotch Bonnet pepper sauce
1 tablespoon Worcestershire sauce
For the Jerk Dipping Sauce:
1/2 stick butter
White parts of the green onion, finely chopped
4 cloves garlic, minced
1 Scotch Bonnet or Habanero pepper, finely chopped
1 tablespoon Scotch Bonnet pepper sauce
4–5 dashes Worcestershire sauce
1 teaspoon Malcom’s Jammin’ Jerk Seasoning
1/4 cup brown sugar
1/4 cup honey
Juice from 1/2 lemon
Instructions
Marinate the Chicken:
Cut the whole chicken into quarters, separating white and dark meat. Score the chicken breasts with shallow slits to help with even cooking and better flavor absorption.
Place the chicken quarters in a large ziplock bag. Pour in the jerk marinade and add Malcom’s Jammin’ Jerk seasoning.
In a separate bowl, whisk together the remaining marinade ingredients, then pour into the ziplock bag.
Squeeze out excess air, seal the bag, and gently massage the marinade into the chicken. Refrigerate overnight (or at least 8 hours).
2. Prepare the Grill:
Remove the chicken from the marinade and lightly season with a little more Jerk seasoning.
Set up a charcoal grill for two-zone cooking at 350°F. (I used my Primo ceramic grill, but any grill works.)
3. Cook the Chicken:
Place the chicken on the indirect side of the grill. Cook for about 45 minutes, or until the internal temperature reaches 160°F for white meat and 175°F for dark meat.
4. Make the Jerk Dipping Sauce:
Place a heavy-bottomed pot directly over the hot coals.
Add butter, white parts of the green onion, garlic, and peppers. Sauté for 2-3 minutes until softened.
Stir in the remaining sauce ingredients and bring to a gentle boil. Remove from heat and pour into a small dish to cool.
5. Char & Serve:
Move the chicken quarters to the direct heat side of the grill.
Sear for 1-2 minutes per side, just until you get that perfect jerk char.
Remove from the grill and let rest for 5 minutes before serving.
Serve hot with the jerk dipping sauce on the side.
Enjoy the bold, smoky, and spicy goodness of this Jerk Chicken!
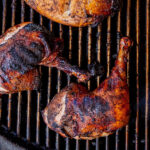
Grilled & Sauced BBQ Chicken – I start with a whole, cut-up chicken (2 wings, 2 thighs, 2 legs and 2 breasts) and then brined it in a BBQ Brine for 2 hours, then seasoned with BBQ Rub and grilled. At the end, each piece of chicken is glazed with a slightly spicy bbq sauce and allow to caramelize and char a little. The final product is juicy, tangy, sweet and saucy Old School BBQ Chicken.
Ingredients
8pc chicken skin on, bone in
2 cups water
1 bottle Wickers BBQ Marinade
1 lemon sliced
1/4 cup Malcom’s Bird Brine
1/2 cup Killer Hogs Hot Rub (divide into 2 portions)
1 cup Killer Hogs The BBQ Sauce
1 cup Killer Hogs Vinegar Sauce
2oz Killer Hogs Hot Sauce
Instructions
Place the chicken pieces in a large zip top bag and pour in the Wickers marinade. Add 1/4 cup Bird Brine and 1/4 cup of Hot Rub to the water and stir well. Pour this mixture over the chicken and squeeze the lemon slices then drop in the bag. Make sure all pieces of chicken are covered and close the bag squeezing as much air out as possible. Place bag in the refrigerator for 4-6 hours at least.
Remove the chicken pieces from the brine and place on a raised wire rack to air dry for 30 minutes. Season with Hot Rub on all sides.
Prepare a charcoal grill for indirect cooking using a 2 zone method – Hot side and Cool side. Adjust the air vents so the grill temperature reaches 350 degrees.
Place the chicken on the cool side of the grill skin side up until the internal temperature reaches 150-155 degrees.
Combine the bbq sauce, vinegar sauce, and hot sauce in a small container. Brush the skin side with the sauce and cook for 10 minutes. Flip each piece over and brush sauce over the back side and cook for 10 minutes.
Right at the very end move each piece of chicken over to the direct heat side of the grill and glaze on both sides. Don’t walk away because it can burn really quick. The breast should reach an internal temperature of 165 and the dark meat should go to at least 175.
It’s been a while since I made a Korean recipe and when I saw that Gochujang chicken thighs are doing their viral rounds on the internet, I could not resist jumping on the bandwagon!
If you have tried & loved Korean recipes, then I am sure you are also a spice-lover just like us! Hence I can bet that you will also gush over these Korean Gochujang chicken thighs!
We love spicy food and as a natural instinct we are drawn towards Korean food (and also Thai) when we have to opt for one from Oriental cuisines.
Though I haven't shared many Korean recipes in my blog yet, we both love them thanks to the flavor-packed dishes that Korean cuisine offers!
The strong aromas of Korean recipes may be a little overwhelming for a few of you, but the one I have come with today will fit into everyone’s palate!
Sticky Korean Gochujang chicken thighs! This is a keeper as it takes minimal prep time and produces maximum flavors!
What are Gochujang chicken thighs?
When you generously marinade a few skin-on & bone-in chicken thighs with a generous amount of Gochujang, the Korean chilli-bean paste, and air fry them until cooked, you get the most flavorful, juicy & tender Korean flavored chicken ever without the guilt of deep-fried food!
And that’s Gochujang chicken thighs for you!
If you are familiar with Korean recipes, you may already be aware that many Korean recipes involve double-frying, which enhances the crispiness of the food and retains the crunch longer.
Since I intentionally try to avoid deep-fried foods, most of the authentic Korean recipes are out of my league, unfortunately!
Then appeared these sticky Gochujang chicken thighs! Why did I love these? Because they are baked/air-fried and not deep fried! Absolute win-win!
Have you had the chance to try the tasty chicken fry from Aaya Kadai restaurant in Erode, Tamil Nadu? Although I haven’t had the opportunity to taste it from the restaurant itself, I came across the recipe online and decided to give it a try.
To make it, you’ll need fresh chicken(Country chicken/நாட்டு கோழி), shallots, dry red chilli, salt, and turmeric powder, cooked perfectly in cold-pressed groundnut oil. It’s a simple recipe, but it’s important to use fresh ingredients and a good quality, heavy-bottomed pan. Cooking it on a low flame for 40 to 45 minutes will give you the best results.
The process involves sautéing the onions until golden brown, then adding the chicken and letting it cook until the chilli and onion form a thick sauce. Trust me, the end result is amazing, and your taste buds will thank you!
Enjoy the video of aaya kadai chicken fry. Subscribe for more videos.
Heat a heavy bottom pan and add oil. Once oil gets heated up add shallots and fry for 5 to 8 minutes until onion turns golden brown.
Add dry red chili and saute for 5 minutes. Then add chicken, salt to taste, turmeric powder and mix all thoroughly.
cook on medium flame for 5 mins or until chicken turns white.
Then add a cup of water, close the lid and cook on low flame for about half an hour. Mix the chicken in between.
At last onion and chili forms a thick gravy. Chicken gravy is ready. Serve hot with rice.
Recipe Notes
For an authentic taste, opt for country chicken.
Ensure you use an ample amount of shallots, as other ingredients like tomato are not added.
Adjust the amount of chilli to your personal preference.
This recipe does not require fancy ingredients such as ginger garlic paste, garam masala powder, coriander powder or chilli powder.
Delicious chicken fry is ready to relish.
If you found this post helpful, please consider sharing it with your friends and followers on Facebook, Twitter, or Google+. You can do so by clicking the buttons below the post. Your support would be greatly appreciated and will keep me motivated. Thank you!
Quinoa is loaded with all the good things that you must consume for your healthy body; this quinoa salad with chicken is one level up with high protein & loads of fiber and your body & soul will thank you for it !
Quinoa is one of the staples in my meal plans. I have started including this whole grain into my healthy diet a couple of years back and since then there is no looking back.
Quinoa is a new entrant in the Indian kitchens and thanks to its many health benefits, it has quickly become popular among fitness enthusiasts like me!
If you also are looking for different ways of cooking and enjoying quinoa, you have arrived at the right page! I know it can be a bit confusing when you first start with this grain.
To have a great quinoa dish, you first need to make sure you are cooking the quinoa right - fluffy & non-sticky. But unfortunately, cooking quinoa is not something that we can learn to cook from our moms!
But don’t worry! Here you will get to know the perfect step-by-step process of how to cook the quinoa perfectly!
What is new in my quinoa salad with chicken?
I had shared a creamy no-mayo quinoa chicken salad a few months ago which was made with a yogurt based salad dressing.
So of course I have to offer something new this time for you all! And hence comes my quinoa salad with chicken which is infused with a simple yet immensely flavorful dressing.
You just need 4 ingredients to make this very basic salad dressing and I am sure you already have used this dressing in many of your salads if you are a pro-salad lover like me!
All you need is a good quality extra virgin olive oil which is the key flavor base of this quinoa salad with chicken. Then add a good drizzle of fresh lemon juice topping it off with salt & pepper!
Give the dressing a good whisk and voila! You have got your beautiful refreshing salad dressing that’s perfect for any summer salad!
You can use a mason jar too to shake up this easy dressing and use as much or as little as you prefer, saving up the rest for later use!
Chicken Leg Quarters Recipe with Lemon Pepper Flavors – and then grilled on the Weber Kettle and served with White BBQ Sauce.
WHAT MALCOM USED IN THIS RECIPE:
Prepare weber kettle grill for grilling using a charcoal vortex for indirect grilling using briquette charcoal.
Combine AP seasoning, lemon pepper, and dried herbs in small bowl and transfer to a dredge shaker.
Pat dry and trim leg quarters, lightly coat both sides with olive oil, and season generously with the seasoning mixture.
Arrange the leg quarters around the outer edge of the Weber grill for indirect cooking.
Half the lemons and place on the grate for 4-5 minutes cut side down. Squeeze the grilled lemon juice into the melted butter and season with 1 Tablespoon of the seasoning mixture.
Baste the leg quarters with the lemon butter mixture 20 minutes into the cook.
Continue grilling the leg quarters until the internal temperature reaches a minimum of 175°F ( I prefer to take them to 190°F for more tender meat and crispy skin).
Remove the leg quarters from the grill and drizzle with Killer Hogs MS White Sauce
Keywords: Lemon Pepper Chicken Quarters, Lemon Pepper Chicken Leg Quarters, Lemon Pepper Chicken Recipe, grilled lemon pepper chicken, grilled lemon pepper quarters, Chicken on the weber kettle
Lemon chicken fry is my most awaited to try recipe, ever since I had Lemon chicken from the Hotel – The Plantain Leaf. The whole family likes this chicken, which is mildy spiced, juicy and tender. Lemon chicken is prepared by cooking the chicken with spices and lemon juice. Also this consumes very little time […]