Veg Momos | With Soya Filling
I bet you haven’t tried momos this way! These veg momos with a soya filling are tender, juicy, and absolutely delicious. Even my non-veg momo friends can’t help but love these ❤️🔥
I love momos in every form, shape, and style, but those veg momos with the cabbage filling used to be a big no-no. Just something about veg filling felt incomplete, tasteless, and left an unpleasant feeling in my mouth, due to which I have been team chicken momos for a long time.
And that’s exactly why this veg momo recipe is different. It’s got a delicious veggie + soya granules filling that delivers a perfect bite and loads of flavor. Adding soya granules actually keeps the filling insanely juicy and sneaks in some extra protein as well. I love serving these veg momos with my homemade schezwan sauce and chilli oil for the perfect spicy kick. Believe me, once you try making vegetarian momos this way, there is no way you’ll go back to those veggie-only ones ever again!
Jump to section: Veg Momos
Ingredients For Momos
Here’s everything that you’ll need:
For the dough
- Flour: All purpose flour or maida forms the base of the dough. You can use whole wheat flour but the wrapper will be really dense and chewy. All purpose flour or maida also adds more gluten and makes the wrapper easier to roll and pleat
- Oil: Helps make the dough moist and pliable. I have used sunflower oil, but any neutral-flavored oil like canola or rice bran will also work
- Lukewarm water: This is important to make the dough soft, pliable, and easy to work with. Hot water can make the dough tough and stringy, while cold water can make the wrappers dense, chewy and difficult to roll out
- Salt: For seasoning
- Corn flour: For dusting (if needed)
Veggie filling:
- Veggies: Finely chopped carrots, mushrooms, onions, cabbage, and celery form the base of the filling
- Soya granules: Add texture and a boost of protein
- Soy sauce: For umami and saltiness
- Other ingredients: Salt, sugar, pepper, ginger, and garlic for flavor, aroma, and balance
Making the Dough
The dough is a simple mix of all purpose flour, sunflower oil, salt, and lukewarm water. Kneading with lukewarm water creates some steam and a really pliable dough which is perfect for making momos. Once you finish kneading the dough, cover it with a damp towel and allow it to rest for 10 minutes before cutting it into small pieces – each piece should be approx 7 grams.
How to Wrap Momos
- Once the dough has rested, divide the dough into 2 parts & roll one portion into a cylinder roll on the counter top. Cut out small pieces of dough, each weighing 9 grams. This is about ½ tablespoon of dough.
- Prepare a greased plate or parchment paper and damp towel.
- Take each piece of dough and roll it into a ball. Using the fleshy part of your palm, flatten each ball of dough into a disc. Using a rolling pin, roll out each individual piece into a very thin round wrapper. They need to be thin enough such that they appear to be slightly translucent. Thicker wrappers tend to taste very doughy so make it as thin as you can.
- Place about a tablespoon of the prepared filling in the centre of the rolled out wrapper. Shape and seal the wrappers as shown in the video. In order to ensure that it is properly sealed, apply a little bit of water along the edges with your fingertip.
- Place the stuffed momo on the greased plate and cover with the damp cloth.
Richa’s Top Tips
- Make sure to roll the dough thin to prevent thick and chewy momos.
- Feel free to customise the stuffing based on what you like and have available. Just avoid adding really water-y veggies like cucumber and tomatoes as those will break the momos during the steaming process.
- Do not overcrowd the pan when steaming the momos. These tend to expand on steaming and overcrowding the pan will make the momos stick to each other.
- To check for doneness, check the skin. It should be transparent-ish and non-sticky. If it feels sticky, steam for another minute or two.
Storage Tips
- Fridge: If the momos are cooked, allow them to come to room temperature and store in an air-tight box and refrigerate for up to a day. Cooked momos tend to dry out fast, so it’s best to eat them as quickly as possible.
- Reheat: Steam for 3–5 minutes to soften and refresh. Avoid microwaving as they can turn chewy.
Serving Tips
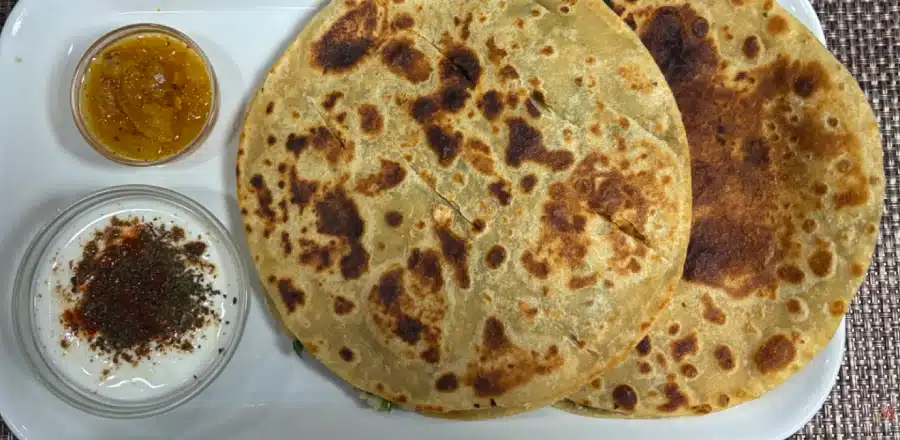
- Dips: Sweet Chili Sauce, schezwan chutney or chilli oil make excellent dipping sauces for momo.
- Soups: Eight Treasure Soup, Hot & Sour Soup, Or Thupka make for the best accompaniments for momos, especially if you want a light yet filling meal.
- Salads: Serve with this Three Bean Salad for a refreshing meal.
I bet everyones going to get super excited when you set the table with these homemade momos that taste street style!!
If you happen to make these veg momos at home, do DM me in your pictures over at @my_foodstory. It’s always so nice to hear from you guys ❤️
Watch Veg Momos Recipe Video
Veg Momos
Equipment
- 1 steamer
Ingredients
Momo Wrapper
- 1 cup all purpose flour maida
- ½ teaspoon salt
- 2 teaspoons sunflower oil or any neutral flavoured oil like canola or rice bran
- ¼ cup + 4 teaspoons lukewarm water we’ve measured this accurately so please stick to this water measurement
- 1-2 tablespoons cornflour for dusting if needed
Vegetarian Filling
- 1 tablespoon oil
- 2 teaspoons finely chopped garlic
- 1 teaspoon finely chopped ginger
- 2 tablespoons finely chopped celery
- ½ cup finely chopped onion
- ½ cup finely chopped cabbage
- ½ cup finely chopped carrot
- ¼ cup finely chopped mushrooms
- ½ cup hydrated soya granules see note 1
- 1 teaspoon soy sauce
- ¼ teaspoon sugar
- ½ teaspoon salt
- ¼ teaspoon pepper
Instructions
Momo Wrapper
- Add the flour, salt and oil to a mixing bowl. And lukewarm water and stir using a wooden spoon or your hands to combine. Do not over knead at the stage, just bring the dough together till you don’t see any dry spots & set aside for 5 minutes covered with a damp towel.1 cup all purpose flour, ½ teaspoon salt, 2 teaspoons sunflower oil, ¼ cup + 4 teaspoons lukewarm water, 1-2 tablespoons cornflour for dusting
- After 5 minutes, remove and place the dough on a counter and knead for 2 to 3 minutes to a smooth dough. You do not need to dust the surface with flour unless the dough is very sticky. The dough is supposed to be slightly tacky, but not sticky.
- Place the dough back into the bowl and cover with a damp towel to rest for 10 minutes.
Vegetarian Filling
- Heat oil in a wok or heavy bottomed pan on a high flame. Add ginger, garlic, celery, onions and sauté till onions turn translucent. Add cabbage, carrot and mushrooms, reduce flame to medium high and sauté for 3 minutes. Add soya granules and saute for a minute. Add soy sauce and sugar and stir to combine. Season with salt and pepper. Remove from flame and keep aside to cool before placing it inside the wrapper.1 tablespoon oil, 2 teaspoons finely chopped garlic, 1 teaspoon finely chopped ginger, 2 tablespoons finely chopped celery, ½ cup finely chopped onion, ½ cup finely chopped cabbage, ½ cup finely chopped carrot, ¼ cup finely chopped mushrooms, ½ cup hydrated soya granules, 1 teaspoon soy sauce, ¼ teaspoon sugar, ½ teaspoon salt, ¼ teaspoon pepper
Wrapping and Pleating Momo
- Once the dough has rested, divide the dough into 2 parts & roll one portion into a cylinder roll on the counter top. Cut out small pieces of dough, each weighing 9 grams. This is about ½ tablespoon of dough.
- Prepare a greased plate or parchment paper and damp towel.
- Take each piece of dough and roll it into a ball. Using the fleshy part of your palm, flatten each ball of dough into a disc. Using a rolling pin, roll out each individual piece into a very thin round wrapper. They need to be thin enough such that they appear to be slightly translucent. Thicker wrappers tend to taste very doughy so make it as thin as you can.
- Place about a tablespoon of the prepared filling in the centre of the rolled out wrapper. Shape and seal the wrappers as shown in the video. In order to ensure that it is properly sealed, apply a little bit of water along the edges with your fingertip.
- Place the stuffed momo on the greased plate and cover with the damp cloth.
Steaming Momo
- Bring the water in the steamer to a boil and grease the steamer plate. Place the stuffed momo on the greased steamer plate. Ensure that they are not sticking to each other. Brush each momo with oil so they cook to be soft. Cover the lid of the steamer and cook for 14 minutes on medium flame. Rest for 5 minutes, remove from the steamer and serve immediately.
Video
Notes
- To hydrate soya granules: Soak the soya granules in 1 cup of boiling water for 10-15 minutes, drain & squeeze out water & use.
- Let the dough rest for 10 minutes for best results.
- It’s best to roll each momo wrapper, stuff them with the filling & roll the next momo wrapper.
- If you roll all the wrapper at once, they dry out very fast, and it will not be possible to shape momo.
- Wrapped momo (uncooked) can be kept frozen for up to 2 weeks in an airtight container, separated by parchment paper.
Nutrition
This article was researched and written by Urvi Dalal.
The post Veg Momos | With Soya Filling appeared first on My Food Story.