Stuffed Parathas Made Easy Aloo Potato Gobhi Cauliflower
19 January 2026 at 04:58
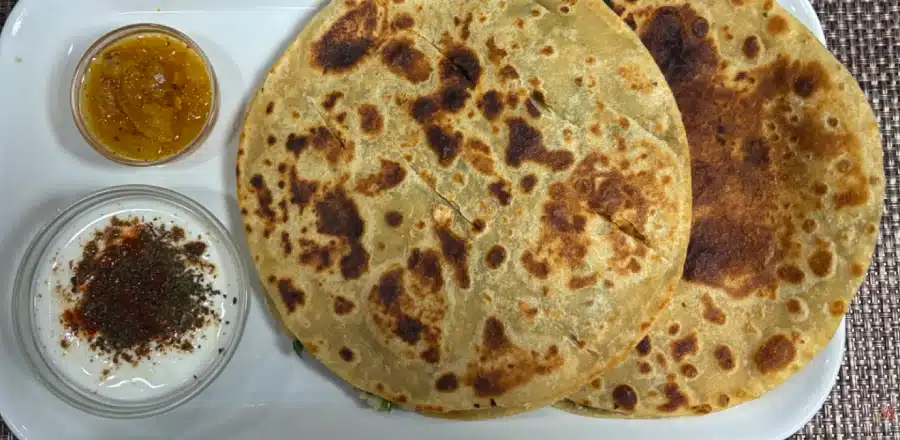
Stuffed Parathas Made Easy Aloo Potato Gobhi Cauliflower
I am truly excited! Stuffed parathas sound difficult to make and time consuming andhonestly, they are. They’re one of the most loved Indian breads, but making the doughand rolling the parathas is the part that creates the most work, the most mess, and themost cleanup.That’s why I’ve been experimenting with easier ways to make them while keeping thetaste true to the original. You can even call it semi-homemade because I’m using store-bought uncooked rotis. I was so happy and surprised when I came up with this quick,simple method. In the end, your own finishing touch makes all the difference!Today, I am sharing recipes for two different parathas:Aloo (Potato) Paratha — my favorite classicGobhi (Cauliflower) Paratha — my husband’s favoriteThis recipe will make 2 parathas — one of each.
Prep Time 15 minutes
Cook Time 15 minutes
Servings 2 parathas
Ingredients
Aloo Paratha
Ingredients
2 Uncooked Rotis (available at Indian stores)
For filling
- ½ cup boiled and mashed potatoes
- ¼ teaspoon cumin seeds
- 1/2 teaspoon coriander powder
- ¼ teaspoon dry mango powder
A pinch of asafetida
- ¼ teaspoon salt
- ¼ teaspoon finely grated ginger
- ½ teaspoon finely chopped green chili (adjust to taste), or ¼ teaspoon red chili powder
- 1 tablespoon finely chopped cilantro
- 2 teaspoons oil to cook the paratha
Gobhi (cauliflower) Paratha
Ingredients
- 2 Uncooked Rotis (available at Indian stores)
- ½ cup grated cauliflower (Gobhi)
- 2 tablespoons of boiled mashed potatoes (to help hold the filling)
- ½ teaspoon cumin seeds
- 1 teaspoon coriander powder
- ¼ teaspoon dry mango powder
A pinch of asafetida
- ¼ teaspoon salt
- ¼ teaspoon finely chopped ginger
- ½ teaspoon finely chopped green chili (adjust to taste), or ¼ teaspoon red chili powder
- 1 tablespoon finely chopped cilantro
- 2 teaspoons oil
Instructions
- Prepare the filling:
- Mix all the ingredients together. Taste and adjust the salt. If filling seems too dry add 1spoon of water.
- Lightly cook the rotis:
- Heat a flat skillet over medium heat. Cook each roti on one side only for about 30 seconds.Place them on a plate.
- Assemble the paratha:
- On one roti (cooked side up), spread the potato filling evenly. The filling should not be too thick. Place the second roti on top with the cooked side facing down.
- Cook the paratha:
- Heat the skillet to medium-high. Transfer the prepared paratha to the skillet. Cook on both sides using about 1 teaspoon oil per side.Press gently with a spatula and cook until golden brown and crispy. These come out looking just like traditional aloo parathas — crispy, hot, and delicious.They taste best when served hot!
Gobhi (cauliflower) Paratha
- Prepare the filling:
- Grate the cauliflower finely. Add the mashed potatoes and mix well, this helps bind the loose cauliflower.
- Mix in all remaining ingredients. Taste and adjust the salt.
- If filling seems too dry add 1 spoon of water
- Lightly cook the rotis:
- Heat a flat skillet over medium heat. Cook each roti on one side only for about 30 seconds.Remove and set aside.
- Assemble the paratha:
- Place one roti on a plate with the cooked side facing up.Spread the cauliflower-potato filling evenly in a thin layer.Place the second roti on top with the cooked side facing down.
- Cook the paratha:
- Heat the skillet on medium high. Gently place the stuffed paratha on the skillet.
- Cook both sides using about 1 teaspoon oil per side.
- Press lightly with a spatula and cook until both sides are golden brown and crisp.
- These semi-homemade Gobhi Parathas turn out wonderfully — flavorful, easy to handle, and so much simpler to prepare than the traditional method. Serve hot for the best taste!
Notes
- Keep the filling layer thin to prevent tearing.
- Prick the paratha lightly while cooking to avoid puffing and separation.
- Always cook on medium to medium-high heat for even browning.
- These parathas stay crisp and reheat well on a skillet.
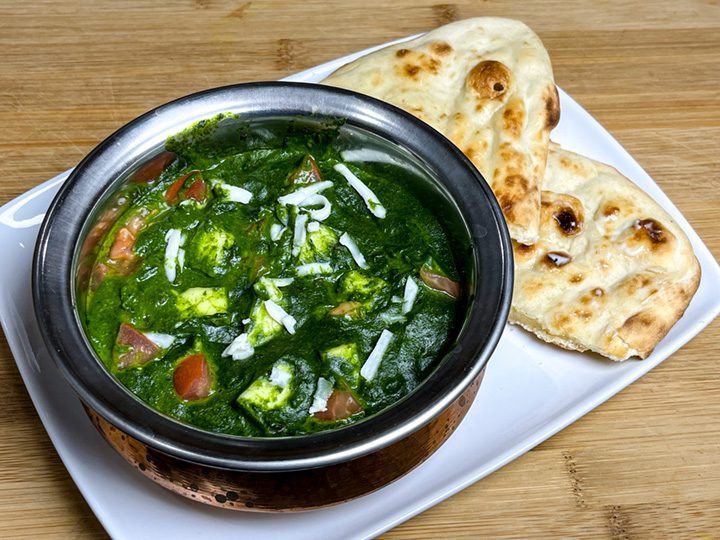
I like to serve paratha spiced yogurt or pickle or just enjoy, with hot cup of tea.
Thank you! Enjoy!
Frequently Asked Questions (FAQs)
1. Can I use frozen rotis?
Yes. Thaw them completely before cooking to ensure even heating and proper texture.
2. Why add potatoes to gobhi filling?
Cauliflower releases moisture while cooking. Adding potatoes helps bind the filling and prevents the paratha from separating.
3. Can I make these ahead of time?
Yes. Cook them slightly less if you plan to reheat later on a skillet.
4. Can I make them oil-free?
A small amount of oil helps create a crisp texture, but you can reduce the quantity if needed.
5. What can I serve with parathas?
Parathas pair well with spiced yogurt, pickle, butter, or simply enjoy them with a hot cup of tea.
The post Stuffed Parathas Made Easy Aloo Potato Gobhi Cauliflower appeared first on Manjula's Kitchen.
![]()