Call it by any name it has a lot of nutritional value and is a powerhouse of nutrients. Snake gourd belongs to the summer squash family, mostly a summer produce ,it is available all round the year in India.
Rich in dietary fiber , vitamins A and C ,snake gourds help in digestion ,prevent bloating and constipation . Helps in detoxification of the body because of its diuretic properties. Due to water content present in the snake gourd it helps maintain body's hydration.
Podalangai Thayir pachadi is a new addition to my kitchen and hence it is making it to the blog .
Amma would make it frequently during summer, but over the years I had totally forgotten about this recipe . As a flash,this recipe occurred to me this morning when I was contemplating what to make with fresh and tender snake gourd that I had just bought. The snake gourds have to be tender. Overly ripe ones taste bitter and become hard and chewy . So while buying, make sure the snake gourd vine is easy to twist and tender to feel. If you find it hard or it easily cracks ,then don't buy that .
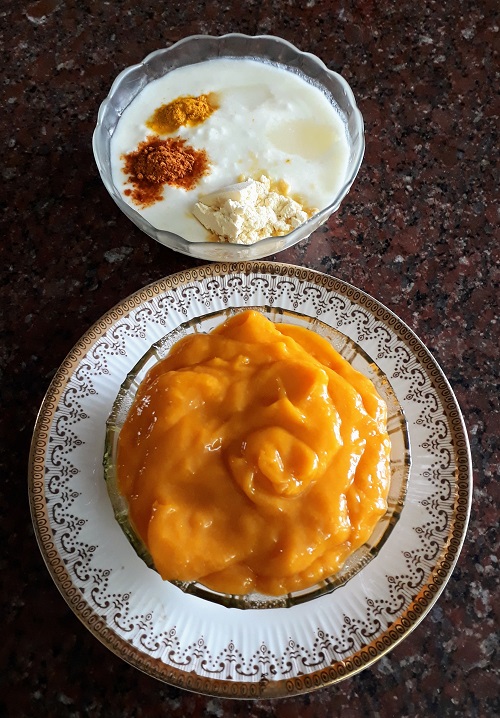
Podalangai thayir pachadi is very easy to make and gets done in no time . A tasty paste is made using fresh coconut, ginger,green chillies and curry leaves which is added to thick whipped yogurt and boiled snake gourd is mixed along with this followed by a tempering of mustard, dry red chillies and asafoetida.
Podalangai thayir pachadi is also made during Amavasya, pithrupaksha and Shraadh cooking in a typical Tamil Brahmin household . Vishu and Onam Sadhyas also feature padavalanga kichadi as one of the Sadhya menu items.
Officially, though it is still winter/spring in India , we are already feeling the warmth in my part of the city. There is hardly any chillness felt and the afternoon sun is at its peak .
As always, with summer setting in; buttermilk,lassi,raita and yogurt based curries make a lot of appearance in my kitchen . Yogurt based curries are light on stomach and easy to digest as well .Most importantly it keeps the body cool during harsh summer and it maintains hydration.
Kichadi (Pachadi) is an integral part of a festive meal (Sadhya) in Kerala. Kerala style kichadi must not be confused with the North Indian Khichdi which is a rice based main course recipe.
Onam and Vishu Sadhya is incomplete without serving a kichadi . Kichadi also known as Pachadi in few regions of Kerala,is a yogurt based side dish often made from various vegetables like Okra/ladies finger ,ginger ,tomato, Cucumbers, ash gourd etc .
Kichadi pairs well with Sambar Rice and a coconut based vegetable stir fry . One can even make it as a part of day to day meal as well. Why wait for a special occasion to savor such a healthy delicacy ?
Vendakkai Thayir Kichadi/Pachadi is made from okra/ladies finger . Ladies finger is known as Vendakka or Vendakkai in Malayalam/ Tamil.
Chopped ladies finger is shallow fried in coconut oil and then added to the coconut chilli paste mixed in yogurt. The yogurt must not be spur, else it will ruin the taste of the kichadi /pachadi.
Some recipes call for cooking the coconut chilli paste + yogurt ,but in this recipe I am not cooking the yogurt mixture . I am going to just add the fried Okra to the yogurt mix along with the tempering.
Some popular kichadi /pachadi served as part of Sadhya
This month in our SHHH Secretly Cooking Challenge food group,we are celebrating Sadhya special hosted by me . My fellow bloggers have come up with amazing and authentic Kerala Sadhya recipes . My partner for this month ,Radha Rajagopalan has dished out the traditional Ada Pradhaman ,which is a classic dessert from Kerala. Do check out her recipe for Ada Pradhaman without fail .
To know more about the dishes served in a typical Sadhya for Onam / Vishu, check out the list soon after the recipe of Vendakkai Kichadi. I am giving you a complete list of authentic recipes.
Preparation Time - 10mins Cooking Time- 5 mins Complexity - simple Serves - 2 to 3
Ingredients
1/4 cup fresh grated coconut 2 green chillies 1/2 tsp jeera/cumin 8 to 10 tender ladies finger/okra/vendakkai 200ml thick yogurt/dahi/thayir Salt as needed 2 tsp coconut oil 1/2 tsp mustard seeds 1 dry red chilli Few curry leaves
Method
Wash and dry the ladies finger. Cut into medium sized roundels.
Whisk the yogurt well and make it lump free and smooth.
Grind the green chillies, coconut,jeera with 1tbsp yogurt and some water into a smooth paste.
Add this paste to the yogurt and mix it well with adequate salt.
In a frying pan,heat 1tsp of coconut oil and roast the ladies finger until it crispy ,add a little salt to the roasted ladies finger in the end .
Prepare a tempering of mustard seeds,red chilli and curry leaves in the remaining coconut oil .
Add the roasted ladies finger ,tempering to the yogurt mixture and mix it well .Delicious and tasty vendakkai kichadi is ready to be served .
Sadhya recipes on the blog. Click on the individual items below to get detailed recipe
Rose Shrikand or Gulab shrikand is made using Gulkand and mild rose essence or rose syrup .
Gulkand is a delicious jam made from rose petals and sugar . Gulkand is an important ingredient while preparing masala paan (flavored betel leaf) or beeda as it is called in the South .
Shrikand is often served alongside the main course meal as an accompaniment to puris and hot parathas. Rose Shrikand is my next favorite after the classic flavors of Badam Elaichi Shrikand and Kesar Pista Shrikand .
This gooey and sweet Gulkand along with mild rose essence is blend into the silky smooth hung curd to make the lipsmacking Gulkand Shrikand . Serve it along with some hot puris or parathas and you will relish the taste forever .
The trick to making a silky smooth yogurt is getting hold of a perfect hung curd.
If you get thick and creamy Greek yogurt,you can also use that to make Shrikand . I have editted my recipe (June 2025) below to include how to make the perfect hung curd using home set Dahi /yogurt .
If you love this flavor of rose / gulkand ,then you must definitely check these recipes out
Pre Preparation time - 2 to 5 hrs Cooking Time - Nil Actual Preparation - 5 mins Serves - 2 to 3
Ingredients
400ml thick yogurt or full fat dahi or curd
2 tsp rose syrup
2 to 3 tablespoons gulkand
2 to 3 tsp powdered sugar (optional)
Preparation of Hung curd
Take a wide mixing bowl and place a strainer over it lined with a muslin cloth/ cotton cloth and pour the curd into the cloth .
I have used home made thick curd for an even consistency. You can also use the store bought dahi if you please . The yogurt should not be sour . So it is best to use freshly set curd made in last 24hrs .
I set the yogurt /dahi in full fat milk .Once the dahi was set ,I let it sit in the fridge for 24hrs to set properly .
Bring the ends of the cloth together, squeeze it once and tie it very tightly . Place a heavy object over the tied cloth and leave the colander over the mixing bowl so that all the whey water will get collected in it . Keep squeezing the cloth occasionally to drain the excess water .
Keep this set up inside the refrigerator so that the hung curd doesn't turn sour especially in summer .
After about 2 to 3 hrs , you can see all the whey collected in the bowl below and when you open the cloth all that is left is thick creamy mass which is hung curd . Squeeze it once again before removing it from the cloth to ensure there is no water content left. When you touch the hung curd , it should appear thick and creamy without any excess water. If you find it watery, leave it for somemore time in the cloth with the weight on .
Donot waste the collected whey, you can use it while kneading the dough for rotis or even to prepare buttermilk or Chaas.
Preparation of Shrikhand
Transfer the hung curd to a wide mixing bowl .Add in the gulkand , rose syrup. Powdered sugar may be added though it isn't necessary. Gulkand as well as rose syrup will have sugar already added in them which is enough to give sweetness to the Shrikhand.
Mix well with a spoon until all the ingredients blend well . Keep it in the refrigerator for it to set well .
Take it off the refrigerator just before serving and garnish with some chopped pistachios and some tutti fruity.
Today , I shall be sharing another favorite recipe using cucumber. Thayir Pachadi is the South Indian version of raita . We can make thayir pachadi with many vegetables like tomatoes, sweet potatoes, ladies finger,ginger etc .
Inji Vellarikaai thayir pachadi ,is very easy to make and is a No cook recipe. We will need fresh and tender cucumbers to make this raita . Donot use an over ripe cucumbers as the cucumber won't be juicy and also the seeds will be too mature and rough.
Spice level can be adjusted by increasing or decreasing the number of chillies used .I prefer to keep the pachadi mild so that the flavor of ginger is lifted up.
Preparation Time - 10 mins Cooking Time - Nil Complexity- easy Serves - 3 to 4
Ingredients
2 small Cucumbers or 1 medium Cucumber 150ml thick yogurt /dahi/curd Salt as needed Small piece of ginger 1 small green chilli Few curry leaves 2 tsp finely chopped fresh corriander
1 tsp oil
1/4 tsp mustard seeds
1/4 tsp udad dhall
Pinch of asafoetida
Method
Peel the skin of the cucumber. Finely chop half the quantity of the cucumbers and add it to a mixing bowl.
Roughly chop the other half of the cucumber and blend it with ginger , chilli, corriander, curryleaves and little salt to a very fine paste.
Whisk the curd with adequate salt and make it lump free.
Mix the cucumber paste , chopped cucumber and the whisked yogurt. Adjust salt if needed.
Prepare a tempering of mustard seeds and udad dhall in hot oil with asafoetida. Cool it and then add it to the raita . Donot pour hot tempering over the pachadi as the curd may turn sour in the hot weather .
We are going through a history where the world is witnessing a pandemic episode of Covid-19. As the world reels in the #StayAtHome concept lots of new ideas are popping up on internet to keep oneself busy and sane. One of them being Baking YES... Baking Breads, Cakes, Muffins, Brownies, Pastries is at its peak and is being enjoyed thoroughly across the globe as we silently fight against the Virus and pray that it dies down.
Irish Soda Bread
I venture into baking once in a while. This time it was so tempting for me to just not to ignore the call of baking a bread. But sigh!! I had to be patient as I did not have yeast in my pantry. Going to grocery stores at the drop of the hat is a big NO NO now, to add to it I kept forgetting to add that ingredient on my list of next home delivered order.
So I was left with no option but to look for something that used no Yeast. Something that was quick, simple and no fermentation recipe for my bread as I craved to make one!
And voila came across Irish Soda Bread in a 5 year old magazine which I was browsing while having my tea. As befitting many of the best breads in the world – Irish Soda Bread is a traditional Irish speciality- it was made with only the most basic of ingredients: flour, baking soda (used as a leavening agent instead of yeast), soured milk to moisten and activate the soda, and salt. Irish Soda bread remains an international favorite. Before baking, a cross was cut on the top with a knife, to ward off the devil and protect the household. Something about it, when you mark that X just before the bread goes in the oven, makes you smile and you know it will come out right :)
You are going to love it I promise.
Made this in like 50 mins [included baking time] and it was ready to be relished with your butter/jam/marmalade.....
Here goes the recipe:
Ingredients:
1 1/2 cup +2 tbsp - all purpose flour
1/4 cup whole wheat flour
2 tbsp regular rolled oats
1/2 tsp baking pwd
3/4 tsp baking soda ( preferably fresh)
3/4 tsp salt
2 tbsp cold u salted butter cut in small cubes
3 tbsp honey
1 1/4 cup buttermilk
1 egg
2 tsp orange zest ( optional)
1/2 cup nuts or dried currents or cranberry
Preparation:
Take all dry ingredients in 1 bowl and mix it with cold butter. Keep mixing the flour with butter till all cubes crumbles n become one with the flour ( you can flatten the butter with a spatula or use hands as you mix the butter with flour)
Then in another bowl take egg, honey, buttermilk and whisk till everything comes together. Add nuts, zest and give a stir.
Pour this mix into dry flour ingredients. Bring everything together with a spoon.
On a parchment paper transfer the dough n knead it gently (sprinkle flour on top if needed) should be soft and little sticky.
Give the dough any size you want like rectangle or round or square. Then with a knife make X sign on the loaf.
Bake it on 350F/180C for 40-45 min ... Let it cool down before u slice and enjoy this beautiful loaf of bread.
Finger Millet is a nutritious grain which is staple food in most of the South India. This Ragi Dosa also know as Finger Millet Dosa and Nachni Dosa. Instant ragi dosa made with homemade sprouted ragi flour is a healthy breakfast/Dinner for babies, toddlers and kids. Lets see how to prepare Instant Ragi Dosa with simple steps
Ingredients:
Ragi flour – 1 cup
Water to mix ragi flour
Salt to taste
For seasoning:
Oil – 3 spoons
Mustard seeds – ½ tea spoon
Chana dal – 1 spoon
Big Onion – 1 (finely chopped)
Red chilli – 1 no
Curry leaves – 1 sprig
Steps to cook instant ragi dosa:
Take a bowl add one cup of ragi flour, required salt then mix well and keep it aside.
Turn on the stove. place a fry pan when it is heated add oil, after one minute add mustard seeds when it is splutters add chana dal fry for a second.
Now add finely chopped onion fry till it become transparent, then add red chilli and curry leaves then fry for a minute then switch off the stove.
Next take a ragi mixture in bowl add these fried item into ragi flour.
This is time to add required water in to ragi flour then mix well.
Ragi dosa batter should be in not thick and not thin consistency.
Switch on the stove place a dosa tawa, when it is heated sprinkle some water and pour the instant ragi dosa batter and make dosa.
Turn other side and cooked well both sides of ragi dosa.
Healthy, easy and instant ragi dosa is ready to serve.
Serve this ragi dosa with tomato chutney and coconut chutney etc.,
Here I used simple method to cook easy and healthy ragi dosa version and anyone can try it.
We can also prepare ragi dosa with curd. but i tried instant ragi dosa without curd.
Some people like to have ragi dosa with rice flour. Here i shared instant ragi dosa without rice flour. Even some people trying ragi dosa with urad dal.
Paruppu Urundai Mor Kuzhambu is an authentic and traditional recipe made in most Tamil homes . It is a festive dish and relished by all .
The lentil dumplings are made by soaking and grinding thoor dhall along with red chillies ,curry leaves and some salt . This ground mixture is then shaped as balls and steamed to be further simmered along with the yogurt gravy until the flavors are absorbed into the urundais.
Some use a combination of lentils /paruppu to make the urundais while some use just thoor dhall . This time I have used just thoor dhall and a handful of udad dhall to get the softness. Pair this delicious paruppu urundai more kulambu with a simple vegetable stir fry with coconut gratings and mix along with piping hot rice to have a wholesome and delicious lunch .
You may also want to try Paruppu Urundai Kuzhambu which is a tamarind based gravy for another gastronomic feast .
Onset of January brings about a lot of festivals in India and the best way to enjoy them is by cooking and eating a delicious feast.This month on our food bloggers' group Shhh Cooking Secretly Challenge , we are celebrating a festive theme suggested by me . I was partnered with the versatile and fantastic food blogger ,Mayuri ji who has prepared a Holi special Thandai Flavored Rava cake
Some more lipsmacking and tasty Mor Kuzhambu variations on my blog
250ml thick yogurt 100 ml water 2 tsp oil 1 tsp mustard 2 to 3 dry red chillies fresh curry leaves pinch of turmeric Pinch of asafoetida salt To grind 6 to 7 tbsp fresh grated coconut 1/2 tsp jeera/cumin 3 to 4 green chillies 1 tsp channa dhall /bengal gram 2 tsp dhaniya /corriander seeds Small piece ginger
Method
To make the Paruppu Urundais
Wash and soak the lentils in sufficient water for 2 to 3 hrs .
Drain the water and grind the lentils along with chillies ,curry leaves, salt and asafoetida to a fine paste .
Make small lemon sized balls out of these and steam it until it is half done . Don't steam until the lentils become hard ,else they won't absorb the flavor of gravy into them . Keeping them half cooked helps it remain soft and easy to eat .
To make the Mor Kuzhambu
Soak all the ingredients under the "to grind" section in water for 10 to 15 mins and grind into a fine paste.
Whisk the yogurt until is creamy and smooth.
Add in the ground spice paste to the whisked yogurt along with salt and turmeric powder and mix well with water mentioned . Donot add too much water , else the mor kuzhambu will be runny and will split on boiling.
Add the steamed lentil dumplings to the mor kuzhmabu as soon as it starts frothing up.Simmer for a few mins and turn it off.
Prepare a tempering of mustard seeds, dry red chillies and fresh curry leaves in oil and pour it over the mor kuzhambu.
Pineapples when combined with thick whisked yogurt makes a perfect accompaniment for any Indian Main course .
The sweet and tangy flavors from the pineapple raita pair well with a spicy biryani or pulao and strikes a superb balance of taste and enhances the eating experience.
Pineapples are a power house of nutrients and very healthy . Rich in vit C ,antioxidants and a very good anti inflammatory property due to the presence of Bromelaine, a very powerful enzyme that helps fight inflammation in the body .
Pineapple juice is very effective in treating the sinuses and eases symptoms of cold and allergies. Bromelain in addition to help alleviate pain of osteoarthritis also helps in maintaining heart health by keeping the cholesterol levels under check .
If we want to keep up with a healthy lifestyle then fresh pineapples must be included as a part of our diet plan regularly. Pineapple PunchPineapple Salsa , Cuban Pineapple Salad (courtesy- sizzling tastebuds by Kalyani )are perfect choices for all age groups and can be easily made with available ingredients in our pantry . More so, these recipes are no cook recipes, hence even a beginner or a teenager can also easily rustle them up .
To make pineapple raita we can either use canned or fresh pineapples . If using canned pineapples then drain out the sugar syrup completely before chopping the pineapples .
When using fresh pineapples, please ensure the fruit is sweet and not sour. Sour or tart pineapples when mixed with yogurt /dahi ruin the taste of the raita .
Pineapple raita is best served chilled ,hence keep it refrigerated until serving.
Preparation Time - 10 mins Cooking Time - nil Complexity - simple Serves - 2 to 3
Ingredients 1/2 cup finely chopped pineapple 2 cups thick yogurt /dahi 2 tsp powdered sugar 1 tsp salt 1/4 tsp cumin powder /jeera powder Pinch of red chilli powder Pinch of kala namak / black salt Fresh corriander chopped
Method
Whisk the yogurt well until smooth and silky .
Add the sugar ,salt ,chilli powder, kalanamak ,roasted jeera powder to the yogurt .
Lastly add the pineapple, corriander and mix well . Adjust the sugar or salt if you feel the raita needs a little more flavor.
Keep refrigerated until serving. Try and consume the raita fresh on the same day and not carry forward to the next day .
Mango Kadhi is a festive dish which can not be resisted especially during Mango season when sweet and juicy mangoes are available in abundance. Mango Kadhi is almost similar to Mambazha Morkuzhzmbu except that few ingredients are slightly different . It is exotic ! It is delicious ! It is a five minute wonder ! So why delay ? Go ahead and cook the mango magic in a jiffy as you go through this easy recipe!
INGREDIENTS
Smooth pulp of one sweet ripe mango
Thick curd - 1 Cup
Besan - 1heaped tbsp
Turmeric powder - 1 pinch
Chilly powder - 1/4 tsp
Salt - 1/4 tsp
Sugar - 1/4 tsp
Asafoetida - 1 pinch
# Blend all the ingredients until smooth using a spoon and keep aside .
SEASONING INGREDIENTS
Sesame oil - 1 tbsp
Mustard seeds - 1/4 tsp
Cumin seeds - 1/4 tsp
Broken red chillies - 2
Curry leaves - a few
# Heat oil in a kadai and add the seasoning ingredients one by one as listed above.
PREPARING THE KADHI
# Stir in the prepared mango - curd mixture to the seasoning and cook for two minutes till the Mango Kadhi acquires a rich colour .
Enjoy the creamy delicious MANGO KADHI with Poories or Parathas ! Or relish a bowl of mango magic as it is !