Normal view

There are new articles available, click to refresh the page.
Before yesterdayMain stream

‘Kiss My Grass’ Speaks Truth

By: K. Astre
20 January 2026 at 18:33

Legal weed looks good on paper. Dispensaries that feel like Apple stores. Influencer product drops. Celebrities launching “wellness” brands from Manhattan to Malibu. But peel back the shiny packaging and the question hits hard: Who’s really cashing in on cannabis, and who’s still paying the price?

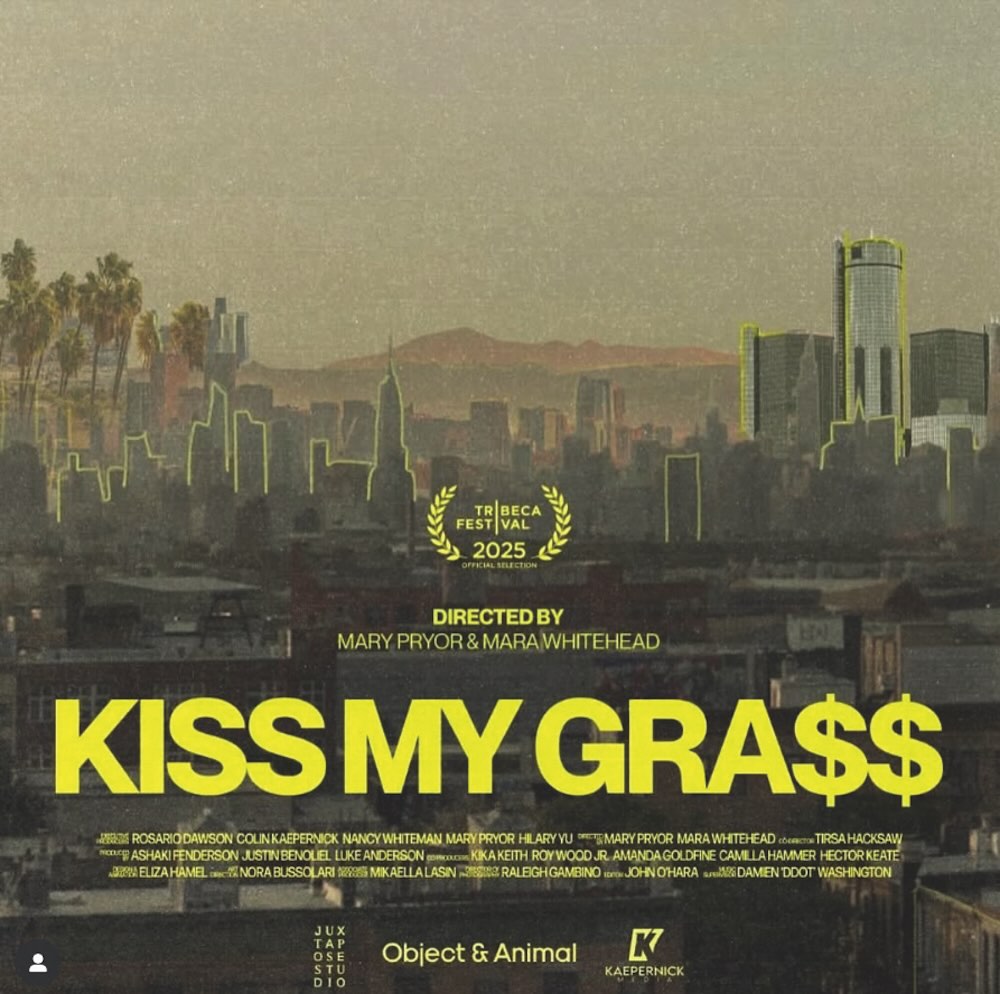
That’s the heartbeat of Kiss My Grass, a short documentary that refuses to let the industry off the hook. Written by Roy Wood, Jr., directed by Mary Pryor, Mara Whitehead, co-directed by Tirsa Hackshaw and narrated by actor and activist Rosario Dawson, the film doesn’t waste time glamorizing the Green Rush. Instead, it zooms in on the people of color, particularly Black women, who’ve had to fight their way into a market that was never built for them.

In less than 20 minutes, Kiss My Grass manages to hit every nerve with candid interviews that strip the false promises of legalization down to its bones. It’s in these raw, personal stories from trailblazers including Kim James, Matha Figaro, Jessica Jackson and Coss Martewhere the documentary hits hardest. Watching them, you’re forced to confront a painful reality: Legalization was sold as a new beginning, but the same old systems keep showing up with new branding.

Kiss My Grass film poster

After watching the film, I had a lot of questions about what it actually takes to make progress in such a complicated system and had the opportunity to ask some of the featured individuals about what’s changed, what hasn’t and what needs to happen.

“True equity requires structural repair,” says Jackson, director of social equity for Minnesota’s Office of Cannabis Management. “That means reinvestment into harmed communities; expungement and record repair; rules that prevent hidden ownership and monopolization; workforce protections; and readiness tools like technical assistance—all interventions Minnesota provided from the start in Chapter 342 legislation.”

While the cannabis industry is expected to hit $45 billion in 2025, equity programs meant to level the field often feel more like public relations stunts than progress in some states. The numbers from around the country tell the story: Only 0.35 percent of venture capital reaches Black women founders. Black people are still 3.7 times more likely to be arrested for possession.

“Access to capital, affordable real estate, and navigating complex regulations are major barriers,” says James, who leads Detroit’s Office of Cannabis Management. “Many equity programs don’t address the systemic economic disadvantages experienced by people who come from communities disproportionately impacted by the War on Drugs.”

Wanda James at her Simply Pure Dispensary
Kiss My Grass appeared at the prestigious Tribeca Fim Festival this past summer in advance of its wider digital release. Wanda James, Simply Pure’s CEO and Regent at the University of Colorado, appears in the movie.

It’s just even more of a reminder that legal doesn’t mean fair for the communities that got felonies instead of spots on the Forbes list for selling cannabis.

As Coss Marte, founder of fitness empire CONBODY, puts it, “If you’re making millions off cannabis, you have a moral obligation to invest in the communities that paid the price for prohibition,” he says. “That means jobs, ownership and capital—not charity optics. Repair starts when money, mentorship and opportunity flow directly to the people most impacted.”

Still, this isn’t a film that wallows in defeat. It’s about persistence. You feel the exhaustion, but also the refusal to give up. You see the discouragement, but also a spark of hope for the future. If there’s one message this film makes clear it’s that equity won’t grow on its own, but it can take root if we tend to it.

For Figaro, the founder behind ButACake and CannPowerment, the future of cannabis isn’t just about who gets in the door now, but what the next generation of women of color will inherit. When asked what needs to change to make that possible, she didn’t hold back. “My hope is that future generations inherit thriving cannabis businesses and the tools to bring underrepresented voices to market,” she says. “But to get there, we must dismantle the small-minded and misinformed policymakers writing rules they’ll never be forced to follow.”

After making its debut at the Tribeca Film Festival this past summer, Kiss My Grass is set for a wider digital release at a later date. Whether you work in cannabis or just care about justice, it’s essential viewing about what happens when an industry sells progress but delivers privilege. It leaves you moved. It leaves you mad. And, just maybe, that’s the point.

The post ‘Kiss My Grass’ Speaks Truth appeared first on Cannabis Now.

Forget burying unwanted carbon — this Washington startup is turning it into protein, fuel and a frost deicer

14 January 2026 at 15:00
Employees at OCOchem who helped produce the world’s first carbon dioxide-derived metric ton of potassium formate at the startup’s Richland, Wash., facility. It was shipped to an OCOchem customer in October. (OCOchem Photo)

OCOchem, a clean tech startup turning carbon dioxide into industrial chemicals, has raised $2.15 million and continues signing new partnerships — despite a cooling regulatory environment for sustainability and a decline in climate tech investing.

The Richland, Wash., company’s technology takes water and captured industrial carbon dioxide and runs it through proprietary electrolyzer cells to produce formic acid and formate compounds. This family of chemicals can be converted into clean-burning hydrogen fuel, serve as ingredients for other valuable chemicals, or be used as a relatively safe acid in critical mineral recovery.

The startup is making progress thanks to the abundance of its feedstock and the versatility of formate, said CEO and co-founder Todd Brix. As OCOchem scales up operations, “we’re opening up new vistas” as customers discover the company’s sustainable, affordable solutions for producing chemicals and clean fuels.

With the new funding, the company has now raised $11.2 million from investors and $8.3 million in government grants.

Initiatives underway include:

  • An agreement announced in December with the German company b.fab, which feeds formate to microorganisms such as bacteria that biosynthesize proteins, amino acids and other commercially useful compounds.
  • A partnership with ADM (Archer-Daniels-Midland) to build a commercial pilot plant at the chemical giant’s Illinois facility, where ADM operates the world’s largest bioethanol refinery. The refinery produces carbon dioxide as a bioproduct of the fermentation process, which will be turned into formate and used in other product lines.
  • Fine-tuning processes at its 40,000-square-foot facility in Richland that was commissioned in May. The plant produced and shipped a metric ton of a formate compound for use as a deicing agent by a New York-based customer.

While the Trump administration has rolled back many climate and environmental policies, one recent change helped level the playing field for carbon reuse efforts like OCOchem’s.

The One Big Beautiful Bill Act retained the tax credit for carbon capture and increased the credit for processes that reuse carbon in industrial applications, raising it from $60 per ton to $85 — matching the credit provided when carbon is permanently sequestered.

Brix launched OCOchem in 2017 after a nearly two-decade career at Microsoft. The 17-person team includes Chief Technologist Arun Agarwal, who previously spent 12 years in R&D focused on renewable chemicals, energy, oil and gas.

The company faces competition in turning carbon dioxide into formate — particularly in the European Union, which is publicly investing in the technology, as well as at labs operated by Toyota.

But Brix said he’s ready to face his rivals. His company has “built the largest CO2 electrolyzer, worked fast to do that, and is operating at the highest performance today,” Brix said. “And so it’s a little bit of a race, but it’s a good race.”

Brain Fry Recipe

11 January 2026 at 19:40

Brain Fry is a yummy and tasty side dish prepared by cooking goat brain with freshly ground spices, onion and curry leaves. This recipe has soft, mildly spiced flavor and very rich in taste. Brain Fry is healthy& nutritious delicacy that is a must try at home.

brain fry served with rice and soup

This dish is not too spicy but still has good flavor, spice and taste. The brain is very soft in texture, so it should be handled carefully while cooking. Brain fry pairs nicely with hot rice, rasam or even soft chapati. It needs some attention during cooking, but the final dish turns out comforting and quite satisfying to eat.

[feast_advanced_jump_to]

About Brain Fry

Brain Fry is a traditional non veg dish popular in many parts of India. It is made using goat brain cooked with freshly ground spices and simple tempering. The dish may look heavy but the making is actually quite simple. The important part is cleaning and cooking it properly, that makes lot of difference in taste. 

The texture of brain becomes almost creamy when cooked properly. It absorbs the masala well and gives a rich taste. The ground spices adds flavor while curry leaves gives nice aroma. Since brain cooks very fast, it should not be over cooked else the texture will get spoiled and turn mushy.

There are small variations to this recipe. Some people make it more spicy by adding extra red chillies, few add tomatoes for slight tang. Spice level can be adjusted easily based on taste and liking. Even small changes give different flavor.

I usually make this when guests who enjoy non veg come home, it feels more like a special dish made at home. I make this dish when we feel like eating something special Since it is not cooked very often, it always feels little special on the table.

brain fry served with rice and soup

Brain Fry Ingredients

  • Goat brain - I have used fresh goat brain as the main ingredient. It cooks very fast and is very delicate. Handle it gently while washing and cooking.
  • Small onions and garlic - I have used these for base flavor, It adds slight sweetness and aroma to the fry.
  • Whole spices - I just used cinnamon, clove, pepper corns and jeera for aroma and mild spice flavor. It adds blends well with the masala.
  • Grinding spices - I grind coriander seeds, poppy seeds and red chilli. This gives body, flavor and slight heat. You can add one more chilli if you like spicy.
  • Turmeric powder - I have used a pinch for color and while cleaning the brain. Do not add more as it will overpower.
  • Curry leaves - I used for tempering and flavor. It gives that typical South Indian aroma. Try not to skip this.
  • Coriander leaves - This is used for garnish and freshness at the end. It adds light flavor and color.
  • Oil - I used for tempering and cooking. Use regular cooking oil only. Do not add too much oil.

Similar Recipes

How to make Brain Fry Step by Step

1.First rinse the brain well, then remove the red vein part as shown below. You can see amma cleaning brain. Though this step is not done by all, amma insists to clean it.

how to make brain fry step1

2.Then rinse it again with turmeric and set aside. Get the chopping done.

how to make brain fry step2

3.Now add all the ingredients given under 'to grind' to the mixer jar and add little water.

how to make brain fry step3

4.Grind it a semi fine paste, Set aside. Heat oil in a kadai add cinnamon, cloves then curry leaves, let it splutter. Then add chopped onion and garlic.

how to make brain fry step4

5.Saute till it becomes transparent. Then add brain along with a pinch of turmeric powder along with salt. Toss it gently.

how to make brain fry step5

6.Now add the masala paste,add ¼ cup water and let it cook for 3mins in low flame.Cook until raw smell of the masalas leave.Brain will get cooked faster,don't cook for long.

how to make brain fry step6

7.Cook until it becomes semi dry, it will take just 3-5 minutes. Garnish with coriander leaves and switch off.

how to make brain fry step7

Serve hot with rice.

brain fry served with rice and soup

Expert Tips

  • Cleaning the brain - I make sure to rinse the brain well and remove the red veins gently. This step improves taste so try not to skip this.
  • Gentle handling - Brain is very delicate, so handle it gently while mixing. Do not mash or break it too much.
  • Low flame cooking - I usually cook this only in low flame. High flame will break the texture and spoil the dish.
  • Do not overcook - Brain cooks very fast. Cooking longer will make it dry and grainy in texture.
  • Stir less - Try not to stir often while cooking. Too much mixing will turn it mushy. Just toss gently once or twice.
  • Water quantity - I add very little water while cooking masala. Too much water will make the fry loose and watery.

Serving and Storage

Serve them hot with plain rice, rasam or mild gravy. This also goes well with chapati. Always serve fresh for best taste. Do not store for long time as texture changes. Leftover is not recommended.

FAQS

1.Is brain fry healthy?

Yes its rich and has nutrients but should be eaten in moderation.

2.Can I make spicier?

Yes, add extra red chillies or pepper while grinding.

3.Why my brain fry became mushy?

Mostly it is over cooked or stirred too much.

4.Can I skip poppy seeds?

Yes, you can skip but masala may be little less thick.

5.How long does brain take to cook?

It cooks very fast, usually within few minutes only.

brain fry served with rice and soup

If you have any more questions about this Brain Fry Recipe do mail me at sharmispassions@gmail.com. In addition, follow me on InstagramFacebookPinterest ,Youtube and Twitter .

Tried this Brain Fry Recipe? Do let me know how you liked it. Also tag us on Instagram @sharmispassions and hash tag it on #sharmispassions.

📖 Recipe Card

BrainFry1
Print

Brain Fry Recipe

Brain Fry is a yummy and tasty side dish prepared by cooking goat brain with freshly ground spices, onion and curry leaves. This recipe has soft, mildly spiced flavor and very rich in taste. Brain Fry is healthy& nutritious delicacy that is a must try at home.
Course Side Dish
Cuisine Indian
Keyword fry recipes, Kerala Meal Sidedish, meals, non veg recipes, Side Dish, stir fry recipes
Prep Time 10 minutes
Cook Time 20 minutes
Total Time 25 minutes
Servings 2
Calories 66kcal
Author Sharmilee J

Ingredients

  • 1 no goat brain
  • 5 nos small onions finely chopped
  • 3 nos garlic cloves finely chopped
  • a generous pinch of turmeric powder
  • few coriander leaves finely chopped
  • water as needed
  • salt to taste

To grind to a semi fine paste:

  • 1 tablespoon coriander seeds
  • 1 teaspoon poppy seeds
  • ½ teaspoon whole pepper corns
  • ½ teaspoon jeera
  • 1 nos red chilli I used kashmiri variety

To temper:

  • 2 teaspoon oil
  • 1 half inch cinnamon
  • 1 no clove
  • a small sprig curry leaves

Instructions

  • First rinse the brain well, then remove the red vein part as shown below.
  • Then rinse it again with turmeric and set aside. Get the chopping done.
  • Now add all the ingredients given under 'to grind' to the mixer jar and add little water.
  • Grind it a semi fine paste. Set aside.
  • Heat oil in a kadai add cinnamon, cloves then curry leaves, let it splutter.
  • Then add chopped onion, garlic.
  • Saute till it becomes transparent. Then add brain with a pinch of turmeric powder. Just toss it.
  • Now add the masala paste, add ¼ cup water and let it cook for 5mins in low flame. Cook until raw smell of the masalas leave. Brain will get cooked faster.
  • Cook until it becomes semi dry, it will take just 3-5 minutes. Garnish with coriander leaves and switch off. Enjoy Brain Fry!

Notes

  • Cleaning the brain - I make sure to rinse the brain well and remove the red veins gently. This step improves taste so try not to skip this.
  • Gentle handling - Brain is very delicate, so handle it gently while mixing. Do not mash or break it too much.
  • Low flame cooking - I usually cook this only in low flame. High flame will break the texture and spoil the dish.
  • Do not overcook - Brain cooks very fast. Cooking longer will make it dry and grainy in texture.
  • Stir less - Try not to stir often while cooking. Too much mixing will turn it mushy. Just toss gently once or twice.
  • Water quantity - I add very little water while cooking masala. Too much water will make the fry loose and watery.

Nutrition

Serving: 100g | Calories: 66kcal | Carbohydrates: 5g | Protein: 1g | Fat: 5g | Saturated Fat: 0.5g | Polyunsaturated Fat: 2g | Monounsaturated Fat: 3g | Trans Fat: 0.01g | Cholesterol: 0.4mg | Sodium: 5mg | Potassium: 91mg | Fiber: 3g | Sugar: 0.3g | Vitamin A: 23IU | Vitamin C: 2mg | Calcium: 73mg | Iron: 1mg

The post Brain Fry Recipe appeared first on Sharmis Passions.

Beetroot Halwa Recipe

By: Aarthi
8 January 2026 at 09:18

Beetroot Halwa, Easy sweet recipe made with fresh beetroot, sugar, milk, ghee, nuts. It is called as beetroot pudding or halwa is a popular winter delicacy. It is similar sweet recipe to carrot halwa but lesser known halwa which is loved by many specially for its vibrant colour. Everyone is familiar with carrot halwa, but...

Read More

The post Beetroot Halwa Recipe appeared first on Yummy Tummy.

7 Cup Burfi Recipe

By: Aarthi
7 January 2026 at 08:07

7 cup barfi is a classic South Indian sweet made using seven equal measures (cups or katori) of simple ingredients like gram flour, sugar, ghee, milk, and coconut, all cooked together in a kadai till barfi consistency. 7 Cup Burfi Recipe When we were little, Amma used to make this 7 cup burfi quite often....

Read More

The post 7 Cup Burfi Recipe appeared first on Yummy Tummy.

Karumbu Chaaru Pongal | Sugarcane Juice Pongal

2 January 2026 at 19:55

Karumbu chaaru pongal is a special sweet pongal made using fresh sugarcane juice, raw rice, moong dal and sugarcandy. It is not the regular sakkarai pongal and has a very unique taste. I usually make this during festival time or when sugarcane is easily available. This recipe tastes naturally sweet and is very aromatic too.

karumbu charu pongal served

This dish has its sweetness from the sugarcane juice. It feels more light when compared to pongal made with jaggery or sugar. The flavor is fresh and bit different from the usual sweet dishes. It is a nice recipe to try if you like traditional sweets and want to make something different at home.

[feast_advanced_jump_to]

About Karumbu Chaaru Pongal

Karumbu chaaru pongal is recipe made with raw rice, moong dal, sugarcane juice and sugar candy as main ingredients. Here Sugarcane juice is used instead of water or milk. It gives that natural sweetness and nice flavor to this recipe. This recipe is simple but it needs little patience while extracting the juice.

The texture of this pongal is soft, slightly gooey and moist. Rice and dal gets cooked well in the sugarcane juice itself. Once mashed well, it becomes creamy and smooth. Ghee added at the end gives good richness and enhances the taste more.

This recipe has a taste of mildly sweet with strong sugarcane flavor to this pongal. Sugar candy adds extra sweetness and slight crunch when it melts. Also the cardamom gives mild aroma which blends well with this recipe. Overall it tastes very comforting and feels very traditional.

I usually make this pongal fresh and serve it hot or warm. It tastes best on the same day itself. This recipe is a little different from usual pongal so it always feels special when made.

Karumbu Chaaru Pongal was very new to me until I saw this in the cookbook I had. This pongal has a very nice flavour of karumbu(sugarcane) and was most liked by everyone at home.Do try this Karumbu Chaaru Pongal for this year's Pongal festival.

karumbu charu pongal served

Karumbu Chaaru Pongal Ingredients

  • Raw rice - I have used raw rice for making this pongal. It cooks soft and gives a good texture. You can use pongal rice also if needed.
  • Yellow moong dal - I add this for flavor and thickness, it gives soft texture when cooked well.
  • Sugarcane juice - It acts as an alternative for sugar and jaggery. It adds natural sweetness and flavor. Use fresh and clean juice only for this recipe.
  • Sugar candy - I add this to increase the sweetness. It melts and makes the pongal little gooey. You can skip it if you want mild sweet taste.
  • Ghee - I melted and used it for richness and aroma. It enhances the taste a lot. You can add little more if you like.

Similar Recipes

How to make Karumbu Charu Pongal Step by Step

1.Peel off the hard sugarcane outer skin, then chop into small cubes. Transfer to a mixer. I did this in batches as I used my small mixer jar.

how to make karumbu charu pongal step1

2.Add little water and grind it. Now drain the sugarcane extract in a strainer.

how to make karumbu charu pongal step1

3.Squeeze it with your hands or press using a spoon. Keep a bowl underneath to hold the juice. Repeat this again if you feel the extract is juicy then grind again and discard. Then proceed grinding with next batch.

how to make karumbu charu pongal step3

4.Measure and rice,dal. In a pressure pan roast dal till slightly golden, Set aside. Rinse rice and add it to cooker along with sugarcane juice.

how to make karumbu charu pongal step4

5.Pressure cook for 4 whistles in low medium flame. Once rice is cooked, add sugar candy.

how to make karumbu charu pongal step5

6.Stir it well, the sugar candy will melt  and it will turn goey. Mash the rice with a ladle. Add cardamom powder.

how to make karumbu charu pongal step6

7.Mix well, finally heat 2 tablespoon ghee, add cashews fry till golden add it to the pongal, stir well and cook for 2 minutes.

how to make karumbu charu pongal step7

Serve hot or warm.

karumbu charu pongal served

Expert Tips

  • Juice extraction - I make sure to strain the juice well. Any fibre left may affect the texture of the pongal.
  • Dal roasting - I always roast moong dal till light golden only. This avoids raw smell after cooking.
  • Cooking flame - I cook in low to medium flame only. High flame may burn the bottom part.
  • Sweetness level - You can skip sugar candy if you want mild sweetness. Sugarcane juice itself is sweet enough.
  • Mashing stage - I just mash the pongal well while it is hot itself. This makes it smooth and creamy.

Serving and Storage

Serve karumbu chaaru pongal hot or warm for best taste. It tastes very good when freshly made. You can drizzle little ghee on top before serving. This pongal is best eaten on same day. Refrigerating is not recommended as flavor may change.

FAQS

1.Can I skip sugar candy?

Yes you can skip it. it will still be sweet from sugarcane juice.

2.Can I make this without pressure cooker?

Yes you can cook in heavy bottom pan but it takes more time and stirring.

3.Why my pongal turned thick?

Sugarcane juice reduces while cooking. Add little hot water and mix well.

4.Can I add edible camphor?

Yes you can add a tiny pinch for extra flavor. Do not add more.

5.Is this pongal very sweet?

No it is mildly sweet. You can adjust sweetness as per your taste.

karumbu charu pongal served

If you have any more questions about this Karumbu Chaaru Pongal Recipe do mail me at sharmispassions@gmail.com. In addition, follow me on Instagram, FacebookPinterest, Youtube and Twitter .

Tried this  Karumbu Chaaru Pongal Recipe Recipe? Do let me know how you liked it. Also tag us on Instagram @sharmispassions and hash tag it on #sharmispassions.

📖 Recipe Card

31423313324 29beda9fe9 o
Print

Karumbu Chaaru Pongal | Sugarcane Juice Pongal

Karumbu chaaru pongal is a special sweet pongal made using fresh sugarcane juice, raw rice, moong dal and sugarcandy. It is not the regular sakkarai pongal and has a very unique taste. I usually make this during festival time or when sugarcane is easily available. This recipe tastes naturally sweet and is very aromatic too.
Course Lunch, Main Course
Cuisine Indian
Keyword 30 mins recipes, 30 mins rice recipes, Festival, pongal, pongal recipes, rice recipes, sweet recipes
Prep Time 15 minutes
Cook Time 15 minutes
Total Time 30 minutes
Servings 2
Calories 817kcal
Author Sharmilee J

Ingredients

  • ¼ cup raw rice
  • cup yellow moong dal
  • 1 and ½ cups sugarcane juice
  • cup sugar candy
  • 2 tablespoon ghee melted

Instructions

  • Peel off the hard sugarcane outer skin, then chop into small cubes. Transfer to a mixer. I did this in batches as I used my small mixer jar.
  • Add little water and grind it. Now drain the sugarcane extract in a strainer.
  • Squeeze it with your hands or press using a spoon. Keep a bowl underneath to hold the juice. Repeat this again if you feel the extract is juicy then grind again and discard. Then proceed grinding with next batch.
  • Measure and rice, dal. In a pressure pan roast dal till slightly golden, set aside. Rinse rice and add it to cooker along with sugarcane juice.
  • Pressure cook for 4 whistles in low medium flame. Once rice is cooked, add sugar candy.
  • Stir it well, the sugar candy will melt  and it will turn gooey. Mash the rice with a ladle. Add cardamom powder.
  • Mix well, finally heat 2 tablespoon ghee, add cashews fry till golden add it to the pongal, stir well and cook for 2mins.
  • Serve Karumbu Chaaru Pongal hot or warm.

Notes

  • Juice extraction - I make sure to strain the juice well. Any fibre left may affect the texture of the pongal.
  • Dal roasting - I always roast moong dal till light golden only. This avoids raw smell after cooking.
  • Cooking flame - I cook in low to medium flame only. High flame may burn the bottom part.
  • Sweetness level - You can skip sugar candy if you want mild sweetness. Sugarcane juice itself is sweet enough.
  • Mashing stage - I just mash the pongal well while it is hot itself. This makes it smooth and creamy.

Nutrition

Serving: 150g | Calories: 817kcal | Carbohydrates: 188g | Protein: 6g | Fat: 16g | Saturated Fat: 10g | Polyunsaturated Fat: 1g | Monounsaturated Fat: 5g | Cholesterol: 39mg | Sodium: 41mg | Potassium: 108mg | Fiber: 2g | Sugar: 160g | Vitamin A: 31IU | Vitamin C: 0.1mg | Calcium: 32mg | Iron: 1mg

The post Karumbu Chaaru Pongal | Sugarcane Juice Pongal appeared first on Sharmis Passions.

Rabdi Recipe (Rabri)

By: Aarthi
16 December 2025 at 05:07

Rabri also known as rabdi is a sweet thickened milk which is made by simmering full-fat milk for hours until it reduces and thickens, forming layers of malai. These malai are mixed back into the milk, which is then lightly sweetened and flavored with cardamom, saffron, or rose water. Thick Rabri is paired with classic...

Read More

The post Rabdi Recipe (Rabri) appeared first on Yummy Tummy.

Thirukarthigai - Recipes - Why & How do we celebrate Karthigai Deepam

8 November 2025 at 18:15

Thirukarthigai, also known as Karthigai Deepam, is one of the oldest and most sacred Tamil festivals, celebrated in the Tamil month of Karthigai on the auspicious Pournami (Full Moon) day. It is a festival of light, devotion, and divine protection, where homes are adorned with rows of glowing oil lamps symbolizing prosperity and spiritual awakening.

Throughout the entire month of Karthigai, families light lamps at the entrance of their homes. On the day of Thirukarthigai/Karthigai Deepam, the whole house is beautifully illuminated, creating a divine and uplifting atmosphere.

One of the most iconic places associated with this festival is Thiruvannamalai, world-renowned for its spectacular Karthigai Deepam celebrations.

Traditional oil lamps lit for Thirukarthigai festival during Karthigai Deepam.
Rows of glowing oil lamps lit for the auspicious Thirukarthigai / Karthigai Deepam festival.

The Legend Behind Thirukarthigai / Karthigai Deepam

According to Hindu scriptures, Lord Brahma and Lord Vishnu once fell into an ego-driven argument, each claiming superiority. To humble them and restore harmony, Lord Shiva appeared as an infinite pillar of fire (Jyothi Sthambam) and challenged them:

“Whoever finds the beginning or end of this fire is the greatest.”

  • Brahma transformed into a swan (Annam) and flew upward.
  • Vishnu took the form of Varaha (boar) and dug deep into the earth.

Despite their divine powers, neither could find the beginning nor end of Shiva’s fiery form. Realizing their mistake, they surrendered their ego and prayed with devotion. Lord Shiva then revealed himself to them.

This divine appearance as a pillar of endless fire is commemorated as Thirukarthigai / Karthigai Deepam.

Thiruvannamalai Deepam – The Holy Fire Hill

Thiruvannamalai in Tamil Nadu is the spiritual epicenter of Karthigai Deepam. Lord Shiva is believed to have manifested as Arunachala Hill, a form of Agni (fire).

  • Tiruvannamalai and Arunachala both mean “holy fire hill.”
  • The Shiva Linga here is the Agni Linga, representing the fire element.
  • Devotees light tiny oil lamps at home which symbolize miniature Jyothi Lingas.

Every year, lakhs of devotees gather to witness the Mahadeepam, lit atop the sacred hill—a mesmerizing sight symbolizing divine brilliance and protection.

Spiritual Significance of Thirukarthigai

Karthigai Deepam represents

  • The victory of light over darkness
  • Removal of ignorance and ego
  • Infinite nature of God (Ananta Jyothi)
  • Protection, prosperity & spiritual growth

Homes are decorated with rows of lamps to invoke Lord Shiva’s Jyothi Swarupam—the form of divine light.

Festival Days

  • Day 1: Appa Karthigai
  • Day 2: Vadai Karthigai

Devotees prepare and offer traditional neivedhyam such as Pori, Adhirasam, Vella Seedai, Vetrilai-Pakku, and fruits.

In South Tamil Nadu and Kerala, sisters light the sacred Gajalakshmi Vilakku (Elephant Lamp) to pray for the well-being and longevity of their brothers.

Why Do We Light the Elephant Lamp (Gajalakshmi Vilakku) on Karthigai?

A touching traditional story explains this practice:

A king once had a single daughter who grew up with a beloved elephant. She treated the elephant as her own brother. After marriage, she deeply missed him. Every Karthigai Deepam, she lit an elephant-shaped lamp, prayed for her brother, and offered:

  • Tender coconut
  • Milagu Adai (elephant-leg sized)
  • Pori
  • Adhirasam
  • Vella Seedai

This devotional practice later became part of the traditional Karthigai rituals. Today, lighting the Gajalakshmi Vilakku symbolizes:

  • Protection of brothers
  • Family prosperity
  • Blessings of Goddess Lakshmi
  • Removal of obstacles

Verses to Chant While Lighting the Lamp

கீட: பதங்கா மசகாஸ்ச வ்ருதா
ஜலே ஸ்த்யேயே விசரந்தி ஜீவா
தருஷ்டவா ப்ரதீபம் ந ச ஜன்ம பாகிந:
பவந்தி நித்யம் சவ பசா ஹி விப்ரா

Yaanai Vaazha
Arasan Vaazha
Penn Vaazha
Piranthagam Vaazha

After chanting, devotees place a piece of pori into the lamp and offer neivedhyam.

Thirukarthigai Neivedhyam Recipes

The post Thirukarthigai - Recipes - Why & How do we celebrate Karthigai Deepam appeared first on Subbus Kitchen.

Nethili Meen Fry / Anchovies Fry / Netholi Fry

15 August 2021 at 06:46
Nethili Fish Fry

Anchovies marinated with spices and deep fried in oil to perfection. Crispy, crunchy and flavorful nethili meen fry recipe. It serves as a perfect appetizer and good for side dish too.

Nethili aka Anchovy fry is a very popular dish in South India, be it at home or at restaurant menu. It’s the favourite dish of many. It is prepared by marinating the fish with spices like chilli powder, turmeric powder, pepper powder, coriander powder, ginger garlic paste, rice flour, cornstarch and then deep fried until brown and crispy.

Nethili fish fry is a simple and super easy recipe prepared with handful ingredients which are easily available in our pantry. So now you can make this restaurant style anchovies fry at home and serve it as a starter, snack or side dish with meal.

Anchovies fish fry is an amazing fish fry which is loved by all age groups. It is ridiculously delicious and so crispy which will make you ask for more.

This restaurant style nethili fish fry is one of my personal favourite among the many fishes and sea food I love. Even my husband and my kiddo love this as much as I do so we can say its a family favourite dish.

Anchovy is also called nethili or chooda or netholi in different parts of India. Anchovies is a small fish variant. It has tiny bones which are soft. The center bone is not hard as in other big fishes. We need not remove the bones while eating because when fried the bones become crispy and can be eaten as such.

Nethili meen fry aka nethili varuval is a quick fish fry using anchovies. You can also called this nethili meen fry as nethili 65, it is just like the Tamil Nadu’s  famous chicken 65 and prawn 65 recipe. The fish tastes heavenly and spicy which a fish lover should definitely try. This fish fry is so addictive that you can’t stop with few. I am sure you going to love this one!

WHY YOU’LL LOVE THIS RECIPE
● Quick and easy
● Needs handful of pantry staples
● Crispy and crunchy
● Can be served as a starter, party appetizer, snacks or side dish with meal.
● Perfectly golden fried under 10 minutes.
● Flavorful
● Ideal for all age groups including kids.

Coming to the recipe, I have used fresh large size anchovies aka nethili fish. I have cleaned the fish well and removed the head and tail too. You can keep the head and tail intact if you wish. Fresh fish taste much better than frozen one. Along with spice masala powders I have used ginger garlic paste and combination of rice flour and cornstarch/cornflour for adding crispness and crunch to the fish. The fish is marinated with the spice mix and kept marinated for a minimum of 30 minutes. Then the fish is deep-fried. You can shallow fry as well.

You can use other small fish for this recipe. The dish tastes best when served with a side combo of steamed rice or as a starter with onion rings, lemon wedges, green chillies and fried curry leaves.

PRO TIPS
● Marinate the fish for longer duration. This will allow the spices to penetrate nicely into the fish and make it more flavorful.
● You can fry the fish ahead of time to avoid rushing at the end moment for any party or gatherings. Just fry the fish for few minutes. You dont need to make them brown and crisp. Just before serving heat oil and drop the previously fried fishes and fry them for a minute. You will get a crisp and crunchy fish.
● Fry the fish on medium flame, just increase the flame to high just few seconds before taking off. Be sure to stir constantly. This will brown evenly and make it crisp.

I made a simple recipe video of this amazing anchovies fry recipe for my readers which I have shared below. Please do watch and SUBSCRIBE to my channel if you haven’t yet. It will mean a lot to me and motivate me to come up with more videos for my readers. As always looking forward to your feedbacks!

NETHILI MEEN FRY VIDEO TUTORIAL

I hope you’ll try this authentic South Indian nethili meen fry recipe and do share your thoughts about the recipe with me here.

FEW FISH RECIPES YOU MIGHT LIKE
Rohu Fish Curry
● Shallow Fried King Fish
● Pan Grilled Green Masala Fish
● Fish Fingers
● Pan Seared Pepper Fish With Mashed Potato
● Green Chilly Masala Fish
● Karimeen Pollichathu ( Pearl spot in Banana Leaf)
● Fish And Prawn Tandoori Platter
● Garlic & Herbs Prawn With Chili Garlic Yogurt Dip
● Easy Pan Fried Fish
● Easy Fish Fry
● Fish With Spinach (Zero Oil)
● Fish With Fermented Bamboo Shoot (Naga Fish)
● Masor Tenga
● Fish Head With Cauliflower & Potato

All of these recipes are super easy to prepare, ready in no time, and will never disappoint you.

Here’s how I made the amazing anchovies fry.

Preparation time: 5 minutes
Cooking time: 7 minutes
Serves: 4

Ingredients to make anchovies fry:

500 gms anchovies fish/nethili meen
1 tbsp ginger garlic paste
2 tsp coriander powder
2 tbsp kashmiri red chilly powder
1 tsp turmeric powder
1 tsp pepper powder
2 tbsp rice flour
2 tbsp corn flour
Juice of half lemon
Salt as per taste
Oil for frying

For Garnishing
Few curry leaves
Green chillies
Onion rings
Lemon slices

Step by step pictorial instructions to make anchovies fry:

In a mixing bowl add in the ginger garlic paste, coriander powder, chilly powder, turmeric powder, pepper powder, rice flour, corn flour, lemon juice and salt. Mix well and make a thick paste. Please do not add water.

Marination Masala

Now add in the cleaned anchovies. Mix well together the masala paste and the fish. Marinated for atleast 30 minutes.

Fish Marination

Heat oil in a frying pan. When the oil is heated, reduce the flame to low and frist fry some curry leaves until crisp. Remove and keep aside.

Fried Curry Leaves

Now carefully drop the fish one by one onto the hot oil. Do not over crowd it.

Fry the fish on medium flame for about 3-4 minutes. Then flip over and fry for 2-3 minutes or until golden and crisp. It will take totally approximately 6-7 minutes. Flip over in between for evening cooking.

Remove them and continue the same process with the remaining fish.

Serve hot with fried curry leaves, green chillies, onion rings and squeeze of lemon juice.

NOTES:
● This recipe can be used in other small fish varieties also.
● You can also use egg white of one egg.
● Adjust the chilly powder according to your heat preference.
● You can skip the cornstarch and increase the rice flour a bit if it is not available.
● If you don’t have much time for marination, you can keep marinated for few minutes and fry it. But the longer marination the better in taste.

Well, if you make this nethili meen fry, please do leave a feedback in the comments box below or snap a photo and tag Akum Raj Jamir on Facebook and akumrajjamir on Instagram with hashtag #atmykitchen. I would love to see your creations.

Thank you so much for stopping by my blog. I hope you liked the recipe. Your valuable feedbacks are always welcome, I love hearing from you guys and always do my best to respond to each and every one of you.

Happy Cooking!
Love Akum

Disclosure: At My Kitchen is an Amazon Affiliate, which simply means that if you make a purchase through these links, I will earn a very small commission at no additional cost to you!

Please click on the link if you wish to purchase these products from Amazon.

Nirlon Non Stick Aluminium Gas Compatible Appa Chatti/Appam Pan/kallu with Steel Lid 22.5cm – 1 LTR(26_mm_Classic_AC)

Nirlon Non-Stick PFOA Free 3 Piece Gas Compatible Cookware Utensil Item Set with Supreme Quality

OMORTEX Women’s First Choice 10 Pcs Color Measuring Cups and Spoon Set

Aric Steels Premium Quality Stainless Steel Deep Fry Strainer Wire Skimmer with Spiral Mesh, Professional Grade Handle Skimmer Spoon/Ladle for Spaetzle/Pasta/Chips (16 cm, Pack of 2)

Cello Ornella Mixing Bowl without Lid, 1000ml

Homeleven Plastic, Steel Solid Bowl Set and Wishker – 3.5L, 3 Bowl and 1 Wishker

Simran Handicrafts Beautiful Table Decor Round Shape Wooden Serving Tray/Platter for Home and Kitchen

Homeware Unbreakable 2 Compartments Serving Snacks Platter/Tray Plastic (Black)

Easy Egg Roast / Muttai Varuval

31 July 2025 at 14:25
Easy egg roast recipe is hard-boiled eggs fried and then cooked in an onion tomato based masala. This egg roast is also called muttai varuval in Tamil and nadan muttai roast in Kerala. It goes so well with flatbreads like roti, chapati, parota, dosa, appams, string hoppers and as a side to regular rice dal or lentils.
Egg roast

Recipe for easy egg roast, egg thokku recipe,  muttai thokku recipe, muttai varuval. Curried eggs in an onion tomato masala. Recipe with step by step pictures.

This easy egg roast is a close cousin of the Kerala nadan muttai roast. It’s best described as boiled eggs in roasted onion and tomato masala. It’s an easy recipe that can be put together in under thirty minutes.

The base sauce or “masala” as called in India is made with simple ingredients and indian spices, found in most indian pantry.This masala can be used as a base masala for other non vegetarian and vegetarian options.

Easy Egg Roast

Muttai Varuval is my easy everyday recipe. It is nothing but boiled eggs  golden fried and cooked in a thick and spicy onion tomato masala. Perfect side dish for the busy weekdays. I believe every household has their own version of egg roast or muttai varuval. Just like for the Kerala style egg roast we use coconut oil for making the nadan muttai roast. The heat for the egg roast is either from red chilli powder, green chillies or black pepper powder or a combination of these.

For making egg roast or egg curry we like to fry the boiled eggs and then add it to the curry or the masala. But some directly add the boiled eggs and it’s totally up to your preference. Frying the eggs makes the skin slightly blistered and golden in colour which makes the dish looks so beautiful and appealing.

WHY THIS RECIPE WORKS

* Ready in under 30 minutes.
* Required only pantry Ingredients. This is a perfect recipe for days when you have only basics available.
* Easy and straight forward recipe. Requires no roasting and grinding. Turns out so delicious and tasty with spice masala powders.
* An easy way to add more protein to the Indian diet.
* The same masala base can be used with vegetables and non-vegetarian food too.
*  It goes with almost everything – roti, rice , chapati, parota, dosas, appams etc.

INGREDIENTS TO MAKE EASY EGG ROAST

Hard boiled eggs
Oil
Onion 
Tomato
Garlic
Ginger
Green chillies
Curry leaves
Coriander leaves
Red chilli powder 
Coriander powder
Garam masala powder
Cumin powder
Black pepper powder
Turmeric powder
Salt as per taste
Water as required

HOW TO MAKE EASY EGG ROAST

This section shows how to make easy egg roast with step-by-step photos and details about the technique with video tutorial. For full ingredients measurements, see the recipe card below.

I made a simple video of this easy egg roast recipe for my readers which I have shared below. Please do watch to know how I made this delicious recipe. If you liked the video please do SUBSCRIBE to my channel if you haven’t yet. Also like, share and comment on it! It will mean a lot to me and really motivate me to come up and shoot more videos for my readers. As always I’m looking forward to your feedback!

EASY EGG ROAST VIDEO TUTORIAL

STEP BY STEP PICTORIAL RECIPE TO MAKE EASY EGG ROAST

In a pot add some water and salt and boil 3 to 4 eggs. Once the eggs are hard boiled allow them to cool down. Peel the eggs and cut them into halves. Keep aside.

Hard boiled eggs

In a pan heat the oil. Once the oil is heated, simmer the flame and add in the eggs.

Fry the eggs on both the sides until golden brown. Remove and keep aside.

Fried egg

In the same oil add in the ginger and garlic. Saute them for a minute.

Add in the curry leaves, onion and green chillies. Saute until the onions are cooked and soft

Add in the tomatoes and cook until it turns soft and mushy.

Add in the salt along with the masala – red chilli powder, garam masala powder, coriander powder, cumin powder, black pepper powder, turmeric powder.

Mix well and cook for a minute. Now add in about ¼ cup of water and cook the masalas for about 2 minutes or until the water is dried up and the oil separates. ( Cook over low to medium flame).

Egg roast masala

Add in the fried eggs in single layers. Take some masalas and cover up the top layer of the eggs. Put on the lid and let it cook for about 2 minutes in low flame.

Flip over the eggs and again cook for about 2 minutes in low flame.

Flip over again and turn off the flame. Sprinkle the coriander leaves and your easy egg roast is ready to be served. Enjoy!

Nadan muttai roast

RECIPE NOTES

* Here the eggs are cut halves and made. You can keep the eggs whole. Suggest to put some cuts so that the masala penetrates inside.
* We used refined sunflower oil. You can use mustard oil or coconut oil for making the egg roast.
* You can always adjust the chilli and red chilli powder as per your heat preference.
* The masalas can be adjusted as per your taste and availability.

RECIPE CARD

Print

Easy Egg Roast

Easy egg roast recipe is hard-boiled eggs fried and then cook in an onion tomato based masala. This egg roast is also called muttai varuval in Tamil and nadan muttai roast in Kerala. It goes so well with flatbreads like roti, chapati, parota, dosa, appams, string hoppers and as a side to regular rice dal or lentils.
Course Side Dish
Cuisine Indian
Keyword boiled egg roast, egg fry, egg roast, muttai thokku
Prep Time 5 minutes
Cook Time 20 minutes
Total Time 25 minutes
Servings 2
Author Akum Raj Jamir

Equipment

  • Frying pan
  • Spatula

Ingredients

  • 3 or 4 Pieces Egg
  • 3 Tablespoon Oil
  • 2 Medium Onion chopped
  • 2 Medium Tomato chopped
  • 3 Large Garlic cloves chopped
  • 1 Inch Ginger chopped
  • 3 Pieces Green chillies chopped
  • 1 Sprig Curry leaves
  • Few Sprigs Coriander leaves chopped (dhania)
  • 2 Teaspoon Red chilli powder or as per your taste
  • 1 Teaspoon Coriander powder (dhania powder)
  • 1 Teaspoon Garam masala powder
  • ½ Teaspoon Cumin powder (jeera powder)
  • ½ Teaspoon Black pepper powder (kali mirch powder)
  • ½ Teaspoon Turmeric powder (haldi powder)
  • 1-2 Teaspoon Salt or as per your taste
  • ¼ Cup Water

Instructions

  • In a pot add some water and salt and boil 3 to 4 eggs. Once the eggs are hard boiled allow to cool down. Peel the eggs and cut them into halves. Keep aside.
  • In a pan heat the oil. Once the oil is heated, simmer the flame and add in the eggs.
  • Fry the eggs on both the sides until golden brown. Remove and keep aside.
  • In the same oil add in the ginger and garlic. Saute them for a minute.
  • Add in the curry leaves, onion and green chillies. Saute until the onions are cooked and soft 
  • Add in the tomatoes and cook until it turns soft and mushy.
  • Add in the salt along with the masala - red chilli powder, garam masala powder, coriander powder, cumin powder, black pepper powder, turmeric powder.
  • Mix well and cook for a minute. Now add in about ¼ cup of water and cook the masalas for about 2 minutes or until the water is dried up and the oil separate. ( Cook over low to medium flame).
  • Add in the fried eggs in single layers. Take some masalas and cover up the top layer of the eggs. Put on the lid and let it cook about 2 minutes in low flame.
  • Flip over the eggs and again cook for about 2 minutes in low flame.
  • Flip over again and turn off the flame. Sprinkle the coriander leaves and your easy egg roast is ready to be served. Enjoy!

Video

Notes

  1. Here the eggs are cut halves and made. You can keep the eggs whole. Suggest to put some cuts so that the masala penetrates inside.
  2. We used refined sunflower oil. You can use mustard oil or coconut oil for making the egg roast.
  3. You can always adjust the chilli and red chilli powder as per your heat preference.
  4. The masalas can be adjusted as per your taste and availability.

SERVING SUGGESTION

Muttai Varuval

SERVING SUGGESTIONS

An egg roast is a perfect side dish with simple dal and rice. This simple egg dish instantly lifts the humble meal to a feast!

We also love pairing it with roti, chapati, parota, butter naan, appams, idiyappam (string hopper), or dosas! It’s one of those dishes that fits breakfast, lunch and dinner perfectly!

It’s also a perfect appetizer or side for your favourite drinks.

MORE EGG RECIPES

Egg Curry
Egg Fried Rice
Spanish Omelette
Mixed Dal With Potato & Egg

Well, if you make this easy egg roast recipe I’ll be glad if you take out some time and rate the recipe and leave a feedback in the comments box below. You can also snap a photo and tag Akum Raj Jamir on Facebook and akumrajjamir on Instagram with hashtag #atmykitchen. I would love to see your creations.

Thank you so much for stopping by my blog. I hope you liked the recipe. Your valuable feedbacks are always welcome, I love hearing from you guys and always do my best to respond to each and every one of you.

Happy Cooking!
Love Akum 

Egg masala

Coconut Ladoo Recipe with Condensed Milk and Desiccated Coconut

By: Sharmili
2 September 2024 at 08:12

Coconut ladoos are a delightful and easy-to-make Indian sweet that is perfect for festive occasions or as a quick treat to satisfy your sweet tooth. The recipe requires minimal ingredients, primarily desiccated coconut and sweetened condensed milk, making it accessible and simple to prepare even for novice cooks. The addition of cardamom powder infuses a warm, aromatic flavour that beautifully complements the sweetness of the condensed milk and the nutty taste of the coconut.

The process of making coconut ladoos is straightforward, involving a few basic steps. Initially, the coconut is lightly roasted in ghee to enhance its flavour and aroma. Then, it is mixed with condensed milk and flavoured with cardamom powder. This mixture is cooked until it thickens and begins to leave the sides of the pan. After a short cooling period, the mixture is shaped into small balls and rolled in additional desiccated coconut, giving them a beautiful finish and a pleasant texture.

These coconut ladoos are delicious and visually appealing, making them a great addition to any dessert table. They are perfect for sharing with family and friends during celebrations or as a homemade gift. The ease of preparation and the delightful taste make them a favourite among both kids and adults. With the provided tips, you can easily perfect the recipe and enjoy these scrumptious coconut ladoos anytime.

Enjoy the video of coconut ladoo. Subscribe for more videos.

Now, let us see how to prepare this recipe.

Coconut Ladoo Recipe with Condensed Milk and Desiccated Coconut
Delicious coconut ladoo.
Servings10 pieces appox
Prep Time5 mins
Cook Time10 mins
Ingredients
Instructions
  1. In a heavy-bottomed pan, heat the ghee on medium heat. Add the desiccated coconut and roast it lightly for about 2-3 minutes. Stir continuously to ensure it doesn't burn. The coconut should just start to turn golden and release its aroma.
  2. Lower the heat and add the sweetened condensed milk to the roasted coconut. Mix well until the coconut and condensed milk are thoroughly combined.
  3. Add the cardamom powder to the mixture. Continue to cook the mixture on low heat, stirring constantly, until it thickens and starts to leave the sides of the pan. This should take about 5-7 minutes.
  4. Remove the mixture from heat and let it cool slightly. It should be warm but cool enough to handle with your hands.
  5. Grease your palms with a little ghee to prevent sticking. Take small portions of the mixture and roll them into smooth, round balls.
  6. Roll the shaped ladoos in the extra desiccated coconut to coat them evenly.
  7. Allow the coconut ladoos to cool completely. They will firm up as they cool. Store them in an airtight container. They can be kept at room temperature for a couple of days or refrigerated for longer shelf life.
Recipe Notes
  • Ensure you stir the mixture continuously while cooking to prevent it from sticking to the pan and burning.
  • If the mixture feels too dry, add a little more condensed milk. If it’s too sticky, incorporate some extra desiccated coconut.
  • Grease your hands with ghee while shaping the ladoos to make the process smoother and prevent sticking.
  • Let the mixture cool enough to handle but not completely, as it might harden and become difficult to shape.
  • For a longer shelf life, store the ladoos in the refrigerator, especially in warm climates.

Delicious Coconut ladoo using Condensed Milk is ready to serve.

If you found this post useful, I would love it if you pin it or share it with your Facebook fans, Twitter followers, or Google+ circles today. All it takes is a simple click on the “pin it”, “like,” “share,” “Tweet,” or Google+ buttons below the post. It will keep me motivated. Thank you!


Karthigai Vella Adai Recipe – Karthigai Deepam Special

By: Sharmili
21 November 2023 at 03:23

Karthigai Deepam is a highly celebrated festival in Southern India, particularly in Tamil Nadu. It is a time for people to honour Lord Shiva as a divine flame during the Tamil month of Karthigai (November-December). This festival is also known as the Festival of Lights and is a grand affair.

As part of the celebration, people illuminate their homes with lamps to symbolize the triumph of light over darkness and ignorance. It is a beautiful sight that fills everyone’s hearts with hope and inspiration. The day is marked with prayers, rituals, and the lighting of a massive lamp on the hill of Arunachala in Thiruvannamalai, an awe-inspiring sight.

Sweet Karthigai Adai is a delectable treat that adds to the joy of the festival. It is prepared with great care and devotion, using rice, lentils, jaggery, coconut, and cardamom. These adais are a cherished offering during Karthigai Deepam, bringing sweetness and symbolism to the celebration. It is a testament to the love and unity among families and communities.

Enjoy the video of Karthiga Vella Adai. Subscribe for more videos.

Now, let us see how to prepare this recipe.

Karthigai Vella Adai Recipe - Karthigai Deepam Special
Delicious Karthigai Vella Adai.
Servings10 pieces appox
Prep Time10 min(excluding soaking time)
Cook Time20 mins
Ingredients
Instructions
  1. Add rice, toor dal, and chana dal in a bowl. Add enough water and wash it thoroughly 2 to 3 times. Add fresh water and soak rice and dal for 2 to 3 hours.
  2. Once soaked, transfer rice and dal to a mixer jar. Add little water and grind it to a smooth paste.
  3. To the batter, add salt, jaggery, cardamom powder and grind to a smooth batter.
  4. Transfer the batter to a bowl. Add coconut bits and mix all thoroughly. Adjust the batter consistency if required.
  5. Adai is usually made thick. If you want thinner adai, add the water and make it like crispy dosa.
  6. Heat a pan, pour a ladle of batter, and spread it in a circular motion, as shown. Drizzle a spoon of ghee. Let it cook.
  7. Now flip to the other side and drizzle another spoon of ghee. Once cooked again, flip to the first side and cook for a few more minutes till it gets crispier. Now transfer to a plate. Vella adai is ready.
Recipe Notes
  • Soak lentils and rice for at least 2-3 hours.
  • Grind the batter to a smooth paste, and keep it slightly thicker than the dosa batter consistency.
  • Adai can be made immediately after grinding. You need not ferment the batter.
  • If you want to use the remaining batter, refrigerate it for later use. (approx two days)

Delicious Karthigai Vella Adai is ready to serve God as Prashad.

If you found this post useful, I would really love it if you pin it or share it with your Facebook fans, Twitter followers, or Google+ circles today. All it takes is a simple click on the “pin it”, “like,” “share,” “Tweet,” or Google+ buttons below the post. It will keep me motivated. Thank you!


Poondu Varagu Murukku Recipe | Garlic Kodo Millet Murukku – Diwali Snacks

By: Sharmili
7 November 2023 at 07:50

Preparing and sharing traditional sweets and savouries is an integral part of Diwali preparations. Families make an array of delicious treats, such as ladoos, jalebis, and murukku, to offer to guests and exchange with loved ones.

With Diwali fast approaching, many of you have likely begun preparing sweets and snacks. This is the perfect time to share my healthy version of the garlic murukku recipe using Kodo millet flour with you all, which can be prepared in 15 minutes.

Garlic Murukku is a popular South Indian snack, particularly during festivals like Diwali. Murukku is a crunchy, deep-fried snack made from rice flour and various seasonings. Garlic Murukku gets its distinctive flavour from the addition of garlic.

To make the perfect murukku, the following steps should be followed.

  • Use any good brand of Kodo millet flour.
  • Grind enough garlic by adding a little water into a smooth paste. Use only one or one and a half tsp of garlic paste into the mixture.
  • Always cook murukku on the medium-low flame to cook evenly.
  • Instead of sesame seeds, you can use carom seeds or cumin seeds.
  • Gently drop the murukku into the oil, or else the oil may spill. Use enough oil to deep fry.
  • If you feel the dough is getting dry and not able to press, sprinkle a little water and mix it thoroughly.
  • Always keep the dough closed with a cloth or lid to prevent it from getting dry.
  • If making in large quantities, always make it in batches.

Enjoy the video of Kodo millet murukku. Subscribe for more videos.

Now, let us see how to prepare this recipe.

Poondu Varagu Murukku Recipe | Garlic Kodo Millet Murukku - Diwali Snacks
Instant and crispy garlic flavoured kodo millet murukku in 15 mins.
Servings10-12 Murukku approx
Prep Time10 mins
Cook Time15 mins
Ingredients
Instructions
  1. Grind enough garlic (10 pods) by adding a little water into a smooth paste. Use only one or one and a half tsp of garlic paste into the mixture.
  2. On a wide bowl, place a sieve, add kodo millet flour, and Bengal gram flour. Sieve both thoroughly and discard the residue.
  3. Now to the bowl, add sesame seeds, required salt, hing, chili powder, garlic paste, a tbsp of hot oil, mix with a spatula, and crumble the mixture thoroughly.
  4. Then add water little by little. Bring it to a chapati dough consistency. It should neither be too stiff nor too soft. Murukku press (3 dots) shown here in the video is used for making murukku.
  5. Take a small portion of dough and make it into the ball. Now grease the murukku press with oil and fill 3/4 of the press with dough. Keep 2-3 butter paper ready by applying oil on it.
  6. Now press the murukku batter on butter paper in a circular motion as shown. 3 to 4 circles are enough. Heat oil in a heavy bottom Kadai. First, check by dropping a little dough in oil. If the oil is hot enough the dough would rise immediately or else it will go down. Now gently drop the murukku into the oil. Deep fry 2 to 3 murukkus at a time. Do not overcrowd.
  7. Let it cook on low flame till it turns crispy. Then gently turn to the other side and let it cook till bubbling stops.
  8. Now remove and place it on a kitchen towel to remove excess oil. Repeat the process with the remaining murukku batter. Let it cool and store it in an airtight container.
Recipe Notes
  • Use any good brand of Kodo millet flour. 
  • Grind enough garlic by adding a little water into a smooth paste. Use only one or one and a half tsp of garlic paste into the mixture.
  • Always cook murukku on the medium-low flame to cook evenly.
  • Instead of sesame seeds, you can use carom seeds or cumin seeds.
  • Gently drop the murukku into the oil, or else the oil may spill. Use enough oil to deep fry. 
  • If you feel the dough is getting dry and unable to press, sprinkle a little water and mix it thoroughly.
  • Always keep the dough closed with a cloth or lid to prevent it from getting dry.
  • If making in large quantities, always make it in batches.

Crispy and crunchy garlic Kodo millet murukku is ready to relish.

If you found this post useful, I would really love it if you pin it or share it with your Facebook fans, Twitter followers, or Google+ circles today. All it takes is a simple click on the “pin it”, “like,” “share,” “Tweet,” or Google+ buttons below the post. It will keep me motivated. Thank you!

Karupatti Mysore Pak Recipe | Palm Jaggery Mysore Pak – Diwali Sweet

By: Sharmili
2 November 2023 at 03:41

Karupatti Mysore Pak is a delicious and unique variation of the traditional Indian sweet Mysore Pak. What sets it apart is the use of karupatti, which is a type of palm jaggery made from the sap of palm trees. This rich, dark jaggery imparts a distinct flavour and aroma to the Mysore Pak, making it a favourite among those who appreciate traditional South Indian sweets.

There are so many varieties of Mysore Pak nowadays available in shops, and Karupatti Mysore Pak is one of them. So this time, I wanted to try this recipe for the upcoming Diwali. I am glad that I gave it a try, and this turned out to be super yummy. I have already posted regular soft Mysore Pak. Using the same recipe, I have tweaked this recipe, and it turned out like we get in the Sri Krishna Sweets shop.

Follow the below steps to get the perfect soft carrot Mysore Pak:

  • Keep flame to medium-low for the entire process.
  • Do not leave it unattended.
  • Always use fresh Bengal gram powder.
  • Fry Bengal gram until you get a nice aroma, do not burn. If not fried properly, then you will get the raw smell in the final product.
  • Make sure you get one string consistency while making jaggery syrup.
  • The last stage is also important. When the mixture starts leaving the Kadai, immediately switch off the flame and transfer it to a greased plate; otherwise, it will become hard.

If you use the given ingredients with a specified quantity and follow the steps as such, you will get an awesome mouth-melting dessert. Now let us see how to prepare this recipe.

Enjoy the video of Karupatti mysore pak. Subscribe for more vidoes.

Karupatti Mysore Pak Recipe | Palm Jaggery Mysore Pak - Diwali Sweet
Melt in the mouth soft karupatti ghee mysore pak.
Servings12 pieces appox
Prep Time10 mins
Cook Time20 mins
Instructions
  1. Grease a plate with ghee and set aside. To get a proper square I have used a cake ring.
  2. Now heat a heavy bottom non-stick Kadai, add Bengal gram, and dry roast it on low flame for about 5-6 minutes until a nice aroma comes. Don't let the color change.
  3. Now transfer the Bengal gram to another bowl and allow it to cool. If you leave it in Kadai, it will turn brown due to residual heat in it. In a bowl add roasted Bengal gram, 1/2 cup ghee, mix it without any lumps, and set aside.
  4. In a sauce pan, add water and palm jaggery. Cook until the palm jaggery is melted completely. Remove it from the stove.
  5. Now heat a pan and filter and add the prepared jaggery water. Boil the jaggery until you get the one string consistency. If you take the jaggery syrup between the thumb and the index finger a single string will form, that's the correct consistency.
  6. Now add the Bengal gram oil mixture to the jaggery syrup and mix well.
  7. Now add the remaining 1/2 cup ghee in intervals (2 tbsp at a time) to avoid drying and mix well. Keep stirring continuously until all the ghee is used.
  8. At this last stage, you can see foam forming, and now if you scoop, it will not stick to Kadai. The mixture will not be sticky anymore. Switch off the flame and pour the mixture into the greased plate.
  9. Just allow it to cool for a while and once it starts to get set, cut it into the desired shape.
Recipe Notes
  • Keep flame to medium-low for the entire process.
  • Please do not leave it unattended.
  • Always use fresh Bengal gram powder.
  • Fry Bengal gram until you get a nice aroma; do not burn. If not fried properly, then you will get the raw smell in the final product.
  • Make sure you get one string consistency while making jaggery syrup.
  • The last stage is also important. When the mixture starts leaving the Kadai, immediately switch off the flame and transfer it to a greased plate; otherwise, it will become hard.

Soft, melt-in-the-mouth carrot Mysore Pak is ready to relish.

If you found this post useful, I would really love it if you pin it or share it with your Facebook fans, Twitter followers, or Google+ circles today. All it takes is a simple click on the “pin it”, “like,” “share,” “Tweet,” or Google+ buttons below the post. It will keep me motivated. Thank you!

Aadi Kummayam Recipe | Chettinadu Special Aadi Kummayam

By: Sharmili
25 July 2023 at 07:00

In the Chettinad region of Tamil Nadu, a traditional sweet dish called kummayam is made during the month of Aadi. This dish resembles halwa and is made by roasting urad dal, moong dal, and raw rice. To add sweetness, jaggery or palm jaggery is used, and it is typically flavoured with ghee.

In the Tamil solar calendar, Aadi is the fifth month, which holds immense significance in Tamil culture. This is because it marks the onset of the monsoon season and the annual freshes of the rivers. The 18th day of the month is celebrated as the Aadi festival, a time to honour the importance of water, the source of all life.

During the month of Aadi, people make kummayam for various reasons:

  1. It’s a way to celebrate the abundance of the monsoon season.
  2. Kummayam is known to have health benefits, especially for women. The ingredients used in kummayam are said to strengthen the bones and uterus and are also a good source of protein and iron.
  3. Kummayam is a traditional sweet often served during special occasions like weddings and festivals.

Here are some additional facts about kummayam:

  • The name kummayam comes from the Tamil word “Kumm,” which means “to grind.”
  • Kummayam is traditionally made in a clay pot over a wood fire.
  • The texture of kummayam should be smooth and soft and have a slight chewiness.
  • Kummayam can be stored in an airtight container for up to one week.

If you are looking for a delicious and nutritious sweet, I encourage you to try kummayam. It is a traditional Chettinad dish that is sure to please your tastebuds. Now let us see how to prepare this recipe.

Enjoy the video Kummayam. Subscribe for more videos.

Aadi Kummayam Recipe | Chettinadu Special Aadi Kummayam
Kummayam - a delicious and nutritious sweet from the region of Chettinad.
Servings1 Cup
Prep Time10 mins
Cook Time30 mins
Instructions
  1. Dry roast whole urad dal, moong dal, and rice separately until it turns aromatic and golden brown. Place it on a plate and let it cool completely.
  2. Transfer the dals and rice to a blender or food processor and grind into a fine powder. Sieve the powder to remove any large pieces.
  3. In a small saucepan, heat the jaggery and 3/4 cup of water over medium heat. (Water ratio is 1:3). Stir until the jaggery melts and the mixture comes to a boil. Remove from the heat and let cool slightly.
  4. Heat a tbsp of the ghee in a large skillet or wok over medium heat. Add the kummayam powder and cook, stirring constantly, for about 5 minutes, or until fragrant.
  5. Add the jaggery mixture and cook, stirring constantly, until the kummayam thickens, about 10 minutes more.
  6. Finally add the remaining tbsp of ghee and stir for another minute. Remove from the heat and let cool completely. Kummayam is ready.
Recipe Notes
  • Use good quality whole urad dal, moong dal, and rice.
  • Dry roast whole urad dal, moong dal, and rice separately until it turns aromatic and golden brown.
  • Use either jaggery or palm jaggery.
  • You can enjoy this nutritious treat, either warm or cold.

Delicious and healthy Aadi Kummayam is ready to serve God as Prashad.

If you found this post helpful, please consider sharing it with your friends and followers on Facebook, Twitter, or Google+. You can do so by clicking the buttons below the post. Your support would be greatly appreciated and will keep me motivated. Thank you!

Pudanlangai Thayir Pachadi | Potlakaya Perugu pachadi | Snake Gourd raita

13 February 2025 at 08:23
Snake gourd /padwal(Marathi)/Potlakaaya (Telugu) /Padavalanga (Malayalam) / Padavalkkai (Kannada) .
Call it by any name it has a lot of nutritional value and is a powerhouse of nutrients. Snake gourd belongs to the summer squash family, mostly a summer produce ,it is available all round the year in India.

Rich in dietary fiber , vitamins A and C ,snake gourds help in digestion ,prevent bloating and constipation . Helps in detoxification of the body because of its diuretic properties. Due to water content present in the snake gourd it helps maintain body's hydration.

Snake gourd /padwal(Marathi)/Potlakaaya (Telugu) /Padavalanga (Malayalam) / Padavalkkai (Kannada) , Snake gourd /padwal(Marathi)/Potlakaaya (Telugu) /Padavalanga (Malayalam) / Padavalkkai (Kannada)  pachadi, perugu pachadi, pachadi, kichadi, padavalnga kichadi, podalanga pachadi, podalanga thayir pachadi, potlakaya perugu,potlakaya, padwal raita, padval raita, dahi padwal

 Podalangai Thayir pachadi is a new addition to my kitchen and hence it is making it to the blog . 
Amma would make it frequently during summer, but over the years I had totally forgotten about this recipe . As a flash,this recipe occurred to me this morning when I was contemplating what to make with fresh and tender snake gourd that I had just bought. The snake gourds have to be tender. Overly ripe ones taste bitter and become hard and chewy . So while buying, make sure the snake gourd vine is easy to twist and tender to feel. If you find it hard or it easily cracks ,then don't buy that .

Podalangai thayir pachadi is very easy to make and gets done in no time . A tasty paste is made using fresh coconut, ginger,green chillies and curry leaves which is added to thick whipped yogurt and boiled snake gourd is mixed along with this followed by a tempering of mustard, dry red chillies and asafoetida. 

Podalangai thayir pachadi is also made during Amavasya, pithrupaksha and Shraadh cooking in a typical Tamil Brahmin household . Vishu and Onam Sadhyas also feature padavalanga kichadi as one of the Sadhya menu items.

Snake gourd /padwal(Marathi)/Potlakaaya (Telugu) /Padavalanga (Malayalam) / Padavalkkai (Kannada) , Snake gourd /padwal(Marathi)/Potlakaaya (Telugu) /Padavalanga (Malayalam) / Padavalkkai (Kannada)  pachadi, perugu pachadi, pachadi, kichadi, padavalnga kichadi, podalanga pachadi, podalanga thayir pachadi, potlakaya perugu,potlakaya, padwal raita, padval raita, dahi padwal

Officially, though it is still winter/spring in India , we are already feeling the warmth in my part of the city. There is hardly any chillness felt and the afternoon sun is at its peak .

As always, with summer setting in; buttermilk,lassi,raita and yogurt based curries make a lot of appearance in my kitchen . Yogurt based curries are light on stomach and easy to digest as well .Most importantly it keeps the body cool during harsh summer and it maintains hydration. 

Snake gourd /padwal(Marathi)/Potlakaaya (Telugu) /Padavalanga (Malayalam) / Padavalkkai (Kannada) , Snake gourd /padwal(Marathi)/Potlakaaya (Telugu) /Padavalanga (Malayalam) / Padavalkkai (Kannada)  pachadi, perugu pachadi, pachadi, kichadi, padavalnga kichadi, podalanga pachadi, podalanga thayir pachadi, potlakaya perugu,potlakaya, padwal raita, padval raita, dahi padwal

Some lipsmacking raitas in South Indian flavor 


Pinterest link


Snake gourd /padwal(Marathi)/Potlakaaya (Telugu) /Padavalanga (Malayalam) / Padavalkkai (Kannada) , Snake gourd /padwal(Marathi)/Potlakaaya (Telugu) /Padavalanga (Malayalam) / Padavalkkai (Kannada)  pachadi, perugu pachadi, pachadi, kichadi, padavalnga kichadi, podalanga pachadi, podalanga thayir pachadi, potlakaya perugu,potlakaya, padwal raita, padval raita, dahi padwal

Preparation Time - 5 mins
Cooking Time - 8 mins
Serves - 2 to 3 
Complexity - easy 

Ingredients 

1 medium vine snake gourd 
1.5 cups thick yogurt
2 tbsp coconut grated
1 green chilli (optional)
2 to 3 dried red chilli
Few curry leaves  
Small piece ginger 
Salt as needed 
1/2 tsp oil 
1/4 tsp mustard seeds 
1/4 tsp udad dhal /black gram 
Pinch of asafoetida 

Note - if you family tradition doesn't use green chilli for shraadh/Amavasya then replace with dry red chillies.

Method 

  • Wash the snake gourd and slit it vertically . Deseed /remove the seeds and chop it into small cubes. 
  • Boil half cup water with salt and cook the snake gourd until soft and tender . Drain the water .
  • Grind the coconut, green or red chilli ,curry leaves,ginger to a fine paste .
  • Beat the curd/yogurt to make it lump free and smooth.
  • Mix the ground coconut paste ,whipped curd and boiled snake gourd . Adjust salt if needed.
  • Prepare a tempering of mustard seeds , curry leaves ,udad dhall, red chilli,asafoetida and pour it over the raita and mix well. 


❌
❌