From top left, clockwise: Axel AI CEO Bobby Figueroa; Eluum CEO Bilkay Rose, DrunR CEO Yaya Ali, and profileAPI CEO Wissam Tabbara.
New year, new Startup Radar.
We’re back with our regular spotlight on early stage startups sprouting up in the Seattle region. For this edition, we’re featuring Axel AI, DrunR, Eluum, and profileAPI.
Read on for brief descriptions of each company — along with pitch assessments from “Mean VC,” a GPT-powered critic offering a mix of encouragement and constructive criticism.
Check out past Startup Radar posts here, and email me at taylor@geekwire.com to flag other companies and startup news.
The business: A self-described “reasoning layer” for retail media sales teams that aims to translate messy data into commercial narratives and proposals. The idea is to help sales teams spend less time on manual analysis and preparation. The bootstrapped company officially launched its MVP at CES and NRF 2026 earlier this month.
Leadership: CEO and co-founder Bobby Figueroa previously founded Gradient, another Seattle-based commerce insights company that was acquired by Criteo. He was also an exec at Amazon. Axel’s leadership and advisory team includes former sales and advertising leaders at Amazon, Google, and Microsoft.
Mean VC: “You’re targeting a real friction point — sales teams juggling fragmented data with limited time to craft a compelling narrative. The pedigree helps, but long-term success will hinge on whether your product drives actual revenue lift, not just cleaner decks. I’d focus on embedding directly into the sales team’s existing workflow — don’t make users open another tool, make yours the one that quietly does the heavy lifting behind the scenes.”
The business: A nutrition app that provides personalized guidance based on users’ goals and preferences, particularly while dining out or ordering food online. DrunR is running a closed beta in Seattle with restaurants and users, including people using GLP-1 medication. The startup is part of the WTIA Founder Cohort 13 program.
Leadership: Founder and CEO Yaya Ali is a financial analyst at Perkins Coie and previously worked for King County and Amazon. He also has food operations experience. David Greene, the company’s CTO, is a software engineer at Capital One and previously worked at Moody’s.
Mean VC: “The intersection of nutrition, personalization, and GLP-1s is timely — especially as eating habits shift alongside new weight-loss drugs. The challenge will be making the app feel essential day-to-day, not just ‘nice to have’ after a restaurant meal or clinic visit. I’d zero in on a high-frequency use case — something that keeps users opening the app daily, not just when they’re thinking about dinner.”
The business: A new take on social media with a product that helps people organize their personal memories, stories, and digital artifacts into one user-controlled system. Built on community-driven moderation and works across different platforms. The bootstrapped company is onboarding early users and plans to launch a MVP later this year.
Leadership: CEO and co-founder Bilkay Rose was a VP at tax software company Avalara and a director at Clearwire. Other co-founders include CTO Dale Rector, who spent three decades at Microsoft, and Jennifer Gianola, also a former exec at Avalara.
Mean VC: “The concept taps into a real emotional need — people are overwhelmed by digital clutter and increasingly skeptical of algorithm-driven feeds. The key will be showing how your platform earns daily use without relying on dopamine loops. I’d push to define a sharp use case first — memory curation is broad, so lead with one thing people urgently want to preserve, then expand once you’ve earned their trust.”
The business: A business data layer for developers building AI-native chat, copilot, and agentic tools for go-to-market. Its platform tracks more than 10,000 signals across more than 10 million companies and 500 million professionals. The company, which was previously a sales AI agent product called Truebase, has raised $2 million in funding.
Leadership: Founder and CEO Wissam Tabbara has sold two startups and spent more than six years at Microsoft in the 2000s.
Mean VC: “The shift from product to platform is smart — selling infrastructure to power GTM copilots has stronger upside than building another agent. But you’ll need to show that your data isn’t just broad, but relevant and timely enough to drive meaningful in-app decisions. I’d focus on becoming the plug-and-play GTM brain — make integration dead simple, and let other tools build magic on top of your stack.”
In the previous article, we lifted the curtain on tracking technologies and showed how much information the internet collects from you. Many people still believe that privacy tools such as VPNs completely protect them, but as you are now learning, the story goes much deeper than that. Today we will explore what else is hiding behind the code. You will discover that even more information can be extracted from your device without your knowledge. And of course, we will also walk through ways to reduce these risks, because predictability creates patterns. Patterns can be tracked. And tracking means exposure.
Beyond Visuals
Most people assume fingerprinting is only about what you see on the screen. However, browser fingerprinting reaches far beyond the visual world. It also includes non visual methods that silently measure the way your device processes audio or stores small website assets. These methods do not rely on cookies or user logins. They do not require permission prompts. They simply observe tiny differences in system behavior and convert them into unique identifiers.
A major example is AudioContext fingerprinting. This technique creates and analyzes audio signals that you never actually hear. Instead, the browser processes the sound internally using the Web Audio API. Meanwhile favicon based tracking abuses the way browsers cache the small icons you see in your tab bar. Together, these methods help trackers identify users even if visual fingerprints are blocked or randomized. These non visual fingerprints work extremely well alongside visual ones such as Canvas and WebGL. One type of fingerprint reveals how your graphics hardware behaves. Another reveals how your audio pipeline behaves. A third records caching behavior. When all of this is combined, the tracking system becomes far more resilient. It becomes very difficult to hide, because turning off one fingerprinting technology still leaves several others running in the background.
Everything occurs invisibly behind the web page. Meanwhile your device is revealing small but deeply personal technical traits about itself.
AudioContext Fingerprinting
AudioContext fingerprinting is built on the Web Audio API. This is a feature that exists in modern browsers to support sound generation and manipulation. Developers normally use it to create music, sound effects, and audio visualizations. Trackers, however, discovered that it can also be used to uniquely identify devices.
Here is what happens behind the scenes. A website creates an AudioContext object. Inside this context, it often generates a simple sine wave using an OscillatorNode. The signal is then passed through a DynamicsCompressorNode. This compressor highlights tiny variations in how the audio is processed. Finally, the processed audio data is read, converted into numerical form, and hashed into an identifier.
The interesting part is where the uniqueness comes from. Audio hardware varies greatly. Different manufacturers like Realtek or Intel design chips differently. Audio drivers introduce their own behavior. Operating systems handle floating point math in slightly different ways. All of these variations influence the resulting signal, even when the exact same code is used. Two computers will nearly always produce slightly different waveform results.
Only specific privacy protections can interfere with this process. Some browsers randomize or block Web Audio output to prevent fingerprinting. Others standardize the audio result across users so that everyone looks the same. But if these protections are not in place, your system will keep producing the same recognizable audio fingerprint again and again.
You can actually test this yourself. There are demo websites that implement AudioContext fingerprinting.
Favicon Supercookie Tracking
Favicons are the small images you see in your browser tabs. They appear completely harmless. However, the way browsers cache them can be abused to create a tracking mechanism. The basic idea is simple. A server assigns a unique identifier to a user and encodes that identifier into a specific pattern of favicon requests. Because favicons are cached separately from normal website data, they can act as a form of persistent storage. When the user later returns, the server instructs the browser to request a large set of possible favicons. Icons that are already present in the cache do not trigger network requests, while missing icons do. By observing which requests occur and which do not, the server can reconstruct the original identifier.
This is clever because favicon caches have traditionally been treated differently from normal browser data. Clearing cookies or browsing history often does not remove favicon cache entries. In some older browser versions, favicon cache persistence even extended across incognito sessions.
There are limits. Trackers must maintain multiple unique icon routes, which requires server side management. Modern browsers have also taken steps to partition or isolate favicon caches per website, reducing the effectiveness of the method. Still, many legacy systems remain exposed, and clever implementations continue to find ways to abuse caching behavior.
Other Methods of Identification
Fingerprinting does not stop with visuals and audio. There are many additional identifiers that leak information about your device. Screen fingerprinting gathers details such as your screen resolution, usable workspace, color depth, pixel density, and zoom levels. These factors vary across laptops, desktops, tablets, and external monitors.
Font enumeration checks which fonts are installed on your system. This can be done by drawing hidden text elements and measuring their size. If the size changes, the font exists. The final list of available fonts can be surprisingly unique.
Speech synthesis fingerprinting queries the Web Speech API to discover which text to speech voices exist on your device. These are tied to language packs and operating system features.
The Battery Status API can reveal information about your battery capacity, charge state, and discharge behavior. This information itself is not very useful, but it helps illustrate how deep browser fingerprinting can go.
The website may also detect which Chrome plugins you use, making your anonymous identity even more traceable.
And this is still only part of the story. Browsers evolve quickly. New features create new opportunities for fingerprinting. So awareness is critical here.
Combined Threats and Defenses
When audio fingerprinting, favicon identifiers, Canvas, WebGL, and other methods are combined, they form what is often called a super fingerprint. This is a multi-layered identity constructed from many small technical signals. It becomes extremely difficult to change without replacing your entire hardware and software environment. This capability can be used for both legitimate analytics and harmful surveillance. Advertisers may track behavior across websites. Data brokers may build profiles over time. More dangerous actors may attempt to unmask users who believe they are anonymous.
Fortunately, there are tools that help reduce these risks. No defense is perfect. But layered protections can improve your privacy. For example, Tor standardizes many outputs, including audio behaviors and cache storage. But not everything, which means some things can expose you. Firefox includes settings such as privacy.resistFingerprinting that limit API details. Brave Browser randomizes or blocks fingerprinting attempts by default. Extensions such as CanvasBlocker and uBlock Origin also help reduce exposure, although they must be configured with care.
We encourage you to test your own exposure, experiment with privacy tools, and make conscious decisions about how and where you browse.
Conclusion
The key takeaway is not paranoia. Privacy tools do not eliminate fingerprinting, but defenses such as Tor, Brave, Firefox fingerprint-resistance, and well-configured extensions do reduce exposure. Understanding how non-visual fingerprints work allows you to make informed decisions instead of relying on assumptions. In modern browsing, privacy is not about hiding perfectly. It is about minimizing consistency and breaking long-term patterns.
Awareness matters. When you understand how you are being tracked, you’re far better equipped to protect your privacy.
The 7 Best Real-Time Stock Data APIs for Investors and Developers in 2026 (In-Depth Analysis & Comparison)
Many believe that to access high-quality financial data, you need to pay thousands of dollars for a Bloomberg terminal or settle for limited platforms like Yahoo Finance. The truth is different: today, there are powerful, affordable, and even free real-time stock data APIs you can integrate into your Python scripts, interactive dashboards, or algorithmic trading systems.
As W. Edwards Deming said:
“Without data, you’re just another person with an opinion.”
In this article, I present a practical comparison of the 7 best financial APIs on the market (with a focus on real-time stock data). I include:
Pros and cons of each API
Pricing plans (free tiers and paid options)
Key features and data coverage
Recommendations by profile (analyst, trader, developer, or enterprise)
Concrete use cases demonstrating each API
Comparison table (quick selection guide)
Frequently asked questions to address common doubts
Let’s dive in.
1. EODHD API (End-of-Day Historical Data)
Best for: Fundamental analysis, backtesting, and financial reports Website: eodhd.com
Key features:
Historical end-of-day (EOD) prices and intraday data (1m, 5m, 1h intervals)
Fundamental data (financial ratios, balance sheets, income and cash flow statements)
Corporate actions: dividends, stock splits, earnings, IPO data
Macroeconomic indicators and earnings calendars
Financial news API (with sentiment analysis)
Broad coverage: stocks, ETFs, indices, forex, and cryptocurrencies
Highlights:EODHD provides clear documentation with plenty of Python examples, and it combines both quantitative price data and fundamental data in one service. This makes it great for building dashboards or predictive models that require both historical prices and financial metrics. Its data consistency (handling of splits, ticker changes, etc.) is also highly regarded.
Pricing:
Free: 20 API requests per day (limited to basic end-of-day data) — useful for testing or small-scale scripts
Pro: Plans from ~$17.99 per month (for individual market packages) up to ~$79.99 per month for an all-in-one global data package. The paid tiers offer generous limits (e.g. 100,000 API calls/day) and full access to historical and real-time data.
Cons:
The free plan’s 20 calls/day is very limited, suitable only for trial runs or simple prototypes. Serious projects will need a paid plan.
Some advanced features (like extensive options data or certain international markets) may require higher-tier subscriptions.
Use case: Extract Apple’s dividend history over the past 5 years and calculate the dividend yield trend. (EODHD’s API can provide historical dividend payouts which you can combine with price data for this calculation.)
Personal recommendation: If you need a single comprehensive API for global stocks (prices + fundamentals + news), EODHD is an excellent choice. ✨ Get 10% off here to try it out.
Time series data for equities (daily, intraday down to 1-minute)
Technical indicators built-in (e.g. RSI, MACD, Bollinger Bands) — you can query indicator values directly via the API.
Crypto and Forex data support
Some sentiment and macroeconomic data (e.g. sector performance, economic indicators)
Highlights: Alpha Vantage is known for its ease of use and generous free tier for beginners. It’s one of the most popular starting points for developers learning to work with financial data. Uniquely, Alpha Vantage is an official vendor of Nasdaq market data, which speaks to its data reliability. The API responses are JSON by default, and the documentation includes examples that integrate well with Python and pandas.
Pricing:
Free: Up to 5 API calls per minute (approximately 500 calls per day). This is sufficient for small applications or learning purposes, though heavy use will hit the limits quickly. (Note: Alpha Vantage’s standard free limit is actually 25 calls per day as of late 2024, enforced alongside the 5/minute rate.)
Premium: Paid plans starting from $29.99/month for higher throughput (e.g. 30+ calls/minute) and no daily cap. Higher tiers (ranging up to ~$199/month) allow dozens or hundreds of calls per minute for enterprise needs.
Cons:
Strict rate limits on the free tier. Hitting 5 calls/min means you often have to throttle your scripts or batch requests. For example, pulling intraday data for many symbols or calling many technical indicators will quickly require a paid plan.
Limited depth in some areas: fundamental data coverage is basic (company overviews, a few ratios) and not as extensive globally as some competitors.
Use case: Build an email alert system that triggers when a stock’s 14-day RSI drops below 30 (an oversold signal). Alpha Vantage’s technical indicators API can directly return the RSI for a given symbol, making this straightforward to implement without calculating RSI manually.
3. Intrinio
Best for: Enterprise projects, advanced fundamental data, and large-scale financial applications Website: intrinio.com
Key features:
Extensive financial statement data: Intrinio provides detailed fundamentals — standardized and as-reported financials (income statements, balance sheets, cash flows) for thousands of companies. It’s very useful for deep fundamental analysis and modeling.
Real-time and historical stock prices: Access to real-time equity quotes (for supported exchanges) and long historical price data (often decades back). Intrinio also offers options data, ETFs, Forex, and other asset classes through various packages.
Data marketplace model: Intrinio has a variety of data feeds and endpoints (e.g., US stock prices, global equities, options, ESG data, etc.). You subscribe only to the feeds you need, which can be cost-efficient for specific use cases.
Developer tools: Clean REST API with robust documentation, SDKs in multiple languages, and even a real-time data streaming option for certain feeds. They also provide a sandbox environment and live chat support to help during development.
Highlights: Intrinio is known for high data accuracy and quality. It’s the go-to for many fintech startups and even institutions when building platforms that require reliable and up-to-date financial data. The breadth of APIs and endpoints is massive — from stock screeners to data on insider transactions. Intrinio’s website and product pages are very informative, and they even include an AI chatbot to help you find the data you need.
Pricing:
Free trial: Intrinio offers a free trial period for new users to test out the API with limited access. This is great for evaluating their data before committing.
Paid packages: Pricing is segmented by data type. For example, a US equities core package starts around $200/month (Bronze tier) for end-of-day prices and fundamentals. Real-time stock price feeds and expanded data (Silver/Gold tiers) cost more — e.g., U.S. equities Gold (with real-time quotes and full history) is about $800/month. Similarly, options data packages range from ~$150 up to $1600/month for real-time options feeds. Intrinio’s model is pay for what you need, which scales up to enterprise-level contracts for wide coverage.
Cons:
Not ideal for small projects or beginners: Intrinio’s offerings can be overkill for hobbyist use — the range of data is immense and the pricing is relatively high. There is no unlimited free tier, so after the trial you must budget for at least a few hundred dollars per month to continue using their data at any scale.
Complex pricing structure: Because of the package system (separate feeds for stocks, options, etc.), it may be confusing to figure out exactly which plan(s) you need, and costs can add up if you require multiple data types. It’s geared more toward startups, fintech companies, or professionals with a clear data strategy (as opposed to one-size-fits-all simple pricing).
Website account required: You’ll need to go through account setup and possibly consultation for certain datasets. It’s not as plug-and-play as some other services for quick experiments.
Use case: An investor relations platform could use Intrinio to automate financial report analysis — pulling in several years of standardized financials for dozens of companies to compare ratios and performance. Intrinio’s high-quality fundamentals and wide historical coverage make it ideal for such an application.
4. Polygon.io
Best for: Real-time market data (especially U.S. stocks) and high-frequency trading apps Website:https://massive.com/
Key features:
Real-time price feeds: Polygon provides live tick-by-tick price data for U.S. stocks, options, forex, and crypto. It supports streaming via WebSockets, so you can get quotes and trades in real time with low latency.
Historical data down to ticks: You can access granular historical data, including full tick data and minute-by-minute bars for equities (often used for backtesting trading algorithms).
WebSockets & Streaming: Excellent WebSocket API for streaming live quotes, trades, and aggregates. This is crucial for building live dashboards or trading bots that react to market movements instantly.
Reference data & tools: Polygon also offers comprehensive reference data (company info, financials, splits/dividends, etc.) and endpoints like news, analyst ratings, and more. However, its core strength is market price data.
Highlights: Polygon.io stands out for performance and depth in the U.S. markets. If you need real-time stock prices or even need to stream every trade for a given stock, Polygon can handle it. Their documentation is well-structured and they have a developer-friendly interface with interactive docs. They also offer community resources and example code which make integration easier. Polygon’s pricing page clearly separates plans for different asset types, so you can pick what you need.
Pricing
Free: The free tier allows 5 API requests per minute and limited historical data (e.g., 2 years of daily data). Real-time streaming might be restricted or delayed on the free plan (often 15-minute delayed data for stocks). This tier is good for trying out the API or basic apps that don’t require extensive data.
Paid: Plans start at $29/month for higher call limits and more data access. For instance, Polygon’s “Starter” or “Developer” plans (around $29-$79/month) provide live data with certain limitations (like delayed vs real-time) and a cap on how far back you can fetch history. More advanced plans can go up to a few hundred per month for full real-time tick data and larger rate limits. (Polygon has recently rebranded some offerings under “Massive” but the pricing remains in this range for individual developers.)
Cons:
Primarily U.S.-focused: Polygon’s strength is U.S. stocks and options. If you need comprehensive data for international markets, you’ll need other APIs. Its coverage outside the U.S. (for equities) is limited, so it’s not a one-stop solution for global portfolios.
Costly for full real-time access: While entry plans are affordable, truly real-time professional data (especially if you need full tick data or entire market streaming) can become expensive. Higher-tier plans for real-time data (with no delay and high rate limits) can run into the hundreds per month, and certain data (like entire market breadth or entire options chains in real time) might require enterprise arrangements.
Limited fundamentals/news: Polygon has some fundamental data and news, but it does not offer the depth in these areas that more fundamentally-oriented APIs (like EODHD or FMP) do. It focuses on pricing data.
Use case: Stream live quotes for AAPL and MSFT using Polygon’s WebSocket API and display a live updating chart in a web app. With just a few lines of code, you can subscribe to the ticker feed and get real-time price updates that drive an interactive chart (great for a day-trading dashboard or a demo of live market data).
5. Alpaca Markets
Best for: Building trading bots and executing live trades (with data included) Website: alpaca.markets
Key features:
Commission-free stock trading API: Alpaca is actually a brokerage platform that provides APIs, so you can place real buy/sell orders for U.S. stocks with zero commissions via their API. This sets it apart from pure data providers.
Real-time and historical market data: Alpaca offers real-time price data (for stocks on the US exchanges) and historical data as part of its service. When you have a brokerage account, you get access to stock quotes and minute-level bars, etc., through the API.
Paper trading environment: For developers, Alpaca’s paper trading is a big plus — you can simulate trading with virtual money. You get the same API for paper and live trading, which is ideal for testing your algorithmic strategies safely.
Brokerage integration: You can manage orders, positions, and account info via API. This means you not only get data but can also automate an entire trading strategy (from data analysis to order execution) with Alpaca’s platform.
Highlights: Alpaca is a favorite for DIY algorithmic traders and hackathon projects because it lowers the barrier to entry for trading automation. With a few API calls, you can retrieve market data and send orders. It’s essentially an all-in-one trading service. The documentation is developer-centric, and there are official SDKs (Python, JS, etc.) as well as a vibrant community. Alpaca integrates with other tools (like TradingView, Zapier) and supports OAuth, making it easier to incorporate in different applications.
Pricing:
Free tier: You can use Alpaca’s core API for free. Creating an account (which requires U.S. residency or certain other country residencies for live trading) gives you access to real-time stock data and the ability to trade with no monthly fee. Alpaca makes money if you trade (through other means like payment for order flow), so the API and basic data are provided at no cost to developers.
Premium data plans: Alpaca does have optional subscriptions for more advanced data feeds. For example, the free data might be SIP consolidated feed with a small delay or only IEX data; if you need full real-time consolidated market data or extended history, they offer Data API subscriptions (like $9/month for more history, or higher for things like real-time news, etc.). These are add-ons; however, many users find the free data sufficient for starting out.
Cons:
Limited to U.S. stock market: Alpaca’s trading and data are focused on U.S. equities. You won’t get direct access to international stocks or other asset classes (except crypto, which Alpaca has added in a separate offering).
Requires KYC for live trading: If you plan to execute real trades, you must open a brokerage account with Alpaca, which involves identity verification and is only available in certain countries. Paper trading (demo mode) is available globally, but live trading has restrictions.
Data not as extensive as dedicated providers: While Alpaca’s included data is decent, it may not be as comprehensive (in terms of history or variety of technical indicators) as some standalone data APIs. It’s primarily meant to support trading rather than be a full analytics dataset.
Use case: Create a Python trading bot that implements a simple moving average crossover strategy (e.g., buy when the 50-day MA crosses above the 200-day MA, sell on the reverse crossover). The bot can use Alpaca’s data API to fetch the latest prices for your stock, compute moving averages, and Alpaca’s trading API to place orders when signals occur. You can even run this in paper trading first to fine-tune the strategy.
6. Finnhub
Best for: A mix of data types (real-time prices, fundamentals, news, crypto) in one service Website: finnhub.io
Key features:
Real-time market data: Finnhub provides real-time quotes for stocks (free for US stocks via IEX), forex, and cryptocurrencies through its API. It’s a solid choice if you need live pricing across multiple asset classes.
Financial news with sentiment: There’s a news API that returns the latest news articles for companies or markets, including sentiment analysis scores. This is useful for gauging market sentiment or doing news-driven strategies.
Corporate and economic calendar data: Endpoints for earnings calendars, IPO schedules, analyst earnings estimates, and economic indicators are available. This variety helps investors and analysts stay on top of upcoming events.
Fundamental data: Finnhub offers some fundamentals (e.g., company profiles, financial statements, key metrics), as well as alternative data like COVID-19 stats, and even ESG scores. However, some of these are limited in the free tier.
Highlights: Finnhub is like a Swiss Army knife — it covers a broad range of financial data in one API. Many startups use Finnhub to power their apps because it’s relatively easy to use and the free tier is generous in terms of number of calls. Developers also appreciate that Finnhub’s documentation is straightforward and they have examples for how to use each endpoint. It’s particularly notable for its news and social sentiment features, which not all finance APIs offer.
Pricing:
Free: 60 API requests per minute are allowed on the free plan, which is quite high compared to most free plans. This includes real-time stock prices (US markets) and basic access to many endpoints. The free tier is for personal or non-commercial use and has some data limits (like certain endpoints or depth of history may be restricted).
Pro: Paid plans start from $49–50 per month for individual markets or data bundles. Finnhub’s pricing can be a bit modular; for example, real-time international stock feeds or more historical data might each be priced separately (often ~$50/month per market). They also have higher plans (hundreds per month) for enterprise or for accessing all data with fewer limits. For many users, the $50/month range unlocks a lot of additional data useful for scaling up an application.
Cons:
Limited free fundamentals: The free plan, while generous with call volume, does not include all data. For instance, certain fundamental data endpoints (like full financial statements or international market data) require a paid plan. This can be frustrating if you expect all features to work out of the box with the free API key. Essentially, you might hit “Access denied” for some endpoints until you upgrade.
Pricing can add up: If you need multiple data types (say US stocks real-time, plus international stocks, plus in-depth fundamentals, etc.), Finnhub’s costs can increase quickly because each component may be an add-on. In comparison, some competitors’ bundled plans might be more cost-effective for broad needs.
Website/UI is basic: Finnhub’s website isn’t the slickest and occasionally the docs have minor inconsistencies. This isn’t a huge issue, but it’s not as polished as some others like Alpha Vantage or Twelve Data in terms of user interface.
Use case: Pull the latest news headlines and sentiment for Tesla (TSLA) and display a “sentiment gauge”. With Finnhub’s news API, you can get recent news articles about Tesla along with a sentiment score (positive/negative). A developer could feed this into a simple app or dashboard to visualize how news sentiment is trending for the company.
7. Twelve Data
Best for: Quick visualizations, simple dashboards, and spreadsheet integrations Website: twelvedata.com
Key features:
Historical & real-time data for stocks, forex, crypto: Twelve Data covers many global markets, offering time series data at various intervals (intraday to daily) for equities, FX, and cryptocurrencies.
Built-in visualization tools: Uniquely, Twelve Data provides a web UI where you can quickly generate charts and indicators from their data without writing code. It’s useful for non-developers or for quickly checking data visually.
Easy integration with Python, Excel, etc.: They have a straightforward REST API and also provide connectors (like an Excel/Google Sheets add-in and integration guides for Python, Node, and other languages). This makes it appealing to analysts who might want data in Excel as well as developers.
Technical indicators and studies: Twelve Data’s API can return technical indicators similar to Alpha Vantage. They also support complex queries like retrieving multiple symbols in one call, and even some fundamentals for certain stocks.
Highlights: Twelve Data markets itself as very user-friendly. For someone who is building a simple web app or learning to analyze stock data, Twelve Data’s combination of an intuitive API plus a pretty interface for quick tests is attractive. Another highlight is their freemium model with credits — this can be flexible if your usage is light. They also have educational content and a responsive support team. Many users praise the quality of documentation, which includes example requests and responses for every endpoint (so you can see what data you’ll get).
Pricing:
Free (Basic): 8 API requests per minute (up to ~800/day). This free plan gives real-time data for US stocks, forex, and crypto, which is quite useful for small projects. However, certain features (like WebSocket streaming or extended history) are limited on the free tier.
Paid plans:Grow plan from $29/month, Pro plan from $79/month, and higher tiers up to Enterprise. The pricing is based on a credit system: each API call “costs” a certain number of credits (e.g., 1 credit per quote, more credits for heavier endpoints). Higher plans give you more credits per minute and access to more markets. For example, the Pro plan (~$79) significantly raises rate limits (e.g. 50+ calls/min) and adds a lot more historical data and international market coverage. Enterprise ($1,999/mo) is for organizations needing very high limits and all data. The credit system is a bit complex to grasp at first, but effectively the more you pay, the more data and speed you get.
Cons:
Free plan limitations: The Basic plan is fine for testing, but serious usage will bump into its limits (both in call volume and data depth). Also, some endpoints require higher plans, and real-time WebSocket access is mostly for paid users. In short, Basic is more of a trial.
Credit-based pricing confusion: As noted, the concept of “API credits” and each endpoint having a weight can be confusing. For instance, an API call that fetches 100 data points might consume more credits than one that fetches 1 data point. New users may find it hard to estimate how many credits they need, compared to providers with simple call counts.
Fewer specialty datasets: Twelve Data covers the essentials well, but it doesn’t have things like in-depth fundamentals or alternative data. Its focus is on price data and basic indicators. Large-scale applications needing extensive financial statement data or niche data (like options, sentiment) would need an additional source.
Use case: Build a lightweight crypto price dashboard that updates every 5 minutes. Using Twelve Data’s API, you could fetch the latest price for a set of cryptocurrencies (e.g., BTC, ETH) at a 5-min interval and display them in a Streamlit or Dash app. Twelve Data’s ease of integration means you could have this running quickly, and if you use their built-in visualization components, you might not need to code the charting yourself.
Quick Selection Guide by User Profile:
If you’re an investor/analyst needing both fundamentals and price history:EODHD or FMP are excellent due to their rich fundamental datasets and broad market coverage
If you’re a trader focused on real-time data and execution:Polygon.io (for raw real-time feeds) or Alpaca (for trading with built-in data) are tailored to your needs. Polygon for pure data speed; Alpaca if you also want to place trades via API.
If you’re a developer or student learning the ropes,Alpha Vantage or Yahoo Finance via yfinance are very beginner-friendly. They have free access, simple endpoints, and plenty of examples to get you started in Python or JavaScript.
If you need global market coverage in one service:EODHD, Finnhub, or FMP will give you international stocks, forex, crypto, and more under a single API — useful for broad applications or multi-asset platforms.
If you prefer no-code or Excel integration:EODHD, FMP, and Twelve Data offer Excel/Google Sheets add-ons and straightforward no-code solutions, so you can fetch market data into spreadsheets or BI tools without programming.
Bonus: Financial Modeling Prep (FMP)
Best for: Advanced fundamental analysis and automated financial statement retrieval Website:financialmodelingprep.com
Key features:
Extensive financial statements coverage: FMP provides APIs for detailed financial statements (balance sheets, income statements, cash flows) for many public companies, including quarterly and annual data. They also offer calculated financial ratios and metrics, making it a favorite for equity analysts.
Real-time and historical stock prices: You can get real-time quotes as well as historical daily and intraday price data for stocks. FMP covers stocks worldwide, plus ETFs, mutual funds, and cryptocurrencies.
Specialty endpoints: There are unique APIs for things like DCF (Discounted Cash Flow) valuation, historical dividend and stock split data, insider trading information, and even ESG scores. This breadth is great for those building sophisticated models.
News and alternative data: FMP includes a financial news feed, earnings calendar, and economic indicators. While not as deep on news sentiment as Finnhub, it’s a well-rounded data source for market context.
Highlights: FMP has gained a lot of traction as a developer-friendly alternative to more expensive data platforms. Its documentation is clear, with examples in multiple languages. One big plus is the Excel/Google Sheets integration — even non-coders can use FMP by installing their Google Sheets add-on and pulling data directly into a spreadsheet. The combination of fundamentals + market data in one API, along with affordable pricing, makes FMP very appealing for startups and students. In my personal experience, FMP’s fundamental data depth is excellent for building valuation models or screening stocks based on financial criteria.
Pricing:
Free tier: FMP offers a free plan with a limited number of daily requests (e.g., 250 per day). The free tier gives access to basic endpoints — you can get some real-time quotes, key financial metrics, and historical data for a few symbols to test it out.
Pro plans: Paid plans start at around $19.99/month, which is quite affordable. These plans increase the daily request limit substantially (into the thousands per day) and unlock more endpoints. Higher tiers (on the order of $50-$100/month) offer even larger call volumes and priority support. For most individual developers or small businesses, FMP’s paid plans provide a lot of data bang for the buck. Enterprise plans are also available if needed, but many will find the mid-tier plans sufficient.
Cons:
Free plan restrictions: The free plan is mainly for trial or very light use — serious users will quickly find it inadequate (in terms of both request limits and available data). If you have an app in production, you’ll almost certainly need a paid plan, though fortunately the entry cost is low.
Data normalization quirks: Because FMP aggregates data from various sources, you might notice slight inconsistencies or formatting differences across certain endpoints. For example, some lesser-used financial metrics might have different naming conventions or units. These are minor issues and FMP continually improves them, but it’s something to be aware of if you encounter an odd-looking field.
Not focused on real-time streaming: FMP provides real-time quotes on paid plans, but it’s not a streaming service. If you need tick-by-tick streaming or ultra-low-latency data, a specialized API like Polygon or a broker feed would be necessary. FMP is more geared towards snapshots of data (which is fine for most analysis and moderate-frequency querying).
Why we include FMP: Lately, many developers (myself included) have been testing FMP for projects because of its rich fundamental dataset and solid documentation. It’s a strong alternative if you want advanced company metrics or need to automate financial statement analysis directly into your Python scripts or dashboards. For example, you could pull 10 years of financials for dozens of companies in seconds via FMP — something that’s invaluable for quantitative investing or academic research. FMP combines flexibility, affordability, and depth of data that few APIs offer in one package.
Frequently Asked Questions (FAQs)
❓ What’s the most complete API that combines fundamentals, historical prices, and news? ✅ If you need everything in one service, EODHD, FMP, and Alpha Vantage stand out. They each offer a balance of broad market coverage, reliable data, and depth. EODHD and FMP in particular have extensive fundamental and historical datasets (with news feeds) alongside real-time data, making them all-in-one solutions.
❓ Is there a free API with real-time stock data? ✅ Polygon.io provides limited real-time access on their free plan — you can get real-time quotes for U.S. stocks (with some delays or limits). Additionally, Finnhub’s free tier offers real-time data for U.S. markets (60 calls/min) which is quite generous. If you’re open to paid plans, FMP offers real-time quotes in its affordable paid tiers as well. And for an unofficial free route, Yahoo Finance data via the yfinance library can give near-real-time quotes (with no API key needed), though it’s not guaranteed or supported.
❓ I’m new to programming and want to learn using stock data. Which API is best? ✅ Alpha Vantage or Yahoo Finance (yfinance) are excellent for beginners. Alpha Vantage’s free tier and straightforward endpoints (plus a ton of community examples) make it easy to get started. The yfinance Python library lets you pull data from Yahoo Finance without dealing with complex API details – perfect for quick prototypes or learning pandas data analysis. Both integrate seamlessly with Python for learning purposes.
❓ Which API has the best global market coverage? ✅ EODHD, Finnhub, and FMP are known for their international coverage. EODHD covers dozens of exchanges worldwide (US, Europe, Asia, etc.) for both stock prices and fundamentals. Finnhub includes international stock data and forex/crypto. FMP also has a global equity coverage and even macro data for various countries. If you need data beyond just U.S. markets, these providers will serve you well.
❓ Can I use these APIs in Excel or Google Sheets without coding? ✅ Yes, several of them offer no-code solutions. EODHD, FMP, and Twelve Data all provide add-ins or integrations for Excel/Sheets. For example, EODHD and FMP have official Google Sheets functions after you install their add-on, letting you fetch stock prices or financial metrics into a spreadsheet cell. Twelve Data has an Excel plugin as well. This is ideal for analysts who prefer working in spreadsheets but still want live data updates.
Final Thoughts and Action Plan
You don’t need to be a big firm to access professional-grade financial data. Today’s landscape of financial APIs makes it possible for anyone — from a solo developer to a small startup — to get quality real-time stock data and more.
Follow these steps to get started:
Choose the API that best fits your profile and project needs. (Review the comparisons above to decide which one aligns with your requirements and budget.)
Sign up and get your free API key. Every platform listed offers a free tier or trial — take advantage of that to test the waters.
Connect the data to your tool of choice: whether it’s a Python script, an Excel sheet, or a custom dashboard, use the API documentation and examples to integrate live data into your workflow. Start with small experiments — e.g., pull one stock’s data and plot it.
By iterating on those steps, you’ll quickly gain familiarity with these APIs and unlock new possibilities, from automated trading bots to insightful financial dashboards.
Looking for a single API that does it all (fundamentals, historical prices, and news)? My recommendation is EODHD for its all-around strength in data coverage and value. It’s a one-stop shop for investors and developers alike.
Pro tip: You can try EODHD with a 10% discountusing the link above, to kickstart your project with some savings. Happy data hunting, and may your analyses be ever insightful!
Sources: The information above is gathered from official documentation and user reviews of each platform, including their pricing pages and features as of 2025. For example, Alpha Vantage’s free call limits, Intrinio’s pricing tiers, and Twelve Data’s rate limits are based on published data. Always double-check the latest details on each provider’s website, as features and pricing can evolve over time.
Strengthen your API security strategy by using trusted tools that help developers protect public and private APIs, improve system reliability, and scale applications with confidence. Discover how modern security solutions enhance visibility, streamline development workflows, and support long-term performance and growth.
APIs are the foundation of modern software development. They connect applications, enable integrations, support mobile experiences, and drive cloud-native architectures. As organizations rely more heavily on APIs, protecting them becomes an opportunity for developers to build resilient, scalable, and trusted systems. Today’s API security tools are powerful, easy to integrate, and designed to enhance developer productivity. Rather than slowing development, modern security platforms streamline workflows, improve visibility, and promote best practices. This article explores the best API security tools and how they help developers protect both public and private APIs effectively.
Why API Security Matters for Developers
APIs often handle sensitive data, authentication flows, and critical business logic. A secure API environment ensures stable performance, protects user trust, and supports long-term scalability.
For developers, strong API security delivers several positive benefits:
Faster and safer releases
Reduced operational risk
Clear visibility into system behaviour
Improved application reliability
Better compliance alignment
When security is built into the development process, teams gain confidence and momentum in delivering high-quality software.
API Gateways: Centralized Protection and Traffic Control
API gateways provide a centralized layer for managing incoming requests. They handle authentication, authorization, rate limiting, routing, and logging in a consistent way. Popular platforms such as Kong, Apigee, AWS API Gateway, and Azure API Management help developers enforce security policies across all services. Gateways support modern authentication standards like OAuth, JWT tokens, and encrypted communication. This centralized control simplifies maintenance, improves consistency, and enhances overall system reliability while keeping developer workflows efficient.
Web Application and API Protection Platforms
Web Application and API Protection platforms add intelligent traffic filtering and automated threat detection. These tools analyze behavior patterns and block abnormal requests before they impact applications. Solutions such as Cloud flare, Akamai, and Fastly provide global protection, bot management, and traffic optimization. Developers benefit from consistent performance, high availability, and automatic scaling during traffic spikes. These platforms contribute to stable production environments and improved user experience.
API Security Testing and Automation Tools
Proactive testing helps teams identify potential issues early in the development lifecycle. API security testing tools scan endpoints for configuration gaps, authentication issues, and data exposure risks. Tools like Postman, OWASP ZAP, and automated scanners integrate well into CI/CD pipelines, enabling continuous validation without disrupting delivery speed. Automated testing improves code quality, strengthens development discipline, and reduces long-term maintenance costs.
Runtime Monitoring and Observability Tools
Monitoring tools provide real-time insights into API health, performance, and usage trends. Platforms such as Data dog, New Relic, and Dynatrace offer dashboards, alerts, and tracing capabilities. These tools help developers identify bottlenecks, optimize response times, and maintain consistent uptime. Observability encourages proactive optimization and continuous improvement across engineering teams. Clear visibility into production systems supports confident scaling and long-term reliability.
Identity and Access Management Solutions
Identity and Access Management platforms ensure that only authorized users and services can access APIs. They manage authentication workflows, access policies, and token lifecycle management. Solutions like Auth0, Okta, AWS Cognito, and Azure Active Directory simplify secure authentication for both internal and public APIs. Developers can implement strong access controls quickly while maintaining excellent user experience. This approach strengthens security and reduces operational complexity.
Secrets Management and Encryption Tools
Secrets management tools protect sensitive information such as API keys, certificates, and credentials. Platforms like HashiCorp Vault, AWS Secrets Manager, and Azure Key Vault store secrets securely and automate rotation. Confidentiality and compliance are guaranteed via encryption, which safeguards data while it’s in transit and at rest. These tools support safe deployments and reinforce trust across environments.
Benefits of a Strong API Security Stack
A well-designed API security stack delivers meaningful advantages:
Consistent protection across services
Faster onboarding for new developers
Improved debugging and troubleshooting
Strong system resilience
Long-term scalability and trust
Instead of being a limitation, security becomes the basis for development.
Choosing the Right Tools for Your Architecture
The best API security tools align with your cloud environment, application architecture, and team workflows. Developers should prioritize solutions that integrate easily with CI/CD pipelines, provide clear documentation, and support automation. A layered approach combining gateways, protection platforms, testing tools, monitoring, identity management, and secrets management creates balanced protection without unnecessary complexity.
Final Thoughts
Protecting public and private APIs has become more accessible and developer-friendly than ever. Modern API security tools empower teams to build reliable, scalable, and secure systems with confidence. By adopting the right combination of security platforms and best practices, developers can accelerate delivery, maintain system stability, and build trusted digital experiences that grow successfully over time.
In today’s Chromed-up world it can be hard to remember an era where browsers could be extended with not just extensions, but also with plugins. Although for those of us who use traditional Netscape-based browsers like Pale Moon the use of plugins has never gone away, for the rest of the WWW’s users their choice has been limited to increasingly more restrictive browser extensions, with Google’s Manifest V3 taking the cake.
Although most browsers stopped supporting plugins due to “security concerns”, this did nothing to address the need for executing code in the browser faster than the sedate snail’s pace possible with JavaScript, or the convenience of not having to port native code to JavaScript in the first place. This led to various approaches that ultimately have culminated in the WebAssembly (WASM) standard, which comes with its own set of issues and security criticisms.
Other than Netscape’s Plugin API (NPAPI) being great for making even 1990s browsers ready for 2026, there are also very practical reasons why WASM and JavaScript-based approaches simply cannot do certain basic things.
It’s A JavaScript World
One of the Achilles heels of the plugin-less WWW is that while TCP connections are easy and straightforward, things go south once you wish to do anything with UDP datagrams. Although there are ugly ways of abusing WebRTC for UDP traffic with WASM, ultimately you are stuck inside a JavaScript bubble inside a browser, which really doesn’t want you to employ any advanced network functionality.
Technically there is the WASI Sockets proposal that may become part of WASM before long, but this proposal comes with a plethora of asterisks and limitations attached to it, and even if it does work for your purposes, you are limited to whatever browsers happen to implement it. Meanwhile with NPAPI you are only limited by what the operating system can provide.
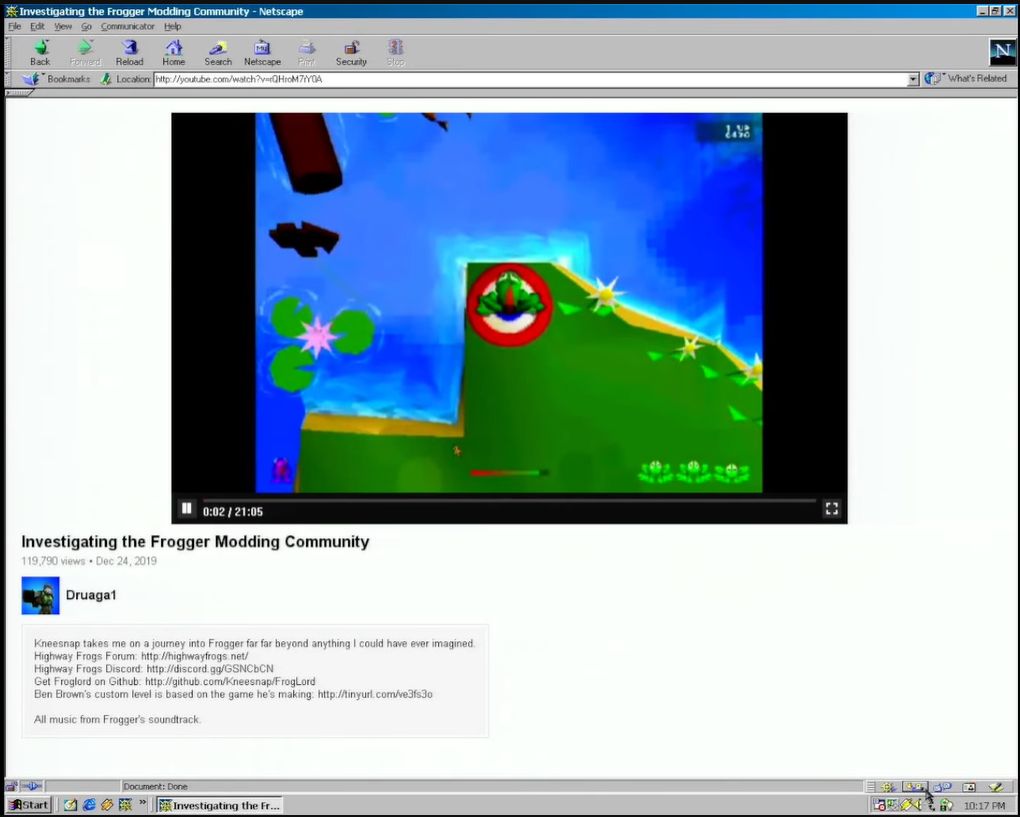
NPAPI plugin rendering YouTube videos in a Netscape 4.5 browser on Windows 98. (Credit: Throaty Mumbo, YouTube)
With NPAPI plugins you can even use the traditional method of directly rendering to a part of the screen, removing any need for difficult setup and configuration beyond an HTML page with an <embed> tag that set up said rendering surface. This is what Macromedia Flash and the VLC media player plugin use, for example.
These limitations of a plugin-less browser are a major concern when you’d like to have, say, a client running in the browser that wishes to use UDP for something like service discovery or communication with UDP-based services. This was a WASM deal breaker with a project of mine, as UDP-based service discovery is essential unless I wish to manually mash IP addresses into an input field. Even the WASI Sockets don’t help much, as retrieving local adapter information and the like are crucial, as is UDP broadcast.
Meanwhile the NPAPI version is just the existing client dynamic library, with a few NPAPI-specific export functions tagged onto it. This really rubs in just how straightforward browser plugins are.
Implementing It
With one’s mind set on implementing an NPAPI plugin, and ignoring that Pale Moon is only one of a small handful of modern browsers to support it, the next question is where to start. Sadly, Mozilla decided to completely obliterate every single last trace of NPAPI-related documentation from its servers. This leaves just the web.archive.org backup as the last authoritative source.
For me, this provided also a bit of an obstacle, as I had originally planned to first do a quick NPAPI plugin adaptation of the libnymphcast client library project, along with a basic front-end using the scriptable interface and possibly also direct rendering of a Qt-based GUI. Instead, I would spend a lot of time piecing back together the scraps of documentation and sample projects that existed when I implemented my last NPAPI plugin back in about 2015 or 2016, back when Mozilla’s MDN hadn’t yet carried out the purge.
One of the better NPAPI tutorials, over on the ColonelPanic blog, had also been wiped, leaving me again with no other discourse than to dive into the archives. Fortunately I was still able to get my hands on the Mozilla NPAPI SDK, containing the npruntime headers. I also found a pretty good and simple sample plugin called npsimple (forked from the original) that provides a good starting point for a scriptable NPAPI plugin.
Starting With The Basics
At its core an NPAPI plugin is little more than a shared library that happens to export a handful of required and optional functions. The required ones pertain to setting up and tearing down the plugin, as well as querying its functionality. These functions all have specific prefixes, with the NP_ prefixed functions being not part of any API, but simply used for the basic initialization and clean-up. These are:
NP_GetEntryPoints (not on Linux)
NP_Initialize
NP_Shutdown
During the initialization phase the browser simply loads the plugin and reads its MIME type(s) along with the resources exported by it. After destroying the last instance, the shutdown function is called to give the plugin a chance to clean up all resources before it’s unloaded. These functions are directly exported, unlike the NPP_ functions that are assigned to function pointers.
The NPP_ prefixed functions are part of the plugin (NP Plugin), with the following being required:
NPP_New
NPP_Destroy
NPP_GetValue
Each instance of the plugin (e.g. per page) has its own NPP_New called, with an accompanying NPP_Destroy when the page is closed again. These are set in an NPPluginFuncs struct instance which is provided to the browser via the appropriate NP_ function, depending on the OS.
Finally, there are NPN_ prefixed functions, which are part of the browser and can be called from the plugin on the browser object that is passed upon initialization. These we will need for example when we set up a scriptable interface which can be called from e.g. JavaScript in the browser.
When the browser calls NPP_GetValue with as variable an instance of NPPVpluginScriptableNPObject, we can use these NPP_ functions to create a new NPP instance and retain it by calling the appropriate functions on the browser interface instance which we got upon initialization.
Registration of the MIME type unfortunately differs per OS , along with the typical differences of how the final shared library is produced on Windows, Linux/BSD and MacOS. These differences continue with where the plugin is registered, with on Windows the registry being preferred (e.g. HKLM/Software/MozillaPlugins/plugin-identifier), while on Linux and MacOS the plugin is copied to specific folders.
Software Archaeology
It’s somewhat tragic that a straightforward technology like NPAPI-based browser plugins was maligned and mostly erased, as it clearly holds many advantages over APIs that were later integrated into browsers, thus adding to their size and complexity. With for example the VLC browser plugin, part of the VLC installation until version 4, you would be able to play back any video and audio format supported by VLC in any browser that supports NPAPI, meaning since about Netscape 2.x.
Although I do not really see mainstream browsers like the Chromium-based ones returning to plugins with their push towards a locked-down ecosystem, I do think that it is important that everything pertaining to NPAPI is preserved. Currently it is disheartening to see how much of the documentation and source code has already been erased in a mere decade. Without snapshots from archive.org and kin much it likely would already be gone forever.
In the next article I will hopefully show off a working NPAPI plugin or two in Pale Moon, both to demonstrate how cool the technology is, as well as how overblown the security concerns are. After all, how much desktop software in use today doesn’t use shared libraries in some fashion?
New API capabilities and AI-powered Threat Encyclopedia eliminate manual audit preparation, providing real-time compliance evidence and instant threat intelligence.
In this write-up, we will explore the “Voleur” machine from Hack The Box, categorised as a medium difficulty challenge. This walkthrough will cover the reconnaissance, exploitation, and privilege escalation steps required to capture the flag.
Objective:
The goal of this walkthrough is to complete the “Voleur” machine from Hack The Box by achieving the following objectives:
User Flag:
I found a password-protected Excel file on an SMB share, cracked it to recover service-account credentials, used those credentials to obtain Kerberos access and log into the victim account, and then opened the user’s Desktop to read user.txt.
Root Flag:
I used recovered service privileges to restore a deleted administrator account, extracted that user’s encrypted credential material, decrypted it to obtain higher-privilege credentials, and used those credentials to access the domain controller and read root.txt.
Enumerating the Machine
Reconnaissance:
Nmap Scan:
Begin with a network scan to identify open ports and running services on the target machine.
53/tcp: DNS (Simple DNS Plus) – domain name resolution
88/tcp: Kerberos – Active Directory authentication service
135/tcp: MSRPC – Windows RPC endpoint mapper
139/tcp: NetBIOS-SSN – legacy file and printer sharing
389/tcp: LDAP – Active Directory directory service
445/tcp: SMB – file sharing and remote administration
464/tcp: kpasswd – Kerberos password change service
593/tcp: RPC over HTTP – remote procedure calls over HTTP
636/tcp: tcpwrapped – likely LDAPS (secure LDAP)
2222/tcp: SSH – OpenSSH on Ubuntu (remote management)
3268/tcp: Global Catalog (LDAP GC) – forest-wide directory service
3269/tcp: tcpwrapped – likely Global Catalog over LDAPS
Machine Enumeration:
impacket-getTGT voleur.htb/ryan.naylor:HollowOct31Nyt (Impacket v0.12.0) — TGT saved to ryan.naylor.ccache; note: significant clock skew with the DC may disrupt Kerberos operations.
impacket-getTGT used ryan.naylor’s credentials to request a Kerberos TGT from the domain KDC and saved it to ryan.naylor.ccache; that ticket lets anyone request service tickets and access AD services (SMB, LDAP, HTTP) as ryan.naylor until it expires or is revoked, so inspect it with KRB5CCNAME=./ryan.naylor.ccache && klist and, if the request was unauthorized, reset the account password and check KDC logs for suspicious AS-REQs.
Setting KRB5CCNAME=ryan.naylor.ccache tells the Kerberos libraries to use that credential cache file for authentication so Kerberos-aware tools (klist, smbclient -k, ldapsearch -Y GSSAPI, Impacket tools with -k) will present the saved TGT; after exporting, run klist to view the ticket timestamps and then use the desired Kerberos-capable client (or unset the variable when done).
nxc ldap connected to the domain controller’s LDAP (DC.voleur.htb:389) using Kerberos (-k), discovered AD info (x64 DC, domain voleur.htb, signing enabled, SMBv1 disabled) and successfully authenticated as voleur.htb\ryan.naylor with the supplied credentials, confirming those credentials are valid for LDAP access.
nxc smb connected to the domain controller on TCP 445 using Kerberos (-k), enumerated the host as dc.voleur.htb (x64) with SMB signing enabled and SMBv1 disabled, and successfully authenticated as voleur.htb\ryan.naylor with the supplied credentials, confirming SMB access to the DC which can be used to list or mount shares, upload/download files, or perform further AD discovery while the account’s privileges allow.
Bloodhound enumeration
Runs bloodhound-python to authenticate to the voleur.htb domain as ryan.naylor (using the provided password and Kerberos via -k), query the specified DNS server (10.10.11.76) and collect all AD data (-c All) across the domain (-d voleur.htb), then package the resulting JSON data into a zip file (–zip) ready for import into BloodHound for graph-based AD attack path analysis; this gathers users, groups, computers, sessions, ACLs, trusts, and other relationships that are sensitive — only run with authorization.
ryan.naylor is a member of Domain Users and First-line Technicians — Domain Users is the default domain account group with standard user privileges, while First-line Technicians is a delegated helpdesk/tech group that typically has elevated rights like resetting passwords, unlocking accounts, and limited workstation or AD object management; combined, these memberships let the account perform routine IT tasks and makes it a useful foothold for lateral movement or privilege escalation if abused, so treat it as sensitive and monitor or restrict as needed.
SMB enumeration
Connected to dc.voleur.htb over SMB using Kerberos authentication; authenticated as voleur.htb\ryan.naylor and enumerated shares: ADMIN$, C$, Finance, HR, IPC$ (READ), IT (READ), NETLOGON (READ), and SYSVOL (READ), with SMB signing enabled and NTLM disabled.
If impacket-smbclient -k dc.voleur.htb failed, target a specific share and provide credentials or use your Kerberos cache. For example, connect with Kerberos and no password to a known share: impacket-smbclient -k -no-pass //dc.voleur.htb/Finance after exporting KRB5CCNAME=./ryan.naylor.ccache, or authenticate directly with username and password: impacket-smbclient //dc.voleur.htb/Finance -u ryan.naylor -p HollowOct31Nyt; specifying the share usually succeeds when the root endpoint refuses connections.
Shares need to be selected from the enumerated list before accessing them.
The SMB session showed available shares (including hidden admin shares ADMIN$ and C$, domain shares NETLOGON and SYSVOL, and user shares like Finance, HR, IT); the command use IT switched into the IT share and ls will list that share’s files and directories — output depends on ryan.naylor’s permissions and may be empty or restricted if the account lacks write/list rights.
Directory listing shows a folder named First-Line Support — change into it with cd First-Line Support and run ls to view its contents.
Inside the First-Line Support folder, there is a single file named Access_Review.xlsx with a size of 16,896 bytes, along with the standard . and .. directories.
Retrieve or save the Access_Review.xlsx file from the share to the local system.
Saved the file locally on your machine.
The file Access_Review.xlsx is encrypted using CDFv2.
The file is password-protected and cannot be opened without the correct password.
Extracted the password hash from Access_Review.xlsx using office2john and saved it to a file named hash.
The output is the extracted Office 2013 password hash from Access_Review.xlsx in hashcat/John format, showing encryption type, iteration count, salt, and encrypted data, which can be used for offline password cracking attempts.
Hashcat could not identify any supported hash mode that matches the format of the provided hash.
CrackStation failed to find a viable cracking path.
After researching the hash, it’s confirmed as Office 2013 / CDFv2 (PBKDF2‑HMAC‑SHA1 with 100,000 iterations) and maps to hashcat mode 9600; use hashcat -m 9600 with targeted wordlists, masks, or rules (GPU recommended) but expect slow hashing due to the high iteration count — if hashcat rejects the format, update to the latest hashcat build or try John’s office2john/output path; only attempt cracking with proper authorization.
I found this guide on Medium that explains how to extract and crack the Office 2013 hash we retrieved
After performing a password enumeration, the credential football1 was identified, potentially belonging to the svc account. It is noteworthy that the Todd user had been deleted, yet its password remnants were still recoverable.
The Access_Review.xlsx file contained plaintext credentials for two service accounts: svc_ldap — M1XyC9pW7qT5Vn and svc_iis — N5pXyV1WqM7CZ8. These appear to be service-account passwords that could grant LDAP and IIS access; treat them as sensitive, rotate/reset the accounts immediately, and audit where and how the credentials were stored and used.
svc_ldap has GenericWrite over the Lacey user objects and WriteSPN on svc_winrm; next step is to request a service ticket for svc_winrm.
impacket-getTGT used svc_ldap’s credentials to perform a Kerberos AS-REQ to the domain KDC, received a valid TGT, and saved it to svc_ldap.ccache; that TGT can be used to request service tickets (TGS) and access domain services as svc_ldap until it expires or is revoked, so treat the ccache as a live credential and rotate/reset the account or investigate KDC logs if the activity is unauthorized.
Set the Kerberos credential cache to svc_ldap.ccache so that Kerberos-aware tools will use svc_ldap’s TGT for authentication.
Attempt to bypass the disabled account failed: no krbtgt entries were found, indicating an issue with the LDAP account used.
Run bloodyAD against voleur.htb as svc_ldap (Kerberos) targeting dc.voleur.htb to set the svc_winrm object’s servicePrincipalName to HTTP/fake.voleur.htb.
The hashes were successfully retrieved as shown previously.
Cracking failed when hashcat hit a segmentation fault.
Using John the Ripper, the Office hash was cracked and the password AFireInsidedeOzarctica980219afi was recovered — treat it as a live credential and use it only with authorization (e.g., to open the file or authenticate as the associated account).
Authenticate with kinit using the cracked password, then run evil-winrm to access the target.
To retrieve the user flag, run type user.txt in the compromised session.
Another way to retrieve user flag
Request a TGS for the svc_winrm service principal.
Use evil-winrm the same way as before to connect and proceed.
Alternatively, display the user flag with type C:\Users\<username>\Desktop\user.txt.
Escalate to Root Privileges Access
Privilege Escalation:
Enumerated C:\ and found an IT folder that warrants closer inspection.
The IT folder contains three directories — each checked next for sensitive files.
No relevant files or artifacts discovered so far.
The directories cannot be opened with the current permissions.
Runs bloodyAD against dc.voleur.htb as svc_ldap (authenticating with the given password and Kerberos) to enumerate all Active Directory objects that svc_ldap can write to; the get writable command lists objects with writable ACLs (e.g., GenericWrite, WriteSPN) and –include-del also returns deleted-object entries, revealing targets you can modify or abuse for privilege escalation (resetting attributes, writing SPNs, planting creds, etc.).
From the list of writable AD objects, locate the object corresponding to Todd Wolfe.
Located the object; proceed to restore it by assigning sAMAccountName todd.wolfe.
Runs bloodyAD against dc.voleur.htb as svc_ldap (Kerberos) to restore the deleted AD object todd.wolfe on the domain — this attempts to undelete the tombstoned account and reinstate its sAMAccountName; success depends on svc_ldap having sufficient rights and the object still being restorable.
The restoration was successful, so the next step is to verify whether the original password still works.
After evaluating options, launch runascs.exe to move forward with the attack path.
Execute RunasCS.exe to run powershell as svc_ldap using password M1XyC9pW7qT5Vn and connect back to 10.10.14.189:9007.
Established a reverse shell session from the callback.
Successfully escalated to and accessed the system as todd.wolfe.
Ultimately, all previously restricted directories are now visible.
You navigated into the IT share (Second-Line Support → Archived Users → todd.wolfe) and downloaded two DPAPI-related artefacts: the Protect blob at AppData\Roaming\Microsoft\Protect<SID>\08949382-134f-4c63-b93c-ce52efc0aa88 and the credential file at AppData\Roaming\Microsoft\Credentials\772275FAD58525253490A9B0039791D3; these are DPAPI master-key/credential blobs that can be used to recover saved secrets for todd.wolfe, when combined with the appropriate user or system keys, should be them as highly sensitive.
DPAPI Recovery and Abuse: How Encrypted Blobs Lead to Root
Using impacket-dpapi with todd.wolfe’s masterkey file and password (NightT1meP1dg3on14), the DPAPI master key was successfully decrypted; the output shows the master key GUID, lengths, and flags, with the decrypted key displayed in hex, which can now be used to unlock the user’s protected credentials and recover saved secrets from Windows.
The credential blob was decrypted successfully: it’s an enterprise-persisted domain password entry last written on 2025-01-29 12:55:19 for target Jezzas_Account with username jeremy.combs and password qT3V9pLXyN7W4m; the flags indicate it requires confirmation and supports wildcard matching. This is a live domain credential that can be used to authenticate to AD services or for lateral movement, so handle it as sensitive and test access only with authorization.
impacket-getTGT used jeremy.combs’s credentials to request a Kerberos TGT from the domain KDC and saved it to jeremy.combs.ccache; that TGT can be used to request service tickets (TGS) and authenticate to AD services (SMB, LDAP, WinRM, etc.) as jeremy.combs until it expires or is revoked, so inspect it with KRB5CCNAME=./jeremy.combs.ccache && klist and treat the cache as a live credential — rotate/reset the account or review KDC logs if the activity is unauthorized.
Set the Kerberos credential cache to jeremy.combs.ccache so Kerberos-aware tools will use jeremy.combs’s TGT for authentication.
Run bloodhound-python as jeremy.combs (password qT3V9pLXyN7W4m) using Kerberos and DNS server 10.10.11.76 to collect all AD data for voleur.htb and save the output as a zip for BloodHound import.
Account jeremy.combs is in the Third-Line Technicians group.
Connected to dc.voleur.htb with impacket-smbclient (Kerberos), switched into the IT share and listed contents — the directory Third-Line Support is present.
Downloaded two files from the share: the private SSH key id_rsa and the text file Note.txt.txt — treat id_rsa as a sensitive private key (check for a passphrase) and review Note.txt.txt for useful creds or instructions.
The note indicates that the administrator was dissatisfied with Windows Backup and has started configuring Windows Subsystem for Linux (WSL) to experiment with Linux-based backup tools. They are asking Jeremy to review the setup and implement or configure any viable backup solutions using the Linux environment. Essentially, it’s guidance to transition or supplement backup tasks from native Windows tools to Linux-based tools via WSL.
The key belongs to the svc_backup user, and based on the earlier port scan, port 2222 is open, which can be used to attempt a connection.
The only difference in this case is the presence of the backups directory.
There are two directories present: Active Directory and Registry.
Stream the raw contents of the ntds.dit file to a remote host by writing it out over a TCP connection.
The ntds.dit file was transferred to the remote host.
Stream the raw contents of the SYSTEM file to a remote host by writing it out over a TCP connection.
The SYSTEM file was transferred to the remote host.
That command runs impacket-secretsdump in offline mode against the dumped AD database and system hive — reading ntds.dit and SYSTEM to extract domain credentials and secrets (user NTLM hashes, cached credentials, machine account hashes, LSA secrets, etc.) for further offline analysis; treat the output as highly sensitive and use only with proper authorization.
Acquire an Administrator service ticket for WinRM access.
Authenticate with kinit using the cracked password, then run evil-winrm to access the target.
To retrieve the root flag, run type root.txt in the compromised session.
In this writeup, we will explore the “DarkCorp” machine from Hack The Box, categorized as an Insane difficulty challenge. This walkthrough will cover the reconnaissance, exploitation, and privilege escalation steps required to capture the flag.
Objective:
The goal of this walkthrough is to complete the “DarkCorp” machine from Hack The Box by achieving the following objectives:
User Flag:
Gained initial foothold via the webmail/contact vector, registered an account, abused the contact form, and executed a payload to spawn a reverse shell. From the shell, read user.txt to capture the user flag.
Root Flag:
Performed post-exploitation and credential harvesting (SQLi → hashes → cracked password thePlague61780, DPAPI master key recovery and Pack_beneath_Solid9! recovered), used recovered credentials and privilege escalation techniques to obtain root, then read root.txt to capture the root flag.
Enumerating the DarkCorp Machine
Reconnaissance:
Nmap Scan:
Begin with a network scan to identify open ports and running services on the target machine.
nmap-sC-sV-oNnmap_initial.txt10.10.11.54
Nmap Output:
┌─[dark@parrot]─[~/Documents/htb/darkcorp]└──╼$nmap-sC-sV-oAinitial10.10.11.54# Nmap 7.94SVN scan initiated Sun Aug 17 03:07:38 2025 as: nmap -sC -sV -oA initial 10.10.11.54Nmapscanreportfor10.10.11.54Hostisup (0.18s latency).Notshown:998filteredtcpports (no-response)PORTSTATESERVICEVERSION22/tcpopensshOpenSSH9.2p1Debian2+deb12u3 (protocol 2.0)| ssh-hostkey:| 25633:41:ed:0a:a5:1a:86:d0:cc:2a:a6:2b:8d:8d:b2:ad (ECDSA)|_25604:ad:7e:ba:11:0e:e0:fb:d0:80:d3:24:c2:3e:2c:c5 (ED25519)80/tcpopenhttpnginx1.22.1|_http-title:Sitedoesn't have a title (text/html).|_http-server-header: nginx/1.22.1Service Info: OS: Linux; CPE: cpe:/o:linux:linux_kernelService detection performed. Please report any incorrect results at https://nmap.org/submit/ .# Nmap done at Sun Aug 17 03:08:04 2025 -- 1 IP address (1 host up) scanned in 25.73 seconds┌─[dark@parrot]─[~/Documents/htb/darkcorp]└──╼ $
Analysis:
Port 22 (SSH): OpenSSH 9.2p1 on Debian — secure remote access; check for password authentication or weak credentials.
Port 80 (HTTP): nginx 1.22.1 — web server serving GET/HEAD only; perform directory and file enumeration for further insights.
Web Enumeration:
Nothing noteworthy was found on the website itself.
A subdomain was discovered that leads to the DripMail Webmail interface.
Register a new account and enter the email
As a next step, proceed to register a new account.
Enter the required information to create the new account.
We successfully created the account, confirming that the DripMail Webmail portal’s registration process works correctly. This indicates that user registration is open; therefore, we can interact with the mail system. Consequently, this may enable further exploration, including login, email sending, and service enumeration.
Check your email inbox
A new email appeared in the inbox from no-reply@drip.htb, indicating that the system had sent an automated message; moreover, it may contain a verification notice, onboarding information, or credential-related details, all of which are worth reviewing for further clues.
However, it turned out to be just a welcome email from no-reply@drip.htb, providing no useful information.
Contact Form Exploitation
The site includes a contact form that attackers could potentially exploit.
We entered a non-deterministic key value into the input.
We sent the message successfully, confirming that the contact form works and accepts submissions.
CVE‑2024‑42009 — Web Enumeration with Burp Suite
Burp shows the contact form submission (POST) carrying the random key and payload, followed by a successful response.
We modified the contact-form recipient field and replayed the POST via Burp Repeater; the server returned 200 OK, and it delivered the message to admin@drip.htb.
We received a request for customer information.
Let’s start our listener
Contact Form Payload
Insert the base64-encoded string into the message.
The Burp Suite trace looks like the following.
A staff member sent an email.
Resetting the password
We need to change the password.
After setting the payload, we received a password reset link.
Let’s change the password as needed
We are provide with a dashboard
SQL injection discovered on dev-a3f1-01.drip.htb.
We accessed the user overview and discovered useful information.
The application is vulnerable to SQL injection.
SQLi Payload for Table Enumeration
The input is an SQL injection payload that closes the current query and injects a new one: it terminates the original statement, runs SELECT table_name FROM information_schema.tables WHERE table_schema=’public’; and uses — to comment out the remainder. This enumerates all table names in the public schema; the response (Users, Admins) shows the database exposed those table names, confirming successful SQLi and information disclosure.
The payload closes the current query and injects a new one: SELECT column_name FROM information_schema.columns WHERE table_name=’Users’;– which lists all column names for the Users table. The response (id, username, password, email, host_header, ip_address) confirms successful SQLi-driven schema enumeration and reveals sensitive columns (notably password and email) that could enable credential or user-data disclosure.
Obtained password hashes from the Users table (Users.password). These values are opaque; we should determine their type, attempt to crack only with authorisation, and protect them securely.
PostgreSQL File Enumeration
The SQL command SELECT pg_ls_dir('./'); invokes PostgreSQL’s pg_ls_dir() function to list all files and directories in the server process’s current directory (typically the database data or working directory). Because pg_ls_dir() exposes the filesystem view, it can reveal configuration files or other server-side files accessible to the database process — which is why it’s often used during post‑exploitation or SQLi-driven reconnaissance. Importantly, this function requires superuser privileges; therefore, a non‑superuser connection will be denied. Consequently, successful execution implies that the user has elevated database permissions.
The SQL command SELECT pg_read_file('PG_VERSION', 0, 200); calls PostgreSQL’s pg_read_file() to read up to 200 bytes starting at offset 0 from the file PG_VERSION on the database server. PG_VERSION normally contains the PostgreSQL version string, so a successful call discloses the DB version to the attacker — useful for fingerprinting — and typically requires superuser privileges, making its successful execution an indicator of elevated database access and a potential information‑disclosure risk.
Returning down the path, I spotted one; it would impress those who have beaten Cerberus…/../../ssssss
SSSD maintains its own local ticket credential caching mechanism (KCM), managed by the SSSD process. It stores a copy of the valid credential cache, while the corresponding encryption key is stored separately in /var/lib/sss/secrets/secrets.ldb and /var/lib/sss/secrets/.secrets.mkey.
Shell as postgres
Finally, we successfully received a reverse shell connection back to our machine; therefore, this confirmed that the payload executed correctly and established remote access as intended.
Nothing of significance was detected.
Discovered the database username and password.
Restore the Old email
Elevate the current shell to an interactive TTY.
The encrypted PostgreSQL backup dev-dripmail.old.sql.gpg is decrypted using the provided passphrase, and the resulting SQL dump is saved as dev-dripmail.old.sql. Consequently, this allows further inspection or restoration of the database for deeper analysis or recovery.
The output resembles what is shown above.
Found three hashes that can be cracked with Hashcat.
Hash Cracking via hashcat
We successfully recovered the password thePlague61780.
Since Hashcat managed to crack only one hash, we’ll therefore use CrackStation to attempt cracking the remaining two.
Bloodhound enumeration
Update the configuration file.
SSH as ebelford user
Established an SSH session to the machine as ebelforrd.
No binary found
Found two IP addresses and several subdomains on the target machine.
Update the subdomain entries in our /etc/hosts file.
Network Tunnelling and DNS Spoofing with sshuttle and dnschef
Use sshuttle to connect to the server and route traffic (like a VPN / port forwarding).
Additionally, dnschef was used to intercept and spoof DNS traffic during testing.
Gathering Information via Internal Status Monitor
Log in using the victor.r account credentials.
Click the check button to get a response
Replace the saved victor.r login details in Burp Suite.
Testing the suspected host and port for reachability.
Begin the NTLM relay/replay attack.
Leverage socatx64 to perform this activity.
Abuse S4U2Self and Gain a Shell on WEB-01
An LDAP interactive shell session is now running.
Run get_user_groups on svc_acc to list their groups.
Retrieved the SID associated with this action.
Retrieved the administrator.ccache Kerberos ticket.
We can read the user flag by typing “type user.txt” command
Escalate to Root Privileges Access on Darkcorp machine
Privilege Escalation:
Transfer sharpdpapi.exe to the target host.
Attempting to evade Windows Defender in a sanctioned test environment
The output reveals a DPAPI-protected credential blob located at C:\Users\Administrator\AppData\Local\Microsoft\Credentials\32B2774DF751FF7E28E78AE75C237A1E. It references a master key with GUID {6037d071-...} and shows that the blob is protected using system-level DPAPI (CRYPTPROTECT_SYSTEM), with SHA-512 for hashing and AES-256 for encryption. Since the message indicates MasterKey GUID not in cache, the decryption cannot proceed until the corresponding master key is obtained — either from the user’s masterkey file or by accessing a process currently holding it in memory.
This output shows a DPAPI local credential file at C:\Users\Administrator\AppData\Local\Microsoft\Credentials\ with the filename 32B2774DF751FF7E28E78AE75C237A1E. The system protects it using a DPAPI master key (GUID {6037d071-cac5-481e-9e08-c4296c0a7ff7}), applies SHA-512 for hashing, and uses AES-256 for encryption. Because the master key isn’t currently in the cache, we can’t decrypt the credential blob until we obtain that master key (for example from the masterkey file) or access the process that holds it in memory.
Direct file transfer through evil-winrm was unsuccessful.
Transform the file into base64 format.
We successfully recovered the decrypted key; as noted above, this confirms the prior output and therefore enables further analysis.
Access darkcorp machine via angela.w
Successfully recovered the password Pack_beneath_Solid9!
Retrieval of angela.w’s NT hash failed.
Attempt to gain access to the angela.w account via a different method.
Acquired the hash dump for angela.w.
Save the ticket as angela.w.adm.ccache.
Successful privilege escalation to root.
Retrieved password hashes.
Password reset completed and new password obtained.
Exploiting GPOs with pyGPOAbuse
Enumerated several GPOs in the darkcorp.htb domain; additionally, each entry shows the GPO GUID, display name, SYSVOL path, applied extension GUIDs, version, and the policy areas it controls (registry, EFS policy/recovery, Windows Firewall, security/audit, restricted groups, scheduled tasks). Furthermore, the Default Domain Policy and Default Domain Controllers Policy enforce core domain and DC security — notably, the DC policy has many revisions. Meanwhile, the SecurityUpdates GPO appears to manage scheduled tasks and update enforcement. Therefore, map these SYSVOL files to find promising escalation vectors: for example, check for misconfigured scheduled tasks, review EFS recovery settings for exposed keys, and identify privileged group memberships. Also, correlate GPO versions and recent changes to prioritize likely targets.
BloodHound identifies taylor as GPO manager — pyGPOAbuse is applicable, pending discovery of the GPO ID.
Force a Group Policy update using gpupdate /force.
REST-Attacker is an automatedpenetration testing framework for APIs following the REST architecture style. The tool's focus is on streamlining the analysis of generic REST API implementations by completely automating the testing process - including test generation, access control handling, and report generation - with minimal configuration effort. Additionally, REST-Attacker is designed to be flexible and extensible with support for both large-scale testing and fine-grained analysis.
You also need to install the following packages with pip:
python3 -m pip install -r requirements.txt
Quickstart
Here you can find a quick rundown of the most common and useful commands. You can find more information on each command and other about available configuration options in our usage guides.
Get the list of supported test cases:
python3 -m rest_attacker --list
Basic test run (with load-time test case generation):
Test run with only selected test cases (only generates test cases for test cases scopes.TestTokenRequestScopeOmit and resources.FindSecurityParameters):
Usage guides and configuration format documentation can be found in the documentation subfolders.
Troubleshooting
For fixes/mitigations for known problems with the tool, see the troubleshooting docs or the Issues section.
Contributing
Contributions of all kinds are appreciated! If you found a bug or want to make a suggestion or feature request, feel free to create a new issue in the issue tracker. You can also submit fixes or code ammendments via a pull request.
Unfortunately, we can be very busy sometimes, so it may take a while before we respond to comments in this repository.
License
This project is licensed under GNU LGPLv3 or later (LGPL3+). See COPYING for the full license text and CONTRIBUTORS.md for the list of authors.
An automatic unpacker and logger for DotNet Framework targeting files! This tool has been unveiled at Black Hat USA 2022.
The automatic detection and classification of any given file in a reliable manner is often considered the holy grail of malware analysis. The trials and tribulations to get there are plenty, which is why the creation of such a system is held in high regard. When it comes to DotNet targeting binaries, our new open-source tool DotDumper aims to assist in several of the crucial steps along the way: logging (in-memory) activity, dumping interesting memory segments, and extracting characteristics from the given sample.
In brief, manual unpacking is a tedious process which consumes a disproportional amount of time for analysts. Obfuscated binaries further increase the time an analyst must spend to unpack a given file. When scaling this, organizations need numerous analysts who dissect malware daily, likely in combination with a scalable sandbox. The lost valuable time could be used to dig into interesting campaigns or samples to uncover new threats, rather than the mundane generic malware that is widely spread. Afterall, analysts look for the few needles in the haystack.
So, what difference does DotDumper make? Running a DotNet based malware sample via DotDumper provides log files of crucial, contextualizing, and common function calls in three formats (human readable plaintext, JSON, and XML), as well as copies from useful in-memory segments. As such, an analyst can skim through the function call log. Additionally, the dumped files can be scanned to classify them, providing additional insight into the malware sample and the data it contains. This cuts down on time vital to the triage and incident response processes, and frees up SOC analyst and researcher time for more sophisticated analysis needs.
To log and dump the contextualizing function calls and their results, DotDumper uses a mixture of reflection and managed hooks, all written in pure C#. Below, key features will be highlighted and elaborated upon, in combination with excerpts of DotDumper’s results of a packed AgentTesla stealer sample, the hashes of which are below.
DotDumper is accessible through a command-line interface, with a variety of arguments. The image below shows the help menu. Note that not all arguments will be discussed, but rather the most used ones.
The minimal requirement to run a given sample, is to provide the “-file” argument, along with a file name or file path. If a full path is given, it is used. If a file name is given, the current working directory is checked, as well as the folder of DotDumper’s executable location.
Unless a directory name is provided, the “-log” folder name is set equal to the file name of the sample without the extension (if any). The folder is located in the same folder as DotDumper resides in, which is where the logs and dumped files will be saved in.
In the case of a library, or an alternative entry point into a binary, one must override the entry point using “-overrideEntry true”. Additionally, one has to provide the fully qualified class, which includes the name space using “-fqcn My.NameSpace.MyClass”. This tells DotDumper which class to select, which is where the provided function name (using “-functionName MyFunction”) is retrieved.
If the selected function requires arguments, one has to provide the number of arguments using “-argc” and the number of required arguments. The argument types and values are to be provided as “string|myValue int|9”. Note that when spaces are used in the values, the argument on the command-line interface needs to be encapsulated between quotes to ensure it is passed as a single argument.
Other less frequently used options such as “-raceTime” or “-deprecated” are safe in their default settings but might require tweaking in the future due to changes in the DotNet Framework. They are currently exposed in the command-line interface to easily allow changes, if need be, even if one is using an older version of DotDumper when the time comes.
Logging and dumping are the two core features of DotDumper. To minimize the amount of time the analysis takes, the logging should provide context to the analyst. This is done by providing the analyst with the following information for each logged function call:
A stack trace based on the function’s caller
Information regarding the assembly object where the call originated from, such as the name, version, and cryptographic hashes
The parent assembly, from which the call originates if it is not the original sample
The type, name, and value of the function’s arguments
The type, name, and value of function’s return value, if any
A list of files which are dumped to disk which correspond with the given function call
Note that for each dumped file, the file name is equal to the file’s SHA-256 hash.
To clarify the above, an excerpt of a log is given below. The excerpt shows the details for the aforementioned AgentTesla sample, where it loads the second stage using DotNet’s Assembly.Load function.
First, the local system time is given, together with the original function’s return type, name, and argument(s). Second, the stack trace is given, where it shows that the sample’s main function leads to a constructor, initialises the components, and calls two custom functions. The Assembly.Load function was called from within “NavigationLib.TaskEightBestOil.GGGGGGGGGGGGGGGGGGGG(String str)”. This provides context for the analyst to find the code around this call if it is of interest.
Then, information regarding the assembly call order is given. The more stages are loaded, the more complex it becomes to see via which stages the call came to be. One normally expects one stage to load the next, but in some cases later stages utilize previous stages in a non-linear order. Additionally, information regarding the originating assembly is given to further enrich the data for the analyst.
Next, the parent hash is given. The parent of a stage is the previous stage, which in this example is not yet present. The newly loaded stage will have this stage as its parent. This allows the analyst to correlate events more easily.
Finally, the function’s return type and value are stored, along with the type, name, and value of each argument that is passed to the hooked function. If any variable is larger than 100 bytes in size, it is stored on the disk instead. A reference is then inserted in the log to reference the file, rather than showing the value. The threshold has been set to avoid hiccups in the printing of the log, as some arrays are thousands of indices in size.
Per Microsoft’s documentation, reflection is best summarized as “[…] provides objects that encapsulate assemblies, modules, and types”. In short, this allows the dynamic creation and invocation of DotNet classes and functions from the malware sample. DotDumper contains a reflective loader which allows an analyst to load and analyze both executables and libraries, as long as they are DotNet Framework based.
To utilize the loader, one has to opt to overwrite the entry point in the command-line interface, specify the class (including the namespace it resides in) and function name within a given file. Optionally, one can provide arguments to the specified function, for all native types and arrays thereof. Examples of native types are int, string, char, and arrays such as int[], string[], and char[]. All the arguments are to be provided via the command-line interface, where both the type and the value are to be specified.
Not overriding the entry point results in the default entry point being used. By default, an empty string array is passed towards the sample’s main function, as if the sample is executed without arguments. Additionally, reflection is often used by loaders to invoke a given function in a given class in the next stage. Sometimes, arguments are passed along as well, which are used later to decrypt a resource. In the aforementioned AgentTesla sample, this exact scenario plays out. DotDumper’s invoke related hooks log these occurrences, as can be seen below.
The function name in the first line is not an internal function of the DotNet Framework, but rather a call to a specific function in the second stage. The types and names of the three arguments are listed in the function signature. Their values can be found in the function argument information section. This would allow an analyst to load the second stage in a custom loader with the given values for the arguments, or even do this using DotDumper by loading the previously dumped stage and providing the arguments.
Before going into managed hooks, one needs to understand how hooks work. There are two main variables to consider here: the target function and a controlled function which is referred to as the hook. Simply put, the memory at the target function (i.e. Assembly.Load) is altered to instead to jump to the hook. As such, the program’s execution flow is diverted. The hook can then perform arbitrary actions, optionally call the original function, after which it returns the execution to the caller together with a return value if need be. The diagram below illustrates this process.
Knowing what hooks are is essential to understand what managed hooks are. Managed code is executed in a virtual and managed environment, such as the DotNet runtime or Java’s virtual machine. Obtaining the memory address where the managed function resides differs from an unmanaged language such as C. Once the correct memory addresses for both functions have been obtained, the hook can be set by directly accessing memory using unsafe C#, along with DotNet’s interoperability service to call native Windows API functionality.
Since DotDumper is written in pure C# without any external dependencies, one can easily extend the framework using Visual Studio. The code is documented in this blog, on GitHub, and in classes, in functions, and in-line in the source code. This, in combination with the clear naming scheme, allows anyone to modify the tool as they see fit, minimizing the time and effort that one needs to spend to understand the tool. Instead, it allows developers and analysts alike to focus their efforts on the tool’s improvement.
With the goal and features of DotDumper clear, it might seem as if there’s overlap with known publicly available tools such as ILSpy, dnSpyEx, de4dot, or pe-sieve. Note that there is no intention to proclaim one tool is better than another, but rather how the tools differ.
DotDumper’s goal is to log and dump crucial, contextualizing, and common function calls from DotNet targeting samples. ILSpy is a DotNet disassembler and decompiler, but does not allow the execution of the file. dnSpyEx (and its predecessor dnSpy) utilise ILSpy as the disassembler and decompiler component, while adding a debugger. This allows one to manually inspect and manipulate memory. de4dot is solely used to deobfuscate DotNet binaries, improving the code’s readability for human eyes. The last tool in this comparison, pe-sieve, is meant to detect and dump malware from running processes, disregarding the used programming language. The table below provides a graphical overview of the above-mentioned tools.
DotDumper is under constant review and development, all of which is focused on two main areas of interest: bug fixing and the addition of new features. During the development, the code was tested, but due to injection of hooks into the DotNet Framework’s functions which can be subject to change, it’s very well possible that there are bugs in the code. Anyone who encounters a bug is urged to open an issue on the GitHub repository, which will then be looked at. The suggestion of new features is also possible via the GitHub repository. For those with a GitHub account, or for those who rather not publicly interact, feel free to send me a private message on my Twitter.
Needless to say, if you've used DotDumper during an analysis, or used it in a creative way, feel free to reach out in public or in private! There’s nothing like hearing about the usage of a home-made tool!
There is more in store for DotDumper, and an update will be sent out to the community once it is available!
In November 2021, a threat actor in the Iranian geopolitical network was discovered to have deployed two new targeted malware with “simple” backdoor functionality as part of an incursion into an unnamed government body in the Middle East.
Cybersecurity firm Mandiant attributed the attack to an uncategorized cluster it tracks as UNC3313, which it rates with “moderate certainty” associated with state-sponsored group MuddyWater.
“UNC3313 monitors and collects strategic information to support Iranian interests and decision-making,” said researchers Ryan Tomczyk, Emiel Hegebarth and Tufail Ahmed. “Guidance schemes and their associated decoys show a strong focus on targets with a geopolitical connection.”
In mid-January 2022, MuddyWater (aka Static Kitten, Seedworm, TEMP.Zagros or Mercury) was characterized by U.S. intelligence agencies as a subordinate element of Iran’s Ministry of Intelligence and Security (MOIS) that has been active since at least 2018 and is known to use a wide range of tools and methods in their activities.
The attacks were allegedly orchestrated using spear-phishing messages to gain initial access, followed by the use of offensive security tools and publicly available remote access software to move sideways and maintain medium access security.
The phishing emails were created for promotion and tricked several victims into clicking a URL to download a RAR archive file hosted on OneHub, paving the way for installing ScreenConnect, a legitimate remote access software, to gain a foothold.
“UNC3313 quickly established remote access using ScreenConnect to infiltrate systems within an hour of the initial compromise,” the researchers noted, adding that the security incident was quickly contained and resolved.
Subsequent stages of the attack included privilege escalation, performing internal reconnaissance on the target network, and executing obfuscated PowerShell commands to download additional tools and payloads to remote systems.
A previously undocumented backdoor called STARWHALE, a Windows script file (.WSF) that executes commands received from a hard-coded command and control (C2) server via HTTP, was also discovered.
The other implant delivered in the attack is GRAMDOOR, so named because it uses the Telegram API to communicate its network with an attacker-controlled server in an attempt to avoid detection, further emphasizing the use of communication tools to facilitate data theft.
The findings also align with a new joint council from the UK and US cybersecurity agencies that accuses the MuddyWater group of spy attacks targeting defense, local government, the oil and gas sector and telecommunications around the world.
API (application programming interface) cybersecurity isn’t as thorough as it needs to be. When it comes to pentesting, web APIs are often lumped in with web applications, despite 90% of web applications having a larger attack surface exposed via APIs than user interfaces, according to Gartner. However, that kind of testing doesn’t cover the full spectrum of APIs, potentially leaving vulnerabilities undiscovered. As APIs become both increasingly important and increasingly vulnerable, it’s more important than ever to keep your APIs secure.
APIs vs. Web Applications
APIs are how software programs talk to each other. APIs are interfaces that allow software programs to transmit data to other software programs. Integrating applications via APIs allows one piece of software to access and use the capabilities of another. In today’s increasingly connected digital world, it’s no surprise that APIs are becoming more and more prevalent.
When most people think of APIs, what they’re really thinking about are APIs exposed via a web application UI, usually by means of an HTTP-based web server. A web application is any application program that is stored remotely and delivered via the internet through a browser interface.
APIs, however, connect and power everything from mobile applications, to cloud-based services, to internal applications, partner platforms and more. An organization’s APIs may be more numerous than those that can be enumerated through browsing a web application.
Differences in Pentesting
Frequently, organizations that perform pentesting on their web applications assume that a clean bill of health for web applications means that their APIs are just as secure. Unfortunately, that isn’t the case. An effective API security testing strategy requires understanding the differences between web application testing and API security testing.
Web application security mostly focuses on threats like injection attacks, cross-site scripting and buffer overflows. Meanwhile, API breaches typically occur through issues with authorization and authentication, which lets cyber attackers get access to business logic or data.
Web application pentesting isn’t sufficient for testing APIs. Web application testing usually only covers the API calls made by the application, though APIs have a much broader range of functioning than that.
To begin a web application pentest, you provide your pentesters with a list of and they test all of the fields associated with these URLs. Some of these fields will have APIs behind them, allowing them to communicate with something. If the pentesters find a vulnerability here, that’s an API vulnerability – and that kind of API vulnerability will be caught. However, any APIs that aren’t connected to a field won’t be tested.
Most organizations have more APIs than just the ones attached to web application fields. Any time an application needs to talk to another application or to a database, that’s an API that might still be vulnerable. While a web application pentest won’t be able to test these APIs, an API pentest will.
The Importance of API Pentesting
Unlike web applications, APIs have direct access to endpoints, and cyber attackers can manipulate the data that these endpoints accept. So, it’s important to make sure that your APIs are just as thoroughly tested as your web applications. By performing separate pentesting for APIs and web applications, you make sure that you have your attack surface covered.
Synack can help. To learn more about the importance of pentesting for APIs, read this white paper and visit our API security solution page.