It’s fair to say that there are many people in our community who just love to dunk on Microsoft Windows. It’s an easy win, after all, the dominant player in the PC operating system market has a long history of dunking on free software, and let’s face it, today’s Windows doesn’t offer a good experience. But what might the future hold? [Mason] has an unexpected prediction: that Microsoft will eventually move towards offering a Windows-themed Linux distro instead of a descendant of today’s Windows.
The very idea is sure to cause mirth, but on a little sober reflection, it’s not such a crazy one. Windows 11 is slow and unfriendly, and increasingly it’s losing the position once enjoyed by its ancestors. The desktop (or laptop) PC is no longer the default computing experience, and what to do about that must be a big headache for the Redmond company. Even gaming, once a stronghold for Windows, is being lost to competitors such as Valve’s Steam OS, so it wouldn’t be outlandish for them to wonder whether the old embrace-and-extend strategy could be tried on the Linux desktop.
We do not possess a working crystal ball here at Hackaday, so we’ll hold off hailing a Microsoft desktop Linux. But we have to admit it’s not an impossible future, having seen Apple reinvent their OS in the past using BSD, and even Microsoft bring out a cloud Linux distro. If you can’t wait, you’ll have to make do with a Windows skin, WINE, and the .NET runtime on your current Linux box.
This little fellow is named Sesame. A quadruped robot, it’s built out of 3D-printed components. Each leg features a pair of MG90S hobby servos, one of which rotates the leg around the vertical axis, while the other moves the foot. The ESP32 microcontroller controls all eight servos, enabling remote control of Sesame via its built-in wireless connectivity. Sesame also gets a 128×64 OLED display, which it uses to display a range of emotions.
Mechanically, the Sesame design isn’t particularly sophisticated. Where it shines is that even with such a limited range of motion, between its four legs and its little screen, this robot can display a great deal of emotion. [Dorian] shows this off in the project video, in which Sesame scampers around a desktop with all the joy and verve of a new puppy. It’s also very cheap; [Dorian] estimates you can build your own Sesame for about $60. Files are on GitHub for the curious.
For certain high-security devices, such as card readers, ATMs, and hardware security modules, normal physical security isn’t enough – they need to wipe out their sensitive data if someone starts drilling through the case. Such devices, therefore, often integrate circuit meshes into their cases and regularly monitor them for changes that could indicate damage. To improve the sensitivity and accuracy of such countermeasures, [Jan Sebastian Götte] and [Björn Scheuermann] recently designed a time-domain reflectometer to monitor meshes (pre-print paper).
Many meshes are made from flexible circuit boards with winding traces built into the case, so cutting or drilling into the case breaks a trace. The problem is that most common ways to detect broken traces, such as by resistance or capacitance measurements, aren’t easy to implement with both high sensitivity and low error rates. Instead, this system uses time-domain reflectometry: it sends a sharp pulse into the mesh, then times the returning echoes to create a mesh fingerprint. When the circuit is damaged, it creates an additional echo, which is detected by classifier software. If enough subsequent measurements find a significant fingerprint change, it triggers a data wipe.
The most novel aspect of this design is its affordability. An STM32G4-series microcontroller manages the timing, pulse generation, and measurement, thanks to its two fast ADCs and a high-resolution timer with sub-200 picosecond resolution. For a pulse-shaping amplifier, [Jan] and [Björn] used the high-speed amplifiers in an HDMI redriver chip, which would normally compensate for cable and connector losses. Despite its inexpensive design, the circuit was sensitive enough to detect when oscilloscope probes contacted the trace, pick up temperature changes, and even discern the tiny variations between different copies of the same mesh.
It’s not absolutely impossible for an attacker to bypass this system, nor was it intended to be, but overcoming it would take a great deal of skill and some custom equipment, such as a non-conductive drill bit. If you’re interested in seeing such a system in the real world, check out this teardown of a payment terminal. One of the same authors also previously wrote a KiCad plugin to generate anti-tamper meshes.
We live in a golden age for MIDI controllers. [rheslip]’s contribution to the milieu is a twisty take on the format, in that it’s covered in an array of knobs. Thus the name—Twisty 2.
The controller can be built using the Raspberry Pi Pico or Pico 2. It’s set up to read a 4×4 array of clickable encoders, plus two bonus control knobs to make 18 in total, which are read via a 74HC4067 analog mux chip. There’s also an SK6812 RGB LED for each encoder, and an OLED display for showing status information. MIDI output is via USB, or, if you purchased the W variant of the Pi Pico/Pico 2, it can operate wirelessly over Bluetooth MIDI instead. The controller is set up to send MIDI CC messages, program changes, or note on/off messages depending on its configuration. Flipping through different modes is handled with the bottom set of encoders and the OLED display.
Few musicians we’ve ever met have told us they learned how to play the encoders, and yet. The cool thing about building your own MIDI controller is you can tune it to suit whatever method of performance strikes your fancy. If the name of this build alone has you inspired, you could always whip up a MIDI controller out of a Twister mat.
Attributed to Picasso was the notion that when art critics get together they talk about content, style, trend, and meaning; but that when painters get together they talk about where to get the best turpentine. We can extend that sentiment into the digital age by saying that when philosophers get together they talk about ideas, theory, and meaning; but when hackers get together they talk about where to get the best tweezers.
In this video [nanofix] runs us through his collection of tweezers talking about what he likes and doesn’t like for each. If you’re just getting into microsoldering this video will have some tips about where you should start, and if you’ve been soldering tiny stuff for a while you might find some ideas for a helpful new bit of kit, or two.
If you’re interested in tweezers and novel applications you might want to check out “smart” tweezers, which can read capacitance and resistance values on the fly. Or read about a suction based SMD tool, which can securely hold SMD components with less risk of them flying across the bench and disappearing forever into the carpet on the floor.
Al and I were talking about the IBM 9020 FAA Air Traffic Control computer system on the podcast. It’s a strange machine, made up of a bunch of IBM System 360 mainframes connected together to a common memory unit, with all sorts of custom peripherals to support keeping track of airplanes in the sky. Absolutely go read the in-depth article on that machine if it sparks your curiosity.
It got me thinking about how strange computers were in the early days, and how boringly similar they’ve all become. Just looking at the word sizes of old machines is a great example. Over the last, say, 40 years, things that do computing have had 4, 8, 16, 32, or even 64-bit words. You noticed the powers-of-two trend going on here, right? Basically starting with the lowly Intel 4004, it’s been round numbers ever since.
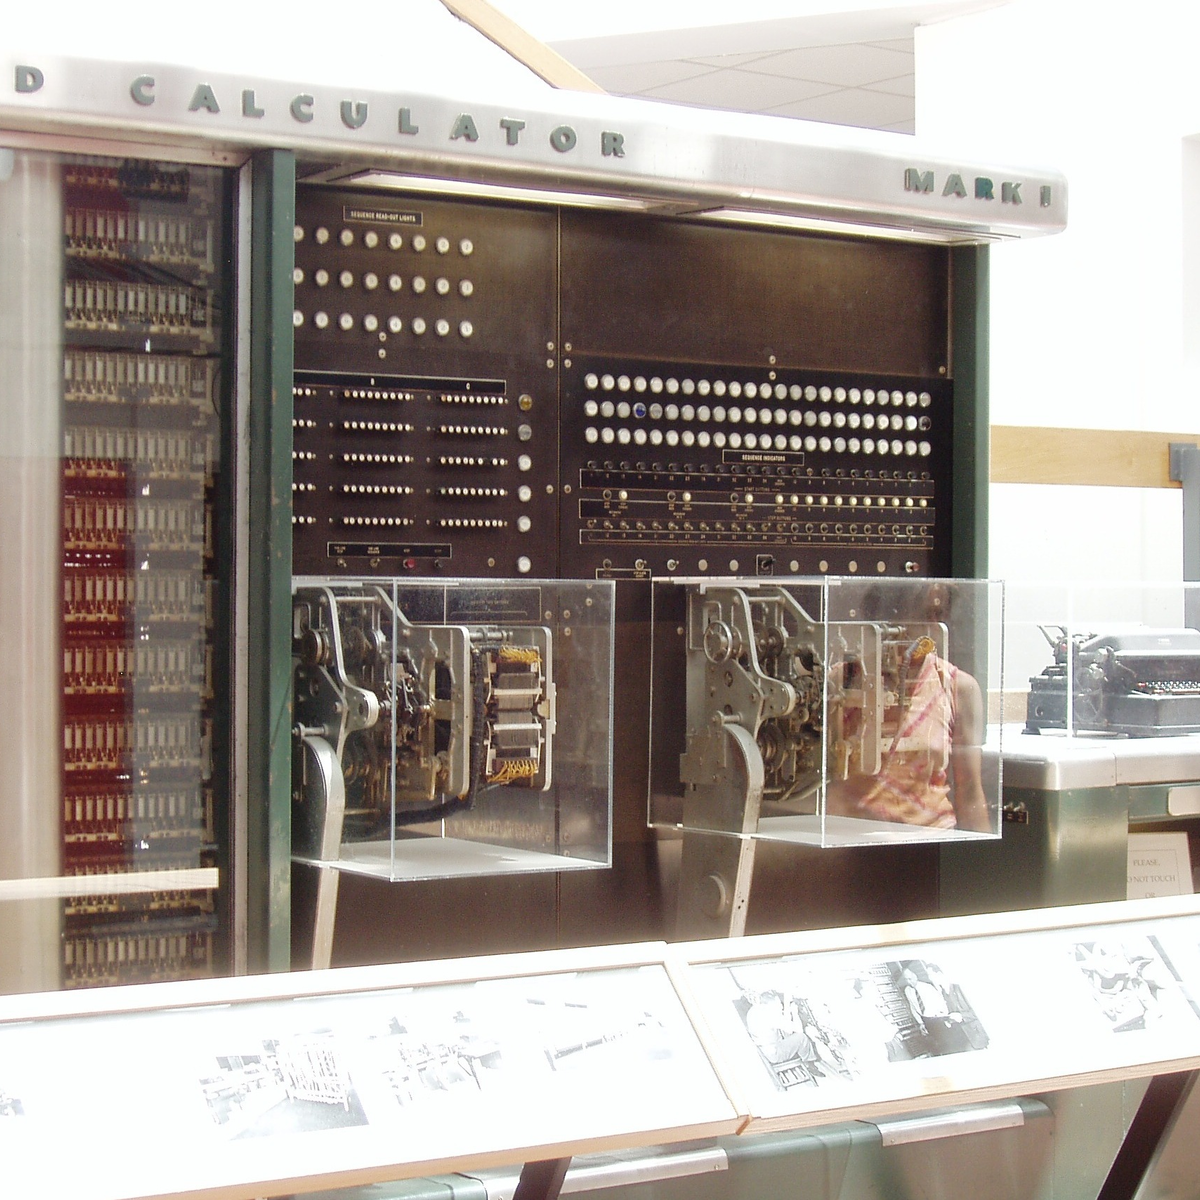
Harvard Mark I, by [Topory]On the other side of the timeline, though, you get strange beasts. The classic PDP-8 had 12-bit words, while its predecessors the PDP-6 and PDP-1 had 36 bits and 18 bits respectively. (Factors of six?) There’s a string of military guidance computers that had 27-bit words, while the Apollo Guidance computer ran 15-bit words. UNIVAC III had 25-bit words, putting the 23-bit Harvard Mark I to shame.
I wasn’t there, but it gives you the feeling that each computer is a unique, almost hand-crafted machine. Some must have made their odd architectural choices to suit particular functions, others because some designer had a clever idea. I’m not a computer historian, but I’m sure that the word lengths must tell a number of interesting stories.
On the whole, though, it gives the impression of a time when each computer was it’s own unique machine, before the convergence of everything to roughly the same architectural ideas. A much more hackery time, for lack of a better word. We still see echoes of this in the people who make their own “retro” computers these days, either virtually, on a breadboard, or emulated in the fabric of an FPGA. It’s not just nostalgia, though, but a return to a time when there was more creative freedom: a time before 64 bits took over.
This article is part of the Hackaday.com newsletter, delivered every seven days for each of the last 200+ weeks. It also includes our favorite articles from the last seven days that you can see on the web version of the newsletter.
Want this type of article to hit your inbox every Friday morning? You should sign up!
When you’re testing or debugging some mains-powered gear, plugging it directly into the outlet can often be an exciting proposition. If such excitement is not really your thing, you can opt for an isolation transformer and other types of safeties. In the case of [Michał Słomkowski], he opted to take a few steps further by modding a vintage East-German isolating variac with a broken amp meter into an isolated AC/DC power supply and testing station.
The core is formed by the isolated variable transformer, to which a configurable DC output section, a current limiter and digital voltage and current read-outs were added. This enables a variable AC output of 0 – 330 VAC and 0 – 450 VDC on their respective terminals, with the incandescent light bulb providing an optional current limiter.
In its final configuration [Michał] has been using the device for the past four years now for a range of tasks, including the simulating of various undesirable mains power conditions, varying the speed of an old Soviet-era drill, powering vacuum tube devices, capacitor reforming and of course running 100-120 VAC devices from e.g. the US.
As far as feature set goes, we have to admit that it is an impressive device, indeed. Although some parts of it are clearly playing it fast and loose with best practices, with [Michał] admitting to not being an electrician, it was clearly engineered well enough to survive a few years of use, something which cannot be said for even professional laboratory equipment these days.
When you think of a high performance liquid rocket, what do you think of? Beer kegs? No? Well, when [Ryan] from the YouTube channel “Project KegRocket” saw a beer keg, the first thing he and his friends saw was a pressurized rocket body.
You wouldn’t be crazy if the first thing you thought of was something designed by a massive company or university. Liquid rockets are far from simple to develop, with Keg Rocket being no exception. Liquid oxygen and alcohol is the oxidizer/fuel mixture of choice. Liquid oxygen in particular is a problem with its cryogenic temperatures and tendency to do what rocket fuel does best, burn. This problem causes a large amount of work to simply connect the pipes. Traditional O-rings have no chance at surviving, along with most other non-metallic solutions.
Even with all these problems, the group creating the piece of art is more than capable, having experience creating similar rockets in the past. As of currently, the pumping has been pressure and leak checked. We will be watching this project closely for updates and an eventual launch.
For more rocketry science, be sure to check out aerospike engines for the most efficient engines around. If you want efficiency in your pizzas and beer kegs, check out this keg pizza oven instead!
Lithium batteries have taken over as the primary battery chemistry from applications ranging from consumer electronics to electric vehicles and all kinds of other things in between. But the standard lithium ion battery has a few downsides, namely issues operating at temperature extremes. Lead acid solves some of these problems but has much lower energy density, and if you want to split the difference with your own battery you’ll need to build your own lithium iron phosphate (LiFePO4) pack.
[Well Done Tips] is building this specific type of battery because the lead acid battery in his electric ATV is on the decline. He’s using cylindrical cells that resemble an 18650 battery but are much larger. Beyond the size, though, many of the design principles from building 18650 battery packs are similar, with the exception that these have screw terminals so that bus bars can be easily attached and don’t require spot welding.
With the pack assembled using 3D printed parts, a battery management system is installed with the balance wires cleverly routed through the prints and attached to the bus bars. The only problem [Well Done Tips] had was not realizing that LiFePO4 batteries’ voltages settle a bit after being fully charged, which meant that he didn’t properly calculate the final voltage of his pack and had to add a cell, bringing his original 15S1P battery up to 16S1P and the correct 54V at full charge.
3D printing is wonderful, but sometimes you just don’t want to look at a plastic peice. Beethoven’s bust wouldn’t look quite right in front of your secret door if it was bright orange PLA, after all. [Denny] over at “Shake the Future” on YouTube is taking a break from metal casting to show off a quick-and-easy plaster casting method— but don’t worry, he still uses a microwave.
Most people, when they’re casting something non-metallic from a 3D print are going to reach for castable silicone and create a mold, first. It works for chocolate just as easily as it does plaster, and it does work well. The problem is that it’s an extra step and extra materials, and who can afford the time and money that takes these days?
[Denny]’s proposal is simple: make the mold out of PLA. He’s using a resin slicer to get the negative shape for the mold, and exporting the STL to slice in PrusaSlicer, but Blender, Meshmixer and we’re pretty sure Cura should all work as well. [Denny] takes care when arranging his print to avoid needing supports inside the mold, but that’s not strictly necessary as long as you’re willing to clean them out. After that, it’s just a matter of mixing up the plaster, pouring it into the PLA, mold, and waiting.
Waiting, but not too long. Rather than let the plaster fully set up, [Denny] only waits about an hour. The mold is still quite ‘wet’ at this point, but that’s a good thing. When [Denny] tosses it in his beloved microwave, the moisture remaining in the plaster gets everything hot, softening the PLA so it can be easily cut with scissors and peeled off.
Yeah, this technique is single-use as presented, which might be one advantage to silicone, if you need multiple copies of a cast. Reusing silicone molds is often doable with a little forethought. On the other hand, by removing the plaster half-cured, smoothing out layer lines becomes a simple matter of buffing with a wet rag, which is certainly an advantage to this technique.
Some of you may be going “well, duh,” so check out [Denny]’s cast-iron benchy if his plasterwork doesn’t impress. We’ve long been impressed with the microwave crucibles shown off on “Shake the Future”, but it’s great to have options. Maybe metal is the material, or perhaps plain plastic is perfect– but if not, perchance Plaster of Paris can play a part in your play.
Few things rival the usability and speed of a full-sized keyboard for text input. For decades, though, keyboards were mostly wired, which can limit where you use your favorite one. To address this, [KoStard]’s latest project uses an ESP32 to bridge a USB keyboard to BLE devices.
The ESP32-S3 packs a ton of fantastic functionality into its small size and low price—including USB-OTG support, which is key here. Taking advantage of this, [KoStard] programmed an ESP32-S3 to host a keyboard over its USB port while connecting via BLE to devices like cellphones.
There are some slick tricks baked in, too: you can pair with up to three devices and switch between them using a key combo. Some of you might be wondering how you can just plug a microcontroller into a keyboard and have it work. The truth is, it doesn’t without extra hardware. Both the keyboard and ESP32-S3 need power. The simplest fix is a powered USB hub: it can be battery-powered for a truly mobile setup, or use a wired 5V supply so you never have to charge batteries.
We love seeing a simple, affordable microcontroller extend the usefulness of gear you already have. Let us know in the comments about other hacks you’ve used to connect keyboards to devices never designed for them.
Today’s PCs are locked up with Trusted Platform Module (TPM) devices so much so that modern Windows versions insist on having a recent TPM to even install. These have become so prevalent that even larger embedded boards now have TPM and, of course, if you are repurposing consumer hardware, you’ll have to deal with it, too. [Sigma Star] has just the primer for you. It explains what TPM does, how it applies to embedded devices, and where the pitfalls are.
The TPM is sometimes a chip or sometimes secure firmware that is difficult to tamper with. They provide secret storage and can store boot signatures to detect if something has changed how a computer starts up. The TPM can also “sign off” that the system configuration is the same to a remote entity. This allows, for example, a network to prevent a hacked or rogue computer from communicating with other computers.
Embedded systems, usually, aren’t like PCs. A weather station at a remote location may have strangers poking at it without anyone noticing. Also, that remote computer might be expected to be working for many more years than a typical laptop or desktop computer.
This leads to a variety of security concerns that TPM 2.0 attempts to mitigate. For example, it is unreasonable to think a typical attacker might connect a logic analyzer to your PC, but for an embedded system, it is easier to imagine. There is a session-based encryption to protect against someone simply snooping traffic off the communication bus. According to the post, not all implementations use this encryption, however.
This “dream wish list for criminals” includes millions of Gmail, Facebook, banking logins, and more. The researcher who discovered it suspects they were collected using infostealing malware.
If you’re gonna be a hacker eventually you’re gonna have to write software to process and generate text data. And when you deal with text data, in this day and age, there are really only two main things you need to know: 7-bit ASCII and UTF-8. In this video [Nic] explains 7-bit ASCII and Unicode, and then explains UTF-8 and how it relates to Unicode and ASCII. [Nic] goes into detail about some of the clever features of Unicode and UTF-8 such as self-synchronization, single-byte ASCII, multi-byte codepoints, leading bytes, continuation bytes, and grapheme clusters.
[Nic] mentions about UTF-16, but UTF-16 turned out to be a really bad idea. UTF-16 combines all of the disadvantages of UTF-8 with all of the disadvantages of UTF-32. In UTF-16 there are things known as “surrogate pairs”, which means a single Unicode codepoint might require two UTF-16 “characters” to describe it. Also the Byte Order Marks (BOM) introduced with UTF-16 proved to be problematic. Particularly if you cat files together you can end up with stray BOM indicators randomly embedded in your new file. They say that null was a billion dollar mistake, well, UTF-16 was the other billion dollar mistake.
tl;dr: don’t use UTF-16, but do use 7-bit ASCII and UTF-8.
Oh, and as we’re here, and talking about Unicode, did you know that you can support The Unicode Consortium with Unicode Adopt-a-Character? You send money to sponsor a character and they put your name up in lights! Win, win! (We noticed while doing the research for this post that Jeroen Frijters of IKVM fame has sponsored #, a nod to C#.)
It’s possible to improve your 3D prints in all kinds of ways. You can tune your printer’s motion, buy better filament, or tinker endlessly with any number of slicer settings. Or, as [Dirt-E-Bikes] explains, you could grab yourself some silica gel.
If you’re unfamiliar with silica gel, it’s that stuff that comes in the “DO NOT EAT” packet when you buy a new pair of shoes. It’s key feature is that it’s hygroscopic—which means it likes to suck up moisture from the atmosphere. When it comes to 3D printing, this is a highly useful property—specifically because it can help keep filament dry. Over time, plastic filament tends to pick up some moisture on its own from the atmosphere, and this tends to interfere with print quality. This can be avoided by storing filament in a sealed or semi-seaeled environment with silica gel. The gel will tend to suck up most of the moisture from the air in the sealed container, helping to keep the filament drier.
[Dirt-E-Bikes] does a great job of explaining how best to integrate silica gel with your filament spools and automatic material changer (if you have one). He also explains the value of color changing silica gel which indicates when the material is saturated with water, as well as how to dry it out for reuse. You can even combine some of the color changing beads with the more common plain white beads recycled from your shoe boxes, since you only need a few colored beads to get an idea of the water content.
After the swivel by Helium Inc. towards simply running distributed WiFi hotspots after for years pushing LoRaWAN nodes, much of the associated hardware became effectively obsolete. This led to quite a few of these Nebra LoRa Miners getting sold off, with the [Buy it Fix it] channel being one of those who sought to give these chunks of IP-67-rated computing hardware a new life.
Originally designed to be part of the Helium Network Token (HNT) cryptocurrency mining operation, with users getting rewarded by having these devices operating, they contain fairly off-the-shelf hardware. As can be glanced from e.g. the Sparkfun product page, it’s basically a Raspberry Pi Compute Module 3+ on a breakout board with a RAK 2287 LoRa module. The idea in the video was to convert it into a Meshcore repeater, which ought to be fairly straightforward, one might think.
Unfortunately the unit came with a dead eMMC chip on the compute module, the LoRa module wasn’t compatible with Meshcore, and the Nebra breakout board only covers the first 24 pins of the standard RPi header on its pin header.
The solutions involved using a µSD card for the firmware instead of the eMMC, and doing some creative routing on the bottom of the breakout board to connect the unconnected pins on the breakout’s RPi header to the pins on the compute module’s connector. This way a compatible LoRa module could be placed on this header.
Rather than buying an off-the-shelf LoRa module for the RPi and waiting for delivery, a custom module was assembled from an eByte E22 LoRa module and some stripboard to test whether the contraption would work at all. Fortunately a test of the system as a Meshcore repeater showed that it works as intended, serving as a pretty decent proof-of-concept of how to repurpose those systems from a defunct crypto mining scheme into a typical LoRa repeater, whether Meshcore or equivalent.
[Clough42] created a 3D print for a lathe tool and designed in some support to hold the piece on the bed while printing. It worked, but removing the support left unsightly blemishes on the part. A commenter mentioned that the support doesn’t have to exactly touch the part to support it. You can see the results of trying that method in the video below.
In this case [Cloug42] uses Fusion, but the idea would be the same regardless of how you design your parts. Originally, the support piece was built as a single piece along with the target object. However, he changed it to make the object separate from the support structure. That’s only the first step, though. If you import both pieces and print, the result will be the same.
Instead, he split the part into the original two objects that touch but don’t blend together. The result looks good.
We couldn’t help but notice that we do this by mistake when we use alternate materials for support (for example, PETG mixed with PLA or PLA with COPE). Turns out, maybe you don’t have to switch filament to get good results.
Sleep apnea is a debilitating disease that many sufferers don’t even realize they have. Those afflicted with the condition will regularly stop breathing during sleep as the muscles in their throat relax, sometimes hundreds of times a night. Breathing eventually resumes when the individual’s oxygen supply gets critically low, and the body semi-wakes to restore proper respiration. The disruption to sleep causes serious fatigue and a wide range of other deleterious health effects.
Treatment for sleep apnea has traditionally involved pressurized respiration aids, mechanical devices, or invasive surgeries. However, researchers are now attempting to develop a new drug combination that could solve the problem with pharmaceuticals alone.
Breathe Into Me
There are a variety of conditions that fall under the sleep apnea umbrella, with various causes and a range of imperfect treatments. Perhaps the most visible is obstructive sleep apnea (OSA), in which the muscles in the throat relax during sleep. Under certain conditions, and depending on anatomy, this can lead the airway to become blocked, causing a cessation of breathing that requires the sufferer to wake to a certain degree to restore proper respiration. Since the 1980s, OSA has routinely been treated with the use of Continuous Positive Airway Pressure (CPAP) machines, which supply pressurized air to the face and throat to forcibly keep the airway open. These are effective, except for one major problem—a great deal of patients hate them, and compliance with treatment is remarkably poor. Some studies have shown up to 50% of patients give up on CPAP treatment within a year due to discomfort around sleeping with a pressurized air mask.
Obstructive sleep apnea occurs when upper airway muscles relax excessively during sleep, ultimately restricting or totally blocking the airway. Credit: Apnimed
Against this backdrop, a simple pill-based treatment for sleep apnea is a remarkably attractive proposition. It would allow the treatment of the condition without the need for expensive, high-maintenance CPAP machines which a huge proportion of patients hate using in the first place. Such a treatment is now close to being a reality, under the name AD109.
The treatment aims to directly target the actual cause of obstructive sleep apnea. OSA is a neuromuscular condition, and one that only occurs during sleep—as those afflicted with the disease don’t suffer random airway blockages while awake. When sleep occurs, neurotransmitter levels like norepinephrine tend to decrease. This can can cause the upper airway muscles to excessively relax in sleep apnea sufferers, to the point that the airway blocks itself shut. AD109 tackles this issue with a combination of drugs—an antimuscarinic called aroxybutynin, and a norepinephrine reuptake inhibitor called atomoxetine. In simple terms, the aroxybutynin blocks so-called muscarinic receptors which decrease muscle tone in the upper airway. Meanwhile, the atomoxetine is believed to simultaneously improve muscle tone in the upper airway by maintaining higher activity in the hyperglossal motor neurons that control muscles in this area.
Results in phase 2 testing showed a marked decrease in AHI compared to those taking a placebo. Credit: research paper
Thus far, clinical testing has been positive, suggesting the synergistic combination of drugs may be able to improve airflow for sleep apnea patients. Phase 1 and Phase 2 clinical trials have been conducted to verify the safety of the treatment, as well as its efficacy at treating the condition. Success in the trials was measured with the Apnea-Hypopnea Index (AHI), which records the number of airway disruptions an individual has per hour. AHI events were reduced by 45% in those taking AD109 when compared to the placebo group in a phase 2 trial featuring 211 participants. It achieved this while proving generally safe in early testing without causing detectable detriments to attention or memory. However, some side effects were noted with the drug—most specifically dry mouth, urinary hesitancy, and a level of insomina. The latter being particularly of note given the drug’s intention to improve sleep.
Testing on AD109 continues, with randomized Phase 3 trials measuring its performance in treating mild, moderate, and severe obstructive sleep apnea. For now, commercialization remains a ways down the road. And yet, for the first time, it appears promising that modern medicine will develop a simple drug-based treatment for a disease that leaves millions fatigued and exhausted every day. If it proves viable, expect it to become a major pharmaceutical success story and the hottest new drug on the market.
[Kevin] admits that FreeCAD may not be the ideal tool for editing STL files. But it is possible, and he shares some practical advice in the video below. If you want to get the most out of your 3D printer, it pays to be able to create new parts, and FreeCAD is a fine option for that. However, sometimes you download an STL from the Internet, and it just isn’t quite what you need.
Unlike native CAD formats, STLs are meshes of triangles, so you get very large numbers of items, which can be unwieldy. The first trick is to get the object exactly centered. That’s easy if you know how, but not easy if you are just eyeballing it.
If you use the correct workbench, FreeCAD can analyze and fix mesh problems like non-manifold parts, flipped normals, and other issues. The example is a wheel with just over 6,000 faces, which is manageable. But complex objects may make FreeCAD slow. [Kevin] says you should be fine until the number of faces goes above 100,000. In that case, you can decimate the number of faces with, of course, a corresponding loss in resolution.
Once you are satisfied with the mesh, you can create a real FreeCAD shape from the mesh. The resulting object will be hollow, so the next step will be to convert the shape to a solid.
That still leaves many triangles when you really want flat surfaces to be, well, flat. The trick is to make a copy and use the “refine shape” option for the copy. Once you have a FreeCAD solid, you can do anything you can do in FreeCAD.
We’ve run our share of FreeCAD tips if you want more. There are other ways to tweak STLs, too.