โŒ

Normal view

There are new articles available, click to refresh the page.
Before yesterdayNibble Me This

Sirloin Beef Kebabs with Pineapple Chile Rice Pilaf

By: Chris
27 October 2025 at 10:23

[Standard FTC Disclaimer] We don't receive compensation from any products or links posted in this post.

This is a simple and quick recipe that we have made several times this year. It's one of those low-effort, high-reward dishes.ย 

We picked up a nice pair of Certified Angus Beef top sirloin steaks at Food City and I decided to make a classic - teriyaki steak kebabs. Skewers laden with peppers and onions were the obvious pairing. The sweet and spicy pilaf with pineapple and Fresno chile added big flavor and some originality.ย 

Steak kebabs with pineapple chile rice pilaf


Sirloin Beef Kebabs with Pineapple Chile Rice Pilaf

www.nibblemethis.com

Publishedย 10/25/2025

Teriyaki steak kebabs, roasted veggies, and a sweet and spicy rice pilaf. You can use whatever skewers you like, but I prefer to use about a dozen 6" bamboo skewers that I soak for about 1 hour. Allow at least 4 hours for marinating the steak.

INGREDIENTS

  • 12 to 16 ounces Certified Angus Beef top sirloin steak, cut into 1" cubes
  • 1 Vidalia onion or other sweet onion cut into 1" pieces
  • 2 Sweet Peak Long Peppers or red bell pepper, cut into 1" pieces
  • 1 tablespoon SPG type rub - I used NMT Umami Steak Seasoning recipe
  • Garnish:ย  sliced green onion, sesame seeds
For the Marinade
  • 1/4 cup peanut or other high temp oil
  • 1 tablespoon soy sauce
  • 1 tablespoon mirin
  • 1/2 tablespoon lime juice
For the Glaze
  • 1/2 cup teriyaki sauce
  • 1 ounce mirin
  • 1 ounce lime juice
For the Pineapple Chile Rice Pilaf
  • 2 tablespoons bacon fat
  • 1/2 fresno chile, finely chopped (Substitute red jalapeno or serrano)
  • 1/2 cup diced sweet pepper and onion (leftovers from making the veggie kebabs)
  • 1/2 cup pineapple, 1/4" dice
  • 1 cup long grain rice
  • 1 teaspoon salt
  • 1 teaspoon soy sauce
  • 1 cup chicken stock
  • 1 cup water

INSTRUCTIONS

  1. Marinade the steak. Mix the marinade ingredients together in a bowl and toss the sirloin cubes to coat. Cover and refrigerate for at least four hours or up to 24 hours.
  2. Assemble the kebabs.ย Remove the meat from the marinade and shake off excess. Place 5 or 6 pieces of meat each on skewers. Thread the veggies on some skewers. Drizzle all kebabs with oil and season with a salt-pepper-garlic rub.
  3. Preheat the grill to 450ยฐf. Set it up for a two-zone fire: One area directly above the hot coals and an area not over the coals for indirect cooking. See pics below for an example.
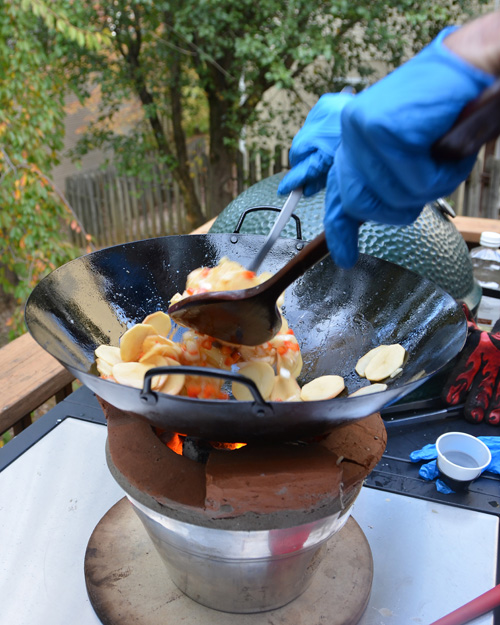
  4. Start the rice.ย  Preheat a medium pot over medium heat. Melt the bacon fat and sautรฉ the chile, sweet pepper, and onion for 3 minutes. Stir in the rice to coat and cook until the rice becomes aromatic, 1 minute or so. Add the pineapple, salt, soy sauce stock, and water. Bring to a simmer, cover with a tight lid and cook for 21 minutes. Check to make sure all liquid is absorbed. Leave covered for 5 minutes and then fluff with a fork.
  5. Make the glaze. Whisk the marinade ingredients together. You add a little pineapple juice if you like.
  6. Grill the veggie kebabs.ย  Grill them over direct heat, turning them every 1-2 minutes for about 4-6 minutes total. Move to the indirect side and brush with the glaze.
  7. Grill the steak kebabs.ย Grill them over direct heat for two minutes. Flip and cook for another minute. Move them to the indirect side, glaze them, and return to the direct side for another minute or so until done.
  8. Serve the rice, topped with 3 kebabs, green onion, and sesame seed.ย 

Yield:ย 2-4 Servings

Prep Time:ย 00 hrs. 30 mins.

Cook time:ย 00 hrs. 30 mins.

Total time:ย 1 hour plus marinade time

Tags: grill, steak, rice

Here are some notes and pictures from this session.

Beef is pricey these days so I like to make sure I get my money's worth. I know I'm getting quality when I see the CAB logo.

Fresno chiles are mild, fruity, and flavorful
Fresno chiles are my favorite because of their vivid red color, fruity flavor, and mild heat - less fire, more character. We grow them every Summer and I'm sad to see them finish up for the year.

The Sweet Peak long peppers are very mild in heat and rich in flavor, similar to bell peppers.ย 

The set up that I used keeps the food close to the heat source. I used a spider rig to lower the grate.
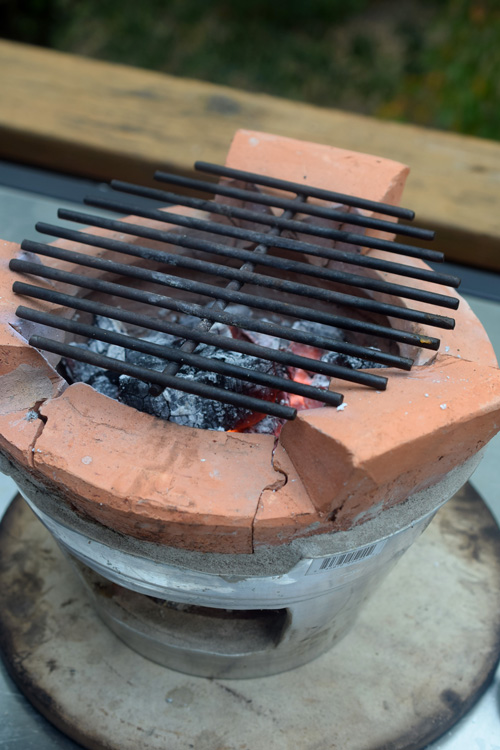
I found that I was out of charcoal so I used a divider for my Kick Ash Basket. Then I dropped in a spider rig and stole the cast iron grate from my BGE Mini-Max so the food would cook closer to the coals. The strategy worked out perfectly.


THis Big Green Egg is 18 years old
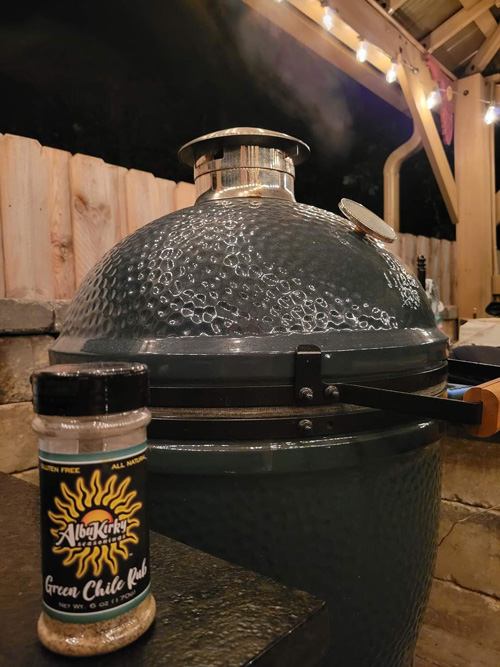
It's hard to believe that it has been 18 years since I bought this Big Green Egg, which was my first. It has held up beautifully over the year.


Grilling veggie skewers and meat skewers separately lets them cook at the appropriate time and temp.
Like many grilling enthusiasts, I like to grill my veggies and meat separately, which allows them to cook at the appropriate time and temp.


Fire makes peppers and onions even more delicious!


Sirloin kebabs roasting over hot coals next to veggie kebabs on the Big Green Egg.
Another advantage of using a two zone fire like this is you can apply the baste over the empty side. That way oil in the baste doesn't cause the coals to flame up.

In this pic, you can see that the spider rig and smaller grate from the Mini-Max allowed me to get the grates a few inches closer to the coals. This is useful for searing or in this case where I was running out of fuel.

Sirloin Beef Kebabs with Pineapple Chile Rice Pilaf
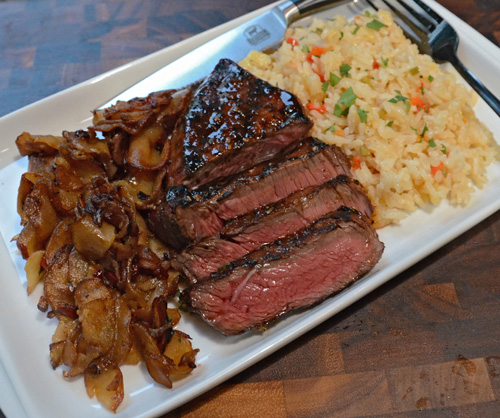
Sirloin Beef Kebabs with Pineapple Chile Rice Pilaf - Delicious!

Certified Angus Beef Sirloin was juicy, tender and flavorful!
The sirloin was juicy, tender, and flavorful!


Certified Angus Beef Sirloin Beef Kebabs with Pineapple Chile Rice Pilaf
This has become a go-to meal for us because it is quick, inexpensive, and uses lean protein.


Petite Fillet with Garlic Peppercorn Sauce

By: Chris
30 March 2025 at 13:16

ย [FTC Standard Disclosure] We receive no compensation for any content or links in this post.

Let's get the recipe out of the way first since people hate scrolling through the typical food blogger stuff to get to the recipe. This is a simple white sauce variation that is creamy, savory, and as the name implies - it has a peppery kick.

Petite fillet with creamy peppercorn sauce
Mini-Surf and Turf - Petite fillet with creamy peppercorn sauce, snow crab legs, and asparagus.


Creamy Garlic Peppercorn Sauce

www.nibblemethis.com

Publishedย 03/30/2025

A creamy and delicious sauce that's delicious on steaks, burgers, and grilled vegetables. We took ours to another level by using Bourbon Barrel Smoked Pepper.

INGREDIENTS

  • 3 tablespoons unsalted butter
  • 1 tablespoon minced garlic
  • 1 tablespoon minced shallot
  • 1/2 teaspoon kosher salt
  • 1 1/2 teaspoon coarse black pepper
  • 2 tablespoons all purpose flour
  • 1 cup cream or half and half
  • 1/4 cup shredded parmesan cheese
  • salt to taste once finished

INSTRUCTIONS

  1. Preheat a small sauce pot to medium/low heat, melt the butter.ย  Then add saute the garlic, shallot, salt and pepper and whisk frequently until the garlic starts turning golden brown - about 2 minutes.
  2. Make a light roux by whisking in the flour and continuing to whisk until it smells nutty, about 2-3 minutes.
  3. Slowly add the cream, whisking continuously, until combined into a sauce.
  4. When the sauce begins to slightly simmer, whisk in the parmesan and stir occaisionally until the cheese is melted.
  5. Tasted and add more salt as desired.

Yield:ย 2-4 Servings

Prep Time:ย 00 hrs. 5 mins.

Cook time:ย 00 hrs. 15 mins.

Total time: 20 minutes

Tags:ย sauce

We weren't planning on cooking yesterday afternoon but when I saw a pair of Certified Angus Beef brand petite fillet at Food City, things changed.

petite Certified Angus Beef fillet and snow crab legs
Food City also had a pack of snow crabs for a low price so on the spur of the moment, we decided to make a mini-turf and surf for the afternoon's NCAA Elite 8 basketball games.

We didn't have a lot of time because the skies were turning dark and Spring storms were popping up. I fired up one of our Big Green Eggs and got to prepping the food. I seasoned the steaks simply with Bourbon Barrel smoked salt and smoked black pepper.ย  Did the same for the asparagus.

petite fillet and asparagus prepped for grill
As you can see, one fillet was much more petite than the other. One was a heavy 5 ounces while the other barely weighed in at 3 ounces.

While the crab legs heated up in our steamer, I raced against time to grill the steaks. My plan was to grill the smaller one about 3 min per side and the larger one about 4 min per side.

pair of petite fillet cooking on the grill
My set up for the Big Green Egg was a Kick Ash Basket full of Jealous Devil lump charcoal and a pre-heated cast iron grate from Craycort. Notice how the angle of the grates go in 3 directions? Each of those are inserts that you can lift out to add fuel or wood OR you can drop in an accessory insert like a griddle plate or veggie wok.

Steak and asparagus cooking on the Big Green Egg grill
Once the steaks were flipped, I added a bit of asparagus to the heat of the hot coals.

Fillet mignon and asparagus on the grill
Cooking away on the Big Green Egg. This was just before I pulled her smaller fillet off of the grill.


Certified Angus Beef brand fillet from Food City cooking on the grill with asparagus
Remember that plan to let the larger fillet go for a couple of minutes longer? The weather had other ideas about that and I'm fine with a rare fillet so I pulled it early.

Asparagus and steak fresh from the grill
Asparagus is one of my favorite veggies to pair with steaks because prep is literally a snap and they cook quickly.


Surf and turf for the games! My filet was rare due to the cooking time being cut short but like I said, I was fine with that.ย 

Every bite was delicious! Since we normally opt for ribeye or strip, Alexis couldn't get over how tender the steak was. Not a bad meal for an afternoon when we weren't planning on cooking in the first place.

Bahamian Pork Chops with Pineapple Herb Sauce

By: Chris
26 January 2025 at 14:26

ย [FTC Standard Disclosure] We receive no compensation for this post or any of the links within.ย 

"That's the best pork chop I've ever had!" my wife exclaimed.

Bahamian Pork Chops with Pineapple Herb Sauce, Gold rum Glazed carrots, and fire-roasted salt and vinegar potatoes
Bahamian Pork Chops with Pineapple Herb Sauce
Salt and Vinegar Roasted Potatoes
Gold Rum Glazed Carrots


But big news, first. Two members of the Nibble Me This grilling team got married in December! My sister, Rhonda, and Sean tied the knot in a family wedding on Exuma in the Bahamas.ย 


NMT Grilling Team members Rhonda and Sean getting married on Jolly Beach on Exuma in the Bahamas.

The meal that I had at the reception at The Rusty Anchor was Double Boned Porkchops with Roasted Potatoes and Vegetable Medley and it was incredible. The pork chop was tender, perfectly cooked, simply seasoned and served with a sweet and savory sauce.ย 

Double Bone Pork Chop at the Rusty Anchor, Exuma Bahamas
Double Bone Pork Chop with Roasted Potatoes & Vegetable Medley
I promise, there are carrots under that pork chop, they're turned lengthwise.

We wanted to do our spin on this dish when we got home.ย 

  • Double bone pork chop - We got beautiful duroc pork chops from Jesse's Butcher Shop in Knoxville and they expertly frenched the bones for us. They weighed in about 1 pound each so this could easily feed 2 people per pork chop.
  • Brine - Normally, I prefer to dry brine but I wanted to use a wet brine as a nod to the famous swimming pigs at Pig Beach on Big Major Cay. These pigs swim in high salinity ocean water.
  • Seasoning - I tried a couple of variations but the best was simple - Salt, pepper, and garlic.
  • Cook - I went with a sear then roast. I could have done a reverse-sear but I wanted to also use the sear grill to roast the potatoes which take an hour so I needed to sear at the beginning.
  • Sauce - The sauce was brown, clear, had visible herbs, and small diced pineapple. So I came up with a pineapple herb sauce. It's sweet, earthy and warm. I tried glazing a pork chop with the sauce and just adding the sauce at the end. It worked well both ways but I preferred it served with the sauce at the end.

Bahamian Pork Chop with Pineapple Herb Sauce

www.nibblemethis.com

Publishedย 01/25/2025

My spin on the amazing double-bone pork chops served at my sister's wedding in Exuma, Bahamas. The brine is a tribute to the swimming pigs of Exuma. The thick chops are grilled/roasted and served with the sweet and savory pineapple herb sauce. Serve with Gold Rum Glazed Carrots and Fire Roasted Salt and Vinegar potatoes.

INGREDIENTS

  • 2 double-bone, frenched duroc pork chops (about 1 pound each)
  • Garnish ideas: They used a cabbage, bell pepper, carrot slaw and balsamic glaze. I like pineapple salsa and balsamic glaze.
For the Brine
  • 3 quarts water
  • 9 tablespoons kosher salt
  • 1/2 cup sugar
For the seasoning
  • 2 teaspoons salt
  • 1 teaspoon white pepper
  • 1/2 teaspoon granulated garlic
  • 1/4 teaspoon cayenne pepper
For the Pineapple Herb Sauce
  • 1 cup fresh pineapple juice
  • 1/2 cup turbinado or brown sugar
  • 1/4 cup finely diced pineapple
  • 1 ounce soy sauce
  • 1 tablespoon cider vinegar
  • 1 tablespoon Dijon mustard
  • 1 teaspoon granulated garlic
  • 1 teaspoon onion powder
  • 1/2 teaspoon dried thyme
  • 1/2 teaspoon ground cinnamon
  • 1/4 teaspoon ground allspice
  • 1/4 teaspoon white pepper

INSTRUCTIONS

  1. Brine the pork chops.ย  Mix together the brine ingredients and chill to 40f. Add the pork chops and brine for 18 to 36 hours, keeping refrigerated.
  2. Preheat the grill to 450-500f (high heat).
  3. Prep the chops. Remove the chops from the brine and pat dry. Lightly cover with oil and then season all over.
  4. Sear the chops. Sear the chops about 2-3 minutes per side, just long enough to get nice cross hatch marks.
  5. Roast the chops to finish. Move the pork chops to a grill set up for indirect heat (or oven) at 275f. Roast until the chops reach an internal temperature of 150f, about 45 to 60 minutes. I like to add a chunk of smoke wood of your choice for extra flavor and color.
  6. While the chops are roasting, place all sauce ingredients in a small pot over medium heat and bring to a simmer. Reduce heat and simmer until thickened, 15 to 20 minutes. If you like a thicker sauce, feel free to add in 1/2 teaspoon xanthan gum or a starch slurry.
  7. Serve chops on a bed of roasted carrots and potatoes, drizzle with balsamic glaze, add pineapple glaze sauce or serve on the side.

Yield:ย 2-4 Servings

Prep Time:ย 00 hrs. 30 mins.

Cook time:ย 01 hrs. 30 mins.

Total time:ย 02 hrs plus brine time

Tags:ย sauce

Notes and Pictures


Frenched, two bone pork chop from Jesse's Butcher in Knoxville
Look at the beautiful marbling on these Duroc pork chops!

Like I said, most often I prefer dry brining but in this case I did it as a nod to the swimming pigs. Swimming pigs, you ask?

Yes! Swimming pigs!ย  Here Alexis is feeding one from the boat. They live on the beach but swim out to be fed by the boats of tourists. I joked that they weren't swimming, rather they were brining in the ocean water.

Searing Duroc pork chops on the Big Green Egg Mini-Max
Searing the pork chops.ย 

Double bone pork chop searing on a set of GrillGrates on a Big Green Egg Mini-Max
I used GrillGratesย to get majestically defined cross-hatch marks.

Grilling an extra thick pork chop on a Big Green Egg Mini-Max
I used the Big Green Egg Mini-Max for searing because I also wanted to use it for roasting the potatoes.

Fire roasting vinegar and salt potatoes on a Big Green Egg Mini-Max
As soon as the chops were seared, I switched the Mini-Max to indirect cooking and placed the potatoes in to fire roast.


Extra thick pork chop smoking on a Big Green Egg
I moved the pork chops over to a Large Big Green Egg that I had set up for indirect heat.ย  My set up pictured was an Adjustable Rig with the oval heat stone. Any indirect set up would work.

Thick pork chop with grill marks on a Big Green Egg
The rack and pan was probably overkill but it just keeps things cleaner.ย 

I added a chunk of pecan wood to give a bit more color and flavor.

I flipped the pork chops over about halfway through the cooking time. It probably wasn't necessary with the convection inside the Egg and the raised rack, but it can't hurt, right?

It took just over an hour for this chop to reach an internal temperature of 145f cooking at 275f. The temps are up a little here because I had the lid open for taking pics and the fire kicked up.

The hour is just the right time for the Fire-Roasted Vinegar and Salt Potatoes to finish in the Mini-Max.

Meanwhile, I finished some steamed carrots in a flambe of gold rum, butter turbinado sugar, salt, and carrot tops.

Bahamian Pork Chops with Pineapple Herb Sauce
To finish it, I plate the chop on a bed of carrots and potatoes, drizzle with balsamic glaze, spoon the sauce over the chop and top it all off with pineapple salsa.

Brisket, Butts, and Chicken Cook 4 October 2024

By: Chris
11 October 2024 at 14:14

ย [Standard Disclaimer] Any link that may earn us a commission is tagged as [Affiliate Link].ย 

Is this thing still on?ย 

I noticed our freezer stock of BBQ was looking a bit bare.ย  So, last weekend, I fired up my big smoker to smoke a brisket, two pork butts, and some chicken.ย 


Here are some notes from that cook. I hadn't been cooking a lot so this time, I was trying to use up a lot of products that I had on hand.

Meat Prep

  • Brisket -ย 
    • Meat - It was a 17.44 lb USDA Choice brisket that I wet aged for 28 days. I prefer CAB briskets but with the cost of beef these days, I buy what I can get for a decent price that looks good.
    • Trim - Minimal trimming, just enough to get the fat cap about 1/4" thick and to achieve an aerodynamic shape so the smoke flows over it. If I was cooking this on a Big Green Egg I would have gone with the competition trim and split the point and flat sections.
    • Injection - I used Butcher's Original Brisket injection. I used that mostly for competitions. At home, I'll often just use seasoned stock or nothing at all.ย 
    • Seasoning - I gave the whole trimmed and injected brisket a 12-hour dry brine. I used Four 41 South's Fat Henry's Classic and Gentry's Beef Brigade. I put that on a tray and rack, covered it with a plastic food bag and stuck it in the fridge.
  • Pork butts
    • Meat - They were two 9 lb bone-in pork butts from Sam's. The were almost exactly the same size, 6 hundredths of a pound apart.
    • Trim - Minimal trim of the exterior fat.
    • Injection - I injected with Chris Lilly's World Championship Pork Shoulder Injection recipe from his first book. I've found you can't go wrong with that one.
    • Seasoning - I dry brined them for 12 hours as well. I used a mix of Denny Mike's Sublime Swine and Kansas City Cowtown's Sweet Spot rub. In general for pork I like a combination of a sweet & spicy rub and a savory rub.
  • Chicken
    • Meat - Normally we would use bone-in, skin-on chicken for this. But for a couple of reasons, we had to use boneless, skinless thighs and breasts. It wasn't ideal but we worked with it.
    • Trim - I cut off the excess fat from a few of the fattier pieces but that's it.
    • Seasoning - I gave them a 4 hour dry brine in Denny Mike's Pixie Dust Universal Seasoning.

Wet aging a 17 lb brisket in the Cryovac packaging
I wet aged the brisket for 28 days. It isn't as effective as dry aging but it is a heck of a lot easier when you don't have a dedicated dry aging fridge.

Usually, I used my Beef Rub v.2 but like I said, I was trying to use up stuff that I had on hand. Fat Henry's Classic was a good choice. Even though it was so old from sitting, it still had a great flavor that complemented the brisket well.ย 

Trimmed and seasoned beef brisket for smoking BBQ
Brisket trimmed, injected, and seasoned.ย 

My neighbor and teammate bought me the Kansas City Cowtown's Sweet Spot during a trip to Kansas City and I have enjoyed it quite a bit on pork.ย 

Pork butt injected with an apple juice mixture and seasoned with KC Cowtown's Sweet Spot rub
I thought it was cool that I got two butts that were only 6/100ths of a pound apart in size. Here they are ready to go into the fridge for 12 hours before smoking.

For the chicken, I used Denny Mike's Pixie Dust Universal Seasoning Blend. It has a smoky, salty, and mildly sweet profile that goes well on BBQ chicken.

Smoker Set Up
I love cooking on my Deep South Smoker GC36 but I don't do it often because it is such a big cooker. It's a gravity fed smoker. That means it has a vertical chamber that you fill with lump charcoal, which gradually feeds the firebox below as the fire burns. This gives long, steady cook times. Sadly, last time I looked, the fabrication shop had quit making the smokers.ย 

Deep South Smokers GC36 showing the ports for the controller and thermometers
This section is where I keep my thermometers and fan controllers. The two black caps unscrew to open pass throughs for thermometer wires. On top, you can see the chute door, that is where you load the lump charcoal from top down.

This is the door of the fire box. I can run the smoker manually just by controlling the air flow with this one ball valve.ย 

There are two ways to add wood to this smoker. You can mix wood chunks in with the lump charcoal, which requires less hands on. I prefer to add large chunks of wood directly to the firebox every 30-45 minutes for steady dosing and the maximum control. Either way works, just my preference.

But this was an overnight cook and I like my sleep, so I used my Thermoworks Billows fan to control the air flow. Yes, the same fan that controls my Big Green Egg can handle this big cabinet smoker! In fact, it is so capable, I run it with the "restrictor plate".ย 
Thermoworks Billows Fan [Affiliate link]

Red BBQ pit with a bag of FOGO charcoal
All set up and ready to go. The foil cap on the chimney on the upper left will come off when I start it. I only use quality lump charcoal in this pit. In this case, I went with Fogo.


Smoke Session
  • 10pm - I fired up the pit.ย I light a single hay-wick on a piece of wood in the firebox, turn on the Thermoworks fan and let it come up to temp over two hours. If I'm in a hurry I can use a blow torch and get it up to temp in an hour. I wasn't in a hurry so I ran it at 250f. If this was a competition, I would run it at 290f.ย 
  • 1am - (slightly before) Loaded the briskets and butts on the top rack of the smoker and placed steam pans below them to catch the drippings. I like keeping this smoker clean!ย ย 
  • Every 30 or 45 minutes, Alexis or I would add a couple chunks of hickory wood to the fire box and about every 90 minutes, we would spritz the meats with apple juice.ย 
  • 9am - (slightly before) The brisket and butts were at internal temperatures of 155f or so. Normally I don't wrap the meats (if I'm going to) until they hit an internal temp of 160f or higher but I had the color I wanted so I wrapped now.
    • Brisket - I wrapped with beef stock and a small amount of dried onion.
    • Butts - I wrapped with Parkay, apple juice and more rub.
  • Turn up the heat! Since the meats were wrapped, I adjusted the heat to 275f. I used the app to change the setting on the Thermowork Signals which controls the Billows. Easy peasy.
  • 10am - I drizzled Parkay over the chicken thighs and breasts, which were in steam pans, and put the steam pans into the smoker on the middle rack. I let them go until they hit an internal temperature of 155f. Then I brushed them with Pepper Palace's Chipotle Honey Rum BBQ Sauce ย and let them finish to 160f.ย  If the thighs were bone-in, I would have taken them to 175-180f.ย 
  • 12:46pm - I pulled the brisket off at an internal temp of 204/206f. It was perfectly probe tender at that point so I put it into a preheated Cambro hot box to hold.
  • 1:00pm - I pulled the pork butts to rest as well.
  • 2:30pm - I put a chunk of wood in the fire box to kick up some fresh, heavy smoke. I glazed the brisket and ribs with Blues Hog Original that I cut with apple juice and put them back in the smoker for a final kiss of smoke until the sauce was set.

Unsurprisingly, the DSS cooked steady and smooth all night long.


Thermoworks Signals cooking alarm and controller
The brisket flat (155f) was slightly behind the point (159f) when I wrapped.
This is the Thermoworks Signals which controls the Billows Fan. It can track 3 internal temps and maintain the cooking temp all at the same time. Of course it connects wirelessly to their app so I can control my smoker even if I'm at the store.ย 
Thermoworks Signals Cooking Alarm/Controller [Affiliate link]

The two port butts were also right at 155f when I wrapped.
Here, I'm using the Thermoworks Smoke for tracking the internal temps. This just tracks two temps and connects to a remote device. It's not as fancy, feature rich, or flexible as the Signals but it's good for simply tracking temps.
Thermoworks Smoke [Affiliate link]


Two smoked pork butts
Here are the two pork butts before going into the wrap. They were plenty dark and didn't have to wait another 5 degrees to wrap.

Smoked brisket waiting to go into the wrap.
Smoked brisket waiting to be wrapped.

Please excuse the harsh sunlight, not much I could do about it at this time of the morning. Pork butts wrapped upper left, brisket upper right, drip pans underneath, and pans of chicken below all of that.


Graph from the Thermoworks Signals for the brisket cook. One temp probe was in the brisket point (blue), one in the flat (yellow), one unused, and one for the air temp (green).


The Results
I was glad to find out that I have not lost my BBQ touch while I have been away :) Everything turned out deliciously!


The brisket had a nice bark and the aroma of a good, clean smoke.


Slicing up the brisket. I love the first slice or two because you can immediately tell how tender it is.


I'm usually full by this point from all of the "quality control" bites that I take.
This gave us 2 half-sized steam pans of brisket, packed tight. We kept all of the liquid from the wrap, removed the fat with a grease seperator, and then poured the beef jus over the brisket.
We ended up with 16 vacuum sealed packs of brisket for the freezer.


Smoked chicken thighs coming off of the smoker.
The chicken was sweet, spicy, and smoky - just perfect.

Look how juicy the chicken breasts were. Despite being so lean, they stayed moist.

We broke up the thighs and breasts for pulled chicken. We had 16 one-pound packs of pulled chicken for the freezer. These are fantastic when making soups, pasta dishes, etc through the winter. I can taste the chicken tortilla soup now.


The pork butts were excellent - smoky, sweet and a hint of heat. We got about 11 pounds of pork for the freezer. That will be killer for pork sandwiches, BBQ nachos and my favorite - carnitas tacos!

smoked pork carnitas tacos
Of course, not all of that BBQ made it to the freezer. I had to have some pork carnitas tacos...

smoked brisket nachos
and some brisket nachos!

Twenty-four hours later, Big Red was all cleaned up and ready to roll back into the garage.


Rue Morgue Burger - A Bunless Burger Delight

By: Chris
19 August 2023 at 11:40

The Beef Rue Morgue is a wild bunless burger that starts with a bed of crispy golden fries. Then it is layered with Edgarโ€™s drunken chili, queso, a thick burger, and topped with a perfect sunny-side-up egg.

This is my version of the Beef Rue Morgue, one of the fabulous burgers served at Poeโ€™s Tavern in Atlantic Beach, FL. Any trip back home isnโ€™t complete for me without a trip to this Edgar Allen Poe-themed tavern because of its killer burger lineup.

Rue Morgue burger on a bed of fries, chili, and queso
Crispy fries, drunken chili, creamy queso, and a perfectly cooked burger with a sunny-side-up egg on top...yes, please!

You donโ€™t need a recipe for a burger, but hereโ€™s what I was thinking and what I did to make mine tasty and delicious like theirs.

Of course, I cooked mine on a Big Green Egg grill but a flat top would be good too.


Fries

Poeโ€™s hand cuts their fries. They are crunchy on the outside, delicate on the inside, and well-seasoned. So Alexis deep-fried shoestring potatoes and as soon as they came out, she seasoned them with popcorn salt and some finely ground NMT Umami SteakSeasoning recipe.

In case you can't tell, the Rue Morgue burger is a thing of decadence. So no air frying here, we deep-fried those shoestring potatoes.


Edgarโ€™s Drunken Chili

Poeโ€™s chili is richly flavored with a pleasant heat. It seems to have the usual suspects of ground beef, onion, seasonings, and some black beans. Fortunately, I had a batch of chorizo and black bean chili in the freezer so I used that.

Queso

Poeโ€™s queso seemed like standard fare. I made mine in a double broiler with equal parts Velveeta queso and pepper jack cheese. I added enough milk to get the texture that I wanted and kosher salt to taste.

The Burger

What I like about Poeโ€™s burgers is that they grind their burgers in-house. Even though they are loaded with all kinds of tasty toppings, you still taste the beefy burger. Their burgers are huge, so I made 8-ounce burgers with freshly ground chuck. To maximize flavor, I cooked them on a griddle plate on a Big Green Egg and then seasoned them after the flip with finely ground Umami Steak Seasoning.

Griddle plate on a big green egg kamado grill
My favorite tool for griddle burgers on the grill is an old griddle plate that went with a gas grill that I had eons ago. It fits perfectly in the Big Green Egg and it has a grease catch in one corner.

A major trick for proper griddle cooking is knowing the surface temp, not just guessing. That's why I love, love, love the Thermapen IR that my sister got me for Christmas. It combines the renowned Thermapen super-fast digital food thermometer with a non-contact infrared surface thermometer.
[Thermapen IR - Affiliate Link]

For the patties, I used 8 ounces of freshly ground chuck and used a burger press to form them. Then I rested them in the fridge for about an hour.

Grilled burgers are tasty, for sure, but a griddle-cooked burger gives you the maximum crust and utmost flavor.ย 


Egg

I wanted the perfect sunny-side-up egg for this killer burger. One thing I did is remove the thinner part of the egg whites by straining the egg over a mesh screen. Then for the perfect flavor, I used Kitaโ€™s Over Easy seasoning.


Flavor you can see on that egg! Kita's Over Easy is THE seasoning for eggs, it also works killer on potato salad, chicken, and so much more. No commissions or anything, just a solid recommendation.

Golden lava!! Notice how clean the edges of the egg are. That's why a strain off the thinnest part of the egg white, you get the clean edges.

Final Burger

This was amazing, even better than Poe's if I do say so, myself. When you pop that egg, the yolk mixes with the queso and chili, creating a river of deliciousness that coats the fries and burger. Oo la la, so good!ย 

Rue Morgue Burger ala Poe's Tavern but made at home on the Big Green Egg.
Perfection! So good it would even tame an escaped orangutan armed with a straight razor.
[Spoiler alert, I guess? I mean, the short-story has been out since 1841.]


More About Poe's Tavern

I highly recommend checking out Poe's Tavern if you ever get the chance. They have locations in Atlantic Beach (FL), Wrightsville Beach (NC), Sullivan's Island (SC), and Savannah (GA).ย 

My go-to order is the Tell-Tale Heart - A big honkin' burger with cheddar, apple wood-smoked bacon, and a fried egg.ย 

Their primary line is their gourmet burgers and sandwiches. You can get any of them as a burger, veggie burger, or chicken sandwich.ย  They also have fish tacos, chili cheese fries, nachos, salads, and more.


The service has always been fast and friendly, the beers cold, and the food amazing. I just wish I could get there more often!

Gorgonzola and Roasted Garlic Sauce for Steaks, Beef Roasts, and Burgers

By: Chris
12 May 2023 at 16:00

[FTC Standard Disclosure] We receive no compensation for this post. Any links which may earn us a commission are tagged as [Affiliate Link].ย 

This is the recipe for the sauce that we served with reverse-seared beef tenderloin at the 2023 Chain of Lakes Eggfest. We won 1st place there and this sauce was definitely one of the reasons that we did so well. A lot of folks asked for this recipe so here it is.ย 

Gorgonzola and Roasted Garlic Sauce for Steaks

About Gorgonzola Sauce

This sauce is rich in texture and flavor. Loaded with heavy cream, the sauce is like velvet. It has the flavor trifecta with gorgonzola cheese, green peppercorn, and roasted garlic. It is excellent on:
  • Beef roasts, such as beef tenderloin or rib roasts,
  • Steaks, including ribeye, porterhouse, strip and filet, and
  • Big juicy burgers!

Green Peppercorns

Green peppercorns are just black peppercorns that aren't sun-dried.ย 
  • Green peppercorns have a fragrant aroma and have a more fruity flavor.
  • Green peppercorns have less heat and are less astringent in flavor than black peppercorns.
  • Green peppercorns are more tender, so I crush mine in a mortar and pestle to get rustic, coarse bits for my sauce.
  • Substitute - If you can't find green peppercorns (I mail order ours), you can probably find those little pepper grinders full of tri-color pepper in any grocery store. Coarsely ground tri-color pepper will work, just dial back the quantity to about 1 teaspoon.

Here's the recipe.

Gorgonzola and Roasted Garlic Sauce for Steaks, Beef Roasts, and Burgers

www.nibblemethis.com

Publishedย 05/07/2023

This is the rich, velvety, and boldly flavored cheese sauce that we served on beef tenderloin at the 2023 Chain of Lakes Eggest. It was a huge hit with the crowds and helped us win First Place in that event.ย 

INGREDIENTS

  • 4 tablespoons butter
  • 1 shallot, peeled and diced
  • 3 tablespoons all-purpose flour
  • 1 tablespoon roasted garlic paste
  • 2-3 cups heavy cream
  • 5 ounces of crumbled gorgonzola cheese
  • 1 1/2 teaspoons crushed green peppercorns
  • kosher salt to taste, about 3/4 teaspoonย 
  • 1 egg yolk

INSTRUCTIONS

  1. Melt butter in a sauce pot preheated over medium heat and saute the diced shallot for about 3-5 minutes until tender. Stir in the garlic paste and cook for 1 more minute.
  2. Whisk in the flour and continue whisking until it is combined into a roux and has a nutty aroma, 1-3 minutes.
  3. Whisk in the cream and green peppercorn until smooth and creamy. Allow a very slow simmer, about 3-5 minutes.
  4. Once the sauce starts to slowly bubble, whisk in the egg gorgonzola in batches until it has all melted into the sauce.
  5. Whisk in the egg yolk and let cook for 1 more minute.
  6. Add kosher salt to taste.
  7. Keep warm and serve over roasts or burgers. For burgers, this is best refrigerated and placed on top of the burgers after they have been flipped.ย 

Yield:ย 2 cups of sauce

Prep Time:ย 00 hrs. 10 mins.

Cook time:ย 00 hrs. 15 mins.

Total time:ย 25 mins.

Tags:ย sauce

Notes and Pictures


Gorgonzola and Roasted Garlic Sauce for Steaks
I started with a 2.2-pound tomahawk ribeye steak from Butler and Bailey Market.

I used my NMT Umami Steak Seasoning recipe except I ground it finely as seen on the left. I do this for a couple of reasons. One, the fresh grinding activates the flavors a bit more. Two, the fine particles seem to absorb into the meat more easily during a dry brine. Third, the finely ground rub makes a fantastic finish seasoning.

I put the seasoned steak on a rack, loosely covered it with a food bag, and put it in the fridge for a 24-hour dry brining.

Gorgonzola and Roasted Garlic Sauce for Steaks
After 24 hours, you can see how the rub has adhered to the steak.ย 


Mojobricks Bar-B-Cubes
For fuel, I loaded fresh Fogo lump charcoal in my Kick Ash Basket and added 2 cubes of red oak Mojobrick Bar-B-Cubes. Then I topped this off with the cleaned, leftover lump charcoal.

I know the wood cubes look like MDF but Bar-B-Cubes are bricks of food-safe wood varieties that are bound together using a 100% natural binder. I know several pro teams that use them in competition and they have won at World Champion levels. I love them in the backyard for their consistency and convenience. I receive no compensation from them, I just like the product.ย ย 


Tomahawk ribeye on a big green egg
My grill of choice for this cook was one of my large Big Green Eggs. I used an indirect setup of a cast-iron plate setter (aka ConvEGGtor) and cast iron grates from Craycort.
There are now a lot of cheap cast-iron plate setters out there, but I use the original created by Michael Chance now sold by Smokeware. I've had mine for over 8 years and it is still rocking along.


Themoworks Square Dot
My slow-roast portion of the reverse-sear was 275ยฐf until it reached an internal temp of 125ยฐf. Normally, I prefer a cooking temp of 225-250ยฐf but I compromised to speed the cooking time up. You'll still get a nice steak at 275ยฐf but you'll be a little more done on the edges than at 225ยฐf.

Zucchini on the grill
While the steak rested, I switched to direct heat and dropped in the griddle plate to cook a side of zucchini. This modular feature is one of the reasons I have been using this grate from Craycort for over a decade.ย 

Tomahawk on Craycort cast iron grate on a big green egg kamado grill
Finally, I seared the steak. I could have done this on the grates or griddle. I went with the grates because I still had zucchini on at the time.

Gorgonzola and Roasted Garlic Sauce for Steaks
Reverse-seared ribeye steak with grilled zucchini and roasted potatoes, not bad for a weeknight.

Sue Ann Staff Estate Winery The Gritstone
We had a special wine with this - Sue Ann Staff Estate Winery's The Gritstone, a cabernet. It's a dry, medium-bodied red wine that is barrel aged for 20 months. It is named after a generations-old gritstone that remains on their property.

We were lucky enough to have Sue Ann Staff with us at the Eggfest and she brought some of her wines. The vineyards have been in her family for over 200 years, how cool is that? Sue and I both had recipes for gorgonzola sauce so we combined them and this sauce was a fantastic result.

Gorgonzola and Roasted Garlic Sauce for Steaks
We finished the steak with the gorgonzola sauce, more gorg crumbles, and the finely ground steak seasoning.ย 

Gorgonzola and Roasted Garlic Sauce for Steaks
The creamy and richly flavored sauce on the steak was a trip to heaven.

Appetizer Idea: Fried Mashed Potato Cakes with Brisket and Pimento Cheese

By: Chris
22 April 2023 at 18:50

[FTC Standard Disclosure] We receive no compensation for this post. If any links may earn us a commission, those links will be tagged [Affiliate link].

I smoked a brisket last weekend and while it was tender, delicious, and amazing, that is just the start of this post.


One night last week, I made twice-baked potatoes with some of this tasty brisket and leftover pimento cheese that Alexis had made.

Twice-Baked Potatoes

The process is simple.ย 

  • I baked two large Idaho bakers on the Egg until they were tender.ย 
  • I sliced the top off and scoops the steaming potato pulp into a large bowl.ย 
  • There I added about a cup of chopped brisket and a heaping amount of pimento cheese.ย 
  • I stuffed most of this mix back into the potato shells.

I put the potatoes on a tray into a Big Green Egg set up for indirect heat and running at 350ยฐf. I topped them with a few pats of butter and let them run for 20 minutes.


Then I topped them with a "small" amount of sharp cheddar and let them roll until the cheese was melted, another 10 minutes or so.

I seasoned them with some dried herbs and they were ready.
Warm, creamy, smoky, and briskety - these were phenomenal.
But...that's just half of the story.


Fried Mashed Potato Cakes

Remember the leftover stuffing for the twice-baked potatoes? Yes, the leftover, leftovers. I used those to make Fried Mashed Potato Cakes!ย 


Here's how I did those, it was pretty simple.ย 


I started by cleaning out my BGE Mini-Max grill. That is so much easier now that I finally bought a Kick Ash Basket Ash Can.ย 

How fussy are you about adding coal? I like to shake the ash off of the leftover coal in the Egg. It's fine to just add more coal to the basket. But I like to remove the used coal, add the new coal, and put the used coal on top. I find the used coal lights easier and it definitely doesn't pop as much.

I formed the leftover twice-baked potato mix into cakes using a 2 1/2" ring and thenย double-dipped them (flour-egg-flour).
.ย 
I got the Mini-Max dialed in at 350ยฐf and preheated the skillet of oil for 5 minutes. I fried them in oil for right at 1 minute per side.

I put them on a rack when they came out so they didn't get greasy.

I gave them a quick squirt of white queso sauce and it was time to dive into
golden, crispy deliciousness!ย 


2023 Chain of Lakes Eggfest

By: Chris
8 April 2023 at 14:39
[FTC Standard Disclosure] We receive no compensation for this post. Any links that may earn us a commission are tagged [Affililate Link]

Once again, I'm super proud of the Nibble Me This grilling team. Last weekend, we cooked in the 2023 Chain of Lakes Eggfest and the hungry crowds voted us as the 2023 Champions.

2023 Chain of Lakes Eggfest grilling food festival
I couldn't ask to cook with a better group of friends and family.

But even better, this grilled food festival is an annual fund-raiser hosted by Mannix Pools and Grills for Girls Inc. and the local Boys and Girls Club. The top 3 placing teams - TromboKing, Pork's Peak, and Nibble Me This - not only donated our cash prizes back to the charities but the 3 teams also MATCHED that with an additional donation, totaling $5,000 extra for the two clubs.

Here is a look back at the event.

Planning

Before we light the first fire, Rhonda (team captain and my sister) and I plan it all out.

  • What to serve - We look at things that are crowd favorites, can be prepped ahead of time, and have short cook times so we can keep the food coming out.
  • How much to serve - We create a demand forecast by taking the number of ticket presales and typically double that to account for walk-up sales.
  • What to take - We coordinate our equipment & supplies lists so that team members bring everything we need but not 2 and 3 of everything since space is a premium.

Pre-Prep

Since we only have 2 hours before gates open on the event day, we have to smoke our green chile-seasoned pork butts during the week. Rhonda did two of these for Jordan's Drunk Pickles and I did one for the Smoked Pork Taquitos.

Is the Thermoworks Signals any good? It's my favorite!
Eight-pound pork butt seasoned with Albukirky's Green Chile Seasoning. For smoke, I used Jealous Devil Smoke Woodย blocks that I cut down to cubes for the kamado grill. I used the Thermoworks Signal with a Billows fan to run the Big Green Egg grill at 250ยฐf.
Thermoworks Signal [Affiliate Link]ย (currently $59 off)
Thermoworks Billows [Affiliate Link]


This was taken when I was about to wrap the pork butt in foil with lime butter about 9 hours into the cook.

Here is the graph from my Thermoworks Signals. The green line is the cooking temperature which held steady all night. The red line is the internal temperature. You can tell that I put the butt on about midnight and then see when I wrapped it at about 9am. After wrapping, I turned the heat up to 290ยฐf to finish it up. I pulled the pork butt when it hit an internal temperature of 205ยฐf.
Thermoworks Signal [Affiliate Link]ย (currently $59 off)


Thursday - Travel Day

Our team has members from the Tampa area, Jacksonville, FL, Knoxville, TN, and Virginia. This time we also had our friends Rob and Sue Ann down from Ontario, CA to stay with us and help out.

Alexis and I drove about 700 miles from Knoxville, TN to Winter Haven on Thursday. On the way, we stopped in at Owls Nest BBQ supply store to pick up some Meat Church Fajita seasoning and Blues Hog Raspberry Chipotle sauce for the event. Owls Nest is located in Ooltewah, TN just off I-75 near Chattanooga.ย 


Friday Prep Day

We always rent a large house so the whole team can stay together and prep out everything on the day before the event.

Chef Works Urban Collection Omaha
We got new team shirts for 2023!ย  The black dots are steer, hogs, and chickens - aren't they adorable? They are the Omaha shirt from theย Chef Works Urban collection. Shout out to Kelly S. at Chef Works for helping us rush this order in 1 week!

2023 Chain of Lakes Eggfest grilling food festival
I prepped 2 beef tenderloins. I center-cut one because it was so tapered and just cut the other one in half. We also used the small "mini-roast" pieces once we ran out of the 3 larger pieces. I seasoned them with black pepper, green peppercorns, kosher salt, and garlic for a 20-hour dry brine.

Next was pickle time! We did just under 500 portions which meant all hands on deck for slicing, coring, and stuffing pickles.

If you HAVE to be prepping food all day, you might as well do it lakeside, right?

We use a modified apple corer tool for coring the pickles. We add a fine wire to the end that cleanly cuts the core without penetrating all the way through the pickle and it pulls the core back out mostly in one piece.

First place pickle recipe at 2023 Chain of Lakes Eggfest grilling food festival Mount Olive Pickles
Sean slicing the pickles while Alexis and Rob core the halves.

2023 Chain of Lakes Eggfest grilling food festival
Laurie, Sue Ann, and Rhonda getting a head start on stuffing the pickles with the mix of green chile pork, salami, ham, and Swiss cheese.

2023 Chain of Lakes Eggfest grilling food festival
The stuffing process starts with a carefully applied squirt of mustard. Ideally, you want mustard in every bite, not just pooled at the bottom, so we do a light criss-cross application. Yeah, we're that exacting about it.

2023 Chain of Lakes Eggfest grilling food festival
Help! Help! I'm being repressed!

2023 Chain of Lakes Eggfest grilling food festival
Carson and Scott showed up from Tampa just in time to help with the pickles.

The taquitos were a new menu item so we fried up a few samples on Friday and did some taste testing to come up with the best sauce combination. We prepped about 450 portions of these.

2023 Chain of Lakes Eggfest grilling food festival
Rhonda kicks butt at doing our menu board for these events.

Eggfest Day

We arrived bright and early Saturday morning to set up before the gates opened to the crowds at 10am. The first order of business is to fire up our loaned Big Green Eggs. While they preheat, we set up our team site and then start cooking our first dishes of the day.ย  Our full menu was....

Dueling Breakfast Casseroles
-Sean's has biscuits, green chiles, eggs, sausage, cheeses, and sausage gravy
-Carson's has potatoes, onions, peppers, eggs, bacon, sausage, and cheeses.

Jordan's Drunk Pickles
Crowd favorite - It's the ingredients of a Cuban sandwich, minus the bread,ย 
stuffed into a pickle and fire-roasted.

Reverse-Seared Beef Tenderloin
Seasoned with our Umami Steak Seasoning recipe, reverse-seared, glazed withย 
bone marrow butter, and served with Cherry Bourbon Sauce or Gorgonzola Sauce.

Smoked Pork Taquitos
Smoked pork, corn, peppers, poblano chile, and cheeses in a white corn tortilla
shallow fried in a skillet. Served with chipotle-lime crema and a spicy BBQ sauce.

Mom's Strawberry Cobbler
Literally.....Mom's cobbler recipe with in-season Plant City strawberries.


I collect the cook tags we've had from the events over the years. For me, it's like keeping concert ticket stubs....back when they HAD concert ticket stubs. I'm old.

Of course, with a name like Chain of Lakes Eggfest, this Eggfest is located at a lake-side meadow with moss-laden trees.

2023 Chain of Lakes Eggfest grilling food festival
They had some bounce houses available for the kids.

2023 Chain of Lakes Eggfest grilling food festival
The last few minutes before the gates open and the crowds start rolling in. It was a "Chamber of Commerce" day weather-wise - mild, breezy, and sunny.

2023 Chain of Lakes Eggfest grilling food festival
Set up and ready to roll!

2023 Chain of Lakes Eggfest grilling food festival
One of the best things about these events is getting to see friends that we only get to see a handful of times each year. My man, Josh Tahan of True Craft BBQ was there to teach a class.

2023 Chain of Lakes Eggfest grilling food festival
Breakfast casseroles were the first thing we served.ย 

2023 Chain of Lakes Eggfest grilling food festival
We slow-roast the tenderloins in the morning and then hold them in a pre-heated Cambro hotbox until we're ready to serve some. Then we sear them off just before serving each one so they are hot and fresh.

2023 Chain of Lakes Eggfest grilling food festival
I brought my Thermoworks Square Dot for roasting the tenderloins to an internal temp of 125ยฐf. It's small in size making it perfect for traveling to events. Plus it's relatively inexpensive so if anything happens to it at the event, I'm not out a lot of money.
Thermoworks Square DOT [Affiliate link]

Event organizer, BJ Mannix, conducting the team meeting before opening the event gates to the crowds. This is when the organizer thanks teams and sponsors again, goes over the schedule and repeats any rules/requests for the day's event.

The JROTC Color Guard presented the flags for the National Anthem.ย  The tribute ended with a hang glider with a US flag landing on the beach, very cool.

2023 Chain of Lakes Eggfest grilling food festival
Then the tasters arrived and it was time to get to serving!

2023 Chain of Lakes Eggfest grilling food festival
We have a lot of fun with the dueling breakfast casseroles. Both are great but Sean and Carson give each other a lot of good-natured ribbing about whose is better.

2023 Chain of Lakes Eggfest grilling food festival
We got the food going early and didn't stop until we ran out at about 2:30pm.

2023 Chain of Lakes Eggfest grilling food festival
I always grab a portion of breakfast casserole because it's usually the only thing I eat the rest of the day, except for quality taste testing while cooking. I just don't like to eat while cooking.


2023 Chain of Lakes Eggfest grilling food festival
Scott and Alexis getting another round of pickles ready for the grill. Our team excels at working in concert together - zero egos, everyone finds their roles and everyone pitches in where needed.

2023 Chain of Lakes Eggfest grilling food festival
All the teams did a wonderful job, putting out quality food for the tasters.

2023 Chain of Lakes Eggfest grilling food festival
Chad (Kick Ash Baskets), me, and Rhonda kidding around.
I bought 2 KAB ash cans at the event and I'll post about them later this month.

To me, Eggfests and food festivals are more fun than cooking at structured type BBQ contests because of the interaction with guests. In KCBS-style BBQ contests, the only people tasting your food is 6 anonymous judges. I like getting to meet the people tasting our food, see their reactions, and talk about recipes and techniques.

Laurie and Carson - I can tell this is early in the day because neither of them is sweaty, dusty, or greasy.....yet.

2023 Chain of Lakes Eggfest grilling food festival
So typical...the guys are clowning around while the girls are busy working!
(Kidding, EVERYONE on our team works their butts off!)

2023 Chain of Lakes Eggfest grilling food festival
Carson and Alexis doing another round of Jordan's Drunk Pickles.

2023 Chain of Lakes Eggfest grilling food festival
Carson and Laurie serve up breakfast casserole while Rhonda, Scott, and Alexis work pickles in the background.

2023 Chain of Lakes Eggfest grilling food festival
Me searing one of the tenderloins on the Mini-Max. Carson's Mini-Max may be small but it has been at every Eggfest we've done and has produced thousands of portions of food for the crowds.

Perfectly medium rare!

2023 Chain of Lakes Eggfest grilling food festival
You might find any of us manning the grill at some point but Carson is our head grill-master. The dude plays multiple grills like a drum kit.

When we ran out of the main tenderloin, we started grilling off the smaller pieces directly instead of reverse-searing them. That was only because it was quicker and we didn't have a grill to tie up for an hour.

A bite of our beef tenderloin on the gorgonzola sauce. I thought the gorgonzola sauce might be a love/hate thing with the crowd since some folks don't like blue cheese. I couldn't be more wrong, it was a huge hit and I'll post the exact recipe we used later this week.

I always look forward to seeing some of our extended family from my mom's side at this event.ย 

Thermapen IR has two thermometers, an instant read for internal temperatures and a non-contact thermometer for surface measurements
Using my Thermapen IR to temp check the skillet as the oil heats up for the taquitos. That was the trick, figuring out the best configuration to keep the oil between 350 and 400ยฐf. This thermometer has a probe for getting fast internal temperature readings AND a non-contact thermometer for measuring surface temps. My sister gave it to me for Christmas and it's become my favorite Thermapen.
Thermoworks IR [Affiliate link]

2023 Chain of Lakes Eggfest grilling food festival
One issue was the skillet handle didn't fit inside the Egg so we couldn't close the lid without tilting the skillet. We rigged a piece of stiff foil to keep that from happening. I'm getting a skillet that will fit for next time but this worked on the fly.

2023 Chain of Lakes Eggfest grilling food festival
I bet when the original owner bought this Griswold #8 some 85-90 years ago, they never expected someone else would just the skillet decades later to feed hundreds.

The taquitos were a big hit with the crowds, too.

Next time, I think we'll add a brisket version as well, just for variety throughout the day.

2023 Chain of Lakes Eggfest grilling food festival
Scott and Alexis ready for the next round of taquitos. For every dish we had, we had a coordinated process for quick service. Before I could finish a batch of taquitos, Laurie would already have counted out how many boats we needed. I'd slice the crispy taquitos, they would already have the chipotle-lime crema smear down. As soon as the hot taquito landed, Scott would sauce it and Alexis would make it "snow cotija cheese". Love cooking with this team.

2023 Chain of Lakes Eggfest grilling food festival
Carson, me, Laurie, Scott, and Alexis posing for a quick selfie.

Each year, the COL Eggfest has a limited edition knife made by Rhineland Cutlery for each team. The one for 2023 is a 6" Nakiri knife pictured at the bottom.

Our new menu was excellent, our performance was solid and Jordan (the pickle's namesake) must have watching over us, because at the end of the day, our vote bucket overflowed. I told the team before awards were announced, win or lose, I was so proud of our performance and wouldn't want to cook with anyone else.

That said, it was sure still very nice to be called on stage as the 2023 champions!

2023 Chain of Lakes Eggfest grilling food festival
Thanks to Mannix Pools and Grills for another spectacular event!
If you didn't make it this year, you definitely want to pencil it in for next year. Spend a few extra days and enjoy all the Orlando area has to offer.

It was a blast, but it was also good to arrive back home in East Tennessee.


Avocado, Chorizo, and Pepper Jack Cheeseburger

By: Chris
17 March 2023 at 16:36

ย [FTC Standard Disclosure]ย  We received no compensation for this post. Any links which may earn us a commission are tagged [Affilate Link].ย ย 

A chorizo, avocado, and pepper jack cheeseburger is a delicious twist on the classic American cheeseburger. This burger features a juicy patty made from ground chuck and topped with gooey melted pepper jack cheese. We crown it with creamy avocado and flavorful chorizo. The combination of smoky, spicy, and creamy flavors creates a mouthwatering burger experience that's sure to satisfy any craving.

Avocado, Chorizo, and Pepper Jack Cheeseburger cooked on a Big Green Egg

Alexis was craving a griddle-cooked burger while I wanted mine grilled. No problem. I used my modular cast-iron grate from Craycort, which let me swap a grate section out with a griddle plate as shown below.

Craycort's modular grate system lets me use various inserts like this griddle plate, a chicken throne or a veggie wok.
I've been using cast iron grates from Craycort for about 14 years. In addition to being a fantastic cast-iron grate, the modular design lets you add other components like this griddle, a vegetable wok, or a chicken throne.ย 
Craycort

Not that you need a recipe for a burger, but here is what we did.

Avocado, Chorizo, and Pepper Jack Cheeseburger

www.nibblemethis.com

Publishedย 03/17/2023

Six-ounce burgers topped with pepper jack cheese, avocado, and chorizo on a brioche bun.

INGREDIENTS

  • 18 ounces fresh ground chuck
  • Fire and Smoke BBQ's The Classic for seasoning
  • 3 brioche buns, toasted
  • 3 slices Tillamook pepper jack cheese
For the avocado mash
  • 1 avocado, peeled and pitted
  • 1/2 tablespoon fresh lemon juice
  • pinch salt
For the quick chorizo chili
  • 4.5 ounces Mexican chorizo (raw, not the smoked style)
  • 1/4 cup finely diced onion
  • ย 1 ounce finely diced red bell pepper (I used 1 mini-sweet red pepper)
  • 1 ounce finely diced jalapeno

INSTRUCTIONS

  1. Preheat a grill to 450fยฐ. I used a Big Green Egg Mini-Max with a full Kick Ash Basket of coal. I used a propane torch to light the coal in 3 spots and when it hit 350f, I gradually started shutting the lower vent to bring it to 450fยฐ.ย 
  2. Form the burgers.ย  I used a burger press to create three 6-ounce burgers.
  3. Make the avocado mash. Smash the avocado together with lemon juice and salt.ย 
  4. Make the quick chorizo chili.ย  Preheat a grill-safe skillet for 5 minutes. Add a splash of oil and then cook the chorizo until the fat begins to render out, about 1-2 minutes. Then add the jalapeno, onion, jalapeno, and red bell pepper and saute until they are tender. Remove from heat. The total time should be about 5 minutes.
  5. Grill the burgers.ย ย I cook the grilled burger for about 4 minutes per side and the griddled burger for about 3 minutes per side. I season the burgers when I flipped them. I used maybe 1/2 teaspoon of The Classic. I top it with a slice of pepper jack cheese during the last 90 seconds.
  6. Build the burgers. Put the burger on the toasted bun bottom, and top it with the avocado mash, chorizo, and the bun top.

Yield:ย 3 burgers

Prep Time:ย 00 hrs. 10 mins.

Cook time:ย 00 hrs. 10 mins.

Total time:ย 20 mins.

Tags:ย burger, cheeseburger


Avocado, Chorizo, and Pepper Jack Cheeseburger cooked on a Big Green Egg
Getting everything in place.

Using the Thermapen IR to accurately measure the temp of the cast iron skillet
Make sure you give your cast-iron time to pre-heat. I THOUGHT this was ready to go but when I temp-checked it using my Thermapen IR, it wasn't quite 450ยฐf yet. My sister got me this combo food and surface thermometer and I love it. No more guessing.
Thermapen IR [Affiliate Link]

Making a quick chroizo chili for a delicious burger
Cooking the chorizo in a skillet that's over 80 years old - a Griswold #5.ย 

Cooking burger patties on the big green egg mini-max
Don't you just love the sizzle when you put food onto the griddle and/or grill?ย 

Griddled or grilled? Your choice when using a Craycort cast iron grate on the Big Green Egg kamado grill
Options are always a nice thing, right?

Burgers on the mini-max
I like using the Mini-Max over a large Egg because it's often just the two of us and the Mini-Max saves fuel.

The Classic is one of my go-to SPG-type seasonings for the kitchen or grill. Keep an eye out for Mikey and Cowboy Kev on the Eggfest circuit or you can mail order their seasonings:
Fire and Smoke The Classic

Avocado, Chorizo, and Pepper Jack Cheeseburger cooked on a Big Green Egg
Mmmmm a pepper jack cheese blanket!

Avocado, Chorizo, and Pepper Jack Cheeseburger cooked on a Big Green Egg
I always look forward to a cheese-draped burger.

Avocado, Chorizo, and Pepper Jack Cheeseburger cooked on a Big Green Egg
These burgers were FANTASTIC. I wouldn't change a thing.ย 

New Year's Day Pork Butt

By: Chris
7 January 2023 at 16:48

ย [FTC Standard Disclaimer] We received no compensation for this post. None of the links in the post earn us a commission either.ย 

I was only planning on smoking that brisket for New Years' Day but Food City had pork butts for $1.49 per pound and I couldn't resist picking one up.ย 

Smoking pork butt on the Big Green Egg kamado grill
Smoked pork butt finishing on the Big Green Egg.

Meat Prep

I kept it simple. I started with an 8.7-pound Smithfield bone-in pork shoulder butt roast.

  • Trimming - None needed.
  • Injection - I injected it with a simple solution of 12 ounces of apple juice and 2 tablespoons of kosher salt.
  • Seasoning - I heavily coated the pork butt with Fire and Smoke BBQ Company's Second City Sweet BBQ Rub. I covered it and let it dry brine for 6 hours in the fridge.ย 


Second City Sweet BBQ Rub is balanced and not overly sweet.
Despite its name, Fire and Smoke's Second City Sweet BBQ Rub is balanced, so it's not as sweet as some rubs that are high in sugar.

It's a good idea to freshen up the rub after the dry brine period. I apply a light second coat.
After the dry-brine, much of the seasoning has soaked in so I like to apply a "freshen up" coat just before the pork butt goes into the smoker.


Smoker SetUp

I used a large Big Green Egg for this smoke.

  • Clean up. I cleaned out the Egg before starting; that ensures the best airflow.ย 
    • I had used coal so I shook the Kick Ash Basket to get all of the ash out.
    • I emptied the KAB Ash Can.
  • Fuel - Kick Ash Basket with fresh Jealous Devil XL lump charcoal and blocks of hickory wood. I then topped that off with the used coal that I cleaned earlier.ย 
  • Gear - I used a cast-iron plate setter and topped it with a drip pan. I used my favorite cast-iron cooking grates from Craycort.ย 
  • Controller - I used a BBQGuru UltraQ running at 275ยฐf connected to a Pit Bull Fan.


A Kick Ash Basket is a tool that makes maintaining airflow in a grill, easy
I like to bury my wood chunks so they don't all ignite at the start of the cook. I top this with more fresh lump charcoal and whatever leftover coal was previously in the Kick Ash Basket. When I go to put the pork butt on, I make sure to put a block on the burning coals to ensure it gets smoke from the beginning.

Smoking pork butt on the Big Green Egg kamado grill
Here's a look at my setup - cast-iron plate setter on the bottom, foil-covered drip pan on that, all topped with a cast-iron grate from Craycort.


The Cook

8:30PMย 

I lit the coals in one spot at the front of the Egg to give it plenty of time to come to temp and stabilize.

10:15PM

Time to start cooking!ย 

Smithfield pork butt getting ready to go on the Big Green Egg for smoking.
I took the pork butt out of the fridge and refreshed the rub by sprinkling more Second City Sweet BBQ Rub.ย 

Smoking pork butt on the Big Green Egg kamado grill
I put the pork butt on a wire rack and a small sheet pan and placed that in the center of the Big Green Egg. I spritzed it with apple juice and let it run.


Dual Big Green Eggs smoking a brisket and a pork butt
I let it run overnight at 275ยฐf, spritzing with apple juice once or twice. The Egg is a moist cooking environment so I didn't have to spritz as often as I would on my stick burners.

5:30AM

The pork butt had the color that I wanted so I wrapped it in foil. I put the butt on two sheets of foil, gave it about 3 tablespoons of butter, spritzed it generously with apple juice, wrapped it up and put it back on the smoker.

8:30AM

The pork butt reached an internal temperature of 205ยฐf. I tested it with a temp probe in a few spots and it was tender so it was time to rest. I put it in a Cambro hotbox that we pre-heated earlier and let it hold for a few hours. (You can make your own hotbox with a warm, empty cooler and some towels.

11:00AM

A KCBS Team of the Year pitmaster once told me that the last thing you flavor the pork with is the first thing you'll taste. So he recommended giving it that one last kiss of smoke.
  • I raise the temperature of the controller to get it to kick the fan on.
  • I added 1 fresh block of wood to the coals in an area that was burning.
  • I removed the pork butt from its foil wrap and glazed it with Blues Hog Original BBQ Sauce thinned by cutting it with apple juice.
  • I placed the pork butt back on the smoker just long enough to set the glaze and expose it to smoke one last time.ย 

Smoking pork butt on the Big Green Egg kamado grill
Giving the pork butt one last kiss of smoke.

Smoking pork butt on the Big Green Egg kamado grill
Just long enough until the sauce is cooked onto the pork butt - about 10-15 minutes.

Pork butt smoked on the Big Green Egg kamado grill
Alexis dropping the pork butt to begin pulling it. Nice bark, eh?

Wearing cotton gloves under the food gloves lets you handle the steaming hot pork butt without burning your fingers.

When Trevor grabbed a bite of the pulled pork, he mentioned wanting to have a BBQ burger.ย  That was too good of an idea to resist.

So made 8-ounce patties from a brisket/sirloin blend, seasoned them with Fire and Smoke's Classic rub, and grilled them 4 minutes a side on my CharBroil Cruise temperature-controlled gas grill.

BBQ Burger - brisket burger patty, cheddar, pulled pork and candied bacon.
BBQ Burger - toasted brioche bun, half-pound burger, cheddar, pulled pork, mocha BBQ sauce, and candied bacon. NOICE!ย 


New Years Eve Brisket Cook

By: Chris
2 January 2023 at 13:55

[FTC Standard Disclaimer] We received no compensation for this post. Any links that may earn us a commission are tagged [affiliate link].

We welcomed in 2023 by smoking a whole brisket and a pork butt overnight on New Year's Eve. Here's my notes about how the brisket cook went.

Meat Prep

I started with an 18-pound USDA Prime, Certified Angus Beef Brand whole brisket.

  • Wet aging - I wet-aged the brisket in the original packaging for a few extra weeks.
  • Trimming - I did a competition-style trim, meaning I separated the point from the flat. I mainly did that so it would fit in a large Big Green Egg but I also like getting bark on all sides of the point.
  • Injection - I injected it with 2 cups of plain beef stock, skipping the typical phosphate-basted injections used in competitions.ย 
  • Seasoning - I used Thunderbird's Bravo Bark Builder for Beef and let it dry brine for about 6 hours before smoking. Usually, I do at least 10-12 hours but I was short on time and figured that some time was better than none, right?


This brisket was a long boy! That meant I pretty much had to trim it comp-style, which separates the point and the flat. Otherwise, it would be too long to fit inside one of my large Big Green Egg kamado grills.ย 


USDA Prime is the grade. Certified Angus Beef is the brand.
Only 3% of beef meets the Prime grade AND Certified Angus Beef's 10 science-based quality specifications. [Read more]

Thunderbird Bravo is intriguing because it is based on the flavors of Mexican mole' - chocolate, cinnamon, cumin, and cloves.ย 

Here's a tip for buying BBQ seasonings - when at all possible, buy directly from the company instead of a huge reseller like Amazon. You'll likely get fresher products and it's usually cheaper when you buy direct.

Split, injected, and seasoned - ready to be covered and put in the fridge until it's time to smoke. As you can see, the flat on this brisket was HUGE!


Smoker Set-Up

I was originally going to use my Oklahoma Joe Rider DLX so I could leave my aircraft carrier-sized brisket whole. That smoker has tons of room. But the weather looked sketchy, so I used a Big Green Egg since I have those under my gazebo, protected from rain and snow.ย 

As with any long cook, I started by cleaning out my smoker to ensure that air flowed freely for the entire cook. Nobody likes waking up at 4am to find their fire had dropped temp or died because ash had clogged airflow. An ounce of prevention...


A Kick Ash Basket also helps guarantee a good fire. I start with fresh Jealous Devil XL lump charcoal and 3 or 4 blocks of wood. Then I cover this with the leftover lump charcoal that I had previously shaken in the Kick Ash Basket to get rid of the ash.

So let's talk wood. Normally, I would go with post oak and/or pecan. All I had on hand was hickory, it's my preferred for smoking pork but it also works with beef.ย  I use Jealous Devil Smoke Wood Blocks and cut them in quarters. In my opinion, this size works best for kamado grills.ย 

My sister gave me an oval stone heat deflector from the Ceramic Grill Store. I accidentally broke my old one after 5 or 6 years. If you have a kamado and smoke ribs or brisket, you want one of these. No more having the ends of your ribs/brisket stick out over direct heat, where traditional round deflectors leave unshielded.


The Adjustable Rig (also from Ceramic Grill Store) set up was like this inside the Egg. I put the point on the middle rack and the flat on the top rack.

For overnight fire management, I used the Thermoworks Signals pictured on the left paired with a Billows fan to stoke the fire as needed. This unit will manage your temperature and monitor the internal temperature of three different items all at the same time. I recently did a full review of the Signals/Billows after using them for 18 months.
Thermoworks Signals / Thermoworks Billows [Affiliate links]
(01/02/2023 Signals are currently discounted by $47.80 and Billows are discounted $19.75)

The Cook

My plan for this cook was toย 

  • Smoke the brisket at 250ยฐf until the bark was set (about 5-6 hours or an internal temp of around 170ยฐf on a kamado grill).
  • Then wrap the point and flat with a little stock, raise the cooking temperature to 290ยฐf and finish until the brisket was tender (typically just a few hours or around 203-208ยฐf).
  • Rest the brisket for 1-2 hours in a heated Cambro.

I didn't get a lot of pictures during the overnight portion, mainly because I was half-asleep.

8:30pm

Lit the smokers (I was also cooking a pork butt) and let the Signals handle bring the cooking temperature up to 250ยฐf

10pm

  • Add 1 wood cube to a burning area of coals, just before putting the flat on. There's already three in the coals.ย 
  • Take the brisket flat out of the fridge, remove the plastic wrap, apply a fresh light coat of seasoning.
  • Put the flat on the top rack, stick a temp probe in the thickest part.
  • Spritz the flat with quality apple juice.

I put a light, fresh layer of seasoning on the flat just before I put it on the smoker.

Even the flat by itself just barely fit onto the standard grill grate! I think this was the biggest flat I've ever cooked on a kamado grill.


Notice that the lower rack is empty. The point cooks faster than the flat, so I typically give the flat a 1 hour head start and then they finish about the same time.ย  Typically....

11pm

  • Add another block of wood to the burning coals.
  • Freshen up the seasoning on the brisket point.
  • Add the point to the smoker on the middle grate.
  • Spritz the flat and point with apple juice.

Just before putting the flat on at 11pm.

1am and 3amย 

Spritzed the flat and point with apple juice. I do this every few hours on a kamado or my DSS pit because they are moist cooking environments. If I'm cooking on a pellet cooker, drum or offset, I normally spritz about once an hour.

6:30am

Cooking temps have been steady all night.ย 
  • The internal temps were 158ยฐf and 159ยฐf but the bark was where I wanted it in terms of color (earlier than usual). So I wrapped both pieces with about a half cup of beef stock in a double sheet of foil.
  • Tip:ย  Fold the edges of the foil up before pouring the stock or you'll find out how level/unlevel your grilling table surface is.
  • I was supposed to boost the cooking temps to 290ยฐf (what I do in competitions) at this point but I forgot.

8:30am

  • The point was registering 205ยฐf and I could feel it was floppy and flexible so I pulled it from the smoker and let it rest in a preheated Cambro hotbox. You could also use a dry cooler with towels but I love the convenience of the Cambro.
  • The flat was only registering an internal temperature of about 185ยฐf. That's a bit further behind than usual but it was a BIG flat.

10:45am

  • The flat was now showing an internal temp of 203ยฐf.
  • When I picked it up, it didn't feel relaxed yet but I took it out to check anyway.
  • I probed in a few places with my Thermapen. It was still resisting and the Thermapen registered an internal temp of 185ยฐf.ย ย 
  • Since one piece of equipment was telling me one thing but my gut, probe sensitivity, and another thermometer told me otherwise.ย  Maybe my probe wasn't placed well?ย  I reset the temp probe from the Signals and the temp changed to 185ยฐf.ย  Yep, this brisket flat still has a while to go.
  • Oh yeah.....this was when I caught my earlier mistake and I upped the cooking temperature to 290ยฐf.

Noon

  • Went ahead and pulled the point from the Cambro since it had been holding for 4 hours.
  • I took the point from the foil and put it on a smoker at 275ยฐf to give it a last kiss of smoke and to reset the bark.
  • Sliced it up. Deeeelicious.

The last 10 or 15 minutes on the smoker help reset the crust, which can get steamed and soft while resting in the Cambro. It also adds a last note of smoke.ย 

Normally I would have made burnt ends at this time but I was craving fatty sliced brisket instead so we sliced the point up. It was tenderlicious!ย 


1pm

  • Flat still only reading 198.5ยฐf but it feels about right

1:15pm

  • Flat finally hits 200ยฐf.ย 
  • Pulled it out, feels relaxed and jiggly like it should.
  • Temp probes go in like butter.
  • Pulled the brisket flat from the grill and rested it in the Cambro.

Final Graph from Thermoworks Signals

I like looking at the graphs from my cooks, you learn and reaffirm things. Here are some things to notice.

  • Notice how steadily the temps ran at 250ยฐf except for the times when I opened my smoker. That's the Signals and Billows doing their jobs.
  • Notice how the point (blue line) went on an hour later but caught up and pass the flat.ย 
  • Notice how the internal temps jump up when I wrapped the parts at 6:30am. That's because the evaporative cooling was stopped by the foil.
  • Notice how the flat temp (yellow line) fell back to 185ยฐfย  when I reset it at 10:45am.

2:15p

  • Removed the flat from the Cambro.ย 
  • Upon inspection, the bark was beautiful and firm, I didn't need the last 10 minutes on the smoker so I sliced it straight away.
  • Outstanding bark, just about flawless.ย  Bravo definitely is a bark builder!
  • The flat was juicy and tender, passing the bend test easily.ย 
  • The flavors started beefy and smoky then transitioned to the subtle mole' flavors - cinnamon, smoky, dark chocolate, and slightly fruity.ย 
  • Normally, I pair two rubs on brisket, one being a peppery SPG type.ย  I think I would do that with Bravo as well the next time as I like the first three tastes my brisket yields to be: pepper, smoke, and beef.ย 


Black gold!ย  Just look at that bark.

It sure took a long time but it was worth it!

Product Review: Thermoworks Signals and Billows

By: Chris
18 December 2022 at 14:05

[FTC Standard Disclosure] I paid full price for my Thermoworks Signals and Billows. I used Thermoworks products for over a decade before recently agreeing to become an affiliate seller for Thermoworks. All links in this post are affiliate links and I earn a commission if you purchase through these links.

Last week, I was speaking with a relatively new user of kamado grills and he wasn't familiar with electronic controllers. That made me realize I had not yet written up my review of the Thermoworks Signals/Billows combination for controlling smokers/grills.

Thermoworks Signals
Here is the Signals controlling my large BBQ pit while smoking 3 briskets.
I own 6 models and 3 brands of controllers.
I have used this controller for 18 months.
So this is an in-depth, thorough review.


Intro to Electronic Controllers

Electronic Controllers are equipment that uses some type of processor (CPU) and a fan to control the temperature of your smoker/grill at a chosen temperature. It's a feedback loop. The CPU reads from a probe inside the grill and if the grill temperature is less than the chosen temperature, the CPU tells the fan to cut on. The fan will stoke the fire, increasing the temperature. The CPU checks back for the result and readjusts. It's more complicated than that, but that's the gist.ย 

  • Advantages
    • Consistent monitoring leads to a consistent fire (within variables)
    • SLEEP! It's nice to sleep during overnight cooks without having to worry about the temperature dropping or the smoker getting too hot.
  • Things can still go wrong when using a controller, for example - the grill runs out of fuel, airflow gets restricted, the temperature probe fails, or power failures.
  • Learn fire management first! I strongly recommend people use the manual controls of their grill or smoker for six months before starting to use an electronic controller. There's no substitute for knowing how to manage the fire on your grill.
Credit: Thermoworks


So now that you know WHAT an electronic controller does, HOW WELL does the Signals/Billows combo do that?ย 

Signals Features

The Signals is the CPU or "brains" of the controller. It is what monitors and analyzes what's going on in your smoker/grill and it's what tells the fan what to do.

Four Channels


The Signals is a 4-channel cooking thermometer that is useful for BBQ, oven roasting, deep frying, sous vide cooking, home brewing, and candy making. You can monitor 4 meats or 3 meats and 1 cooking temperature probe at the same time.

Connectivity and Smart Technology


The Signals device has both Bluetooth and Wi-Fi technology. The smartphone app unleashes the full power and flexibility of the Signals unit. More about that later.
TIP for Wi-Fi - Most home routers today offer 2.4GHz (longer range) and 5GHz (faster speed).ย  Most grilling areas are far from the router so most BBQ and grilling devices are designed for the 2.4GHz. If you experience connectivity issues with grilling equipment, make sure the 2.4GHz setting is enabled on your home router.ย 

It's Alarming!


Each channel has audible (90db) high-temp and low-temp alarms. That's as loud as a subway or a motorcycle 25 feet away, so you're not likely to miss it. Also, you can have alerts sent to your smartphone.

Temperature Probes

The Signals uses Thremoworks Pro-Series temperature probes. The unit comes with 3 food probes and 1 air temperature probe.ย 
  • Durable - The first thing to go bad on most BBQ electronics is the wire (aka lead) to the temp probe. Many remote probe thermometers max out at 572fยฐ (300cยฐ)
  • Flexible - The Pro-series is compatible with most consumer-grade Thermoworks products. This lets you share probes between devices, saving money.
  • Options - The Pro-series offers a variety of probes, such as; curved, straight, short, long, needle, and waterproof (for sous vide).
The signal uses the Thermoworks Pro-series temperature probes, which are also compatible with Smoke, ChefAlarm, and DOT series thermometers.

Device Construction and Design

The Signals has a plastic composite body with molded seals that give the Signals weather resistance, slip resistance, and magnetic mounts. It's easy to clean the unit after each use.

The plastic body with molded seals gives the Signals an IP66 splashproof rating
.

The back of the unit has 2 magnets that are strong enough to securely support the device when mounted to a metal surface.ย 

The bottom has a non-skid strip to help the device secure. I have three other competing products and I've accidentally pulled and/or knocked those off of a grilling table before.

Power Options

Most controllers use proprietary cords, making it difficult to find a replacement in a bind. I was very impressed that the Signals and Billows utilize standard USB and USB-C cables. You have 3 options for powering your Signals.


    • Long Battery Power - The Signals can run up to 16 hours using the onboard battery.
    • AC Adapter - You can use the AC adapter for UNLIMITED POWERRRRRR (Emperor Palpatine's favorite)
    • Battery Pack - If you're in for a long cook, somewhere where there is no electrical power, you can buy the optional 12v Battery Bank to get 24 hours of power.

Choice of color -ย 

As with most of the consumer-level products from Thermoworks, the Signals is offered in 9 colors.
Credit: Thermoworks

Display

The large LCD screen (nearly 2" x 4") is well laid out. It lets you simultaneously see all four of the channels at a glance.ย 

One of my favorite features is being able to "name" each channel so you know exactly what you're looking at when you have multiple meats cooking on the grill. Here, I was cooking three briskets so I named each channel after the name of the person who was receiving the brisket.

The display is also backlit, which is useful for those overnight cooks.

Data Logging

During a cook, the Signals records your maximum and minimum temperatures.ย 

In this case, the channel was recording my pit temp which was set at 250f. You can see the pit temp was 82.2f when I started. It also hit a max temp of 276.6f which sent me a notification. In this specific case, the high temp was during start-up because I had forgotten to close the top vent of my pit.


So the Signals is the brains of this operation, which leaves the Billows to be the brawn.ย 

Thermoworks Billows Temperature Control Fan Kit

Adding the optional Billows turns the Signals into a fully featured electronic controller. I have used multiple fan models from 3 different brands and the Thermoworks Billows is my "fan favorite" because of its power and flexibility.

Thermoworks Billows

Best In Class Airflow

The Billows boasts a best-in-class airflow of 45cfm, which is the most powerful fan I have used. A more powerful fan means faster start-ups and quicker recoveries after opening the grill.

The Billows (center) has an airflow of 45cfm compared to 6.5cfm on the left and 10cfm on the right. The BBQ Guru seems to run better than just 10cfm but that's their rating. Also, the Pit Viper from BBQ Guru can run at 25cfm.

Rugged, Weatherproof Composite Body

The housing for the Billows is a composite material that holds up to the rigors of outdoor cooking.

The composite body is durable, weatherproof, and cool to the touch.


Choice of Controllersย 

The Billows works with several products from Thermoworks, including Signals, ThermaQ2, and SmokeX.ย ย 
  • This lets you save on costs if you already own one of the other compatible devices.ย 
  • This lets you tailor your setup to your exact needs. Not sure which Thermoworks product is for you?ย  Check out this guide.ย 
Credit: Thermoworks


Restrictor Plate

This isn't NASCAR but I highly recommend buying the optional restrictor plate aka Billows Damper. It lets you get dialed in with micro-adjustments and I find it is necessary if using this powerful fan on smaller grills. Pony up the $2.99, you'll be glad you did.

IMO, to best control temperatures, especially on smaller grills like a kamado, you will want the optional restrictor plate.

Making A Connection

Two things I like about the design of the way Billows mounts to your grill: it minimizes air leaks and has a variety of mounting options.

Billows shown with 2 threaded mounts for large pits and a plate for mounting the unit onto a kamado grill. Mine came with the kamado attachment. The threaded adapters are optional and must be purchased separately.ย 

A closer look at the gasket. That is the original gasket so it has lasted for 18 months and not starting to degrade yet. I am surprised it has held up to the high heat of being attached directly to the metal vent of a kamado but it has been durable.

Billows mounted onto a Big Green Egg. The foam ensures an airtight seal.

Close-up showing the Billows attached to a threaded mount on a much larger pit.

My Signals/Billows is the controller I use for my Deep South Smokers GC36 gravity-fed smoker.

Teamwork Makes The Dream Work

Thermoworks does offer an expansion kit that lets you attach 2 Billows to a single controller. However, even with my big red smoker, I've never felt like I need a second blower.

Smart Phone Apps

The Thermoworks smartphone app provides even greater flexibility and extra features.ย 

Credit: Thermoworks


Remote Controlย 

The best thing about the app is being able to monitor and control my cook from the warmth and comfort of my bed during overnight cooks. When connected to Wi-Fi, you can literally control your grill from anywhere with a mobile data connection.

The app lets you view current cooking and internal food temperatures. It also lets you raise or lower your cooking temperature remotely.ย 

Graphical Analysisย 

A visual representation of your cook makes it easy to spot a trend or change with your cook, such as, knowing when you are heading into a "stall".ย 

The graph from a cook of 12 pork butts. I had probes in a butt on each rack. I suspected the middle rack represented by blue really wasn't running 20 degrees above the rest. When I repositioned the temp prob at 6:51am, it confirmed my suspicion.


Alertsย 

The app will trigger notification alerts, such as; when your grill temp is too high, or too low, or when your food is done.


  • Learn from History - The app will maintain a history of your more recent cooks.
  • Customization - The app lets you change the titles and colors of the 4 channels. You can change your notification preferences, temperature scale,
  • Device Updates - The app will download and install firmware updates to your device, keeping your device secure, up to date, and in some cases, adding new features.
  • Not All Apps Are Equal - A lot of smart BBQ devices have apps these days. Some are well-engineered with planning and forethought while others are thrown together just "to say we have an app". My tip is to go to the app store and read the reviews. Case in point, a competitor to the Signals has excellent hardware. But the competitor app has persistent connectivity issues making the app worthless and limiting the device itself. Two years of reviews clearly show this and the company's inability or unwillingness to resolve the issue.ย 

Performance of the Signals

My experience over the last 18 months is that the Signals and Billows as a BBQ pit controller are steady, accurate, powerful, and reliable.

  • Steady and accurate - The temperature readings are accurate and the devices keep my BBQ pit temperatures where I want them to be.
  • Powerfulย - The best-in-class fan ensures quick start-ups and fast temperature recovery.
  • Reliable - I have had minimal problems and have confidence that it has things under control.ย 
I did a 4-hour temperature stability test when I first got my Signals/Billows and it shows what has also been my experience - the Signals/Billows does a great job maintaining a stable set temperature.

My testing and experience have shown the temperature readings of the Signals to be spot-on accurate.


From left to right:ย  FlameBoss 300*, Signals/Billows, and BBQ Guru UltraQ
I have used all three of these units considerably in the past 1 1/2 years, so I have a good base for comparison.
*FlameBoss 300 has been replaced by a newer model, the 500 which I have not used.


The Signals/Billows combo works excellently on smaller grills like the Big Green Egg.

The Signals/Billows works well on insulated box smokers like Humphrey's Battle Box.

The powerful Billow's fan means the Signals/Billows can handle large cooks like when 12 cold pork butts go into the smoker at once.

The Signals/Billows combo rocks even on larger pits like myย Deep South Smokers GC36. It has become my preferred controller for this big smoker.

I still use multiple brands of controllers. The FlameBoss and BBQ Guru models are fine choices. If someone told me they were going with one of those, I wouldn't try to talk them out of their choice. The brands share good performance and have many similar features.ย 

But when I was pressed last week for WHICH ONE I would buy today, I recommended the Signals/Billows combination because of it's

  • more informative display,
  • significantly more powerful fan,
  • better app connectivity, and
  • very surprisingly.....PRICE.ย ย 
Of the models I have discussed, the combination of the Signals and Billows is currently just $318 ($45.50 to $61 less expensive than the other models).

Thermoworks Signals BBQ Alarm Thermometerย with WiFi and Bluetooth Technology (currently $239)
Thermoworks Billows Temperature Control Fan Kitย (currently $79)ย 
Thermoworks Silicone Probe Spool (currently $6.99 each)


Having Fun With a Wok Stove

By: Chris
4 December 2022 at 15:56

[FTC Standard Disclosure] We received no payment for this post. Any links that might earn us a commission are marked [Affiliate Link].

Have you ever cooked on a wok stove? I stumbled across this 13" clay stove on sale for like $20 at my local Asian supermarket and couldn't resist it. It sat in my garage for a while but I recently got the chance to play with it.


Clay stoves are ubiquitous across Asia. China has the wok stove, Thailand has the tao charcoal burner, Vietnam has the lo than, the Philippines has the ulingan or kalan de uling, and Japan has the hibachi and hotpot. I have zero experience with these but live-fire cooking is live-fire cooking, so let's play with this grill of sorts.

How It Works

This clay stove looks and functions a lot like the internal parts of a kamado grill, only smaller in size.

  • Hot coals go into the top part, resting on the ceramic grate with holes.
  • A cooking vessel (wok, pot, grate) rests on the three clay knobs.
  • The airflow is from a wide-open vent on the bottom.
  • So temperature control is basically a matter of the quantity of coal. More coals hotter, fewer coals cooler.
There is a removable section that theoretically lets you add coals. I've also seen cooks use this to insert pieces of wood to add smoke to the equation.


The ceramic fire grate is similar to the holes and placement of the cast-iron fire grate on Big Green Eggs.


As you can see, the firebox on a wok stove is small. The one on my 13" stove is barely 7.5" across. It is mostly ideal for short cooks like wok cooking or searing. Also, since the firebox is so small, it makes the most sense to have a larger fire going in a fire pit, barrel, or grill to supply the hot coals you need.

I built a medium fire in one of my Big Green Eggs and then transferred hot coals over as needed. I cooked the two stir-fried dishes on the first batch of coals and then replenished them before searing the steak.

Here is how much I put in for the stir-frying. It might not look like a lot of coals, but this was throwing off about 500-600ยฐf.

Teriyaki Steak, Stir Fried Potatoes, and Pineapple Habanero Fried Rice

Since stir-frying and searing were the order of the day, I decided to grill a teriyaki steak and two stir-fried dishes.ย 


Stir-Fried Potatoes

I sliced peeled russet potatoes to 1/8th inch on a mandolin and tossed them in a mix of 2 Tbsp soy sauce, 1 teaspoon brown sugar, 1 teaspoon AP flower, and 1 teaspoon of sesame oil while I prepped everything else.ย 

I stir-fried the potatoes with a half cup of diced sweet onion and a quarter cup of red bell pepper until tender, about 10-12 minutes.

When done, I taste for seasoning and add soy sauce to taste.

Pineapple Habanero Fried Rice

This one is still a work in process. The concept is solid but the dish was too spicy for me. It has as much sting as eating a mouthful of yellowjackets.ย 

The flavor was tasty but it was overshadowed by the intense heat. I usually enjoy the sting of habanero but 1 and 1/2 of them were too much for this rice. I'll dial it back next time.

This little stove was completely adequate for the wok cooking.ย 

There is a difference between the wok stove and wok cooking on the grill. On the grill, the full wok is being heated from below uniformly. On the stove, the edges that extend beyond the stove edge aren't as hot.ย 


Teriyaki Steak

I started by dry-brining a Certified Angus Beef Brand sirloin steak with Lane's BBQ Q-nami for about 8-hours.ย 

To convert the wok stove into a sear station, I found that a Fishbones charcoal grate from Innovations by Chance fits perfectly on top of the wok stove.ย 

The Fishbones is a durable charcoal gate designed for kamado grills like the Big Green Egg and Kamado Joe. It also happens to be a fantastic sear grate.
[Fishbones charcoal grate:ย  Affiliate Link]


After cooking the potatoes and rice, the coals had died off a bit so I refreshed them with hot coals from the Big Green Egg.

After grilling both sides, in the last 2 minutes I brushed the steak with teriyaki sauce cut 3:1 with rice wine vinegar.

The steak was fantastic. I've eaten a lot more sirloin since the price has beef has skyrocketed and I've enjoyed so much that I expect to keep eating it when the price of beef goes back down.ย  Ha ha ha, yeah, I know the price isn't ever going back down, I just wanted to try saying it with a straight face.ย 

This was a splendid version of steak and potatoes.

This entire meal would have been fantastic but for the excessive heat of the stir-fried rice.

I had fun playing with the clay stove and I'm glad I picked it up. Did I needย it? No, but do I need 15 other grills?ย  (That's rhetorical, of course.)

Snake River Farms

Snake River Farms has some holiday season promotions going on. They have free shipping going right now and 10% off all orders over $249. I'm not an affiliate seller and get nothing for this, just passing it on.

Gifting Promotion

Offer: Free Shipping on All Boxes + an Extra 10% Off orders of $249+

Code: GIFTSRF

Dates Active: 12/5 - 12/8

URL: https://www.snakeriverfarms.com/hand-curated-boxes.html

Fall 2022 North Florida Eggfest - St John' County

By: Chris
19 November 2022 at 15:19

[FTC Standard Disclosure] We received no compensation for this post. Any links which may earn us a commission are tagged [Affiliate Link]

The North Florida Eggfest is held each Spring but this year, Pinch-a-Penny decided to squeeze in an extra Fall version. The Nibble Me This grilling team couldn't wait to cook at this event when we found out that the proceeds were going to Operation BBQ Relief.ย 

When the smoke cleared and the crowd voted, we won 2nd place. Congratulations to Cline's Custom Meats Butcher Shop for besting the reigning champ (that would be us!).

Our team celebrated our 2nd place finish with jello shots with friends.

Here's a look back at the event through the mobile phones of our team members.

Preparation

Just like KCBS BBQ competitions, the key to a successful and fun Eggfest is doing as much prep as humanly possible before you've stepped foot on the event grounds.ย 

My North Florida Eggfest started with a longer-than-usual drive since I had to drive through the remnants of Hurricane Nicole. The traffic frequently came to a standstill adding about 90 minutes to the normally 8 hour drive.

So the team started without me. Here Rhonda was making green chile smoked pork - one of the key ingredients of the perennial crowd favorite Jordan's Drunk Pickles. I spy two Thermoworks Chef Alarms in the background being used to monitor the internal cooking temps.
Thermoworks Chef Alarm [Affiliate link]

We coat the butts with AlbuKirky Green Chile Rub and smoke them until they are an internal temp of 200f+ and probe tender. So it takes a while.

Sean explaining the work they had done over the summer to create their new grilling area. Or he might have been fibbing about the last fish he caught...he's a fisherman after all.

Sean and Carson using the Blackstone griddle to prep some of the ingredients for the breakfast casserole. Rhonda and Sean's new grilling area makes me BGE green with envy!

Pre-cooking ingredients wheen possible is a great way to minimize on-site work and the amount of cleaning at an Eggfest.

Have to make the jello shots as part of the prep!

Breaking up the green chile smoked pork for the pickles.

Laurie shredded Swiss cheese for the pickles.

Scott, Carson, and Sean coring the pickles so we can stuff them at the Eggfest. We get about 35-40 servings per jar, and we have done as many as 1200 for a single event. We did just under 500 for this event and we didn't have a single leftover pickle.

Here's everything that goes into the pickle - green chile pork, Boar's Head ham, Boar's Head salami, and Swiss cheese.ย 

Laurie, Scott, Sean, and Carson taking a break while I'm in the background cooking. That's only fair since they cooked all day while I was driving.

Rhonda has some of our food festival awards lining the back wall of her new outdoor kitchen.

Eggfest Day

It's finally here! Typically you have an hour or two to start cooking before the gates open so you have to hit the ground running.

The first action for the Eggfest is getting your Eggs fueled and up to temp so you can start cooking. For this Eggfest we had two demo XL Big Green Eggs to use, plus we had Carson and Rhonda's Mini-Maxes to use for searing, warming up sauces, etc.


Rhonda always does such a good job with creating our menu board for the event.

Here's our menu for this food festival. The back side of the board also had our dueling breakfast casseroles listed.

Laurie, Sean and Scott getting ready to tackle pickle stuffing time.

Where did all the pickles go?

There they are!ย 

Carson getting the grills ready for a day full of action.

Memorial Park is a beautiful location. It's on the water, has nice flat, even ground, and the ancient oaks provide a welcoming canopy.

Me trimming up two beef tenderloins.


We slow roast the beef tenderloin to temp and then sear off a section when we are ready to serve them later in the day. The seasoning is my NMT Umami Steak recipe.

The two skinnier portions have already reached full temp but these two larger butt ends of the tenderloin needed about 10-15 more minutes. Things are busy so we monitor the temps with a Thermoworks Smoke X2 so we don't accidentally overcook them.
Thermoworks Smoke X2 [Affiliate link]

The park was set up with teams lined up on two opposite sides.

The Menu


Dueling Breakfast Casseroles

The first thing we served was dueling breakfast casseroles. Carson made his version which uses a hash brown base with bacon, onions, peppers, eggs, seasoning and cheese. Sean made his version with a biscuit base with cheese, seasonings, green chiles, eggs, and sausage gravy. Both are fantastic recipes and I will get them up on the site before two long.

Laurie, Scott, and Sean getting ready to serve the first batches of breakfast casserole.

Carson getting his kick butt breakfast casserole ready.

Jordan's Drunk Pickles (Recipe here)

We change our menu around, but we HAVE to do Jordan's Drunk Pickles EVERY time, or the crowd revolts. These delectable fire-roasted treats are a Cuban sandwich stuffed into a pickle!

Stuffing the pickles is a team effort. On the left, Scott is squirting 2 lines (no less, no more) of mustard into each cored pickle half and then Ed and Laurie are stuffing those with the meat and cheese mixture.


Onsite hot and cold storage is important at a food festival. These are ready and waiting to go onto a grill, as needed.

Carson cooking a batch of pickles. They go about 20 minutes at 350f, with a spritz of pickle juice 2 or 3 times to build the flavor.

Grab them while you can because they disappear quickly!

Jordan's Drunk Pickles are named after Rhonda's son, who is no longer with us.
This lets us honor his memory in a fun and tasty way.
And yes, the pickles are so popular that when we run out, we have a "Next Drunk Pickles" sign to let people know when the next batch is coming out.ย 


Reverse Seared Beef Tenderloin with Bourbon Cherry Sauce (Recipe Here)

With the holidays coming up, we thought it would be good to share our Reverse-Seared Beef Tenderloin with Bourbon Cherry Sauce. Whole or center-cut beef tenderloin roast is an exceptional centerpiece for the holiday meal.

We kept the smoked roast warm and then when ready to serve, I would sear it off on the Mini-Max for a few minutes per side.

The Mini-Max is a beast for searing roasts and steaks because the coals are close to the grate.

The roasts are already cooked to temperature, so I'm going strictly by color here.


I also made the bourbon-cherry sauce the night before so all I had to do was warm some up alongside the roast.

I spread a little of the NMT Umami Steak Seasoning on the board before slicing. This rub has 3 types of dried and ground mushrooms, which have natural flavor enhancers that bring out the flavor of the beef.

Sliced and ready to serve.

We served the bites drizzled with the cherry bourbon sauce in 2oz portion cups

Tender and delicious!


Chris Lilly's Skillet Mac and Cheese

We also made Smoked Mac and Cheese with gouda, Gruyere, and cheddar cheese. We basically follow Chris Lilly's (6 or 7 time BBQ World Champion...I've lost count) skillet mac and cheese recipe from his second book, Fire and Smoke. I actually got to help out with the production of that book and I highly recommend it for any aspiring griller.ย ย Fire and Smoke [Affiliate Link]


Loaded with Gruyere, gouda, and cheddar, you know it's gonna be good!

Serving up the mac! Sean and the president of the Nibble Me This fan club, my father.

Thai Sticky Wings

This recipe was in my first book, The Kamado Smoker and Grill Cookbookย [Affiliate Link].ย The sauce recipe for these wings is amazing on wings, pork chops, shrimp, you name it!ย 

Carson and I pre-roasted the wings to temp and kept them warm in a Cambro hotbox. Then when we needed them, we'd grill them for a few minutes and sauce them up.

Laurie preparing pickles for service while I'm saucing a batch of wings.

We serve the wings on crispy noodles and garnish with chopped cilantro and crushed nuts. We kind of forgot the nuts this time but they were still amazing.

More wings...


With the teams lined up on either side, the center of the park made for a natural gathering place for the crowds.

Serving It Up NMT Style

The reason we love Eggfest instead of KCBS-style BBQ competitions is that we get to interact with our guests. We give them our best tips and recipes, discuss techniques, or just shoot the bull with them. I still like competing in traditional BBQ contests but it's the interaction that motivates us.

Carson and I manning the grills. Everybody on our team cooks but I'd say Carson is our grill master. His first jobs were back of the house in commercial kitchens and he knows how to crank out the food.

Sean, Laurie, Rhonda, I and Scott serving and talking with the crowds.

We are known for cutting up and I don't mean just beef :)ย 

Laurie and I dancing with the hip bump action to the sound of Bad Dog Mama
.
Carson taking a minute to hang out with my dad. He's known Carson since we were wild teenagers back in the 80s.

The crowds enjoying the music and resting up for a 2nd or 3rd round of food.

Bad Dog Mama played a fantastic set, doing some wild mash-ups of different songs. I would absolutely go see their show if they are ever up our way in Knoxville.


We got to see a lot of our favorite friends at this event, too many to name them all and we didn't get pictures with many of them this time. Here's Donny Leeper, long-time friend of NMT, who was our neighbor for this event.ย 

Donny's dog Charley found a friend with my dad.

Charley also knew that when we sliced beef tenderloin, he was getting a few scraps here and there!


What an absolutely beautiful day for this event.

It was so good to get to see our friends Alicia and Scott Wehner, who were there representing Jealous Devil.


Nibble Me This Grilling Team at 2022 Fall North Florida Eggfest
Toasting our day with jello shots.


Back at Rhonda's house, we cooked up a batch of smash burgers for dinner.


The perfect end to a fun day spent with old friends and family!


Thai-Style Beef Back Ribs

By: Chris
6 November 2022 at 12:12

ย [FTC Standard Disclosure] We received no compensation for this post. Any link that may earn us a commission will be tagged [Affiliate Link].


These Thai Style Beef Back Ribs have a deep flavor that sings. The melodies are salty, smoky, and peppery while the harmonies are aromatic notes, umami, and a subtle dark sweetness.


Thai-style Beef Back Ribs on the Big Green Egg

This is a recipe development post so these are more notes than the recipe itself. I'll do a full version later and get better pics.

This recipe was inspired by a chicken recipe, of all things. James Beard Award-winning Chef Andy Ricker of Pok Pok demonstrated his Thai roasted chicken on Man, Food, Fire (S:5 E:7). He uses a brine, a herb paste stuffing, a sauce, and a glaze. We made that at home and it was as fantastic as it looked on TV.ย 

I used a lot of the same flavor treatments for a rack of beef back ribs:ย 

  • a brine,ย 
  • a rub,ย 
  • a braising liquid for the wrap, andย 
  • a glaze.

The Rack

There are two main types of beef ribs - short ribs and back ribs. Short ribs are meatier and taste like brisket. This was a 4.5-pound rack of beef back ribs from Costco, USDA Choice. Not bad, nothing special.

  • Beef back ribs
    • Ribs which are the bones cut from the ribeye subprimal. These are the same bones you would see in a prime rib or a bone-in ribeye (if they hadn't been cut off here).ย 
    • Because the meat from these becomes high-dollar steaks, butchers cut all of the meat that they can off of the ribs. Therefore there isn't a lot of meat on back ribs, they're mostly bone.
    • Not surprisingly, beef back ribs taste like steak.

Beef back ribs are trimmed from the same subprimal that gives us prime rib and ribeye steaks.


Brine

This is where the flavor starts and it starts with a bang. I mixed up the brine featuring the Thai flavors that Chef Ricker used on his birds. I let it brine for about 18 hours before smoking on the Egg. Next time I might swap the soy and sugar for a half cup of sweet soy sauce (kecap manis) for its depth of flavor.ย 

Thai-style Beef Back Ribs on the Big Green Egg

  • 1/2 cup kosher salt
  • 1/2 cup soy sauceย 
  • 1/4 cup sugar
  • 1/4 cup cilantro stems and scraps
  • 1/4 cup lemongrass, sliced and crushed
  • 25 grams galangal root, chopped
  • 1 quart beef stock
  • 3 quarts ice water

Mix everything except the water and bring to a simmer for 5 minutes. Remove from heat and mix with ice/water to lower the temp to 40f. I put the ribs in a non-reactive hotel pan, covered it with the brine, covered it and placed it in the fridge. I flipped the ribs about halfway through. 18 hours was perfect.

Note: I adjust the salt in my brines. Generally, I do 30 grams (~ 2 tablespoons) of salt per quart of liquid for longer brine periods (18-24 hours). If I have to get it done shorter (8-12 hours), I will increase the salt up to 60 grams per quart.

The Cook

When I cooked Chef Andy's chicken, we went hot and fast in a drum but smoking was a better idea for the beef ribs.ย 

  • Grill - I gave serious thought to hanging the ribs in a drum cooker since Chef hung his chickens. But the weather was iffy so I went with one of our Big Green Eggs since they are under a roof.
  • Fuel - Chef specifically mentioned using Thaan binchotan-style coal. I didn't have that so I went with a quality lump charcoal (Jealous Devil, Fogo, Rockwood, etc). Quality coal is key because I'm not using any smoking wood, I'm just letting the lump give it a light smokiness.ย  [Thaan binchotan-style coal Affiliate link]
  • Grill set up - Kick Ash Basket to ensure good airflow and make clean up easy. I used a cast iron grate from Craycort and a cast iron plate setter for the indirect piece between the fire and the grates.ย 
  • Plan - Season the rack with Lane's Q-Nami. Cook it at 275f for about 2 hours. Wrap it in foil with a Thai-flavored paste for about 90 minutes. Take it out of the wrap, glaze it with a sweet soy-based sauce, and finish it on the cooker for 15 more minutes.

Here's how the cook went.

  • 1:00pm -ย  I set up the Egg, lit it with a propane torch, and let it come up to 275f using manual controls and a natural draft. I wanted a low, steady, and clean burning fire.
  • 2:30pm - Took ribs out of the brine and did not rinse. Give the ribs a light to moderate coat of Lane's Q-Nami, an Asian fusion rub with a nice peppery kick.
  • 2:40pm - Ribs placed on, bone-side down.

I did my best to make sure the ribs didn't stick out above the open areas.ย 
Cast iron grates don't add sear power in a low temp cook but they do add some thermal mass which always helps with holding steady temps. Plus low and slow cooks help keep your cast iron well-seasoned.

  • 4:40pm - Two hours in and ready to wrap.
Thai-style Beef Back Ribs on the Big Green Egg
So I forgot something...I forgot to peel the membrane off the back of the ribs before putting them in the brine. Oops. That contributed to the ribs twisting like this. Not a big deal and surprisingly, it wasn't noticeable at the end.

The Wrap

My braising liquid for the wrap was inspired by the paste that Chef Ricker used on the inside of his birds.ย  I put it all in a mini-blender and spun it until it was a chunky liquid.
  • 1/4 cup sliced lemongrass
  • 1/4 cup beef stock
  • 2 tablespoons soy sauce
  • 2 tablespoons chopped cilantro
  • 1 tablespoon peeled and chopped galangal
  • 2 cloves garlic, peeled

I formed a well in a 24 x 24 piece of foil and poured about 1/3rd of the liquid in that. I placed the ribs bone-side up and poured the rest over the ribs. I sealed that up and put it back on the Egg for 90 minutes.

The Glaze

The dark, sweet almost-smoky flavor of sweet soy sauce (kecap manis) is the star of the glaze. Don't be tempted to substitute regular soy for sweet soy.ย  Sweet soy sauce is much different than soy sauce in texture and taste. We buy ours at Sunshine Market in Knoxville but you can order it online. [Sweet Soy Sauce Affiliate Link]
  • 1/4 cup sweet soy sauce
  • 1 tablespoon fish sauce
  • 1 tablespoon rice wine vinegar
  • 3/4 teaspoon white pepper
  • 3/4 teaspoon ground fresh ginger
  • 3/4 teaspoon ground fresh galangal
Thai-style Beef Back Ribs on the Big Green Egg
Noice rack!

Thai-style Beef Back Ribs on the Big Green Egg
To be honest, I didn't time how long it was on after glazing. I just waited for the glaze to cook on and get tacky to the touch. It was about 10 minutes but I wasn't timing it.

Thai-style Beef Back Ribs on the Big Green Egg
Beef back rib deliciousness.ย 

These ribs were literally "shut your mouth good" because all three of us got quiet when first biting into them. Then came the praise. So much taste in every bite. The salty, sweet, smoky, and slight heat blended flawlessly with the ginger, galangal, and umami profile.ย 

We will absolutely do these again in the near future. That will let me re-test the recipe and get better pictures.

Note: Chef Ricker has a few books available: [Both are Amazon Affiliate links]


Smoking Pork Butts 2 Ways on the Big Green Eggs

By: Chris
30 October 2022 at 13:03

[FTC Standard Disclosure] We received no compensation for this post. If any links may earn us a commission, those links will be tagged as [Affiliate Link].

A grocery store had pork butts on sale for under $1 per pound and there's no way I'm passing that price up these days. I picked up a couple of butts and cooked them using two different recipes - I wanted one for chopped Carolina-style pork and one using our smoked green chile pork recipe for tacos, nachos, etc. Here's how it all went down.

Smoking Pork Butts 2 Ways on the Big Green Eggs

Meat Prep - Friday 4pm

I usually like to prep butts and briskets 12 hours before going on the smoker. Because of a time crunch for when I wanted these ready, I only had about 8 hours this time. Resting the seasoned meat in the fridge for hours lets "dry brining" occur. That builds depth of flavor and actually alters the cell structure of the meat so that it retains more moisture [source].

  • Pork Butt for Carolina-Style Chopped Pork - I did minimal trimming, injected it with an apple juice solution, and seasoned it liberally with Meat Church Honey Hog.
  • Smoked Green Chile Pork Butt - Also minimal trimming and injection but I seasoned it heavily with the green chile rub.
  • Then I loosely cover both pork butts with a food bag and pop them into the fridge until I'm ready to put them on the smoker.

I made up a batch of my NMT Green Chile Steak Seasoning, loaded with ground green chile, salt, black pepper, garlic, shallot, cumin, and coriander.ย ย Alternatively, you can save some work and buy a jar of Albukirky's Green Chile Seasoning. I can't recommend Kirk's seasoning enough; it's fantastic on eggs, chicken, steak, pork, shrimp, or just about anything.

Injecting apple juice solution into a pork butt for smoking
I injected both butts with a simple solution of apple juice, salt, and sugar. I don't inject every time, but I tend to do it more often than not. Brining only penetrates so far into big meats; injection complements the job and gets seasoning deep down in the meat.ย 

Honey hog is a safe bet for seasoning pork.
Boneless pork butt what? I was so giddy about the low price that I didn't notice that one of the pork butts I selected was boneless. Oops. Not a major deal. I take advantage of the opening and season it before tying up the butt.

Seasoning a pork butt with green chile rub
Seasoning the other pork butt (the bone-in one) with green chile seasoning. I like to make sure I get the pork coated on all sides, not just the top and bottom.

Pro tip:ย  I like to put a glove on my seasoning jars when prepping big meats because your hands are going to be dirty when you need to pick up the seasoning. This lets you not worry so much about cross-contamination and makes cleanup a breeze.ย 

Smoking Pork Butts 2 Ways on the Big Green Eggs
There isn't much different about smoking a boneless pork butt, but I do like to tie the roast, so it cooks evenly. Otherwise, the 2 flaps of meat where the bone was removed can separate, cooking faster than the rest of the pork butt.

Smoking Pork Butts 2 Ways on the Big Green Eggs
Regular pork butt on the left, green chile pork butt on the right. I often get asked about the steam pans. I learned this from several competition BBQ classes. The two main benefits for me are 1) ease of handling from start to finish and 2) it keeps your smoker much cleaner. The one disadvantage for a smaller smoker like a Big Green Egg is that it takes up more space.

Smoking Pork Butts 2 Ways on the Big Green Eggs
Loosely covering the pork butts is an important part of the dry brine process. That's because, for the first hour or so, the salts in the seasoning actually extract moisture from the meat. That moisture mixes with the seasoning, changing the concentration, so the meat starts pulling the moisture back into the meat. If you don't cover the meat, the cold, dry air blowing in the fridge will evaporate the moisture before it can be pulled back into the meat. We use 18 x 24" food bags, but you can use plastic wrap.
18 x 24" food bags [Affiliate link]

Smoker Set Up - Friday 6pm

I decided to use my pair of large Big Green Eggs for this cook. I like to set up my cookers well in advance of the time to light up.ย 

  • Carolina-style Chopped Pork - For this butt, I used my Egg in the BGE Modular Nest. The fuel was a Kick Ash Basket full of lump charcoal and 2 big chunks of hickory wood. I used a cast-iron plate setter for the indirect piece. I used a Flame Boss 200 to run the show while I slept.
  • Green Chile Smoked Pork - For this butt, I used the Egg in the Challenger Torch table. Same fuel as the other butt. My indirect setup was an Adjustable Rig with a spider rig/heat stone.


I tried out some new Jealous Devil products
We swung by Academy to pick up some Jealous Devil XL lump charcoal and found that they also had some Jealous Devil products I hadn't tried...

...namely, the JD Smoke Wood Blocks and the JD Boom! Firestarters. I used them both for this cook and will do some type of review post later.

Smoking Pork Butts 2 Ways on the Big Green Eggs
The first step for me for any overnight cook is cleaning out the smoker. This ensures the best possible airflow which is important to fire management. Yeah, I know my fire bowl and fire ring are both cracked. They still work so I haven't bothered with a warranty claim.

I loaded each Kick Ash Basket about half full with 2 blocks of wood. I stood one piece of wood up in the middle and then the other one about 8-10 inches from where I planned to light the coals. I was trying to have the smoke kick in about an hour after starting the Egg when the pork butts go on. I topped all of this with the leftover lump charcoal from a prior cook.

Smoking Pork Butts 2 Ways on the Big Green Eggs
Eggs all set up, side by side.ย 

Lighting Up - Friday 11pm

I lit both eggs about an hour before I wanted to start smoking the butts. When I'm using a natural draft with manual controls, I usually like to fire up at least 90 minutes before the start time. But controllers start up consistently more quickly and I find an hour is long enough.

  • I turned the Flame Boss 200 and the Signals/Bellows at 250
  • f so that the fan would be running.
  • I nestled a Jealous Devil Boom! Starter in the basket of coal in each Big Green Egg. I put it towards the front left at about 7 o'clock when looking down into the fire bowl. Strategically, that way it will burn across the coal hitting the two chunks of smoke sequentially.ย 
  • I lit the starters, shut the grills, and headed inside.ย 
  • The Boom! Starter had the grills to temp quite quickly. I'll do a full review later.

Jealous Devil Boom! charcoal starter in use

The Cook - Midnight

I put the butts on at midnight with the Eggs running at 250f with the following plan:

  • Add moisture throughout the cook.
    • Carolina-style pork - Spritzed every 1 to 1.5 hours with a mix of apple juice and apple pie moonshine.
    • Green chile pork - baste every 1 to 1.5 hours with a mix of 1/2 cup lime juice, 1/2 cup oil, and 1 tablespoon of green chile rub.
  • Wrap the butts in foil when they get the color I want, typically about 6+ hours and at an internal temperature of 160-170f.
  • Pull them to rest in a warm Cambro hotbox when they are tender, usually at an internal temperature of 203-205f.
  • Final kiss of smoke.ย 

Smoking Pork Butts 2 Ways on the Big Green Eggs
I pretty much always use an electronic temperature controller when cooking overnight on the Eggs because I like to sleep as much as possible. Manual controls work fine and there's something to be said about natural draft, but I like the insurance of having the controller keep an eye on things.

Smoking Pork Butts 2 Ways on the Big Green Eggs
Carolina-style pork butt about an hour into the cook when I was about to apply the next spritz of apple juice.ย 

The Wrap - Saturday 7:30am

I used to only wrap my pork butts for BBQ competitions but over time, I've started doing it at home. Wrappingย 
  • locks in the color,ย 
  • speeds up the cooking time, andย 
  • retains moisture.ย 
On the other hand, it's braising, not smoking. Like so much in the BBQ world, it's just a matter of preference.

The "wrap liquid" for each pork butt was:
  • Carolina-style pork butt - Sprinkled pork butt with more Honey Hog, 3 pats of butter, and several spritzes of apple juice.
  • Green chile pork butt - I added the remainder of the lime oil baste.

Flame Boss 200 for Smoking Pork Butts 2 Ways on the Big Green Eggs
One of the factors I consider for WHEN to wrap is the internal temperature. For offsets and pellet grills, I usually wrap when the pork is in the 160f neighborhood. For kamados or my gravity-fed pit, it's usually more like 170f. I suspect that's because kamado grills and my big pit have humid cooking environments. Moisture inhibits the Maillard reaction so that would make sense.ย 

Smoked pork butt in steam pan on Big Green Egg
Here's the Carolina-style pork butt just before wrapping. It was a little darker than it looks here; the overhead light makes it appear a bit lighter in this picture.

Smoking Pork Butts 2 Ways on the Big Green Eggs
The green chile pork butt prior to wrapping. It smelled ridiculously good like it was ready to eat NOW.

After wrapping, I put the butts back on the grill, stick the probe through the foil, and wait. Once wrapped in foil, you can raise the cooking temp significantly if you are in a hurry to push through to the finish.

When I put the butts back on the Eggs, the green chile butt was significantly behind the other pork butt so I bumped the temp up on the Signals to raise the cooking temperature of that Egg to 275f so it could catch up. You can see what a difference just 25f degrees made.ย 

Rest - Saturday 11:45 to 2pm

The rest is a crucial step in my pork butt process. It lets everything balance out.ย 

  • What - Use can use a cooler, a hot box, or even an oven set at 140-170f.ย 
  • How long - At least 1 hour up to 4 hours
  • Pro-tip:ย  PRE-HEAT your cooler or hot box.ย 

Cambro hot box is my preferred method for resting big smoked meats.
My Cambro hot box is one of my favorite tools for BBQ because of 1) it's heat retention, 2) ease of sliding trays in and out and 3) capacity (holds 8 half pans or 4 butts). To preheat it, I pour a large pot of boiling water in a hotel pan on the lowest level about 15 minutes before I put the butts in the hot box.
Cambro UPC 300 [Affiliate Link]

Finish - Saturday 2pm

A KCBS Team of the Year once told me, the last thing you put on BBQ is the first thing you taste so I like to give them a few final moments in smoke.ย 

  • Refresh the smoke - While the butts rest, I drop the Egg temp and let it run at a low temp just to conserve coal. About 15 minutes prior to finishing, I turn the temp back up to get the fans blowing and add a chunk of wood to an area with lit coals.
  • This gives an opportunity to add another layer of flavor.ย 
  • Put the butts back on the Eggs for that final dose of smoke.ย 
  • This also resets the crust, which gets soft during the wrapped rest.


Smoking Pork Butts 2 Ways on the Big Green Eggs
When the pork butts come out of the wrap, after the rest, the crust is a little soggy. This will crisp back up in 10-15 minutes on the Egg.


Smoking Pork Butts 2 Ways on the Big Green Eggs
This comes from our competition program and kind of goes against the Carolina-style pork tradition which eschews sweet BBQ sauces. I glaze the pork butt with Blues Hog Original BBQ sauce that I thinned with apple juice.

Finally done! The thin sauce is cooked on to give the bark just a hint of sweetness.

Processing

Normally we would just pull the pork into shreds but in this case we wanted chopped pork instead. We were making my childhood favorite chopped pork with vinegar sauce and since the green chile pork is for tacos, etc, it makes sense for it to be chopped as well.


For both butts, we started by breaking them up into big sections and pulling out any big chunks of non-rendered fat. There shouldn't be much.

Dark tasty bark and juicy pink smoked pork.

A heavy cleaver is a perfect tool for chopping pork. We got this top one from the Chain of Lakes Eggfest in Winter Haven, FL. It is made by Rhineland Cutlery in nearby Melbourne, FL.

Smoking Pork Butts 2 Ways on the Big Green Eggs
For the Carolina-style pork butt, I chop it with my Old Virden's Carolina-Style Vinegar sauce so it all gets mixed in together. No additional sauce is needed. Look at those bits of chopped-up bark in there, so much flavor!

Smoking Pork Butts 2 Ways on the Big Green Eggs
For the green chile pork, I put a can of green chiles on top before I start chopping so it all gets chopped up together.

Smoking Pork Butts 2 Ways on the Big Green Eggs
Good googly moogly, this is delicious!


Dish and Devour!

It's all over except the dining!ย 


chopped smoked pork sandwich Smoking Pork Butts 2 Ways on the Big Green Eggs
For me a perfect chopped pork sandwich needs nothing but chopped pork and a bun. The piquant smoked pork and white bread are perfection together. I won't get "butt-hurt" (see what I did there?) if you want to put slaw or a spicy pickle on top.

Green chile smoked pork and chorizo tacos
Smoked green chile pork and chorizo street tacos - simple yet powerfully delicious.

huevos rancheros from Smoking Pork Butts 2 Ways on the Big Green Eggs
Huevos Rancheros featuring some of my green chile smoked pork.

Admittedly this is a lot of pork for a house with 3 people. We vacuum seal and freeze about half of it for eating later.ย 

Fiery Asian Drumsticks with Mushroom (Faux) Stir Fried Rice

By: Chris
15 October 2022 at 14:30

[FTC Standard Disclosure] We received no compensation for this post. Any links that may earn us a commission are tagged [Affiliate Link].

These Fiery Asian Drumsticks pack the flavor and heat!


Fiery Asian Drumsticks with Mushroom Faux Stir Fried Rice on the Grilla pellet grill
Fiery Asian Drumstick with Mushroom Faux Stir Fried Rice


The chicken has the tidal wave of Asian flavor from Lane's Q-nami Rub and the dark sweet flavor of Japanese BBQ sauce. Q-nami has heat from black pepper and chiles and notes of umami, the "fifth taste." The Japanese BBQ sauce reminds me a lot of kecap manis (sweet soy sauce) with a dark, almost smoky, sweetness.ย  [kecap manis Affiliate Link]

Knox Asian Food Festival

The flavors were inspired a few weeks back when we went to Knoxville's Asian Food Festival at World's Fair Park.ย 

It was a beautiful day in World's Fair Park for the multitude of Asian food trucks and booths with cultural information about various Asian countries.ย 

Grilling up skewers of deliciousness and feeding the throngs of people.

Daddy-O's, based out of Maryville, serves up delicious Philippine food in a bus styled like the jitneys in the Philippines.

Fried potatoes on a stick were popular, no surprise.

The festival is a wonderful way to experience some of the excellent Asian food from restaurants and food trucks across East Tennessee, all in one place.

But the food was only half of the story. Various booths and displays shared information about their native culture and offered hands-on activities....or "feet-on activities," as is the case here.

Fiery Asian Drumsticks

The drumsticks were quite simple. I spritzed 6 chicken legs with peanut oil and then seasoned them rather heavily with Lane's Qnami Rub. I put them on the smoker at 275ยฐf and let them go until they hit an internal temperature of about 160ยฐf, which took about 1 hour. I then glazed the legs with Japanese BBQ sauce, boosted the temp up to 350ยฐf, and finished the legs off until they reached an internal temperature of 175ยฐf about 15 more minutes.


The Grilla original pellet grill is a fantastic design of function and beauty
My weapon of choice for this cook was my Grilla pellet grill. I've been using their original model for 6 or 7 years now. I still think it is a fantastic design of function and beauty. The unique shape gives it a small footprint and a convective vortex effect.ย 

Fiery Asian Drumsticks with Mushroom Faux Stir Fried Rice featuring Lane's Q-Nami Asian Fusion rub
I'm a big fan of Lane's Q-Nami when I want Asian flavor and heat. It has turbinado sugar, black pepper, kosher salt, garlic, ginger, coriander, and togarashi. Togarashi includes chiles and seaweed (and more), so that's where the heat and umami get their invitation to the flavor party.

I was excited to find Bachan's Japanese Barbecue Sauce in a local grocery store. Japanese Barbecue Sauce is excellent on just about anything, but we like it on shrimp and chicken. It's made of soy sauce, sugar, mirin, garlic, ginger, rice wine vinegar, tomato paste, green onion, and sesame oil, so it has a darkly sweet flavor. Its body is thinner than American-style BBQ sauces, and it brushes on easily.ย 
Bachan's Japanese Barbecue Sauce [Affiliate Link]


Fiery Asian Drumsticks with Mushroom Faux Stir Fried Rice on the Grilla grill
My setup was straightforward. I had the Grilla set to 275ยฐf and put the chicken on a rack/pan combo on the upper shelf of the cooker.

The Grilla grill features a swing lid that lets you just take a peek or open it all the way. Quite unique in the grilling world.
That swing lid is one of the unique design ideas that I love. You can open it 180 degrees to get full access for things like putting the food in, spritzing, and sauces. Alternatively, you can open it just a sliver to peek at the food without letting all of your heat out.ย 

Using the Thermapen IR to temp check chicken legs
Using my Thermapen IR to temp-check the drumsticks. My sister gave me this Thermapen, and it has become my favorite one. Why? Because in addition to the super-fast readings of a traditional Thermapen, the Thermoworks folks added a non-contact thermometer on the bottom so I can check the surface temperatures of things like griddles and skillets.
Thermapen IR [Affiliate Link]

Fiery Asian Drumsticks with Mushroom Faux Stir Fried Rice on the Grilla pellet grill
Going back in the grill after glazing. Notice how the color has already improved courtesy of the Japanese Barbecue Sauce.

Fiery Asian Drumsticks with Mushroom Faux Stir Fried Rice
Crispy with the sauce cooked onto the legs and ready to come off the grill.

Fiery Asian Drumsticks with Mushroom Faux Stir Fried Rice
Isn't that swing lid a cool feature?


I didn't think of the rice idea until the legs were already on the cooker. I wanted to do stir-fried rice, but that requires you to already have rice cooked and cooled down, which would take 40 minutes before I could even start the stir-fry.ย  So instead, I used the Asian flavors with the pilaf method, which took about 25 minutes in total.

Mushroom (Faux) Stir Fried Rice

www.nibblemethis.com

Published 10/15/2022

I came up with this dish when I wanted to make a mushroom stir-fried rice, but I only had about 20 minutes and did not already have cooked and cooled rice on hand. Although this has the flavors of stir-fried rice, I use the pilaf cooking method instead of stir-fry. We used baby Bella mushrooms, but a mix of Bellas and shiitake would be ideal.

Ingredients

  • 2-3 tablespoons oil
  • 1 clove garlic, peeled
  • 8 ounces mushrooms, stemmed and diced
  • 1/2 cup diced red bell pepper
  • 1/2 cup diced yellow onion
  • 1 cup jasmine rice
  • 2 cups chicken or vegetable stock
  • 1.5 teaspoons soy sauce
  • 1.5 teaspoons chile-garlic sauce

Instructions

  1. Preheat a medium saucepot over medium heat. Add oil and toast the garlic until turning a light, golden brown, about 1 minute. Remove the clove and reserve it for later.
  2. Saute the veggies. Add the mushrooms and saute for 1 minute. Add the bell pepper and saute for another minute. Stir in the onion and go for one more minute.
  3. Saute the rice and garlic. Mince the reserved garlic from step one. Add the rice and garlic, tossing to coat the rice in the remaining oil. Stir frequently until the rice gives a nutty aroma, 1-2 minutes.
  4. Simmer the rice. Add the stock, soy sauce, and chile-garlic sauce and stir to combine. Bring to a simmer, slightly reduce heat, cover tightly, and cook until the rice has absorbed all the liquid, about 18-20 minutes.
  5. Rest and fluff the rice. When the rice is done, let it rest covered for 5 minutes. Taste for seasoning and add salt or soy sauce as desired. Fluff and serve.

Yield: 3 cups

Prep Time: 00 hrs. 10 mins.

Cook time: 00 hrs. 25 mins.

Total time:ย 00 hrs. 35 mins.

Tags: side dish, vegetarian


Fiery Asian Drumsticks with Mushroom Faux Stir Fried Rice
Grab a leg!

Fiery Asian Drumsticks with Mushroom Faux Stir Fried Rice
Lane's Q-nami always delivers. I liked mine just like this.

Fiery Asian Drumsticks with Mushroom Faux Stir Fried Rice
Alexis drizzled some Yum-Yum Sauce over hers.


Mushroom Swiss Burgers on the Grill

By: Chris
3 October 2022 at 16:12

[Standard FTC Disclosure] We received no compensation for this post. Any link which may earn us a commission is tagged as [Affiliate Link].

We've been chowing down on mushroom Swiss burgers in the past few weeks. Not that you need a recipe for mushroom Swiss burgers, but I have a basic recipe that I follow for the mushroom topping, and it's easy to prepare one of three ways; sauteed, saucy, or creamy.

I add chopped bacon to my mushroom topping to add a smoky, salty element.

Fun Fungi Facts

Here are some fun facts about mushrooms from Harold McGee's epic On Food and Cooking: The Science and Lore of the Kitchen. [Affiliate Link]

  • Mushrooms are natural flavor enhancers. They naturally contain monosodium glutamate, and many also contain guanosine monophosphate.ย 
  • Mushrooms don't have cellulose like plants. Instead, their cell walls are made of chitin which is the same thing as the exoskeletons of crustaceans.ย 
  • Mushrooms produce octenol (an 8-carbon alcohol) and there is more in the gills. Therefore, mature mushrooms that have opened have more gills and more flavor while unopened mushrooms like button mushrooms have less flavor.


Whole Mushrooms vs Pre-Sliced

I prefer to buy whole mushrooms and slice them myself.ย 

  • Mushrooms continue to be quite active for days after being picked. Enzymes continue to develop and store flavor compounds in the gills.ย 
  • If you slice them up before packaging, it disrupts that process and also lets the mushrooms start to dry out.ย 
  • For me, the loss of flavor isn't worth the 30 seconds you save from buying pre-sliced mushrooms.ย 
  • Prep tip:ย  If you don't have knife skills, you can use an egg slicer to slice your mushrooms instead.

Here's the topping recipe that I use. When you do the sauteed version of this, it's basically mushroom ragout and we've tossed it with pasta or used it as a base for mushroom soup.

Mushroom Swiss Burger cooked on the CharBroil Cruise Grill
We didn't have any frozen fries or tots and the only potatoes I had on hand were these bite-size "ruby sensations" that we bought at Food City. If fries are just bite-sized pieces of fried or roasted potatoes, doesn't that make these.....ROUND FRENCH FRIES!?!?ย ย 

Mushroom Topping for Mushroom Swiss Burgers

www.nibblemethis.com

Published 10/01/2022

This topping can be served in one of three ways; sauteed, saucy, or creamy. You can substitute butter for the bacon fat if needed.

Ingredients

  • 2 tablespoons bacon fat
  • 12 ounces baby bella mushrooms, freshly sliced thin
  • 1/2 cup yellow onion, peeled and sliced
  • 5 slices smoked bacon, raw, chopped
  • 1 ounce bourbon
  • 1 ounce stone ground mustard
  • 1 tablespoon Worcestershire sauce

Instructions

  1. Preheat a medium cast-iron skillet over a 350ยฐf grill.
  2. Saute the mushrooms. Add bacon fat or butter to the skillet and saute the sliced mushrooms for 2 minutes.
  3. Stir in the bacon and cook for 3 more minutes.
  4. Stir in the onions and cook until the onions are softened and the bacon has started to brown, about 4-5 more minutes.
  5. Flambe the bourbon.ย 
    1. Keep your face, extremities, important documents, and anything else you don't want to be burned from above the skillet.ย 
    2. Wear heat-resistant gloves.ย 
    3. Don't do this unless you've been trained or at least watched 3 YouTube videos on how to flambe.ย 
    4. What I'm trying to say is don't do this if you don't know what you're doing and don't sue me if you burn off your eyebrows.ย 
    5. Remove the skillet from the heat, add the bourbon and quickly use a long-necked lighter to ignite the bourbon flames which will create a brief fireball. It will burn down and the flames will self-extinguish in about 15-20 seconds.ย 
  6. Sauteed Version: Stir in the stone-ground mustard and Worcestershire sauce and simmer for 1 minute until thickened. Taste and add salt or Worcestershire sauce as needed.ย 
  7. Saucy Version:ย  After step 6, add 1/2 cup or so of beef stock and let simmer until the liquid reduces by half. Stir in a slurry of 1 tablespoon each of corn starch and cold water to thicken.
  8. Creamy Version:ย  After step 6, add 1/2 cup or so of heavy cream and let simmer until the liquid reduces by half. Stir in a slurry of 1 tablespoon each of corn starch and cold water to thicken.

Yield: enough for 4 burgers

Prep Time: 00 hrs. 10 mins.

Cook time: 00 hrs. 15 mins.

Total time: 25 mins.

Tags: sauce

Here are two of my recent burgers.

For the first burger, I used my CharBroil Cruise grill with infrared cooking and automatic controls to cook at the specific temperature of my choosing. That's pretty unique for gas grills which usually just have a dial with settings of low, medium, and high.


Seasoned with Jalapeno Steak Butter from Pepper Palace and cooked on the CharBroil Cruise grill
I started with fresh ground chuck from Food City and made 6-ounce burger patties. I heavily seasoned those with Jalapeno Steak Butter Seasoning from Pepper Palace. I've been using it on burgers a good bit lately - I enjoy the jalapeno flavor and mild sting.

There was no specific reasoning for the 535ยฐf, I meant to do 525ยฐf and didn't notice that I rolled past it on the dial.ย 


I cooked the burgers for about 3 minutes per side. If you're wondering why you don't see flames, the CharBroil Amplifire system has a metal emitter plate just under the grate and above the flames. It prevents flare-ups and cooks using infrared heat which keeps the food more juicy.

I like to use two pieces of Sargento Baby Swiss per burger. Perfectly cheesy!

For the "round french fries", I tossed them with oil and plenty of the Jalapeno Steak Butter seasoning.ย  I put them in a cast iron cooker on the upper rack of the CharBroil Cruise and cooked them for about 30-45 minutes at 425ยฐf until they were tender.

The mushrooms amplify the cheesy, beefy burger.

I cooked this next batch of Mushroom Swiss Burgers on a flat-top griddle.

Mushroom Swiss Burgers on the Grill

Sometimes I opt for convenience and use Schweid & Son's premade burgers. They are fresh, Certified Angus Beefยฎ Brand beef. The All American is USDA Choice while the One Percenter is USDA Prime.
Sometimes I opt for convenience and use Schweid & Son's premade burgers. They are fresh, Certified Angus Beefยฎ Brand beef. The All American is USDA Choice while the One Percenter is USDA Prime. Also, when making Mushroom Swiss Burgers, it makes sense to season them with a mushroom-based seasoning like Fire and Smoke's Shiitake Steak Rub or my Umami Steak Seasoning recipe.

Mushroom Swiss Burgers on the Blackstone grill
Cooking burgers on a flat-top grill are probably my favorite way to go, even if I'm not doing smashburgers.ย 

Mushroom Swiss Burgers on the Blackstone griddle
Look at that pile of deliciousness! I would have eaten it just like this except I like to avoid 3rd-degree burns on my lips and tongue.


Mushroom Swiss Burger on a toasted brioche roll
Umami for the win! I love a toasted brioche bun as well.

Chipotle Shrimp Tacos with Tex-Mex Rice

By: Chris
24 September 2022 at 15:04

ย [FTC Standard Disclosure] We received no compensation for this post. Any link which may earn us a commission is tagged [Affiliate Link].

These shrimp tacos burst with spice and have smoky heat. The cilantro-lime slaw brings brightness and balances out the peppery shrimp.ย 

Chipotle shrimp tacos with Tex-Mex rice

The recipe is Eating Well's Chipotle Shrimp Tacos (August 2022 pg 114), I just changed it up a bit for us - I used a more complex-flavored seasoning and cooked the shrimp in a wok over hot coals. Finally we served it with a quick and easy Tex-Mex Rice.

Their seasoning was just ground chipotle, garlic, and salt, which is fine. For tacos, I wanted to jazz it up a bit with smoky paprika, toasted cumin, coriander, chili powder, and turbinado sugar.ย 


Chipolte Seafood Seasoning

www.nibblemethis.com

Published: 09/24/2022

This smoky and spicy seasoning will wake up your shrimp, scallops and other seafood. For best results, I like to brush my seafood with a citrus juice and oil mix and season it heavily with this rub about 30 minutes before grilling.

Ingredients

  • 1 teaspoon ground chipotle
  • 1 teaspoon turbinado sugar (aka Sugar in the Raw)
  • 1 teaspoon smoked paprika
  • 3/4 teaspoon sea salt
  • 1/2 teaspoon Gebhardt chili powder
  • 1/4 teaspoon toasted cumin
  • 1/4 teaspoon corianderย 
  • 1/4 teaspoon granulated garlic

Instructions

  1. Mix ingredients together in a small bowl.
  2. Sprinkle on seafood.

Yield: about 1 1/2 tablespoons

Prep Time: 00 hrs. 05 mins.

Cook time: 00 hrs. 00 mins.

Total time:ย 05 mins.

Tags: seasoning

The paprika, chili, and cumin add to the smokiness of the chipotle while the raw sugar and coriander brighten the flavor.


Wok and Roll

The wok is an ideal cooking vessel for the kamado-style grill and "stir-firing" these shrimp was the optimal technique.ย 

Here is my setup for stir-firing (aka stir-frying) the shrimp. A large Big Green Egg with a Kick-Ash Basket of lump charcoal, I used a spider-rig for the wok ring, and a 16" carbon steel wok tha got for cheap at our local Asian grocery store.


Cooking shrimp in a wok over a flaming fire in the Big Green Egg kamado style grill.
If you use a wok often at all, you should pick up a wok spatula. The long handle is good for the heat and the curved front edge fits the curve of the wok, making it easy to scoop and flip the food.
Wok spatula [Amazon Affiliate Link]

Cooking chipotle shrimp tacos on the Big Green Egg kamado grill
With stir-frying, the food should constantly be moving. The cook only takes about 90 seconds with shrimp.


These smoky, spicy shrimp are amazing just by themselves. We had some leftovers and our youngest son used them to make a shrimp po' boy with slaw and remoulade.


Recipe for Quick and Easy Tex-Mex Rice
Tex-Mex Rice with corn and chipotle peppers.

Tex-Mex Rice

www.nibblemethis.com

Published 09/24/2022

One of our go-to side dishes, this is a low-effort, high-reward recipe.

Ingredients

  • 2 tablespoons pork fatย 
  • 1 cup long-grain rice
  • 1/2 can Food Club Whole Kernal Corn with Chipotle Peppers, drained
  • 1 3/4 cups vegetable stock
  • 1/4 cup tomato sauce
  • 1 teaspoon salt

Instructions

  1. Preheat a pot over medium-high heat.
  2. Melt the bacon fat and saute the rice and corn, stirring almost constantly, until the rice begins to toast and emit a nutty aroma, about 1-2 minutes.
  3. Stir in the stock, tomato sauce, and salt. Reduce heat to medium-low and bring to a low simmer. Cover and cook for 18-20 minutes.
  4. Rest, covered for 5 minutes. Fluff with a fork and serve.

Yield: 4 servings

Prep Time: 00 hrs. 05 mins.

Cook time: 00 hrs. 25 mins.

Total time: 30 mins.

Tags: Rice


Chipotle shrimp tacos with Tex-Mex rice

Teriyaki Shaoxing Wings on the Grill

By: Chris
10 September 2022 at 15:12

ย [FTC Standard Disclosure] We received no compensation for this post. Any links that may earn us a commission are clearly tagged [Affiliate Link].

College football is back, and these wings epitomize great Game Day eats! They are sweet, smoky, and spicy because we glaze them at the end with teriyaki sauce cut with Shaoxing.

Teryiaki Shaoxing Wings on the Big Green Egg kamado grill

Shaoxingย 

What the heck is Shaoxing? It is a traditional fermented rice wine, also known as Shaohsing or "ye."ow wine". It is yellow or amber in color and mildly sweet, and highly fragrant, reminding me of a strong marsala wine (another favorite of mine).ย 


Lane's BBQ Q-Nami Rub

The heat in these wings comes from Lane's Q-Nami - an Asian fusion seasoning. It features turbinado sugar, salt, pepper, garlic, ginger, coriander, and togarashi for a sweet heat.


If you can't find it locally, you can order Q-Nami online from Lane's BBQ. You could also substitute Dizzy Pig Tsunami Spin or try Steven Raichlen's 5-4-3-2-1 Asian Barbecue Rub recipe.


Teriyaki Shaoxing Wings

www.nibblemethis.com

Published 09/10/2022

Grilled wings with a sweet and savory glaze of teriyaki sauce and rice wine, we like to serve ours with Cilantro-Lime Coconut Rice.

Ingredients

  • 2 1/2 pounds chicken wings broken down into wingettes/drumettes
  • 1 tablespoon peanut oil or other high temperature cooking oil
  • 2 tablespoons Lane's Q-Nami Rub
  • 4 ounces quality teriyaki sauce
  • 1 ounce Shaoxing rice wine
  • garnish: sesame seeds and jalapeno slices

Instructions

  1. Preheat a grill to 350ยฐf.ย  Set the grill up for "raised direct", meaning you cook directly over the heat source, but are cooking on an elevated rack. See the pics below for my setup.
  2. Season the wings. Lightly coat the wings with peanut oil and season them heavily with Lane's Q-Nami rub.
  3. Grill the wings. Grill the wings on an elevated grill rack, turning every 10 minutes or so, until the wings reach an internal temperature of 175ยฐf. It should take about 20-30 minutes.
  4. Sauce the wings. Glaze the wings on both sides and allow to cook until the sauce is cooked onto the wings, another 3-5 minutes.
  5. Garnish. Garnish the wings with sesame seeds and a few jalapeno slices.

Yield:ย 20-24 wing pieces

Prep Time: 00 hrs. 10 mins.

Cook time: 00 hrs. 30 mins.

Total time: 40 mins.

Tags: wings, chicken, grilled


Gerber's Amish Farm's wings are a step up from the rest of the wings in the meat case.
I like to buy the best quality wings available at the time. My first preference is Springer Mountain because they are consistently large wings with good quality. Bell and Evans is also quite good. Food City doesn't carry either of those so if I don't feel like making a special trip, I'll get the Gerber's Amish Farm wings.

Don't be bashful with the Q-Nami seasoning, really lay it on there.

Raised direct setup on a large Big Green Egg
For my "raised direct" setup, I used a Large Big Green Egg set up with an Adjustable Rig (Ceramic Grill Store) and a cast iron grate from Craycort.

Cooking wings raised direct on a large Big Green Egg
The advantage of "raised direct" is that the extra distance from the coals makes it less likely to burn, so you don't have to turn the wings as often. It gives you a cross between grilling and fire roasting. It is faster than indirect cooking or smoking the wings.

Teriyaki Shaoxing wings on the grill
The wings smelled so good at this point that I wanted to lick them right on the grill.....
I DIDN'T, but I wanted to.

Teryiaki Shaoxing Wings on the Big Green Egg kamado grill
Teriyaki Shaoxing wings are sweet, richly flavored, and slightly smoky.
We served ours with a tasty Cilantro-Lime-Coconut Rice


Please follow me onย Instagram,ย Twitter,ย Facebook, andย Pinterest.


โŒ
โŒ