❌

Reading view

There are new articles available, click to refresh the page.

Air Fryer Nashville Fried Chicken Burger

Nashville fried chicken is known for its fiery heat, deep flavour, and perfect crispy texture. Traditionally, it’s deep-fried, but this air fryer version keeps the boldness intact while making it far more doable for regular cooking.

nashville fried chicken served in a burger

If you have never tried Nashville Fried Chicken before, consider this your sign to make it ASAP. Traditionally, chicken pieces are marinated and then coated in flour and egg wash before being deep fried. Which makes it feel pretty heavy.

But this air fryer version of Nashville hot chicken is wayyy lighter. Instead of flour and egg wash, we coat the chicken in cornflakes and then air fry it with just a light brushing of oil. The result? Perfectly crispy yet healthy pieces of chicken that are ready in no time. And of course the quick Nasvhille-style chilli oil is the star of the show!

I love eating this chicken as a burger with some cooling homemade ranch, and crisp lettuce for a meal that’s spicy, creamy, crunchy, and satisfying. It’s lighter but just as delicious as the original version!Β 

Nashville Chicken Burger Ingredients

Chicken marinade

  • Chicken thighs – stay juicy and tender even with the high cooking temperature. You can use chicken breast, but be sure to reduce cooking time
  • Greek yogurt – tenderises the chicken and adds moisture. Feel free to use hung curd in its placeΒ 
  • Vinegar – balances richness and helps tenderise; lemon juice works too
  • Red chilli powder – adds heat and colour; reduce or replace with paprika for a milder version
  • Garlic paste – for aroma and flavor. Fresh minced garlic works as well
  • Sriracha – adds heat and tang
  • Cornflour – helps the marinade cling and keeps the chicken crisp
  • Salt – to seasonΒ 
  • Crushed pepper – adds mild heat and flavor

Chicken coating

  • Crushed cornflakes – creates a crunchy, fried-style coating without deep frying. Can be replaced with panko breadcrumbs
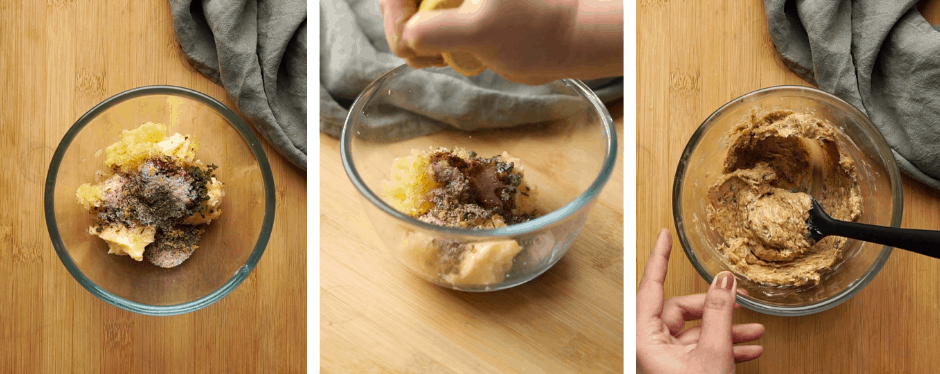
Nashville oil

  • Garlic paste – adds flavor and aroma
  • Chilli oil – for that signature Nashville heat and flavor. I have used my homemade chilli oil, but store-bought works as wellΒ 
  • Red chilli powder – for heat and colourΒ 
  • Salt – for seasoning and balance
  • Honey – adds subtle sweetness to round off the heat; can be replaced with sugar or maple syrup
  • Hot water – thins the oil for easy brushing and even coating.
  • Butter – adds richness and shineΒ 

Ranch sauce

  • Greek yogurt – forms a the creamy base
  • Garlic paste – adds flavour and aroma
  • Pepper – adds gentle heatΒ 
  • Honey – adds a subtle sweetness and softens the tangΒ 
  • Spring onion greens – finely chopped to add freshness and texture

Serving

  • Lettuce leaves – shredded, to add crunch and freshness. I have used iceberg, but Romanian works tooΒ 
  • Burger buns – brioche or whole wheat buns both work well

Frequently Asked Questions

Can I make this less spicy?

Yes. Reduce the red chilli powder and sriracha in the marinade, and cut back on chilli oil in the Nashville coating.

Can I bake this instead of air frying?

You can bake it at 220Β°C for 18–22 minutes, flipping halfway, but the air fryer gives better crispness.

Can I make the ranch ahead of time?

Yes, the ranch sauce can be made up to 24 hours in advance and stored refrigerated.

nashville fried chicken placed in the air fryer and ready to be cooked

Richa’s Top Tips

  • I would highly recommend using chicken thighs as it stays juicier in the air fryer and can handle the spicy coating better
  • Be sure to crush the cornflakes unevenly (a mix of fine crumbs and larger flakes) for better texture
  • A light brush of oil over the chicken is enough to achieve crispy results. Overdoing it can lead to a soggy, unappetising mess.Β 
  • Adjust heat gradually: Taste the Nashville oil before brushing and tweak chilli levels if needed.
  • If you have the time, marinate the chicken for longer. Anywhere 3 to up to 24 hours will deliver more flavorful resultsΒ 
  • Do not overcrowd the air fryer basket if making a larger batch. Air frying the chicken in batches will give you much crispier resultsΒ 

Storage Tips

  • Allow any leftover Nashville fried chicken to cool down completely and then transfer to an air tight container. Store this in the fridge for up to 3 days.Β 

Tip: Place a paper towel in between each piece to absorb any moisture and keep things fresh and crispy longer.Β 

  • This one’s also pretty freezer friendly. Once the chicken cools down completely, wrap it tightly in cling foil or parchment paper and transfer to freezer safe bags. It stays good for up to a month.Β 
  • To reheat, simply air fry or bake for a couple minutes until it heats through and regains some of that crispiness.Β 

Serving Ideas

  • My favorite way to eat this is in the form of a burger. The crispiness of the chicken, the creaminess of the ranch sauce, and the crunch and freshness from lettuce make it into a delicious meal.Β 
  • You can also turn it into wraps with your favorite sauces and veggies.Β 
  • Serve it some baked potatoes or sweet potato friesΒ 
  • A simple cucumber salad or coleslaw helps cut down on the heat and makes the dish more wholesomeΒ 

Customisation Ideas

  • Swap cornflakes with panko breadcrumbs for a finer crunch
  • Add pickles or pickled onions for extra tang
  • Make it extra indulgent with a slice of cheese melted onto the hot chicken
  • Use plain mayo instead of ranch dressing for a different flavor profileΒ 
nashville fried chicken served in a plate

This air fryer Nashville fried chicken burger delivers all the bold, spicy flavours of the classic while keeping things lighter and easier to make at home. It’s crunchy, juicy, and perfectly balanced with a cooling ranch and fresh lettuce. Whether you’re cooking for a weekend treat or a casual get-together, this is a burger that doesn’t feel like a compromise at all.

If you try this Nashville fried chicken recipe at home then send me pictures of your recreations over in my Instagram DMs @my_foodstory.Β 

Watch Air Fryer Nashville Fried Chicken Burger Recipe Video

nashville fried chicken served in a burger
Print

Nashville Chicken Burger (Air Fryer)

Nashville chicken is known for its fiery heat, deep flavour, and perfect crispy texture. Traditionally, it’s deep-fried, but this air fryer version is healthier and just as delicious!
Course Main Course
Cuisine international
Diet Halal
Prep Time 5 minutes
Cook Time 18 minutes
Total Time 23 minutes
Servings 3 servings
Calories 889kcal
Author Richa

Equipment

Ingredients

marination

  • 3 chicken thighs 240 gms
  • 2 tablespoons greek yoghurt / hung curd
  • Β½ teaspoon vinegar
  • 1 Β½ teaspoons red chilli powder
  • 1 Β½ teaspoons garlic paste
  • 1 tablespoon sriracha
  • 2 teaspoons cornflour
  • Β½ teaspoon salt
  • Β½ teaspoon crushed pepper

Chicken crumbs

  • 1 Β½ cups crushed cornflakes

Nashville oil for coating

  • Β½ teaspoon garlic paste
  • 2 teaspoons chilli oil
  • 1 teaspoon red chilli powder
  • ΒΌ teaspoon salt
  • Β½ teaspoon honey
  • ΒΌ cup hot water
  • 1 teaspoon butter

Ranch sauce

  • Β½ cup greek yoghurt / hung curd
  • Β½ teaspoon garlic paste
  • ΒΌ teaspoon salt
  • ΒΌ teaspoon pepper
  • 1 teaspoon honey
  • 2-3 tablespoons chopped spring onion greens

For serving

  • 3-4 lettuce leaves shredded
  • 3 burger buns

Instructions

  • Take all the ingredients for marination in a bowl, mix well. Add chicken thighs, toss well and set aside for 30 minutes.
    3 chicken thighs, 2 tablespoons greek yoghurt / hung curd, Β½ teaspoon vinegar, 1 Β½ teaspoons red chilli powder, 1 Β½ teaspoons garlic paste, 1 tablespoon sriracha, 2 teaspoons cornflour, Β½ teaspoon salt, Β½ teaspoon crushed pepper
  • Take cornflakes on a plate, dredge each chicken thigh to coat well.
    1 Β½ cups crushed cornflakes
  • Pre heat air fryer to 200C and brush the basket with oil. Add coated chicken thighs and air fry for 8-10 minutes at 200C.
  • Heat oil in a pan, add all ingredients listed for nashville oil and once it comes to a boil, simmer for 3-4 minutes. Brush on the air fried chicken thighs so its coated well.
    Β½ teaspoon garlic paste, 2 teaspoons chilli oil, 1 teaspoon red chilli powder, ΒΌ teaspoon salt, Β½ teaspoon honey, ΒΌ cup hot water, 1 teaspoon butter
  • Take all ingredients for ranch sauce in a bowl, mix well. Mix ΒΌ cup of ranch sauce with shredded lettuce and set aside.
    Β½ cup greek yoghurt / hung curd, Β½ teaspoon garlic paste, ΒΌ teaspoon salt, ΒΌ teaspoon pepper, 1 teaspoon honey, 2-3 tablespoons chopped spring onion greens
  • Take a burger bun, split into half, spread lettuce slaw on one of the sides, place roasted chicken, spread ranch sauce on the other side of the bun and use this to cover the burger and serve.
    3-4 lettuce leaves, 3 burger buns

Video

Nutrition

Calories: 889kcal | Carbohydrates: 131g | Protein: 37g | Fat: 26g | Saturated Fat: 7g | Polyunsaturated Fat: 5g | Monounsaturated Fat: 11g | Trans Fat: 0.2g | Cholesterol: 116mg | Sodium: 2115mg | Potassium: 662mg | Fiber: 6g | Sugar: 20g | Vitamin A: 4564IU | Vitamin C: 35mg | Calcium: 154mg | Iron: 37mg

This article was researched and written by Urvi Dalal.

The post Air Fryer Nashville Fried Chicken Burger appeared first on My Food Story.

Lemongrass Chicken with Coconut Soup

If you like soups that feel like a full meal without being heavy, this lemongrass chicken with coconut soupΒ  should be next on your list.

This is a very easy soup to fall in love with, and if you like Thai flavours, this recipe is a no-brainer. Lemongrass and coconut broth do most of the work, the chicken stays tender, and the whole thing tastes incredibly special. It’s warm, fragrant, and exactly the kind of soup you want to eat when it’s chilly outside.

If you’re someone who enjoys a simple, brothy soup that feels complete on its own, this soup will be your next best friend. You just make it, sit down, and enjoy a really good bowl of soup that feels like exactly what you wanted.

Ingredients for Lemongrass Chicken in Coconut Soup

  • Chicken: Boneless chicken thighs work best as they stay tender, juicy, and flavourful.Β 
  • Aromatics: Lemongrass, ginger, garlic, green chillies, spring onion whites, and kaffir lime leaves form the base of the soup and give it that unmistakable Thai-style fragrance.
  • Seasoning & Marinade: Soy sauce, red chilli sauce, chilli flakes, pepper, honey, lemon juice, oyster sauce, and a touch of chilli oil add depth, gentle heat, and balance to the chicken.
  • Broth: Water and coconut milk come together to create a light, flavourful coconut broth that’s super rich in flavour.Β 
  • Cooking Fat: A neutral oil like peanut, canola, sunflower, rice bran, etc. is used to roast the chicken.
  • For Serving: Steamed rice makes the soup filling and turns it into a complete one-bowl meal, finished with spring onion greens for freshness.

Richa’s Top Tips

  • Use chicken thighs if you can: They stay juicier than breast meat and hold up better in the soup without drying out.
  • Don’t rush the flavour base: Let the lemongrass, ginger, and chillies warm gently in the oil so the broth picks up flavour without turning sharp.
  • Keep the broth balanced: Coconut milk should soften the flavours, not overpower them, so avoid boiling the soup hard once it’s added.
  • Assemble just before serving: Add the rice and pour the hot soup over it at the end to keep the texture right and the bowl feeling fresh.

Frequently Asked Questions

Can I add vegetables to this soup?

Yes, easily. Vegetables like mushrooms, bok choy, spinach, or bean sprouts work well here. Add quick-cooking vegetables towards the end so they stay tender and don’t overpower the broth.

Can I make this soup vegetarian?

You can. Replace the chicken with tofu or mushrooms and use a vegetarian alternative to oyster sauce. The coconut broth and lemongrass still carry plenty of flavour on their own.

Can I use chicken breast instead of thighs?

Yes, chicken breast works, but it cooks faster and can dry out more easily. If using breast meat, add it a little later and avoid overcooking.

Is this soup very spicy?

No, it’s gently spiced. You can easily adjust the heat by reducing or increasing the chillies, chilli flakes, or chilli oil.

Storage Tips

  • In the fridge: You can store the soup without rice in an airtight container for about 2 days.Β 
  • Store rice separately: Keep the cooked rice separately so it doesn’t soak up the broth & turn mushy.
  • Freezing: Freezing is not recommended, since coconut milk can split and go bad.Β 
  • Reheating tip: If you want to reheat the soup, do it at on low heat and avoid boiling. Add rice first, then pour the hot soup over it just before serving.

Serving Ideas

This lemongrass chicken in coconut soup is meant to be enjoyed as a complete bowl on its own. But if you want to add something small on the side, you can:

Customisation Ideas

  • Swap rice for noodles: Turn this into a noodle soup by replacing the rice with cooked rice noodles, egg noodles, or flat wheat noodles. The coconut broth works just as well with noodles and gives the soup a completely different feel.
  • Use prawns instead of chicken: Replace the chicken with prawns and skip the marination. Add the prawns directly to the simmering coconut broth and cook just until they turn pink. The lemongrass and coconut pair really well with seafood and make the soup lighter

With colder days around, this lemongrass chicken in coconut soup is a really nice one to have in your rotation. If you end up making it, do share it with me on InstagramΒ  @my_foodstory. I always love seeing these recipes come to life in your kitchens.Β 

Watch Lemongrass Chicken in Coconut Soup Recipe Video

Print

Lemongrass Chicken with Coconut Soup

If you like soups that feel like a full meal without being heavy, this lemongrass chicken with coconut soup should be next on your list.
Course Main Course, Soups
Cuisine international
Diet Halal
Prep Time 5 minutes
Cook Time 30 minutes
Total Time 35 minutes
Servings 4 servings
Calories 398kcal
Author Richa

Ingredients

Marination

  • 250 gms boneless chicken thighs
  • ΒΌ teaspoon pepper crushed
  • 1 teaspoon grated garlic
  • 1 teaspoon grated ginger
  • 4 roots lemon grass grated
  • Β½ teaspoon chilli oil
  • 1 teaspoon soy sauce
  • 1 teaspoon red chilli sauce
  • Β½ teaspoon lemon juice
  • 1 teaspoon honey
  • 1 teaspoon oyster sauce
  • 1 teaspoon red chilli flakes

For broth

  • 1 tablespoon sunflower or any neutral flavored oil
  • ΒΎ cup onion petals
  • 1 Β½ inch ginger thinly sliced
  • 3 green chillies slit
  • ΒΌ cup + 2 tablespoons spring onion whites
  • 4 kafir lime leaves
  • 3 lemon grass roots crushed
  • 3 lemon grass greens roughly chopped
  • 4 Β½ cups water
  • 1 Β½ cups coconut milk
  • ΒΎ teaspoon salt
  • 1 Β½ teaspoons lemon juice

For serving

  • 3-4 cups cooked rice
  • 1-2 tablespoons Spring onion greens

Instructions

Chicken marination & roasting

  • Add all the ingredients for marination to a bowl, give a good mix and marinate for 30 minutes. Heat oil in a pan, add chicken & roast on low flame for 5-6 minutes on each side. They should be cooked well and roasted to a golden brown. Transfer the chicken to a plate and set aside.
    250 gms boneless chicken thighs, ΒΌ teaspoon pepper, 1 teaspoon grated garlic, 1 teaspoon grated ginger, 4 roots lemon grass, Β½ teaspoon chilli oil, 1 teaspoon soy sauce, 1 teaspoon red chilli sauce, Β½ teaspoon lemon juice, 1 teaspoon honey, 1 teaspoon oyster sauce, 1 teaspoon red chilli flakes, 1 tablespoon sunflower or any neutral flavored oil

Making of broth

  • To the same pan, add onion petals, ginger, green chillies and saute for 1-2 minutes. Add spring onions and saute on low for a few seconds till fragrant. Add lime leaves, lemon grass roots and greens, saute for a few seconds, add coconut milk, water, salt and cook for 10 minutes till the broth gets the flavour from the aromatics. Take off the heat, add lemon juice and mix well.
    ΒΎ cup onion petals, 1 Β½ inch ginger, 3 green chillies, ΒΌ cup + 2 tablespoons spring onion whites, 4 kafir lime leaves, 3 lemon grass roots, 3 lemon grass greens, 4 Β½ cups water, 1 Β½ cups coconut milk, ΒΎ teaspoon salt, 1 Β½ teaspoons lemon juice

Serving

  • take rice in a serving bowl, place roasted chicken on top, add broth around the rice and serve.
    3-4 cups cooked rice, 1-2 tablespoons Spring onion greens

Video

Notes

  1. Boneless chicken thighs are used in the recipe as they are tender & juicy which may be replaced with chicken breast.

Nutrition

Calories: 398kcal | Carbohydrates: 55g | Protein: 17g | Fat: 12g | Saturated Fat: 6g | Polyunsaturated Fat: 1g | Monounsaturated Fat: 4g | Trans Fat: 0.01g | Cholesterol: 59mg | Sodium: 793mg | Potassium: 455mg | Fiber: 4g | Sugar: 6g | Vitamin A: 276IU | Vitamin C: 29mg | Calcium: 74mg | Iron: 3mg

This article was researched and written by Harita Odedra.

The post Lemongrass Chicken with Coconut Soup appeared first on My Food Story.

The NYC Token Crash: Allegations Of Rug Pull After $2.5 Million Liquidity Withdrawal

Former New York City Mayor Eric Adams is facing significant backlash after the crash of his newly launched cryptocurrency, the NYC Token, shortly after its debut on Monday. The token initially soared to a market cap of $580 million but has since fallen sharply to approximately $133 million.

Eric Adams Under Fire

In a promotional video, Adams declared, β€œWe’re about to change the game. This thing is about to take off like crazy.” However, the excitement was short-lived as evidence surfaced suggesting that the steep decline in value resulted from a significant sell-off involving a user connected to the NYC Token’s development team.

Blockchain analysis platform Bubblemaps flagged potentially concerning activity linked to the NYC Token. Notably, a wallet associated with the token’s deployer withdrew around $2.5 million in liquidity when the token peaked.Β 

Although about $1.5 million was returned after the token’s value dropped by 60%, approximately $900,000 remains unreturned. This has led users on social media platform X (formerly Twitter) to accuse Adams of orchestrating a crypto rug pull.Β 

NYC Token

Adams, who has been an outspoken proponent of cryptocurrency, stated during a Monday event that some of the funds generated by the NYC Token would be directed towards nonprofits focused on combating antisemitism and β€œanti-Americanism.” Additionally, he expressed intentions to use the proceeds to β€œteach our children about embracing blockchain technology.”

The NYC Token’s official website states there is a total supply of one billion tokens in circulation, and details reveal that 10 percent of profits are allocated to the team’s activities, though the identities of those involved were not disclosed.Β 

NYC Token Team RespondsΒ 

In response to criticism, the NYC Token team acknowledged the liquidity withdrawal, stating, β€œGiven the overwhelming support and demand for the token at launch, our partners had to rebalance the liquidity.” They added, β€œWe’re in it for the long haul!” 

However, there remains uncertainty about the details surrounding the token’s launch, with a recently listed entity, C18 Digital, associated with the project. Delaware corporation records show that C18 Digital was incorporated on December 30, 2025.

Typically, when a cryptocurrency launches, developers create a liquidity pool using various assets, such as Circle’s USDC or Solana (SOL), to allow users to buy and sell the new token. The NYC Token took a different approach by establishing a one-sided liquidity pool comprised solely of the token itself.Β 

As users began purchasing the token, they injected liquidity into the pool using USDC, which was followed by the significant withdrawal of $2.5 million. This tactic, described by analyst Vaiman, can be more subtle than direct token sell-offs.

Following the viral reports of the alleged rug pull, a new account associated with the NYC Token announced that additional funds had been injected into the liquidity pool.Β 

NYC Token

Featured image from CNN, chart from TradingView.comΒ 

Out Of Office, Into Crypto: Ex-NYC Mayor Debuts β€˜NYC Token’ Memecoin

Former New York City Mayor Eric Adams unveiled a new cryptocurrency called β€œNYC Token” on January 12, 2026, drawing quick attention and equally fast criticism.

According to reports, Adams presented the project in Times Square and framed it as a way to support education and to fight anti-semitism and anti-American sentiment. The token is built on the Solana blockchain, based on information released at the launch.

Token Launch And Purpose

According to the official pitch and subsequent statements, proceeds from the token were to help fund scholarships and blockchain training programs for underserved communities.

Adams described the coin as a civic symbol tied to New York’s identity and global reach. The launch was promoted with promises of community benefits, but critics said the public information about governance and fund handling was thin.

Market Moves

The market reacted in a rush. Based on reports, the token briefly showed an implied market cap of about $580 million–$730 million in the first hours after trading began. Then prices tumbled.

Proud to launch @buynyctoken, a new token built to fight the rapid spread of antisemitism and anti-Americanism across this country and now in New York City.

Now live at https://t.co/zowY9Ri3aK pic.twitter.com/qBMzV88Tmj

β€” Eric Adams (@ericadamsfornyc) January 12, 2026

Trades showed a fall of roughly 80% as the token’s price dropped from near $0.46 to about $0.10 shortly after markets opened for the asset. Trading volume spiked and then collapsed, leaving many traders facing big losses.

Liquidity And Allegations

On-chain observers and crypto analysts flagged sudden withdrawals of liquidity minutes after the token’s debut. Reports have disclosed that millions of dollars were pulled from trading pools, which prompted accusations of a rug pull from some corners of the crypto community.

The token’s official website was also criticized for missing or nonfunctional links to key documents, and there was little detail about which groups would receive funds or how decisions would be made.

Adams’ Crypto Record: Political Context

Eric Adams is no stranger to digital assets. During his time in office he converted parts of his salary to Bitcoin and Ethereum and pushed policies to attract blockchain firms to the city.

His successor, Mayor Zohran Mamdani, declined to take part in the token project and did not endorse it. That split in approach raised questions about whether a former official should use his public profile to promote a privately issued coin.

Public Response

Analysts called for transparency and urged a closer look at on-chain data. Based on reports from blockchain trackers, some transfers and liquidity extractions were visible publicly on the Solana network, which added to the scrutiny.

Community groups and investors asked for clearer disclosures, while legal experts warned that investigations or regulatory attention could follow if money was moved in ways that harmed ordinary buyers.

Featured image by ThomasShanahan / iStock.com, chart from TradingView

Ethereum Just Logged A Historical Level In Its Active Addresses – Here Are The Numbers

Ethereum’s main network is witnessing a dramatic surge in activity, signaling renewed confidence and accelerating momentum across the ecosystem. Aspects like transaction throughput and user engagement appear to have pushed significantly higher over the past few weeks, breaking past prior peaks.

Another Historic Moment For Ethereum Network

Since the beginning of 2026, the Ethereum network has been hitting major milestones that reflect the blockchain’s efficiency and expanding ecosystem. Even in a volatile crypto landscape, ETH’s network usage and adoption have increased sharply, as evidenced by its rapidly growing active wallet addresses.

On-chain data reveals that the network has recently crossed a key threshold in terms of active wallet addresses following a sudden spike. From the report from Joseph Young, a market expert and narrator, the number of active addresses on ETH has surged to the highest level ever in its history.

This spike in user activity and interest signals more than just routine market noise and speculation. It shows growing adoption, increasing on-chain activity, and rekindled conviction in the leading ecosystem in the midst of general market instability.

Ethereum

After delving into the metric, the expert disclosed that the number of active 7DMA wallet addresses on Ethereum is sitting at over 811,500. As active address counts reached historic levels, the network’s fundamentals appear to have started surpassing its price performance. Should this performance hold, it is likely to play a huge role in shaping ETH’s next major move.

The blockchain’s performance extends beyond just massive active wallet addresses. Young added that Ethereum is the most proven network with more than 10 years of track record, underscoring its reliability and robust scalability.

During the period, ETH remained one of the most active and liquid crypto ecosystems by far. With several key updates over the years, such as the Fusaka Upgrade, the ETH network is now scaling faster than it ever did since its launch.Β 

ETH Carry Out More Transactions Than Ever

Given that a significantly high level of transactions is carried out on the network, Ethereum is still showing robust strength and a growing ecosystem. On-chain Foundation head of research, Leon Waidmann, shared a report that reveals that ETH is experiencing a wave of transactions, reaching unprecedented levels.

With over 2.2 million transactions being executed per day, the network has just hit yet another all-time high. The chart shows that the previous peak was positioned at 1.89 million per day, as recorded on January 10, reflecting its rising real-world usage in a period where network fundamentals are gaining robust significance.

While transactions continue to increase, the network’s transaction costs have remained extremely low. Swapping on the blockchain now costs just $0.04, Non-Fungible Token (NFT) sales cost about $0.06, borrowing fees are $0.03, and bridging costs, which are the lowest, are around $0.01.

Ethereum

High Protein Vegan Tofu Noodle Soup | Super-Comforting Vegan Soup For Winter

By: Priyanka

If you are not pleased with the chilly winter, this high protein vegan tofu noodle soup might change your mind after you try this! The warm, savory and fulfilling tofu noodle soup is the best of winter that you can pamper yourself with!

In my quest to find light dinners, soups & stews are on top of my list of preferred dishes and I keep hunting for hearty soup recipes which are not only delicious but also season-appropriate!

Hence comes my high protein vegan tofu noodle soup which is only the perfect 10 on 10 soup in itself but also the most relevant soup for the season!

Winter doesn’t mean boring & bland soups which only warm you up with the hot broth; the winter special soups must also be hearty, filling and work as one-pot meals!

Which is exactly what my tofu noodle soup does!

What is Vegan Tofu Noodle Soup?

This high protein tofu noodle soup is a vegan dish made with all plant-based ingredients while being high in protein from the best source of plant-based protein that is none other than tofu!

The broth of the tofu noodle soup is light yet filling with a savory & umami-rich flavor. I made the broth of my soup lightly creamy by adding coconut milk as we love its flavor.

This tofu noodle soup is also packed with winter fresh veggies which makes it a one-pot meal giving you the best of both worlds - good protein and loads of fiber!

The post High Protein Vegan Tofu Noodle Soup | Super-Comforting Vegan Soup For Winter first appeared on Flavor Quotient.

High-Protein-Vegan-Tofu-Noodle-Soup-FQ-6-1

Chinese Chicken & Onion Stir Fry | Best Ever Restaurant Style Onion & Chicken Stir Fry

By: Priyanka

This quick and simple Chinese chicken onion stir fry dinner is a real winner because it is ready in under 30 minutes which is exactly what you need after all the post-holiday exhaustion!

To be absolutely honest, I didn't intend to open my blog in the new year with this recipe! Wondering why?

This chicken onion stir fry recipe is definitely a keeper and I can guarantee that you will reach out for it more often than not after you try it once!

This is a good recipe and will please everyone in the family for sure; then what is my reluctance for?

This delicious recipe of chicken onion stir fry is an everyday recipe that must be part of your weekly meals thanks to its ease of prep and incredible taste!

But all I wanted was a showstopper recipe to open my blog this new year! You know, that party-kinda recipe?

Unfortunately I could not make that on time and there was no way I could delay sharing a new recipe for another day! So here I am with this delish chicken onion stir fry with all its glory!

What is Chicken Onion stir fry?

Chicken onion stir fry is a quick & easy chicken dinner where thinly sliced chicken is cooked over high heat with regular onions and spring onions!

Chicken and onions are flavored with simple sauces and/or seasonings until everything is tender, slightly caramelized and flavorful while onions are left crunchy!

This dish has a flavor profile of savory & mild sweetness thanks to the oyster sauce and onions; but can be made spicy if you like them that way by adding any hot sauce of your choice.

You can relish this chicken onion stir fry with plain white rice or stir fry noodles as this pairs with both beautifully!

The post Chinese Chicken & Onion Stir Fry | Best Ever Restaurant Style Onion & Chicken Stir Fry first appeared on Flavor Quotient.

Chicken-Scallions-Stir-Fry-FQ-3-7897

Baked Greek Lemon Chicken | Mediterranean Style Baked Chicken with Oregano & Thyme

By: Priyanka

The classic Greek lemon chicken is a must-try recipe if you love savory, citrusy and comforting flavors with your chicken having crispy skin and juicy meat!

If you are a blogger, irrespective of your domain, I am sure you would have also experienced blogger fatigue at times and I am not ashamed to confess that I am going through that exact same phase at the moment!

That’s the very reason behind the irregularities of my blog posts and I am fully aware that the frequency of my publishing must improve sooner than later!

However, while I fix & sort out my schedule, I must apologize to my loyal readers who still visit my page and have shown their immense love over the years!

End of year is always the best time to reflect on the time we have left behind and express gratitude for all the good things life has bestowed upon us!

With a heart full of nothing but thankfulness, I am here today to share a classic recipe from one of my favorite cuisines, the Mediterranean!

This classic Greek lemon chicken is absolutely gonna brighten up your days ahead once you give it a try in your kitchen! It is easy, quick with minimal prep and a perfect bang for the buck!

What is Greek lemon chicken?

Greek lemon chicken is a traditional baked chicken recipe made with bone-in and skin-on portions of chicken like chicken thighs or chicken drumsticks.

The unique USP of this Greek lemon chicken is its marinade which is a flavor-bomb thanks to all the fresh ingredients used in it.

The post Baked Greek Lemon Chicken | Mediterranean Style Baked Chicken with Oregano & Thyme first appeared on Flavor Quotient.

Greek-Lemon-Chicken-FQ-5-1

Korean Chicken Wings

By: Richa

These Korean Chicken Wings are insanely addictive! Spicy, crispy, and full of umami, I bet you’ll never go back to having wings any other way!

Spicy, crispy, full of umami and insanely addictive Korean baked gochujang chicken wings. You'll never go back to having wings any other way!

Gochujang and chicken wings might not be the most common combination, but once you try it, it’s an absolute game changer! I first had these Korean Baked Gochujang Chicken Wings at a Korean Restaurant a few years ago and instantly fell in love! Since then, I always have a tub of gochujang in the fridge and this amazing dish at every party I have hosted!

If you love spicy food, then you’re going to love these Korean chicken wings! They’re insanely easy to make (like literally just three simple steps – marinate, rest, bake), and make for the perfect appetizer. Pair it with chilled beer for game nights and parties or serve it with fried rice or noodles for a complete meal. Don’t forget to make extras because these gochujang chicken wings disappear faaast πŸ”₯

Korean Chicken Wings Ingredients

Chicken wings – opt for skin-on fresh chicken wings for maximum flavor and crispiness

Soy sauce – dark soy sauce for umami and saltiness

Gochujang – aka Korean chili paste. Delivers heat, umami, and a slight sweetness

Red chili flakes – for heat. can be adjusted according to your tolerance.

Rice vinegar – for tanginess and freshness

Honey – for sweetness to balance out the heat of gochujang and chilli flakes. honey also adds signature chicken wings stickiness

Ginger and garlic – for flavor and aroma

Oil – for brushing. Any neutral-flavored oil like vegetable, peanut, sunflower, canola, etc. will work here

Sesame seeds – used as garnish to add a mild earthy flavor and texture

What is Gochujang?

For all those who are a little stumped Gochujang is a spicy, fermented paste made from red chili, glutinous rice, fermented soybeans, and salt. And it is awesome and I’ve been adding it to everything including these Korean inspired baked chicken wings.

Frequently Asked Questions

Can I make this in the air fryer?

Yes, you can. Air fry at 190Β°C for 18–22 minutes, turning halfway, and brush with marinade towards the end.

Can I make this on the stovetop?

Yes. Cook the marinated wings in a wide pan on medium heat with a little oil, turning occasionally until cooked through. Once done, increase the heat and let the sauce reduce and caramelise, keeping a close eye so it doesn’t burn.

I don’t have gochujang. What can I use instead?

You can replace gochujang with siracha or Thai chilli sauce, but the flavors will be different.

Can I make this less spicy?

Absolutely! Reduce the amount of gochujang and skip chili flakes for a milder version that’s just as delicious.

Spicy, crispy, full of umami and insanely addictive Korean baked gochujang chicken wings. You'll never go back to having wings any other way!

Richa’s Top Tips

  • When baking, avoid overcrowding the pan and place the wings in a single line to prevent soggy wings. If you are cooking for a crowd, bake in batches to allow the Korean chicken wings to become crispy.
  • Pat the wings dry before marinating so the sauce clings better and the wings brown more evenly.
  • Don’t drench the wings in oil, just a light brushing of oil is enough to make them crispy and allow browning.

Storage Tips

  • Refrigeration: Store leftover wings in an airtight container in the refrigerator for up to 2 days.
  • Reheating: Reheat in a hot oven or air fryer to bring back some crispness. Avoid microwaving if possible, as it softens the skin.
  • Make-ahead: You can marinate the wings up to 24 hours in advance and keep them refrigerated until ready to bake.
  • Freezing: Cooked wings can be frozen for up to 1 month. Thaw overnight in the refrigerator and reheat in the oven.

Serving Ideas

Spicy, crispy, full of umami and insanely addictive Korean baked gochujang chicken wings. You'll never go back to having wings any other way!

These chicken wings are definitely making it to the next party menu, and honestly, the one after that, and the one after that too. Because once you try these crispy, crunchy, absolutely addictive Korean chicken wings, it’s hard to imagine a gathering without sticky fingers, cold beer, and another batch on the table.

I’d absolutely love to know if you experimented with this brand new flavor and what you thought about it. Leave me a comment or tag your pictures @my_foodstory on Instagram!

Watch Korean Chicken Wings Recipe Video

Korean Baked Gochujang Chicken Wings baked to perfection.
Print

Korean Baked Gochujang Chicken Wings

Spicy, crispy, full of umami and insanely addictive Korean baked gochujang chicken wings. You’ll never go back to having wings any other way!
Course Snacks & Appetizers
Cuisine Korean
Diet Halal
Prep Time 10 minutes
Cook Time 25 minutes
Total Time 35 minutes
Servings 6 Portions
Calories 253kcal
Author Richa

Equipment

  • Oven

Ingredients

  • 1 kilogram Chicken Wings
  • 1/4 cup Soy Sauce
  • 4 tablespoons Gochujang Korean chili paste (Or substitute with Sriracha)
  • 1 tablespoon Red Chili Flakes
  • 1 tablespoon Rice Vinegar
  • 3 tablespoons Honey
  • 1 tablespoon Ginger minced
  • 1 tablespoon Garlic minced
  • Oil for brushing
  • Sesame seeds for topping

Instructions

  • Mix together all in the ingredients except oil in a bowl or tupperware box so that the mixture coats the wings evenly.
  • Marinade for at least 2 hours in the refrigerator, or for best results, overnight.
  • When ready to bake, preheat oven to 200 C/400 F.
  • Line a baking sheet with foil and place the wings equidistant from each other on the sheet. Brush with oil.
  • Bake for 12-15 minutes on each side, brushing with remaining marinade and oil before turning them. In the last five minutes crank up the heat and let the wings broil so that they are nice and charred. Top with some sesame seeds and serve immediately.

Video

Notes

  1. Always use fresh wings. If you’re going to use frozen wings, let them thaw in the fridge overnight before baking. Pat them dry really well, this will remove the excess water.Β 
  2. Knowing when the chicken is cooked:Β The internal temperature of cooked chicken should read 165F/73C. The most handy way to tell would be using a meat thermometer. If you do not own one, you can cut and check the juices. If the meat is white in colour and the juices run clear that means the chicken is cooked. The meat or the juices should not have a red/pinkish hue.
  3. The β€œfire” flavour comes from the Gochujang which is a staple Korean condiment. It is a fermented savoury chilli paste.Β  It can be substituted with Sriracha or Thai red chilli paste.Β 
  4. Serve along with some dipping sauce like a cheese dip, ranch dressing or a fry sauce!

Nutrition

Calories: 253kcal | Carbohydrates: 13g | Protein: 18g | Fat: 14g | Saturated Fat: 4g | Cholesterol: 69mg | Sodium: 609mg | Potassium: 208mg | Fiber: 1g | Sugar: 10g | Vitamin A: 177IU | Vitamin C: 6mg | Calcium: 17mg | Iron: 1mg

This article was researched and written by Urvi Dalal.

The post Korean Chicken Wings appeared first on My Food Story.

Spicy Korean Chicken Thighs in Gochujang Sauce

Spicy Korean Chicken Thighs in Gochujang Sauce is an intensely flavored chicken recipe made in a cast iron pan for extra crispy, juicy thighs and a finger licking marinade!

Spicy Korean Chicken Thighs in Gochujang Sauce - an intensely flavoured chicken recipe made in a cast iron pan for extra crispy, juicy thighs and a finger licking marinade!

This Korean Chicken Wings with Gochujang sauce is one of those recipes I come back to when I want big flavour but without too much effort. It’s spicy, sticky, slightly sweet, and deeply comforting, the kind of dish that feels indulgent but still very doable on a regular day. Everything happens in one pan, and most of the work is done by the marinade.

This is the kind of food I make when I want something bold and satisfying. These Korean chicken wings are great for a relaxed dinner, sharing with friends, or even meal-prepping when you’re craving something with a little attitude. It’s comforting, flavour-packed, and always a crowd-pleaser.

Korean Chicken Wings Ingredients

  • Chicken – skin-on, bone-in thigh pieces work best as they stay juicy through the high temperatures
  • Light soy sauce – adds umami and saltiness
  • Gochujang sauce – the heart of the dish that’s responsible for the adding heat, richness, and depth of flavor
  • Honey – balances out the heat, and adds a subtle sweetness
  • Ginger garlic paste – for flavor and aroma
  • Rice vinegar – helps add some bright, tangy flavors to balance out the heat
  • Oil – I have used vegetable oil, but any neutral-flavored works
  • Seasoning – salt and pepper
  • Garnish – Toasted sesame seeds and green onions added a lovely nutty texture and freshness
  • Chilli flakes – for extra heat. Feel free to skip if you have a low spice tolerance

Frequently Asked Questions

Can I use boneless chicken?

Yep you can, although the flavor and texture might slight change slightly. Use boneless thigh pieces and adjust cooking time as boneless chicken cooks faster.

I don’t have Gochujang. What can I use instead?

You can use a mixture of chilli flakes and miso paste. The flavors will be different, but it will still be delicious.

Spicy Korean Chicken Thighs in Gochujang Sauce - an intensely flavoured chicken recipe made in a cast iron pan for extra crispy, juicy thighs and a finger licking marinade!

Richa’s Top Tips

  • If you want a more sauce-y consistency, add in a little water to the pan
  • Be careful while adding salt as gochujang and soy sauce already contain a fair amount of salt
  • Sear on high, then cook low and slow to keep the chicken juicy
  • Marinating the chicken overnight gives the best results. But if you are in a hurry, 2 hours should also do the trick

Serving Ideas

  • I love serving this with candied bacon and sautΓ©ed green beans for a wholesome meal.
  • You can also serve it on a bed of mashed potatoes along with stir-fried veggies for a holiday party meal
  • Shred leftovers and use them in wraps or rice bowls.
  • Serve it with fried rice or noodles

Storage Ideas

  • Make-ahead: The chicken tastes even better the next day as the flavours deepen.
  • Refrigeration: Store leftovers in an airtight container for up to 2 days.
  • Reheating: Reheat gently on the stovetop with a splash of water to loosen the sauce.
Spicy Korean Chicken Thighs in Gochujang Sauce - an intensely flavoured chicken recipe made in a cast iron pan for extra crispy, juicy thighs and a finger licking marinade!

This spicy Korean chicken is bold, comforting, and deeply satisfying. It’s the kind of recipe you want to make again and again and again. Rich sauce, tender chicken, and just the right amount of heat make it one you’ll want to keep in regular rotation.

Spicy Korean Chicken Thighs in Gochujang Sauce served on a white plate.
Print

Spicy Korean Chicken Thighs in Gochujang Sauce

Spicy Korean Chicken Thighs in Gochujang Sauce – an intensely flavoured chicken recipe made in a cast iron pan for extra crispy, juicy thighs and a finger licking marinade!
Course Main Course
Cuisine Asian, Korean
Prep Time 5 minutes
Cook Time 40 minutes
Total Time 45 minutes
Servings 5 portions
Calories 327kcal
Author Richa

Ingredients

  • 6 Chicken Thighs skin on, bone in
  • 1 1/2 tablespoons Vegetable Oil
  • Toasted Sesame Seeds and Green Onions for topping

For the Marinade:

  • 1/4 cup light Soy Sauce
  • 2 tablespoons Gochujang spicy Korean chili paste
  • 3 tablespoons Honey
  • 1 tablespoon Garlic Paste
  • 1 teaspoon Ginger Paste
  • 2 tablespoons Rice Vinegar
  • 1/2 teaspoon Chili Flakes optional
  • Salt and Pepper to taste

Instructions

  • Mix together all the ingredients under marinade. Be careful not to add additional salt without tasting because both soy sauce and gochujang have salt in them.
  • Add chicken and toss to coat the chicken. Marinate for at least two hours or overnight. If refrigerating overnight, take the chicken out half an hour before cooking to bring it to room temperature.
  • Heat oil in a cast iron skilletΒ and add chicken thighs and all the marinade to it. Sear on high flame for 2-3 minutes on either side. Reduce the flame to low, add half a cup of water and cover and cook for 30 to 40 minutes till the chicken is cooked through. Turn the chicken once halfway. Add more water if you’d like more sauce and simmer.
  • Once the chicken is cooked through, top with sesame seeds, chopped green onions and serve immediately.

Notes

  1. Always use fresh wings. If you’re going to use frozen wings, let them thaw in the fridge overnight before baking. Pat them dry really well, this will remove the excess water.Β 
  2. Knowing when the chicken is cooked:Β The internal temperature of cooked chicken should read 165F/73C. The most handy way to tell would be using a meat thermometer.
  3. The β€œfire” flavour comes from the Gochujang which is a staple Korean condiment. It is a fermented savoury chilli paste.Β  It can be substituted with Sriracha or Thai red chilli paste.Β 
  4. Serve along with some dipping sauce like a cheese dip, ranch dressing or a fry sauce!

Nutrition

Calories: 327kcal | Carbohydrates: 12g | Protein: 20g | Fat: 22g | Saturated Fat: 8g | Cholesterol: 111mg | Sodium: 632mg | Potassium: 282mg | Fiber: 1g | Sugar: 9g | Vitamin A: 148IU | Vitamin C: 2mg | Calcium: 15mg | Iron: 1mg

Β This article was researched and written by Urvi Dalal.

The post Spicy Korean Chicken Thighs in Gochujang Sauce appeared first on My Food Story.

Chicken Strips Recipe

By: Aarthi

Crispy and spicy chicken strips made by marinating chicken in buttermilk and spice mix. Coated in plain flour and cornstarch to create crispy and juicy texture. Chicken Strips Recipe Crispy Chicken Stripsor Chicken Tenders Recipe with step wise pictures. This is a delicious crunchy chicken strips which has a coating of cornflakes in it. It...

Read More

The post Chicken Strips Recipe appeared first on Yummy Tummy.

Creamy Tuscan Chicken Restaurant Style | Italian-American Style Tuscan Chicken

By: Priyanka

Creamy, cheesy and decadent, this restaurant style creamy Tuscan chicken screams holidays more than anything I have made recently and I am so glad I could bring this to you right on time!

If you are at the last leg of finalizing your holiday menu, I would strongly urge you to keep a spot for my classic restaurant style creamy Tuscan chicken in your list!

This creamy Tuscan chicken is a cheesy chicken recipe with a burst of freshness from spinach and fresh basil that is just perfect to serve over your favorite pasta and an ideal holiday meal for everyone!

This is also a good option for a make-ahead dish as this freezes very well! You just need to thaw and reheat to make the sauce melty and glossy again!

What is creamy Tuscan chicken?

Interestingly enough this creamy Tuscan chicken is not a traditional Tuscan recipe from Italy! Then why is it called Tuscan chicken? Fair question!

Upon reading more about this quirky recipe, I finally deduced that this creamy Tuscan chicken is a modern Italian-American dish, most likely developed in the United States!

The name β€œTuscan” chicken comes from the ingredients commonly associated with Tuscan-style cooking e.g. olive oil, garlic, sun-dried tomatoes, leafy greens like fresh spinach & basil and Parmesan.

However, authentic Tuscan cuisine is usually lighter and not cream-based. The creamy version is more of an Italian-American or modern comfort-food creation.

But calling it β€œTuscan” chicken instantly evokes certain emotions within the food lovers and we all know how crucial the role of emotion is when it comes to food!

The warmth, countryside charm and Italian comfort, the qualities that foodies already loved, get instantly packed into that name inviting more and more food enthusiasts to try it and fall for it!

The post Creamy Tuscan Chicken Restaurant Style | Italian-American Style Tuscan Chicken first appeared on Flavor Quotient.

Creamy-Tuscan-Chicken-FQ-5-1

Herb Garlic Roast Chicken

By: Richa

This whole roasted herb garlic roast chicken has the perfect crispy chicken skin and tons of flavour from herbs, garlic and butter. This post includes detailed instructions on how to roast chicken, make a flavorful herb garlic butter, a delicious jus, as well as tips to prep and carve a chicken.

Roast chicken in the cast iron skillet, roasted with veggies and pan juices

If there’s one recipe my family always requests I make every Christmas, it’s this Herb Garlic Roasted Chicken. It makes for such a delicious meal; super satisfying and has all the Christmas-y vibes. This is a complete meal with roasted veggies and gravy made from the leftover meat juices, which means you don’t have to cook separate dishes when hosting and nothing goes to waste!

This recipe and it’s steps might feel long and complicated, but don’t let that intimidate you. I’ve explained each and every step in detail so that it’s simple to follow. You can also take a look at the video below!

Herb Garlic Roast Chicken Ingredients

Chicken

  • Chicken – Whole, with giblets and neck removed
  • Lemon – halved and placed inside the cavity to add freshness and aroma
  • Rosemary sprig – tucked inside the chicken for subtle herbal flavor
  • Olive oil – to brush the chicken for a golden, crisp roast

Marinade

  • Butter – adds a really nice flavor and aroma
  • Garlic – minced, to infuse the chicken with a deep, savory flavor
  • Herbs – finely chopped sage, rosemary, and thyme add a lovely earthy aroma and flavor
  • Paprika and pepper – for a hint of spicy kick and seasoning
  • Lemon zest and juice – for brightness and tanginess

Vegetables

  • Onions and potatoes – for flavor and texture
  • Garlic head – halved
  • Chicken stock – poured into the pan to keep the roast juicy and form the base for the gravy. I don’t recommend replacing this with water

Gravy

  • Flour – to thicken the pan juices after roasting, turning them into a rich, savory gravy

How to Make Herb Garlic Butter

The herbs we have used are thyme and sage, and some people also like to add parsley. They are not overpowering and they beautifully complement each other. We’ve added some paprika and ground pepper for some heat. My favourite and most underrated ingredient is lemon for some citrusy zing! Everything is mixed with butter – this is such a simple marinade with clean flavours.

We use this herb butter under and on the skin which is how this roast chicken recipe is packed with flavour.

steps to make herbed butter

Three Important Steps For The Best Crispy Skin Roast Chicken

  1. Loosening chicken skin: The key to getting that crispy skin on the roast chicken is to loosen the skin of the chicken before marinating it. The skin on the chicken traps all the juices of the herb garlic butter and allows the meat to absorb flavours really well. It makes the chicken really succulent and also gives a nice crispy skin on top. Be as careful as possible so you don’t tear the skin. Don’t skip this step, otherwise you’ll end up with a fab looking chicken on the outside but with bland meat on the inside.
  1. Marinating the chicken: The advantage of having loosened the skin of the chicken is that you can not only put the herb garlic butter over the chicken, but also under the skin and inside the cavity! This actually creates a double whammy of flavours! We recommend marinating the stuffed chicken overnight in the fridge for max flavour!
  1. Trussing the chicken: Trussing is basically when you tie up the wings and legs of a chicken, or any bird, before roasting it. For this roast chicken, we haven’t trussed the bird like it is traditionally done. We’ve just tied the legs to make it more presentable! Tuck the wings of the chicken behind the neck. This prevents the wing tips from burning as the chicken roasts.
steps to marinate the chicken

How To Cook A Whole Chicken

I like to use a cast iron skillet to roast the chicken and veggies, but any roasting pan will do. Elevate the chicken (breast side up) by placing it on top of the veggies – this way the meat juices will easily drip down into the pan. A drizzle of olive oil on top ensures it gets that golden colour. With me so far? Great job! We’ve added chicken stock and a few sprigs of rosemary to the pan. And we’ll use these reduced juices to make a delicious jus. Yum yum!

Richa’s Top Tips

  • If your chicken was refrigerated, take it out of the fridge 60 minutes before you are ready to roast it to bring it to room temperature. This will ensure even cooking.
  • Preheat the oven at 200 degrees C. Preheating helps to cook the meat evenly.
  • Bake the chicken at 200 degrees C for about 25-30 minutes
  • The cooking time will differ based on the size of the chicken. The general rule is 25 minutes cook time for 500 grams of chicken. Our 1 kg whole roast chicken took about 50 minutes to cook.Β 
  • After baking for 30 minutes, baste the chicken – with the rendered fat and juices of the chicken and veggies in the bottom of the pan. After basting it, put the chicken back in the oven for another 20 minutes.
  • At this point, if the skin is browning up too quickly, place another tray on the rack above the chicken. This will prevent the heat from hitting the chicken skin directly.
  • When the oven temperature hits 75C or 165F, OR when you see those meat juices running clear, that’s when you know that the chicken is done.
  • Rest for 10-15 minutes before carving

How to Carve Chicken

Now it’s carving time! Cut off and remove the twine completely. Use a fork and a meat knife and cut between the joints of the leg and body. If your chicken is cooked perfectly, it should cut right through without any hassle. Next, keeping your hand for support, horizontally slice off each breast of the chicken. The wings can be taken off next. And finally, you can shred any extra meat off the carcass. The carcass is perfect to make stock.Β 

steps to carve the chicken

Roast Chicken Gravy

Usually the gravy is made with a roux of flour and butter and the meat juices. We’ve taken a shortcut by directly whisking in flour. (Just saving you and me a couple of extra steps!) The jus will turn out to be a nice golden brown and saucy. It’s my favourite part of the dish coz it’s like all components of this dish rolled into one! Plus we don’t want to waste a single bit of flavour in that pan. Serve this jus in an elegant piece of crockery, and pour it onto the chicken pieces in front of your guests. How’s that for presentation? πŸ™‚

steps to make the jus

Frequently Asked Questions

Can I use dried herbs instead of fresh?

Yes! Use about one-third the amount since dried herbs are more potent. Rub them between your fingers before adding to release flavor. Note: the taste will be deeper and slightly earthier than fresh herbs.

What’s the best way to know if the roast chicken is done?

The most reliable way is to check the internal temperature with a meat thermometer. Insert it into the thickest part of the thigh (without touching bone); the chicken is done when it reaches about 75Β°C and the juices run clear.

Serving Ideas

  • Serve the carved herb garlic roast chicken with the roasted onions, sweet potatoes, and garlic from the pan, plus a generous drizzle of the lemony pan gravy.
  • Pair with simple sides like mashed potatoes, buttered green beans, steamed veggies, or a fresh green salad to balance the richness.
  • For a more casual meal, serve with crusty bread or garlic bread to mop up all the buttery, herby juices.

Customisation ideas

  • Swap sweet potatoes with carrots, regular potatoes, or parsnips for a different roast veggie mix.
  • Change up the herbs by using Italian seasoning or adding oregano and parsley if you do not have sage or thyme.
  • Add a touch of heat with chilli flakes or cayenne in the marinade, or a bit of honey for a sweeter, caramelised finish on the skin.
A closeup picture to show the crispy skin

This herb garlic roast chicken is the kind of recipe you can come back to on special occasions, but it is comforting enough to make for cozy weekends too. With crisp skin, juicy meat, and plenty of roasted veggies and gravy on the side, it is simple enough for everyday cooking but impressive enough for guests.

If you make this recipe, don’t forget to send me pictures over on my IG @my_foodstory. I love seeing your recreations and chatting with you guys!

Watch How to make Roast Chicken Recipe Video

Roast chicken in the cast iron skillet, roasted with veggies and pan juices
Print

Whole Roast Chicken

Classic roast chicken made scrumptious with our very own herb garlic marinade. This detailed foolproof recipe will help you make the perfect homemade roast chicken.
Course Main Course
Cuisine American, American Italian, Continental
Diet Gluten Free
Prep Time 2 hours 15 minutes
Cook Time 1 hour
Total Time 3 hours 15 minutes
Servings 6 portions
Calories 494kcal
Author Richa

Ingredients

  • 1 kg whole chicken at room temperature giblets and neck removed from cavity
  • 1 Lemon halved
  • 1 sprig Rosemary
  • Olive Oil for brushing

Marinade

  • Β½ cup Salted Butter
  • 2 tablespoon Garlic minced
  • Β½ teaspoon Sage chopped
  • Β½ teaspoon Rosemary chopped
  • Β½ teaspoon Thyme chopped
  • 1 tablespoon Paprika
  • 1 Β½ teaspoon Salt
  • Β½ teaspoon Pepper
  • 1 Lemon Zested
  • 1 tablespoon Lemon Juice

Vegetables

  • 3 Onion quartered
  • 2 Sweet Potato chunks
  • 1 head Garlic halved
  • Β½ cup Chicken Stock + ΒΌ cup extra

Gravy

  • 1 tablespoon flour

Instructions

  • Add all the marinade ingredients to a mixing bowl and whisk together to combine. Use the back of a spoon to gently loosen the skin. Turn over the chicken and repeat the process using the other end of the spoon. Use the spoon to insert marinade underneath the chicken skin. Massage the chicken and spread the marinade evenly. Remember to add butter in the cavity as well. Rub the remaining marinade all over the chicken. Cover the chicken and rest for 2-3 hours or overnight.
  • Stuff the rosemary sprig into the chicken cavity along with half a lemon. Tie legs together with kitchen string.
  • Lightly grease a roasting pan. Mix the sweet potato, onion, and garlic in a bowl. Place some of the vegetables in the center of the roasting pan. Place breast-side up on top of the vegetables in the middle. Place the remaining vegetables on the sides of the pan. Tuck the wings underneath the chicken as they cook faster and we do not want to overcook them. Rub the chicken with some olive oil and drizzle some over the vegetables as well. Add half a cup of chicken stock to the pan.
  • Preheat the oven to 200C. Roast in the oven for 45-50 minutes. baste using the pan juices half way through cooking time. Remember when cooked, juices run clear when chicken thigh is pierced with a skewer. Internal temperature should read 75C.
  • Remove from the oven and allow it to stand for 10 minutes before serving. To carve the chicken, first cut out the legs. Then proceed to cut the breast out carefully, seperate the wing tips and then remove the meat from the cavity area.
  • Remove the vegetables from the roasting pan and move it to a serving platter. Add 1 tablespoons of flour to the pan and whisk it with the pan juices. Bring this mixture to a boil over low heat till the liquid thickens up to make a gravy. Add up to an additional quarter cup of stock if necessary. Serve hot along with the chicken and vegetables!

Video

Notes

  1. The chicken I used was approximately 1.2 kgs.Β This took 90 minutes at 220C. The time may vary depending on your oven’s capacity and the size of the chicken.Β 
  2. Use chicken with skin on as the skin gives it that crispy roast texture.Β 
  3. Remember to marinade the chicken well. Apply the marinade in between the skin and meat. These pockets can hold ample amounts of marinade and help get the flavour all the way into the meat.Β 
  4. Knowing when the chicken is cooked:Β The internal temperature of cooked chicken should read 165F/73C. The most handy way to tell would be using a meat thermometer. If you do not own one, you can cut and check the juices. If the meat is white in colour and the juices run clear that means the chicken is cooked. The meat or the juices should not have a red/pinkish hue.Β 
  5. Getting rid of juices Tip 1: A trick to getting rid of the juices if you absolutely prefer it that way is to remove the chicken once its cooked and place the sheet pan with veggies back into the oven on the top rack. Turn the broiler or the top element on and let the veggies broil for 3-4 minutes. This will get them nice and crispy and evaporate all the juices in the sheet pan.
  6. Getting rid of juices Tip 2:Β Another way to get rid of the juices is to sear the thighs on both sides in a pan first before placing them in the oven. This can help lock in the juices so that you have less liquid when it comes out of the oven.

Nutrition

Calories: 494kcal | Carbohydrates: 29g | Protein: 19g | Fat: 35g | Saturated Fat: 14g | Cholesterol: 101mg | Sodium: 848mg | Potassium: 612mg | Fiber: 5g | Sugar: 7g | Vitamin A: 11847IU | Vitamin C: 30mg | Calcium: 74mg | Iron: 2mg

This article was researched and written by Urvi Dalal.

The post Herb Garlic Roast Chicken appeared first on My Food Story.

Jerk Chicken Recipe

By: Aarthi

Jerk chicken is a popular Jamaican recipe, where the marinated chicken is slow cooked or grilled. It is a super flavourful and spicy chicken recipe perfect for lunch, dinner or special occasions. It is so easy to make and perfect for busy nights. Jerk Chicken I have been eyeing on this recipe for quite a...

Read More

The post Jerk Chicken Recipe appeared first on Yummy Tummy.

❌