❌

Reading view

There are new articles available, click to refresh the page.

Smart Home? Make It Smart Quarters With This LCARS Dashboard

At the risk of starting a controversy: is there anyone who goes to the effort of setting up Home Assistant who wouldn’t really rather be living on the Enterprise-D? If such a person exists, it’s not [steve-gibbs5], who has not only put together a convincing LCARS dashboard on an Android tablet, but has also put together an easy-to-follow Instructable so you can too.

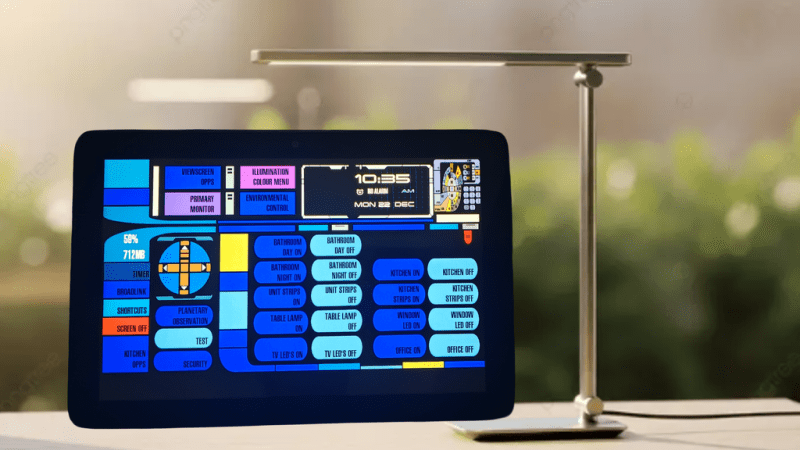
In case you’ve been monkishly avoiding television since the mid-1980s, LCARS is the high-tech touchscreen interface used on Star Trek: The Next Generation and its sequels. It’s an iconic, instantly-recognizable aesthetic, and we think [Steve] nailed it, even if he was taking design cues from Voyager,Β which is… not everyone’s favorite trek, to put it mildly. Though perhaps the haters are looking back on it a bit more fondly when compared to some more modern adaptations. Check it out in action in the video embedded below.

The secret to getting your Android tablet looking like a 24th-century terminal is an application called β€œTotal Launcherβ€œ, which allows one to customize one’s homescreen to a very high degree. [Steve] shows us how he styled Total Launcher, but that custom home screen isn’t enough on its own. Those futuristic buttons need to do something, which is where a second app called Tasker comes in. Tasks in Tasker are linked to the LCARS interface and the smart home features β€” in [Steve]’s case, Amazon Alexa, but it looks like Google’s spyware or the open-source Home Assistant are equally viable options.

We saw Star Trek style on Raspberry Pi back in the day, but nothing says your smart home has to be Trek-themed. You could even control it via a dumb terminal if that’s more your style.

Modifying a QingPing Air Quality Monitor for Local MQTT Access

The QingPing Air Quality Monitor 2 is an Android-based device that not only features a touch screen with the current air quality statistics of the room, but also includes an MQTT interface that normally is used in combination with the QingPing mobile app and the Xiaomi IoT ecosystem. Changing it to report to a local MQTT server instead for integration with e.g. Home Assistant can be done in an official way that still requires creating a cloud account, or you can just do it yourself via an ADB shell and some file modifications as [ea] has done.

By default these devices do not enumerate when you connect a computer to their USB-C port, but that’s easily resolved by enabling Android’s developer mode. This involves seven taps on the Device Name line in the About section of settings. After this you can enter Developer Options to toggle on Debug Mode and Adbd Debugging, which creates the option to connect to the device via USB with ADB and open up a shell with adb shell.

From there you can shoot off the QingSnow2 app and the watchdog.sh that’s running in the background, disable IPv6 and edit /etc/host to redirect all the standard cloud server calls to a local server. Apparently there is even SSH access at this point, with root access and password rockchip. The MQTT configuration is found under /data/etc/ in settings.ini, which is used by the QingPing app, so editing redirects all that.

Of course, the device also queries a remote server for weather data for your location, so if you modify this you have to provide a proxy, which [ea] did with a simple MQTT server that’s found along with other files on the GitHub project page.

❌