Peanut Chaat is a simple Indian snack made by mixing peanuts with onions, tomatoes, spices, herbs and lemon juice. It can be prepared using boiled peanuts made from fresh peanut pods or roasted and salted peanuts. The boiled peanut version has a soft texture, while the roasted peanut version is crunchy. Both methods use the...
Balushahi, also known as Badusha in South India, is a traditional Indian sweet made with a leavened dough that is deep fried and soaked in sugar syrup. The sweet has a lightly crisp outer layer with a soft, slightly flaky center. It is flavored with cardamom and saffron, which give it its characteristic aroma and...
Fluffy, soft moong egg muffins are a perfect savory grab-and-go breakfast or snack. Learn how to make the moong egg batter and 3 delicious ways to use it! Pizza egg muffins, Bagel and cream cheese muffins and Indian spiced vegan egg muffins. (gluten-free, soy-free, option for nut-free)
Moong dal – split mung beans – is the base for Just Egg, and today we are making a homemade version of that eggy base. You can use the base batter just like you’d use whipped eggs, in scrambles, frittatas, and more.
Today, we are going to take this versatile moong egg batter and add different ingredients to it to make savory breakfast vegan egg muffins. We make pizza egg muffins, bagel and cream cheese egg bites and Indian spiced bites. You can also use this batter to make savory waffles, which are even faster and come out nicely crispy! This batter can be used in many ways, check out 10 different ways to use it on my YouTube.
For the batter, we need moong dal, which is petite yellow lentils (split and skinned mung beans). Green mung beans won’t work here, because they make the batter gritty instead of smooth.
Why You’ll Love Moong Egg Muffins
fluffy, soft muffins stuffed with your fillings of choice
super easy make-ahead breakfast
batter keeps well in the fridge or freezer for quick breakfasts
Vada Pav is one of Mumbai’s most loved street food snacks and a daily staple for the city. It consists of a spiced potato fritter coated in gram flour batter, deep fried until crisp, and served inside soft pav with chutneys. For readers unfamiliar with Indian street food, it is often described as India’s vegetarian...
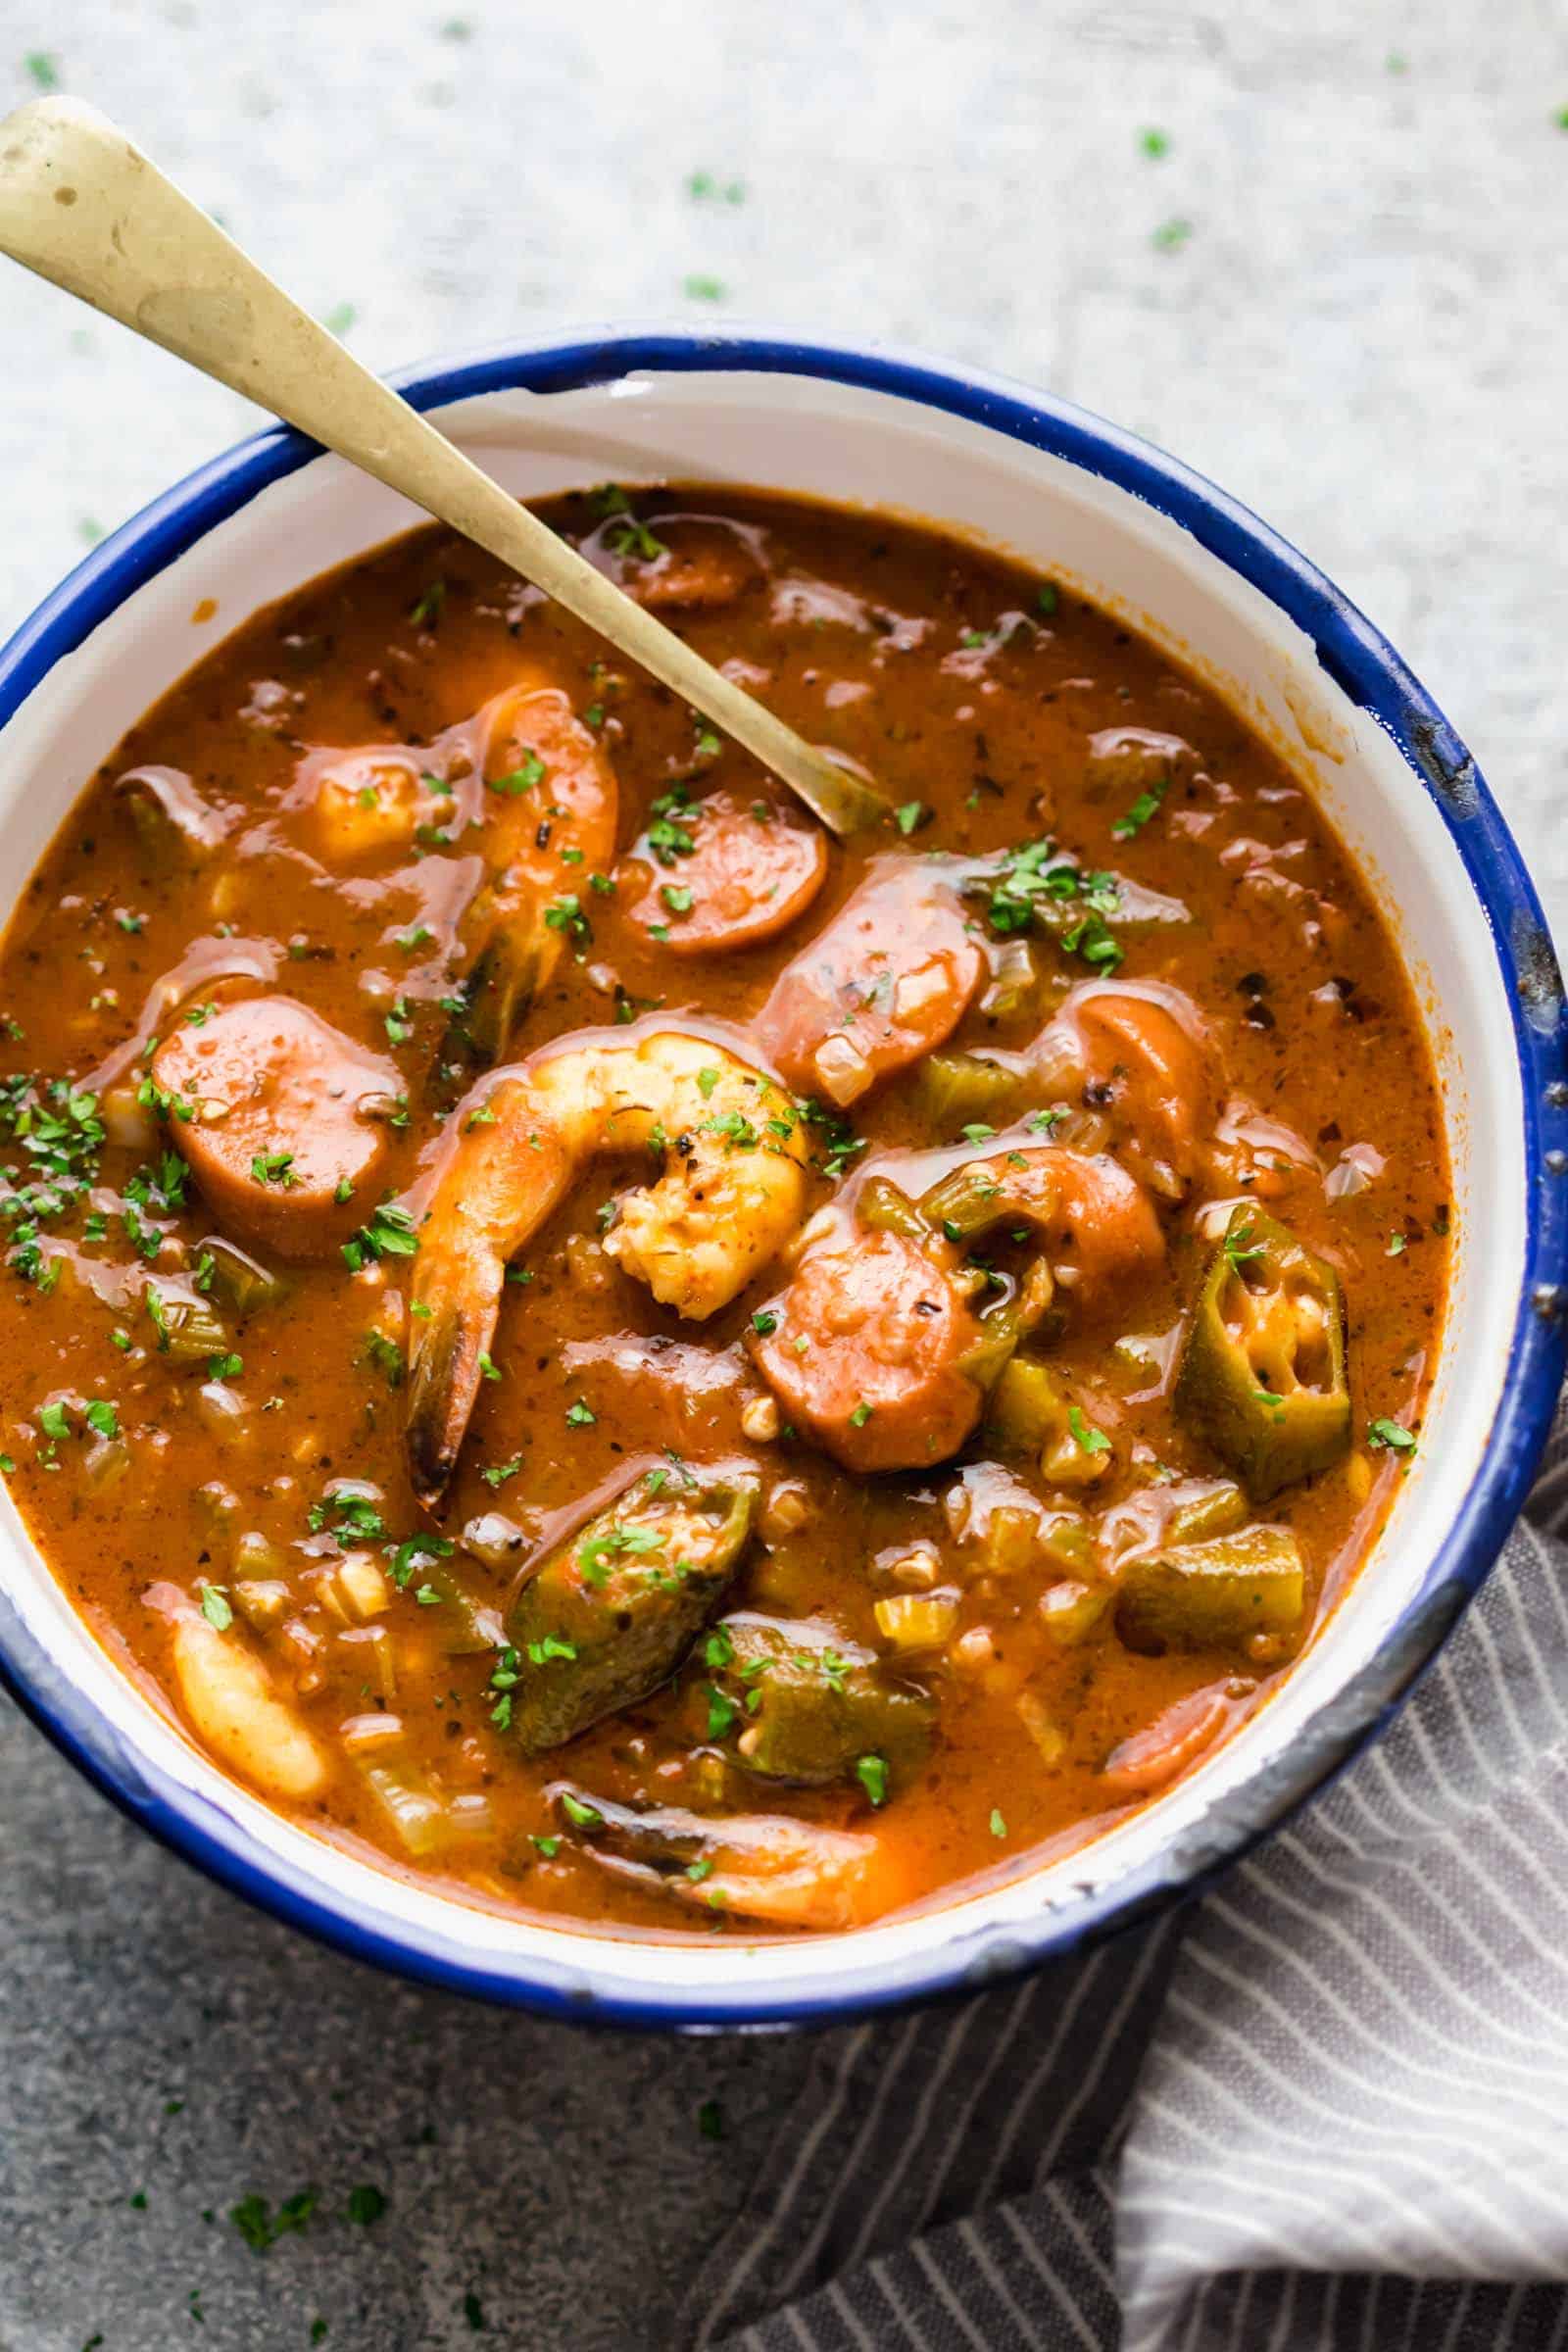
New Orleans Shrimp Sausage Gumbo has an intense, complicated flavor that’s unlike anything you have ever had before. It takes a little time and patience, but it’s worth it the time you spend on it because it will bring the best kind of satisfaction!
We are taking a little detour from MFS’s regular recipe style which is fast and easy, to share with you a slightly complicated, time consuming recipe. But but but don’t close the window yet because trust me when I say – you WILL want to try this New Orleans sausage shrimp gumbo! It is one of those recipes that should be a weekend project like my chicken biryani or dal makhani and are 100% worth the time and effort you put into them. Plus they last for days so you can enjoy them till you’ve really had your fill.
You only need one piece of equipment to successfully make gumbo and that’s a or any other heavy bottomed pot. And the reason is that these avoid the roux and the gumbo from sticking to the bottom and burning.
Making the Roux for Gumbo
Making the roux for gumbo is probably the most complicated and the most essential step of the recipe if you want to make your gumbo from scratch. I recommend leaving everything else, and concentrating on this one task till it’s over.
A roux is a base thats usually created with oil/butter and flour. A roux for bechamel sauce (white sauce) is usually light in color where the flour is cooked in butter for a minute or two. But for a gumbo, equal parts of fat and flour are cooked for anywhere between 20-30 minutes. I prefer the 20 minute roux.
Start by heating oil or butter (I used a combination) and adding flour. Keep stirring the flour fairly regularly so that it doesn’t stick to the bottom or start burning – its important to keep moving it around, till it changes color from light to a deep golden brown (like the color of peanut butter). For me, this happened at the 20 minute mark. You can take it farther and cook it for 30 minutes to get a deep milk chocolate color but the gumbo tends to be thinner in that case. Here’s how the color will change (these are just screenshots from the video I made to demonstrate this recipe and I recommend you watch the video for detailed instructions).
Mise En Place
Once your roux is ready, quickly gather the rest of your ingredients. I recommend getting mise en place ready in advance. This means dicing the onions, celery, capsicum, chopping the sausages, cleaning the shrimp etc. So that everything is at arm’s length when you start the recipe.
The Stock for Gumbo
I think this is as essential as the roux. The stock you choose will help determine some of the flavors in this gumbo. Since this is a shrimp sausage gumbo, I recommend using shrimp stock which is really easy to prepare at home – just boil the head, tail or any part of the shell in water for 40-60 minutes and drain. Your shrimp stock is ready. But if that’s effort you don’t want to take, use chicken stock for this recipe.
Okra in Gumbo
This is a highly debatable ingredient. Most authentic gumbo recipes will use okra in their recipe because it is native to the region where gumbo originates, and is a natural thickener. Since we are cooking our roux so much (the deeper the color of the roux, the lesser its thickening abilities), the gumbo needs an additional thickener which comes from okra or lady finger (as we refer to it here in India). Some people dislike it because of its slimy texture but okra is only slimy if its not cooked properly. Here’s how to cook okra so it is not slimy As it cooks, it completely loses the slime and just becomes vegetable that’s soft and almost creamy.
Serving Gumbo
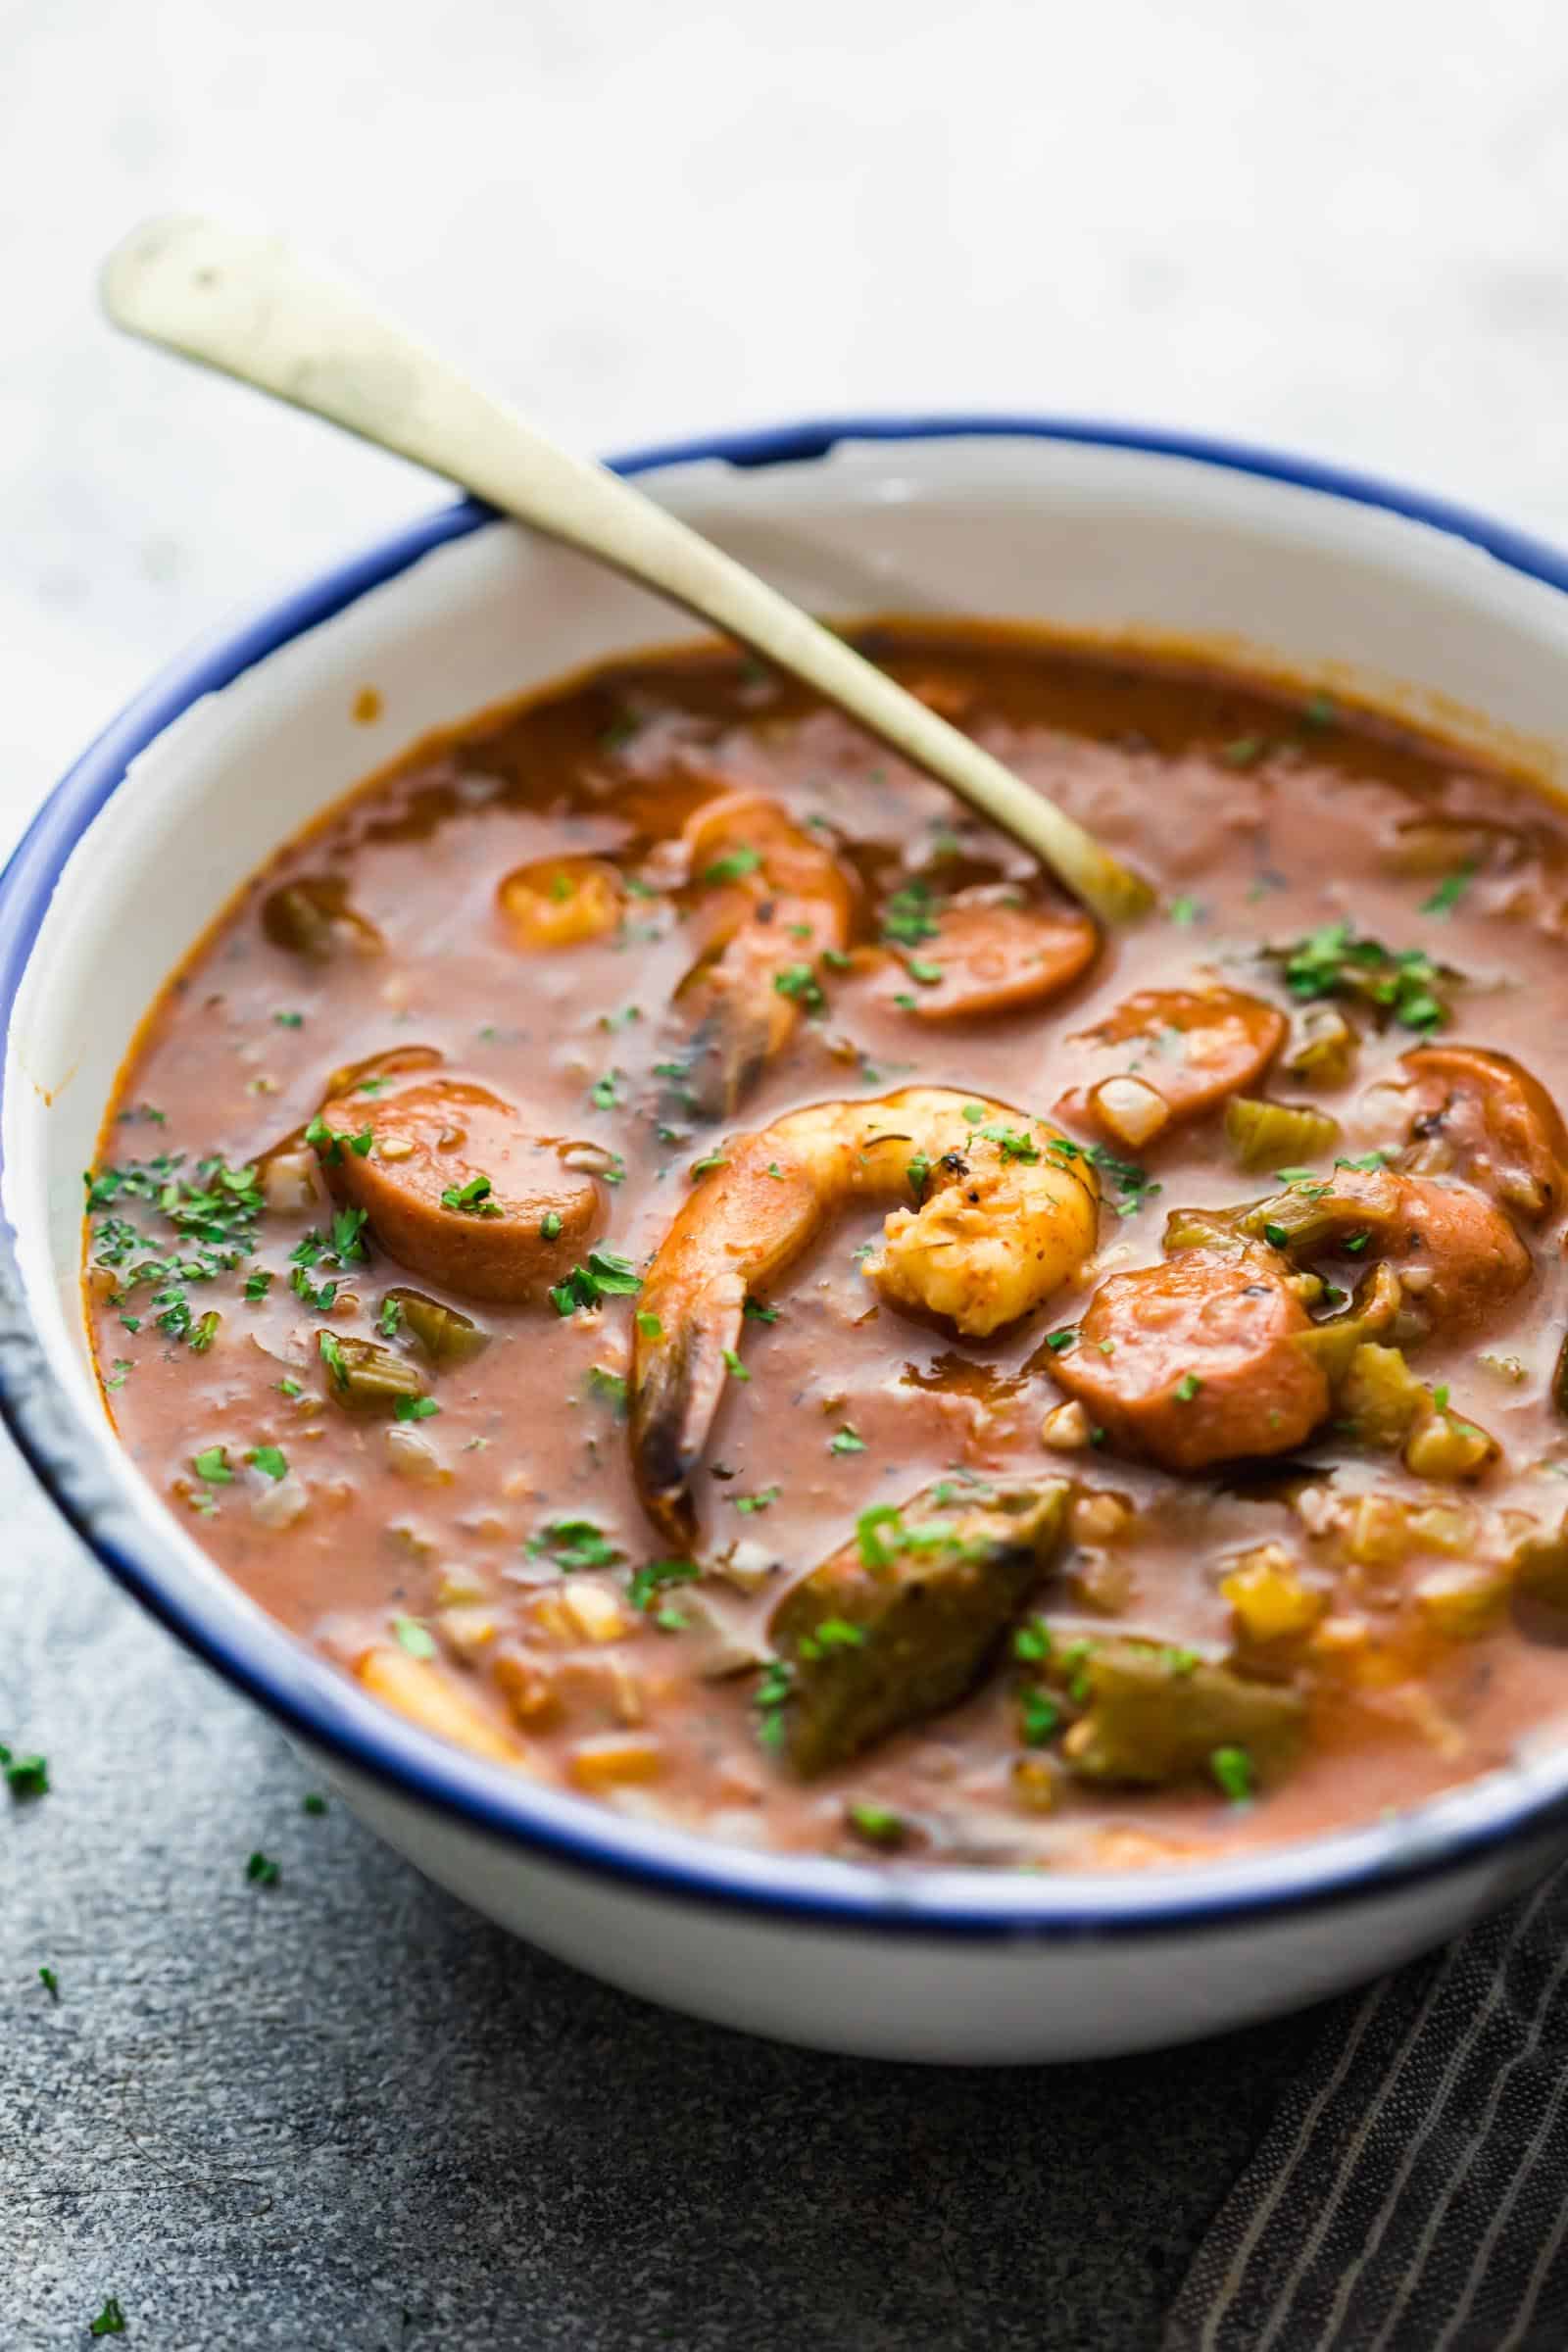
Gumbo is essentially served with rice, but I’m one of those who loves dipping a slice of crusty bread in it. But you are the boss of your gumbo so take your pick – rice, potatoes or bread.
Other Gumbo Variations
There are different variations you can do while making gumbo. Just use the same base, spices and vegetables and experiment with other ingredients you have on hand.
Chicken Sausage Gumbo
All Seafood Gumbo
Sausage Seafood Gumbo
Crawfish Gumbo
Turkey Gumbo
This is really one of those recipes that seems complicated the first time. But the second time you try it, you’ll be cooking like a boss! And for those leftovers, you will attempt it again and again.
Watch Recipe Video Above. New Orleans Shrimp Sausage Gumbo has an intense, complicated flavor that comes from making a patiently toasted roux, cajun spices, shrimp stock and finally okra which makes this thick, rich stew even better. This is a weekend project that’s totally worth the time you’ll spend on it because a big pot of this will bring the best kind of satisfaction.
Start by preparing the roux. Heat oil and butter in a dutch oven or heavy bottomed pot and add flour. Cook the flour while stirring fairly regularly on a medium flame for 20 minutes till it gradually deepens in color to the color of peanut butter. It’s important to keep stirring so that the flour doesn’t stick to the bottom or burn (watch the video above to see how the flour changes color as it cooks).
Once the roux has reached the desired color, add the bayleaf, onions, celery and capsicum and stir for two to three minutes till the onions are tender. Add garlic and slowly start adding shrimp stock while stirring continuously till the mixture thickens a little and comes to a boil.
Stir in crushed tomatoes or tomato puree, cajun seasoning and salt (if using) along with sausages and okra. Mix this well and bring this to a boil. Once the stew starts boiling, reduce the flame and cover and let it simmer for 15 minutes or till the okra is cooked and not slimy anymore.
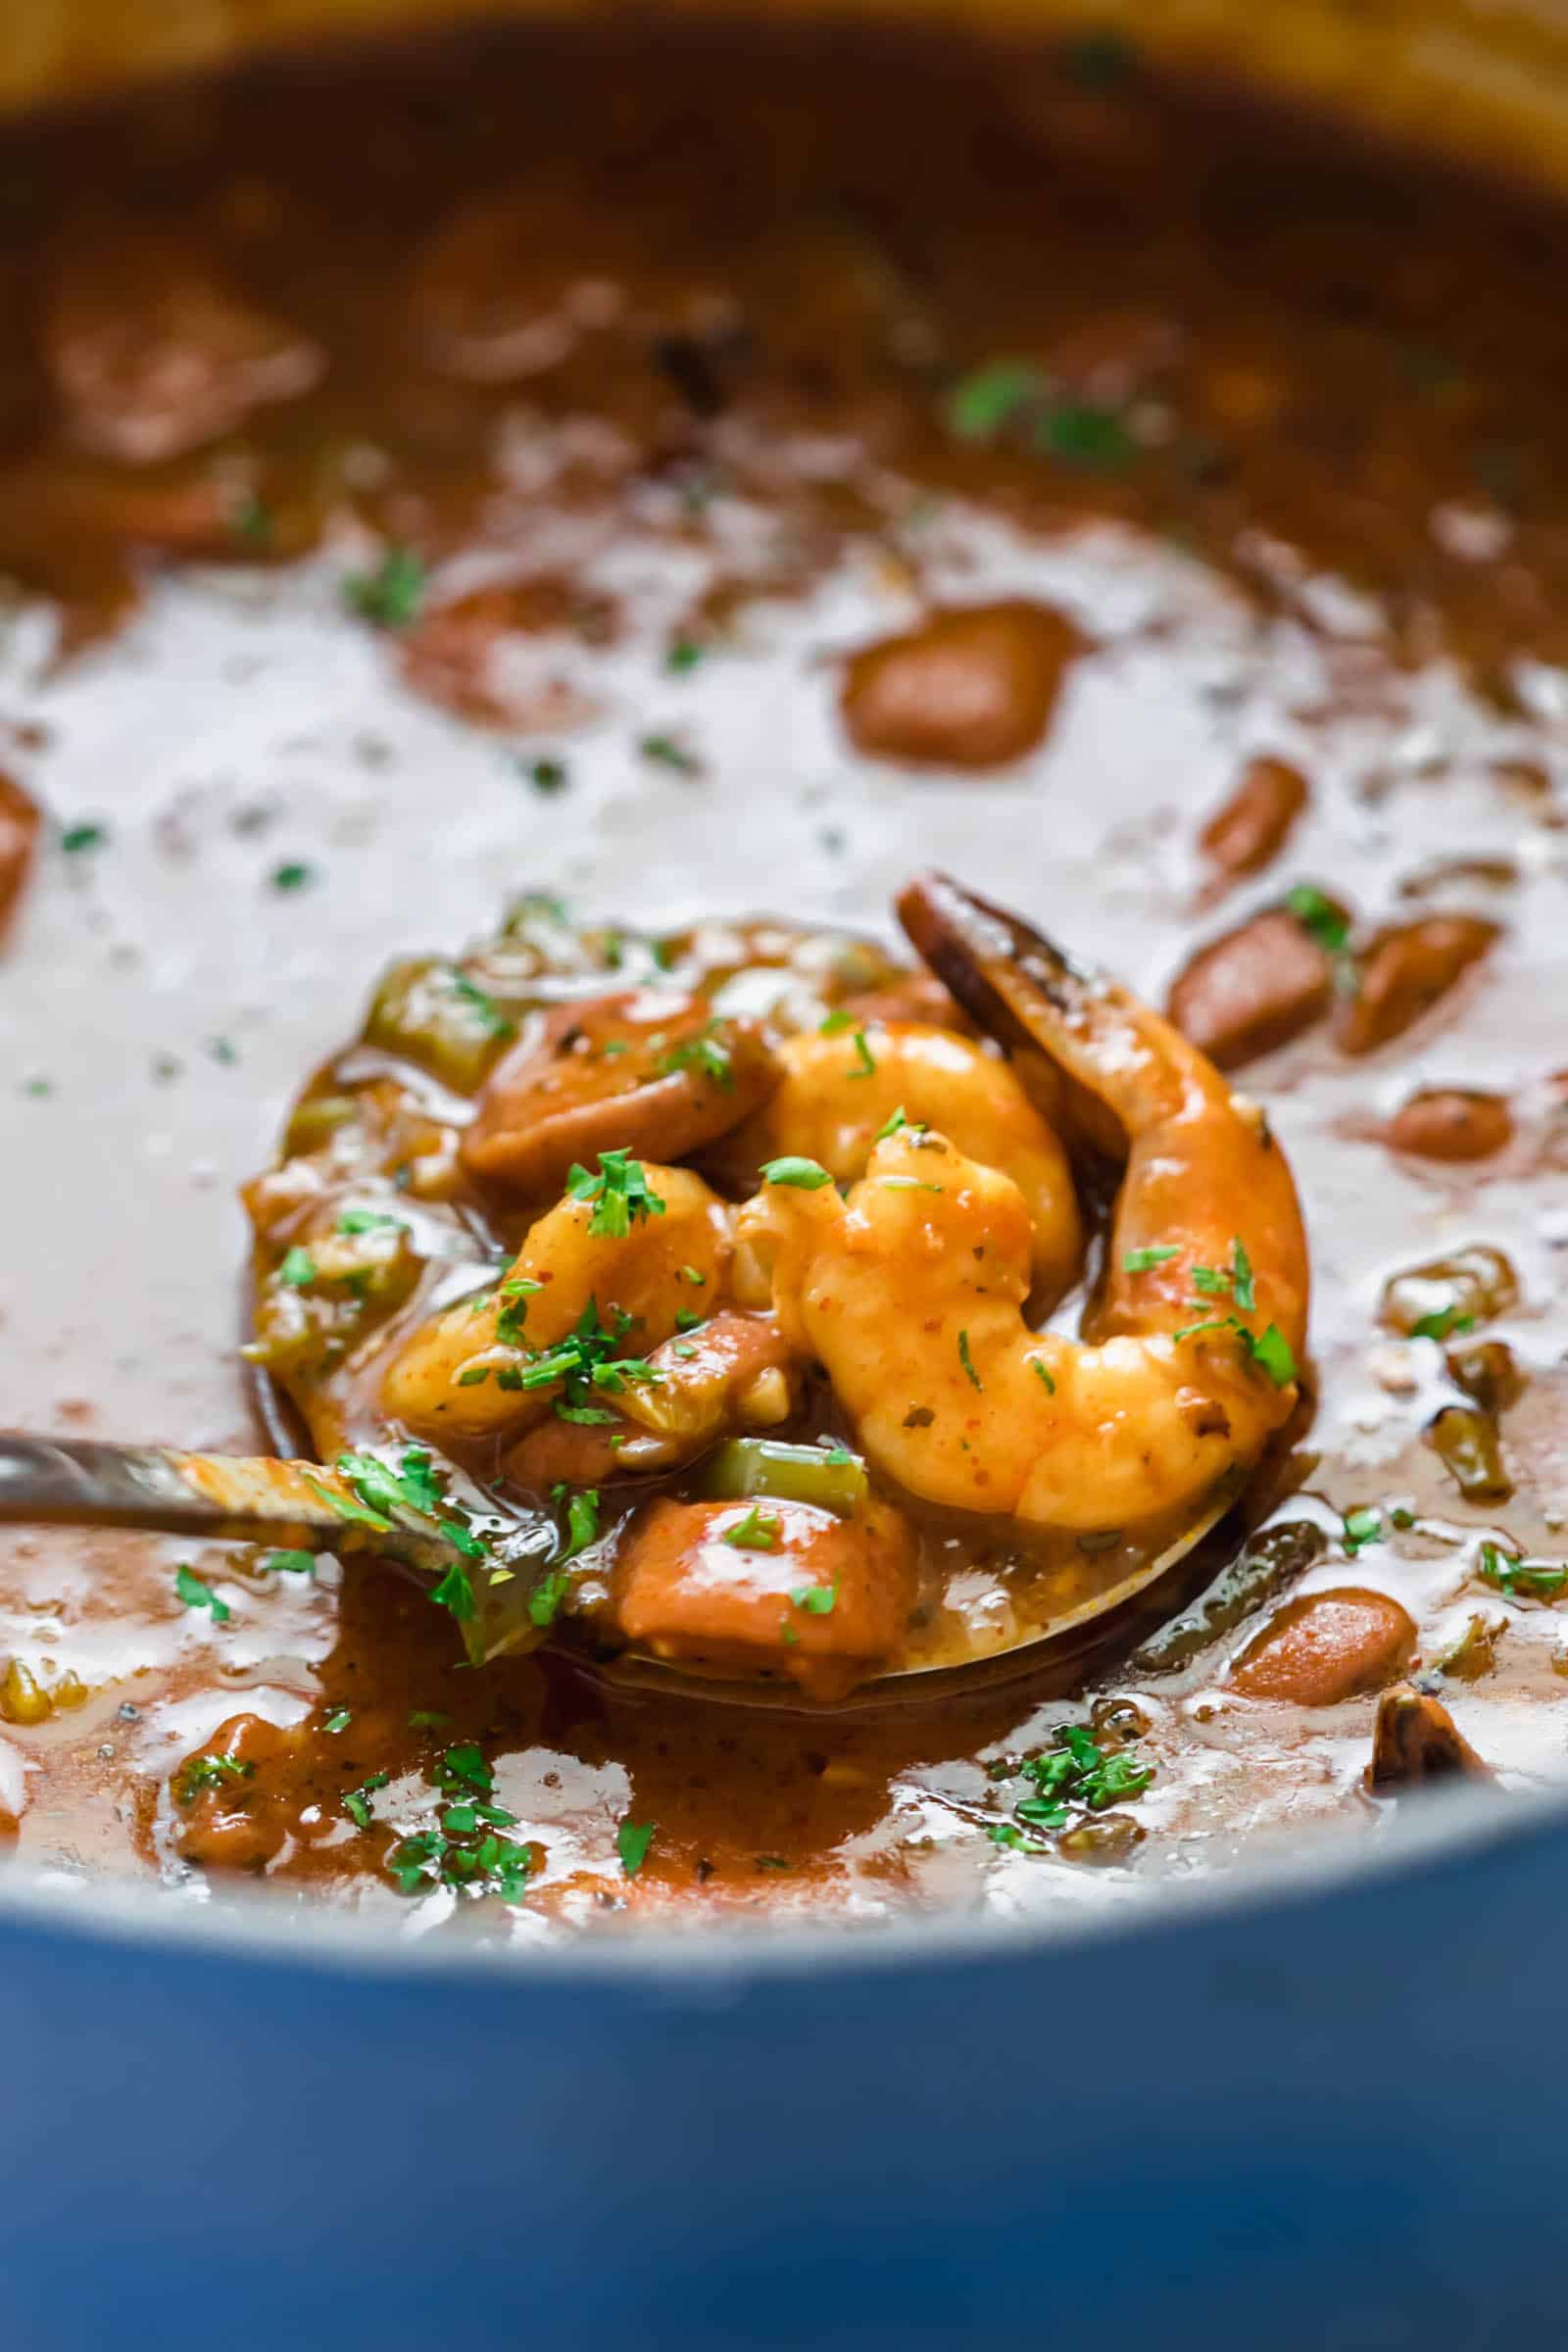
Add shrimp to the pot, simmer for 8-10 minutes and turn off the flame. (if using smaller or larger sized shrimp, cooking time will vary slightly). Top with chopped parsley and serve hot. This gumbo keeps for days and leftovers taste even better!
Video
Notes
Don’t burn the roux: If you don’t have a heavy bottomed pot, make the roux in a cast iron skillet or heavy bottomed pan and then transfer it to a regular soup pot. The key is to keep the flour from burning or sticking to the bottom.
Green Bell Peppers: I love the taste and flavor that green bell peppers add. They add a sharpness without being spicy. Avoid using yellow or red bell peppers because they are sweeter in taste.
Sausages: My favorite sausages to use in gumbo are andouille but if you can’t get your hands on them, use any variety of pork sausages you like.
Shrimp Stock: Shrimp stock makes this gumbo really flavorful. Its best made at home and is really easy to make. Just cook shrimp heads and tails in water and then strain them and reserve the liquid.
Okra: If you plan to skip the okra, your gumbo will not be as thick. If your okra is over ripened, it will take longer to cook.
Cajun Seasoning: We use homemade cajun seasoning without the salt so that its easy to adjust salt in the recipe. However, if you are using store bought seasoning, reduce the cajun seasoning to 2 tablespoons, taste and then add more.
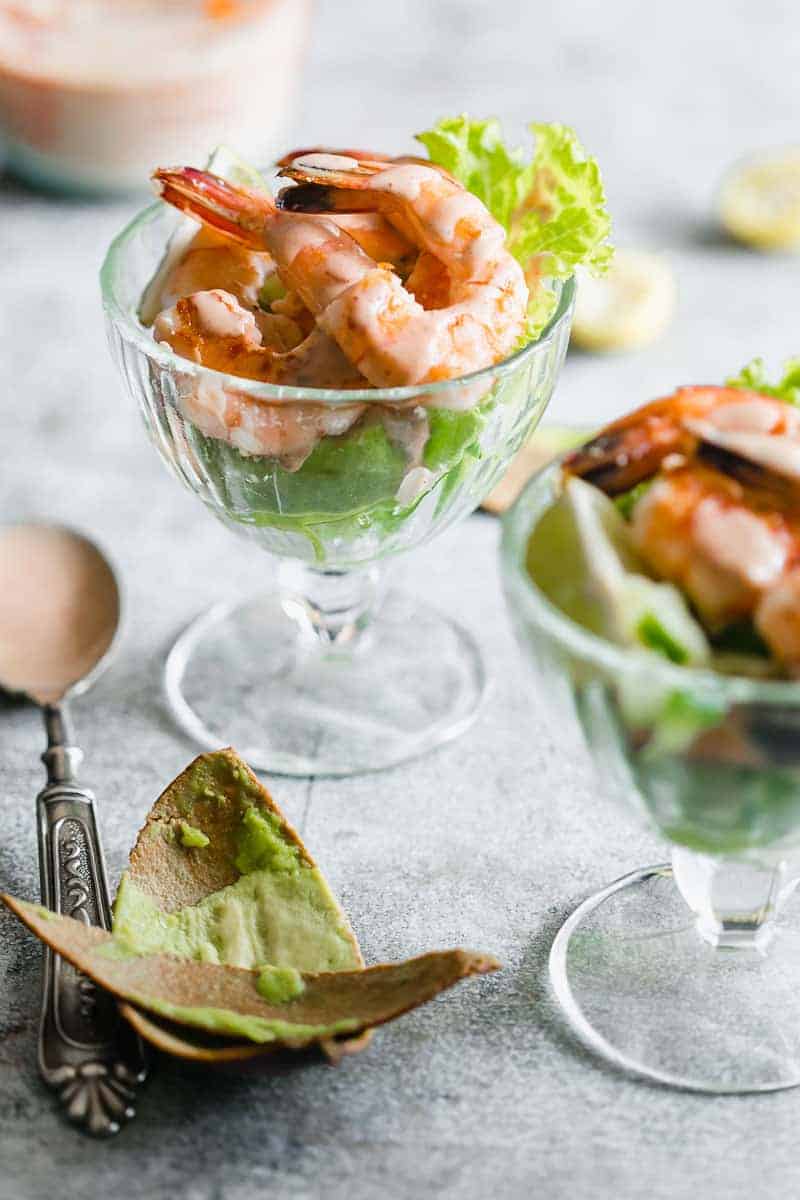
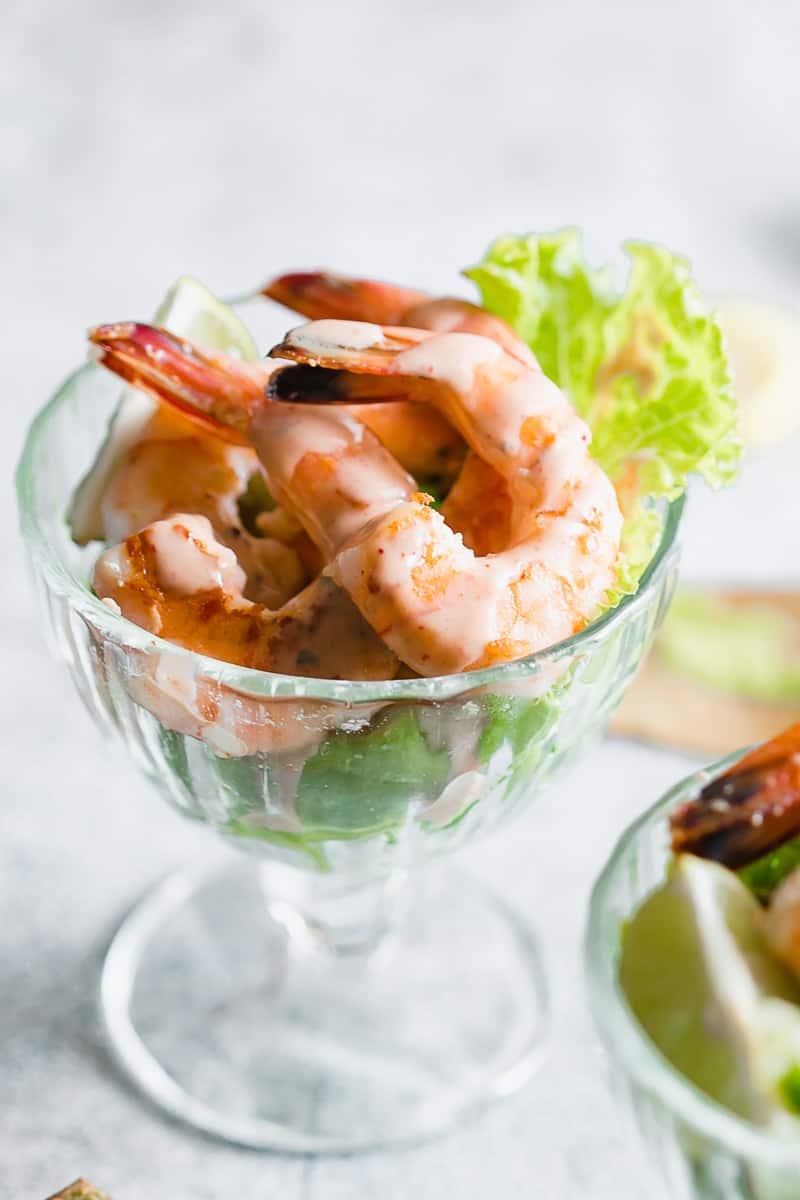
This retro prawn cocktail is straight from the 80’s, but is a must on the Holiday food table even today! Plump, juicy prawns tossed in a pink rose marie sauce; this classic dish is easy to make and tastes 10/10!
This prawn cocktail is one of those dishes that instantly feels a little special, even though it’s incredibly easy to put together. It’s cool, creamy, fresh, and quietly indulgent and the kind of recipe I reach for when I want something elegant without spending too much time in the kitchen.
I love how adaptable it is. You can make it for a casual lunch, a dinner party starter, or even a festive spread when you want something light before the mains. Crisp lettuce, sweet prawns, creamy avocado, and that nostalgic rose marie sauce, simple ingredients, but they come together beautifully.
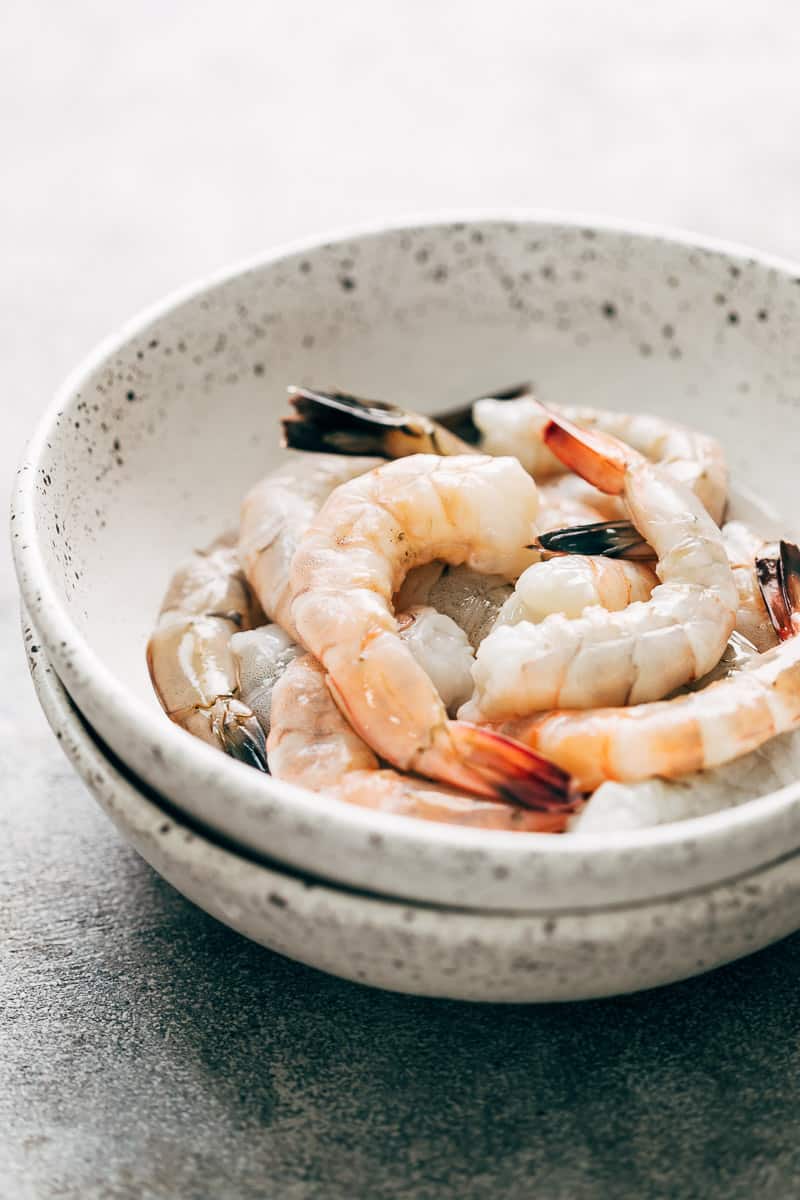
Prawns – I have used raw jumbo prawns as this size works best for this recipe. You can use pre-cooked prawns as well
Olive oil – to cook the prawns
Lettuceand cucumber – make for a fresh and crunchy base for the prawn cocktail
Avocado – adds richness and a buttery texture
Rose Marie sauce
Mayonnaise – forms the creamy backbone of the sauce.
Ketchup – adds sweetness and colour.
Worcestershire sauce – brings depth and umami.
Cayenne pepper or red chilli powder – adds gentle heat.
Lime juice – brightens and balances the richness.
Frequently Asked Questions
Can I use frozen prawns?
Yes. Thaw completely, pat dry, and cook or chill before assembling.
Is this recipe spicy?
No. The heat is very mild and can be adjusted or skipped entirely.
Can I make this ahead for a party?
You can prep the prawns and sauce ahead, but assemble only at serving time.
What can I use instead of Worcestershire sauce?
A few drops of soy sauce can work in a pinch, though the flavour will differ slightly.
Richa’s Top Tips
Don’t overcook the prawns. Prawns cook very quickly and overcooked prawns taste chewy and rubbery. Cook them until they’re just pink and and tender.
Chill the prawns and sauce before assembling for the best flavour and texture.
Pat prawns dry if using pre-cooked ones to avoid a watery cocktail.
Assemble just before serving to keep everything crisp and fresh.
Customisation Ideas
Add a little finely chopped celery for extra crunch.
Replace lime juice with lemon juice for a sharper finish.
Stir in a spoon of Greek yogurt to lighten the sauce slightly.
Add a pinch of smoked paprika for a subtle smoky note.
Storage Ideas
Avoid storing assembled cocktails as they tend to become watery and lose freshness.
Prawns: Cooked prawns can be stored in an airtight container in the refrigerator for up to 24 hours.
Sauce: The rose marie sauce keeps well refrigerated for 2–3 days when stored separately in an airtight jar.
Vegetables: Chop lettuce, cucumber, and avocado just before serving for best texture.
This prawn cocktail is proof that simple food can still feel thoughtful and elegant. With fresh ingredients and a well-balanced sauce, it’s the kind of dish that never really goes out of style.
This prawn cocktail recipe is straight from the 80’s. Crisp lettuce, plump, juicy prawns and an addictive cocktail sauce that’s perfect as a dipping sauce. Its an appetizer that will take everyone back in time!
900gramsRaw Jumbo Prawnstails on (Or freshly cooked prawns)
1teaspoonOlive Oilif using raw prawns
3cupsLettuceroughly chopped
2Avocadosdiced
1Cucumberdiced
Rose Marie Sauce
3/4cupMayonnaise
2tablespoonsKetchup
1tablespoonWorcestershire Sauce
1/2teaspoonCayenne Pepperor Red Chilli Powder
1teaspoonLime Juice
Instructions
If using raw prawns, heat olive oil in a skillet and cook the prawns for 3-4 minutes on each side till they turn pink. Sprinkle lightly with salt and refrigerate for 15-20 minutes.
In a bowl, whisk together all the ingredients for sauce and refrigerate.
When ready to assemble, add lettuce to the bottom of a glass, top with a few pieces of cucumber, avocado and finally prawns. Drizzle with the sauce and serve immediately.
Notes
Poaching prawns: If you prefer poaching prawns instead of cooking them, add salted boiling water to prawns in a bowl and let them sit for 5-6 minutes, till the prawns turn pink.
Fresh vs. Frozen Prawns: If you happen to stay by the sea, please buy your prawns as fresh as possible and peel them at home if you can. If you don’t, then buy your prawns frozen because they will be better than the prawns that are sold seemingly fresh. Frozen prawns are frozen within a few hours of catching them. Thaw them completely before cooking.
Refrigerating: I prefer serving these cold, but its best to chill each element separately rather than assembling them and then chilling, because the sauce can pool at the bottom. The sauce can be made 4-5 days ahead and refrigerated, and the prawns stay well refrigerated once cooked for a day.
Mayonnaise: I can’t stress how important it is to use good quality mayonnaise for this recipe, and no, you can’t substitute it with greek yogurt. Either make your own at home – it’s really easy, I promise and I have anInstagram video that shows you how to make mayo, or buy mayonnaise made with whole eggs.
Raw Banana Powder for Babies with step by step pictures. This recipe helps to ease constipation and may also helps in weight gain. Raw Banana Powder for Babies I am really glad that the baby food series in yummy tummy is really helpful for many of you. Daily i am getting tons and tons of...
A good pickle can completely change a meal, and this Mangalorean Prawn Pickle proves it. This recipe brings together juicy prawns, roasted spices, and chillies in a finger-licking addictive punch.
If you love having a little something spicy on the side of your meals, this Mangalorean Prawn Pickle is going to make you very happy. It’s full of the classic slow-roasted kick that coastal dishes are known for.
The flavours remind me of the same comfort you get from dishes like our Prawn Curry. Plus this one also has that same homely charm with a simple mix of prawns, chillies and spices cooked down till everything smells amazing. It’s easy to make, stores beautifully, and only tastes better with time.
Prawns: Fresh, cleaned prawns work best here. They’re marinated before to help them firm up slightly before cooking.
For the Masala Paste: Byadgi chillies (for colour and flavour), cumin, black pepper, cloves, cinnamon, fenugreek seeds and turmeric. Everything is ground with vinegar for that tangy base.
Aromatics: Sliced garlic, chopped ginger, green chillies and curry leaves add freshness and that signature South Indian aroma.
Oils: Sesame oil for frying the prawns and roasting the masala, and a little coconut oil at the end for an authentic coastal touch.
Seasoning & Liquid: Salt and hot water to bring the pickle together and help it cook down to the right consistency.
Frequently Asked Questions
What makes Mangalorean prawn pickle different from other prawn pickles?
Mangalorean pickle has a deep flavour from Byadgi chillies, vinegar, and slow-roasted spices. It’s spicy, tangy, and has a beautiful red colour without needing any food colouring.
Can I use frozen prawns instead of fresh ones?
Yes, absolutely. Just thaw them completely and drain out every bit of excess water. Pat them dry so the pickle doesn’t get watery.
How do I prevent the prawns from turning rubbery?
Cook them on low heat and only until they turn opaque and lightly golden. Overcooking is the main reason prawns become chewy.
How long does prawn pickle last?
It stays good for 2–3 months in the fridge when stored in a clean, dry glass jar. Always use a dry spoon and avoid introducing any moisture
Richa’s Top Tips
Dry the prawns really well: Any extra moisture makes the pickle watery and reduces its shelf life, so pat the prawns dry before marinating.
Fry the prawns on low heat to help them firm up without turning rubbery. They should get lightly golden on the edges, not crisp.
Roast the masala patiently: This is where most of the flavour comes from. Keep the heat low and roast until you see oil separating on the sides.
Use vinegar, not water, for grinding: It gives the masala a smooth texture and also helps preserve the pickle.
Always add hot water at the end: Cold water can reduce shelf life. Hot water blends into the masala better and helps everything come together.
Storage Tips
Fridge: Store the prawn pickle in a clean, completely dry glass jar for up to 2–3 months. The key is keeping moisture out, so always use a dry spoon when scooping.
Room Temperature: Avoid keeping the pickle out for long, especially in warm weather. After serving, pop it back into the fridge as soon as you can.
Freezer: Not recommended. Freezing can change the texture of the prawns and affect the flavour of the spices.
Shelf-Life Booster Tip: Use hot water in the recipe exactly as mentioned, it helps the pickle last longer and keeps the masala smooth.
Serving Ideas
A good prawn pickle can lift almost anything you pair it with. Here are some delicious ways to enjoy it: :
With Rice: The classic way to enjoy spicy, tangy prawn pickle. Keep it simple and comforting.
With Neer Dosa: Soft, delicate Neer Dosa balances the heat beautifully.
With Parathas: Enjoy it with flaky Laccha Paratha or even simple chapatis.
With Biryani: A tiny spoon of this pickle takes your Hyderabadi Veg Biryani to the next level.
In Tiffin Boxes: Pairs well with lemon rice, upma, curd rice, or pongal when you want something quick and flavourful.
Customisation Ideas
Add a coconut twist: Stir in a spoon of roasted coconut paste (just lightly roast grated coconut till golden and grind without water). It gives the pickle a coastal, almost-thokku style richness.
Add heat in layers: Instead of increasing just the red chillies, add ½ teaspoon crushed black pepper towards the end. Pepper heat hits differently and gives you that Mangalorean-style punch.
Oil-cured version: After the pickle cools, top it with 2–3 extra tablespoons of sesame oil. As it rests, the oil absorbs flavour and becomes a ready-to-drizzle “prawn chilli oil” for dosas and rice.
Whether you’re pairing it with a simple dal-chawal meal or adding it to a festive thali, it brings instant excitement to the plate. If you try this at home, don’t forget to tag me on Instagram @my_foodstory I’d love to see how your batch turns out!
Take prawns in a bowl, add turmeric powder, salt and mix well. Set aside to marinate for 30 minutes.
Add all ingredients for ground masala except for vinegar to a mixer. Add ¼ cup of vinegar and start grinding the spices. Add 2-3 tablespoons of vinegar at a time and grind to a smooth paste. This method of grinding ensures the smooth grinding of paste.
Heat sesame oil in a kadai or pan, add the marinated prawns and fry them on low heat for 5-6 minutes till the moisture evaporates and prawns get roasted on the edges to a golden brown. Remove from oil and set aside on a plate.
Heat the same kadai, add garlic, ginger and green chillies and saute for 1-2 minutes till they are fragrant. Add 2 sprigs of curry leaves and saute for a few seconds. Add the ground paste, salt and roast on low for 10-12 minutes till the masala gets roasted and oil separates from the side of the pan. While frying, if the masala sticks to the sides of the pan, scrape them out and add to the masala getting roasted. This will add more flavour to the pickle.
Add roasted prawns, mix well and cook for 2-3 minutes. Add hot water, mix well, cook for 2-3 minutes, add the remaining 1 sprig of curry leaves and take off the heat.
Cool completely, store in an airtight glass container and refrigerate.
Video
Notes
Make sure you use only hot water to increase its shelf life.
Pickle stays good for 2-3 months in the refrigerator.
Glass container is ideal as its stored for a longer period.
Breakfast taquitos filled with a quick scramble along with veggies, cheese, and your favorite toppings is such a quick, easy, and satisfying meal! Make the super versatile scramble seasoning ahead, so you can whip up all kinds of eggy breakfasts in a flash. (gluten-free, nut-free, with easy soy-free option)
These breakfast taquitos are super easy and super quick, if you have my scramble seasoning on hand. Even if you don’t, making the scramble seasoning is also easy. You just get all the spices, mix them in a jar, and it’s ready. You can use that scramble seasoning on scrambles, omelettes, frittatas, or to make a quick tofu egg salad in many different ways. It works well wherever you want any kind of eggy breakfast flavor.
Definitely make some and use that in this recipe, because then it’s super quick. You just crumble the tofu, add some chopped veggies, the scramble seasoning, and vegan cream cheese. Mix it all up in a bowl, and your scramble is ready to stuff into your breakfast taquitos.
Then, you roll that scramble up in warm tortillas and bake or pan fry. Serve with your favorite toppings, like pico de gallo, salsa, vegan sour cream, etc., and they are just fabulous!
Why You’ll Love Breakfast Taquitos
quick and easy breakfast that’s super satisfying
cheesy, veggie-packed tofu scramble stuffed into soft tortillas, baked or pan fried until crisp
versatile! Customize mix-ins and flavors to taste.
easy to make gluten-free, nut-free, and even soy-free
Dahi ke Sholay is a popular North Indian street snack made with spiced hung curd (greek yogurt) stuffed in bread and fried until crisp. You might also see it spelled Dahi ke Sholey, especially in Delhi stalls. The filling is creamy, tangy, lightly spiced and pairs so well with the crunchy bread exterior. You can shape...
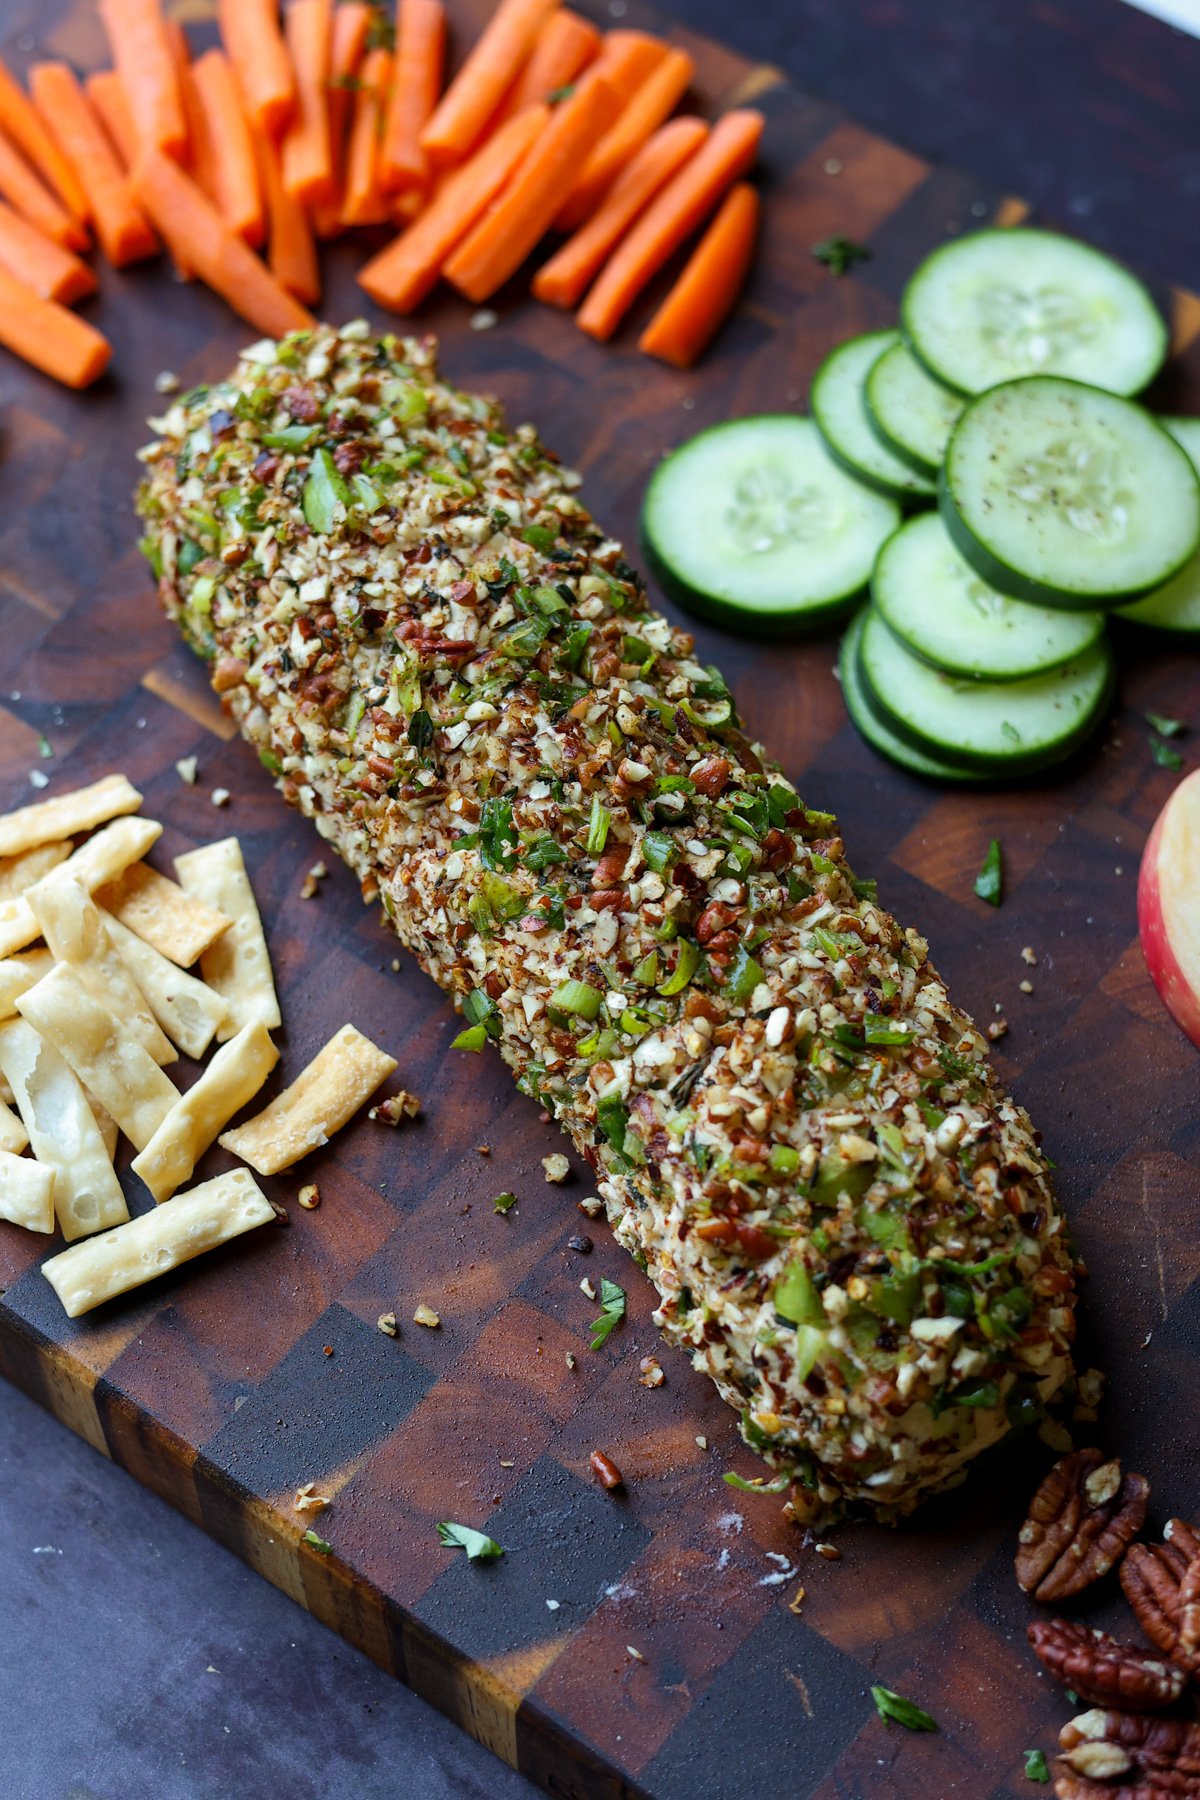
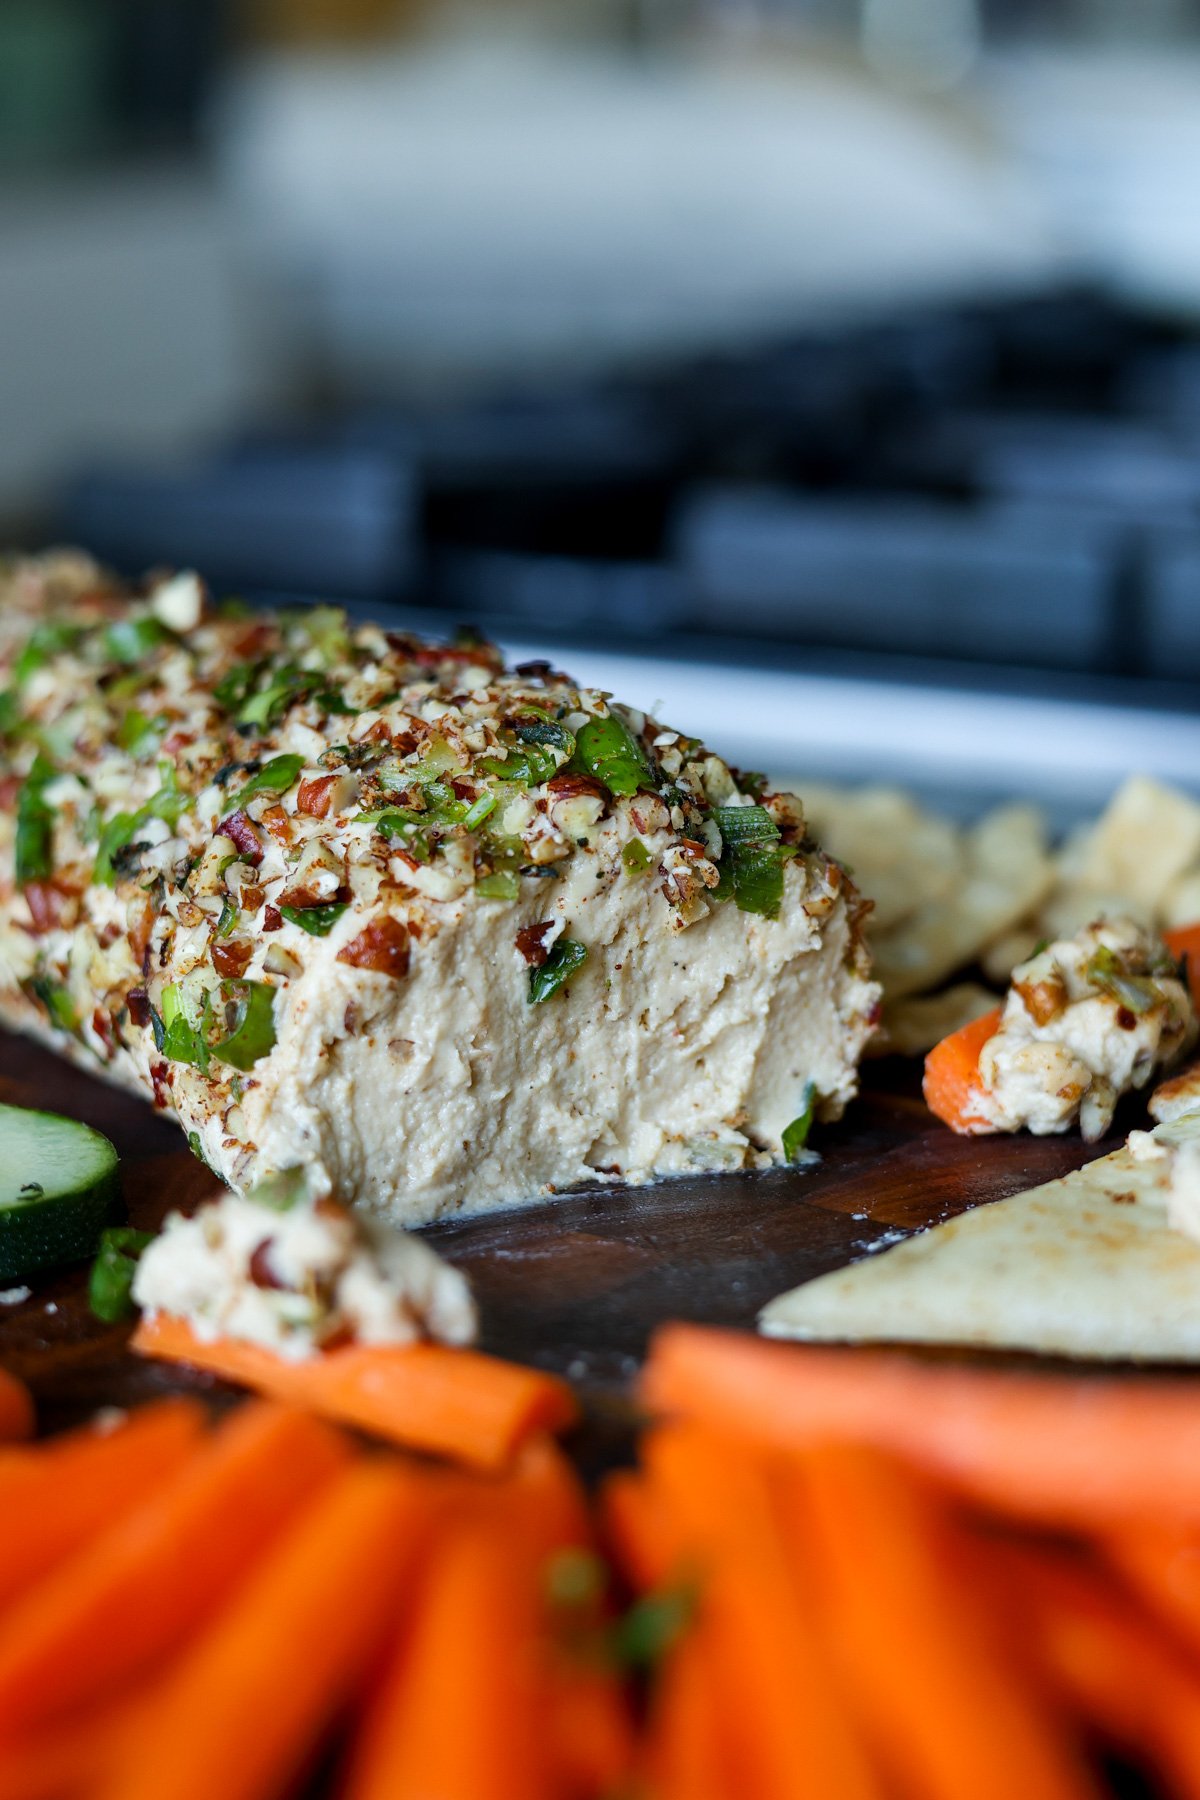
A creamy vegan cheese log coated in crunchy pecans and fresh herbs is perfect for holiday parties served with crackers and veggies. This recipe is super easy, delicious, and versatile! (gluten-free, soy-free and nut-free options)
This is a wow-worthy, super easy vegan cheese log that you can whip up for any party, potluck, or holiday gathering. It’s delicious, cheesy, and creamy with a fantastic pecan-herb crumb which adds wonderful texture and flavor.
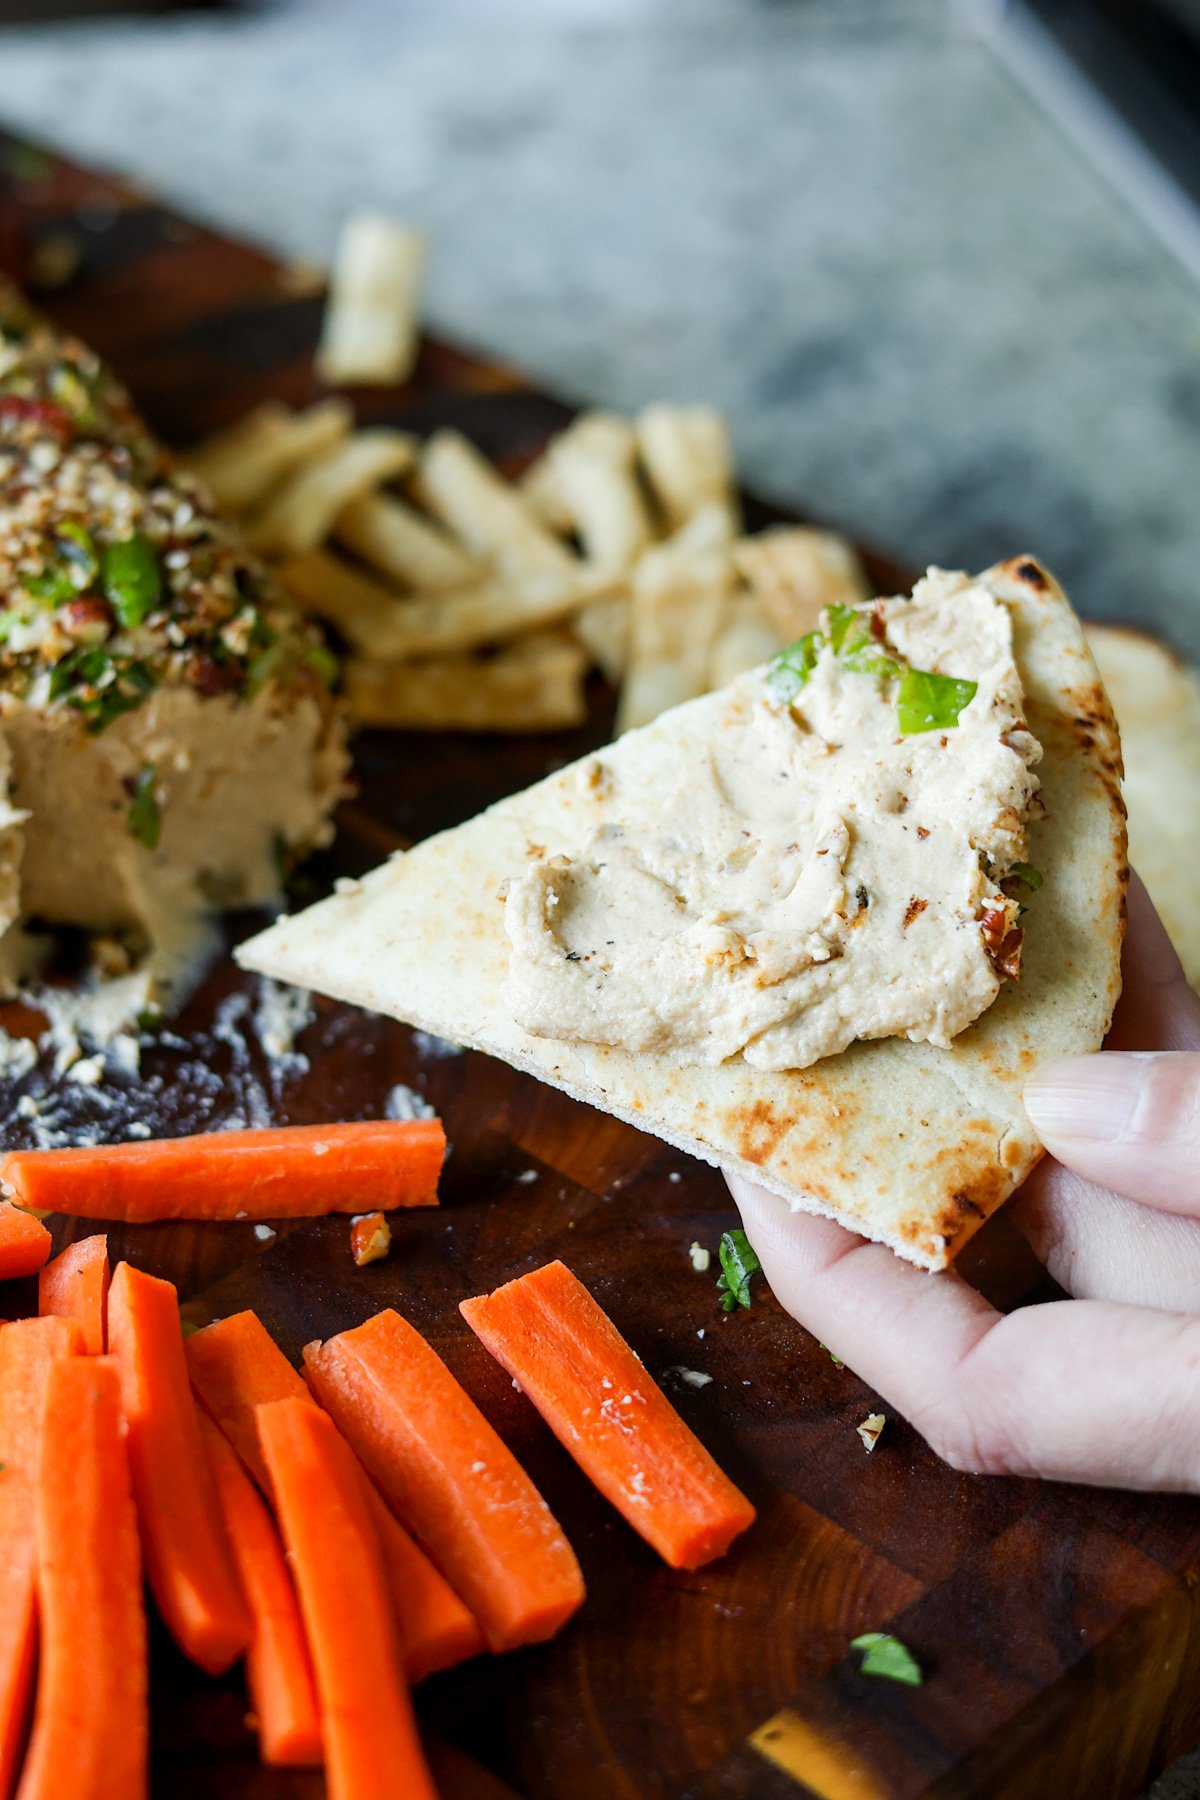
The holiday cheese log pairs beautifully with all kinds of veggies, crudites, crackers, fruit, or even spicy jams and chutneys. It’s perfect on a charcuterie board served with mango chutney and paired with one of my cheese balls, like my Jalapeno popper cheese ball.
You can also use this creamy cheese as a spread for baguettes or bagels or even to make grilled cheese, quesadillas, or mac and cheese. For mac and cheese, just add some stock to a pan, heat it up with the cheese log to make a sauce, and toss in your cooked pasta of choice.
This vegan cheese log recipe is flexible and easy to adapt to your flavor profile. Try adding paprika and jerk seasoning, Cajun spices, or extra red pepper flakes for a spicy version.
Why You’ll Love this Vegan Cheese Log
creamy vegan cheese log coated in crunchy toasted pecans and fresh herbs
perfect for parties, potlucks, cheese boards, and charcuterie boards
easy to make and versatile! Try different base and seasoning options.
easy to make gluten-free, soy-free, and/or, nut-free
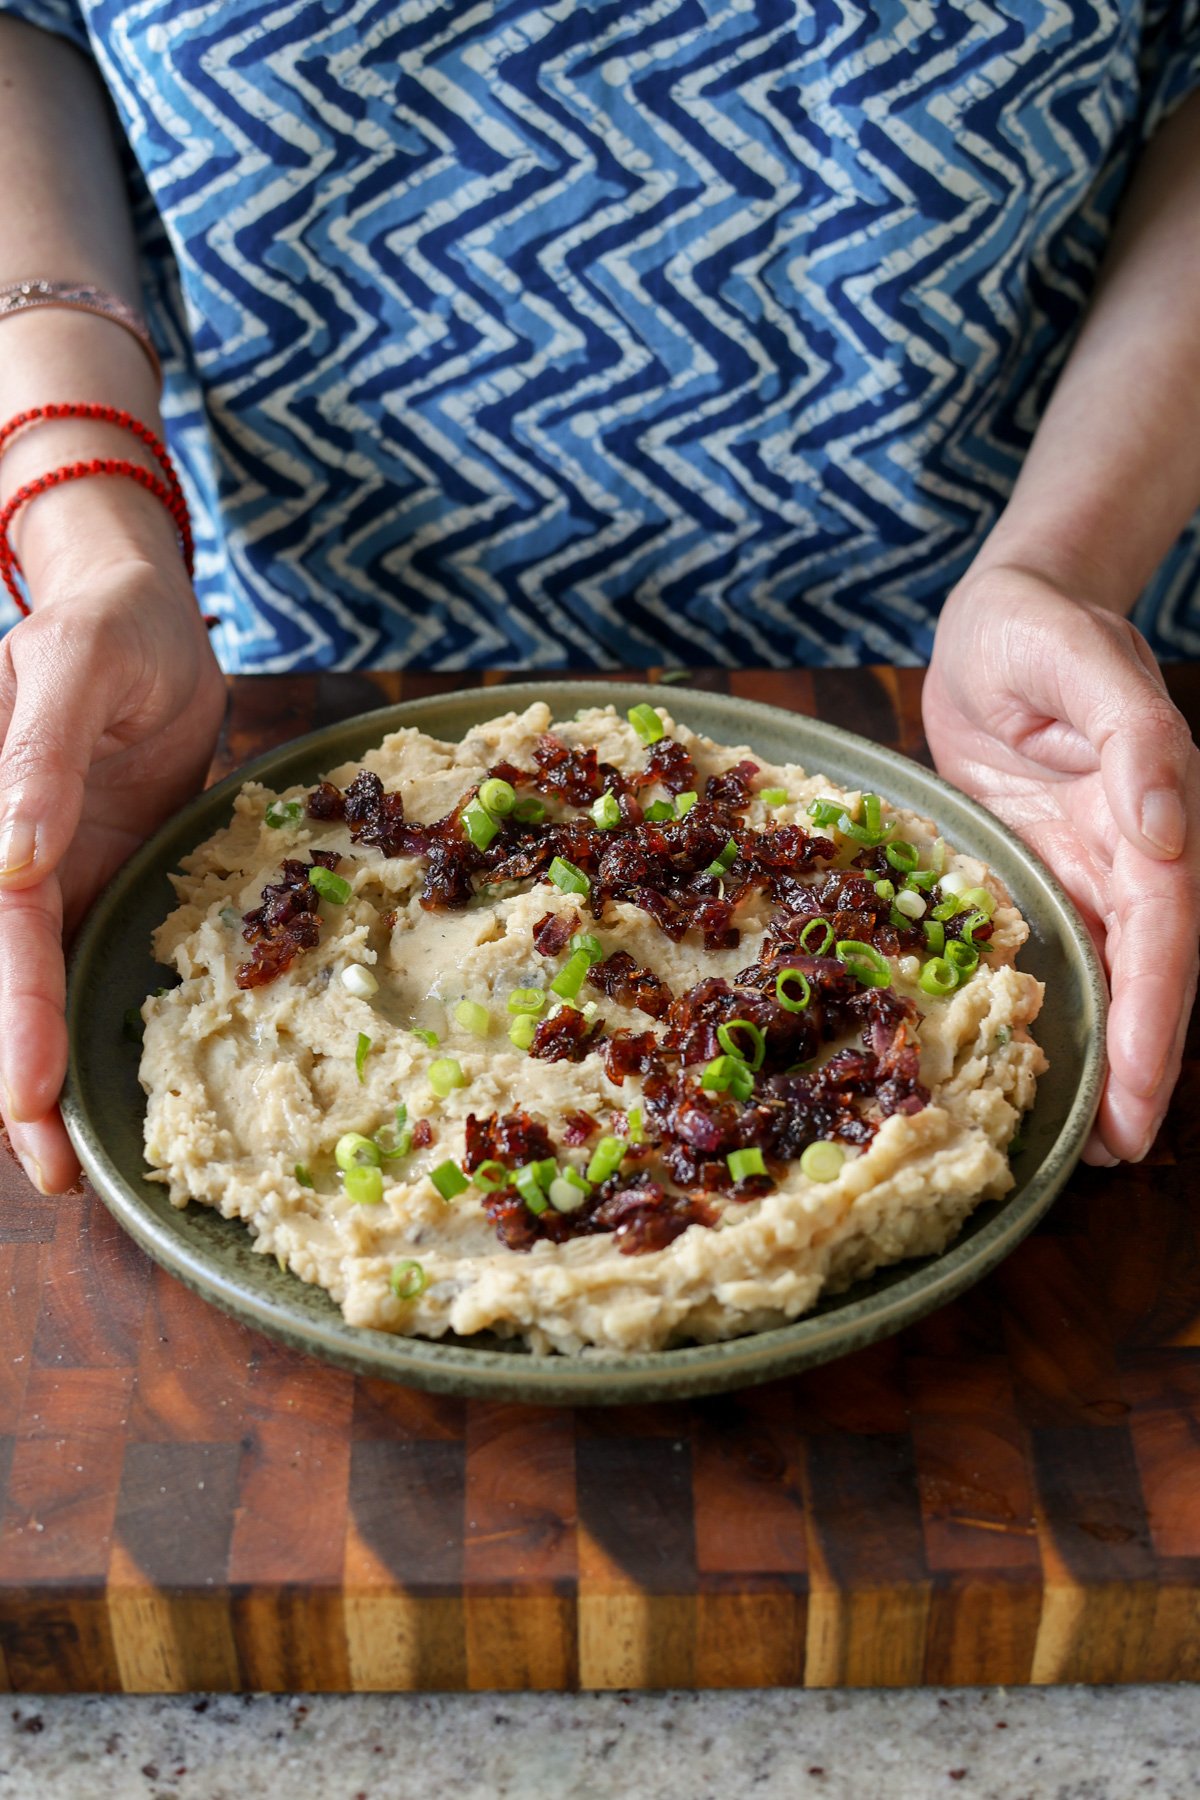
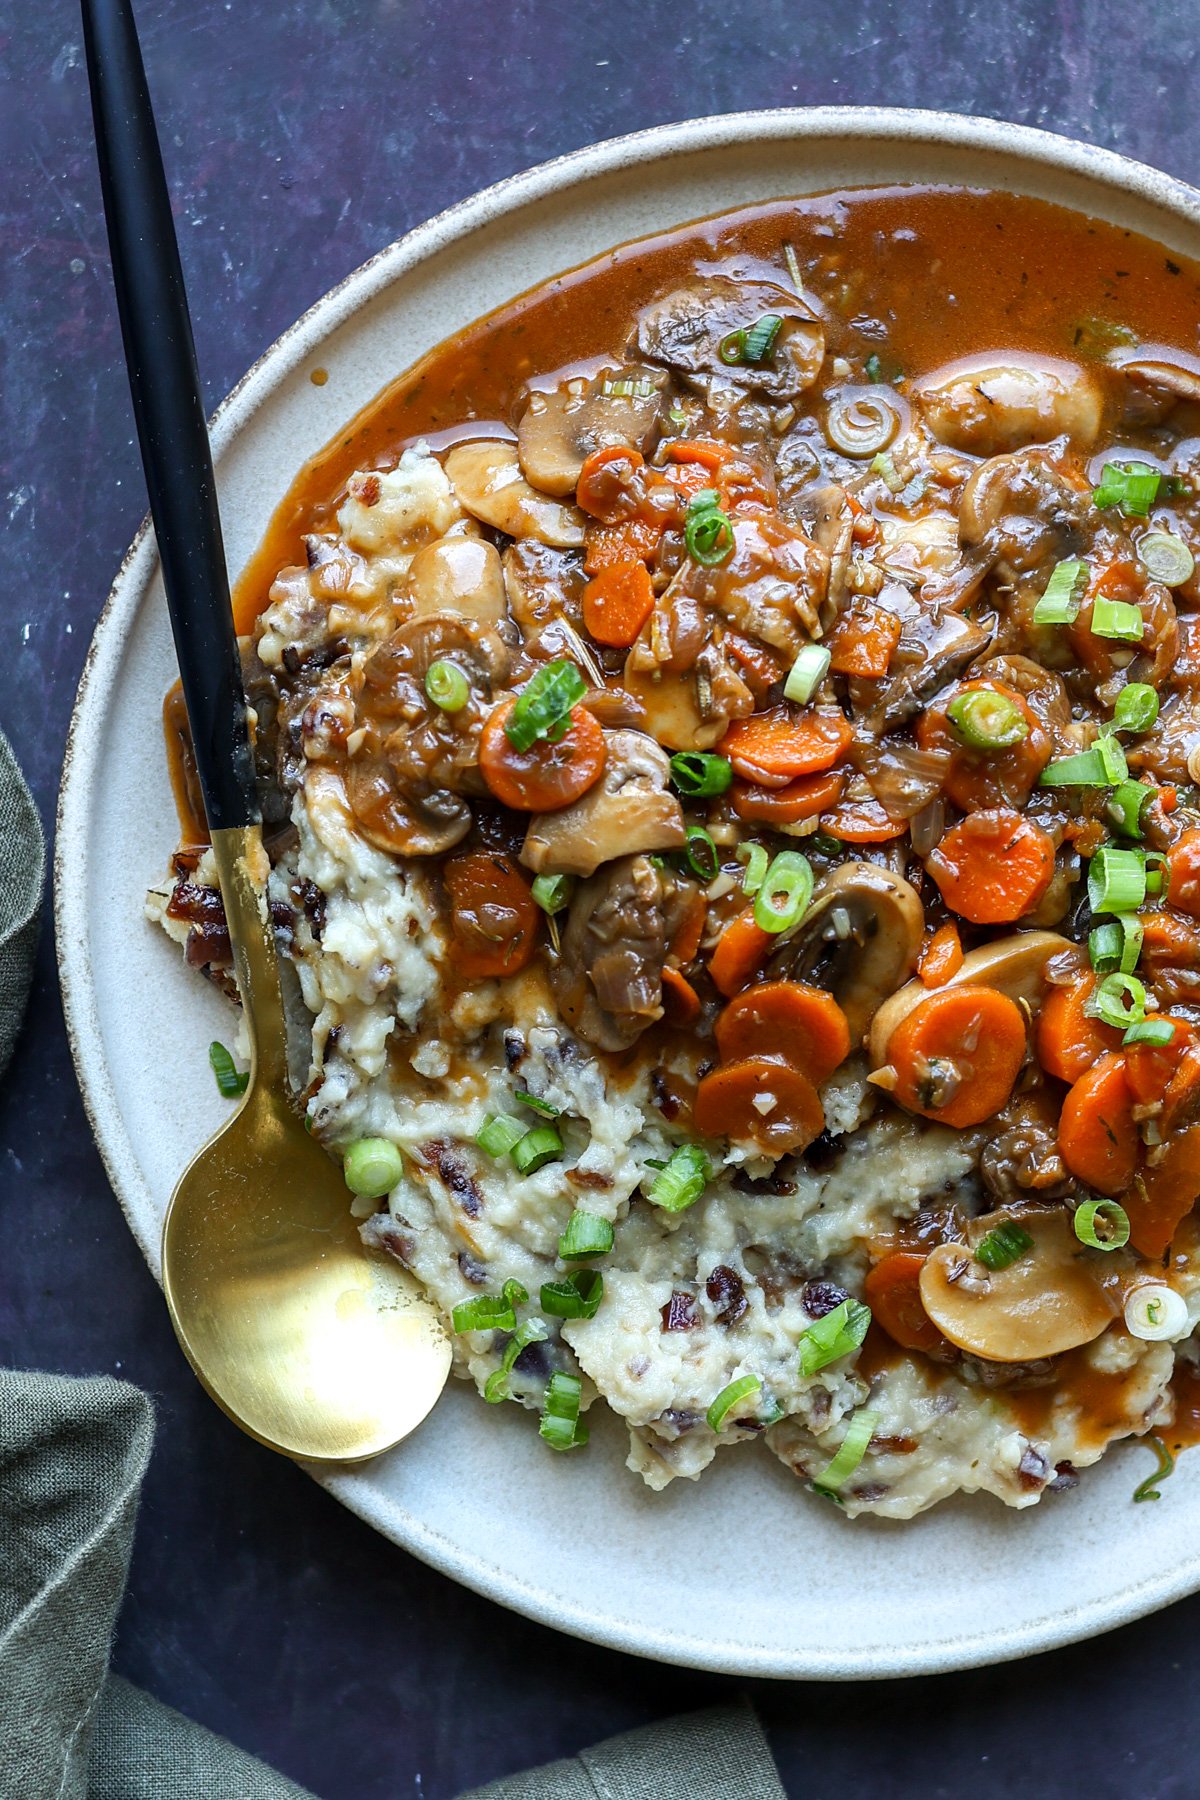
Creamy, rich, and deeply savory, these mashed potatoes get a flavor upgrade with caramelized onions and a secret boost of plant-based protein from pureed white beans. The result is velvety, buttery comfort in every bite. A side that’s perfect for holidays or weeknights alike. (Gluten-free, nut-free, with a soy-free option.)
Everyone loves potatoes in every form, especially mashed potatoes around the holiday season. They’re a fixture at every meal, and we’re going to level them up times two.
This recipe levels up the flavor with caramelized onions, garlic, and herbs that add an amazing flavor to these mashed potatoes. And we’re going to add some pureed white beans for extra protein and heartiness.
You’ll get protein from the beans, nutritional yeast, and non-dairy milk. You can add even more protein by serving it with crispy lentils or tofu bacon bits.
No matter how you serve caramelized onion mashed potatoes they’re rich, hearty, and perfect for any holiday table or cozy dinner. Served here with my mushroom bourguignon.
Why You’ll Love Caramelized Onion Mashed Potatoes
creamy mashed potatoes
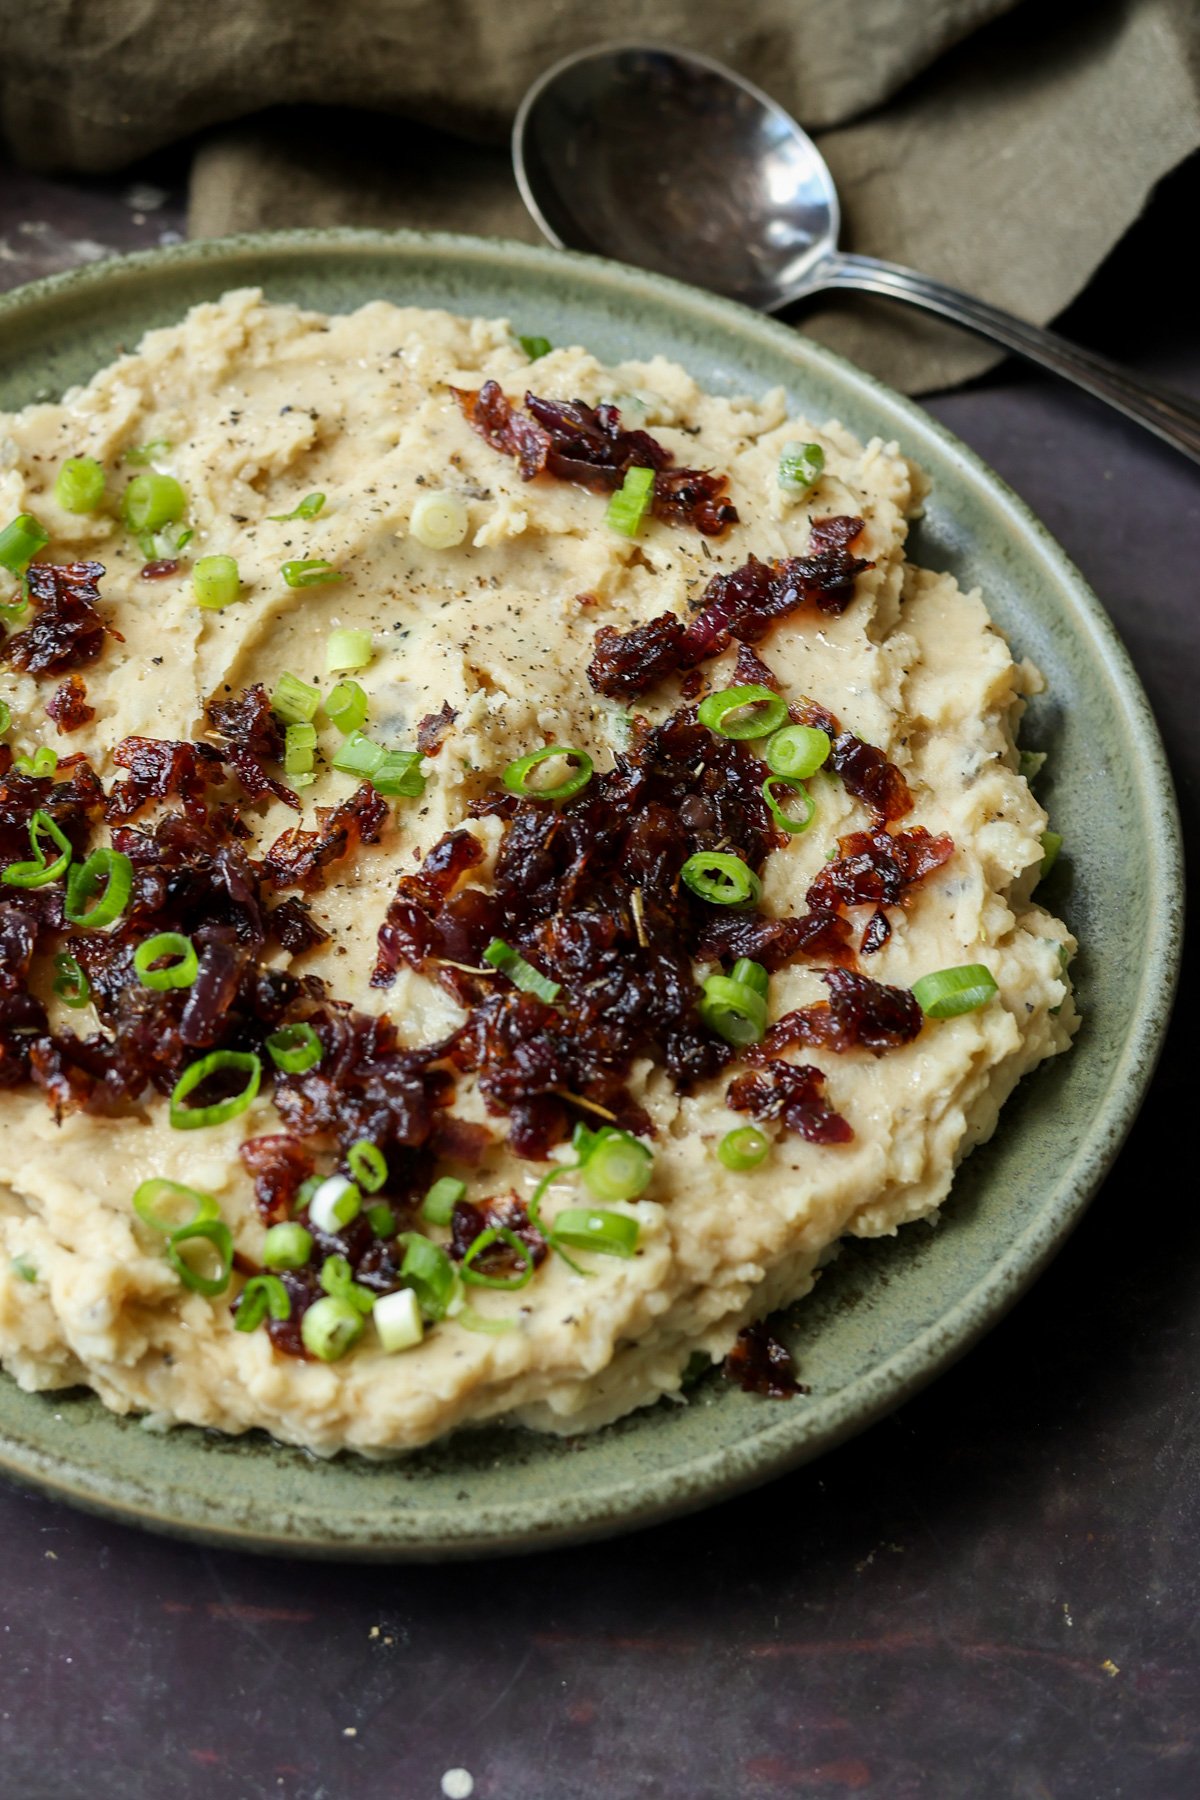
savory caramelized onion topping
sneaky protein
delicious holiday side dish
naturally gluten-free and nut-free with easy soy-free option
Paneer Angara is a restaurant-style curry made with soft paneer cubes cooked in a creamy onion-tomato-cashew gravy. The flavors are mild and balanced with a touch of warmth from fragrant spices. The curry is finished with a charcoal smoke infusion that gives it a unique depth and restaurant-like flavor. Cashews make the gravy smooth, while...
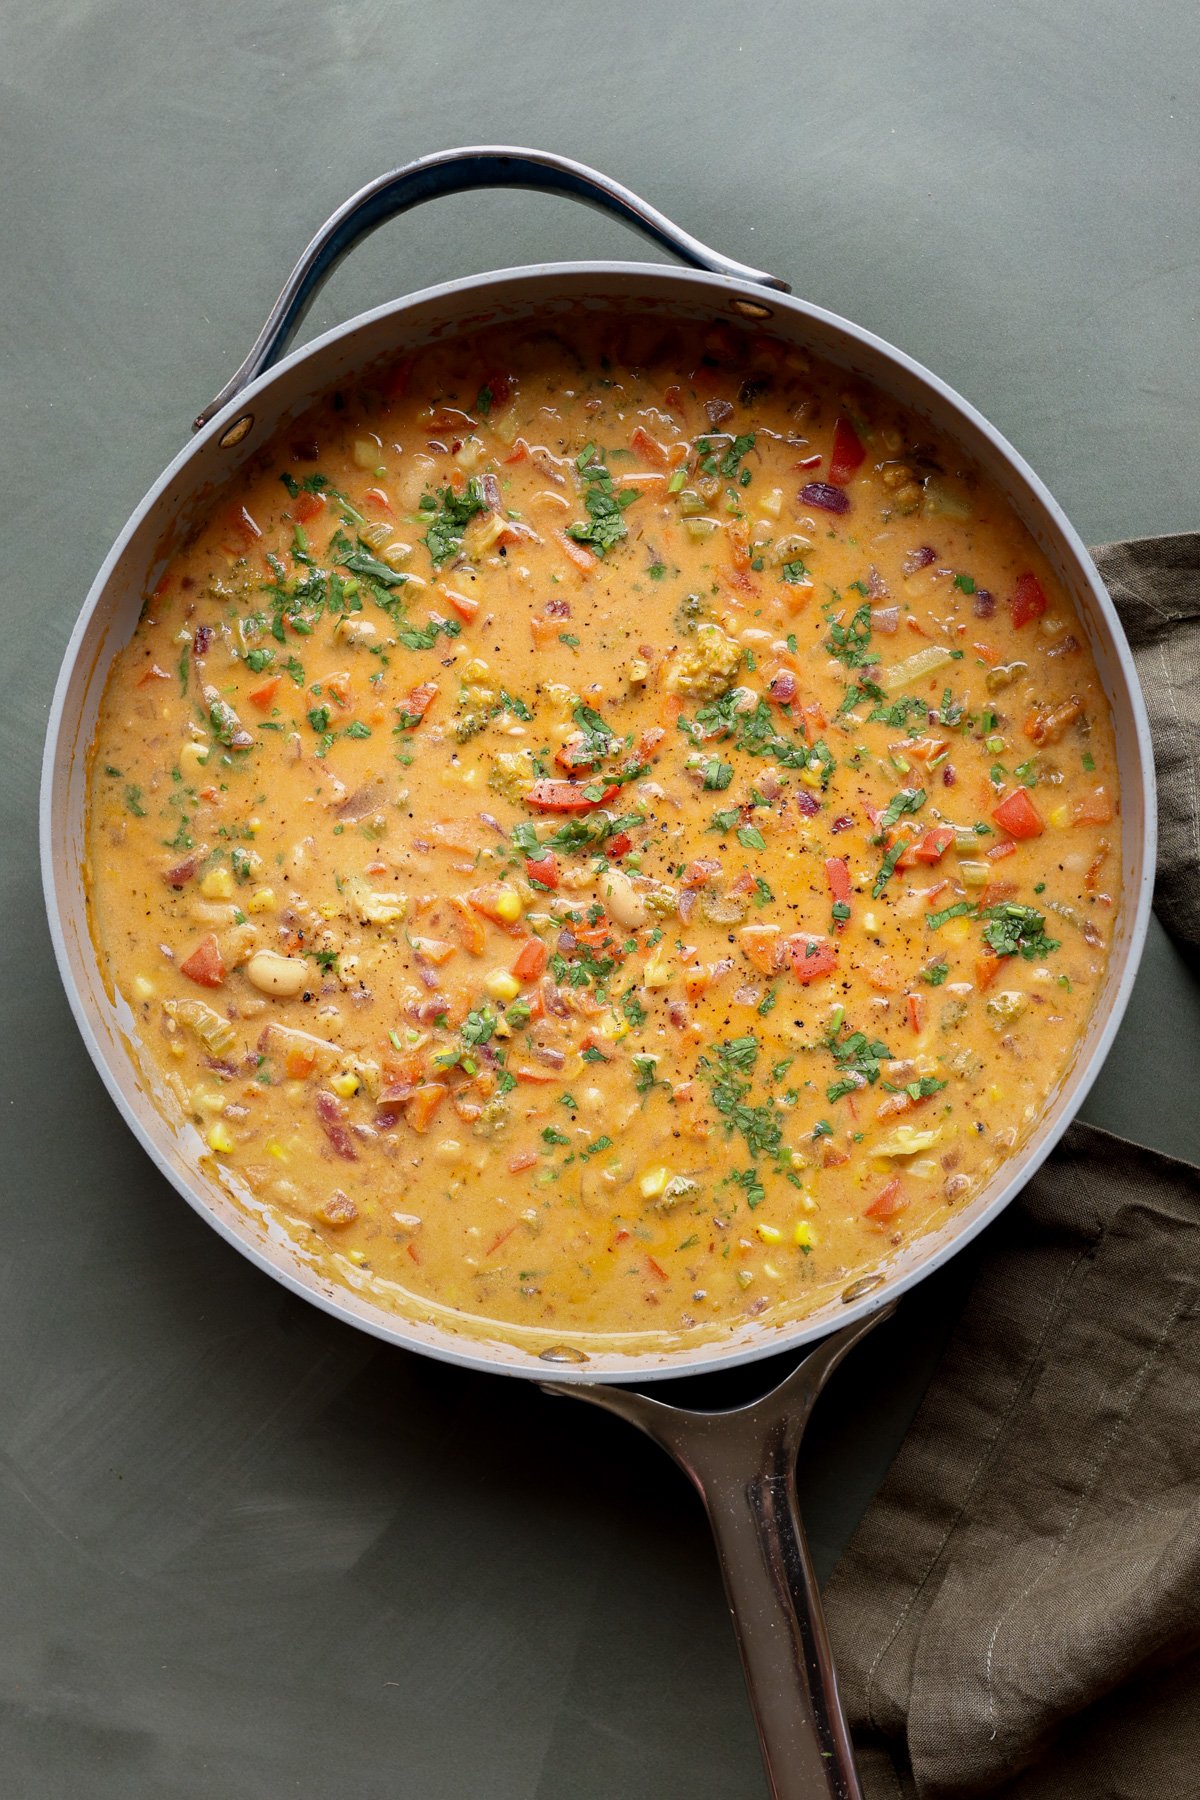
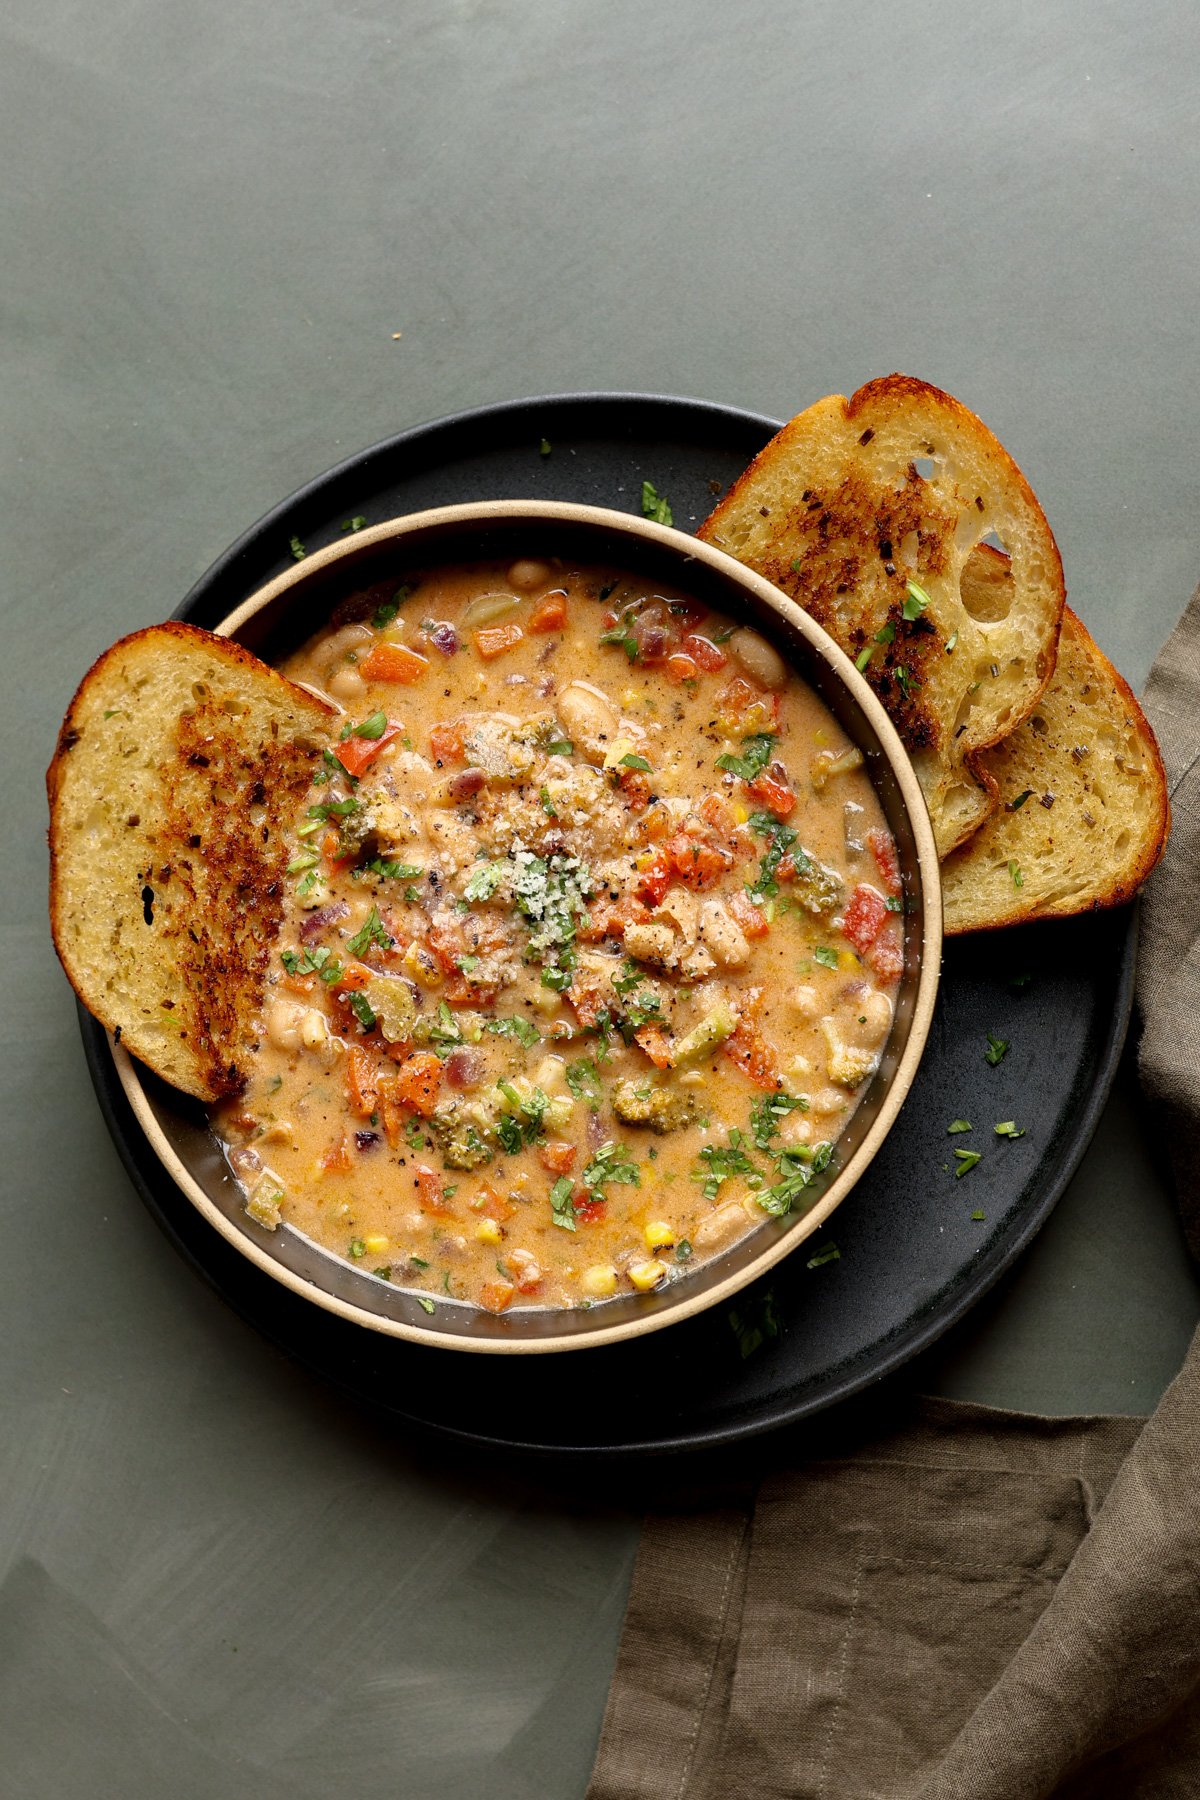
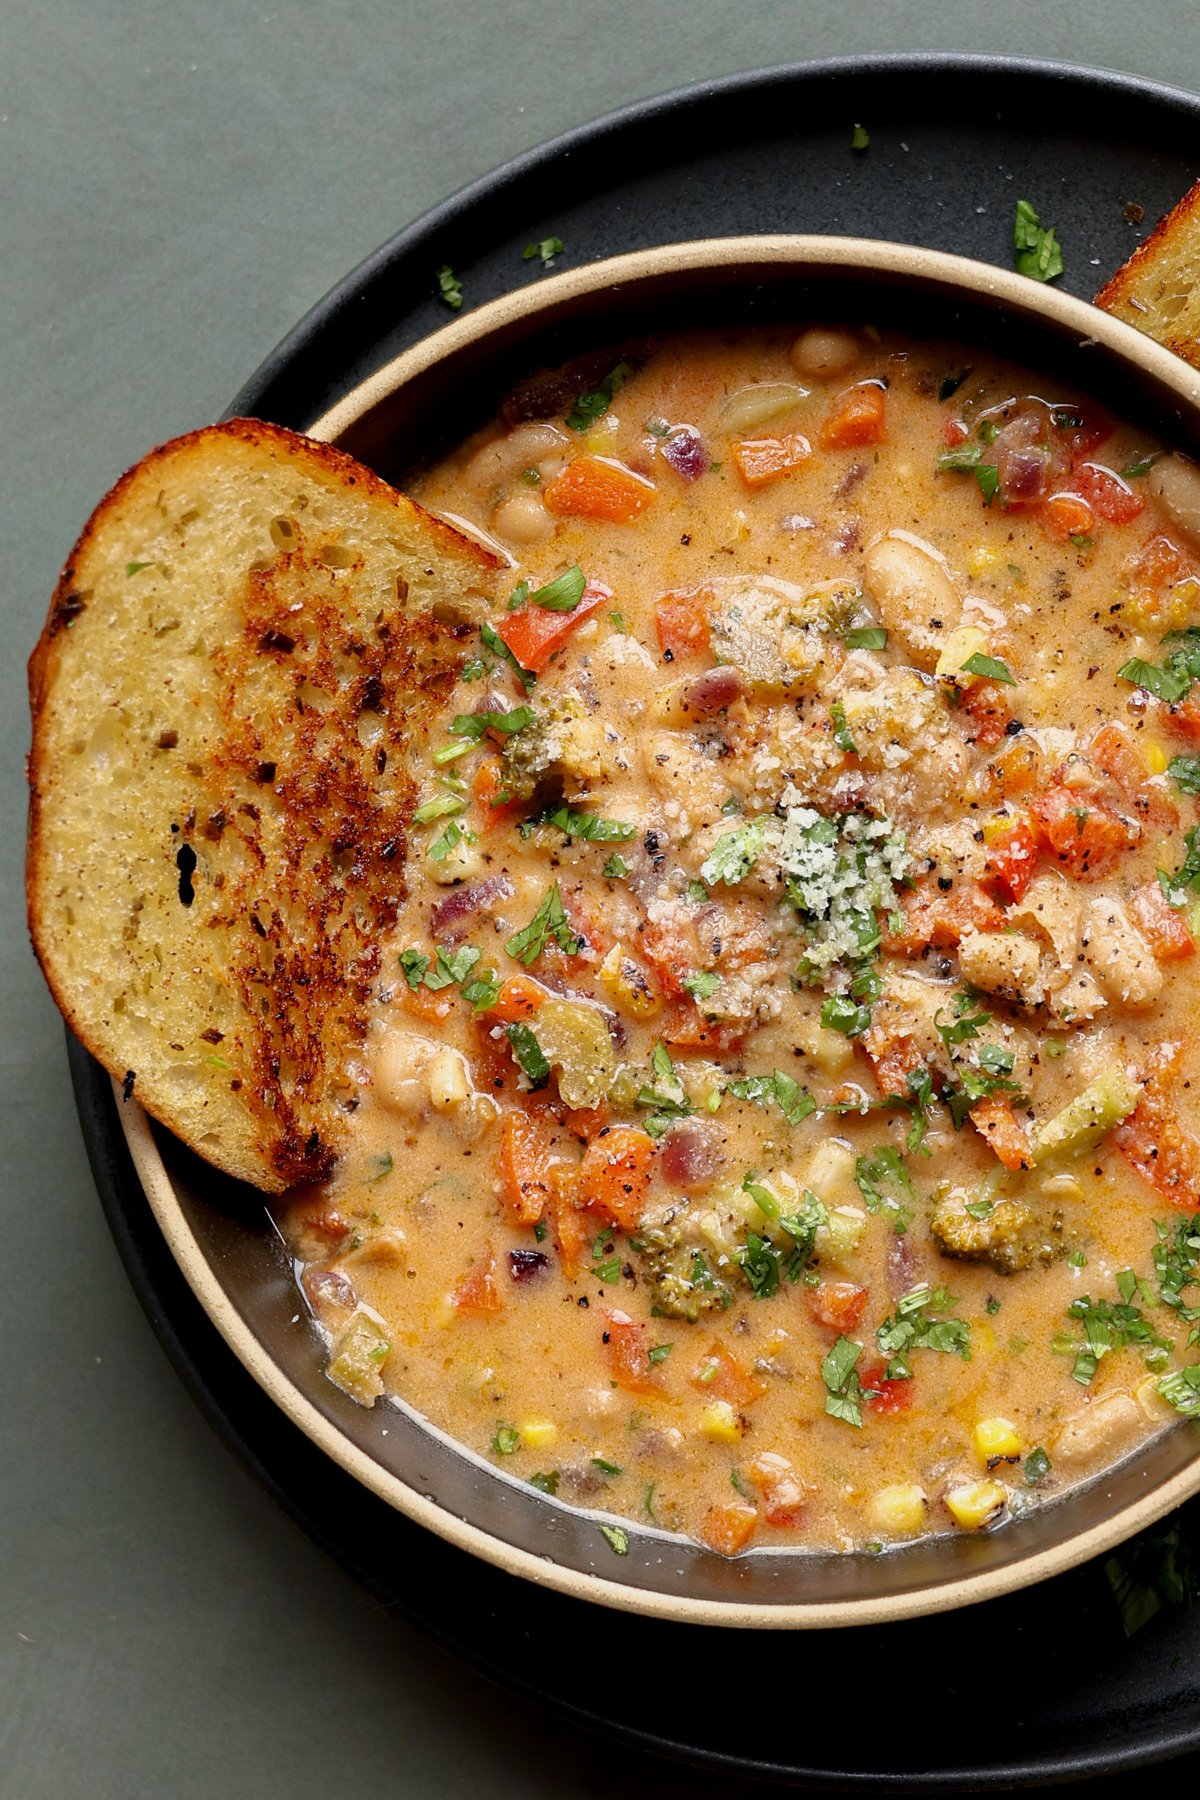
Lemon white bean soup is a creamy, vibrant one pot meal that’s perfect for busy weeknights. It’s hearty, filling, and uses simple, budget-friendly ingredients. (gluten-free with soy-free and nut-free options)
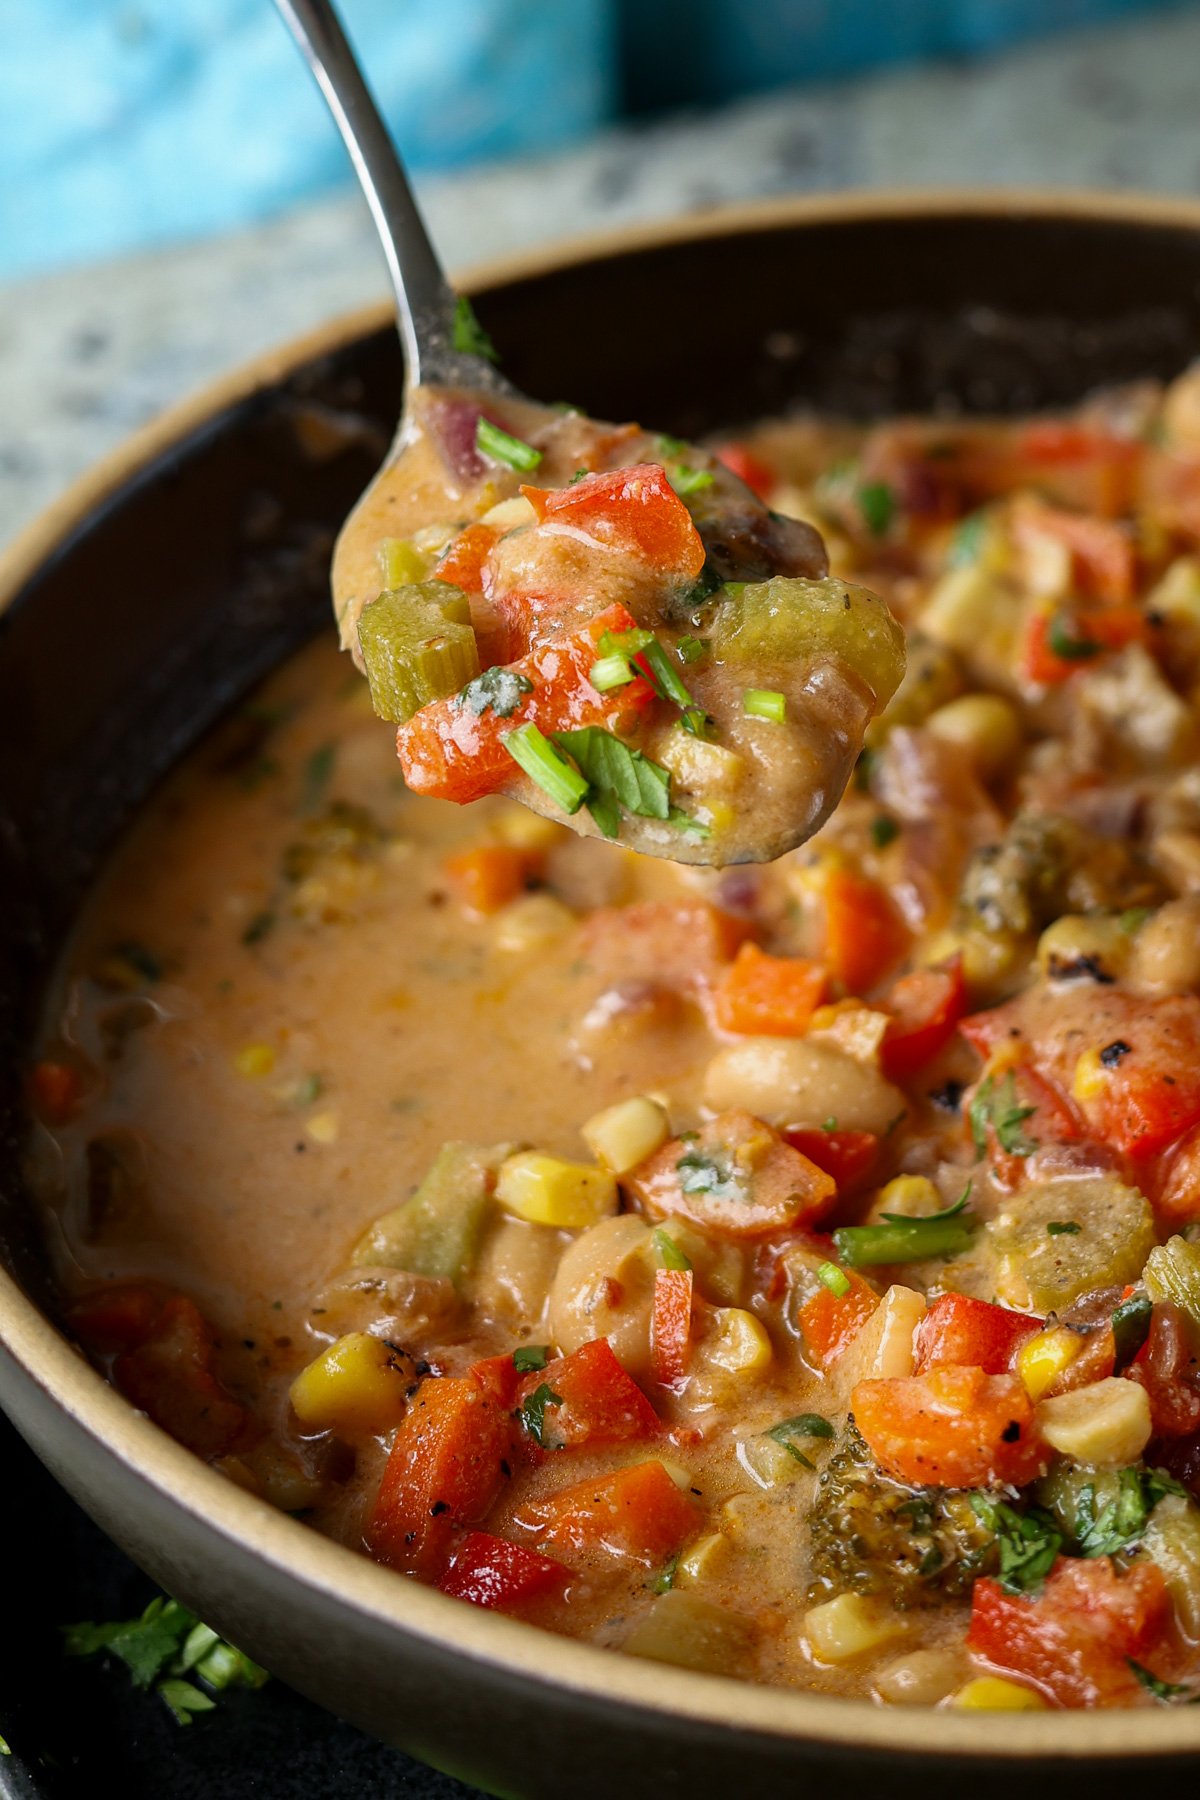
It’s soup season, and I am loving all the creamy, hearty, and budget-friendly soups — and this lemony white bean soup fits exactly into that category. It’s packed with tons of veggies, beans, and protein.
The best part about this lemon white bean soup is that it’s flexible to your flavor profile. You can easily adjust the flavors and ingredients based on what you have on hand. It’s vibrant, lemony, and perfect for the whole family!
The soup gets its protein from beans, cashews or tofu, nutritional yeast, and the veggies. You also blend up some of the beans into a puree to create that creamy texture along with either cashews or tofu. You can even omit the cashews and tofu, if you need to, and use just the beans for the creamy base.
This creamy lemon white bean soup is wholesome, flexible, and easy to make. The perfect go-to for cozy soup season!!
Why You’ll Love Lemon White Bean Soup
creamy, vibrant soup with tons of veggies and protein
versatile recipe! Adjust seasoning and proteins to your taste.
40-minute, 1-pot meal
naturally gluten-free with easy soy-free and nut-free options
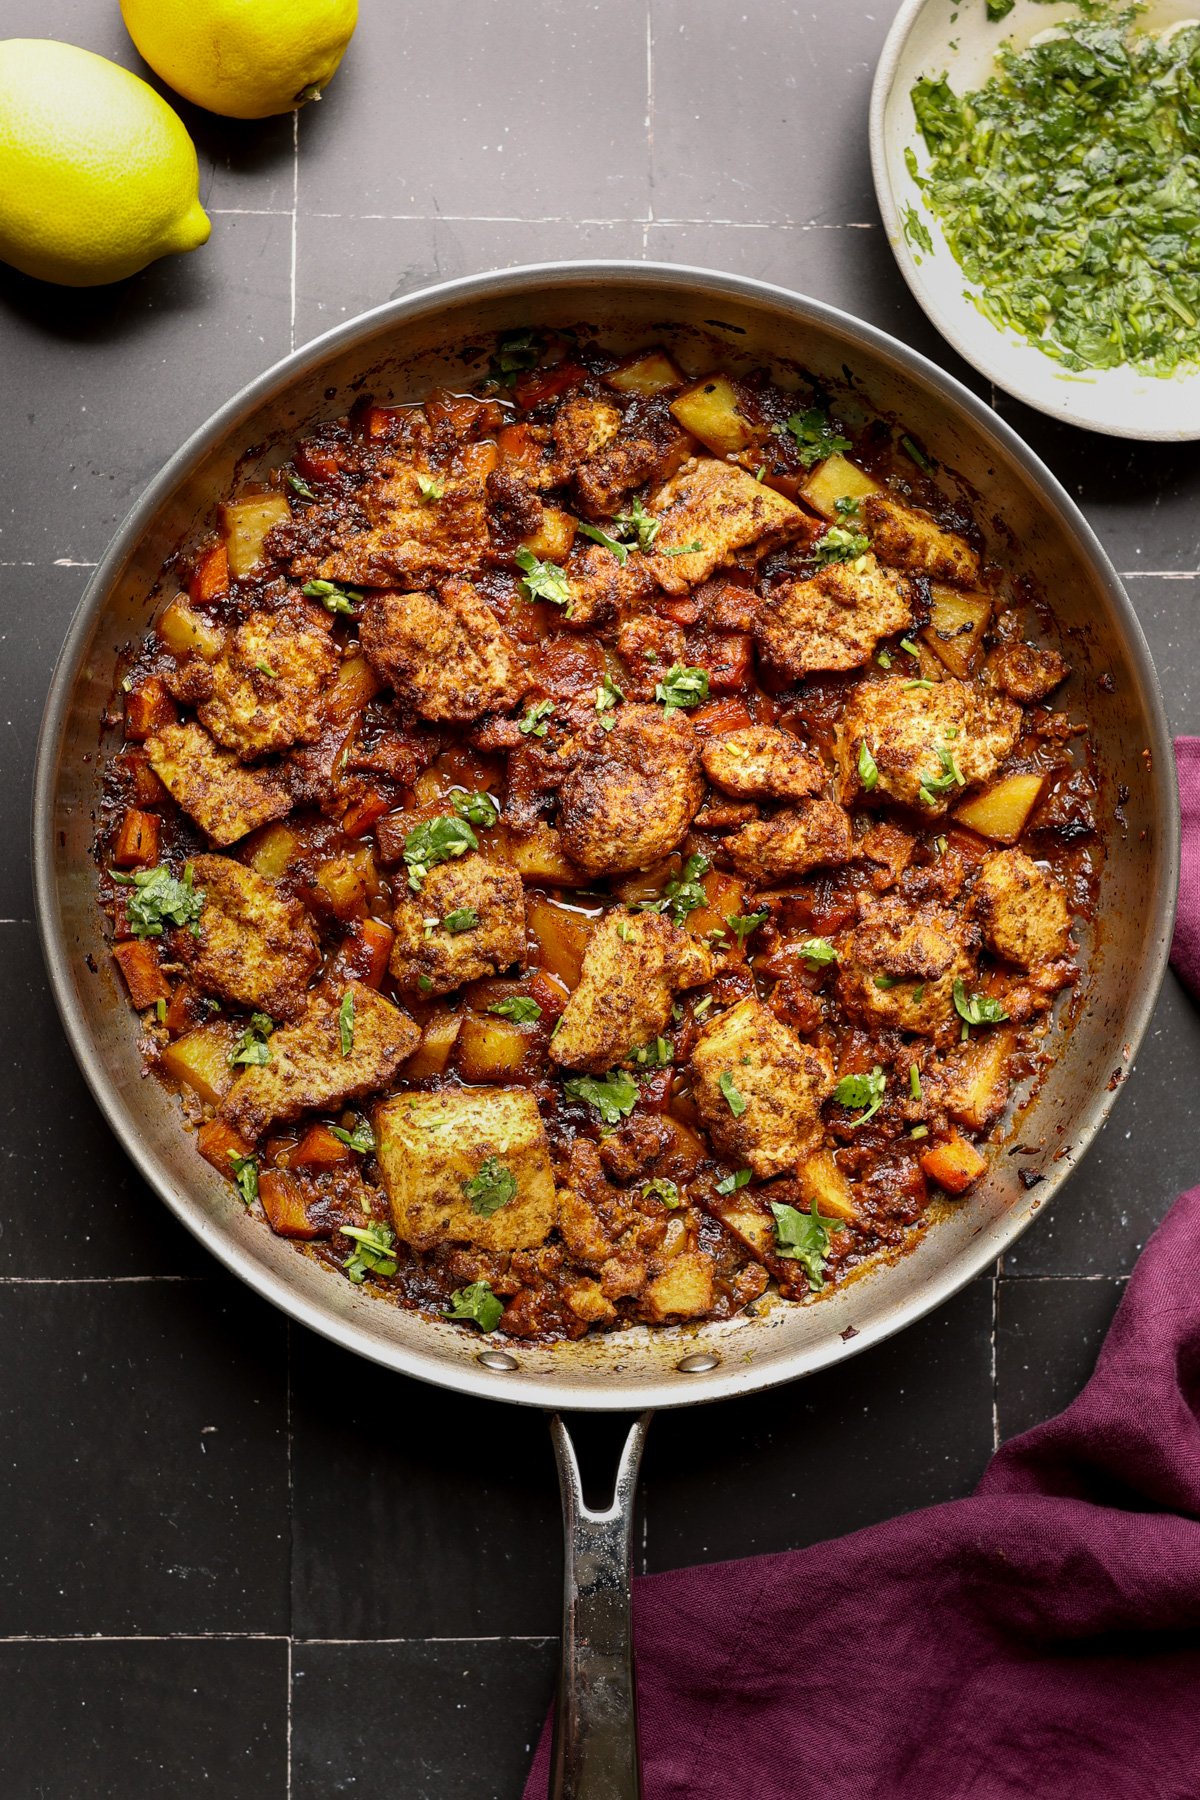
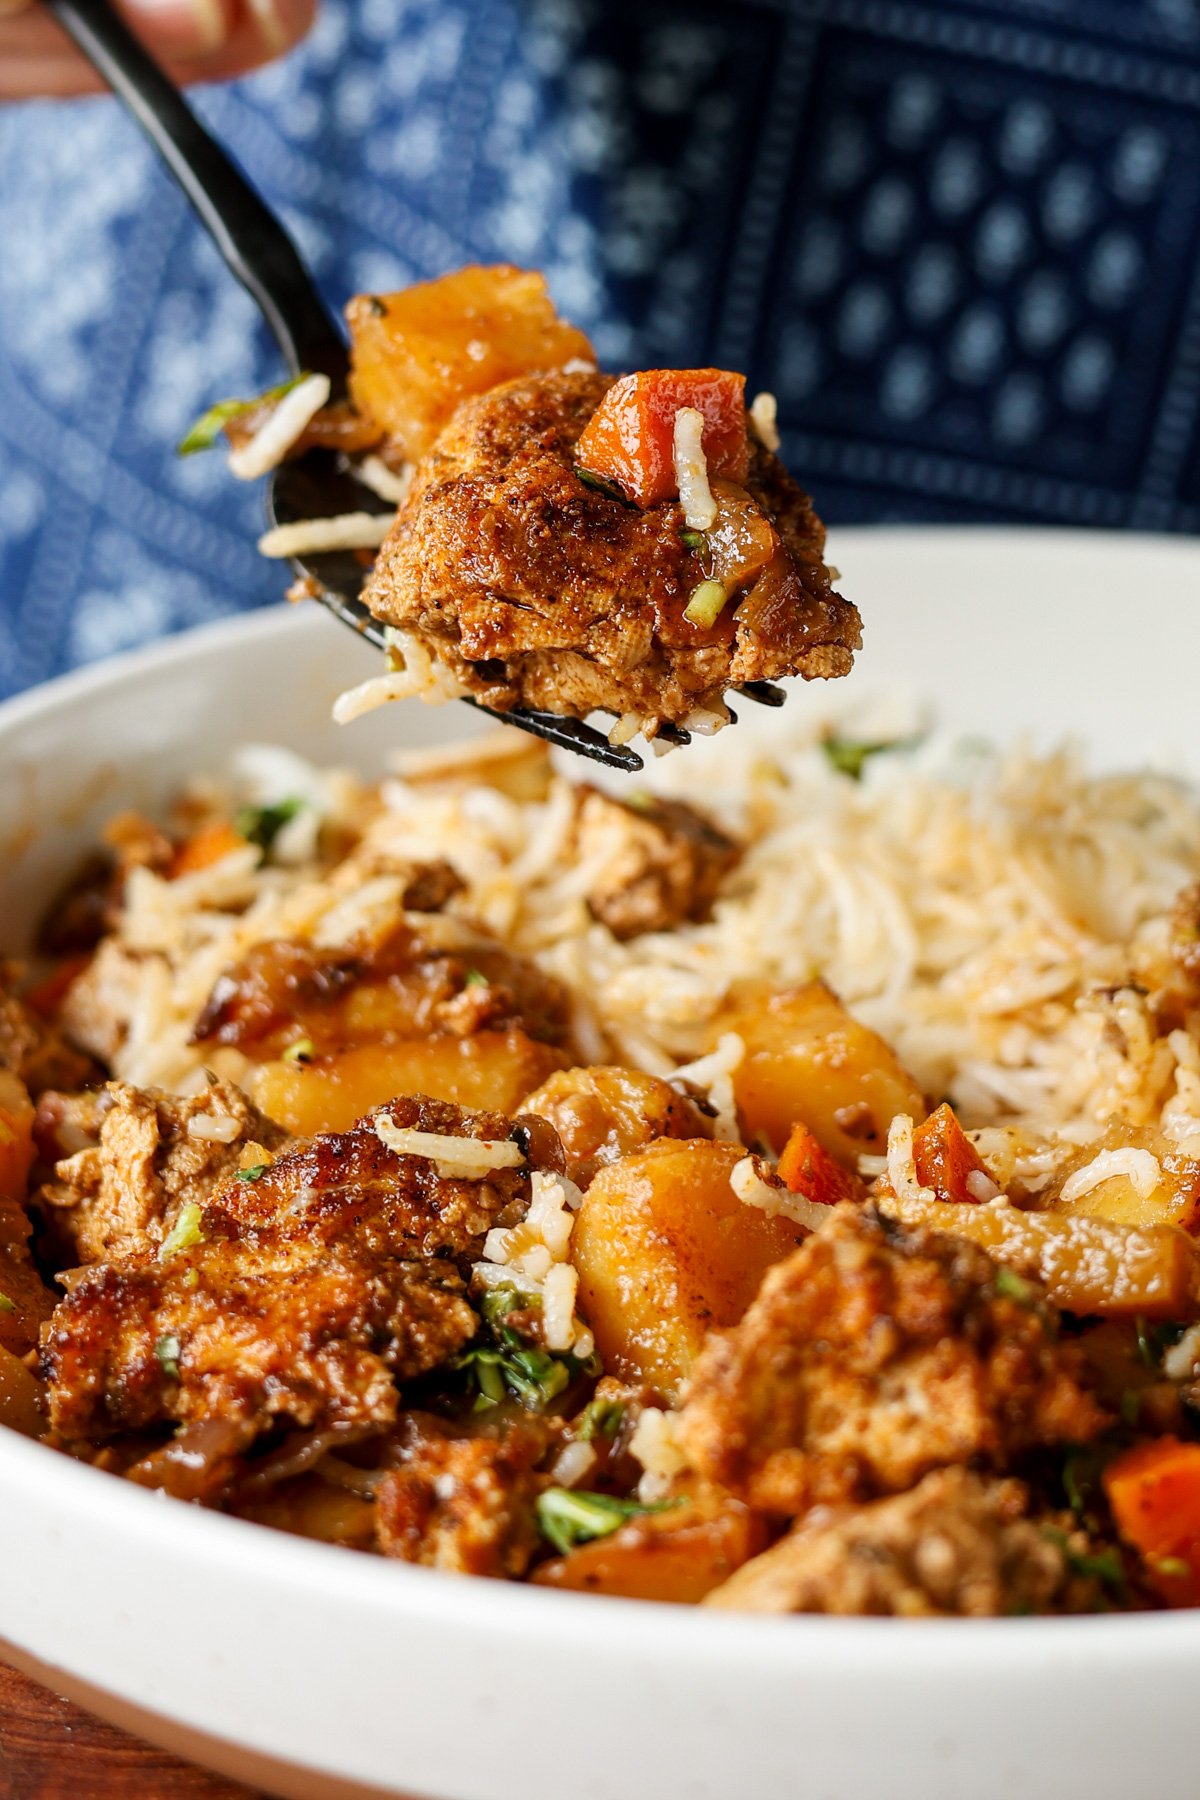
Spice-Rubbed Braised Tofu with Vegetables in a Savory Umami Sauce. A unique delicious holiday entree that all cooks in one pan! (gluten-free and nut-free with soy-free options)
I wanted to make a vegan braised meat-style dish for the holidays, so I came up with this one-skillet meal that’s rich, hearty, and incredibly flavorful. It features an amazing, aromatic spice rub that smells so meaty you’ll be surprised it’s entirely plant-based. The spice rub coats tofu that’s been frozen, thawed, and pressed, giving it a dense, chewy texture perfect for braising.
The base for the braise starts with crisped-up potatoes and carrots. After searing the vegetables, we make a deeply flavorful sauce with caramelized onions, lots of aromatics, and fresh herbs, and flavor boosters.
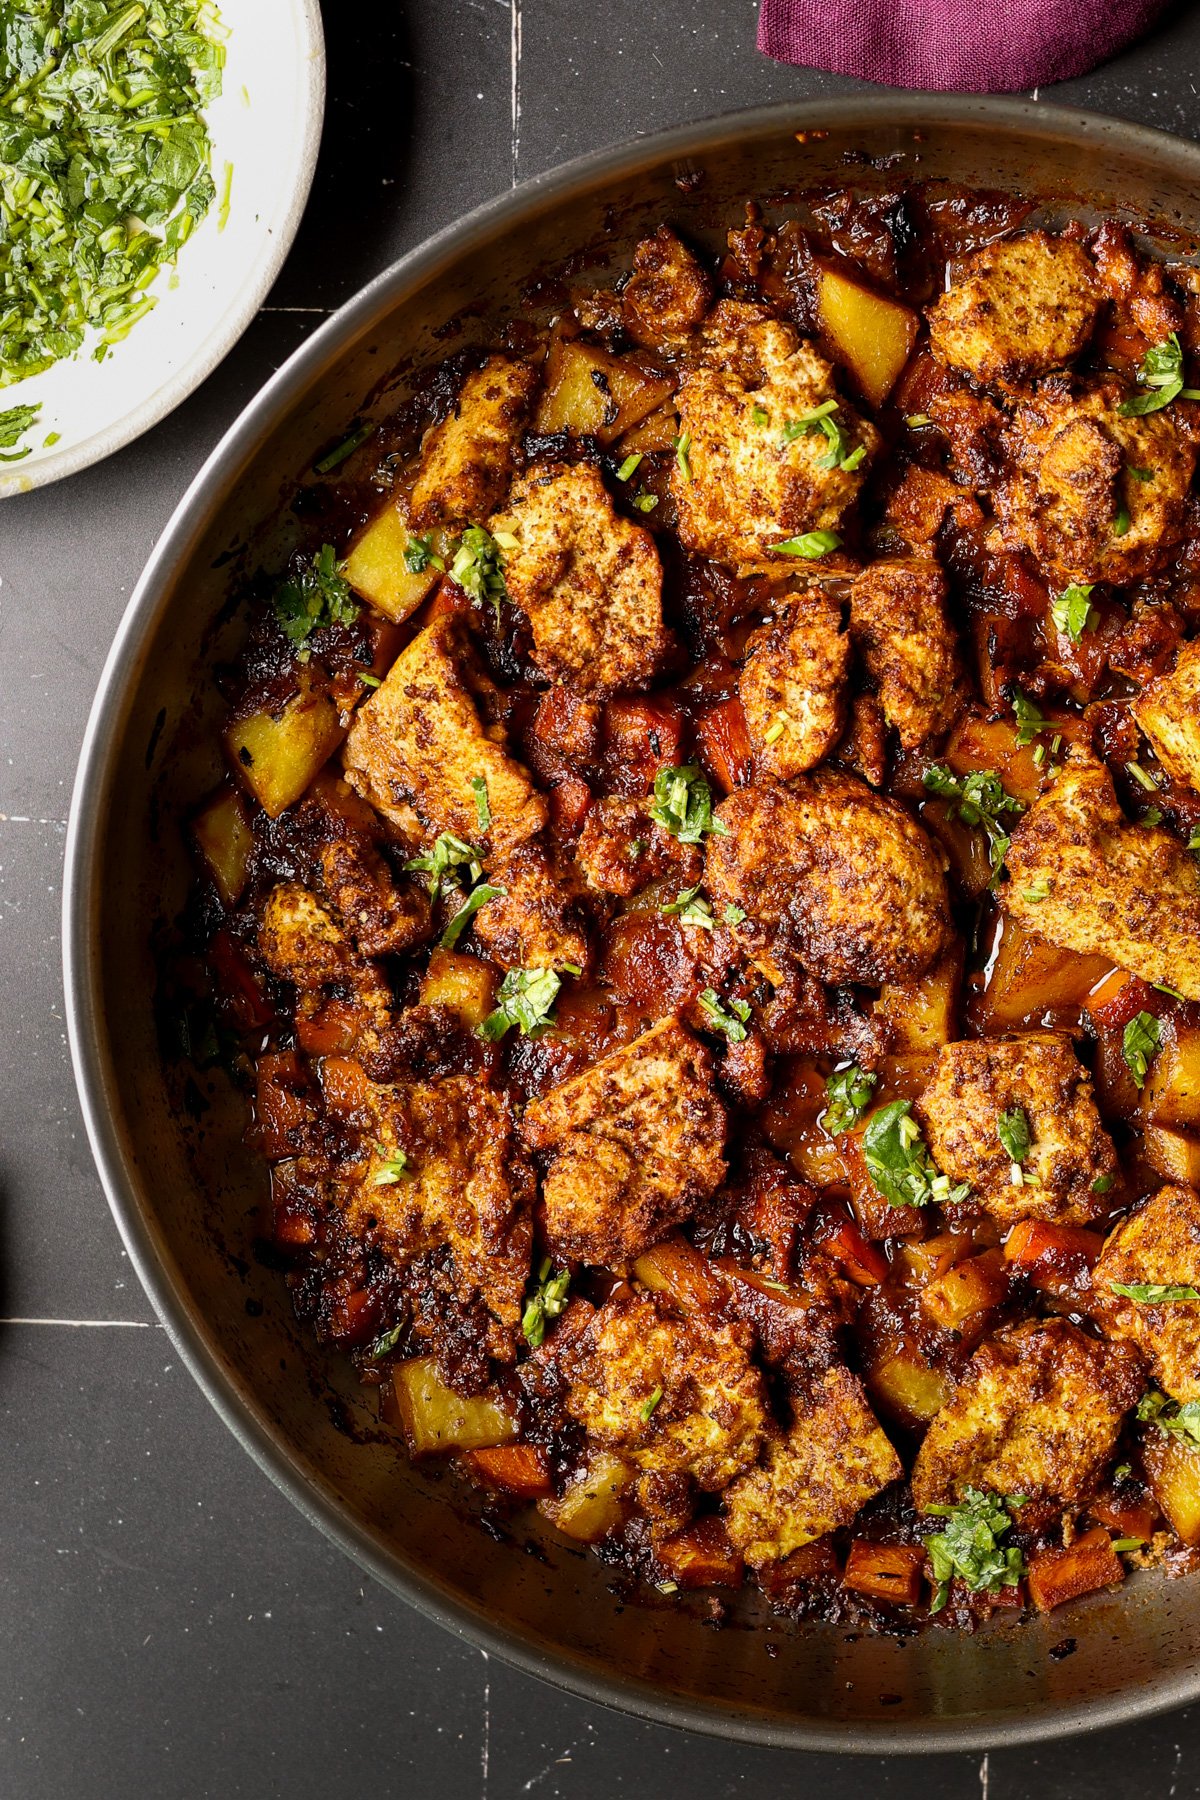
The tofu and vegetables braise together in this sauce, allowing the tofu to absorb all that flavor while developing a slightly crispy top and a tender, chicken-like interior.
We use an oven-safe pan to start the dish on the stovetop and finish it in the oven, where the vegetables become perfectly tender and the tofu gets a gorgeous golden top.
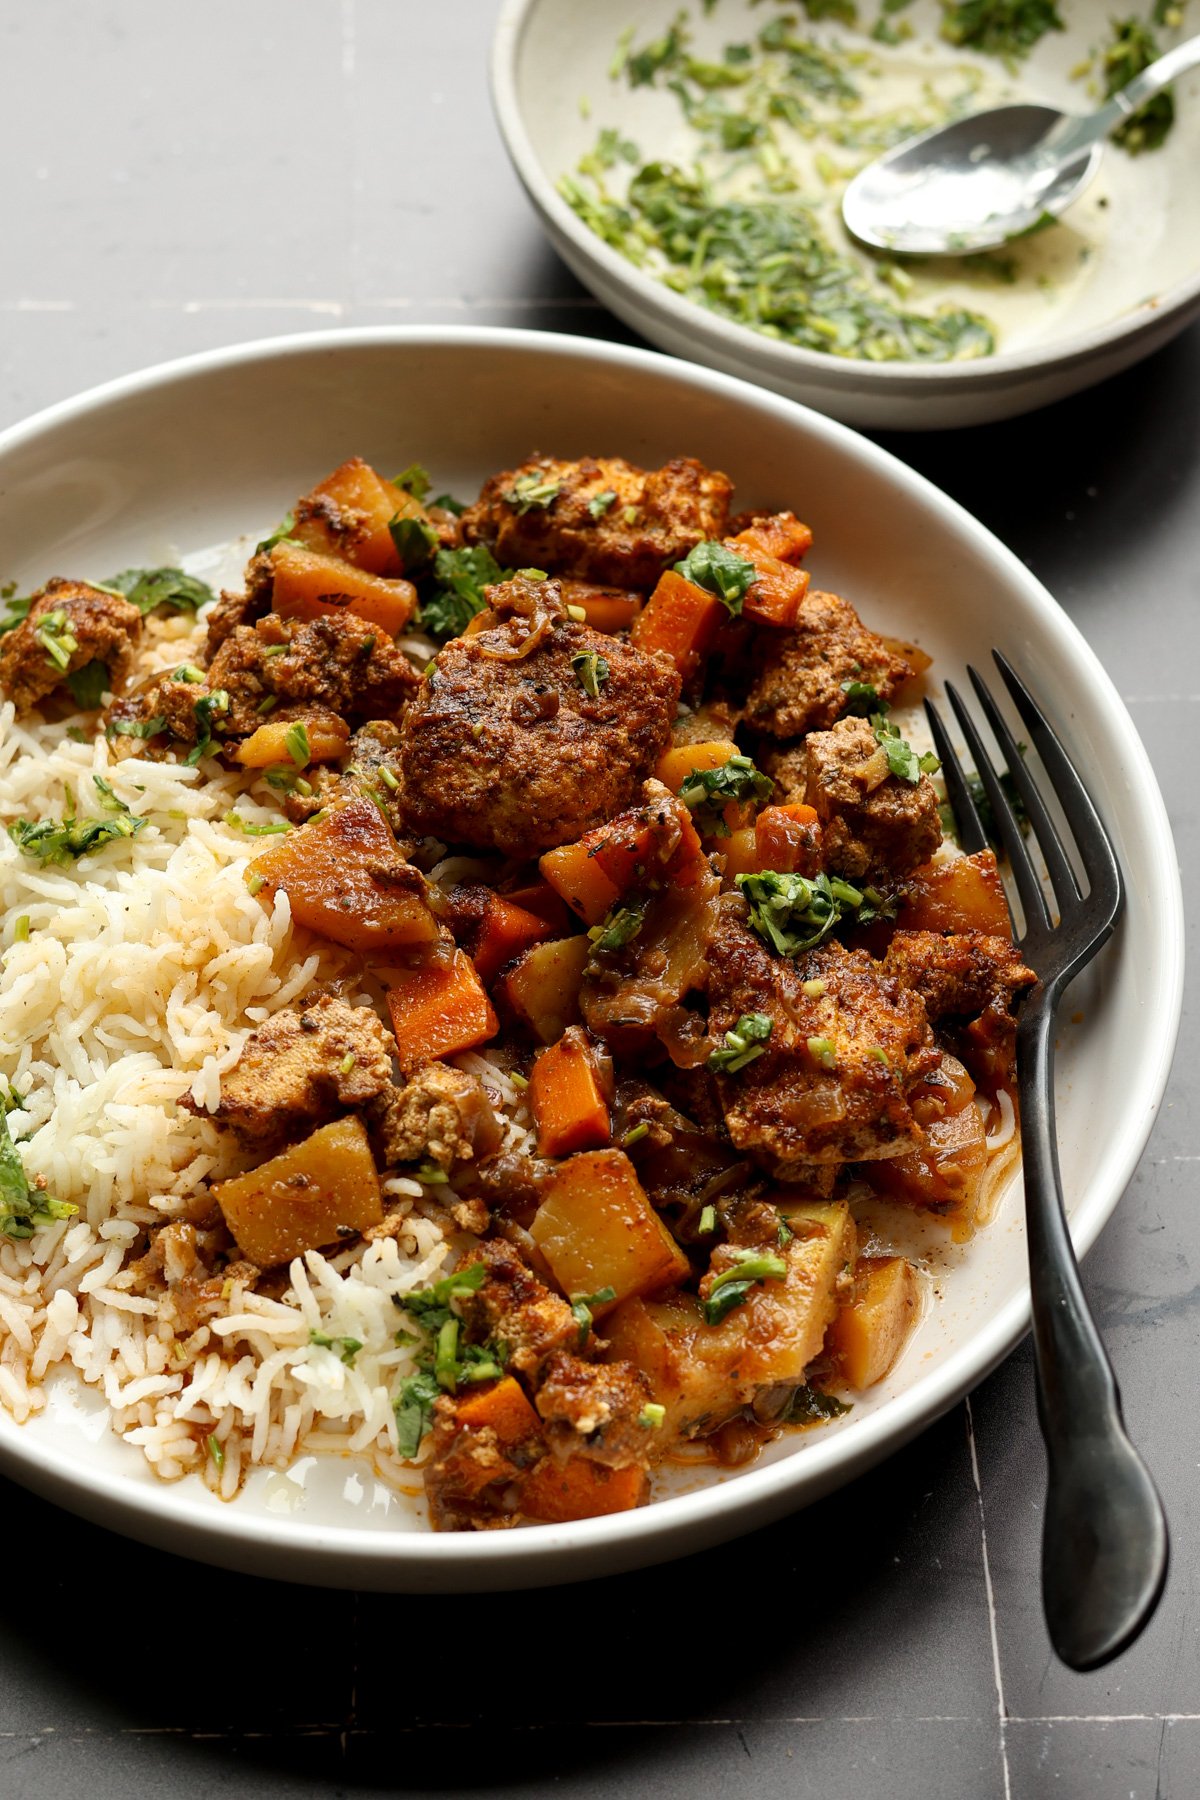
It’s fantastic served with rice, couscous, mashed potatoes or other mashed vegetables, bean purée, some crusty bakery bread, or a side salad.
A simple herb sauce adds a bright, fresh contrast, but you can enjoy it on its own, too. It’s full of amazing flavors with or without. The herb sauce just bumps up the flavor even more.
Why You’ll Love Braised Tofu and Vegetables
1-pan entree that’s perfect for the holiday table
flavorful braised vegetables in caramelized onion sauce
big pieces of crisp, herb-rubbed tofu
naturally gluten-free and nut-free with easy soy-free option
Everyday Indian cooking often relies on one simple trick which is the right masala blend. This homemade Sabji Masala gives that signature North Indian aroma and warmth to everyday vegetable dishes. It is a balanced spice mix that works beautifully in both dry and gravy-based sabzis. The flavors are gentle yet deep, making it ideal...
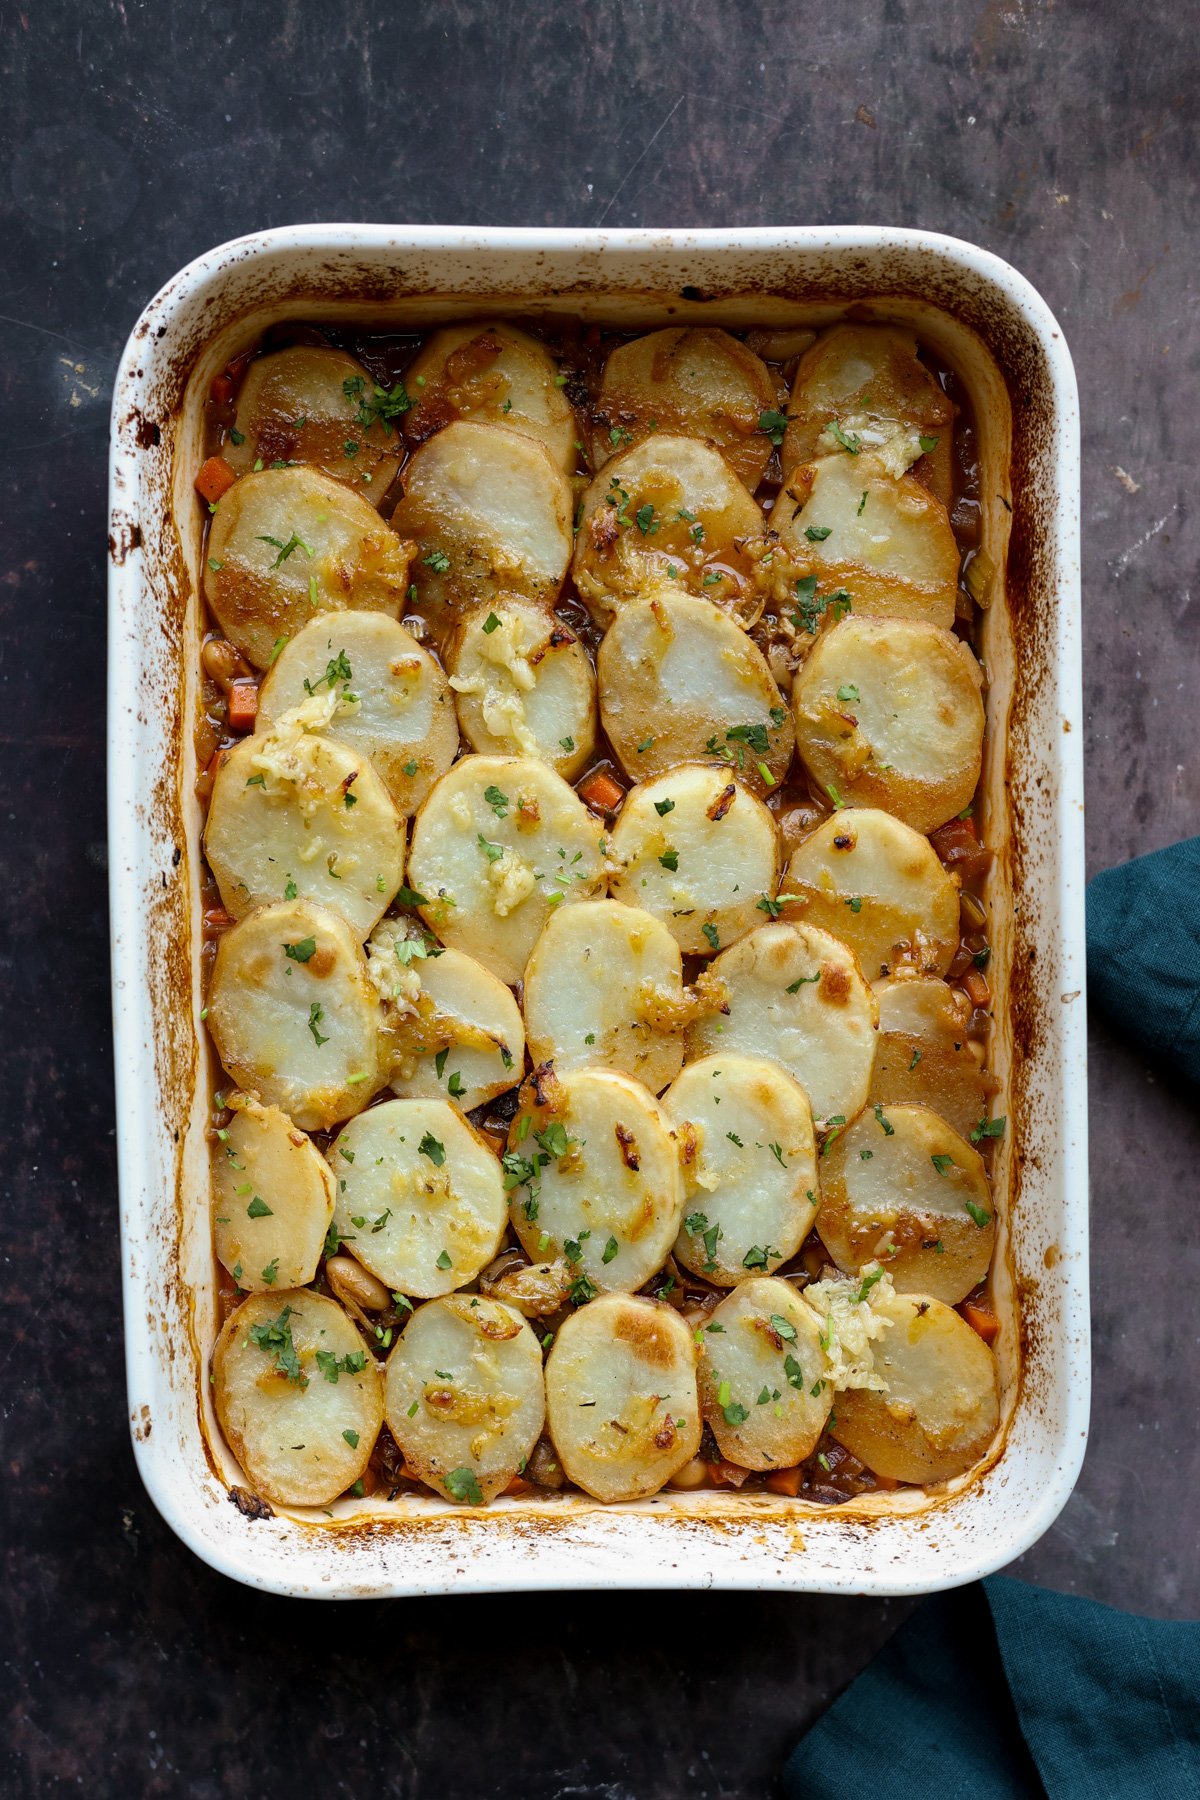
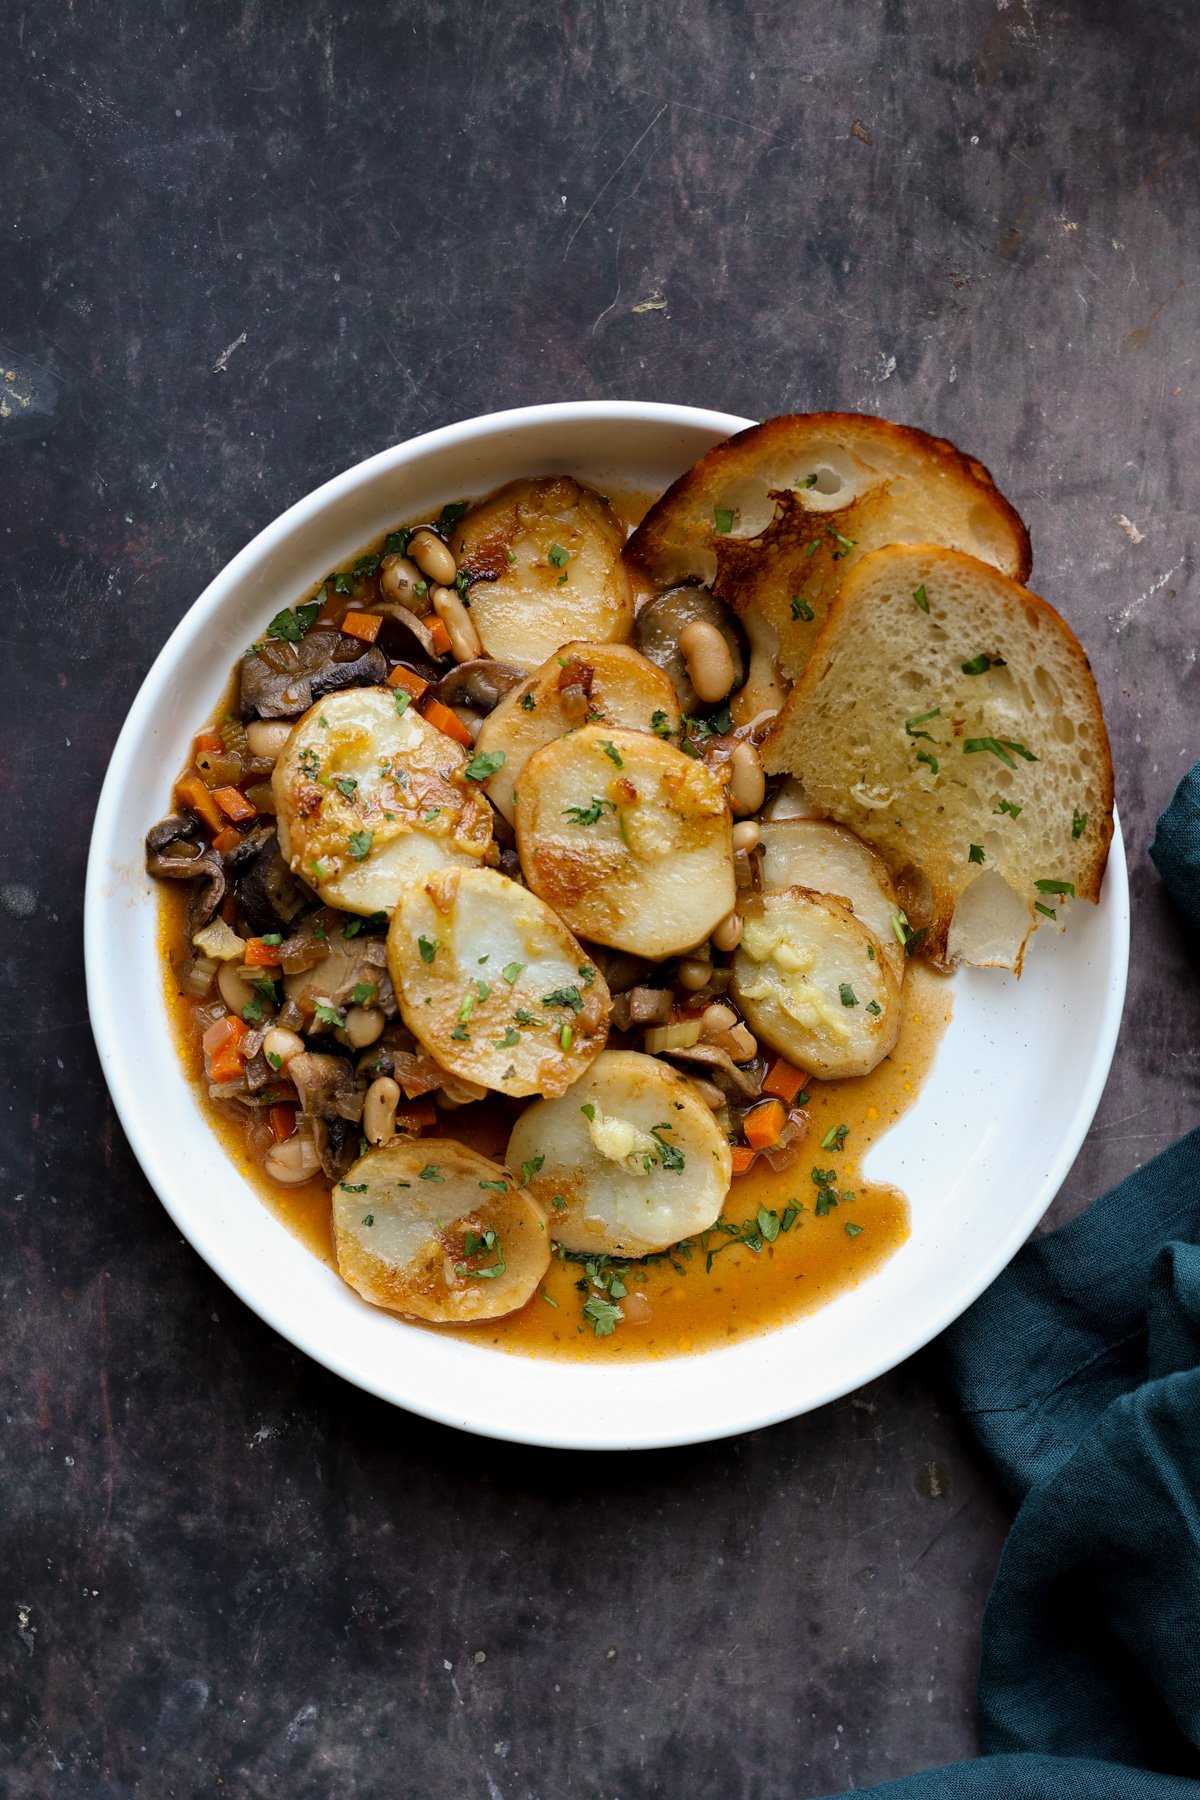
A cozy, hands-off, no sauté mushroom potato casserole that needs just 1 pan. Layers of rich mushroom gravy with beans and veggies, layered with crisp garlic herb potatoes that take only minutes to put together as the oven does all the work. (gluten-free with soy-free and nut-free options)
It’s fall, and it’s time for some comfort food. And what’s more comforting than this casserole, which has a stewy mushroom gravy with beans and veggies, topped with potatoes smothered in garlic butter? There are lots of fall herbs, like fresh thyme and sage, and it all comes together really quickly.
This is a super easy one-pan casserole. No need to sauté or stand around the kitchen for long periods of time cooking the onions and mushrooms. Everything goes right into the baking dish, and the oven does all the work.
Once the mushroom and onions are cooked, add the beans, herbs and stew ingredients and top them with some sliced potato and bake, and thats it. You get all the fall flavors and a dish that reminds of mashed potatoes and mushroom bourguignon w/o all the work.
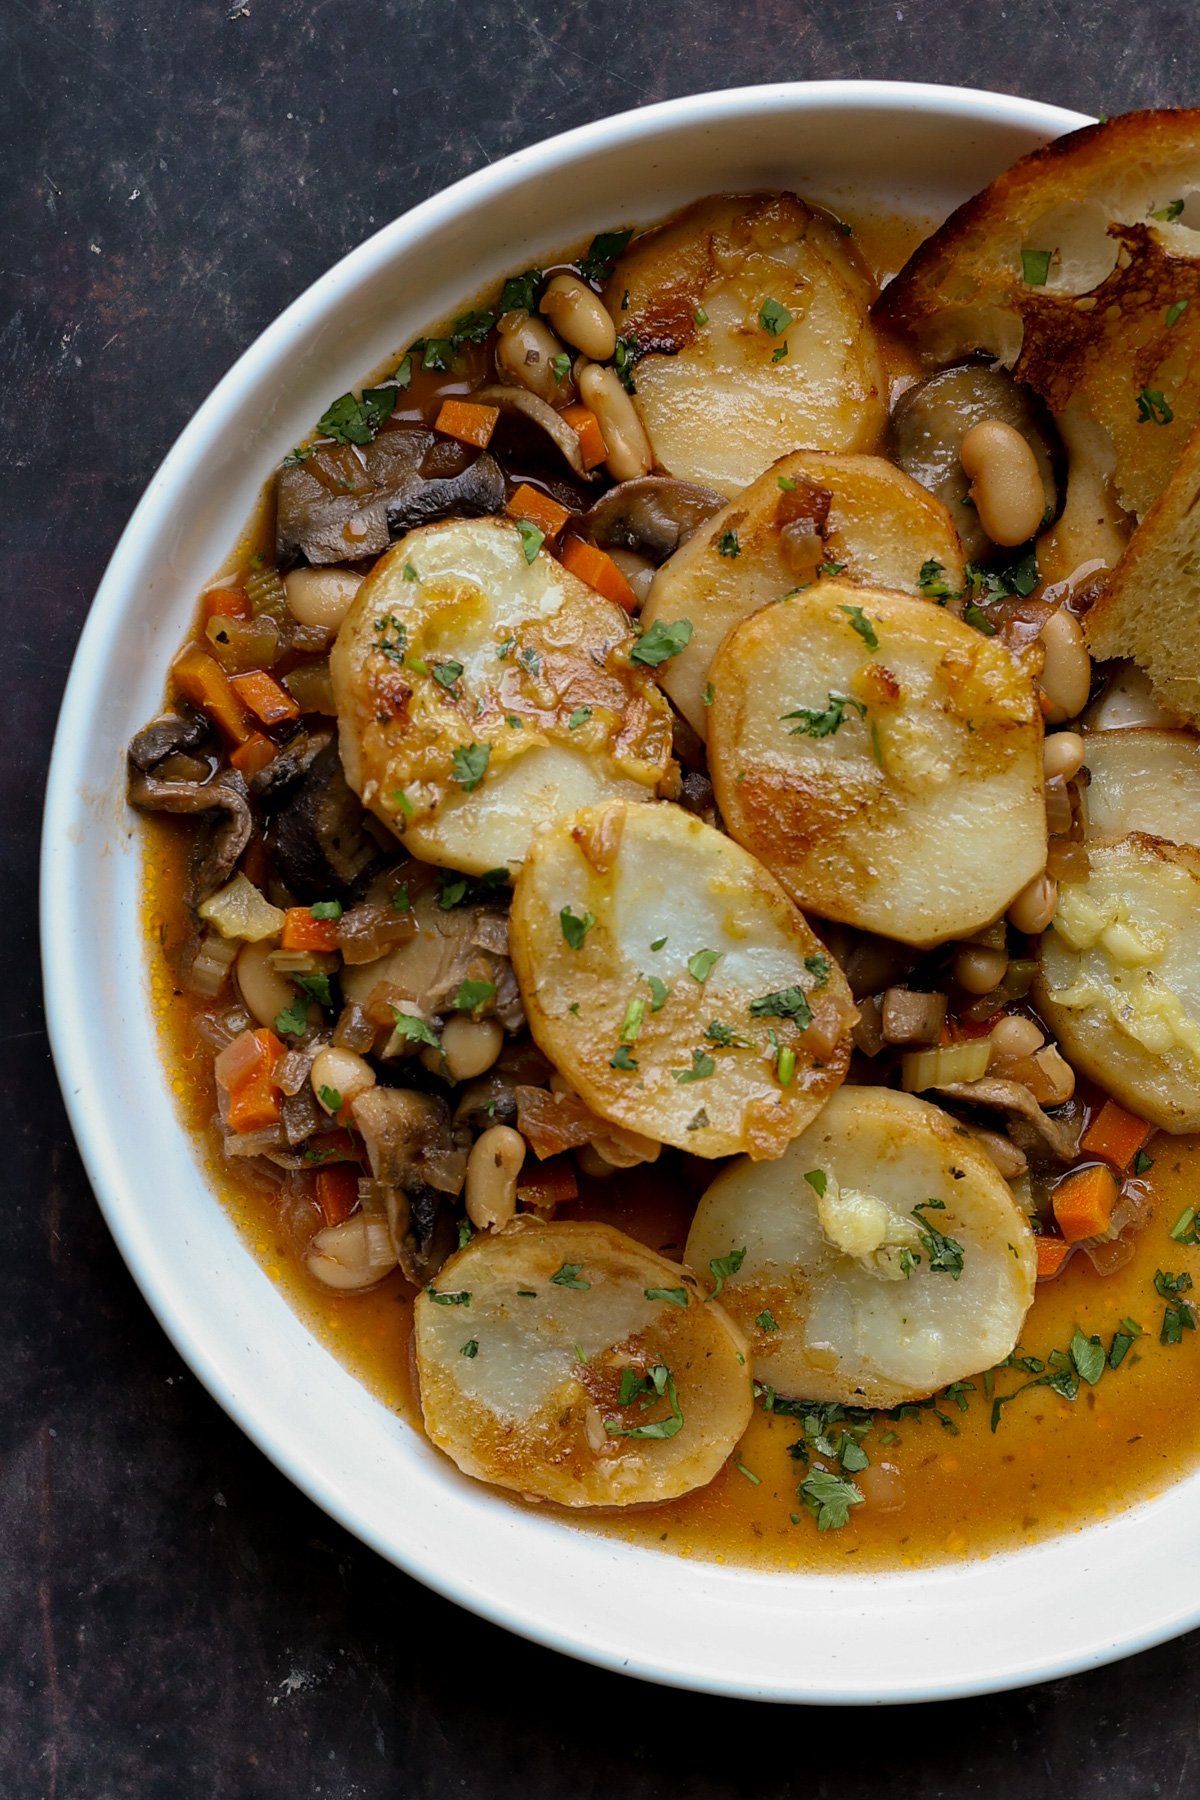
It’s comforting, stewy, and perfect for a fall dinner with your family, served with a side salad, garlicky dinner rolls, or some crusty bakery bread. Or serve it however else you like!
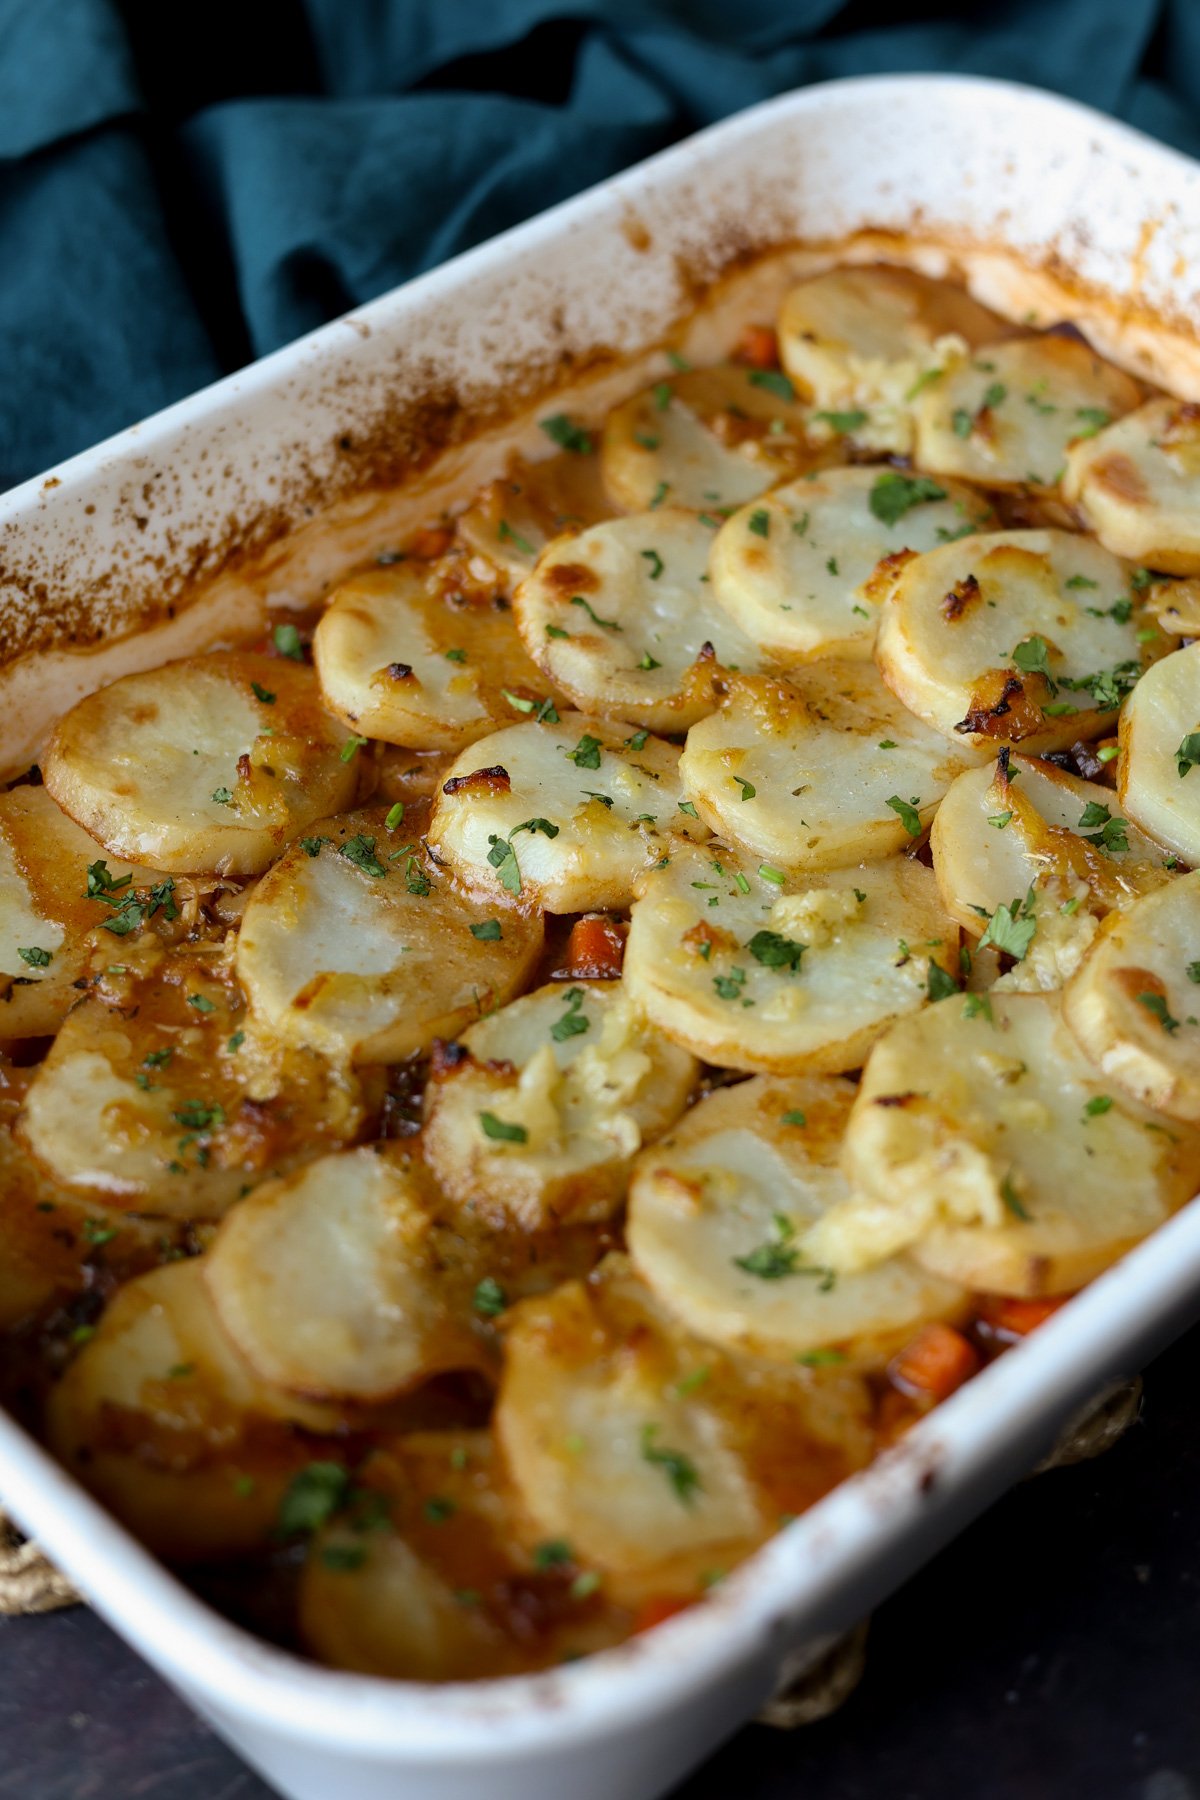
Why You’ll Love Mushroom Potato Casserole
cozy, hearty, stewy beans and veggies in a rich, mushroom gravy
1-pan oven recipe, no standing at the stove!
very little active cooking time
No cooking the aromatics and potato separately
naturally nut-free with easy gluten-free and soy-free options
Onion Samosa is a small, crispy fried snack filled with a spiced onion and poha (flattened rice) mixture. It’s popular in Mumbai, Pune and Hyderabad, especially in Irani cafés and some select snack cafés, where it’s also called Irani Samosa, Patti Samosa, or Chota Samosa (meaning small samosa). These triangular samosas have a light, crunchy texture and a mildly...
Glistening diyas, sparkling fairy lights, sweets and snacks that glitter the eyes and soul, and joy all around – this is the Diwali festival in India. Popular under the sobriquet ‘festival of lights,’ Diwali in 2025, falls on October 20. Since the festivities also mean the most delicious Diwali Sweets, both sweet and savory, I...
Paneer Butter Masala is one of the most loved paneer curries, both in restaurants and Indian homes. I’ve been making this recipe for years, refining it until it became a family favorite. This restaurant-style curry is creamy, lightly spiced, and always a hit. With my step-by-step photos and video, you’ll see how easy it is...