If you are not pleased with the chilly winter, this high protein vegan tofu noodle soup might change your mind after you try this! The warm, savory and fulfilling tofu noodle soup is the best of winter that you can pamper yourself with!
In my quest to find light dinners, soups & stews are on top of my list of preferred dishes and I keep hunting for hearty soup recipes which are not only delicious but also season-appropriate!
Hence comes my high protein vegan tofu noodle soup which is only the perfect 10 on 10 soup in itself but also the most relevant soup for the season!
Winter doesn’t mean boring & bland soups which only warm you up with the hot broth; the winter special soups must also be hearty, filling and work as one-pot meals!
Which is exactly what my tofu noodle soup does!
What is Vegan Tofu Noodle Soup?
This high protein tofu noodle soup is a vegan dish made with all plant-based ingredients while being high in protein from the best source of plant-based protein that is none other than tofu!
The broth of the tofu noodle soup is light yet filling with a savory & umami-rich flavor. I made the broth of my soup lightly creamy by adding coconut milk as we love its flavor.
This tofu noodle soup is also packed with winter fresh veggies which makes it a one-pot meal giving you the best of both worlds - good protein and loads of fiber!
If you think vegetarian food is boring, this viral Mapo Tofu Udon will change your mind instantly. This dish proves that plant-based meals can be bold, spicy, comforting, and full of flavour. With soft tofu sauce, chewy udon noodles, and chilli-based mushroom topping, this vegetarian bowl is just as satisfying as any meat-based dish. Mapo...
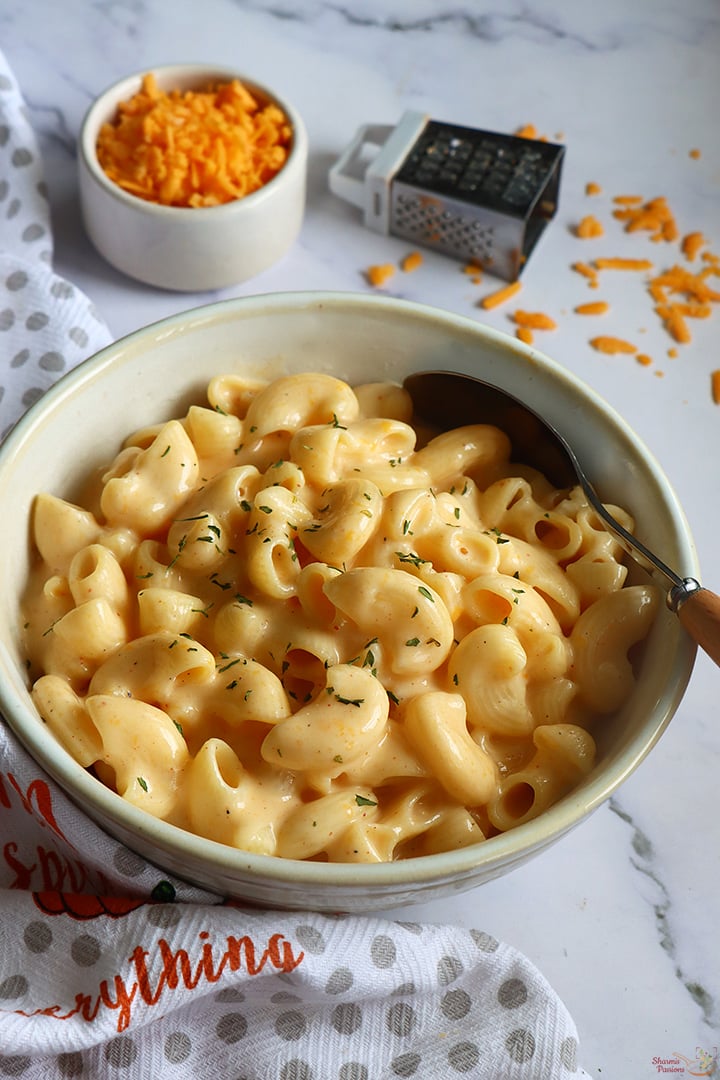
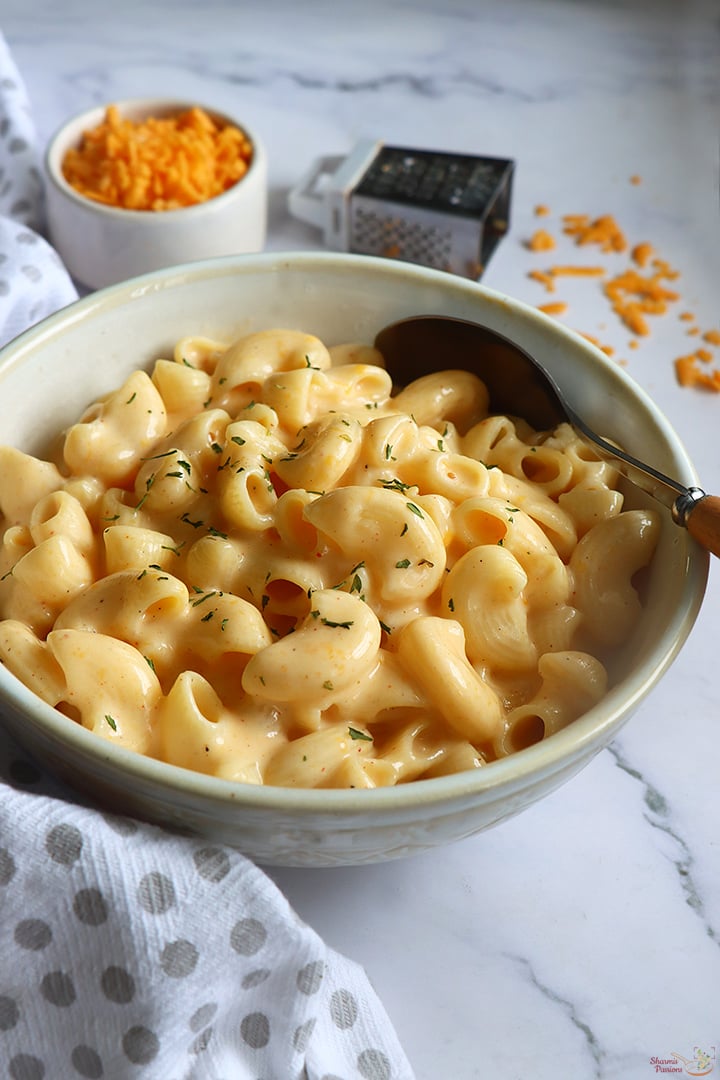
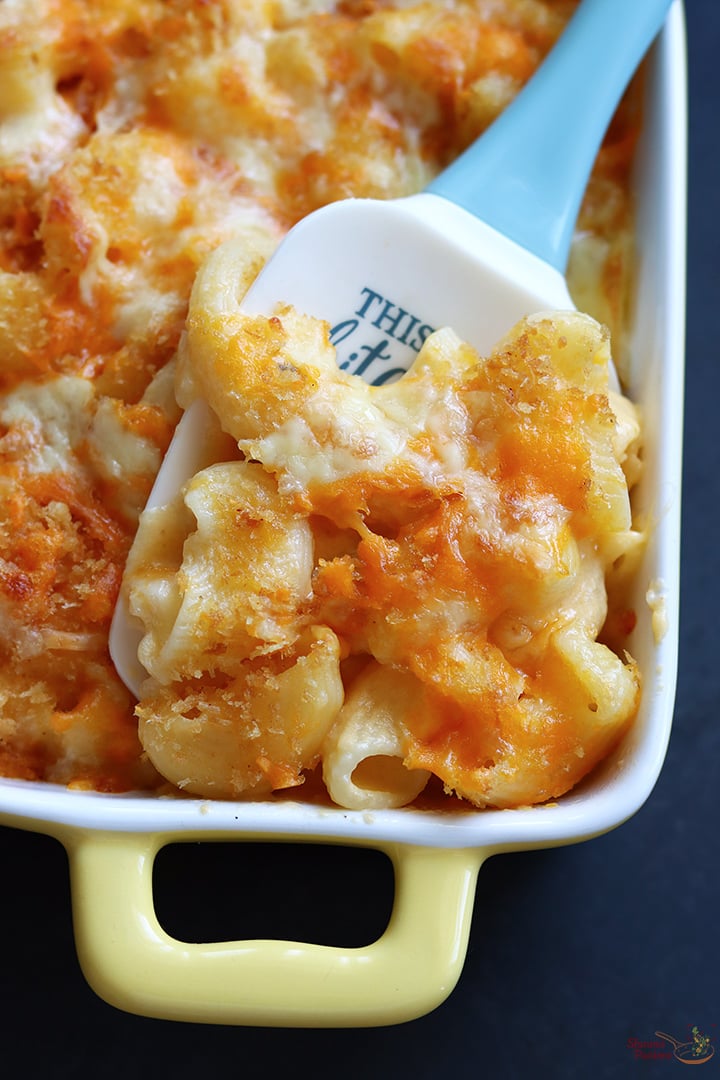
Mac and Cheese is a creamy, cheesy pasta made by cooking pasta then tossing it in a creamy cheese sauce. Macaroni and Cheese is a quick, easy pasta dish which will be loved by all. Macaroni and Cheese is popular all around the world and this recipe is a must try for its ease and taste. Recipe included with step by step pictures and video.
This Mac and Cheese is very simple and easy to make. Stove top Macaroni and Cheese uses staple ingredients in your pantry and comes together very quickly. This is a perfect dish if you are looking for special weekend dinner. It is a popular quick fix meal for kids.
[feast_advanced_jump_to]
About Mac and Cheese
Macaroni is a type of pasta and cheese is loaded in this dish hence the name Mac and Cheese. Macaroni and Cheese is popularly known as Mac and Cheese. This recipe is made from scratch and tastes so delicious. You can see how quick and easy it comes together.
Mac and Cheese is made by first cooking pasta then tossing it a rich creamy milk based cheesy sauce. A different combination of cheese is used for this recipe but I have given alternates for cheese varieties which can be easily found in supermarkets.
Mac and cheese is quick and easy to make once you know how to make the sauce perfectly. It is really no rocket science just you need to note down the tips and trick to make the creamy cheese sauce.
Mac and Cheese is made using a milk and cheese based white sauce. This is more like our regular white sauce pasta minus vegetables and loaded with cheesy goodness that kids will love it for sure.
Mac and cheese can be made in stove or baked. I have a separate recipe for baked mac and cheese, you can check that too if you are interested.
Cheese
Cheddar Cheese is one of the main ingredient used here. The Classic Mac and Cheese uses a special variety of cheddar cheese which is orange in color which isnt readily available everywhere but you can use regukar Cheddar itself. I was fortunate enough to find orange cheddar cheese here in Coimbatore.
Cheddar cheese is the main ingredient here so you can either use regular white cheddar cheese or orange cheddar cheese. The other cheese can be a combination of either mozarella or processed or gouda cheese.
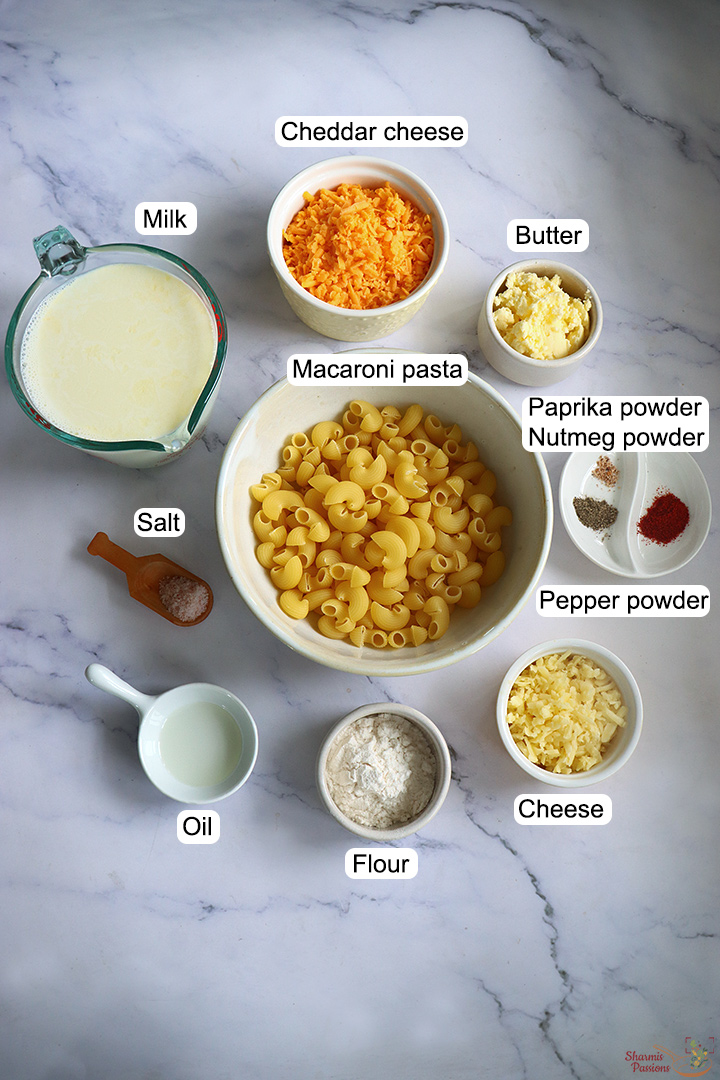
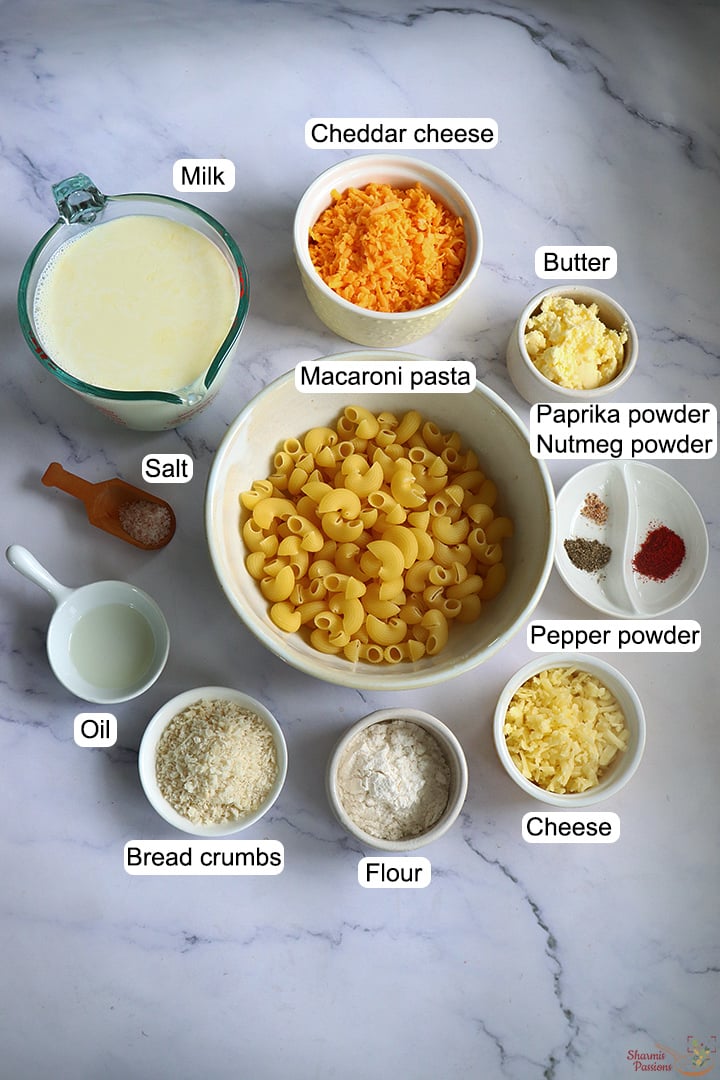
Mac and Cheese Ingredients
Macaroni Pasta - Macaroni Pasta variety is preferred for this recipe and I would suggest to stick with it. However you can use any small variety pasta.
Milk - Use full cream milk for a creamy rich sauce.
Cheese - Cheddar cheese is the main ingredient here, in addition you can add processed or mozarella cheese.
Flour - Usually maida is used but you can replace it with wheat flour too.
Spices - Nutmeg, paprika and pepper powder are used here.
1.Bring 4 cups water to boil in a large pot. Get ready with all other ingredients.When water starts to boil add 1 teaspoon olive oil along with salt.
2. Let it boil well.
3.Add 1 heaped cup macaroni pasta variety.
4.Give a quick mix.
5.Cook until fork tender. It may take 5-6 mins depending upon the pasta variety and size. Reserve ½ cup pasta cooked water for later use.
6.Drain water and Set aside.
7.Rinse it with cold water to prevent further cooking. Set it aside.
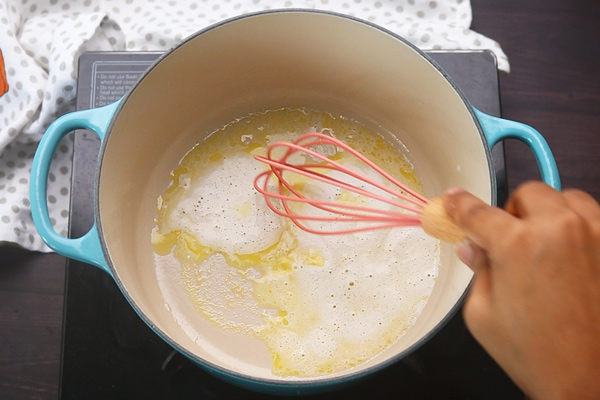
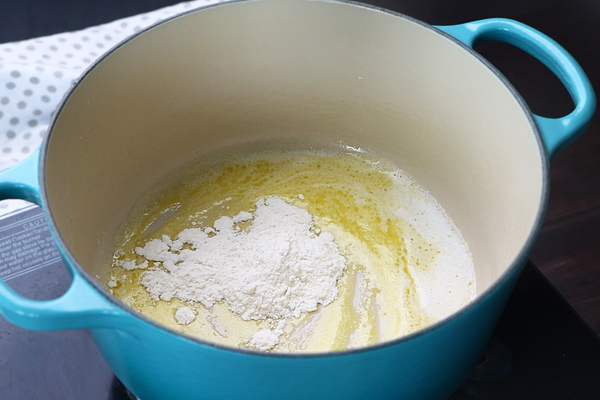
8.Keep the flame in low. Now to a heavy bottomed pot add 2 tablespoon butter, let it melt slightly - give a quick whisk.
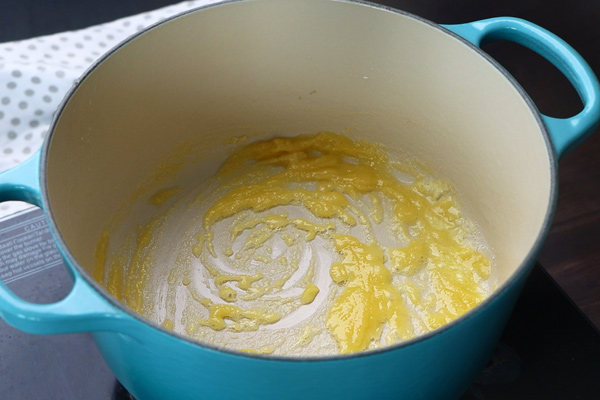
9.Add 2 tablespoon flour.
10.Whisk quickly until no dry flour is seen.
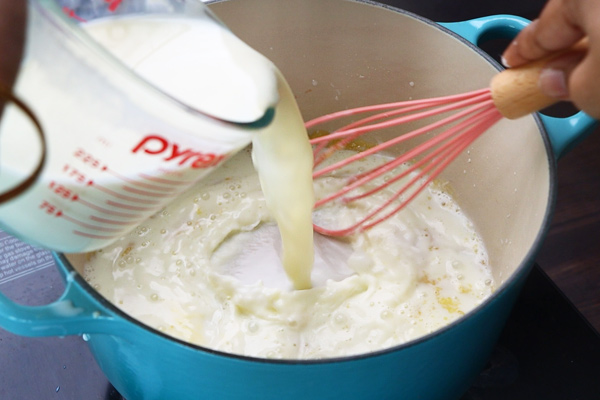
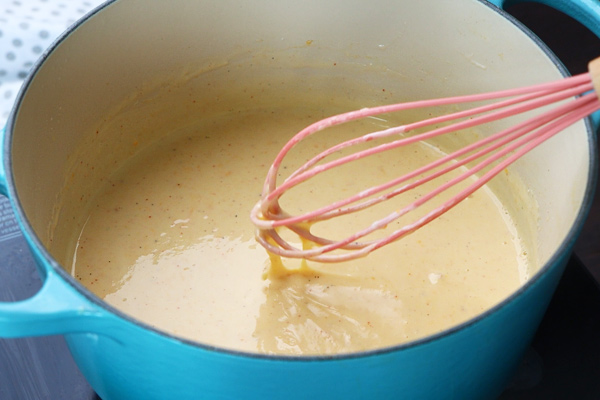
11.Immediately add 2 cups milk(boiled, cooled).
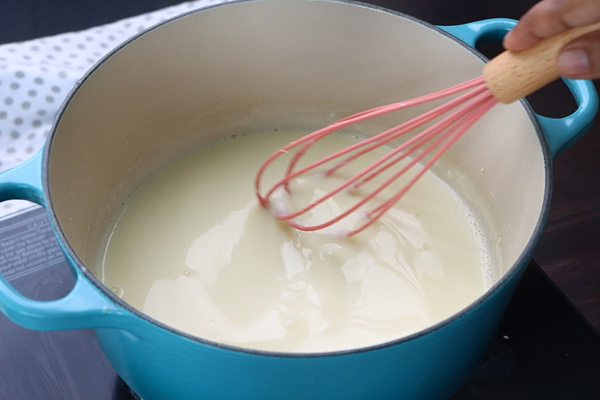
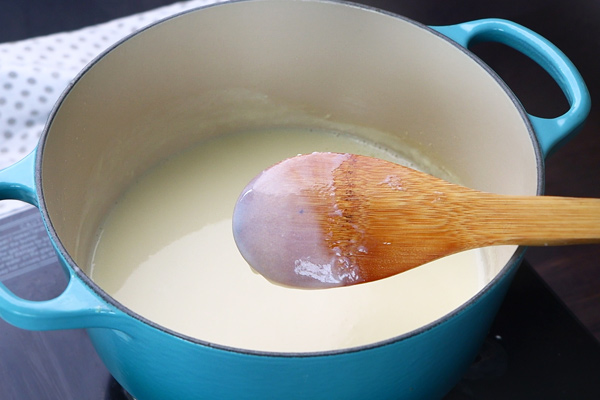
12.Keep whisking and stirring. Once it starts to thicken switch to a spatula.
13.Keep stirring continuously to avoid lumps. In few minutes it turns slightly thick coating the ladle.
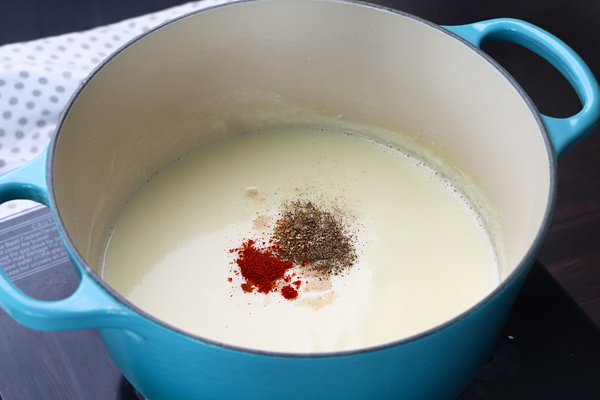
14.Now add salt to taste, ¼ teaspoon pepper powder, ½ teaspoon paprika powder and a pinch of nutmeg powder.
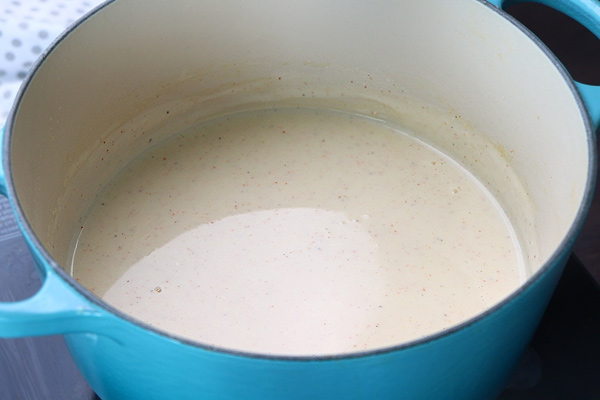
15.Mix it well.
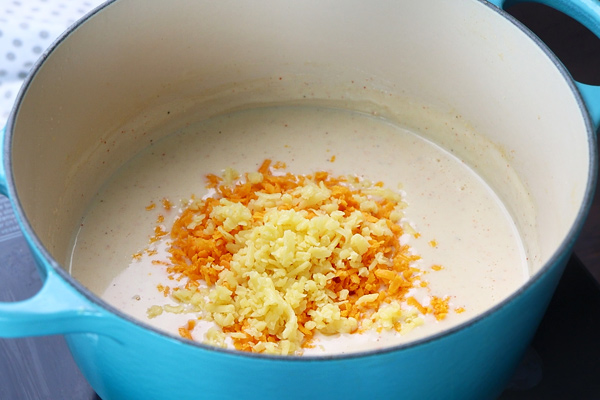
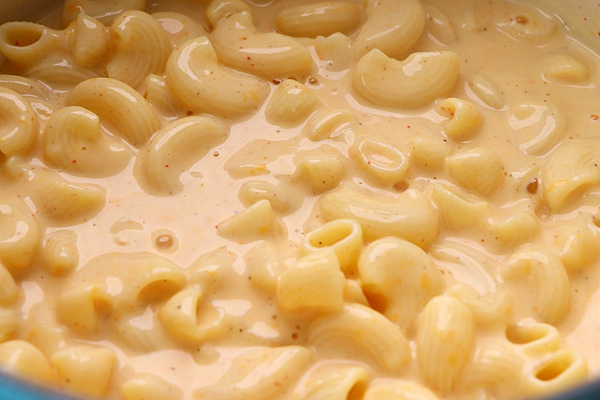
16.Now add grated 1 cup orange cheddar cheese and ½ cup processed or mozarella cheese - I used processed cheese.
17.Whisk well until cheese melts and it is smooth and creamy.
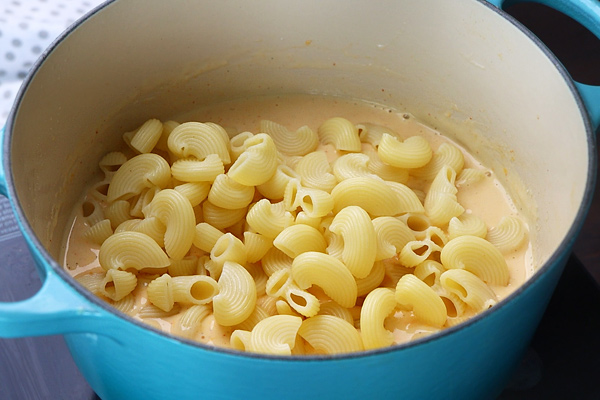
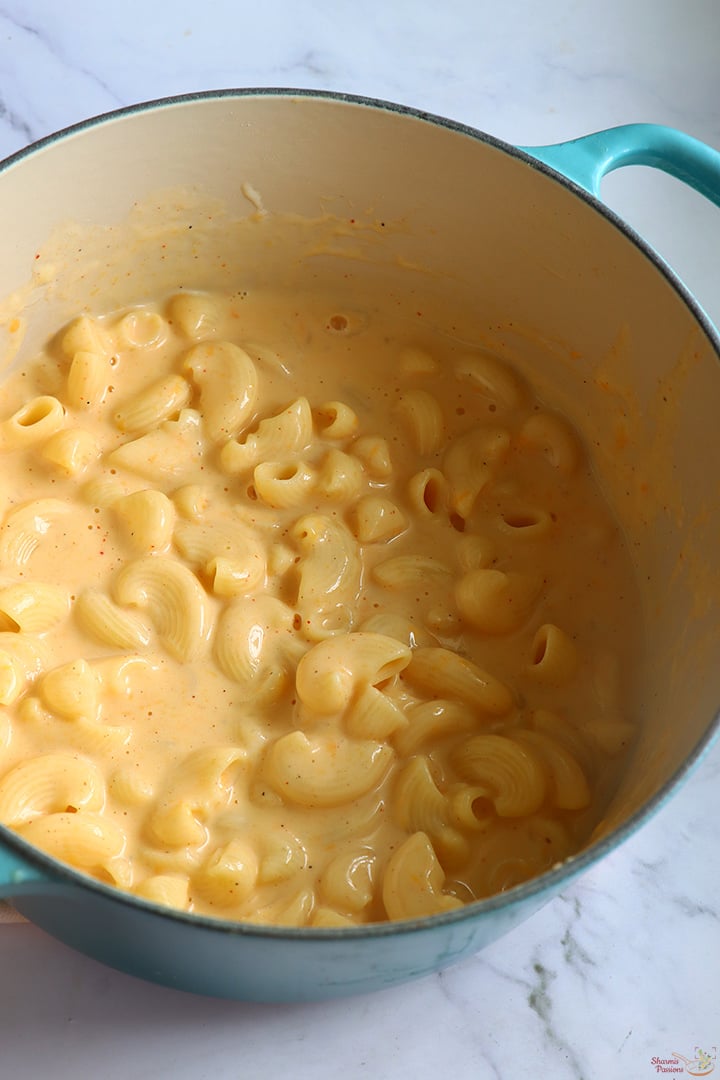
18.Add cooked macaroni pasta.
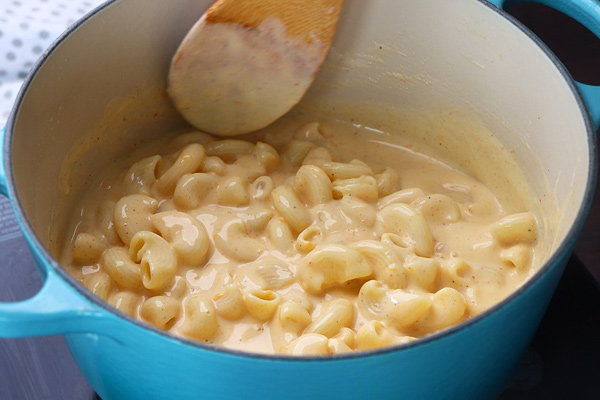
19.Mix it well. Let it be goey only then while baking it will not get dried up.
20.Mac and Cheese is ready to serve as such too. But we are making baked version so lets proceed to below steps.
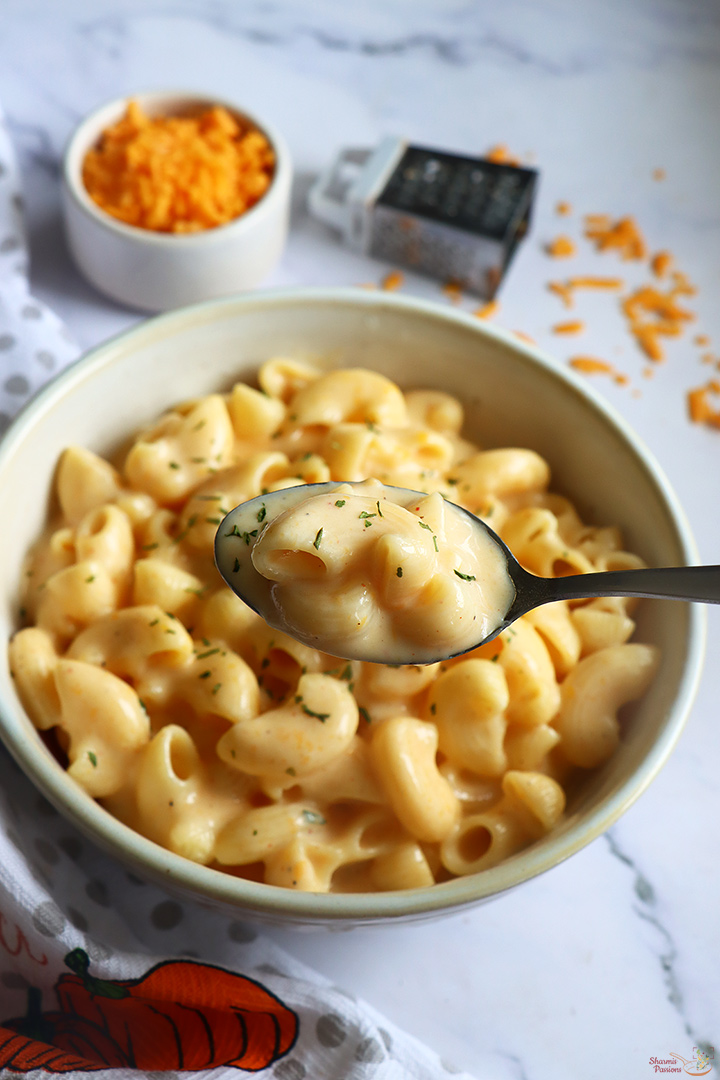
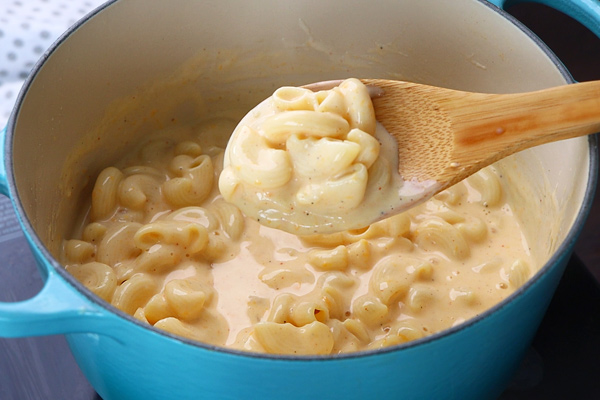
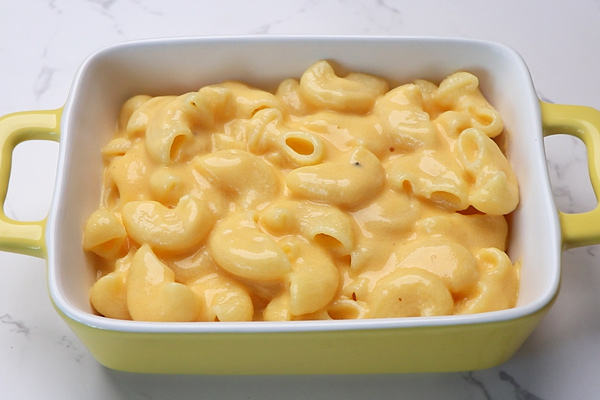
21.See how creamy and goey it is. Set aside.
Enjoy hot!
Expert Tips
Pasta - Macaroni pasta is best suited for this recipe. However you can use other varieties of pasta too.
Milk - Use farm fresh full cream milk. Use boiled warm milk, I would not recommend using raw milk.
Cheese - You can use a combination of cheese. Make sure to buy a block, grate it and then use to ensure that the cheese melts properly.
Adding cheese - Simmer and then add cheese. Whisk continuously when adding milk to avoid lumps.
Flame - Cook in low medium flame so that cheese melts and does not get burnt.
Serving - Always serve hot and immediately from stove. The taste changes once it cools down.
Serving & Storage
Serve it hot with toasted bread or it tastes great as such too. I wouldn't recommend to store as it tastes great when hot also the consistency of mac and cheese changes when cooled or stored. So always Serve hot!
FAQS
1.What is Mac and Cheese?
Macaroni is a type of pasta and cheese is loaded in this dish hence the name Mac and Cheese. Mac and Cheese is a creamy, cheesy pasta made by cooking pasta then tossing it in a milk and cheese sauce.
2.What is the best cheese to use for Mac and Cheese?
Cheddar cheese is a must for this recipe. It is ok to use yellow cheddar cheese if you don't get orange cheddar cheese. In addition use a combination of gowda cheese, mozarella cheese and processed cheese.
3.Why does my cheese sauce turn grainy?
This happens when pre-shredded cheese is used which has additives or when heat is high. Make sure to use freshly grated cheese and cook in low medium flame to avoid it.
4. Can I make mac and cheese without flour?
Yes. You can make a one-pot mac and cheese where pasta starch thickens the sauce. You can even use cream + cheese for making a thick sauce.
5.Can I bake mac and cheese after cooking it?
Yes. Transfer cooked mac and cheese to a baking dish, top with breadcrumbs and cheese, and bake at 190°C for 25-30 minutes.
If you have any more questions about this Mac and Cheese Recipe do mail me at sharmispassions@gmail.com. In addition, follow me on Instagram, Facebook, Pinterest, Youtube and Twitter .
Tried this Mac and Cheese Recipe? Do let me know how you liked it. Also tag us on Instagram @sharmispassions and hash tag it on #sharmispassions.
Mac and Cheese is a creamy, cheesy pasta made by cooking pasta then tossing it in a creamy cheese sauce. Macaroni and Cheese is a quick, easy pasta dish which will be loved by all. Macaroni and Cheese is popular all around the world and this recipe is a must try for its ease and taste. Recipe included with step by step pictures and video.
Course Breakfast, dinner, Lunch, Main Course
Cuisine Indian, Italian
Keyword 30 mins recipes, easy pasta recipes, macaroni recipes, pasta, pasta recipes, penne pasta recipes
Baked Mac and Cheese is a classic and comforting pasta best anytime and popular during Thanks Giving and Christmas. My baked mac and cheese recipe is creamy, cheesy with a buttery crisp topping and goey cheese. Recipe includes how to video and step by step pictures with instructions, stove top method also given.
Baked Mac and Cheese is our family favourite loved by both the kids and hubby. When I was browsing through pasta recipes, I found this Baked Mac and Cheese Recipe quite interesting and started trying. Since then this has been in our regular menu at least once a month.
[feast_advanced_jump_to]
About Baked Mac and Cheese
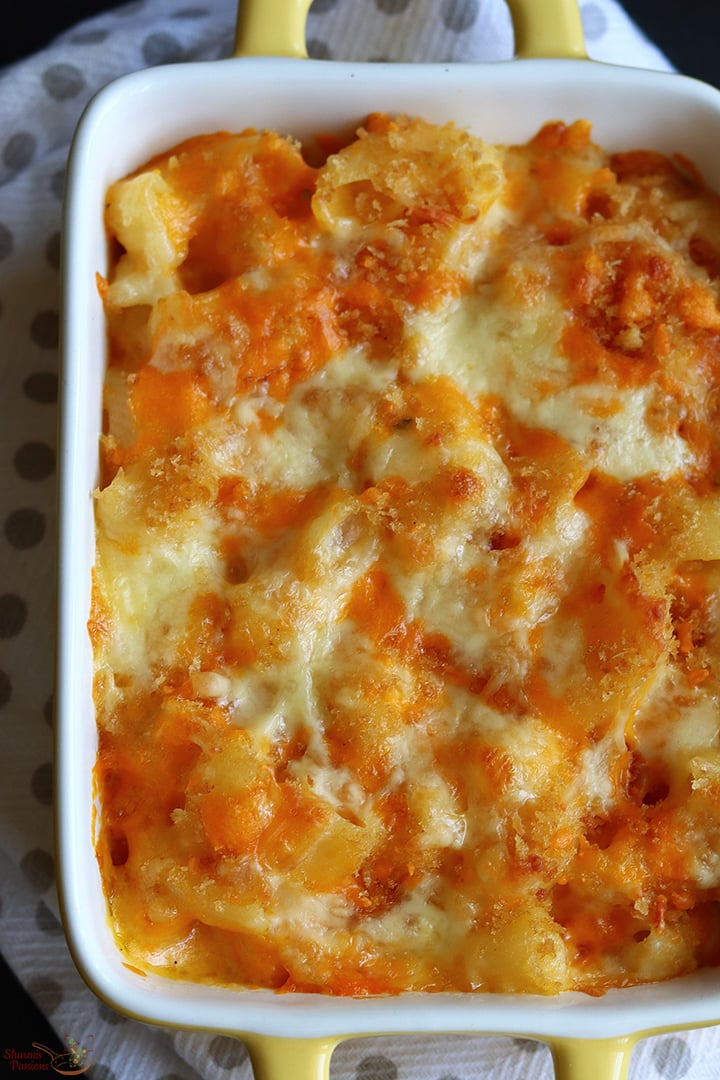
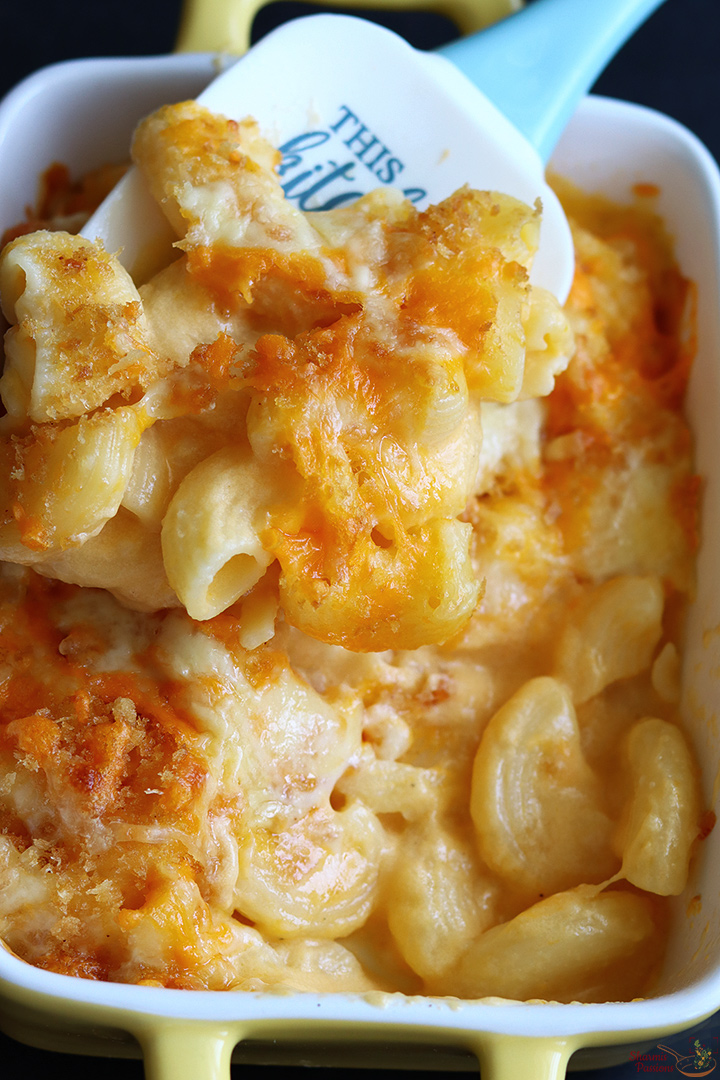
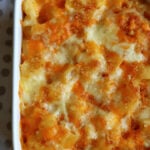
Mac and Cheese is made by first cooking pasta then tossing it a rich creamy cheesy white sauce finally layered in a baking tray topped with cheese and breadcrumbs and baked. We totally loved it as it had a crusty top from the breadcrumbs with a soft cheesy pasta - total yum.
My family loves all types of pasta and white sauce pasta is their favorite. Me being the odd man out in the family as I am not fond of pasta at all but would love to make for them. This is extra cheesy with a buttery crisp panko topping this tastes out of the world.
I would recommend having it as a brunch (skip a meal) so that you dont feel guilty of having the cheesy pasta. But guess a day of cheesy indulgence is ok to go what say?! I have given notes for stove top version also for those who want to make it without an oven.
Baked Mac and Cheese is a cheesy goodness perfect for a special dinner or holiday. There are many Mac and Cheese recipes out there but this one is our family favourite. It serves best as such but you can serve it with mashed potatoes, green bean casserole or just a crisp toast.
First when I tried I used a combination of regular cheddar cheese and mozarella cheese. But now when I wanted to shoot a video, I wanted to create a classic recipe which uses orange cheddar cheese as main ingredient. And you know it isn't easy to find this orange cheddar cheese here in my place but luckily one day hubby found it at the supermarket and there was no looking back since then.
Baked Mac and Cheese Video
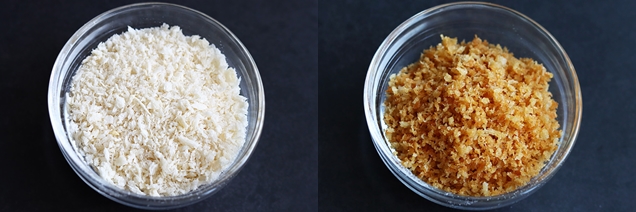
Breadcrumbs
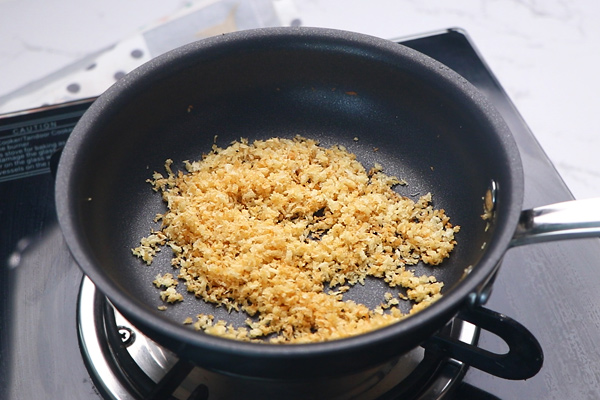
You can use regular breadcrumbs too but panko breadcrumbs works best. This is before and after shots of toasting the breadcrumbs. Toasting the breadcrumbs in butter adds taste and extra crisp texture.
Cheese to use
Cheddar cheese is the main ingredient here so you can either use regular white cheddar cheese or orange cheddar cheese. The other cheese can be a combination of either mozarella or processed or gouda cheese.
Baked vs StoveTop
Baked Mac and Cheese has a crusted crispy top with a goey mac and cheese inside. With Stovetop version you will miss the crusty top otherwise taste will be the same.
For stove-top version check step 28.
Baked Macaroni and Cheese Ingredients
Macaroni Pasta - Macaroni Pasta variety is preferred for this recipe and I would suggest to stick with it.But if you prefer you can use shell type or any small variety pasta.
Milk - Use full cream milk for a creamy rich sauce.
Cheese - Cheddar cheese is the main ingredient here, in addition you can add processed or mozarella cheese.
Butter - Use fresh butter for best taste. I always use homemade butter.
Flour - Usually white flour is used but you can replace it with wheat flour too.
Breadcrumbs - I used panko breadcrumbs which works best however you can use regular breadcrumbs too.
Spices - Nutmeg, paprika and pepper powder are used here for flavor.
How to make Baked Mac and Cheese Step by Step
1.Bring 4 cups water to boil in a large pot. Get ready with all other ingredients.When water starts to boil add 1 teaspoon oil along with salt.
2. Let it boil well.
3.Add 1 heaped cup macaroni pasta variety.
4.Give a quick mix.
5.Cook until fork tender. It may take 5-6 minutes depending upon the pasta variety and size. Reserve ½ cup pasta cooked water for later use.
6.Drain water and Set aside.
7.Rinse it with cold water to prevent further cooking. Set it aside.
8.Keep the flame in low. Now to a heavy bottomed pot add 2 tablespoon butter, let it melt slightly - give a quick whisk.
9.Add 2 tablespoon flour.
10.Whisk quickly until no dry flour is seen.
11.Immediately add 2 cups milk(boiled, cooled).
12.Keep whisking and stirring. Once it starts to thicken switch to a spatula.
13.Keep stirring continuously to avoid lumps.In few minutes it turns slightly thick coating the ladle.
14.Now add salt to taste, ¼ teaspoon pepper powder, ½ teaspoon paprika powder and a pinch of nutmeg powder.
15.Mix it well.
16.Now add grated 1 cup orange cheddar cheese and ½ cup processed or mozarella cheese - I used processed cheese.
17.Whisk well until cheese melts and it is smooth and creamy.
18.Add cooked macaroni pasta.
19.Mix it well. Let it be goey only then while baking it will not get dried up.
20.Mac and Cheese is ready to serve as such too. But we are making baked version so lets proceed to below steps.
21.See how creamy and goey it is. Set aside. Preheat oven at 190 deg C for 10 minutes.
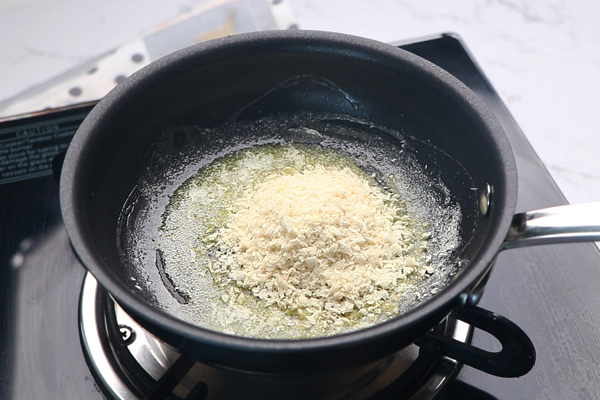
22.To a small pan add 2 tablespoon butter add ¼ cup panko breadcrumbs.
23.Toast it until it turns golden bown in color.Set aside.
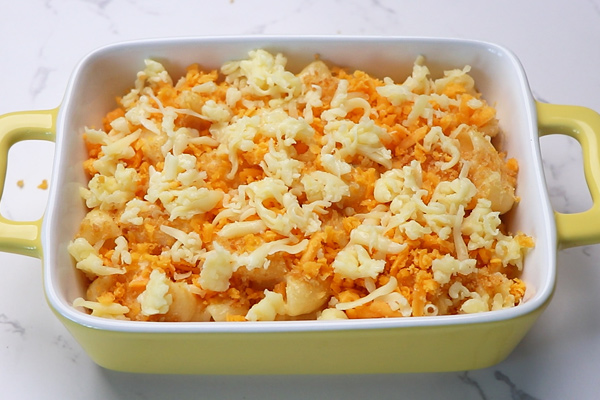
24.Now to a baking tray first spoon the prepared mac and cheese.
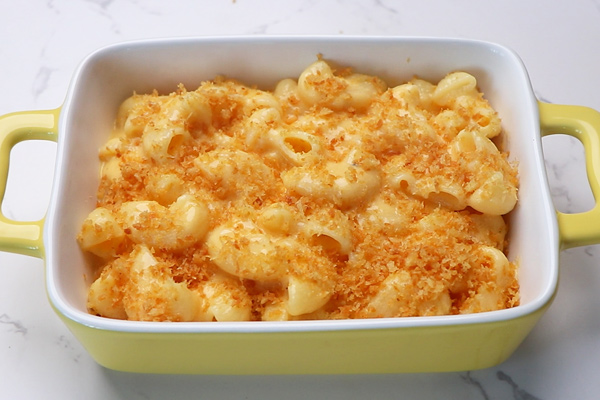
25.Sprinkle toasted breadcrumbs.
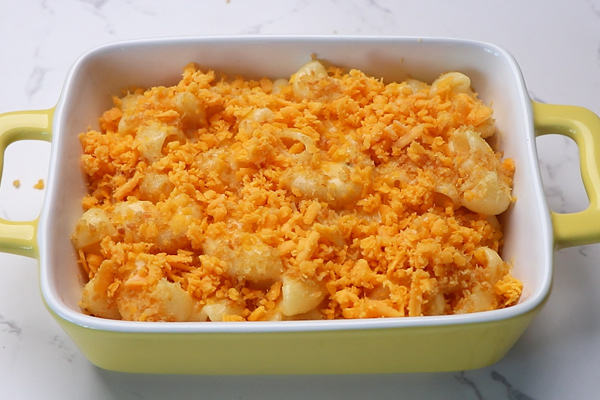
26.Add ¼ cup cheddar cheese.
27.Add 2 tablespoon regular processed cheese.
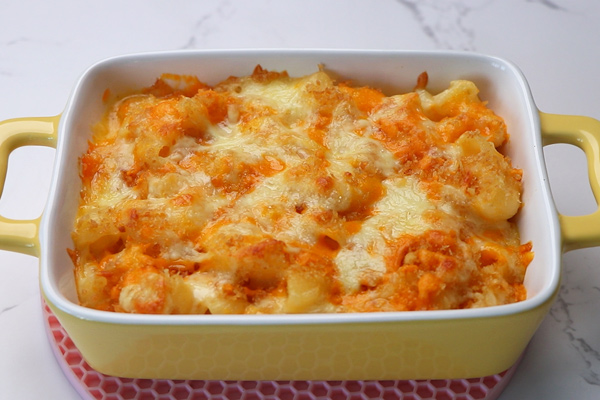
28.Baked in preheated oven at 190 deg C for 30 minutes. Baked Mac and Cheese is ready to serve!
For stove top version add prepared mac and cheese in flame safe bowl then add the toasted breadcrumb, cheese topping and cook in lowest flame for 10 minutes until cheese melts.
Baked Mac and Cheese is ready!
Expert Tips
Pasta - Macaroni pasta is best suited for this recipe. However you can use other varieties of pasta too.
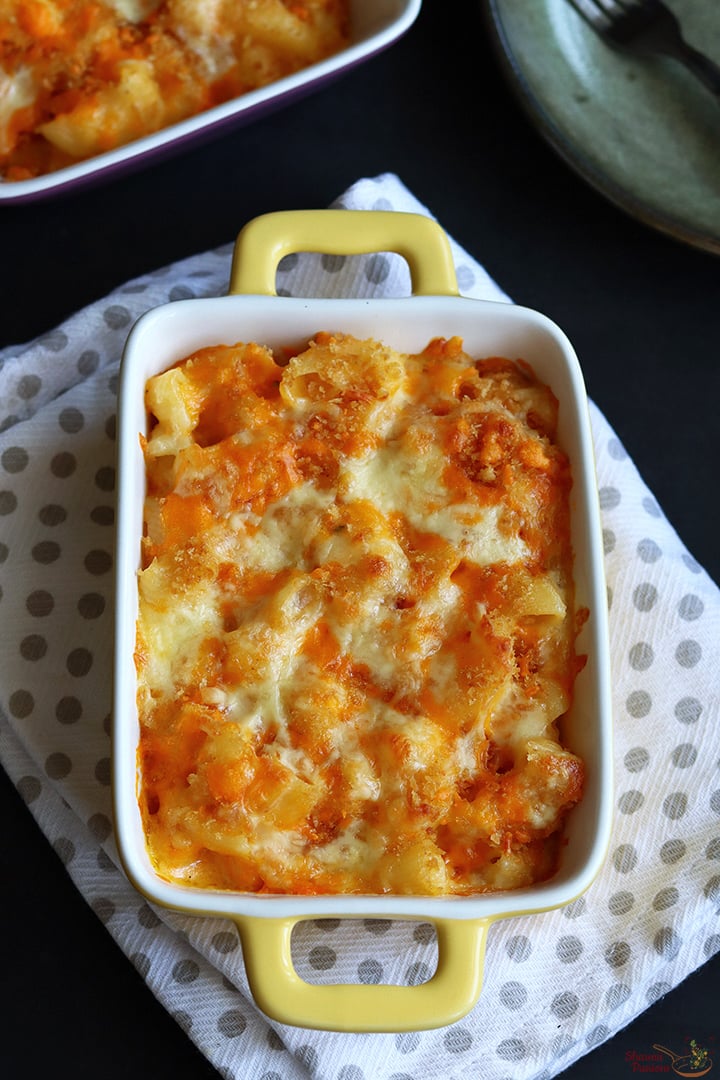
Individual serving - You can even use ramekins to bake for individual serving.I baked in 3 small oven proof trays.
Milk - Use farm fresh full cream milk. Use boiled warm milk, I would not recommend using raw milk.
Cheese - You can use a combination of cheese. Make sure to buy a block, grate it and then use to ensure that the cheese melts properly.
Breadcrumbs - If you do no have panko breadcrumbs you can use regular breadcrumbs too.
Adding cheese - Simmer and then add cheese. Whisk continuously when adding milk to avoid lumps.
Serving & Storage
Serve it hot with toasted bread or it tastes great as such too. I wouldn't recommend to store as it tastes great when hot also the consistency of mac and cheese changes when cooled or stored. So always Serve hot!
FAQS
1.What is the best cheese to use for Mac and Cheese?
Cheddar cheese is a must for this recipe. It is ok to use yellow cheddar cheese if you don't get orange cheddar cheese. In addition use a combination of gowda cheese, mozarella cheese and processed cheese. Using a combination of cheese always works.
2.I dont have a oven, Can I make this Mac and Cheese?
Yes definitely. You can make Mac and Cheese as mentioned then finally add the topping and cook in stovetop for 10 minutes or until the cheese melts.
3.Should I cover the tray while I bake mac and cheese?
I usually don't cover and there is no necessity to cover for this recipe.
4.Can I add other adds-ins like vegetables?
Yes you can add sautéed bell pepper, mushroom, chicken, onion and dried herbs of your choice.
5.How long can I store mac and cheese in fridge?
It keeps well in fridge for 3-5 days in fridge. But it gets easily dried in fridge so make sure to add more sauce if needed while you reheat and serve.
If you have any more questions about this Baked Mac and Cheese Recipe do mail me at sharmispassions@gmail.com. In addition, follow me on Instagram, Facebook, Pinterest, Youtube and Twitter.
Tried this Baked Mac and Cheese Recipe? Do let me know how you liked it. Also tag us on Instagram @sharmispassions and hash tag it on #sharmispassions.
Baked Mac and Cheese is a classic and comforting pasta best anytime and popular during Thanks Giving and Christmas. My baked mac and cheese recipe is creamy, cheesy with a buttery crisp topping and goey cheese. Recipe includes how to video and step by step pictures with instructions, stove top method also given.
Course Breakfast, dinner, Lunch, Main Course
Cuisine Indian, Italian
Keyword 30 mins recipes, easy pasta recipes, macaroni recipes, pasta, pasta recipes, penne pasta recipes
Drunken Noodles, also known as Pad Kee Mao, is a comforting Thai street-style noodle dish. Despite the name, there's no alcohol in the dish. The story goes that it's so spicy and flavour-packed that it's perfect to eat with a cup of cold beer. Learn how to make Authentic drunken noodles vegetarian. Drunken Noodles Drunken noodles...
Bibim-Guksu is a popular cold Korean noodle dish made with very thin wheat noodles called somyeon or Somen noodles with added spice paste, sweetener, sesame oil and Kimchi. It is one of the most popular traditional noodle dishes in Korean cuisine and especially popular during summer. Bibim guksu Cold noodles might be a weird recipe...
Learn how to make delicious Paneer Fried Rice recipe with detailed step by step pictures. Quick, easy and utterly addictive fried rice recipe with Indian cottage cheese! Paneer Fried Rice is a delicious Indo-Chinese recipe that is combines soft, golden-fried paneer with fragrant basmati rice, crunchy vegetables, and a subtle seasoning mix. It is protein...
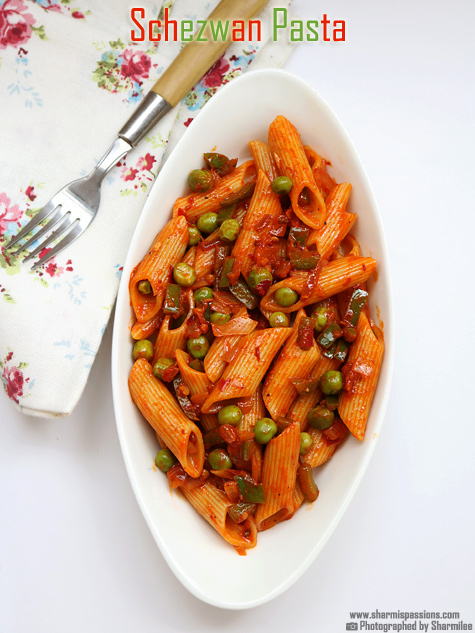
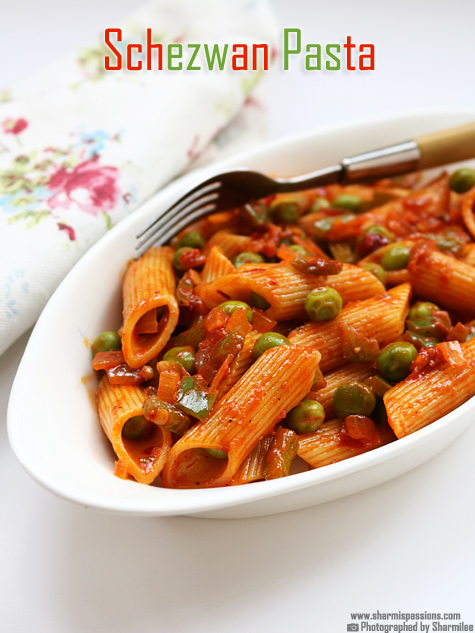
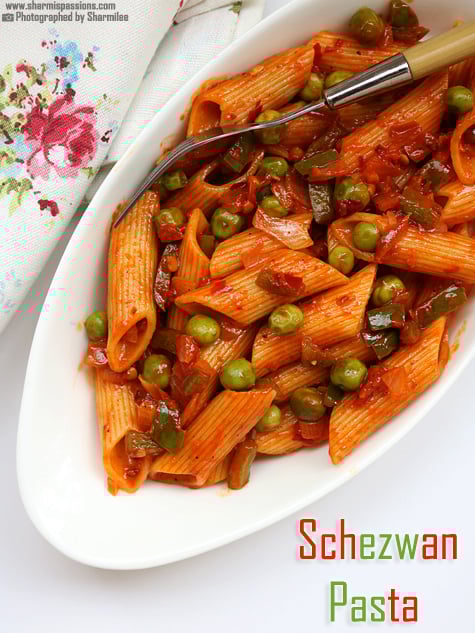
Veg Pasta is a simple but tasty dish made by cooking pasta, vegetables in a spicy Schezwan sauce. It's really a good option for quick lunch or dinner and you can make it with easy ingredients at home. Soft pasta with peas and capsicum mixed in sauce makes it filling but still light at the same time.
It is light and healthy because uses very little oil and you can add vegetables as you like. The sauce gives flavor without making it heavy and little spice can be adjusted as per taste. Veg Pasta is also quick to make so good for busy days or when you want something simple but tasty.
[feast_advanced_jump_to]
About Veg Pasta
Veg Pasta is pasta dish made with boiled pasta, peas, capsicum, onion and schezwan sauce. Its a very simple recipe, does not need fancy ingredients but taste really good and wholesome. Pasta should be cooked soft but still little firm so it mixes well with the sauce and vegetables.
The sauce is little tangy and spicy, it goes very well with sweet peas and crunchy capsicum. You also can add carrot, beans or corn to make it more colorful and healthier. It stays light but also filling, so good for quick meal. It also looks good on plate with colorful vegetables and sauce coating pasta.
Texture is soft with little firmness in pasta and little crunch in vegetables. Herbs and pepper gives small aroma which makes it good to eat. Indo-Chinese style makes it bit different from normal pasta.
I sometimes make on weekend lunch when we are not doing heavy meal. I usually make this pasta when I don't want complicated dishes and want something quick but filling. Kids like it a lot too.
Veg Pasta Ingredients
Pasta - I have used penne here. It cooks soft but still holds shape. You can use macaroni or fusilli also. I usually rinse after boiling so it does not stick together.
Green peas - I used for little sweetness and soft texture. Frozen peas works fine too. Fresh peas gives better taste if you get. Sometimes I pressure cook few whistles before adding.
Butter - I add for smooth taste and richness, you can use oil instead. Butter also makes pasta little glossy and sauce sticks better.
Onion - I use for little sweetness and thick base. Onion also gives aroma while cooking.
Capsicum - I add for crunch and color, green and red together looks nice. Can use more or less. Saute lightly so stays crunchy.
Schezwan sauce - I used for tangy and spicy flavor. You can reduce for mild taste or mix little ketchup to balance.
Mixed herbs - I add for subtle herby flavor, oregano or basil also works.
Pepper powder - I used this for light heat and aroma. Can add little more if like spicy.
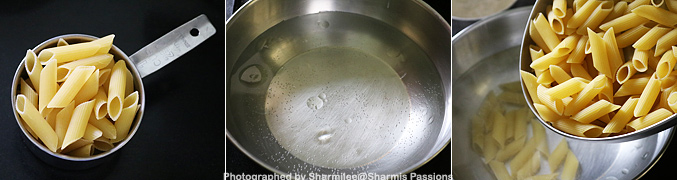
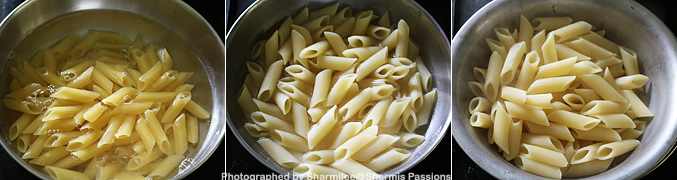
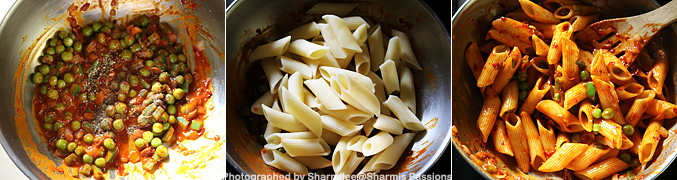
1.Boil water. When it starts to boil, add the pasta along with salt and a few drops of oil.
2.Cook in medium flame. Keep cooking and make sure you stir in between. Cook until it becomes soft but not mushy. It should have the crunch to bite at the same time it will slightly bend, that's the right stage. Switch off and drain water, Set aside.
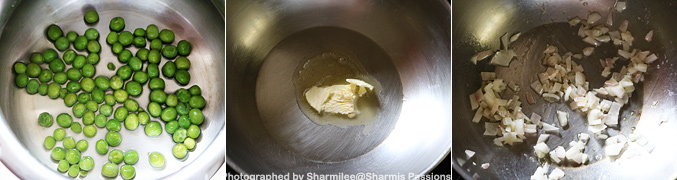
3.Pressure cook green peas for 3 whistles. Heat oil in a pan - add onion saute till transparent.
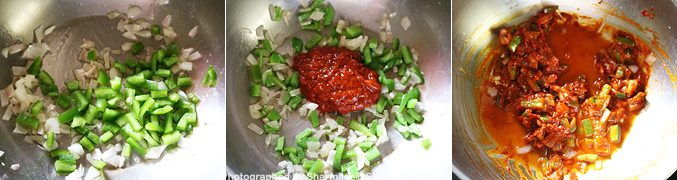
4.Add capsicum saute for 2 minutes, then add schezwan sauce add little water and let it boil for 2 minutes.
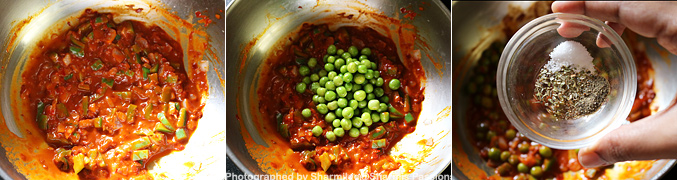
5.Give a quick mix then add cooked green peas, salt, mixed herbs and pepper powder.
6.Give a mix, then add cooked paste and toss it well till the pasta is fully coated with the sauce, cook for 2 minutes then switch off.
Serve hot!
Expert Tips
Cooking pasta - I boil till soft but not mushy, check by tasting, should bend little. I add few drops of oil in water so pasta does not stick.
Vegetables - I add peas and capsicum, carrot or beans works too. Cut evenly so that it cooks fast. I sometimes steam peas and add it.
Schezwan sauce - I add little water to coat pasta, too thick sauce makes it sticky. Taste first, then adjust accordingly.
Adjust spice - I taste after adding sauce, reduce chili if kids are eating. Sometimes I add pinch of sugar to balance tangy taste.
Extra Add ons - You can also add corn, mushrooms, or broccoli. I sometimes add grated cheese, makes creamy and kids love it.
Serving and Storage
Serve Veg Pasta hot with little herbs or grated cheese on top. Goes good for lunch, dinner or kids meal. Leftover pasta can keep in fridge for one day in tight box. Reheat on stove or microwave, sprinkle little water, stays soft and sauce mixes well. Tastes better after few hours when sauce sits with pasta.
FAQS
1.Can I skip shezwan sauce?
Yes, you can skip but use tomato ketchup or chili sauce for saucy taste.
2.Can I make this ahead?
Yes, cook the pasta and vegetables separate and mix when ready to serve.
3.Can I add other vegetables?
Yes, carrot, beans, corn or mushrooms works well.
4.Is this pasta kid-friendly?
Yes, kids like it for colors and mild taste.
5.Can I use different pasta shape?
Yes, you can use macaroni, fusilli, spaghetti all works, cooking time may change a bit.
If you have any more questions about this Veg Pasta Recipe do mail me at sharmispassions@gmail.com. In addition, follow me on Instagram, Facebook, Pinterest ,Youtube and Twitter .
Tried this Veg Pasta Recipe? Do let me know how you liked it. Also tag us on Instagram @sharmispassions and hash tag it on #sharmispassions.
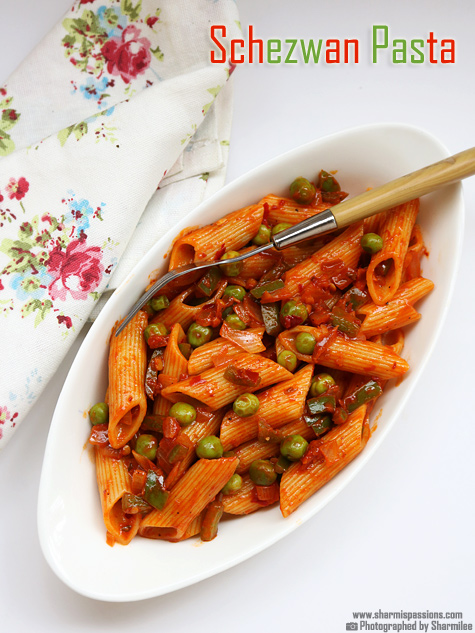
Veg Pasta Recipe | Vegetable Pasta in Schezwan Sauce
Veg Pasta is a simple but tasty dish made by cooking pasta, vegetables in a spicy Schezwan sauce. It's really a good option for quick lunch or dinner and you can make it with easy ingredients at home. Soft pasta with peas and capsicum mixed in sauce makes it filling but still light at the same time.
Course Breakfast, dinner, Lunch, Main Course
Cuisine Indian, Italian
Keyword 30 mins recipes, easy pasta recipes, fusili pasta recipes, fusilli pasta recipes, pasta, pasta recipes, pasta with sauce recipes, penne pasta recipes, veg recipes, vegetable
Boil water.When it starts to boil, add the pasta along with salt and a few drops of oil.
Cook in medium flame.Keep cooking and make sure you stir in between.
Cook until it becomes soft but not mushy. It should have the crunch to bite at the same time it will slightly bend, that is the right stage. Switch off and drain water, Set aside.
Pressure cook green peas for 3 whistles.
Heat oil in a pan - add onion saute till transparent.
Add capicum saute for 2 minutes, then add schezwan sauce add little water and let it boil for 2 minutes.
Give a quick mix then add cooked green peas,salt,mixed herbs and pepper powder.
Give a mix, then add cooked paste and toss it well till the pasta is fully coated with the sauce, cook for 2 minutes then switch off.
Serve Veg Pasta hot!
Notes
Cooking pasta - I boil till soft but not mushy, check by tasting, should bend little. I add few drops of oil in water so pasta does not stick.
Vegetables - I add peas and capsicum, carrot or beans works too. Cut evenly so that it cooks fast. I sometimes steam peas and add it.
Schezwan sauce - I add little water to coat pasta, too thick sauce makes it sticky. Taste first, then adjust accordingly.
Adjust spice - I taste after adding sauce, reduce chili if kids are eating. Sometimes I add pinch of sugar to balance tangy taste.
Extra Add ons - You can also add corn, mushrooms, or broccoli. I sometimes add grated cheese, makes creamy and kids love it.
A hearty, comforting and fulfilling soup that you must try this winter season is the classic restaurant style chicken noodle soup which is a one pot wonder that will keep you full for the entire night!
Winter is just round the corner and so is the craving for that soulful bowl of warm soup that will perfectly fit the bill as a one pot meal!
So here I come with my homemade chicken noodle soup that not only looks gorgeous but can also give the restaurant version a run for its money in terms of its flavors and taste!
Try it once and you will know why I am saying what I am saying!
What is chicken noodle soup?
Asian chicken noodle soup is a widely popular soup and I am not surprised at all! If a single dish can work as an entree as well as main course, who wouldn’t love it?
I made this a week before Diwali when we were feeling a little under the weather; we loved it so much that we immediately decided to prepare it for our little blog and share it with ya’all!
The best thing about this soup recipe is that you won’t need a long list of ingredients; just the basic aromatics, chicken & noodles and you are ready to whip up the most comforting soup of the season!
Cooking pasta is quite easy when you do it the right way. It should be cooked soft but not mushy, and have that little bite in the middle, that's the right texture which makes pasta taste great. You can mix it with sauce, veggies or just toss with some olive oil and herbs. It cooks fast and makes it as a filling meal even on busy days.
Pasta is simple to make and don't need many things. It does not take long time to get ready and everyone in the family likes it. When cooked right, it will not stick or turn mushy. You can use it for salads, baked pasta or just with some seasoning and cheese. Kids love this anytime.
[feast_advanced_jump_to]
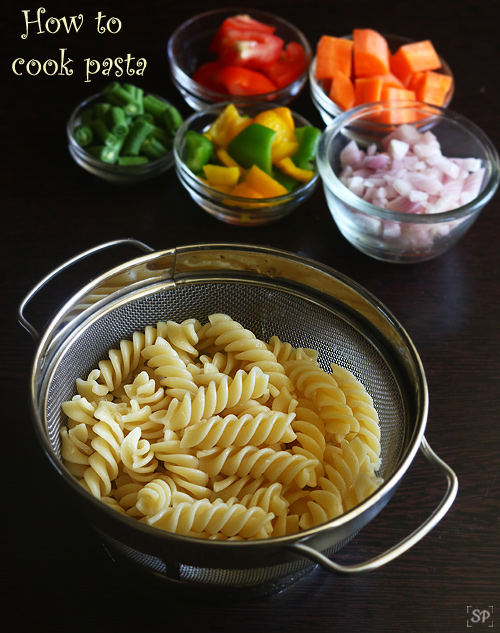
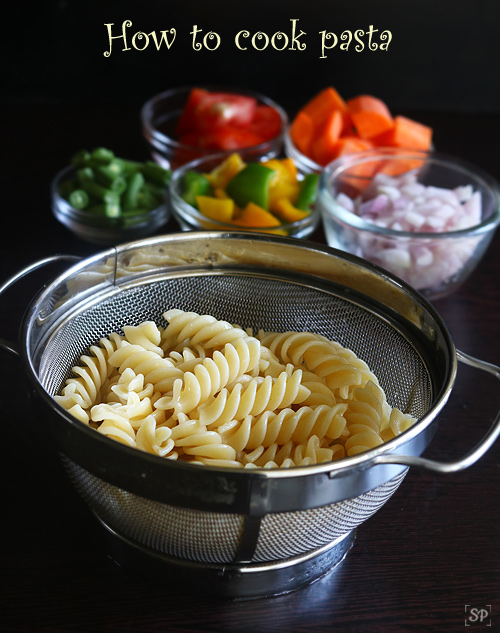
About How to Cook Pasta
Pasta is one of the most common dishes used in different ways. It is made by boiling in water along with some salt and a few drops of oil. Once it gets cooked right, you can mix with any sauce or just toss plain. There are many shapes like fusilli, penne and macaroni, but all can be cooked with same method.
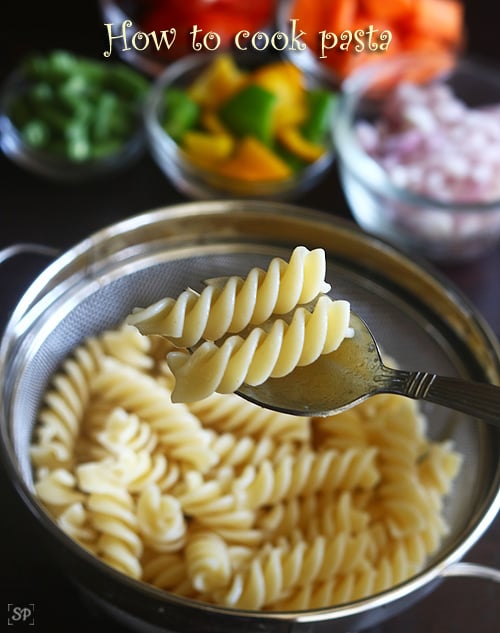
The right texture of pasta is what makes it nice to eat. It should be soft but little firm inside, what we call 'al dente'. If you cook more, it becomes sticky and heavy. If less, it stays hard. So stirring well and checking in between helps to get that correct doneness. It make them nice and fluffy.
You can make it fresh and mix whatever sauce or topping you like. It is also healthy because you can control oil and salt. It fits well for lunch, dinner or even for lunch box. Sometimes I cook extra pasta and keep it in fridge, it helps when you want to fix dinner fast later.
I make pasta many times, especially on weekends or when I feel lazy to cook big meal. After draining I just add few drops of oil to keep it separate. This small step keeps pasta soft even after cooling. I have used fusilli pasta here, you can use any type of pasta of your choice like penne, macaroni, shell, disc etc.
Pasta making is a time saving all-rounder recipe which will be nourished anytime by the entire family. Pasta cooking at home is made easy with this recipe. Pasta is generally cooked, tossed in sauce / veggies and seasoned with herbs / spices.
Video
How to Cook Pasta Ingredients
Pasta - I add fusilli for this recipe but penne, macaroni or spaghetti also works good. You can use any type you want.
Water - I used enough water so pasta cooks perfectly and don't stick. You can use more water if you want.
Oil - I used few drops of oil while boiling. You can use olive oil or any cooking oil you use. It helps pasta non sticky.
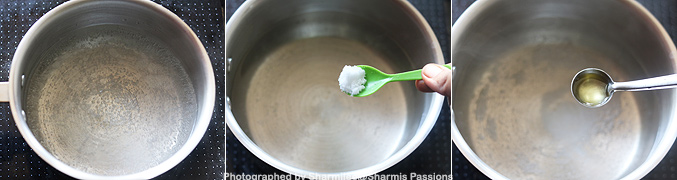
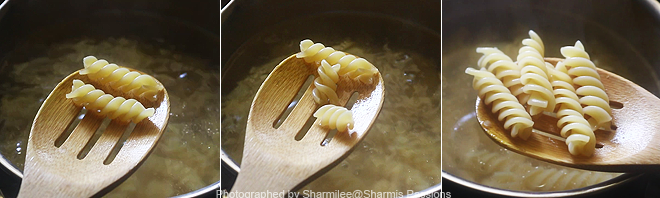
1.Take water in a sauce pan, add salt and oil to it. Boil it.
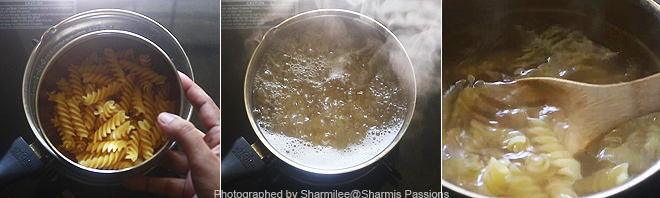
2.When it starts to boil, add the pasta and cook in medium flame. Stir in between
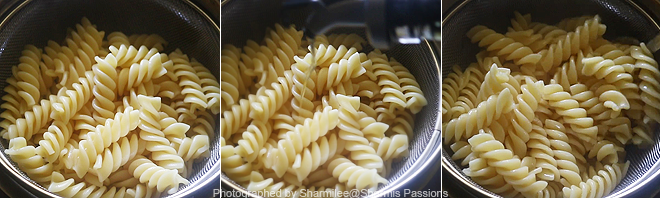
3.Keep cooking and make sure you stir in between. Cook until it becomes soft but not mushy. It should have the crunch to bite at the same time it will slightly bend ,thats the right stage. Cut with a spoon to check. Switch off and drain water.
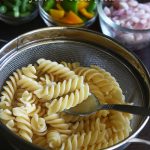
4.Rinse it well in running water. Strain, drizzle oil fluff it up and now its ready. So you can use it for your recipes.
Cooked pasta ready!
Expert Tips
Stir often - I usually stir pasta in between while cooking, this helps it not stick to bottom or to each other.
Check texture - Always check in between if pasta is soft but still has little firmness inside. Overcooked pasta will turn mushy.
Rinse after cooking - After draining I rinse pasta in normal running water, it removes extra starch and stops overcooking.
Add oil after draining - Adding few drops of oil after draining keeps pasta separate and easy to toss later.
Salt - I added salt to give light flavor and season the pasta. You can use normal or sea salt, both are fine.
Serving and Storage
Serve this with any sauce you like such as tomato, white, or even just simple olive oil and herbs. It also taste good with vegetables, cheese or used for baked pasta dishes. You can also mix it cold for salad type dishes.
Keep leftover pasta in a box in fridge for 1-2 days. Add few drops of oil and mix before storing so it will not stick.
FAQS
1.Can I use any type of pasta?
Yes, you can use any type like penne, macaroni, fusilli or spaghetti. Only the cooking time may change little.
2.Should I add oil while boiling?
Adding oil is not must but I prefer few drops so pasta does not stick together.
3.Can I make pasta before and store it?
Yes, you can boil and keep it in fridge for 1-2 days. Just fluff before mixing with sauce.
4.How do know that it is cooked?
When you bite, it should be soft but little firm in middle. That is called al dente and perfect.
5.What if I overcook pasta?
Overcooked pasta becomes sticky and too soft. So always check near the end to avoid that.
If you have any more questions about this How to Cook Pasta do mail me at sharmispassions@gmail.com. In addition, follow me on Instagram, Facebook, Pinterest ,Youtube and Twitter .
Tried this How to Cook Pasta? Do let me know how you liked it. Also tag us on Instagram @sharmispassions and hash tag it on #sharmispassions.
Cooking pasta is quite easy when you do it the right way. It should be cooked soft but not mushy, and have that little bite in the middle, that's the right texture which makes pasta taste great. You can mix it with sauce, veggies or just toss with some olive oil and herbs. It cooks fast and makes it as a filling meal even on busy days.
Course Breakfast, dinner, Lunch, Main Course
Cuisine Indian, Indo Chinese, Italian
Keyword 30 mins recipes, easy pasta recipes, fusili pasta recipes, fusilli pasta recipes, pasta, pasta recipes, penne pasta recipes
Prep Time 5 minutesminutes
Cook Time 10 minutesminutes
Total Time 15 minutesminutes
Servings 2
Calories 167kcal
Author Sharmilee J
Ingredients
1 and ½cupspastaI used fusilli variety
3cupswater
salt as needed
few drops oil
Instructions
Take water in a sauce pan, add salt and oil to it.Boil it.
When it starts to boil, add the pasta and cook in medium flame.Stir inbetween.
Keep cooking and make sure you stir inbetween.Cook until it becomes soft but not mushy.It should have the crunch to bite at the same time it will slightly bend,thats the right stage.Switch off and drain water.
Rinse it well in running water.Strain,Drizzle oil, mix well.Then fluff it up and use it for your recipes.
Cooked pasta ready!
Video
Notes
Stir often - I usually stir pasta in between while cooking, this helps it not stick to bottom or to each other.
Check texture - Always check in between if pasta is soft but still has little firmness inside. Overcooked pasta will turn mushy.
Rinse after cooking - After draining I rinse pasta in normal running water, it removes extra starch and stops overcooking.
Add oil after draining - Adding few drops of oil after draining keeps pasta separate and easy to toss later.
Salt - I added salt to give light flavor and season the pasta. You can use normal or sea salt, both are fine.
Chicken stroganoff is a luxurious recipe that you must save in your repertoire for that extra-special occasion to celebrate with your friends and family! This decadent dish is full of indulgent flavors which will simply blow your mind when you try it for the very first time!
I have been planning to make the popular chicken stroganoff for months now and finally I became successful last week! Yay!
For something or the other, I kept pushing back this gorgeous chicken stroganoff and prioritized other recipes which are part of my regular meals designed particularly for my weight loss journey.
If you wanna have a look at those recipes, feel free to check out this collection!
But hey, we all deserve a break and indulge in something sinfully satisfying occasionally!
So without any further delay, let’s dig into this stunning chicken stroganoff and enjoy the best moments of life that we curate intentionally for our rejuvenation!
Before getting into it, please forgive me, but I can’t help but repeat myself that the best way to savor these extravagant dishes is by doing conscious portion control!
You won’t want to ruin your hard work (your week long workout and mindful eating!) just for the pleasure of one meal!
What is Chicken Stroganoff?
After reading up quite a few sources about stroganoff in general, this is what I came to know. Historically, this stroganoff was made with beef.
The original recipe for beef stroganoff dates back to Russia in the late 1800s, created by a chef who cooked this dish for his employer, Count Pavel Alexandrovich Stroganov and hence the dish is named after him. [source]
The native dish contained meat of your choice, mushrooms and sour cream which is how it is made today as well.
Tangy, sweet and mildly spicy, this restaurant style saucy shrimp noodles stir fry is hell of a recipe that you must try asap! You will be amazed to see how easy it is to recreate your favorite asian shrimp noodles stir fry at the comfort of your home when you have the right ingredients in place!
If you love a good stir fry then you will love my shrimp noodles stir fry recipe that I’m sharing today! This was due for long as it is quite a common affair at my home!
This is one such recipe which comes around in about 30 minutes or so but promises big flavors on your plate!
That's why it's not an ordinary stir fry but a classic restaurant style shrimp noodles stir fry and you will come back to it again and again!
What is shrimp noodles stir fry?
Like a good stir fry recipe, my shrimp noodles stir fry also follows the standard grammar of an authentic one!
You have your choice of noodles, your choice of protein which is shrimp in this case and a killer sauce that brings everything together in the most irresistible way possible!
You can of course add a few veggies in your shrimp noodles stir fry that increases the fiber quotient of the dish while also making it more hearty and fulfilling!
I only added shredded cabbage today to keep things simple and fast as I wanted to bring the dinner from kitchen to table in thirty minutes!
This stir fry noodles recipe make a flavourful satisfying meal that is low carb, high protein, and is low calorie. This delicious shirataki stir fry noodles is one dish that I enjoy regularly on my weight loss journey. Crispy tofu, fresh colourful veggies, and a bold, spicy peanut sauce this quick stir fry noodles recipe packs flavors and help me feeling full without weighing me down.
So if you are a someone who is watching their weight, managing diabetes, counting macros, or following a gluten-free or vegan diet this fiber-rich shirataki stir fry noodles bowl is perfect. It’s a delicious, plant-based meal perfect for weight loss, meal prep, or anyone following a gluten-free or Weight Watchers-friendly diet.
Ready in just 20 minutes! A perfect under 200 calories meal (192 calories and 14g of protein per serving) this low-carb high-protein shirataki noodle stir-fry is a game-changer!
What Are Shirataki Noodles?
If you’ve never tried shirataki noodles before, you’re in for a game-changing pantry staple vegan noodle recipe. There’s a reason that these are popularly known as weight loss noodles.
Made from the root of the konjac plant, shirataki noodles are:
Virtually zero net carbs
Very low calorie (about 5–10 calories per serving)
Gluten-free and grain-free
High in glucomannan, a prebiotic fiber that supports gut health
Shirataki noodles have a slightly chewy texture and are perfect for absorbing sauces which are ideal in stir-fry and noodle bowls like this one.
Why This Stir Fry Noodles Recipe Is So Healthy
Low Calorie: At just 192 calories, it’s light enough for lunch or dinner.
High Protein: Thanks to tofu and peanuts, you get 14g of plant protein per serving.
Low Carb: Shirataki noodles bring the carbs down to just 14g.
Gluten-Free: Naturally gluten-free when you use tamari instead of soy sauce.
Weight Loss Friendly: Packed with fiber, protein, and volume so you feel full without overeating
Whether you’re on a weight loss journey, counting macros, or trying to eat more clean and plant-based, this vegan noodles recipe checks every box.
Why You’ll Love This Stir Fry Noodles Recipe
Low in Calories: Just 192 calories per serving!
High in Plant Protein: Thanks to tofu and peanuts – 14g protein.
Low-Carb & Keto-Friendly: Only 14g net carbs from natural veggies.
Naturally Gluten-Free & Vegan: No dairy or wheat.
Meal Prep & Weight Watchers Friendly: Keeps well in fridge.
Quick and Easy: Done in 20 minutes, perfect Weight Loss Dinner for busy days.
This stir fry noodles recipe is perfect if you’re following:
A weight loss or GLP-1 diet
A Weight Watchers meal plan
Diabetic-friendly eating
Vegan, vegetarian, or gluten-free lifestyles
Ingredients You’ll Need
Shirataki noodles: Rinse & drain before cooking
Olive oil: Or use avocado oil
Onion: Finely chopped
Red bell pepper:Sliced thin
Green bell pepper: Sliced thin
Mushrooms: Button or cremini mushrooms
Tofu: Firm or extra-firm, diced
Lemon Juice
Basil Leaves
Roasted peanuts
Sesame seeds
Lemon juice
Spicy Ramen-Style Peanut Stir Fry Sauce
For making this spicy stir fry sauce whisk together:
1 tbsp soy sauce (or tamari for gluten-free)
1 tsp sriracha or hot sauce
1 tbsp peanut butter
1 tsp tahini
½ tsp chili flakes
Salt to taste
2 tbsp water
This bold, creamy sauce pairs perfectly with tofu and shirataki noodles. Adjust spice to taste. This spicy, nutty sauce is the heart of the dish. It’s creamy, rich, and perfectly coats the noodles.
Step-by-Step Instructions
1. Prep the Shirataki Noodles
Drain and rinse the noodles well under cold running water to remove their natural odor. Shake off any excess water and set aside.
2. Make the Sauce
In a small bowl, whisk together soy sauce, sriracha, peanut butter, tahini, chili flakes, salt, and water until smooth and creamy.
3. Sauté the Vegetables
Heat olive oil in a non-stick skillet. Add onion and bell peppers. Sauté for 3–4 minutes until they begin to soften but remain slightly crisp. Add mushrooms and cook for another 2 minutes.
4. Cook the Tofu
Add diced tofu to the pan and sauté until lightly golden on the edges, about 2–3 minutes. Add rinsed shirataki noodles to the pan.
5. Toss in Noodles & Sauce
Pour in the sauce and gently toss everything together until noodles are fully coated.
6. Finish & Garnish
Turn off the heat. Add lemon juice and torn basil. Garnish with sesame seeds, chopped roasted peanuts, and green onions. Serve hot! Perfect macro balance for a healthy lunch or dinner!
Frequently Asked Questions
Q1: Can shirataki noodles help with weight loss?
Yes! Shirataki noodles are very low in calories and carbs, this makes them ideal for people trying to reduce overall calorie intake or lose weight.
Q2: Is this recipe gluten-free?
Yes! As long as you use tamari or gluten-free soy sauce, this noodle stir-fry is completely gluten-free.
Q3: What does shirataki taste like?
They’re mostly neutral but soak up any sauce you toss them in. After rinsing and cooking, they absorb flavor really well and have a slightly chewy texture.
Q4: Can I eat this on Weight Watchers?
Yes! This is a low point weight watchers noodles recipe (approx. 3-4 depending on oil/tofu brand) and fits beautifully into most WW meal plans.
Q: Are shirataki noodles good for weight loss?
Yes! This is my go to weight loss noodle recipe They’re low in calories, high in fiber, and help you feel full longer.
Q: Can I meal prep this?
Yes, this recipe stores well in the fridge for up to 3 days. Reheat in a non-stick pan or microwave.
Q: Can I substitute tofu in this shirataki noodle bowl?
Yes, try tempeh, chickpeas, or edamame for a protein-rich alternative.
Storage & Meal Prep Tips
You can store leftover noodles in an airtight container for up to 2 days.
Best reheated in a skillet with a splash of water.
Great for meal prepping healthy lunches.
Expert Tips
Rinse Shirataki well.
Crisp your tofu: Air fry or pan-fry tofu beforehand for more texture.
Make it spicy: Add more sriracha or chili oil to dial up the heat.
Add greens: Toss in spinach, bok choy, or kale for added volume and nutrients.
If You like this recipe and made it Please rate the recipe. It helps us to reach more people. For the Latest updates Subscribe to Rekha’s Whatsapp. You can follow me onInstagram, Facebook, Youtube, Pinterestfor more food inspirations.
Delicious Stir fry noodles recipe with tofu, veggies, and spicy peanut sauce. This healthy noodles recipe is Just 192 calories, high protein, vegan, gluten-free, and is perfect for weight loss, Weight Watchers, or anyone craving a healthy noodle stir-fry.
Course Main Dish, Side Dish
Cuisine Asian
Keyword Low calorie noodles, Low carb high protein noodles, stir fry noodles, vegan noodles, weight loss noodles, weight watchers friendly noodles
Prep Time 10 minutesminutes
Cook Time 15 minutesminutes
Total Time 25 minutesminutes
Servings 2people
Calories 192kcal
Ingredients
270gshirataki noodles
1tbspolive oil
½onionchopped
½red bell pepperchopped
½green bell pepperchopped
5mushroomssliced
200gtofudiced
1tbsplemon juice
10basil leaves
1tbsproasted peanutsfor garnish
1tspsesame seedsfor garnish
1tbspgreen onionfor garnish
2tbspSoy Sauce
2tbsp sriracha sauce
1tbsppeanut butter
1tbsptahini paste
1tspchilli flakes
1/4tspsaltto taste
Instructions
Prep Noodles
Before cooking begins, drain your shirataki noodles and rinse them under running cold water.
270 g shirataki noodles
Light shake off the excess water from noodles and keep them aside.
Make Spicy sauce
To prepare the spicy ramen sauce, whisk some soy sauce with Sriracha, peanut butter, Tahini paste, salt and chili flakes.
Then add a splash of water and mix everything into a uniform consistency.
Cook the veggies and Noodles
Heat some olive oil in a pan and toss chopped onions, both red and green bell peppers and saute for 3-4 minutes just until the veggies begin to soften but still stay crisp.
1 tbsp olive oil, ½ onion, ½ red bell pepper, ½ green bell pepper
Next, toss in sliced mushrooms and cook for 2 more minutes. Now, toss the diced tofu and give everything a quick stir.
5 mushrooms, 200 g tofu
Next, get the Shirataki noodles in the pan and pour the prepared sauce. Gently roll the noodles so its evenly coated in the spicy sauce.
Turn off the heat and pour some lemon juice. Tear in some fresh basil leaves for aroma.
1 tbsp lemon juice, 10 basil leaves
Lastly, garnish with sesame seeds, roasted peanuts and green onion leaves before serving. Serve hot and enjoy!
Looking for a low carb, high protein vegan dinner that’s big on flavor but light on calories? This quick and easy shirataki noodle stir-fry is made with tofu...
It’s an adventure to find tastes and components that give the body life and the plate colour. Here are 6 ideas to create a nutritious dinner. Making a nutritious diner is similar to creating an Read More ...
These spicy noodles are so good, believe me. They are packed with flavor and the green chilies will make them super hot. So, watch your spice toleration level and adjust accordingly when cooking this recipe. Serves 4Ingredients:1/2 pack raw hakka noodles (600gm pack - use half)2 Tbsp vegetable oil3-4 Thai green chilies, slit in half1 Tbsp ginger julienne1 Tbsp minced garlic1 Tbsp dark soy sauce1
Who doesn’t love the potato salad served as a side at home or in restaurants? We all tend to have huge helpings at the eat as much as you like buffets!! However, a lot Read More ...
Shrimp & mixed veggies udon noodle stir fry, the best recipe… I swear this is better than restaurant style & has turned into one of my favorite noodle stir fry. Packed with flavor, aromatic & absolutely delicious. Japanese Style Shrimp Udon Noodle Stir Fry- Better Than Restaurant Style Print Prep time 5 mins Cook […]
Easy 1 Pot Thai Skillet Noodles stir fry! These inspired drunken noodles come together in 30 minutes and don’t need noodles cooked separately. Everything cooks in 1 pot!
Thai cuisine has always fascinated me. The bold flavors, the use of different textures and colors, one pot meals, and above all the fact that most dishes come together super quickly.
My Vegan Thai Basil Fried Rice and my Thai pumpkin Curry recipe are some of my favorite recipes ever and I make them all the time. These easy skillet noodles are inspired from Pad kee mao (drunken noodles). They come together quickly and hit the right spots!
You know me, I am a huge fan of cooking pasta in a skillet! Have you tried some of my skillet lasagnas? Life-changing!
Preparing pasta in a skillet along with the sauce ingredients drastically shortens the total cooking time.
The exact cooking times will vary based on the noodles and brands, so keep an eye on them. If you are unsure, make them separately and add precooked noodles, then add to the veggies and sauces. See recipe notes for that method.
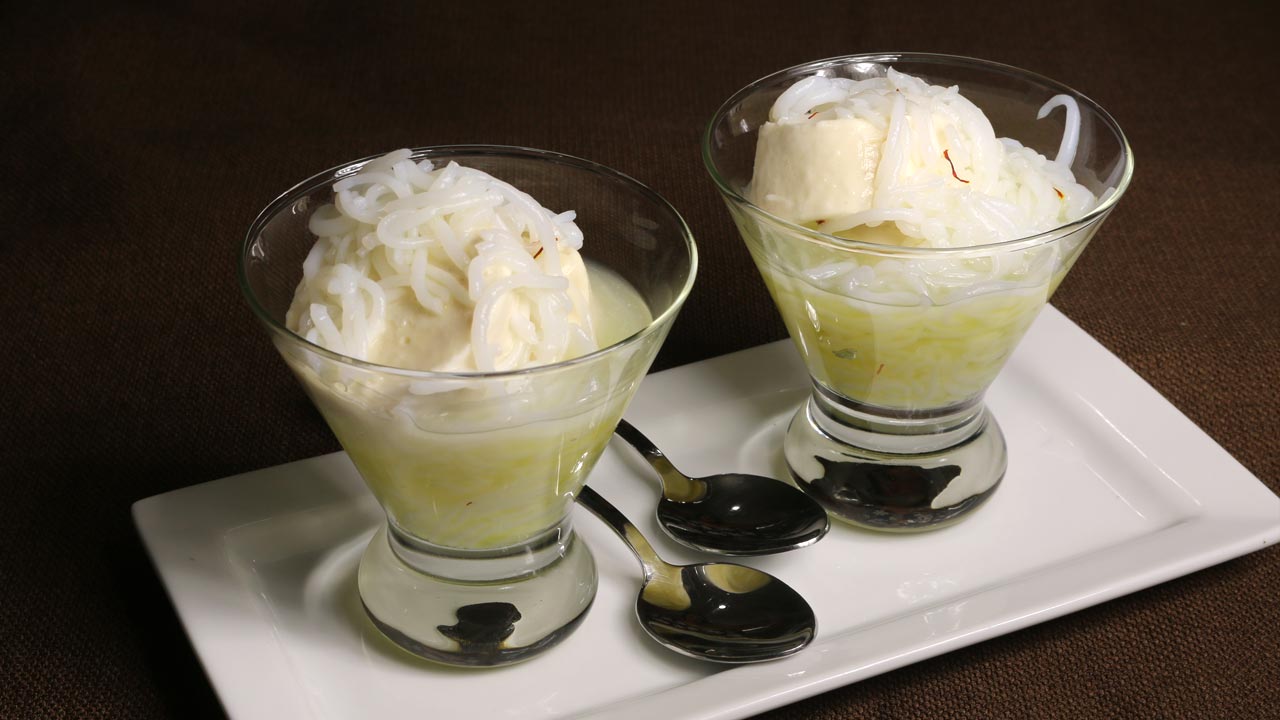
Falooda Kulfi is a refreshing dessert. “Falooda” looks like rice noodles and they are made with cornstarch or arrowroot. “Kulfi” is an Indian ice cream. This is a delicacy with street vendors all over India. One has to experience this delightful dessert to appreciate it. You can also serve Falooda with any ice cream of your choice. Try this recipe to enjoy as one of my favorite summertime treats!
Recipe will serve 6.
Ingredients:
1/2 cup corn starch or arrowroot
2 cup water
1/2 cup sugar
1/4 cup water
12 strings of saffron
1/2 cup kulfi for each serving, check my web site for kulfi recipe
Wide bowl of ice cold water with some ice
Also need sev maker
Method
For syrup boil sugar, water and saffron together, as it comes to boil turn of the heat and stir the syrup making sure sugar has dissolved. Syrup needs to be chilled before serving, keep it in refrigerator.
Add water to corn starch slowly making sure there is no lumps, batter will look like consistency of milk.
Over low medium heat in a frying pan add the batter and cook stirring continuously till corn starch become translution and consistency of thick batter or soft lumpy dough. This will take about 10-12 minutes. Turn off the heat and remove from stove.
Let the mix cool off little bit and pour the hot mixture into sev maker using fine sev attachment. Press the sev maker over ice cold water, and let the sev string drop into the bowl.
Leave the falooda in ice cold water at least for 2 hours before using.
Falooda will stay good for about a week in refrigerator, but make sure falooda stays in chilled water.
Serving the Falooda Kulfi
Use individual serving bowl, first layer the bowel with falooda, drizzle about 1 tablespoon of syrup. Put the kulfi then over the kulfi put some more faluda and finish off drizzling 1 tablespoon of syrup. Falooda kulfi is ready to serve! This just taste great.