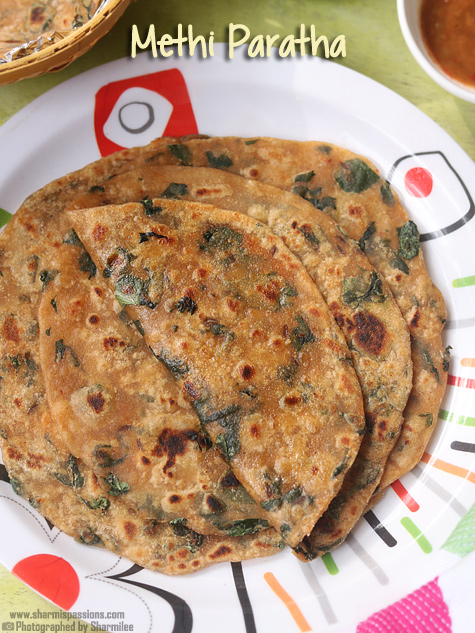
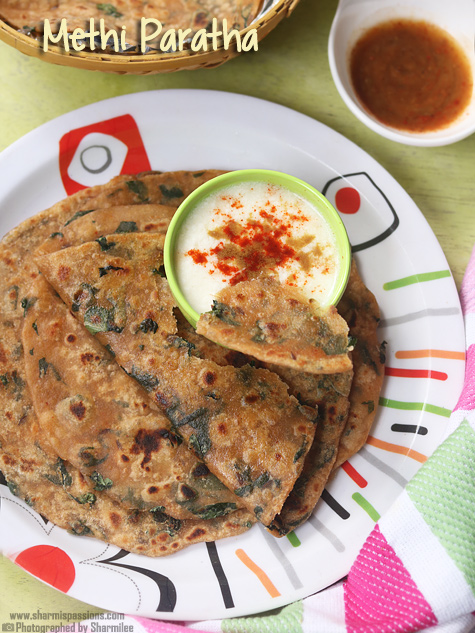
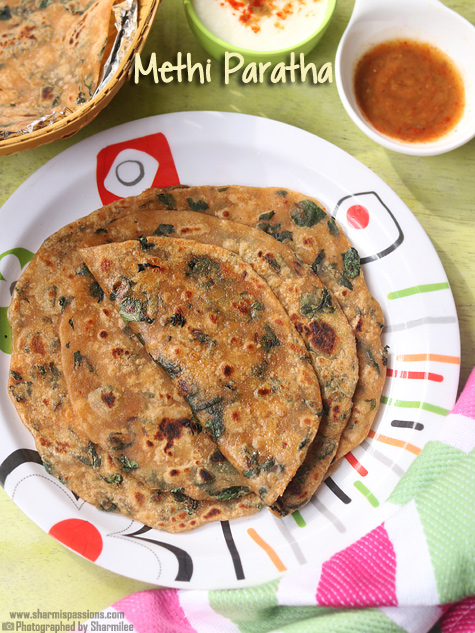
Methi Paratha Recipe
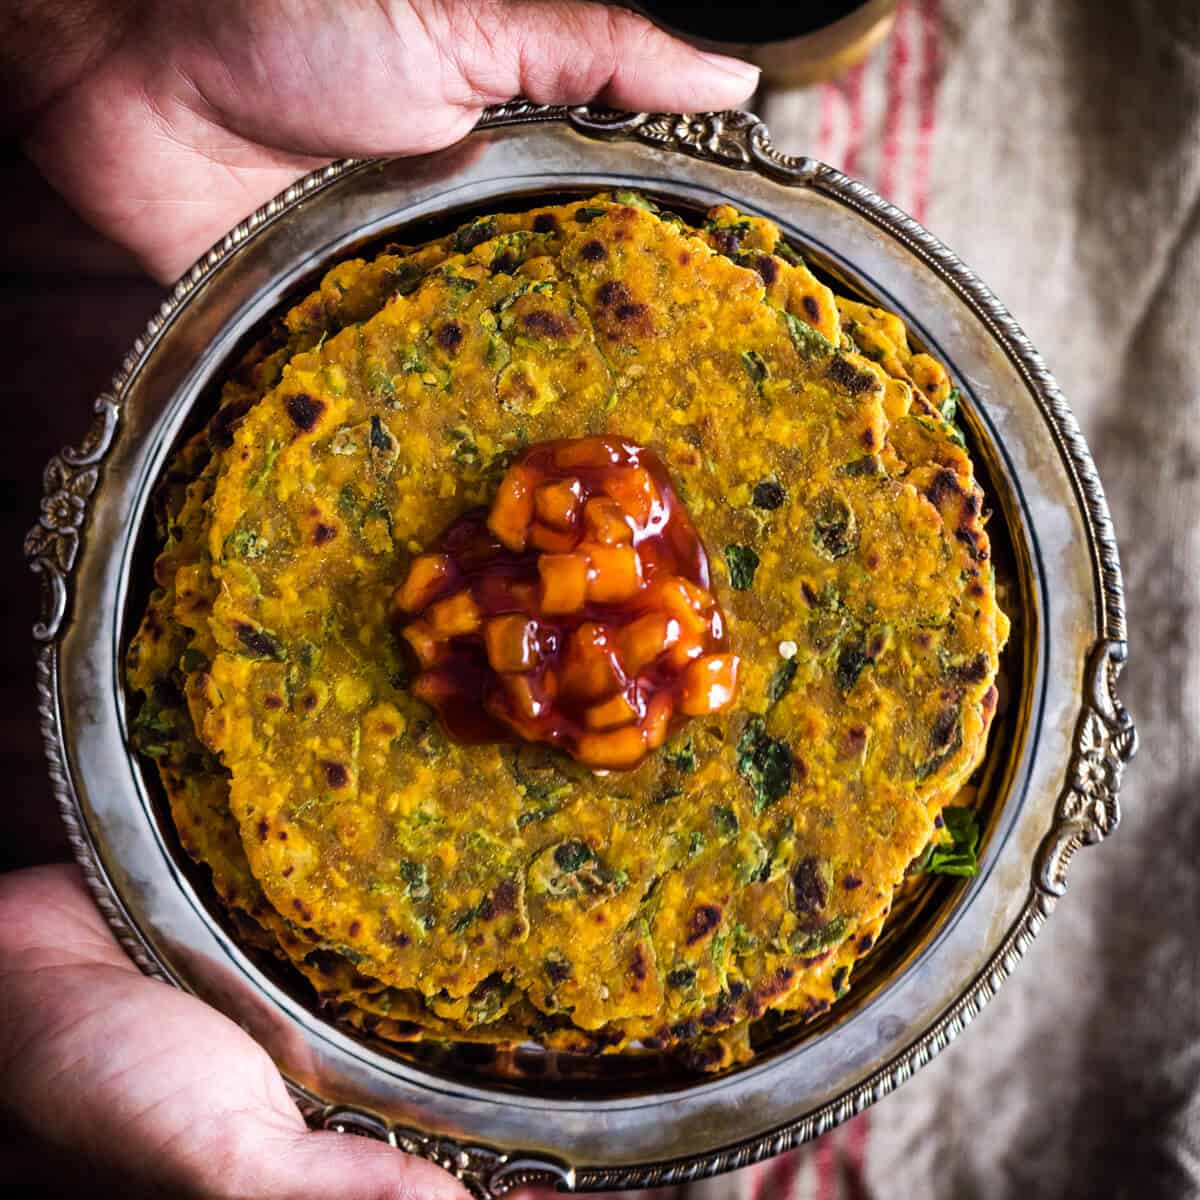
Methi Paratha is a healthy spiced paratha made by mixing tempered methi leaves with wheat flour in the regular making of paratha. Methi Paratha is an nice idea of including greens in the meal. This has a nice aroma, flavor because of fresh methi leaves. It can be made easily at home without much effort.
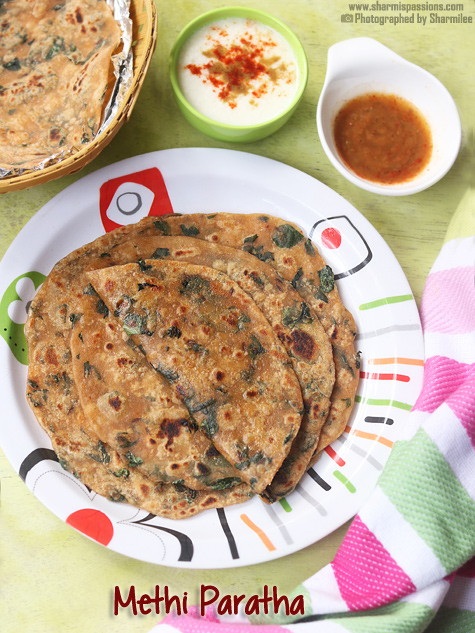
I usually make methi paratha for breakfast or for lunch box as it stays soft for a long time. You can pack it easily and it stays soft for long hours and it is one of the staple during travel. It goes very well with curd, pickle or even a simple dal. This recipe is simple and easy to understand and it does not need any fancy ingredients. If you like methi thepla, you can surely like this paratha also.
[feast_advanced_jump_to]About Methi Paratha
Methi paratha is simple paratha made with fresh fenugreek leaves, wheat flour and some basic spices. It is commonly made in many North Indian homes, mostly during winter season when fresh methi is easily available in markets. The paratha has nice flavor and soft texture when it is cooked perfectly.
This has a great flavor because of methi leaves, also it balances well with the spices added. Sautéing methi before adding it to the dough helps to reduce the raw taste and bitterness a lot. It also gives flavor and makes the paratha tastier. You can also pack it for travel as it stays good for one or two days easily.
This methi paratha has soft inside with slight crisp outside when cooked well. It is not very thick and it rolls easily. You can make it little thin or little thick based on your preference. You can also make stuffing using paneer or potato, fill it in the middle and cook it same way like aloo paratha.
I usually make this when I get fresh methi from the market. It feels wholesome and filling, makes a super way to use methi in dishes. I love parathas very much so it was such a treat for me as methi paratha is packed with flavours with the addition of all the spice powders that I added.
Whenever I find fresh methi leaves, I buy them as we all love methi thepla so this time after packing mittus lunchbox, I reserved a handful of methi leaves to try this methi paratha. Methi paratha needs no side dish at all for me, but if you prefer you can have it with curd and pickle. I had mine with curd and tangy tamarind sauce.
Methi Paratha Ingredients
- Whole wheat flour - I used wheat flour for base of the dough. It gives soft texture and makes it filling. You can mix little maida if you like.
- Fresh methi leaves - I have used fresh methi for flavor and nutrition. You can use palak or other greens also.
- Jeera - I have used it for tempering the methi leaves. It gives nice aroma, you can skip it if you don't like jeera flavor.
- Spice powders - I added red chili powder, jeera powder and chat masala. They give heat, aroma and little tang to the paratha. You can adjust according to your spice liking only.
- Oil - I have used oil for sautéing the methi and also while cooking the parathas. Oil keeps them soft. You can use ghee also for more rich taste.
Similar Recipes
How to make Methi Paratha Step by Step
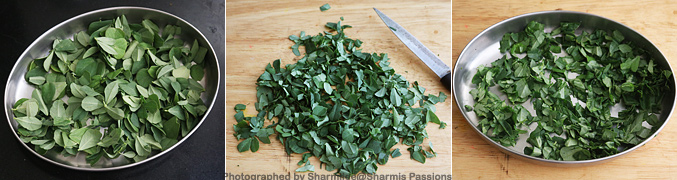
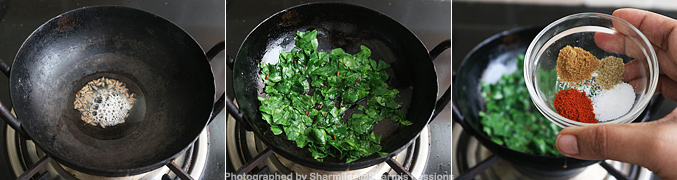
1.Clean the methi leaves, chop it roughly rinse it in water and keep it ready.
2.Heat oil in a kadai, add jeera let it crackle. Add methi leaves and saute for a minute until it shrinks. Now add red chilli powder, jeera powder, chat masala powder and required salt.
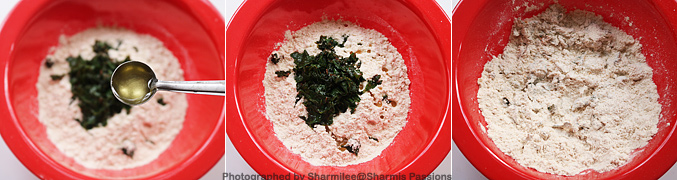
3.Saute for 2 minutes. Now add this to whole wheat flour in a mixing bowl.

4.Add oil, first mix well with your fingers.
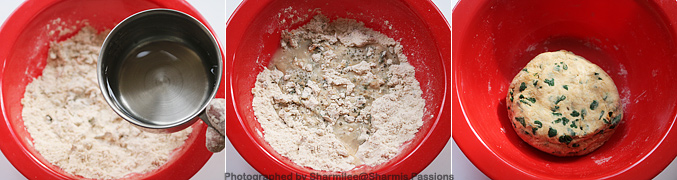
5.Now add water little by little to form a smooth nonsticky dough like chapathi dough. Let the dough rest at least for 15 minutes, keep covered.
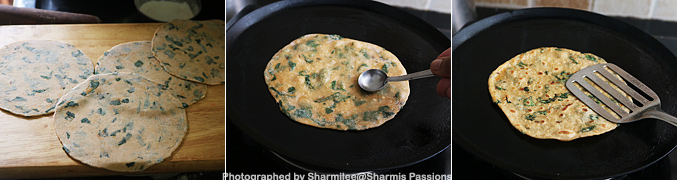
6.Roll into small lemon sized balls. Take one ball,dust flour and roll it slightly thin as shown.
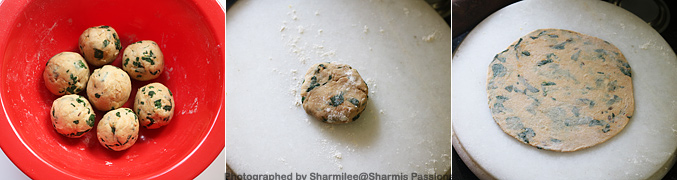
7.Like ways roll all the parathas ready. Heat tawa, cook the parathas first on one side, drizzle oil and cook on both sides till golden spots appear here and there. Serve hot!
Serve hot with curd or raita!
Expert Tips
- Cleaning methi - I clean the methi leaves well. I remove the thick stems and wash it well in water before using it.
- Reducing bitterness - I sauté methi before adding it to the dough. This step helps in reducing bitterness and gives good flavor.
- Dough resting - I let the dough rest for some time after kneading it. This makes paratha soft and also easy to roll.
- Spice - I add spice powders according to our taste. Sometimes I add garam masala instead of chat masala just for change.
- Cooking fat - I mostly cook using oil, but at times I have used ghee also for little more rich taste and aroma.
Serving and Storage
Serve this hot with curd, pickle or butter. This goes well for breakfast or lunch. You can store cooked parathas for a 2 days at room temperature and up to 4 days in fridge. Reheat on tawa before serving. If packing for travel, cook with little extra oil.
FAQS
1.Can I use dried methi instead of fresh?
Yes you can use kasoori methi if fresh methi is not available. Taste will differ but still good.
2.Can I skip sautéing methi?
You can, but sautéing gives better taste and reduces bitterness.
3.Can I add other greens?
Yes you can replace methi with palak or mix both also.
4.Does this paratha stay soft for long?
Yes it stays soft for a day and is good for lunch box.
5.Can I make dough in advance?
Yes you can make dough and keep in fridge for few hours. Bring to room temperature before rolling.
If you have any more questions about this methi paratha do mail me at sharmispassions@gmail.com. In addition, follow me on Instagram, Facebook, Pinterest ,Youtube and Twitter .
Tried this methi paratha ? Do let me know how you liked it. Also tag us on Instagram @sharmispassions and hash tag it on #sharmispassions.
📖 Recipe Card
Methi Paratha Recipe
Ingredients
- 1 cup whole wheat flour
- 1 cup fresh methi leaves loosely packed
- ½ teaspoon jeera
- ½ teaspoon red chilli powder
- ½ teaspoon jeera powder
- ¼ teaspoon chat masala powder
- salt to taste
- water as required
- 1 teaspoon oil plus for toasting
Instructions
- Clean the methi leaves, chop it roughly rinse it in water and keep it ready.
- Heat oil in a kadai, add jeera let it crackle. Add methi leaves and sauté for a minute until it shrinks. Now add red chilli powder, jeera powder, chat masala powder and required salt.
- Saute for 2 mins. Now add this to whole wheat flour in a mixing bowl.
- Add oil, first mix well with your fingers.
- Now add water little by little to form a smooth non sticky dough like chapathi dough .Let the dough rest at least for 15mins, keep covered.
- Roll into small lemon sized balls. Take one ball, dust flour and roll it slightly thin as shown.
- Like ways roll all the parathas ready. Heat tawa, cook the parathas first on one side, drizzle oil and cook on both sides till golden spots appear here and there. Serve Methi Paratha hot!
Notes
- Cleaning methi - I clean the methi leaves well. I remove the thick stems and wash it well in water before using it.
- Reducing bitterness - I sauté methi before adding it to the dough. This step helps in reducing bitterness and gives good flavor.
- Dough resting - I let the dough rest for some time after kneading it. This makes paratha soft and also easy to roll.
- Spice - I add spice powders according to our taste. Sometimes I add garam masala instead of chat masala just for change.
- Cooking fat - I mostly cook using oil, but at times I have used ghee also for little more rich taste and aroma.
Nutrition
The post Methi Paratha Recipe appeared first on Sharmis Passions.