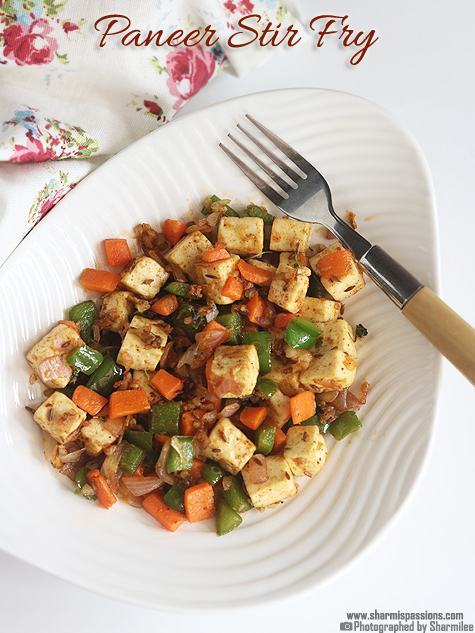
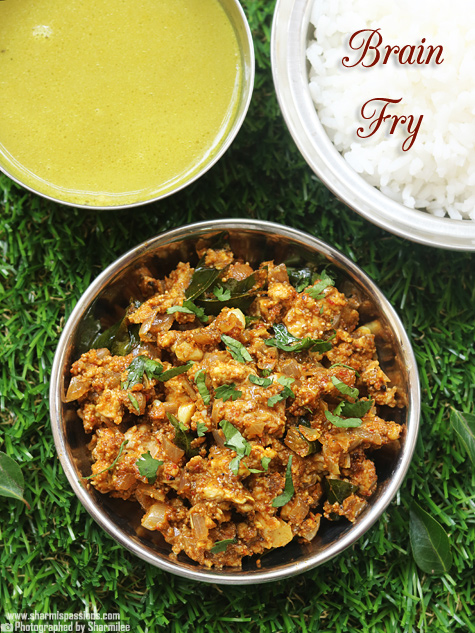
Tawa Paneer Recipe (Tawa Paneer Masala)
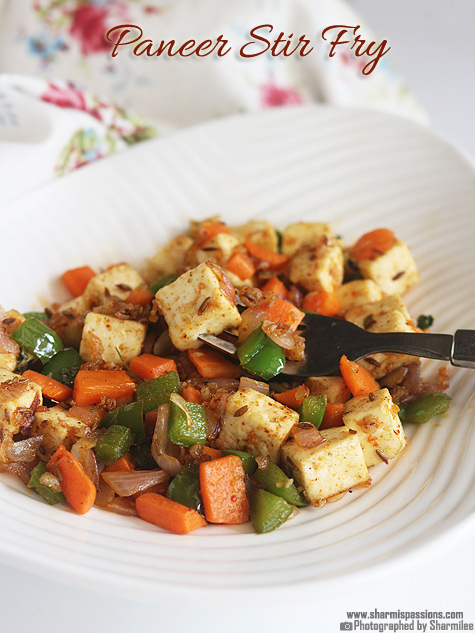
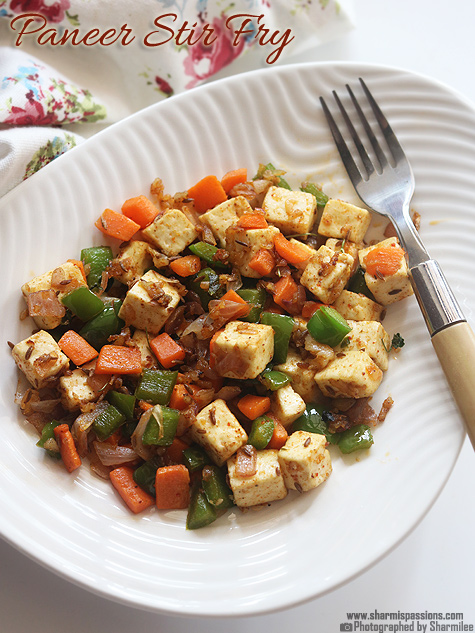
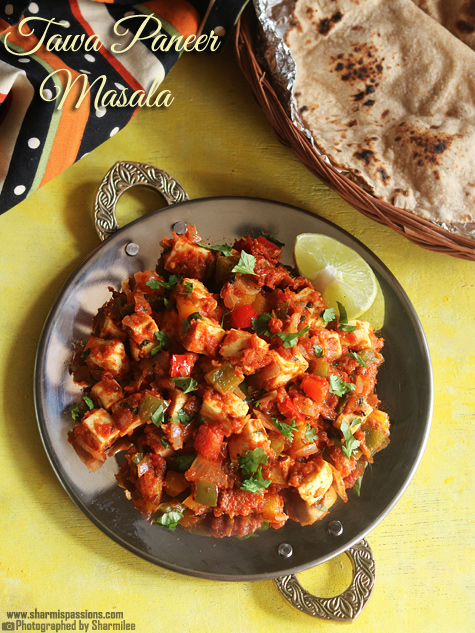
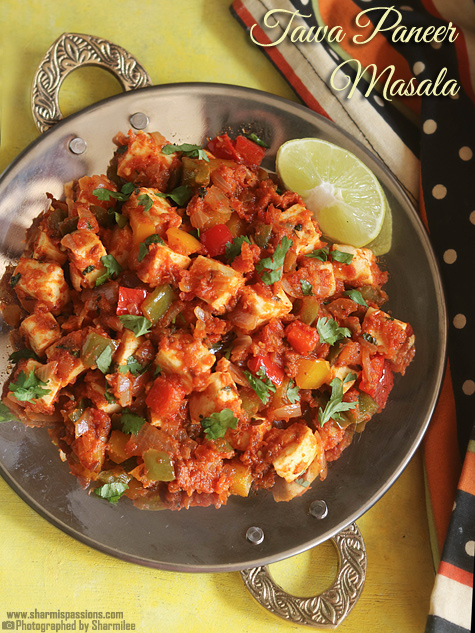
Tawa Paneer is a spicy and masala rich side dish made on a flat tawa using paneer with onion, tomato and capsicum base. It has a great taste with slight roasted flavor which makes it little different from regular paneer gravies. The dish is mostly semi dry and pairs well with roti, naan or even with plain rice.
This is quite often made for weekend lunch or dinner when something quick is needed at home. The masala coats the paneer nicely and gives a street style touch to the dish which everyone likes. It is filling yet satisfying and suits well for both family meals and small get togethers.
[feast_advanced_jump_to]About Tawa Paneer
Tawa Paneer Masala is a popular North Indian style paneer recipe where everything is cooked directly on a tawa itself. Cooking on tawa gives a slightly smoky and intense flavor to the dish which you don't get in kadai cooking. It is commonly served as a side dish or sometimes used as stuffing for rolls and wraps.
This is usually cooked on tawa but you can use a kadai or frying pan too if you don't have a tawa. I have used my roti pan which has a flat base, you can use a tawa which has concave base too.
The texture of this dish is semi dry with soft paneer cubes covered in thick masala. Onion and tomato forms the base while capsicum adds slight crunch in between. The spices give warmth and heat but it does not overpower the paneer taste.
This is flexible and easy to adjust as per taste. It can be made more spicy, less spicy or even turned into a gravy by adding more tomato and little water. Butter adds richness but oil can also be used if butter is not there. It tastes good even after reheating also which makes it useful for busy days.
Tawa Paneer Masala is one of the popular dishes in restaurants too. I usually made on weekends or when guests come home suddenly. It does not need long cooking time and still feels special on the plate.
Tawa Paneer Ingredients
- Paneer - It stays soft and absorbs masala well. Fresh or store bought paneer both works fine for this dish.
- Onion and Tomato - I used for making the masala base, onion gives slight sweetness and tomato adds tanginess to balance. Chopped tomato can be used instead of puree.
- Capsicum - I added for mild crunch and flavor in the dish. Colored or green capsicum can be used based on what is available at home.
- Ginger garlic paste - I just added this for base flavor and aroma. I used freshly crushed ginger and garlic also can be added instead of paste if you want.
- Spice powders - I just add some for spice and depth, I used red chilli powder, roasted jeera powder and garam masala. Spice level can be adjusted as per taste and preference of people at home.
- Kasoori methi - I just used for aroma and slight bitterness. Try not to skip this if possible.
- Coriander leaves - I added this for freshness and mild flavor. It also gives nice finish to the dish.
- Butter - I just used for tempering, it gives richness and tawa style taste. You can use oil also but butter tastes better.
- Jeera - I added jeera for tempering, it gives light crunch and flavor in the beginning.
Why This Recipe Works
- This recipe is quick and does not need complicated steps.
- Cooking on tawa gives smoky and street style flavor.
- Paneer stays soft while masala turns thick and coating.
- It works well as side dish, starter or roll filling.
- Spice and texture can be adjusted very easily.
Similar Recipes
How to make Tawa Paneer Masala Step by Step
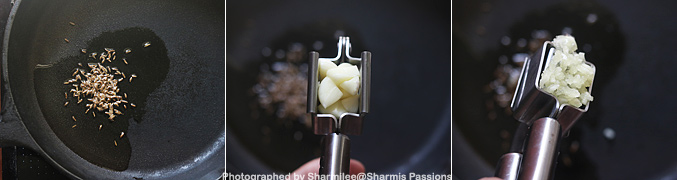
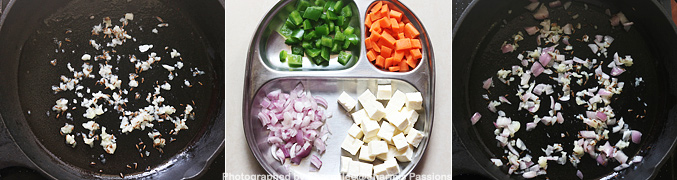
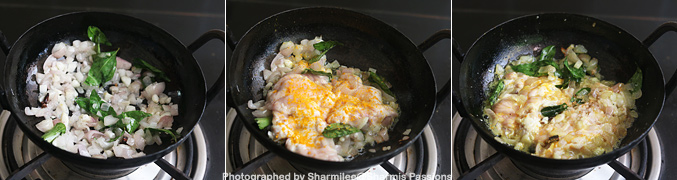
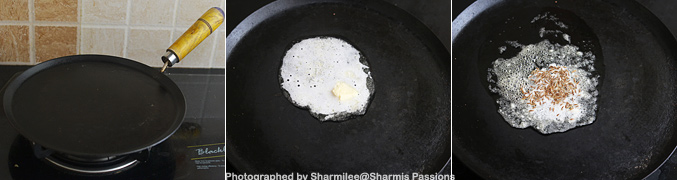
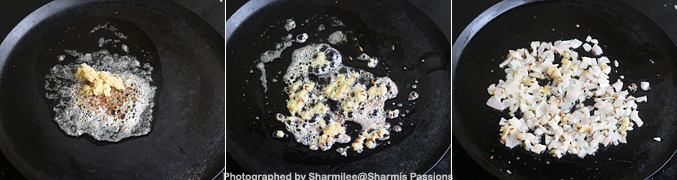
1.You first need a tawa for making this, dosa tawa will be fine. I used flat bottomed dosa tawa. Heat butter when it starts to melt, add jeera let it crackle.
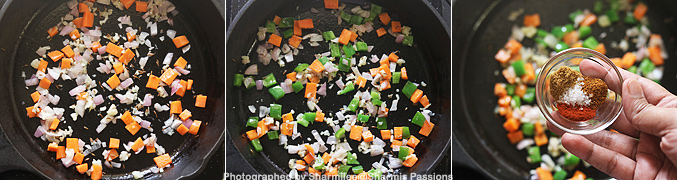
2.Add ginger garlic paste, saute for a minute then add chopped onion, saute till it becomes transparent.
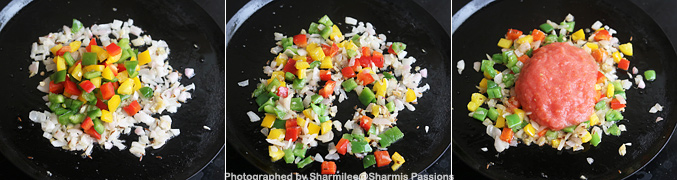
3.Add chopped capsicum, saute for 2 minutes. Then add tomato puree.
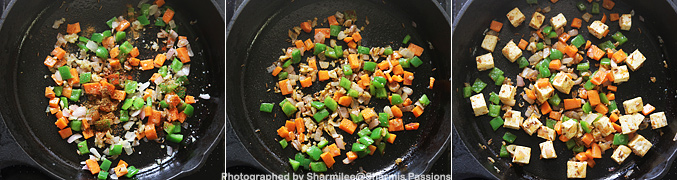
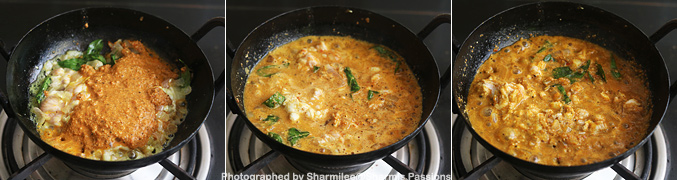
4.Give a quick mix, then add red chilli, roasted jeera and garam masala powders along with required salt.
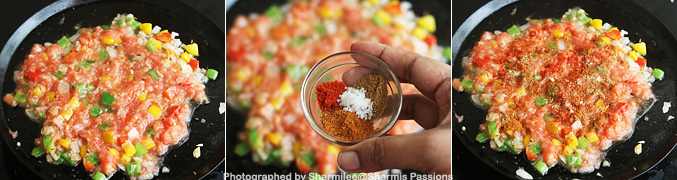
5.Cook until raw smell of tomatoes leave. It will become dry in few minutes.
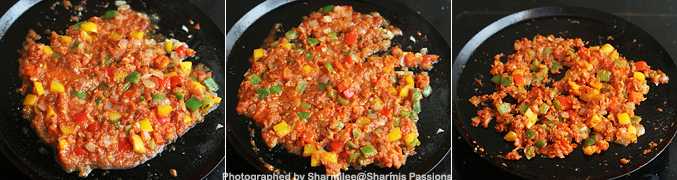
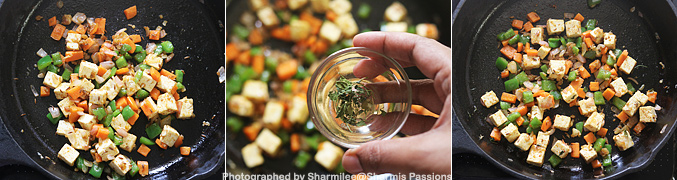
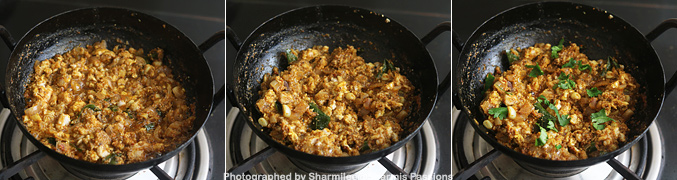
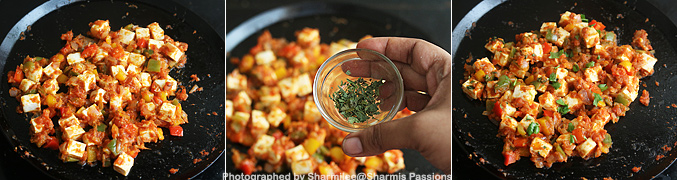
6.Sprinkle little water then add paneer and toss it so that the masala coats the paneer well.

7.Add crushed kasoori methi and chopped coriander leaves and switch off.
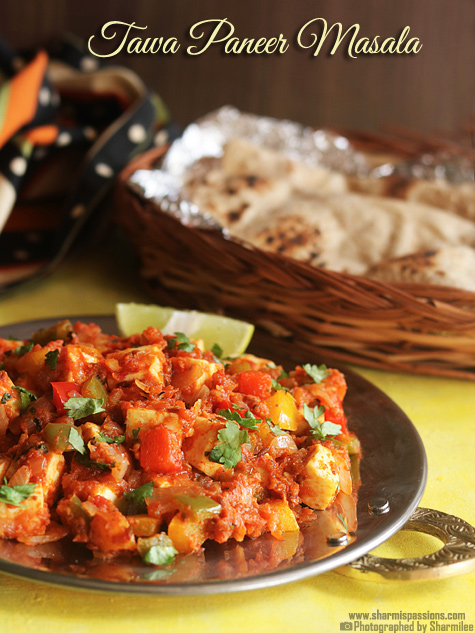
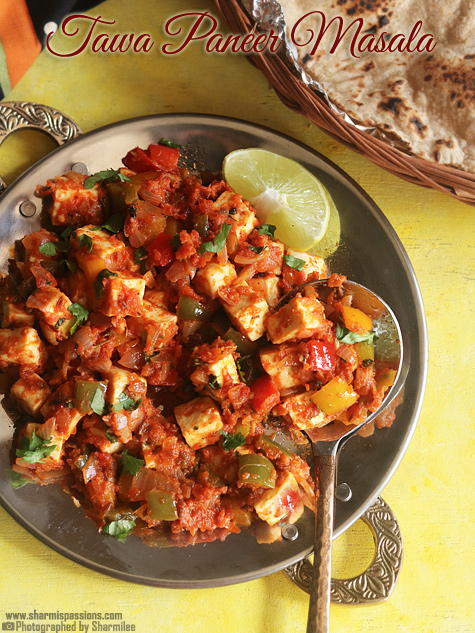
Serve hot with rotis with a lemon wedge.
Expert Tips
- Paneer - I make sure the paneer is soft, I usually soak it in warm water for few minutes if it feels little hard.
- Masala cooking - I cook the tomato puree well till the raw smell goes, try not to skip this step or the taste will go little off.
- Flame control - I keep the flame in medium while cooking on tawa, high flame may burn the masala very quickly.
- Water adding - I add only little water if needed, too much water will spoil the semi dry texture of the dish.
- Kasoori methi use - I crush it between my hands before adding, it releases more flavor and aroma nicely.
Serving and Storage
Serve it hot with roti, naan or phulka straight from tawa. This also taste good with jeera rice or plain rice and dal. It can be used as stuffing for rolls also. Store leftovers in fridge and reheat on tawa with little water. Freshly made always taste better.
FAQS
1.Can I make this without capsicum?
Yes capsicum can be skipped, the dish will still taste good with onion and tomato base.
2.Can I make it more gravy like?
Yes add more tomato puree and little water to make gravy version.
3.Is butter necessary?
Butter gives best flavor but oil can be used if needed.
4.Can spice level be reduced?
Yes reduce chilli powder and garam masala for mild taste.
5.Can this be made in advance?
It can be made few hours earlier, but reheat properly before serving.
If you have any more questions about this Tawa Paneer Recipe do mail me at sharmispassions@gmail.com. In addition, follow me on Instagram, Facebook, Pinterest, Youtube and Twitter .
Tried this Tawa Paneer Masala Recipe? Do let me know how you liked it. Also tag us on Instagram @sharmispassions and hash tag it on #sharmispassions.
📖 Recipe Card

Tawa Paneer Recipe | Tawa Paneer Masala Recipe
Ingredients
- 1 cup paneer cubed
- 1 no small sized big onion finely chopped
- ½ cup tomato puree just grind 2 medium sized tomatoes to a semi fine paste
- ⅓ cup capsicum cubed - I used coloured capsicum
- 1 teaspoon ginger garlic paste
- 1 teaspoon red chilli powder
- ¾ teaspoon roasted jeera powder
- ½ teaspoon garam masala powder
- 1 teaspoon kasoori methi
- 1 tablespoon coriander leaves
- salt to taste
To temper:
- 1 heaped teaspoon butter
- 1 teaspoon jeera
Instructions
- You first need a tawa for making this, dosa tawa will be fine. I used flat bottomed dosa tawa. Heat butter when it starts to melt, add jeera let it crackle.
- Add ginger garlic paste, sauté for a minute then add chopped onion, sauté till it becomes transparent.
- Add chopped capsicum, sauté for 2mins.Then add tomato puree.
- Give a quick mix, then add red chilli, roasted jeera and garam masala powders along with required salt.
- Cook until raw smell of tomatoes leave. It will become dry in few mins.
- Sprinkle little water then add paneer and toss it so that the masala coats the paneer well.
- Add crushed kasoori methi and chopped coriander leaves and switch off. Enjoy Tawa Paneer!
Notes
- Paneer - I make sure the paneer is soft, I usually soak it in warm water for few minutes if it feels little hard.
- Masala cooking - I cook the tomato puree well till the raw smell goes, try not to skip this step or the taste will go little off.
- Flame control - I keep the flame in medium while cooking on tawa, high flame may burn the masala very quickly.
- Water adding - I add only little water if needed, too much water will spoil the semi dry texture of the dish.
- Kasoori methi use - I crush it between my hands before adding, it releases more flavor and aroma nicely.
Nutrition
The post Tawa Paneer Recipe (Tawa Paneer Masala) appeared first on Sharmis Passions.