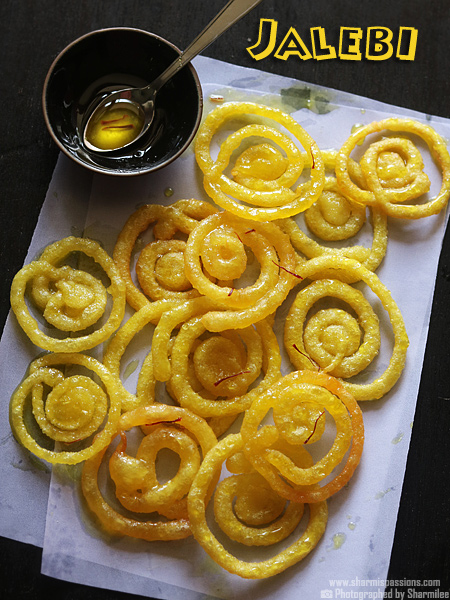
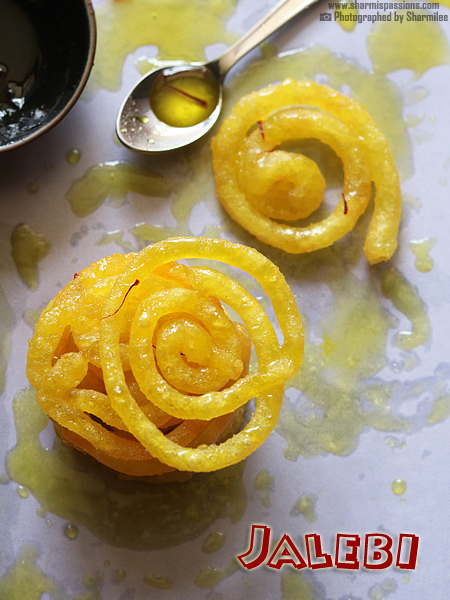
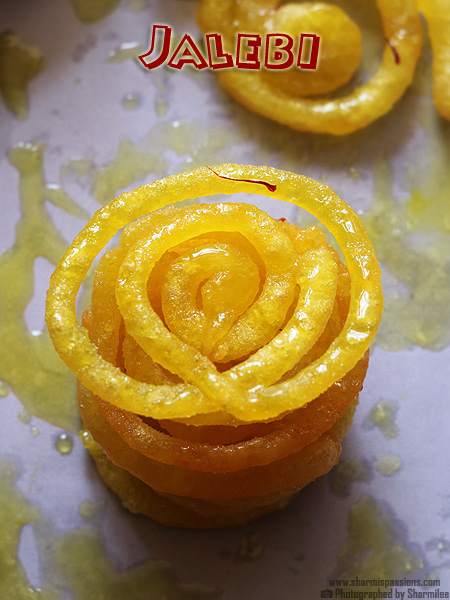
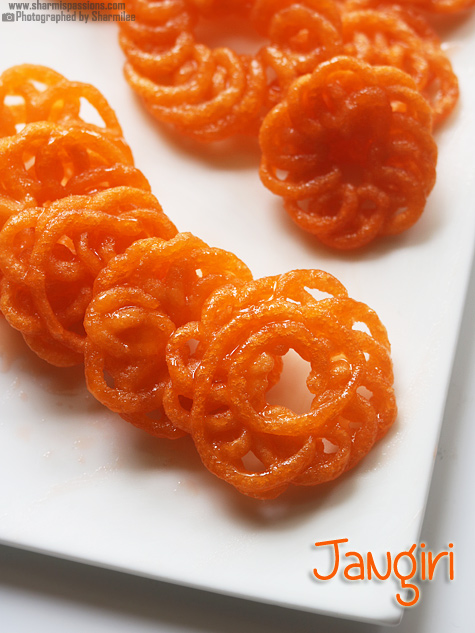
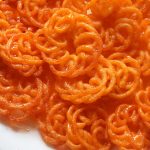
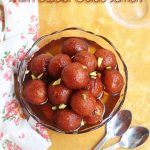
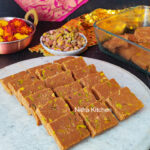
Jalebi is a juicy sweet made by pouring a fermented maida batter into hot oil in concentric circles, frying it until crisp and dipping it inside sugar syrup. It is mostly made during festive seasons and special occasions. Sweet jalebi with syrup is perfect for celebration or even just a small treat at home. The smell of hot jalebi frying in oil itself makes you feel so happy.
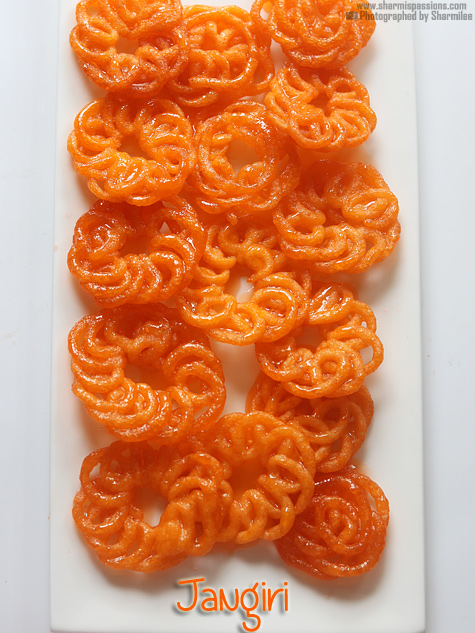
This dessert is little tricky but really worth trying at home. The batter ferments overnight and gives that nice tangy flavor which is very special for jalebis. The sugar syrup coats each jalebi well making it soft inside and crisp outside. It is one of those sweets everyone likes, and honestly looks so pretty on the plate also.
[feast_advanced_jump_to]
About Jalebi
Jalebi is a sweet made using maida and little besan along with a hint of yogurt and baking powder. Then it is poured in hot oil in small concentric circles, fried until crisp and dunked straight into warm sugar syrup. You can add pinch of cardamom or saffron too for extra aroma.
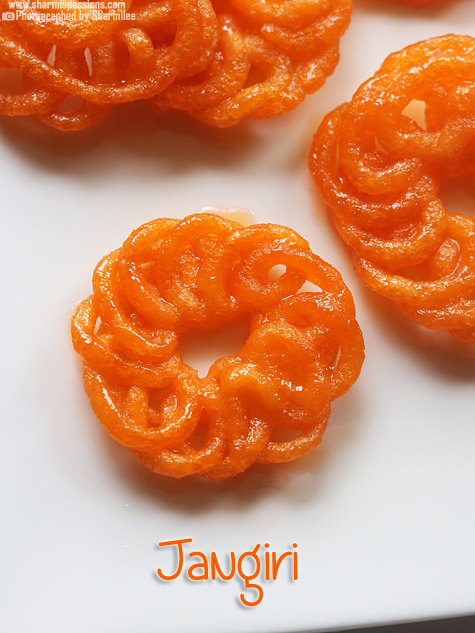
The texture comes crispy outside and soft inside, almost falling in love the second you take one bite. The sugar syrup gives sweetness and that glossy look which makes jalebi very tempting. It is usually golden yellow in color and you can make plain or add saffron for more flavor.
The taste is sweet and little tangy because of fermentation, and that combo is really lovely for dessert lovers. Sometimes after sitting few minutes in syrup it actually tastes more tasty and juicy. Making jalebi takes some time but the result always feels worth it. The batter must be thick but still pourable, otherwise it won't hold shape.
I usually make jalebi during special days or whenever I feel like something celebratory at home. I love dipping it in warm syrup so it stays juicy. It is fun to make with family too, drawing circles in oil and watching them puff slightly, it gives that festive mood instantly.
Jalebi Ingredients
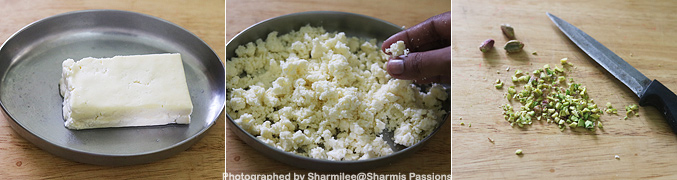
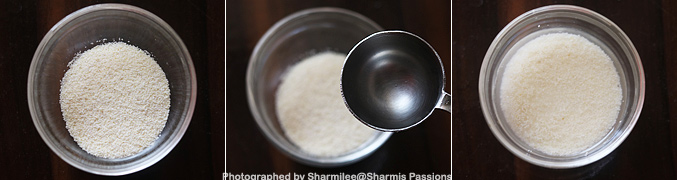
- Maida (all-purpose flour) - I use it for the batter, it gives soft inside and slightly chewy texture. You can mix little atta if you want mild wheat flavor.
- Besan flour - I add small amount to help batter hold shape and give little nutty flavor.
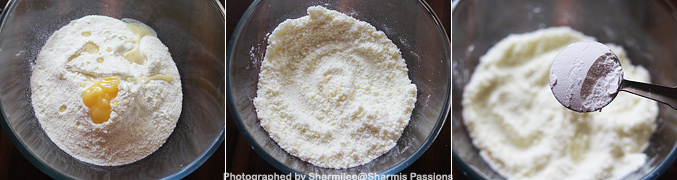
- Baking powder - I add a small pinch for slight puffiness while frying.
- Baking soda - Tiny pinch helps batter rise, gives crisp outer layer. Don't add more else batter becomes loose.
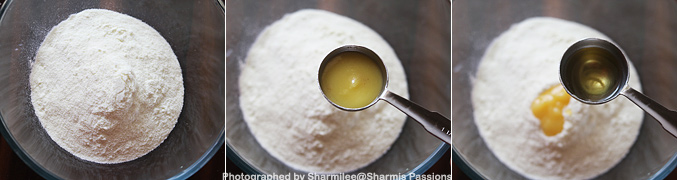
- Sour curd / yogurt - I add for fermentation and tangy flavor. It also helps batter get small bubbles after resting overnight.
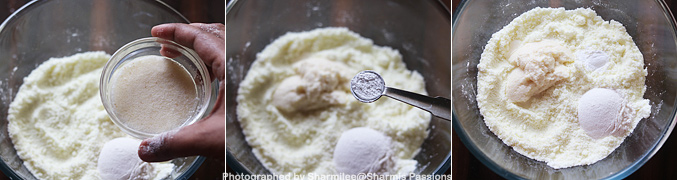
- Water - I added lukewarm water little by little to get batter thick yet pourable. Too thin batter will not hold shape while making jalebi.
- Oil - I deep fry in heavy bottom pan, level enough to immerse jalebi. Can use ghee for richer taste.
- Sugar - I use it for making the syrup, it makes the jalebi sweet and little sticky. The syrup should be thick but not too much thick.
- For the syrup - I put a little yellow color or sometimes turmeric for getting the shade, saffron and cardamom for nice smell, and rose essence for light fragrance. Lemon juice helps the syrup from turning grainy.
Why This Recipe Works
- This makes crispy outside and soft inside jalebis.
- It's tangy from fermented batter and sweet from syrup.
- It has golden color and perfect shape make it look beautiful for occasions.
- It can be prepared in advance as batter ferments overnight.
- Simple ingredients but gives professional style sweet at home.
Similar Recipes
How to make Jalebi Step by Step
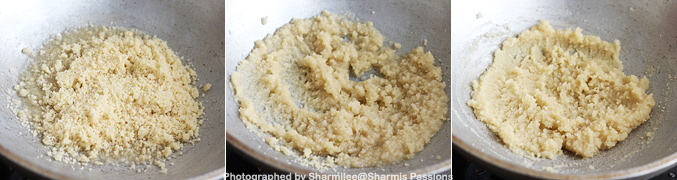
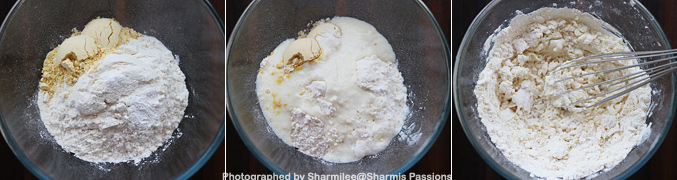
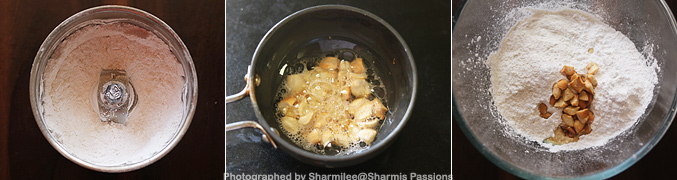
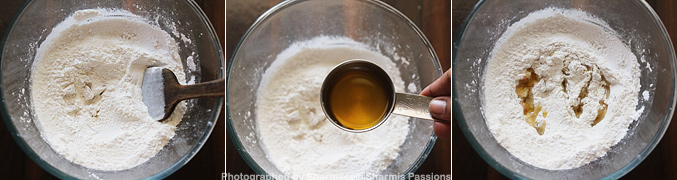
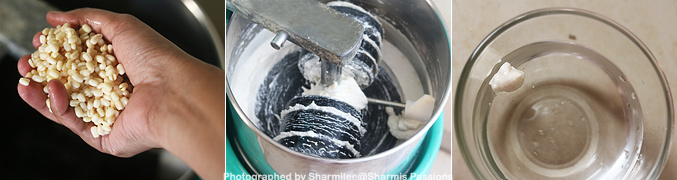
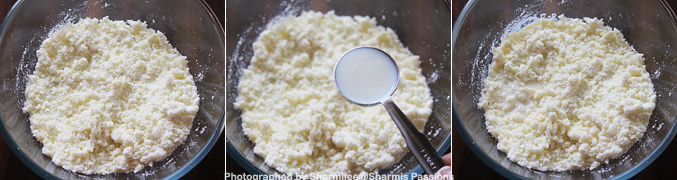
1.In a mixing bowl - take maida, besan flour, baking powder, baking soda, sour yogurt, mix it with a whisk.
2.Then add water little by little to form a thickish batter more like idli batter consistency.
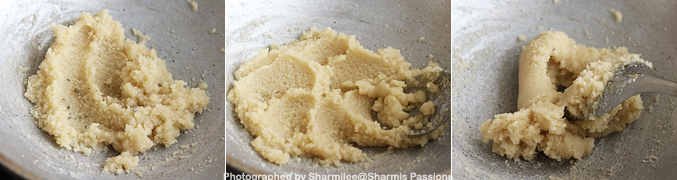
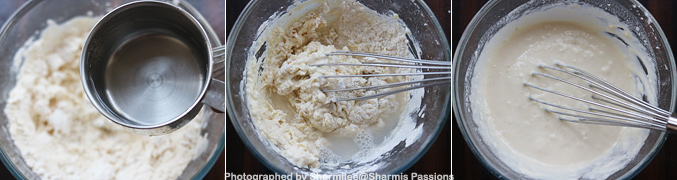
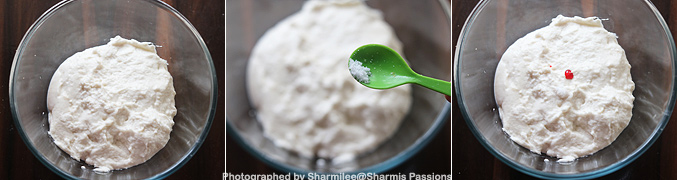
3.It should be pourable but very thick, Add food color, mix it well, Make sure there are no lumps.
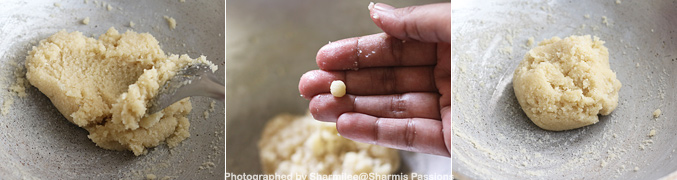
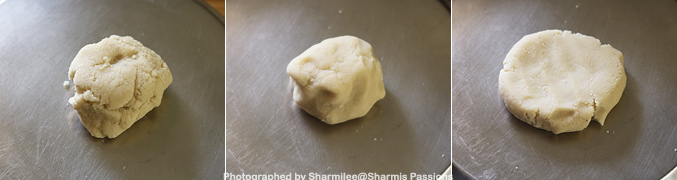
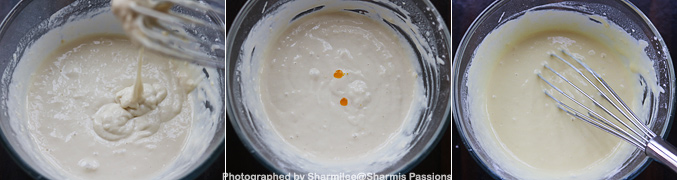
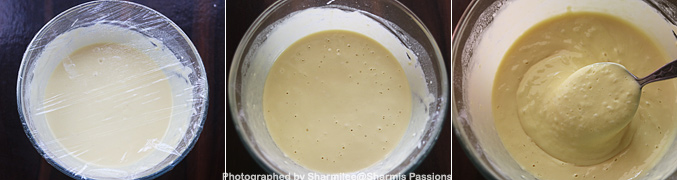
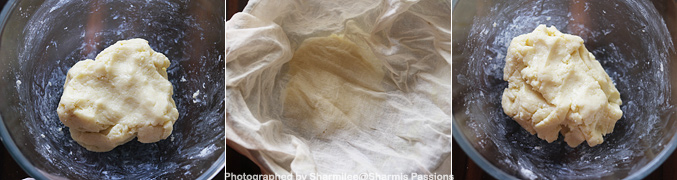
4.Cling wrap it and set aside for at least 12-15 hours or overnight preferably in a warm place. Next day morning if you check there will be small bubbles seen as shown. Mix well, when you mix you can see the fermented batter, even the smell will be different. Set aside. It may be slightly runny the next day.
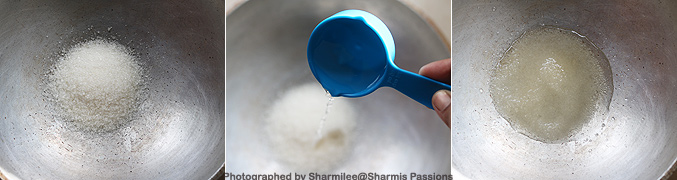
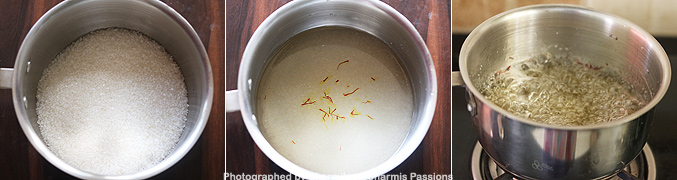
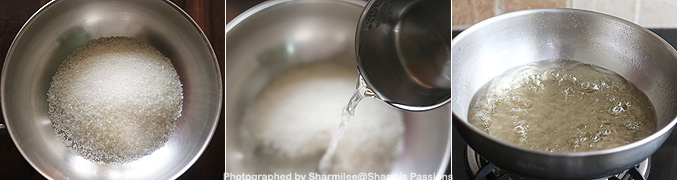
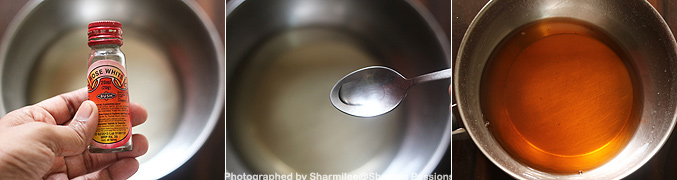
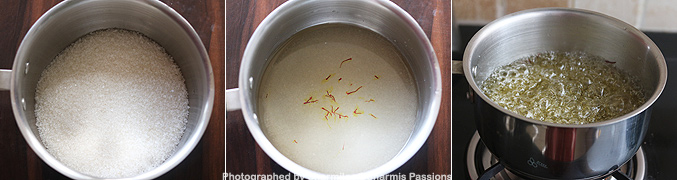
5.Take sugar in a pan - add water and saffron let it boil
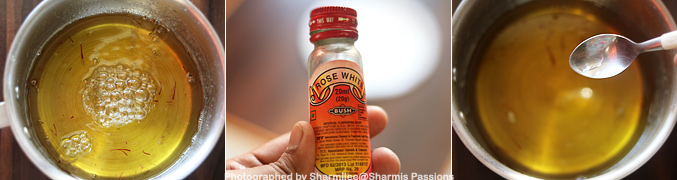
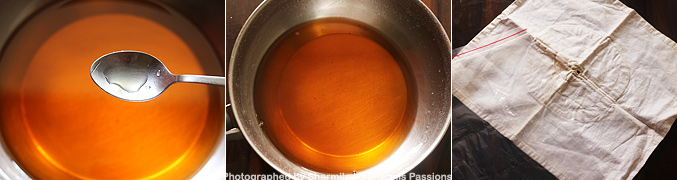
6.When it forms a thick sticky syrup switch off, Add food color and rose essence.
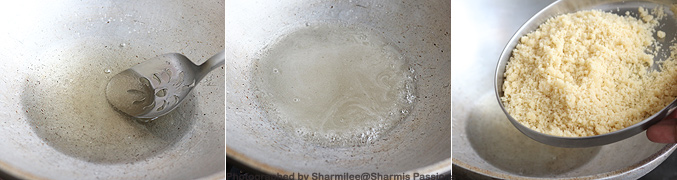
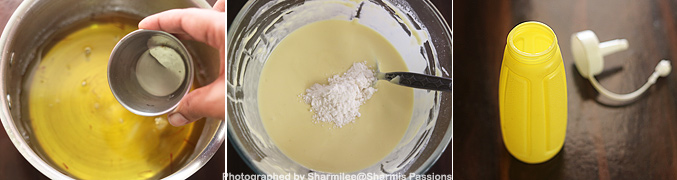
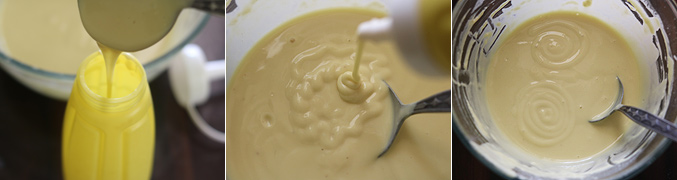
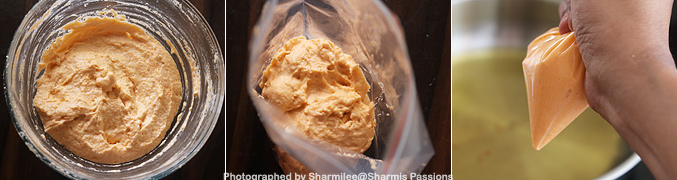
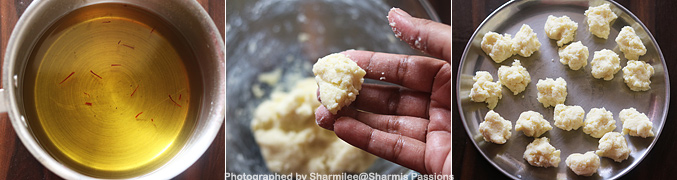
7.Add lemon juice to prevent from crystallization. I added 2 teaspoon maida flour(do not add more) as I found the batter a bit runny, this step is purely optional, if your batter is thick you don't need to add flour. Now take a sauce bottle or zip lock or whichever is suitable for you.
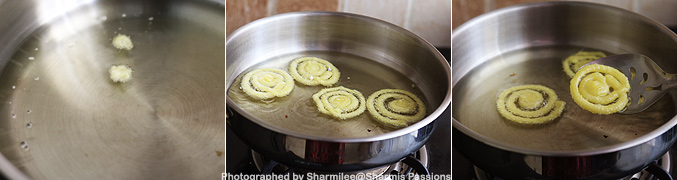
8.Fill the sauce bottle with the batter. Check by drawing concentric circles on the batter itself, just for practice.
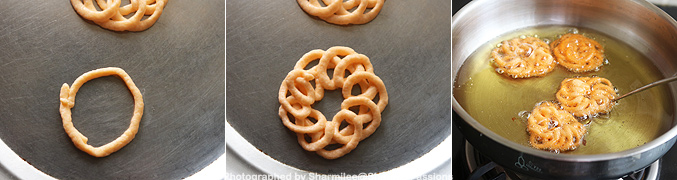
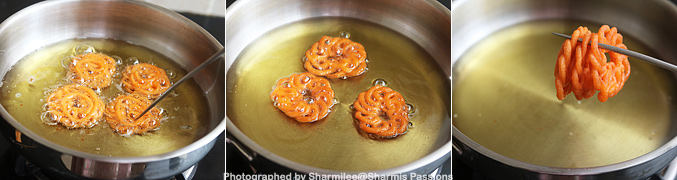
9.Heat oil in a flat heavy bottomed pan(the level of oil should be just right for the jalebis to immerse) - try pouring few drops it should rise immediately without sticking and changing color then the oil temperature is perfect. Now start drawing small concentric circles. Deep fry, turn over and cook on both sides until slightly golden and crisp. Drain for few seconds.
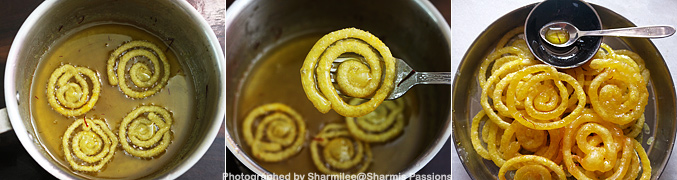
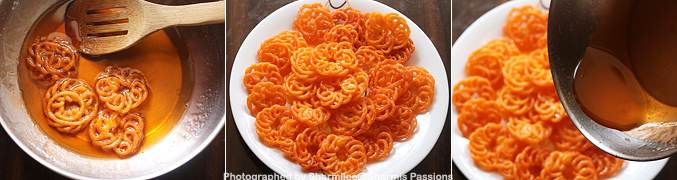
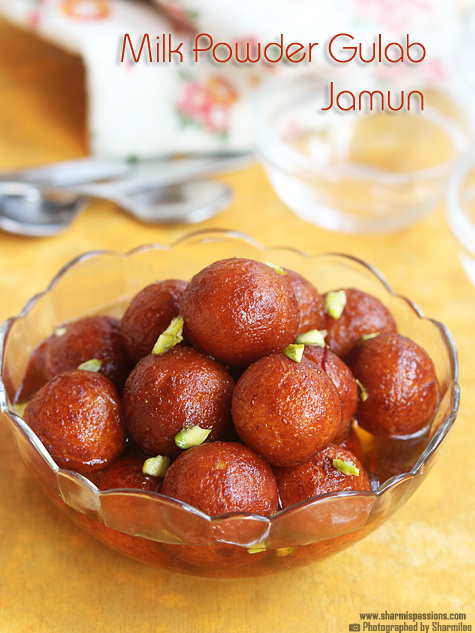
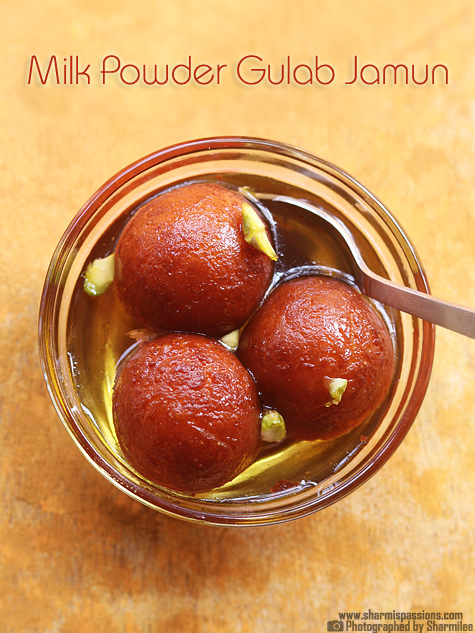
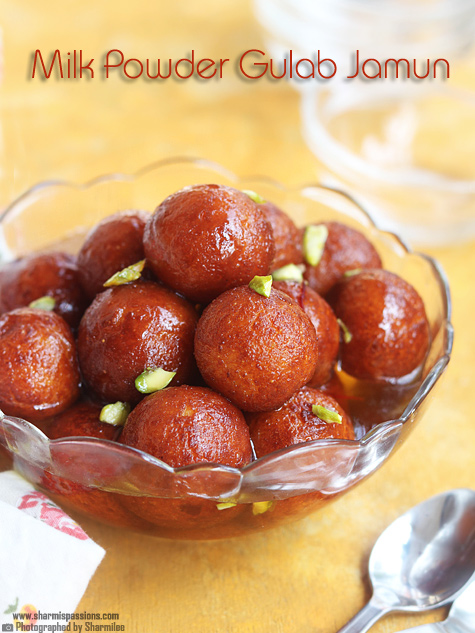
10.Immediately add it to the sugar syrup, dip it for few seconds, press it with a fork for the jalebis to dunk in, turn over and press again. Remove the jalebi from oil and immediately add it to get the syrup evenly coated put them in the sugar syrup. Remove and place it in a plate. Then store. I got a big container full.
I love it when it still warm, juicy yummy jalebis!!!
Expert Tips
- Ferment batter - I keep batter in warm place overnight. Bubbles show it is ready and smell becomes slightly tangy.
- Batter consistency - Thick but pourable like idli batter. Too thin batter spreads and won't hold shape.
- Frying oil - I keep in low-medium flame works best. Test with few drops first, should rise without changing color quickly.
- Making shapes - I used thin-holed nozzle or sauce bottle. Draw small circles, do not overcrowd in pan or stick.
- Serving warm - I serve immediately after dipping in syrup. Leftover can keep at room temp or fridge, warm slightly before serving.
Serving and Storage
Serve jalebi warm or slightly cooled. Goes well alone or with rabri. Leftover jalebi can keep in airtight container at room temperature for few hours or in fridge. While serving again, warm little so syrup mixes back and jalebi stays soft inside.
FAQS
1.Can I skip food color?
Yes, jalebi will be pale. Can use pinch turmeric if you want golden color.
2.Can I make batter less hours?
Better to ferment 12 hours, else jalebi will not get tangy and bubbles.
3.Can I add more baking soda?
No, too much makes batter porous and jalebi loose.
4.Can I fry on high flame?
No, jalebi will burn outside and stay raw inside. Use low-medium flame.
5.Can I store in fridge?
Yes, airtight container 1-2 days. Warm slightly before serving.
If you have any more questions about this Jalebi Recipe do mail me at sharmispassions@gmail.com. In addition, follow me on Instagram, Facebook, Pinterest, Youtube and Twitter .
Tried this Jalebi Recipe? Do let me know how you liked it. Also tag us on Instagram @sharmispassions and hash tag it on #sharmispassions.
📖 Recipe Card
Print
Jalebi Recipe | Jilebi Recipe
Jalebi is a juicy sweet made by pouring a fermented maida batter into hot oil in concentric circles, frying it until crisp and dipping it inside sugar syrup. It is mostly made during festive seasons and special occasions. Sweet jalebi with syrup is perfect for celebration or even just a small treat at home. The smell of hot jalebi frying in oil itself makes you feel so happy.
Course sweets
Cuisine Indian
Keyword all purpose flour recipes, cardamom powder recipe, curd recipes, diwali dishes, diwali food, diwali mithai, diwali recipes, diwali snacks, diwali sweets, diwali sweets recipes, easy diwali recipes, Festival, maida recipes, North Indian, sweet recipes, virtual diwali party, yogurt recipes
Prep Time 12 hours hours 10 minutes minutes
Cook Time 30 minutes minutes
Total Time 12 hours hours 40 minutes minutes
Servings 25 Jalebi
Calories 52kcal
Author Sharmilee J
Ingredients
- 1 cup maida
- 2 tablespoon besan flour
- ¼ teaspoon baking powder
- ⅛ teaspoon baking soda
- 2 tablespoon sour curd
- few drops yellow food color
- luke warm water as required
- oil to fry
- 1 cup sugar
- ¾ cup water
Instructions
Making Batter:
In a mixing bowl - take maida, besan flour, baking powder, baking soda, sour yogurt, mix it with a whisk.
Then add water little by little to form a thickish batter more like idli batter consistency.
It should be pourable but very thick. Add food color, mix it well, make sure there are no lumps.
Cling wrap it and set aside for at least 12-15 hours or overnight preferably in a warm place.
Next day morning if you check there will be small bubbles seen. Mix well, when you mix you can see the fermented batter, even the smell will be different. Set aside. It may be slightly runny the next day.
Making Sugar Syrup
Take sugar in a pan - add water and saffron let it boil
When it forms a thick sticky syrup switch off, add food color and rose essence.
Add lemon juice to prevent from crystallization. I added 2 teaspoon maida flour (do not add more) as I found the batter a bit runny, this step is purely optional, if your batter is thick you don't need to add flour. Now take a sauce bottle or zip lock or whichever is suitable for you.
Making Jalebis:
Fill the sauce bottle with the batter. Check by drawing concentric circles on the batter itself, just for practice.
Heat oil in a flat heavy bottomed pan (the level of oil should be just right for the jalebis to immerse) - try pouring few drops it should rise immediately without sticking and changing color then the oil temperature is perfect.
Now start making small concentric circles in oil with the batter. Deep fry, turn over and cook on both sides until slightly golden and crisp. Drain for few seconds.
Immediately add it to the sugar syrup, dip it for few seconds, press it with a fork for the jalebis to dunk in, turn over and press again.
Remove the jalebi from oil and immediately add it to get the syrup evenly coated put them in the sugar syrup. Remove and place it in a plate. Store in an air tight container. Enjoy Jalebi!
Notes
- Ferment batter - I keep batter in warm place overnight. Bubbles show it is ready and smell becomes slightly tangy.
- Batter consistency - Thick but pourable like idli batter. Too thin batter spreads and won't hold shape.
- Frying oil - I keep in low-medium flame works best. Test with few drops first, should rise without changing color quickly.
- Making shapes - I used thin-holed nozzle or sauce bottle. Draw small circles, do not overcrowd in pan or stick.
- Serving warm - I serve immediately after dipping in syrup. Leftover can keep at room temp or fridge, warm slightly before serving.
Nutrition
Serving: 25g | Calories: 52kcal | Carbohydrates: 12g | Protein: 1g | Fat: 0.2g | Saturated Fat: 0.1g | Polyunsaturated Fat: 0.1g | Monounsaturated Fat: 0.03g | Cholesterol: 0.2mg | Sodium: 11mg | Potassium: 13mg | Fiber: 0.2g | Sugar: 8g | Vitamin A: 2IU | Vitamin C: 0.05mg | Calcium: 6mg | Iron: 0.1mg
The post Jalebi Recipe | Jilebi Recipe appeared first on Sharmis Passions.