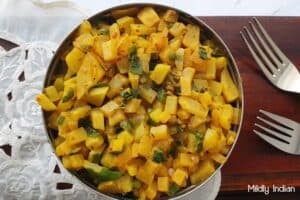
Ellu podi | dry til chutney

Dry til chutney or ellu podi is a common accompaniment on the side of a home-style thali. This dry condiment is a melange of lentils and sesame seeds with spices. Make some of this vegan, gluten-free ellu podi to complement your meals.
Molagapodi or the dry chutney that is used with dosa or idly comes in many flavours like garlic chutney podi and dhaniya podi. This adds a lot of variety to the same breakfasts that we make day after day or the simple home-style lunch. Also, it is one with a fantastic shelf life, thereby a boon to providing some relief to busy mornings. Here is another one that is handy, ellu podi.
Black and white sesame seeds
Sesame seeds are one of the tiniest ingredients that are common in the Indian kitchen. In fact, it is one of the hardest to harvest due to its size too. In the Asian markets, both black and white seeds are available. Both varieties of oil-rich seeds are rich in iron and calcium. Black sesame seeds are explored for their ability to reduce oxidative stress.
Hulled and unhulled sesame seeds
The polishing process at times removes the edible outer coating of the sesame seeds. This is the Hulled sesame seeds. If the outer coat is intact, it is unhulled. Nutritionally they are not very different. In addition, both hulled and unhulled seeds are equally edible roasted or raw. The hulled ones are brighter white and the unhulled white sesame seeds are slightly browned.
Ingredients for this til chutney
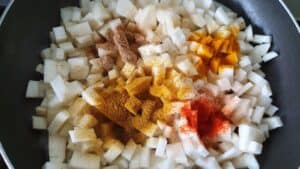
Sesame seeds- for this recipe I have used unhulled white sesame seeds. You can use black ones too and the podi looks much darker in colour. Upon roasting the sesame seeds have pop slightly and release the oils. upon grinding if the til chutney looks too oily roast some more of the lentils and adjust to form a dry powder.
Black gram dal- Urad dal or ulundu parippu is the base of most molagapodis. The skinned version is roasted and powdered. If using black sesame seeds, you can use the skinned black ones too. Roast well till they turn golden or aromatic.
Chickpea Dal-Bengal gram or kadala parippu is roasted separately and powdered with the urad dal. These two form the lentil base for most molagapodis. Roasted till slightly deeper brown the dal is crunchy and easy to powder.
Curry leaves- you can’t miss out on the karivepelai to give the classic ellu podi aroma. Add a handful if you have one. Dried ones will work well too, slightly roast before powdering.
Red chillies: depending on the spice levels you prefer can use a couple of different varieties here. The bydige or Kashmir red chilli adds a deep red colour without adding all that heat. Whereas the Guntur varieties give lighter red colour with a lot more pungent heat packed in. The ellu podi in the picture has bydige as I am not a huge fan of the heat.
Salt: Seasoning with salt is an absolute must to flavour and keep a good shelf life for the powder.
Hot tip:
On the first day, the salt doesn’t flavour well as the fresh ground chillies take over the flavour. However, taste test the next day to adjust the salt levels as by now the lentils will start absorbing the flavours and the pungent heat is slightly toned down.
Steps to make the dry til chutney
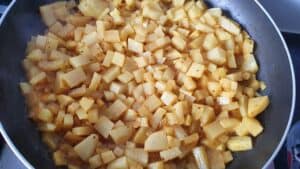
Roasting: dry and slow roasting of each ingredient ensures that the lentils are cooked and also that they can be powdered well. The sesame seeds crackle when roasted releasing the oil needed to bring the powder together. Each ingredient has a different time to roast, so have to be done separately.
Grinding: A spice mill or a coffee grinder can powder the spice mix. Powder the lentils and seasoning separately and then mix them well together. At times the sesame seeds will become mushy upon grinding as they release a lot of oil. Add a tablespoon or two of the lentil mix and grind further to reduce the stickiness.
Ellu podi
Equipment
- Kadai
- spatula
- measuring cups and spoons
Ingredients
- 1/2 cup Urad Dal
- 1/4 cup Channa Dal
- 1/2 cup sesame seeds
- 20 curry leaves
- 10 dry red chillies
- salt to taste
Instructions
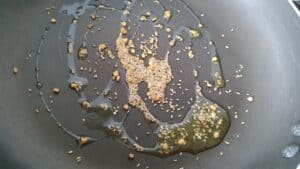
- Set the kadai on low heat and let it come to warmth.
- Now add the sesame seeds and let it roast gently.
- When the seeds start popping and turn golden brown, remove from heat and set it aside to cool.
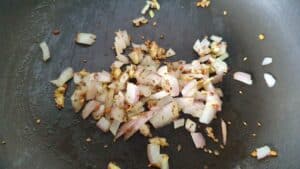
- The kadai now has an oil coating which can be used to roast the urad dal .
- When the dal is golden brown remove and add to the plate to cool.
- Roast the channa dal the same way.
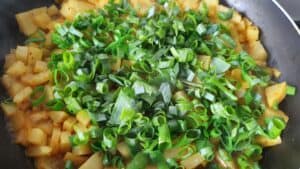
- Now add red chillies and curry leaves to roast and till the curry leaves are crispy.
- Remove and let it cool a bit,
- Powder each ingredient and add into a mixing bowl.
- Mix all the ingredients together and add salt to taste.
- Once the mix is cool, taste test and store in airtight bottles.
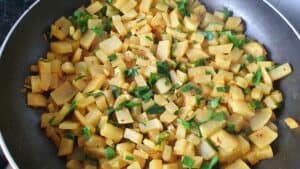
- The ellu podi is now ready to use.
Storing the ellu molagapodi
The til chutney will become rancid if exposed to air much faster. If you are making a batch store it in an airtight bottle on the countertop for about 15 days. Use a dry spoon to serve it. If keeping for a bigger batch keep it in the fridge to slow down the loss of flavour.
Serving ideas for the til chutney
With lunch thali- The dry til chutney can replace the thogayal in the classic south Indian thali meal. It provides a lovely pickle kind of side to add flavour to the dishes.
With idly and dosa- Just like using molagapodi, Ellu podi can be used to dip the idlis and dosas to have. You can add a touch of oil to make a paste that can be smeared on the idlies.
Make a thogayal- Add two or three tbsp of warm water to about the same quantity of til chutney powder and let it sit for 5 to 10 minutes. This will form a thick soft chutney. Further you can dilute it with water if needed.
In variety rice- Just like we make pickle masala rice, sprinkle the chutney podi on the stirfrying leftover rice and make a delightful ellu rice. You can add a tempering of mustard seeds and garnish with coriander leaves to make it more flavourful.
In parathas- Add a tablespoon of til chutney to the atta before kneading it and mix well. This gives a unique flavour to the paratha when cooked, yet cannot be seen much.
Add to sandwiches and wraps– Use the til chutney in your rolls, wraps and sandwiches as this dry spice mix will add flavour without going soggy. Add cooked and drained beans, herbs, or a basic salad to the wrap to make it filling. Smear a bit of the paste-like ellu podi on the slices of bread and make a basic tomato-cucumber sandwich, it tastes amazing.
Collaborations
![]()
The dry til chutney recipe is added to the A_Z collection of recipes for the Alphabet T. Sesame seeds are Til in Hindi and this long-stay chutney is what I chose to showcase.
Stay connected
When you make this ellu podi, tag us or share with us how you like it. Leave us a comment with a 5-star rating to tell us how it is, we would love to hear from you. Stay subscribed as this year we will try our best to bring you a lot more recipes. Stay connected and see you again soon.