❌

Reading view

There are new articles available, click to refresh the page.

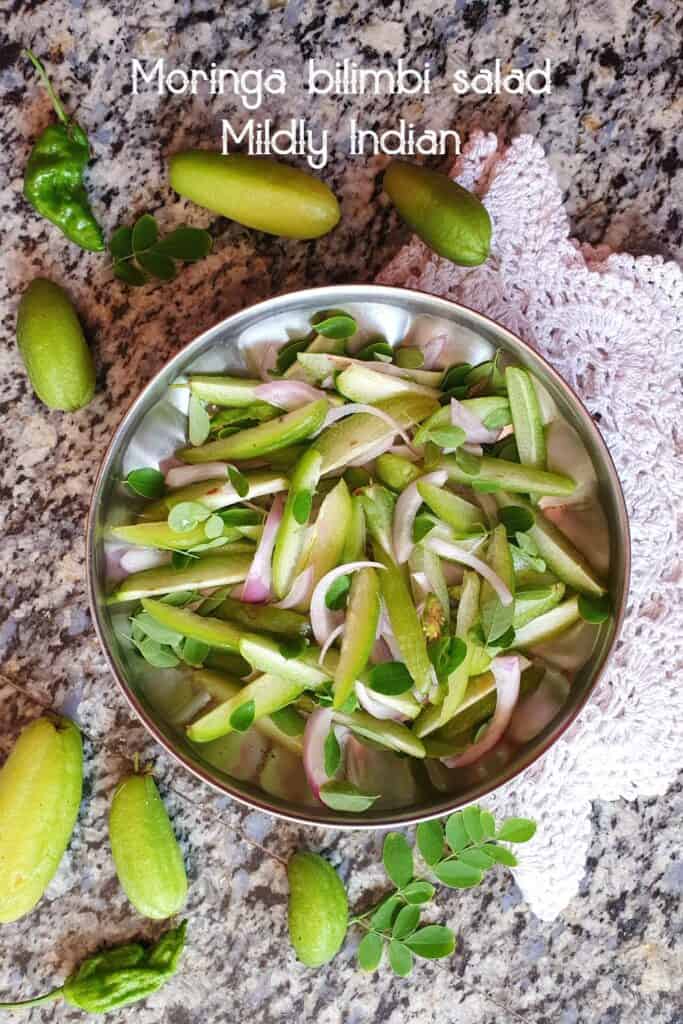
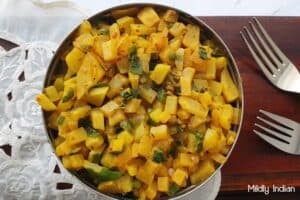
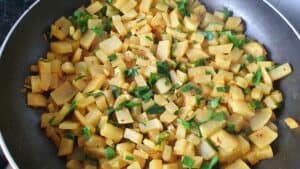
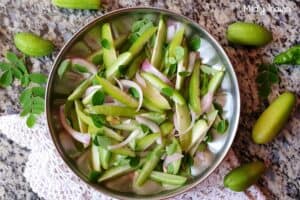
Spicy Moringa bilimbi salad

The India trip is exciting in many ways. Not only do I love being with my parents,Β  the travel but also the foods that I hardly get to see in my daily run in Sydney. However, it was getting to a point where the cooked foods were constant and I missed the simplicity of forking some salad for lunch. Invading into the kitchen garden, the bilimbi tree was almost as if it was waiting for me. This was the first time my daughter saw me climb a tree. She really did not believe I had the monkey in me. Anyway, now that’s proven!Β  we made a sour spicy salad to accompany the meals (just because amma won’t allow the bilimbi salad as a meal).

What is bilimbi?

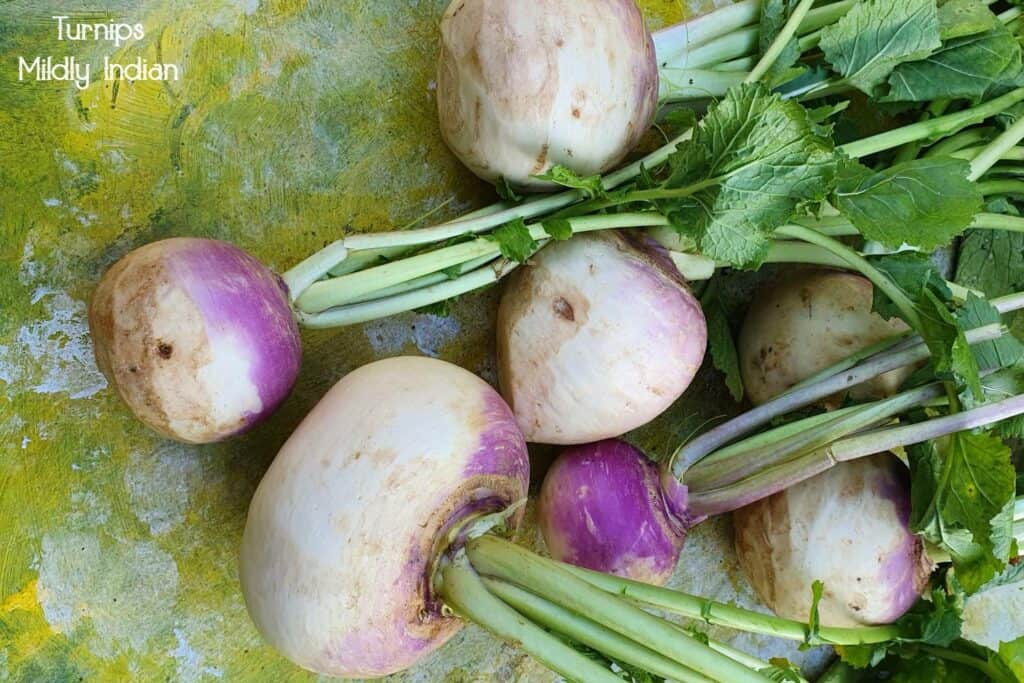
A close relative of the carambola tree the bilimbi, Averrhoa bilimbi is a small tree that grows well in the tropics and a native of South East Asia.Β  Flowering as deep red inflorescence these turn into soft-skinned green fruit. This is bilimbi fruit that has a lot of culinary interest. The whole fruit is edible. The fruit grows in clusters from the stem. The fruit in local Indian names is irumban puli(malayalam) bimbuli (kannada), kamias(Tagalog). (Share with us more regional names if you have any for this fruit please).

bilimbi tree
What does bilimbi taste like?

The crunchy and firm fruit is actually extremely juicy to bite into. The fruit is highly sour and acidic with a slight metallic after-taste. Unlike carambola, the fruit does not turn sweet upon ripening. If eaten raw, best tasted with a pinch of salt mixed with cayenne. Choose the younger fruit if you like a bit lesser intensity for the sourness, especially for salads. For curries, the ripe fleshy ones are more suited.

Ingredients for the salad

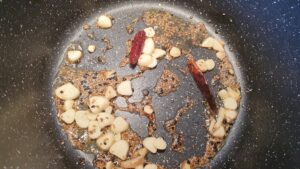
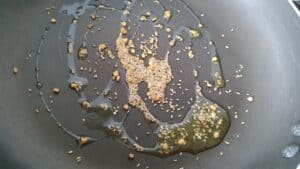
Apart from young bilimbi, you will need other ingredients. A small red onion that is finely sliced and a green chilli to add spiciness. You can either pound the chilli with salt to mix it in the salad or chop it in.Β  I have added a handful of fresh moringa leaves as the mesclun. If you don’t have access to them, use arugula or spinach in their place. Use fine salt to the season only at the end as it draws out a lot of juice from the bilimbi making the salad soggy.

The recipe card below gives the proportion of the ingredients. From this recipe card, you can directly save onto your pin board if you need to find some of the fruit too.

Print

Moringa Bilimbi Salad

Course Appetizer, Salad
Cuisine Fusion, gluten free, Indian
Keyword moringa recipes, Tree sorrel recipes
Prep Time 10 minutes
Servings 2 people

Equipment

  • mixing bowls and spoons.

Ingredients

  • 10 medium Tree sorrel fruit Adjust based on your sourness tolerance.
  • 1 small red onion hinly sliced
  • 1/2 cup moringa leaves cleaned and separated
  • 1 green chilli
  • salt to taste

Instructions

  • Wash and clean all the vegetables for the salad.
  • Cut the tree sorrel fruit into wedges or thinner slices.
  • Slice the onion and set it aside.
  • Thinly slice the chilli remove seeds and central core if you need lesser heat.
  • Clean the moringa leaves, remove small stalk bits and wash throughly. Drain and set it aside.
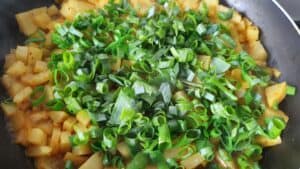
  • Into the mixing bowl add the prepared ingredients and mix well. Sprinkle salt and let it sit for 5 minutes.
  • Mix again and the salad is ready to be served.

Notes

It will be lovely to top this salad with a seed mix of sunflower seeds, pumpkin seeds and flax seeds. Since we paired it with a south Indian thali meal, we did not use any.Β 

Pairing the moringa bilimbi salad.

Since the salad is sour and spicy, it will be a fabulous side to protein-rich preparations. Ideally, it will taste awesome with sheek kebabs, rajma cutlets,cheela or cutlets. If you chop the bilimbi fruit smaller, you can mix it with a basic bhel mix to make a tasty snack. We did not wait for all that but had it just as such with a classic South Indian thali.

Stay connected

We love to bring you new ideas and recipes as we explore them. Hopefully, we will have more tree sorrel recipes I hope you like them too, rate us and leave a comment on your experience of our website. Check out our YouTube, Instagram and Facebook pages too.

moringa Bilimbi Salad

Kothavarakkai poriyal | Cluster beans stirfry

Kothavarakkai poriyal | cluster beans stir fry

Kothavarakkai poriyal is a basic stir fry made with cluster beans. Valued for its medicinal properties this cluster beans stirfry is a gluten-free, vegan addition to your everyday Indian meals.

The visit to Bengaluru this time has seen so many changes. My mother-in-law is finally hooked on blogger world. She is now curious about the new idea. She was talking about bloggers, YouTubers and plenty more who have daily appearances on her devices. So, the suggestion to be videoed while she was making the daily food was welcomed instantly. So as a start, we have kothavarakkai poriyal from her kitchen.

Cluster beans

What is kothavarakkai?

The tender pods of Cyamopsis tetragonoloba are used as a vegetable known in regional languages as guar, gawarfali, the green seed pods that grow in clusters are the product of interest. Grown in crop rotation the guar plant notably provides the legume but also improves the soil by nitrogen fixation. The low-calorie pods are a good source of fibre and potassium.

Did you know?

The much-valued commercial flour improver guar gum is extracted from the endosperm of the mature dry seeds of this plant. This is used in breadmaking, the cheese industry and ice cream manufacture.

Cluster beans stirfry

Ingredients for this kothavarakkai poriyal

This kothavarakka proiyal is made by my mother-in-law. It is one of the simplest stirfries yet very very tasty. Here is the list of ingredients you need to prepare this
Cluster beans or kothavarakkai is the main ingredient in this recipe. Wash and clean the beans. Remove the beans from the thick stalk. Pinch off the tail as it tends to be a bit chewy. Now slice the beans as thin as you like.
Tempering: the classic south Indian tempering is of mustard seeds that crackle to flavour the coconut oil, a touch of dals (split lentils ) for the crunch, followed by curry leaves and red chillies that further flavour the oil.
Seasoning: the recipe is usually just seasoned with salt. However, if you like it spicy use about half teaspoon of cayenne pepper powder can be added.
Garnishes: the final addition of the freshly grated coconut adds a lot of difference to the dish. Honestly, it doesn’t feel the same with the desiccated coconut. However, grated frozen coconut still manages a good bit of flavour.
Additional adds:
Shallots: sliced shallots can be added along with the curry leaves. This gives a wonderful aroma to the poriyal. However, this is not common in Tambaram kitchens so my mother-in-law doesn’t use it.
Cumin: if you don’t have mustard seeds, use cumin. The cumin (jeera) gives a different flavour to the oil.

How to make the poriyal?

As a part of this new journey, we have made a short mature video of how the poriyal is prepared. My mother-in-law is the one who is making this so the measurements in the video are approximate. However, you can follow the recipe card below to get the exact measurements and step-by-step instructions. Hope you will like and share this video too.Β 

Print

Kothavarakkai poriyal

Course Side Dish, Traditional
Cuisine gluten free, South indian
Keyword bean salad, Indian vegetarian dinner, Lunch recipes, warm salad
Prep Time 20 minutes
Cook Time 20 minutes
Servings 4 peopl

Equipment

  • chopping board
  • Knife
  • Kadai
  • ladle

Ingredients

  • 2 cups cluster beans chopped

For tempering

  • 1 tbsp coconut oil
  • 1/2 tsp mustard seeds
  • 1/2 tsp urad dal
  • 1/2 tsp Channa Dal
  • 1 small dry red chilli
  • curry leaves we did not have any.

seasonings

  • 1 pinch turmeric powder
  • salt to taste

To cook

  • 1/4 cup drinking water

Garnish

  • 1/4 cup grated coconut

Instructions

  • Wash and trim the cluster beans.
  • Chop the cluster beans into small bits. Set it aside till needed.
  • Into the khadai add coconut oil and set on medium high heat.
  • As the oil heats up add the mustard seeds, urad dal, channa dal and red chillies. Add curry laves and stir fry till mustard seeds splutter.
  • Add the chopped cluster beans and stir fry for a minute.
  • Now add the turmeric powder, salt and mix well.
  • Add 1/4 cup of water and cover and cook for 5-7 minutes.
  • Once cooked, add the grated coconut and stir fry for another minute or two till water is completely absorbed.
  • The kothavarakkai poriyal is now ready.
    Cluster beans stirfry

Serving suggestions

Kothavarakkai poriyal paired with steamed rice, quinoa or millets with a classic gravy like sundakkai thengaarachukozhambu or podipotta sambhar is a perfect South Indian meal.
To make an easy wrap use a spinach phulka as the base and fill up with this poriyal. If you have cooked potatoes mash add it up to give aΒ  filling wrap.

Meal prep and storage

The poriyal can be made and saved for about 3 days if refrigerated. If storing for a week, I avoid adding the coconut. Since the coconut added is fresh add it after thawing. The cluster beans stirfry is not the best to be frozen. It turns a bit rubbery if texture.

Stay connected

As we are exploring new ideas this year, hope you stay with us by subscribing to our newsletter. When you try this recipe don’t forget to let us know in the comments how you like it and rate the recipe with a 5-star rating. We will love to stay connected with you. Follow us on Instagram or Facebook to receive updates more often.

Cluster beans poriyal

Vegan walnut mushroom mince

walnut mushroom mince

A fantastic vegan alternative, walnut mushroom mince is a filling textually satisfying alternative to faux meat. Try out this simple gluten-free, low-oil recipe that is keto-friendly.

Walnut mushroom mince is one of my favourite fillers for tacos and to add to pasta or fill up a sandwich. The idea was developed as just veggies as filling in a taco was never filling, nor gave depth to that dish. When the recipe was meal prep friendly it was one that my friends loved too. Usually, this mushroom mince is what I go for if there is an omni potluck in which I participate. Throw in some store-bought tacos, a simple pico de Gallo and some shredded vegan cheese, and the plan sounds easy and achievable, doesn’t it?

What mushroom is best for this mince?

There are two mushrooms that work well with the mushroom mince. Portebella and the cremini. If you like a meatier version go with portabello. The cremini gives a nicer mouth feel with the walnuts. You can have a mix of mushrooms too. Baby Bella is not too bad, but it makes the mince much softer. Shimenji and enoki are not suitable for this recipe. I have not tried oyster mushrooms for this vegan mince. If it works for you, leave us a comment so we can try it.

Why walnuts?

Walnuts in this vegan mince provide that oily, crumbly texture. Plus it is a good bit of protein with crushed walnuts. The slightly bitter flavour of the walnuts complements the earthiness of the mushrooms. While mincing the walnuts make sure they are not overprocessed. The powdery walnuts leave the texture too soft.

Ingredients for walnut mushroom mince

This recipe is for a basic vegan mince. The flavour profile you want to develop depends on what you want to use it for. The recipe card below gives the measurements and step-by-step instructions to follow.Β 
Walnuts
Mushroom
Cumin
Oregano
Cayenne

Salt

Flavour variations
The walnut mince I make is predominantly used for taco filling and nachos, hence I have added flavours that taste towards it in my basic vegan mince. However, the mince base takes up flavours based on how you prefer to spice it up. You can add while cooking rosemary, oregano and thyme if you are just planning to be used in pasta or pasta salad. If making an Indian-based curry add to the mince some grated garlic, garam masala powder, some turmeric, cumin and coriander powders and chopped cilantro before cooking and then cook them. So it is up to your tastebuds how you like this walnut mince flavoured.

Print

Walnut mushroom mince

Course Side Dish
Cuisine diabetic friendly, Fusion, gluten free, One pot, Vegetarian
Keyword Lunch recipes, mushroom dishes, vegan
Prep Time 15 minutes
Cook Time 20 minutes
Servings 4 people

Equipment

  • chopping board
  • Knife
  • mixing bowls and spoons.
  • frying pan

Ingredients

to prep the walnuts

  • 1 cup walnuts
  • 2 cups drinking water luke warm

to prep the muhroom base

  • 2 tbsp olive oil
  • 1/4 cup red onion chopped or minced
  • 2.5 cup mushroom minced

Seasonings

  • salt to taste
  • 1/4 tsp cumin
  • 1/4 tsp crushed black pepper
  • 1/4 tsp red chilli powder

To add fresh after cooking

  • fresh herbs use thyme and oregano
  • Lemon juice as required

Instructions

  • Soak the walnuts in luke warm water for about 15 minutes.
    walnuts soked.
  • mince the mushrooms and onion and set it aside till needed.
    mushroom and onions for the mince.
  • Once soaked chop the walnuts and set it aside.
  • Into the frying pan, add the oil followed by the onion.
    frying onions
  • Once the onion is golden, add the minced mushrooms and saute.
    mushroom mince.
  • The mushrooms will release the water and slowly cook.
  • When the water from the mushrooms is nearly over, add the walnuts and saute further.
    dding walnuts to the mince.
  • Add the salt, chilli powder, cumin and pepper and mix well.
    making mushroom mince.
  • Saute and cook till the walnut and mushrooms are well seasoned and cooked.
    walnut mushroom mince.
  • Remove off the heat, add lemon juice and fresh herbs and mix well.
  • The walnut mushroom mince is now ready to be served.
    walnut mushroom mince

Serving the mince

Just as discussed above in this post this is a fantastic recipe to share with any of your vegan friends.
Taco platter: Put up a build-your-own taco with pico de Gallo, cheese, lemon and some soft wraps.Β  In addition, you can add it to salads or top up your nachos platter with it.
Make a sandwich: onto your slice of bread add some creamy Mayo (vegan-friendly ones are so tasty) a whole heap of the walnut mushroom mince, and some cheese and press it down with another slice of bread. Grill it or use a sandwich press and it is a filling sandwich on the go.
Build a burger: if you have leftover mince, mix it with breadcrumbs and some mashed potatoes so they hold shape. Now make them like a patty and this is your quick and easy mushroom burger patty.
Add some to your pasta: I would totally fork this on pasta to make this a wholesome meal. Mix it into the ragu or add it on top of your prepared pasta it tastes really good.
Make a good Indian curry: if you have some mince, thaw a small batch of buna masala and add the mince to it. Now Cook them together with a bit of water to bring them together. Adjust salt if needed. Garnish with julienne ginger, lemon juice and lots more coriander leaves. Keep the naan ready to mop up the curry.

Meal prep and storage for the mince

The mushroom walnut mince stays good on the fridge for a week. So if it is a busy week the mince will hold up your need for something filling and quick. Keep in an airtight box and use as needed. The mince can be frozen and thawed as needed, however, once you do that the texture changes slightly as the mushrooms are now a bit fibrous.

Stay connected

shh cooking secretly

The walnut mushroom mince takes a bit of effort to make, yet is one of the handiest meal preps I have ever done. When Shh cooking secretly group placed the theme for vegan dishes this time, this mince is the one I wanted to share. Working with Anu Kollon as my partner, who was so easy to convince to do this, the recipe is now yours too. Let us know in the comments and by star rating how we are doing with our recipe. If you have not subscribed to our content yet, don’t miss out. Follow the arrow below to keep new ideas coming your way.
Stay safe, meal prep and have a lovely week.Β 

vegan mince

Yellow tomato salad with cabbage and cucumbers

yellow tomato salad

Enjoy a delightful yellow tomato salad bursting with summer flavour. Make it a celebration of your homegrown produce with this salad with the best citrus dressing. Make some, share some and enjoy the sun.
It certainly feels so special when your garden provides you with a few good summer produce. Since it is a rainy summer this year, we have planted a few tomatoes. One of the varieties we have is the yellow pear tomato instead of the cherry tomato. These are smaller and sweeter and sunshine yellow in colour. To our surprise, this started fruiting as most as soon as the first rains started. So here are showcasing this beautiful produce with summer fresh cabbages and cucumbers.

Ingredients for the easy summer salad

Yellow tomatoes: these are a variety of cherry tomatoes. They are sweet with a burst of that tomato flavour. You really don’t have to go looking for these, cherry tomatoes or grape tomatoes will also do the job. If you have extra squishy ones, try our cherry tomato soup recipe.
Cabbage:Β  sweet and crunch cabbage forms the leafy base for this salad. It doesn’t matter if it is the red cabbage or the sweet white one. You can swap this for lettuce, arugula or mesclun.
Cucumber: Lebanese cucumbers are the plain complement to yellow tomatoes. Since they are water laden, there are lovely to have during summer, especially in a salad.
Seeds: mix the crunch part is the one that makes the salads more appetising. My go-to mix is flax, chia, sesame seeds and hemp. Depending on what you have at hand, just go with the flow. Popped quinoa tastes brilliant in this salad.

Herbs: Herbs add a good freshness to any salad. Since we are picking up some from the garden we have spring onions, gotugola ( Brahmi) and mint from the garden. So today’s batch pick-up goes right into the salad. You can add what you have at hand to brighten up the flavours.Β 

For the citrus vinaigrette.

Summer certainly is for those strong citrus flavours. This basic citrus vinaigrette has lemon zest, lemon juice, whole grain mustard, grated garlic and grated ginger along with salt. It has no oil added, you can add a teaspoon of olive oil if you like. Do you really need a dressing for this salad, maybe just lemon and salt will do, but it is far nicer with this basic lemon vinaigrette. Since we are using sweet tomatoes,Β  I have not added sugar or date syrup to them. If you are using this dressing for, say, coleslaw or basic garden salad mix, add a tsp of date syrup.

Putting together a meal

Option 1: The salad is actually a fantastic idea to serve at a BBQ or lunch. Make some crusty toast, and creamy cheese to add to a platter. Don’t forget to keep some chocolate crackles for desserts
Option 2: Pop some vegetable sheek kebabs on the barbecue. Toast up some flatbreads. Whip up some cacik sauce and roll up a kind of Greek gyros.
Option 3: Keep light to follow up with a cold drink, like berry kombucha and then serve some chocolate dessert brownies to make it up.

The recipe card below carries step-by-step guidance to make this easy summer salad. You can directly pin this onto your board to make during the tomato season. Share with us how you feel making this recipe in the comments below with a rating of upto 5 stars

yellow tomato salad.

Print

Yellow tomato salad

Enjoy a delightful yellow tomato salad bursting with summer flavour. Make it a celebration of your homegrown produce with this salad with the best citrus dressing. Make some, share some and enjoy the sun.
Course Salad
Cuisine gluten free, International, One pot, Vegan, Vegetarian
Keyword Lunch recipes, no cook recipes,, vegan
Prep Time 15 minutes
Servings 2 people

Equipment

  • Cutting board
  • Knife
  • mandolin slicer
  • mixing bowls and spoons.

Ingredients

  • 15 small cherry tomatoes yellow or red.
  • 1 cup cabbage shredded
  • 2 mdium cucumber sliced
  • 2-3 spring onions
  • 10 leaves indian pennywort brahmi ( optional)
  • 10 leaves mint leaves (optional)

seed mix

  • 1 tbsp flax seeds
  • 1 tsp Toasted sesame seeds
  • 1 tsp Hemp seeds

salad dressing

  • 2 tbsp citrus dressing

Instructions

  • Wash and slice the tomatoes.
  • Add it to the mixing bowl with shredded cabbage.
  • Slice the cucumber and add to the bowl.
  • Chop the herbs and add to the mixing bowl.
  • Add the citrus dressing and toss well.
  • Transfer to a serving dish and sprinkle the seed mix.
  • The salad is now ready to be served.
    yellow tomato salad.

Stay connected

As a home gardener, I get very excited when I see produce come up and the garden active with bees and butterflies. These have an emotional connection to the fruits kind of a sense of joy in their own way. Try your green thumb, you didn’t always have to get it right, but don’t give up.
When you make this yellow tomato salad, whatever type of tomato hope you enjoy the experience. Let us know in the comments how you feel about it and rate the recipe. Don’t forget the citrus dressing is perfect for kidney bean salad or edamame salad.
Stay with us for more, enjoy reading the blog and stay subscribed.Β 

Yellow tomato salad

Β 

Kolmi shaak baaja | Water spinach stirfry

Kolmi shaak baaja | water spinach stirfry

Kolmi shaak baaja is a classic, slightly lesser-known Bengali-style side dish. This quick, easy, vegan water spinach stirfry is all about the greens and is flavoured with just a few ingredients classic to this cuisine. If you find a bunch of kolmi shaak, don’t forget to try this recipe and share with us your feedback.
My parents taught me to be fearless with vegetables. The common thing they say is to try it.. you will know! This has actually saved me a lot many times especially when I move from one country to another. Now I am able to confidently try a new set of greens with a fair approximation of how they will taste. A huge thank you to my parents to set this trend alive in me.
After moving from Malaysia I had not seen water spinach. The bunches in the greengrocer were certainly a surprise. So here we go again with a few dishes across the regions I travel all made with water spinach.

What is water spinach?

Water morning glory, water spinach, kangkong, vayal cheera, swamp valley greens are all Ipomea aquaticus. This green leafy species is a water-loving plant,Β  just as the name suggests. The leaves are slightly conical and dark green. The stem is tube-like, suggesting the aquatic nature. The leaves and the tender twigs are edible. The soft twig snaps till where it is edible, therefore cleaning is pretty much like snapping of asparagus. Don’t forget to check the leaves on both sides for bugs. This leafy green is know for its laxative property along with high mineral content.

Precautions while buying water spinach

Do not pick up this green if you are not sure of the source as it is a plant used in water remediation. Since plant loves to absorb minerals in large quantities, growing them near toxic sources helps to clean the water. Spinach sourced here is unsuitable for consumption as it may have toxic metals. Preferably pick up the greens from where you know their growth is or with clear labelling.

Water spinach

Ingredients to make this kolami shaak baaja

Water spinach: check the leaves ad snap off the tender stalks of the kolmi shaak. Wash thoroughly and drain. Chop the greens roughly, the stalk I chop bit smaller than the greens.
Spices: to add to the smokey flavour of mustard oil, it is kala jeera and ajwain that infuses the oil. Follow this up with garlic and red chillies. Now, these two depend on the flavour you prefer to have. For this dish, I choose to use a bit more garlic and keep the red chillies intact so they release the flavour, not the heat. If you want to have a spicier flavour, split the chillies.
Oil: you can’t miss the classic mustard oil flavour in this dish. It gives it that unique smokey intensity that it really needs. I don’t have any swaps here as another will just change the flavour altogether. We have used mustard oil to make Dal pitha and dudh sukto on this blog.

Bengali water spinach recipe

The recipe card below carries the detailed step-by-step recipe to make this baaja. You can save it onto your pinboard directly from here. When you make this recipe share with us how you paired it or how you liked it and please rate the recipe with a 5-star rating.

Print

Kolmi shaak baaja

Kolmi shaak baaja is a classic, slightly lesser-known Bengali-style side dish. This quick, easy, vegan water spinach stirfry is all about the greens and is flavoured with just a few ingredients classic to this cuisine. If you find a bunch of kolmi shaak, don't forget to try this recipe and share with us your feedback.
Course sidedish
Cuisine diabetic friendly, gluten free, Indian, Kids choice, Vegan, Vegetarian
Keyword Indian vegetarian dinner, leafy green recipes, Lunch recipes, Stirfry, vegan
Prep Time 20 minutes
Cook Time 10 minutes
Servings 4 people

Equipment

  • frying pan
  • Cutting board
  • Knife

Ingredients

  • 1 tsp mustard oil
  • 1/2 tsp carom seeds
  • 1/4 tsp Nigella seeds
  • 4 cloves garlic
  • 1-2 dry red chillies
  • 2 cups water spinach chopped
  • salt to taste

Instructions

  • Wash, check and snap off the water spinach to get the tender part of the twig.
    Water spinach.
  • Chop the spinach and set it aside till needed.
  • Into the frying pan add the oil and set on medium heat.
  • Add the spices and garlic to the frying pan.
  • Let the spices sizzle and infuse the oil.
    spices infused mustard oil
  • Add the greens and saute them well.
  • Sprinkle the salt.
  • Cover and cook for a couple of minutes.
    kolmi shaak baaja
  • Open and saute till the water is evaporated.
    water spinach stirfry.
  • The kolmi shaak baaja is now rady to be served.
    Kolmi shaak baaja | water spinach stirfry

Can I make this baaja with other greens?

The same baaja can be made with any soft greens. So far, I make this with English spinach (palak), amaranth leaves, Swiss chard, Chinese mustard, beet greens or broccoli greens. You can try the same with the greens you have as well.

Stay connected

The kolmi shaak baaja with some steamed rice and dudh shukto made us a wonderful dinner. Hope you enjoy the experience of a small Bengali cuisine platter. Finish off the meal with the unique plastic chutney recipe. Save up this recipe onto your pinboards to use later.
Stay with us by subscribing to our blog. You can follow us on Instagram, Twitter or Facebook (no, we have not dipped our toes into TikTok yet!!).
Stay safe and see you soon.Β 

Water spinach stirfry

Shalgham ke baaji | Turnip dry curry

Shalgam ke baaji |turnip dry curry

Once we had gotten through some soup recipes last week, the taste buds needed aΒ  gentle wake-up. Yet we are not up to the stage where stronger curries and foods can take over and run as a usual week. That will need a bit more time and getting back up to. Meanwhile, we have some veggies in the fridge that need to be used up. Here is a very easy shalgam ke baaji recipe made with fresh turnips. This dry turnip curry is vegan, gluten-free and free of nuts and coconut. Try out the shalgam ke baaji with fresh rotis and salad.

Turnips

Understanding Turnips

There were two turnips I picked up with my grocery list. Turnips or neep are tap root vegetables with pale white skin or a green /pink top. They resemble beetroot in shape. Both the leaves and the bulbous root are edible. A fresh batch of spring turnips is delicious as salads similar to radishes. However, as the season progresses, I prefer cooking them to bring out the sweet flavour. To use the root, peel them and separate them from the greens. Chop up into pieces or wedges and proceed with your recipe.

What do turnips taste like?

Though the turnips look a lot like white beetroot, they taste a lot closer to radishes. Raw turnips have a characteristic crunch and a mustard green-like flavour. This flavour vanishes upon cooking replacing it with a mellow sweet flavour.Β 

Turnips in Indian cooking

Turnips are not alien to Indian cuisine and are called shalgam. Typically this is grown in colder regions where you will find it more popular in cuisine than in the hot humid regions. Turnips in curry, stirfry or grated as a salad. Today’s recipe is a semi-dry preparation called shalgam ke baaji.

Masalas and ingredients for this baaji

Shalgam/ turnips- Fresh turnip roots that are peeled and diced are the ones that are needed to make this turnip dry curry. A peeler will work to get the peel off n then dice the flesh. You can use the turnip greens in this recipe. Wash and clean the leaves. Strip them off the stalk and chop them to add along with the diced root.

Onion- a small bit of onion sauteed adds so much flavour to this dish. I have used half a small white onion. If you have shallots, use that for extra flavour.

Spices – two levels of flavour are created in this simple recipe. One at first by tempering the fenugreek seeds and the carom seeds. For the second layer of flavour, salt, turmeric powder, roasted cumin powder and curry powder ( like Ken’s) is all you need. This curry powder can be sambhar powder, rasam powder, garam masala or Kitchen king masala.

Turnip curry

Β The recipe card below gives the step-by-step details to make this recipe. Pin it onto your board from here for later use.Β 

Print

Shalgam ke baaji

Course Side Dish
Cuisine Autumn, Fusion, gluten free, Indian, One pot, Vegan, Vegetarian, Winter
Keyword curry recipes, Indian vegetarian dinner
Prep Time 15 minutes
Cook Time 15 minutes
Servings 4 people

Equipment

  • frying pan
  • chopping board
  • Knife
  • ladle

Ingredients

for the vegetable

  • 1/2 small onion
  • 3 medium turnip

for tempering

  • 1/2 tsp carom seeds
  • 10-12 fenugreek seeds
  • 1 tsp cooking oil

spice powders

  • 1/4 tsp turmeric powder
  • 1/4 tsp roasted cumin powder
  • 1 tsp curry powder
  • 1/4 tsp red chilli powder

garnish

  • 1/2 cup spring onions chopped

Instructions

  • Wash and trim the turnip greens.
  • Peel the turnips and chip them into small pieces or strips.
  • Chop the spring onions and set aside till needed.
  • Chop the onion and set it aside till needed.
  • Into the frying pan, add the oil, carom seeds and fenugreek seeds.
    tempering for the baaji.
  • Once the seeds crackle add the chopped onions and saute well.
    saute onions
  • To this add the chopped turnips and saute well.
  • Add the red chilli powder, turmeric powder, roasted cumin seeds curry powder.
    shalgam ka baaji
  • Mix well, sprinkle water and cover and cook.
    shalgam ka baaji.
  • Remove and check if fork tender.
  • Add the spring onions mix well and cover and cook for another two minutes.
    turnip dry curry.
  • Once it is cooked mix well.
  • Remove into serving dish and the dish is ready to serve.
    Turnip curry

Putting together a meal

Shalgam ke baaji on a cooler night with a couple of phulkas sounds like home. Leftovers find themselves comfortably hidden in a curry bun or a sandwich for lunch the next day. These are the easiest ways I have tried with the turnip dry curry. As we were unwell, we had it withΒ payaru kanji.

Meal prep and saving the leftovers.

Usually, I prep and chop the turnips on the weekend to help my day at work. The prepared baaji will stay well for 3 to 4 days in the fridge. I have never frozen this shalgam ki baaji. If you have success with this please let us know in the comments.

Stay connected

Shalgham ki baaji is a very basic side dish recipe, best enjoyed warm. When you make this, write a comment with a rating. Share this recipe with friends and family who may also enjoy some turnips.

A-Z recipe challenge logo.

We have added this post to the A-Z recipe challenge,Β  ingredients in Hindi. Shalgam or turnips are one among the many ingredients which start with S.Β 

Stay connected by Instagram, Twitter or Facebook to know what new we have been cooking.
Stay safe and see you in the next post.

Curried turnip

Barley water soup

barley water soup

It hunted us down again!! We are set for another session of home iso, with lots of liquids and panadol. Coming to the rescue this time is barley water soup. It certainly caters for lots of liquids part providing just that nourishment during the time when the throat is sore.

What is barley water?

The strained liquid that results from cooking pearled barley in excess of water is barley water. This is an easily digestible refreshing source of hydration. Barley water is commonly consumed in humid Asian countries to beat the heat. It is also recommended to get relief from kidney stones, urinary tract infections and remove liver toxicity.

Which type of barley to use?

The barley grain is processed in stages. Based on how they are processed it is used in different cuisines.
Unhulled:Β  the whole barley grain, just cleaned and chaffed unhulled barley. To use this, you need to soak it for 24 hours to soften.
Pearled: the polished barley where the hull and the outer layer of the bran have been removed is pearled barley. This is easier to cook with no soaking needed.
I have used pearl barley to make barley water with a ratio of 1 part barley to 6 parts water.

Ingredients for this barley water soup

The barley water soup is a refreshing idea that I can up with as I am not a fan of lemon barley and needed to keep up the liquids for the iso.
Vegetables:Β  quick cooking vegetables that you can easily put together make this soup’s flavour. I have used leeks, capsicum, spinach stalks and carrots here. You can add celery, shallots, cabbage, potatoes, swedes etc too to this soup.
Spices and seasoning:Β  salt and pepper is the only seasoning I have used here. Ginger would be nice in here too.
Barley water: the barley water was prepared using one part barley to 6 parts water. We used the barley to make a salad and the water to make soup.
The recipe card below has the images and step-by-step instructions to get the best-tasting barley water soup. hope you will like it. If you need to pin this for future use, do so directly onto your pin board from this recipe card.

Barley vegetable soup

Print

Barley water soup

A simple vegetable soup recipe made with barley water as the broth.
Course Soup
Cuisine Fusion, gluten free, Vegan, Vegetarian
Keyword easy soup recipes
Prep Time 10 minutes
Cook Time 10 minutes
Servings 2 people

Equipment

  • saucepan

Ingredients

For barley water

  • 1/2 cup barley pearl barley
  • 3 cups drinking water

for making the soup

  • 1/2 tsp coconut oil
  • 2-3 cloves garlic crushed or chopped
  • 2 inches leeks sliced thin ( if not use a bit of onion)
  • 1/2 small carrots chopped small
  • 1 handful Spinach palak, bok choy or any others that you may have .
  • salt to taste
  • crushed black pepper

Instructions

  • Wash and boil the barley with an excess of water.
  • Once the barley is cooked drain the barley grain and save the water.
    barley water.
  • Into the saucepan, add the coconut oil and crushed garlic.
  • Set this on low heat and saute till it is aromatic.
  • Now add the chopped vegetables and saute well.
    vegetables for barley water soup.
  • When the vegetables soften, add the barley water and cook for 5 minutes.
  • Add salt and pepper to taste.
  • The soup is now ready to have.
    barley water soup

What to serve with barley water soup?

Crusty bread at this moment when I have zero energy would do. If you feel lavish ghee croutons are what you should have with this. If you are a south Indian food lover, keep some vadam and vattal on the size as this soup will remind you of kanji a lot.

Other soups for the flu season

Flu busting soupΒ  Β 
Cabbage coconut soup
Corn quinoa soup
Broccoli peas soup
Cherry tomato soup

Barley water usage in other countries.

Roasted barley tea is a popular drink in Japanese culture. It is a robust flavour as the barley is dark roasted which is then steeped as tea.
Greek kykeon pounded barley (not powder) is cooked in excess of water and flavoured with penny royal. This is the post that I loved reading about this recipe.
Lemon barley is the British version of this drink, where there is a bit of lemon squeezed into the barley water to give it flavour. This is still recommended by doctors towards urinary tract infections.

Other grains are similarly used.

Kanji vellam the water drained from cooking matta rice in excess water is called kanji vellum. This is a household mid-morning drink in most south Indian houses (especially Kerala).Β  A pinch of salt is added and consumed warm. It functions like a light soup.
Soba soup while visiting Japan, a friend of mine introduced me to this. Freshly made soba noodles are cooked in water. The water gets thickened by the buckwheat and is then served as soup with some wasabi and bonito flakes. This was one of the most refreshing things to experience in Japanese cuisine without any hype attached to it.

Stay connected

If you are making this soup let us know if you liked it. Rate our recipe with a five-star rating along with your comment. We would love it if you would like to subscribe to the blog and enjoy andΒ interact with us.Β Thank you for your continued support. See you in the next post.Β 

Barley water soup

❌