❌

Reading view

There are new articles available, click to refresh the page.

Building a Simple Ribbon Synth

By: Lewin Day

The usual input device for playing a synthesizer is the good old piano keyboard. However, you don’t have to stick to such pedestrian interfaces when making music. [Daisy] has a fun build that shows us how to put together a ribbon synth that makes wonderful little noises.

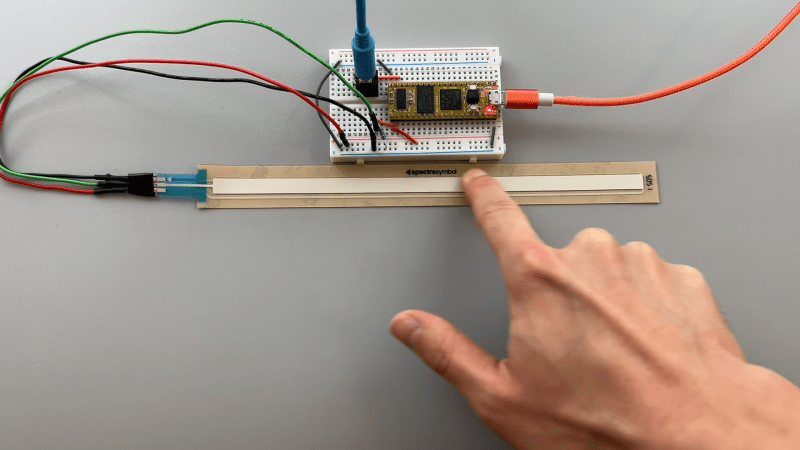
Naturally, the heart of the build is a ribbon potentiometer (also known as soft pots). It’s essentially a touch sensitive strip that changes in resistance depending on where you touch it. You can slide your finger up and down to vary the output continuously; in musical contexts, they can behave rather like a fretless instrument. [Daisy] employs one of these potentiometers in such a role by hooking it up to a Daisy Seed microcontroller board, which reads it with an analog-to-digital converter (ADC). The resistance values are used to vary the pitch of a dual-saw synthesizer programmed in the plugdata framework.

We’ve featured some other great ribbon synths over the years, too, like this tribute to the Eowave Persephone. They’re not the ideal choice for those that prefer their notes on pitch, but they’re beautifully fun to play with when you’re getting a little more experimental.

Baby’s First Synth was Daddy’s First Project

A small, colorful synth built for a 3-year-old. It has five pots, four sliders, and a tiny screen.

We absolutely adore inspired labor-of-love tales such as this one. [Alastair] wanted to build a synth for his daughter’s third birthday in spite of having no prior hardware knowledge. It became the perfect excuse to learn about CAD, microcontrollers, PCB design, and of course, 3D printing.

So, why a synth for a toddler? Aside from plain old β€˜why not?’, the story goes that she received a Montessori busy-type board which she seemed to enjoy, and it reminded [Alastair] of the control surface of a synth. He wondered how hard it could be to build something similar that made sound and didn’t require constant button presses.

[Alastair] began his journey by dusting off a 15-year-old Arduino Inventors Kit. The initial goal was to get potentiometer readings and map them to 12 discrete values, and then emit MIDI messages. This was easy enough, and it was time to move to a synth module and an Elegoo Nano.

The full adventure is definitely worth the read.Β Be sure to check out the pink version in action after the break. You really don’t wanna miss the lil’ panda bear. Trust us.

Thanks for the tip, [dole]!

❌