The weekend is so close I can almost smell it—and that means it’s time for another roundup of Raspberry Pi projects to try out over the next few days. This weekend, I’m focusing on building out self-hosted media servers and controllers to help simplify audio listening and controlling.
Wobbly laptop stand got you feeling seasick while you work? Rather than trying to type like you’re sitting next to a sleeping baby, you might be able to stabilize that stand with a few bits of wood or whatever else you can find.
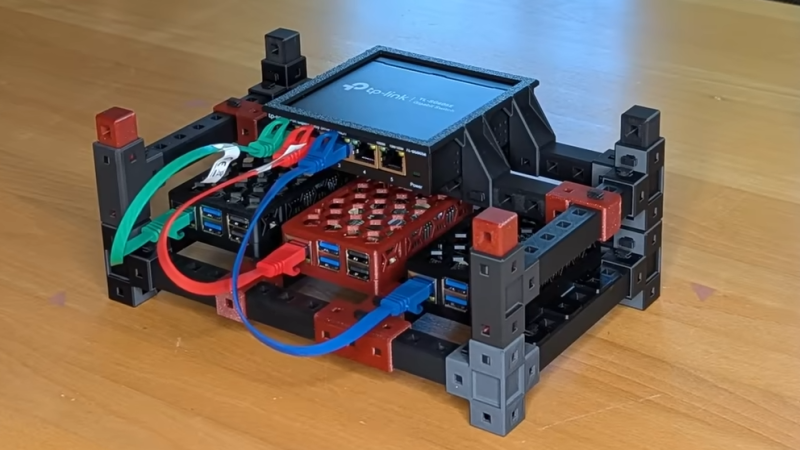
Self-hosting is a great way to save money on subscriptions and take control of your data, but getting everything running smoothly on one system can be difficult, especially if you have incompatible dependencies.
I love organizing my workstation, and my PC gaming setup isn’t immune to getting 3D printed upgrades. From keeping my graphics card from sagging to organizing my USB drives and even holding my controller, here are my top four 3D prints that took my setup to the next level.
I recently got into microcontrollers—and by recently, I mean last week. Thanks to the help of Google’s new Antigravity IDE, an Arduino R4 WiFi, and a 7-color e-paper display, I was able to get an e-ink photo frame built in less than a week.
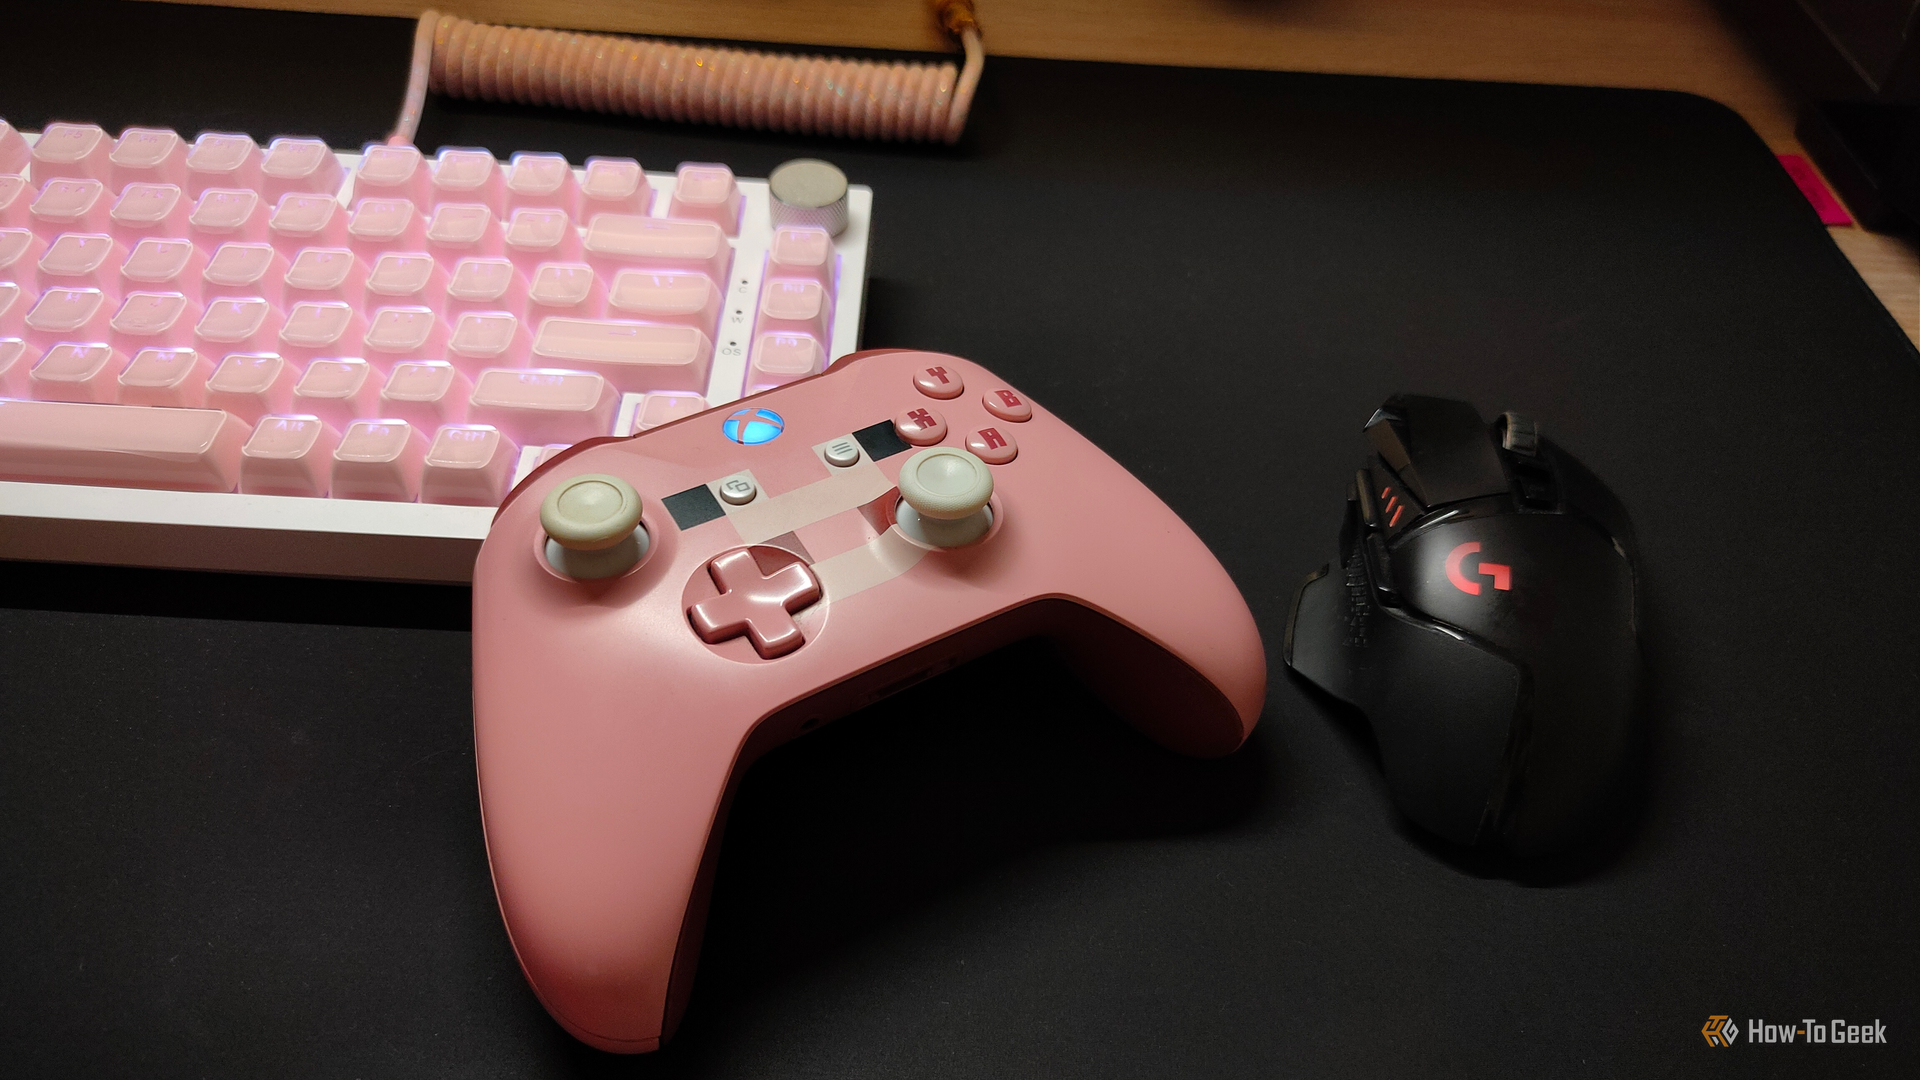
I’ve always wanted a Stream Deck to create custom buttons, speed up my workflow, and make functions more accessible while gaming, but I could never justify the price. That’s when I realized I could just turn my old controller, sitting on my desk gathering dust, into a macro pad instead.
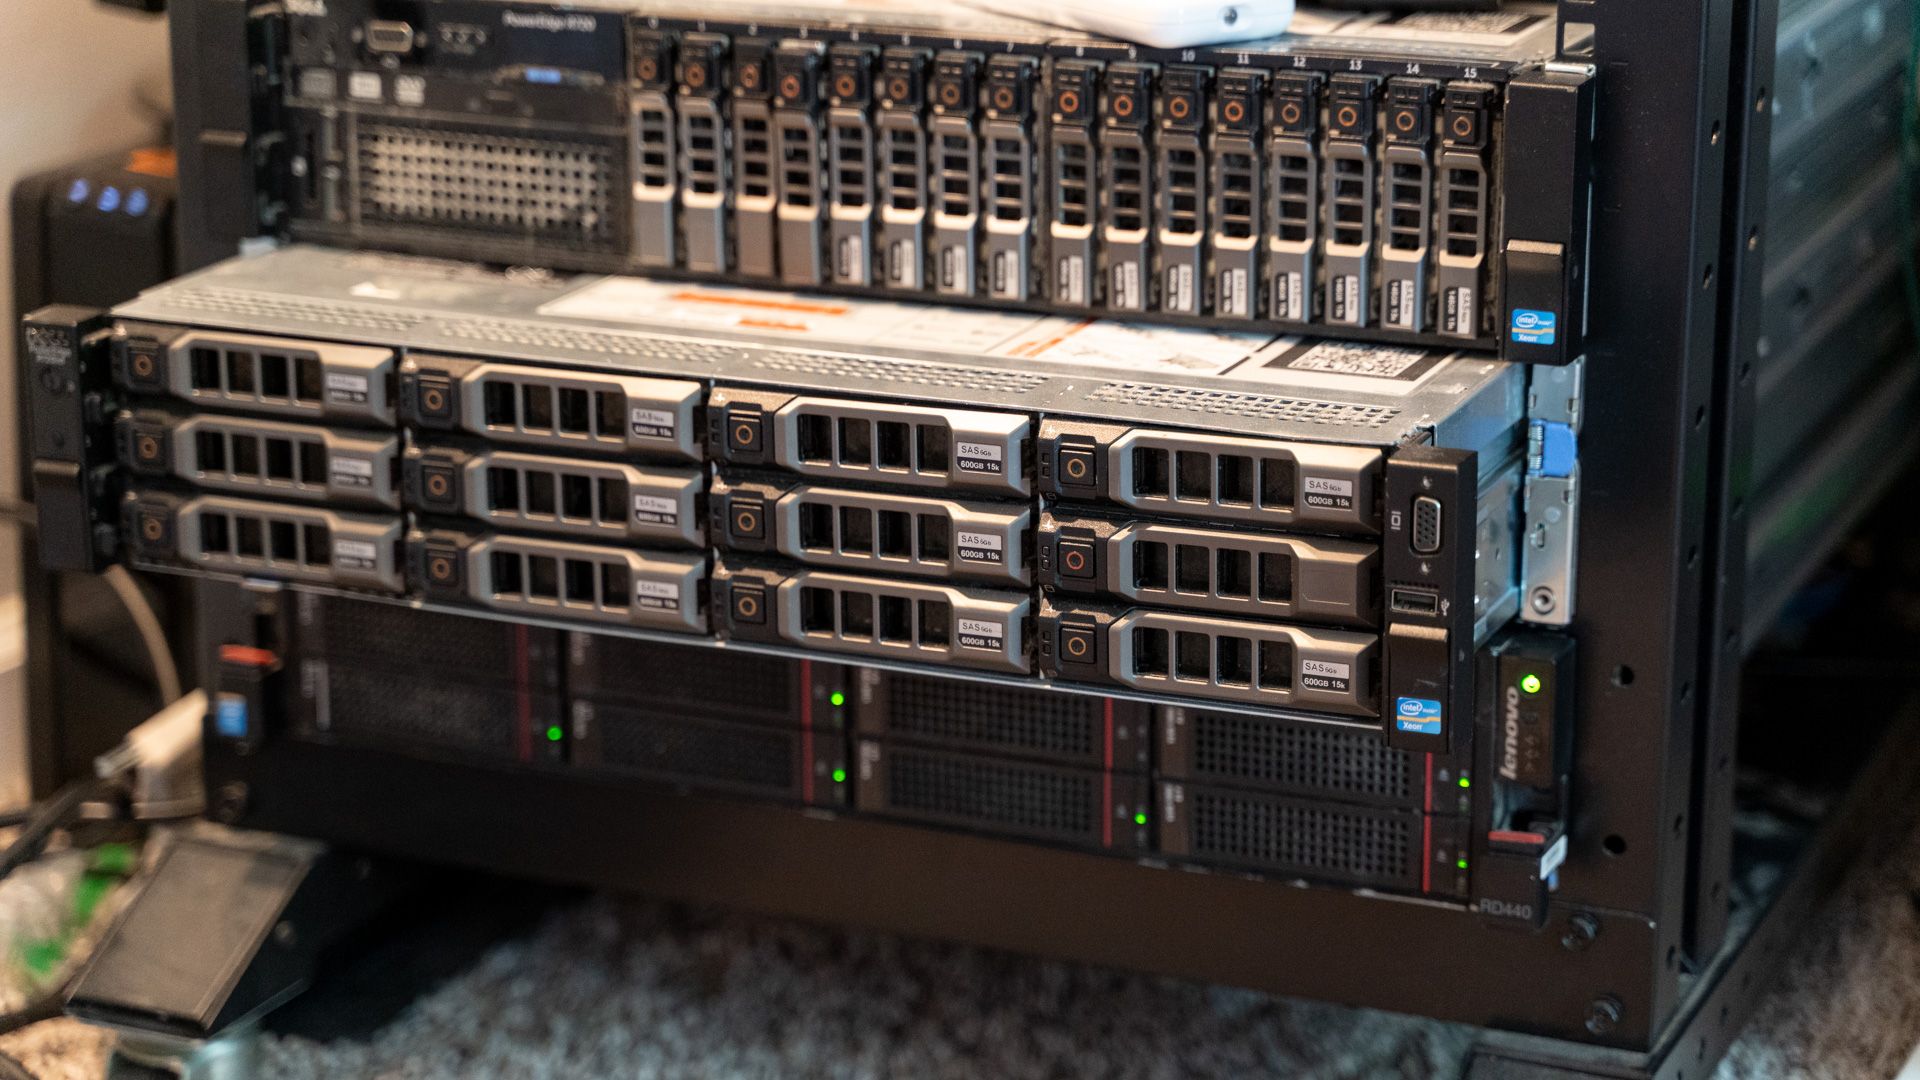
Self-hosting your own services is one of the best ways to save money on subscriptions and increase your privacy. Since you're running the services on your local network, no one else ever sees the data.
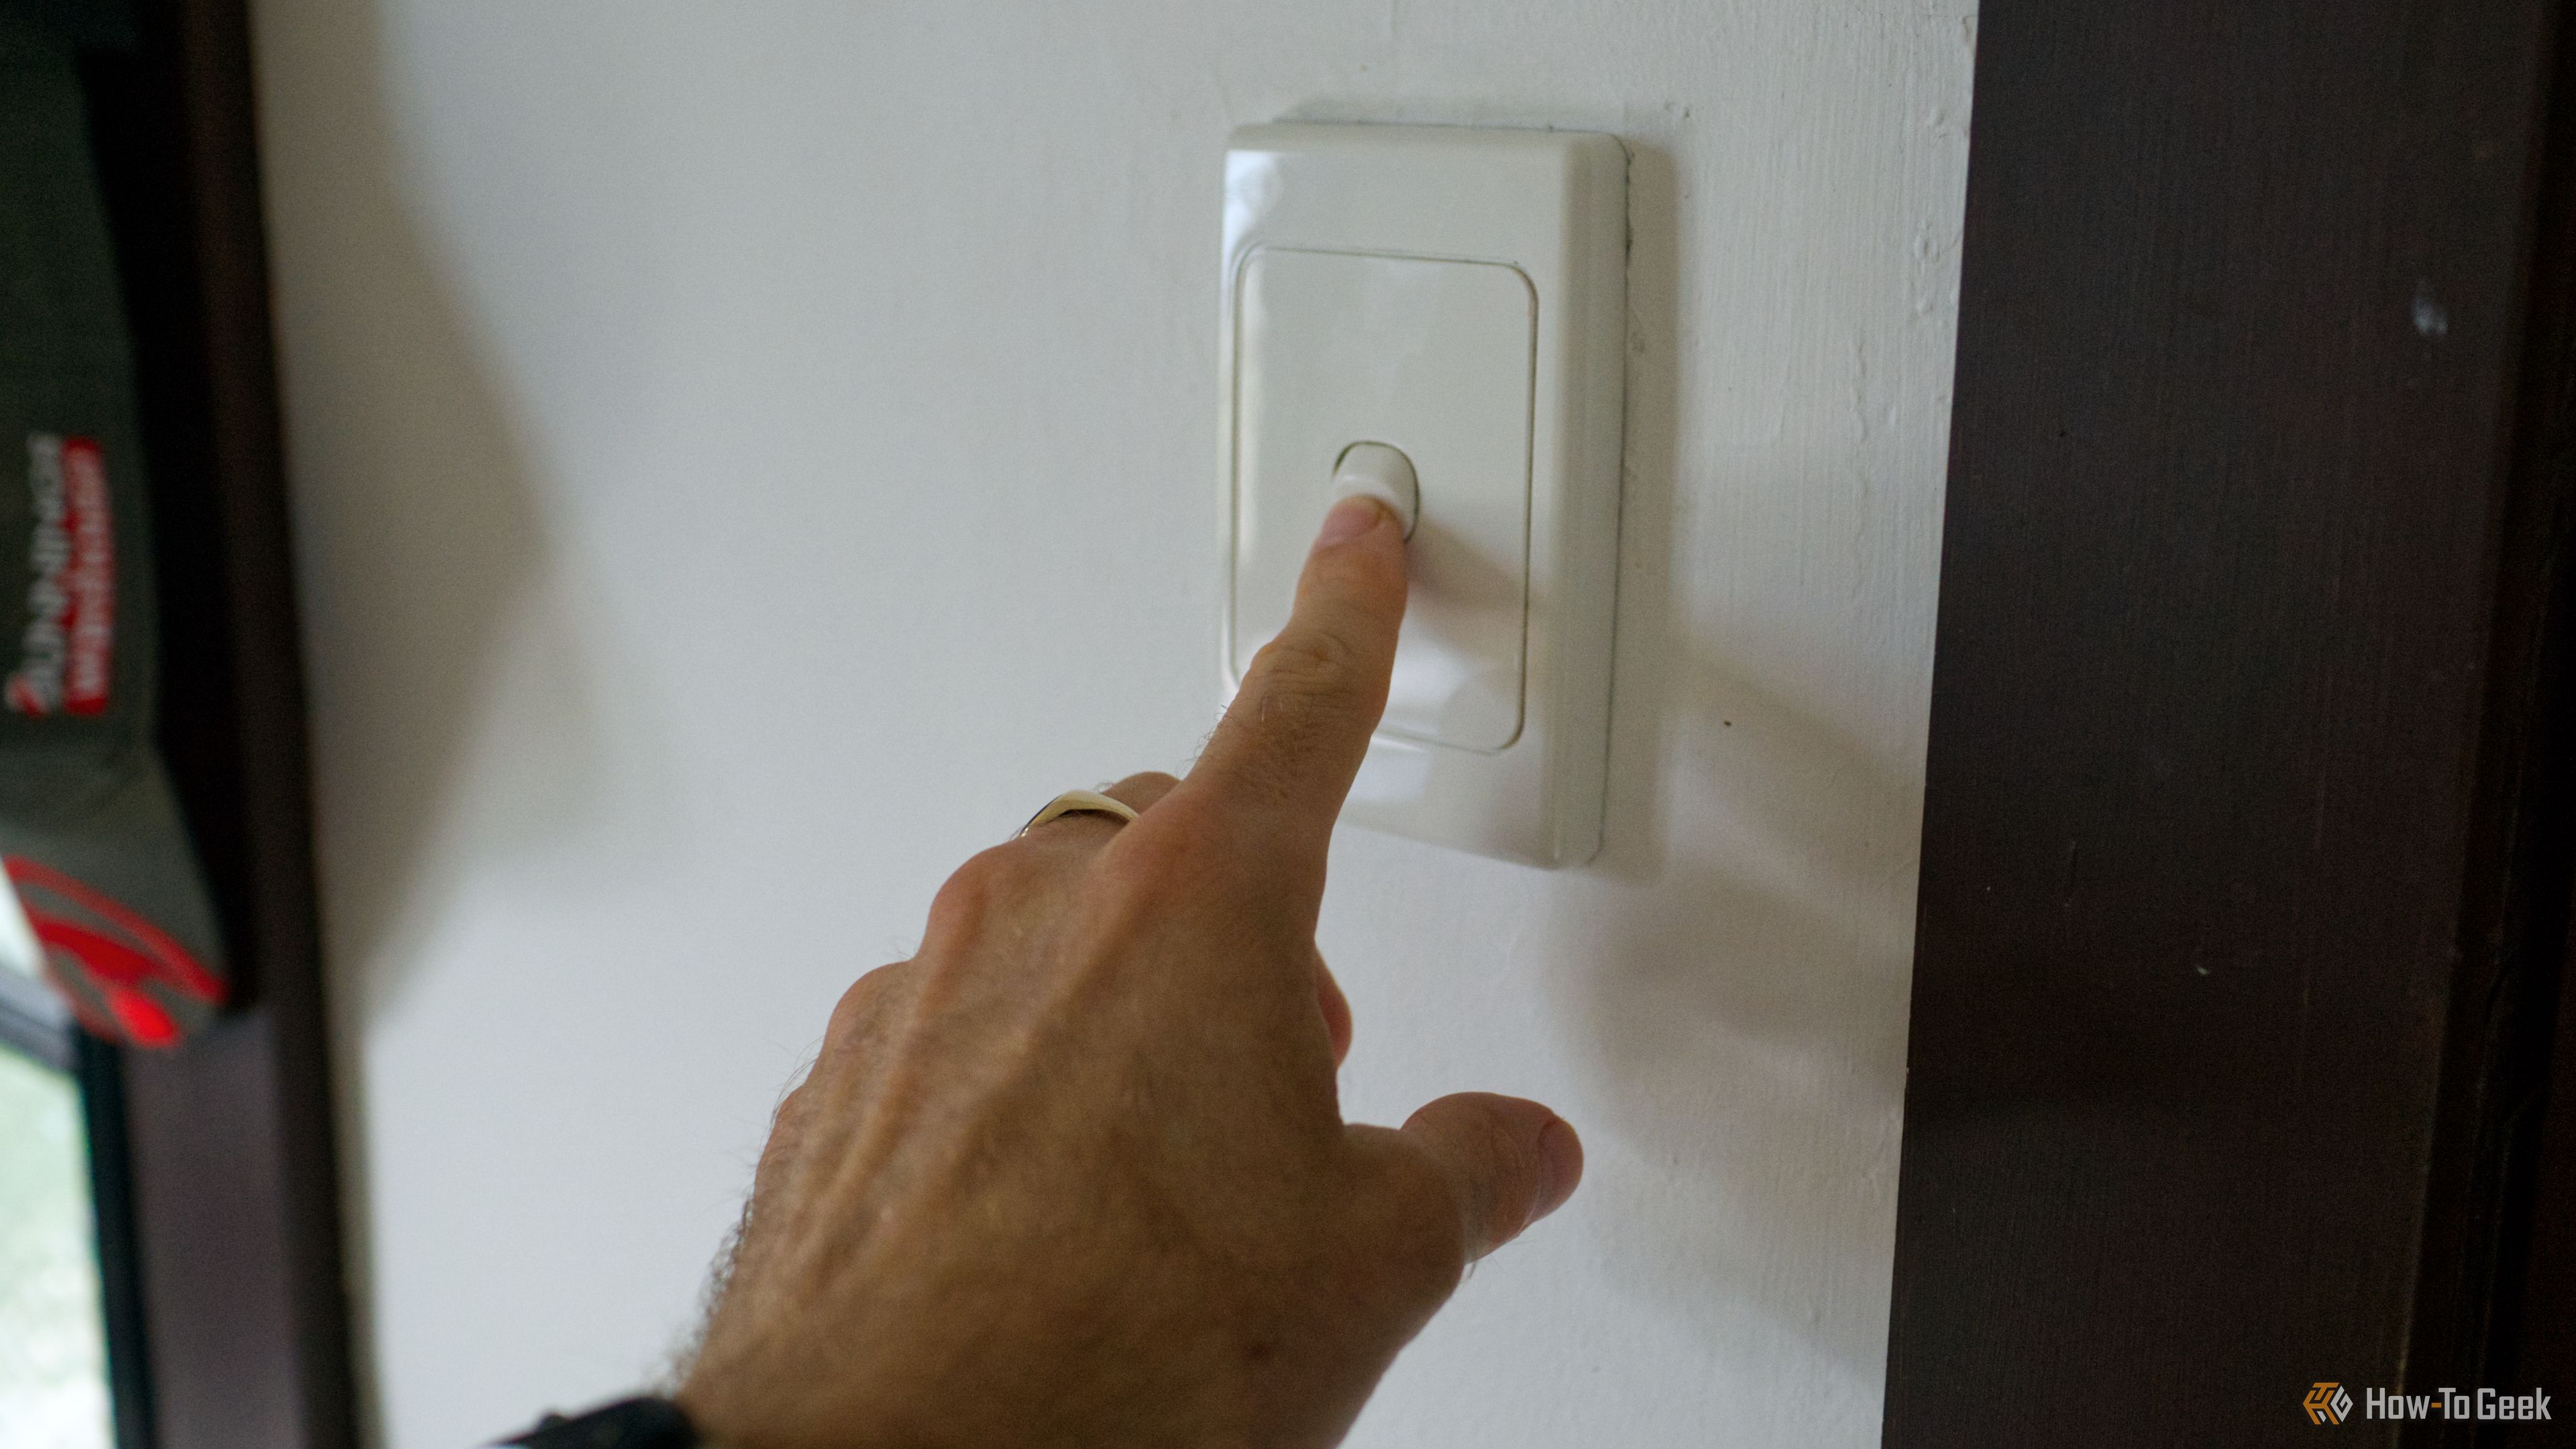
It’s no secret that smart light switches are better buys than smart light bulbs, but I don’t have any smart switches installed yet. That’s what led me to devise a delightfully devilish hack that still lets me use my existing light switches to turn on my smart bulbs in a pinch.
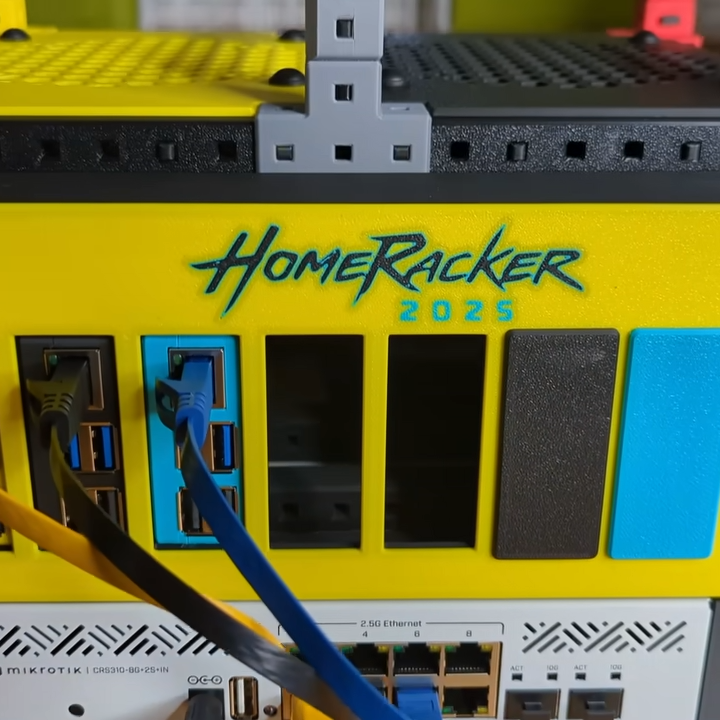
Things are cooler when rack-mounted, and [KellerLab] aims to make that all far more accessible with the HomeRacker, a modular and 3D-printable rack building system designed to let you rack-mount to your heart’s content. While it can handle big things, it seems especially applicable to tasks like mounting one’s home network equipment and Raspberry Pi machines.
A rack is a great place for those Raspberry Pi servers and home networking equipment, but it can also handle bigger jobs.
The basic system (or core) consists of three different parts: supports, connectors, and lock pins. The supports are the main structural bars, the connectors mostly go at the corners, and the lock pins ensure everything stays put. The nominal sizing is a 15 mm x 15 mm profile for the supports, with lengths being a multiple of 15 mm.
All is designed with 3D printing in mind, and requires no tools to assemble or disassemble. There are design elements we really appreciate, like how parts are printed at an angle, which improves strength while eliminating the need for supports. The lock pins (and the slots into which they go) are designed so that they are effective and will neither rattle nor fall out.
But the core system is just the foundation. There’s plenty of modularity and expansions to handle whatever one may need, from Gridfinity shelves and drawers to various faceplates and other modules. There are some example applications available from [KellerLab]’s HomeRacker models page, like CD shelf, under-desk drawer, or filament rack.
One last point to make about the value of printing objects like this at an angle: not only can the resulting layer lines provide better strength and reduce or eliminate the need for supports, but printing at an angle can help hide layer lines.
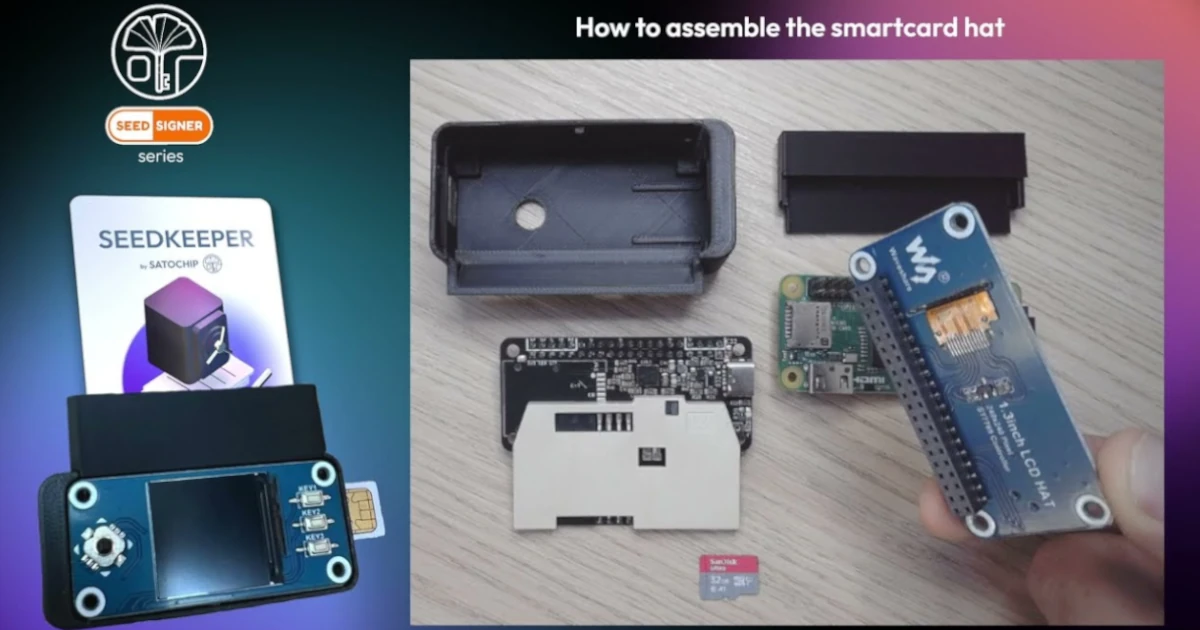
Did you know you can build your own hardware wallet? I recently attended a workshop with Dani @bitcoineando, a Bitcoin evangelist and software engineer who will be hosting a workshop on just this topic next week in Adopting Bitcoin, El Salvador. The whole process took less than an hour and took me from having never assembled a small hardware device of this sort, to a fully configured and self-assembled Bitcoin Seedsigner and smart card backup combo via the Satochip suite.
For those attending the now historic Adopting Bitcoin conference coming up this month in El Salvador, the free workshop will take place on Friday, November 14th at 3:50-4:50 pm, in the English Workshop room and will be delivered in both English and Spanish. Attendees who bring a laptop and go through the full workshop will get a free Seedsigner + Satochip combo to take home, plus the knowledge of how to build the whole thing themselves. Sign up here to lock in a limited spot now.
What’s amazing about the combination of these two great open source projects is that they are made of very common hardware that can be purchased almost anywhere in the world. No specialized hardware from artisan manufacturers, this is a pure DIY project that can be a viable option for users in developing nations with tight import controls, under oppressive financial regimes, under a tight budget, or just those paranoid enough to want to build everything themselves.
SeedSigner
The SeedSigner project launched in December 2020 and empowers users to build their own affordable, air-gapped Bitcoin transaction signing device for more or less $50 using off-the-shelf components like the Raspberry Pi Zero v1.3, a camera module to scan QR codes, and a small LCD display to verify transactions and navigate the menu with a small joystick and three buttons.
Created by a pseudonymous founder known simply as “SeedSigner,” today supported by a growing community of contributors and led by Kieth Mukai, the project emphasizes trustless private key generation and supports a wide range of toolin,g such as BIP39 seed phrase creation via dice rolls, seamless integration with multisig wallets like Sparrow, Specter, BlueWallet, and Nunchuk, among others.
SeedSigner is fully Free and Open Source Software (FOSS) released under an MIT license for the core code. All hardware specs, software, and enclosure designs are publicly auditable on GitHub, allowing anyone to verify, modify, or build from source for maximum transparency and community-driven improvements.
While Raspberry Pi Zero’s CPU/GPU firmware and bootloader are proprietary and closed source software from Broadcom provided by the Raspberry Pi foundation, the design of the Seedsigner optimizes around managing those risks, such as letting the user provide their own entropy, and opting for no wireless communication modules like Bluetooth. Seedsigners are also “stateless”, designed to have no memory storage, instead booting fresh every time and requiring the user to input the seed that is used in the same session to sign transactions.
These security measures make the SeedSigner a popular hardware device for enthusiasts and advanced users; however, it presents some unique user experience challenges. Critics and competitors of the SeedSigner argue that manually inputting 12-word seeds into the device via key input or by scanning QR codes of private key backups puts user funds at risk, as it exposes the key material to cameras, which are ubiquitous in today’s digital age. The process can also be tedious and presents a user experience friction that stateful hardware wallets do not have, which is what makes SeedSigner’s collaboration with Satochip smartcards so special.
Satochip
Satochip, a Belgian startup founded in 2014 by Baudouin Collard and Bastien Taquet, focuses on affordable, open-source smartcard-centric hardware wallets. Their flagship products — Satochip (NFC hardware wallet), Satodime (bearer card), and Seedkeeper (a kind of password manager) — work with wallets like Sparrow and Electrum. Their Java Cards project is an open-source (AGPLv3) applet that turns cheap smartcards (e.g., YubiKey, SIMs) into secure, DIY BIP39 hardware wallets with EAL6+ security.
Taking a different approach to crypto key security, smartcards are stateful and store key material in encrypted formats, using some of the most advanced security chips in the market, often better than the technology used by credit cards and bank debit cards. The smartcards are NFC-enabled, leveraging the same near field communication technology that much of the world is used to today. An antenna that, while ranged, is considered so limited in its distance that advanced hardware wallet manufacturers like CoinKite have also integrated it into their highest-grade hardware wallet, the Coldcard Q.
The main downside of the smartcard approach to crypto security is the lack of a screen, which is needed for users to verify what they are signing. Satochip thus integrates with various mobile and desktop apps, as well as its own apps available on Android and iOS.
SeedSigner, through a community member fork of the firmware, is also now deeply integrated with Satochip, allowing users to flash the new smartcards directly from the SeedSigner, improving the experience of setting up the wallet, while also supporting a smartcard reader hardware expansion. The Satochip integrated SeedSigner firmware was created by YTCryptoGuide and can be found on his GitHub. The fork is not an official SeedSigner release.
The combination of these two open source projects seems like a match made in heaven, as users can now leverage the open source, consumer hardware nature of the SeedSigner, with the seed backup and ease of use nature of the smartcards, arguably improving the security and user experience of both projects.
One of the very valuable skills of the workshop, its corresponding website, and how-to guide teaches how to verify the authenticity of software installed on the hardware. Both the Seedsigner and Satochip applets are signed by the developers with their PGP keys. A hash or unique cryptographic ID of the software is created using an algorithm like SHA-256 (used also in Bitcoin mining) resulting in a string of digits, this string is unique to the exact software used to generate it — if one letter in the software is changed, the hash changes completely.
That hash is then signed by the developers with their PGP keys, which produces another unique and deterministic blob of data. The result is a chain of software signatures that ultimately let users know a known and reputable developer is acknowledging a specific software release as legitimate and authentic.
Knowing how to do this kind of verification can seem daunting at first, but it is actually quite easy and stands as the root of cypherpunk values and sovereignty in the digital age.
Whenever amma start making some yummy bhakshanam( traditional snacks) she first starts with a small conical mount with turmeric powder kneaded together and place some kumkum at the top of it. Following this is when she start actually making the dough for ribbon pakoda, omapodi, chakkuli or murukku. Through this process they are invoking the blessings of the food loving God, Ganesh who will probably remove any obstacles in the tricky process of getting these snacks done. Taking that a step further, we are making turmeric Ganesh this year to add to our collection of Ganesha idols at home.
Why we make Ganesha idols at home?
The festival joy is one my children have never experienced as we never were in the right location at the right time. So with Indian festivals, this was always the case as we couldn’t travel during this time. So we started small by getting air drying clay Ganesha. Then started the issue of visarjan. To solve this too, we started making easy food based Ganesha ideas. This makes it easy for us to plan the visarjan as well without having a water body near us. This also solves the issue of sediment formation or pollution of the wsterbodies.
DIY Ganesh idols we have tried
So far we have made a few different idols and repeated a few others
and the classic rice flour (kozhakattai maav) dough Ganapathy.
This year we attempt to make a wheat and turmeric flour, Haridra Ganapathy.
Significance of turmeric ganesha
It is a common sentiment that anything with a pinch of turmeric has a sanctifying ability. The turmeric Ganesha is supposed to be on of the 32 different varieties of the God. As an obstacle remover, the turmeric Ganesha is regarded higher in ability. This form of Ganesha is also considered to guide you in the right path. This Ganesha is also not so strict and a bit more benevolent, hence more suitable to be made at home.
Get the ingredients to make Haridra Ganapathy
Turmeric powder: good quality turmeric powder is a great spice to keep at home. It is not just a colouring agent, but a main ingredient in this idol making. The idol is considered pious as it is made from this turmeric.
Wheat flour: wheat flour is the second ingredient in this recipe. It adds enough volume to the dough and make it pliable to fold and mould. You can use APF as well if you prefer. Oil:cooking oil or sesame oil is added. This makes the dough smooth and a bit shiny. It is essential to add it, and not skip it. Keep some oil aside for coating the idol once it is done.
Water: to bind into a smooth tough dough add just enough water. You can opt for rose water for fragrant idol.
Let’s make the Turmeric ganesha idol
Making the turmeric idol is as much a fun even as it is pious. It is up to you to decide which way you take it. Making the dough :We need o make a firm but smooth dough to make the Ganesh statue.
Measure out one cup of wheat flour, half cup turmeric powder, one table spoon oil and mix well in a bowl. Add water a little at a time and knead into a smooth dough.
Festivties and naivedyums following Ganesh stapana
The Ganesh idol is usually kept for 11 days and regular pooja and prasad are a part of it. We have outlined a lot of what we do and the collection of naiveduyms in a post.
will come in handy for prasad and double up as snacks for the run
Can we make the statue with just turmeric powder?
Yes, this is absolutely possible and considered pious. The dough is a bit harder to work with for kids as it breaks easily. Since the combination is only water and turmeric powder, it is a dry one with no sticky gluten like effect. However, if you are fairly familiar with the idol making, then it will not be too difficult to smooth the idol.
Stay connected
Making Ganesha idols at home are an actual privilege and a delightful time to spend with children creating. Since the turmeric dough is pretty much like play dough, make this easy Ganesha idol is perfect for little hands too. I agree it may not be perfect Ganesha idol, for us it is the thought behind it that counts. If you are making the idol, leave us a note in comments or rate this post. We would love to hear from you. Please do subscribe to this blog as we plan to bring forth easy recipes throughout this season. Pin this for later See you in the next post.
I was away from my family for about 2 weeks, and figured out a way to get my family to have homemade food. Nothing to beat homemade food, yes it is not as fresh as made everyday, but its a great alternative to outside/processed food. I started off by planning to make curries and storing them in individual containers. This way the food remains fresh, and there is no cross-contamination.