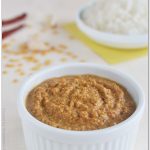
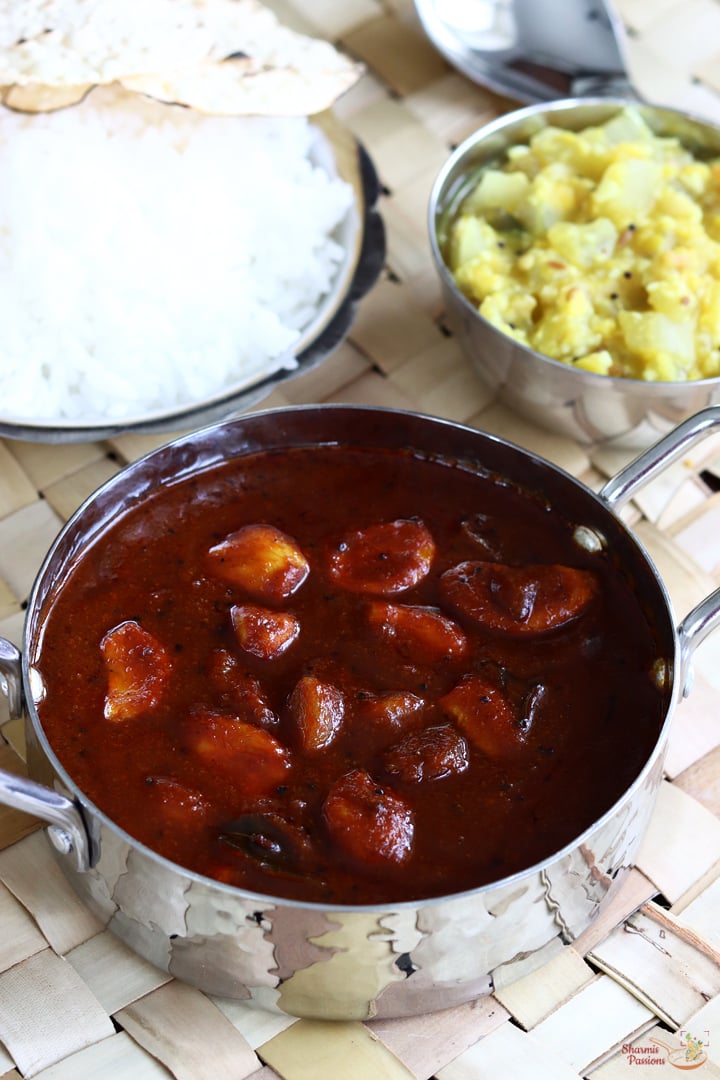
Poondu Kuzhambu | Garlic Kulambu
Poondu Kulambu is a spicy and flavorful curry made using garlic, tamarind, spice powders, herbs and spices. Poondu Kulambu is an excellent choice when we run out of vegetables and perfect to serve with rice, idli and dosa. Learn to make tasty Poondu Kuzhambu with step by step pictures and video.
I've tried many versions of puli kuzhambu, each one different in its own way. But finally settled down with this one which is my keeper as its our family favorite. This is a very easy and quick recipe that you can prepare in just 20 minutes if you have all the ingredients in hand. I served it with rice, sutta appalam and sundakkai kootu. Do try and enjoy this poondu kuzhambu!
[feast_advanced_jump_to]About Poondu Kuzhambu
'Poondu' in tamil means Garlic and 'Kuzhambu' means Curry so Poondu Kuzhambu translates to Garlic Curry. This Poondu Kuzhambu is a tangy spiced South Indian curry perfect to pair up with idli, dosa, rice, chapati etc. It is one of the easy and quick side dish that you can prepare for lunch to pair up with rice and use left overs for dinner with idli, dosa.
This South Indian curry is packed with flavors and keeps well for 2 days. It tastes best the next day with idli or dosa, pairs well with hot steamed rice too. I love it even with curd rice so delicious.
I love garlic in any form, so this kuzhambu is obviously my favorite. The spicy and tangy taste with a dash of sweetness is perfect for rice, idli or even dosa. This keeps well for 3-4 days. You can add any other vegetable of your choice like ladies finger, brinjal etc.
Trust me gugu loves this so much that he fondly tells amma I can have this daily, yes he likes it so very much that he asked me to pack it for lunchbox even after having it for 2 meals straight the previous day. If you like tangy garlic flavored dishes then this is a must try for you!

Garlic Kuzhambu Video
Garlic Kuzhambu Ingredients
- Garlic - Garlic is the main ingredient here which flavors the curry. You can use small garlic variety or big ones according to your liking.
- Small Onion - Small Onion adds flavor to the curry.
- Tamarind - Tamarind forms the base for this curry along with the grind paste.
- Tempering - A basic tempering is done with mustard seeds, cumin seeds, fenugreek seeds, hing and curry leaves.
- Spice powders - Turmeric powder, red chili powder and coriander powder is added to this curry.
- Jaggery - Powdered jaggery is added at the last stage to balance the taste.

Similar Recipes
How to make Garlic Kuzhambu Step by Step
1.To a bowl add ¼ cup tamarind (tightly packed). Add around 1 and ½ cups water to it.

2.Crush it well and set aside.

3.To a kadai add 3 tablespoon gingelly oil. Gingelly oil is best to use however you can use any cooking oil too.
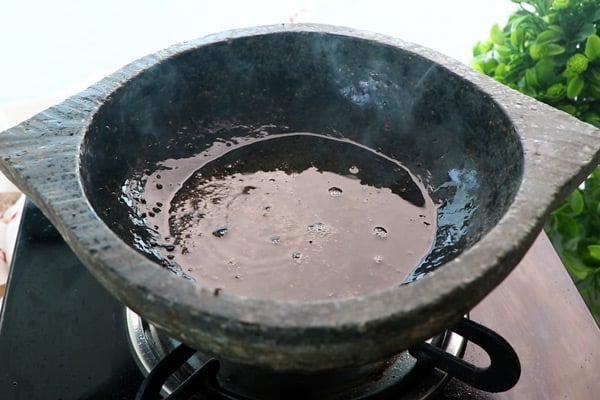
4.Add 1 teaspoon mustard seeds let it splutter. Add ½ teaspoon cumin seeds, ¼ teaspoon fenugreek seeds, few curry leaves and a pinch of hing. Let it crackle.

5.Add 10-15 small onion, 20-25 garlic cloves.

6.Fry until it turns slightly golden.

7.Add 1 and ½ tablespoon red chili powder and 3 tablespoon coriander powder. Spice powders give thickness to this curry.

8.Saute well for few seconds.
9.Strain and add tamarind extract.

10.Add ½ cup water.

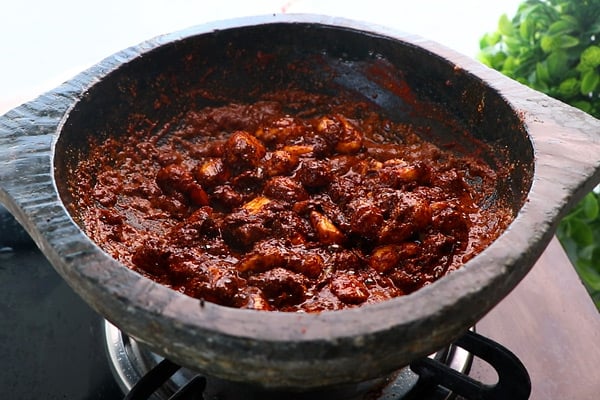
11.Cook covered for 15 minutes or until thick and oil separates. Stir in between to avoid sticking or burning at the bottom.

12.Oil separates and the curry becomes thick. Add 1 teaspoon jaggery powder to it and mix well.
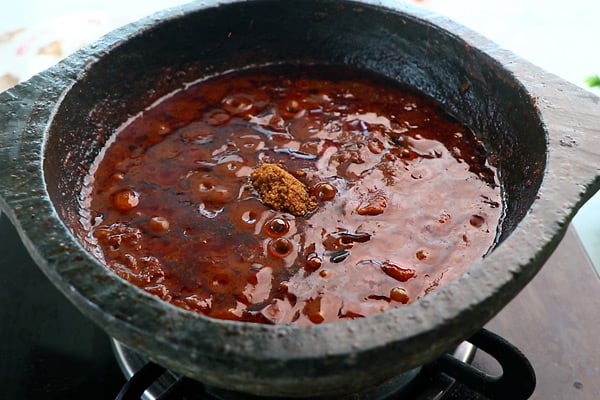
13.Switch off.

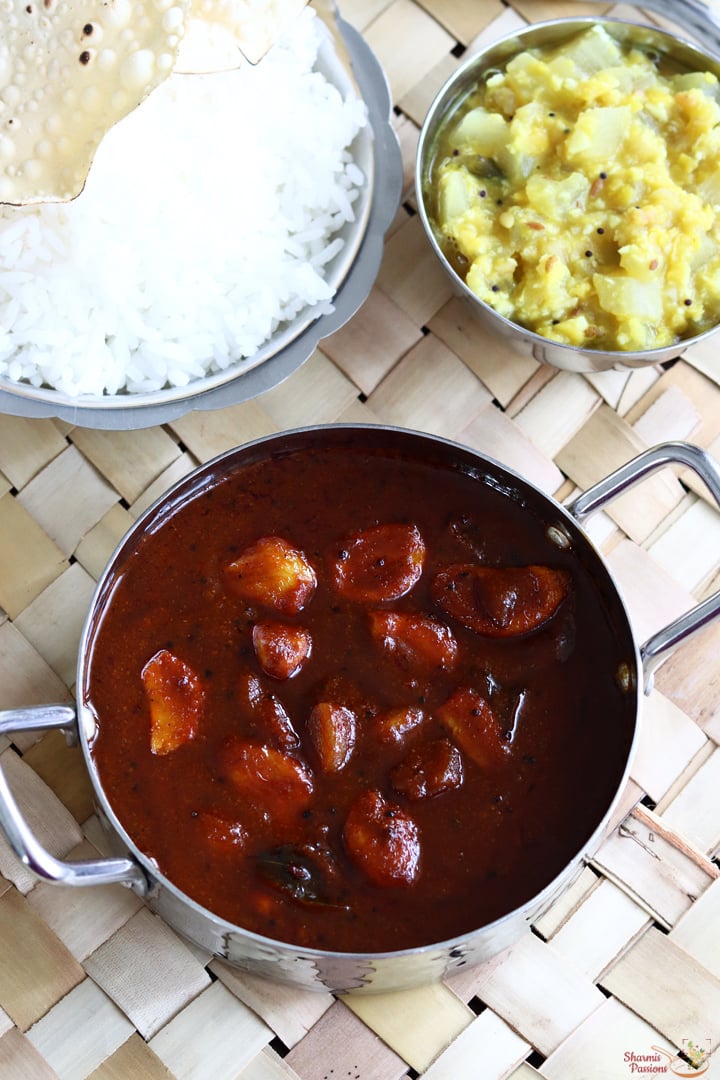
Serve it hot with rice and vegetable of your choice.
Expert Tips
- Garlic - I have used the bigger variety as the small ones easily gets dissolves with the simmering for more time.
- Tamarind - Soak tamarind in hot water then crush it which makes the task easier and yields more pulp.
- Spice powders - The spice powders gives thickness to the curry so add as mentioned. Adjust spice level according to your preference.
- Vegetables - You can also add vegetables like brinjal, ladies finger with garlic. Just sauté the veggies like we do for garlic and onion and follow the same procedure.
- Jaggery - You can omit jaggery if you don't like sweet taste in your curry but we love it as the tangy spicy taste compliments well with the sweetness.
- Spice variation - This is medium spicy, if you like it more spicy add 2 tablespoon red chili powder and 4 tablespoon coriander powder.
Serving & Storage
Serve Poondu Kuzhambu with rice and any stir fried vegetables, tastes best when had fresh. Keeps well in room temperature for 5-6 hours, refrigerate it and it keeps well for 2 days in fridge.
FAQS
1.There is so much oil, Is it healthy?
We use gingelly oil for this curry and gingelly oil is a healthy addition to your diet. If you prefer to just have it for one meal then reduce oil and consume it soon. Adding more oil increases shelf life and taste too.
2.Can I replace gingelly oil?
Yes you can replace gingelly oil or sesame oil with regular cooking oil. But the taste varies as gingelly oil is best for this curry.
3.Can I add coconut?
Yes you can grind 3 tablespoon coconut to a fine paste and add it to get more volume.
4.Is jaggery mandatory?
No you can skip jaggery but I would recommend adding it for the perfect balance and to make this curry tangy.
5.Can we use small sized garlic?
Yes you can use but it may break or get dissolved easily. So I would recommend adding big or medium sized garlic.
If you have any more questions about this Poondu Kuzhambu Recipe do mail me at sharmispassions@gmail.com. In addition, follow me on Instagram, Facebook, Pinterest ,Youtube and Twitter .
Tried this Poondu Kulambu Recipe? Do let me know how you liked it. Also tag us on Instagram @sharmispassions and hash tag it on #sharmispassions.
📖 Recipe Card

Poondu Kulambu Recipe | Garlic Kuzhambu Recipe
Ingredients
- 10-15 small onion
- 20-25 garlic
- ¼ teaspoon turmeric powder
- 1 and ½ tablespoon ed chili powder
- 3 tablespoon coriander powder
- 1 teaspoon jaggery powder
- salt to taste
To temper
- 3 tablespoon gingelly
- 1 teaspoon mustard seeds
- ½ teaspoon cumin seeds
- ¼ teaspoon fenugreek seeds
- a pinch hing
- few curry leaves
For tamarind extract
- ¼ cup tamarind
- 1 and ½ cups water
Instructions
- To a bowl add ¼ cup tamarind (tightly packed). Add around 1 and ½ cups water to it.
- Crush it well and set aside.
- To a kadai add 3 tablespoon gingelly oil.
- Add 1 teaspoon mustard seeds let it splutter. Add ½ teaspoon cumin seeds, ¼ teaspoon fenugreek seeds, few curry leaves and a pinch of hing. Let it crackle.
- Add 10-15 small onion, 20-25 garlic.
- Fry until it turns slightly golden.
- Add 1 and ½ tablespoon red chili powder and 3 tablespoon coriander powder.
- Saute well for few seconds.
- Strain and add tamarind extract.
- Add ½ cup water.
- Cook covered for 15 minutes or until thick and oil separates. Stir in between to avoid sticking or burning at the bottom.
- Oil separates and the curry becomes thick. Add 1 teaspoon jaggery powder to it and mix well.
- Switch off.
Video
Notes
- You can omit jaggery if you don't like sweet taste in your curry but we love it as the tangy spicy taste compliments well with the sweetness.
- The spice powders gives thickness to the curry so add as mentioned. Adjust spice level according to your preference.
- You can also add vegetables like brinjal, ladies finger with garlic. Just saute the veggies like we do for garlic and onion and follow the same procedure.
- This is medium spicy, if you like it more spicy add 2 tablespoon red chili powder and 4 tablespoon coriander powder.
Nutrition
The post Poondu Kuzhambu | Garlic Kulambu appeared first on Sharmis Passions.