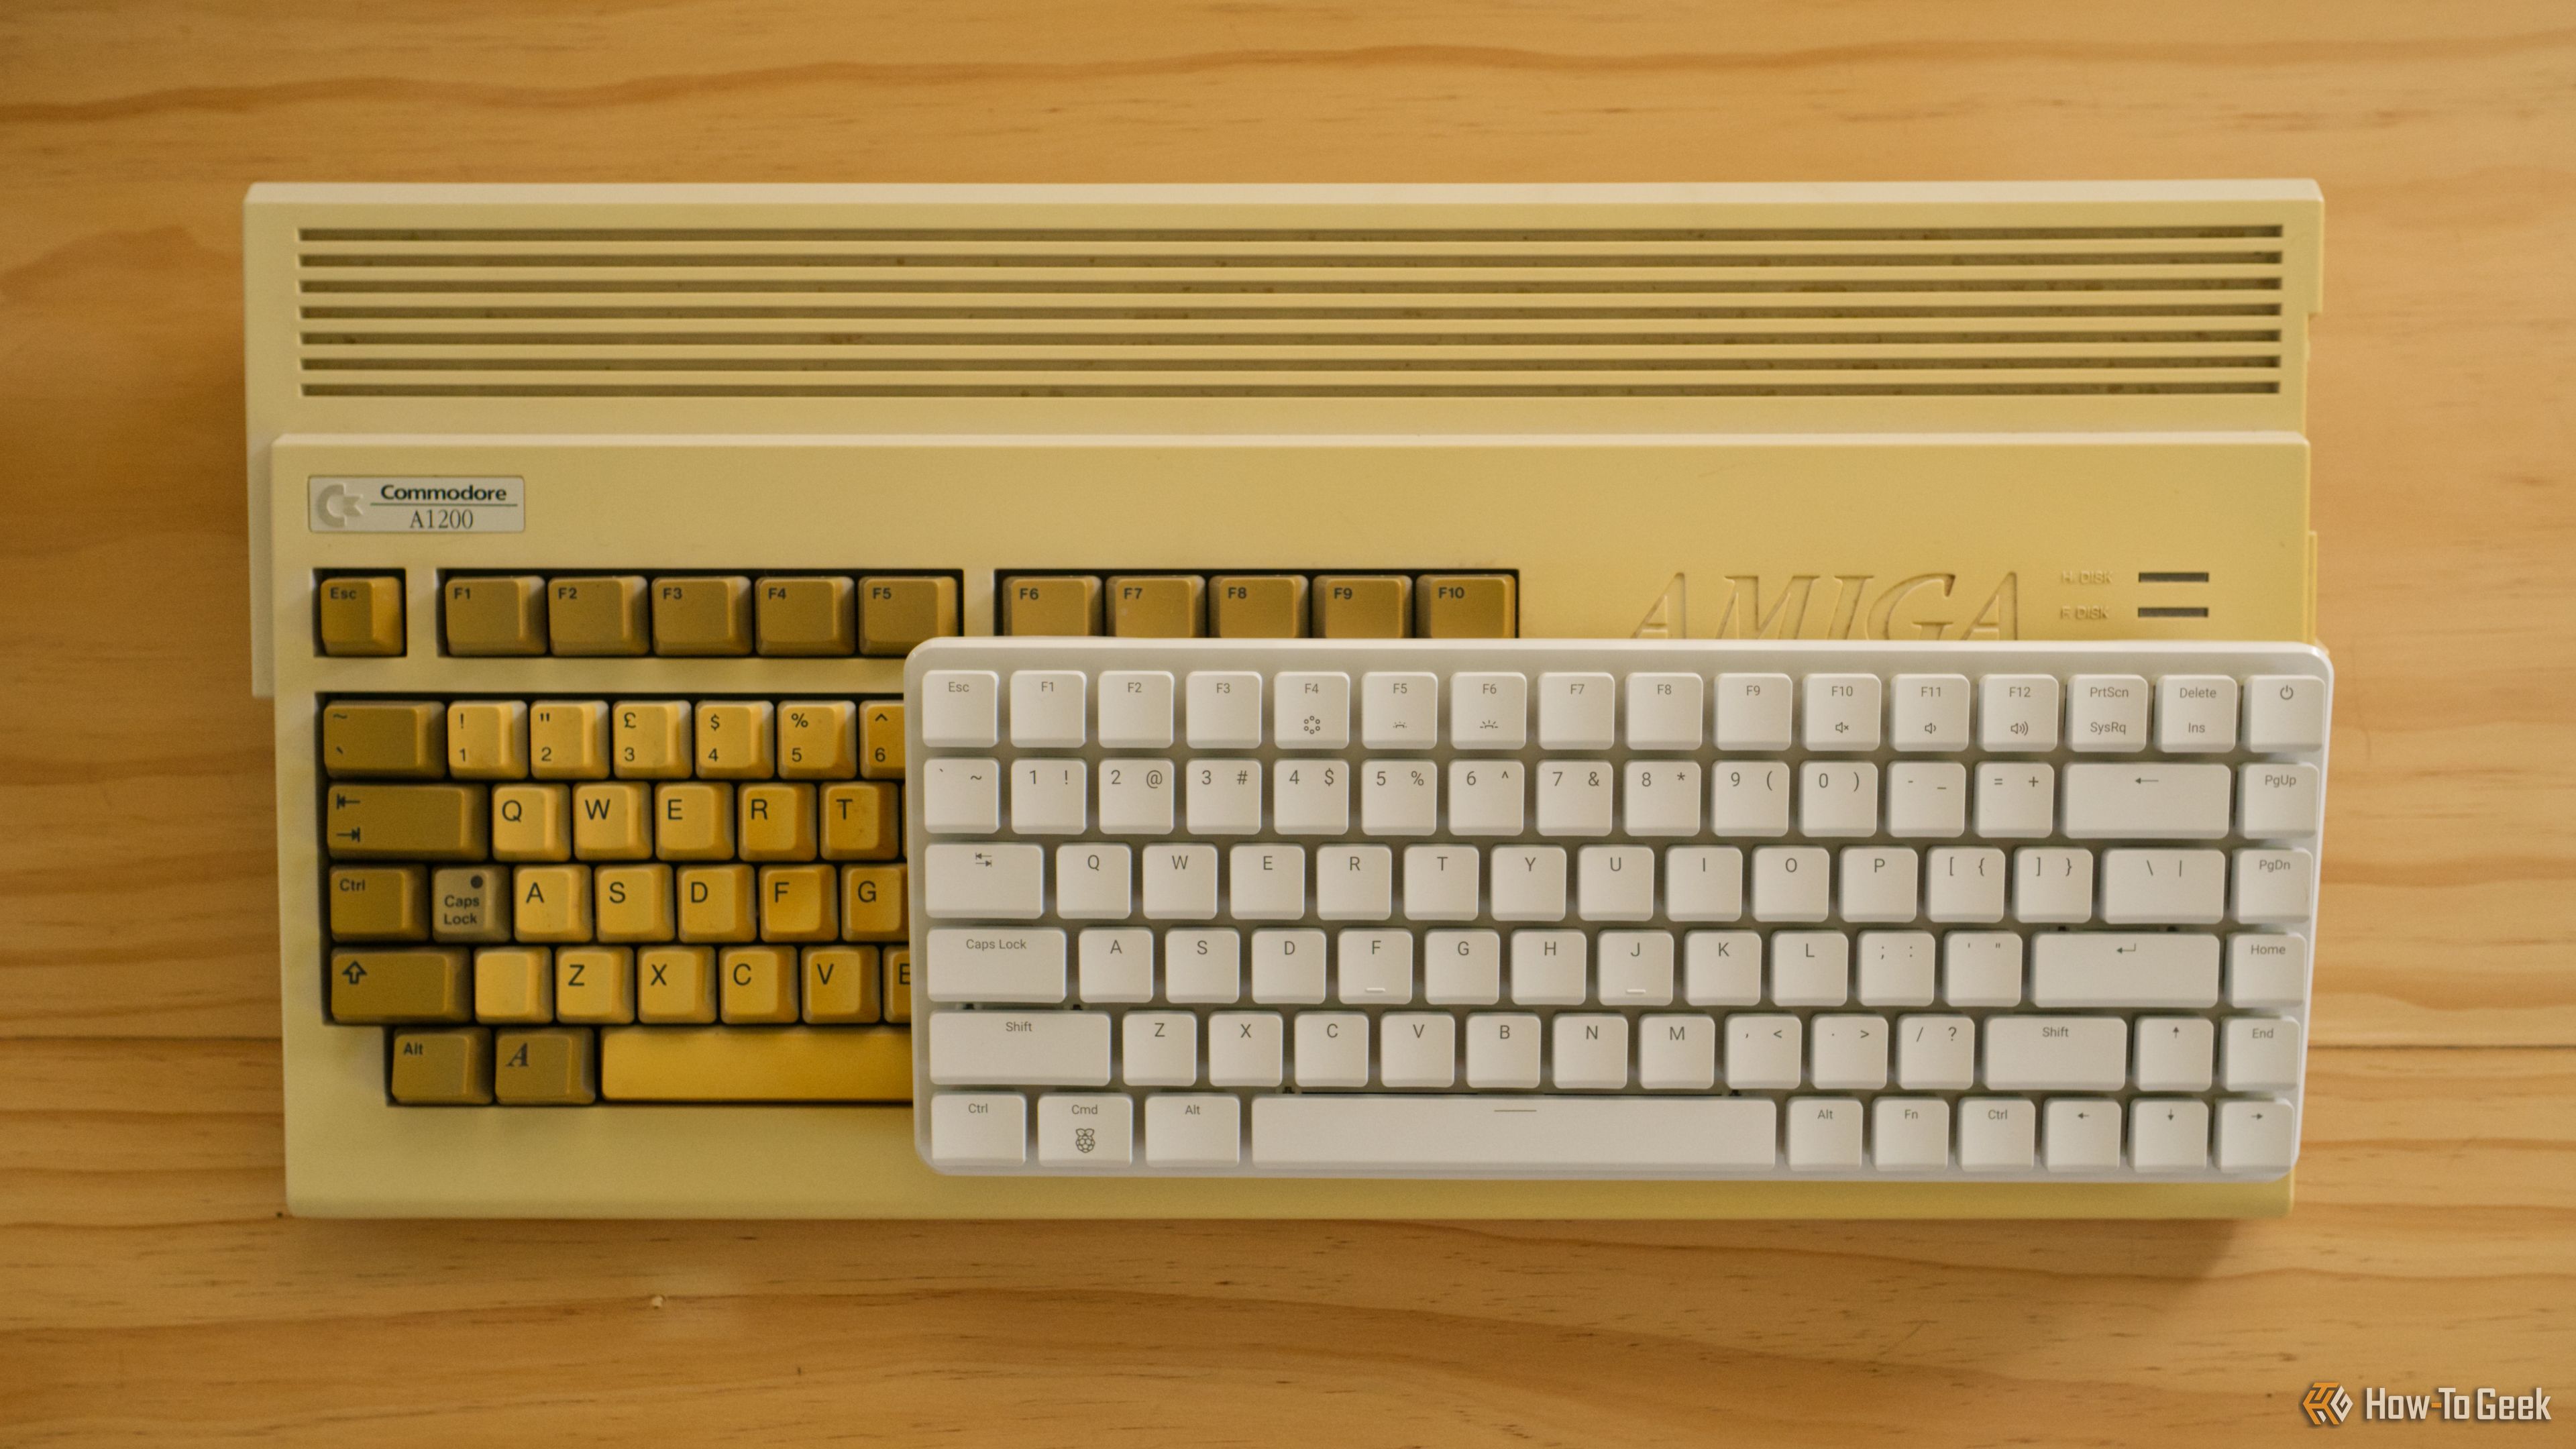
The Raspberry Pi 500+ is most of a Raspberry Pi 5 Model B 16GB that’s been squeezed into a keyboard case, with fancy mechanical key switches and some fetching RGB lighting. It’s fair to ask whether this package is worth the $200 asking price, or whether you’d be better off with a regular Pi instead.
The weekend is so close I can almost smell it—and that means it’s time for another roundup of Raspberry Pi projects to try out over the next few days. This weekend, I’m focusing on building out self-hosted media servers and controllers to help simplify audio listening and controlling.
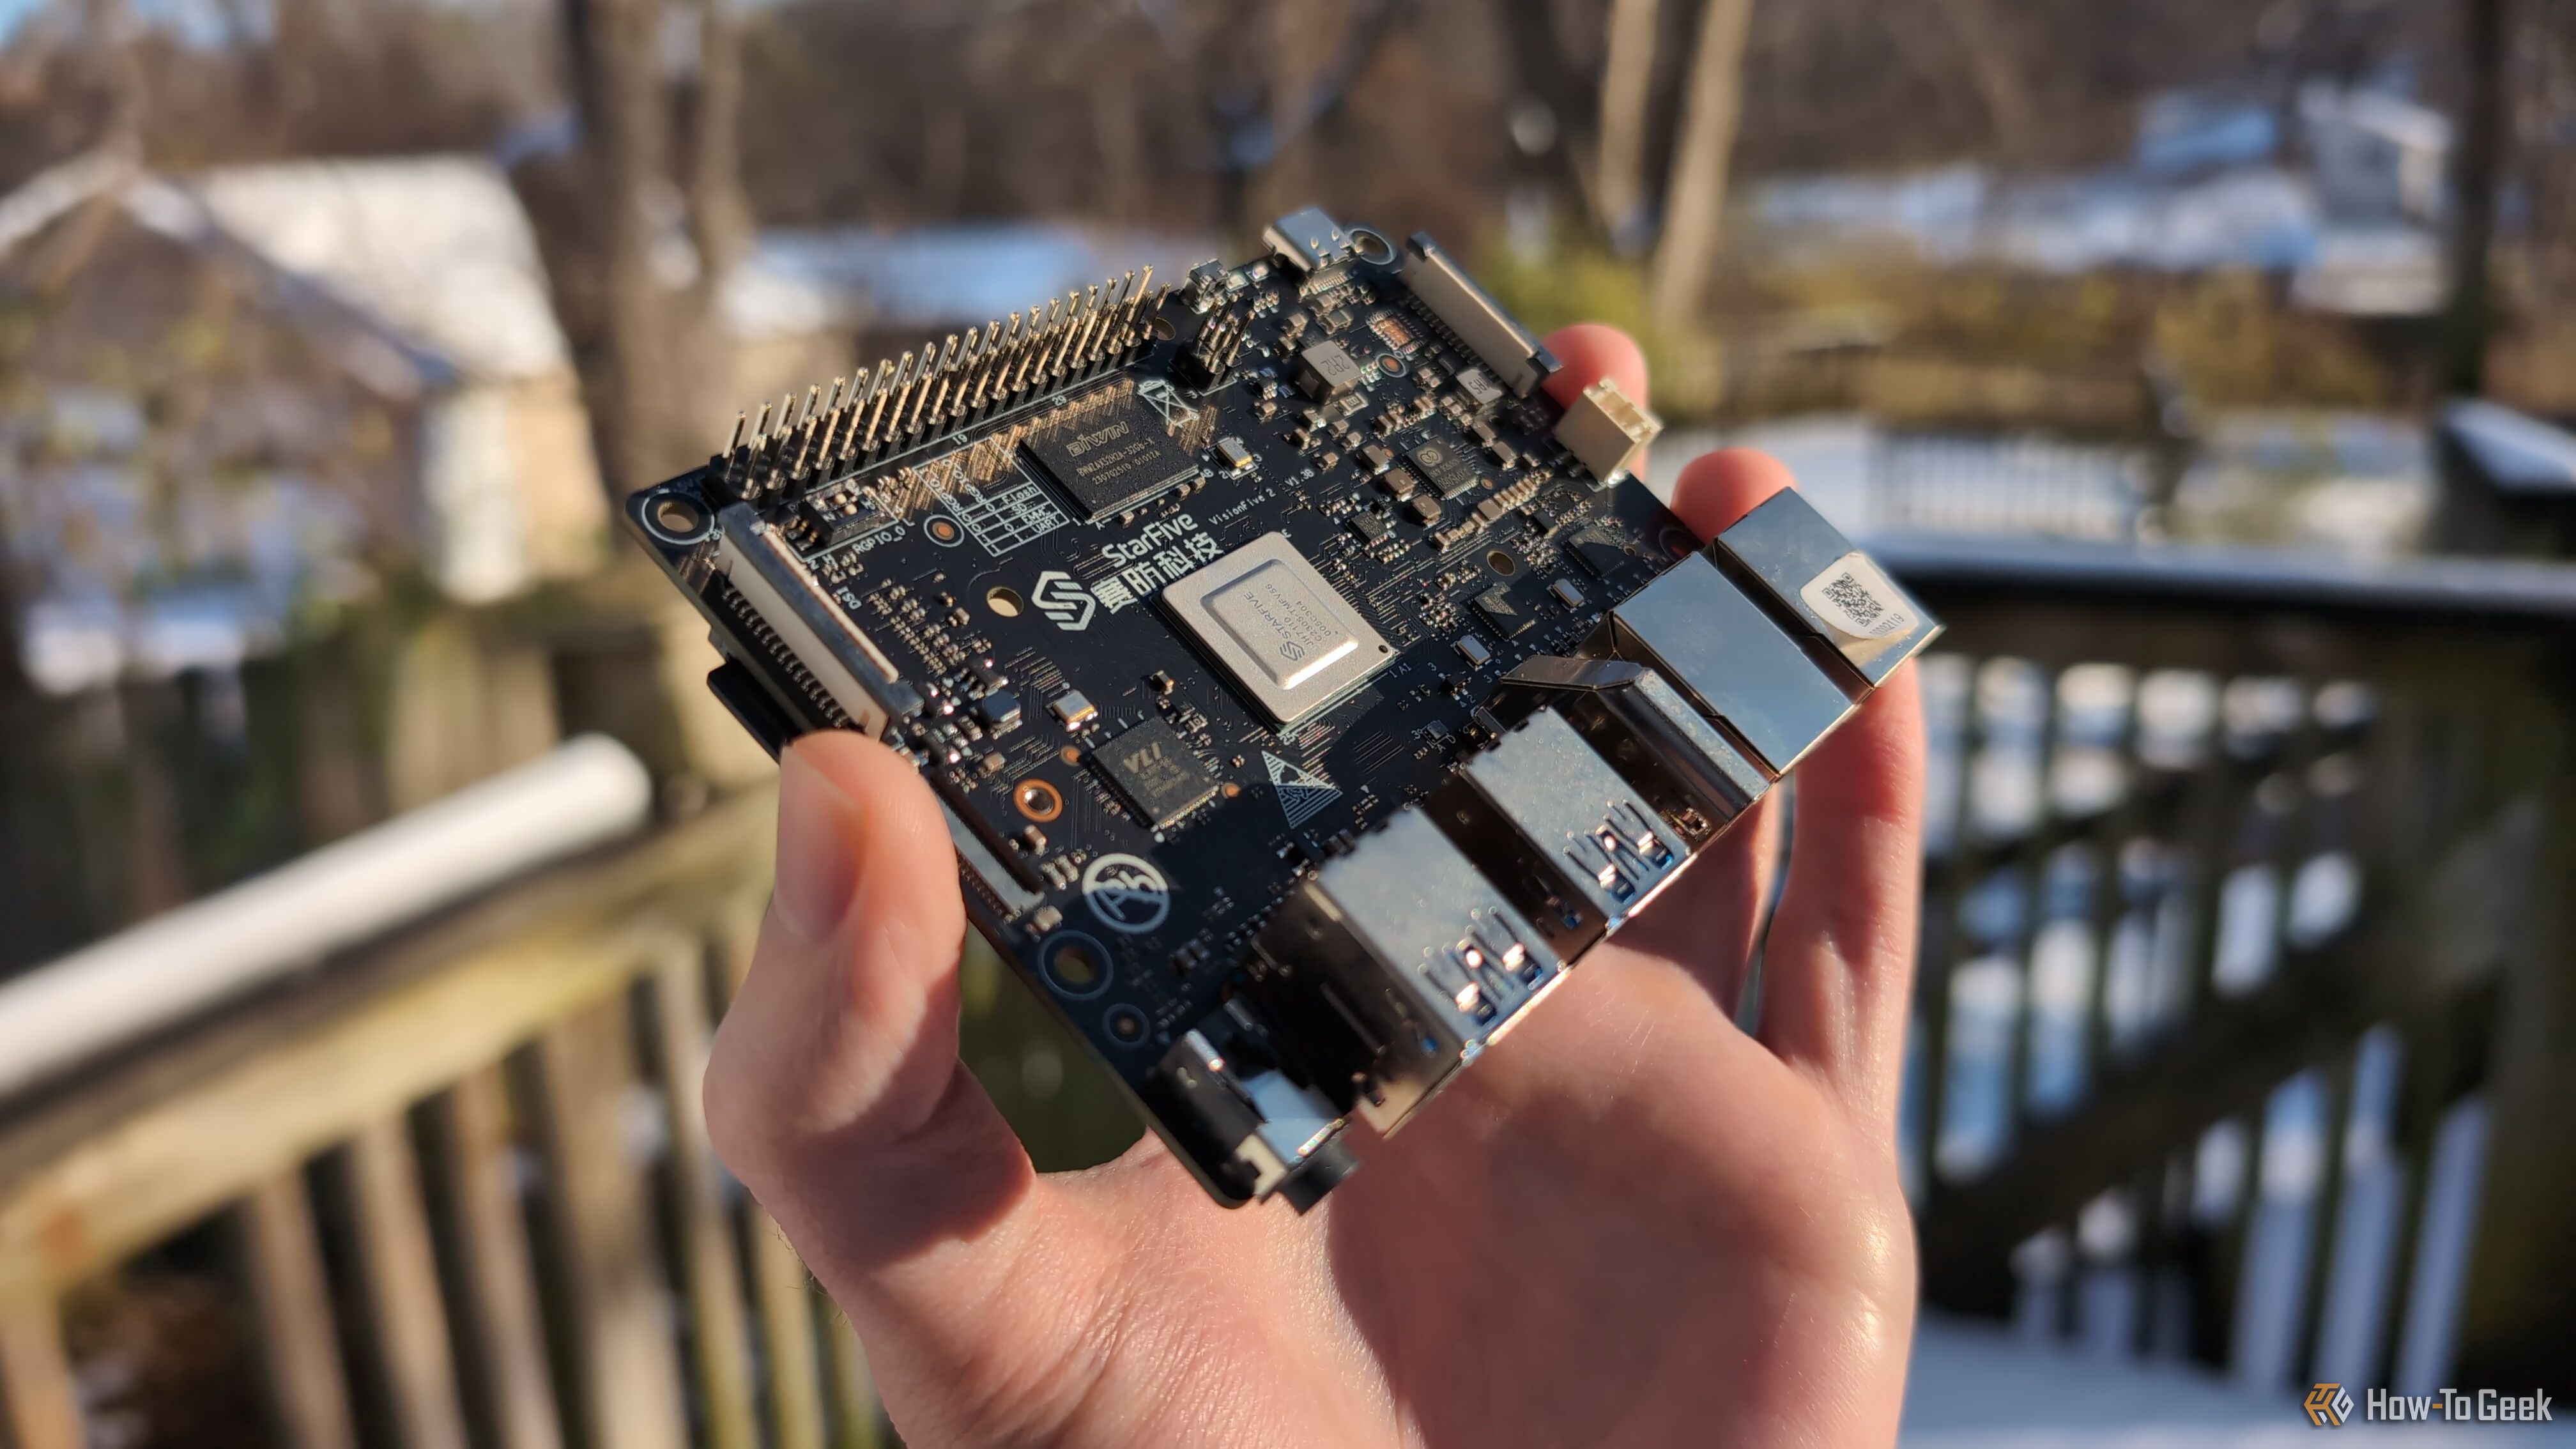
I've been using Raspberry Pi devices and similar single-board computers for years. They all have in common their ARM processors, just like most desktop computers are x86-64 processors, but I'm getting an SBC with a RISC-V chip.
Raspberry Pi just announced software updates for its growing suite of AI products. This is coming with full support for the AI HAT+ on the Trixie release of Raspberry Pi OS and a brand new debugging feature for the AI Camera.
The Raspberry Pi 500+ is a ready-to-go single-board computer and keyboard combo, with a 256GB NVMe drive, mechanical keys, and Raspberry Pi OS preloaded. It’s the fastest way to get started with a Raspberry Pi, and it’s a highly capable ARM-based desktop computer replacement that runs Linux.
My Raspberry Pi 500+ has finally been delivered, but I kept the order brief so I could keep the cost down. In spite of my attempts at being frugal, I’d be lying if I said I hadn’t toyed with the idea of throwing a few more items on the order.
Raspberry Pi computers have remained relatively affordable over the years, even if that meant stock was limited at times. Unfortunately, most modern Pi boards are now going up in price due to AI-driven memory manufacturing costs.
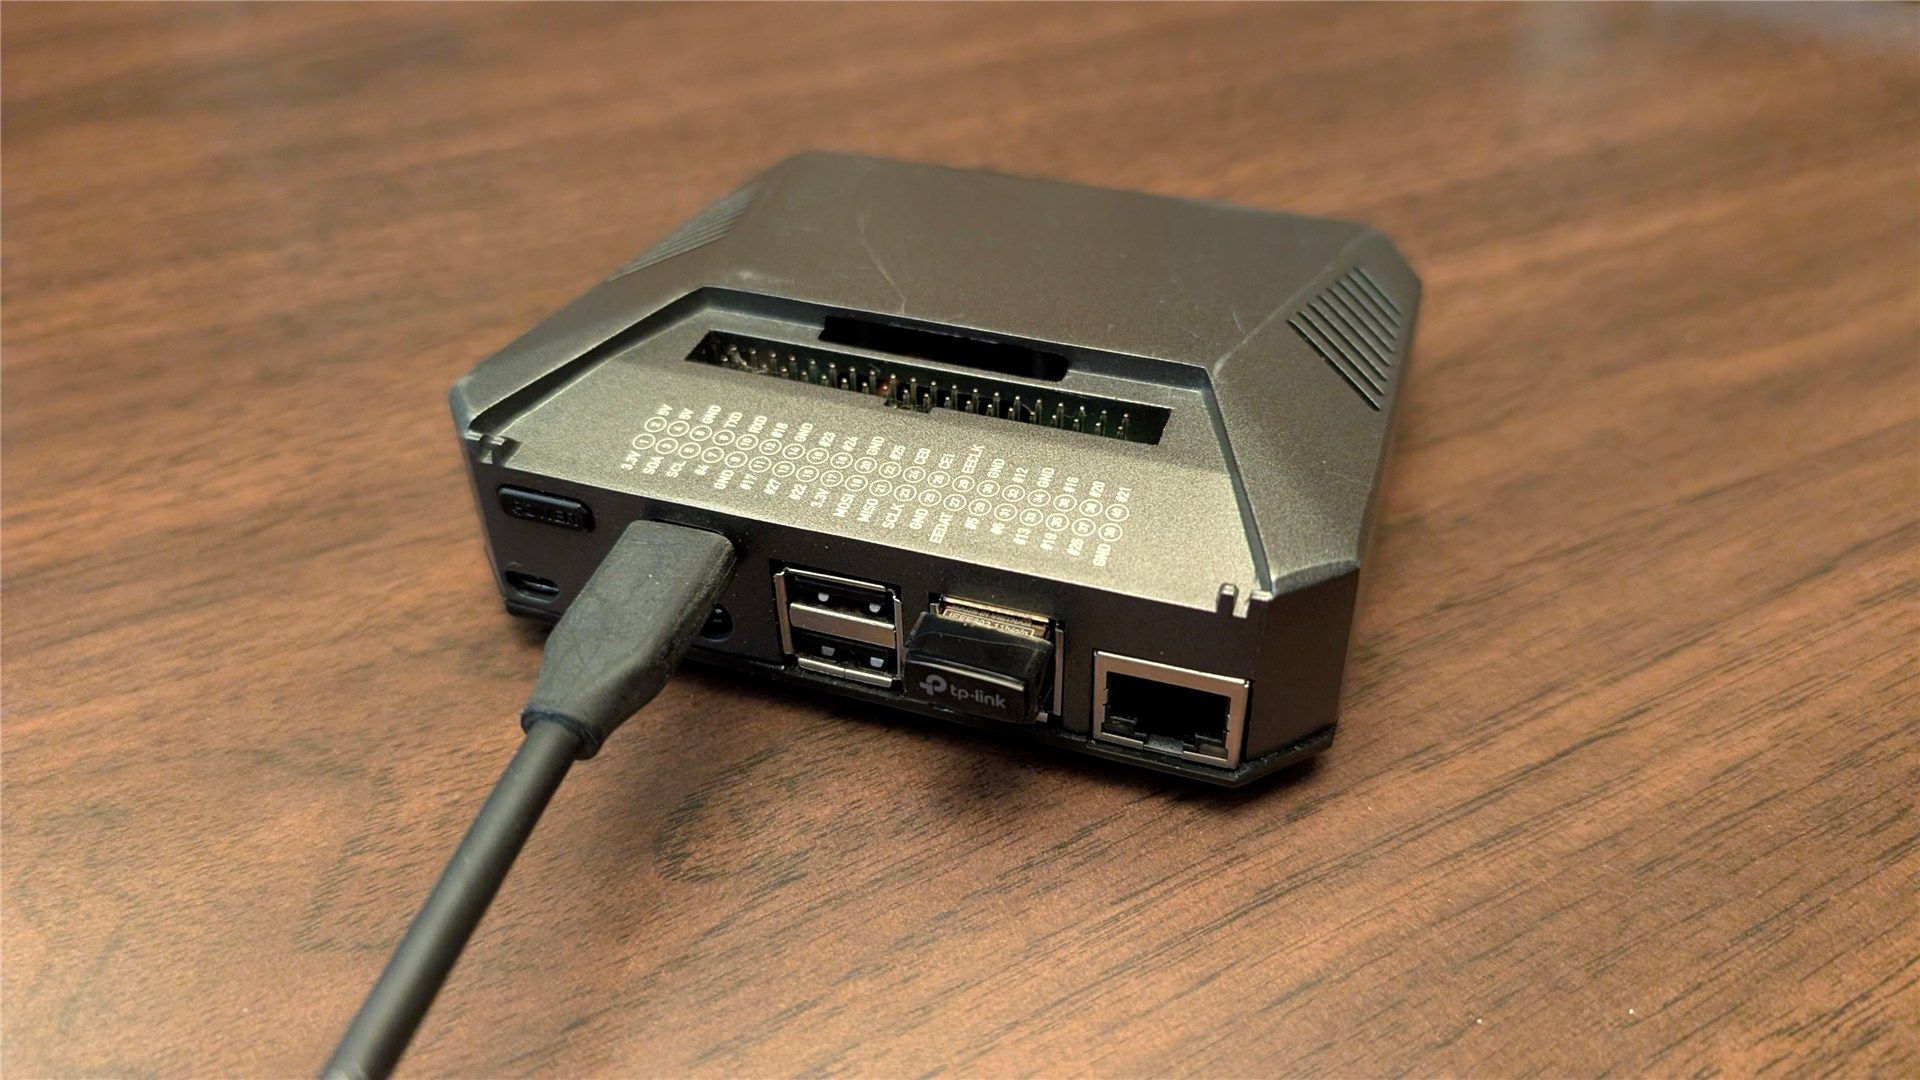
I use all sorts of software when I travel: a VPN, streaming music apps, cloud storage, and more. I turned my Raspberry Pi into a one-stop-shop travel router that combines all of those uses into one device, so I don't have to worry about them individually on my phone, laptop, or console.
The Raspberry Pi 500+ is the latest iteration of the best-selling single-board computer with 16GB RAM and 256GB of solid-state storage, all wrapped up in a keyboard that’s beautiful to type on, and I love it.
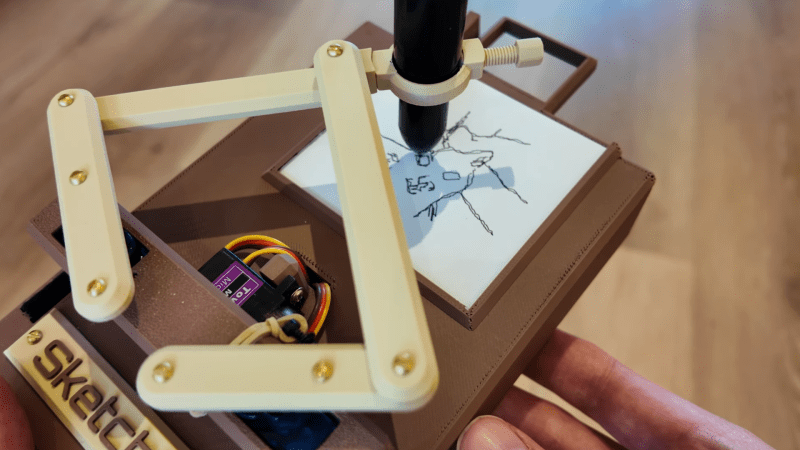
These days, everyone’s got a million different devices that can take a passable photo. That’s not special anymore. A camera that draws what it sees, though? That’s kind of fun. That’s precisely what [Jens] has built—an instant sketch camera!
The sketch camera looks like a miniature drawing easel, holding a rectangular slip of paper not dissimilar in size to the Polaroid film of old. The 3D-printed frame rocks a Raspberry Pi controlling a simple pen plotter, using SG90 servos to position the drawing implement and trace out a drawing. So far, so simple. The real magic is in the image processing, which takes any old photo with the Pi camera and turns it into a sketch in the first place. This is achieved with the OpenCV image processing library, using an edge detection algorithm along with some additional filtering to do the job.
If you’ve ever wanted to take Polaroids that looked like sketches when you’re out on the go, this is a great way to do it. We’ve featured some other great plotter builds before, too, just few that are as compact and portable as this one. Video after the break.
Raspberry Pi OS has a new way to set the Wi-Fi network name and password, SSH access, and other options while you install it. The latest update switched to cloud-init, so setting up a Pi from scratch is more like other Linux systems.
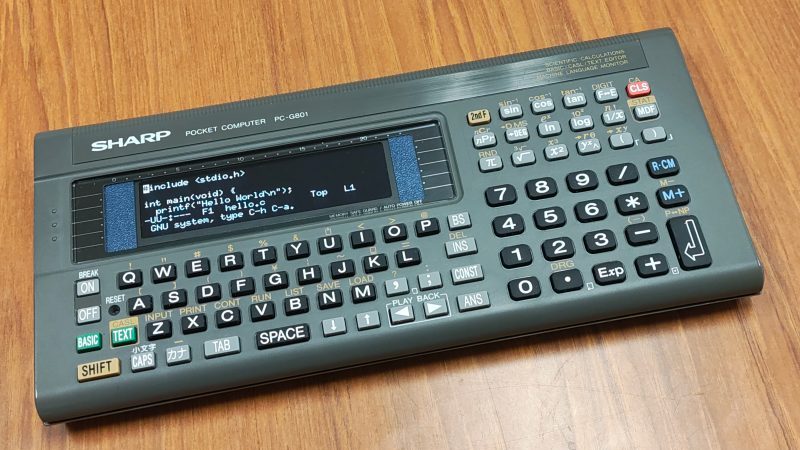
The Sharp PC-G801 was an impressive little pocket computer when it debuted in 1988. However, in the year 2025, a Z80-compatible machine with just 8 kB of RAM is hardly much to get excited about. [shiura] decided to take one of these old machines and upgrade it into something more modern and useful.
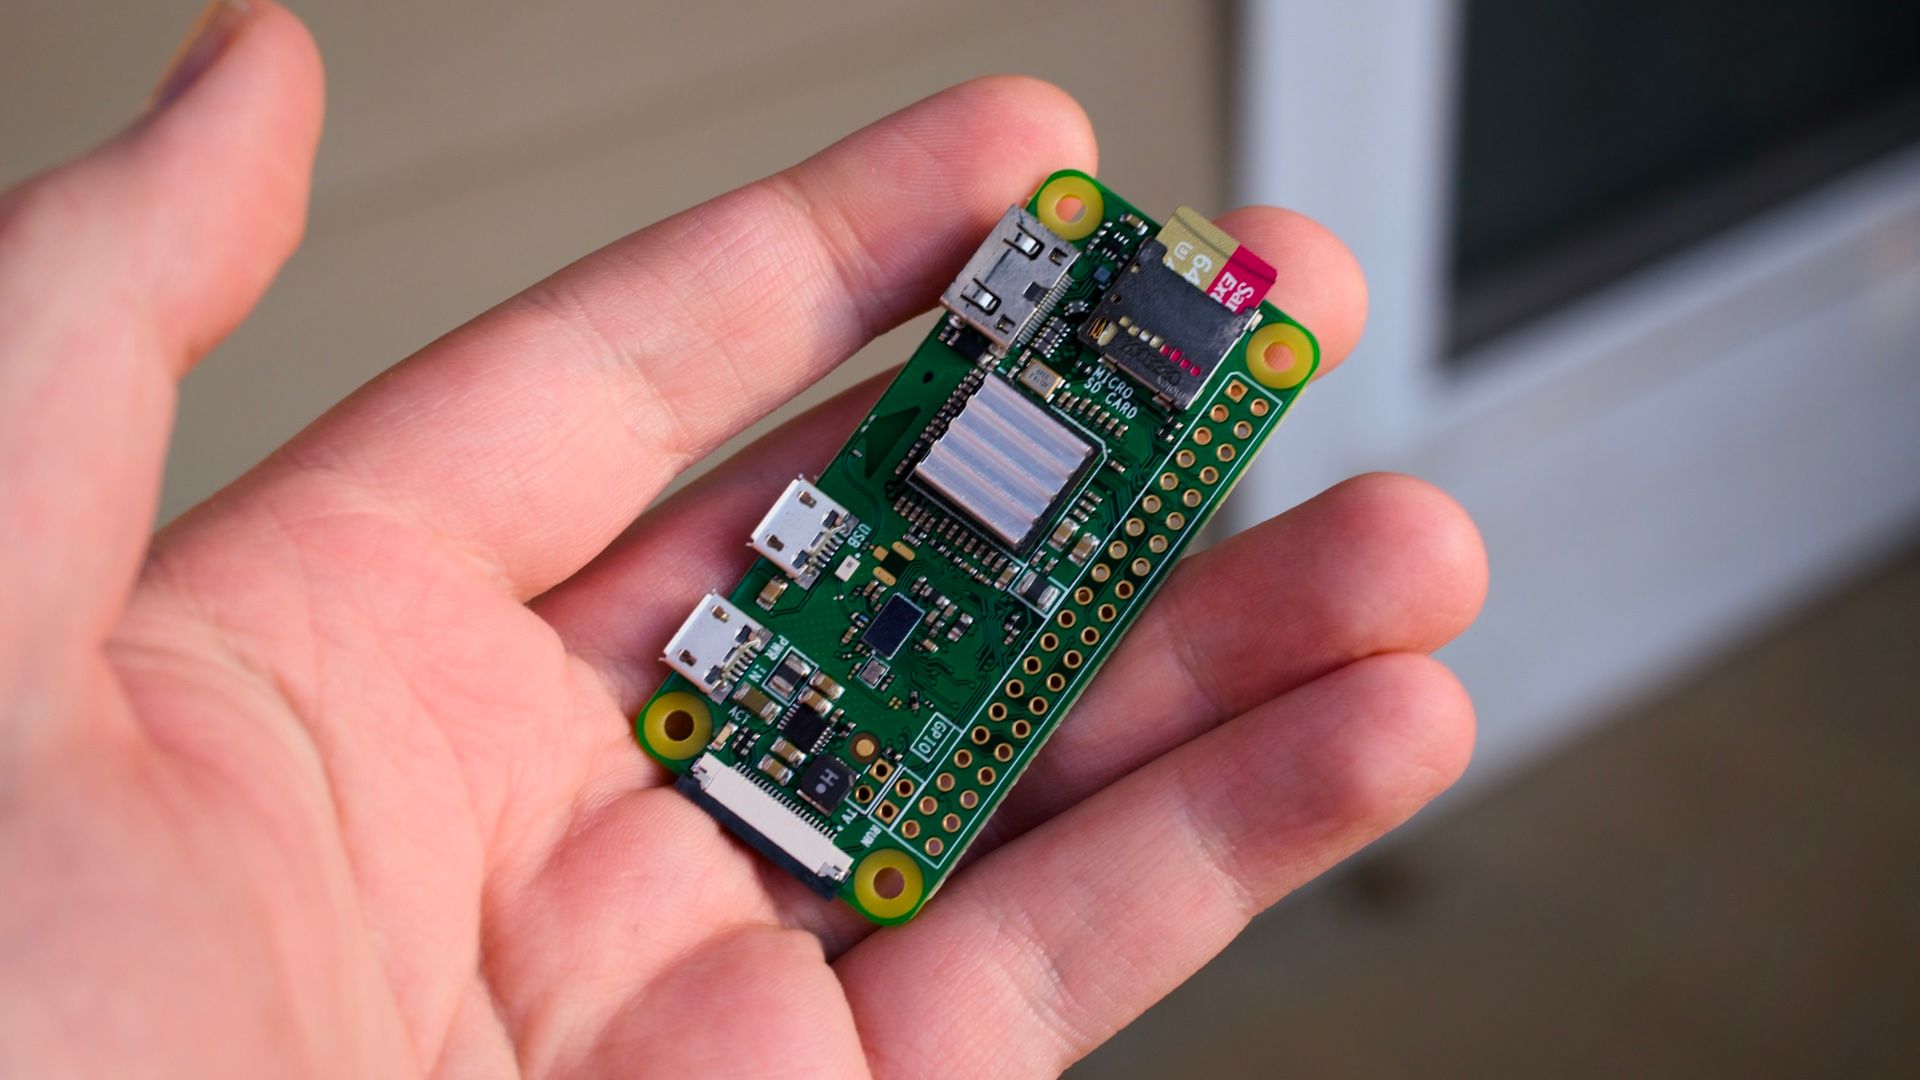
The build maintains the best parts of the Sharp design — namely, the case and the keypad. The original circuit board has been entirely ripped out, and a custom PCB was designed to interface with the membrane keypad and host the new internals. [shiura] landed on the Raspberry Pi Zero 2W to run the show. It’s a capable machine that runs Linux rather well and has wireless connectivity out of the box. It’s paired with an ESP32-S3 microcontroller that handles interfacing all the various parts of the original Sharp hardware. It also handles the connection to the 256×64 OLED display. The new setup can run in ESP32-only mode, where it acts as a classic RPN-style calculator. Alternatively, the Pi Zero can be powered up for a full-fat computing experience.
If you want to protect a system from being hacked, a great way to do that is with an airgap. This term specifically refers to keeping a system off any sort of network or external connection — there is literally air in between it and other systems. Of course, this can be limiting if you want to monitor or export logs from such systems. [Nelop Systems] decided to whip up a simple workaround for this issue, creating a bespoke one-way data extraction method.
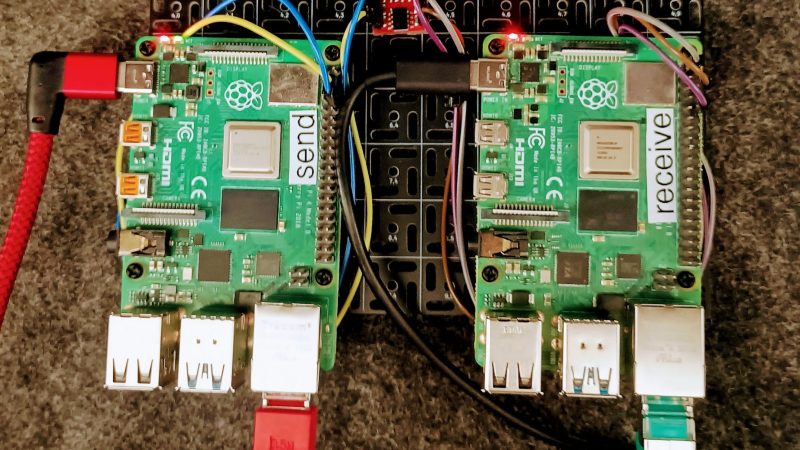
The concept is demonstrated with a pair of Raspberry Pi computers. One is hooked up to critical industrial control systems, and is airgapped to protect it against outside intruders. It’s fitted with an optocoupler, with a UART hooked up to the LED side of the device. The other side of the optocoupler is hooked up to another Raspberry Pi, which is itself on a network and handles monitoring and logging duties.
This method creates a reliable one-way transmission method from the airgapped machine to the outside world, without allowing data to flow in the other direction. Indeed, there is no direct electrical connection at all, since the data is passing through the optocoupler, which provides isolation between the two computers. Security aficionados will argue that the machine is no longer really airgapped because there is some connection between it and the outside world. Regardless, it would be hard to gain any sort of access through the one-way optocoupler connection. If you can conceive of a way that would work, drop it down in the comments.
When AI is being touted as the latest tool to replace writers, filmmakers, and other creative talent it can be a bit depressing staring down the barrel of a future dystopia — especially since most LLMs just parrot their training data and aren’t actually creative. But AI can have some legitimate strengths when it’s taken under wing as an assistant rather than an outright replacement.
The small device is based on a Raspberry Pi 5 with an AI hat nested on top, and uses a wide-angle camera to keep an eagle-eyed lookout of a space like a garden or forest. It runs a few scripts in Python leveraging the OpenCV library, which is a widely available machine learning tool that allows users to easily interact with image recognition. When perched to view an outdoor area, it sends out an email notification to the user’s phone when it detects bird activity so that they can join the action swiftly if they happen to be doing other things at the time. The system also logs hourly bird-counts and creates a daily graph, helping users identify peak bird-watching times.
Right now the system can only detect the presence of birds in general, but he hopes to build future versions that can identify birds with more specificity, perhaps down to the species. Identifying birds by vision is certainly one viable way of going about this process, but one of our other favorite bird-watching tools was demonstrated by [Benn Jordan] which uses similar hardware but listens for bird calls rather than looking for the birds with a vision-based system.
While you might not know it from their market share, Intel makes some fine GPUs. Putting one in a PC with an AMD processor already feels a bit naughty, but AMD’s x86 processors still ultimately trace their lineage all the way back to Intel’s original 4004. Putting that same Intel GPU into a system with an ARM processor, like a Raspberry Pi, or even better, a RISC V SBC? Why, that seems downright deviant, and absolutely hack-y. [Jeff Geerling] shares our love of the bizarre, and has been working tirelessly to get a solid how-to guide written so we can all flout the laws of god and man together.
According to [Jeff], all of Intel’s GPUs should work, though not yet flawlessly. In terms of 3D acceleration, OpenGL works well, but Vulkan renders are going to get texture artifacts if they get textures at all. The desktop has artifacts, and so do images; see for yourself in the video embedded below. Large language models are restricted to the not-so-large, due to memory addressing issues. ARM and RISC V both handle memory somewhat differently than x86 systems, and apparently the difference matters.
The most surprising thing is that we’re now at a point that you don’t need to recompile the Linux kernel yourself to get this to work. Reconfigure, yes, but not recompile. [6by9] has a custom kernel all ready to go. In testing on his Pi5, [Jeff] did have to manually recompile Mesa, however–unsurprisingly, the version for Raspberry Pi wasn’t built against the iris driver for Intel GPUs, because apparently the Mesa devs are normal.
Compared to AMD cards, which already work quite well, the Intel cards don’t shine on the benchmark, but that wasn’t really the point. The point is expanding the hardware available to SBC users, and perhaps allowing for sensible chuckle at the mis-use of an “Intel Inside” sticker. (Or cackle of glee, depending on your sense of humour. We won’t judge.) [Jeff] is one of the people working at getting these changes upstreamed into the Linux kernel and Raspberry Pi OS, and we wish him well in that endeavour.
Raspberry Pi is a great starting point for exploring cybersecurity and hacking in particular. You can grab a $50 board, connect it to the TV, and start learning. Otherwise, you can install the OS on the Pi and control it from your phone. There are a lot of opportunities.
In this article, I’d like to demonstrate how to use a Raspberry Pi for Open Source Intelligence (OSINT) gathering. This a key reconnaissance step before the attack.
Step #1: Understand Where to Start?
There is a wealth of OSINT tools—some have faded away, while new ones constantly emerge. Spiderfoot, for example, has been quietly serving OSINT investigators since 2012.
This tool serves as a starting point in the investigation. It is capable of gathering information from multiple resources automatically with little or no manual interaction. Once this data has been gathered, you can export the results in CSV/JSON or feed scan data to Splunk/ElasticSearch.
Step #2: Getting Started with Spiderfoot
In the previous article we installed Kali Linux on a Raspberry Pi, which comes with Spiderfoot pre‑installed. Let’s take a look at its help page:
kali> spiderfoot -h
To get started, it is enough to run the following command: kali> spiderfoot -l 0.0.0.0:port
Where
-l – tells it to listen for incoming HTTP connections; 0.0.0.0:4444 – the address + port where the web UI will be bound. 0.0.0.0 means “any reachable IP on this machine,” so you can reach the UI from another host on the same network.
By typing http://:<IP>:4444/ on the web browser of any computer/phone on this Local Area Network (LAN), anyone can get access to the spiderfoot user interface.
Step #3: Spiderfoot Modules
By default, Spiderfoot includes more than 200 modules, most of which operate without any API keys. However, adding the appropriate API keys in the settings can significantly boost the effectiveness of your scans.
Step #4: Start Scanning
SpiderFoot offers four primary scan types:
All: Runs every available module. Comprehensive but time-consuming, and may generate excessive queries.
Footprint: Lighter scan focusing on infrastructure and digital footprint.
Investigate: Some basic footprinting will be performed in addition to querying of blacklists and other sources that may have information about your target’s maliciousness.
Passive: Gathering information without touching the target or their affiliates.
Let’s run a “stealth” scan against the Russian oil company Lukoil. Once the scan completes, the Summary tab on the main screen will display an overview of the information that was uncovered.
By clicking the Browse tab, we can review the results.
One of spiderfoot’s standout features is its ability to visualize data graphically.
In the graph, each node represents a distinct piece of information about the target.
Summary
In this simple approach, you can use a Raspberry Pi to conduct OSINT investigations without installing anything on your primary system. Moreover, you can access the Pi’s IP address from your phone and review the results during a coffee break—or whenever you have a spare moment.
As mentioned in the introduction, the Raspberry Pi is a powerful platform for learning cybersecurity.
If you’d like to advance in this field, consider checking out our OSINT training class.
The Raspberry Pi is small and affordable single-board computer that has become extraordinarily popular. Built upon the powerful and efficient ARM processor, it can be used for hacking and pentesting! It might be the ideal, low-cost platform to start your journey in cybersecurity.
Installing Kali Linux on a Raspberry Pi transforms this affordable single-board computer into a powerful portable hacking platform. In this article, we will walk through the entire installation process, from preparation to post-installation configuration.
Understanding the Requirements
Before beginning the installation process, you’ll need to ensure you have the proper hardware and software components. I’m going to use a Raspberry Pi 4, which requires a microSD card with at least 16GB of storage.
Your power supply should be able to deliver at least 3A at 5V. Insufficient power can cause system instability and boot failures. Additionally, you’ll need a computer with an SD card reader to write the Kali Linux image to your microSD card.
Downloading the Kali Linux ARM Image
Navigate to the official Kali Linux website and locate the ARM images section. The Raspberry Pi 4 uses the ARM64 architecture, so you’ll need to download the specific Kali Linux Raspberry Pi 2/3/4/400/5/500 image. This image is pre-configured for the Pi’s hardware and includes the necessary drivers and kernel modifications.
Preparing Your microSD Card
Insert your microSD card into your computer’s card reader. Before writing the Kali image, you should format the card to ensure a clean installation. On Windows, you can use the built-in Disk Management tool or a third-party utility. Linux users can utilize the fdisk or Disk Utility.
Format the card using the FAT32 file system initially, as this provides compatibility across different operating systems. However, keep in mind that this formatting will be overwritten when you write the Kali Linux image, so this step primarily serves to clear any existing partitions and data.
Writing the Image to the microSD Card
For writing the Kali Linux image to your microSD card, several reliable tools are available depending on your operating system. The Raspberry Pi Imager is an excellent choice as it’s officially supported and user-friendly. Download and install this tool from the Raspberry Pi Foundation’s website.
Launch the Raspberry Pi Imager and select your device version.
Next, “Use custom” in the OS window to browse for your downloaded Kali Linux .img.xz file.
Select your microSD card and click Next.
You’ll see a pop-up like above. Click “Edit Settings” so we can set up user credentials, configure Wi-Fi, etc.
Don’t forget to check the Services tab and enable SSH access.
After that, we can proceed to the writing.
The writing process typically takes 10-30 minutes, depending on your card’s speed and the image size. The imager will write the image and then verify the write operation to ensure data integrity. Once completed, you’ll see a success message indicating the process finished without errors.
Initial Boot Configuration
After successfully writing the image, remove the microSD card from your computer and insert it into your Raspberry Pi 4. Connect your Pi to a monitor using an HDMI cable, and attach a keyboard and mouse via USB ports. Or wait for connecting via SSH.
The first boot will take longer than subsequent boots as the system expands the filesystem to utilize the full capacity of your microSD card and performs initial configuration tasks.
To log in, use your username and password that were specified in the imager.
Post-Installation System Updates
Once you’ve successfully logged into your new Kali Linux system, the first critical step is updating all packages to their latest versions. Open a terminal and execute the package manager update commands.
kali> sudo apt update -y
After the initial updates are complete, consider upgrading the system to ensure all packages are at their newest versions.
kali> sudo apt upgrade -y
Summary
Successfully installing Kali Linux ARM on your Raspberry Pi 4 provides you with a capable, portable hacking platform. The combination of Kali’s huge tool suite and the Pi 4’s improved performance creates a great environment for security ops, learning, and professional penetration testing activities.