Cooking outdoors has become increasingly popular in recent years, and it’s no surprise why. Cooking outdoors allows you to enjoy the fresh air, sunshine, and company of friends and family while preparing delicious meals. Oh, and let’s not forget flavor!
Two of the most popular cooking options for outdoor cooking are griddles and grills. In this post, I will compare these two cooking appliances, and we’ll take a look at the pros and cons of both cooking methods and help you determine which one is the best for you.
Griddle Grill
Griddles are flat, solid, hot plate-like surfaces that sit on top of a stove, grill, or purpose-built cooker. The traditional outdoor griddle is typically a gas grill with a flat metal cooking surface, or “griddle.” In simple terms, take a gas grill, eliminate the grates, and add a metal plate on top of the burners.
They are typically made from cast iron or stainless steel and are great for cooking pancakes, eggs, bacon, and other breakfast foods.
Griddles are also great for cooking burgers, steaks, and chicken breasts. With a griddle, you can cook large amounts of food at once, which makes it great for feeding a crowd.
Some Quick Facts about griddles:
These facts highlight just some of the benefits and versatility of griddles as a cooking tool. Whether you’re a professional chef or a home cook, a griddle can be a valuable addition to your cooking arsenal.
Cast iron griddles are often considered to be very efficient cookers because they heat evenly, are durable, and can be seasoned to enhance their non-stick qualities.
Griddles are great for cooking small size, soft and liquid foods.
Griddles are great for cooking breakfast foods, such as pancakes, eggs, and bacon, but they can also be used for cooking a variety of other foods, such as grilled sandwiches, stir-fry, and even pizzas.
Griddles are often designed with grease traps to collect excess fat and oils, but do not let as much food “juices” out as grill grates.
Griddles come in a range of sizes, from small single-serving griddles to large, commercial-sized griddles that can accommodate multiple food items at once.
Griddles can be seasoned to create a non-stick surface, which makes cooking and cleaning a breeze.
Griddles are often easier to clean than traditional grills, as they have a flat surface and are typically made from non-porous materials like cast iron or stainless steel.
Griddle Pros and Cons
Pros:
Large Cooking Surface: Griddles have a large cooking surface, which makes them great for cooking large amounts of food at once.
Even Heating: Griddles heat evenly, which means that your food will cook evenly, without any hot spots.
Versatile Cooking: Griddles can be used to cook a wide variety of foods, from breakfast foods to steaks and burgers.
Easy to Clean: Griddles are easy to clean because they are flat and smooth. Simply wipe them down with a damp cloth after cooking.
Cons:
Expensive: Griddles can be expensive, especially those made from high-quality materials such as cast iron or stainless steel.
Heavy: Large griddles are heavy, which makes them difficult to move around.
Limited Cooking Options: Griddles are limited in the types of cooking they can do. They can’t be used for roasting or smoking meats, for example.
Griddles do not create the “convection heating” effects most grills can do to cook large cuts of meat.
Can’t smoke meats.
BBQ Grills ( charcoal grill, gas, and pellet grill )
Grills are cooking devices that use an open flame, charcoal, propane, or wood pellets to cook food. They are typically made from stainless steel, cast iron, or aluminum and come in a variety of sizes and shapes. Grills are great for cooking burgers, steaks, chicken, and large meats, as well as vegetables and fruits.
With the right skills and equipment, even an inexpensive gas grill can cook just about anything you can think of.
Some Quick Facts About Grills:
These facts highlight some of the benefits and versatility of grills as cooking tool. Whether you’re a seasoned griller or just starting out, a grill can be a valuable tool for creating delicious, flame-grilled meals and smoke meats
Grills come in a range of sizes, from small portable grills to large, permanent outdoor grilling stations.
Grills can be fueled by gas, charcoal, electricity and pellets.
Charcoal grills are often considered the best for imparting that signature smoky flavor to food.
Gas grills are convenient and easy to start, but can be more expensive in the long run due to the cost of propane.
Electric grills are great for indoor cooking, but may not be as powerful as gas or charcoal grills.
Grills come in a variety of materials, including stainless steel, cast iron, and porcelain-coated steel.
Grills typically have a grate or cooking surface that allows grease and oils to drain away from food, preventing flare-ups and keeping food healthy.
Grills often have adjustable cooking grates and better temperature controls to cook food to perfection.
Grills typically require a higher degree of maintenance than griddles, as they need to be cleaned regularly to prevent food from sticking and to remove grease buildup.
Grill Pros and Cons
Pros:
Versatile Cooking: Grills can be used to cook a wide variety of foods, from meats and vegetables to fruits and bread.
Flame Grilling: Grilling over an open flame adds flavor to your food that can’t be achieved with a griddle.
Affordable: Grills are often more affordable than griddles, especially those made from more basic materials such as aluminum and other composites.
Portable: Small two burner grills are portable, which makes them great for camping and other outdoor activities.
Cons:
Limited Cooking Surface: Some grills have a limited cooking surface, which means that you may need to cook your food in batches.
Uneven Heating: Grills can heat unevenly, which can result in some food cooking faster than others.
Requires Constant Attention: Grilling over an open flame requires constant attention, as food can easily burn if not tended to properly.
Some grills can be expensive.
Which is Better for Cooking Outdoors? A grill or a griddle
The answer to this question depends on your cooking needs and preferences. If you are looking for a versatile cooking option that can be used to cook a wide variety of foods but do not have the need to smoke or roast large cuts of meat, a griddle may be the better option for you.
However, if you are looking for that signature flame-grilled flavor and enjoy the art of grilling, a grill might be the way to go. Also consider a grill if you want to smoke meats or enjoy the flavors of charcoal or wood pellets.
Ultimately, it’s a matter of personal preference and what you’ll be using it for. Both griddles and grills have their pros and cons, but they can both be great options for cooking outdoors. If you’re looking to feed a large crowd and cook smaller-sized foods, a griddle might be the best option, while if you want to enjoy a more traditional grilling experience, a grill might be the better choice.
If you’re still not sure which option is right for you, consider purchasing a combination griddle/grill. These versatile cooking devices allow you to enjoy the best of both worlds, giving you the option to cook with a griddle or a grill, depending on what you’re in the mood for.
Key Takeaways
In conclusion, griddles and grills both have their advantages and disadvantages, but both are great options for outdoor cooking. Consider your personal cooking needs and preferences, and choose the option that works best for you. Whether you choose a griddle, a grill, or a combination of the two, you’re sure to enjoy cooking outdoors and creating delicious meals for yourself and your loved ones.
We all love our pellet grills; they are easy to use and produce amazing wood-fired flavor. However, there is one component of these grills that gets particularly dirty: the grease tray, also known as the drip pan.
Neglecting to clean the grease tray can cause numerous problems and damage your pellet grill. I have read about and seen firsthand people’s grills catching fire, which is all due to the grease tray being covered in old grease. Also, a dirty drip pan will ruin food and flavor since when old, dirty grease heats up, it boils and splatters all over your nice cut of steak and releases dirty smoke.
This is easy to avoid by cleaning the grease tray, and I will show you how in nine simple steps.
Follow these steps to clean your pellet grill’s drip tray
Step 1: Remove all the cooking grates from the grill.
Step 2: Warm up the grill to 350 to 375 degrees for 30 minutes.
Step 3: Using a paint scraper, carefully scrape off as much grease and gunk as possible while the tray is still hot. Some of it will be “caked up” and will crack off easily; for others, you will have to use some elbow grease and really work the scraper.
Step 4: Let the drip pan (or grease tray, whatever makes you happy) cool down and remove it from the grill.
This thing will still be messy, so put the tray on a batch of grass that you don’t mind turning brown because it is about to go down.
Step 5: Make a mix of hot water and dish soap. I do not like to use harsh chemicals when cleaning my grills, but soap detergents meant to clean kitchenware work great as degreasers. I mean, that’s how you clean grease plates.
Step 6: Pour the hot water-soap mixture into the drip tray and scrape it again. You can also use a non-wire sponge to deep clean the tray.
Step 7: Rinse thoroughly and dry the pan.
Step 8: Spray the grease tray with cooking oil to prevent rust. ( Light coat )
Step 9: Put everything back in the grill, turn on the grill, and set the temperature no higher than 300 degrees to burn off any excess oil and “cure” some of the oil onto the drip pan.
One Last Word
Cleaning the grease pan on the grill is easier than you think, but it is a time-consuming task. I always recommend covering the tray with aluminum foil before each cook and discarding the used foil.
The foil acts as a shield and grease collector, often eliminating the need to constantly clean the drip pan.
If you’re new to grilling, here are a few tips and hacks to get you started on the right path and enjoy your grill more.
There are numerous things you can do and accessories you can purchase to make your life easier around the grill, but there are a few fundamentals you should learn and master early on to keep your foundation strong and to improve and enjoy your time around the grill.
In other words, these are your ABCs.
1. Keep your grill clean to prevent flare-ups
This might sound obvious, but lots of people, especially beginners, either don’t know how to clean their grills properly or just don’t do it. The fact is that grills, like any other kitchen cooking appliance, need to be kept clean.
This is not only for sanitary reasons but also to avoid flare-ups, dirty smoke, and grease fires. As old food gunk and grease accumulate around the bottom of the grill and on the grill grates, it becomes easier for these to catch fire. If you let old grease and grime accumulate, it’s just a matter of time before you have a little fireball, and I don’t mean the whiskey.
I’ve seen countless incidents where people neglected their grills and, poof, fireball! ( Great, now I got that PitBull song stuck in my head)
The best thing to do is to clean the grill grate after each use, while it’s hot and easier to clean, and do a deep cleaning of your grill at least monthly.
Flare ups might not be an issue when cooking at low temperature but throw some pork belly on those hot grates or try to sears stick on a grease, dirty steak and I assure you, fireball!
2. Use good tools to clean your grill
Following the topic of cleaning your grill, it is important to choose and use the right tools to clean your grill. People often go to a local hardware store and grab the first wire brush or the cheapest brush, and this is often a mistake.
Not all grill brushes are made of or constructed using the same materials. The bristles of some brushes are made of stainless steel, others of brass, and even of plastic.
There are also different types of brushes too. Our article on brushes gets into more detail on the different kinds and what to look for, but here is the skinny.
You don’t want to use hard brushes with steel bristles on porcelain coated grates. The brush will ruin the coating, and the grates will rust. Also, you want to be careful with those bristle brushes. The bristles are like tiny little needles that can come loose and end up on your food.
I like to use cleaning stones and rags to clean my grill grates. Yeap, I’m ol’ school and also like my food without metal. Sure, it is more work, but I know it is safer and more natural.
You can make aluminum foil balls and use a pair of tongs to clean your grill grates. Unless you let the grates get extremely dirty, there isn’t much need to use a hard brush.
3. Preheat your grill to the desired temperature before adding food.
This is one tip that, if followed, can make a world of difference. A properly heated grill will cook food evenly. But also, when you preheat your grill, you burn off anything you don’t want on your food. like old food residue.
4. Use a meat thermometer to ensure your food is cooked to the proper temperature
Yeah, we all want to be the next Bobby Flay and cook awesome food, but here’s the scoop: you are not Bobby Flay. So until then, use years of science and technology to your advantage and use a grill thermometer. I’m telling you, it will become your best friend.
5. If you don’t have charcoal igniters, use paper towels soaked in oil instead
It happens a lot that you are about to light your charcoal grill and, boom, you run out of those little igniters. Using igniters is a fast and easy way to start charcoal, but there is another way. If you run out of eggs, go to your pantry and grab some paper towels, a small bowl, and some vegetable oil.
Make some small paper towel balls with a small tail, just like the shape of a Hershey chocolate, but slightly smaller. Soak the bottoms of the little balls in oil, light the little tail, and let it rip.
6. Use a two-zone cooking method for thicker cuts of meat to ensure they cook evenly
This is a very easy thing to do and a simple technique, but many do not use it. Creating a two-zone cooking environment in a grill’s cooking chamber consists of setting the heat source on one side of the cooking chamber and creating a hotter heat zone on one side than the other.
Light a charcoal grill, for example, and place the coals on one side of the grill. This will result in both a hot and a warm zone.To achieve the same effect on a gas grill, use only one burner on one side of the grill.
The purpose of this technique is to create two cooking zones: a very hot zone and a cooler zone.
If you want to cook food slowly and evenly, this is very helpful. Use the cooler zone to cook, and food will cook slower, allowing it to reach temperatures more evenly.
The two-zone cooking system is also very helpful when grilling steaks. You can use the high temperature zone to sear a steak and then move to the cooler zone to finish cooking.
Having two cooking zones also helps with flare-ups. If you are grilling fatty meats like pork belly, the fat can easily spark up flare ups. You can move the meat away from the fire and to the cooler cooking zone until the fire settles.
7. Pick your fuel wisely
Ok, so this is important. If you own or are thinking about purchasing a charcoal grill, make sure you buy premium charcoal. It will last longer, burn cleaner, and your food will taste better. Our article on charcoal goes into detail about the different brands putting out good stuff.
If you own a pellet grill, do yourself a favor and buy good pellets. With both charcoal and pellets, it is worth paying a bit more for the good stuff.
8. Let the meat rest for a few minutes before slicing or serving
I see a lot of people take a piece of meat from their grills, throw it on a plate, and slice it right in half. This is actually a rookie mistake. You want to let the meat rest. As meat cooks and heats up, its juices will rise, and some of them will evaporate, but if you let the meat rest, portions of those juices will settle back into the meat for juiced meats.
9. Season Your Meat
If you are new to BBQ and Grilling, you will make one rookie mistake right away, not seasoning meats enough. When you grill or smoke meats, you will be cooking at higher temperatures, and there isn’t a pot holding all the juices and seasonings.
Don’t be shy; season the food well and grab good rubs to season your meat.
Last word
These are basic tips, but they are fundamentally important to learn and master. Take some time to go over these tips, apply them, and learn them, and your life around the grill will be a bit easier.
If you are thinking about getting started in BBQ and grilling, or if you are considering jumping into this world, we have a few pointers that can help you carve the path to an amazing journey.
Grilling and BBQ are two distinct culinary arts, but both involve and require many of the same techniques, skills, and equipment. It is a hobby for some, a passion for most, and a business for others.
Regardless of what it might mean to you, if you are thinking about starting in BBQ or grilling, there are a few things you should think about, and no, I’m not going to talk you out of it. The fact is that BBQ can be an amazing pastime, and you can learn amazing skills.
Top that with being able to cook amazing food for the people you love and cherish, and we have a win-win situation. BBQ and grilling can be a hobby, but there are also strong communities you can join and be part of.
Advice for those wanting or getting started in BBQ and Grilling
The first piece of advice I can give you if you want to start grilling or smoking BBQ is to try it. This is a very rewarding pastime, and once you learn a few things, you can cook amazing tasty food for your friends and family. Again, very rewarding.
But this is also a skill. You will learn a lot and master many skills that you can then pass on to others, but you will also learn more about yourself.
Grilling and BBQ, lastly, take you outside, outdoors. To grill, you have to go outside, which is one of my favorite things about this hobby. You have no choice but to go outside, breathe fresh air, and enjoy nature while cooking something amazing, not bad.
BBQ and Grilling
Sometimes people use the words “BBQ” and “grilling” together to refer to cooking food using an outdoor grill of some sort. You’ll hear things like, “I’m going to a BBQ party” or “Let’s cook the vegetables on the BBQ.”
Let’s define these terms. Understanding the differences between BBQ and grilling is your first step towards getting into this amazing pastime and culinary art.
First, let’s make sure we clearly explain that BBQ and grilling are two different cooking methods and styles, both involve using an outdoor grill of some type. I say “type” because within the grill category, you will find different kinds of grills that use different fuels.
Some grills are more beginner-friendly than others, but the point is that for grilling, you need a grill.
Also, grilling food is done at higher temperatures, usually in the 300-500 degree range, and sometimes higher if you are searing meats like steaks.
Second, you have BBQ. Traditional BBQ involves smoking or roasting meats for long periods of time at low temperatures using a BBQ smoker of some sort. BBQ smokers are also available with a variety of fuel types, including propane, pellets, and charcoal.
These smokers, in one form or another, use wood to infuse smoke flavor into the food, giving it that authentic BBQ smokey flavor.
So now you know that BBQ and grilling are not the same, and there are two main groups of cooking appliances for both grilling and BBQ.
Consider this
Below are a few things you should consider if you are thinking about getting started in the BBQ and grilling world, which can help you with choosing equipment, how to learn, and getting started.
Equipment
Looking and searching for equipment is one area where you will spend a lot of time. I mean a lot. When you start looking for grills and smokers, you will quickly realize how many options there are. But here is a simple way to narrow down your choices and find something that might work for you.
First, decide what type of fuel you feel comfortable using. In my beginner’s grill guide, I go over the different fuel types and their pros and cons. But in short, propane and pellets are the easiest grills to use, and charcoal can be the hardest.
Regarding flavor, charcoal grills remain the unbeatable choice, followed by pellet grills. The least flavor you will get will be from a propane grill.
One thing about charcoal grills is that yes, they can be hard to use, but once you master a charcoal grill, you can cook anything on them. So if you want a versatile grill, suck it up buttercup, look at charcoal grills.
If you like tech and gadgets, pellet grills give you all that in abundance but because these grills burn wood pellets for fuel, you get smoky flavor, just not as much as in a charcoal grill.
Cooking styles, Grilling, BBQ, Both
The second thing you should consider is which cooking style you want to adopt. If grilling is more your style and you just want to cook simple recipes, a small propane grill might be enough. If you want to grill but also want flavor, a pellet grill might be a better choice.
However, if you want to get into cooking authentic BBQ, then a smoker will be a better choice. Smokers are designed to cook low and slow and infuse smoke flavor into foods. These appliances can work as grills, but most are designed to work at lower temperatures.
If you are interested in doing both grilling and smoking, know that any grill can be “tuned down” to cook at low temperatures. But some grill types can do this better than others.
Pellet grills work well as smokers not only because they burn wood, which adds flavor, but also because their digital temperature controllers are excellent at keeping temperatures low and steady.
The second-best choice are charcoal grills; as I mentioned before, these things can do it all, and as for flavor, well, they can’t be beat.
But if you are inclined to use grills like propane grills, you can get smoker boxes and even pellet tubes to still smoke delicious meats. Just don’t expect the flavor to be as strong as if you used a pellet or charcoal grill.
You First Equipment List
To get started in BBQ, there are a few things you will need. And no, you do not need to go out and spend thousands of dollars on high-end equipment. In fact, I have seen people win BBQ competitions using 300-dollar smokers; equipment will not replace skills.
First, you will need to choose a grill or a smoker. Again, here are a few articles we have published that can help you navigate and see options for beginners.
With us, of course. Start with our learning guides and explore hundreds of topics around BBQ and grilling. You can also learn from other pitmasters who have published amazing books for you to read and learn real techniques.
Tips
Here are a few tips that will help you learn and improve at BBQ and Grilling.
First, do you! I say this because you will find all kinds of so-called experts telling you the right ways to do something, and in some cases, they are wrong. Why? Because when it comes to foods, there are basics and foundations, but this is an art, and as such, everyone will have their own style.
There is not one way of smoking a brisket or a rack of ribs; there is well-cooked, good-tasting briskets and ribs; how you get there is irrelevant. If you go to a barbecue competition, you’ll see a few dozen people competing and cooking the same dishes, but not in the same way.
The best flavor is what you like. Not everyone likes the same things and flavors. Find your way and what you like, and focus on cooking foods well. Once you’ve mastered that, you can concentrate on flavor, but the most important thing is that you know how to cook something correctly.
Last Word
Getting started in BBQ and grilling can be very rewarding, and anyone can get started. It does take some time, practice, and patience. Getting the right gear is helpful but not a huge deal. Many of us started with tools that were later replaced by high-end gear.
Butcher paper is very common, and many of us have used or handled a piece of meat wrapped in this kind of paper. Many people have heard or seen butcher paper but have no idea what it is or what it has to offer.
What is it, why is it used to wrap meat, what are the different types, and what else can butcher paper be used for? This article will answer these and many other questions.
First, let’s establish what butcher paper is.
What is Butcher Paper
Butcher paper is a type of paper heavily used in the food industry for wrapping, storing, and even cooking meats. Made out of wood pulp, this paper is strong, heat resistant, and moisture resistant, which is why it is often used to wrap and smoke meats. This paper still allows meat to “breathe” while stored or being cooked.
It is very common for butchers and food retailers to use this paper to wrap and label cuts of meat and package food items for customers to take home.
Chefs also use these types of paper for baking, wrapping, and storing food. There are different types of butcher paper, but more on that later. The common attribute among all the different colors and types of butcher is how they are made using wood pulp extracted using the kraft process.
The pulp is wood fiber extracted from trees but also recycled paper, which adds a sustainability factor to butcher paper.
Butcher Paper
Butcher paper starts like many other paper products, from wood pulp, but it’s available in different variations and colors, each with their own specific attributes and purposes. The classic butcher paper is recognizable for its brown, pink, or reddish color.
The more common red or pink butcher paper gets its color naturally during processing by leaving more wood cellulose intact. [1] This also adds strength to the paper.
Different types of butcher paper
All these different types of butcher paper share the same quality, which is why butcher paper is so well liked for smoking meat in the BBQ world. Even though these different types of papers serve different needs and have different moisture absorption qualities, they all let food and meats breathe while being cooked or stored.
So when you wrap a brisket using butcher paper, smoke will penetrate the paper and add flavor to the meat while it sits for hours in the smoker.
Similarly, after purchasing meat from a butcher, it can breathe while wrapped in paper, preventing it from becoming soggy before you get home.
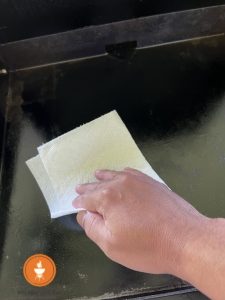
White butcher paper
White butcher paper is another popular variation of butcher paper, and I use the word variation carefully because I don’t want you to think that this is something special but simply paper manufactured with wood pulp that has been treated to remove the lignin and other plant cells, removing its natural brown color. In simple terms, the paper has been bleached.
White butcher paper is often preferred because the color white provides a good background to write on and display food better, and in some cases, it hides grease stains better. However, because FDA-approved white paper is excellent for wrapping items other than meat, such as perisbales or sandwiches, you’ll often see retailers use white butcher paper to wrap sea food.
Gardenia butcher paper
Gardenia Butcher Paper is another popular type of butcher paper that is known for its excellent liquid and moisture resistance. This is good paper for packaging meat cuts like picanha and other cuts that can exert lots of fluid.
Parchment butcher paper
Parchment paper is another type of paper used by butchers and in the BBQ and grilling world. This type of paper is coated with a thin layer of silicone, creating a very good non-stick surface. This paper can be used as a liner for baking sheets or on any cooking surface to prevent food from sticking while cooking or baking.
Butcher paper vs parchment paper
Many people confuse butcher paper and parchment paper and get the two mixed up. There are differences between these two types of paper that primarily lie in the paper material itself. Butcher paper is made from wood pulp, and the paper is absorbent, heat-resistant, and can be written on.
On the other hand, parchment paper is coated with silicon, making it very “slippery,” non-stick, but also difficult to write on and not absorbent as well as butcher paper.
Butcher paper alternatives
Butcher paper is not as widely available in regular stores as you might think. To find this type of paper, it is often necessary to visit a butcher or a specialty store. There are some alternatives, including aluminum foil, parchment paper, and wax paper.
Why is butcher paper used and good for smoking meat
There are two main reasons. First, butcher paper can protect the meat from direct heat, avoiding dry spots or even burning the meat. Second, when you wrap a large cut of meat like brisket, the paper helps hold its juices and tenderize the meat.
Although butcher paper can seal in the juices of the meat, it still allows some smoke to penetrate into the meat, allowing smoke flavor to infuse the meat even while wrapped.
Key Takeaway
Butcher paper is more than just a much-needed toll for butchers and meat retailers. It is something you can cook and smoke at home to make amazing brisket or store foods. By now, you know what it is, the different types, and what it can be used for.
The MeatStick and the Meater are both leading the wireless smart thermometer race and have inspired many household brands to release their own versions. Many of our readers get stuck making a decision between the MeatStick and the Meater, so in this article, I breakdown the main differences and compare the MeatStick vs the Meater.
The MeatStick
First, let’s talk about each of these thermometers before we jump to the comparisons. The MeatStick is almost a carbon copy of the Meater, but they did a few things right. The MeatStick is a wireless thermometer, meaning there are no wires attached to the probe, and it transmits all the temperature information wirelessly to an app on your smartphone.
The MeatStick is available as a standalone probe with a Bluetooth extender and a Wi-Fi bridge.
The MeatStick probe on its own will give you a range of about 65 feet, but if you get the MeatStick with the Extender, which doubles as the charging base, you will get about 260 feet of Bluetooth wireless range. If you opt for the bundle with the WiFi bridge, then Internet access is the only range-limiting factor, meaning you can access the MeatStick from anywhere.
In all options, the MeatStick is the same “probe hardware.” Whether you get the extender combo or the WiFi bundle, it’s the same probe. The bases are what are making the differences in range, but the probes are the same device and have the same components and temperature tolerances.
You can read my full review of the MeatStick to learn all the details about this meat thermometer.
The Meater started the truly wireless smart thermometer revolution. Both the MeatStick and the Meater are not only absolutely, definitely wireless, but they are also smart. Their smartphone applications have built-in algorithms that predict and estimate when the meat will be done at the doneness level you choose.
The Meater started this revolution and companies like Traeger noticed it and quickly adopted them and integrated these probes with with their news grills like the Timberline XL
I wrote a complete review of the Meater explaining everything there is to know about this amazing product. But since this is a comparison article on these two popular probes, let’s jump in and compare them.
You can read our full review of the Meater Plus, which goes into greater detail about his thermometer.
Both manufacturers have done a great job of highlighting the benefits of their thermometers, making it hard to choose between these two probes.
I don’t want you to misinterpret what I’m saying. Both the MeatStick and the Meater are good, and you won’t be disappointed by either one of these two products.
However, if you are on the fence about which one to get, let me break down the major differences between these two probes.
Wireless Range
The first and most important difference between these two thermometers is their wireless range. Both brands use a Bluetooth repeater to boost their signals, and both provide WiFi bridges for connecting to your home wireless network. Wireless range and other features I mention below earned the MeatStick a top spot on our wireless meat thermometer roundup article.
So let’s break down the range of these probes one by one so you can understand the differences.
Meater has three main products: the Meater, the Meater Plus, and the Meater Block. As far as the probes are concerned, they are all the same hardware; what changes is the range in all their models.
MeatStick also has three main variants of their probe, with the only differences being range. The MeatStick ( just the device and charger ), the MeatStick X ( bluetooth extender and repeater), and the MeatStick with the WiFi bridge.
The Meater, which is the original device, on its own has a range of 33 feet, as does the MeatStick ( just the probe ).
Without their extenders, both vendors’ probes have a limited range. This is okay for those who want to get one of these devices at a low cost and don’t mind the range limits.
However, it is important to note that the estimated 33-foot range of these probes is achieved when the probe’s head is not covered and exposed. Meaning if you use the probes inside an oven or a thick-walled grill like a kamado grill, the range will reduce drastically, to more like six feet.
Both brands then have a second-tier bundle, which is their probes plus a signal repeater that doubles as the battery charger. This is the Meater Plus and the MeatStick X, and here is where the differences are benign.
The Meater Plus, even with its repeater, only has a range of 165 feet, whereas the MeatStick X, also with its repeater, has a range of 260 feet.
I tested the MeatStick Mini, which is a small mini version of the MeatStick but does come with the extender, and I have to say, you get every inch of those 260 feet.
Both brands have wireless blocks that can connect to your home WiFi, and when it comes to wireless range, the limiting factor is your home wireless setup. So, if your wireless network can reach your patio or wherever the WiFi block is, the probe and receiver will be connected to the Internet.
The WiFi block then sends the signal to the cloud (via the internet) and accesses all the information from the cloud using the internet. This is how both brands work, and it is how you get whole-house coverage and the ability to monitor your cooking session while you shop or go for a Sunday ride.
Both brands offer cloud technology to give you access to your temperature data from anywhere, but there is one small difference that might be a deciding factor for some related to getting wireless functionality with both of these devices.
To get wireless functionality with Meater, you have to purchase the Meater Block, which includes the charging block with a built-in WiFi bridge and four probes. With MeatStick, you also have to buy the MeatStick WiFi bridge, but you get two probes instead of four. The setup costs half as much, and you can always add more probes later.
As far as functionality goes, both brands give you a Wifi block with a built-in display that shows the cooking temperatures, cooking times, and signal strength.
Device
Range
Range
MeatStick Probe only
33 Feet
MeatStick X ( Bluetooth Extender )
260 Feet
MeatStick Wifi
Limited only by your home Wifi range
The Meater ( Probe Only )
33 Feet,
The Meater Plus
165 Feet
The Meater Block
Limited only by your home Wifi range
Probe Durability
This is one area where I have not found obvious issues with either brand, but as I was reviewing the Meater instruction manual, it did recommend not to pull the meater by the head if it’s exposed to extreme temperatures or past its 572 degree resistance mark.
I can assume that the reason is that heat can loosen whatever adheres the head to the metal part of the probe, and, well, you will have a real mess on your hands.
Meater is also adamant about not using their probe over direct fire or charcoal. Something that MeatStick does not mention but does say not to exceed their specified temperatures.
One thing worth noting is that the Meater has a small mark on the probe that lets you know how far to insert it into the meat, both for accuracy and to protect the internal components. The meatick must be inserted completely or it will be damaged. Remember that batteries and other components are inside these little tubes.
Features
These two brands offer many of the same features, and besides their Bluetooth range, you get a lot of the same features with both. One area where the MeatStick shines compared to the Meater is in their LED charging status light. I know it’s a minor point, but I like how the MeatStick lets me know exactly what’s going on when it comes to charging the probe. To me, this is something I like but is not a big deal.
In the Meater, there is no LED light indicating how the charge is going; instead, the Meater charges “passively.”
Probes App
This is another area where these two probes differ. The MeaStick app is very responsive and works well, but I feel the Meater’s app looks nicer. This is again a preference thing, but to me, the apps on these two devices are pretty much the same.
Price
This is another area where these two brands have some similarities but vary just a tiny bit.
First, the Meater block is more expensive than getting the block Meatstick WiFi setup. You get two more probes with the Meater block, but it is also more expensive.
As far as the meater plus and the MeatStick extender, both cost the same, but the MeatStick is modular, so the price of entry is the same, but you can add more probes and monitor multiple probes with one extender, so it is fully modular.
The Original Meater is the least expensive model and costs the same as the MeatStick Mini. However the MeatStick mini has only a meat temperature sensor and no ambient sensor with range of 260 feet whereas the original
Conclusion
Both of these thermometers are great options. If you enjoy cooking BBQ and want to monitor what’s happening inside your smoker or grill and even while cooking in kitchen appliances, these are great products.
If you enjoy cooking or grilling but want to keep tabs on temperatures, these two thermometers are great products. However, the MeatStick can be fully submerged, so for those looking for a thermometer that can work in devices that use water to cook, the MeatStick takes the lead. The Meater also outperforms the Meater in wireless range, and the MeatStick is more affordable.
I’m sure you’ve heard of Pit Boss by now. Pit Boss has been making affordable pellet grills for many, many years. Not only do they make pellet grills, but they also offer other types of smokers, including verticals.
In recent years, Pit Boss has been working on improving the quality of its grills and matching up with other grill vendors who are offering modern features like Bluetooth and Wi-Fi connectivity. Pit Boss Platinum Laredo 1000 is one example of that.
Pit Boss is evolving
Pit Boss is better known for making affordable smokers and grills than for making the strongest, highest-quality grills. Their older grills were not bad; they were simply a step behind companies like Trager and others. However, affordable grills were and continue to be Pit Boss’ strongest selling point.
It’s fair to say that poor quality, particularly in technology and features, hurt Pit Boss’s name a few years ago, but their newer models are vastly improved.
Pit Boss’ new line of grills is changing that, with consumers looking for and willing to pay more for a higher-quality pellet grill than the most common brands and different models.
The Pit Boss Platinum Laredo Pellet Grill
photo: Pit Boss
The Pit Boss Laredo is a higher-quality grill with lots of space and features. This is a very large grill, offering 1000 square inches of cooking space with three cooking racks. Pit Boss’ “Smoked It” tech and app allows you to control your grill’s temperature and monitor other aspects using your smartphone.
The Big Bus lot of Laredo 1000 also offers higher quality, lots of space, a better-insulated cooking chamber, multiple cooking racks, and other nice modern features.
This Pit Boss Platinum grill has a nice powder-coated finish commonly found in higher-end grills. It features four caster wheels with locks, a shelf for food prep, a cooking chamber light, a front ash clean out tray, a pellet clean out door, a prep side table, and a digital temperature (PID) controller.
First Impressions of the Laredo 1000
Pit Boss definitely paid a lot of attention to customer feedback and improving quality when they were building the Laredo 1000. Right away, you can see and notice the heavy-duty steel used to construct this grill.
Also noticeable is the bottom shelf, which not only helps with storage but also makes the legs and frame itself stronger.
The Laredo 1000 has a large 26-pound pellet hopper and a large-screen PID controller, both of which are easy to notice. The hopper also has a clean-out door, which allows for quick pellet swaps or to simply empty the hopper for storage.
The PID controller has a large digital screen that displays temperatures and other functions of the grill. I will get more into this display screen topic later; there are a few things I didn’t quite enjoy about it.
Overall, the look of this grill feels solid, and it is one heavy piece of metal. The grill comes almost fully assembled. Unlike other grills I have put together, the Laredo 1000’s hopper, auger, and cooking chamber are all assembled at the factory. Mainly, you need to install the legs, shelves, and racks.
A Walkthrough of the Laredo 1000
The Laredo 1000 will greet you with a large 1000-square-foot cooking area, large enough to cook large briskets, pork shoulders, or multiple racks of ribs. This grill is WiFi and Bluetooth ready and works with Pit Boss’ Smoke It app.
This is not to be confused with WiFi-only grills. A Wi-Fi and Bluetooth grill means that the grill can connect to your home wireless network, where you can access its features and temperature controls from anywhere as long as you have Internet access.
If you happen to be in a place where you do not have a wireless network, you can connect directly to the grill using its Bluetooth antenna and create an ad-hoc connection between your phone and the grill.
The Pit Boss Laredo 1000 can operate at temperatures between 180 and 500 degrees Fahrenheit. Now, this might not seem much different than most grills, but here’s one feature that most will enjoy: the “grill” configuration.
The Laredo 1000 can be used as a regular grill or smoker, which means operating temperatures of 180 to 500 degrees Fahrenheit. However, Pit Boss has a feature called the Flame Broiler, which is, in simple terms, a shield that you can remove by pulling a lever. The flame from the burning pot goes straight into the cooking chamber, which can get up to 1000 degrees Fahrenheit.
This is an excellent grill and smoker. You can set it up to cook low and slow, but you can also pull a lever and set the grill for direct flame to sear the perfect steak.
Many manufacturers say that their grills are very versatile, but the Laredo 1000 truly is. Because it can operate at temperatures between 180 and 1000 degrees Fahrenheit, it can grill, smoke, roast, bake, and sear a steak.
Another nice feature of this grill is its built-in lighting for night grilling. Many of us enjoy cooking at night, where lighting isn’t as good as in our backyards. Having a light not only allows you to see where you’re putting your hands and how close you’re getting your hands to the grates, but it is also easier to see how well food is cooking, check for burn spots, and move food around.
Another feature that I came to appreciate in many pellet grills was the built-in, front-mounted ash cleanout tray. Ash buildup is the nemesis of a pellet grill’s performance. That is, the more ashes accumulate in the bottom of the grill and inside the burn pot, the less air flows, which means poorer performance.
The burn pot and bottom of the grill can be difficult to clean at times. With the Laredo 1000, simply pull the tray out and empty the ashes. With other grills, a shop vac needs to be used to clean out the ashes.
Pit Boss The Laredo offers two ways of cooking
One distinct feature of the Pit Boss Laredo 1000 is its ability to “switch” from grill to smoker. You might think that the majority of pellet grills can do the same thing, and you’d be right; however, smoking and grilling functionality is assumed in some grills. By this, I mean that it is assumed that the grill can smoke because it can operate at temperatures anywhere from 180 to about 300 degrees, and it is expected to also be able to grill because the grill can operate at temperatures above 300 degrees.
This grill’s “Flame Broil” feature, on the other hand, can heat up to 1,000 degrees because the heat shield can be moved out of the way to let the fire cup flame into the cooking chamber, which heats the chamber to more than 800 degrees.
There are other pellet grills that can do this; some Z Grills models and the Oklahoma Joe’s Rider DLX can do this as well. This feature is offered by a shack in Seattle, but with limited success.
Using the Pit Boss Laredo 1000 as a smoker
To use the Pit Boss Laredo 1000 smoker, the setup is quite simple. Set the lever on the grill’s side to the “smoke” position and set the desired smoking temperature. Normally, if you want to smoke pork ribs, a pork shoulder, or a brisket, you will be operating at temperatures anywhere from 225 to 275 degrees Fahrenheit.
Using the Pit Boss Laredo 1000 as a grill
It’s also a simple idea to use the Laredo 1000 grill too. Slide the lever to the grill possession to open the heat shield. With the Laredo set up to grill, you can maximize its heat output, and this grill can reach temperatures of upwards of 800 degrees.
One thing I’m hesitant to do is place very greasy foods, such as steaks or pork belly, directly over the burning pot because it will cause flare-ups.
How the Pit Boss Platinum Laredo 1000 Stacks Up
Pit Boss has done a great job in recent years of adding new technology to their grills. A grill that can get hotter than 800 degrees is a great example of this.
Pit Boss has added Bluetooth capability, wireless connectivity, and a digital PID controller to most of their grills, and these new features can be found in high-end grills such as Tragers, Rec Tecs, and Z Grills.
Pti Boss is definitely a bit late to the game, but it seems their focus is still on building affordable grills for everyone to enjoy.
The Laredo 1000 definitely feels stronger than older people’s models. The build quality is stronger; the chamber is solid, and its legs are strong. We enjoy the fact that the grill has three cooking racks, which is enough to fit large cuts of meat but also cook vegetables and keep food warm during a long day of cooking.
The large display on the temperature controller (PID) It’s nice to have but lacks the resolution of high-end grill controller displays. The display is not as easy to read in direct sunlight as it is with other grills. It looks like a 1980s Casio calculator display, but it is not something that many will find troubling.
However, it would be nice to be able to see the display better when cooking outside in direct sunlight.
What we like:
We loved how simple it is to pull the lever and unleash the full fury and power of this grill. Being able to cook at temperatures of 700–800 degrees is Kamado grill territory. This cooker offers another level of versatility that many pellet grill companies claim to offer.
Cooking at 600 to 700 degrees Fahrenheit, for example, means you can drop a pizza stone on this grill and bake your favorite pizza recipe. This also means you can get a nice big rib-eye steak or Tomahawk steak, nicely seared, for dinner.
We also enjoy the fact that the grill has both Bluetooth and wireless capability because not everyone will be at a place where wireless is available. The difference between Bluetooth connectivity and wireless connectivity is that Bluetooth allows you to create a direct connection between your smartphone, whereas with a wireless connection you need a wireless router and Internet access.
One thing worth noting is that Pit Boss has designed this grill so it can actually work with a 12-volt battery. That is, if you take this grill on the road, which will require some assistance because it is large, you can use it with your car’s battery.
The catch is that you must unplug the built-in pellet igniter and manually light the pellets, as specified in the owner’s manual. But the point is that the grill can work with a car battery, and it is beneficial that this grill supports a Bluetooth connection. If you’re in the middle of nowhere but have a 12-volt battery nearby, such as your pickup truck’s and a Bluetooth-capable smartphone, you can control this grill.
The Laredo 1000 also has a very intuitive control display. The display in the temperature controller, or PID, shows you the basics, including cooking chamber temperature, meat probe temperature, and, of course, your “set” temperature.
You also get a couple nice little treats, including a pellet sensor that tells you when you run out of pallets. Now, this is not as useful as the pellet level sensors found in newer Traeger models, which actually tell the actual level of pellets in the hopper. The Pit Boss just tells you when you run out of pallets, and my friends, with pellet grills, you know when you run out of pallets because, well, the temperature drops like a ball and you stop cooking.
Another option is to send the display when the fan is running, which I don’t see the point of because you can hear the fan running.
This grill also supports two meat probes, and you can see the temperature of each of those probes and the internal temperature of the meat displayed on the main display.
Another nice thing about the Laredo 1000 is that there is a door on the side of the hopper that allows you easy access to the internal components, including the fan and other connections, so if you do have to replace a part, you should be able to get in there very quickly.
Things to consider
There are a few things we did not enjoy about the Pit Boss Platinum Laredo. The first is that, for some reason, people choose to offer this grill through only select retailers, and I think that is going to deter some customers, as people might just want to have the option of ordering the grill online or simply going to a store where they have a membership or they like.
I’m sure they have reasons, but in my opinion, this is something I don’t like.
One thing that concerns me about the Loredo 1000 is how flat it is and where the temperature controller display sits. The LCD display is almost flat on top of the hopper lid, and I am concerned that it will be damaged over time as people place tools on it, drop food on it, or do anything else on it.
Conclusion
This grill will not win any beauty or quality contests, but it will surely come in second. But for less than $600, you get a Bluetooth and Wi-Fi capable grill built with decent quality materials, lots of tacky features, and plenty of space.
This grill is ideal for someone looking for a capable yet affordable option. If you are looking for higher-quality better technology and have the budget that I suggest looking at Brands like Traeger Rec Tec and Z grills.
Many of people are looking for an affordable way to get a new, shiny pellet grill in our homes. There is a little-known secret called the Z Grills Blind Box. Z Grills’ blind box is a bundle deal and a quick way to get fired up and enjoy the flavor of a wood pellet grill.
Simply put, you pay a fixed price, hovering around the $399 to $499 mark for a “mystery box”, and you get a bundle that includes a pellet grill, a grill cover a “mission card” ( more on this later ), bucket grease liners, and a set of stickers.
The bottom line is that you get grill no matter what!
What is the buzz about the Blind Box
credit: Z Grills.com
The blind box is probably the least expensive way to get a pellet grill. This pellet grill blind bundle deal does change from time to time to include different grills and different accessories.
I have searched other brands to see if they have similar deals, but no one comes close. Sure, a pack of stickers and some grease lines don’t seem like a big deal, but getting a decent pellet grill for under 500 bucks is.
These are all large, capable grills, and you get a new product with a full three-year warranty.
We have written a few reviews about these grills, including the 700D4E and the 450B, which in our experience are the two most common sizes found in backyards. You could say that the 700 series is your midsize sedan and the 450 series is more of a compact car.
Both of these grills did great in our in-house tests; they maintained temperatures well and produced good smoke flavor.
However, the reason there is so much buzz about Z Grills pellet grill “mystery” box is because no other brand is offering this type of bundle with a standard-size grill and accessories. Just to give you an idea, a portable pellet grill can cost as much as this bundle.
What you get in Z Grills’ Blind Box
As mentioned before, you get a few accessories, but the main point here is that you get a pellet grill. Z Grills changes their deals often, but you can get a grill as big as 800 square inches (1000D3E)or the 550B2 with about 500 square inches of space. Depending on the season, Z grills might include a pellet bag or two!
These grills typically cost between $500 and $900, but with the box special pay under $400 bucks and you get a pellet grill.
You Bet on a pellet grill blind But, there is more
The blind box is like playing the grill lottery: you can get a good grill for a fraction of its original price. You never know what Z Grills pellet grill you’ll get, but the offer page states which models are at play. From there, you can also get more information on the pellet grill specifications, temperature range, sq inches, and even other customers’ reviews.
The Z Grills “secret” box is a great gift for those who love cooking food and love the taste of wood-fired flavor.
Besides a Pellet Grill what else you get in the blind box
You get mostly accessories; some months, Z Grills include pellets, but mostly you get accessories. Things like grease bucket lines, cleaning brushes, and cooking tools are often included.
credit: Z Grills.com
Z Grills is now offering a “mission card,” which is a clever way of getting you to join their social media and share your experiences with others, but at the end of your mission, you get a free grill cover!
Should you consider the Blind Box Special
You should. This price point is difficult to beat if you’re looking for a low-cost way to get a pellet grill. As I mentioned before, even budget-friendly smokers sometimes cost more, and with this specific deal, most times all you need is a pellet bag to complete your setup. The grills are also standard to full size and offer enough space to cook full meals, large meats and smoked meat, low and slow.
If you want more control over the features and what you get for your money, then this deal might not be for you. Because you have no idea what pellet grill you are getting and only a list of possible options is available, some might prefer to look at a broader selection of top pellet grills.
A few advantages of Z Grill;s blind box
You get a grill for under 500 bucks.
These grills are standard size grills, offer appropriate temperature output to cook a wide range of meals, and have enough space for cooking large meals.
These are new grills with a three-year warranty.
A pellet grill produces more smoke and better flavor than a gas grill, which is why they are so popular.
You get most of the accessories you need for grilling in one single box.
You get accessories for your grill and everything you need to start grilling.
A few disadvantages of Z grills blind box
The most obvious disadvantage is that you don’t know what grill you will get, but Z Grills lists the ones at play.
You might get a cheaper model. While you might not get Z Grills’ latest and greatest models, the models at play are still good, solid options.
Conclusion
Z Grills makes amazing grills, and this blind box deal is a great way for many to get their hands on perhaps your first grill or simply get one at a reasonable price.
There are many happy customers posting on social media as they receive their blind boxes, and everyone seems to be happy with the product. I’d say if you are wanting to get into the grilling world and don’t want to spend a fortune but want a decent grill, this is a great “hack” to land a new grill. If you want to be more selective, then see all the other grills offered by Z Grills and pick whichever you want.
Building a smoker can be both very rewarding and a great way to save a few bucks. Besides building an amazing machine to smoke meat and cook amazing foods, the real reason why many people DIY smokers is because it’s a great way of getting everything you want the way you want it and how you want it.
This article will teach you how to make a smoker, or, in simpler words, how to DIY your own smoker. Smokers are not the most expensive BBQ cooking apparatus, but some models can be highly prized for what they are: a metal box with a grate.
If you have the proper tools and skills, you can actually build one at home and, in some cases, even save a few bucks or simply build what you want.
I will go over unique ideas and plans. I will also share step-by-step instructions, different methods, and what the smoker needs to achieve to smoke great food.
Let’s explain what a smoker is
Many of you know what a smoker is, but we frequently get asked what a smoker really is. The reason why is because grill vendors and brands often use the terms “grill” and “smoker” to describe the same product.
Brands like Traeger will use the term “smoker” to describe some of their pellet grills, and by that they mean that some grills can also cook low and slow or hold low steady temperatures for long periods, making them great for smoking.
But a true BBQ smoker might not be able to grill. simply because it might not get to high enough temperatures to grill food. For instance, an offset smoker might not be able to get to temperatures of 400–500 degrees to grill or sear a steak.
Another example are vertical smokers. These smokers are purpose-built to smoke meat and normally operate in a temperature range of 180 to 400 degrees Fahrenheit, sometimes even less.
A smoker, simply put, is a type of grid that is meant to maximize the amount of smoke that can be infused into food by cooking at low temperatures for long periods of time.
What makes a smoker work well and effective
What makes a smoker effective and work well is, number one, the ability to cook at low temperatures, followed by the ability to retain that temperature well, and lastly, a fuel type that can generate good, clean smoke to infuse flavor into the meat.
Heat retention is one of the most important factors and what makes a smoker good or, well, useless.
If you look at the top-performing smokers, one standout feature they have is a double-insulated chamber. This is to retain heat even in cold weather. So consider insulation and heat retention when designing your DIY smoker.
Smoker characteristics
There are a few components that a smoker must have in order to not only be considered a smoker but also operate as one. If you want good-tasting smoked meat, the following components must be part of your DIY smoker design:
The first is a good, sealed cooking chamber. The cooking chamber is where the food will be placed, and it is good for it to be as sealed as possible to retain heat and, second, to retain smoke.
As the smoke and heat rise, it will find ways to escape, so it is important to have a well-sealed chamber to avoid temperature fluctuations but also to retain as much smoke as possible.
Second, a cooking grate. A good grill grate must be made of a good material; these are typically made out of stainless steel or cast iron. The grate will transfer heat to the food and hold it in place away from the fire.
Lasly, another important component of a smoker is the firebox. In an offset smoker the firebox sits outside the main cabinet, usually on the side of the smoker hence and name “offset smoker”
This is a good set-up because these offset smokers cook using indirect heat from the firebox, and only heat and smoke cook the food. Normally, wood and charcoal are fed to the firebox along with a healthy amount of fresh air flow to create a nice, healthy fire.
Different Shapes
There are different types of smokers, each with their own pros and cons, but what makes the smokers different in many ways is the type of fuel they use, their shape, and their size.
For example, pellet smokers will burn wood pellets. These can be found in a vertical or horizontal format. Then there are charcoal smokers, which use charcoal. These are more commonly found in a vertical shape. Offset smokers are very popular; these are horizontal with an outside fire box and normally burn wood.
Before you put on your DIY hat and start grabbing your cutting tools and starting to chop the neighbor’s trash can, you need to decide what kind of smoker you want to try to emulate. Are you leaning more towards being a vertical smoker, or are you leaning more towards being a horizontal smoker?
Make these decisions ahead of time to see what type of design you will go with. Because horizontal smokers are gray from feeding large amounts of food, and wild article smokers can fit a lot of smoke and a lot of food, everything is stacked horizontally, and they take up live space on your back.
This also should be considered if you are planning on using wood charcoal. If so, this will influence the type of charcoal basket or trade you will need to design and keep in mind during your build.
How to Make a Smoker
I have seen my fair share of, let’s say, creative ways of making things, and let me tell you, none of them work or should even be mentioned. I have seen everything from file cabinets to hazards. Making your own smoker Canby we’re goois can be done, but anything that resembles a box and is made out of metal should not be turned into a smoker. Below are three proven and effective homemade ways of making a smoker.
1. Using Cinder Blocks
The cinder block method is a hell of a way of making your own smoker; in fact, I grew up on an island where many people couldn’t afford to buy a fancy smoker, and cinder blocks were the kitchen of the neighborhood. I grew up seeing my family cook whole hogs using cinder block smokers, and I remember sitting behind them and thinking that I might turn into a hog all day long. Although a little different, the concert is much the same. You are going to use cinder blocks to build a chamber, or firebox, and smoke stack.
2. Using a Steel drum
This is perhaps my favorite way of building a smoker. This is because a steel drum is easily accessible; it’s already shaved to the perfect shape to create a smoker and is extremely easy, if not the easiest method, to build a smoker. The problem with using a drum or building a drum smoker is that he does require a different set of tools that you will need to cut into metal, which means that you will need either some strong cutting pliers or, in some cases, even welding equipment.
You can use a 10, 30, or 50-gallon steel drum, which you can order online, or recycle one as long as it is cleaned.
To build the smoker, simply build a charcoal basket out of stainless steel or use a cast iron box. You can pretty much use anything else as long as it can withstand the extreme heat the charcoal will generate and allows proper air flow.
Depending on the size of the drum you use, you can find many “off the shelf” grill grate options or you can go to a welding shop and have someone make you one. All you have to do is measure the diameter of the drum, and you are ready to go.
Next, you will need to cut a hole in the lid to build a smoke stack. The stack needs to be wide enough to aid in air flow. Three to four inches in diameter should be appropriate for these size drums. You can install a cap to control air flow, although you will see that most offset smokers in competition don’t have one.
These are the basic materials needed to build a drum smoker, also called an “ugly drum smoker.”
These things work well because the cylindrical shape creates an amazing hot air convection effect to cook meat evenly. Heck, I have seen people make these ugly smokers out of garbage cans.
There are companies selling these “ugly smokers,” and one popular brand is Pit Barrel.
3. Using Large Plant pots
This is what I like to call a “home brew kamado.” Kamado grills are the most versatile cookers in the grilling world. These things can grill, bake, and smoke foods. Here is the deal: most kamado grills are made out of ceramic, about an inch thing, and guess what large plant pots are made of? Yep, ceramic.
Making a DIY meat smoker out of ceramic pots is simple. It’s pretty, but it is simple. First, grab two pots. It’s likely you have someone who has two laying around. Order the smoker heat gasket and apply it to the top lips of the pot.
Now you will need to do two things for this smoker to work, and if you get them right, you just made a Kamado for likely 75 percent of the cost of the cheapest model out there.
First, with charcoal, you need to work on airflow. You need to build a smoke stack and an air inlet for the charcoal. You can very carefully drill these holes with a concrete-concrete drill bit.
The last step is to build a charcoal basket. I like to use baskets that are already built, which you can find easily at your local Ace Hardware or Lowes. But if you feel creative, you can build your own.
Making the smoker work
Ok, so we just talked about how to build a smoker, but now let’s talk about how to make it work. There are a few things that the smoker needs to do well for it to work.
First, you need a good, or at least decent, “seal.” If you build a smoker that leaks hot air and smoke all over the place, it will not work very well.
Use gaskets where needed, and make sure you cover and fill gaps as needed.
Second, you need good air flow. Good airflow will make a good fire! Make sure you build a good inlet and smoke stack. The diameters of these two pieces should match.
Build a good charcoal or wood basket. The basket should have enough holes to let enough air in so that the coals or wood can catch fire and get enough oxygen to burn cleanly.
An Ugly drum smoker
Ugly smokers, or drum smokers, are one of the most popular DIY smokers. For years, people have been making these smokers, and they do work. You can actually buy these smokers for cheap and save yourself some work. Our guide to drum smoking lists some of the top models, including drum smoker kits, that you can buy at great prices.
Meat Smoker Care
Just like any other grill or smoker, you need to maintain your creation. Prepare to spend some hours cleaning grate surfaces, seasoning, and performing overall maintenance. Get some good cleaning tools and spend some time taking care of your smoker. Whether you spend a thousand bucks or a few hundred dollars, every smoker needs maintenance to extend its lifespan.
Smoker Plans
If you want to make the time and learn how to build your own smokers, I have also mentioned that there are smoker plans and kits available on the market. You can buy these kits and smabale them at home. Sure, it’s not the same as building your own, but it’s very close.
Pro Tips
Here are some tips to make your build successful: First, make sure you have a good set of tools handy; you will need them. Second, take your time. Like any DIY project expect some setbacks and having to make some adjustments. The first step is to think about the type of smoker you want to build
Conclusion
Smoking meats is a great pastime, and I call it a passion. Here, I shared how to make and build your own smoking machine, but if you don’t feel like you have to know how to build these machines, there are many options on the market that will help you get closer to your dream smoking machine.
But if you feel like you can handle a few tools and want to build something unique, Enjoy the ride.
Charcoal is ready to cook when there is a grey ash cap covering the coal and any lighting fluid or other igniter has completely burned off. Charcoal can take up to 20 minutes to be ready, but this time frame can be affected by the type of grill, weather conditions, and, of course, the type of charcoal you are using.
Also, the process you choose to light the charcoal will affect how soon it will be ready. Using a charcoal chimney generally takes about 20 minutes and is chemical-less, whereas using lighter fluid can reduce the time to about 10 or 15 minutes, but there is often a strong chemical smell left behind. Usually you have to wait a few extra minutes to burn off that chemical smell.
Lump charcoal lights up faster and can be ready in about 5 to 10 minutes, and briquettes take longer, up to 20 minutes in some cases. This all depends on the grill and the type of charcoal, but once the coals are ready, expect hours of heat.
When is charcoal ready to be used to cook food?
When the charcoal turns grayish-white.
When the briquettes are a uniform black color, even if on fire, they are neither ready nor ready to cool. The coals will burr for a while and start generating heat, but that doesn’t mean they are ready. If you used lighter fluid, it can be absorbed by the coals and create a fire frame, but that does not mean your grill is ready. Also, when using lighter fluid to light coals, it’s important to open every air vent in your charcoal grill to avoid a flare-up.
Cooking times once the charcoal is ready vary depending on whether you are using lump or briquette coals. Lump charcoal burns faster than briquettes, but lump burns hotter and puts out more heat per pound. I wrote an article on the differences between these two types of charcoal, and there are many.
Charcoal is part charbon, or char, which is the product of cooking wood in low-oxigen silos. The process burns off tar, moisture, and other compounds until the wood turns to char and before it turns to ash.
The white or grey cap on the coals is an indication that the coals are fully ignited and combustion is in full swing. When charcoal is first ignited, you will notice a blue flame at first. This is an indication of hot gases burning, not combustion. Eventually you start seeing that orange color around the coals and the white caps, which is why the white caps are a good indication that combustion is fully on.
Steps for Getting Charcoal Good and Ready for Cooking
Grab your favorite bag of charcoal, whether it is lump or briquettes. Remember, there are many ways of lighting charcoal, and my preferred method is using a chimney starter and not lighter fluid. There are many methods and alternatives to lighting charcoal without using lighter fluid.
If you are using a charcoal chimney, which works great, fill it to the desired level and light up the bottom of the chimney until the coals are lit. I have a detailed guide on using chimneys to light charcoal. To start a fire and light the charcoal, place newspaper at the bottom of the charcoal chimney starter.
If you don’t have a charcoal chimney, pile the coals in a pyramid shape and use a lighting wax cube or smoker stick; whatever you use, try to avoid using chemicals to avoid a chemical odor on your food.
Open all your air vents in your grill to allow oxygen into the grill and get a healthy fire going. Always be sure your charcoal grill is away from flammable items and things that can get damaged by high heat.
Let the charcoal or briquettes burn until they’re covered with white-gray ash, adjust the airflow in your charcoal grill, and you are ready to cook.
Get the grill Prepared for charcoal
Make sure your grill is ready, clean, and ash free. Old charcoal ash can prevent new charcoal from lighting correctly, disrupt air flow and prevent you from getting a healthy fire. I like to scoop old ash and coals out of my kamado grill before each cook, and sometimes using a shop vac is necessary.
Once you make sure you grill is clean it is ready for the new charcoal.
Tips when getting charcoal ready
Before you start grilling, I also recommend doing a temperature check to make sure the charcoal is at the temperature you desire. Some grills make this simple as they have a built-in lid or cooking chamber thermometer. If you are cooking something simple like burgers and hot dogs, you do not need to add too much charcoal to the grill. Half a charcoal chimney full of charcoal will generate enough heat.
When getting charcoal ready, weigh in the amount of food you are planning on cooking and the temperature at which you want to cook it at.
If you are planning on cooking for long periods, add a full charcoal chimney full of charcoal and use the air vents in your charcoal grill to control the temperature.
If you use an electric starter, make sure it’s long as they tend to make the charcoal spark a lot. Pile up the coals in a pyramid shape and light the bottom charcoal first. As the flames consume the bottom charcoal, they will light up the top ones, but keep in mind that it does work as well the other way around. Always light the bottom coals first.
Make sure that you are find a good place in your home to work and cook with your charcoal grill. These grills can get very hot and generate a lot of smoke, so a good open area is always best.
One Last Word
Regardless the type of charcoal you like to use, it is ready when the charcoal firsts turns white. The lighting process can take up to 20 minutes. To speed up the lighting process open all the air vents on your grill and wait until it is to temperature before cooking any food.
In this article, I will answer how long does ground beef last in your fridge but also how long it lasts in the freezer, signs of spoilage, and tips to help extend the life of the beef.
Ground beef is a popular meat and works for many recipes and dishes. However, one ground beef does not last as long as other meats. Sometimes we go to the store and grab a pound of meat, thinking ahead while planning our weekly family menu.
However, life gets busy and dinner plans get postponed. Now that you know that ground beef will sit in the fridge, you are wondering how long ground beef lasts in the fridge before it goes bad.
How long Does ground beef last in the fridge – Raw Meat
Food is our precious fuel, but it does have a shelf life, and that also includes ground beef meat.
Ground beef can last one to two days in a refrigerator as per the U.S. Food and Safety website. This also depends on the freshness of the meat, which can be calculated by looking at the “sell by” stamp on the meat package. If you buy fresh meat and store it in the right compartment in your fridge, you can get up to two days out of the meat from the date of purchase before it starts showing signs of spoilage.
If you buy ground beef close to the end of its “sell by” date, then unfortunately you might get about a day out of the meat even if stored in the fridge. Also, meat that has been sitting on the store shelf and is too close to the “sell by” date will not taste as fresh and will not last as long in the fridge as a pound of beef that has just been placed on the store cooler.
Ground beef has a short “fridge life,” but the key is to buy as fresh as you can.
How Long does Ground beef last in the freezer – Raw
Just like with other meats and foods, storing ground beef in the freezer can extend its shelf life. Ground beef can last anywhere from three to four months and be free of contamination. Just keep in mind that when you thaw the meat, it might not taste as fresh as if you cooked it right after you purchased it.
I like to use unfrozen ground beef in grilling recipes because the smokey flavor and seasoning help to mask any signs of lack of freshness.
And here is the important part: unfrozen raw ground beef should never be refrozen. I calculate my meal plans so that if I take food from the freezer, it is cooked immediately.
I sometimes buy meat from club stores and buy in bulk to save some cash, but I have a large freezer in my garage where I can keep large cuts of meat frozen for long periods safely.
How long does “Cooked” Ground Beef last in the Fridge
Just as with other cooked meals and meat cuts, ground beef can last about 3 to 4 days in your refrigerator. So, if you cooked extra meat and have leftovers, you can eat the ground beef after a few days. Always follow the USDA guidelines on how to safely handle leftovers.
As with every food and raw meat, the point of following safe and healthy guidelines from sources like the USDA and other Health and Food organizations to make sure you are handling food correctly.
The biggest issue with mishandled food is bacteria growth. If you consume bad ground beef or any other meat, even if kept in your refrigerator, it can cause health problems.
Also, spoiled food can contaminate other foods in your fridge. Also referred to as food cross-contamination.
What causes raw ground beef to spoil in just a few days
Ground beef spoils quickly because it is skinless and very exposed, allowing for greater levels of bacteria and microorganisms to come into contact with the meat during packaging and manufacturing.
Meat comes from animals, and bacteria and microorganisms are already in the animal and thus in the meat before it is processed, packaged, and delivered to stores.
During the stages of processing and butchering, the meat is exposed to more bacteria and contamination. Even though butchers and food processing companies follow strict guidelines, more bacteria get into the meat during these steps. Pre-handling of live sticks also plays a factor in meat quality and post-processing slicing speed.
Things like butchering, cutting, and processing the meat through different machines expose the meat to bacteria, microorganisms, and lipid oxidation. In turn, this bacteria is killed when food is cooked to proper temperatures, but the point is that the bacteria is there and is actively growing. This is why, once again, meats must be cooked to proper internal temperatures to ensure bacteria are killed.
The way livestock is handled prior to being processed also contributed to the meat’s quality and likelihood of early spoilage. Factors like nutrition, transportation methods, and lairage contribute to meat products’ spoilage rate.
Most fresh ground beef is uncured or preserved using preservatives with no nitrites, organic acids, or sulfides, so we can say that its freshness is also its downfall.
Refrigeration and freezing ground beef are ways to slow bacteria growth and spoilage. Sure, there are other ways of preserving ground beef, but some are far-fetched and more factory methods than stuff we can do in a home kitchen.
How can you tell that ground beef is going bad
There are a few telltale signs of ground beef spoilage, or at least that it is starting to go bad. As we discussed earlier, storing the meat in the refrigerator as soon as you can slows down bacteria growth and avoids spoilage for a couple of days, but if you believe you have passed that mark, there are a few signs that the ground beef is going bad or has been in the fridge for too long.
Color change
It’s important to know that the color of ground beef can change due to lighting or exposure to oxygen in fresh air. Fresh ground beef should have a red tone as its levels of oxymyoglobin absorb oxygen (2). As you open the ground beef package, the meat in the inner and bottom portions of the package might look more pink or even grayish because of a lack of oxygen, and that is normal.
However, if the outside portion of the ground beef has turned gray or has a brown tone, it has started to spoil and is best to dispose of.
Also, if you notice any mold spots or green and blue spots, the meat has spoiled (4).
Texture change
Another way to tell that the ground beef is bad is by doing a quick texture test. Touch the beef, and if it feels slimy, it should be disposed of. Good ground beef should feel firm to the touch and break apart when pulled, but it should not have a slimy, sticky consistency (5). Please remember to wash your hands after touching the meat.
Ground Beef Smell
Fresh raw ground beef has very little smell, but if the meat has a tangy smell, it is likely going bad and should not be consumed. The smell comes from bacteria (Lactobacillus and Pseudomonas spp.) and is no longer safe to eat (6).
The reason we list color and texture tests higher than this smell test is because pathogenic bacteria does not smell, but at this stage you should notice color and texture signs of spoilage (4).
Expiration Date
This is pretty obvious, but I have often rushed in and out of the supermarket and forgotten to check the expiration date on the ground beef package. There are two type of date stamps you need to be aware and they both have different meanings,
First you have the sell-by dates, which indicate how long the store can display the ground beef on their shelves. The ground beef can be safely stored in your fridge and consumed up to two days from the “sell-by” date (7).
Then there is the “expiration date or best before date,” which is when the ground beef will start to go bad. If you have frozen the meat before these dates, it can last up to four months, but if you have not, then it will need to be trashed (7).
So it is important to pay attention to the labels and clearly understand their meaning.
Stages of Ground Beef Spoilage
So we have talked about how long beef will last in your fridge, but below you can view different spoilage stages.
Color Change
Texture Change
Surface slime
Tips for preserving Ground Beef and Food
Bacteria starts growing on food rapidly at temperatures between 40 and 100 degrees Fahrenheit, referred to as the danger zone. In a matter of hours, food left outside your refrigerator can reach these temperatures, and bacteria growth will accelerate.
Try to plan your trip to the grocery store, and if you are planning on buying meat, it is best to stick to a quick route. Plan on going to the grocery store and returning to your home as soon as possible so that you can place your groceries in your fridge as soon as possible.
Sure, Walmart and Home Goods have sales, but leaving raw foods in your car means it can reach “danger zone” temperatures, which accelerate spillage.
Take a small cooler with you. I know this sounds drastic, but it is effective. You can take a small Yeti or any type of cooler with you in the car and place those perishable items in the cooler as soon as you get to your car. This will help a lot in keeping the meat fresh and slowing any bacteria growth.
Lastly, put perishable items like ground beef in your refrigerator as soon as possible. Other canned goods, cereal, and rice can wait.
In Conclusion
Raw ground beef can last up to two days in your refrigerator and up to four months in the freezer. Always be sure to read the expiration and sell-by dates, and don’t hesitate to throw away bad beef if you suspect it has gone bad.
Cleaning your grill brushes regularly is important to preserving their effectiveness, extending their lifespan, and keeping bacteria at bay.
In this article, I will show you three methods to clean your grill brush and keep it in top shape. It’s not hard to clean these brushes, but it is important.
Why is it important to clean grill cleaning brushes?
As with anything that comes into contact with food, cleanliness is crucial when it comes to grill brushes and cleaning your grill. Although brushes do not directly touch food, they do come in contact with the grill’s grates. Therefore, any bacteria, dirt, old grease, or other contaminants that become lodged in the brush will be transferred to the grates and ultimately to your food.
So in order to have the most clean cooking environment possible, we encourage everyone and teach our readers to keep every tool around the grill clean, including your brushes used to clean grates.
Effective Methods for Cleaning a Grill Brush
Method 1: Soft Cleaning
If you take the time to clean your grill brushes after each use, you will save yourself some hardware later and keep the brush in a better state. I like to heat up the brush using the grill itself. Sometimes you can see old grease and gunk melt away from the brush.
After exposing the brush to heat for a few minutes, I grab a plastic kitchen brush and rub it against the grill brush to dislodge any food particles and old grease. This is a simple cleaning method that you can use every time you use your brush. I like doing it because it keeps me from having to do Method 2.
Method 2: Deep Clean
Use dish soap. That’s right. Just like dish soap breaks down and cleans grease and food residue from plates, it can do the same for grill brushes. To deep clean a grill brush, simply fill a pot or bowl with hot, soapy water and sink the brush in it for 10 to 15 minutes. Once the water cools down, it is no longer as effective, so I like to sink the burhs for no more than ten minutes.
If you need to repeat this process a few times, that is fine. I sometimes find myself going through 3 rounds of hot, soapy water to get my brushes clean. However, this is why I like using dish soap and hot water to clean my brushes.
First, dish soap’s chemistry is designed to remove and dissolve grease from soiled food utensils. That same benefit will apply when cleaning grease brushes. The hot water, combined with the cleaning characteristics of soap, will help soften and dissolve caked-on food and grease off the brush.
Second, dish soap will also help kill bacteria and sanitize the brush.
Last, grab a garden hose to rinse the brush. Make sure you let it dry well and inspect the brush.
Method 3: Deeper Cleaning
This is a more drastic approach, and you should ask yourself if it’s worth cleaning the brush or throwing it away. I still apply this method to some of my favorite brushes.
My “deeper cleaning” method built on Method 2, but it had a power tool, a pressure washer. This method can get messy, and I recommend you pick a grassy area or sidewalk that you don’t care much about, because again, it will get messy.
Just as I mentioned in the method, I use a small electric water pressure washer. Deep the brush in hot, soapy water, and then rinse the brush using water pressure. This method works but, again, it is messy.
Inspect BBQ Cleaning Brushes
There are four types of grate brushes, each with advantages and disadvantages, but regardless of the type of brush, you want to inspect it often. Here are some tips for what to look for when inspecting your brush.
Wire bristle brushes
I have to be honest and tell you that this is my least favorite type of brush. Even good quality brushes tend to loose wire bristles over time which can get logged in your grill grates and thus food.
To inspect these brushes, grab a flashlight and look for signs of missing bristles, bending, or damage. If you suspect the brush is missing a few bristles or they look damaged, it is best to toss the brush.
Stainless Steel Woven Brushes
These brushes are, in my professional opinion, a better option, although not as effective as true wire brushes. To inspect these brushes, use a good light and look for signs of wear or tear. Although these brushes do not have bristles, the woven stainless steel strands wear out and break.
Plastic, nylon, or soft brushes
These brushes are made out of some sort of plastic composite and are for those who do not want any metal around or near the grates and food. These brushes are not recommended to be used on hot grates, but from time to time they do get damaged due to contact with hot surfaces. Look for signs of melting or deforming.
Cloth, kevlar brushes
Ok this are my favorite brushes although one most know how to use them. These brushes no only clean but also steam grates. To inspect look for tears or signs of material melting.
Conclusion
I hope these methods come in handy and help you keep your grill brushes clean. Remember that most grill brushes are cheap products and will not last more than a few months. So inspect your tools, and if it’s better to trash the brush, then so be it, but if the brush is in good shape and the metal bristles look good, these methods will help you clean it.
Welcome to the BBQ Grill Academy. Our website is intended to assist newbies and experts alike in the world of grilling and barbecue, including mastering their grills, discovering new recipes, and locating outstanding equipment and accessories.
Getting a decent grill is part of beginning a new BBQ journey; in fact, finding your first grill is the most difficult aspect of beginning your BBQ and grilling learning.
We have written a complete guide on grills for beginners, but in this article I will explain what you should consider and what you should do prior to making your first purchase.
Grills come in a variety of sizes, fuel types, and colors. There are hundreds of brands and all claim to be of high quality, causing confusion among consumers. There are also two primary kinds of barbecue and grilling cookware: grills and BBQ smokers.
If you want the flavor of true barbecue and want to cook your meats low and slow, a smoker is a fantastic option, but you can also find pellet grills that can function as both grills and smokers. There are several varieties of smokers, so choose one that matches your cooking style. Our guide to different types of smokers is a wonderful place to begin learning about BBQ smokers.
Set A Budget
But because there are so many varieties of smokers and grills on the market, it is vital to begin your search by establishing a reasonable budget for a grill. To assist with budget planning, ask yourself the following questions: How frequently will you grill?, how many features are you willing to give up? Do you need WiFi grill? Do you need all the latest grilling gadgets and toysIn our experience, you can find very good grills in the price range of $500 to $1,000, with exceptionally good grills costing upwards of $1,000.
Grills made in the United States typically begin at or above the $1,000 mark, but if you are on a very tight budget, you should consider grills priced between $200 and $500. If you spend $200 or less on a grill, these are often small grills or constructed out of thin metal that will not survive more than a year and a half unless you take excellent care of them by keeping them covered and dry.
Choose a fuel type that you feel comfortable using
Selecting the grill’s fuel type is the next step in purchasing your first grill or smoker. It is essential to realize that different fuels will yield different results and flavors. For example, propane grills are easy to use, yet grills burning gas or propane yield no flavor.
However, nothing tops propane for its simplicity and ease of use. There are also electric grills. These are more conventional “indoor grills” and are also very easy to use. Electric grills are my least favorite type, as their metal heating plates do a good job at cooking food but yield no flavor. In gas grills, a “smoker box” is used, and the heat from the propane burners chars wood chips or wood pellets, imparting a wood flavor to the food.
Then we have charcoal grills. These are my favorite grills because they give the most control, versatility, and taste. Once temperature control is mastered, a charcoal grill can be used to smoke meats, grill foods, and cook anything else you can imagine.
Mastering how to control the fire and air flow is the hardest part of using a charcoal grill. Once you have mastered these two aspects of a charcoal grill, you can transform it into anything.
The most popular type of grill are pellet grills. Simply push a button, and the grill’s digital controller will manage temperature and take care of the rest. If you purchase a good-quality pellet grill, it can reach a high enough temperature to sear steak, but it can also function at low temperatures, maintain steady temperatures, and smoke juicy brisket.
What makes pellet grills special is that they yield amazing wood-fired flavor if you use high-quality wood pellets. One of the reasons these grills are gaining in popularity is because they are loaded with technology, such as WIFI, mobile applications, and several other cooking aids.
Pick a size
When purchasing your first grill, you must also take into account the size of the grill. These are some questions you ought to ask yourself. How large is your family? Do you frequently host parties? How often will you grill?
If you’re the sort of person who likes to cook for a group of 10 people, you should consider purchasing a grill with a cooking surface area greater than 700 square inches. Grills in the 500 to 700-square-inch range are considered mid size and great for the average person or family.
Identify a storage area in your home. You want to ensure that you have adequate room to store your grill away from direct sunlight and from the elements.
My personal suggestion
I’ve been cooking on grills, smokers, and over fire for over 20 years, and I can assure you that as you develop and polish your cooking abilities, you’ll desire bigger and better equipment. Because of this, I usually tell people who have never used a grill before to start with a small grill that fits their budget.
I do not advise you to purchase the greatest pellet smoker in the world and spend thousands of dollars to later find out you are interested in learning how to cook over an open flame or on an offset smoker.
I do suggest you get a grill that meets your budget and cooking abilities. Learn about fire control, meal preparation, and what cooking method best suits you. Learn how you want to prepare your food, and what tastes you like before beginning to hone in on the grill types and fuel types you desire.
Conclusion
I hope this guide helps you find your first grill. If you are new to the world of barbecuing and grilling, my greatest advice is to get started. This is a terrific pastime and a fun way to spend time with friends and family. Remember, don’t overspend, don’t assume your first grill will be your last, and always use what is comfortable for you.
BBQ grills can be a large investment, and some grill models can range anywhere from a few hundred dollars to thousands of dollars. So it makes sense to take the necessary steps to safeguard your grill and your investment.
Some people don’t really care much about upkeep and maintaining a cheap grill, but if you spent a few thousand dollars on a grill, you might want to read these simple tips to keep your grill in tip-top shape. Let’s get started!
Hear are 7 simple tips to keep your grill in top shape
1. Keep it clean
I cannot emphasize enough how important it is to keep your grill clean. A clean grill is a happy grill. It doesn’t matter if your grill is a top-of-the-line Blaze or a budget Z Grills; if you don’t clean and maintain it, its lifespan will be shortened.
For example, let’s say that you cook often and you leave food residue all over the grill. Grease fires caused by greasy trays can produce filthy black smoke that can contaminate food, but more importantly, grease fires can damage your grill’s coating and ruin food. Once the coating on your grill is damaged, the material can start to rust.
Grease fires can get out of hand quickly, and I have seen people lose their grills to these types of fires.
Also, keeping the grill clean makes sure that it works the way the manufacturer designed it to. Grills that are dirty need more fuel to run. When this happens with pellet grills, when the fire pot is full of ashes, it needs to burn more pellets to keep the temperature stable, wasting more fuel and working harder.
I recommend doing a basic cleaning on your grill every time you use it. We wrote a nice guide on how to clean your grill, which can teach you how to do both, a deep cleaning and routine cleaning of your grill.
2. Don’t use harsh chemicals
Sure, it’s easy to spray down your grill with trendy cleaning products, but the reality is that you can do the same with soapy water, vinegar, and other natural products. Sure, you might have to apply more elbow grease, but soapy water will be more gentle, help maintain the finish of your grill, and keep chemicals away from your grill.
I like to use soapy water to clean the exterior of my grill and remove any grease splatters and grease spots. I use a good microfiber cloth to get the job done.
3. Protect the exterior and finish of your grill.
Cleaning the exterior coating or finish of your grill is not enough. Go the extra mile and protect it. Protecting the exterior of any grill is easy and simple. I like to use vegetable or spray cooking oils on my grills. I simply wipe the grill with an oily rag to create a protective layer of oil that keeps rust away.
This is important, especially after using soap water, as the detergent in the water removes oil and lubricants. I do this often, at least once a week, as I cook on my grill almost daily.
4. Don’t use wire brushes
For a very long time, it was believed that the best method for cleaning grills and grill grates was to use hard metal bristle wire brushes. But this couldn’t be further from the truth! Wire brushes can damage porcelain-coated grates, removing the coating and leaving the raw metal exposed on the grates and rusting away.
Wire brushes also pose a different issue because the metal bristles can come loose and become stuck on the grill grate, then transfer to and end up in your food. You can have a bad day if you consume these small metal bristles.
I like to use a simple aluminum foil ball to scrape the grates and a wet rag. But you can also look at brushes like the Fire Rescue Brush, which is made out of kevlar and uses steam power to clean the grates.
There are also plastic brushes and other natural products you can use to clean your grill grates.
5. Use an Appropriate Grill Cover
This is perhaps the most overlooked item in every grill-owning household. However, a good grill cover can protect your grill from the elements, harsh UV rays, and the sun. If you don’t grill often, it’s best to keep the grill covered.
Something a cheap grill cover will help extend the lifespan of your grill and even keep pests away during long storage periods when you are not using the grill.
6. Use good fuel
Always be sure to use good fuel. Although this may not seem important to some, it is. For example, if you are using cheap charcoal in your kamado grill, you will end up with more ash buildup, which then means you have to do more cleaning. If you do not clean your grill properly, it will not perform as intended.
As far as pellet grills go, using good pellets will help keep the auger and firepot working as designed. Cheap pellets tend to clog up the auger screw, which puts extra strain on the entire system, shortening the life of your grill.
7. Avoid extreme heat
This may seem paradoxical, but please hear me out. Preheating your grill is an effective method for bringing all of its surfaces up to temperature, cleaning it, and preparing it for cooking. However, increasing the heat to its maximum and leaving it there for extended periods of time can cause damage to the grill, including warping, and paint damage.
Therefore, whether you are preheating your grill or need to sear a steak at a high temperature, you should not do it for too long. This may not be an issue if you have a high-quality grill, but it is with cheaper grills.
Last word
I hope you find these simple tips useful. Every bit helps when it comes to maintaining your grill and extending its useful life. After all, we like using our grills and want to be able to cook without having to fight it first.
We all love our pellet grills and enjoy cooking with them. When the fun is over, it is time to clean. I know we just want to keep grilling and cooking good food, but if you don’t take care of your grill, it doesn’t matter how good or expensive it is, it will go bad. Cleaning your grill is an important part of ownership and a crucial step to its longevity.
So, in this article, I’ll show you how to clean your pellet grill in just a few steps. I will deep dive into two different types of cleaning. One method I call “routine cleaning,” and the other I refer to as “deep cleaning.” Let’s get started.
What do you need to clean a pellet grill?
You don’t need to overcomplicate things by using complicated gadgets or even chemicals to clean your pellet grill. I actually hate using any type of chemicals on my grills and prefer to keep the area where I cook my food chemical-free. It is OK to use grill cleaners that are 100 percent natural, though.
A reliable shop vacuum or shop vac
The way pellet grills operate, and similar charcoal grills, create ash buildup because of the combustion of wood pellets. Due to the burning of pellets, a lot of wood ash will accumulate at the bottom of the grill. If the ashes are not cleaned, they will end up on your food.
When the ashes obstruct the air flow holes in the burning pod, this becomes a problem. As more ash builds up inside and around the burning pod, the more your grill’s performance will degrade and even burn more pellets to stay at temperature.
Cleaning clothes and rags, paper towels (lots)
Gather your old t-shirts, cloth or paper towels, and cleaning clothes because you’ll need a lot of them to clean and wipe down your grill. The clothes and paper towels help absorb grease and also apply oil around the surfaces of the grill during the cleaning process.
Any clean rag will do, but to clean an antique stainless steel surface, you want to use a good microfiber rag to avoid scratching the finish.
A good spatula, putty knife, or scraper
A good scraping tool, putty knife, or spatula will be your friend here. You will need to clean the grease tray on your pellet grill. Yes, one thing that I do not like about pellet grills is that they have a grease tray that sits on top of the burning pot, collects all grease, and directs it to the grease bucket.
The grease drip tray is a fundamental component in pellet grills. These keep grease away from the heat baffle and burn pot. The drip tray also directs grease and food particles to the grease bucket.
Tip: Once the grills cool down, the grease adheres to the tray. If you don’t like scraping, use aluminum foil on your grease drip pan.
Some soapy water
Grab a bowl of warm soapy water. This water will be used to clean areas like the grill’s lid and other areas where grease and oil run off. Soap water will help clean off grease splatters around the grill as well.
A good grill brush to clean the grates
A good grill cleaning brush is your friend here. The key here is “good.” You will need it to scrape the grates and clean all the grease, sauce, and food residue off the grates. I personally do not like to use brushes with metal bristles, but do like brushes with scrapers. I have an article on cleaning brushes if you want to learn a bit more about the different options you can get.
You can also use plastic brushes and other cleaning brushes without wire bristles. I have a nylon scrubber, but keep in mind that to use plastic brushes, the grill has to be cold.
Routine cleaning of your grill
First, I’m going to teach you how to perform routine cleaning and maintenance on your pellet grill. This is where it all starts and, depending on how well you keep up your grill’s maintenance, will dictate how long your grill lasts and how well it performs. I always tell people, it doesn’t matter how good or expensive your grill is, if you don’t maintain it, it will not outlast a cheap one.
Routine cleaning will reduce the amount of work when it is time to do a deep clean. So a little bit of work after each cook can save you from having to spend hours later doing a deep clean.
Also, many people experience grease fires simply because they do not clean their grills. I have read hundreds of stories where people complain about their grills catching on fire, but it all boils down to poor maintenance.
What’s involved in a routine cleaning (using my ECF process)?
Keeping your grill clean by doing routine maintenance is just as important as maintaining your car. It will help not only prolong the life of your grill, but also ensure that your grill will always be ready for the next cook.
For routine cleaning, I like to use a process we teach here at BBQ Grill Academy we call the E.C.F. process, which stands for Exterior, Chamber, and Firepot. This simple process will pay off by reducing lots of hours of deep cleaning.
This process is very simple and involves addressing three main areas of your grill. The exterior finishing and surfaces of the grill. Second, address the cooking chamber, which pretty much involves cleaning the grill grates and grease tray.
And lastly, you want to clean the ash buildup from the pellet burn box.
These simple three steps will keep your pellet grill in top shape and help it perform in top shape. So let’s go over the ECF method in more detail.
E ( Exterior ) – After cooking your meal, grab a clean rag and wipe clean the exterior of the grill. Clean up any grease, food, or sauce spills. If you want to protect the grill’s exterior, apply a bit of vegetable oil or cooking oil spray to the grill. This will help keep corrosion at bay and dirt and grime from adhering to the exterior of the grill.
C ( Cooking Chamber ) – The cooking chamber is where you cook your food, so be sure you do your best to keep it as clean as possible. After each cook and while the grill is hot, carefully grab a grill brush and clean the grates. This is the best time to clean the grates because while the grates are hot, it is much easier to remove food particles and residues, plus grease and sauces haven’t settled yet.
I know you want to rush off and enjoy your meal, but spending an extra 10 minutes cleaning the grates while they are hot will pay off when it is time to use the grill again.
Also, as part of taking care of the cooking chamber, you want to carefully grab some heat resistant gloves and remove the grill grate. Again, while the grill is still hot, scrape off all the grease and food residue from the grease tray. Believe me when I tell you that it is much easier to grab a spatula and scrape clean the grease tray when it is warm.
Once the grease tray cools off, you will need to use more muscle power to scrape it clean. If you do not want to deal with the grease tray and think it gets messy, simply put down some aluminum foil over it.
As part of cleaning your grease tray, you also want to empty the grease bucket while it is hot.
F (Firepot ): The fire pot is the most important component of your pellet grill. The fire pot is where the wood pellet combustion happens, the engine of the pellet grill if you will. The fire pot houses the igniter and also has holes to soak the wood pellets with fresh oxygen for igniting. So if the burn pot is clogged or dirty, you might still have a fire but not an efficient one.
Some grills have an ash cup, making it easier to clean the ashes, but with others you will need to use a shop vac to get the ashes out.
How to Deep Clean a Pellet Grill
Deep cleaning your grill is also necessary to keep it in good shape and remove more grease and food residue from tough areas of the grill.
Deep cleaning your grill is a good way to inspect crucial components in your grill and take your time and get into those areas that routine cleaning does not allow for. If you spend more time on your routine cleaning and keep up with your regular maintenance, your deep cleaning will be much easier and you will spend a lot less time scraping and cleaning.
So this is how you deep clean your pellet grill. We apply the same concepts explained in the ECF method above, but we are going to spend more time in a few areas of the grill and also be more detailed.
Start with the exterior of the grill. For routine cleaning, just wiping the exterior of the grill is enough. For deep cleaning, you want to take it a step further and use some sort of natural detergent, or at the very least, soapy water.
Grab a rag and clean up any grease splatter, old sauce grime, and residue. Clean the grill and then apply a nice coat of vegetable oil or natural grill protector. If you don’t have any, you can use cooking oil spray.
Second, following the ECF method we teach in BBQ Grill Academy, move to the cooking chamber next. Just like we suggest you do with the exterior, you will want to up your game when deep cleaning your grill.
During routine cleaning, you should primarily clean the grates, grease pan, and ashes. However, when deep cleaning your grill, you should take things a step further. There are a few things that need attention inside your cooking chamber that should be addressed during the deep clean.
First you want to inspect the grill’s lid and, if necessary, use a scraper to scrape off any excess grease built up on the lid. This will help you avoid old grease dripping on your food, foul odors, and even reduce the possibility of old grease catching fire.
Second, you want to inspect and clean the cooking chamber’s side walls. Scrape and wipe old grease, but it doesn’t have to be perfect.
This is a good opportunity to also check your pellet grill’s internal temperature sensor. This little probe looks like an old car’s antenna and is usually stuck up on one side of the grill. Wipe clean to prevent the probe from failing or failing to send accurate temperature signals to the temp controller.
Lastly, during the deep cleaning, you want to spend some time cleaning the fire box as best as you can. Start by vacuuming up all the ashes. Carefully scrape any hardened ashes inside the fire pot and inspect the “air holes” in the firepot.
Airflow is important for a good fire, and your pellet grill’s firebox is fed fresh, oxygen-rich air by a small fan through small holes in the burning pot.
This is a good opportunity to inspect other components of your grill, including the auger screw, the igniter, and the convection fan.
Extra Tips
When doing a deep clean, use plastic gloves to avoid getting your hands dirty. Deep cleaning a grill can be as messy as changing the oil in your car.
Keep a trash can near by. If you are using paper towels, you will want to throw them away right away.
If you are working with a hot grill, be sure to have the proper safety gear.
Never use a metal grill brush on porcelain grill racks. Most pellet grills and smokers are fitted with porcelain-coated grates to prevent rusting. However, using any metal grill brush may deteriorate your porcelain surface and introduce rust.
Conclusion
Cleaning your grill is part of the ownership experience. But more importantly, it helps protect your investment. Take some time to clean your grill after each cook. That extra time will help a lot.
I hope you found this guide useful. Enjoy grilling!
The Traeger name is synonymous with pellet BBQ grills, and for good reason. Traeger created the pellet grill and has produced a wide range of grill models over the years.
Traeger is the industry leader in grill technology and innovation, but all that innovation comes at a hefty cost. Also, not everyone wants a Traeger grill. After all, that is one of the freedoms we all enjoy; the freedom to choose what you like.
We did an analysis of Traeger alternatives by considering brands that offer similar products and are comparable with every budget and feature. There are other products that offer the same cooking experience, some for far less and some for about the same price.
So, if you are into pellet grilling or perhaps looking for more affordable options to a Traeger grill, this article will cover other popular brands and alternatives available on the market today.
Why Choose an Alternative to Traeger wood pellet smoker?
Traeger makes amazing pellet grills, and their brand is known for bringing leading innovation to the pellet grill market. They invented the pellet grill and have a substantial advantage over many companies, having vast experience in grills and being the first.
Traeger is also a large company with hundreds of employees devoted to the research and design of their grills. However, all this comes at a price. Traeger grills can be expensive. You do have to pay to get all the gadgetry. Traeger’s latest grill, the Timberline XL, even has a touchscreen temperature PID controller.
With that being said, there are two reasons why you might choose a different brand to Traeger. The first and most obvious is to find a more affordable smoker or grill, and the second is to find other quality attributes and features that Traeger might not deliver.
Not everyone has a couple thousand dollars around to throw at a grill, and some people don’t grill that often, in which case a more affordable option can be a better fit. Others don’t care for all the gadgetry and technology, so there is a cost-saving point.
Others are looking for basic features or are looking for a starter grill. Something simple and easy to use.
Lastly, we have those who are looking for exceptional quality and even a grill made in the USA. There are smaller pellet grill companies still making their products here in the USA. These grills tend to be more expensive and cater to a smaller niche of hardcore BBQ enthusiasts, but they offer exceptional quality and great alternatives.
Top Traeger Options and Alternatives
Below is a list of great Traeger competitors and alternatives, including high-end brands. All of these companies manufacture and sell excellent grills, and we will briefly discuss each of them to let you know which ones are the best at what they do.
Z Grills
Z Grills is a company better known for offering very affordable pellet grills and manufacturing grills for other well-known brands. That’s right. Z Grills has been manufacturing grills for over 30 years, including making grills for popular brands like Traeger.
What makes Z Grills a good alternative to Treager’s is price. Z Grills are untouchable when it comes to their prices and bundles. Some of their grills include advanced features like digital temperature controllers, meat probes, and even WIFI.
The fit and finish are not as good quality as Trager’s, but on average a Z Grill retails for about half the price of a comparable Traeger grill. This is because since Z Grills manufactures and sells direct to consumers, there isn’t a middle man or much overhead compared to brands that outsource every aspect of manufacturing.
The 450B is small but mighty. This model is very popular for various reasons, but mainly because you get a lot of bang for your buck. This is Z Grills’ entry level grill, so it is priced affordably. Still, you get a digital temperature controller, a meat probe, and enough grilling surface for a small family.
This grill is very popular among beginners, those looking for something simple and easy to use.
The 700D4E is another well-rounded grill manufactured by Z Grills. This is a larger and more desirable model because it is closer to the typical size of most backyard grills, has more usable space, and is still priced well below every other grill on this list.
The 700D4E offers over 600 square inches of cooking surface, two meat probes, a digital temperature controller for precise temperature control, and two cooking grates.
We tested the 7004DE and were impressed with its large storage area, which is great for storing pellet bins and containers as well as BBQ tools.
The Multitasker is the most technologically advanced of this particular brand’s larger models. It features a wireless temperature controller and over 900 square inches of cooking space. This grill is pretty much as close as you can get to an older Traeger Timberline series, they even look the same but almost half the price.
Pit Boss Grills
Pit Boss is another brand offering good grills to consumers at affordable prices. Pit Boss, in terms of quality, goes a step above Z Grills by offering thicker, stronger steel-built grills. Their price is also higher, but as far as features go, both Z Grills and Pit Boss are equal.
With Pit Boss, you will find a large range of models at different price points with slightly different features, but as far as gadgetry and technology go, they are pretty equal to Z grills, priced just a bit higher.
One area where Pit Boss shines is in their direct heat feature, which consists of a manual operated lever that opens a shield above the fire pot to allow direct flame to come into contact with the grates. This allows you to sear steak or substantially increase the temperature for high and fast cooking.
The Pit Boss Sportsman is Pit Boss’ entry level grill and are available in different models, including portable models. The Sportman is simple and easy to use but packs all the basic features you need to cook a good BBQ dinner.
Camp Chef
Camp Chef is better known for its wide variety of outdoor camping cooking products. They do also have a nice range of pellet grills, among other things. Camp Chef pellet grills are comparable to Z Grills in terms of build quality. (The latest Pit Boss models use pretty decent thick steel).
However, Camp Chef is superior to both Z Grills and Pit Boss in terms of technology and features, while their construction quality is comparable. With Camp Chef, you get an amazing mobile app to wirelessly control the grill from anywhere in your home.
A WIFI digital temperature controller, meat probes, and unique to Camp Chef, their SideKick gas-powered accessories. More on that later.
Camp Chef pellet grills are a few hundred dollars more expensive than Z Grills, and the price difference is all in the technology and gadgetry. Price wise, Camp Chef is comparable to Pit Boss, but in technology and features, they are almost there with Treager, almost.
One unique and winning feature is their SideKick system. The SideKick is a platform on the grill that allows you to “snap on” various gas/propane powered accessories, making this grill an excellent gas/pellet combo grill for those looking for maximum versatility.
The Sidekick system supports a propane-powered side griddle, a pizza box, and even a searing side burner. So you can have a full pellet grill on one side and your side table can be turned into just about anything.
This is a great invention by Camp Chef. Pellet grills are amazing and easy to use, but with most of their models, the average temperature range is from 160 to 500 degrees, meaning that if you want to bake a pizza or sear a steak, the grill might not get hot enough. This is when the SideKick system delivers.
Top Camp Chef Grills
The Woodwind Line up
Camp Chef keeps things straightforward, unlike competing brands. The Woodwind grills are the name of Camp Chefs’ product line. Among this line up you will find different sized models, all with the same features but with the expectation of size. There is a Woodwind 24, a 36, and so on.
New to their line up is the Apex grill, which is their largest and newest wood pellet smoker and grill.
Green Mountain Grills
Green Mountain grills are well known for their portable pellet grills. This brand also makes good quality large grills. They are best known for their portable pellet grill, the David Crocket. This little guy can connect to your car’s 12 volt battery and operate.
This makes it a good option for RVs and campers. Grab your favorite campfire cooking gear and pack this little guy for a weekend full of flavorful BBQ.
Grilla Grills
Grilla Grill is another cool brand and another wood pellet grill company offering well rounded wood pellet grills. This company incorporates their name into the design of their grills and has come up with interesting shapes and features.
Top Selling Traeger Grills
Now there isn’t to say that there isn’t good affordable Trager grills Check out these models and top selling Traeger grills.
The Pro 575 series
The Pro 575 is Traeger’s entry level grill but packed with features. The only thing you do not get with this grill is the double walled cooking chamber found in their more expensive models, but you still get Trwager quality, warranty, and best of all, their D2 temperature controller.
The D2 controller is smart and controls a variable speed fan to deliver the most precise cooking temperatures.
Other High-End
As I mentioned before, there are smaller wood pellet grill companies offering great alternatives to Traeger. Some of these companies are focusing more on quality and building materials, but it is still hard to beat Trager innovation and technology. Traeger, as a large company, has plenty of resources to devote to things like mobile app development and grill technology.
Twin Eagles
In case you are wondering or looking for the pinnacle of pellet grill luxury, quality, and technology, then let me introduce you to Twin Eagles. Many have not heard about this brand, but its company is the Mercedes Benz of pellet grills.
With Twin Eagles, you get state-of-the-art technology, including touchscreen controls and an outstanding mobile app.
These grills are the absolute best in terms of luxury and style when it comes to outdoor cooking appliances. Twin Eagle takes the lead. These grills are great for luxurious outdoor kitchen setups and for those with large budgets. Yes, these girls are not cheap.
Memphis Pellet Grills
If you like the finer things in life, and that includes a good looking grill for your outdoor kitchen, these Memphis grills deliver. These grills are built using fine and high quality materials such as stainless steel. But unlike rectqe, these companies pride themselves on delivering highly refined grills with the latest technology.
Expect to pay a premium for these grills, but their technology and features are comparable or better in some ways than Traeger.
Recteq
Recteq is a direct competitor to Traeger and, despite being a smaller company, manages to offer a full line of electric pellet grills primarily to the consumer. These grills are built exceptionally well using top quality materials, and the main cooking chamber is all 304 stainless steel.
As you can expect, these rec teq ain’t cheap, but because they are built so well, you can expect to get hours out of your investment.
One area where recteqw falls short of Traeger and even other grill brands is technology and refinement. Reqteq grills, though they boast amazing build quality, look and feel more like smaller hand-built grill brands. Also, although they use digital temperature controllers, you will not see the technology found in a traditional traeger.
There are other small details that scream “homemade”, like exposed wires, and even an ol’school wireless antenna that sticks out of the controllers.
Nevertheless, this company is known for its quality, amazing warranty, and customer support. So if quality is all that matters to you, rec teq can deliver.
Yoder Pellet Smokers
Yoder Smokers is another high-end brand known for building tanks on wheels for smokers and is made in the USA. These pellet smokers will set you back a few thousand dollars, but you get a large, heavy-gauge steel smoker. Tech is not where these grills shine; it’s in their build quality.
Q&A
What Makes Traeger Smokers So Special?
Traeger is a well known brand, and most people have heard of or owned a Traeger. This isn’t necessary because they are the best, but they were definitely the first pellet grill company.
Are wood pellet grills worth the investment?
Wood pellet grills are definitely a good buy, but a lot depends on the type and brand of pellet grill you choose. As far as cooking with wood pellets and pellet grills, you get great flavor and these grills are easy to use.
As far as which is best, our article on wood pellet grills is a good start to finding a good fit, but a good rule of thumb is to find a reliable brand with a good warranty and built using decent materials. But remember, a good pellet grill won’t make you a better cook.
Conclusion
Traeger grills are market leaders in innovation and technology when it comes to pellet grills. However, they are not the only game in town. As we showed in this article, there are good options to Traeger grills and also very high-end, better quality wood pellet grill companies.
What’s important when choosing a wood pellet grill is to know how much you are willing to spend, find a company with a good warranty and the features you need.
If you’re new to the BBQ and grilling world, or simply looking for a grill to get you started, this guide will show you five great grills for those starting out in BBQ and grilling.
We will share with you a list of the best grills for beginners and also what you should consider before getting one. We will also teach you about different types of grills and fuel types.
When I first started exploring the BBQ world over two decades ago, I knew I needed a grill but didn’t know where to begin. I will use my 20 years of experience, trial and error to save you some trouble, overspending and headaches.
And no, you don’t need a thousand dollar grill if you are a beginner or to cook good BBQ.
Top Best grills for Those Starting in Grilling and barbecue
This grill is one of my favorites and our top recommendations for barbecue beginners because it checks many boxes, including ease of use and low purchase cost. The Z Grills 450B is a budget-friendly pellet grill but still offers good quality and features found in more expensive models.
The 450B offers 459 square inches of cooking space, is fueled by wood pellets, and has a digital controller to manage temperature. It even includes a meat probe, so you can monitor the meat’s internal temperature as you cook, and the meat temperature is displayed on the grill’s LCD screen.
One noteworthy aspect of the 450B is that it is compact and light. I can grab this grill and move it around my patio with ease. It is also easy to fit into small backyards.
We chose the Z Grills 450B as our best overall because, first, it is reasonably priced, and second, it offers all the features necessary to grill and smoke foods. This grill is small which makes it great for those looking for something simple, inexpensive, easy to handle and maintain.
What we like:
It’s easy to use – Add pellets to the hopper, push the power button, and set the cooking temperature.
Good quality for the money.
Three year warranty.
Includes meat probes.
Easy to clean and maintain.
Great smoky flavor.
What to consider
You will need to become familiar with pellet flavors to be sure you are pairing meats with the right flavors.
Cooking temperatures on pellet grills range from 160 to 500 degrees, which are good for smoking and grilling but not high enough to bake pizzas or get a nice sear on steaks.
The Weber Spirit is a two burner propane gas grill with enough cooking space for a small family or couple. This grill is very easy to use and gets the job done without any gadgetry to get in the way.
This propane gas grill is very easy to use. Turn on the burners using a push-start piezo igniter and set the burners to low, medium, or high heat, or until the built-in lid thermometer shows the desired temperature.
Weber grills are good quality, and most of us started our BBQ journey using one. This grill has a fuel gauge to let you know the fuel level in the propane tank, flavorizer bars, and two cooking grates. It is a simple grill, but that’s what makes it so good.
This Weber is one of the best beginner grills because of its simplicity but it also includes all the aids ad feature you need for grilling great food.
What we like:
It’s simple to use and get started.
Two burners can get the grill to a high enough temperature to get grill marks on steaks.
of grilling space for a small family or entertaining a small group.
The cooking area is split between a main cooking grate and a warming rack, which comes in handy to keep food warm.
The flavorizer bars help with flare ups.
Stainless steel burners should last a long time.
What to consider
Propane grills do yield real BBQ flavor since fuels like natural gas and propane don’t have flavor. ( like charcoal or wood pellets )
If you want a “smoky flavor” you will need to use a smoker box with wood chips.
This Z Grills is a larger, more refined version of the 450B we mentioned above, and it is also larger. This means that the Z Grills 4004DE shares the same easy to use controls and includes many of the same features, but it is larger.
This grill can double as a smoker, so if you are wanting to start your grilling career and are also interested in learning how to smoke meats, the 700D4E is a great grill smoker combo grill.
This grill offers you a large cooking space, the well-liked automation of a digital temperature controller, meat probes, and two cooking racks. This is a grill that you can easily learn to use and grow with. It is very easy to use and versatile. Its temperature range is from 180 to 450 degrees, so you can cook a variety of foods, smoke meats, and grill.
This is the best grill for those who are looking for good wood-fired flavor and have the space and budget for a slightly larger grill than the top two on this list. If you budget allows it I would recommend this 700 over the 450B since you get a lot more space and a nice storage cabinet for not that much more.
The Weber Kettle is not only easy to use and simple, it is a classic. The shape of this grill is Weber, which is the most recognizable shape in the BBQ world. This BBQ grill is fueled by charcoal but is designed with simplicity in mind.
Charcoal grills give you total control over the cooking process and can be easily adapted to work as pizza ovens, charcoal smokers, and, of course, grills.
However, many people get intimidated by the idea of having to deal with charcoal or grab a bottle of lighter fluid to light charcoal. This is all eliminated by using a chimney starter, some good quality lump charcoal, and you are ready to go. There are different methods of lighting charcoal without using chemicals or lighter fluid.
What we like:
Easy to use grill for beginners wanting to start on a charcoal grill.
Simple airflow controls to manage the fire and temperature.
Easy to arrange lump charcoal for indirect heat cooking when smoking meats.
The Ninja Foodie Smart is a different type of grill, and it is electric. This grill is considered more of an indoor electric grill than an outdoor one, but for some who live in apartments. This can be a good start.
The Ninja has two heating plates, so it cooks food evenly. It also has a smart digital temperature controller that handles all aspects of temperature control.
What we like:
As easy as it gets- press a button and start cooking.
Can be used indoors
Small and compact, fits in many places.
What to consider:
Limited cooking surface.
No smoky flavor.
6. The Joe Classic Kamado Charcoal Grill
The Joe Kamado is a premium charcoal grill. It can be your first grill and your last. The reason I say this is because kamados are incredibly durable and versatile. You can cook virtually anything with them, and because they are ceramic, they will not rust. However, these grills are on expensive side.
Things to consider As a beginner when selecting a grill
Have you ever been to a golf course where a beginner claims his golf clubs are terrible and that is why he curved the ball? Then a more experienced golfer grabs the same set of clubs and hits a straight 200 yard drive. Well, the same can be said about BBQ grills. Your skills will play a major role in how good or bad your food tastes. Nevertheless, when looking for the best grill for beginners, our test and research teams look for the following attributes, and so should you.
The flavor of the food will be affected by factors such as the type of fuel used, the type of grill, and, of course, your grilling skills.
But to help you navigate the world of grills, here are a few things you should consider when purchasing your first grill or if you are a beginner.
Price of the Grill
If this is going to be your first grill, you might want to start with something inexpensive and budget friendly. There are budget smokers on the market that will cook just fine, and great gas grills under 500 dollars that will also do a fine job.
The point here is that you do not need to overspend to get a good grill, especially if this is your first grill.
If you are sure you are in the BBQ game for the long haul and want to spend on a good grill now so you don’t have to buy another grill later, then there are good American made grills that will outlast most budget options.
Grill Quality
You should look for quality characteristics in any item you purchase, but especially in grills. These are poor quality grills which succumb to the abuse of high temperatures, moisture, grease, and eventually rust.
Good quality grills will also include a good warranty and great support.
Good quality characteristics include the use of high-quality materials to construct the grill, such as stainless steel and heavy-duty steel. Also, cast iron grates, stainless steel grates, and stainless steel components are often found in good quality grills.
The Grill Fuel Type
There are grills powered by a variety of fuel types. I will elaborate on this later in the article, but it’s important to note this now. Each fuel type has its own list of advantages and disadvantages, but in summary, charcoal grills are very versatile and, in some cases, inexpensive, but require more effort and expertise to manage. A charcoal grill is a good grill to learn on if you want to learn how to cook authentic BBQ and delicious food.
The common fuel types are gas or propane, charcoal, pellets, and electricity. Think about what type of cooking you will be doing , what fuel you feel comfortable using, and what type of flavor profile you are after.
Your Cooking Style
If you want to learn how to grill simple dishes like hot dogs and burgers, it’s one thing, but if you want to learn how to cook real BBQ, it’s another. For grilling a few hot dogs now and then, any grill can do, but to cook real BBQ and get lots of flavor, a charcoal grill / charcoal smoker, or pellet grill should be on the short list of options.
Common Types of grills
This is very important and here is why. There are quite different types of grills and all have their own pros and cons, which I dive more into detail in my grill and smoker types guide.
However, here is a quick list of grill type available on the market.
Gas Grills ( propane or natural gas )
Charcoal
Electric
Pellet
Wood
BBQ Grill Smokers
The first thing you need to know is that when it comes to grilling and BBQ, there are two main and more common types of “cookers,” namely, smokers and grills.
Smokers are traditionally larger grills designed to cook meat for a longer period of time and cook at lower temperatures. When you go to a restaurant, you see on the menu “smoked ribs” or “smoked pulled pork”, those dishes were prepared in a smoker.
With a smoker, you can cook food low and slow and infuse meats with extra smoke to achieve that authentic BBQ flavor.
Smokers are available in different shapes and fuel types, and if smoking meat is more of what you want to learn and cook, be sure to read our smokers guide to learn all about the different types of smokers.
Smokers’ operating temperatures range anywhere from 160 degrees to about 450 degrees. Smoking cooking temperatures are usually in the ballpark of 190 to 275 degrees.
BBQ Grills
Grills are more common and traditionally what people start with. In retrospect, some grills can work as smokers, but few smokers can get to high enough temperatures to grill. So keep that in mind.
Grills can operate at low temperatures but also reach high temperatures in the range of 600 to 900 degrees, which is enough to sear steaks and bake pizzas. There are a variety of fuels available for grills, and each has advantages and disadvantages that relate primarily to the skills required to operate the grill and to its flavor.
Let’s take a look at the different types of grill fuel.
Ease of Use by Grill Fuel Type
Grills come in all shapes and sizes, but the primary difference is the type of fuel. Below are the most popular grill fuel types, ranked by ease of use.
Electric grills – Easiest
Electric grills are extremely user-friendly, making them ideal for beginners and novices. An electric grill doesn’t burn any fuel. Instead, a heating element or resistance heats up cooking grates or a metal plate of some sort to evenly distribute heat and cook the food.
Electric grills are great for cooking indoors or for those wanting something small, maybe a portable grill or just the simplest grill to operate. Electric grills are also great for those who live in apartments or have little to no space for a grill.
These grills are often called “ smokeless grills,” which makes them great for cooking indoors.
The biggest and most significant drawback of an electric grill is that it yields no flavor. Since you are not burning wood, wood pellets, or charcoal, the only taste comes from the seasoning. Quite frankly, this is my least favorite type of grill, although it has its purpose.
Gas Grill or propane – Easier
Gas grills are the second-easiest to operate, primarily because most of us are familiar with the primary components of a gas grill, namely the gas burners. Many of us already have gas stoves in our homes, and just like a gas stove, a gas grill has one or more burners to heat up the cooking space.
A gas grill, just like an electric grill, does not yield flavor since you are burning gas from a propane tank. The main difference between your gas stove and a gas grill is that the grill has grates to cook the food on.
The food will be cooked on some sort of grate, be it cast iron, porcelain coated steel, or stainless steel. This creates a different cooking effect than boiling or braising the meat in a pan, as melted fat, grease, and oils drain and escape from the bottom of the grill.
Some gas grills have what are called “flavorizing bars,” or shields, above the burners and below the grill grates, and as fat hits those flavorizer bars, the “fat steam” can add flavor to the food. Nothing live changing but it does add some “grill flavor” to foods.
Nerve the less you can use smoker boxes in your gas grill and add more smokey flavor to your food. It will not be as much as a charcoal or pellet grill, but it will add more flavor than grilling on an electric grill.
Gas grills are simple because all that you have to do to operate one is turn the burner control knob and decrease or increase the flame to decrease or increase the temperature. That’s it.
Pellet grill – Easier
I own a pellet grill and I absolutely love it. Pellet BBQ grills are not necessarily harder to use than electric grills, but because there are a few more steps involved, I rank them below gas or propane grills.
Now, don’t think these pellet cookers are hard to use; they are not at all, but because high-end pellet smokers and grills have WIFI, temperature probes, and other components, it might take a minute or two to become familiar with the tech, not the grill.
As far as the grills go, they are as easy to use as a propane or electric grill. In fact, one would say that a pellet grill is the combination of the ease of use of an electric grill with some of the flavor of a charcoal grill.
These grills are my favorite types to use because they are simple to use and you get an amazing smoky flavor from burning wood pellets.
The only steps required to operate a pellet grill are to add pellets to a hopper, turn on the grill, and set the temperature. The grill does everything for you, including feeding pellets to maintain the temperature setting.
Charcoal grills – Harder
Charcoal grills are the most difficult to learn to use, but they are also the most versatile and rewarding. Charcoal grilling can be a lot of fun and opens the door to a wide range of culinary options because you are in control. Fire, heat, flavor, you control it all.
I own a kamado grill, and it is by far one of the best grills I own, but even for me, with years of experience, it took me a while to master that grill.
The point here is that a charcoal grill will beat all other grills on this list, but it does take longer to learn and some people simply do not like to deal with charcoal.
If you intend to be in the BBQ game for the long haul, I strongly recommend starting with a charcoal grill. The results will be very rewarding and you will learn skills you can later apply when using other grills or any cooking style.
Conclusion
We go over a lot in this article, but to summarize, the best grill for beginners should be simple to use, and I recommend something affordable. You should also consider the type of fuel you want to use, as this can affect the flavor.
I hope you found this guide to be helpful. Grill on!
In this guide, I will show you how to clean a flat top grill, more commonly known as a griddle. I own a Blackstone griddle and have tested various methods for removing food debris, old grease, and fat from its surface.
There are many “suggestions” on the Internet. People have come up with creative names and made up methods to get clicks, but these are three true and tested methods I use to clean my flat top grill surface and keep it in good shape.
How to Clean a Flat Top Grill: Three Effective, Simple Methods
These are natural methods without using chemicals or special tools or any other nonsense. I have tested these methods to confirm their effectiveness, and as you can see in my video above, when it comes to cleaning a flat-top grill, simple does it, and you do not need to overspend on fancy cleaning tools or cleaning products.
Method #1: Scrape and clean, add oil ( after each use )
Routine Cleaning – This method is your daily routine cleaning, sort of speaking. This is the method you want to apply after each use of your griddle. This method consists of, after your food is cooked and you are done using the griddle, turn off the burners and scrape the grill top with a spatula, griddle scraper, or any flat scraper.
Scrape the food and grease towards the grease collector. Grab a paper towel or a piece of cloth and wipe the top clean and apply a small coat of cooking oil.
Remember, after you’re done scraping and wiping the girdle, apply a small coat of cooking oil or vegetable oil to the flat top.
Method #2: Spray Water, Scrape and clean, add oil ( deep cleaning )
Deep cleaning – I only recommend this method when things like sauces, caramelized sugar, BBQ sauce, and anything sticky have gunked up on the grill top. This deep clean method also works when there is excess grease build up. However, you will remove more of the original seasoning coating you applied when you first got the flat top grill.
The key here is to turn off the burners and allow the grill top to cool down to at least 300 degrees. This technique consists of spraying or pouring small amounts of water onto a hot flat-top grill. As the water comes into contact with the hot surface, it will boil and steam, loosening and removing food and grease deposits.
However, because metal can expand and contract in response to thermal changes, you do not want the flat top of your griddle to be too hot to prevent warping and damage. A Blackstone flat top grill is made out of steel, Blackstone still recommends using water to clean their flat top grills only below 300 degrees.
However, other brands may use stainless steel or even thin metal for their tops, which are susceptible to warping.
So apply this method, simply remove any leftover food, turn off the burners, and let the griddle cool down to about 300 degrees. Spray or pour a small amount of water over a six-inch wide section of the flap-top grill at a time.
Spray water, scrape, and move to the next spot. Again, spray water every six inches, scrape food and grease towards the grease collector, rinse and repeat. To avoid “shocking” too much of the large surface area of a flat top when using water, you should clean it in small sessions.
Once you are done cleaning the flat top, grab some paper towels or a cloth rag and wipe clean the griddle. Lastly, apply a small amount of cooking or vegetable oil, and now you have a clean flat top grill.
The cool thing about this technique is that boiling water and steam do all the work of separating grease from the medal and reducing scraping.
The downside of this method is that it removes more of the oil coating required to keep flat tops rust-free and non-stick. So is important, after using this cleaning method, to apply a good coating of oil. This method is going to leave you with a good, clean flat top grill.
Method #3: White vinegar spray, Scrape and Clean, add Oil
Even Deeper clean – This method is good for situations when the laptop grill is extremely dirty or has been left out outside or neglected for some time. This method removes a lot of the oil coating, so it is important to reapply oil immediately after cleaning.
Similar to the other methods, apply some vinegar and water to a hot grill top, scrape the food and grease residue off, rinse with water, and apply oil. I like to “re-season” the griddle after applying this cleaning method.
These are the steps to cleaning your flat top grill or griddle.
Once you are done cooking food on the griddle, go ahead and turn off the burners. As the grill cools down, grab a scraper or spatula and scrape off any food residue from the flat top grill. A grill scraper, spatula, or bench scraper are all tools you need to cook and also clean a flat top grill.
After cleaning the flat top grill with the scraper, apply a thin layer of oil to the cooking surface using paper towels or a clean cloth rag. Cover the entire surface with cooking oil to keep the grill surface “seasoned” and rust-free and to preserve its nonstick nature.
Total Time:5 minutes
Step #1: Scrape
The first step in cleaning a flat-top grill is always to discard food and residue while the grill is still hot and after cooking has concluded. Scraping a flat-top grill while it is still hot prevents residue from sticking and settling on the grill’s surface. Once food residues have cooled on the grill’s surface, they are much more difficult to remove, and additional scraping is required.
Step #2: Wipe clean
Wipe clean. Always use paper towels, a rag, or a damp cloth to wipe the grill’s surface after scraping it. The purpose of this step is to use the rag to clean and absorb small particles left behind by the scraper.
Step #3: Oil or season your flat top grill
This is an important step and it serves two purposes. First, the oil is a natural way to lubricate and keep your flat top grill top “seasoned”. This will keep away rust. Second, oil acts as a natural non-stick coating for your flat top grill. So the next time you use the grill, less food will stick to the grill’s surface.
Supply:
Water
Vegetable oil
Tools:
Scraper
Spatula
Squeeze Bottles for Water
Materials:Paper towels
Paper Towels
Cooking oil, vegetable oil
Storing your griddle and keeping it clean
When it’s time to store the griddle, it’s important to take a few extra steps to keep it in top shape. Here are a few tips for storing your griddle to keep it clean and rust free.
Ensure that the griddle is thoroughly cleaned and oiled before storing it. This means that you have applied the steps we discussed above and the griddle is clean before storing it.
Oil prevents rust and ensures that the grill is prepared for its next use.
Lastly, use a dry or slightly oiled piece of cloth to protect the exterior of the grill from rust, which is especially important if you plan to store the griddle outside. Try to store your griddle in a dry, indoor location.
Tips for keeping your flat top grill griddle in top shape
Cleaning it after use – Many people create more work for themselves by failing to clean the grille immediately after use. I know we all want to jump in and start eating, but cleaning your flat top grill immediately after cooking is a lot easier than cleaning it when it is cold. Plus, your griddle will be ready for its next cooking session.
While the griddle is hot, right after you use it, is the easiest way to clean it and keep it clean.
Don’t use brushes on your griddle. I know it is tempting, but you will likely damage the grill’s surface.
Avoid using soap when possible. Soap should only be used when you first unbox your griddle to remove manufacturing oils and contaminants and then season your flat top grill. On rare occasions where the flat top grill has been neglected for a long time and you need to revive it, you can use soap, but you will need to “season” the griddle with a couple layers of oil.
Q&A
Do you use soap to clean your griddle?
No, I do not. I only use soap to clean the griddle surface when the grill is new. This is to remove manufacturing contaminants.
How to clean a blackstone flat top grill?
The steps for cleaning a Blackstone griddle are no different than for any other flat top grill. Scrape, wipe, and oil.
Why do I need to apply cooking oil to the flat top grill’s surface?
Cooking oil acts as a natural lubricant for the cooking surface and will protect the flat top grill surface from rusting.
Conclusion
Maintaining your flat-top griddle is easier than you think. A daily cleaning routine and cleaning the grill after each use will suffice for the majority of individuals. The best way to maintain the grill is to clean it as soon as you are finished cooking.
However, if your grill needs a little bit more extra cleaning, you can use water or even a vinegar water mixture to remove excess oil grease and burnt up sugar. One point that you must remember is that it is extremely important to keep the flat-top griddle oiled and seasoned to extend its lifetime and keep rust away.
This is a quick video to showing three easy methods to clean your griddle or flat top grill.The full article can be found at www.bbqgrillacademy.com/how-to-c...
In this article, we compare ribeye and T bone steak and explain the main differences. Knowing the differences between various meat cuts is a good way to know what you’re getting on your plate, what flavor to anticipate, and, for steak lovers, which steak cut is superior to another.
The primary distinction between ribeye and T-bone steaks is where the meat is “cut” from the cow’s caracas. So, in more detail below, I will explain where the meat is cut from, the flavor profile of each cut, which is better, their unique attributes, and a few tips to cook your ribeye steaks and T bone steaks.
Before understanding the differences between these two steaks, it is important to understand what each of them is.
What is a ribeye steak?
The ribeye steak, not to be confused with “rib steak”; both are cuts from the rib section of the cow, but the ribeye steak is boneless while the rib steak has the rib bone intact. This cut comes from the upper rib cage closer to the neck, behind the chunk.
image: BBQ Grill Academy
This cut is a muscle that extends from the cow’s hip bone up to the shoulder. The rib section is one of the nine primary cuts of the cow caracas. Ribeye is a boneless, sub-primal cut of the rib, whereas rib steak is a bone-in ribeye. Both cuts are subprimal cuts from the rib.
Ribeye steaks are very tender and have lots of marbling compared to other steak cuts. Ribeye is very sought after and popular among BBQ folks and in the restaurant industry due to its deliciously tender and juicy texture and flavor due to all the fat content in the meat.
Something important to remember is that ribeye steaks can be purchased both bone-in and boneless. Some popular cuts of bone in ribeye are cowboy steaks. The bone in ribeye is often labeled rib steak.
Attributes of Ribeye Steaks
image: BBQ Grill Academy
It is very rich in fat and marble, and requires very little seasoning to get a good flavor.
Tender texture. This cut is a muscle that does not get much exercise in the animal, so it gets a rich deposit of fat content.
What is T Bone Steak?
When first cut, T-bone steak is carved from the short loin and, when first cut, this steak cut has two unique and distinctive characteristics. First, it has two steak cuts in one, divided by the unmistakably recognizable T-shaped bone.
image: BBQ Grill Academy
The smaller side of the T bone contains the filet mignon, and the longer part of the steak contains the New York strip. The T bone steak is not cut from a primal cut like the ribeye is, but rather from a sub primal cut, the short loin. The short loin itself is cut from the primal, narrow part of the cut of the cow’s loin.
A T bone steak can be trimmed further to produce subprimal cuts like filet mignon and New York strip. If you cook or grill it untrimmed with the T-shaped bone, it is T bone steak.
T bone steak is a signature dish in many steak houses and is often considered an upscale dish. This is one of the finest steaks you can order or cook and is among the most popular steaks.
Related to the T bone steak is the bigger porterhouse steak, which shares many of the same characteristics as the “T” bone, but it is thicker. It has to be at least 1 and a quarter inches, whereas regular T bones are cut to at least one inch.
Something to keep in mind regarding T Bone steak is that it has two other well-known cuts, the filet mignon and the New York strip, and can also be cut as a porterhouse steak, which is thicker and larger.
Attributes of T Bone Steaks
Image: BBQ Grill Academy
A smaller cut than the porterhouse steak, both the New York strip and the filet mignon are part of the T bone steak, split by a T shaped bone .
This cut combines beefy flavor and tenderness thanks to having the strip and the filet.
This cut is significantly thinner than a ribeye steak, so it cooks faster.
Differences between Ribeye and T-Bone steaks
Where is the meat cut from, from which primal cut
The most substantive distinction is where the meat is cut/carved from the cow. Other things like flavor and tenderness can be subjective, and some steak lovers will argue for hours over which steak tastes better, but where each steak cut is carved from is a decisive difference. Also, things like searing techniques can impact the tenderness and flavor of a steak.
However, the origin of each steak cannot be disputed, as there is a definitive guideline for where ribeye and T-bone steaks must be cut from in order to be classified as such.
The T bone is carved from the short loin and the ribeye is cut from the longissimus dorsi muscle of the steer rib, the rib being a primal cut of the steer.
Tenderness and flavor
One common question is which steak cut is more tender, ribeye or T bone? Ribeye is more tender than T bone because of its very rich fat marbling and fat content. Also, ribeye is a longissimus dorsi muscle of the cow that is not very active and collects large deposits of fat and remains tender.
When cooking ribeye properly, the fat will keep the meat moist and juicy and prevent it from being dry. T bone has bone and is less tender as it is a leaner cut, but both cuts pack tremendous flavor.
Flavor is one area that can be subjective because there are different ways to cook a steak and season a steak. Also, not everyone has the same taste buds. However, there are recognizable flavor and tenderness traits in each steak cut.
Both steaks pack rich flavor and when cooked properly, but because of the ribeye’s fat levels, you can expect a more savory, salty profile, whereas T bone will have a more “meaty flavor”.
Marbiling
We slightly touched on this topic, but this is another clear difference between these two steak cuts. Ribeye has more and more pronounced marbling than T bone. The ribeye is a muscle on the cow that is fatty and tender. The top loin is a leaner cut.
Price Difference T bone vs ribeye
There are price differences. Ribeye is more expensive and there is a reason it is called a beauty steak. Ribeye is very sought after due to its tenderness and taste. The more marbled and beautiful the meat looks, the higher the cost. Ribeye is more expensive than T bone. As you can see on the chart below, the average price for ribeye is higher than T Bone’s
Image: USDA
Tips for cooking ribeye or T bone steaks
Both of these steak cuts offer great flavor profiles and are easy to make either on your grill or on a hot pan. I prefer using my grill, but these tips apply to either cooking method.
Tip #1: Do not over season these meat cuts. Both boneless ribeye and T bone are flavorful cuts of steak and do not need too much seasoning. Ribeye, in particular, has a lot of fat content and marbling. All that rich marbling will take care of flavor.
I like to keep things simple. A simple mix of salt and pepper will yield good results.
Tip #2: Use an instant read thermometer or smart thermometer to monitor the internal temperature of the steaks. Many people undercook their steaks, but even many more overcook their steaks. It is not a question of how long the steak should be cooked. Cooking and grilling techniques, as well as the size of the steak, will all influence how long it takes to cook, so instead of guessing, use a meat thermometer.
Tip#3: Try reverse searing your steaks if they are thick. This process involves grilling or smoking the steak at a lower temperature to get the internal temperature to your desired doneness level and then sear this steak at high heat. This method is especially useful for those who like medium well steaks but do not want to dry up the steak.
Tip#4: Beware of flare ups. These steaks have a lot of fat, and as the juicy fat starts melting away and hits your hot grill or charcoal, you can expect some flare ups. If you are grilling your steak, set your grill so you have a resting area or an area without coals or burners off, so when the steak flares up you can move the steak away from the fire.
Tip#5: Try to find good steaks and high-quality cuts. Besides my local butcher, I use a few handpicked online butchers for my meats. When I just want a quick steak, I go to my local grocery store, but when I want a real steak, one that I will spend a few hours prepping, searing, and grilling to perfection, I order from Snake River Farms or Crowd Cow. They are my go-to people for steaks.
Conclusion
So the next time you go to your local store or even a restaurant, now you know exactly what to order or purchase. I hope this article explains very well the differences between a ribeye steak and a T bone steak.
To circle back, ribeye is extremely tender and has more fat than T bone. Also, ribeye is carved from the cow’s rib while T- bone comes from the short loin. T bone has a stronger meaty flavor, ribeye has a more savory, salty, jucy, melt in your mouth flavor.
More than ever, everyone is keeping a close eye on their wallets, and with that in mind, our team at BBQ Grill Academy put together these easy, low-cost, affordable grilling ideas to keep enjoying your grill and cook great meals for your friends and family on a dime.
This article will provide you with nine inexpensive recipes, cheap grilling ideas, and budget-friendly grilled main dishes you can try at home.
Cheap Budget Friendly grilling ideas and grilling recipes
1. Skinless chicken breasts
Chicken breasts are one of my favorite go-to foods when it’s time to find something fast and easy to make on the grill. The price of chicken is reasonable, and grilled chicken is a popular and staple BBQ dish.
Grilled chicken is a great protein source and, if seasoned with the right BBQ rubs and a little bit of a smoky flavor using wood chips, if you have a gas grill, grilled chicken can taste delicious.
If you own a pellet grill, cooking grilled chicken is as easy as turning on your pellet cooker, setting the temperature to about 350 degrees, and let it rip! The pellet grill will do the work, and the wood pellets will take care of the flavor.
I use a combination of salt and pepper to make my skinless chicken breast recipe, and occasionally I like to use a chicken dry rub BBQ dry rub to add more flavor. If you keep it simple, a salt and pepper grilled chicken breast goes well with a simple side like jasmine rice. If you went more on the BBQ side, things like coleslaw, a salad, grilled sweet potatoes, and grilled corn go well. Just be sure to cook the chicken to the right doneness level.
2. Grilled Chicken Wings
Let’s talk about chicken wings since the subject is chicken. One of the simplest meats to grill is chicken wings, which you can cook for a reasonable price. There are three things that I like about chicken wings. One, you can get more wings for your money, two, you can serve more people, and three, they are easier to prepare.
My recipe for chicken wings is simple. Grab a chicken rub or seasoning, throw the wings in a bowl, and coat the wings with the seasoning. After the chicken wings have reached the desired doneness, increase the grill’s heat to a higher temperature. Grill and carefully crisp the outer skin of the wings. Because they are finger food, chicken wings can be served on their own on occasion.
3. Grilled pulled pork ( or smoked )
Some people are intimidated by the thought of preparing pulled pork, but the reality is that it is simple and yields a substantial amount per person. I enjoy preparing pulled pork because it not only pairs well with numerous side dishes, but it also allows for a great deal of culinary creativity.
Furthermore, it is easier to be left with a large amount of pulled pork and have plenty of leftovers for sandwiches, snacks, and even the next main meal.
My recipe for pulled pork is simple. If I’m going for a more Texas-style flavor profile, I use a simple combination of salt and pepper. Put the pork butt or pork shoulder in the smoker at 250 degrees until done, then let it rest, shred with bear claws, and serve.
If I want something sweet or savory with a hint of spice, I choose a sweet pork rub heavy on brown sugar and proceed as described above.
Pull pork is a low-cost recipe because you can order a cheap pork shoulder online and, because you’re “shredding” the meat, you can serve a large number of people, making this a great tailgate recipe, Fourth of July dish, and great for Superbowl parties.
4. Pork Chops
Pork chops are one of my favorite things to cook for my family. Pork chops can be purchased in small packages or in larger packages for a better price. Pork chops have the advantage of being simple to prepare and quick to grill.
Pork chops are a tough cut of meat, so I like to use a spray bottle and spritz the pork chops with a little bit of apple juice to keep them moist, especially if grilling high and fast. Second, I like to use a simple salt and pepper one to one mix, but you can also use sweet seasonings to enhance that apple’s sweet flavor from the apple juice.
5. Grilled pizza
One of my favorite weekend activities is grilling pizza. Grilling pizza is easier than you think. You can purchase pre-made pizza dough at your local grocery store or order it online. The rest is up to you to customize your own Slice of Heaven on your grill by selecting your favorite cheese toppings and vegetables. Baking pizzas on your grill is not that complicated. You do need a good pizza stone to make sure the pizza comes out crisp.
6. Tacos a la Plancha
This means tacos on your griddle, my friend. This is by far one of my favorite summer main dishes to prepare. All you need is ground beef, and if you have a lot of mouths to feed, grab a little more, but the point here is that ground beef is the main ingredient for tacos, and it is inexpensive.
You can definitely use other proteins like steak, bacon, and chicken. Buy bell peppers, garlic, onions, red onions, red peppers, and a host of other vegetables to make as toppings. This is one of the beauties of tacos. There’s no such thing as a way to make tacos. You can make tacos 100 different ways and still be amazing.
I like to keep things simple, and my go-to taco recipe is good ground beef, onions, a little lemon juice, and tomatoes, all cooked on the grill. That’s the cool part about tacos you can take a small portable griddle to the beach and still make amazing tacos without breaking the bank.
7. Pork Pinchos (pork kabobs).
Pork pinchos are kabobs made out of pork chunks. You can use different pork cuts to prepare kabobs. Pork tenderloin works, but you can also use fattier cuts like a boston butt. The key here is to cut the chunks into nice squares so they cook evenly, but not so small that they cook too quickly and become dry and tough.
Pork Pinchos is a great recipe for family gatherings, a tailgate recipe to grill on your tailgate grill, and yes, because you are cutting a larger cut of meat into small chunks, it is inexpensive and yields a lot of portions.
8. Smoked Mac and Cheese
Smoked Mac and Cheese is a tasty recipe you can make on your grill or smoker. If you own a pellet grill, the wood-fire flavor from the pellets will infuse the macaroni and cheese with a smoky taste. I have also made just cheese with the same amazing results.
Mac and cheese is easy to make, and you don’t have to spend hours making a recipe. One of my favorite tricks is to grab a Bob’s Evans Mac and Cheese tray from my local grocery store. I pour the mac and cheese onto a cast iron skillet and put it in the smoker for about 30 minutes.
Chicken thighs are easy to grill and, with the right seasoning, can be a delicious main dish. Another reason I like grilling chicken thighs is that, besides being budget friendly you can make other dishes or the chicken thighs can be the main dish.
I often make chicken thigh tacos, salads, and pico.
Great Tips for grilling on the cheap and keeping it budget friendly
Buy in Bulk
Before you go and buy ingredients for your next grilled meal take some time and do some research to find stores where you can buy in bulk.
When you go to the store, try to buy large cuts of meat that you can slice and dice into smaller cuts and create lots of smaller dishes. Buying in bulk is a great way to save money, especially when buying meat.
Buy unseasoned, untrimmed primal cuts.
We all like our ham sliced, our ribs trimmed, our chicken spatchcocked, and our briskets cut. However, you can save money at the grocery store by buying primal cuts and then trimming them to what you want to grill. For example, you can buy a whole brisket and cut it down into slices, burn ends, or take a pork sirloin and cut it into small chunks.
This is the same case with pork belly and bacon. You can get a full slab of pork belly, which is a primal cut, and take it home and slice it into bacon using a meat slicer. A large cut of pork belly can be turned into a lot of different smoked masterpieces.
Add vegetables and side dishes
Vegetables can be more price friendly than other proteins. Side dishes like grilled sweet potatoes, grilled corn, sweet corn, and even asparagus can help increase portion sizes while keeping cooking costs low. So don’t be afraid to add some greens to those plates.
Complement main dishes with desserts
Desserts can be a good way to justify smaller serving portions. Everyone wants to have space to eat dessert.
One Last Word
We all want to find ways of cooking and grilling for our family while staying within our budgets. I hope these inexpensive grilling ideas help you for your next cookout. The key here is to get creative, get out of your comfort zone and find ways to make less with more.
I personally like to buy meat in bulk and then slice and dice it at home to make smaller dishes and get creative. Things like ground beef can be turned into many different dishes; chicken is also very versatile; and vegetables can help fill a plate.
I hope you enjoyed this guide and take some of these ideas and turn them into your own. The important part is to try and learn something new.