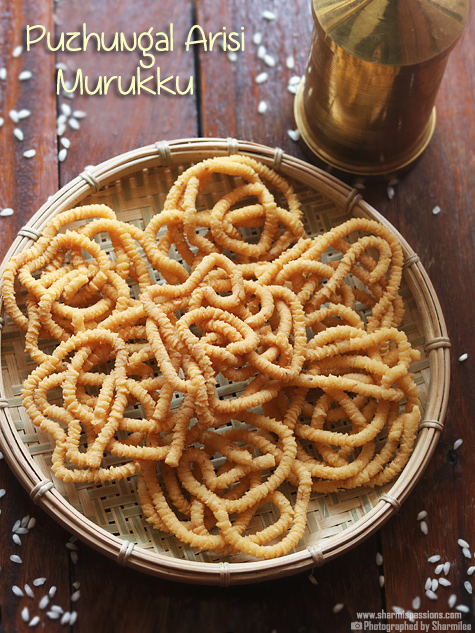
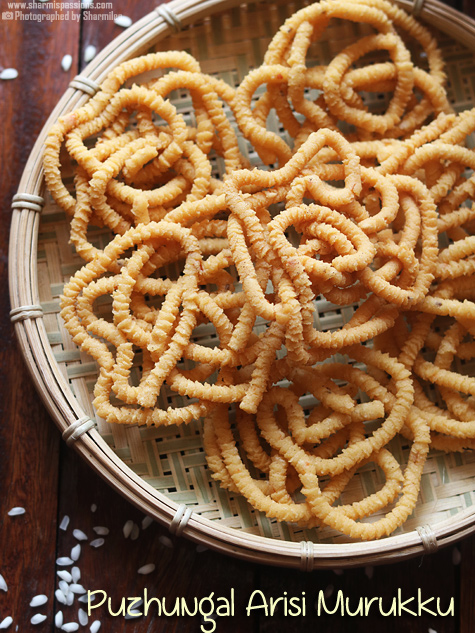
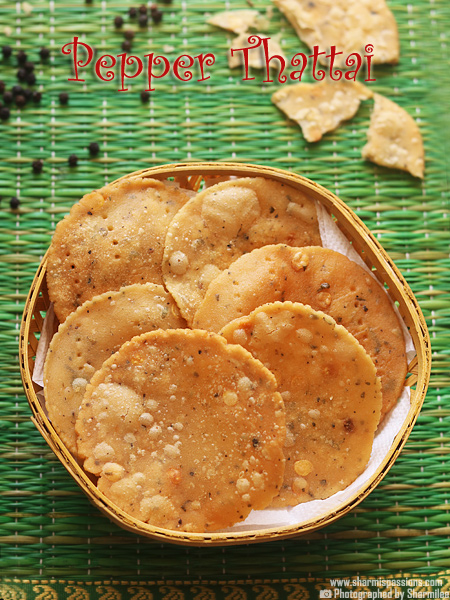
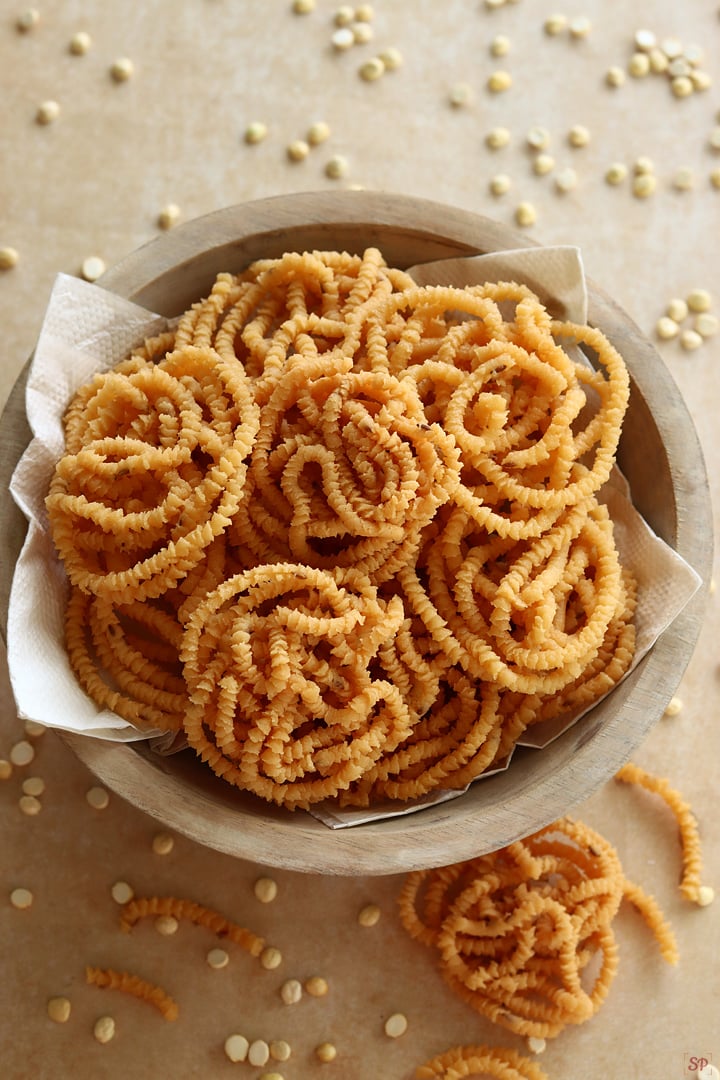
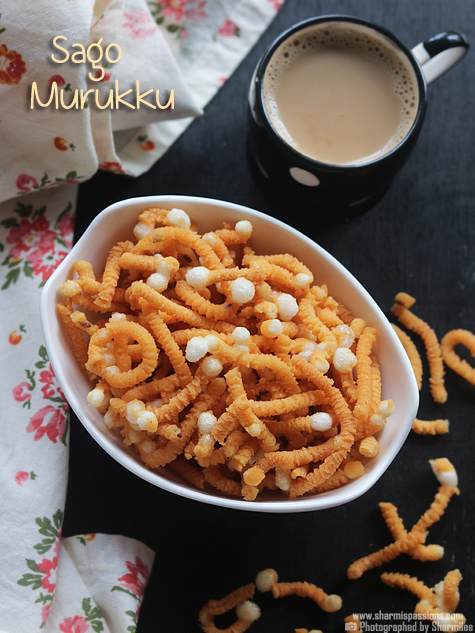
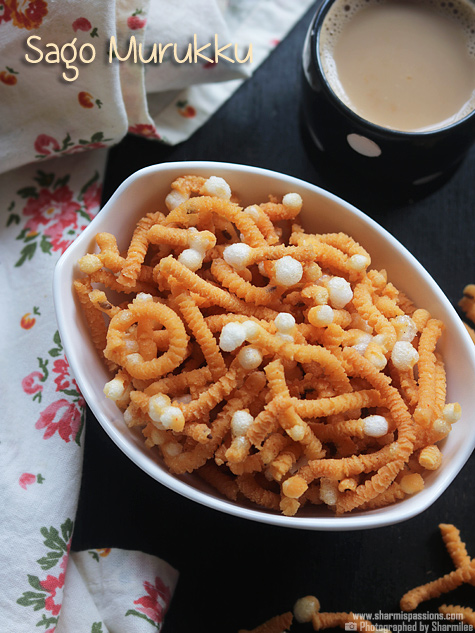
Sago Murukku | Javvarisi Murukku
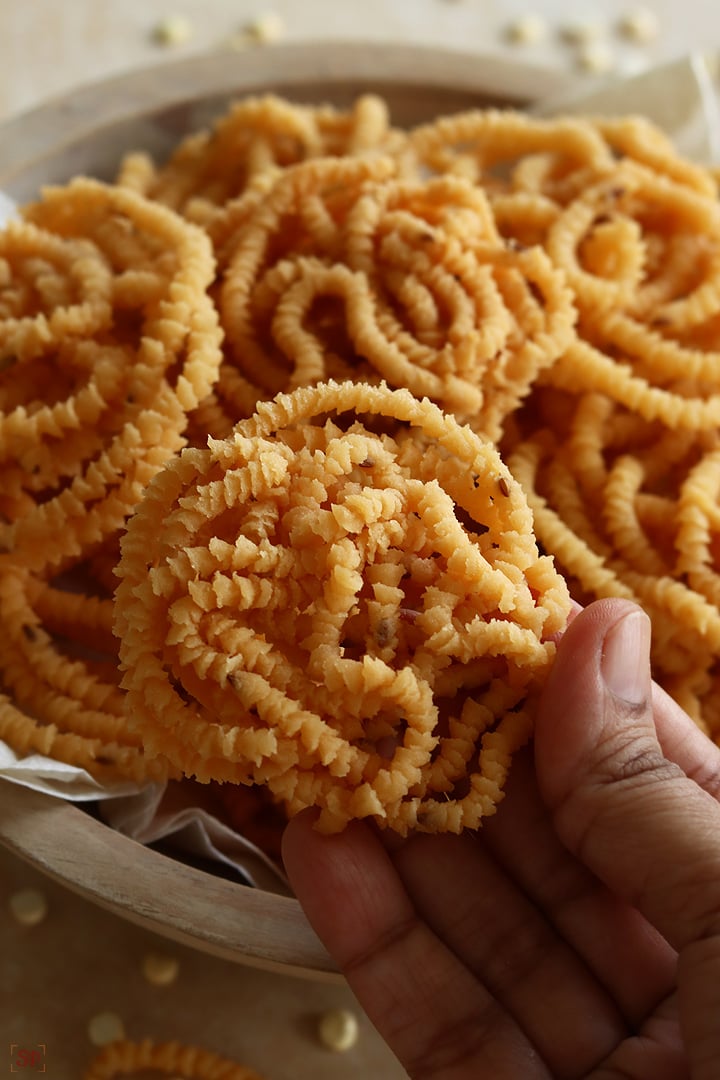
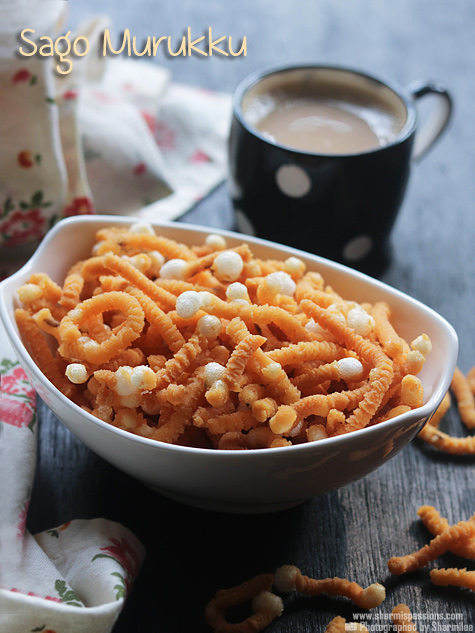
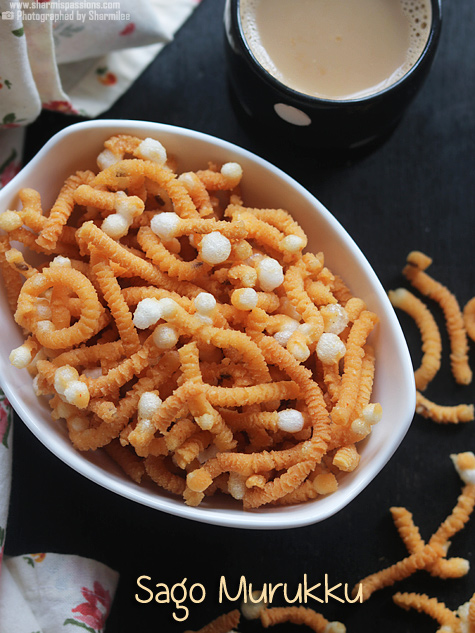
Sago Murukku is a crispy snack made with rice flour and sago pearls as main ingredients. It has that perfect crunch with mild spicy flavor which makes it a great tea time snack in the evening. The texture is bit different from regular murukku because of the soaked sago, it gives nice bubbly look and extra crisp feel when you bite.
This murukku is very popular during festival time but also a nice choice for casual snacking anytime. The method is quite simple but the soaking of sago should be done properly else it may burst while frying. Once fried, the murukku turns golden and crunchy with that little taste of cumin and butter which make it so addictive.
[feast_advanced_jump_to]About Sago Murukku
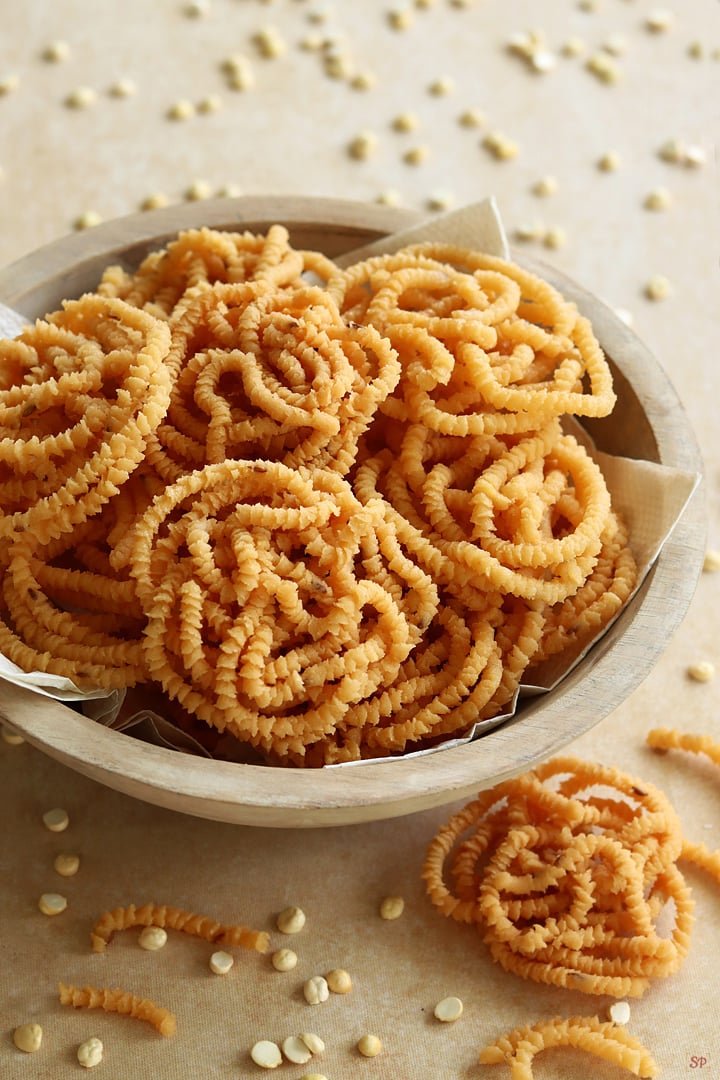
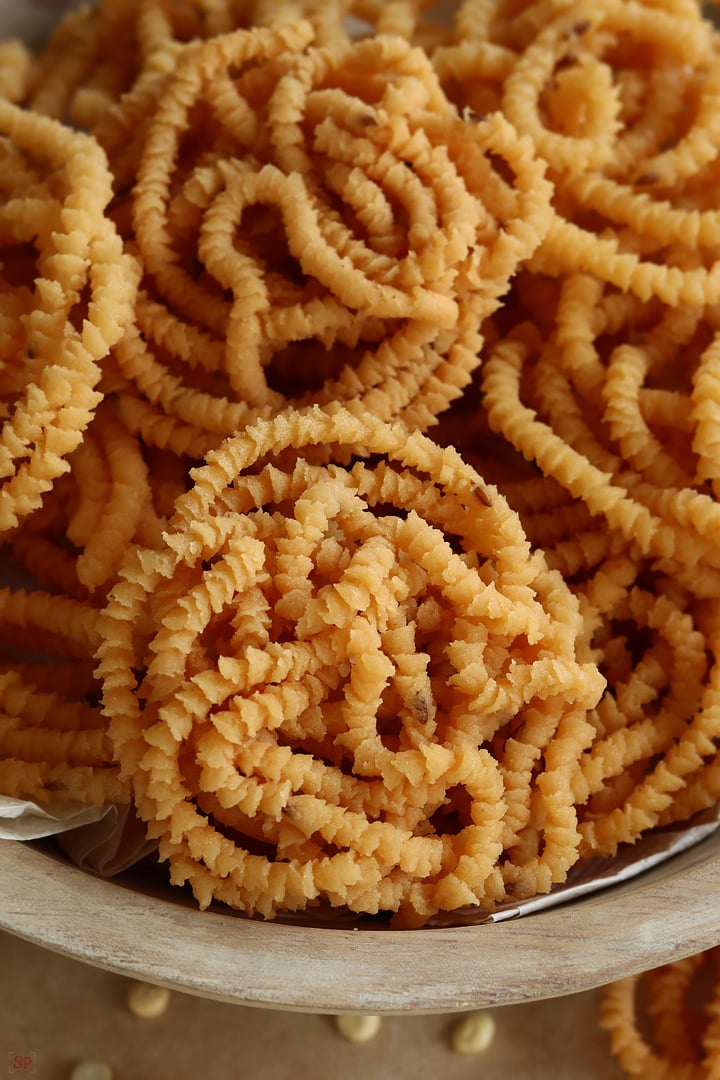
Sago Murukku, also called Javvarisi Murukku, is one interesting twist to the usual South Indian murukku recipe. Instead of using only rice flour, this version adds soaked sago pearls which give lovely crisp texture and airy bubbles on top when fried. The look itself is tempting and taste is even more.
The recipe mainly uses rice flour, sago, curd, and butter. The curd and soaked sago helps in binding the dough easily and adds slight tangy flavor too. Once deep-fried in medium hot oil, the murukku puffs up slightly, gets crunchy on the outside and remains light inside.
This version is perfect for those who are bored of making same old thenkuzhal or butter murukku every time. It is something new and flavorful with nice crispness. Even though soaking part takes little time, the actual mixing and frying are very simple and quick to do.
At my home, I usually make this in small batches during festive or when guests come. It stays good for many days and goes well with tea, coffee or even with rasam rice. Kids also love it because of its crunch and mild spicy taste.
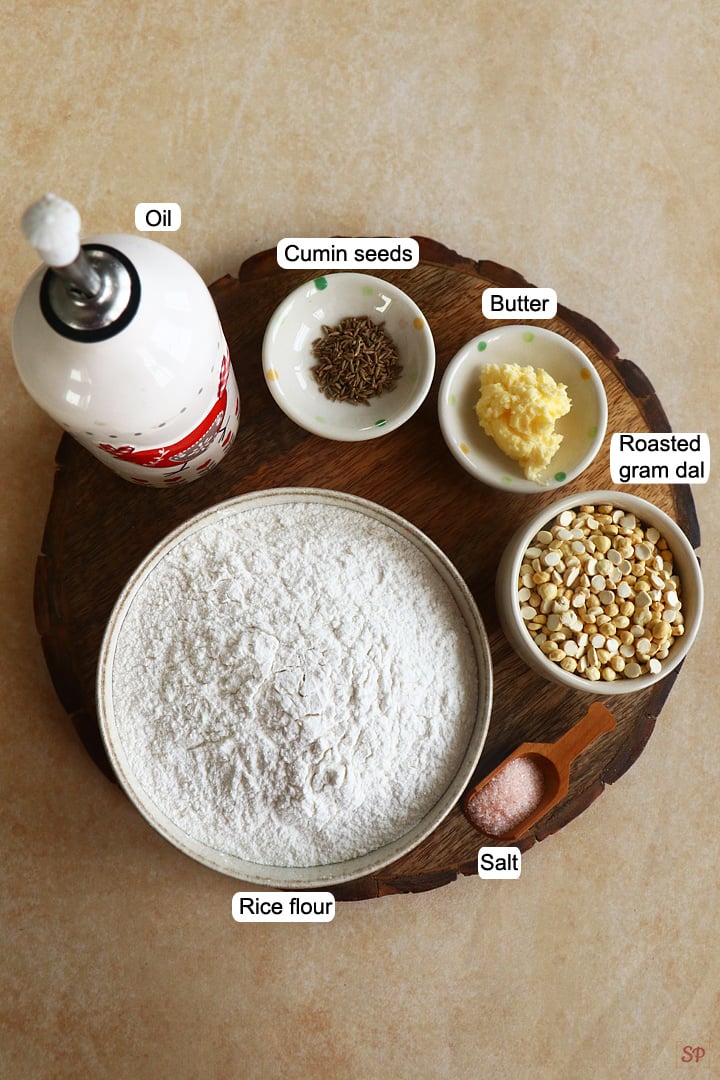
Sago Murukku Ingredients
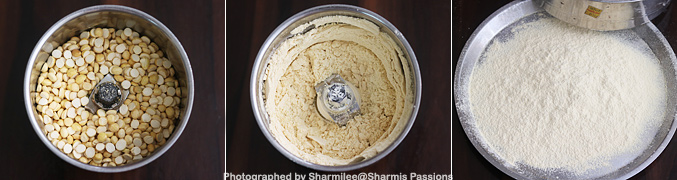
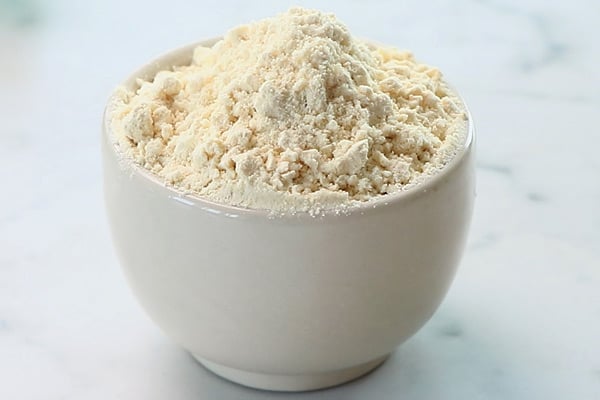
- Rice flour - I add homemade flour as it gives the best crisp texture. You can use store bought also, but make sure it is fine and smooth.
- Sago (Javvarisi) - This is the main ingredient that gives the murukku its bubbly look and light crunchy feel. I always soak it well in curd, else it may pop while frying. The soaking part is really important.
- Curd - I have used thick curd to soak the sago, it helps to soften it and gives mild tang taste too. If the curd is very thick, I add little water or sometimes use buttermilk instead.
- Butter - I add a small piece of butter to give rich flavor and soft crispness. Too much butter will make dough break while pressing, so I always add carefully.
- Red chilli powder - I used mild red chilli powder just for light spice and color. You can add more if you like little extra heat.
- Cumin seeds - I like adding cumin seeds as it gives nice aroma and also helps for easy digestion. Sometimes I mix few sesame seeds also for change in flavor.
- Hing (asafoetida) - I always add one small pinch of hing for flavor and also to avoid gas trouble after eating fried snacks. It adds nice subtle aroma.
- Oil - I used refined oil for deep frying, it helps to makes the murukku more crispy and tasty. You can also use groundnut oil for better taste.
Similar Recipes
How to make Sago Murukku Step by Step
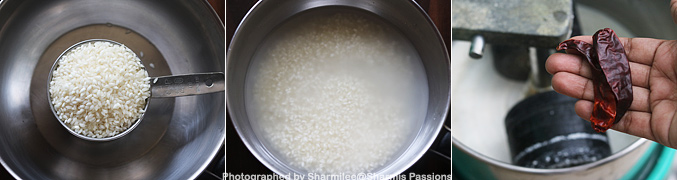
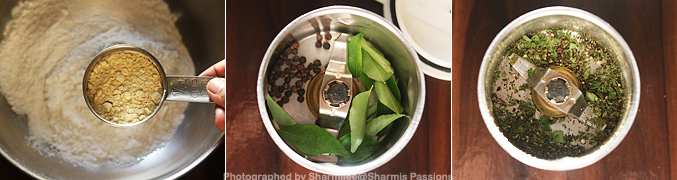
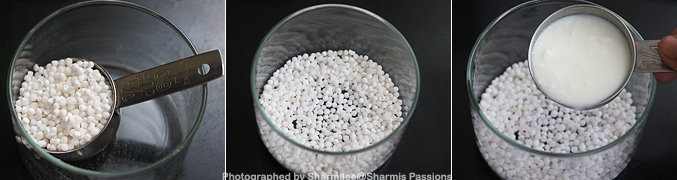
1.Measure and soak sago in curd at least for 6 hours. I soaked it overnight
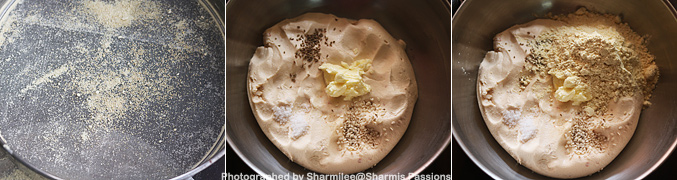
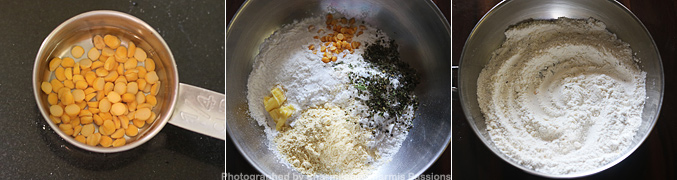
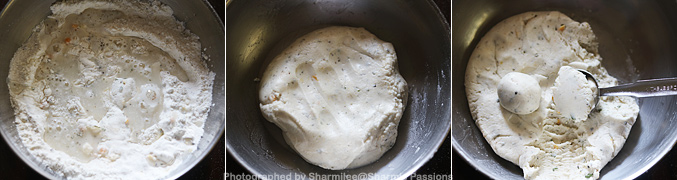
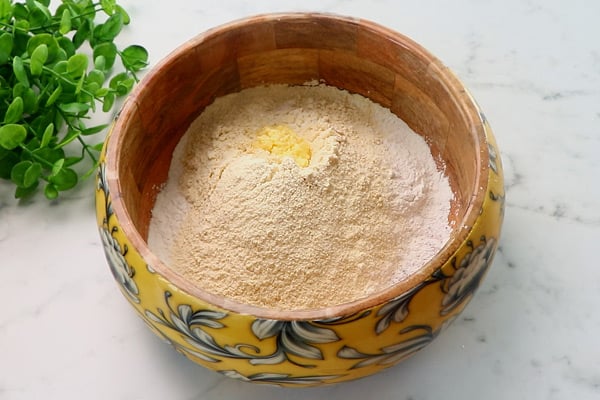
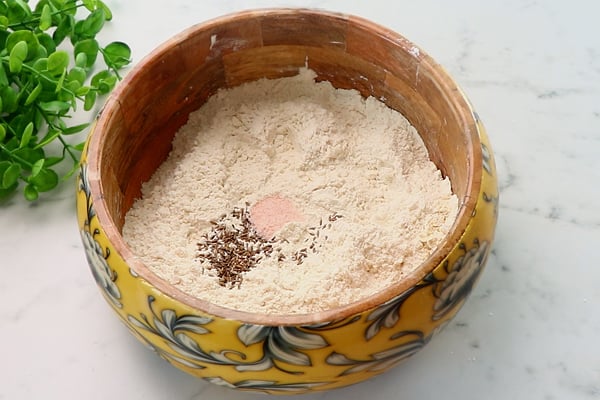
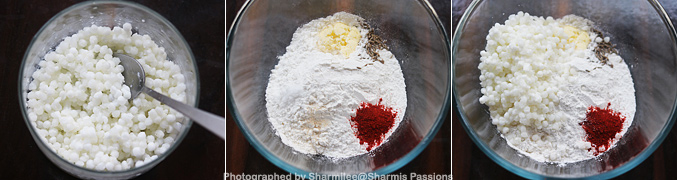
2.Morning when you see the sago pearls will be soft. Now in a mixing bowl - add rice flour, red chili powder, sago, jeera, butter, hing.
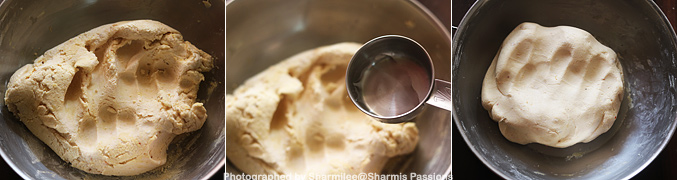
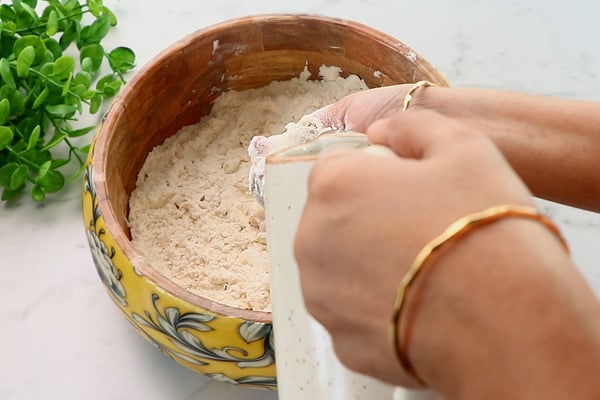
3.Mix it well with your hands, then add water little by little. Gather together to form a non sticky dough like this.
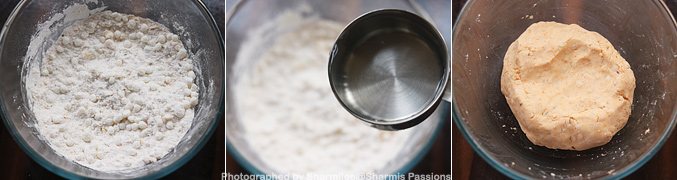
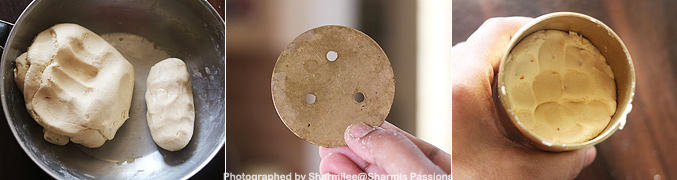
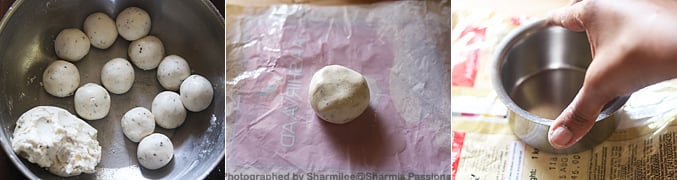
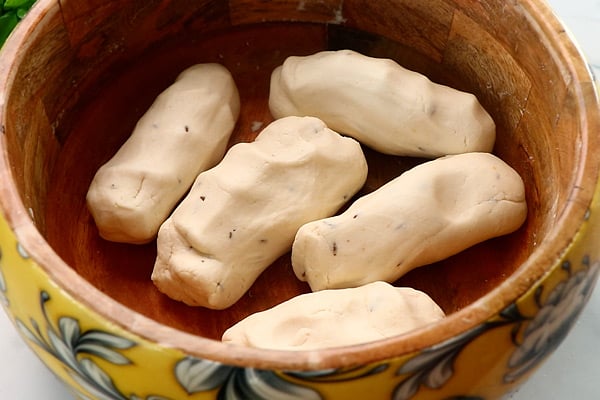
4.Shape it into a log and keep it ready. Fix your thenkuzhal murukku mold.
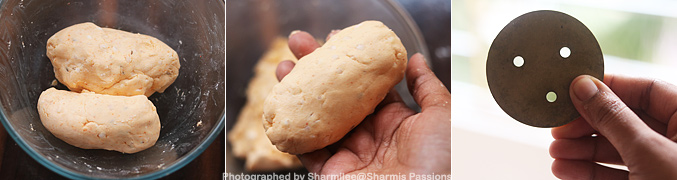
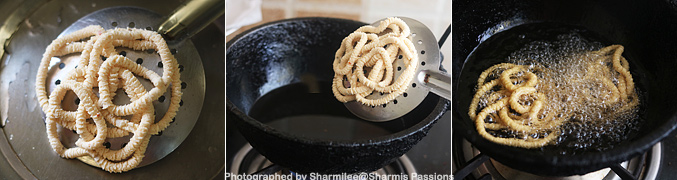
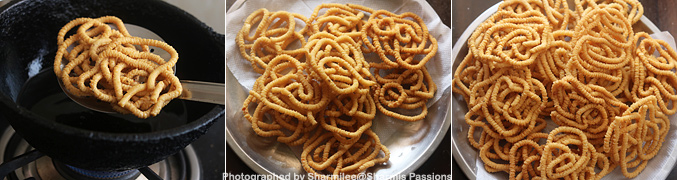
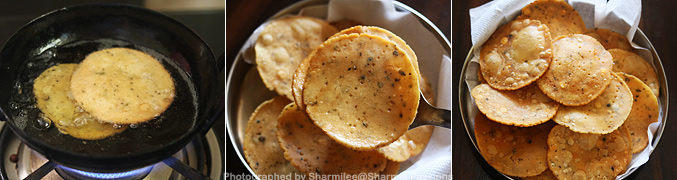
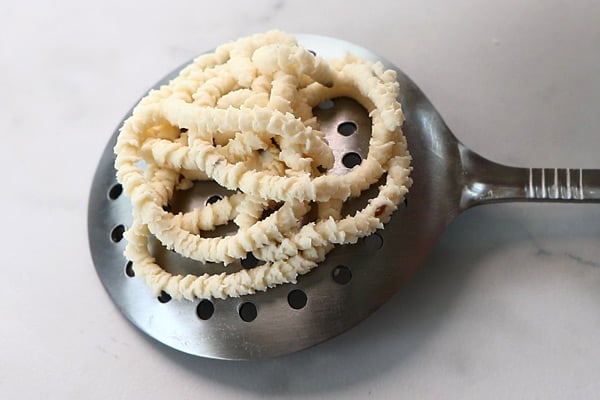
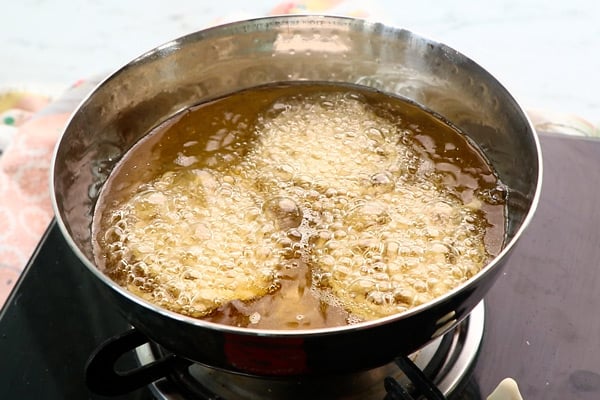
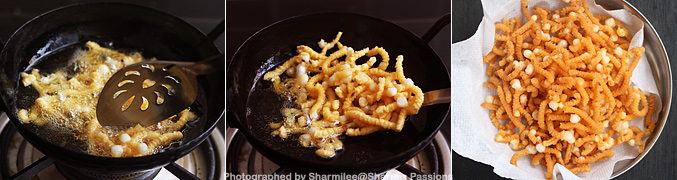
5.Now fill the murukku press with the dough, in parallel heat oil. When oil is hot, drop a pinch of batter to check it comes up immediately, then oil is at the correct temperature. Squeeze in a spread manner, do not crowd. Fry till golden and until shh sound ceases.
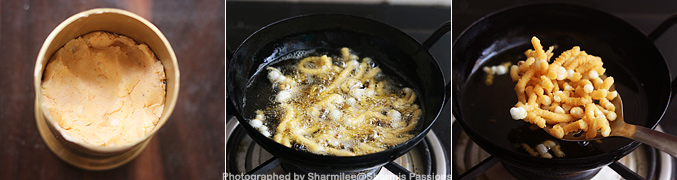
6.t will stick together just break it while frying. You can break it after frying. Drain in tissue paper. Once it cools down, break it and set aside.
Store in a dry jar.
Expert Tips
- Soaking sago- I always soak sago for minimum 6 hours or overnight. When I press it between fingers it should feel soft, else it may burst while frying.
- Dough consistency - The dough should be smooth and soft. If it feels dry, I sprinkle few drops of water and knead again till it becomes even.
- Oil temperature - I check the oil by dropping tiny piece of dough, it should come up slowly. If oil is too hot, murukku will turn brown fast and stay soft inside.
- Shaping method - Because of the sago, the dough will not come perfectly in circles. So i just press directly into oil to make uthiri murukku, it comes more crunchy this way.
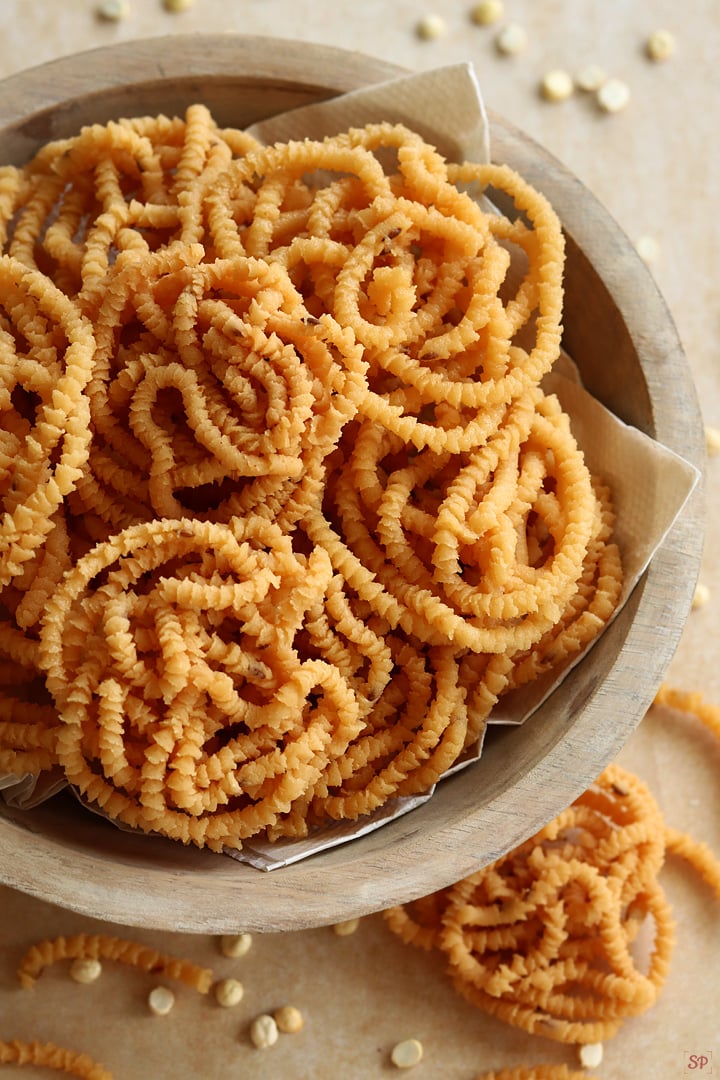
- Storage - I always cool the murukku completely before storing. I keep it in airtight tin box and it stays crisp for about 10 days easily.
Serving and Storage
Serve this Sago Murukku along with evening tea or filter coffee as a light crunchy snack. It is also a nice addition to your festive snacks box to share with friends and family. Once cooled completely, transfer to clean airtight container or steel box. If kept away from moisture, it stays fresh and crispy up to 10-12 days easily.
FAQS
1.Can I skip curd and use only water?
Yes, but curd helps to soften the sago and gives slight flavor. Only water may make the murukku little hard in texture.
2.My sago is popping while frying, what to do?
That happens when sago is not soaked enough. Soak it for more hours till it turns soft when pressed.
3.Can I make in air fryer?
No, it will not give same texture as deep frying, it gives best crisp and taste for this murukku.
4.Can I use ghee?
You can use ghee also, but butter gives a lighter and flakier result with nice golden color.
5.Why my murukku is breaking while pressing?
It means the dough is too dry. Sprinkle little water, knead again till soft and then press gently.
If you have any more questions about this Sago Murukku Recipe do mail me at sharmispassions@gmail.com. In addition, follow me on Instagram, Facebook, Pinterest ,Youtube and Twitter .
Tried this Sago Murukku Recipe? Do let me know how you liked it. Also tag us on Instagram @sharmispassions and hash tag it on #sharmispassions.
📖 Recipe Card

Sago Murukku | Javvarisi Murukku
Ingredients
- 1 cup rice flour
- ⅓ cup sago
- ¼ cup curd
- ¾ tablespoon butter
- ½ teaspoon red chilli powder
- ½ teaspoon cumin seeds
- a tiny pinch hing
- salt to taste
- oil to deep fry
Instructions
- Measure and soak sago in curd at least for 6 hrs. I soaked it overnight. Morning when you see the sago pearls will be soft.
- Now in a mixing bowl - add rice flour, red chilli powder, sago, jeera, butter, hing.
- Mix it well with your hands, then add water little by little. Gather together to form a non sticky dough.
- Shape it into a log and keep it ready.
- Fix your thenkuzhal murukku mould and fill the murukku press with the dough.
- Now, in parallel heat oil. When oil is hot, drop a pinch of batter to check it comes up immediately, then oil is at the correct temperature. Squeeze in a spreaded manner, do not crowd.
- Fry till golden and until shh sound ceases. It will stick together just break it while frying. You can break it after frying.
- Drain in tissue paper. Once it cools down, break it and set aside.
- Serve Sago Murukku with tea!
Notes
- Do not overcook, it should golden.
- As sago is more in this recipe, I recommend to make it as uthiri murukku as I don't think we can make circles with this recipe.
- Soaking for more hours is required else sago may pop out so be at a safer distance while frying.
- When you squeeze the dough will stick to each other, when it becomes crispy try to break with the ladle else after frying you can break it.
- Regulate flame and cook, do not cook in high flame.
- I used my thenkuzhal press to get this shape.
- If you are making in larger quantity keep the dough closed to avoid from drying.
If the dough is too dry sprinkle little water.
Nutrition
The post Sago Murukku | Javvarisi Murukku appeared first on Sharmis Passions.