Cooking outdoors has become increasingly popular in recent years, and it’s no surprise why. Cooking outdoors allows you to enjoy the fresh air, sunshine, and company of friends and family while preparing delicious meals. Oh, and let’s not forget flavor!
Two of the most popular cooking options for outdoor cooking are griddles and grills. In this post, I will compare these two cooking appliances, and we’ll take a look at the pros and cons of both cooking methods and help you determine which one is the best for you.
Griddle Grill
Griddles are flat, solid, hot plate-like surfaces that sit on top of a stove, grill, or purpose-built cooker. The traditional outdoor griddle is typically a gas grill with a flat metal cooking surface, or “griddle.” In simple terms, take a gas grill, eliminate the grates, and add a metal plate on top of the burners.
They are typically made from cast iron or stainless steel and are great for cooking pancakes, eggs, bacon, and other breakfast foods.
Griddles are also great for cooking burgers, steaks, and chicken breasts. With a griddle, you can cook large amounts of food at once, which makes it great for feeding a crowd.
Some Quick Facts about griddles:
These facts highlight just some of the benefits and versatility of griddles as a cooking tool. Whether you’re a professional chef or a home cook, a griddle can be a valuable addition to your cooking arsenal.
Cast iron griddles are often considered to be very efficient cookers because they heat evenly, are durable, and can be seasoned to enhance their non-stick qualities.
Griddles are great for cooking small size, soft and liquid foods.
Griddles are great for cooking breakfast foods, such as pancakes, eggs, and bacon, but they can also be used for cooking a variety of other foods, such as grilled sandwiches, stir-fry, and even pizzas.
Griddles are often designed with grease traps to collect excess fat and oils, but do not let as much food “juices” out as grill grates.
Griddles come in a range of sizes, from small single-serving griddles to large, commercial-sized griddles that can accommodate multiple food items at once.
Griddles can be seasoned to create a non-stick surface, which makes cooking and cleaning a breeze.
Griddles are often easier to clean than traditional grills, as they have a flat surface and are typically made from non-porous materials like cast iron or stainless steel.
Griddle Pros and Cons
Pros:
Large Cooking Surface: Griddles have a large cooking surface, which makes them great for cooking large amounts of food at once.
Even Heating: Griddles heat evenly, which means that your food will cook evenly, without any hot spots.
Versatile Cooking: Griddles can be used to cook a wide variety of foods, from breakfast foods to steaks and burgers.
Easy to Clean: Griddles are easy to clean because they are flat and smooth. Simply wipe them down with a damp cloth after cooking.
Cons:
Expensive: Griddles can be expensive, especially those made from high-quality materials such as cast iron or stainless steel.
Heavy: Large griddles are heavy, which makes them difficult to move around.
Limited Cooking Options: Griddles are limited in the types of cooking they can do. They can’t be used for roasting or smoking meats, for example.
Griddles do not create the “convection heating” effects most grills can do to cook large cuts of meat.
Can’t smoke meats.
BBQ Grills ( charcoal grill, gas, and pellet grill )
Grills are cooking devices that use an open flame, charcoal, propane, or wood pellets to cook food. They are typically made from stainless steel, cast iron, or aluminum and come in a variety of sizes and shapes. Grills are great for cooking burgers, steaks, chicken, and large meats, as well as vegetables and fruits.
With the right skills and equipment, even an inexpensive gas grill can cook just about anything you can think of.
Some Quick Facts About Grills:
These facts highlight some of the benefits and versatility of grills as cooking tool. Whether you’re a seasoned griller or just starting out, a grill can be a valuable tool for creating delicious, flame-grilled meals and smoke meats
Grills come in a range of sizes, from small portable grills to large, permanent outdoor grilling stations.
Grills can be fueled by gas, charcoal, electricity and pellets.
Charcoal grills are often considered the best for imparting that signature smoky flavor to food.
Gas grills are convenient and easy to start, but can be more expensive in the long run due to the cost of propane.
Electric grills are great for indoor cooking, but may not be as powerful as gas or charcoal grills.
Grills come in a variety of materials, including stainless steel, cast iron, and porcelain-coated steel.
Grills typically have a grate or cooking surface that allows grease and oils to drain away from food, preventing flare-ups and keeping food healthy.
Grills often have adjustable cooking grates and better temperature controls to cook food to perfection.
Grills typically require a higher degree of maintenance than griddles, as they need to be cleaned regularly to prevent food from sticking and to remove grease buildup.
Grill Pros and Cons
Pros:
Versatile Cooking: Grills can be used to cook a wide variety of foods, from meats and vegetables to fruits and bread.
Flame Grilling: Grilling over an open flame adds flavor to your food that can’t be achieved with a griddle.
Affordable: Grills are often more affordable than griddles, especially those made from more basic materials such as aluminum and other composites.
Portable: Small two burner grills are portable, which makes them great for camping and other outdoor activities.
Cons:
Limited Cooking Surface: Some grills have a limited cooking surface, which means that you may need to cook your food in batches.
Uneven Heating: Grills can heat unevenly, which can result in some food cooking faster than others.
Requires Constant Attention: Grilling over an open flame requires constant attention, as food can easily burn if not tended to properly.
Some grills can be expensive.
Which is Better for Cooking Outdoors? A grill or a griddle
The answer to this question depends on your cooking needs and preferences. If you are looking for a versatile cooking option that can be used to cook a wide variety of foods but do not have the need to smoke or roast large cuts of meat, a griddle may be the better option for you.
However, if you are looking for that signature flame-grilled flavor and enjoy the art of grilling, a grill might be the way to go. Also consider a grill if you want to smoke meats or enjoy the flavors of charcoal or wood pellets.
Ultimately, it’s a matter of personal preference and what you’ll be using it for. Both griddles and grills have their pros and cons, but they can both be great options for cooking outdoors. If you’re looking to feed a large crowd and cook smaller-sized foods, a griddle might be the best option, while if you want to enjoy a more traditional grilling experience, a grill might be the better choice.
If you’re still not sure which option is right for you, consider purchasing a combination griddle/grill. These versatile cooking devices allow you to enjoy the best of both worlds, giving you the option to cook with a griddle or a grill, depending on what you’re in the mood for.
Key Takeaways
In conclusion, griddles and grills both have their advantages and disadvantages, but both are great options for outdoor cooking. Consider your personal cooking needs and preferences, and choose the option that works best for you. Whether you choose a griddle, a grill, or a combination of the two, you’re sure to enjoy cooking outdoors and creating delicious meals for yourself and your loved ones.
We all love our pellet grills; they are easy to use and produce amazing wood-fired flavor. However, there is one component of these grills that gets particularly dirty: the grease tray, also known as the drip pan.
Neglecting to clean the grease tray can cause numerous problems and damage your pellet grill. I have read about and seen firsthand people’s grills catching fire, which is all due to the grease tray being covered in old grease. Also, a dirty drip pan will ruin food and flavor since when old, dirty grease heats up, it boils and splatters all over your nice cut of steak and releases dirty smoke.
This is easy to avoid by cleaning the grease tray, and I will show you how in nine simple steps.
Follow these steps to clean your pellet grill’s drip tray
Step 1: Remove all the cooking grates from the grill.
Step 2: Warm up the grill to 350 to 375 degrees for 30 minutes.
Step 3: Using a paint scraper, carefully scrape off as much grease and gunk as possible while the tray is still hot. Some of it will be “caked up” and will crack off easily; for others, you will have to use some elbow grease and really work the scraper.
Step 4: Let the drip pan (or grease tray, whatever makes you happy) cool down and remove it from the grill.
This thing will still be messy, so put the tray on a batch of grass that you don’t mind turning brown because it is about to go down.
Step 5: Make a mix of hot water and dish soap. I do not like to use harsh chemicals when cleaning my grills, but soap detergents meant to clean kitchenware work great as degreasers. I mean, that’s how you clean grease plates.
Step 6: Pour the hot water-soap mixture into the drip tray and scrape it again. You can also use a non-wire sponge to deep clean the tray.
Step 7: Rinse thoroughly and dry the pan.
Step 8: Spray the grease tray with cooking oil to prevent rust. ( Light coat )
Step 9: Put everything back in the grill, turn on the grill, and set the temperature no higher than 300 degrees to burn off any excess oil and “cure” some of the oil onto the drip pan.
One Last Word
Cleaning the grease pan on the grill is easier than you think, but it is a time-consuming task. I always recommend covering the tray with aluminum foil before each cook and discarding the used foil.
The foil acts as a shield and grease collector, often eliminating the need to constantly clean the drip pan.
If you’re new to grilling, here are a few tips and hacks to get you started on the right path and enjoy your grill more.
There are numerous things you can do and accessories you can purchase to make your life easier around the grill, but there are a few fundamentals you should learn and master early on to keep your foundation strong and to improve and enjoy your time around the grill.
In other words, these are your ABCs.
1. Keep your grill clean to prevent flare-ups
This might sound obvious, but lots of people, especially beginners, either don’t know how to clean their grills properly or just don’t do it. The fact is that grills, like any other kitchen cooking appliance, need to be kept clean.
This is not only for sanitary reasons but also to avoid flare-ups, dirty smoke, and grease fires. As old food gunk and grease accumulate around the bottom of the grill and on the grill grates, it becomes easier for these to catch fire. If you let old grease and grime accumulate, it’s just a matter of time before you have a little fireball, and I don’t mean the whiskey.
I’ve seen countless incidents where people neglected their grills and, poof, fireball! ( Great, now I got that PitBull song stuck in my head)
The best thing to do is to clean the grill grate after each use, while it’s hot and easier to clean, and do a deep cleaning of your grill at least monthly.
Flare ups might not be an issue when cooking at low temperature but throw some pork belly on those hot grates or try to sears stick on a grease, dirty steak and I assure you, fireball!
2. Use good tools to clean your grill
Following the topic of cleaning your grill, it is important to choose and use the right tools to clean your grill. People often go to a local hardware store and grab the first wire brush or the cheapest brush, and this is often a mistake.
Not all grill brushes are made of or constructed using the same materials. The bristles of some brushes are made of stainless steel, others of brass, and even of plastic.
There are also different types of brushes too. Our article on brushes gets into more detail on the different kinds and what to look for, but here is the skinny.
You don’t want to use hard brushes with steel bristles on porcelain coated grates. The brush will ruin the coating, and the grates will rust. Also, you want to be careful with those bristle brushes. The bristles are like tiny little needles that can come loose and end up on your food.
I like to use cleaning stones and rags to clean my grill grates. Yeap, I’m ol’ school and also like my food without metal. Sure, it is more work, but I know it is safer and more natural.
You can make aluminum foil balls and use a pair of tongs to clean your grill grates. Unless you let the grates get extremely dirty, there isn’t much need to use a hard brush.
3. Preheat your grill to the desired temperature before adding food.
This is one tip that, if followed, can make a world of difference. A properly heated grill will cook food evenly. But also, when you preheat your grill, you burn off anything you don’t want on your food. like old food residue.
4. Use a meat thermometer to ensure your food is cooked to the proper temperature
Yeah, we all want to be the next Bobby Flay and cook awesome food, but here’s the scoop: you are not Bobby Flay. So until then, use years of science and technology to your advantage and use a grill thermometer. I’m telling you, it will become your best friend.
5. If you don’t have charcoal igniters, use paper towels soaked in oil instead
It happens a lot that you are about to light your charcoal grill and, boom, you run out of those little igniters. Using igniters is a fast and easy way to start charcoal, but there is another way. If you run out of eggs, go to your pantry and grab some paper towels, a small bowl, and some vegetable oil.
Make some small paper towel balls with a small tail, just like the shape of a Hershey chocolate, but slightly smaller. Soak the bottoms of the little balls in oil, light the little tail, and let it rip.
6. Use a two-zone cooking method for thicker cuts of meat to ensure they cook evenly
This is a very easy thing to do and a simple technique, but many do not use it. Creating a two-zone cooking environment in a grill’s cooking chamber consists of setting the heat source on one side of the cooking chamber and creating a hotter heat zone on one side than the other.
Light a charcoal grill, for example, and place the coals on one side of the grill. This will result in both a hot and a warm zone.To achieve the same effect on a gas grill, use only one burner on one side of the grill.
The purpose of this technique is to create two cooking zones: a very hot zone and a cooler zone.
If you want to cook food slowly and evenly, this is very helpful. Use the cooler zone to cook, and food will cook slower, allowing it to reach temperatures more evenly.
The two-zone cooking system is also very helpful when grilling steaks. You can use the high temperature zone to sear a steak and then move to the cooler zone to finish cooking.
Having two cooking zones also helps with flare-ups. If you are grilling fatty meats like pork belly, the fat can easily spark up flare ups. You can move the meat away from the fire and to the cooler cooking zone until the fire settles.
7. Pick your fuel wisely
Ok, so this is important. If you own or are thinking about purchasing a charcoal grill, make sure you buy premium charcoal. It will last longer, burn cleaner, and your food will taste better. Our article on charcoal goes into detail about the different brands putting out good stuff.
If you own a pellet grill, do yourself a favor and buy good pellets. With both charcoal and pellets, it is worth paying a bit more for the good stuff.
8. Let the meat rest for a few minutes before slicing or serving
I see a lot of people take a piece of meat from their grills, throw it on a plate, and slice it right in half. This is actually a rookie mistake. You want to let the meat rest. As meat cooks and heats up, its juices will rise, and some of them will evaporate, but if you let the meat rest, portions of those juices will settle back into the meat for juiced meats.
9. Season Your Meat
If you are new to BBQ and Grilling, you will make one rookie mistake right away, not seasoning meats enough. When you grill or smoke meats, you will be cooking at higher temperatures, and there isn’t a pot holding all the juices and seasonings.
Don’t be shy; season the food well and grab good rubs to season your meat.
Last word
These are basic tips, but they are fundamentally important to learn and master. Take some time to go over these tips, apply them, and learn them, and your life around the grill will be a bit easier.
If you are thinking about getting started in BBQ and grilling, or if you are considering jumping into this world, we have a few pointers that can help you carve the path to an amazing journey.
Grilling and BBQ are two distinct culinary arts, but both involve and require many of the same techniques, skills, and equipment. It is a hobby for some, a passion for most, and a business for others.
Regardless of what it might mean to you, if you are thinking about starting in BBQ or grilling, there are a few things you should think about, and no, I’m not going to talk you out of it. The fact is that BBQ can be an amazing pastime, and you can learn amazing skills.
Top that with being able to cook amazing food for the people you love and cherish, and we have a win-win situation. BBQ and grilling can be a hobby, but there are also strong communities you can join and be part of.
Advice for those wanting or getting started in BBQ and Grilling
The first piece of advice I can give you if you want to start grilling or smoking BBQ is to try it. This is a very rewarding pastime, and once you learn a few things, you can cook amazing tasty food for your friends and family. Again, very rewarding.
But this is also a skill. You will learn a lot and master many skills that you can then pass on to others, but you will also learn more about yourself.
Grilling and BBQ, lastly, take you outside, outdoors. To grill, you have to go outside, which is one of my favorite things about this hobby. You have no choice but to go outside, breathe fresh air, and enjoy nature while cooking something amazing, not bad.
BBQ and Grilling
Sometimes people use the words “BBQ” and “grilling” together to refer to cooking food using an outdoor grill of some sort. You’ll hear things like, “I’m going to a BBQ party” or “Let’s cook the vegetables on the BBQ.”
Let’s define these terms. Understanding the differences between BBQ and grilling is your first step towards getting into this amazing pastime and culinary art.
First, let’s make sure we clearly explain that BBQ and grilling are two different cooking methods and styles, both involve using an outdoor grill of some type. I say “type” because within the grill category, you will find different kinds of grills that use different fuels.
Some grills are more beginner-friendly than others, but the point is that for grilling, you need a grill.
Also, grilling food is done at higher temperatures, usually in the 300-500 degree range, and sometimes higher if you are searing meats like steaks.
Second, you have BBQ. Traditional BBQ involves smoking or roasting meats for long periods of time at low temperatures using a BBQ smoker of some sort. BBQ smokers are also available with a variety of fuel types, including propane, pellets, and charcoal.
These smokers, in one form or another, use wood to infuse smoke flavor into the food, giving it that authentic BBQ smokey flavor.
So now you know that BBQ and grilling are not the same, and there are two main groups of cooking appliances for both grilling and BBQ.
Consider this
Below are a few things you should consider if you are thinking about getting started in the BBQ and grilling world, which can help you with choosing equipment, how to learn, and getting started.
Equipment
Looking and searching for equipment is one area where you will spend a lot of time. I mean a lot. When you start looking for grills and smokers, you will quickly realize how many options there are. But here is a simple way to narrow down your choices and find something that might work for you.
First, decide what type of fuel you feel comfortable using. In my beginner’s grill guide, I go over the different fuel types and their pros and cons. But in short, propane and pellets are the easiest grills to use, and charcoal can be the hardest.
Regarding flavor, charcoal grills remain the unbeatable choice, followed by pellet grills. The least flavor you will get will be from a propane grill.
One thing about charcoal grills is that yes, they can be hard to use, but once you master a charcoal grill, you can cook anything on them. So if you want a versatile grill, suck it up buttercup, look at charcoal grills.
If you like tech and gadgets, pellet grills give you all that in abundance but because these grills burn wood pellets for fuel, you get smoky flavor, just not as much as in a charcoal grill.
Cooking styles, Grilling, BBQ, Both
The second thing you should consider is which cooking style you want to adopt. If grilling is more your style and you just want to cook simple recipes, a small propane grill might be enough. If you want to grill but also want flavor, a pellet grill might be a better choice.
However, if you want to get into cooking authentic BBQ, then a smoker will be a better choice. Smokers are designed to cook low and slow and infuse smoke flavor into foods. These appliances can work as grills, but most are designed to work at lower temperatures.
If you are interested in doing both grilling and smoking, know that any grill can be “tuned down” to cook at low temperatures. But some grill types can do this better than others.
Pellet grills work well as smokers not only because they burn wood, which adds flavor, but also because their digital temperature controllers are excellent at keeping temperatures low and steady.
The second-best choice are charcoal grills; as I mentioned before, these things can do it all, and as for flavor, well, they can’t be beat.
But if you are inclined to use grills like propane grills, you can get smoker boxes and even pellet tubes to still smoke delicious meats. Just don’t expect the flavor to be as strong as if you used a pellet or charcoal grill.
You First Equipment List
To get started in BBQ, there are a few things you will need. And no, you do not need to go out and spend thousands of dollars on high-end equipment. In fact, I have seen people win BBQ competitions using 300-dollar smokers; equipment will not replace skills.
First, you will need to choose a grill or a smoker. Again, here are a few articles we have published that can help you navigate and see options for beginners.
With us, of course. Start with our learning guides and explore hundreds of topics around BBQ and grilling. You can also learn from other pitmasters who have published amazing books for you to read and learn real techniques.
Tips
Here are a few tips that will help you learn and improve at BBQ and Grilling.
First, do you! I say this because you will find all kinds of so-called experts telling you the right ways to do something, and in some cases, they are wrong. Why? Because when it comes to foods, there are basics and foundations, but this is an art, and as such, everyone will have their own style.
There is not one way of smoking a brisket or a rack of ribs; there is well-cooked, good-tasting briskets and ribs; how you get there is irrelevant. If you go to a barbecue competition, you’ll see a few dozen people competing and cooking the same dishes, but not in the same way.
The best flavor is what you like. Not everyone likes the same things and flavors. Find your way and what you like, and focus on cooking foods well. Once you’ve mastered that, you can concentrate on flavor, but the most important thing is that you know how to cook something correctly.
Last Word
Getting started in BBQ and grilling can be very rewarding, and anyone can get started. It does take some time, practice, and patience. Getting the right gear is helpful but not a huge deal. Many of us started with tools that were later replaced by high-end gear.
In this article, we answer the question many of our readers have been asking. Yes, we read your emails, and based on popular demand, I will explain how much brisket you need per person, both when planning and measuring raw or cooked brisket.
There is a difference in weight between raw and cooked brisket. But don’t worry, I will cover both. It is important to keep in mind that brisket can lose 30 percent or more of its “water” weight after it is cooked.
I have cooked hundreds of pounds of brisket over the years, and I have experienced anywhere between 30 and 40 percent meat weight loss. I can also tell you that if you cook a mean brisket and plan for that, people can eat brisket like you won’t believe.
I will give recommendations for both raw brisket and pounds of cooked brisket so you can plan properly.
Let’s discuss brisket first
Brisket is a popular cut of meat that is often smoked low and slow to make it tender and juicy. Okay, let me clarify: brisket SHOULD be smoked low and slow to achieve a tender and juicy cut of meat. To me, that’s the only way, but that’s a conversation for another day.
This cut of beef is inherently tough and, unless cooked properly, can be a tough piece of meat. Brisket is carved from the lower breast muscles of a cow.
To be more precise, the brisket is cut from the breast section beneath the first five ribs behind the foreshank. This area sees a lot of exercise, which makes this muscle a very tough piece of meat with lots of connective tissue. Hence, it is often cooked low and slow.
However, brisket is so versatile that it can also be prepared as corned beef and used in stews, but it is most popular in BBQ dishes.
Briskets can be found at local stores and sold as a whole brisket, or you can also buy them as two cuts, where you can choose between the point and the flat. In the brisket, the point is the fatty portion of the brisket, and the flat is the leaner, thinner part of the brisket.
So, How much brisket per person?
To answer the question and explain how much brisket per person, you should account for one pound of raw brisket per adult and half a pound for kids. This is the recommended amount when calculating brisket per person.
This is how many pounds of raw brisket you should account for, and, though this seems like a large portion per person, remember that the brisket will shrink in size with trimming and will lose some of its weight as it cooks. In other words, a pound of uncooked packer brisket will be more like half a pound after cooking.
A more conservative serving specially in a more grumnet setting would be ½ lb of raw brisket per person.
But in a normal sitting, an average guest will eat half a pound of cooked brisket. Accounting for the weight loss due to trimming and moisture and fat content lost during cooking, on average the brisket will lose up to 50 percent of its raw weight, so 1 pound of raw meat will cook to half a pound of cooked meat. So, for example, a 12-pound brisket should feed 12 adults.
This is the amount of cooked brisket per person
You should account for about half a pound of cooked brisket per person. This is a good serving size for a big adult, but based on my experience, plan for a little more if you are cooking for a large event like a New Year’s party.
You will see that many BBQ places sell brisket by the pound. Relatively speaking, this is enough for two people. The average person will eat around half a pound of cooked flat-cut brisket and feel full. This amount can change per person but between a ½ -¾ pound per person is a good estimation.
Flat Cut Brisket
The flat cut is the larger portion of a packer brisket with a hefty fat cap. This side of the brisket is very common to find in stores and is the leaner side of the brisket. This is the side of the brisket that works well for a corned beef recipe.
As far as serving portions go, plan on around half a pound of cooked flat-cut brisket per person.
The Point Brisket Cut
The second cut from the beef brisket, known as the “point cut,” is a thicker piece of meat containing significantly more inner fat running throughout the cut. The point cut is not as easy to find in local food stores because it appears fatty and less appealing to most shoppers. However, it can be equally as flavorful as the flat cut and is great for smoking low and slow.
Raw Brisket Pound
Always keep in mind that raw brisket weighs more than cooked brisket. Therefore, when calculating how many adults need to be fed, keep this in mind. A pound of brisket will lose up to 50 percent of its weight as it sits for hours cooking in your grill.
Here is my take
Every time I smoke a brisket, people want seconds or some to take home, which I completely understand and love because, well, it tells me I did a great job and my brisket was on point.
I personally recommend upping your portions if you are entertaining or cooking for a large party. People tend to eat more, have a couple drinks, eat some more, and then take some home.
Conclusion
When estimating how much brisket per person to prepare and serve, two things have to be considered. First, get a total headcount of the people you will be cooking for. Keep in mind that brisket can lose up to 50% of its weight while it’s cooking, so you want to start your calculations using the raw brisket weight in pounds when you go to the store to select your brisket.
If you’re planning on cooking for ten people, can you estimate a 10 lb raw brisket, which means 1 lb per adult and half a pound of cooked brisket per adult.
My personal take, based on my years of experience and having cooked many briskets myself, don’t be afraid to add a bit more. Brisket is a delicious cut of meat, and it is easy to indulge in a plate full of this meat.
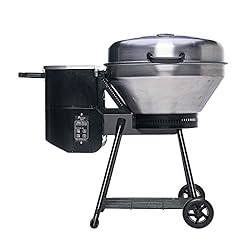
Many of people are looking for an affordable way to get a new, shiny pellet grill in our homes. There is a little-known secret called the Z Grills Blind Box. Z Grills’ blind box is a bundle deal and a quick way to get fired up and enjoy the flavor of a wood pellet grill.
Simply put, you pay a fixed price, hovering around the $399 to $499 mark for a “mystery box”, and you get a bundle that includes a pellet grill, a grill cover a “mission card” ( more on this later ), bucket grease liners, and a set of stickers.
The bottom line is that you get grill no matter what!
What is the buzz about the Blind Box
credit: Z Grills.com
The blind box is probably the least expensive way to get a pellet grill. This pellet grill blind bundle deal does change from time to time to include different grills and different accessories.
I have searched other brands to see if they have similar deals, but no one comes close. Sure, a pack of stickers and some grease lines don’t seem like a big deal, but getting a decent pellet grill for under 500 bucks is.
These are all large, capable grills, and you get a new product with a full three-year warranty.
We have written a few reviews about these grills, including the 700D4E and the 450B, which in our experience are the two most common sizes found in backyards. You could say that the 700 series is your midsize sedan and the 450 series is more of a compact car.
Both of these grills did great in our in-house tests; they maintained temperatures well and produced good smoke flavor.
However, the reason there is so much buzz about Z Grills pellet grill “mystery” box is because no other brand is offering this type of bundle with a standard-size grill and accessories. Just to give you an idea, a portable pellet grill can cost as much as this bundle.
What you get in Z Grills’ Blind Box
As mentioned before, you get a few accessories, but the main point here is that you get a pellet grill. Z Grills changes their deals often, but you can get a grill as big as 800 square inches (1000D3E)or the 550B2 with about 500 square inches of space. Depending on the season, Z grills might include a pellet bag or two!
These grills typically cost between $500 and $900, but with the box special pay under $400 bucks and you get a pellet grill.
You Bet on a pellet grill blind But, there is more
The blind box is like playing the grill lottery: you can get a good grill for a fraction of its original price. You never know what Z Grills pellet grill you’ll get, but the offer page states which models are at play. From there, you can also get more information on the pellet grill specifications, temperature range, sq inches, and even other customers’ reviews.
The Z Grills “secret” box is a great gift for those who love cooking food and love the taste of wood-fired flavor.
Besides a Pellet Grill what else you get in the blind box
You get mostly accessories; some months, Z Grills include pellets, but mostly you get accessories. Things like grease bucket lines, cleaning brushes, and cooking tools are often included.
credit: Z Grills.com
Z Grills is now offering a “mission card,” which is a clever way of getting you to join their social media and share your experiences with others, but at the end of your mission, you get a free grill cover!
Should you consider the Blind Box Special
You should. This price point is difficult to beat if you’re looking for a low-cost way to get a pellet grill. As I mentioned before, even budget-friendly smokers sometimes cost more, and with this specific deal, most times all you need is a pellet bag to complete your setup. The grills are also standard to full size and offer enough space to cook full meals, large meats and smoked meat, low and slow.
If you want more control over the features and what you get for your money, then this deal might not be for you. Because you have no idea what pellet grill you are getting and only a list of possible options is available, some might prefer to look at a broader selection of top pellet grills.
A few advantages of Z Grill;s blind box
You get a grill for under 500 bucks.
These grills are standard size grills, offer appropriate temperature output to cook a wide range of meals, and have enough space for cooking large meals.
These are new grills with a three-year warranty.
A pellet grill produces more smoke and better flavor than a gas grill, which is why they are so popular.
You get most of the accessories you need for grilling in one single box.
You get accessories for your grill and everything you need to start grilling.
A few disadvantages of Z grills blind box
The most obvious disadvantage is that you don’t know what grill you will get, but Z Grills lists the ones at play.
You might get a cheaper model. While you might not get Z Grills’ latest and greatest models, the models at play are still good, solid options.
Conclusion
Z Grills makes amazing grills, and this blind box deal is a great way for many to get their hands on perhaps your first grill or simply get one at a reasonable price.
There are many happy customers posting on social media as they receive their blind boxes, and everyone seems to be happy with the product. I’d say if you are wanting to get into the grilling world and don’t want to spend a fortune but want a decent grill, this is a great “hack” to land a new grill. If you want to be more selective, then see all the other grills offered by Z Grills and pick whichever you want.
More than ever, everyone is keeping a close eye on their wallets, and with that in mind, our team at BBQ Grill Academy put together these easy, low-cost, affordable grilling ideas to keep enjoying your grill and cook great meals for your friends and family on a dime.
This article will provide you with nine inexpensive recipes, cheap grilling ideas, and budget-friendly grilled main dishes you can try at home.
Cheap Budget Friendly grilling ideas and grilling recipes
1. Skinless chicken breasts
Chicken breasts are one of my favorite go-to foods when it’s time to find something fast and easy to make on the grill. The price of chicken is reasonable, and grilled chicken is a popular and staple BBQ dish.
Grilled chicken is a great protein source and, if seasoned with the right BBQ rubs and a little bit of a smoky flavor using wood chips, if you have a gas grill, grilled chicken can taste delicious.
If you own a pellet grill, cooking grilled chicken is as easy as turning on your pellet cooker, setting the temperature to about 350 degrees, and let it rip! The pellet grill will do the work, and the wood pellets will take care of the flavor.
I use a combination of salt and pepper to make my skinless chicken breast recipe, and occasionally I like to use a chicken dry rub BBQ dry rub to add more flavor. If you keep it simple, a salt and pepper grilled chicken breast goes well with a simple side like jasmine rice. If you went more on the BBQ side, things like coleslaw, a salad, grilled sweet potatoes, and grilled corn go well. Just be sure to cook the chicken to the right doneness level.
2. Grilled Chicken Wings
Let’s talk about chicken wings since the subject is chicken. One of the simplest meats to grill is chicken wings, which you can cook for a reasonable price. There are three things that I like about chicken wings. One, you can get more wings for your money, two, you can serve more people, and three, they are easier to prepare.
My recipe for chicken wings is simple. Grab a chicken rub or seasoning, throw the wings in a bowl, and coat the wings with the seasoning. After the chicken wings have reached the desired doneness, increase the grill’s heat to a higher temperature. Grill and carefully crisp the outer skin of the wings. Because they are finger food, chicken wings can be served on their own on occasion.
3. Grilled pulled pork ( or smoked )
Some people are intimidated by the thought of preparing pulled pork, but the reality is that it is simple and yields a substantial amount per person. I enjoy preparing pulled pork because it not only pairs well with numerous side dishes, but it also allows for a great deal of culinary creativity.
Furthermore, it is easier to be left with a large amount of pulled pork and have plenty of leftovers for sandwiches, snacks, and even the next main meal.
My recipe for pulled pork is simple. If I’m going for a more Texas-style flavor profile, I use a simple combination of salt and pepper. Put the pork butt or pork shoulder in the smoker at 250 degrees until done, then let it rest, shred with bear claws, and serve.
If I want something sweet or savory with a hint of spice, I choose a sweet pork rub heavy on brown sugar and proceed as described above.
Pull pork is a low-cost recipe because you can order a cheap pork shoulder online and, because you’re “shredding” the meat, you can serve a large number of people, making this a great tailgate recipe, Fourth of July dish, and great for Superbowl parties.
4. Pork Chops
Pork chops are one of my favorite things to cook for my family. Pork chops can be purchased in small packages or in larger packages for a better price. Pork chops have the advantage of being simple to prepare and quick to grill.
Pork chops are a tough cut of meat, so I like to use a spray bottle and spritz the pork chops with a little bit of apple juice to keep them moist, especially if grilling high and fast. Second, I like to use a simple salt and pepper one to one mix, but you can also use sweet seasonings to enhance that apple’s sweet flavor from the apple juice.
5. Grilled pizza
One of my favorite weekend activities is grilling pizza. Grilling pizza is easier than you think. You can purchase pre-made pizza dough at your local grocery store or order it online. The rest is up to you to customize your own Slice of Heaven on your grill by selecting your favorite cheese toppings and vegetables. Baking pizzas on your grill is not that complicated. You do need a good pizza stone to make sure the pizza comes out crisp.
6. Tacos a la Plancha
This means tacos on your griddle, my friend. This is by far one of my favorite summer main dishes to prepare. All you need is ground beef, and if you have a lot of mouths to feed, grab a little more, but the point here is that ground beef is the main ingredient for tacos, and it is inexpensive.
You can definitely use other proteins like steak, bacon, and chicken. Buy bell peppers, garlic, onions, red onions, red peppers, and a host of other vegetables to make as toppings. This is one of the beauties of tacos. There’s no such thing as a way to make tacos. You can make tacos 100 different ways and still be amazing.
I like to keep things simple, and my go-to taco recipe is good ground beef, onions, a little lemon juice, and tomatoes, all cooked on the grill. That’s the cool part about tacos you can take a small portable griddle to the beach and still make amazing tacos without breaking the bank.
7. Pork Pinchos (pork kabobs).
Pork pinchos are kabobs made out of pork chunks. You can use different pork cuts to prepare kabobs. Pork tenderloin works, but you can also use fattier cuts like a boston butt. The key here is to cut the chunks into nice squares so they cook evenly, but not so small that they cook too quickly and become dry and tough.
Pork Pinchos is a great recipe for family gatherings, a tailgate recipe to grill on your tailgate grill, and yes, because you are cutting a larger cut of meat into small chunks, it is inexpensive and yields a lot of portions.
8. Smoked Mac and Cheese
Smoked Mac and Cheese is a tasty recipe you can make on your grill or smoker. If you own a pellet grill, the wood-fire flavor from the pellets will infuse the macaroni and cheese with a smoky taste. I have also made just cheese with the same amazing results.
Mac and cheese is easy to make, and you don’t have to spend hours making a recipe. One of my favorite tricks is to grab a Bob’s Evans Mac and Cheese tray from my local grocery store. I pour the mac and cheese onto a cast iron skillet and put it in the smoker for about 30 minutes.
Chicken thighs are easy to grill and, with the right seasoning, can be a delicious main dish. Another reason I like grilling chicken thighs is that, besides being budget friendly you can make other dishes or the chicken thighs can be the main dish.
I often make chicken thigh tacos, salads, and pico.
Great Tips for grilling on the cheap and keeping it budget friendly
Buy in Bulk
Before you go and buy ingredients for your next grilled meal take some time and do some research to find stores where you can buy in bulk.
When you go to the store, try to buy large cuts of meat that you can slice and dice into smaller cuts and create lots of smaller dishes. Buying in bulk is a great way to save money, especially when buying meat.
Buy unseasoned, untrimmed primal cuts.
We all like our ham sliced, our ribs trimmed, our chicken spatchcocked, and our briskets cut. However, you can save money at the grocery store by buying primal cuts and then trimming them to what you want to grill. For example, you can buy a whole brisket and cut it down into slices, burn ends, or take a pork sirloin and cut it into small chunks.
This is the same case with pork belly and bacon. You can get a full slab of pork belly, which is a primal cut, and take it home and slice it into bacon using a meat slicer. A large cut of pork belly can be turned into a lot of different smoked masterpieces.
Add vegetables and side dishes
Vegetables can be more price friendly than other proteins. Side dishes like grilled sweet potatoes, grilled corn, sweet corn, and even asparagus can help increase portion sizes while keeping cooking costs low. So don’t be afraid to add some greens to those plates.
Complement main dishes with desserts
Desserts can be a good way to justify smaller serving portions. Everyone wants to have space to eat dessert.
One Last Word
We all want to find ways of cooking and grilling for our family while staying within our budgets. I hope these inexpensive grilling ideas help you for your next cookout. The key here is to get creative, get out of your comfort zone and find ways to make less with more.
I personally like to buy meat in bulk and then slice and dice it at home to make smaller dishes and get creative. Things like ground beef can be turned into many different dishes; chicken is also very versatile; and vegetables can help fill a plate.
I hope you enjoyed this guide and take some of these ideas and turn them into your own. The important part is to try and learn something new.
In this article, we’ll share some great pellet grill accessories on the market today to supercharge your grill. We’ll talk about why each accessory is useful, and we’ll give you tips on how to choose the right one for your needs. So whether you just got a shiny new grill and are looking for accessories or just want to update your current setup, read on for some great ideas!
If you’re like most pellet grill owners, you love your grill and use it as much as possible. Pellet grills are easy to use, yield good flavor, and are great to cook outdoors. With the right accessories, you can make your grilling experience even better.
Pellet Grill Accessories: Protect and Enjoy Your Grill Even More
A grill master is only as capable as his or her tools, and that’s why good grill accessories are so essential. With the right accessories for your grill smoker, you can make it even more durable, easier to use, and enjoyable to cook with.
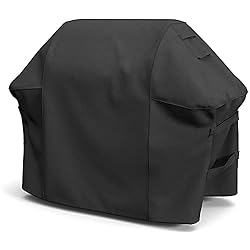
Pellet Grill Cover
One of the most important grill accessories is a cover. A good cover will protect your grill from the elements, keeping it clean and dry when not in use. It’s also important to choose a cover that’s durable and well-made, so it will last for years. If you live in a state with harsh crazy weather, a grill cover is a must-have accessory.
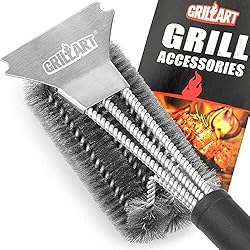
Grill brushes
Grill brushes are needed for keeping your grill clean. They help to remove debris and grease from the grates, and they also make it easier to scrub away stubborn stains. Pellet grill brushes come in various shapes and sizes, so be sure to choose the one that best suits your grill.
Grill Temperature Probe
A temperature probe is another important Pellet grill accessory. This handy tool allows you to monitor the internal temperature of your food, so you can cook it perfectly every time. A quality temperature probe will be accurate and durable, and it will last for years of regular use.
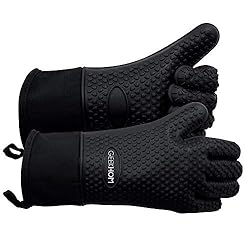
Grilling Gloves
Grilling gloves are another essential Pellet grill accessory. Gloves protect your hands from heat, hot surfaces, and flames, so you can handle food safely on the grill. They’re also useful for holding onto hot objects, such as skewers or grill racks. Choose a pair of grilling gloves that are comfortable and well-made, so you can use them for years to come.
A Good Meat Thermometer
A meat thermometer is another Pellet grill accessory that’s essential for cooking perfect food. This tool allows you to check the internal temperature of your meat, so you can cook it to the perfect level of doneness. Choose a meat thermometer that’s accurate and easy to use, so you can get the best results every time.
A Grill Pizza Stone
A pizza stone is a great Pellet grill accessory for those who love homemade pizza. This stone evenly distributes heat, so your pizza will cook evenly and come out with a crispy crust. Choose a pizza stone that’s big enough to fit your Pellet grill, so you can make delicious pizzas at home anytime you want.
BBQ Rack and Baskets
Racks and Grilling baskets are grilling accessories often used in grills. Racks can be used to hold and cook multiple foods tightly and securely. Think about grilling shrimp, asparagus, and other vegetables. Grilling baskets are great for cooking smaller items or delicate foods that might fall through the grill grates.
Grilling Mats
I first discovered grilling mats on a camping trip when a friend of mine pulled out a few and said, “don’t worry if the grates are dirty; I got this.” Grilling mats are not an excuse to not clean your grill grates, but if you are cooking small foods or vegetables, they also work great.
These mats are heat resistant and have a non-stick surface. Grilling mats can be used on Pellet grills, gas grills, and charcoal grills.
Magnetic Hooks
Magnetic hooks are a Pellet grill accessory that I use all the time. They are great for hanging Pellet grill tools, such as tongs, brushes, and thermometers. They’re also handy for holding onto other things like aprons and oven mitts.
Wood Pellets
Wood pellets come in a variety of flavors; try finding the right one for your pellet barbecue. Pellets are a healthier alternative to conventional cooking methods and a terrific way to add flavor to your cuisine. Pellets are manufactured entirely of natural wood and come in flavors such as hickory, oak, and special competition mixes.
Smoker Boxes
A smoker box is an accessory that’s great for adding “smoky” flavor to your food. This box sits on top of the grill grates, and it’s filled with wood chips or pellets. As the grill heats up, the smoke from the wood chips infuses your food with flavor.
Now, you might say you don’t need a wood chip box or pellet tube with a pellet cooker, but if you want to add a second type of wood for extra flavor or extra smoke to your cook, a smoker box will do.
A Grill Ligh
A grill light is a Pellet grill accessory that’s perfect for grilling at night. This light attaches to the grill lid, so you can see what you’re cooking without having to fumble in the dark. A good grill light will let you see those ribs at night; even a grill master needs to be able to see what he or she is doing!
Some high-end grills include built-in lights, which are helpful, but most grills do not.
BBQ Seasoning Rubs
You can never have enough or too many. Try a few rubs until you find what you like but always have plenty around in the pantry.
Traeger Accessories To Protect and Enjoy Your Traeger Pellet Grill
Traeger makes amazing pellet smokers and grills. Our readers often as for a list of useful Traeger grill accessories, well, you got it.
Traeger Custom Grill Covers
A custom grill cover is a perfect way to protect your Traeger from the elements. After all, these machines are expensive. Traeger’s model-specific covers so they fit perfectly and keep your grill safe and dry. Choose a cover that’s durable and waterproof, so you can count on it to protect your investment. Traeger grill accessories also share Traeger’s quality and warranties.
A Traeger Cover is the way to go as you will get a perfect fit, but if you want to save some money, you can opt for a universal cover or third-party covers made for your Traeger. There are plenty of brands making covers for popular Traeger grill models.
The Traeger Front Folding Shelf
Traeger grill accessories are in everybody’s wish lists, but please do yourself a favor and get yourselves a food prep folding shelf from Traeger.
This handy shelf attaches to the front of your Traeger, and it’s perfect for holding food, utensils, or other grilling accessories. It folds down when not in use, so it doesn’t take up extra space.
These folding shelves are the perfect complement to an Ironwood or Timberline.
The Pellet Grill Cleaning Kit
A Pellet grill cleaning kit is a must-have for anyone who owns a Pellet grill. These kits include everything you need to clean your grill, including a brush, scraper, and cleaning solution.
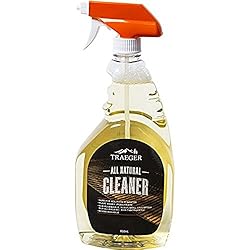
Traeger All Natural Grill Cleaner
If you’re looking for a non-toxic and environmentally friendly grill cleaner, check out Traeger’s line of all-natural grill cleaners. These cleaners are biodegradable and safe for use on all types of grills.
The Traeger stainless steel grill basket
This Pellet grill accessory is a must-have for anyone who loves to cook vegetables on their grill. The stainless steel grill basket is perfect for grilling delicate vegetables like asparagus or mushrooms. It’s also great for holding small items like shrimp or chicken breasts.
Winter insulated cooking blankets
If you live in a cold climate, you know how important it is to have a good insulated cooking blanket. These blankets help keep your grill hot, so you can continue cooking even in freezing temperatures. Traeger offers a variety of different blankets, and there are also their party brands offering thermal blankets.
The Traeger 12V to 110V power inverter
Trager grill accessories are plentiful, but this power inverter is something you want to consider if you are serious about cooking outdoors, campsite, or on the beach.
The 12V to 110V power inverter allows you to plug into a standard 110V outlet, so you can cook anywhere.
Conclusion
There are many grilling accessories and toys to help you become a better grill master. The list provides you with the best and fundamental accessories to help you get the most out of your grill and enjoy it better, make your life easier, and cook more often.
I recommend, at the very least, getting a cover and cleaning and cooking tools. So get your accessories, get grilling, invite friends over, and have a great time.
Grilling is a popular summer pastime, grilling with your RecTeq, well that is just a delight. There are plenty of great pellet grill accessories for your REC TEC (recteq ) grill to choose from. In order to make the most of your grill, you need some essential grill accessories. This article will show you fifteen of the most important tools you’ll need for your new REC TEC grill.
Having these essential accessories will help you get the most out of your “bull” and will also help keep your cooking machine in good condition. So if you’re looking to get the most out of your REC TEC (recteq ) grill this summer, check this list out.
Here is a list of Rec Tec Accessories you should get for your (now RecTeq ) today and enhance your Grilling Experience
Owning a REC TEC (rebranded to recteq ) grill is an experience in itself, and with the right accessories, you can make the most of your grill, protect your investment and enjoy it longer. Some essential accessories include a grill cover to protect your grill from the elements, a meat thermometer to ensure your meals is cooked properly, and a grilling toolset to help you flip and move food around on the grill.
Wood Pellet and lots of ’em
Do you love steak and other types of beef? Or are you more of a smoked ribs or brisket type of person? Love them both? Yes, we all do. If that’s the case, we recommend keeping a lot of wood pellets on deck.
You will spend a lot of time trying new recipes, looking for the next best thing, and burning steaks or two. You will want to try different wood pellet flavors, whether you are cooking beef, pork, or even cooking vegetables.
Although there are recommended wood flavor pairings for every cut of meat, you are the boss of your own pallet and will want to try your own mix of flavors. Also, you will find yourself switching pellet flavors based on what you are cooking and your culinary experiments.
You will spend some money buying and trying new pellet flavors. The last thing you want to do is leave pellets outside and exposed to the elements. A bunch of pellet bags laying around the house will become wood dust in a matter of days, and if you live in a humid climate like my state of Florida, those pellets will absorb moisture quicker than a sponge. Wet pellets will jam the auger even in the best pellet grills. [1]
Wood pellet containers are not that expensive and are a small investment compared to the price of RecTec grills ( now recteq ) or replacing parts in your new grill.
These containers come in many shapes and sizes, most are stackable and can be labeled. Solid hard plastic containers will airtight lids will not absorb moisture from the air and can be cleaned easily. They will also protect pellets from mold, rain, sunlight, and even pests.
Grill brushes are essential for keeping your grill clean. A dirty, greasy grill not only looks unappetizing but over time can actually cause food to stick and even change the flavor of the food. That black conked-up grease on your grill grates won’t state good amigo!
Grime builds up on the inside of your grill as well, creating a smoky mess and black or dirty smoke is not good for your food either. Balck smoke will add a bidder flavor to your meats. Dirty grills also produce soot and black smoke which will stain walls in your backyard or patio.
A good grill brush will help you keep those grates cleaned and your recteq in a good shape. Be sure you look for a brush that won’t damage your grill grates and if don’t like brushes with metal wires or bristles you can opt for a brush like the Grill Recure Brush.
Choose a brush with a long handle so it’s easy to maneuver around hot surfaces like burners.
One of the pellet grills accessories that you should buy immediately is a grill cover. I see often people spending hundreds of dollars even thousands on a pellet grill to just leave outside exposed to the elements.
If you leave in an area that experiences all four seasons or like here in Florida where it rains every day, living your grill outside unprotected will shorten its lifespan. Rec Tec grills (reqtec ) are made tough and out of 304 stainless still which will help with corrosion and withstand the elements but components inside your grill can still start to deteriorate and fail.
We recommend grill covers with pockets to store some of your grill tools and anchoring cords to keep the cover from flying away and as tight as possible.
Grill covers are not that expensive and worth the investment.
Having a good set of grilling tongs is good because they are useful for turning food on the grill, and you’ll need a good set of grill forks for moving larger items from one area of the grates to another or removing food from the pellet grill.
Most tongs have long handles so they can be gripped without getting too close to the heat. They come in a variety of shapes and sizes, and most are built out of durable materials that won’t warp even if they get hot.
Some brands offer silicone grips that won’t melt, and other cool features like magnetic locking systems to keep them closed when you store them away.
Recteq grills come with built in meat probes to monitor your food, but you only get one or two depending on the grill model. A good meat thermometer and meat probe will help handle large cooks and multiple cuts of meat cooking at once.
You can use a thermometer pen, an instant-read thermometer, or a multiple probe thermometer to monitor all the meat you’ve got smoking in your grill.
Most meat thermometers have a thin probe that inserts into the center of meats, and a digital display that shows what temperature they are at. Some thermometers have internal temperature alerts and sometimes more options than the probes in your grill do.
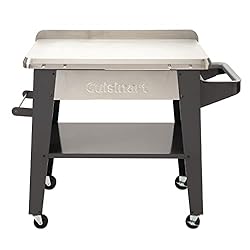
Not everyone has a full outdoor kitchen or a summer kitchen to prepare the food. A side table is one of the best accessories I purchased for my outdoor grilling area.
Side tables are great for food prepping, seasoning meat, and even removing food from the grill if you get into trouble, you know what I mean Mrs. Well Done.
If you have a big family gathering, they also help provide more space for serving food and putting meals together, or even resting that hot brisket. Not to mention a good size side table can be a great place to place your BBQ tools.
You can also get the front folding shelf available for rec tec grills on their website or opt for a less expensive “off the shelf” table. These tables are great for rec tec grills like the rt 590 which does not include side or a front folding shelf.
A good grill cleaner is essential if you want to keep your Rec Tec Grill in tip-top condition. There are different types of grill cleaners that will work but for recteq grills look for a stainless steel cleaner.
One option is a soap and water mixture, but these don’t always get the tough stuff off. Also, a good natural grill cleaner is a great choice to keep the stainless finish of your grill looking new and protected from elements.
A cutting board is your friend when it comes to trimming meats and one of the most useful grill accessories you can own. Why? Well, unless you like damaging your kitchen countertops or cutting meats on slippery surfaces, well let’s just say this is one of those grill accessories that is nice to have.
You can get them in many different shapes and sizes, depending on the space you have available or for what you want to use it for.
Talking about cutting and trimming, a good BBQ knife or good knife set is a must-have accessory for cutting and trimming. For outdoor cooking, you will need a good-quality set of BBQ knives that you can use to cut and trim meats, do meal prep, and serve.
A butcher’s knife should be part of your grill accessories list together with a good knife sharpener tool.
I know what you are going to say, why do I need a pellet smoker tube or box, doesn’t a pellet grill generate smoke? Yes, you are right, but here are a few things you can do with a smoke tube.
You can add more smoke flavors adding more pellets during the cook without having to stop the grill and empty out the pellets in the hopper. Let’s say you are smoking pork ribs and are using a hickory pellet blend but you want to add a touch of sweetness.
Well, my friend, with some tubes you can grab a handful of apple pellets, light up the tube and add the hint of sweetness to your smoked ribs. All while leaving the pellets in the hopper alone.
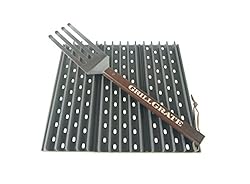
If you are smoking spare ribs or briskets the grates in your new bull will work great. However, if you love a nicely seared steak, consider a set of searing grates. A searing grill grate will transfer heat better to “shock” and sear the steak better.
They come in handy when cooking thicker cuts of meat or even veggies at high heat. To properly sear your meats, it is best to use a ridged surface or cast iron grates.
You can also invest in some grill baskets (that you need to line with foil) for vegetables like potatoes so that they can go straight on the grill instead of boiling or frying.
A cooking mat is simple to use and simple to clean! That’s why we love them.
A Mesh Grill Cooking Mat is ideal for grilling messy foods and little meats that might slip between the grates. For example, think about shrimp, asparagus, and onions. These mats also make loading and unloading your pellet grill a breeze.
You can also say a grill mat is good for those of you who don’t keep those grates too clean. Yeap, I’m talking to you once a year griller!
Yeap, you heard me right. Get a pizza stone for your pellet grill and enjoy homemade wood-fired pizza using your new recteq. Making homemade pizza is a lot of fun, but even better is the wood and smoky flavor you get when using your recteq.
In Conclusion
As you can see, there are many grill accessories to consider and available for your RecTeq. The right accessories will help make your outdoor cooking experience better and more enjoyable. Grill cleaner is one of the most important items on this list since it keeps your Rec Tec Grill looking new, helps remove tough food residue that builds up over time with use.
If you have not heard, Kamado Joe has been hard at work on a new project: the Kamado Joe Pellet grill. When it comes to kamado grills, you will hear popular names like “Big Green Egg” and “Kamado Joe.” These two brands have dominated the kamado grill market and make excellent charcoal grills.
Kamados can be used for everything from grilling to smoking, and because they are constructed of ceramic, they can last a long time if cared for correctly.
Nevertheless, charcoal is not for everybody. Managing a charcoal fire might be difficult for some people, while others simply despise messing with charcoal and getting their hands dirty. The automation that comes with pellet cookers has made them a favored alternative to charcoal grills, removing all of the hard labor while retaining all of the flavor.
Kamado Joe must have been paying attention because they jumped in and took all the benefits of a kamado grill and added the convenience and automation of a pellet grill.
In this article, we take a look at the new Kamado Joe Pellet and share with you what we found and learned about this new grill.
Traditional Pellet Grills VS a Kamado Pellet Grill
Traditional pellet grills are not in the same category as ceramic grills. New pellet grills are the Teslas of the BBQ industry, featuring high-tech features like Wifi, smart temperature controllers, and even Alexa integration. All this technology won’t make you a perfect cook, but it sure helps.
The ceramic kamado grill category is, well, much simpler. There was a time when a fiberglass gasket was considered a technological advancement in kamados.
A traditional Kamado Joe grill is very simple at its core. You get a ceramic egg-shaped chamber, a ceramic charcoal basket, and, of course, grill grates and other accessories, but the core of the grill is as basic as a cave man’s cave.
No, I’m not dismissing the quality of Kamado Joe and the versatility of these grills. The fact is, these grills are amazing and, in the hands of an experienced pitmaster, you can cook, bake, smoke meat, and pretty much anything your culinary mind can imagine.
Companies like Kamado Joe improved upon the designs of popular kamado grill companies and added modern touches and features like a commercial quality heat gasket, removable ashtray, and an arsenal of high-quality and useful accessories like a pizza tray and rotisserie. The end result is a high-quality ceramic grill.
Introducing Pellet Joe:
The Kamado Joe pellet is the newest addition to the Kamado Joe lineup. This grill is great for anyone who wants the smoky flavor, efficiency, durability, and versatility of a charcoal Kamado with the convenience of a pellet grill.
The Kamado Joe Pellet is a new Kamado-style grill that incorporates some of the same components as a traditional steel pellet grill. There is an electric auger that feeds the pellets to a fire pot, pellet agitators, and pellet hopper.
The system is pretty much self-contained and tightly packed in the belly of the egg. I’m actually very impressed with how Kamado Joe was able to fit a PID controller, a stainless steel hopper, an auger, and a fire pot all in the gut of this kamado.
What’s in the Box of Pellet Joe?
You get a high-quality ceramic pellet grill with a sturdy four-leg stand and two meat probes that connect to the integrated hopper that sits in the guts of this kamado. Kamado Joe states that the integrated hopper nearly eliminate pellet bridging, and the grill uses less pellets than traditional pellet cookers thanks to its ceramic construction and high efficiency.
The stainless steel hopper holds 10 pounds of pellets and the grill heat range reaches as high as 600 degrees.
There is also a drip tray, which also helps with heat dispersion but mainly directs all the grease to a drip bucket.
You also get the Joe scoop. This little tool is necessary to easily scoop pellets. This is a wifi-ready grill, so you will get a little antenna. Make sure not to lose that. Monitoring with WiFi control from a mobile device adds a level of convenience not available in the charcoal models.
Some features Found in the Kamado Joe Pellet include:
An automatic start system makes it easy to get started grilling. Turn the temperature knob and set the temperature.
A convection system (the heat shield above the burning pot) ensures even heat distribution and eliminates hot and cold spots.
A porcelain-coated cooking grate for easy cleanup.
Side shelves
Air lift hinge
Quirks and Features of the Pellet Joe
There are some interesting quirks and features unique to the Pellet Joe. A lot of the original Joe has carried over to the Pellet Joe. You get the same ceramic quality, fit and finish, spring-loaded (air lift hinge stainless ) top lop lid system, the classic stainless steel latch and the four-legged base.
Some accessories from the classic can be used on the Pellet Joe.
Some interesting quirks making this grill different from its original predecessor are a tiny hole on the back of the top lid where the ambient sensor is attached, an aside grease bucket, and a WIFI antenna next to an on and off switch on the back of the grill. It is almost strange to see these small clues of a pellet system on an old school grill known for its rudimentary design.
For the most part, the grill dimensions are the same. This grill is very similar to the Classic 18 grill.
So what is the deal with pellets?
Unlike traditional charcoal grills, pellet grills burn wood pellets that are fed into a burner to create heat. The pellets are made of compressed sawdust and other hardwoods, so they burn clean and produce a great wood smoke flavor.
Pellet grills are easy to operate and have redefined cooking. These grills can be set to a variety of temperatures, making them a great choice for all kinds of cooking.
Pros and Cons of the Kamado Joe Pellet
Pros
It gets hot, reaching over 600 degrees.
WiFi control means you can sit down and watch a game and still monitor the grill and the meat cooking process.
ceramic grill efficiency. -Kamados are known for being very efficient and retaining heat well, cooking tender food and offering unsurpassed flavor.
Fuel efficiency and heat retention. Kamados are efficient, so they consume less charcoal and pellets.
Unlike its charcoal brother, where air vents are used to control the fire, this grill is thermostatically controlled by the PID controller. Simply set the desired temperature and the grill will maintain that temperature.
Since the grill monitors its internal temperature, it is crucial to perfectly adjust the smoke tower.
The Kamado works great and can retain consistent smoking temperatures.
The pellet agitators help with jamming the pellet door, which provides access to pellets.
The aluminum side shelves
Efficient: burning and needing fewer pellets thanks to the efficiency of the ceramic chamber.
Cons
It’s not as easy to load pellets. With traditional grills, you can dump a 20 lbs bag in a matter of seconds. With this grill, you need to use a scoop, which can do about 5 pounds of pellets at a time.
For the Pellet Joe 18, there is no display. To know the ambient temperature of the grill or the meat probe readings, you need to use the app.
The hopper capacity is only 10 pounds. But although Kamado Joe says that fewer pellets are needed thanks to the efficiency of ceramic grills.
The cooking surface is not as large as steel pellet grills in this price range.
Conclusion
The Kamado Joe Pellet is a great option for anyone looking for an easy-to-use, reliable grill that can handle all kinds of cooking. This grill is wifi-ready, so you can control it from your phone or tablet, and it has a number of other features that make it stand out from the competition.
This grill combines the outstanding cooking efficiency of a kamado grill with the simplicity of use and convenience of a pellet cooker.
Whether you’re grilling steaks or smoking ribs, the Kamado Joe pellet grill is sure to deliver delicious results.
In this article, we teach you everything about blue steak. We go over what exclay is blue steak, is it safe to eat, temperatures, and more.
Some people like to eat meat well done, while others like to eat steak. Yes, my friends, there is a difference between burning meat and a properly grilled steak, but we’ll leave that topic for another day. Today we are going to talk about blue steak.
There are those who like to eat a good steak, and then there are those outlaws who want to eat blue steak.
What Is Blue Steak?
“Blue steak” is a term used to refer to the lowest level of doneness in a steak. The meat is grilled only for a few minutes to sear and brown on the outside while the inside remains raw. Steak cooked blue is placed on the grill for 1 to 2 minutes, and its internal temperatures seldom exceed 115 degrees.
The term “blue steak” is often used because steak cuts’ raw meat has a subtle purple or blue-ish color when it is first sliced. This is due to the meat’s leftover blood becoming oxygen-depleted. On the other hand, this blue color does not remain for long. When exposed to air, myoglobin begins to oxygenate and develops the brilliant red hue we recognize with a new cut.
Therefore, unless you are present when your steak is initially sliced, you are unlikely to notice the blue-ish color.
Blue steak is done a step lower than a steak served raw. Whereas rare steaks are grilled outside, and in the center, blue steaks are only cooked on the outside. Blue steaks don’t take too much time to cook. The steaks’ internal temperature barely reaches above 115°F.
Why Is It Called “Blue Steak”?
The term “au bleu” is often used in European countries to describe and order raw meat. The term is used as a descriptive term when the meat is first unwrapped, and the raw meat has a darker purple before it is cut. The term is also used to describe the doneness level when cooking the steak.
Blue steak is very popular because of its smooth, melty texture that enables you to absorb its rawness even when the outside of the steak is seared brown.
Is Blue Steak Safe To Eat?
Though steak is raw and consuming raw meat should be done carefully, it is safe to eat. It is perfectly safe. The key here is to cook the outside of the steak to kill any bacteria and kill pathogens.
Cooking A Blue Steak To Get The Best Results
The key to cooking blue steak is to grill and sear the entire outer surface of the meat. After a short time, your Au Bleu steak will be ready. It is important to “seal brown” all the edges and the entire surface of the meat.
E. coli bacteria is found on the outer surface of the meat, and grilling it at a high temperature will kill the bacteria. It is also important to sterilize the grilling tools you will be using to cook the meat, as bacteria from the tools can be transferred to the meat.
Every step you take, including sanitizing serving tongs, will help keep the meat safe and avoid food poisoning. After all, you are serving the plate extra rare, not even close to medium-rare steak.
Important Points To Keep In Mind
The steak must be sealed and browned to prevent bacterial and viral contamination. Sterilize tongs and other cooking tools to prevent them from contaminating the food.
How To Cook Blue Steak? Eat Blue Steak, Not A Medium Rare Steak
To cook blue steaks, first take them out of the refrigerator and allow the cut to get to room temperature. Second, add seasoning and spices to get the steak ready for cooking.
Use a meat thermometer; the internal temperature should reach 115 to 120 degrees. If done correctly, the outside will be seared and have a bright red color. Let your steak rest briefly, this will get meat juice flowing.
This Is What You Will Need To Cook Your Steak
You will need a 1-inch-thick, high-quality cut of meat. I use either filet or sirloin, both excellent choices. But the point here is “good quality beef.”
Extra virgin olive oil. Olive oil helps the seasoning adhere to the meat. Seasoning
ingredients (salt and black pepper work well.)
A good grill that can reach high temperatures, a cast iron pan, or a flat griddle
Wipes for disinfection of counters, tools, and other surfaces
A good cooking or kitchen-grade thermometer is digital.
Steps To Cook Or Grill The Steak
If your steak has been in the refrigerator, remove it from the fridge a few hours prior to cooking and allow it to reach room temperature. Even though you will only be cooking it for such a short time, this will help the interior of the steak warm up before searing at a high temperature for a short period.
Pat the steak dry using a napkin and season it with salt and pepper to taste. I like to mix a 50/50 blend of salt and pepper.
In a skillet, flat iron pan, or griddle, heat the olive oil over high heat until it begins to smoke. The oil needs to be hot because you will only be grilling the steak for a few minutes, and it will quickly char.
Place the steak in the heated oil while maintaining high heat. Allow it to sizzle for 1 minute.
Flip the steak over and heat it for another minute. Avoid touching the beef with your hands and use sterilized tongs. This avoids cross-contamination.
After a minute, check to see if the entire outer surface of the steak has been sealed with brown. If the edges of the steak are still raw, roll it around and seal them. Then the entire outside of the steak has to be seared. This is why this cooking style doesn’t work with a thin steak. When grilling at a high temperature, even for a short period, you won’t get rare meat.
If cooked properly, the inner temperature of the steak will be about 115 degrees when ready for eating. The meat should feel soft and bright red.
Which Cuts Should You Avoid Cooking Blue? Why Not?
Some of the best-tasting steaks have a lot of fat marbling, but fatty steaks should be avoided if you want a perfect blue steak.
Fat requires more cooking time and heat exposure to render, giving moisture and flavor to your steak. A fatty steak cooked ala blue will have chewy fat bits. To be honest, the texture alone will be discussed.
Tough cuts of steak should also be avoided. Tough steak cuts require marination as well as adequate cooking time in the heat to make them tender and good to eat.
Thinly sliced steak cuts should also be avoided. By the time you have successfully seared the whole outside, the insides should be medium-rare. Sure, it will be wonderful, but it will not be blue.
The following cuts will not work well for cooking blue:
Porterhouse or T-bone
Ribeye
Flank steak
Beef Cuts To Cook
You may attempt to cook any cut of steak blue. However, if you use the wrong cuts, the effects may be different than what you planned and far from a perfect steak.
The following are the best options for a blue steak:
Sirloin tip
Top sirloin:
Round steak (any)
Filet mignon
Make sure your steaks are at least 1 inch thick, preferably 1.5 inches or more. Even with 60 seconds of searing, a very thin steak will cook through quickly and in a very short period of time.
Blue Steak VS Rare
Blue steak is cooked a step below rare. Rare steaks are cooked on the outside, but the center of the steak is also brought up to higher temperatures, Whereas blue steak is only cooked, browned, and seared on the outside.
What Temperature Should I Cook Blue Steak At?
Blue steaks are generally rated at 125-120°F and more than 125 °f, not “blue territory but rare.”
What’s The Texture Of Blue Steak Like?
The texture is soft and juicy. They are packed with a lot of flavor.
How To Know If You Have Cooked The Perfect Blue Steak?
First, make sure you have browned and seared the entire outer surface of the steak. Lastly, make sure the temperature has not gone above 120 degrees F.
Final Thoughts
Blue steak is considered a delicacy in many places, and many enjoy cooking a steak using this method. Not everyone likes meat raw, but now you know what blue steaks are.
A WiFi pellet grill gives every BBQ enthusiast, regardless of skill level, an extra level of convenience, control, and monitoring. WiFi equipped pellet grills may be operated, controlled, and monitored remotely while cooking, allowing you to spend more time with your friends and family.
This is incredible technology, and it is no surprise that everyone is looking for WiFi pellet grills these days. The ability to monitor and control your grill from anywhere in the world is outstanding. All you need is an Internet connection, a home wireless router, and a mobile phone.
Not all pellet grills have a WiFi-enabled control panel or even Bluetooth connectivity. So, in this article, we will share with you not only the best WiFi pellet grills but also the top models.
Let talk about WiFi and App functionality in pellet grills
While most manufacturers offer WiFi-ready pellet grills and smokers, only a few take the functionality to the next level.
For example, some manufacturers only offer the ability to monitor the grill’s temperature. Others offer the ability to monitor the grill’s temperature and the meat, and then there are the top manufacturers offering the ability to monitor the grill’s and food temperature plus remotely adjust the grill’s temperature using a mobile app.
Traeger takes WiFi functionality with the Traeger WiFire app to the next level by including additional features such as a hopper pellet level monitoring sensor that shows you the pellet levels in the hopper. Not only when the pellets on the grill run out like most grills. This is huge!
For even greater convenience, some pellet grill manufacturers include Bluetooth connectivity in some of their grill models. This means that even if you do not have a WiFi connection available, you connect your phone directly to the grill and control the grill with your phone. Similar to how you would connect your phone to a Bluetooth speaker.
What is a WiFi Pellet Grill?
A WiFi pellet grill connects to your home WiFi and can be managed, controlled, and monitored using a smartphone. Via the smartphone app, you can see crucial information about your grill and food, such as temperatures, cooking times, and adjusting cooking temperatures.
This type of technology lets you keep an eye on your grill while you do chores around your house or entertain your guests. For example, you can set the desired temperature and go mow the grass and check your grill anytime.
How do I choose the best WiFi pellet grill?
Not all Pellet grills are built equal, and even those with a WiFi-enabled controller might not offer the features you are looking for.
So, in this section, we will go over the features and qualities you should look for when buying a new wireless pellet grill this year.
WiFi Enabled, Bluetooth Enabled or Both
While some pellet grills are only WiFi capable, others are Bluetooth capable, and some are both. Consider this, if you will use your grill both in your backyard at home and at the campsite, a WiFi and Bluetooth wireless pellet grill will be ideal for you.
At home, you can connect to your home WiFi network, and at the campsite, where likely you will not have wireless connectivity, you can use the Bluetooth connection.
If you are planning on only using your grill only at home, a grill with only a wireless connection will be good enough and save you money. Grills with both Bluetooth and wireless enabled controllers are more expensive.
Convenience and Features
The conveniences of using a WiFi pellet grill are determined only by how well the technology works and how simple its control features are.
A wood pellet grill needs to cook and cook well; let’s start there. But all this technology also has to work. If it is too complicated to set up the WiFi controller or if the system is unreliable, you will feel very disappointed and find that you have wasted your money.
Also, some brands’ WiFi technologies are too basic and do not justify the cost. If all the grill offers is meat temperature information, is it worth the extra cash for that functionality? Or is it cheaper to just buy a wireless meat thermometer?
The best WiFi pellet grill models offer innovative features like those found in the Traeger app, which includes recipes and can auto-adjust temperatures based on those recipes. Pick a recipe from the app and let the grill cook.
But essential and good features to have are the ability to control the temperature manually from the app, view the grill’s temperature, and monitor the internal temperature of the meat. These are the essential qualities of a good wireless grill.
Grill size and Square Inches of Cooking Space
No matter how much money you spend on a grill, it will be pointless if it lacks sufficient square inches of cooking space or grilling surface area.
The cooking space in your grill is something you can not change after the purchase. Only buying a new larger grill will be the solution. This is why it is important to consider the size of grill you need before buying.
If you have a small family, then 300 to 500 square inches of cooking space will work great but if you are planning on grilling for large groups, events, or entertaining, then consider a pellet grill with a larger capacity, something around the 800 to 1000 square inch range.
When shopping for a pellet grill smoker, a larger cooking chamber should be considered if planning to smoke large portions of meat such as briskets or pork shoulders.
If you enjoy cooking different types of proteins and side dishes, consider a pellet grill with multiple grill grates and even warming racks. Warming racks are great for placing food after it is done cooking and even warming up slices of bread.
Pro tip: Porcelain grill grates are easy to clean and offer a great non-stick surface for your food.
Construction Quality
Whether you are purchasing a grill, a car, or a house, quality is an important ranking factor in every grill we review. Just keep in mind that grills built using quality materials will cost more, but will also last longer, retain heat better, and cook more efficiently.
Look for grills built out of heavy gauge steel, 304 stainless steel components, and those finishes are powder coated with nice thick coats of powder coat. Powder coat is a strong coating and does better than paint when exposed to high heat and temperatures. Powder coating is also more durable. [1]
Hopper Capacity and Easily Swap Pellets
The fuel in a pellet grill is held in a pellet hopper. Every Pellet grill has a pellet hopper, and the hopper feeds the pellets to a burning pot using an auger. Once you start your grill, the auger will start feeding pellets from the hopper to the firepot.
If you need to add more pellets, simply open the hopper and dump more, but if you need to change the pellet flavor, then a hopper with an easy-to-use pellet cleanout door is a must. If you are like me and like to experiment with different wood pellet flavors, look for grills with good hopper clean doors, so it is easy to swap pellets.
The hopper capacity is also important. Pellet grills burn about one pound of pellets per hour, so a 20 pound pellet hopper can fuel your grill for about 20 hours.
Maintenance
Cleaning a grill can be a pain, so we recommend grills with removable parts and easy-to-clean components. For example, removable grease drip pans or grease buckets are easy to wash. Removable ash pans are also easy to clean.
The cleaner you keep your grill, the better it will operate and the longer it will last.
Grill Warranty and Customer Support
These grills have many moving parts, including fans, an auger, and, yes, a digital controller. Grills with so much technology are bound to have issues; thus, having a solid warranty is beneficial.
Even if you never run into issues, you might have some questions with so much technology and so many gadgets.
Companies like Traeger pellet grills, Camp Chef, and Pit Boss are well known for having excellent customer service. One of the nicest things nowadays is being able to pick up the phone and speak with a live person who can answer your questions.
Pros and Cons of Wireless Pellet Grills
Pros
WiFi pellet grills offer a lot of conveniences and automation.
Easy to keep an eye on your food from anywhere.
You can adjust the grill’s temperature quickly from anywhere.
For individuals with little experience grilling, this type of technology can be a huge help.
Cons
Wireless systems, components, and controllers can increase the grill’s price.
Forget about the KISS principle here… more stuff to go wrong.
Traeger grills are leading the pellet grill revolution and are one of the top-selling pellet grill brands on the market today. Traeger Grills has been in business for decades, perfecting the Traeger grill models that we all love today. [2]
The Traeger Grill Pro Series is their entry-level series, but do not let the word “entry” fool you. Traeger Grills are top quality and pack the best technology and features. The Pro series allows consumers to get a taste of all this quality and technology in smaller packages and at lower prices. Still, you can enjoy many of the features and technologies found in their top-tier models.
Here is why the Traeger Grills Pro series is the best WiFi Pellet Grill.
First and foremost, the Traeger app, WiFIRE, is the most feature-rich and well-developed of any pellet grill software on the market. The Traeger app has capabilities that other barbecue applications either lack or do not have.
Traeger grills, for example, have a pellet level sensor inside the pellet hopper that measures the level of pellets. The sensor can send this data to the digital controller, which can send notifications directly to your phone via the app.
This is leading technology as most grills only send you an alert only after the grill has run out of pellets. Yeah, I know, useless.
Combine its WiFi capabilities with Traeger’s powerful D2 controller to provide precise temperatures plus build quality, and you have a clear winner.
Z Grills Multitasker is Z Grills’ new entry into the wireless wood pellet grill arena. Z Grills is known for making good and affordable pellet grills that are easy and simple to use. The Multitasker, as its name implies, is a large grill capable of handling many cuts of meat at the same time. It offers lots of cooking space and, of course, wireless technology.
We all love wood-fired flavor, and wood-fired taste is more enjoyable when it requires less work. This is why we are all enjoying these wireless grills. Z Grills Smarter Grill app lets you monitor the grill’s temperature and adjust the grill’s temperature.
The Z Grill’s app is not as feature-rich as Traeger’s, but you get the basics: temperature control and temperature monitoring.
Camp Chef is a great brand and another pellet grill with a WiFi option. Camp Chef is a more affordable alternative to other grills on this list but still offers good features and good quality.
Here are a few things we like about the Camp Chef. First, you get a beautiful stainless steel lid that is easy to clean and, well, it just looks cool. But the real reason we like the Camp Chef is that you get a lot for your dollar. You get a WiFi and Bluetooth-ready grill to manage and control the PID controller and four meat probes to monitor up to four different types of meats.
You also get Camp Chef’s Ash Kickin ash cleanout system and their unique Slide and Grill system. These are two cool features that are unique to the Camp Chef grills. The ash cleanout system consists of a removable cup underneath the grill; pull a lever and remove the ash cup. You just cleaned your grill!
The Slide and Grill system allows you to purchase several propane-powered side add-ons for this grill. This grill’s versatility is improved with the addition of a pizza oven and a searing grill. The main takeaway from these grills is their affordability. Camp Chef has kept its grills reasonably priced while packing them with a bunch of options.
The Green Mountain is a nice option for those looking for a portable compact pellet grill grill that they can take anywhere. This grill can be operated using your car’s battery or a regular power outlet. And yes, it is wireless.
Can operate using your car’s battery. ( or 12 volt outlet )
Compact and light enough to use on a table.
What we don’t like:
This is a smaller grill, so the hopper capacity will be less than the larger grills on this list.
5. PIT BOSS PRO SERIES II 600 – Pit Boss WiFi Pellet Grill
Pit Boss introduced the Pro Series, and it is good in quality and features good technology. This grill can also be controlled using a mobile app, and you can monitor the meat’s temperature using the meat probes.
What we like:
Good quality.
Thick powder coating.
What we don’t like:
It’s only sold in a few selected retailers, and people want options!
So which WiFi Pellet Grill is Best and Why
The clear winner is the Traeger Pro. Not only is Traeger a well-established company, but it has also worked very hard to develop the quality and technology of its grills.
Traeger is a leader when it comes to quality, technology, and functionality. However, companies like Z Grills are also offering great WiFi grills and a lot of value.
If you are looking for value for the dollar, Z Grills are a great option, but if you are willing to spend a little more to get more features, yet stay below the price point of a Traeger grill, then take a look at Camp Chef.
Smoking a brisket is a lot of work but also a lot of fun, and if done right, the results are one of the most tender, juicy, and flavorful meats you can have. Knowing how long to smoke a brisk is the first step to attaining good results.
To achieve the best results when smoking a brisket, you need to know a few basics. If you ignore these basic guidelines, the end result will be a dry brisket.
So in this article, we are going to address the most important factor when smoking a brisket, how long to smoke the brisket per pound, cooking temperature guidelines, and how long to smoke a brisket per pound at 225 or 250 degrees. F.
Follow this article to learn a few basics, and you will enjoy the best brisket of your life.
How long to smoke a brisket per pound – With Calculator and examples
They are different ways and styles to smoke a brisket, including temperature preferences. However, the overall consensus to smoke a whole brisket is to cook at a low temperature from 225 to 250 degrees F.
A 25 degree difference will only shorten cook times by a few minutes, so aim for the 225-degree temperature to cook brisket.
For the proposes of this article, we will use a cooking temperature of 225 degrees Fahrenheit as our set temperature to show you specific breakdowns and examples of smoking temperatures per pound.
If you choose a different temperature to smoke, remember to adjust the cooking time accordingly.
Temperature and Cooking Times Guidelines:
It is recommended to smoke one pound of brisket for 1 hour and 30 minutes at 225 degrees Fahrenheit.
If you are going to smoke a little faster or your smoker or grill does not operate well at low temperature, here is another guideline:
It is recommended to smoke one pound of brisket for 1 hour and 15 minutes at 250 degrees Fahrenheit.
Here is a breakdown of smoking times
How long should I smoke brisket per pound for best results? Cooking Times Per Pound of Brisket
How long should I smoke a 18 lb brisket
18lb brisket smoke time
At 250 Degrees Fahrenheit
18lbs x 1.25 hours= 22.5 hours
At 225 Degrees Fahrenheit
18lbs x 1.5 hours = 27 hours
How long should I smoke a 16 lb brisket
Smoking a 16-pound brisket is a long process and will require some patience.
At 250 Degrees Fahrenheit
16lbs x 1.25 hours= 20 hours ( What ?)
At 225 Degrees Fahrenheit
16lbs x 1.5 hours = 24 hours
How long should I smoke a 10 lb brisket?
A 10-pound brisket is more manageable and will require less time than a large 16-pound brisket. Your meat thermometer is your friend, and always check the brisket’s temperature to know when it is ready.
At 250 Degrees Fahrenheit
10lbs x 1.25 hours = 12.25 hours
At 225 Degrees Fahrenheit
10lbs x 1.5 hours = 15 hours
How long should I smoke a 4 lb brisket
A 4-pound beef brisket is big enough for a small family and will take less work and time. Larger briskets will sometimes stall, requiring you to wrap the brisket.
At 250 Degrees Fahrenheit
4lbs x 1.25 hours = 5 hours
At 225 Degrees Fahrenheit
4lbs x 1.5 hours = 5.5hours
How long should I smoke a 2 lb brisket
A two-pound brisket will require less time and is a good size for beginners. This is how long to smoke a 2lb brisket.
At 250 Degrees Fahrenheit
2lbs x 1.25 hours = 2.5 hours
At 225 Degrees Fahrenheit
2lbs x 1.5 hours = 3 hours
How do I smoke brisket?
Here at BBQGrillAcademy.com we love brisket and have an amazing smoked brisket recipe simple enough for everyone to try.
The secret to tender brisket is to smoke it at a constant temperature using the low and slow method at the temperatures listed in this article.
How do I prepare brisket for smoking?
It is not difficult to prepare the brisket and get it ready for the smoker. In our step-by-step guide to smoking a brisket, we teach you how to trim the brisket so it cooks evenly and without burned ends.
Seasoning
Seasoning is one of those areas where people go bananas and overthink everything. Yes, you may use garlic powder, and some people even inject broth into the meat.
If you follow any of the top Pit Masters, including Aaron Franklin, you will know that when it comes to briskets, simple seasoning can provide fantastic results. You do not want to season the meat in such a manner that it overpowers the smoke flavor.
To season your brisket, a simple mixture of salt and paper will be enough.
IMPORTANT: Choose The Right Brisket
The key to a fantastic brisket is not the aluminum foil weave or the sort of beef broth you inject into it. Everything starts with the quality of the meat. Yes, the meat quality will dramatically impact how tender and juicy your smoked brisket will be.
We recommend companies like Snake River Farms as they offer prime meat cuts and fresh choices.
Best beef
What creates great smoked beef brisket is quality beef.
If you want to cook the best-smoked brisket, start with the best quality cut of beef possible. If you are new to smoking brisket and want to do test runs, then your local supermarket meat will do but when you are ready to move up, use nothing but the freshest and high-quality meat.
How can I shorten the cooking time?
You can also use the Texas Crutch method in a stall to speed things up. This method involved warping the beef brisket.
Preheat your smoker to 350 F and turn the brisket fat side down to prevent the bottom from burning. So at 330 degrees, your brisket will cook considerably faster, but you can end up with a tougher brisket.
Wrapping the meat can save around 45 minutes per pound without compromising its smokey flavor or bark, but be aware that beef brisket cooks more tender at low temperatures.
Other factors to consider
The bigger the brisket, the longer it takes to cook per pound because the heat takes longer to penetrate and reach the center of the beef cut.
Your cooking methods and the type of smoker will affect the cooking time per pound.
Burnt Ends
The brisket point end is more marbled with fat than the flat lean cut end, which is commonly used for slices. The point is utilized for chopped brisket or burned ends.
These slices, sometimes known as “meat candy,” are not truly burned; they merely appear that way due to the Maillard effect. And they are especially sweet, generally served with a sweet BBQ sauce and cooked separately from the rest of the brisket.
How do I wrap brisket?
When the smoke brisket is at 165 degrees F, we remove the meat from the smoker and wrap it in pink butchers paper. This is often called a Texas crutch.
Wrapping permits the brisket to reach a higher internal temperature without drying out.
Wrapping the brisket prevents what is called the “stall” when evaporation from the surface of the meat halts the cooking process. Cook times vary from 8 to 16 hours depending on the size, temperature, and the brisket cur.
The average smoked brisket takes approximately 17 hours when cooked at 225 to 250 degrees Fahrenheit.
How long does it take to smoke brisket?
We have a specific species of animals; there is nothing universal in all cuts. You use weight to estimate the smoking time of your brisket. Remember, internal temperatures always control things.
Beef is considered done when it reaches internal temperature of 165 degrees, but brisket is done when it has reached a 190° to 200° internal temperature.
If you are going to smoke a brisket for the first time I recommend you try a few wood mixes before you settle on one flavor. You might find you enjoy fruity flavors like apple, cherry, or even maple.
Everyone loves smoked meat, and everyone wants to try their own pulled pork recipe at home. Good news! Smoking your own meats at home does not have to be expensive.
We’ll show you nine budget-friendly smokers as well as what to look for in a cheap smoker so it can still get the job done without breaking your budget.
We found the Smokey Mountain to be the best budget smoker, but I’ve included nine choices for all budgets and cooking styles.
Dimensions: 21 | 19 | 41 inches ( 18 Inch Model ) Weight: 39 lbs Fuel: Charcoal Material: Coated Steel
The Weber Smokey Mountain cooker is an all-time favorite, a best seller, and among the best affordable smokers. The Weber Smokey Mountain cooker bullet smoker has been around for years, and its design has stayed the same throughout the years. You can say, “If it ain’t broke, don’t fix it,” and this is the case with the Weber Smokey Mountain bullet smoker.
Not only is this smoker inexpensive, but it is also easy to use and can be mastered in a few hours. There aren’t any complex components, high-tech gadgets, or electrical parts, just a charcoal basket, a water pan, and cooking grates. Everything you need for smoked meat!
Due to the Weber Smokey Mountain size and lightweight, this smoker is considered a portable smoker and is ranked by many as one of the best smokers on the market.
Two smoking ( cooking ) racks offer good cooking capacity.
Available in different sizes.
Built in thermometer.
It is a great portable smoker as it splits in three pieces.
Works well with any type of charcoal.
What we don’t like:
There isn’t much negative to say about this smoker, and we are not going to write something vague just to fill a gap. This is a good smoker, great for those starting or new to BBQ smoking, but it is a budget pick.
If you are not familiar with Recteq and its grills, let me tell you that these grills are very well known and have one of the strongest followings I have seen. Some people claim these grills are among the top, and I agree with that statement. These grills are made out of stainless steel, backed by a six-year warranty, and is among the best budget smokers under 400 bucks. The temperature controls are easy to use, and the fire is accessible for cleaning.
The RT-B380 gets its name from its reasonably large cooking area, which measures a total 380 square inches.
What I like the most about this grill is that it offers a good cooking surface size and can get to high temperatures enough to grill, smoke meat, and even bake. This grill is built to last and, for its price, is an amazing pick. This is a compact grill, but its cooking surface can fit a lot of food. It is large enough to smoke a full-sized brisket or a few racks of ribs.
what we like:
Stainless steel body
Compact but because of its shape is can fit a lot of food.
It gets to hot – 700 degrees hot great for searing
The temperature controller is very accurate.
What we don’t like:
It needs to be kept clean or performance deteriorates.
The Pit Barrel Cooker is our runner-up for multiple reasons, including quality, good warranty, efficiency, and the company behind it. This company is here in the USA and has built an amazing brand. The Pit Barrel Cooker was a family idea that turned into an amazing company and a great product.
But here is why we love the Pit Barrel Cooker. First, these cookers are inexpensive. You get a lot of quality and a lot of cooking space for your dollar.
Second, these cookers are easy to use. There is only one air vent to worry about for temperature control, and Pit Barrel gives you specific instructions on how to set the air vent to achieve the desired temperature.
Lastly, these smokers are designed specifically to cook at low temperatures but can also be used as a charcoal grill. You get a meat hook hanging system and a grill grate to use this smoker in whichever configuration you want.
Easy to use – comes ready with everything you need to cook except charcoal.
Inexpensive but great quality. You get a lot of smoker for your money.
SIMPLE to use. Only one air vent to worry about to control temperature.
Amazing cooking capacity and square inches of cooking for its size.
Use it as a charcoal grill too.
Easy to keep a steady temperature and operate at a steady temperature range.
Good quality components.
Suitable for cold smoking.
What we don’t like:
It would be nice if it had an internal temperature gauge, but that is an easy and inexpensive fix. Besides, you already get a lot of smoker for your money.
If you like the concept of a pellet cooker, and many people do, then The Z Grills 450 will catch your attention. Finding an affordable pellet smoker is not easy. Why? Because all the parts and components needed to make these smokers work add to the price of the smoker.
However, you get a super easy-to-use smoker with a digital temperature control system, but unlike an electric smoker, you get a lot of flavor. Pellet grills and smokers burn wood pellets that produce an authentic wood smoke flavor.
The Z Pellet Grill features an easy-to-use digital controller; all you have to do is add your favorite wood pellets, set the desired temperature, and enjoy a beer.
This grill offers over 400 square inches of cooking space enough for a few racks of ribs or a large pork shoulder.
We did a full review of the Z Grills 450B and found this grill to be extremely easy to use and did a great job at cooking low and slow.
Talk about getting a lot for your buck. Well, the Dyna Glo vertical smoker does just that. If you are looking for a large smoker without spending a fortune, this is a good choice. The Dyna Glo is perfect for outdoor cooking and parties and can fit a lot of food in its smoking chamber.
This is one of the best smokers on the market and has made it into many of our articles for a few reasons, but mainly because it is affordable and you get a lot of space for your money. This is an offset smoker, meaning it cooks with indirect heat, cooking meat only with heat, smoke, and steam during the smoking process.
Dimensions: 22 | 17 | 35 inches ( 17 Inch Model ) Weight: 19 lbs Fuel: Charcoal Material: Coated Steel
The Real Cook Vertical smoker is another simple cooker and inexpensive. Don’t expect the highest levels of quality, but you do get a bargain. For your money, you get more than a dedicated smoker. You get a smoker and a grill. This little guy can be used as a grill, but be careful when cooking at high temperatures.
This smoker is very similar to the Smokey Mountain and works with both charcoal and wood chips.
The Royal Gourmet is another bargain and a good smoker. It is not the highest in quality, but neither is in price. You can expect a simple smoker with good square inches of cooking and simple to use.
This smoker is great for those wanting to get started but do not want to spend too much money on their first smoker.
The Camp Chef stands out among many gas and pellet grills due to its simplicity and quality build. Sure, nothing beats a wood smoker, but if you want to enjoy the cooking process and have a beer while cooking, you will appreciate this grill’s simplicity.
You do not need a wood chip tray with pellet grills since the smoker produces smoke and flavor by burning wood pellets.
What we like:
Simple to use, as easy as an electric smoker or kitchen oven.
It includes a grease bucket and an ash cup.
Pellet grills offer that “set it and forget it” convenience.
What we don’t like:
It is hard to find something we don’t like about this Camp Chef. However, several users agree with our findings, indicating that the shape of the pellet hopper bottom metal plate might be improved to allow the pellets to flow more freely to the auger.
Although an electric smoker may not offer the most authentic barbecue flavor, they are easy to operate, inexpensive and can yield good results. Being electric and the absence of wood, charcoal, or pellet combustion means that the meats are not adequately infused with smoke, not as much.
The digital LED controller of this electric smoker makes it simple to choose the correct cooking temperature, after which the smoker takes care of the rest. This electric smoker is also designed so that everything, including the grease pan, slides easily within the cooking chamber and is simple to maintain.
This electric smoker is affordably priced, yet this budget smoker has innovative features like double wall construction for better heat retention and insulation. This electric budget cooker has a meat probe thermometer for monitoring the internal temperature of the meat.
Certainly, an electric smoker will not produce the same results as a charcoal smoker, but if convenience and affordability are a priority, this electric smoker can be an excellent choice.
What we like
Easy to use
LED controller
Meat temperature probe
Push a few buttons and start smoking meat.
What we don’t like:
I wish that this grill had wheels. During our testing, I had some difficulties picking up the smoker and moving it around.
Here are a few pros and cons of each Barbecue smoker fuel type
Here is a quick comparison of the main pros and cons of all smoker fuel types. You can find affordable smokers in all fuel types.
Gas Smokers and LP Smokers
Gas or LP smokers are known for their ease of use, short learning curve, and simple temperature control. To enhance flavor, a propane smoker will require the help of wood chips. Without them, there is no flavor. We are talking about smoked meat here! However, gas smokers are incredibly simple to operate and let you to regulate the temperature without having to bother with air flow vents.
Pros
Gas smokers are easy to use and great for beginners.
Easy to control the temperature. In gas smokers, temperature is handled by a dial that controls the propane burner.
Propane is easy to find. Which is one reason gas smokers are popular and portable.
Cons
Not the same flavor you get with other smokers.
More parts than a charcoal smoker, meaning more things that can go bad.
Pellet Smokers
Pros
Easy to use and love the automation.
Pellets are available in many flavors.
Cons
These smokers have a lot of components, including electrical components.
They can be more expensive because of all the technology.
Need electricity to operate.
Charcoal Smokers
Pros
Charcoal is an inexpensive fuel.
You get the most authentic BBQ flavor and consistent smoke ring.
Charcoal grills can work anywhere and, in most conditions, no electricity is needed.
A charcoal grill can reach temperatures other grills can’t.
Cons
You will need to learn how to handle charcoal.
You will need to learn how to use your smoker air vents to manage temperature control. No temperature dials or buttons here amigo!
Electric smokers
Electric smokers can be compared to your kitchen oven. An electric smoker uses a heating element to generate heat and cook food. Electric smokers heat the cooking chamber with an electric heating element. Due to the absence of wood or charcoal combustion, electric smokers lack the ” wood-fired” taste found in other types of smokers. Despite this, they are really simple to operate.
Pros
Electric smokers are easy to use.
Cons
Least amount of flavor of any smoker.
Need a reliable power source.
What Should you consider before you buy a Budget ( Cheap ) BBQ Smoker
Price – Cost – Dinero!
This article talks about budget friendly smokers, and price is at the top of our buying list. We usually do not give price too much importance because we look for quality. But since we went looking for an affordable smoker, we know cost is a significant factor. I mean, a thousand-dollar smoker is not an low-cost smoker.
The good news is that you can find, and we did, great smokers at great prices.
The trend you will see is that charcoal BBQ smokers tend to be less expensive, and understandably so. Charcoal smokers are simple cookers with fewer parts.
On the other hand, pellet grills tend to be more expensive since they have many components, electronics, and even high-tech features like WIFI enabled controllers and temperature monitoring systems.
Inches of cooking space/capacity
Smaller smokers tend to be cheaper than larger offset smokers and high-end smokers. However, unless you are looking for a portable smoker, you need to pay attention to the inches of cooking space offered in cheap smokers.
The primary reason is that you can come across a fantastic deal on a smoker at a meager price, only to discover it is far too small.
Smaller smokers require less metal to build, which is why they are less expensive. However, be sure that the smoker you choose is not only within your budget but also large enough to accommodate a rack of ribs, a whole brisket, or at the very least, a small pork shoulder. In other words, useful!
Quality – Oh Quality!
Whether you are buying a propane smoker, a pellet smoker, or an offset or “stick” wood smoker, you need to pay attention to the quality of these smokers.
There are a lot of poor-quality grills on the market, and all it takes is a search of consumer reviews and feedback to find the bad ones. This is why, in addition to our own testing, we value user feedback.
Cheap smokers can never match the quality of a Kamado grill or a Meadow Creek smoker, but that does not rule out the possibility of finding a decent deal among the options available.
Sure, cheap smokers will leak, are built of thinner metal, and might not last a lifetime, but if you are looking for a budget pick, then you know there will be compromises.
However, with appropriate care and maintenance, you can still get cheap smokers that will perform and do the job well, plus last a few years.
Warranty
A good manufacturer will stand behind their product. Grills and smokers with a good warranty are a plus and needed when buying an inexpensive smoker. If you come across a good deal, but it has a poor warranty, run!
Metal Thickness
Even the best low cost smokers will be built using lesser quality materials and thinner metals. However, if the walls of the smoker are too thin, it will have a hard time retaining heat, and the walls can even warp during preheating or accidental flare-ups.
We look for a fine balance between price and quality materials.
Necessary Features
It is OK to watch your dollars and look for a good bargain but to smoke good food and get good results; you will need at least a few features to help you during the cook.
A temperature gauge is one of the things that you should have in your smoker, at the very least. Smoking meats is all about low and slow plus cooking at constant temperatures to get the best results.
Type of fuel
Consider what fuel type you are most comfortable with, and then go from there. Why? Not everyone likes to use charcoal, and some dislike propane. There are pros and cons to everything, and that includes smokers and the different fuel types.
For example, charcoal yields great flavor, and with some experience, you can have absolute control over your smoker. On the other hand, propane smokers are easy to use but do not yield flavor. To get the smokey flavor, you need to use wood chips, but propane alone will not yield a great authentic BBQ flavor.
Then you have pellet grill smokers, which combine the convenience of propane smokers with the flavor of cooking with wood and coal. Since pellet smokers burn wood pellets, you get a good BBQ flavor.
budget smoker grills affordability and price guide
The following guide will assist you in grasping the price structures of various smokers. Some smokes are actually more expensive than others; features like as electronics and components can increase the price.
Type of Smoker
Affordability
Large Offsets
$$$$$ -Expensive ( larger high quality ones)
Charcoal Smokers
$$ – Lower cost
Electric Smokers
$$$ – Moderate cost
Gas Smokers
$$$ – Moderate cost
Pellet Smokers
$$$$$ – Moderate to expensive
Conclusion: Which is Our top pick for an Affordable Smoker?
The goal of this article is to help you find a good quality smoker without breaking the bank. All the smokers on this list are excellent options and will do the job.
However, our pick for a budget smoker is the Weber Smokey, followed by the Pit Barrel Cooker which is among the best affordable smokers. The Pit Barrel cooker is the easiest to use, and you get a lot of smoker for your money.
The only downside to the Pit Barrel Cooker smoker is also what makes it so efficient; it is a steel drum, so if you need to add charcoal, you will need to do it through the top opening. You might even need to move the food out of the way.
The Smokey Mountain is more of a traditional smoker and is a good choice. It is our top choice since it is of good quality and will do the job well. In fact, some people use the Smokey in competitions.
Your Pit Boss is an amazing cooking machine, but if you don’t keep it clean or one of its electrical components goes bad, you will see an error code on the control board. No Bueno amigo!
In this article, I will explain what the most common and annoying Pit Boss error code ( Er1 ) means, how to troubleshoot, fix it, and prevent it.
Pit Boss has a great customer service team, but this article can save you waiting on hold or a 50-minute call. Read on!
Pit Boss Erl Code – Er1 Code on Pit Boss Smoker, What this Code means
The ER1 message code on your Pit Boss control board display is a Pit Boss error code indicating an issue with the temperature sensor inside the Pellet Grill. Pit Boss Grills have a temperature sensor or temp probe inside the cooking chamber, normally towards the back wall of the grill, to monitor the temperature inside the grill.
The sensor we are referring to is called an RTD temperature sensor. RTD is an abbreviation for “Resistance Temperature Detector.” RTDs often incorporate platinum, nickel, or copper wires because of the positive temperature coefficient of these materials. This implies that an increase in temperature causes an increase in resistance, which is subsequently utilized to detect and monitor temperature changes.
The temperature RTD probe is how a pellet smoker or grill can read the grill’s cooking chamber temperature so the PID controller can determine if it needs to feed more pellets to the fire pot and keep the cooking chamber steady or keep feeding pellets to meet the temperature you set.
There are many reasons why this sensor can stop communicating with the controller, triggering the ER1 error code.
The good news is that the error code can be cleared quickly following a few steps in most cases. In some rare cases, you might be dealing with a bad internal thermometer sensor or a cable not connected properly, but we will show you a few steps you can follow to troubleshoot and clear the ERL error code.
How do I fix Er1 code on Pit Boss?
Fixing and clearing the Pit Boss ERL error code can be as simple as cleaning the temperature probe. In fact, many times, a dirty temperature probe is the source of the problem.
When you smoke food in your Pit Boss Smoker or grill, grease, dust, ash are all accumulated on this sensor. Eventually, and once the smoker cools down, this grease and grime will harden on the sensors.
The problem usually manifests itself when it is time for your next grilling or smoking session after the grill has been sitting for a while.
As you start your Pit Boss and set it to its ignition position, the grill will start feeding pellets to the burn pot, which will iginte the pellets and start a fire.
Your Pit Boss will keep feeding pellets until the temperature sensor reads and senses that the grill has achieved cooking temperatures. If the sensor fails to send temperature readings and cannot tell the control board what the internal cooking chamber temperature is, your Pit Boss will shut down and greet you with an error code.
So the first thing to do to fix the erl code is clean the RTD sensor. Use water, soap, or vinegar to clean the grease and grime off the sensor. By the way the sensor looks like a little antenna, you won’t miss it.
Troubleshooting
Keeping your Pit Boss clean is important and is part of any grill maintenance. Keeping the temperature probe clean will likely save you hours of troubleshooting.
Turn off the smoker and let it cool down.
Unplug the smoker from the power outlet.
Check underneath the smoker for loose wires, especially the temperature probe wires.
Check the RTD temperature probe for damage or excessive gunk. If the temperature probe is covered in grease and ash, your Pit Boss will not be able to read the temperature, and an error will be displayed on the control board.
A Few Fixes
Grab some water and vinegar and clean the temperature probe. Create a mix of one part water and one part vinegar and clean the temperature probe as best as you can.
Clean the burning pod, and vacuum the grill. If the fire pot is clogged with ashes, it will take longer to ignite the pellets, and an error number will be generated as a result.
How can I test if the RTD temperature sensor is bad?
You can run a few tests and see if your Pit Boss temperature probe is acting right. For example, you can use a heat gun to read the cooking chamber’s integral temperature. A Pit Boss Smoker will have its sensor against the back wall inside the cooking chamber. Aim the heat gun at the sensor and compare the temperature reading with that off the control board.
If the temperature readings between the heat gun and the controller board are way off, you likely have a bad sensor. It is time to contact customer service.
However, this test should be done after checking and making sure all cables on the back of the board, auger, fan, and other components are firmly connected. Also, make sure you have thoroughly cleaned the sensor before conducting this test.
If you don’t have a heat gun, you use a meat thermometer, but the test will not be as accurate.
How do I replace Pit Boss RTD Probe?
The process is not that complicated. The temperature problem can be removed by undoing two scores and unplugging them from the controller. Always follow Pit Boss instructions on how to perform repairs on Pit Boss smoker.
To install the new probe, screw it back in and plugin in the wires to the controller firmly.
We have partnered with one of the largest grill parts stores, and you can find all Pit Boss parts on their website.
Grill Parts Replacement ( dot ) com has the largest selections of grill and smoker parts, including parts for your Pit Boss. Our readers can use our discount code, EZS39WGQQG for an extra 7% off.
Preventing the Pit Boss Er1 Code
Pit Boos owners love their grills and smoker for many great reasons. To avoid and prevent getting Pit Boss error codes in the way of a good Saturday afternoon cook, maintenance will be your friend.
The main reason why you Pit Boss will throw an error code is that its internal temperature sensor is dirty. I own a Pit Boss wood pellet smoker, and everything time I have an issue, an erl code is because the probe is dirty and the grill shuts off.
Where can I get help with Pit Boss error codes?
The Pit Boss Grills are one of the most popular grills. There are plenty of places to get help with error codes.
However, if you believe there is something wrong with the probe and are getting multiple error codes is best to contact Pit Boss customer service. I have called customer service, and Pit Boss owners will agree they are among the best.
One Last Word.
I know we all want our grills to work forever and never give us any problems. But the truth is if you use your grill or smoker often, you will need to do some maintenance to keep it in top shape.
Most Pit Boss grills go into an error code mode due to poor maintenance and parts failing.
Spend some time and clean your grill at least once a month. If you plan on storing your smoker or grill during the winter, make sure it is cleaned and use a nice grill cover.
I like to clean the probe on my smoker at least once a month with water and vinegar. When the smoker cooled enough, grab a rag and wipe clean the temperature probe.
You want to enjoy your grill or smoker as much as possible and with the least amount of problems. The best thing you can do is keep your grill clean.
My friends, I hope you found this article useful. Feel free to share it with your friends and family.
Chicken wings are a crowd favorite, and often you find yourself cooking a few dozen wings and are left with leftovers wings. This guide will explain how to reheat chicken wings, keeping them crispy, moist, and tasteful.
We will teach you how to reheat wings using different methods to preserve the chicken wings’ texture and flavor.
It all starts with proper storage and How You store leftover chicken wings
If you want better results when it is time to reheat chicken wings, start by properly storing them after the cook. This is how you need to store the chicken wings. Wrap cooked chicken wings in foil or plastic and place them in airtight containers to stop the growth of bacteria.
Avoid letting cooked food come in contact with uncooked foods. Keep the already-cooked wings from raw poultry.
Reheating chicken wings works best when the wings have been stored correctly and have not been left unprotected in the fridge to dry.
How long can I keep chicken wings?
Chicken wings can last for days in the refrigerator given that they are stored in airtight containers without being contaminated by other foods.
If you plan on reheating the wings days later, you can freeze the wings, but if you plan to finish eating the wings in a day or so, keeping them in the fridge will preserve the wings and the flavor.
When reheating chicken wings is important to let the wings acclimate to room temperature before applying any of the methods in this article.
How do I store leftover chicken wings?
Chicken wings should be put in the refrigerator within two hours after being cooked. By refrigerating the wings within the two-hour window, you will preserve their freshness and flavor.
I prefer to use hard plastic airtight containers to avoid squeezing the wings with other containers and foods in the refrigerator.
Leftover wings can also be stored in your refrigerator using zip lock bags.
How To Reheat Chicken Wings?
The key to enjoying wings days after being cooked is to know how to reheat them. These are six fast and easy ways to reheat chicken wings.
Reheating chicken wings is not that complicated, and most of us just throw the wings in the oven or warm up the wings in the microwave. In this article, we will focus on the best way to reheat chicken.
Here are Six Quick and Easy Ways to Reheat Chicken Wings
1. Use The Oven
To reheat chicken wings in an oven, take the wings out of the refrigerator and let them rest at room temperature. Turn on the oven, preheat your oven, and set the oven’s temperature to 350 F. We recommend using a spray bottle and spraying water over the wings so they stay moist while reheating in the oven.
After you preheat your oven and set your oven to 350 degrees, place the wings on a baking tray and use baking sheets to keep the wings from sticking to the tray. Hit each side of the wings for about 5 minutes. Enjoy leftover wings.
2. Use an Air Fryer
Air fryers are amazing appliances. You can cook so many things in these little ovens, but better yet, you can make just about anything crispy.
Start by letting the wings reach room temperature. Most air fryers come with a baking pan which you can use in this process.
Straight to the point. Set the air fryer cooking temperature to 400 degrees and cook the wings for 10 minutes. Air fryers are great for reheating because they are easy to use, and unlike microwaves, air fryers can crisp the wings.
Serve and enjoy!
3. Use the microwave
Using your microwave to reheat food is quick and easy but also can make meats like chicken soggy. However, if the microwave is your choice and speed is your only requirement, here is how to reheat chicken wings in a microwave.
Remember to use a microwave safe plate to reheat your wings. Grab some paper towels and damp paper towels in a bit of water. Place the paper towel on the microwave safe plate and place the wings on the top of the napkin. Remember, we are using a moist paper towel.
As the water on the napkins evaporates, it will help keep the wings moist.
Put the wings in a microwave safe tray, spray a little bit of water on the wings and reheat for about two minutes. If you need the wings warmer, just add 30 seconds increments.
4. Use a Frying Pan on Your Stove
Using a small frying pan or cast iron skillet is a quick and easy way to reheat the chicken wings. This method is simple and yields good results.
Take the wings out of the refrigerator and let them climate to room temperature for about 20 minutes before reheating the wings. Add just a tiny amount of oil to the pan and reheat the wings for about 10 minutes until they reach the desired internal temperature.
Place the chicken on a serving plate and get ready to enjoy some good wings.
5. Use Your Grill Or Smoker
Using your grill is the most prolonged method but yields the best results. Using your grill allows you to add more flavor to the chicken wings and make them crispy. You can also use your smoker and a baking sheet in your smoker. I like to put the wings on top of aluminum foil, but it is not necessary.
Get your grill going and get the grill temperature to about 350 degrees. Reheat the wings for about 10 to 15 minutes or until the internal temperature reaches 165 degrees Fahrenheit.
6. Use The Microwave and the Oven
Using the microwave and your oven takes a few extra steps but will yield great results and help you keep the wings crispy. I don’t like to use the microwave to reheat food all that much. Still, microwaves are accessible and available to most of us and are easy to use.
This process uses the speed of the microwave to get the wings to temperature and then uses the oven to get crispy wings. If you just want to reheat the wings, then utilizing the microwave alone will do the trick.
It is important to let the wings reach room temperature. The process is simple, microwave the wings until hot in, and this should only take 1 to 2 minutes in the micro.
Then place the wind in a cookie baking sheet and place the ings in the oven for another 1 to two minutes until they reach the temperature and feel crisp.
Reheating traditional vs boneless chicken wings
Boneless wings, in general, tend to warm up faster but also tend to dry out easier. If you’re reheating boneless wings, it may be a good idea to reheat these wings for somewhat less than the time we suggested in this guide or to spritz them with water before reheating.
These methods generally work just as well no matter what type of wings you want to reheat, including buffalo wings. Buffalo wings with the sauce in the side reheat better.
Can I reheat chicken wings multiple times?
Eventually, the texture you feel soggy. This is, of course, given that you are storing the wings properly and are using the methods in this guide to preheat the chicken. However, you can reheat and enjoy wings for few times. You can reheat chicken wings multiple times, but keep in mind that the more you reheat meat, the less fresh it will taste.
Yes, follow the steps and methods in this guide, and you can reheat the wings so there are crispy. If you use an air fryer or your grill, the wings will come out crisper than using the microwave or the oven.
Can you reheat chicken wings the next day?
Absolutely. You can reheat wings the next day, given that you have taken proper steps to store the wings in the refrigerator and were not left outside for more than two hours after cooked.
How do you microwave leftover chicken wings?
The microwave option is simple. Use a microwave safe plate and spray some water on the wings to keep them from drying out.
One last word
This guide will help you reheat your chicken wings so that they keep their flavor and texture. Always try and test to find what works best for you. I recommend using a meat thermometer whenever dealing and working with food. If you are cooking wings, it is good to plan ahead and know how to store them and protect them for later.
A good BBQ tools set for your grill or smoker with useful accessories can help you enjoy your grill and enhance your cooking experience. In this article, I go over the best grill tools sets and show you the ones that stood up to my tests.
I also add my personal experience and feedback using these tools. Our BBQ Grill Academy team researched and tested different BBQ tool brands so we could compare different tools and see how well they work. We also looked at customer reviews and comments, the set’s quality, the kinds of accessories it came with, and more.
What To Look to look for in a good BBQ Grill Tool Set?
Tools and Accessories are included in set
imagae: BBQ Grill Academy ( different types of sets )
A majority of grill tool sets on the market have at least five different tools, while other sets include additional accessories for handling and cooking food. Accessories like as cooking gloves, corn cob holders, and thermometers are frequently included with these sets.
Ensure that the toolset you select includes a pair of decent tongs and a spatula at the absolute least. Both are necessary when cooking on a barbecue. But check that the set has everything you want.
Some of these accessories are unnecessary for barbecue use, and tool kits with fewer accessories will be less expensive.
A decent barbecue grill tool set should include have at least a brush, a spatula, a fork, and tongs. These are the essential components of every grilling tool set. Some companies also include utensil sets, which come in handy for outdoor camping cooking and serving.
The carrying or storage case
image: BBQ Grill Academy
Most barbecue tool sets include a carrying case, which is often constructed of plastic, nylon, wood, or metal. We find it logical to buy barbecue tools set with sturdy carrying bags to safeguard and arrange the tools.
Just keep in mind that nylon cases do not protect the tools as well as a metal or even plastic case will do.
Materials utilized in the manufacturing of the tools
When purchasing a set of grilling BBQ tools, pay close attention to their design. A well-designed tool includes a cleaning brush, spatulas, and other accessories with appropriate-length handles and strong tongs.
A good design will also incorporate robust heat-resistance guards and grips for holding the tools securely.
Some of the more expensive BBQ tool sets have clever features like locking mechanisms, bottle openers built into the handles, and a hook on each tool for hanging it on the grill.
Some barbecue tool sets may not provide adequate functionality. For instance, poorly constructed tools with short handles place the user’s hands closer to the fire, rendering the equipment ineffective. In addition, poor quality tongs will not grip food well, causing you to drop food on the floor more often.
Quality
Durability and quality are essential characteristics that we seek when purchasing a set of grilling tools. The majority of grill tool sets are constructed from stainless steel, although not all manufacturers employ heavy-duty stainless steel or other high-quality metals.
We also look for tools made of tough, rust-proof materials that can withstand high temperatures and tools with heat-resistant handles.
The Romanticist Grill Set offers a lot of value for your money. This BBQ tool set includes 28 grill tools and accessories at a reasonable price.
The tools are made out of food-grade stainless steel, and they all fit in an aluminum case. These tools are dishwasher-safe. This stainless steel set works for outdoor use or even as a camping companion set
This set stainless steel is pretty sturdy and can handle a bit of force specially the brush.
Cuisinart is a well-known brand, and they make everything from grills to smokers and, of course, grilling tool kits. Cuisinart’s Deluxe grill set includes 20 different tools. The items in the Deluxe Grill set are made from durable stainless steel and are all protected in a good-quality aluminum case.
The design of this tool set is very user-friendly, with features like a spatula with a built in bottle opener and a digital meat thermometer built into the tongs.
The fork in the Deluxe grill set has a built-in thermometer which is a great feature.
This 20-piece set from Cuisinart includes:
A spatula
Tongs
Basting brush
Fork with built in meat thermometer
4 Pairs of corn holders,
5 skewers ( stainless steel )
18.5 inches long cleaning brush
What we like:
20 fundamental tools, great design, and user-friendly.
The built-in fork thermometer is very useful and convenient.
Well built long handles.
What we don’t like:
This tool set is a bit pricey, but it is of good quality.
These grilling tools are made from stainless steel and are reasonably priced. The quality is not as high as the top two options on this list, but you get all the basic tools at a good price. The tools have heat-safe handles and are dishwasher safe. One nice perk is a replacement head for the cleaning brush.
The 16-piece set includes:
Tongs
A spatula with a built-in bottle opener
8 corn holders
2 skewers
A cleaning brush with a spare head is nice!
A basting
A grill bristle brush
Aluminum carry case
What we like:
It includes every tool you need at a good price.
A smaller 7 pieces set is available.
Cold touch handles
Aluminum Carrying Case
What we don’t like:
The tong heads are small can be hard to grab long pieces of meat.
The Olarhike BBQ Grill Tools Set is among the best-rated grill toolsets in the market. This set includes every you need to grill and smoke meats.
The set includes a marinade meat injector, a thermometer, and all the basic food handling tools. The tools are made out of stainless steel, which should withstand the heat of your grill well.
The OlarHike kit includes 22 grill cooking tools and is all packed in a clothes case. This tool set is well put together and includes a lot of tools and accessories.
Included in this tools set:
Marinade meat injector
cooking gloves
skewers sticks
spatula
tongs
grill brush
Forks
What we like:
This kit includes many tools, including a marinade injection and a thermometer.
Long Handles
Tools for prepping and smoking meats.
What we don’t like:
I’d be concerned with dropping something on top of the case; it is not a hard case.
This is a good choice for those looking for just the basic tools to cook on a grill.
The set is made from heavy-duty stainless steel and includes four tools. The spatula is sharp, and its serrated cutting edge can be used for cutting meat. The serrated edge is not as sharp as a meat cutting knife but it works. The spatula can also be used as a bottle opener.
This set is simple and has all the essential tools you need for your grill.
This set includes four tools:
A Grill fork
A Basting brush
A pair of Tongs
A spatula
What we like:
Very Heavy Duty Design
Multi-Use Spatula
Lockable BBQ pair of tongs
What we don’t like:
Simple set, not all the accessories found in other sets.
Things to Consider Before Picking Up Your Next Set
What do You Really Need?
When searching for the grilling tool sets, keep in mind what tools you really need. You might not need more than a spatula and a pair of tongs.
According to a survey by the HPBA (Hearth, Patio & Barbecue Association), 70 percent of all US adults owned a BBQ grill at some point. It turned out that 70 percent of people, 83 percent, had purchased three or more grill accessories. Think of how many of those were junk!
What are the Essential Grill Tools?
Essential BBQ tools are those that are necessary in the process of cooking food on your grills in an efficient and safe manner. You can’t use your bare hands to cook on your grills, and you need utensils like a fork and a spatula in order to cook on your grill
At the very least, you will need to transfer food to and from the grill, flip, turn food, and keep your grill clean.
Tongs
Tongs are essential for transferring food into and out of the grill, as well as for handling and managing food while it is being grilled. Tongs are an essential piece of equipment for every barbecue setup. Tongs are useful for almost any task.
However, tasks such as turning burgers over are difficult to do with them; a spatula would be more effective in this situation.
Spatula
When it comes to rotating and flipping food, a spatula is absolutely necessary, particularly when dealing with delicacies or meats that are prone to breaking when using tongs.
It is necessary to use a spatula while working with meats such as fish and burgers. In addition to that, you may use your spatula to scrape the grime off of your barbecue grates and even clean your griddle top.
Basting Brush
When used to apply sauces, marinades, and other moisture-based ingredients, basting can help prevent food from drying out, and a basting brush is your best friend when it comes to doing so.
Grill Brush
Invest in a quality grill brush to keep your grill grates clean. I wrote a comprehensive guide on grill brushes, but the following is what I recommend after testing a large number of different brushes. If you are the type of person who keeps their grill clean and doesn’t cook often, a simple cloth brush or cleaning brick will do the trick. On the other hand, if you cook things like ribs with a lot of sugar-based sauce and, well, don’t clean it as often, I recommend a metal bristle free brush with a built-in spatula.
Conclusion
We went looking for the best grill tool sets, and the options were many. However, after our hours of testing and research, we chose the The Romanticist 20 Piece Tool Set as the top choice and the Cuisinart Deluxe Grill Set as our Runner up.
Lump charcoal is natural hardwood, tree branches, and twigs that have been cooked in a low oxygen environment to create hardwood lump charcoal. This charcoal is called lump charcoal because after the hardwood is cooked and turned into charcoal, it retains its natural shape and tree-like characteristics resulting in large lumps of coals.
How Hardwood Lump charcoal is made
Lump charcoal is made from natural hardwoods. Logs, wood scraps, branches, and twigs can all be carbonized to make lump charcoal. The charcoal is often produced from tress like Quebracho from South America, which produces a distinct flavor, but oak and hickory hardwoods are also used.
Water, tar, and other organic compounds are removed by cooking the wood in a low oxygen environment.
The result is are natural-looking wood chunks turned into charcoal, hence the name lump charcoal. Lump charcoal is recognizable due to its lump size, irregular shapes since it is all-natural. Good lump charcoal brands produce 100 percent natural charcoal that will burn clean and not interfere with food seasoning or flavor.
Why is lump charcoal Preferred, in some cases
Lump charcoal has no binder, artificial flavors, or chemicals. The natural aspect of lump charcoal attracts many BBQ enthusiasts, and many only turn to lump charcoal for smoking meats and grilling food.
Lump charcoal’s natural origins make it the closest thing to grilling and smoking food with natural wood. However, charcoal should never be considered a source of flavor. Lump charcoal, like any other charcoal, is your fuel and source of heat.
Lump charcoal is also preferred among Kamado grill owners as lump charcoal produces less ash than briquette charcoal. This is important for kamado grills as kamado’s design and efficiency depend heavily on airflow, and too much ash in the firebox will shut off the grill making it impossible to use.
Kamado grills do not have large ash boxes, and too much ah can easily clog up a kamado grill ashpan and disrupt airflow.
Another reason many BBQ Grill and smoker owners prefer lump charcoal is because it burns clean, as it is natural, and it burns hot. This means that you can potentially use fewer coals to grill a few dogs.
Lump charcoal, how over does have its drawbacks, is directly linked to its innate nature. First, lump charcoal is more expensive to produce, and therefore the price per pound is higher.
Second, the lumps are all kinds of sizes, shapes, and lengths. Having inconsistent size chunks can create uneven heat in your grill. For some, lump charcoal can be harder to manage and temperature control.
Lastly, not all lump charcoal manufactures cook their wood the same. Some have high-quality standards, but the less expensive brands use recycled woods which can introduce foreign objects to the mix and end up in your bag and therefore in your grill.
The key point here is that lump charcoal is made out of natural wood, and as with anything natural, some things cannot be controlled during the manufacturing process. Aspects like shape, size, and but the output of the lump will not be controlled as this product is a natural by-product of carbonizing natural wood.
Charcoal is for heat, and nor lump charcoal nor briquettes will make your food taste better. Try Some lump charcoal brands are made of hardwoods that can add flavor, but to get the authentic smoky flavor, smoking wood needs to be used in your smoker or charcoal grill.
One Last Word.
Lump charcoal is an excellent choice for those with kamado grills and absolutely natural products. However, natural also means is not perfect. Nevertheless, lump charcoal is good charcoal for any grilling application, including high-temperature searing and low-temperature smoking.
The Best Charcoal Rake You can Buy today to Safely handle charcoal
Ever wonder if there is some sort of tool to remove ash from your grill, handle charcoal, move it around, spread split, and rake it. Yeap, there is a tool for that and is called a charcoal rake. A charcoal rake is a tool you can use in your charcoal grill or smoker to rearrange and safely move hot charcoal around in your grill.
This tool is often used to reset hot charcoal after a cook and prep the grill for a sizzling steak sear. It can also be used to scoop ash out the grill when you are done using the grill.
In this article, we will look at the best charcoal rakes we found online and the ones you can get today.
What is a charcoal rake?
Well, kids, a charcoal rake or ash tool is a metal tool shaped similarly to a scoop or spatula, but so you can shovel or move charcoal in your grill around.
These tools are designed with a blade or head on one side and a handgrip on the opposite side connected by a long shaft, usually averaging 20 to 30 inches long.
The tool is devised to handle hot charcoal from a safer distance and not use things like broomsticks cloth hangers to move hot charcoal around. Yeap, I’ve been there.
How to use a charcoal rake?
This is a simple tool, and all you have to do is grab a pair of cooking gloves, grab the charcoal rake, and spread or rearrange charcoal as needed.
For example, say you are reverse searing a steak, and the time comes to crank up the heat. You can use a charcoal rake to pile the hot charcoal into a corner of your grill and create a hot zone to sear the steak.
You can also use some charcoal rakes to scoop ash or shovel old charcoal out of your grill. For example, some kamado grills do not have a removable ashtray, and the only way to remove ash is by scooping it out or using a shop vac.
Charocal rakes with a slight head angle work well for shoveling ash, whereas rakes with a 90 degree shaped head or blade work better for pushing charcoal around.
A 90-degree head rake tool can also push hot pizza stones, burn wood, and even pick up grates.
How we chose the best charcoal rakes
As with anything that comes in contact with hot charcoals, charcoal rakes need to be heat resistant and withstand high temperatures. We are going to closely look at the materials used to build the rake.
Also, the blade or head angle will play a role and determine which kind is best for you. For example, a charcoal rake with a large blade might not work well if you own a kamado, but a smaller ash tool that can fit inside the kamado’s ash box will do the job better.
If you are working with a large smoker and need to move lots of charcoal, then a big head rake will work best. So consider how you will be using the tool.
The Weber charcoal rake has excellent online reviews and is popular among all skill-level users. This tool is built out of stainless steel and is 21 inches long. This means this tool can put about two feet of distance between you and hot charcoal.
Length: 21 inches
What we like:
It is well priced for what it is, and it works well.
Gives you 21 inches of distance from hot charcoal.
The Gilljoy ash/rake is another excellent option. It is 25 inches long, and it features a rubber grip handle. The grip might be helpful for those with sweaty hands or if the handle gets too hot. The blade on this rake is bent 90 degrees will help push large charcoal chunks around.
Length: 25 inches
What we like:
The rake is 25 inches long, putting more distance between your hands and hot charcoal.
The rubber handle is welcomed as it helps to hold the tool better.
Built out of stainless steel.
The 90-degree head is excellent for pushing things around, including charcoal, pizza stones, and grates.
What we don’t like:
Is a two pieces design that can come unscrewed sometimes.
The Dracarys Ash tool can replace the raking ash tool included in your Green Egg and Kamado Joe. Although this tool does not have a large blade or head, it works excellent in ceramic kamado grills with small ash door openings and small places.
Length: 18, 26, and 32 inches
What we like:
Excellent replacement for original kamado ash tool.
Available in different sizes.
Small in enough to fit in Kamado ash box.
What we don’t like:
The head or blade on this tool is small and might not work for those wanting to move large chunks of charcoal around.
The Romanticist ass tool rake is good and features a rubber handle, and is 24 inches long.
What we like:
90 Degree head helps push charcoal around or pick up ash
Rubber grip helps hold the tool better.
24 inches long
10 years warranty
What we don’t like:
the head will not fit the ash access opening of some kamado grills.
Not as strong as the top two on this list.
One Last Word
Charcoal ash or rake tool is a simple BBQ grill accessory yet, handy around charcoal grills and charcoal smokers. Spending a few bucks on this type of tool can make working with charcoal a bit easier.
The best charcoal rake tool needs to withstand high temperatures but also work well with your charcoal or smoker grill.