Digital Forensics: Repairing a Damaged Hard Drive and Extracting the Data
Welcome back, aspiring digital forensic analysts!
There are times when our work requires repairing damaged disks to perform a proper forensic analysis. Attackers use a range of techniques to cover their tracks. These can be corrupting the boot sector, overwriting metadata, physically damaging a drive, or exposing hardware to high heat. That’s what they did in Mr.Robot.
Physical damage often destroys data beyond practical recovery, but a much more common tactic is logical sabotage. Attackers wipe partitions, corrupt the Master Boot Record, or otherwise tamper with the file system to slow or confuse investigators. Most real-world incidents that require disk-level recovery come from remote activity rather than physical tampering, unless the case involves an insider with physical access to servers or workstations.
Inexperienced administrators sometimes assume that data becomes irrecoverable after tampering, or that simply deleting files destroys their content and structure. That is not true. In this article we will examine how disks can be repaired and how deleted files can still be discovered and analysed.
In our previous article, PowerShell for Hackers: Mayhem Edition, we showed how an attacker can overwrite the MBR and render Windows unbootable. Today we will examine an image with a deliberately damaged boot sector. The machine that produced the image was used for data exfiltration. An insider opened an important PDF that contained a canary token and that token notified the owner that the document had been opened. It also showed the host that was used to access the file. Everything else is unknown and we will work through the evidence together.
Fixing the Drive
Corrupting the disk boot sector is straightforward in principle. You alter the data the system expects to find there so the OS cannot load the disk in the normal way. File formats, executables, archives, images and other files have internal headers and structures that tell software how to interpret their contents. Changing a file extension does not change those internal headers, so renaming alone is a poor method of concealment. Tools that inspect file headers and signatures will still identify the real file type. Users sometimes try to hide VeraCrypt containers by renaming them to appear as ordinary executables. Forensic tools and signature scanners will still flag such anomalies. Windows also leaves numerous artefacts that can indicate which files were opened. Among them are MRU lists, Jump Lists, Recent Items and other traces created by common applications, including simple editors.
Before we continue, let’s see what evidence we were given.
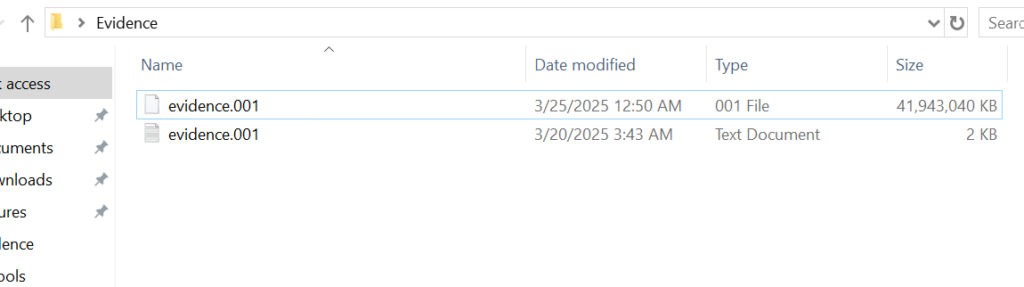
Above is a forensic image and below is a text file with metadata about that image. As a forensic analyst you should verify the integrity of the evidence by comparing the computed hash of the image with the hash recorded in the metadata file.

If the hash matches, work only on a duplicate and keep the original evidence sealed. Create a verified working copy for all further analysis.
Opening a disk image with a corrupted boot sector in Autopsy or FTK Imager will not succeed, as many of these tools expect a valid partition table and a readable boot sector. In such cases you will need to repair the image manually with a hex editor such as HxD so other tools can parse the structure.
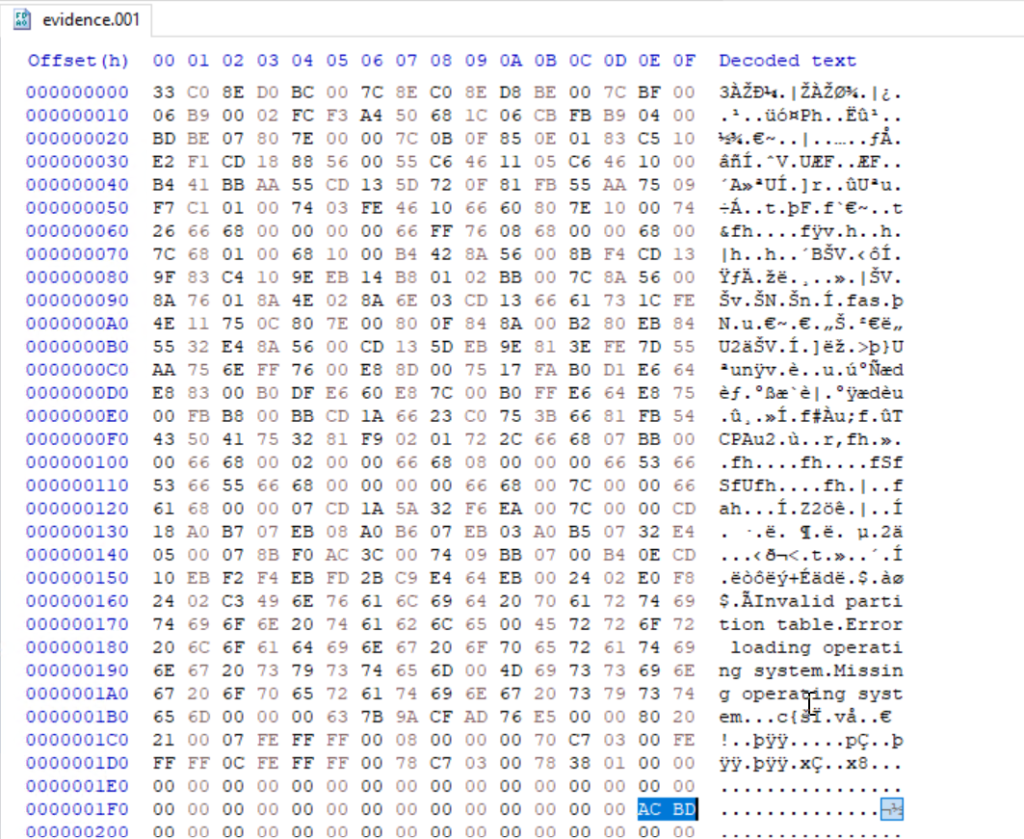
The first 512 bytes of a disk image contain the MBR (Master Boot Record) on traditional MBR-partitioned media. In this image the final two bytes of that sector were modified. A valid MBR should end with the boot signature 0x55 0xAA. Those two bytes tell the firmware and many tools that the sector contains a valid boot record. Without the signature the image may be unreadable, so restoring the correct 0x55AA signature is the first step we need to do.

When editing the MBR in a hex editor, do not delete bytes with backspace, you need to overwrite them. Place the cursor before the bytes to be changed and type the new hex values. The editor will replace the existing bytes without shifting the file.
Partitions
This image contains two partitions. In a hex view you can see the partition table entries that describe those partitions. In forensic viewers such as FTK Imager and Autopsy those partitions will be displayed graphically once the MBR and partition table are valid.

Both of them are in the black frame. The partition table entries also encode the partition size and starting sector in little-endian form, which requires byte-order interpretation and calculation to convert to human-readable sizes. For example, if you see an entry that corresponds to 63,401,984 sectors and each sector is 512 bytes, the size calculation is:
63,401,984 sectors × 512 bytes = 32,461,815,808 bytes, which is 32.46 GB (decimal) or ≈ 30.23 GiB

FTK Imager
Now let’s use FTK Imager to view the contents of our evidence file. In FTK Imager choose File, then Add Evidence Item, select Image File, and point the application to the verified copy of the image.

Once the MBR has been repaired and the image loaded, FTK Imager will display the partitions and expose their file systems. While Autopsy and other automated tools can handle a large portion of the analysis and save time, manual inspection gives you a deeper understanding of how Windows stores metadata and how to validate automated results. In this article we will show how to manually get the results and put the results together using Zimmer’s forensic utilities.
$MFT
Our next goal is to analyse the $MFT (Master File Table). The $MFT is a special system file on NTFS volumes that acts as an index for every file and directory on the file system. It contains records with metadata about filenames, timestamps, attributes, and, in many cases, pointers to file data. The $MFT is hidden in File Explorer, but it is always present on NTFS volumes (for example, C:$MFT)

Export the $MFT from the mounted or imaged volume. Right-click the $MFT entry in your forensic viewer and choose Export Files

To parse and extract readable output from the $MFT you can use MFTECmd.exe, a tool included in Eric Zimmerman’s EZTools collection. From a command shell run the extractor, for example:
PS> MFTECmd.exe -f ..\Evidence$MFT --csv ..\Evidence\ --csvf MFT.csv

The command above creates a CSV file you can use for keyword searches and timeline work. If needed, rename the exported files to make it easier to work with them in PowerShell.

When a CSV file is opened, you can use basic keyword search or pick an extension to see what files existed on the drive.
Understanding and working with $MFT records is important. If a suspect deleted a file, the $MFT may still contain its last known filename, path, timestamps and sometimes even data pointers. That information lets investigators target data recovery and build a timeline of the suspect’s activity.
Suspicious Files
During inspection of the second partition we located several suspicious entries. Many were marked as deleted but can still be exported and examined.

The evidence shows the perpetrator had a utility named DiskWipe.exe, which suggests an attempt to remove traces. We also found references to sensitive corporate documents, which together indicates data exfiltration. At this stage we can confirm the machine was used to access sensitive files. If we decide to analyze further, we can use registry and disk data to see whether the wiping utility was actually executed and what user executed it. This is outside of our scope today.
$USNJRNL
The $USNJRNL (Update Sequence Number Journal) is another hidden NTFS system file that records changes to files and directories. It logs actions such as creation, modification and deletion before those actions are committed to disk. Because it records a history of file-system operations, $UsnJrnl ($J) can be invaluable in cases involving mass file deletion or tampering.
To extract the journal, first go to root, then $Extend and double-click $UsnJrnl. You need a $J file.

You can then parse it with MFTECmd in the same way:
PS> MFTECmd.exe -f ..\Evidence$J --csv ..\Evidence\ --csvf J.csv

Since the second partition had the wiper, we can assume the perpetrator deleted files to cover traces. Let’s open the CSV in Timeline Explorer and set the Update Reason to FileDelete to view deleted files.


Among the deleted entries we found a folder named “data Exfil.” In many insider exfiltration cases the perpetrator will compress those folders before transfer, so we searched $MFT and $J for archive extensions. Multiple entries for files named “New Compressed (zipped) Folder.zip” were present.

The journal shows the zip was created and files were appended to it. The final operation was a rename (RenameOldName). Using the Parent Entry Number exposed in $J we can correlate entries and recover the original folder name.

As you can see, using the Parent Entry Number we found that the original folder name was “data Exfil” which was later deleted by the suspect.
Timeline
From the assembled artifacts we can conclude that the machine was used to access and exfiltrate sensitive material. We found Excel sheets, PDFs, text documents and zip archives with sensitive data. The insider created a folder called “data Exfil,” packed its contents into an archive, and then attempted to cover tracks using a wiper. DiskWipe.exe and the deleted file entries support our hypothesis. To confirm execution and attribute actions to a user, we can examine registry entries, prefetch files, Windows event logs, shellbags and user profile activity that may show us process execution and the account responsible for it. The corrupted MBR suggests the perpetrator also intentionally damaged the boot sector to complicate inspection.
Summary
Digital forensics is a fascinating field. It exposes how much information an operating system preserves about user actions and how those artifacts can be used to reconstruct events. Many Windows features were designed to improve reliability and user experience, but those same features give us useful forensic traces. Although automated tools can speed up analysis, skilled analysts must validate tool output by understanding the underlying data structures and by performing manual checks when necessary. As you gain experience with the $MFT, $UsnJrnl and low-level disk structures, you will become more effective at recovering evidence and validating your hypotheses. See you soon!