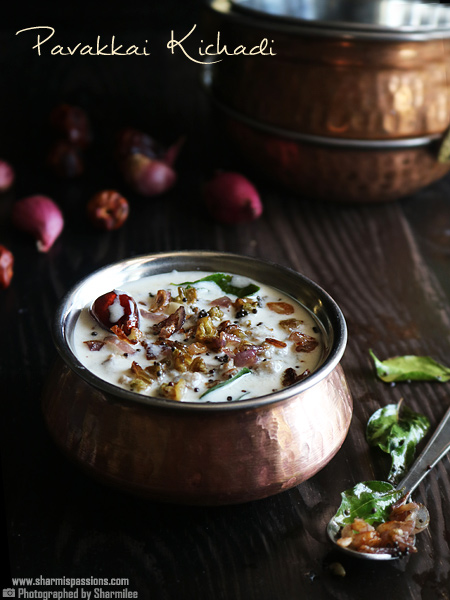
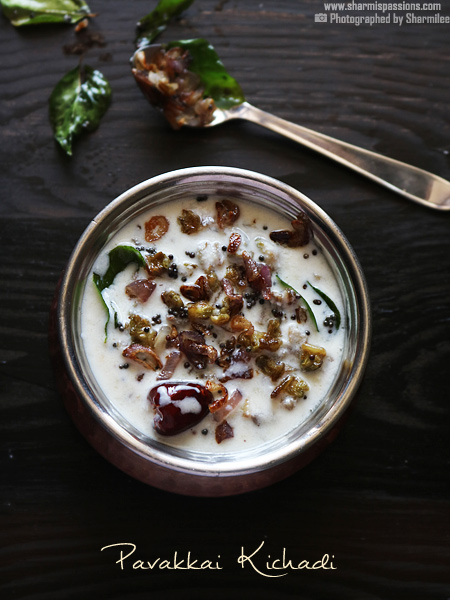
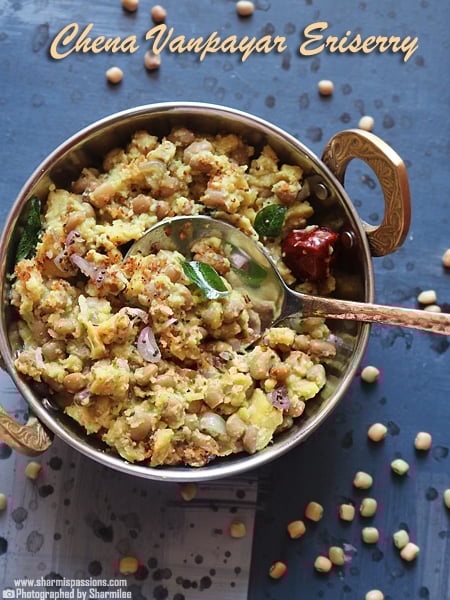
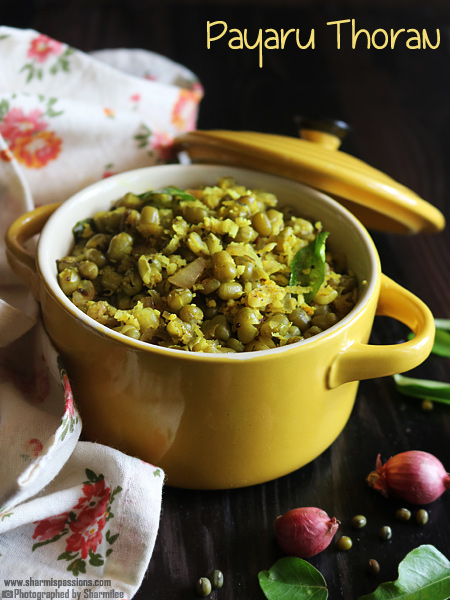
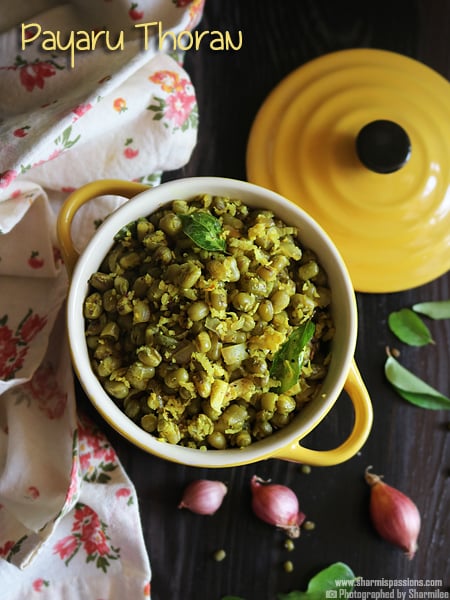
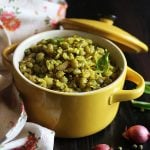
Cherupayar Thoran | Green Gram Stir Fry
Cherupayar Thoran is a very humble Kerala style side dish made using green gram, coconut and few simple spices. It has that homely taste which you always find in Kerala meals. The soft cooked green gram blends so well with fresh coconut with a small hint of garlic and pepper.
This dish is not fancy or rich but has deep comfort feel in it. The aroma of coconut oil, curry leaves and green chili itself is enough to make anyone hungry. It is one dish you can make any day, even when fridge is almost empty and you still want something warm and tasty to go with rice.
[feast_advanced_jump_to]About Cherupayar Thoran
'Cherupayar' means whole green gram or moong bean in Malayalam, and 'thoran' means a simple dry stir fry with coconut. It is one of the very common dishes made daily in Kerala homes. The beauty of this dish is in its simplicity with no heavy masala, no strong spice, still it taste balanced and delicious.
The green gram is soaked overnight so that it cooks soft but not mushy. Then it is mixed with onion, garlic, fresh coconut and few tempering items. It is light, filling and gives nice satisfaction when had with hot rice. I always love such thoran because they come together quick and is healthy too.
There are few variations too. Some people add red chilli powder or tiny bit of cumin powder to make flavor little different. Few even add grated carrot with coconut for color. But honestly the classic version taste best with just minimal spices. You can serve it as side with rice, or even eat as evening snack with tea.
I make Cherupayar Thoran often when I am tired of heavy curries or fried dishes. It is filling but light on stomach. Sometimes I eat it with kanji or even roll inside chapati like dry filling. The taste never disappoints, it is always homely and satisfying.
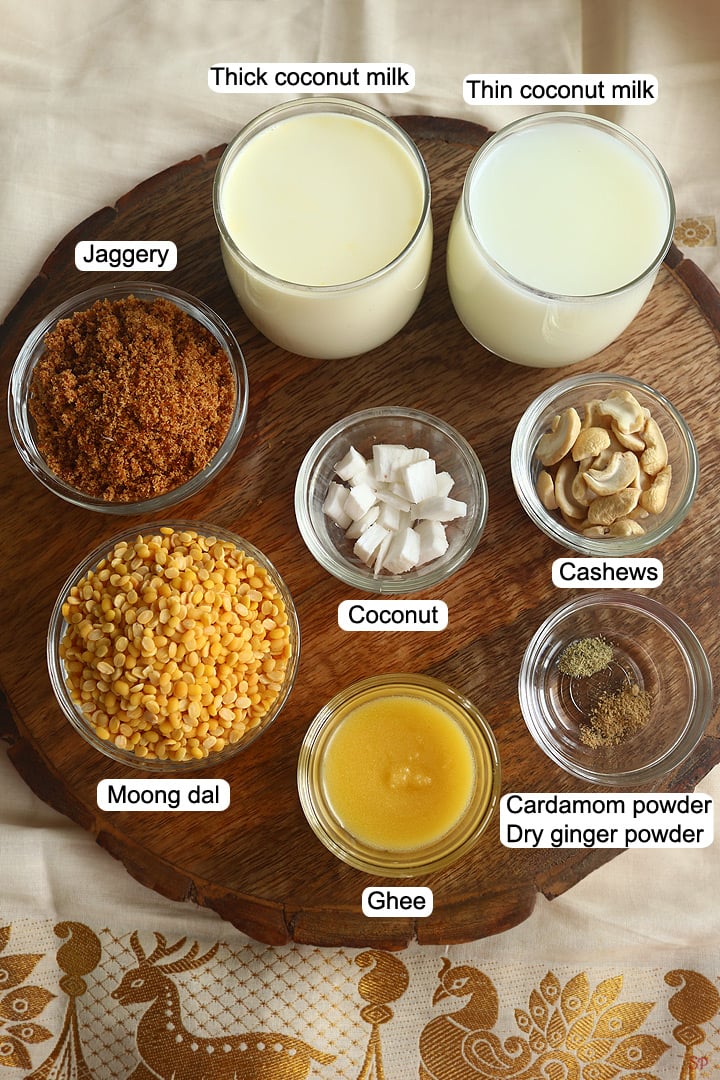
Cherupayar Thoran Ingredients
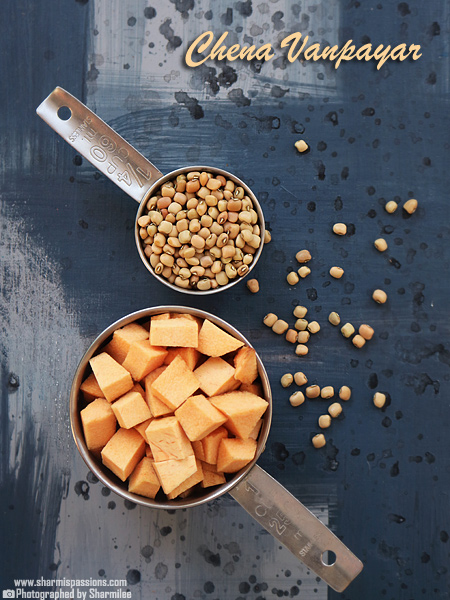
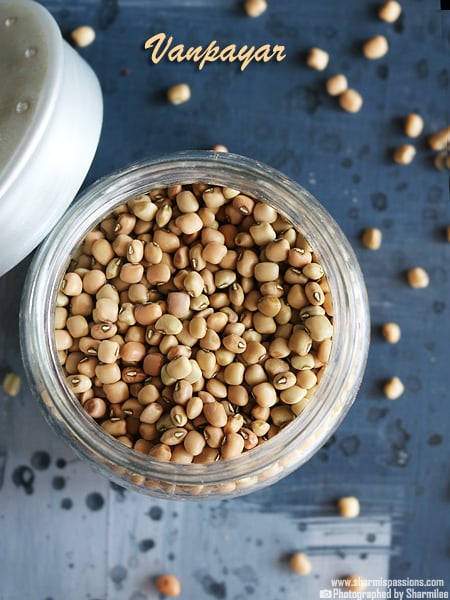
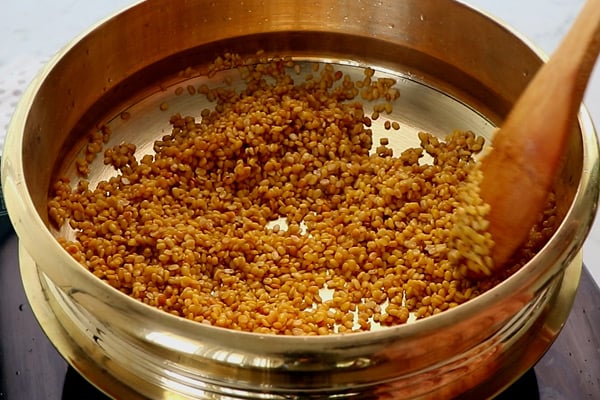
- Green gram (Cherupayar) - I have used half cup whole green gram soaked overnight. It gives good protein, earthy flavor and soft texture. You can also use sprouted ones if you want more nutrition.
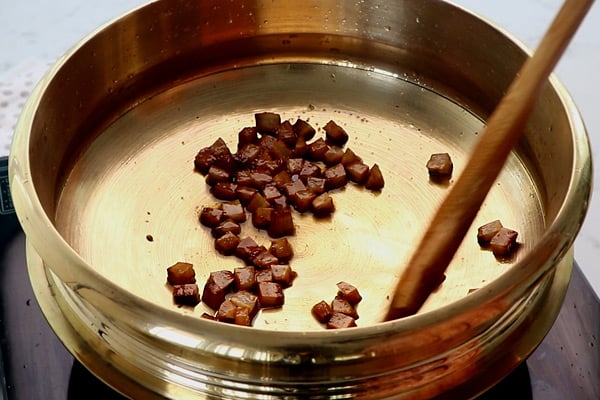
- Small onion - I used small onion for mild sweetness and balance. If you do not have, just use regular onion sliced thin, it works same.
- Garlic - I add few small garlic just for taste and aroma You can skip if you not like strong smell, but I feel it goes nice with green gram.
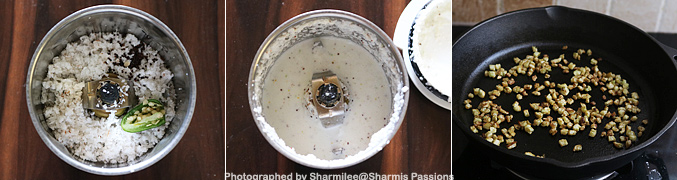
- Coconut grated - I have used fresh grated coconut, it gives nice texture and little moisture. Frozen one also okay but fresh taste better always.
- Green chilli - I add one or two slit green chilli for small heat and brightness. You can add more if you like more spicy side.
- Turmeric powder - Just a small pinch I used for color. It also makes the dish look brighter.
- Pepper powder - I have used a small sprinkle to give earthy and mild spice. It balances coconut sweetness very well.
- Coconut oil - I always make thoran with coconut oil only. It gives that Kerala flavor. Try not to skip, it changes the taste.
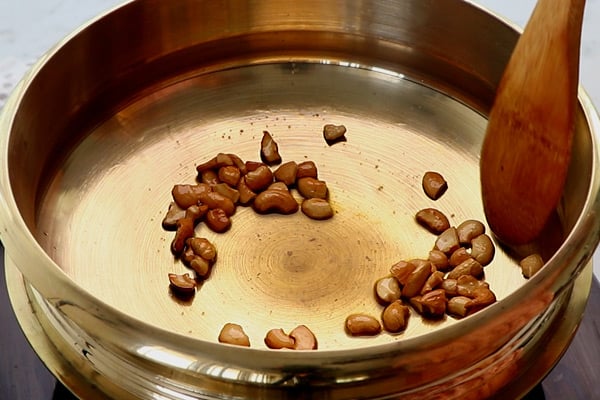
- Mustard seeds - I used for little crunch and nutty taste. Wait till it pop fully before adding next item.
- Jeera (Cumin seeds) - I add a small pinch of jeera while tempering, it gives nice flavor and also helps for digestion.
- Curry leaves - I always use fresh curry leaves, it gives freshness and lovely aroma to dish. If you not have, you can skip but flavor reduce little.
Similar Recipes
How to make Cheru Payaru Thoran Step by Step
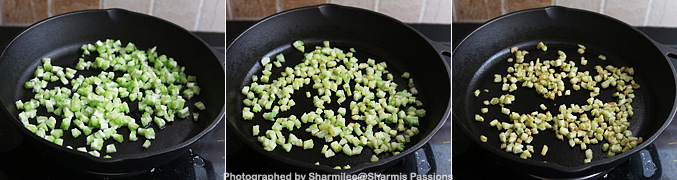
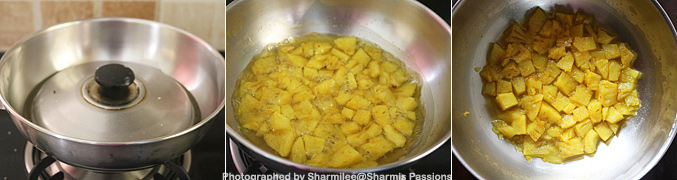
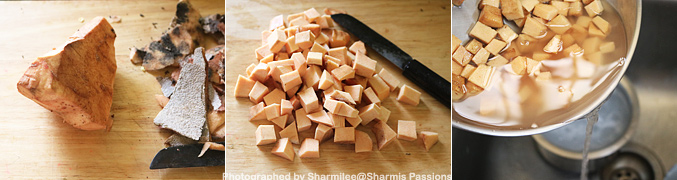
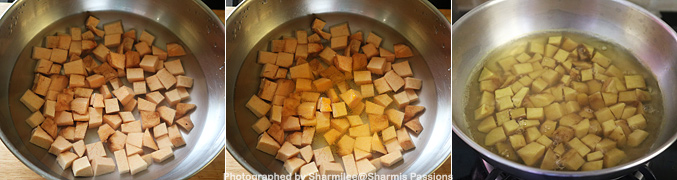
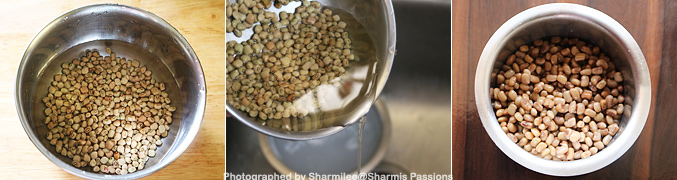
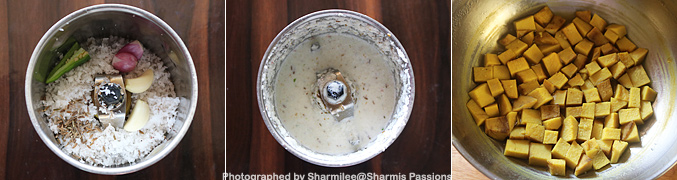
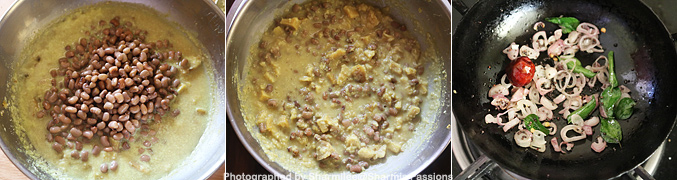
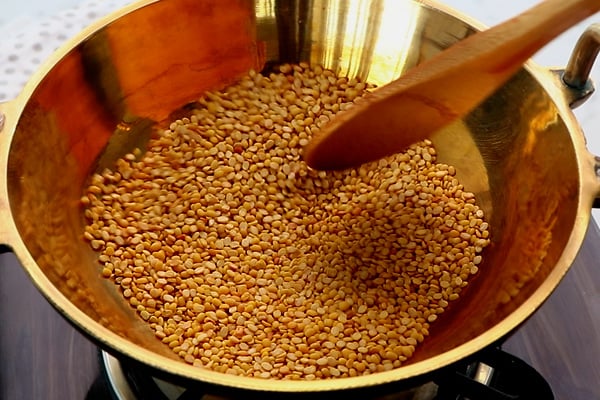
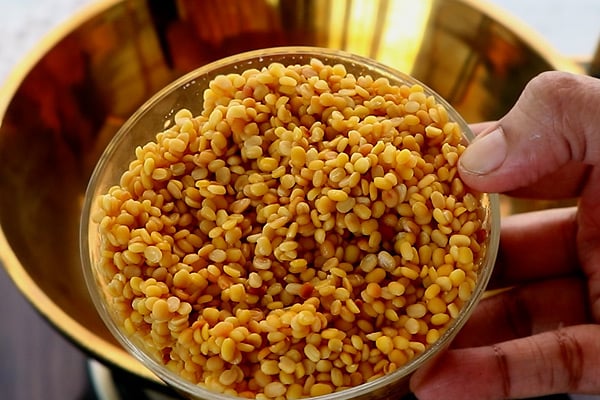
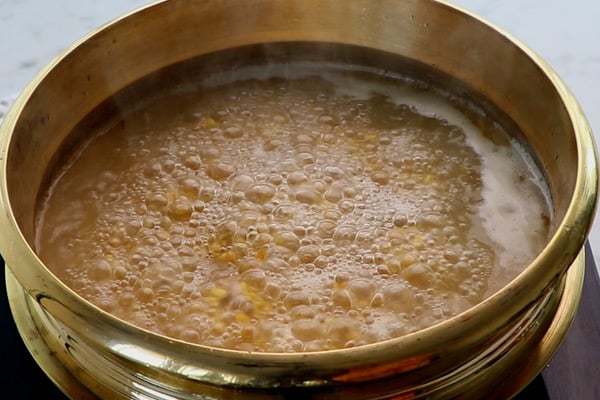
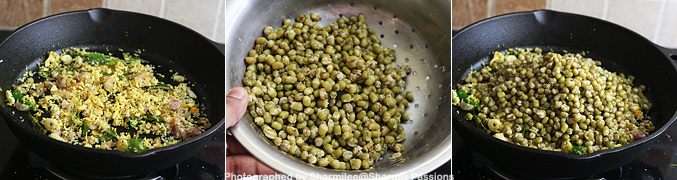
1.Soak green gram over night. Rinse it well and then cook in pan with enough water and little salt. When it becomes soft but not mushy, switch off. If there is excess water, drain it. If there is only little then no need to drain it, Set aside.

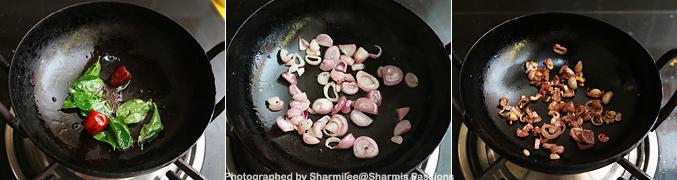
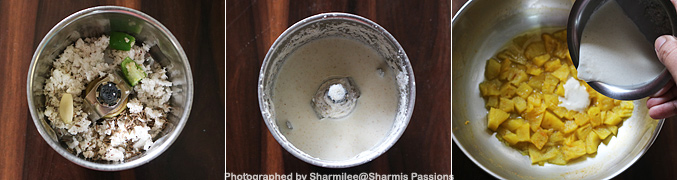
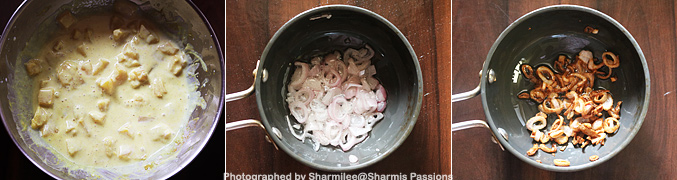
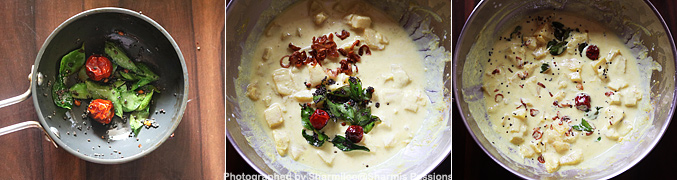
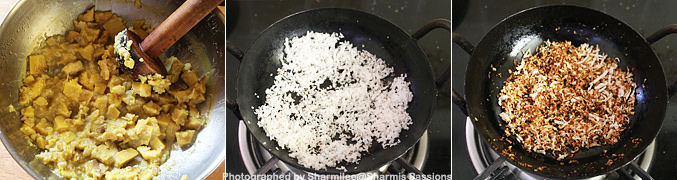
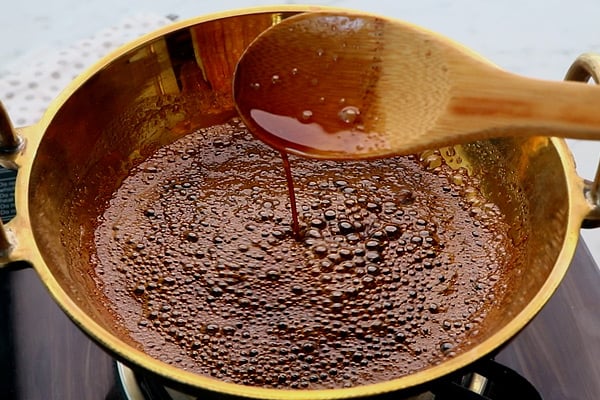
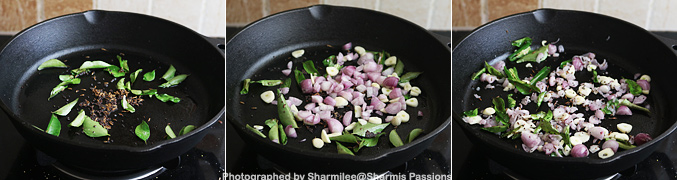
2.Heat oil in a pan - add the items listed under 'to temper', let it splutter. Add small onion, garlic, green chili, saute till it turns transparent.
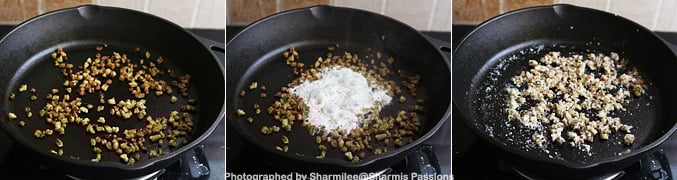
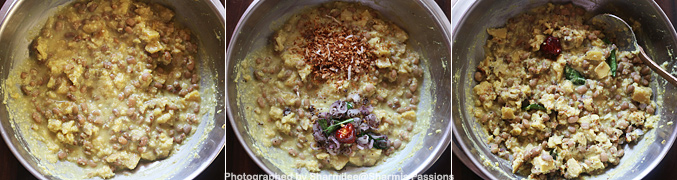
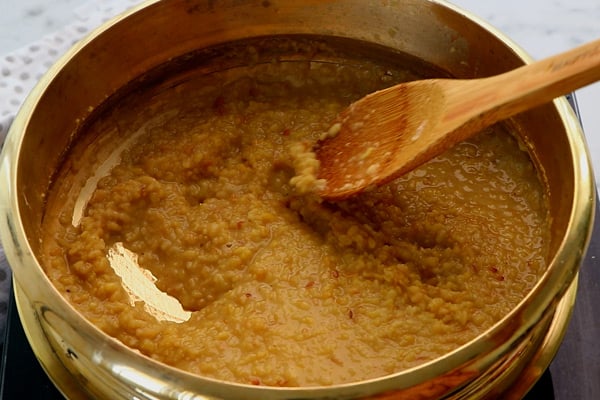
3.Add turmeric powder, pepper powder and salt. We have already added salt with green gram so adjust and accordingly. Mix well then add coconut.
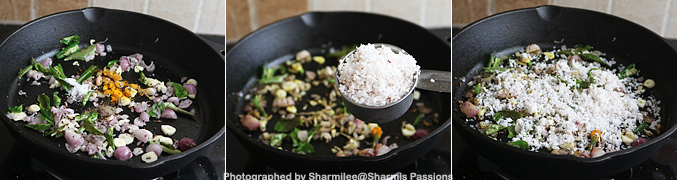
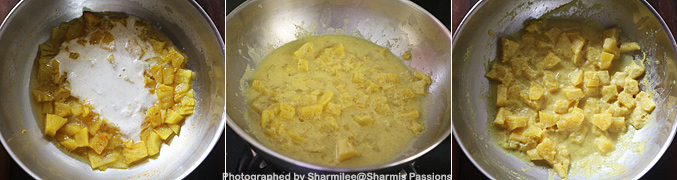
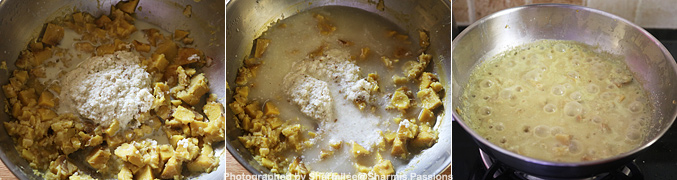
4.Saute for 2 minutes then add cooked green gram.
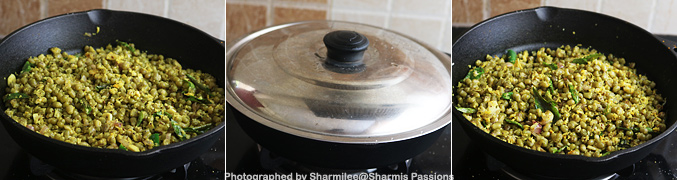
Toss it well, cook covered for 2 minutes. Fluff it up and switch it off.
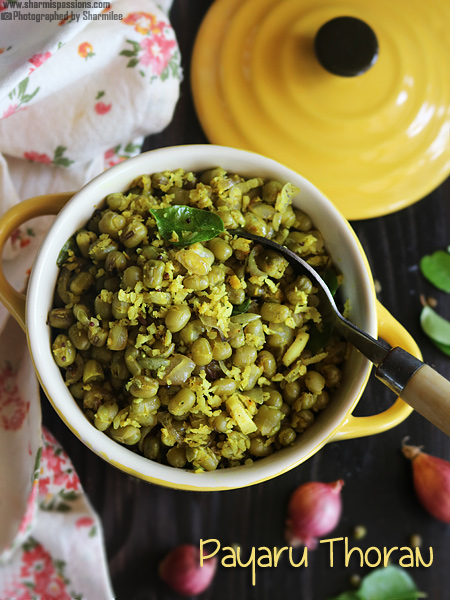
Serve hot / warm with rice and sambar or with any variety rice.
Expert Tips
- Soaking time - I always soak green gram overnight or at least for 6 hours. It cooks evenly and becomes soft but not break easily.
- Cooking stage - Do not overcook, I usually stop cooking when it just turns soft when pressed. If overdone, it becomes mushy and will not taste good for thoran.
- Tempering - I have noticed when mustard seeds and jeera splutter well in hot coconut oil before onion, it gives strong nice flavor. So do that patiently.
- Coconut - I used fresh grated coconut here. It gives more taste and keeps the dish moist. If you use frozen, thaw well before adding.
- Avoid extra water - Always drain cooked green gram well. If water stays, thoran will become soggy instead of dry and fluffy. I usually spread it few minutes before mixing.
Serving and Storage
Serve Cherupayar Thoran hot with steamed rice, sambar, rasam or even moru curry. It pairs very well with simple meals and kanji also.
Leftover thoran stays good in fridge for one day. Reheat gently or keep outside for some time before serving. Try not to keep it longer as coconut may turn sour after a day.
FAQS
1.Can I make thoran without soaking green gram?
You can, but it will take more time to cook and sometimes stays uneven. So soaking always better for good result.
2.Can I add red chili powder?
Yes, small pinch gives nice color and little spice. But traditional version mostly made without.
3.Can I skip garlic?
Yes can skip, though it gives lovely aroma and mild sharpness. Without it, dish taste more plain side.
4.Why my thoran turned too dry?
Maybe green gram was drained too much or less coconut used. Add some grated coconut or little coconut oil to fix it.
5.Can I make with sprouted green gram?
Yes, sprouted one tastes good and healthy too. But cook it very lightly so it stays crunchy and fresh.
If you have any more questions about this Cherupayar Thoran Recipe do mail me at sharmispassions@gmail.com. In addition, follow me on Instagram, Facebook, Pinterest, Youtube and Twitter .
Tried this Cherupayar Thoran Recipe? Do let me know how you liked it. Also tag us on Instagram @sharmispassions and hash tag it on #sharmispassions.
📖 Recipe Card
Cherupayar Thoran Recipe | Green Gram Stir Fry Recipe
Ingredients
- ½ cup green gram
- 5 small onion sliced
- 3 garlic sliced
- ¼ cup coconut grated
- 1 green chili slitted
- 1 tiny pinch turmeric powder
- ¼ teaspoon pepper powder
- salt to taste
To Temper:
- 2 teaspoon coconut oil
- ½ teaspoon mustard seeds
- ½ teaspoon jeera
- small sprig curry leaves
Instructions
- Soak green gram overnight. Rinse it well and then cook in pan with enough water and little salt. When it becomes soft but not mushy, switch off. If there is excess water, drain it. If there is only little then no need to drain it. Set aside.
- Heat oil in a pan - add the items listed under 'to temper', let it splutter.
- Add small onion, garlic, green chilli, saute till it turns transparent.
- Add turmeric powder, pepper powder and salt. We have already added salt with green gram so adjust and accordingly.
- Mix well then add coconut.
- Saute for 2 minutes then add cooked green gram.
- Toss it well, cook covered for 2 minutes. Fluff it up and switch it off.
- Serve Cherupayar Thoran hot / warm with rice and sambar or with any variety rice.
Notes
- Soaking time - I always soak green gram overnight or at least for 6 hours. It cooks evenly and becomes soft but not break easily.
- Cooking stage - Do not overcook, I usually stop cooking when it just turns soft when pressed. If overdone, it becomes mushy and will not taste good for thoran.
- Tempering - I have noticed when mustard seeds and jeera splutter well in hot coconut oil before onion, it gives strong nice flavor. So do that patiently.
- Coconut - I used fresh grated coconut here. It gives more taste and keeps the dish moist. If you use frozen, thaw well before adding.
- Avoid extra water - Always drain cooked green gram well. If water stays, thoran will become soggy instead of dry and fluffy. I usually spread it few minutes before mixing.
Nutrition
The post Cherupayar Thoran | Green Gram Stir Fry appeared first on Sharmis Passions.