Reading view

There are new articles available, click to refresh the page.

Easy Butter Garlic Naan

By: Richa

 If you’ve ever wished you could make restaurant-style Garlic Naan at home without any stress, you’re going to love this recipe!

close up image of butter garlic naan stacked one on top of the other

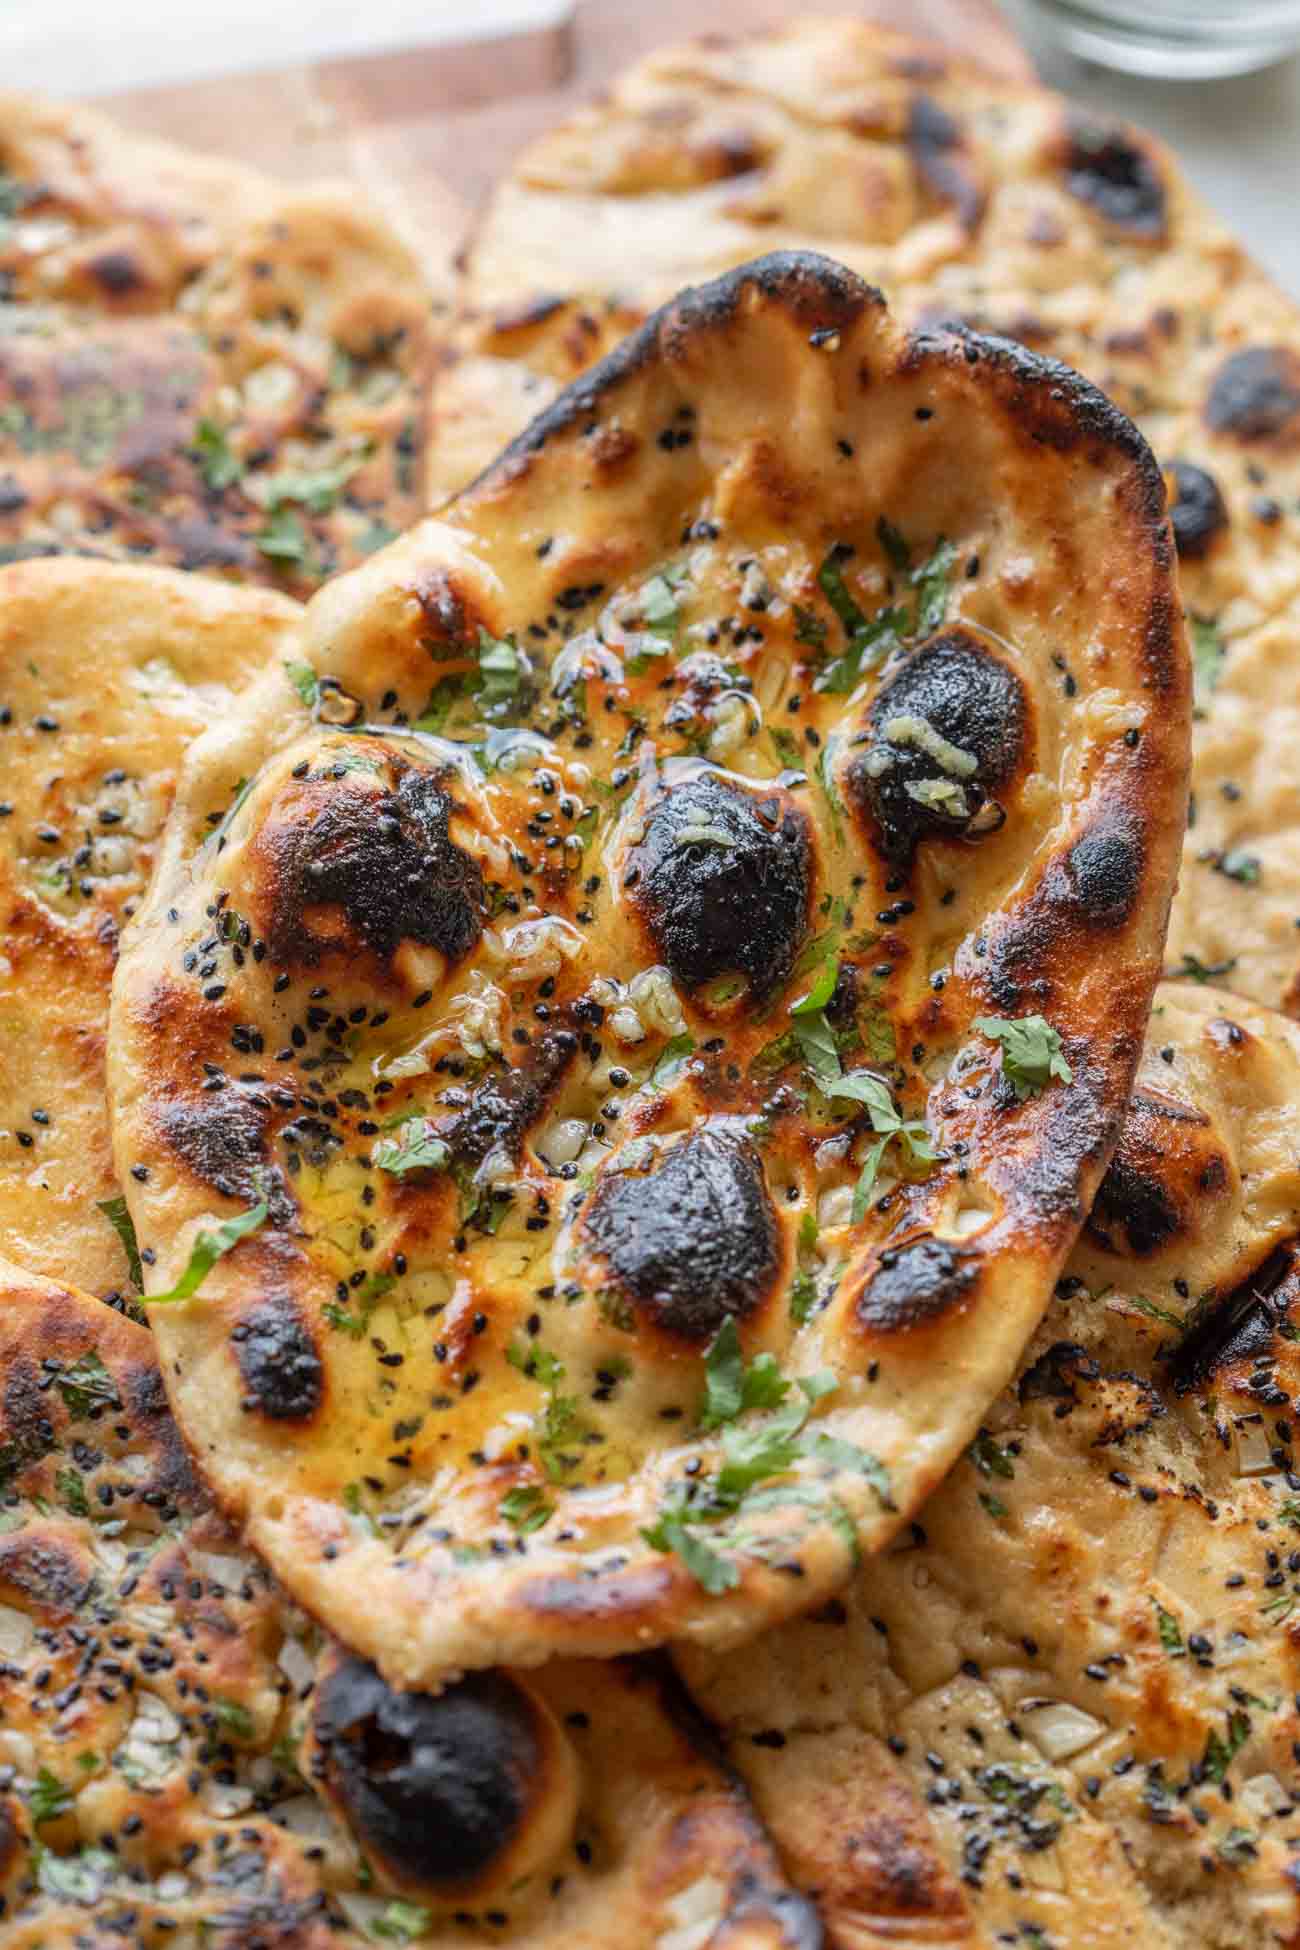
Making restaurant-style garlic naan at home is easier than you’d think. All you need is a few pantry staple ingredients and 30 minutes to recreate the best, homemade garlic naan. Since this is a no-yeast recipe, the dough needs almost no resting time, which means you can whip up a batch whenever the craving for it hits. 

This recipe keeps things really easy, even if you’re new to making naan. And once you get the hang of it, you can switch things up to add a little chilli to turn it into a chilli-garlic naan, or try our no-yeast naan variation when you want something even quicker.  can get the same restaurant-style charred bits and a smokey flavour on the stovetop.  

Ingredients for Garlic Naan

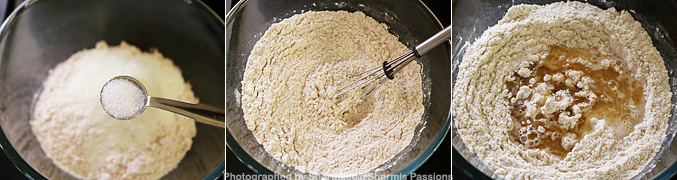
  • Dry Ingredients: Maida, salt, sugar (helps tenderize, brown and balance flavors), and baking powder (for that signature naan fluffiness)make up the base of this naan.
  • Wet Ingredients: Milk and water help bring the dough together, and a little oil keeps it smooth and easy to roll.
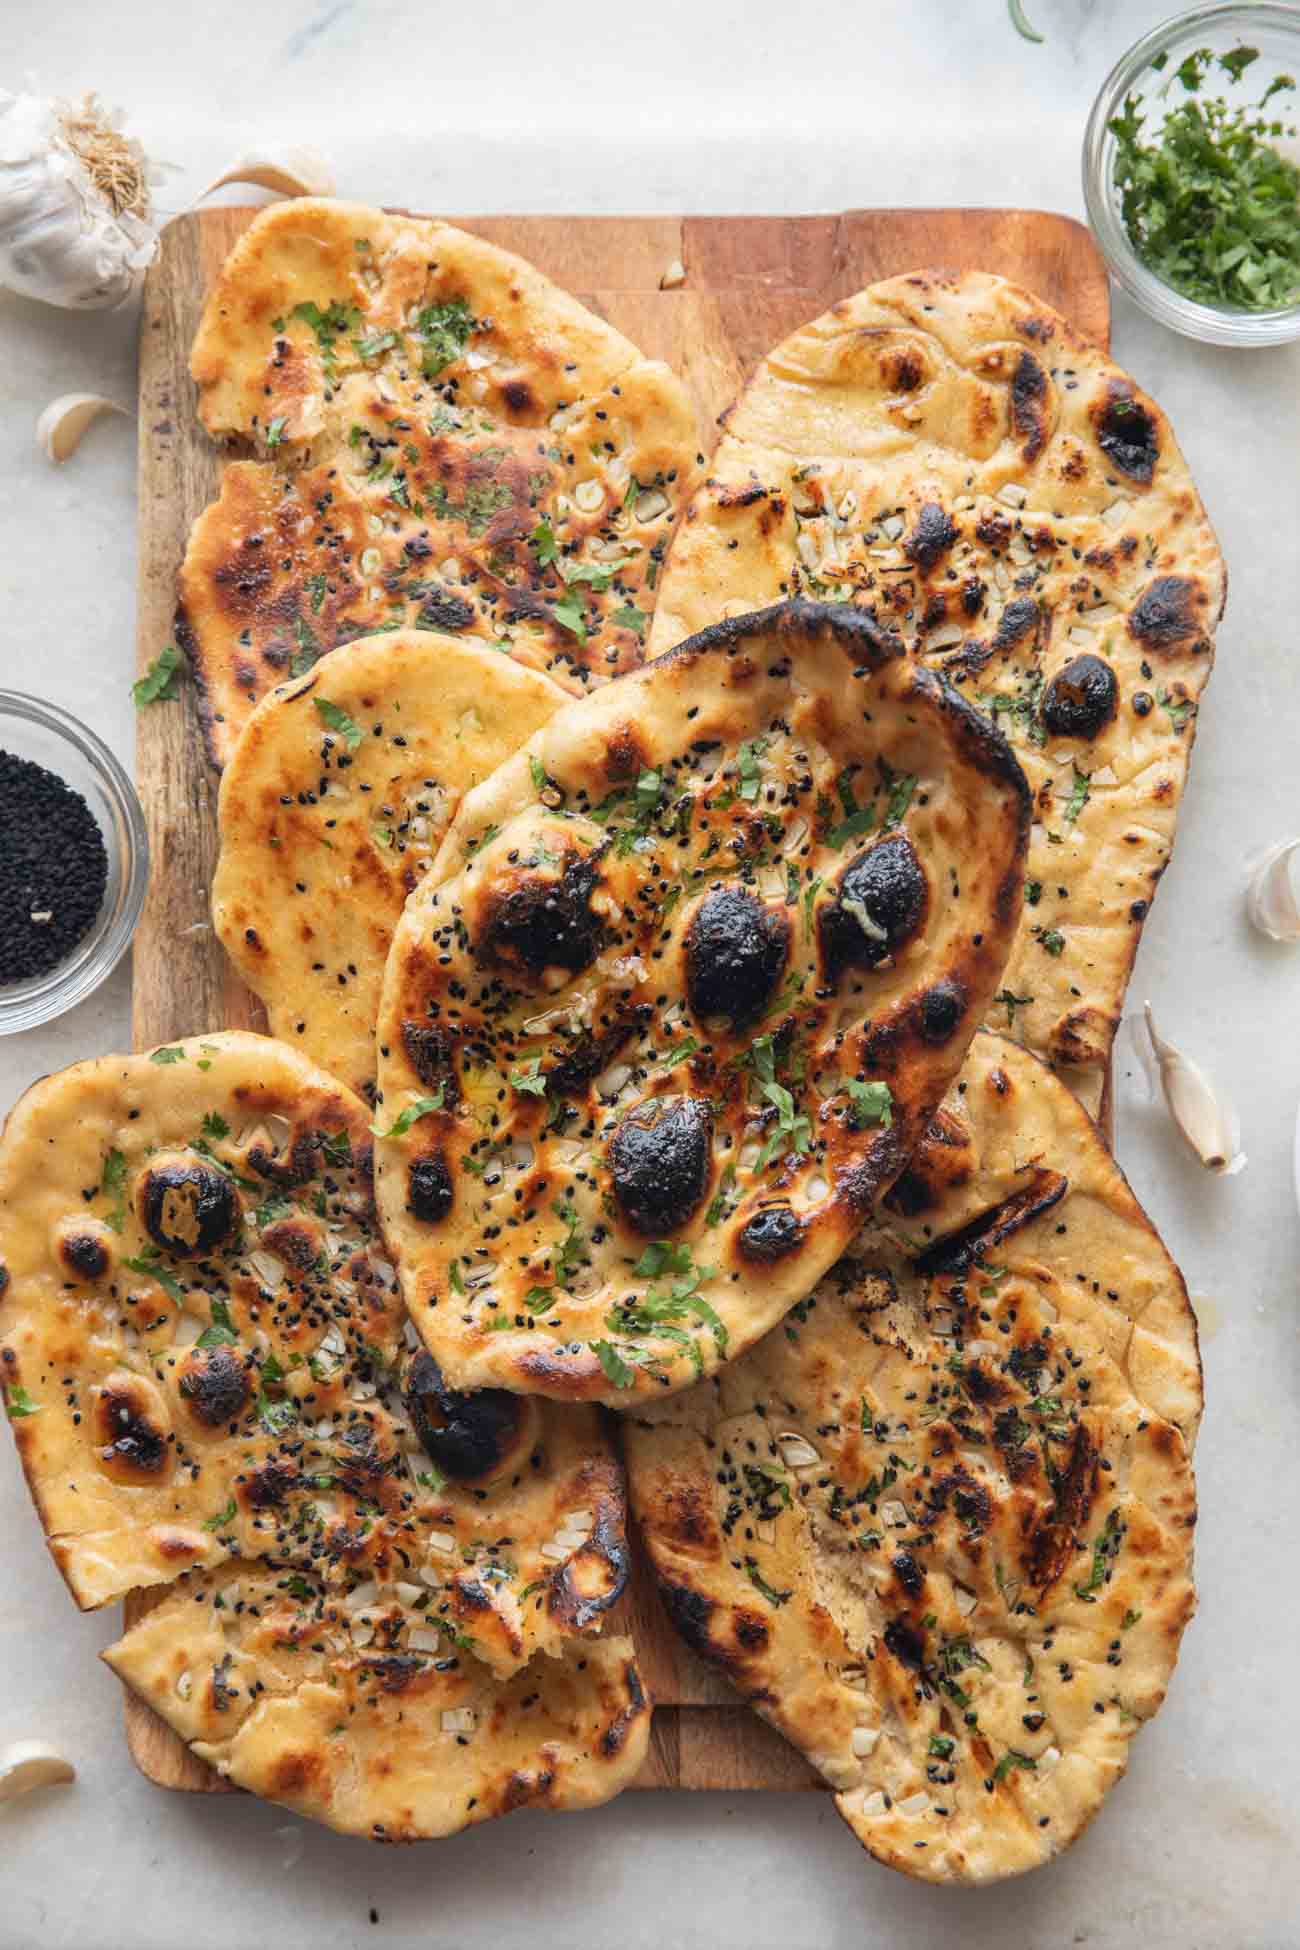
  • Garlic Topping: Finely chopped garlic and coriander for that classic flavour.
  • Finishing: Melted butter brushed on top once the naan is cooked to give it that glossy, restaurant-style finish.

Richa’s Top Tips

  • Make sure the pan is hot enough, but not smoking before placing the rolled dough, or it won’t stick properly. 
  • Once you make dough balls, leave them to rest on a greased plate or baking tray to prevent them from sticking to the plate or each other. Rest the dough properly: Those 30 minutes of resting time make a huge difference. The dough relaxes, becomes easier to roll, and cooks softer.
  • Roll it evenly (and not too thick): A thin, even naan puffs better on the tawa and cooks without turning chewy.
  • Use water to help it stick: Brushing the non-garlic side with water before placing it on the tawa ensures the naan sticks well and won’t fall off when you flip the pan.
  • Cook on medium heat: Too high and the naan burns before it cooks through, too low and it dries out. Medium heat gives the perfect puff and colour.
  • Press the garlic in gently: Lightly pressing the garlic onto the dough helps it stay put while cooking instead of falling off on the tawa.

Frequently Asked Questions

Why isn’t my naan puffing up?

This usually happens when the dough isn’t soft enough or the naan is rolled too thick or too thin. Make sure the dough is well-rested and roll it out evenly so it has room to puff on the tawa.

Can I use whole wheat flour instead of all-purpose flour?

You can swap part of the maida for atta, but using 100 percent whole wheat will make the naan denser and less soft. A half-and-half mix works best if you want a healthier version.

How do I make the naan soft and not chewy?

Keep the heat at medium, roll the dough thin, and don’t overcook it. Removing the naan as soon as it gets those golden brown spots keeps it soft.

Do I need a tandoor or oven for this recipe?

No, this stove-top method gives you the same smoky, charred effect without any special equipment.

Storage Tips

  • Fridge: Keep leftover naan wrapped in foil or in an airtight container for 2 days. Warm it on a tawa with a little butter to bring back the softness.
  • Freezer: Garlic naan freezes really well. Cool completely, stack with butter paper between each piece, wrap tightly, and freeze for up to a month.
  • Reheating: Heat on a tawa for 1–2 minutes until soft. Avoid the microwave for too long because it can make the naan chewy.

Serving Ideas

Garlic Naan goes with almost any creamy curry or sabzi, but here are some tried-and-loved pairings that turn it into a full, comforting meal:
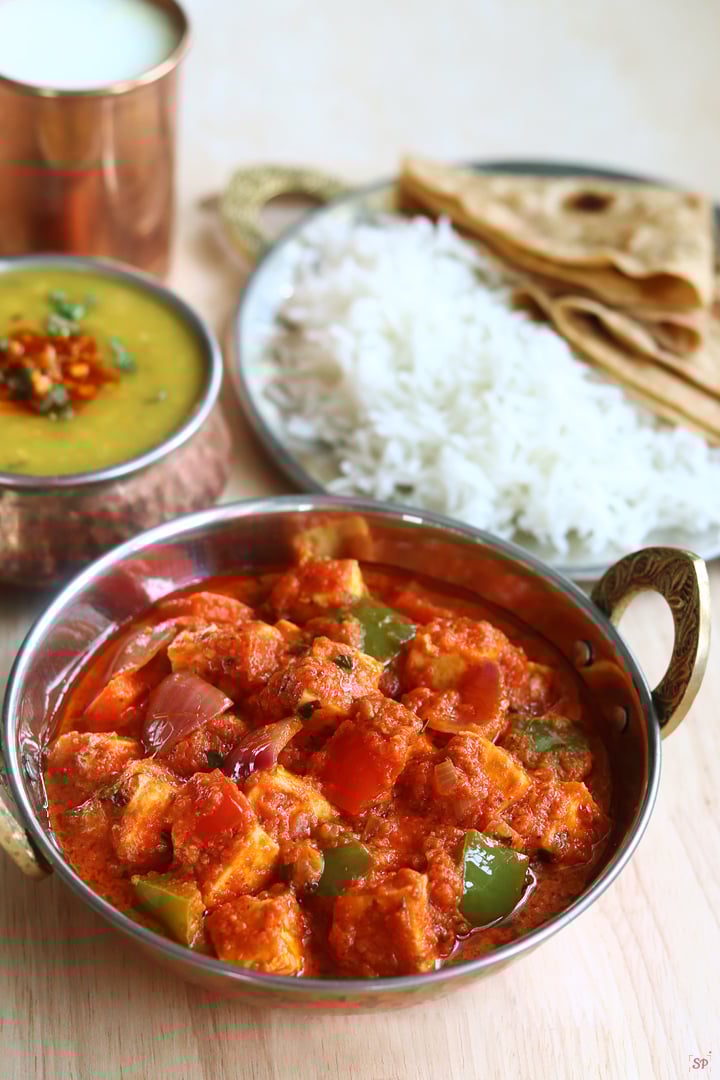
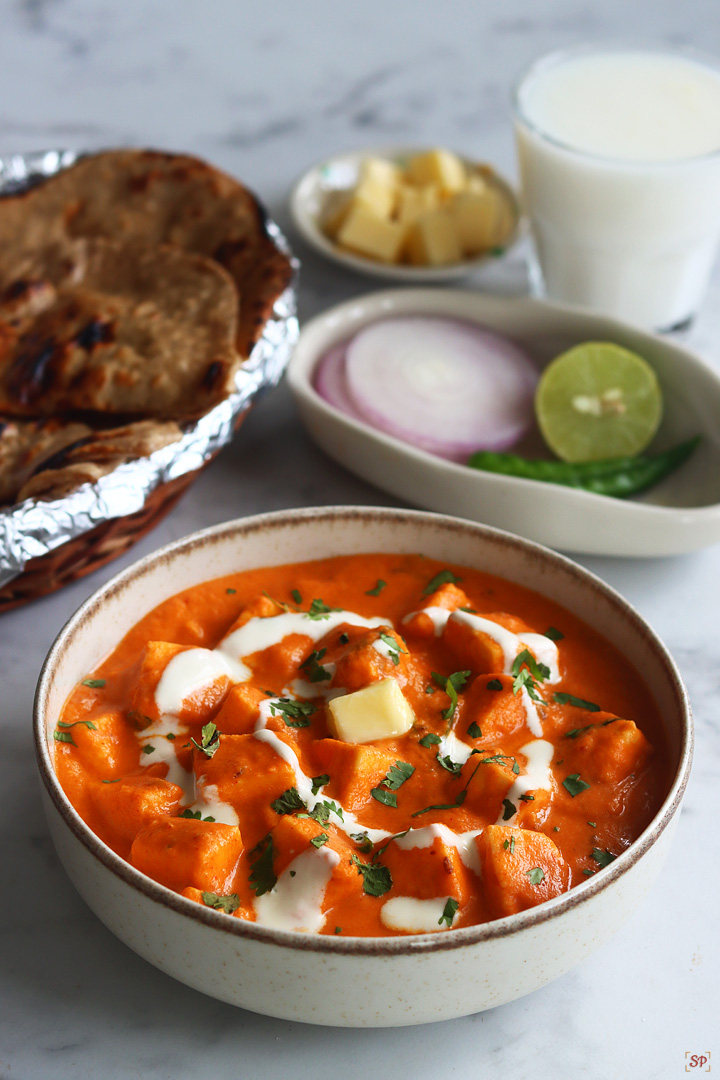
Customisation Ideas

  • Extra-Garlic Lover’s Naan: Mix grated garlic directly into the dough and brush the naan with garlic butter at the end for a double-hit of flavour.
  • Cheesy Garlic Naan: Right after flipping the naan and letting it puff, sprinkle shredded mozzarella or cheddar on the cooked side. It melts instantly and tastes like restaurant-style cheese naan.
  • Chilli-Garlic Twist: Mix finely chopped green chillies into the garlic topping before pressing it onto the dough. Adds heat without changing the recipe structure.
  • Herb Explosion: Swap coriander for fresh chives or parsley if you want a milder, fresher flavour profile.
image of butter garlic naan stacked one on top of the other on a wooden board

Did You Know?

The word “naan” comes from the Persian word nān, which simply means “bread.” The earliest mentions of naan date back to 1300 AD in the writings of Indo-Persian poet Amir Khusrau. It was originally baked in royal Mughal kitchens—making naan the original food of emperors.

Now it’s over to you! Make a fresh, cozy, homemade garlic naan without special equipment using simple ingredients for that amazing restaurant-style flavour. Serve it hot, share it around, and watch how quickly it becomes a favourite. 

Don’t forget to tag me on Instagram @my_foodstory when you make it. I’d love to see your fluffy naans!

Watch Garlic Naan Recipe Video

image of butter garlic naan stacked one on top of the other on a wooden board
Print

Garlic Naan

Learn how to make delicious crispy butter garlic naan at home without using yeast or a tandoor!
Course Side Dishes
Cuisine Indian
Diet Vegetarian
Prep Time 5 minutes
Cook Time 25 minutes
Total Time 30 minutes
Servings 4 Portions
Calories 167kcal
Author Richa

Ingredients

For naan

  • 3 tablespoons milk
  • 3 tablespoons water
  • 1 pinch salt
  • 1 pinch sugar
  • 1 ½ + ⅛ teaspoon baking powder
  • 1 cup maida
  • 2 teaspoons sunflower oil divided

Other

  • 2 tablespoons water
  • 1 tablespoon finely chopped garlic
  • 1 tablespoons finely chopped coriander leaves
  • 1 tablespoons butter melted

Instructions

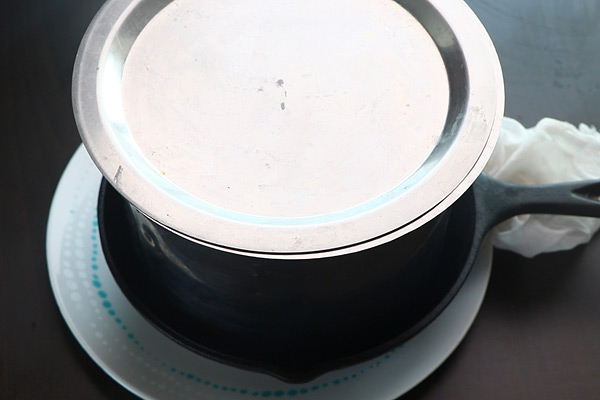
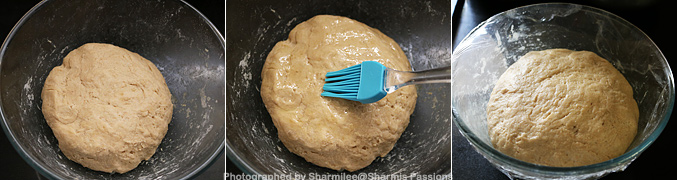
  • Add all dry ingredients, maida, salt, sugar, baking powder in a bowl and mix well. Add 1 teaspoon oil, milk & water and knead for 7-8 minutes till you get a soft, smooth dough. Add oil on the surface of the dough & keep covered to rest for 30 minutes.
    3 tablespoons milk, 1 pinch salt, 1 pinch sugar, 1 ½ + ⅛ teaspoon baking powder, 1 cup maida, 2 teaspoons sunflower oil, 3 tablespoons water
  • Herb butter: Take melted butter in a bowl, add coriander leaves. Mix and set aside.
    1 tablespoons butter, 1 tablespoons finely chopped coriander leaves
  • Heat tawa on medium.
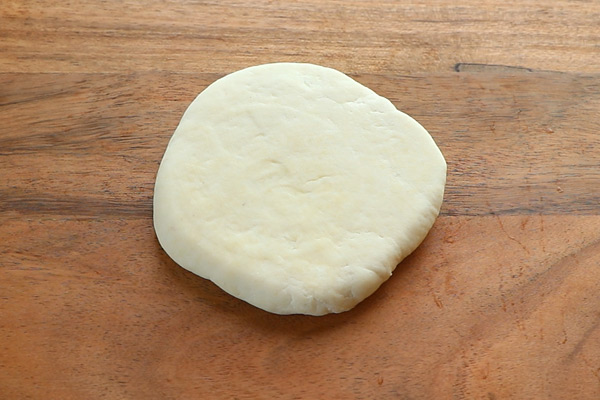
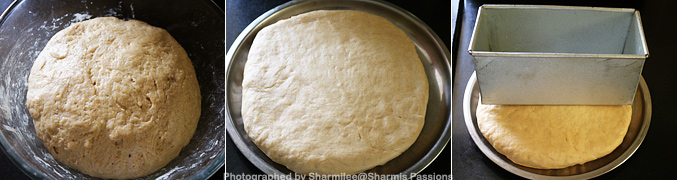
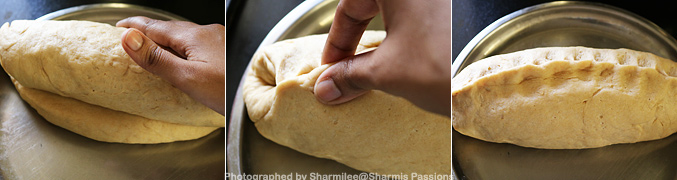
  • Divide the dough into 3-4 balls. Take a ball of dough, place it on a rolling platform and roll into a round or oval shaped naan, about 6 inches long and ⅛ inch thick. Sprinkle chopped garlic and gently press with fingers.
    1 tablespoon finely chopped garlic
  • Brush the non garlic side with water and place the water side on the hot tawa so that it sticks well to the tava (watch video for details). cook on high until bubbles form on top, about 1-2 minutes. Flip the tava over so that the naan is directly over the flames. Set the heat to medium and move the tava around till more bubbles form and naan is brown all over and charred around the edges.
    2 tablespoons water
  • Alternatively, if the naan does not stick to the tava or slips out while frying, you may hold the naan with tongs and fry the naan over flames on either side till they turn brown.
  • Transfer the naan on a plate, brush with the herb butter and serve. Repeat the same process of making naan with the rest of the dough.

Video

Notes

  • If the dough is extremely sticky, add a teaspoon of flour at a time till it’s workable. The dough should be soft and pliable
  • Roll the naan thin so that it puffs up better
  • To make this in the oven, heat the oven to 220C or as high as your oven will go. Place the baking tray in the oven to get it nice and hot. Roll out the naan with all the toppings. Brush the other side with water and place it water-side down on the hot baking tray, being careful not to burn yourself. Now place the baking tray back in the oven. After 3-4 minutes once you see the naan puff up and see bubbles on top, turn on the broil function (or only the top element) and cook it for another 2-3 minutes till it browns a bit. Then take it out and brush it with butter.

Nutrition

Calories: 167kcal | Carbohydrates: 25g | Protein: 4g | Fat: 6g | Saturated Fat: 2g | Polyunsaturated Fat: 0.3g | Monounsaturated Fat: 3g | Trans Fat: 0.1g | Cholesterol: 9mg | Sodium: 78mg | Potassium: 60mg | Fiber: 1g | Sugar: 1g | Vitamin A: 113IU | Vitamin C: 1mg | Calcium: 46mg | Iron: 2mg

This article was researched and written by Harita Odedra.

The post Easy Butter Garlic Naan appeared first on My Food Story.

How to make Asafoetida | Homemade Hing Recipe

Asafoetida is a quite essential spice every Indian kitchen must have. It is that tiny pinch we add that gives great aroma and unique punch to our dals and curries. Most of us buy ready hing powder from stores, but fresh homemade hing powder has great flavor and stroNg aroma, and it is pure. When you make it at home, you can control how fine you want and the flavor also lasts longer.

homemade asafoetida

When you make it fresh, you can really feel how much change it brings in the taste, especially in rasam, sambar and chutneys. I started making hing powder at home few years back. The solid hing may look small, but when you roast and powder it, the kitchen fills with strong traditional smell.

[feast_advanced_jump_to]

About Asafoetida

Hing, also called as Asafoetida, is a gum resin obtained from plant roots, mostly used in Indian cooking for its strong flavor and digestive property. It is very common in South Indian homes, especially used in dishes with dal and legumes. The strong pungent smell becomes mild and pleasant once roasted and powdered.

In olden days, compound or solid hing was mostly used as it stays fresh for a long time. Nowadays most people prefer powdered one because it is easy to handle. But homemade hing powder from compound hing is always more pure and strong compared to packed ones. It just needs few minutes and little patience to make at home.

The solid hing pieces are cut into small chunks, lightly roasted till they puff up and then cooled down before powdering. The roasting part is very important because it removes raw smell and makes hing easy to grind. It can be stored for many months without losing aroma.

I usually make this in small batch and store it in an airtight bottle. When I open the jar, the smell itself reminds me of my grandmother's kitchen. It is one of those simple things that keeps the real taste of Indian cooking alive.

homemade asafoetida

Asafoetida Recipe Video

Asafoetida Ingredients

  • Solid / Compound Hing - I have used pure solid or compound hing bought from a local store. It gives stronger aroma and more flavor than readymade powder. You can use any good quality brand you get easily.
compound asafoetida

Why This Recipe Works

  • This recipe is very simple and takes just few minutes to prepare.
  • Homemade hing powder stays fresh for many months when stored properly.
  • Roasting removes raw smell and brings that lovely nutty aroma.
  • You get pure hing flavor without any added flour or filler.
  • It makes all dishes taste better, even a small pinch is enough.

Similar Recipes

How to make Asafoetida Step by Step

1.Take compound hing (asafoetida), stretch it a bit. I used 2 small blocks.

stretch compound hing

2.Cut into small pieces. It is a bit hard but you can cut it using a sharp scissor.

cut into small pieces

3.All cut and ready.

cut and ready

4.Add it to a pan and dry roast it.

add to pan and roast

5.Roast until it is crisp and puffs up. It takes around 8-10 minutes in low flame.

roast till it puffs well

6.Cool down completely.

cool down

7.Transfer to a mixer jar.

add to mixer

8.Grind it to a fine powder.

powder it fine

9.Transfer to a plate, cool down completely. Store in a clean dry jar.

cool down

Expert Tips

  • Cut small - I always cut the solid hing into very small pieces so that it gets roasted evenly and puffs up well.
  • Roast slowly - Keep the flame low, roast till it bulges slightly and gives nice smell. If burnt, it becomes bitter so take care to roast only in low flame. While roasting it may tends to stick but it is ok.
  • Cool down - Let it cool down completely before powdering else it become sticky.
  • Grind fine - I use small dry jar to powder it very fine. It mixes easily in dishes.
  • Storage - Keep the powder in small airtight bottle away from moisture. I usually store in a glass jar.

Serving and Storage

Use homemade hing powder just like store-bought one. Add a pinch while tempering for rasam, sambar or any dal dish. You can even use in chutneys and pickles for that traditional aroma. Store it in airtight bottle in cool dry place. It stays good for 6 to 8 months easily if handled clean.

FAQS

1.Can I skip roasting the hing?

No, roasting is must. It removes raw harsh smell and makes hing crisp which makes it easy to grind.

2.Why my hing turned sticky after grinding?

Maybe it was hot when powdered or too much moisture in air. Always cool it fully before grinding.

3.Can I use mixer for grinding?

Yes, use small dry mixer jar. Grind in short pulses to get fine powder.

4.Is this stronger than store bought hing?

Yes, very much stronger and pure. You can use less quantity while cooking.

5.How to make it mild if too strong?

You can mix small portion with rice flour or roasted urad dal powder to reduce strength.

homemade asafoetida

If you have any more questions about this Homemade Asafoetida Recipe do mail me at sharmispassions@gmail.com. In addition, follow me on InstagramFacebook,  PinterestYoutube and Twitter .

Tried this Homemade Asafoetida Recipe? Do let me know how you liked it. Also tag us on Instagram @sharmispassions and hash tag it on #sharmispassions.

📖 Recipe Card

Print

How to make Asafoetida | Homemade Hing Recipe

Asafoetida is something every Indian kitchen must have. It is that tiny pinch we add that gives great aroma and unique punch to our dals and curries. Most of us buy ready hing powder from stores, but fresh homemade hing powder has great flavor and strog aroma, and it is pure. When you make it at home, you can control how fine you want and the flavor also last longer.
Course how to
Cuisine Indian
Keyword 20 mins recipes, How to
Prep Time 10 minutes
Cook Time 10 minutes
Total Time 20 minutes
Servings 20
Calories
Author Sharmilee J

Ingredients

  • 100 grams compound hing

Instructions

  • Take compound hing (asafoetida), stretch it a bit. I used 2 small blocks.
  • Cut into small pieces. It is a bit hard but you can cut it using a sharp scissor.
  • All cut and ready.
  • Add it to a pan and dry roast it.
  • Roast until it is crisp and puffs up. It takes around 8-10 minutes in low flame.
  • Cool down completely.
  • Transfer to a mixer jar.
  • Grind it to a fine powder.
  • Transfer to a plate, cool down completely. Store in a clean dry jar.

Video

Notes

  • Cut small - I always cut the solid hing into very small pieces so that it gets roasted evenly and puffs up well.
  • Roast slowly - Keep the flame low, roast till it bulges slightly and gives nice smell. If burnt, it becomes bitter so take care to roast only in low flame. While roasting it may tends to stick but it is ok.
  • Cool down - Let it cool down completely before powdering else it become sticky.
  • Grind fine - I use small dry jar to powder it very fine. It mixes easily in dishes.
  • Storage - Keep the powder in small airtight bottle away from moisture. I usually store in a glass jar.

Nutrition

Serving: 1g

The post How to make Asafoetida | Homemade Hing Recipe appeared first on Sharmis Passions.

How to Cook Pasta

Cooking pasta is quite easy when you do it the right way. It should be cooked soft but not mushy, and have that little bite in the middle, that's the right texture which makes pasta taste great. You can mix it with sauce, veggies or just toss with some olive oil and herbs. It cooks fast and makes it as a filling meal even on busy days.

Cooked pasta

Pasta is simple to make and don't need many things. It does not take long time to get ready and everyone in the family likes it. When cooked right, it will not stick or turn mushy. You can use it for salads, baked pasta or just with some seasoning and cheese. Kids love this anytime.

[feast_advanced_jump_to]

About How to Cook Pasta

Pasta is one of the most common dishes used in different ways. It is made by boiling in water along with some salt and a few drops of oil. Once it gets cooked right, you can mix with any sauce or just toss plain. There are many shapes like fusilli, penne and macaroni, but all can be cooked with same method.

The right texture of pasta is what makes it nice to eat. It should be soft but little firm inside, what we call 'al dente'. If you cook more, it becomes sticky and heavy. If less, it stays hard. So stirring well and checking in between helps to get that correct doneness. It make them nice and fluffy.

You can make it fresh and mix whatever sauce or topping you like. It is also healthy because you can control oil and salt. It fits well for lunch, dinner or even for lunch box. Sometimes I cook extra pasta and keep it in fridge, it helps when you want to fix dinner fast later.

I make pasta many times, especially on weekends or when I feel lazy to cook big meal. After draining I just add few drops of oil to keep it separate. This small step keeps pasta soft even after cooling. I have used fusilli pasta here, you can use any type of pasta of your choice like penne, macaroni, shell, disc etc.

Pasta making is a time saving all-rounder recipe which will be nourished anytime by the entire family. Pasta cooking at home is made easy with this recipe. Pasta is generally cooked, tossed in sauce / veggies and seasoned with herbs / spices.

Cooked pasta

Video

How to Cook Pasta Ingredients

  • Pasta - I add fusilli for this recipe but penne, macaroni or spaghetti also works good. You can use any type you want.
  • Water - I used enough water so pasta cooks perfectly and don't stick. You can use more water if you want.
  • Oil - I used few drops of oil while boiling. You can use olive oil or any cooking oil you use. It helps pasta non sticky.

Similar Recipes

How to cook Pasta Step by Step

1.Take water in a sauce pan, add salt and oil to it. Boil it.

how to cook pasta step1

2.When it starts to boil, add the pasta and cook in medium flame. Stir in between

how to cook pasta step2

3.Keep cooking and make sure you stir in between. Cook until it becomes soft but not mushy. It should have the crunch to bite at the same time it will slightly bend ,thats the right stage. Cut with a spoon to check. Switch off and drain water.

how to cook pasta step3

4.Rinse it well in running water. Strain, drizzle oil fluff it up and  now its ready. So you can use it for your recipes.

how to cook pasta step4

Cooked pasta ready!

Cooked pasta

Expert Tips

  • Stir often - I usually stir pasta in between while cooking, this helps it not stick to bottom or to each other.
  • Check texture - Always check in between if pasta is soft but still has little firmness inside. Overcooked pasta will turn mushy.
  • Rinse after cooking - After draining I rinse pasta in normal running water, it removes extra starch and stops overcooking.
  • Add oil after draining - Adding few drops of oil after draining keeps pasta separate and easy to toss later.
  • Salt - I added salt to give light flavor and season the pasta. You can use normal or sea salt, both are fine.

Serving and Storage

Serve this with any sauce you like such as tomato, white, or even just simple olive oil and herbs. It also taste good with vegetables, cheese or used for baked pasta dishes. You can also mix it cold for salad type dishes.

Keep leftover pasta in a box in fridge for 1-2 days. Add few drops of oil and mix before storing so it will not stick.

FAQS

1.Can I use any type of pasta?

Yes, you can use any type like penne, macaroni, fusilli or spaghetti. Only the cooking time may change little.

2.Should I add oil while boiling?

Adding oil is not must but I prefer few drops so pasta does not stick together.

3.Can I make pasta before and store it?

Yes, you can boil and keep it in fridge for 1-2 days. Just fluff before mixing with sauce.

4.How do know that it is cooked?

When you bite, it should be soft but little firm in middle. That is called al dente and perfect.

5.What if I overcook pasta?

Overcooked pasta becomes sticky and too soft. So always check near the end to avoid that.

Cooked pasta

If you have any more questions about this How to Cook Pasta do mail me at sharmispassions@gmail.com. In addition, follow me on InstagramFacebookPinterest ,Youtube and Twitter .

Tried this How to Cook Pasta? Do let me know how you liked it. Also tag us on Instagram @sharmispassions and hash tag it on #sharmispassions.

📖 Recipe Card

Howtocookpasta2
Print

How to Cook Pasta

Cooking pasta is quite easy when you do it the right way. It should be cooked soft but not mushy, and have that little bite in the middle, that's the right texture which makes pasta taste great. You can mix it with sauce, veggies or just toss with some olive oil and herbs. It cooks fast and makes it as a filling meal even on busy days.
Course Breakfast, dinner, Lunch, Main Course
Cuisine Indian, Indo Chinese, Italian
Keyword 30 mins recipes, easy pasta recipes, fusili pasta recipes, fusilli pasta recipes, pasta, pasta recipes, penne pasta recipes
Prep Time 5 minutes
Cook Time 10 minutes
Total Time 15 minutes
Servings 2
Calories 167kcal
Author Sharmilee J

Ingredients

  • 1 and ½ cups pasta I used fusilli variety
  • 3 cups water
  • salt as needed
  • few drops oil

Instructions

  • Take water in a sauce pan, add salt and oil to it.Boil it.
  • When it starts to boil, add the pasta and cook in medium flame.Stir inbetween.
  • Keep cooking and make sure you stir inbetween.Cook until it becomes soft but not mushy.It should have the crunch to bite at the same time it will slightly bend,thats the right stage.Switch off and drain water.
  • Rinse it well in running water.Strain,Drizzle oil, mix well.Then fluff it up and use it for your recipes.
  • Cooked pasta ready!

Video

Notes

  • Stir often - I usually stir pasta in between while cooking, this helps it not stick to bottom or to each other.
  • Check texture - Always check in between if pasta is soft but still has little firmness inside. Overcooked pasta will turn mushy.
  • Rinse after cooking - After draining I rinse pasta in normal running water, it removes extra starch and stops overcooking.
  • Add oil after draining - Adding few drops of oil after draining keeps pasta separate and easy to toss later.
  • Salt - I added salt to give light flavor and season the pasta. You can use normal or sea salt, both are fine.

Nutrition

Serving: 150g | Calories: 167kcal | Carbohydrates: 34g | Protein: 6g | Fat: 1g | Saturated Fat: 0.1g | Polyunsaturated Fat: 0.3g | Monounsaturated Fat: 0.1g | Sodium: 20mg | Potassium: 100mg | Fiber: 1g | Sugar: 1g | Calcium: 20mg | Iron: 1mg

The post How to Cook Pasta appeared first on Sharmis Passions.

How to make paneer | Homemade Paneer Recipe

Homemade Paneer is fresh, soft and very easy to make at home using just 2 ingredients. Paneer or Indian cottage cheese can be made at home with no added preservatives or additives. Making paneer at home is so easy and comes out perfect every time if you the steps and instructions mentioned in this post.

homemade paneer cubes

Making paneer at home is easy and had been making it for years now. Though we always use homemade paneer, I didn't give much thoughts of posting it here until my best friend asked to post the recipe. I have shared all the tips and tricks to make perfect homemade paneer every single time.

[feast_advanced_jump_to]

What is Paneer?

Paneer also known as Indian Cottage Cheese is fresh cheese made by curdling milk using any acidic foods like lemon juice, curd or vinegar or citric acid etc. The resulting whey water is strained and the curdled milk solids are transferred to a cheese cloth and pressed using a heavy object to form a paneer block. Later the block is cubed into small paneer cubes and used in dishes.

Paneer is basically fresh non melting cheese made without using rennet like other cheese varieties so it is completely vegetarian. Paneer is soft and neutral in flavor so it absorbs the flavors easily.

Paneer can be used to make a lot of dishes including gravies, starters, rice, pulao, biryani and many more. You can even just sauté paneer with onion, capsicum and some basic spices and it is good to go as a side dish or even as a filling for wraps. Paneer is so versatile that it can be used to make so many dishes.

homemade paneer cubes

Video

Homemade Paneer

My paneer making journey started soon after I started cooking. Amma started making homemade paneer even when paneer was not popular in the 80's. When I was in 4th-5th grade when there was no internet or recipes online amma used to make paneer learnt from a popular tamil magazine.

First she used to make crumbled paneer to add it along with vegetables to make stir fry later she started making black of paneer to make gravies and curries. So seeing that from my childhood homemade paneer was not at all new to me. It is one of the few dishes I learnt soon after I started cooking.

Paneer making process is very easy - First boil milk then add any acidic food to curdle the milk. The curdled milk solids are strained to a muslin or cheese cloth to form a block pf paneer. It is pressed with a heavy object to drain out all the excess water and set to make a block of paneer.

Homemade paneer comes out super soft and cannot be compared with store bought ones. Just follow the tips and tricks shared here and you will get perfect homemade paneer.

homemade paneer making process

Homemade Paneer Ingredients

  • Milk - I prefer to use fresh milk that is cows milk. But you can use any full fat or full cream milk. You can use raw milk or even previously boiled milk to make paneer.
  • Curd / Yoghurt - I always use curd to curdle milk for 2 reasons - it gives volume also does not leave any after taste like the other food acids.
ingredients needed to make homemade paneer

Milk to use

You can use raw milk or even leftover boiled milk too to make paneer.

  • Farm Fresh Milk - Farm fresh milk is raw milk without any processing straight from the cow. We usually buy cows milk on a regular basis so mostly use this for making paneer.
  • Processed milk - Milk is processed and sold in packets or bottles to increase shelf life and to kill harmful bacteria. You can use this milk also to make paneer.

Acidic foods to curdle milk

  • Curd - For 1 liter milk you will need ½ cup curd. The measure of curd may vary depending on the fat content in the milk so you may need 1- 2 tablespoon extra curd based on it.
  • Lemon Juice - For 1 liter milk you will need 2 tablespoon lemon juice. I usually don't suggest lemon juice as it imparts lemony flavor to the paneer even after it is washed.
  • Vinegar - For 1 liter milk you will need 2 tablespoon vinegar juice. Vinegar is the most quickest to curdle the milk.
  • Whey water - Whey water is drained water after collecting the curdled milk solids. For 1 liter milk you will need around 1 cup whey water.
  • Citric acid - For 1 liter milk you will need ½ teaspoon citric acid.
food acids to curdle milk

How to press paneer (with & without paneer maker)

You don't really need a paneer press to make homemade paneer. Paneer press makes paneer making process a bit quicker and easier, also gives it the perfect square shape as store bought ones. I have shown both making paneer with and without paneer press here.

homemade paneer using paneer maker

You can make homemade paneer with just a cheese cloth or muslin cloth too. I was using cloth to make paneer for so many years only recently I bought this paneer press so wanted to share my experience.

If you don't have a paneer press don't worry - You can make homemade paneer by pouring the curdled milk to a muslin / cheese cloth. Wrap it well and place heavy object on it to remove excess water. The resulting paneer block will be round in shape and it can be cut into cubes. You can even wrap it to a square to make square paneer block.

First pic is homemade paneer using paneer press and second pic is using just a cloth without using paneer maker.

paneer using paneer press and without using paneer maker

How to make Paneer Step by Step

Boiling milk

1.To a large pot add 2 liters milk to it.

boil milk

2.Let it start to boil.

let it start to boil

3.Give a quick mix.

give a quick mix

Curdling milk

4.Add 1 cup curd little by little stirring simultaneously.

curdle milk

5.Keep stirring until you start the milk curdling.

stir it well

6.In few seconds the milk will curdle and you will clear greenish liquid separating which is called whey water.

milk is curdled

7.This is curdled milk solids. Do not overcook immediately switch off.

curdled milk solids

Using paneer maker / paneer press

8.Place a strainer over the bowl first. Then place the paneer press on the strainer.

paneer maker kept ready

Draining

9.Place the cheese cloth on the strainer and pour the milk curdles to it.

strain the curdles

10.Rinse it with water.

rinse it with water

11.Press it with a ladle to drain out excess water.

press with ladle

12.Wrap it with the cloth.

wrap with cloth

Pressing paneer

13.Cloth with the paneer maker lid and press well to remove the excess water.

press with lid

14.Place the paneer maker on a wire rack and place heavy object on the paneer press making sure the paneer maker is pressed well. Let it set for at least 1 hour.

place heavy object on it

Homemade paneer

15.After 1 hour remove the paneer from the press. Fresh, soft homemade paneer is ready.

homemade paneer is ready

16.Cut into cubes.

cut it

17.You can store it as a block as such or cut into small cubes and store in fridge.

cut into small cubes

18.See how soft it is.

soft paneer is ready

Without using paneer maker

19.I served little curdles to show you how to make paneer without the paneer maker.Place the cheese cloth over the strainer first. Transfer the curdles to it.

strain the curdles

20.Pull the edges of the cloth and press well to remove excess water.

press well to squeeze excess water

21.Flatten it slightly.

flatten it slightly

22.Place heavy object on it. Let it set for 1 hour minimum.

place a heavy object

23.Now remove and your homemade paneer is ready.

homemade paneer is ready

24.Cut into cubes.

cut into cubes

25.Homemade paneer is ready!

homemade paneer is ready

26.Store the paneer in a clean container soaked in water. You can store this in fridge for up to a week.

store in soaked water

27.The drained water is whey water, you can collect this and store in a clean bottle in fridge. You can use this to knead chapathi / roti dough or use to curdle milk the next time you make paneer.

whey water

Expert Tips

  • Milk - For perfect soft paneer I would recommend to use full fat whole milk. Pasteurized milk is ok to use but should have high fat content. You can use leftover boiled milk or fresh milk to make paneer.
  • Food Acid - I prefer using curd or yogurt to curdle milk. However you can use lemon juice or vinegar or citric acid too to curdle milk but these have a slight after taste in the paneer.
  • Straining - While straining the milk solid curdles make sure to strain it on a cheese cloth or muslin cloth.
  • Whey water - Use the leftover whey for making rotis or rasgullas or save it for making paneer next time.
  • Pressing Paneer - Use any heavy flat object to be placed directly. You can use heavy stone based chapathi board or hand mortar pestle etc.
  • Setting time - Leave at least minimum 1 hour for the paneer to set well. Leave it undisturbed. Take care to wrap it to form a circle / square so that while cutting into pieces it is easy to form squares.

Storage

You can store the paneer as a block or cut into cubes. Make sure to soak in water and store in fridge for it to stay fresh even for a week. Soaking in water avoids paneer from becoming hard.

FAQS

1.What type of milk to use?

Use full cream or full fa milk for best results. You can use farm fresh milk that is cows milk or processed milk too. You can use raw milk boil and use it or use leftover previously boiled milk too.

2.Even after adding food acids milk is not curdling why?

If the fat or cream content in milk is more then milk may not curdle with less quantity of food acids. So add little more in parts until you see whey water start to separate.

3.My paneer is crumbling or grainy, why?

If you keep stirring after the milk curdles it may result in crumbled paneer.

4.How much paneer do I get?

The measure of paneer you yield purely depends on the cariety of milk used. But on an average if you use full fat milk for 1 adn ½ liters of milk you will get around 200 grams paneer.

5.Why my paneer is hard or rubbery?

Do not keep cooking after the milk curdles. Immediately switch off when you see milk curdles and strain it. Overcooking results in hard and rubbery paneer.

homemade paneer cubes

Recipes with Paneer

More paneer recipes

homemade paneer cubes in a bowl

If you have any more questions about this How to make paneer do mail me at sharmispassions@gmail.com. In addition, follow me on InstagramFacebookPinterest ,Youtube and Twitter .

Tried this How to make paneer? Do let me know how you liked it. Also tag us on Instagram @sharmispassions and hash tag it on #sharmispassions.

📖 Recipe Card

Print

How to make paneer | Homemade Paneer Recipe

Homemade Paneer is fresh, soft and very easy to make at home using just 2 ingredients. Paneer or Indian cottage cheese can be made at home with no added preservatives or additives. Making paneer at home is so easy and comes out perfect every time if you the steps and instructions mentioned in this post.
Course howtos
Cuisine Indian
Keyword easy paneer recipes, How to, indian paneer recipes, milk recipes, paneer 65, paneer dishes, paneer recipes
Prep Time 30 minutes
Cook Time 10 minutes
Total Time 40 minutes
Servings 1 cup
Calories 694kcal
Author Sharmilee J

Ingredients

  • 2 liters milk
  • 1 cup curd

Instructions

  • To a large pot add 2 liters milk to it.
  • Let it start to boil.
  • Give a quick mix.
  • Add 1 cup curd little by little stirring simultaneously.
  • Keep stirring until you start the milk curdling.
  • In few seconds the milk will curdle and you will clear greenish liquid separating which is called whey water.
  • This is curdled milk solids. Do not overcook immediately switch off.
  • Place a strainer over the bowl first. Then place the paneer press on the strainer.
  • Place the cheese cloth on the strainer and pour the milk curdles to it.
  • Rinse it with water.
  • Press it with a ladle to drain out excess water.
  • Wrap it with the cloth.
  • Cloth with the paneer maker lid and press well to remove the excess water.
  • Place the paneer maker on a wire rack and place heavy object on the paneer press making sure the paneer maker is pressed well. Let it set for at least 1 hour.
  • After 1 hour remove the paneer from the press. Fresh, soft homemade paneer is ready.
  • Cut into cubes.
  • You can store it as a block as such or cut into small cubes and store in fridge.
  • See how soft it is.
  • I served little curdles to show you how to make paneer without the paneer maker.Place the cheese cloth over the strainer first. Transfer the curdles to it.
  • Pull the edges of the cloth and press well to remove excess water.
  • Flatten it slightly.
  • Place heavy object on it. Let it set for 1 hour minimum.
  • Now remove and your homemade paneer is ready.
  • Cut into cubes.
  • Homemade paneer is ready!
  • Store the paneer in a clean container soaked in water. You can store this in fridge for up to a week.
  • The drained water is whey water, you can collect this and store in a clean bottle in fridge. You can use this to knead chapathi / roti dough or use to curdle milk the next time you make paneer.

Video

Notes

  • I prefer to cut them a bit small so that while added to gravies, it absorbs well. Soaking the paneer 10mins before adding it to gravies also makes it to absorb the gravy well. You can store in fridge for up to 3 to 4 days....After that it starts to harden.
  • Use the leftover whey for making rotis or rasgullas or save it for making paneer next time.
  • Setting time is very important in getting the perfect paneer cubes. Also keeping in fridge before cutting into cubes gives neat pieces.
  • You can even use ¼ cup curd to curdle but I used ½ cup to curdle quickly and to get little more volume of paneer.
  • I used cows milk so had to simmer for a while before I added curd as cows milk is little watery. People here in India can use aavin full cream milk.
  • Use a cheese cloth which drains the water well. I used dhoti cloth for draining.
  • Take care to wrap it to form a circle / square so that while cutting into pieces it is easy to form squares.
  • Also allow the paneer to come to room temperature before cutting it to avoid paneer from crumbling.

Nutrition

Serving: 200g | Calories: 694kcal | Carbohydrates: 54g | Protein: 38g | Fat: 37g | Saturated Fat: 22g | Polyunsaturated Fat: 1g | Monounsaturated Fat: 8g | Cholesterol: 140mg | Sodium: 448mg | Potassium: 1737mg | Sugar: 55g | Vitamin A: 1792IU | Vitamin C: 1mg | Calcium: 1417mg | Iron: 0.1mg

The post How to make paneer | Homemade Paneer Recipe appeared first on Sharmis Passions.

Whole Wheat Sandwich Bread Recipe

Whole Wheat Sandwich Bread is a soft, fluffy homemade bread made using 100% atta without any maida. This bread is very simple to make and comes out fresh and healthy compared to store bought breads. The texture is soft enough for sandwiches yet sturdy for toasts too.

whole wheat sandwich bread sliced

Baking bread at home is always special, the smell of fresh bread itself is worth the effort. This atta bread is good for people who want to avoid maida and go for a healthier choice. You can enjoy it plain, toasted with butter, or use it for sandwiches. It stays soft for a good time and is cost effective also.

[feast_advanced_jump_to]

About Whole Wheat Sandwich Bread

Whole Wheat Sandwich Bread is made by kneading whole wheat flour into a dough with yeast, sugar, oil and milk powder, then letting it rise before baking. The process may sound long but it is not difficult once you try it. The yeast helps for dough rise and makes the bread airy and soft.

This bread recipe is completely made with whole wheat flour, I didn't add maida to this. This recipe has slight dense texture compared to bakery breads made with refined flour, but it's still soft and tasty enough to enjoy. Adding milk powder and oil makes it more soft and tasty.

The flavor of whole wheat bread is very mild, slightly nutty from the flour, with a natural sweetness if you add sugar. You can keep it plain for savory sandwiches, or add little more sugar to make it slightly sweet bread which tastes great with butter and jam. You can also add honey or seeds like flax, sesame for extra crunch.

I usually bake this bread on weekends. My family enjoys it warm with butter melting on top. I love making my own homemade bread is something satisfying.

whole wheat sandwich bread sliced

Whole Wheat Sandwich Bread Ingredients

  • Whole wheat flour - I used only atta. It gives the bread its wholesome taste and makes it healthier. You can also mix little maida if you want lighter texture, but I kept this 100% wheat.
  • Dry milk powder - This makes bread soft and gives slight milk flavor. If you don't have, you can skip but I feel it really improves texture.
  • Oil or butter - I have used oil this time, but butter also works well. It makes the bread soft and adds richness. Oil makes the texture lighter, butter adds more flavor.
  • Sugar - I have used demerara sugar which gives mild caramel taste, but normal white sugar works fine too. Sugar also helps yeast to activate.
  • Dry yeast - The key ingredient for rising. Yeast must be fresh. If yeast didn't bubble when mixed with warm water and sugar, then it won't rise.
whole wheat sandwich bread sliced

Similar Recipes

How to make Whole Wheat Sandwich Bread Step by Step

1.Take yeast in a bowl, add 3 tablespoon sugar then oil

how to make whole wheat sandwich bread step1

2.Add ½ cup luke warm water and set aside undisturbed for few minutes. It will bubble up which shows that the yeast is active, Set aside. Now add 3 cups of wheat flour in a mixing bowl, add ¼ cup milk powder.

how to make whole wheat sandwich bread step2

3.Then add salt. Whisk it well for even mixing. Now add the yeast mixture. Then add remaining water little by little.

how to make whole wheat sandwich bread step3

4.Knead to a soft pliable dough. Brush with oil and wrap with cling film and set aside to rise for 1 or 2 hours depends on your climate and yeast too. Mine got doubled in an hour.

how to make whole wheat sandwich bread step4

5.Punch down and knead it once again. Flatten it using a rolling pin or just with your hands, measure it with your bread loaf pan. Make sure to make it a square. My bread loaf pan is 9X5 inches.

how to make whole wheat sandwich bread step5

6.Start rolling from one edge.After rolling till the end, flip over and pinch like this to seal it.

how to make whole wheat sandwich bread step6

7.Seam edges and place it inside the pan. If you don't want a dome shaped bread then flatten it or close with a lid. I left it as such. Let it rise in the pan for at least 45 minutes.

how to make whole wheat sandwich bread step7

8.Brush with top of bread with oil and bake in preheated oven at 170 deg C for 40-45 minutes or until the top turns golden. Mine got done in 40 minutes. Once baked remove the pan and let it cool for 15 minutes then carefully invert and let it to cool down completely at least for 2 hours. If you don't want the crust on top, use a wet cloth to cover and keep aside for few mins.

how to make whole wheat sandwich bread step8

Use serrated knife to slice. Slice and serve. Serve as bread toast / plain bread.

whole wheat sandwich bread sliced

Expert Tips

  • Yeast proofing - I always test yeast by mixing with warm water and sugar. It should foam within few minutes. If it didn't then bread won't rise.
  • Kneading - I always knead the dough for 8 to 10 minutes until its smooth. This develops gluten and makes bread soft.
  • First rise - I cover and rest the dough in warm place. Depending on climate it may take 1 or 2 hours. Dough should be double in size before shaping.
  • Shaping loaf - Roll dough into rectangle and then roll tightly from one end to shape like a log. Pinch ends to seal before keeping in loaf tin.
  • Second rise - Don't skip this. Let shaped dough rise in pan for at least 40-45 minutes. This helps bread get soft and airy.
  • Cooling before slicing - Always cool bread fully before slicing, at least 2 hours. Cutting hot bread will make it gummy.

Serving and Storage

Serve Whole Wheat Sandwich Bread toasted with butter, jam or as sandwich bread with your favorite fillings. It also tastes good plain too. Leftover bread can be stored in airtight box at room temperature for 2 days.

FAQS

1.Can I use regular atta?

Yes, I have used regular chapati atta and it works fine.

2.Why my bread didn't rise?

This happens if yeast wasn't fresh or water was too hot. Always proof yeast first.

3.Can I replace milk powder?

Yes you can skip it, but it makes soft bread.

4.Can I use butter?

Yes, you can use butter if you like it gives more flavor.

5.How long does this stay fresh?

It stays fresh for around 2 days outside, 4-5 days in fridge. Always cool completely before storing.

whole wheat sandwich bread sliced

If you have any more questions about this Whole Wheat Sandwich Bread Recipe do mail me at sharmispassions@gmail.com. In addition, follow me on InstagramFacebookPinterest ,Youtube and Twitter .

Tried this Whole Wheat Sandwich Bread Recipe? Do let me know how you liked it. Also tag us on Instagram @sharmispassions and hash tag it on #sharmispassions.

📖 Recipe Card

25348705866 40c9408614 o
Print

Whole Wheat Sandwich Bread Recipe

Whole Wheat Sandwich Bread is a soft, fluffy homemade bread made using 100% atta without any maida. This bread is very simple to make and comes out fresh and healthy compared to store bought breads. The texture is soft enough for sandwiches yet sturdy for toasts too.
Course Breakfast, Main Course
Cuisine Indian
Keyword Baking, baking recipes, bread, bread recipes, wheat flour recipes, whole wheat recipes
Prep Time 2 hours
Cook Time 45 minutes
Total Time 2 hours 45 minutes
Servings 12 loaf
Calories 159kcal
Author Sharmilee J

Ingredients

  • 3 cups whole wheat flour
  • ¼ cup dry milk powder
  • 3 tablespoon oil or butter
  • 1 and ½ cups warm water
  • 3 tablespoon sugar
  • 1 and ½ teaspoon dry yeast
  • 1 and ½ teaspoon salt

Instructions

  • Take yeast in a bowl, add 3 tablespoon sugar then oil.
  • Add ½ cup luke warm water and set aside undisturbed for few mins.It will bubble up which shows that the yeast is active. Set aside.
  • Now add 3 cups of wheat flour in a mixing bowl, add ¼ cup milk powder.
  • Then add salt. Whisk it well for even mixing. Now add the yeast mixture. Then add remaining water little by little.
  • Knead to a soft pliable dough. Brush with oil and wrap with cling film and set aside to rise for 1 or 2 hrs depends on ur climate and yeast too. Mine got doubled in a n hr.
  • Punch down and knead it once again. Flatten it using a rolling pin or just with your hands, measure it with your bread loaf pan. Make sure to make it a square. My bread loaf pan is 9X5 inches.
  • Start rolling from one edge. After rolling till the end, flip over and pinch like this to seal it.
  • Seam edges and place it inside the pan. If you don't want a dome shaped bread then flatten it or close with a lid. I left it as such. Let it rise in the pan for at least 45mins.
  • Brush with top of bread with oil and bake in preheated oven at 170 deg C for 40-45mins or until the top turns golden. Mine got done in 40mins.
  • Once baked remove the pan and let it cool for 15mins then carefully invert and let it to cool down completely at least for 2hrs. If you don't want the crust on top, use a wet cloth to cover and keep aside for few mins.
  • Use serrated knife to slice. Slice and serve. Serve as bread toast / plain bread.

Notes

  • Yeast proofing - I always test yeast by mixing with warm water and sugar. It should foam within few minutes. If it didn't then bread won't rise.
  • Kneading - I always knead the dough for 8 to 10 minutes until its smooth. This develops gluten and makes bread soft.
  • First rise - I cover and rest the dough in warm place. Depending on climate it may take 1 or 2 hours. Dough should be double in size before shaping.
  • Shaping loaf - Roll dough into rectangle and then roll tightly from one end to shape like a log. Pinch ends to seal before keeping in loaf tin.
  • Second rise - Don't skip this. Let shaped dough rise in pan for at least 40-45 minutes. This helps bread get soft and airy.
  • Cooling before slicing - Always cool bread fully before slicing, at least 2 hours. Cutting hot bread will make it gummy.

Nutrition

Serving: 10g | Calories: 159kcal | Carbohydrates: 27g | Protein: 6g | Fat: 4g | Saturated Fat: 0.4g | Polyunsaturated Fat: 1g | Monounsaturated Fat: 2g | Trans Fat: 0.01g | Cholesterol: 1mg | Sodium: 308mg | Potassium: 171mg | Fiber: 4g | Sugar: 5g | Vitamin A: 61IU | Vitamin C: 0.2mg | Calcium: 45mg | Iron: 1mg

The post Whole Wheat Sandwich Bread Recipe appeared first on Sharmis Passions.

Schezwan Sauce | Schezwan Chutney

By: Richa

This homemade Schezwan sauce is fiery, garlicky, and totally addictive — perfect for tossing into noodles, rice, or using as a spicy dip! The best part? You can make a batch and keep it in the fridge for whenever those Indo-Chinese cravings hit. 

Learn how to make this simple schezwan sauce which is perfect with chicken lollipops, schezwan rice, noodles and manchurian (Step by step video recipe)

I’ve always been that person asking for extra Schezwan Sauce with my momos so it just made sense for me to start making it at home! It’s cleaner, pocket-friendly, and I can now put this schezwan chutney on everything – dosas, fried rice, noodles.  It also makes for a great dipping sauce.forliterally any snack from spring rolls to chakli, and is a must to have in the fridge for  whenever those Indo-Chinese cravings hit!  

My sister and I have the BEST childhood memories of ordering extra schezwan sauce at our fav Chinese restaurant just to take home and eat it with papad the next day. You guys have to trust me on this combination. It is the ultimate chatpata snack! And now I can have it all the time, and the best part? This Schezwan Sauce recipe is fresh and preservative-free, just how we like it. 

Schezwan Sauce Ingredients

Ingredients for schezwan sauce. Pictures here are chillies and water
  • Chillies: I used a combination of Byadgi Chillies (for heat) and Kashmiri Chillies (for colour and flavour). You can change the proportions a little if you want it to be more or less spicy.

The chillies are soaked in hot water to soften them and then blended with a little bit of that water into a coarse paste. We don’t want to break them down completely because we want texture as well. So keep the mixture coarse where you can still see bits of chillies

All the ingredients required for schezwan sauce are pictures on a wooden board, except chillies and hot water
  • Shallots/Sambar Onions/Pearl Onions: Any of these smaller varieties of onions will work here. They have a milder flavour than red onions and soften beautifully
  • Garlic and Ginger: Lots of finely chopped garlic and ginger. I usually buy peeled garlic when I make this schezwan sauce/ schezwan chutney to make life easier
  • Ketchup: My favourite thing to add when I’m making Indo Chinese because it has the perfect balance of sweet, salty, acidic
  • Sugar: Might seem like a lot but you need this to balance out the heat from the chillies
  • Soy Sauce: Light soy sauce to add that hit of umami
  • Vinegar: To add acidity. Use synthetic or rice vinegar
  • Oil: There is 1/3 cup of oil in this recipe. I don’t recommend reducing it. The oil does two things – it helps cook the chillies till they are jammy and helps preserve this sauce so that it can last up to a month in the fridge

How to make Schezwan Sauce

This is a simple recipe that has a lot of hands off time while the sauce is simmering and reducing

  1. Soak: Soak the chillies in hot water to soften them. I like to discard the stems before soaking
  2. Blend: Blend to a coarse paste with a little water. The smoother the chilli paste, the less texture you’ll have in the sauce. And that texture makes a big difference
  3. Saute: Saute the ginger, garlic and onions in oil till they soften but be careful not to brown the onions. As soon as they are translucent, you know they are ready.
  4. Chillies: Add the coarsely blended chillies and all the other ingredients along with water and mix well
  5. Simmer: Let the sauce come to a simmer and then cover and cook, stirring occasionally in between till the sauce reduces and takes on a jammy consistency. You should also see oil floating on top. That’s when you know the sauce is ready and the chillies have cooked down. This process can take anywhere between 25-40 minutes.
  6. Cool and store: Let the sauce cool completely before you transfer it to an airtight container. This will last for up to 4 weeks in the fridge (if you don’t finish it before that 😂)
Learn how to make this simple schezwan sauce which is perfect with chicken lollipops, schezwan rice, noodles and manchurian (Step by step video recipe)

Frequently Asked Questions

What is Schezwan sauce?

Schezwan sauce is an Indo-Chinese spicy chutney made with red chillies, garlic, vinegar, and sugar. It’s used in fried rice, noodles, stir-fries, and famously, as a dip for momos at streetside stalls. 

Is Schezwan sauce spicy?

Yes! It’s fiery, but the heat is balanced with tang from vinegar and a hint of sweetness. Using Kashmiri chillies makes it less sharp but still bold.

How long can I store homemade Schezwan sauce?

It stays fresh in the fridge for up to 1 week. For longer storage, freeze in small portions and thaw before use.

Can I use regular chillies instead of Kashmiri chillies?

Yes, but the color will be less vibrant and the sauce spicier. Adjust the chillies based on your spice preference.

Richa’s Top Tips

  • The proportion of chillies will determine heat levels in this sauce. You can play around with this proportion based on how spicy you’d like your schezwan chutney/sauce to be I wouldn’t recommend reducing the oil in this recipe as it helps preserve the sauce so that it can be stored for a month or so. We’ll also be using very small quantities of it for dipping or as a condiment so the total calories are not very high
  • Use a chopper or food processor to chop the shallots, ginger and garlic finely. Makes the task much faster!
  • Taste and adjust sugar, vinegar, and salt until balanced.
  • Make sure to cool the schezwan sauce before storing and refrigerating. 
  • Store in the fridge in a clean, dry glass jar.

Serving Suggestions

If you still aren’t convinced about this low-effort high-rewards sauce, here are a few more reasons:

Storage Suggestions

  • Storage: The sauce can be store in a clean, air tight container in the fridge for up to a month
  • Freezer Friendly: You can also portion the sauce and freeze it and it can last for up to 3 months. I sometimes like to portion it out into ice trays and freeze it. Once frozen, I remove the cubes, transfer them to a zip lock and freeze. Then I have perfect portions anytime I want to thaw them.
Learn how to make this simple schezwan sauce which is perfect with chicken lollipops, schezwan rice, noodles and manchurian (Step by step video recipe)

Ever since I discovered this Schezwan Sauce recipe, I make a large batch at least once a month and use it for as long as it lasts (which TBH, is not that long!). I have this with everything!! Once you try this, you’ll never go back to store-bought and I think that’s beautiful ❤️

If you liked this recipe, be sure to check my other saucy Indo-Chinese recipes like these Chilli Chicken Noodles and Corn Bhel!

Watch Schezwan Sauce Recipe Video

Schezwan sauce in a jar.
Print

How To Make Schezwan Sauce (Step by Step Video)

Learn how to make this simple indo-chinese schezwan sauce/condiment which goes really well with chicken lollipops, schezwan rice, noodles and manchurian. Makes 1.5 cups. Each serving size is estimated at 1 tbsp.
Course Dips, Dressings & Sauces
Cuisine Asian, Chinese, Indian
Diet Vegan, Vegetarian
Prep Time 10 minutes
Cook Time 40 minutes
Total Time 50 minutes
Servings 24 servings
Calories 43kcal
Author Richa

Ingredients

  • 1/3 cup Vegetable oil
  • 15 cloves Garlic finely chopped
  • 1 1/2 inch Ginger finely chopped
  • 6 Shallots or Sambhar Onions, minced
  • 23 Kashmiri Red Chilies
  • 3 Byadgi Chillies
  • 1 teaspoon soy sauce
  • 1 teaspoon Vinegar
  • 1/4 cup Water
  • 2 tablespoons Ketchup
  • 3 tablespoons Sugar
  • 1 teaspoon Salt to taste

Instructions

  • Soak the chillies in hot water for half an hour. Add only the chillies to a blender along with 2-3 tbsp water and blend to a coarse paste
  • Heat oil in a pan and add garlic and ginger. Saute on a low flame till the raw aroma goes. Be careful not to brown or burn the ginger garlic.
  • Add the minced onions and let them cook on a low flame till they soften and turn translucent. Be careful not to let them brown.
  • Once the onions look like they are almost melting, add ground chilies, soy sauce, vinegar, ketchup, sugar, salt and 1/4 cup water. Mix well.
  • Bring this to a boil and simmer till the sauce thickens. Oil should have separated, and there should be some oil floating on top.
  • Switch off the flame and let it cool. Once the sauce has completely cooled down, transfer to an airtight container and store in the refrigerator for up to 15 days.

Video

Notes

  1. Chillies: I used a combination of Byadgi Chillies (for heat) and Kashmiri Chillies (for colour and flavour). You can change the proportions a little if you want it to be more or less spicy.
  2. Shallots/Sambar Onions/Pearl Onions: Any of these smaller varieties of onions will work here. They have a milder flavour than red onions and soften beautifully
  3. Simmer: You should also see oil floating on top. That’s when you know the sauce is ready and the chillies have cooked down. This process can take anywhere between 25-40 minutes.
  4. Cool and store: Let the sauce cool completely before you transfer it to an airtight container. This will last for up to 4 weeks in the fridge.
  5. The nutrition label below is for 15 servings

Nutrition

Calories: 43kcal | Carbohydrates: 4g | Protein: 1g | Fat: 3g | Saturated Fat: 2g | Polyunsaturated Fat: 1g | Monounsaturated Fat: 1g | Sodium: 124mg | Potassium: 45mg | Fiber: 1g | Sugar: 3g | Vitamin A: 150IU | Vitamin C: 1mg | Calcium: 6mg | Iron: 1mg

This article was researched and written by Navya Khetarpal.

The post Schezwan Sauce | Schezwan Chutney appeared first on My Food Story.

Best Labor Day Recipes 2025 | Easy, Healthy & Vegetarian

Enjoy these healthy Labor Day recipes perfect for a picnic, barbecue, or backyard party! This collection of end-of-summer recipes are a perfect crowd pleaser for a gathering. There’s everything from mains and sides to drinks and desserts, that are easy to mix and match for the tastiest Labor Day weekend spread which is packed with season’s freshest flavors.

Labor Day 2025 is on September 1st, it’s the perfect time to fire up the grill, pack a picnic, or host a cozy dinner at home. Think veggie burgers, pizzas on the grill, colorful salads, dips, snacks, and refreshing desserts.

50+ Labor day recipes

Whether you’re planning a backyard BBQ or bringing a dish to share, these Labor Day menu ideas are healthy, vegetarian, and delicious. Send summer off in style with these Labor Day weekend recipes.

So skip the stress of planning! These healthy Labor Day recipes all vegetarian, many make-ahead friendly, and perfect for creating an unforgettable end of summer feast.

Healthy Labor Day Appetizers & Starters

Start your celebration with easy vegetarian appetizers that are perfect for sharing. Fresh dips, finger foods, and picnic-ready bites make entertaining stress-free and delicious.

Vegetarian Finger Foods for Parties

If you are looking to add some nibbles to start your cookout these Labor Day recipes for party appetisers are a perfect start.

Easy Dips & Picnic-Perfect Snacks

Wholesome hummus, chutneys, and light dips pair beautifully with chips, crackers, or fresh veggies for a healthy Labor Day starter.

Labor Day BBQ & Grilling Recipes

Fire up the grill with these vegetarian Labor Day BBQ recipes. Perfect for outdoor cookouts and backyard parties, these dishes are flavorful, filling, and festive.

Vegetarian Burgers, Skewers & Grilled Mains

Try hearty veggie burgers, paneer tikka skewers, Malai Broccoli Tikka , or grilled flatbreads that everyone, even meat eaters will love.

Light & Healthy Cookout Ideas

Grilled vegetables, stuffed peppers, and lighter mains are great options for a healthier Labor Day barbecue menu.

Fresh & Colorful Labor Day Side Dishes

No party is complete without vibrant side dishes. These healthy sides highlight seasonal produce and are easy to prep ahead.

Summer Salads with Seasonal Produce

From quinoa salads to tomato-cucumber bowls, fresh salads bring color and crunch to your Labor Day weekend recipes.

Veggie Sides That Everyone Loves

Simple yet tasty sides like roasted corn, spiced potatoes, and chutneys round out your Labor Day cookout menu. Try some of my favourites for your labor day recipes selection.

 Labor Day Recipes 2025: BBQ, Sides, Appetizers & Desserts

Pasta Salads

For a refreshing and tasty addition to your Labor Day menu, these delightful pasta salads are crowd pleasers. These vegetarian and vegan Labor Day recipes are easy to make and full of flavor.

Labor Day Desserts & Drinks

End your meal on a sweet note with healthy summer desserts and refreshing drinks. Light, fruity, and easy-to-make treats. These easy Labor Day dessert recipes everyone will enjoy.

Healthy & Fruity Summer Desserts

Think fruit parfaits, chia puddings, and no-bake desserts perfect for keeping your Labor Day menu healthy yet indulgent. Try out these labor day recipes to mark end of summer.

Refreshing Beverages & Party Drinks

Cool off with light and fruity lemonade, mocktails, iced teas, or spritzers, ideal Labor Day party drinks for a hot weekend. Quench your thirst with refreshing drinks perfect for Labor Day. All these beverages are easy to make and offer a delightful, cooling touch to your holiday celebration.

Drinks for labor day party
Labor day party drink recipes

Easy Labor Day Menu Ideas 2025

Simplify your planning with Labor Day menu ideas that combine mains, sides, drinks, and desserts. Perfect labor day recipes for buffets, BBQs, or picnics.

1. Picnic, Party & Backyard BBQ Menu Plans

Choose a few favorites to build a balanced menu that works for any gathering style.

2. Mix-and-Match Recipes for Every Gathering

Create your own Labor Day buffet with versatile vegetarian dishes that guests can enjoy all day long.

More Labor Day Weekend Ideas

End-of-Summer Recipes to Celebrate Labor Day Weekend

Labor Day 2025 falls on September 1st, making it the perfect send-off to summer. Celebrate with these end-of-summer vegetarian recipes that highlight fresh produce, easy cooking, and festive flavors for an unforgettable holiday.

Labor Day Recipes FAQ

What vegetarian dishes are best for a Labor Day BBQ?

Some of the best vegetarian BBQ dishes include veggie burgers, grilled paneer, Halloumi or tofu skewers, stuffed peppers, and marinated vegetables on the grill. They’re hearty, flavorful, and perfect for outdoor cookouts.

Can you prep healthy Labor Day desserts ahead of time?

Yes! Desserts like chia pudding, overnight oats parfaits, fruit salads, and no-bake bars can be prepared a day in advance. These are easy, refreshing, and ideal for hot summer weekends.

What’s a good Labor Day picnic menu idea?

simple vegetarian Labor Day picnic menu might include sandwiches or wraps, fresh salads, chips with hummus or chutney, a fruit platter, and an easy no-bake dessert. Everything packs well and is crowd-pleasing.

What are some healthy side dishes for a Labor Day cookout?

Healthy sides like quinoa salad, roasted corn on the cob, sprouted moong dal chaat, grilled vegetables, and cucumber-tomato salads are light, nutritious, and pair well with mains.

When is Labor Day 2025?

Labor Day in 2025 falls on Monday, September 1st. It’s a perfect time to enjoy an end-of-summer feast with fresh, seasonal vegetarian recipes.


If You like this recipe and made it Please rate the recipe. It helps us to reach more people. For the Latest updates Subscribe to Rekha’s Whatsapp. You can follow me on InstagramFacebookYoutubePinterest for more food inspirations.

How I Fried and Fixed Zephyrus M16 while applying PTM7950 on CPU and GPU

By: Dr-Hack

I stumbled on PTM7950 listing on AliExpress and thought to try it out. My Laptops and PC were working fine in my opinion until I checked out that I had the following Temps :

Relevant PC Specs :
CPU – AMD Ryzen 9 3900X 12-Core Processor [CPU Max : 83 ]
GPU – AMD Radeon RX 5700 XT [GPU Max : 89 / Hot Spot 100]
Laptop Specs [Asus M16]:
CPU – 11th Gen Intel Core i9-11900H [CPU Max : 100]
GPU – NVIDIA GeForce RTX 3060 Laptop GPU [GPU Max : 75 / Hotspot 80]

Decision to Use PTM7950

The above mentioned temps on PC GPU and Laptop CPU made it clear to me that I need to apply PTM7950 and I while the process of repasting of PTM on GPU for PC was very uneventful.

Applying PTM ON Radeon RX 5700 XT

Things were bit different for the Asus Zephyrus M16. I could always respread the LM , but didn’t because the way it was spread all over the place and as I already opened the machine up , thought to apply PTM on both CPU and GPU.

Asus Zehpyrus M16 CPU and GPU Thermal Paste and Liquid Metal

While opening was relatively straight forward, I did get a surprise of Liquid Metal on the CPU , cleaning the LM was cumbersome, cleaned it up carefully and to the best of my ability.

After removing Liquid Metal and Thermal Paste from Asus M16

After closing up the laptop and turning the power button I was presented with :

  • Blank Screen / No POST
  • Power light constant ON
  • Battery light would blink twice and then give a gap and repeat
  • Keyboard backlit in red
  • Fans not spinning

I started googling and searching and the unanimous reddit verdict on such a condition was “LM is conductive and you didn’t do a good job and it has fried the circuits” a.k.a Motherboard dead.

Additional Remedies

Going to page 2 and 3 of google (indicates how desperate I was) revealed more ways to find out the problem, none worked, but it included:

  • Removing the battery, pressing the power button for 45-60 second and connecting battery again before trying
  • Drain it’s battery and then turn it on
  • Let it run for 10 minutes
  • Connect adapter and then turn it on after doing a power reset
  • Ensuring the display cable didn’t break or is properly seated and connecting external display [but as the system was not POST so never tried that]

While I gave up thinking the motherboard is fried, One YouTube video mentioned that the Error code of “battery light blinking twice and then repeating after gap” means a corrupt bios and you will need to remove the bios chip and put it in a programmer to get it sorted (video did not show where is the bios chip)

Hope and Revival of Asus Zephyrus M16

The above mentioned video made me think maybe it’s not a dead motherboard. While the method which I tried (and worked for me) was mentioned in different asus related queries but not with something where fans wouldn’t work and the keyboard would be red lit.

How It Was Revived

You can follow the steps mentioned below to get your laptop back to working if you are facing similar symptoms:-

  1. Open up the back case
  2. Remove the battery connecter
  3. Press power button for 10 odd seconds
  4. Remove Ram
  5. Connect battery connecter
  6. Rest the laptop on its screen with keyboard in the air, and press the power button
  7. Laptop did POST and went to windows [a bit slow as running only on mounted ram]
  8. Turn off laptop
  9. Repeat Step 2 and 3
  10. Insert Ram removed in step 4
  11. Turn on Laptop , it works fine
  12. Turn Off Laptop
  13. Put the back case back and screw them up

Conclusion

Congrats if you got your machine to work.

Just thought to share it ,as it was really frustrating thinking that I burned the motherboard, even while being so careful with the removal of LM as that is mostly the defaulter … If you got some queries you can get in touch over X @Hackology.

While I reduced PC GPU temps by 20 degrees, the impact on laptop wasn’t profound , although I am glad it’s still running and might wait a few days before reapplying as reseating the conductors over and again might ruin the PTM.

The post How I Fried and Fixed Zephyrus M16 while applying PTM7950 on CPU and GPU first appeared on Internet Security Blog - Hackology.

2 Easy Methods to Bypass Netflix Household

By: Taj S

After allowing password sharing for years, Netflix has recently changed its policy. The password sharing is now only allowed for a single physical household. However, we also have multiple methods to bypass Netflix household. Want to know more? Make sure to read till the end. Let’s being!

Since its initial years, Netflix encouraged password sharing with your friends and family, which allowed them to generate a strong user base. After they were done with this, Netflix unexpectedly started to impose a BAN on password sharing. This helped them surpass the expected revenue in Q4 of 2023, due to an overflow of new subscriptions.

Netflix Love is making more money

Current Netflix Password-sharing Policy

Netflix only allows account sharing under a single, physical household. In simple terms, Netflix will only allow sharing your account with those who stream from the same internet as yours (the main account), preferably your family members.

However, to beat this, we first need to understand the concept of a single physical household.

Enforcement of the Policy

The policy is not enforced on smartphones because it is natural for mobile phones to be active outside of Netflix household. Currently, Password-sharing under single household policy is enforced for TVs, smart TV boxes, PCs, and all other similar devices.

What is a Single Physical Household?

As soon as the Netflix restrictions will move to your region, you will start getting monitored for your activity. On the basis of this activity, Netflix will automatically determine a “primary location” where your account is used the most. If your account is used by other devices, using the same internet, as you are using at your primary location, all the devices, including yours, will considered to be under a single physical household, known as Netflix Household. If you trying logging into an account which has a different Netflix Household you will be presented by an error message “your TV isn’t part of the Netflix household for this account” followed by an explanation that why you can not access Netflix.

Since we have looked at what is Netflix Household, and what the restrictions for it are, let’s just move to our main topic on how to bypass Netflix Household.

How to Bypass Netflix Household

It must be clear by now, that to bypass Netflix household, we must make Netflix think that all the users sharing the account are living in the same “physical household” or the same “primary location”. As Netflix determines the location by the IP of the primary device, we can do so by simply routing the traffic of all the additional devices from one primary device.

To make it clear, imagine you and your 4 friends plan to share the same Netflix account. You own the account and you run it in your house, on the TV. So the primary location is the IP address of your home internet router. Now, if all your friends route their Netflix traffic from your IP address while physically being on different locations, Netflix will think all of you 5 are in the same physical household, and you must not have an issue sharing the same account.

But if any of your friend is not in the same physical household i.e. Netflix Household , they will get a message “your TV isn’t part of the Netflix household for this account” while he tries to access Netflix.

Now let’s dwell into the methods on how we can bypass Netflix Household so that you can access Netflix even if you are not sharing the same location or internet. Lets discover them one by one.

Method 1: Tailscale to

If thinking of a Virtual Private Network or VPN brings you the idea of a consumer VPN, like SurfShark or ProtonVPN, we are not going to use that here, since the crackdown by Netflix for consumer VPNs have begun for years. We will however, set up our very own Private Network from our primary location to route all the traffic of shared devices from our IP. Now under this, we again have a few third-party services we can use. One of the easiest and most convenient to use is “Tailscale”.

What is Tailscale VPN?

Tailscale is a free VPN which allows you to route and monitor the traffic, you are sending or receiving from your IP. We will be using it to redirect all the traffic from the devices using shared account i.e. Outside of Netflix Household, to the device running from the primary location. To get started, you will have to follow these steps.

Set up Tailscale to Bypass Netflix Household

First of all, you need to download Tailscale. It’s simple and easy.

Bypass Netflix Household Restrictions - Download Tailscale for Free
  • Click the button and Sign Up with the option of your choice.
  • Next up, you need to select the type of your primary device.
  • It is important to note that your primary device needs to always be online.
  • You can use Windows, Raspberry Pi, or a Mac to run your Netflix account.
  • Select the respective option and click on “Download for Windows (in this case)”
Bypass Netflix Household Restrictions - Download Tailscale for Windows

Tailscale – Add the Primary Device

Once you have downloaded Tailscale, you will need to log in to the account you created previously. After the installation is completed, simply run the Tailscale app and link the account you just created, by signing in. This will add your device as a primary device.

Tailscale – Add Second Device

Next up, you will need to add a second device that is intended to run the same Netflix account. To add a second device, install the Tailscale VPN on that device and log in with the same account you created earlier. After you have logged in with the same account on your secondary device, simply go back to your primary device to check if the device list is updated.

Once the device list is updated, you will see your secondary device, which in our case is
“iphone”. Although the device is for testing purposes, this is to be noted, that this method will not entertain any smartphone users – moreover smartphones are not barred by Netflix Household restrictions.

Bypass Netflix Household Restrictions - Adding Second Device

Anyways, once your device list is updated, click on “Success, it works”.

Tailscale – The Admin Console

On the next screen, click on “Go to the admin console” to access full control of all the devices.

Bypass Netflix PHousehold Restrictions - Admin Console

This will show all the available devices that are currently connected to current account.

Bypass Netflix Household Restrictions - Device LIst

Now it’s time to set up our main server, which will route all the traffic from other devices. It will be our primary device which will be online all the time. And as we have decided already, this is going to be our Windows machine. Let’s set it up as an exit node (server).

Tailscale – Specify Primary Device as Exit Node

Go to little windows tray in taskbar and right click on Tailscale icon. Under “Exit Node” click on “Run exit node” and confirm it by clicking “Yes” for the pop-up.

Bypass Netflix Password-sharing Restrictions - Exit Node

As soon as the exit node will be reflected on the application, a little badge will appear under the device name, indicating it is acting as exit node.

Bypass Netflix Password-sharing Restrictions - Exit Node badge

We will also need to approve this change from the admin console. For that, click on three dots against the name of the machine and click on “Edit route settings”.

Bypass Netflix Password-sharing Restrictions - Edit Route Settings

Under this window, check the box before “Use as exit node” and click “Save”.

Bypass Netflix Password-sharing Restrictions - Save as Exit Node

Now we have verified that we want our Windows machine to act as our server or exit node.

Tailscale – Disable Key Expiry

Another thing we have to do is, to disable expiry, that is, we have to authenticate all the devices periodically if the expiry is enabled. We can turn that off by click on three dots against our Windows machine name and click on “Disable Expiry”.

Bypass Netflix Password-sharing Restrictions - Disable Key Expiary

Tailscale – Make Primary Device a Service

Now, we want our machine to act as a service, so even if no device is connected, it still functions as a server. For that, simply click on the little tray icon and right-click on the Talescale icon. Go to Preferences and enable “Run unattended”. Confirm by clicking “Yes” for the pop-up that appears.

Bypass Netflix Password-sharing Restrictions - Run Unattended

Now we are done with our Windows machine. For the next step, we need to go to the Talescale app in our client device, and select our Windows machine as exit node. Once done, all our internet traffic will go through our primary device.

This was it for the first method. We can run Netflix on all of our devices and it will be good to go. As all internet traffic will go through the Talescale server we created above which is residing in the Netflix Household and Netflix will consider your outside session to be coming from the same location / IP thus allowing you to view Netflix.

Tailscale Alternative Services

Tailscale is not only the VPN offering this solution. We can use some other fantastic VPNs that do the same thing:

  • SoftEther VPN
  • WireGuard VPN
  • PiVPN (for single-board computer and Linux)

Method 2: Meshnet by NordVPN to Bypass Netflix Household

If the previous method seems too technical or time-consuming to you, here is an alternate method for you. Although this method is relatively simple and easy, it comes with a question of reliability. Still there is nothing bad with giving it a shot. So let’s jump straight into it.

We will use NordVPN’s Meshnet service for this method. Meshnet is primarily aimed to provide a LAN network which can help route the traffic from a single device, transfer files in a network, and link multiple devices. We will, however, use this feature to bypass Netflix household restrictions. This method is easy, simple, and totally free of cost. For that, you will have to follow these steps:

Meshnet – Set up NordVPN

  • First of all, download and install NordVPN in your primary device, which is again Windows machine in our case. (Setting up MeshNet is Free, however you can use this referral to get upto 3 months additional for free if you opt to buy)
  • Sign Up or log in to your account
  • Click at the third button from the top, at upper left corner and turn on Meshnet.
Bypass Netflix Household Restrictions - Meshnet

Meshnet – Set up Meshnet on Client Device

  • On the client device, install NordVPN and log in with the same account.
  • Turn on Meshnet.
  • Come back to your host device (Windows PC) and check, the device list must be updated by then.
  • Click on the 3 dot icon in front of the client device name and click “manage device”.
  • Make sure all the options shown below are turned on.
Bypass Netflix Houshold - Meshnet Options
  • Now come back to your client device, and click on the Route Traffic option.
  • You should see the host device.
  • Simply click on “Route all Traffic”.
  • Repeat the process for all the devices you want to add to the same network.

Once done, you will see the number of the devices on your host device that are routing their traffic from your device.

And that was it! Now all the devices are running under the same IP and you will be able to successfully bypass Netflix household restrictions.

Cautions and Restrictions

Although these bypass methods will let you enjoy the same Netflix account for all your buddies, here are a few cautions and restrictions you should be aware of.

Security Risks

The biggest caution for this method is the security. When you are routing all the traffic from multiple devices to a single device, it simply means you are allowing all the devices to access each other exposing your cyber footprint. And that any of your private information is easily visible to other devices connected to the same network.

So it is important to share your account and server with only the people you truly trust. While NordVPN Meshnet will regard your data security / privacy the Tailscale will give you more flexibility but lesser security protection.

Internet Speed

For the first method, Tailscale VPN informs its users that their services are not yet fully optimized for Windows devices. This means users can experience a lower internet speed compared to normal streaming.

This is also worth noting, that as the primary device is routing the internet for multiple devices, it must have a faster internet connection for a smooth Netflix experience.

Occasional Practices

As mentioned earlier, Netflix automatically determines a user’s primary location by analyzing it’s log data, we must take some measures to make Netflix determine our desired location i.e., as primary location.

Netflix usually checks for the household every 30 days. So to keep enjoying your streams, you must perform this routing practice at least within 30 days. However, the more frequently you perform the practice, the lesser the chances of you getting barred with this Netflix Household restriction will be. Ideally, a one or two week gap would be the best to make things going as desired.

Conclusion

After allowing password sharing for years, it seems like Netflix is now focusing on making some money. Netflix recently imposed a password-sharing ban to bring more users under their subscription model. Currently, they only offer “Password Sharing in Household”. This means, only people in the same physical household are allowed to share their passwords.

We can, however, use several methods to bypass Netflix household, allowing multiple devices to run physically on different locations, and virtually, under same IP. This is what this guide exactly talks about.

The post 2 Easy Methods to Bypass Netflix Household first appeared on Internet Security Blog - Hackology.

Microsoft Unveils New Bing with AI Integration and Its Amazing

Microsoft Unveiled New Bing with AI Integration. This integration represents a major step forward for the search engine. It allows Bing to better understand the context and intent behind users’ queries and respond in a more conversational and intuitive manner. The new Bing not only offers a faster and more efficient way to find information but also takes user privacy into consideration, implementing strict privacy policies to protect personal information.

New Bing’s chat, as well as the search feature, will allow users to find what they’re looking for faster and more easily than ever before. In this article, we will take a closer look at what makes the new Bing different from other search engines, its privacy protection measures, and its search capabilities. We will also provide a step-by-step guide on how to join the waitlist to gain early access to the new Bing.

How is New Bing Different from other Search Engines?

One of the key ways in which New Bing stands out from other search engines is its ability to understand the context and intent behind a query. This makes it easier for users to find exactly what they are looking for, even if their search terms are a little vague. For example, if a user searches for “best restaurants in New York”, New Bing takes into account the user’s location, personal preferences, and past search history to present a list of the most relevant restaurants in New York.

New Bing also has the ability to understand and respond to users’ follow-up questions. For example, if a user asks a question about a particular topic, Bing can provide an answer and then follow up with additional information or related queries. This ability to engage in a back-and-forth conversation with users helps to further improve the accuracy and relevance of Bing’s search results.

Is User’s Privacy Maintained in New Bing?

When it comes to privacy, Microsoft has taken great care to ensure that user’s personal information is protected when using the new Bing. The company has implemented strict privacy policies and measures to guarantee that user data is only used for the purpose of providing better search results. Microsoft recognizes the importance of privacy in the age of AI-powered services and is committed to preserving users’ privacy. While no technology can be 100% secure, users can feel confident that their privacy is a top priority for Microsoft and that they are taking the necessary steps to protect it.

A Sneak Peek at New Bing’s Search Capabilities

Microsoft has been working to improve Bing’s search algorithms and has added new features that are aimed at making the search experience more personalized and efficient. The new Bing now includes a sleek design and a more intuitive interface, which makes it easier for users to quickly find what they are looking for.

The integration of AI technology into the new Bing search engine has led to a remarkable improvement in its responsiveness to user queries. You will be amazed at the quick and accurate search results Bing will provide to your queries. The integration of AI into the new Bing search engine has elevated the user experience to a whole new level, leaving users thoroughly impressed with the results. A few examples are listed below.

Upon asking “Plan me a workout for my arms and abs with no situps and no gym equipment. It should only take 30 minutes”, the AI-integrated new Bing delivered remarkable and accurate answers to users’ queries besides showing the typical web results.

Microsoft Unveiled New Bing with AI Integration
New Bing Responding to User’s Query about Diet Plan

Similarly, when asked to “Write code to find the Fibonacci sequence in Python,” the AI-powered Bing provided a complete and proper code, instead of just directing users to typical websites.

Bing Providing user with the python code in response to their query

Here’s another video showcasing the new Bing and demonstrating how cool and intelligent it is.

New Bing: The Search Engine that Gets You!

The integration of AI into search engines like Bing is going to revolutionize the way we search for information online. New Bing, equipped with cutting-edge AI technology, will be able to offer a more intuitive and personalized experience for users. With its advanced natural language processing capabilities, New Bing will be able to understand and respond to questions in a way that is more human-like and less like a machine. This means that users will no longer have to worry about typing in exact keywords or phrases to get the results they are looking for. Instead, they will be able to ask questions in their own words and receive answers that are both relevant and accurate.

How to Access New Bing?

While the new Bing is not yet publicly available, you can sign up for the waitlist to gain access as soon as it goes live. The process of joining the waitlist is straightforward and requires only a few simple steps, which are as follows:

1. Visit the Bing website and select the chat icon located at the top bar as shown in the image below.

2. Upon following the link, you will be taken to the Bing AI page where a pop-up will appear inviting you to join the waitlist.

3. Simply click the “Join Waitlist” button to complete the process. You will then be added to the waitlist and a message confirming this, “You’re already on the waitlist,” will be displayed as depicted in the image below.

4. Now you are in the waitlist and you will have the advantage of accessing the new AI-powered Bing ahead of the general public and receive all its benefits.

Conclusion

In conclusion, the new Bing powered by OpenAI’s ChatGPT is a major advancement for Microsoft’s search engine. With its AI integration, users can now experience a more conversational and intuitive search. Here, users can pose queries in natural language and the queries are accurately addressed. Microsoft has taken great care to ensure that users’ privacy is protected, implementing strict privacy policies and measures. The new Bing includes a sleek design and improved algorithms, delivering quick and accurate results. Although it is not yet publicly available, users can sign up for the waitlist to gain early access to the new Bing. In conclusion, the new Bing is a testament to Microsoft’s commitment to using AI to enhance the user experience and is sure to be well-received by users everywhere.

The post Microsoft Unveils New Bing with AI Integration and Its Amazing first appeared on Internet Security Blog - Hackology.

How To Write Code With OpenAI’s Latest Tool ‘Codex’

OpenAI is currently generating buzz as its intelligent chatbot, ChatGPT. The Chabot gathers data from the web to answer a wide range of questions. Although its responses may not always be correct. ChatGPT has piqued people’s interest and sparked discussions about the future role of artificial intelligence. Keep reading to know how to use Codex for Software writing?

The company has also been developing Codex, a less well-known service that has the potential to revolutionize the way developers work. This new tool is a ChatGPT-like AI model that can write software. This makes it a powerful tool for developers. In this article, we’ll explore why Codex won’t replace developers and will instead create more demand for their skills.

OpenAI Codex

How Does Codex Work?

First and foremost, it’s important to understand what Codex does and how it works. Codex is a tool powered by the GPT-3 model that has the capability to generate code in multiple programming languages such as Python, JavaScript, and C++. It uses advanced natural language processing techniques to understand the requirements given by a developer and then writes the code accordingly. The tool is designed to save time for developers by handling routine coding tasks such as writing boilerplate code. This allows them to concentrate on more complex tasks.

How To Use Codex For Software Writing?

To use Codex, you need to provide it with the details of the software problem you want to solve. You can do this by describing the problem in natural language. Your instruction should outline the requirements and specify the programming language you want to use. Codex will then generate a code solution based on its understanding and its training data.

For instance, if you were trying to build a web application that displays the current weather, you could provide Codex with the following information: “I want to build a web application that displays the current weather for a specific location. I want to use JavaScript.” Codex would then generate a code solution that implements this requirement. This will include the code for fetching the weather data and displaying it on a web page.

It’s a good idea to review the code generated by Codex. In this way, you can then make any necessary modifications to ensure that it meets your requirements. To use Codex, you may need to have some basic knowledge of programming and software development, as well as experience working with the specified programming language.

Using Codex via API Key

Codex API is a set of APIs provided by OpenAI that allow you to access the functionality of their large language models. With Codex API, you can programmatically perform various language-related tasks. These include text generation, question answering, text summarization, and more.

To use Codex API, you need to make API requests over the internet. This is typically done using a programming language like Python or JavaScript. The API request contains the input data, such as a text prompt or a question, and the API key. The response from the API contains the results of your query, which can be processed and used in your applications.

Here is how you can get your API key from OpenAI and can call it in Python.

  1. Login to your OpenAI account, or create one.
  2. In the upper right corner, click on your account profile.
  3. Select View your API keys. (as shown below)
  4. You can copy an existing key or create a new one.
How to use Codex for Software writing?
How to get your API keys?

The next step is to utilize your Codex API key in a programming language. In this article, we will use Python as an example.

To install the official Python bindings for Codex, execute the following command in your Python terminal:

pip install openai

Why Codex Can’t Replace Humans?

Software development is a complex and ever-evolving field. The technology used to build software changes rapidly, and new tools and frameworks are constantly being introduced. Developers have to stay up-to-date with these changes in order to work efficiently. They have to be able to adapt to new tools and technologies. When it comes to Codex, it operates on a pre-programmed set of algorithms and does not have the ability to learn and adapt to new technologies.

Codex requires a significant amount of input and guidance from a human developer to function effectively. It cannot write code without specific instructions and parameters. All this conclude that developers must still be involved in complex projects. That’s the reason Codex will not replace developers any soon. Although we can say, it will augment their abilities and help them work more efficiently.

Conclusion

Codex is not a replacement for the creativity and innovation that developers bring to the table. Software development requires a great deal of creativity and problem-solving skills. Developers must be able to think outside the box and come up with innovative solutions to complex problems. However, Codex is limited by its pre-programmed algorithms and cannot generate creative solutions on its own. Developers bring a unique perspective, problem-solving abilities, and creativity to the table, which cannot be replicated by Codex or any other AI tool. The future of software development is not one of replacement but of collaboration between humans and AI, and Codex will play a crucial role in this collaboration by making the development process more efficient and streamlined.

The post How To Write Code With OpenAI’s Latest Tool ‘Codex’ first appeared on Internet Security Blog - Hackology.

Windows 11 Supports ReFS And How To Install Windows 11 on ReFS

Windows 11 is the latest version of the popular operating system from Microsoft. One of the key new features in this release is support for ReFS, or Resilient File System. This advanced file system is designed to provide improved performance, reliability, and data integrity for large-scale storage solutions.

What Is ReFS?

Resilient File System (ReFS) is a file system developed by Microsoft that was first introduced in Windows Server 2012. It is designed to be a replacement for the older NTFS file system and offers a number of advanced features that make it more suitable for certain types of storage solutions. ReFS uses advanced algorithms to detect and correct data corruption in real time, and it also supports large files and volumes, data deduplication, data mirroring, and virtualization. Additionally, ReFS allows for the creation of storage spaces, which are virtual disks that can be used to combine multiple physical storage devices into a single logical storage pool. It is designed to improve the performance, reliability, and data integrity of storage systems.

Why ReFS Is An Optimal File System?

ReFS provides support for large files and volumes. NTFS has a maximum file size of 16 TB and a maximum volume size of 256 TB. ReFS, on the other hand, supports files up to 16 exabytes and volumes up to 1 yottabyte. That’s huge, right?

This makes it ideal for use in large-scale storage solutions such as data centers and cloud storage. ReFS has built-in support for data deduplication, which can help to reduce the amount of storage space required. This feature works by identifying and removing duplicate data, which can help to save space on storage devices.

ReFS supports virtualization as well. This allows for multiple virtual machines to share the same storage space, which can help to reduce the amount of storage space required. These virtual disks can be used to combine multiple physical storage devices into a single logical storage pool. This makes it easy to create large, highly available storage solutions.

NTFS vs ReFS: Head-To-Head Comparison

NTFS (New Technology File System) and ReFS (Resilient File System) are two of the most popular options available on the Windows operating system. Both file systems have their own unique features and advantages, making it difficult to determine which one is the better option. Let’s compare NTFS and ReFS and discuss their key features, benefits, and use cases to help you decide which file system is best for your needs.

  • NTFS is the default file system for Windows operating systems and has been in use for over two decades. While ReFS was first introduced in Windows Server 2012.
  • NTFS supports file sizes up to 16 TB and volume sizes up to 256 TB. On the other hand, ReFS supports file sizes up to 16 exabytes and volume sizes up to 1 yottabyte.
  • NTFS does not have any built-in data corruption detection and correction capabilities. Meanwhile, ReFS uses advanced algorithms to detect and correct data corruption in real time.
  • NTFS offers robust features such as file and folder permissions, encryption, and compression. ReFS, however, offers advanced features such as data deduplication, data mirroring, and virtualization support.
  • NTFS is supported by most third-party software and tools. Contradictory, ReFS is a newer file system that may not be as widely supported by third-party software and tools.
  • NTFS is a mature and stable file system that is ideal for most storage needs. Meanwhile, ReFS is ideal for large-scale storage solutions where data integrity is of the utmost importance.
  • NTFS does not support features like space-efficient snapshots. However, ReFS supports features like space-efficient snapshots.
  • NTFS does not support features like data tiering. But ReFS does support features like data tiering.
  • NTFS does not support features like online data scrubbing. When it comes to ReFS, it supports features like online data scrubbing
  • NTFS does not support features like storage pools. While ReFS supports features like storage pools.

ReFS Compatibility In Windows 11

Windows 11 operating system will include support for ReFS as a new option, but it may only be available in certain editions such as Enterprise, Education, and Workstation. However, it has been reported that a Pro version of Windows 11 also has this support. Additionally, it is likely that ReFS can only be chosen during initial setup and not while the system is running due to the lack of direct NTFS to ReFS conversion. Windows 11 administrators can enable ReFS on Insider builds using ViVeTool and ID 42189933, but it is recommended to create a full system backup before installing Windows 11 on ReFS.

How To Install Windows 11 on ReFS

Microsoft is in the process of developing the ability to format a drive to ReFS during the Windows 11 setup process. This allows the operating system to run on the latest file system. The feature is currently under development and not publicly available. However, some tech enthusiasts have found a way to activate it and have successfully installed Windows 11 on a ReFS partition. Let’s examine the process of installing Windows 11 on a ReFS partition.

With the release of the Windows 10 Fall Creators Update, Microsoft eliminated the option to format drives to ReFS for consumer versions. This limited it to only “workstation pro” and Enterprise editions. However, Windows 11 Build 25281 has included support for ReFS as a target file system for the system drive. Although it is currently hidden and not officially listed in the release notes.

Enabling velocity ID 42189933 in the component store allowed Twitter users @XenoPanther and @PhantomOfEarth to install Windows 11 on ReFS directly. The screenshots are attached below:

Install Windows 11 on ReFS
Twitter User Showed ReFS Disk Partition
Windows 11 Support for ReFS

They stated that the installation process was smooth, but they encountered a green screen of death.

However, here’s how to enable support for ReFS during the Windows Setup process.

  1. Download ViveTool from GitHub.
  2. Extract the app to the “c:\vivetool” folder.
  3. Open the Terminal as an Administrator by pressing Win + X and selecting “Terminal (Admin)“.
  4. Type in the command: c:\vivetool\vivetool /enable /id 42189933.
  5. Restart Windows 11.
  6. Double-click the ISO file of your Windows 11 (build 25281 or above). If you don’t have one, you can download here.
  7. In the File Explorer window that opens, double-click setup.exe file and proceed with the installation. Make sure to select the ReFS partition as the target drive for the operating system.

You’re all set!

Conclusion

At present, ReFS support is not available in the official version of Windows 11 and it is primarily intended for specific use cases. NTFS will remain the primary file system and it is unlikely that it will be replaced by ReFS in the near future. However, having the option to use ReFS can provide additional choices for users and organizations. If you like living on the edge you may give it a go and share your experience.

The post Windows 11 Supports ReFS And How To Install Windows 11 on ReFS first appeared on Internet Security Blog - Hackology.

How to Set Blank Status on WhatsApp in 2022

By: Dr-Hack

The blank status WhatsApp trick is a unique way to show off to your contacts. Normally WhatsApp doesn’t allow you to post empty status but by using this trick, you will be able to show an empty status to everyone you have added on WhatsApp. 

In this guide, we will show you exactly how you can set a blank status on your WhatsApp. Just follow the steps mentioned below, and you will be good to go.

How to Set Blank Status on WhatsApp

  1. Copy the blank space between the brackets [ ‏‏‎ ‏‏‎ ‏‏‎ ‏‏‎ ‏‏‎ ‏‏‎ ‏‏‎ ‏‏‎ ‏‏‎ ‏‏‎ ]
  2. Now open WhatsApp
  3. Tap on the three vertical dots present in the top right corner
  4. Tap on Settings and then press on your name
  5. In the About section click on the pencil icon ✎
  6. Paste the empty copied text
  7. Now press Save

There you have it! You have successfully set a blank status on WhatsApp. Similarly, if you want to make a blank comment on Instagram or Facebook you can read more about it here.

How to Post Blank Status on WhatsApp

  1. Copy the blank space between the brackets [ ‏‏‎ ‏‏‎ ‏‏‎ ‏‏‎ ‏‏‎ ‏‏‎ ‏‏‎ ‏‏‎ ‏‏‎ ‏‏‎ ]
  2. Now open WhatsApp
  3. Go to Status
  4. Now click on the pencil icon ✎
  5. Paste the empty copied text
  6. Now press send
post blank status WhatsApp

Conclusion

That’s it. Following this guide will post a blank status to everyone with only the background colour.

This is it for this short guide if you don’t understand any steps you can reach out to us by leaving a comment below.

The post How to Set Blank Status on WhatsApp in 2022 first appeared on Internet Security Blog - Hackology.

❌