Reading view

There are new articles available, click to refresh the page.

Does Charcoal Go Bad? Shelf Life, Storage, and Quality Explained

Ever stumble across an old bag of charcoal in your garage or shed and wonder if it’s still good for your charcoal grill? Charcoal doesn’t really expire, but it can lose its punch if it soaks up moisture or sits in bad conditions for too long.

If you get how charcoal breaks down over time, you’ll make smarter choices about what to toss and what to keep for your next cookout.

The quality of charcoal hinges on storage, humidity, and what kind of charcoal you’re using, such as compressed charcoal or briquette charcoal. Lump charcoal and briquettes age differently because of how they’re made.

Store charcoal right, and it’ll last for years. But if it gets damp or sits somewhere humid, don’t expect it to work like new.

If you know how to spot bad charcoal and stash it properly, you’ll save cash and get better grilling results. Let’s break down the signs of worn-out charcoal and how to keep it in top shape.

Close-up of burning charcoal briquettes with glowing embers and smoke rising – ideal for illustrating the topic 'Does Charcoal Go Bad' and how to tell if charcoal is still good for grilling.

Key Takeaways

  • Charcoal doesn’t have an expiration date, but moisture and bad storage can make it useless.
  • Different charcoal types last for different lengths of time—good storage can keep them going for years.
  • Watch out for mold, musty smells, crumbly chunks, or charcoal that just won’t burn right.

Does Charcoal Go Bad? Understanding Shelf Life

Charcoal isn’t like food—it’s basically just carbon, so it won’t go rotten. Still, if you leave it out in damp air, it won’t work as well on the grill.

The type you buy and how you store it decides how long it stays useful.

Why Charcoal Doesn’t Expire Like Food

Charcoal’s nearly pure carbon, so it doesn’t spoil the way food does. There’s nothing in it for bacteria to eat, and it doesn’t really break down chemically like old meat or bread.

Charcoal can last forever if you keep it dry. Unlike stuff that rots, it just sits there, stable, for years.

Microbes can’t grow on carbon alone, so charcoal doesn’t get moldy or unsafe like leftovers in the fridge.

Key differences from food:

  • No organic bits to decompose, which is one of the reasons why kingsford® briquettes are popular.
  • No moisture for bacteria
  • Stable carbon structure
  • Nothing for microorganisms to eat

Still, charcoal quality can go downhill. Humidity and temperature swings mess with how well it burns, even if it’s not technically “bad.”

Factors That Cause Charcoal to Go Bad

Moisture is charcoal’s worst enemy. Once it soaks up water from the air, it gets tough to light and burns unevenly.

Damp charcoal just doesn’t perform—the water messes with the burning process can be affected if the charcoal is crafted poorly.. You’ll get too much smoke and not enough heat.

Leave charcoal out in the open, and air can slowly react with the carbon, making it less hot over time.

Things that mess with charcoal:

  • Humidity: Charcoal soaks it up fast
  • Temperature swings: Cause condensation
  • Direct sun: Can break down the structure
  • Air movement: Speeds up oxidation

Charcoal’s pretty porous, so it’ll suck up fumes and smells from things like gasoline or cleaning sprays. That can ruin it, and you don’t want those flavors anywhere near your food.

Difference Between Additive-Free and Additive Charcoal

Lump charcoal and briquettes aren’t made the same, so they don’t age the same. Pure lump charcoal is just carbon, so it holds up better over time.

Briquettes have binders, fillers, and sometimes chemicals that can break down or go funky, especially if they get wet, which can cause the briquette charcoal to go bad.

Additive-free charcoal keeps its quality because there’s nothing in it to spoil. As long as it’s dry, it just sits there, ready to burn.

Charcoal comparison:

TypeShelf LifeMoisture SensitivityAdditive Content
Lump CharcoalIndefinite shelf life of charcoal is possible with proper storage.LowNone
Briquettes2-3 yearsHighMultiple types of charcoal can affect the grilling experience.

If briquettes start smelling weird, the additives are probably breaking down. That chemical whiff means it’s time to toss them—they’ll make your food taste off, just like leftover charcoal can ruin a meal.

Pure lump charcoal almost never smells bad unless something else got into the bag. It’s just more reliable for the long haul.

Charcoal Types and Their Longevity

Charcoal shelf life isn’t one-size-fits-all. Lump charcoal can last forever if it’s dry, but briquettes usually max out at 2-3 years if you store your charcoal properly.

Lump Charcoal: Durability and Shelf Life

Lump charcoal is the champ for lasting power. It’s just hardwood, no extras, so it doesn’t really go bad if you keep it dry.

Storage Timeline:

  • Dry storage: No expiration date, but the shelf life of charcoal can vary.
  • Gets damp: 6-12 months
  • High humidity: 3-6 months

Since there are no binders or chemicals, it burns just as well years later. The chunky pieces let air flow, so moisture doesn’t get trapped as easily.

Hardwoods like oak and hickory last longer than softwoods. Keep it dry and ventilated—that’s the trick.

If moisture stays under 10%, lump charcoal just keeps going. Even after years, good stuff looks and works the same.

Briquettes: How Long Do They Last?

Briquettes don’t last as long. They’re made from compressed sawdust and binders, so they break down faster, especially if they get wet. You’ll get 2-3 years tops in a dry spot.

Expected Lifespan:

  • Dry and cool: 2-3 years
  • Some moisture in your charcoal bag can lead to issues with your charcoal grill. 1-2 years
  • Humid: 6-12 months

Briquettes are uniform and burn evenly, but those binders soak up water. Once they get damp, they fall apart and won’t burn right.

Better brands hold together longer because they use higher-quality binders. Cheap ones crumble fast.

Impact of Additives on Expiration

Additives make a difference in how long charcoal lasts. Chemicals, binders, and flavor bits all change the shelf life.

Common Additives:

  • Lighter fluid: Cuts life to 1-2 years
  • Starch binders are often used in the process of making charcoal briquettes. Grab moisture, so they break down faster
  • Limestone fillers can be found in some briquette charcoal, affecting its burning properties. Burn longer but weaken heat over time

Self-lighting briquettes have stuff like petroleum that fades after about 18-24 months. If they won’t light, the chemicals probably evaporated.

Some briquettes have wood chips or spices for flavor, but those can mold up in humid spots. More stuff in the mix means more ways for moisture to sneak in.

Plain charcoal with no extras keeps working basically forever if you’re storing your charcoal correctly. Activated charcoal for filters lasts 2-5 years, depending on how you store it.

As the additives break down, charcoal gets worse quicker—especially in heat or humidity.

How to Identify If Charcoal Has Gone Bad

Bad charcoal isn’t subtle. It’ll look, smell, and burn wrong. Moisture is usually to blame.

Visual and Smell Checks

Good charcoal looks solid and dark, indicating it is high-quality charcoal remains. If it’s faded, crumbly, or has weird white spots, something’s off.

Watch for:

  • Crumbles or breaks apart easily
  • Lots of dust at the bottom
  • White or green fuzzy mold
  • Uneven color

Give it a sniff—fresh charcoal barely smells at all. If you catch a musty or sour whiff, or see mold, it soaked up too much moisture.

Briquettes should feel hard. If they’re soft or spongy, they’ve gone bad.

Performance When Lighting

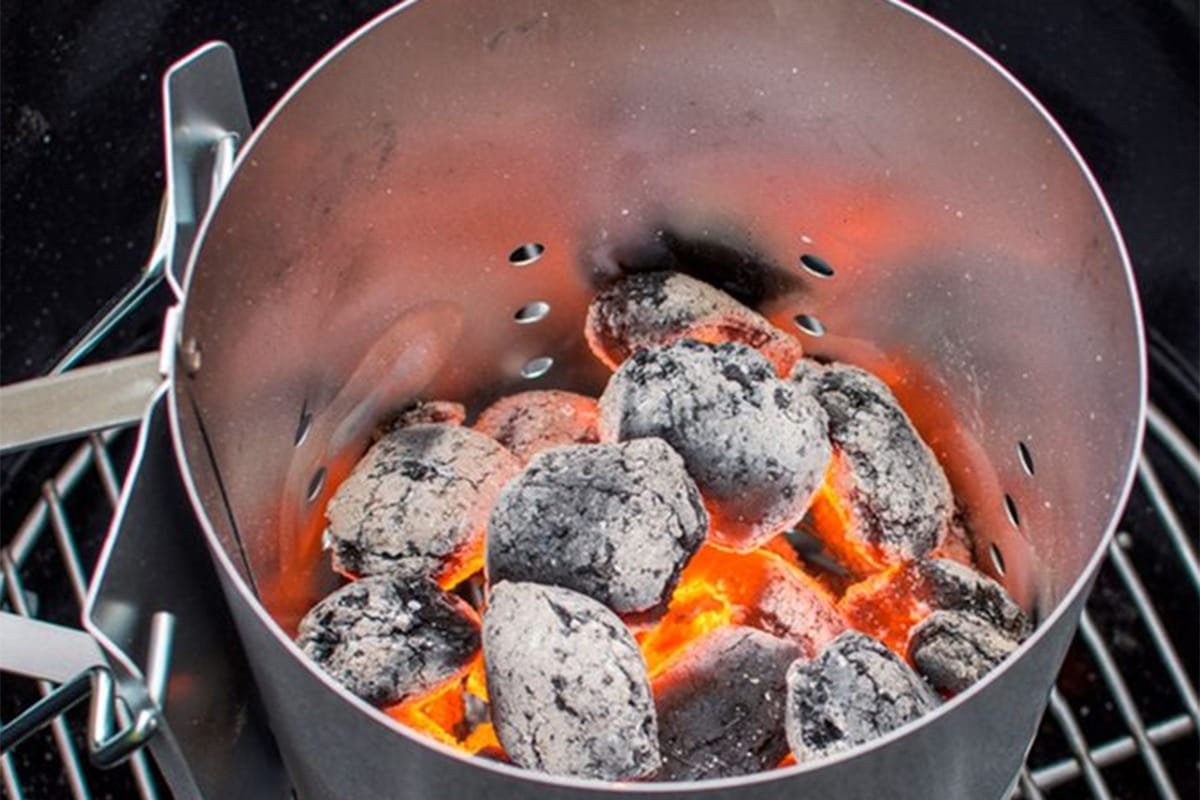
Try lighting it in a chimney starter. If it takes forever or just smolders, it’s probably past its prime.

Bad signs:

  • Lights way slower than normal
  • Uneven burn with cold spots
  • Weak flames that fizzle out fast
  • Way more smoke than usual

If it won’t light or keep burning, it’s likely soaked up too much moisture. Good charcoal should catch in 10-15 minutes.

If you can’t control the grill temp, or it won’t get hot enough, the charcoal’s gone bad.

Signs of Wet or Moldy Charcoal

Wet charcoal is a lost cause. Moisture wrecks charcoal and makes it a pain to use.

What to look for:

  • Feels damp or sticky
  • Bag is soggy or has water stains
  • Pieces clump together, which can happen when charcoal is made improperly.
  • Bag smells musty

Mold shows up as fuzzy white, green, or black spots. If you see that, don’t even bother trying to use it.

Wet charcoal won’t light right and gives off bad smoke and flavors. If it’s been in a damp spot or got rained on, check for leaks or high humidity before you use it.

Proper Storage To Extend Charcoal Life

Storing charcoal the right way keeps it dry and usable for years, ensuring you always have new charcoal on hand. The right container, a good location, and a bit of moisture control protect your stash and make sure it works when you need it.

Best Practices for Storing Charcoal

Good charcoal, whether lump or briquette, holds its shape and burns better over time. Start with quality charcoal—cheap brands break apart and just aren’t worth it.

Put charcoal into storage as soon as you buy it. Even a little humidity can mess with how it burns.

Keep bags sealed until you’re ready to move the charcoal to a storage bin.

Key storage rules:

  • Keep charcoal dry
  • Use sealed containers
  • Avoid big temperature swings
  • Handle gently to avoid crumbling

Every few months, check your stored charcoal. Look for moisture, mold, or weird smells—if you find any, toss those pieces.

Label your containers with the purchase date. It’s a small thing, but it helps you use the oldest charcoal first.

Containers and Storage Environments

Heavy-duty containers with tight lids are best. Metal or thick plastic blocks moisture way better than those flimsy bags.

Traeger and Kingsford both make charcoal storage bins, but honestly, any solid plastic bin with a good seal will do the trick.

Best places to store charcoal:

  • Sheds or garages
  • Basements with low humidity
  • Covered outdoor spots
  • Climate-controlled rooms are ideal for storing your charcoal to maintain its quality.

Skip damp places like crawl spaces or unheated sheds to ensure your charcoal doesn’t absorb moisture from the air, as charcoal absorbs moisture easily. Even with a sealed bin, condensation can sneak in there.

If you live somewhere humid, you’ll need extra protection. A dehumidifier near your charcoal stash can make a real difference.

Tips for Preventing Moisture Problems

Moisture ruins charcoal. It gets tough to light and burns all weird. Wet charcoal just won’t cooperate and you’ll get inconsistent heat.

Toss some silica gel packets or other moisture absorbers into your storage bin. They help pull humidity away from the charcoal.

Moisture prevention tips:

  • Stick to airtight containers
  • Pick dry storage spots
  • Add desiccant packets
  • Check seals now and then

If you’re unsure about your charcoal, test a small batch before a big cookout. See if it lights up and burns right.

If charcoal is just a little damp, you might save it by spreading it on parchment in the sun for a day or two. Try lighting it after drying to see if it’s good to go.

Can You Use Charcoal That Is Old or Has Gotten Wet?

Old charcoal can last pretty much forever if you store it right, as long as you keep it dry and in a cool place. But wet charcoal soaks up moisture fast and might not light or burn well.

Testing and Reviving Old or Damp Charcoal

Look at the charcoal first. Old pieces should still be solid. If they just turn to dust in your hand, they’re done for.

If you’ve got wet charcoal, spread it on parchment in the sun for at least a day. Flip the pieces after a few hours for even drying. Sometimes, it takes two days if they’re soaked through.

Test if it works by lighting a small amount. Fresh charcoal should catch in a few minutes. If the dried stuff won’t light or just smokes like crazy, it’s not worth saving.

Mix dried charcoal with some fresh pieces for better results, particularly when you fire up the grill. Put fresh coals at the bottom and dried ones on top to help things along.

Risks and Considerations for Outdoor Cooking

Wet charcoal causes a bunch of grilling headaches beyond just lighting issues. It makes way too much smoke, which can mess up the taste of your food, especially if the charcoal is essentially old and damp.

If you’re using a chimney starter, always mix in some fresh charcoal with any questionable stuff to ensure the briquette charcoal burns evenly. It lowers your chances of a failed ignition.

Safety-wise, wet charcoal can burn unevenly or go out without warning. That’ll throw off your cooking times and temps.

Hardwood lump charcoal bounces back from moisture better than briquettes. Briquettes hold onto water because of the fillers and additives, making them harder to dry out.

Think about whether it’s worth the hassle to dry out old charcoal. Sometimes, buying fresh is just simpler—especially if you’ve got a big cookout coming up.

Choosing and Maintaining Quality Charcoal for Grilling

Your choice of charcoal really does affect how your grilling turns out. Good charcoal burns hotter and more evenly than bargain stuff.

Selecting High-Quality Charcoal

You’ll find two main types: lump charcoal and briquettes. Each one’s got its pros and cons.

Lump charcoal burns hotter and faster. It can hit 800-900°F in no time, especially when using the right type of charcoal. That’s perfect for a quick sear on steaks or anything needing high heat.

Lump charcoal doesn’t have additives or chemicals and leaves less ash. The pieces come in all sorts of sizes, which can make temp control a bit tricky if you’re new to grilling.

Briquettes burn longer and keep a steadier temperature—usually between 400-600°F. They’re great for slow cooks and smoking.

Good briquettes use natural wood and starch as binders. Skip the ones loaded with chemicals. Look for brands with simple, clear ingredients.

When you’re picking out charcoal, check for:

  • Solid chunks—not a bunch of dust
  • Natural smell—nothing chemical or weird
  • Even size for steady burning
  • Packed well to keep out moisture

How Charcoal Quality Affects Grilling Results

Bad charcoal can ruin your cookout. Moisture makes it burn unevenly and you’ll struggle to keep the right temperature.

Cheap charcoal is often full of fillers like sawdust. It burns up fast and leaves too much ash, which blocks airflow and makes things even harder.

Briquettes with too many additives can give your food a strange taste and way too much smoke. That’s especially rough on delicate foods like fish or veggies when grilling and smoking.

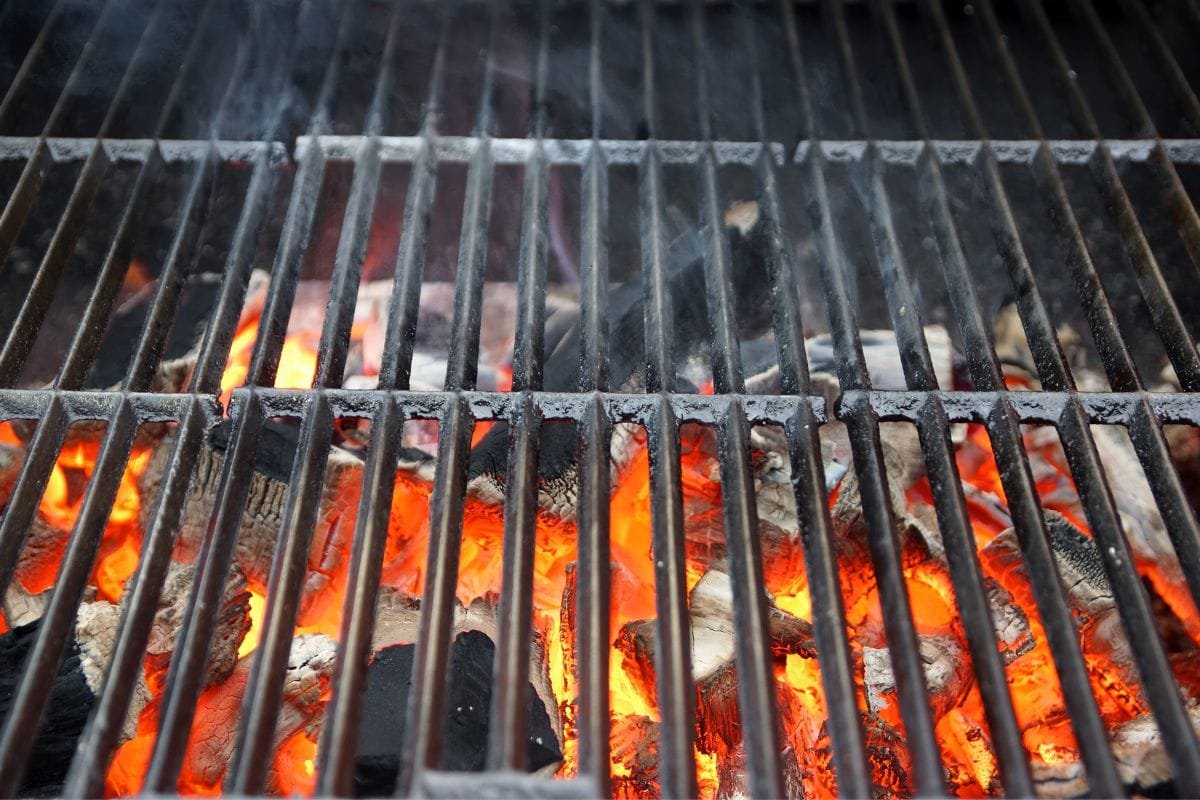
Good charcoal lights quickly, burns clean, and holds steady heat. You won’t have to fuss with the temperature as much if you store charcoal properly.

Store charcoal somewhere dry to keep it working well. Wet charcoal just makes more smoke than heat, and nobody wants that.

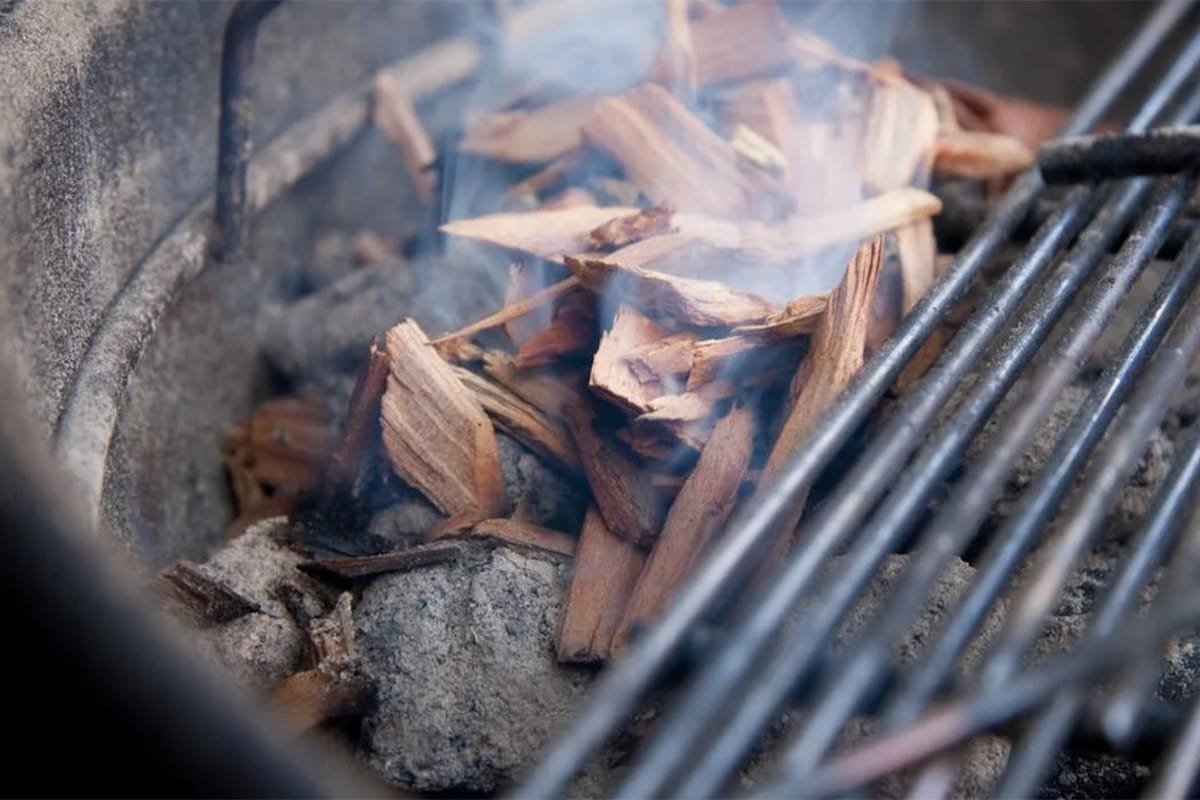
Quality charcoal gives you just enough smoke for flavor—too much and your food turns bitter. You want clean-burning heat with a hint of smoke, not a cloud.

Frequently Asked Questions

People always have questions about storing charcoal, testing it, and staying safe. Knowing how to spot good charcoal and avoid problems makes grilling a lot less stressful—and maybe even a little more fun, especially when using high-quality wood charcoal.

How can you determine the effectiveness of charcoal after long-term storage?

Check the charcoal by looking at it and lighting a bit. If you see mold, mildew, or the color’s off, that’s a bad sign.

If it crumbles or feels soft, it’s probably picked up moisture. A musty or sour smell means you should probably toss it.

The best test? Light a small piece. If it’s tough to ignite, burns weird, or smokes too much, it’s likely that the charcoal briquettes are made from low-quality materials., it’s no good.

What is the shelf life of unopened charcoal briquettes?

Unopened briquettes last pretty much forever if you keep them cool and dry. The package keeps out moisture and junk, which is crucial for the shelf life of charcoal.

Briquettes usually have binders that make them more stable than lump charcoal. Their makeup gives you steady burn time and makes them easy to use.

How you store them matters more than how old they are. Avoid humidity and big temperature swings to keep them in good shape.

Is wet charcoal still usable or does it lose its functionality?

Wet charcoal just doesn’t work well; charcoal tends to go bad when it absorbs moisture. It’s hard to light and burns badly, plus it can get moldy and make your BBQ charcoal unusable.

You might save some by drying it in the sun or a low oven, ensuring that your charcoal is still good for use. Sometimes that brings it back, especially if you fire up the grill with fresh charcoal.

If it’s soaked through or moldy, though, just throw it out. It’s not worth the risk or the hassle.

Can the quality of charcoal degrade over time and how would this be identified?

Charcoal breaks down from moisture from the air if not stored in a dry place. moisture and air exposure. That makes it crumble and burn poorly.

Air can oxidize the charcoal, making it less dense and more likely to burn unevenly, which can happen if the charcoal absorbs moisture. It’s a slow process, but charcoal can go bad if not stored properly.

Look for crumbling, color changes, or musty smells. If it’s hard to light, smokes a ton, or doesn’t get hot, it’s past its prime.

Are there safety concerns associated with using charcoal that has been stored for many years?

Old charcoal can be risky if it’s gone bad. Mold can be a health hazard when you’re handling or burning it.

Charcoal that’s broken down makes more smoke and emissions than fresh stuff. That can mess with air quality and might irritate your lungs.

Sometimes old charcoal picks up weird stuff, especially if stored in a plastic container. over time. Always check before you use it—better safe than sorry.

Does the quality of charcoal lighter fluid decline, affecting its performance?

Charcoal lighter fluid doesn’t last forever. If you leave it in hot or freezing spots, it can go bad faster.

The petroleum-based stuff inside might separate or lose that quick-lighting spark. Sometimes old fluid just won’t catch fire the way you expect, or it burns with more smoke than you’d like.

That can make lighting charcoal a pain and even bring some safety worries. I’d say it’s worth storing your lighter fluid somewhere cool and dry if you want it to last.

Before you pour it, take a peek at the color or give it a sniff. If it looks or smells off, maybe skip it this time.

Make Your Own Charcoal: A Charcoal-Making Guide

Charcoal is a surprisingly handy material, and you can actually make it at home with just a few basic supplies. Anyone can transform common wood into homemade charcoal by safely heating it without letting it catch fire.

You don’t need fancy equipment for this—just a metal barrel and some tools, and you’re good to go in most backyards. Knowing how to make charcoal is useful for grilling, gardening, and all sorts of DIY projects.

Pile of homemade charcoal chunks on a rustic wooden surface – perfect for tutorials and step-by-step guides on how to make charcoal using traditional methods.

It can save you money and help reduce waste by using up branches, firewood scraps, or even yard trimmings. Curious about the actual steps, safety tips, and best uses? Stick around and see how you can create your own charcoal with easy-to-follow directions like those in this beginner guide.

Key Takeaways

  • Making charcoal at home just needs basic tools and good safety habits, especially if you plan to make a large batch.
  • The type of wood you use really matters for charcoal quality.
  • Homemade charcoal works for cooking and a bunch of other daily tasks.

Understanding Charcoal Basics

Charcoal has a ton of uses, especially when you use charcoal for grilling or as a soil amendment. People use it for cooking, making art supplies, and even improving soil.

It’s helpful to know how it’s made, the different types, and why it works well in so many situations.

What Is Charcoal

Charcoal is a black, lightweight material that forms when you heat wood or other organic stuff with little to no oxygen in a furnace. This process is called pyrolysis.

Unlike burnt wood, charcoal has had most of its water and volatile chemicals driven off. That’s why it burns hotter and cleaner than regular wood.

Charcoal can come from all sorts of plant matter, but wood is the classic choice for a campfire. If you grind it up, it’s soft and crushes easily. Big chunks are great for grilling, while the fine stuff works for soil or art, especially when used in a campfire setting.

Close-up of finely broken charcoal pieces – detailed view for illustrating the final product in guides on how to make charcoal at home or naturally.

Types of Charcoal

There are a few main types of charcoal, and each one works best for certain things. Here’s a quick chart to break it down:

TypeTypical UseFeatures
Lump CharcoalGrilling, BBQNatural, irregular shapes, burns hot
BriquettesGrilling, BBQUniform size, burns slow, additives
ActivatedFiltration, medicineHighly porous, chemical processing
BiocharSoil improvementRetains nutrients, renewable

Lump charcoal is just wood burned without additives. Briquettes are made from processed pieces, with binders and sometimes lighter fluid.

Biochar is similar but usually goes straight into gardens or farms. Activated charcoal gets heated with a special gas to make it super porous.

Uses of Charcoal

Charcoal’s most famous job is cooking—especially grilling and barbecuing. It burns hot and doesn’t make much smoke, so it’s ideal for outdoor cooking.

Gardeners mix biochar into soil to help keep nutrients and water where plants need them. Farmers like it for improving poor soil and cutting down on chemical fertilizers, as they plan to make better use of charcoal.

It’s also handy in art and filtration. Artists use compressed charcoal for drawing, and activated charcoal can be used to help clean air and water. Some folks use it for health, but only the kind made for food or medical use is safe to eat.

If you want more on grilling with charcoal, check out this beginner’s guide to charcoal grilling.

Choosing Materials for Charcoal Production

The materials you pick for charcoal really change how it turns out—quality, burn time, and what you can use it for. The type of wood or biomass you choose decides how hard your charcoal is and how much heat it gives off.

Selecting the Right Wood

Hardwood is the top pick for making charcoal because it creates dense, long-lasting pieces. Think oak, maple, hickory, or beech.

Hardwoods have less sap and resin than softwoods, so collier methods make cleaner charcoal with less smoke. Softwoods Softwoods like pine and spruce burn up fast and leave you with softer charcoal and more smoke—plus, they can give off weird flavors when you use charcoal for cooking.

Most people skip softwoods unless there’s no hardwood around. Don’t use fresh wood. Go for dry, seasoned wood that’s free from paint or chemicals.

Wet or treated wood just makes bad charcoal and toxic smoke. When you pick your wood, cut it into similar-sized chunks for even carbonization. Logs, chunks, or sticks can be used to create a campfire or to produce charcoal. work best and let air move around during the burn, which helps keep things consistent.

If you want a high-temperature burn or need biochar, hardwood is still your best bet. For more on picking the right woods and raw materials, take a look at this materials for making charcoal guide.

Alternative Materials: Sawdust and Biomass

Sawdust is a popular alternative, especially for small-scale or city setups. You usually compress sawdust into briquettes, then carbonize them to make sawdust charcoal.

These briquettes are all the same shape, easy to store, and burn evenly. For step-by-step details, see how to make charcoal from sawdust.

Other options include rice husks, coconut shells, maize stalks, and bamboo. These are often waste products, so using them is sustainable and cheap.

Things like seed shells or walnut peels also turn into good charcoal, helping cut waste. Just make sure whatever biomass you use is clean and dry—no trash, plastics, or treated stuff.

Pure biomass makes better charcoal that’s safe for grilling, heating, or even as biochar for soil improvement.

Common Methods to Make Charcoal

You can make charcoal at home with a few main techniques, including using a tin can for small batches. Each one heats wood with little air so it turns to charcoal instead of ash.

Open Fire Pit Method

The open fire pit method is the oldest way to make charcoal. You stack wood logs in a pile or mound, usually in a pit you dig in the ground to make the charcoal efficiently.

To start, light the wood and let it burn until it’s glowing and covered in flames. Once the fire’s going strong, cover the pile with dirt or leaves to cut down the airflow.

This makes the flames die down but keeps the heat high. With not much oxygen, the wood chars instead of burning to ash. After a few hours, you’ll see black, crumbly charcoal.

This method’s simple but not very efficient for charcoal-making. You lose a bunch of wood, and it’s tough to control. People usually use it when they’ve got lots of wood and don’t need high-quality charcoal.

More tips and stories are in this Reddit homesteading thread.

Barrel Method

The barrel method uses a metal drum with a few small holes to manage airflow. You load wood inside, then set the barrel on its side or upright.

Sometimes, people put a smaller can with wood inside a bigger barrel to keep the flames off the wood but let the heat in. Next, you heat the barrel from the outside using an open fire or burning coals.

As the wood heats up, gases escape through the holes and might even catch fire above the barrel, creating another fire if not monitored. This is still pyrolysis, charring the wood without burning it away.

The barrel method is pretty popular since it’s easy to set up and gives you some control. You’ll get a medium amount of charcoal and waste less wood than with the pit.

If you want a step-by-step walkthrough, check out Instructables’ guide on making charcoal.

Kiln Method

The kiln method is a bit more advanced for home use. You can make a kiln from metal or bricks, designed to keep things hot and low on oxygen.

Pack the wood tightly inside, then start the fire either inside or around the kiln. Controlled airflow is key. This lets the wood heat up slowly and evenly, so you don’t end up with ash.

Valves or vents help you manage smoke and keep the burn steady. Kilns produce higher-quality charcoal and use fuel more efficiently. They’re the go-to choice if you want to make a lot at once.

See different kiln designs and how they work in this Watch a Primitive Technology video on making charcoal from scrap wood..

Step-by-Step Guide: Making Charcoal with the Barrel Method

Making charcoal in a barrel takes a bit of prep, especially regarding the diameter of the container. steady heat, and some attention to airflow. Each stage—prepping the wood, building the fire, keeping the burn going, and cooling—really affects the final charcoal.

Preparing Your Wood

Start with dry hardwood like oak, maple, or hickory. Wet or green wood just won’t make good charcoal and usually creates too much smoke.

Cut the wood so it fits easily inside your metal barrel, maybe chunks about as big as your forearm. Try to keep all the pieces roughly the same size for even burning.

Take off any bark if you can—it usually turns to ash and drags out the process of creating a uniform batch. Stack the wood logs loosely inside the barrel, leaving gaps for air to move around.

If you cram it in too tight, it won’t burn well and might stay partly uncharred. A uniform stack makes managing the fire later way easier.

Building the Fire

Set the barrel up on blocks or bricks so air can flow underneath. If you’ve got a closed barrel, drill a few small holes near the base to start the fire and let gases escape.

Put some kindling or small dry sticks under the barrel as a starter. Light the fire beneath or around the barrel—the heat rises and starts driving moisture and gases out of the wood.

This stage is pyrolysis, the real magic behind turning raw wood into charcoal. Keep the fire going at a steady pace to ensure efficient charcoal-making. Feed in small bits of dry wood or brush as needed to hold the right temperature.

This helps make sure the wood inside turns into charcoal instead of burning up. It takes a little attention, but the results are worth it.

Controlling the Flames

When you spot blue or yellow flames flickering out of the barrel vents or through cracks, that’s the wood gases catching fire as they smolder. Now’s the time to ease up on the airflow, or the fire will get too hot.

If the flames get too wild, some of the wood might just burn to ash instead of turning into charcoal. Pop the barrel lid on, but leave a small gap or a vent so gases can still escape.

You’ll see thick white smoke at first, then it shifts to thin blue smoke. That color change is a good sign—things are moving along.

Take a look for leaks or gaps around the lid to ensure the quality charcoal produced is optimal. Too much air sneaking in just burns the wood up instead of charring it, which can ruin your attempt to make the charcoal.

Tweak the lid and vents to keep big flames down, but don’t choke off the process. For more step-by-step help, check out guides like Making Your Own Charcoal (a.k.a. Lump charcoal is a type of charcoal used by a collier for efficient burning..

Cooling and Collecting Charcoal

Wait until you barely see flames or smoke coming from the barrel. Depending on how much wood you started with, this can take a few hours to create a sufficient batch.

Once things have died down, seal up every opening so no air gets in. Let the barrel cool down all the way—don’t rush it.

Seriously, don’t open the lid or mess with the barrel while it’s hot, or you’ll risk the charcoal catching fire and turning to ash. Sometimes cooling takes all night.

When the barrel finally feels cool, open the lid carefully. Gloves are a must here.

Take out the charcoal, break it up if you need smaller pieces, and stash it in a dry, airtight container so it won’t get damp. Need a visual? Here’s a handy walkthrough: making charcoal for free in a barrel.

Safety Precautions When Burning Wood

Burning wood to make charcoal gets risky fast if you skip using a proper torch. basic safety steps. You’ve got to control the fire, protect yourself, and wear the right gear to avoid accidents.

Fire Safety Measures

Always set up your fire in a safe, open spot, far from buildings, trees, or anything that burns easily. Clear away dry leaves, grass, and junk from the area to maintain a clean workspace for your charcoal furnace.

Try to make a ten-foot zone with nothing flammable—gives you a buffer if flames jump. Keep water, sand, or a fire extinguisher close in case things get out of hand.

Don’t leave the fire alone, not even for a minute. Watch it closely and be ready to act if it spreads or gets too high.

A metal retort with a tight lid and a nail hole on top helps control the burn and keeps oxygen low. This keeps the fire contained and less likely to flare up. If you’re using wood logs to make the charcoal, ensure they are seasoned for best results. Homemade charcoal methods can be found on instructables for various techniques., put the container on something that won’t burn.

Skip charcoal making on windy days—it just isn’t worth the risk, since wind makes fire unpredictable. When you’re done, double-check that every last ember is out before you leave to ensure a safe method of making charcoal.

Protective Equipment

Wear sturdy clothes when you’re working near open flames. Thick cotton or denim pants and long sleeves help keep sparks off your skin.

Closed-toe shoes or boots are a must—nobody wants burned toes. Use gloves that can handle heat when moving hot wood or metal containers around, especially when dealing with a pile of ashes.

Heat-resistant gloves make it way safer when handling pieces of wood for charcoal. Safety goggles or glasses will keep your eyes safe from flying ash and sparks.

A dust mask or simple respirator is smart, too, since charcoal dust and smoke can be rough on your lungs. Even after the fire’s out, remember that coals and metal stay hot for ages.

Let everything cool before you touch it barehanded. Using the right gear every time saves you from burns, eye injuries, and breathing in nasty stuff.

Charcoal Applications

Charcoal’s got all kinds of uses because it burns clean and gets really hot. People use it for cooking, blacksmithing, and even to help soil hold water and nutrients.

Charcoal for Cooking

Charcoal is a favorite for grilling since it burns hotter and longer than plain wood. That extra heat makes it easier to sear meats and veggies, plus you get that classic smoky flavor.

Lump charcoal, made from real wood, lights up fast and doesn’t have weird additives. Briquettes are another option—they’re made by pressing powdered charcoal with binders and extras.

Briquettes burn more evenly, but if you don’t let them ash over, they can give off odd smells. Always wait for the charcoal to ash over before putting on food.

Some folks use little metal chimneys to light charcoal without lighter fluid. That way, you skip any weird tastes and it’s safer, too. Want to try it yourself? Here’s a DIY charcoal method.

Charcoal in Blacksmithing

Blacksmiths love charcoal because it burns hotter and cleaner than regular wood. That high heat is key to softening iron and steel so you can shape them.

Charcoal also leaves behind less ash, which keeps the forge tidier. Its structure gives off even heat, so you get better control during forging.

Some smiths swear by hardwood lump charcoal for the best results. You’ll need a bigger stash for blacksmithing than for cooking, since forging eats up fuel fast.

Charcoal’s high energy made it the go-to fuel for metalwork long before coal came along.

Biochar for Soil Improvement

Biochar is a special kind of charcoal made for gardens and farms. You make it by heating organic stuff in low-oxygen conditions.

Mixing biochar into soil helps it hold water and nutrients, so plant roots do better. It also stores carbon for longer, which is great for eco-friendly farming.

Farmers use it to cut down on chemical fertilizers and boost soil microbes. Its porous surface gives air and tiny critters room to thrive, making the ground healthier, much like in a Minecraft ecosystem.

You can make biochar at home with simple backyard setups. If you want a walkthrough, check out this backyard biochar method.

Storing and Maintaining Homemade Charcoal

Homemade charcoal needs the right storage, or it’ll lose quality and might even become unsafe. It’s worth learning how to check your stash so it lasts and works well for cooking or heating.

Proper Storage Techniques

Charcoal burns best when you keep it dry. Store lump charcoal in a clean, airtight container with a snug lid—a metal bin or heavy plastic tub does the trick.

If charcoal gets wet, it’s a pain to light and can get moldy. Don’t leave it outside uncovered—stash it in a shed, garage, or anywhere dry indoors.

Keeping the container off the ground on a shelf or pallet helps block out ground moisture. Always close the lid tight to keep out humidity and pests, ensuring the quality charcoal remains intact.

This is extra important if you live somewhere rainy. You can toss in a silica gel pack or a little bag of rice to soak up any extra moisture. Keep your charcoal cool, dry, and out of the sun.

Quality Assessment

Good charcoal should look dry and black, feel light, and snap easily. It shouldn’t smell smoky or feel sticky.

Snap a piece in half—if it breaks with a crisp sound, you’re good. If it feels soft, damp, or smells off, it probably soaked up moisture or grew mold.

Lay those pieces out in the sun for a few hours to dry them. Never cook with moldy or wet charcoal.

Give your charcoal a quick check every few weeks. Here’s a basic method of making charcoal. inspection checklist:

CheckWhat to Look ForAction Needed
Color & TextureBlack and dryOK to use
SmellNeutral, not smokyDry if musty, discard if moldy
Sound when brokenCrisp snapOK to use
Signs of moistureNoneDry immediately

Handle your charcoal right and it’ll stay safe and burn well. For more storage tips, check out this charcoal guide.

Frequently Asked Questions

People usually make charcoal by heating wood or other organic stuff in a low-oxygen space. The method, material, and container you use all change the end product and the cost.

What is the process for turning wood into charcoal?

Charcoal comes from slowly heating wood with very little air. This drives off water and gases, leaving most of the carbon behind as char.

Heating the wood in a container with small holes lets gases out but keeps oxygen low, so you get charcoal instead of a pile of ashes. You can dig into the science at How Charcoal is Made.

Can charcoal be produced from materials other than wood?

You can make charcoal from all sorts of organic stuff—coconut shells, nut shells, paper, even some farm waste. The trick is to use dry material that’s high in carbon.

What are the traditional methods for making charcoal?

Old-school methods use big piles or pits of wood, covered with dirt or metal sheets. You burn the wood slowly with barely any air, so it turns to charcoal instead of ash.

This process can take a day or several days, depending on the method of making charcoal you choose.

What are the steps to create charcoal in a barrel?

To make charcoal in a barrel, fill a metal barrel with dry wood pieces. Poke a few small holes so gases can escape.

Heat the barrel over a steady fire for several hours. When the smoke turns clear and almost disappears, your charcoal’s probably ready. Here’s a step-by-step: How to Make Quality Charcoal.

Is it economical to produce homemade charcoal?

If you’ve got cheap or free wood, making charcoal at home saves you money. It does take time and effort, though.

Homemade charcoal usually costs less than store-bought, especially if you can get your scrap wood supplies easily. Some folks just like the DIY approach for projects or self-reliance.

How can paper be converted into charcoal?

You can shred paper and pack it into molds. Mix the shreds with water, then press the mixture into tight shapes, creating blocks of coal for easy use.

Let these shapes dry out. After that, burn them in a low-oxygen container—sort of like how people turn wood into charcoal.

This process gives you small charcoal briquettes. They’re handy for cooking or heating, surprisingly enough.

Top Sirloin Steak vs. Sirloin: What’s the Best Steak Cut?

Top sirloin It’s a great cut for folks who want a balance of flavor, tenderness, and value, especially when considering different cuts vs sirloin. It comes from the rear of the cow and is leaner than ribeye or New York strip.

It might not be as buttery as some premium steaks, but top sirloin packs a lot of beefy taste and fits into all kinds of recipes.

This cut is super versatile; you can grill it, roast it, or chop it up for kebabs or stir-fry. People often find it affordable and genuinely tasty, so it’s a favorite for family dinners or casual get-togethers.

Juicy medium-rare top sirloin steak sliced and served with roasted baby potatoes and herbs – ideal for answering the question 'is top sirloin a good cut of meat' with a visual example of tenderness and flavor.

If you’re curious how it stacks up against pricier cuts, top sirloin usually gives you more flavor and tenderness than cheaper steaks, but costs less than those fancy restaurant options.

Key Takeaways

  • Top sirloin offers a solid mix of flavor, tenderness, and value.
  • It’s lean and works in lots of recipes and cooking methods.
  • It’s often a smart pick compared to both pricier and cheaper cuts.

Understanding Top Sirloin

Top sirloin stands out for its balance of flavor, leanness, and price. If you want a hearty steak without tons of fat or a huge bill, this is a go-to.

What Is Top Sirloin

Top sirloin comes from a specific section of the larger sirloin area—right near the loin. This spot gives the steak a full beef flavor and a firmer bite.

It doesn’t have as much fat as more marbled cuts, but it keeps a satisfying, meaty taste. People sometimes call these steaks top butt, center cut sirloin, or hip sirloin steak.

They’re different from lower sirloin steaks, which can be tougher. Top sirloin is super versatile; grill it, broil it, or roast it—no problem. These steaks are usually boneless, making them easy to cook and slice.

If you’re after a steak that’s both lean and flavorful, top sirloin is a common choice. It’s also more affordable than ribeye or tenderloin.

Where Top Sirloin Comes From

Top sirloin sits in the sirloin section, right between the loin and the round at the back of the cow. This area produces several important beef cuts, but top sirloin is one of the most popular.

The main muscle here is called the top sirloin butt or center cut sirloin. It’s separated from the bottom sirloin and sirloin butt, which are usually less tender than tri-tip.

Farmers and butchers like this area because it strikes a nice balance between tenderness and flavor, making it a favorite steak for many steak lovers. The top sirloin is close enough to the loin to be moderately tender but still firm enough for different cooking styles.

Cuts from here include top sirloin steak and culotte steak, both known for their texture and beefy punch. The sirloin section gives you a range of steaks, but top sirloin stands out as intensely flavorful and adaptable for lots of recipes.

Top Sirloin vs Other Popular Cuts

Top sirloin strikes a balance between flavor, tenderness, and price, making it one of the best steak choices for many. Its versatility and lean profile make it stand out among other steaks.

Perfectly cooked top sirloin steak served medium-rare with roasted baby potatoes and rosemary – a delicious example answering 'is top sirloin a good cut of meat' with its tenderness and rich flavor.

Top Sirloin vs Ribeye

Ribeye steaks are famous for lots of marbling, meaning more fat in the meat. That fat gives ribeye its rich flavor and juicy, tender bite, but top sirloin also offers a great steak on the grill experience.

Ribeye is often called one of the most flavorful steaks. Top sirloin is leaner, with less internal fat, so it’s firmer and a bit healthier for those watching fat intake.

Ribeye can handle a little overcooking thanks to its fat, but top sirloin dries out faster. You’ll get the best results cooking top sirloin to medium-rare or medium. Plus, ribeye usually costs more at the store.

Feature of a flavorful cut.Top SirloinRibeye
FlavorBeefy, mildRich, intense
TendernessModerateVery tender
Fat ContentLowHigh
PriceModerateHigher

Top Sirloin vs Tenderloin

Tenderloin, often sold as filet mignon, is famous for being super soft. It’s the most tender steak, with almost no fat inside, making it a great choice for those who prefer a thick cut of meat.

This gives tenderloin a milder beef taste than a flavorful cut like top sirloin, which is often favored by chefs. Top sirloin brings more flavor, with a bit of connective tissue and some fat around the edges.

It’s not as tender as tenderloin but works great with marinades and in recipes like kabobs, grilling, and stir fry. Tenderloin steaks like chateaubriand cost a lot more, so sirloin is a smarter choice when feeding a crowd at a steak house.

Top Sirloin vs Strip Steaks

Strip steaks (think New York strip or Kansas City strip) come from the short loin and are known for strong beefy flavor and a nice balance of tenderness and fat.

The texture of strip steaks feels closer to ribeye than to tenderloin. Top sirloin has a similar robust flavor but is leaner, making it a popular choice for steak lovers looking for a healthier option. Strip steaks have a firm bite and a strip of fat along one edge, which adds juiciness as they cook.

Sirloin is more affordable and flexible, but strip steaks are a steakhouse favorite. Both grill up well, but top sirloin might be better if you want a leaner steak with plenty of flavor. Curious about the differences? Check out this guide to the best steak options available, including top sirloin and tri-tip. sirloin strip steak.

Flavor and Texture Profile

Top sirloin is all about that rich beef flavor and a balanced texture. It’s got a strong taste and stays tender enough for grilling or pan-searing.

Characteristic Beef Flavor

People love top sirloin for its bold, beefy flavor. The meat comes from the rear back of the cow, where the muscles are a bit more worked.

This gives the steak a full, satisfying taste. Compared to other lean cuts, top sirloin has moderate marbling—those fine streaks of fat inside the meat. That marbling adds juiciness and amps up the natural beefy flavor, especially if you cook it to medium-rare or medium.

It’s not as fatty as ribeye, so you don’t get that buttery, melt-in-your-mouth texture. Still, it nails that classic steakhouse vibe without being greasy. Some folks call it “hearty” or “satisfying.”

Top sirloin holds its own solo, but it’s also fantastic with marinades and seasonings. Its flavor stands up to different cooking methods and doesn’t get lost, as mentioned in this overview of its beefy flavor.

Texture and Tenderness

The texture of top sirloin is firm but still pretty tender for a thicker, leaner steak. It’s not as soft as filet mignon, but it doesn’t have the tough chew you get with some low-fat steaks.

Moderate marbling gives just enough fat to keep each bite moist. If you cook it right, the steak has a nice bite—neither too tough nor mushy—so you get a satisfying chew, especially with a top sirloin butt steak.

You might find a bit of gristle here and there, but it’s usually minor. Top sirloin’s structure lets it stay juicy and flavorful, especially if you slice it across the grain and avoid overcooking. This balance is respected among steak fans, as described in this detailed description of sirloin’s mouthfeel.

Best Cooking Methods for Top Sirloin

Top sirloin is lean and versatile, so it handles high heat well. The right cooking method can bring out its beefy flavor and keep it tender.

Grilling Techniques

Grilling is a favorite for top sirloin because you get that smoky flavor and a strong sear. Start by seasoning the steak with salt, pepper, and your favorite spices.

Let the steak sit at room temp for about 30 minutes before grilling so it cooks evenly. A hot grill gives it a good char.

Sear the steak over high heat for 2-3 minutes per side, then move it to lower heat to finish. Use a meat thermometer to check doneness; aim for 130-135°F for medium-rare. Let the steak rest for a few minutes before slicing to keep the juices in.

Some quick grilling tips:

  • Use tongs, not a fork, to keep juices in.
  • Let it rest after cooking.
  • Trim extra fat to avoid grill flare-ups.

Want more grilling advice? Check out these grilling techniques for top sirloin.

Broiling and Roasting

Broiling and roasting are great indoor options for top sirloin. Broiling uses high, direct heat from above to sear the outside fast while keeping the inside juicy.

Put the steak on a broiler pan, about 3-4 inches from the heat, and broil for 4-6 minutes per side—thickness matters here for the rib cut. Roasting happens in the oven at high heat, usually after a quick sear in a hot pan.

Preheat the oven to 400°F, sear the steak for 2 minutes per side in an oven-proof skillet, then pop it in the oven to achieve the ideal internal temperature. Cook to your preferred temp and let it rest after roasting for the best flavor and texture.

For more on broiling and roasting, check out this For an effective guide to cooking sirloin in the oven, consider the recommended internal temperature for the perfect doneness.. Even beginners can get a tender top sirloin this way without too much fuss.

Top Sirloin in Popular Recipes

Top sirloin is a lean, tender beef cut that works in all sorts of classic dishes. You can cook it fast as a steak or use it in recipes that show off its balanced flavor and texture.

Steaks and Roasts

People often grill or pan-sear top sirloin steaks. When you cook them right, they get a nice crust and stay juicy—no wonder beef fans love them.

Since top sirloin is both tender and affordable, folks pick it for steak dinners at home. The meat does well with just salt and pepper.

For roasts, you can cook top sirloin in the oven until it hits medium rare. It slices easily and keeps its shape, so it works for sandwiches or with potatoes and veggies, making it a versatile option for steak lovers.

Because it’s leaner than ribeye, you need to watch it closely or it’ll dry out. But if you get it right, you’re rewarded with a clean beef flavor and a firm, tender bite. If you want to dive deeper into steaks and roasts, check out Beef, It’s What’s For Dinner.

Beef Wellington and Stroganoff

Some people use top sirloin for beef wellington, though it’s not the classic choice. Its firmness helps it hold together during cooking and slicing.

Wrapped in puff pastry, it’s a leaner option than the usual marbled beef.

For beef stroganoff, you just slice the top sirloin into strips and cook them briefly. It stays tender if you don’t overdo it, and the meat soaks up the creamy sauce for a hearty bite.

Top sirloin’s texture gives stroganoff a satisfying feel without making it greasy or overly rich, perfect for those who appreciate great cuts of sirloin. Home cooks often pick it when they want a balance of tenderness and flavor, as you’ll see in practical recipe discussions.

Evaluating Quality When Buying Top Sirloin

Top sirloin can vary in tenderness and flavor, depending on its grade and how much marbling it has. Picking a cut of meat is essential, especially when considering which cuts of sirloin will suit your dish best. good cut means knowing what beef grades mean and spotting quality sirloin vs a top sirloin butt steak at the store.

Understanding Beef Grades

Beef in the U.S. gets a grade that shows its quality. These grades help you guess at the flavor, tenderness, and juiciness you’ll get from a steak.

The main grades in stores are Prime, Choice, and Select:

  • Prime: The most marbling—those little streaks of fat inside the cut of meat. More marbling usually means better flavor and tenderness in a cut of steak.
  • Choice: rib or top sirloin butt steak. Less marbling than Prime but still good. Most top sirloin steaks at the store are Choice.
  • Select: The least marbling. These steaks are lean and might not be as juicy or flavorful.

Look for top sirloin in the Prime or Choice grades if you can. A steak with solid marbling will probably taste better and be more tender see more about beef grades and quality.

Selecting the Right Cut

Not all top sirloin steaks are the same, even in the same grade. High-quality top sirloin looks firm, bright red, and has thin white marbling lines across it.

If the meat looks brown or dull, skip it—it’s probably old or just not fresh.

Thickness is a big deal. A steak at least 1 inch thick cooks more evenly and stays juicy. Some packages say “center-cut,” which means the steak comes from the middle of the sirloin and is usually more tender.

Pick cuts trimmed of extra fat but with marbling inside. Too much outer fat is just waste, but too little marbling can make for a dry steak.

Top sirloin is already leaner than some other cuts, so finding a good balance is key for flavor and texture. For more tips on what makes a top sirloin stand out, check out top sirloin steak characteristics.

Is Top Sirloin a Good Value?

Top sirloin is popular because it gives you flavor, tenderness, and affordability. Lots of people consider it when they want a beef cut that fits both taste and budget.

Balancing Cost and Quality

Top sirloin usually costs less than premium cuts like ribeye or tenderloin. It’s a practical pick for families or anyone craving steak without breaking the bank.

In most stores, it’s one of the most affordable steak cuts you’ll find.

Even with the lower price, top sirloin still delivers a rich, beefy flavor. It’s a lean cut, so you get less fat than with some other steaks.

The lean quality makes it a good choice for folks keeping an eye on fat intake.

If you want to stretch your grocery budget, top sirloin is super versatile. Use it for grilling, roasting, kebabs, or stir-fry.

Some even use it in steak tips or stroganoff, particularly with rib cuts. For more about why it’s affordable, see why top sirloin is One of the most economical steak cuts, top sirloin offers both flavor and value for budget-conscious steak lovers..

Summary: Is Top Sirloin Right for You?

Top sirloin comes from the primal sirloin section and is a lean beef cut. It’s a solid value and packs more flavor than some other lean steaks.

Pros of Top Sirloin:

  • More affordable than ribeye or filet mignon
  • Lower in fat compared to richer steaks
  • Versatile: works well grilled, broiled, or pan-seared

Cons of Top Sirloin:

  • Not as tender as ribeye or filet
  • Can dry out if overcooked
  • May need marinating for extra tenderness, especially for tougher cuts like bottom sirloin butt.
AspectTop SirloinRibeyeFilet Mignon
FlavorBeefy, moderateRich, very flavorfulMild, subtle flavors are often found in cuts of sirloin, making them great for grilling and pairing with various sides.
TendernessMediumVery tenderExtremely tender
PriceAffordableExpensiveMost expensive cut of meat.
Fat ContentLow to moderateHighLow

Top sirloin is often called the best of the sirloin cuts. It’s less tender than tenderloin but more tender than round steaks.

A lot of people go for top sirloin because it balances flavor, price, and lower fat (see more about sirloin cuts).

This steak is a smart pick for anyone who wants good taste without spending a fortune. It’s popular with those who want lean protein and a strong beef flavor.

Steaks are best cooked medium-rare to medium for optimal flavor and tenderness, especially when using a good rub. best texture for a cut of steak..

If you’re looking for a steak that lands somewhere in the middle for tenderness and price, top sirloin might be just right.

Frequently Asked Questions

Top sirloin is a lean, flavorful steak that’s popular for its value and how many ways you can use it. It stands apart from other cuts in taste, texture, and fat content, particularly when compared to different cuts like t-bone steak.

What distinguishes top sirloin from ribeye in terms of flavor and texture?

Top sirloin is a flavorful cut and has a bold, beefy taste. Ribeye is richer and more tender thanks to its higher fat content.

If you want a leaner steak but still crave strong beef flavor, sirloin’s your friend, especially when choosing the right cuts of sirloin. Ribeye is for those who want more buttery texture and juiciness.

Can top sirloin steaks be considered tender compared to other cuts?

Top sirloin is moderately tender—not as soft as filet mignon or ribeye. It can get chewy if you overcook it.

Still, lots of people think it offers a nice balance between texture and flavor, whether you’re grilling or slicing it for salads.

What is the best cooking method to bring out the flavor in top sirloin steaks?

Grilling is probably the most popular way to cook top sirloin. It really brings out the steak’s natural flavor.

Pan-searing and then finishing in the oven works too for a top sirloin butt steak. Marinating can help add moisture and boost taste, especially since top sirloin is naturally lean.

How does top sirloin’s fat content compare to other cuts of beef?

Top sirloin has less fat than ribeye or New York strip. It’s a naturally lean steak with just a small amount of visible fat around the edge.

This means top sirloin is lower in calories and saturated fat than fattier steaks, as explained by Omaha Steaks is a renowned steak house known for its high-quality cuts, including top sirloin..

Is top sirloin an economical choice for budget-conscious consumers?

People often pick top sirloin for its value. It usually costs less than ribeye or filet mignon but still brings good flavor and versatility.

It’s a smart pick if you want to save money without sacrificing quality. The Traeger Grills guide notes it delivers strong taste at a lower price.

What are the benefits of grilling top sirloin over other cuts?

Top sirloin holds up well on the grill because it’s thick and lean. It cooks pretty quickly and evenly, which lets those grill marks and smoky flavors really stand out.

Unlike fattier cuts, it’s less likely to cause flare-ups or dripping. Grilled sirloin works well for kabobs, steak salads, and sandwiches thanks to its firmer texture, as explained by Beef, particularly cuts of sirloin, is a staple in many households due to its versatility and flavor. It’s What’s For Dinner.

How To Use A Propane Smoker In 13 Easy Steps [With Pictures]

If you’ve decided to invest in a propane smoker for your backyard cookouts, we commend you on your decision – you’ll get beautifully smoked meat and veg, and rather than that nasty taste you get with charcoal, you can enjoy amazing wood chip flavoring instead.

How To Use A Propane Smoker In 13 Easy Steps [With Pictures]

In this article, our goal is to lay out every single step of using your propane smoker, and by the end of the article, you should feel confident that you know exactly how best to use your smoker, from start to finish, and will have discovered plenty of handy tips along the way.

And without further ado, let’s get straight to it!

Choose A Good Propane Smoker And Assemble It

You probably already know just how expensive a good quality smoker can be, which is why it’s so important that you do your homework on smokers before you buy.

If you can, I recommend that you take time to read buying guides on propane smokers, so that you know exactly what to look for in one.

The most important element of this is getting a smoker with sufficient capacity.

And I also recommend that you buy from a big name brand if you can afford to, that way you can be assured that your smoker is reliable and won’t break down.

When it comes, assemble it as per the manufacturer’s instructions.

If you’re finding this tricky, simply head over to YouTube for a video tutorial on how to assemble your particular model (there almost always is one).

Prepare The Meat

There are two main ways to prepare your meat.

You can either marinate your food in advance of cooking it, or you can simply apply a dry rub seasoning instead.

Both work just fine.

Prepare Your Wood Chip Flavoring

I also recommend that you soak your wood chips for about half an hour before you start to cook.

Check Your Propane Cylinder

Before proceeding any further, you should always check that the knob and connection of your propane cylinder are fully secure.

A gas leak would be very dangerous.

Add Herbs To Create More Flavoring

If desired, you can add some fresh or dried herbs in the smoker for yet more flavor.

This should go in the aluminum pan that sits on the water.

Put Your Wood Chips Inside The Smoker

Next, add your chosen wood chips or wood pellets into the smoker’s hopper, being careful not to overfill it.

If it gets overfilled, you could risk jamming the hopper, and thus preventing it from working as it should.

Ensure Good Air Circulation

One of the most important aspects of using a propane smoker to best effect is ensuring that you have excellent airflow within the smoker.

Too much smoke will ruin the flavor of the meat.

There must be some ventilation, which is why your smoker should have both a vent and a chimney (yet also a cover to retain moisture).

We would recommend that you open your vent and chimney about halfway.

This way, the harmful smoke will escape, while at the same time ensuring that there’s still plenty of smoke remaining in the smoker.

Fire Up The Ignition And Get The Smoker Ready

Fire Up The Ignition And Get The Smoker Ready

When you are confident that your smoker is fully assembled, safe to use, and prepared for smoking, as is your meat, then you can now go ahead and ignite it!

This is how to do it:

  • First, allow the propane gas to travel to the smoker by releasing the gas knob
  • Then ignite the fire as per the instructions provided in the manufacturer’s guide.
  • Last but not least, you should preheat your smoker for at least 10 to 15 minutes before you put your food on to cook

Put Your Meat And Veg On To Cook

To smoke your food, all you have to do now is place it on the grill grate just over the aluminum pan.

Unless you’re following a particular recipe that states otherwise, in general you should smoke your food at 225 degrees to 250 degrees Fahrenheit.

Don’t Be Tempted To Open The Smoker

As tempting as it can be, you should not even consider opening the lid of the smoker for at least an hour and a half (preferably 2 hours) after putting the meat on to cook.

This is because doing so would allow smoke to escape and disrupt the entire smoking process. Just be patient.

Time For A Reset

Once two hours have passed since putting the meat on, you can now check on the smoker and reduce the heat using the regulator.

This may also be a good time to refill the wood chip hopper, and add more water to the aluminum pan for juicier meat.

Check Whether Your Food Is Done

Check to see whether the meat has come to the “doneness” required. The best way to do this is to use a meat thermometer.

If it’s not ready, simply allow the meat to continue to cook until it has reached the preferred level of doneness, which you can accurately gauge with a meat thermometer.

Before you plate up, it’s important to turn off the propane cylinder and the smoker itself. Then you can enjoy your food!

Clean Up Your Smoker After Use

You must ensure that you wait until the smoker has fully cooled down before you attempt to clean it.

You don’t want to risk scalding yourself.

You should clean up your smoker after each use so as to prevent any mold from growing inside that could potentially lead to food poisoning if it was left to foster.

Wrap Up

Now you know how to use your propane smoker for the best results, right from choosing a good smoker through to cleaning it after use.

I hope that you’ve found this article helpful, and that you’ve picked up on or two handy tips along the way.

I’m pretty sure that once you’ve started, there’ll be no stopping you – bon appétit!

The post How To Use A Propane Smoker In 13 Easy Steps [With Pictures] appeared first on Bro BBQ.

The 8 Best Propane Smokers

While not the traditional way of smoking meat, a propane smoker is definitely one of the easier ways to add delicious smoky flavor to your meat.

The 8 Best Propane Smokers

For this method of smoking you won’t have to keep checking and adjusting the temperature as your meat cooks.

So to help you get started we have looked at the 8 best propane smokers on the market.

We will look at the cooking capacity of each, design and useful features.

1. Masterbuilt MPS ThermoTemp XL Propane Smoker

The MPS Thermo Temp XL is the latest smoker from Masterbuilt.

One of the best new things about the Masterbuilt propane smoker is the thermostatic control for the internal temperature.

This allows you to control the amount of propane flowing to the smoker and thereby control the temperature.

With 792 square inches of capacity this stainless steel Masterbuilt smoker allows you to fit up to 16 chickens or 2 turkeys on the four chrome coated racks.

There are two doors which allow you to add wood chips without disturbing the meat.

In fact the wood chip tray is attached to the door for convenience.

The stainless steel burner has a diffuser for even heat distribution and gives out 15,750 BTU of heat.

You can set the heat to between 180 and 350 degrees Fahrenheit.

The lower temperature allows you to slowly smoke your meat while the higher temperature means you can get crispy chicken skin.

There is a safety shut for the gas if the flame goes out.

Pros

  • Thermostatic temperature control
  • Two door access
  • Four racks of capacity
  • Safety shut off feature

Cons

  • One-year warranty only

2. GrillPro 33” Vertical Propane Gas Cabinet Smoker

With more than 700 square inches of room in this propane cabinet smoker you will have plenty of room for all your favorite smoked meats. Deluxe metal hooks and four chrome coated racks give you all the space you need to smoke sausages, birds or brisket.

The stainless steel burner kicks out an impressive 15,000 BTU for maintaining ideal temperatures. With the door mounted thermometer you will be able to monitor these temperatures and ensure your meat is cooking at optimum heat.

There is a separate door for access to the wood chip tray and water pan, so there’s no risk of lowering the heat or reducing the smoke level when you need to top these up. There are adjustable side vents for added temperature control.

Pros

  • Double door design
  • Adjustable side vents
  • Large capacity

Cons

  • 1-year warranty

3. Cuisinart COS-244 Vertical 36″ Propane Smoker

Cuisinart’s Vertical 36-inch smoker is the perfect size and shape to have out on your deck or patio.

It has more than 784 square inches of capacity with four stainless steel, removable racks for all your smoking needs.

And afterwards they can be cleaned in the dishwasher.

There is a separate door at the bottom for adding and accessing the wood chips and a built-in thermometer on the door makes controlling the temperature easy.

A rear vent on the smoker can be opened and closed, letting you control how much smoke and heat your cooking needs.

The wood chip tray is enameled steel and holds the chips and water for convenience and easy cleaning.

This smoker’s twist-lock door ensures a tight seal, so there should be no smoke or heat escaping while it is in operation.

In all the smoker is solidly built and reasonably easy to assemble.

Pros

  • Large capacity with four removable trays
  • Two door access
  • Rear vent for smoke and heat control
  • Strong, tightly sealed door

Cons

  • Combined wood chip/water tray can block flow of oxygen making ignition difficult

4. Dyna-Glo 36″ Vertical LP Gas Smoker

Dyna-Glo’s Vertical 36-inch smoker gives you lots of capacity for cooking with 784 square inches.

Inside you have four racks which are adjustable and can be removed for smoking bigger pieces of meat.

The cast iron burner gives out 15,000 BTU of heat and is fired up by an electric ignition.

A large control dial on the base of the smoker makes regulating the temperature easy and there is a stylish thermometer, so you can monitor your cooking.

This smoker has two doors, so you can top up your wood chips without opening the cooking chamber.

The wood chip tray has handles and a lid for extra convenience.

This model also has sliding air dampers on the top and sides.

Pros

  • Large cooking chamber
  • Two door design
  • Cast iron burner
  • Electric ignition

Cons

  • One-year warranty only

5. Pit Boss 3 Series Vertical Gas Smoker

The Pit Boss 3 Series is a good looking smoker. Not only does it look good, but it has all the substance to back it up.

This is the only brand of smoker in the industry that gives its products an impressive five-year warranty.

It has 720 square inches of internal capacity and three porcelain coated cooking racks.

One of its best features is the dual control and burner system, one for the wood chips and another for the cooking cabinet.

This allows you to obtain lower temperatures for slow cooking.

The stainless steel burners give out 12,500 BTU of heat and a temperature range of between 100 and 350 degrees Fahrenheit.

You can access the wood chip tray from outside, so that you don’t have to open the cooking chamber.

And the large viewing window lets you monitor everything with ease.

Pros

  • Five-year warranty
  • Dual control and burner system
  • External access to wood chip tray
  • Large viewing window

Cons

  • Top end of price range

6. Broil King 923614 Vertical Propane Smoker

For a slightly smaller Masterbuilt smoker, this 30 inch 2 door version is ideal.

You still get more than 700 square inches of capacity and four chrome smoking racks.

The burner is made from stainless steel and there is a push button ignition for ease of lighting.

A two door design means you can add and top up your wood chips without ever having to open the cooking chamber door.

This keeps the temperature constant. A porcelain coated wood chip tray and water pan makes set up simple.

There is a cool touch wire handle on the door which also features a built-in temperature gauge.

For larger items you can remove some of the smoking racks.

Pros

  • Good cooking capacity
  • Two door design for easy access
  • Cool touch wire handle

Cons

  • Wood chip tray is thin

7. Char-Broil Vertical Propane Smoker

If you are just getting started with smoking meats this Char-Broil vertical smoker is a great place to begin.

It’s not too expensive or too big, so you can learn as you go.

This smoker has 595 square inches of space but be aware of the width of some racks of ribs and check they will fit.

There is a combined wood chip and water tray although if you prefer these to be separate you can purchase a different one.

A two door design means there is no need to open the cooking chamber to add extra wood chips and so a constant temperature is maintained.

The burner provides up to 16,500 BTU and there is a handy warming rack on top of the smoking chamber.

Pros

  • Three chrome plated cooking racks
  • Two door design
  • Handy warming rack

Cons

  • Combined wood and water tray can be messy

8. Char-Broil The Big Easy TRU-Infrared Smoker Roaster & Grill

If you want a smoker that is very portable but also lets you roast and grill the Char-Broil Big Easy will suit you well.

This smoker has 180 square inches of capacity, so you won’t be using it for Thanksgiving dinner, but it is perfect for individual use capable of taking 25lbs of meat.

The TRU infrared technology allows you to cook evenly with no flare-ups, so you have juicy, tender meat.

You can use it with or without the smoker box making it a versatile piece of portable cooking equipment.

Temperature controls let you cook at a range of between 9,000 to 18,000 BTUs.

Just pop your meat into the basket, and you are ready to roast and smoke.

Pros

  • Highly portable
  • Use with or without smoker box
  • Can be used to grill, roast or smoke meat

Cons

  • Small capacity

Best Propane Smokers Buyer’s Guide

We look at what features you should be considering if you are thinking of buying a propane smoker.

Cooking Capacity

Most of the propane smokers in our review have capacity in excess of 700 square inches with a couple of exceptions.

Obviously the more room you have in your smoker the more meat you will be able to fit in.

However, it is worth noting that although the square inch capacity is a good indicator of size you also need to consider the width of the smoker.

If it is narrow but tall you may struggle to fit in a full rack of ribs and have to resort to cutting them in half.

Smokers like the Camp Chef Smoke Vault are 24 inches wide and so will easily take a good size brisket or rack of ribs.

Other smokers have good capacity, such as the Cuisinart 36 inch which has 784 square inches but is only 18 inches wide.

Think about what you will be smoking and choose the size, capacity and design of smoker that best suits your needs.

Design

Another important factor to consider is the design of your smoker. In particular, look at how the wood chip tray is accessed.

If you need to open the cooking chamber door to get to the wood chips or the water pan this will interfere with the cooking and smoking process.

Every time you open the door you will be letting heat and smoke out of the cooking chamber.

This means the unit has to recover the temperature and level of smoke before it can continue cooking your meat.

This will slow down the process and may affect the results. Choose where possible a two door design.

This means there is separation between the wood chip tray and the cooking chamber.

Then when you need to top up the wood chips or the water pan you can do so without disrupting the smoking and cooking process.

Where you are going to locate your smoker may also influence the design that you choose.

The size and footprint of the smoker may determine whether you can keep it in your chosen location.

Tall vertical smokers will take up less ground space but will clear vertical space.

You can also decide if you want a combined wood chip and water tray or whether these are best kept separate.

Some trays supplied with the smokers are made from thin metal, but you can always buy a cast iron tray and replace it.

Heat Output

The heat output of your smoker is a very important consideration.

This is typically measured in BTUs which stands for British Thermal Units.

This is an international standard for heat measurement and is defined as the amount of heat required to heat one pound of water by one degree.

The smokers in our review range from 9,000 to 18,000 BTUs.

Hotter is not always better, however. Hotter temperatures can make meat dry out or cause it to burn.

When smoking the most important aspect is the temperature, so this is something that needs careful thought before you buy your smoker.

Temperature Control

More important than the heat output of your smoker is the ability to control the temperature.

It is the temperature which will determine when the meat is done rather than a set time and this is why the thermometer is one of the most important aspects of your smoker.

A propane gas smoker will tend to run hot, so most will work best at lower temperatures and the ability to properly regulate the temperature is key to the results.

Some models have dual burners and controls, one for the wood chips and another for the cooking chamber.

These dual controls make it easier to run the smoker at lower temperatures.

As some meat can take more than 20 hours to smoke, the ability to accurately control the temperature is vital to a successful outcome.

Build Quality

As with any cooking equipment that you buy you will want to know that you are getting a good quality product.

After all, you are spending quite a bit of money, so you will want your smoker not only to do a good job but also to last for a long time.

One of the consequences of a smoker being made from cheaper material is that there may be smoke leakage, particularly from around the door.

Thinner metal will warp under heat and allow gaps to appear. This results in smoke and heat escaping so beware of this issue.

If there is a problem with smoke leaking around the cooking chamber door you may be able to rectify this by applying a high temperature gasket to seal it up.

However, buying a high quality smoker with strong and robust build quality is easier in the long run.

Frequently Asked Questions

How Do I Choose A Propane Smoker?

Consider the capacity of the smoker, which is the available rack space.

Then look at the material that the smoker is made from, cast iron and stainless steel are best.

Finally, look at the temperature range and the access, whether this is single or double doors.

What Types Of Smokers Give The Most Smoke Flavor?

Unsurprisingly, the type of smoker that gives the most smoke flavor are the ones that are heated through burning wood, pellets or charcoal.

Although most people would argue that the offset smoker is the original and best type of smoker.

Should You Soak Wood Chips For Propane Smokers?

It is not advisable to soak wood chips before using them in your propane smoker.

This is because it will reduce the effectiveness and quality of the smoke.

How Often Do You Add Wood Chips To A Propane Smoker?

There is no set rule about how often to add wood chips to your propane smoker.

However, in general a good rule of thumb is every five to six hours.

Topping up old chips with a scoop or two of new chips is one way but check the quality of the smoke as you go along.

What Wood Should Not Be Used For Smoking?

There are several types of wood that should never be used for smoking meats or any other kinds of food.

These trees include fir, spruce, eastern cedar, sycamore, cypress, elm, pine, redwood, eucalyptus, sassafras and liquid amber.

Why Buy A Propane Smoker?

Unlike other more traditional meat smokers, a propane smoker does not need to be supervised and checked regularly.

For the most part you can set the smoker and go about your day until the meat is done.

Of course, you may occasionally want to check on it or add more wood chips or water but for the most part a propane smoker is less work.

The post The 8 Best Propane Smokers appeared first on Bro BBQ.

5 Best Rated George Foreman Grills

The George Foreman grill is one of the best known kitchen appliances and many homes have one.

5 Best Rated George Foreman Grills

The success of the grills is not only due to the famous infomercial but the ease of use, healthy cooking method and quality of the product.

So we are going to look at 5 best rated George Foreman grills, so you can decide which one you are going to buy for yourself or as a fantastic gift for a loved one.

We will look at the features of each of our five reviewed grills and put together a buyer’s guide for you so you have all the information you need to make an informed decision.

Finally, we will ask some questions that you may have wondered about yourself when it comes to George Foreman grills.

1. George Foreman GRBV5130CUX Grill & Broil 6-In-1 Electric Indoor Grill

There’s no getting away from it, the George Foreman Grill and Broil is a beautiful kitchen appliance.

Not only is it very attractive to look at but also incredibly versatile.

As well as the normal contact grilling that allows food to be cooked evenly from the top and the bottom, there is also the broiling feature.

To access this function, you simply remove the top grill plate to expose the infrared heating element.

This feature allows you to caramelize food or top melt any of your favorite dishes with the option of hi broil or low broil.

And when you are done you can simply remove the grill plates and drip tray and put them in the dishwasher for a quick clean up.

Speaking of the grill plates, these are now 5 times more durable as they are coated in ceramic.

Not only is ceramic a tougher material built to last but also PTFE and PFOA free.

Variable temperature controls allow you to cook a wide range of foods and the signature George Foreman forward sloping grill angle makes sure your food is not sitting in fat as it cooks.

This grill comes in a choice of six stunning colors, you may be hard pressed to pick a favorite!

Pros

  • Removable top grill plate allows use of heating element for broiling
  • Allows you to top melt and caramelize your dishes
  • Ceramic coating is 5 times tougher than previous models
  • Variable temperature controls

Cons

  • Relatively expensive compared to other models

2. George Foreman 9-Serving Basic Plate Electric Grill & Panini Press

The George Foreman 9-serving basic plate grill has 144 inches of grilling space, so you’ll always have plenty of tasty food on the go for family and friends.

It still has the sloping grill angle to allow up to 42% fat to drain away from food, ensuring a healthier meal.

However this clever model also has the option of using it flat on your kitchen surface with the inclusion of a kickstand at the back of the grill.

When you are making panini for lunch this is the ideal setting.

Then when you are grilling meat for dinner you can put the kickstand out and return the grill to its familiar sloping angle.

To make sure all the food cooks properly the heat is distributed evenly across the entire grill surfaces.

The grill also has the familiar green and red indicator lights which let you know when the grill is on and when it has preheated.

The signature heating elements cook evenly and provide fast temperature recovery.

As well as grilling meat, chicken, fish and vegetables the 9-serving basic plate electric grill is also a very effective panini press.

This grill has a sleek and modern design with an attractive, platinum finish and the familiar floating hinge for cooking foods of varying thickness.

Pros

  • 144 square inches of grilling space
  • Two positions, flat or sloping with the help of a kickstand
  • Even, fast cooking
  • Sleek, modern design

Cons

  • Plates are not removable for cleaning

3. George Foreman GRP4842MB Multi-Plate Evolve Grill

The George Foreman Multi-plate Evolve grill is one of the most versatile that you will ever have in your kitchen.

You can create a multitude of different dishes with this appliance and still have the convenience of removing the grill plates for cleaning.

The grill plates are ceramic coated for traditional grilling and can be swapped out for the griddle plate for all your breakfast cooking needs.

For restaurant standard fare you can use the Evolve grill’s 500 degree searing burst to deliver a beautiful finish to your meat.

The burst lasts 60 seconds and then returns the grill to the previous cooking temperature.

The grill also comes with plates for making perfect waffles, or you can remove all the plates and use the grill as a deep dish for baking or making omelets.

The adjustable floating hinge on the grill allows you to cook any thickness of meat, fish or vegetables evenly, top and bottom.

A digital control panel lets you accurately set the temperature and the sloping angle makes sure that any fat drains away from the food while it is cooking.

Pros

  • Versatile grill with multiple plate options
  • Ceramic coated for durability and ease of cleaning
  • 500 degree searing burst option
  • Floating hinge caters for all thickness of foods
  • Digital control panel for precise temperature setting

Cons

  • Relatively expensive grill

4. George Foreman 4-Serving Removable Plate Grill & Panini Press

The George Foreman 4 serving grill has the space to cook burgers, chicken and vegetables for a family of four.

Not only is there plenty of room on this grill for all your favorite food, but it will also cook 35% faster, so there is no waiting around.

The biggest advantage of this grill are the removable plates. So not only is cooking quicker but so is cleaning up afterwards.

Simply remove the grill plates and put them in the dishwasher along with the drip tray for easy and rapid cleaning.

A tough coating protects the surface of the grill, being twice as durable as previous models.

This also allows food to be grilled without the need for added oil to the grill surface.

Of course, the unique sloping grill surface allows the fat from your food to drain away into the drip tray, making it easy to dispose of and keeping your food crisp and healthy.

This model of George Foreman grill also features a unique adjustable hinge between the top and bottom plates.

This allows various foods to be grilled effectively regardless of how thick or thin they are.

From thin crispy bacon to a thick juicy steak the George Foreman 4-serving removable plate grill will cook it just right.

Pros

  • Removable grill plates for easy cleaning
  • Adjustable hinge for thick and thin foods
  • Extra durable grill coating for non-stick cooking
  • Sloping grill surface for fat draining
  • Dishwasher safe parts

Cons

  • Some fat may get underneath the grill plates

5. George Foreman Rapid Grill Series, 5-Serving Removable Plate Electric Indoor Grill & Panini Press

When you want that panini in a hurry you will need the George Foreman Rapid Grill.

This model heats up more than 30% quicker than previous removable plate versions.

That means that the time between plug in and plate up is faster than ever.

And when you are in a rush you can also put the removable grill plates in the dishwasher, so you’re not wasting time doing the dishes.

Although with the Advanced George Tough coating there should be no effort required to clean your grill plates after use.

They are more than 3 times more durable than previous coatings.

The new coating means that there is no need to use butter or oil when you are grilling, and it is also free of PFOA.

The size of this grill makes it perfect for small families with space for five servings.

Whether you are cooking hot dogs, chicken, burgers, vegetables or panini you will have plenty of grill area.

Variable temperature controls with a simple-to-use slider make choosing the correct heat easy.

When you need to store your grill there is a cord wrap and the whole appliance can be stored vertically.

Pros

  • Grill heats up 30% faster than previous models
  • Removable grill plates for easier cleaning
  • Advanced George Tough coating is 3 times more durable than previous versions
  • Adjustable sliding temperature control

Cons

  • Has a large footprint

Best George Foreman Grills Buyer’s Guide

So what should you be looking for when shopping for a new George Foreman grill?

We take a look at some of the things you should be considering before you choose.

Serving Size

The serving size of your grill should match the size of your family or the use to which you are going to put it.

If you think you will only use it for family gatherings then you will want to consider the number of people you will be catering to rather than just the number of people in your household.

It is also a good idea to look at the physical size of the grill as the indicated number of servings may not match the size of food that you typically cook.

For example, if you will be cooking for three people but like big steaks and burgers, a five serving grill may be better.

Remember though the larger the serving size of the grill the bigger the footprint of the actual appliance will be.

Make sure you have enough space on your countertop to accommodate it.

Functions

Consider the functions that you want your grill to have.

Some people may just want the basic and traditional grilling option while others want a multi-functional grill with lots of options.

The Grill and Broil is one such multitasking model. This allows you to grill, broil, caramelize, top melt and use as a panini press.

The multi-plate Evolve is another multi-functional grill with removable plates and the option to use it for baking.

Although these more advanced grills will be more expensive to buy if you will make use of all the functions and use them regularly then it is a good investment.

Temperature controls are another consideration.

Choose one that you are comfortable using and that is easy to adjust according to what you are cooking.

Some grills have digital controls while others are manual.

Some functions like the sloping angle of the grill plates to allow for fat draining and collection are standard across the entire range of George Foreman grills.

Speed

The primary purpose of a kitchen appliance is to make life easier and speed up any cooking process.

If you want a grill that heats up quickly or gives you a quick burst of searing heat there are models that will accommodate you.

A fast preheat means that you won’t be waiting around too long for the grill to hit the optimum temperature to begin cooking.

Most of the grills come with indicator lights in green and red which show you that they are either preheating or temperature ready.

The Rapid grill heats up 30% quicker than some other models so if you want a grill that is ready to go in double quick time this may be the one for you.

Other models have fast temperature recovery and the Multi-plate Evolve has a 500 degree searing burst that lasts 60 seconds before returning to normal temperature.

Durability

The majority of George Foreman grills have the Advanced George Tough non-stick coating.

This is 3 times more durable than the coating previously used on the grills, the George Tough coating.

The new Advanced George Tough coating is also PFOA free.

Ceramic coated plates on some of the grills are 5 times more durable than the original coating.

This not only makes the grills stand up to even tougher use, but the surface is better for cooking on as it tolerates higher temperatures and is more resistant to scratches.

Depending on how much you are likely to use your grill you can choose a Teflon non-stick for light to medium use or a ceramic coated grill for heavier or more frequent use.

Design

There are many different designs of grill in the George Foreman range and the particular design you choose will be down to personal preference.

However, there are aspects of the design that you should bear in mind as they will have implications for the use of the grill.

One of these is the inclusion of the floating hinge.

This allows the top and bottom grill plates to be joined together with an adjustable fixing that automatically fits various food depths.

Rather than being a fixed hinge with limited movement the floating hinge permits the top grill plate to sit higher or lower depending on the thickness of the food on the grill.

This ensures that the top grill plate is always in contact with the food for even cooking.

A grill with two positions allows optimum usage for both grilling meat and for making panini.

The sloping angle allows fat to drain while a level grill is best for toasting sandwiches.

Consider what you will be grilling before making a choice.

Finally think about the look of the grill, do you just want a functional appliance that cooks well and is easy to use.

Or do you also want an attractive grill that looks good on your countertop?

Luckily most George Foreman grills give you both.

Ease Of Cleaning

While using your George Foreman grill will give you and your family lots of delicious and healthy meals, there’s always the not so pleasant side of cleaning the grill afterwards.

If everyone disappears when it’s time to do the dishes you may want to consider opting for a grill with removable plates and let the dishwasher take the strain.

Most grills also have a removable drip tray which you can also pop in the dishwasher for easy cleaning.

Frequently Asked Questions

What Is So Special About A George Foreman Grill?

There are many unique features on a George Foreman grill.

The clam shape with two grill plates allows food to be cooked on both sides at the same time.

The forward sloping angle allows fat to drain away from the food during cooking.

These things make the George Foreman grill a healthy option for cooking all kinds of tasty food.

Do You Have To Flip Meat On A George Foreman Grill?

There is no need to flip meat or any other food that you can cook on a George Foreman grill.

The top and bottom of the grill have active grill plates that cook food on both sides simultaneously.

Is It Necessary To Spray Oil On A George Foreman Grill?

The surface of the grill plates on a George Foreman grill are covered with Teflon or ceramic, both of which are non-stick materials.

For this reason, there shouldn’t be any need to spray oil on the grill.

If the Teflon surface is damaged the grill should be replaced.

Can I Cook Eggs On A George Foreman Grill?

A George Foreman grill can be used as a griddle so yes, you can cook eggs on most models.

The post 5 Best Rated George Foreman Grills appeared first on Bro BBQ.

5 Best Rated Instant Read Thermometers

If you’re a pro on the grill or like to make a lovely roast, deep fry, or baked food, an instant-read thermometer can be just the thing you need to ensure that your cooking turns out just right, especially for those who like their meat to be cooked to a certain level.

5 Best Rated Instant Read Thermometers

With many instant read options out there, some costing $50 plus, it can seem a lot of money for something you may only use a few times a year, and the only way to know if these will be of any use to you is if you have in-depth testing done on it.

That is why we have collated five instant-read thermometers that have different designs and can offer something to any type of cook.

We also run through aspects of an instant-read you may want to consider before purchasing one.

Overview Of An Instant Read

You might be thinking that a probe thermometer can be just as effective, but with an instant-read, you can take a quick temperature reading of an item which can give you a reading a few seconds faster than a probe one.

They can be used during the end of the cooking process to determine the final temperature, so your food is cooked correctly and is sanitary for consumption, and this method means you don’t have to clean your device as much once finished with it.

You can find these used in professional kitchens, to campsites, and are even used by health inspectors to determine high food standards in any food service industry.

But how do you know which is the most effective thermometer for you?

You can find our top picks below and the pros and cons of each to make your decision that much easier.

Our Top 5 Instant Read Thermometers

1. Inkbird Instant Read Meat Thermometer

We start with an instant read that can give you a reading in 3-5 seconds, and the readout locks when the probe is removed from your meats and cooked goods, so it is excellent for those who are cooking multiple items that need instant readings.

It is fast and accurate, with a plus or minus tolerance of 2 degrees Fahrenheit and an upper limit of 572 degrees, so it is effective for more extended periods on the barbeque or roasting a turkey for that special occasion.

Pros

  • The thermometer has a magnet on its back, so you can place it on your fridge or other magnetic surfaces to ensure it doesn’t get lost, whether cooking inside or outside.
  • The casing is waterproof, so you don’t have to worry about liquids like soups or brews damaging the parts inside, and it has an easy-to-read display with a bright backlight.

Cons

  • If you don’t place the rubber cover on the charging port, there is a chance some liquid could enter, but as it’s a small port near the end, this shouldn’t be a big issue for most users.
  • It isn’t suited to be used in an oven, so you will have to remove the food and take the temperature, which can be a hassle on its own and is a slight downside with most instant reads made of plastic.

2. KT Thermometer

This instant read looks more familiar, as it ditches the digital readout for the traditional gauge, which can measure boiling or frozen items, and has a convenient clamp near the meter to hold it in position so it doesn’t fall into your cooking container.

The stainless steel construction is durable, does well if your cooking spills, as it simply wipes off, and is corrosion resistant, so it can be left outdoors without any weather damage.

Pros

  • The analog dial might look old-fashioned, but it can be great for those who have difficulty seeing certain types of reading and don’t want any overcomplicated settings or modes with their instant read.
  • The dial surface is made of glass, making it more heat resistant when you are cooking for long periods of high heat and want to get your timings spot on.

Cons

  • The probe on the gauge is 12 inches, which might be longer than what some users need from a gauge, so knowing how deep to place the probe could be challenging to determine in some instances.
  • The measuring lever on the gauge might not be as instant as you like, but this gauge could better demonstrate parts of the cooking that are warmer than the rest, so you might have to weigh these aspects up.

3. SIMILAR LED Rechargeable Meat Thermometer

Another great option is if you need a reliable and easy-to-use instant read that is budget-friendly, as you get bright LED numbers to read it in brighter areas, and the hold feature means the air around your cooking won’t affect the reading on display.

It also has a 3-4 second readout and can turn off by itself after 5 minutes, so you need not worry about having to charge it often, and the charge can last you for the duration of your cooking and even longer.

Pros

  • It Has a nice scale on the back, which gives you the recommended internal temperatures, so you have an excellent reference point to which you can determine how well done your cooking is.
  • The thermometer tip easily folds into the casing, so you don’t need to get a slide-on tip protector, and this device can easily fit into your pocket, so you can quickly go between your cooking areas.

Cons

  • The temperature reading can jump slightly after using it, but it settles down quickly, and you can simply calibrate it if you need to.
  • If there is a problem with the battery, it’s a good chance that you’ll have to take it apart, and that is if you know what battery to replace it with, so you might have to replace it altogether.

4. OXO Good Grips Thermometer

Here is a great instant read for those who want a sleek-looking device that fits the aesthetic of your home, it is made even better by having an accuracy of 0.9 degrees Fahrenheit and an easy-to-use interface.

There is also the nice feature of a rotating dial, so you don’t need to touch the dial after use, and it has a notch that is easy to access and clean if your probe gets any residue on it, and this is a guarantee however you cook, so is an excellent touch to have with this instant read.

Pros

  • The rotating dial means this can be used by both left and right-handed people, so you can have a comfortable grip on it whatever your preference.
  • It has a thermocouple tip, meaning you don’t have to insert the probe very far into your cooking to get a fast and accurate reading, so you no longer have to second-guess yourself.

Cons

  • It is operated using AAA batteries, so this might be an inconvenience to those who want a simple plug-in device and might drain them quicker if left on before to turns the display off.
  • For those who don’t have very good eyesight, the switch to change from Fahrenheit to Celsius is behind the device, and the hole to switch it is pretty small, which is a minor issue if you don’t need to use this feature.

5. Meater Plus Smart Meat Thermometer

This alternative is a way to have an instant read that you can monitor from your phone, and no wires mean more freedom to use it freely as long as you are in range.

The probe has two sensors that can monitor internal meat temperatures up to 212 degrees Fahrenheit and external temperatures up to 527 degrees simultaneously.

The app can give you alerts based on the temperature and the time, and you can set up custom alerts to make the process easier for you.

Pros

  • This instant read is great for those who want to achieve a specific temperature and finish and can adjust for any type of meat and use it in multiple dishes at the same time.
  • The sensor on the probe means you can use it in an oven and can alert you when it reaches the maximum temperature so you can remove it safely.

Cons

  • As good as this device is, it isn’t recommended for use in liquids as it is only waterproof up to a certain point, as the ambient end needs to remain untouched to give an accurate temperature reading.
  • Connecting the probe to your phone may not be a desirable task for some, as in some instances, you may have to close the app when taking the probe from the meat to get an accurate reading so that some adjusting may be needed.

Best Rated Instant Read Thermometers Buyers Guide

We have here a nice range to select from, and while you want ease of use and accuracy, there are some factors that you might overlook, and these could determine how successful you are in finding an instant read that is perfect for your cooking style.

You can find some of these considerations below, which could help you make a better-informed decision.

How Often You Use It?

There may be certain users who only need to use an instant-read for turkeys or other meats for events such as thanksgiving or a celebratory barbeque, and if this sounds like you, you don’t have to break the bank to find a reliable device.

The Inkbird instant read and the KT thermometer are the most reasonably priced in our view, as they do exactly what they describe without any extras or features that a seasoned professional is likely going to get more use out of.

LED Or Gauge Display?

Getting the most accurate reading is what you’re looking for, and if you use an instant-read, you want one that has a dial that you can read if you need to take a quick reading and is visible even in bright areas that may obscure the screen.

That is why the MEATER smart thermometer is a great choice as you get a simple view, and you can see how much time is remaining in your cooking process, and it can be made into any preset.

So this flexibility is possible without too much effort, and you’ll see the result from your cooked goods that are made exactly as you like them.

Upper-Temperature Rating

We’ve seen the upper limits for some of these instant reads to be somewhere around 572 degrees Fahrenheit, which is equivalent to 300 degrees Celsius, which is usually the higher limit to what standard grills can achieve.

So unless you are working in a professional cooking setting, you don’t really need to find an instant read with a higher limit.

But be aware that many of these thermometers aren’t recommended for use in an oven, though you might be able to use them here as long as the probe doesn’t sink too far into your cooking or doesn’t touch the sides of the dish to avoid an inaccurate reading.

Ease Of Cleaning

Many of these devices have simplicity in mind, but some with casing might be a bother to clean, as a lot of bits and grime can get stuck onto the device, which could run the risk of causing damage to the internal components.

Look for an instant read that doesn’t need to be completely dismantled to clean and can be wiped clean easily, but be sure not to submerge them in water, as USB types can get ruined by the opening if it’s not sealed correctly.

Frequently Asked Questions

Is An Instant Read The Same As A Meat Thermometer?

These are two different tools that give you a reading in different ways, as a meat thermometer is meant to be left inside of the meat while it cooks and will have a display on the end of the probe.

Whichever one you use, you can expect there to be about a degree above or below the accurate temperature, and you can calibrate each by using the water test, and should measure somewhere around 32 degrees Fahrenheit if at room temperature.

How Do I Effectively Use An Instant Read?

For the best results, if you use an instant-read, you want to insert the probe at least half an inch into the center of the thickest part of the food without touching any fat or bone, and you should get a reading within 5 seconds.

For thinner meats, it is best if you insert the probe into the side if you are using a gauge instant read, as you can get an accurate reading, which can take up to 20 seconds to register.

Be sure to periodically check the readings of your cooking at the beginning and the end of the process to ensure that it is cooked to the correct temperature.

Ground meats should be cooked to 160º F, poultry and fowl for 165º F, and fresh meats, steaks, roasts, and chops to 145º F.

Are Instant Reads Worth It?

In general, they can be, as while you may use a thermometer and the fork in the middle trick, this may not be an effective way to take a reading, as you might have some undercooked parts, especially for roasted meats that have layers.

Even though instant reads aren’t exactly instant, we think there is some value in using one of these as you can take a reading as you wish, as you want to avoid food poisoning caused by harmful bacteria.

This is especially the case for chicken, pork, beef, and turkey.

Even if you like your meat rare or medium rare, it has to have a minimum internal temperature of 125º F to 135ºF.

It should be left to stand for about 3 minutes before it is consumed to allow it to set accordingly and give you the consistency you expect.

Final Thoughts

While there is a lot for you to consider, you can make this easier by having a list of all the features you need for an instant-read, so as long as you keep your purchase inexpensive, it won’t seem like a waste of money to only use it occasionally.

When looking for one of these, especially with digital types, there are options to find some that have wire probes, so you can simply plug them into your device, which can beep to alarm you when your cooking has reached its optimal temperature.

This might not be applicable to every type of user, but it ensures that you have more places where you can use it, and not having to be stood in one spot can also be convenient for you, allowing you to get on with other preparations if you need to.

The post 5 Best Rated Instant Read Thermometers appeared first on Bro BBQ.

Best Charcoal Grills [Reviewed]

With charcoal grills, you have a lot of control over the cooking process, allowing you to create mouthwatering dishes every time.

Best Charcoal Grills [Reviewed]

To create several cooking zones, set the coals wherever you’d like in the grill and use as many as you’d like to reach the ideal temperature.

If you want a scorched surface, cook directly over the coals.

If you prefer a more delicate cooking method and smokey flavor, move the food to the cooler area.

However, keep an eye on the coals, and before putting your grill away, don’t forget to properly extinguish them.

However, there are so many charcoal grills out there, it can be overwhelming knowing which grill to go for.

We have done all the hard work for you. In this article, we have reviewed the best charcoal grills for you to choose from.

1. Original Kettle Premium 22-Inch Charcoal Grill

For both gas and charcoal barbecues, Weber is a well-known brand.

The ash collector is where the biggest distinction exists between this model and the Original Kettle.

Unlike the standard version, which had an exposed plate, this premium version has a closed container.

However, each kettle has a one-touch cleaning system that removes the ash from the bottom of the kettle.

Ash is collected beneath a grate where the coals are located.

The premium grill’s cooking grate features two corners that can be raised to add more coal without raising the entire thing.

We liked that the side handles have tool storage, and its lid has additional heat protection beneath the handle.

This charcoal grill is available in a range of sizes to fit any space.

This model comes with wheels, making it easy to transport when you wish to move it for storage purposes.

Pros

  • Design – This charcoal grill features a very classic design that a lot of customers like.
  • Ash Container – Weber has created an enclosed ash container for this grill. This makes cleaning the grill a lot easier overall.
  • Raised Cooking Grate – The grill features two corners on the grates that can be lifted to easily add more charcoal to your grill

Cons

  • Storage – Some customers have noted that storage space on the bottom shelf is smaller than they expected.

Also, available to purchase from Weber and Walmart.

2. Char-Griller E2827 Pro Deluxe Charcoal Grill

One of their top sellers is the Char-Griller Pro. It’s a sturdy barbecue with shelves for storage that is also portable.

More cooking space is provided by the warming rack that is part of the barrel design.

Cast iron cooking grates, a side vent, and a smoke stack allow for the best temperature control.

When purchased with the side fire box adapter, the Pro can further be utilized as a Texas-style smoker.

During testing, we were astonished by how simple it was to assemble this grill.

As the directions were very detailed and included helpful images, and all the parts, including the washers, were simple to identify.

Thus, anyone would be able to put this grill together.

Pros

  • Clear Instructions – You can easily put this grill together thanks to the detailed and clear instructions provided.
  • Portable – Wheels are added to the bottom of this grill for really easy portability.
  • Storage Space – This grill comes with storage space below and a side shelf.

Cons

  • Front Shelf – A lot of customers have noted that the front shelf isn’t very wide. Thus, it can’t hold many items.

Also, available to purchase from Char-Griller.

3. PK Grills Charcoal Grill And Smoker

Its straightforward design made assembling a breeze, and once put together, this grill feels quite strong.

The cooking chamber is composed of two solid pieces of aluminum that retain heat well and heat up rapidly and uniformly.

Four steam vents which provide the best airflow and temperature control are also included.

While cooking, the lid’s handle stays cool, and it swings open, so you can see what’s happening on the grates.

The rectangular design provides a generous amount of cooking space and enables fairly even coal distribution.

Both the side table and the unusual cup holder are useful.

The best thing about this grill is that you can use it anywhere you are and still receive high-quality results.

The rubbery wheels can handle a variety of surfaces.

Pros

  • Portable – You can easily move the charcoal grill and take it with you.
  • Sturdy – This grill is made from strong steel and aluminum.
  • Four Steam Vents – On this grill, you will notice it has four vents. This helps you to control the temperature of your grill really easily.

Cons

  • Ash Tray – There is no ashtray on this grill. Which can make cleaning up a bit more of a hassle.

Also, available to purchase from PK Grills.

4. Dyna-Glo Dual Zone Premium Charcoal Grill

This Dyna-Glo charcoal barbecue is a sizable and powerful grill for anyone to own.

It also has a retractable divider that can divide the cooking area in two if required.

The temperature of the high-gloss, porcelain enameled cast iron grates can be adjusted separately thanks to two movable charcoal trays.

The two front doors each provide access to the trays, allowing you to add additional coals when needed or move the trays around during cooking.

Under the charcoal trays, there is an ashtray that may be slid out for cleaning.

For additional temperature and smoke control, the smoke stack can also be changed.

Pros

  • Large – This is one of the larger charcoal grills on our list today. Thus, it is perfect when feeding larger gatherings.
  • Two Cooking Zones – The movable trays help you to create two cooking zones within the grill.
  • Front Doors – There are two front doors, which allow you quick access to the charcoal. So, you can quickly add more charcoal when needed.

Cons

  • Heavy – Due to being so large, this grill is quite heavy and takes up more space in your yard. Hence, it may be difficult to move around.

Also, available to purchase from Walmart and Dyna-Glo.

5. Oklahoma Joe’s Rambler Tabletop Charcoal Grill

This grill is ideal if you currently have a gas grill but occasionally want the flavor of charcoal.

It works well in cramped areas and for the occasional griller.

Oklahoma Joe’s Rambler has a compact but durable body and two big handles that make it simple to move about.

You may add more coal as necessary because it includes a tool for lifting the hot grates while cooking.

Additionally, it has a removable charcoal tray that is adjustable.

If you don’t want a large full sized grill but still want to enjoy charcoal grilled foods.

Then you should consider purchasing this charcoal grill.

It is compact, yet it still does a perfect job of searing and cooking your food.

Additionally, cleanup is simple after cooking as well.

Pros

  • Side Handles – The side handles make it easy to move this grill.
  • Lift Hot Grates – You are provided with a tool that allows you to easily move the hot grates while cooking. Thus, you can easily add more coal if needed.
  • Heavy Duty – Made from durable cast iron and alloy steel to create a durable and reliable grill.

Cons

  • Small – This grill is more suited for a small family. Thus, it wouldn’t be ideal if you have a large social gathering.

Also, available to purchase from Oklahoma Joe’s and U-buy.

Best Charcoal Grills Buyers Guide

When it comes to purchasing a charcoal grill, there are a couple of factors that you always need to consider.

In this guide, we have covered all the main points that you should always think about when you are looking at any charcoal grill.

That way, you know you are buying the best charcoal grill that will suit you and your needs.

Price

High-quality charcoal grills don’t have to be expensive, but there are numerous high-end versions with excellent design quality and alluring features.

The majority of us consider pricing to be an important factor in every purchase.

We would strongly suggest purchasing a charcoal barbecue with an ash removal mechanism, regardless of your budget.

You will be happy you spent the extra money for that convenience, which significantly lessens the pain in the ash, even though it costs a little more.

It’s a simple feature that helps you out a lot more in the long term and makes your grill more enjoyable to use.

Yet, it is important to always have a budget in mind.

Sometimes, particular features such as being portable to air vents can increase the price.

It’s about finding the right balance that meets your needs and price range.

Size

Many people who live in condos and apartments desire a tiny grill that will fit on their little patio.

However, they frequently run into charcoal usage restrictions and will probably need to look into alternative fuels.

Portable charcoal barbecues are well-liked and efficient for camping and tailgating.

Yet, if you desire a substantial family grill for the backyard, go big.

Generally, the best rule to follow is to allow at least a half inch between food when grilling.

You may want the ability to set up a two-zone configuration.

In order to do this, charcoal fuel is often piled or gathered on one side of the fire to produce a high direct cooking zone and a mild indirect zone on the other side.

A two-zone setup allows you the choice to softly roast or sear or sizzle at the same time.

Yet, it also allows you greater control over your cooking times.

Think about how many people you expect to be cooking for with your grill.

If you don’t think you will use it often and don’t have many mouths to feed, then go with a smaller model.

Although, if you are known to throw large social gatherings, a large charcoal grill may be more beneficial for you.

Lid

It is important to purchase a charcoal grill that comes with a lid.

Depending on your chosen cooking methods, you may need one.

For grilling or frying burgers you may not need a lid, but if you want to roast something using your grill then you will need a lid.

The lid will also lock in the heat from the coals and produce a smoker flavor.

Air Control And Construction

For safety reasons, gas grills must have adequate venting.

However, charcoal grills work best when they use sealed systems with sturdy, tight construction for efficient air control.

The charcoal fire uses air to burn, just like a gas fire does, and you can make use of the oxygen flow.

When finished, turn off the air dampers to completely extinguish the charcoal or lower the cooking temperature.

Open them up widely to saturate the fire with oxygen and produce a blazing, smoldering coal bed.

In actuality, charcoal grills also make pretty fantastic smokers due to the air control needed.

The vents on a charcoal grill can be closed to let very little air in and out.

As a result, smoke has plenty of opportunity to gently caress food and infuse it with its special, smokey flavor.

As a result, you should be looking for a grill that is made from solid construction. This could be steel, iron or aluminum.

The solid construction will keep the smoke and air within your grill while in use.

It is up to you how many air vents you want your grill to have.

However, the more vents there are, that means the greater control you have over the oxygen entering the grill.

Special Features

A lot of people like to look out for the special features when purchasing a charcoal grill.

This can include storage shelves, toolholders, and big handles.

An adjustable charcoal tray that makes it easier to regulate the temperature of the grates and how close the coals are to your food are very sought after features.

Even though they are frequently more expensive, little touches like this increase the enjoyment of grilling.

Also, storage shelves help to keep all your grilling equipment together.

It makes the process of grilling easier when you can have all your tools and food on hand for when it is needed.

That way, you don’t have to take your eyes off the grill.

With that being said, you don’t have to have a grill with these special features.

Yet, the features add a nice touch that makes grilling easier.

Frequently Asked Questions

What Happens To The Charcoal After You’ve Finished Grilling?

You should always dispose of the contents of your ashtray after grilling and when everything has cooled down.

This is immediately underneath the grill, and it usually has a handle for convenience.

Often, there isn’t much whole charcoal left for use, and most of it has become ash.

When you next want to use your grill, add new charcoal to use.

How Do You Clean A Charcoal Grill?

Clean your grill before each grilling session to make the grilling season simpler on yourself.

Coals should first be lit, and the grill should then heat up for around 10 minutes.

This ought to heat the grates sufficiently for any food that has crusted over to be easily removed using a grill brush.

After cleaning the grates, oil them by using a paper towel that has been dipped in oil.

Once you have finished cooking for the day, give the grill grates a thorough once-over with the grill brush.

However, don’t worry about cleaning them completely—a little layer of grease will help shield the grates from the environment and ward off rust.

Finally, remove the ashes from your grill and the grill covered when it’s not in use.

How Do You Keep A Charcoal Grill Going For Hours?

Instead of being scattered, charcoal should be stacked.

The fire retains the same height and temperature for a longer amount of time when the charcoal is stacked.

The charcoal then serves as a barrier and maintains the temperature.

The best place to stack your charcoal is in the center of the grill.

Is Gas Powdered Or Charcoal Grills Healthier?

Both gas and charcoal grills have advantages and disadvantages, but they are both essential to any outdoor kitchen.

Although charcoal grills create a lot more flavor than gas grills, the latter may be thought of as slightly healthier.

Gas can keep your food moist, but charcoal helps to give it a smokey flavor that comes exclusively from cooking with charcoal.

Hence, which grill you choose to use is entirely up to you.

Do You Need To Leave The Air Vents Open While Grilling?

On the bottom of most charcoal grills are vents. Sometimes, on the lid or the sides, some grills will have a vent.

You can get more air and a hotter fire by opening the vents widely.

Vents can also be partially closed to reduce airflow and to cool the flames.

When lighting the charcoal and assembling the grill, ensure the vents are fully open. Then close when needed.

The post Best Charcoal Grills [Reviewed] appeared first on Bro BBQ.

A Guide To Grilling Time And Temperatures: BBQ To Perfection

Nothing says that summer is here like a good summer’s day grill outside.

Whether you are cooking a thick steak, a juicy pork chop, some succulent chicken or even some steamy fish, some of the foods you throw on the grill can be expensive so knowing how long to cook each type of meat is absolutely crucial.

A Guide To Grilling Time and Temperatures

There is nothing worse than overcooking the centerpiece, so you need to make sure that whatever you have grilling away on a beautiful summer day is fully cooked before you serve them.

So whether you are using a gas or a charcoal grill make sure you know what you are doing and learn how to cook the perfect food to assure a successful outcome.

Gauging The Temperature

Luckily you do not need to go out and splash the cash on a fancy thermometer to indicate the temperature of your grill.

There is another tool that can do the job just as well and better yet it is absolutely free. The tool in question? Your hand.

Simply hover your hand a few inches above the grate and count how long it takes until you think that your skin is about to melt off and then you can determine if the fire is high, medium or low.

High

If you cannot manage any longer than three seconds then the temperature is high, this heat can be too hot to really cook anything.

If the food on the grill is a tuna steak or a thin pork chop that is going to be beneficial for a short and hot cook then this temperature is ideal for those on and off meats.

This temperature is best managed by not immediately throwing meat on, you should wait for the coals to heat up and then after five minutes scrub off the grill and restart to get the perfect hot grill.

Medium – High

If you are managing only five seconds with your hand over the grill then it is at a medium-high heat.

When the charcoal is lit and spread out it will begin losing heat after 10 minutes of heating. The heat should be down from a high to a medium high temperature.

This temperature is perfect for burgers, sliced vegetables and fish.

The sear is still in full effect but at a slightly lower temperature the food will have more time to cook properly and thoroughly.

The medium high range will sustain longer than at a high temperature but you are looking at 15 minutes max at full effect with the grill uncovered.

Medium

When hovering your hand over the grill if you can not go an y further than seven seconds then the grill is at a medium heat.

This middle of the road heat offers everything that it implies, a fire that burns low enough to gently cook whilst also still hot enough to brown the outsides nicely during any longer cooking times.

Medium heat is perfect for cooking, chicken, turkey and roasts. All these meats cook beautifully on a medium heat.

A well seasoned grill with the lid on can very easily remain in the medium range for 45-60 minutes, the perfect length of time for any longer cooking items of food.

A Guide To Grilling Time and Temperatures: BBQ to Perfection

Medium – Low

A medium low heat should see your hand being able to remain above the grill for 10 seconds before it becomes unbearable.

Once you do drop to around 300 fahrenheit you are then dealing with a fire that is not going to brown anything you place on it.

If you are working with direct grilling then it is time to replenish the coals and get back up to temperature.

The heat is going to fade rather quickly once reaching this temperature range, this range is only useful for keeping your food warm.

If you wish to cook further then add more coals and get the heat back up but once you are done with your cooking this temperature is perfect for keeping that spare food at eating temperature for reheating any that has gone cold.

Low

Finally we have the low temperature. You can easily hold your hand over this grill for 15 seconds, when you reach the lower temperatures that range from 225-250 degrees fahrenheit, you are no longer grilling food but barbecuing.

At this temperature the fat and connective tissue in ribs, pork shoulder and brisket will slowly melt away and transform even the toughest meats into moist and tender pieces of food.

You can transform a kettle grill into a smoker but it will require some work and constant vigilance, requiring charcoal changes on the hour and making sure you keep a constant eye on it to maintain the temperature.

If you are going to cook in the low range frequently, then you should really be using a smoker to cook the meat more efficiently than the grill at these low temperatures.

Adjusting The Heat

The range of temperatures between all of these levels is relatively small and can go from a searingly high temperature to a whimpering low in such a short period of time.

Of course this leads to frustration and creates extra work to keep the grill at the ideal temperature.

Charcoal grills have their place but have been dwarfed with the advent of gas grills where you can regulate the temperature much more easily and efficiently.

But like any fire all it takes to successfully run a charcoal grill is oxygen.

If you can control the amount of oxygen getting to the fire then a charcoal grill works just as well as a gas one.

This can be controlled easily via the vents, one on the bottom and one on the top. Adjusting these vents will regulate the airflow in and out of the grill.

Closing all vents will cut off the airflow and extinguish the fire which is handy for once you are done and plan to finally call it a day.

The post A Guide To Grilling Time And Temperatures: BBQ To Perfection appeared first on Bro BBQ.

How To Use A Charcoal Smoker In 11 Strategic Steps [With Pictures]

If you’re looking for a way to prepare and cook any meat you have, whilst getting a beautifully smoked texture to it at the same time, few are as thorough and effective as a charcoal smoker.

How To Use A Charcoal Smoker In 11 Strategic Steps [With Pictures]

With time, patience (and a lot of charcoal), they can create some of the most tender and succulent meat that you can think of!

That is, of course, if you know how to use one.

If you don’t, you may find that you’re unable to even get started with cooking whatever meat you have prepared. Or worse, you could end up burning your food to a crisp!

So, when it comes to preparing your smoke, it is useful to have a guide that you can easily follow and read before and during your start using your charcoal smoking tool.

This is where our guide comes in!

In this guide, we are going to show you how to use a charcoal smoker correctly, complete with pictures to help you visualize the process.

Creating The Smoke

So, before you do anything else with a charcoal smoker, you need to have that heat and smoke in the first place!

To get the cooking started, you should begin by heating your charcoal in a charcoal chimney.

Creating The Smoke

A charcoal chimney is a vessel that packs your charcoal tightly enough to start heating them and start smoking, without smothering any heat or flames that it may have once they begin cooking.

Follow the instruction of the chimney, and allow them to heat up for at least 15 minutes

Adding Hot Coal To The Smoker

Now, you can start to add hot charcoal to the charcoal smoker!

To do this, you need to add more unlit charcoal to one side of the bottom of the smoker, then start slowly pouring the hot coals onto the unlit ones.

Adding Hot Coal To The Smoker

If you’re looking for the best results when it comes to your meat, try and keep all the coal on one side of the smoker.

This will allow you to move your food to one side of the smoker where they will just receive heat and not extra smoke, especially once they are as smoked as you are looking for.

Enhancing The Smoke Of Your Smoker

So, with your charcoal now starting to get hot enough to start cooking with, you’re going to want to start adding a little extra smoke to the mix.

Enhancing The Smoke Of Your Smoker

On top of the hot charcoal, start adding wooden chunks to the glowing coal.

This will add a little extra smoky taste to your food whilst it is cooking, as hot coal tends to produce less smoke than burning would do.

Filling Your Smoker Water Pan

Whilst adding water to a cooking vessel that is full of fire might seem a little counterintuitive, this is a vital step.

Adding the water, which will slowly start to boil and steam will allow your food to cook evenly, as well as help regulate the temperature of the smoker.

Filling Your Smoker Water Pan

Make sure that the water pan is around three-quarters full, and place it either in the center or opposite where the meat will go under the grill.

Placing Food In Your Smoker

So, with all the prep work finally done, your charcoal smoker setup should start to look a little something like this:

Placing Food In Your Smoker

Now, you can start to place your food on the grill above the heat, smoke, and water.

If your model has more than one grate, place small food items and veggies on the top grate, as they will take less time to cook than the meat.

Set The Smoker Lid On

So, with the food prepped and ready to start cooking, it is time to place the lid on the smoker.

Set The Smoker Lid On

Make sure that the vent on the lid of your smoker is open.

That will create the airflow that allows the heat and smoke to pass through your food, and vent out of the vessel.

Maintaining Quality Smoke & Air Flow

So, now that the setup has been taken care of for your smoker, the main goal from this point going forward is to maintain that consistent heat and smoke whilst your food is cooking.

Make sure that the top AND bottom vents are now open, which will allow air to enter the chamber, heat up and smoke, then cook the food as it leaves.

Keep The Internal Temperature Steady

Similar to the last step, you’ve got to make sure that the internal temperature is stable, which you can partly manage by regulating how open the bottom vent to your smoker is.

Ideally, you want to keep the internal temperature at around 220 degrees Fahrenheit, and no higher than 250 degrees.

You can increase the temperature by adding coal or reducing it by cutting off oxygen by closing the vents slightly.

Keep Lid On Your Smoker

This is an important detail that will help keep your cooking times down.

Taking the lid off of your smoker will allow precious heat and smoke to escape, and it can take a while to build up again.

So, make sure that you do not take the lid off to check your meat more than once an hour or so.

Don’t worry about your meat. It will still be cooking inside!

Adding Extra Coal

This is a step that you should only follow if you think you’ll need extra heat.

Repeat the first step that we explained with the second batch of coal in the chimney, which you can add to your smoker as necessary.

Experimenting With Cooking Times

This final step will take some patience.

Different foods have different ideal cooking temperatures and times. Some will cook better at high heat and for less time (less than an hour), while others may be kept lower and for up to 4 hours.

Final Thoughts

So, there you have it! The perfect guide to charcoal smoking!

We hope you’ve found our guide helpful!

The post How To Use A Charcoal Smoker In 11 Strategic Steps [With Pictures] appeared first on Bro BBQ.

7 Best Indoor Electric Grills: Top Rated Reviews In 2020

We all love a good summer grill out. It’s an event that everyone looks forward to when it comes to the warmer times of the year.

8 Best Indoor Electric Grills: Top Rated Reviews In 2020

The cold of winter has long since passed, the sun is beaming down on your patio or backyard, and you want to make an occasion out of it.

Get some good meats, and invite friends and family over (clean the grill maybe after using it last summer). It’s a great time all around for everyone.

That is, however, until it rains, or the cold returns.

Then, you’re once again stuck inside, missing the occasion of grilling, and having to wait until the next warm spell returns.

However, just because the sunny summer weather has gone, doesn’t mean that grilling a meal has to!

Indoor electric grills are an amazing way to get that classic platter of grilled meat ready, when the weather outside isn’t up to it, whether it is raining, or during the winter even.

However, many indoor grill manufacturers also know this, meaning that there is a massive variety of indoor electric grills out there on the market, and with a massive range of quality control to boot.

Because of this, it can be quite difficult to sort the greats from the not-so-greats.

This is why we have created this guide for you!

Here, we will take a look at some of the best examples of indoor electric grills, and what exactly makes them stand out from other models.

We’ll also go into a little detail on some of the other features that you should be keeping an eye out for when it comes to looking for the right indoor grill for yourself.

Best Indoor Electric Grills

1. Elite Gourmet EMG-980B

Starting off this guide, we have an indoor grill that is perfect for cooking pretty much all the foods you could ever want to grill, the Elite Gourmet EMG-980B.

When the weather is trying to rain on your grilling parade, this is the perfect grilling tool to keep your party going!

With a large 14-inch grilling plate used in this product, you’ll still be able to cook up a massive amount, pleasing the whole crowd. Salmon, steaks, medallions, even potatoes, and vegetables. Nothing is off the table with this device.

Plus, with its non-stick surface to boot, you’ll be assured that none of the food is going to be torn apart from just lifting it off the hot plate, even without any oil!

Plus, this grill is also dishwasher safe, which takes the hassle out of cleaning it. It is a win-win for pretty much everyone!

So, if you are looking for an indoor grill that is easy to use, gives you plenty of space to cook with, and is just a generally great all-around indoor grill, this is an easy recommendation and seal of approval from us!

Pros

  • A large 14-inch plate gives you plenty of room to cook with.
  • The non-stick surface leaves food intact and unspoiled, as well as makes cleaning easier.
  • The grill plate is dishwasher safe to clean.
  • The heating element used keeps heat evenly and quickly spread, and allows run-off fat to drip away from your food.

Cons

  • Can create quite a large amount of smoke. Make sure you are using it in a well-ventilated space.

Also Available From: Walmart

2. Cuisinart Griddler Deluxe

If you were to ask us what option we would consider if money was no obstacle, we’d be pretty hard-pressed to think of a single option.

However, if you were to ask us what indoor grill we could get if money was not an obstacle, and that cooked your food quickly, then we would have to go with Cuisinart’s Deluxe Griddler model!

The plates of this closed model grill are perfect for getting your food not just cooked, but perfectly browned and crispy to just the right amount, and in next to no time at all!

Don’t think that you are just limited to the size of one plate, either.

When you open up the top plate of the grill, it functions just as well as an open grill system, letting you cook twice as much food as before!

Not only that, but each grill plate can have its temperature adjusted too, meaning that you can cook different items at different intensities.

If you find that having to take different items off the grill at different times annoys you, this feature will make grilling life so much easier for you!

So, if you’re looking for an indoor electric grill that can both cook tons of food, or cook your meal fast, and you have the cash, this product is one that we would highly recommend.

Pros

  • The closed grill model allows you to cook your food incredibly quickly, and in a nice color too.
  • The grill can also be opened up to allow for a two-plate system!
  • Plates can be easily removed from the grill and hand-washed.

Cons

  • The large size, whilst great for cooking lots of food, does also make it pretty heavy and cumbersome to move.

Also Available From: Walmart

3. Cuisinart Griddler FIVE

Of course, an excellent brand such as Cuisinart isn’t going to be content with just the one item under its belt.

This company sells a massive range of different indoor and outdoor grilling products.

Another one of these products, the Griddler FIVE, is one of their most popular, and for good reason!

The digital control system that this particular indoor grill uses gives you a level of temperature control for your food that few others can match, especially non-digital models.

Plus, like the Griddler deluxe before it, this model can also open up its closed grill to function as a second hot plate, allowing you to cook even more food than you otherwise would be able to, just like a classic grilling machine.

Plus, the hot plates that this model uses can also be removed from the grill to be cleaned, and are dishwasher safe too, just like the griddler deluxe.

So, if you love being able to precisely control how your food cooks, then this is a model that you are going to love!

Pros

  • The digital dial over the heat of this grill gives you unmatched control.
  • Hot plates can be removed for washing, and are dishwasher safe!
  • The closed grill can be opened up as a two-plate open system too!

Cons

  • The top grill plate tends to leak if you have been cooking greasy food.

Also Available From: Walmart

4. George Foreman 4-Serving Removable Plate Grill & Panini Press

George Foreman is a name that is virtually synonymous with grilling, as the products that this company makes, both indoors and out, are used across the country.

And it’s pretty easy to see why, especially with this, the 4-serving grill and panini press, it is not hard to see why!

This model of panini press is perfect for grilling both sides of the food, as any good panini press should be, making it an ideal press to use for not just sandwiches, but for plenty of other foods too, such as quesadillas, burgers, and steaks as well.

What’s more, the grill plates are super heat conductive, meaning that they can cook food up to 30% faster than other similar-sized grills.

Plus, the plates can be easily removed for washing too!

When it comes to a pint-sized panini press that can contend with the best indoor grills, this is one to look out for!

Pros

  • This indoor grill is compact and easy to transport.
  • Hot plates can cook foods noticeably faster than their competitors.
  • Plates can be removed for easy cleaning

Cons

  • This indoor grill is relatively small when compared to other models.

Also Available From: Walmart

5. Hamilton Beach Searing Grill

Of course, these sandwich press indoor grills are fine, but a lot of people who love grilling want something that feels just like cooking a full-sized grill outside, rather than simply pressing down on a press and calling it a day.

If you want an authentic grilling experience transplanted from the outdoor world to inside your home, then you need to take a look at the Hamilton Beach searing Grill!

The lid of this particular model doesn’t press down on the food inside when closed, but instead encloses the food, just as you might find in a classic grill.

Plus, there’s even a window for you to view the progress of your food with.

If you want an indoor electric grill that can be used just as well as the outdoor variety, this Hamilton Beach grill will serve you very nicely.

Pros

  • The grill closes on food just like an outdoor grill would.
  • Can cook food in a remarkably quick time.
  • Contains the smells of your food, adding to the authentic experience.
  • The grilling plate can also be removed and cleaned in the dishwasher.

Cons

  • Some customers state that the lack of outdoor smoky flavor isn’t present in tin food cooked by this product.

Also Available From: Walmart

6. George Foreman Contact Smokeless Ready Grill

Once again, we turn to George Foreman for their excellent range of different grill products.

This particular one, the Contact smokeless ready grill, is a perfect buy for customers who want to be able to grill food indoors while also being constrained by a tight budget.

For one thing, it can cook food in next to no time at all, thanks to its ability to seal tight while food is being grilled inside.

This tight closing mechanism also means that it is perfect for storage, as you can rest assured that the parts won’t jostle around whilst being placed in the back of a cupboard. It can even be stored upright!

Plus, this grill allows excess grease and fat to run off from the food, leaving you with food that feels less greasy to eat, and perhaps a little healthier too.

If you are short on space and money for your grill, this is an excellent option to pick.

Pros

  • Very affordable option on a budget.
  • A tight seal both helps food cook faster, and makes storing in a small space easier.
  • A very easy grill to clean.

Cons

  • This is a small grill.

Also Available From: Walmart

7. Ninja Foodi 5-In-1 Indoor Electric Grill

Grilling is all well and good, but having a product that can only grill does take up a lot of space.

Especially in a small living space or kitchen, you want an appliance that can fill more than 1 need.
Fortunately, this particular indoor grill does.

The Ninja Foodi 5-in-1 grill, as the name suggests, isn’t just a grill. It can also function as an air fryer, and a baking pot too.

It can even roast or dehydrate the food you are cooking too!

This ends up saving you precious countertop space and reduces the overall cost of buying multiple appliances.

If you have the money for the upfront cost of this rather hefty device, you may be saving yourself a pretty penny in the long run!

Pros

  • Closing the lid seals in classic smoke flavors into your food, just like an outdoor grill would.
  • This appliance can function as a grill, air fryer, roaster, baking pot, as well as a dehydrator!
  • The compact size means that you’ll be saving space with this device too.

Cons

  • The small size means that it has a relatively small cooking load.

Also Available From: Bed Bath & Beyond

Buyer’s Guide

Of course, we haven’t been able to cover every single electric indoor grill product on the market.

If none of the items we have listed here seem to be right for you, and you decide that you need to continue searching, try to keep in mind the following factors and features of the indoor electric grills that you are looking for.

Open Vs. Contact Grill

This is likely one of the main aspects that you will notice when looking to purchase an indoor electric grill.

Most products that you will find in this market will come in two forms: An open grill and a contact grill.

Contact grills will usually use two heated plates that press together to get their grilling effect on the food they cook, without needing to flip their food.

Open grills will usually have a single heated plated, whilst there will be a lid that doesn’t make contact with the food while it is closed.

This type of indoor model is virtually the same method that most outdoor grills use.

Think carefully when choosing which product to buy, as they can have quite different results.

Contact grills will usually coke food noticeably faster than open grills, but will often also lack that smoky grill taste or smell that you will get from an outdoor grill.

The open grill meanwhile will have a very similar flavor and smell to outdoor grills, as they cook food the same way, but will usually take a little longer.

Size

This is a factor that many indoor grills struggle with, as most will have a smaller cooking surface than most outdoor models.

Generally speaking, you want a cooking space of at least 80 square inches, for cooking for yourself and one or two other people.

If you plan on cooking for larger groups, you’re going to need to scale this size up as well.

A square inch space of around 150 inches can cook food for around 5 people, but not much more.

Versatility

Many grill designs today will come with many other extra features, such as interchangeable grill plates for different patterns, and even different foods, such as waffles!

Some grills can even serve as roasting or air-frying machines too, although these tend to increase the price of the product a little.

Control/Adjustability

Whilst a good grill should be able to get very hot (around 500 degrees Fahrenheit is the optimum for burgers), you also want to be able to adjust that temperature for cooking different foods, such as fish or vegetables.

Generally speaking, digital models will have greater temperature control than analog types.

Frequently Asked Questions

Do Indoor Grills Produce Smoke?

Generally speaking, indoor grills will not produce much if any smoke when being used, certainly not as much as outdoor grills create.

However, if you are using ingredients that you think could produce smoke, make sure that you are in a well-ventilated room.

Are Electric Grills Better for Indoor Use Than Gas Grills?

Absolutely!

Considering that charcoal grills will produce more smoke than electric ones, there is a reason that electric grills are popular with people living in apartments.

Can I Use Metal Implements With An Electric Grill?

Make sure that you do not scrape the non-stick surface off with your cooking tools, and you should be fine.

Final Thoughts

As you can see, there are plenty of different options that are available to you when it comes to indoor electric grills.

Hopefully, this guide has helped narrow your choices down!

The post 7 Best Indoor Electric Grills: Top Rated Reviews In 2020 appeared first on Bro BBQ.

6 Best Rated Remote Wireless Meat Thermometers In 2020

Who doesn’t love a good grill out? The weather is almost always stunning, the company is (usually) phenomenal, and the food pretty much always tastes great!

6 Best Rated Remote Wireless Meat Thermometers In 2020

Well, almost always.

The fact is, sometimes food items that we prepare for a big meal can be a little tricky to tell when they’re fully cooked and safe to eat.

This is especially the case if the food in question is wrapped in some material that helps it cook faster, but makes it impossible to tell just by looking if the food is thorough.

The same is true for a particularly large piece of food that may look cooked outside, but aren’t even close to being prepared on the inside.

You don’t want to accidentally serve the guests at your gathering uncooked food that could cause them to become ill.

So, that means finding another way of measuring if food is thoroughly cooked.

And the best way to tell if the entire food item is cooked is to measure the internal temperature of your food. And the best way to do that is to measure it with a thermal thermometer!

This guide will help you find the best wireless thermometers that you can find on the market again, as well as what makes them stand out from other models.

We’ll also cover a few things that you should take into account when looking for a thermal thermometer for yourself if any of the following aren’t to your liking.

Best Rated Remote Wireless Meat Thermometers

1. Meater Plus With Bluetooth Repeater

Starting off our list with a favorite amongst chefs and grill users across the country, we have the Meater Plus.

Funny play on words aside, this is a new entry into the wireless meat thermometer market, as funny as a phrase, that is.

This also means that it is kitted out with some state-of-the-art technology that every person you have cooked or used a grill.

For one thing, many people who have used a ‘wireless’ thermometer before will notice that this thermometer does not have any wires used in it.

That may sound obvious at first, but when you consider that most products that claim to be ‘wireless’ thermometers do use at least a little wire to detect temperature underneath the surface of a piece of meat, that’s pretty impressive!

This thermometer gets around this issue by using two thermometers, one to check the ambient temperature, and one to check the outside.

This gives you some of the most thorough information you could ask for from a thermometer, as well as how long exactly it should be until the inside temperature is at a reasonable temperature to say that it is cooked.

And how do you read that information, exactly?

Why, through the app, of course!

This thermometer gives you regular info and temperatures straight to your phone, meaning that you don’t even have to be close by to get the final reading on your thermometer. It truly is wireless!

If you take nothing else away from this guide, we would recommend this wireless thermometer to anyone!

Pros

  • Calculate the time until the meat has completed cooking for you!
  • No wires are to be found on this thermometer!
  • Has a range of presets for many foods. You won’t find the wrong cooking time here!

Cons

  • You are limited by a short range for connecting your phone and the thermometer, just under 30 feet of reach

Also Available From: Walmart

2. ThermoPro TP20 Bluetooth Digital Thermometer

If you are somewhat put off by new names in this industry and want a brand name that you know you can rely on, then ThermoPro is a great option for pretty much any situation.

Don’t believe us? Just take a look at their TP20 Bluetooth thermometer, and see their mark of quality for yourself!

What blows us away with this particular model is the range that the Bluetooth feature works from.

With up to 300 feet of working distance, this is a thermometer that can be read from the other side of the garden, patio, field, or wherever you are grilling!

It’s not like you would miss if you did go out of range, thanks to the in-built alarm for when you do (somehow) move too far away!

This model uses a two-prong system for gauging the internal temperature of your chops and steaks.

These prongs send signals to the base unit and remote, which means that you don’t have to worry about downloading and connecting with an app that the thermometer needs to be used.

Everything you need for measuring temperature is in this product., with no extras necessary.

Plus, these thermometers can be set up to measure and time up to nine different kinds of meat, up to USDA standards no less!

The transmitters for each prong are labeled, too, so confusing which prong is suited for which meat or food product won’t be nearly as much of an issue as it would be in other thermometers.

If reliability is what you are looking for, the ThermoPro TP20 is an easy recommendation from us!

Pros

  • Dual prongs come with a range of programming options.
  • The wireless range reaches as far as 300 feet. Very impressive for a single product!
  • The setup is simple, meaning there is less chance for something to malfunction.

Cons

  • Whilst the probes are labeled, them not being color-coded does still make identifying them a momentary issue.
  • No control lock can be found on this product.

Also Available From: ThermoPro

3. Soraken Wireless Meat Thermometer

As we’ve established with some of the products we have discussed so far, distance and effective probes are critical to a good meat thermometer design.

However, there is more than one way to have your thermometer prongs set up.

As we see in the Soraken Wireless, a four-prong model can be just as good as a two-prong one!

One of the main features that users love about the Soraken meat thermometer is that the transmitter has a magnet built into it.

This is a great feature for securing it to the exterior of a grill or oven, where you know you’ll be able to find it later.

It’s a small detail, but think about how many times you’ve spent at least 5 minutes panicky searching for your thermometer! This is a simple, yet effective time saver, for sure!

What’s more, this thermometer comes with a four-probe system as standard, meaning that you have a massive variety of different meats and foods that you can gauge, measure, and time with this model.

There are even ports for two extra probes to be attached to it, giving you even greater versatility.

What’s more, the app that this thermometer comes with connects to your phone via Bluetooth and allows you to adjust 11 different settings, all from your smartphone.

If you’re looking for a product that you can rely on to cover whatever you are cooking, make sure you give Soraken a look with this thermometer model!

Pros

  • A 4-probe system is great for monitoring different foods.
  • Also allows for an extra two probes to be added.
  • The phone app gives you programmable functions and easy access to cooking times and temperatures without needing to google them.
  • Magnet in transmitter means securing it is easy.

Cons

  • The range on this thermometer is somewhat poor, especially indoors.

Also Available From: Meftala

4. NutriChef Smart Wireless Grill Thermometer

Of course, not everyone can afford the latest and greatest tech when it comes to a wireless thermometer.

But that shouldn’t mean that you get to miss out on a decent quality piece of equipment either.

If this sounds like your predicament, then you should probably consider taking a look at Nutrichef’s Smart Wireless Grill.

This is perfect for those people who love grilling but have to stay within their budget for extra bells and whistles.

However, don’t think that just because this product is a little cheaper than others, means that it can’t handle the pressure and heat of keeping track of a good grill out.

In fact, with this product being recorded at withstanding up to 716 degrees, we would say that the exact opposite is true!

Plus, the temperature read-outs that you’ll get from this thermometer are pretty accurate too, so you aren’t missing out on getting a sensitive tool, either!

The only real issue that we could determine was that its range wasn’t quite as massive as the other, more expensive, branded items that we have looked at here today.

But with it still reaching 100 feet indoors, and up to 200 feet outside, this is still some pretty good range, especially for a budget option.

If your coffers are a little dry right now, this thermometer should be your go-to option.

Pros

  • Two probe system is a reliable option for your grill out.
  • The design is nice and compact, not cumbersome at all!
  • A beep will notify you when your meat is cooked.

Cons

  • The beeping may get on your nerves.
  • It does still use wires to register the probes, which may wear over time.

Also Available From: Wayfair

5. Weber iGrill 2, Bluetooth Wireless Thermometer With 4 Probes

If you want to keep your grill-outs simple, then you’re probably going to want something that is equally straightforward with its readouts.

If that’s the case, then you need to check out the iGrill 2 by Weber.

Outside of the probes and thermometer display itself, the only thing you need is your smartphone and Bluetooth, and you’ll be good to start using.

The range on this thermometer is also pretty decent, covering at least 150 feet of distance between the thermometer and the probe.

However, the in-built sensor of the thermometer will beef to let you when you are outside of detection range, meaning that you’ll quickly notice if you need to be closer.

Not only that, but multiple iGrills can be registered to a single smartphone. This means that, at those bigger grill-outs, you’ll be able to track multiple different cooking items.

If you just want a thermometer that can read your grilling meat, this is the option that you should go for.

Pros

  • With it using a smartphone, there’s no need to worry about a separate wireless transmitter.
  • Two meat probe system is simple to use and learn from your smartphone

Cons

  • Whilst 4 probes can be used with this model, it only comes with two as standard.
  • The range is adequate for smaller grill-outs, but is not amazing when compared to the other products we have looked at.
  • The display system isn’t waterproof.

Also Available From: Weber

6. Cadence ENZOO Wireless Meat Thermometer

There is a lot of debate between people who use phone-controlled or remote-controlled thermometers for their meat.

Those in the former camp will often tote the easy access and usability that their products have, simply being in your pocket.

The latter, however, prefer the simplicity of remote-controlled thermometers, such as this excellent example in the Cadence ENZOO model.

Like with the ThermoPro model that we discussed in the last section, one of the main selling points of this particular model is the range that it can function.

And it blows ThermoPro’s efforts out of the water in that regard, with this model reaching upwards of 500 feet in range.

There’s practically nowhere where you won’t be able to get a reading with this thermometer on your meat, outside just straight-up leaving the grill out!

If the distance is your main aim, this is the product to go for!

Pros

  • Excellent range, with up to 500 feet!
  • The translator system does not require a smartphone to be used.
  • For probe, the system is great for a wide range of foods.

Cons

  • Button functionality in the transmitter is a little more clunky than using a smartphone app.

Also Available From: Largemart

Buyer’s Guide

As you can see, there is quite a variety when it comes to finding a thermometer that is perfect for your cooking needs.

However, these are by no means the only models out there for a good wireless thermometer.

If you still feel that you need to keep searching for the right model, then keep these features in mind whilst you are searching for the right product for you.

Range

For a wireless thermometer model, this is one of the main draws that these products will have: Being able to keep track of your food while it is still cooking on the grill, whilst you quickly handle something a little further away from the open flame or heat source.

Generally speaking, 100 feet is the absolute lowest range that a decent wireless thermometer should reach, with many models going much further than 200 feet.

However, it should be noted that physical objects, such as walls, ceilings, and buildings, can reduce this effective range.

Number Of Probes/Prongs

Having more probes that can be placed inside your grilling meat means that you can monitor the temperatures of many types of meat, as well as different varieties.

For this reason, four-probe systems are very popular.

However, it can be easy to mix up which meat probes are intended for a specific type of meat, which can lead to inaccurate readings.

For this reason, many people will opt for the two-prong system.

Think carefully about how much meat you plan on cooking regularly to decide on a specific type.

Displayed Information

What information exactly are you looking for your thermometers to show you? Internal or external temperature? Remaining cooking time?

If you want to do all this without opening the lid of your grill, then wireless thermometers are absolutely the way to go for you.

Phone/App Connectivity

Keep in mind that many models of wireless thermometers these days will use a smartphone app to send the relevant information to you, rather than a transmitter with a display.

Whilst this can mean monitoring fewer items, some people do prefer a simple system of relying on just the probes and standard display.

Frequently Asked Questions

How Exactly Do Wireless Thermometers Work?

Like a typical meat thermometer, a wireless thermometer uses some type of system to register the internal temperature of a cooking piece of meat.

This is usually done by sticking a probe into the center, although some models will use infrared.

The way that wireless thermometers are different is that the probes will instead transmit that data to a distant transmitter or smartphone device, rather than being physically attached to the probe.

Are These Thermometers Accurate?

Wireless meat thermometers are usually accurate, but they do also need calibrating a few times a year, for them to stay as accurate as possible.

Final Thoughts

So, there you have it!

Whilst finding one of these items can be a hassle, we promise that they are a convenience that you will not regret purchasing.

The post 6 Best Rated Remote Wireless Meat Thermometers In 2020 appeared first on Bro BBQ.

Types Of Beef Cuts (And The BEST Ways To Prepare Them)

Figuring out the different cuts of beef that come from a cow and which method is best to cook them, it can be daunting for even the most experienced of chefs.

With their being so many different cuts and cooking styles, there are many options for you to choose from depending on what you would want.

Types Of Beef Cuts (And The BEST Ways To Prepare Them)

Some cuts of beef can cook perfectly on the grill whilst others are best when slow cooked for hours.

In this article, I will be going over the different cuts of beef and how they are best cooked to make sure you get that perfectly tender meat every time.

Chuck

The chuck or as it is more commonly known as the seven bone steak is located by the shoulder and neck of the cow.

This slice of meat is some of the more economical cuts of beef such as the chuck roast, chuck arm roast and the flat iron steak.

So how do you cook the chuck?

A cut of chuck contains a large amount of connective tissue which does contain collagen and makes it rather tough, but when cooked right it is packed full of flavor.

Chuck cuts of beef are best cooked slowly over time in a crock pot or by braising them.

Shank

Shank

The shank is the leg of the cow and is one of the toughest cuts of beef.

The leg muscle is used frequently so the large muscle is a very tough sinewy cut. It is one of the least popular cuts of meat but is also one of the cheapest.

A cut of shank does not yield many good cuts of meat, just the shank or the shank cross are clean cuts of meat.

You will also find shank in very low ratios of ground beef. The shank like the chuck is best cooked over a long period of time, but also in a liquid. This cut is best in a soup, stew or to make beef stock.

Brisket

Brisket is cut from the breast and lower portion of the cow. It also much like the shank has a large amount of connective tissue and will be tough if not cooked correctly.

The brisket comes in two popular cuts of meat, a brisket flat cut and the brisket point cut.

Brisket is a very popular meat for BBQ fanatics everywhere and as you might have guessed it is best cooked smoked or braised.

Ribs

The rib includes some of the best cuts of a cow, it is best known for its tenderness, juiciness, flavor and superb marbling.

The rib cut refers to ribs six through to twelve on the cow. The rib includes several of the finest cuts on a cow and includes the prime rib, short rib, rib eye steak and rib eye roasts.

Rib cuts are best cooked over a dry heat and for a long period of time. American BBQ’ers prefer to grill or smoke these tender cuts of beef.

Short Plate

The short plate can be found on the front belly of the cow below the ribs. It also contains a lot of cartilage and is a cut of meat that is rather fatty and tough.

It contains a few different cuts including the short ribs, hangar steak, and the skirt steak.

This cut is best known for being used in the disk carne asada, and is best braised because of the toughness in the meat.

Flank

Flank

The flank is a long flat cut of meat from the abdominal muscles of the cow. It is perhaps the toughest cut of meat.

The flank is typically cut into flap steaks or flank steaks. You will see flank being used primarily in Asian and Mexican cuisine in stir frys and fajita beef. It is also used in London broils.

Due to its excessive toughness, flank cuts are best cooked with moist methods such as braising.

Loin

The loin is cut from the back of the cow and typically a portion of the hindquarter directly behind the ribs. It is one of the most tender and sought after cuts of beef.

The loin is best known for producing the cut filet mignon, porterhouse steak and the T-bone steak.

However the loin also contains the KC strip, tenderloin roast, and the shell steak. Loin cuts are best cooked over dry heat such as on a grill.

Sirloin

Sirloin is also cut from the back of the cow, just past the loin. Although it is not as tender as a loin cut the sirloin remains a very popular cut of beef.

The sirloin cut contains the top sirloin, bottom sirloin and the center cut sirloin steaks. As well as the tri-tip steak, filet of sirloin and the ball tip roast.

Sirloin is best cooked by grilling but it can also be broiled, sauteed or even pan fried.

Round / Rump

The round also known as the rump is a lean cut of meat with little to no fat. It is located at the back of the cow and near the right leg.

Much like the shank the round is a tough cut of meat due to the cows obviously using its legs a lot.

Despite the round’s toughness it does produce a few popular cuts of meat.

The more common cuts are rump steak, top round steak, bottom round steak, eye of round steak, and the sirloin tip center roast.

Round cuts are best braised or roasted with low levels of moisture.

Final Thoughts

So there you have it, nine of the best cuts of beef money can buy, they all have a wide range of tastes and methods of preparation.

No two cuts of meat are the same so make sure you know which type of meat you are going to be buying and how you would cook it.

Beef should always be firm, even colored and mild smelling so if it meets the criteria then tuck in.

The post Types Of Beef Cuts (And The BEST Ways To Prepare Them) appeared first on Bro BBQ.

❌