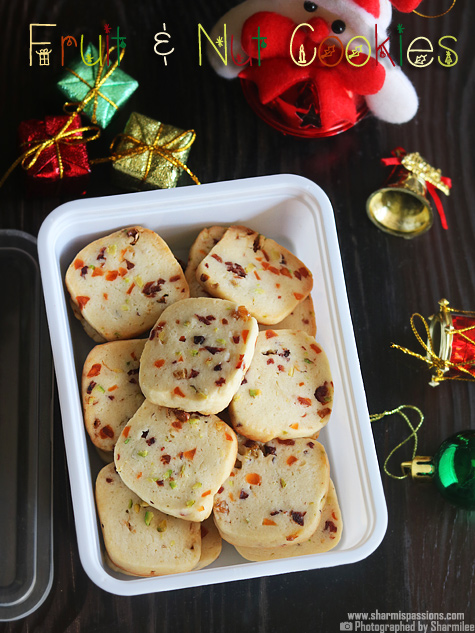
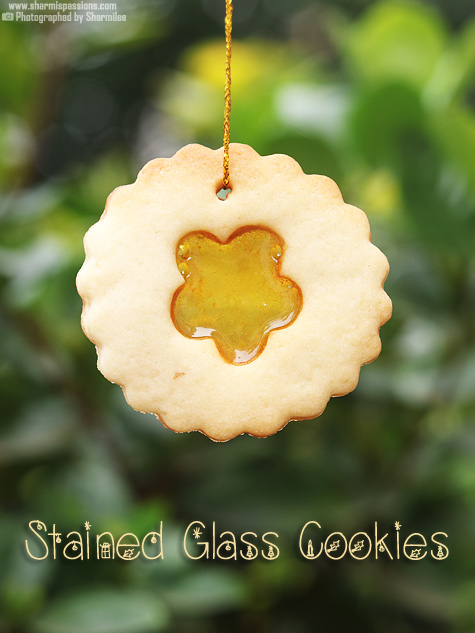
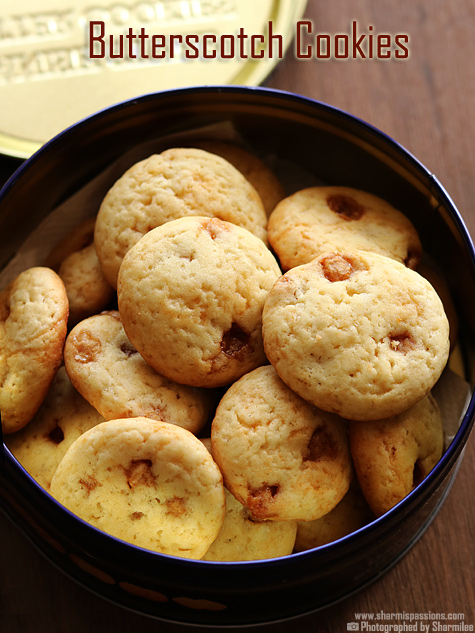
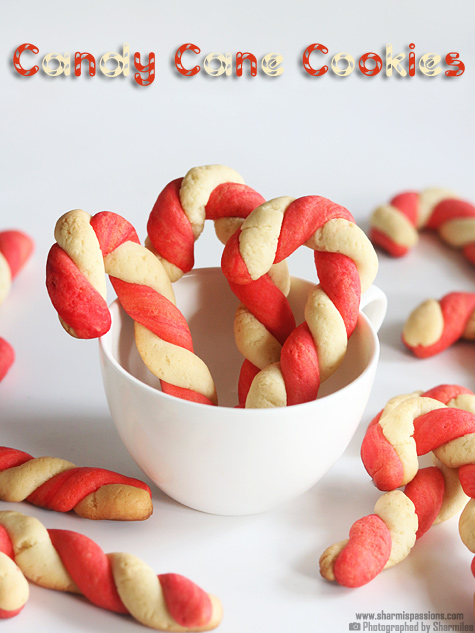
Candy Cane Cookies Recipe
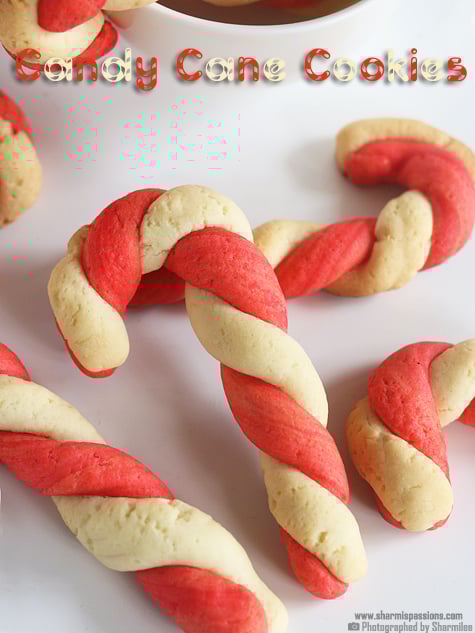
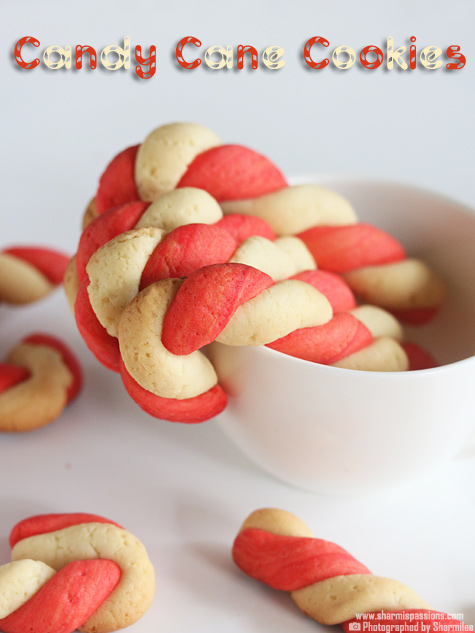
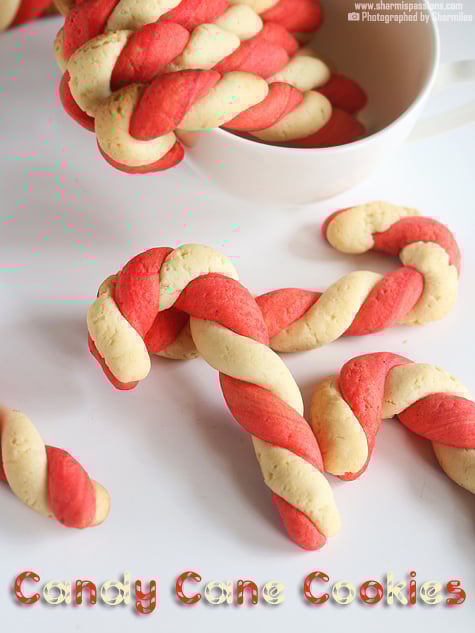
Candy Cane Cookies are cookies that are a colorful treat especially for Christmas season. Candy Cane Cookies hone our baking skills and makes us move from novice to an expert in baking. These have a soft with a light crisp texture. The twisted red-white shape looks really cute on a plate. These taste mildly sweet and buttery, so it goes well with milk or tea. Kids get really excited seeing the candy cane shape and the bright colors.
This recipe is usually made winter holiday, but you can make it any time for little mood lift. The dough is easy to work with. Twisting the two colors together feels relaxing once you get hang of it. It's a good recipe to practice shaping cookies if you are still learning.
[feast_advanced_jump_to]About Candy Cane Cookies
Candy Cane Cookies are festive cookies made with butter sugar dough. One half of the dough is colored to make stripes. The texture is soft inside with gentle crunch at the edges. The mild vanilla flavor mixes well with butter. The cookies are shaped into canes by rolling two colored ropes and twisting them. This makes pretty swirl.
You can change the color using gel or powdered colors. Some people like adding almond essence or peppermint for different taste. The plain vanilla version is simple and nice for everyday snacks. The red twist makes them look festive without extra work. It goes good with coffee, milk, or hot chocolate
The dough is flexible. You can refrigerate it to make shaping easier. If the ropes feel very soft, chilling helps. You can make mini or longer canes depending how you roll the dough. The same base dough can be used for sugar cookies too. This is a must try recipe and you will enjoy making it again and again.
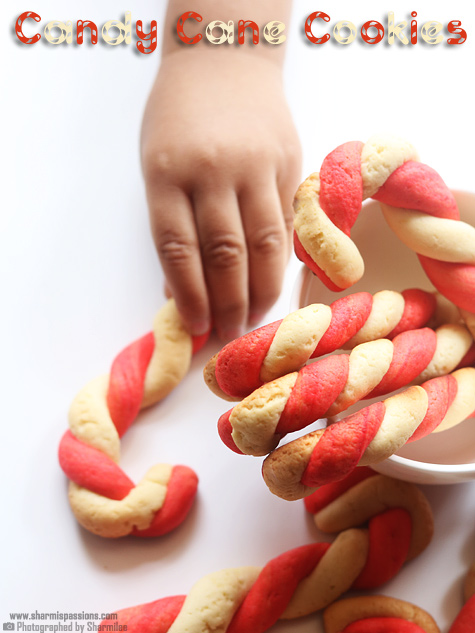
I usually bake these in small batches. The cookies spread a bit and gets even color when baked slowly. It's a perfect for making on parties and get-togethers. It was fun shaping these cookies, I loved to do it and mittu was awed seeing these cookies.She insisted to take it to school for her snacks.
I asked amma to shoot a video using my mobile just to show how to shape the candy cane cookies, hope its useful do check it out.
Video
Candy Cane Cookies Ingredients
- All purpose flour / maida - I just used this as base, it gives smooth texture to cookies. You can mix little wheat flour also but maida keeps them soft.
- Chilled butter - I use this for richness and it helps dough hold shape. You can use salted butter also but reduce small pinch of salt.
- Powdered sugar - I added this for sweetness as it mixes easily with butter. You can use cane sugar but powdered sugar makes dough smoother.
- Egg - I used this to bind and make cookies soft inside. You can replace with milk but texture change little.
- Vanilla essence - I have used this for flavor and smell. You can add peppermint essence also if want festive touch.
- Baking powder - I have added as it gives softness to the cookies. It helps bake evenly.
- Red food color - I have added liquid red color to get bright the stripe. Gel color also works for stronger shade.
Why This Recipe Works
- It is easy to shape and uses simple pantry ingredients.
- This recipe gives soft cookies that stay light and buttery.
- You can color and shape the dough in many ways based on your liking.
- It is beginner-friendly and helps improve shaping skills.
- The cookies look festive and makes a nice gift.
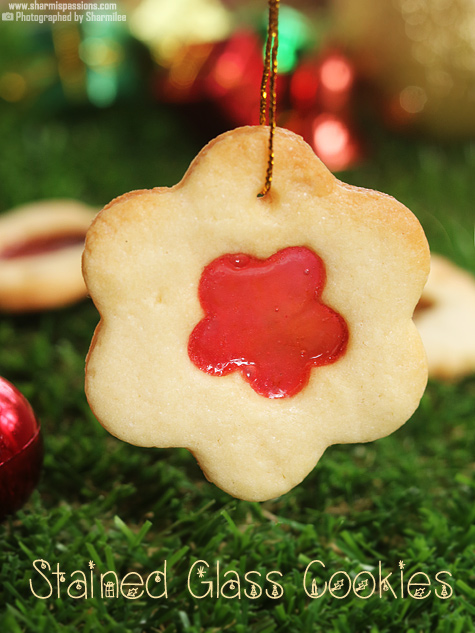
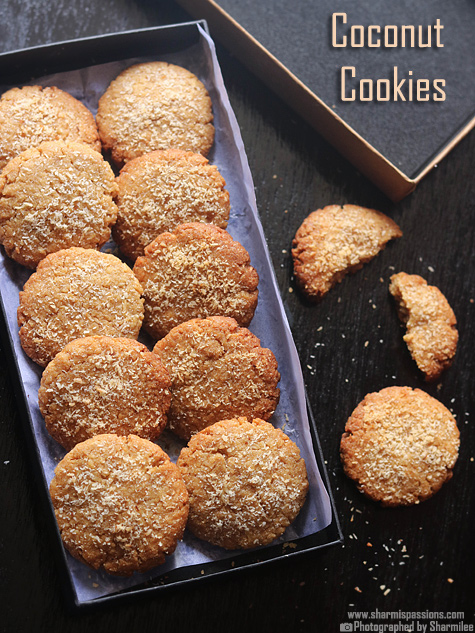
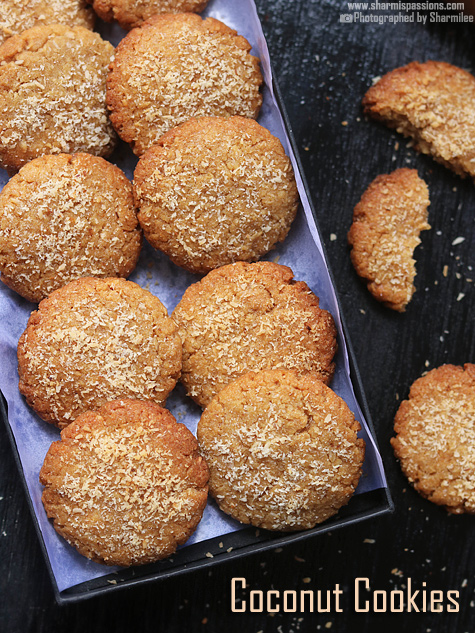
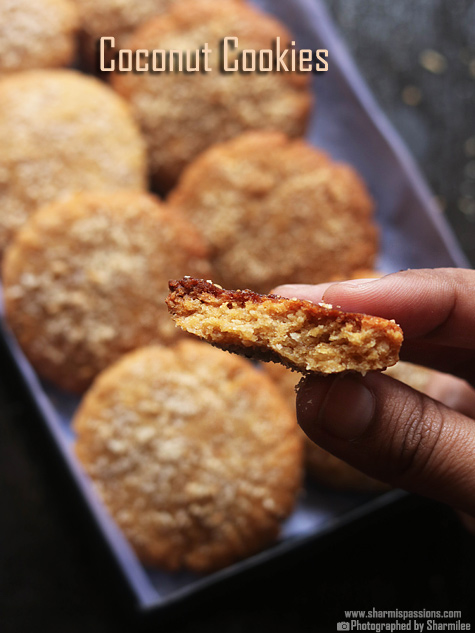
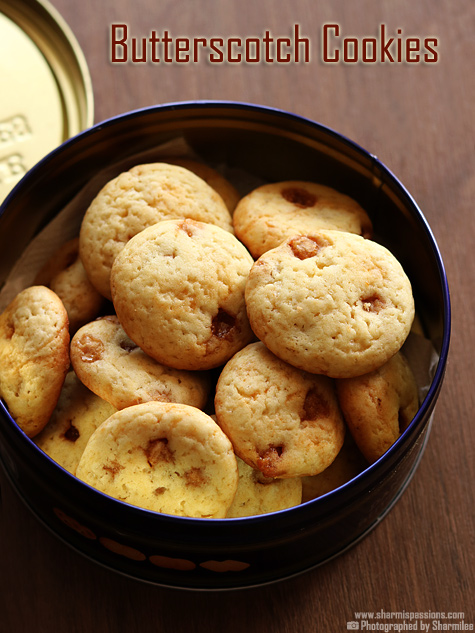
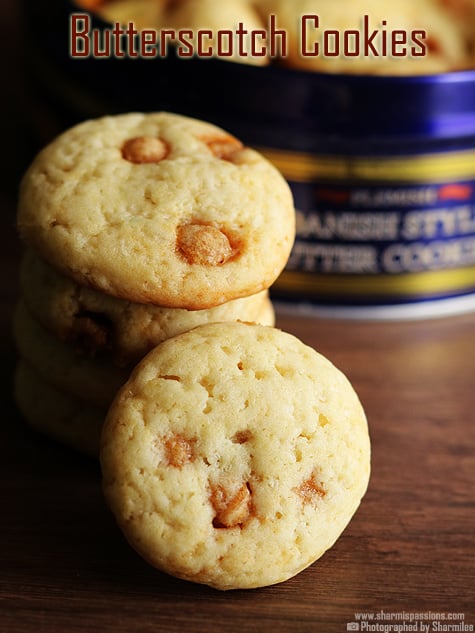
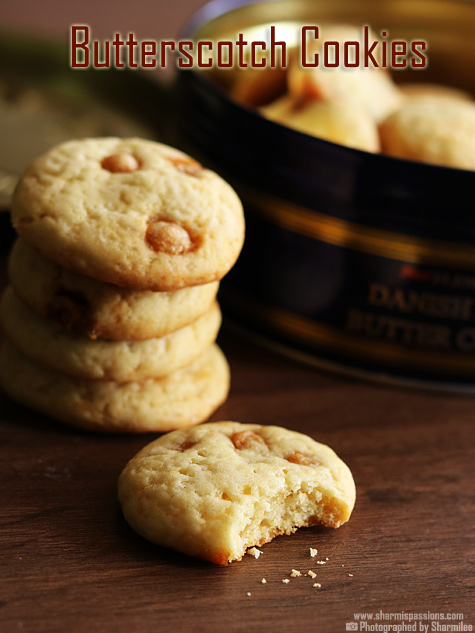
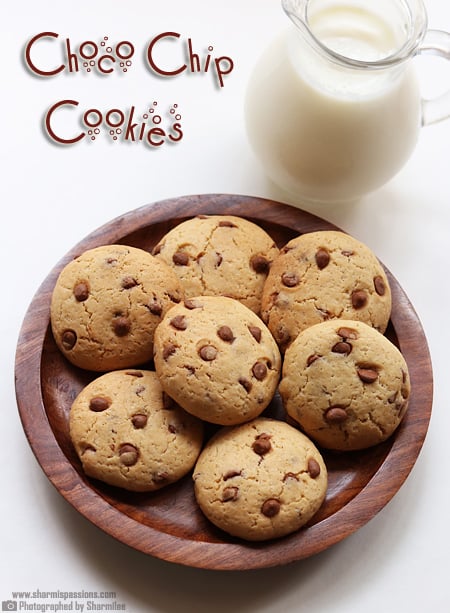
Similar Recipes
How to make Candy Cane Cookies Step by Step
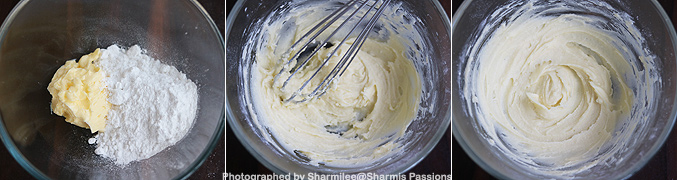
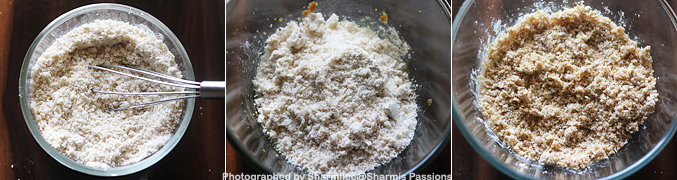
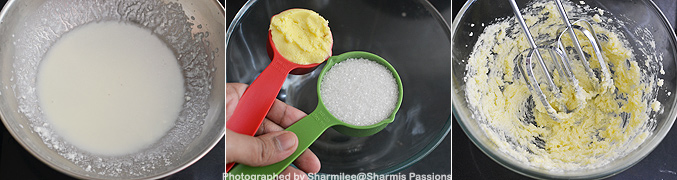
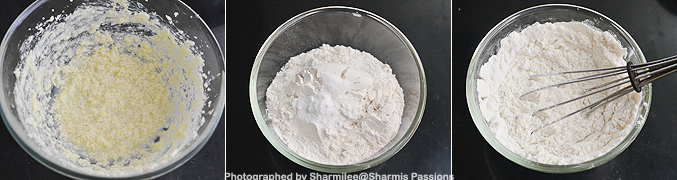
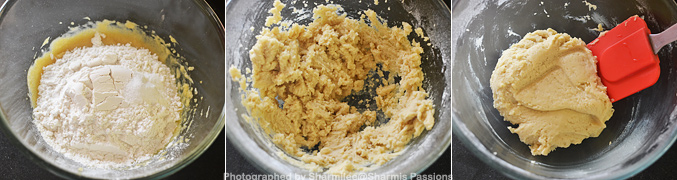
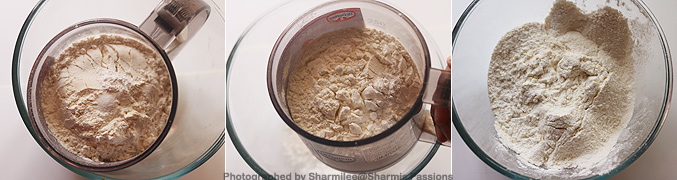
1.Measure and add flour to a sieve, then add baking powder and salt.
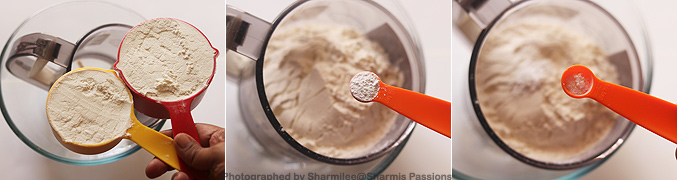
2.Sieve it well for even mixing.
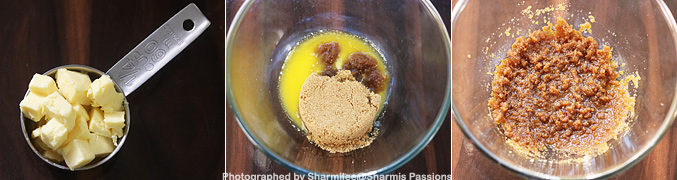
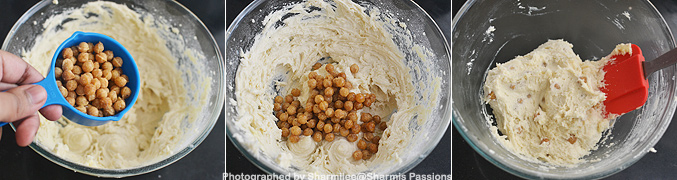
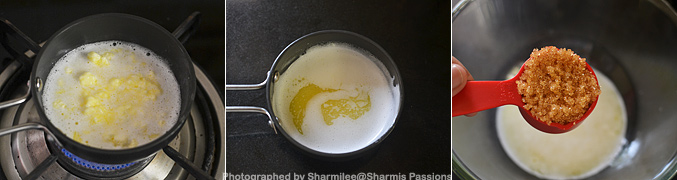
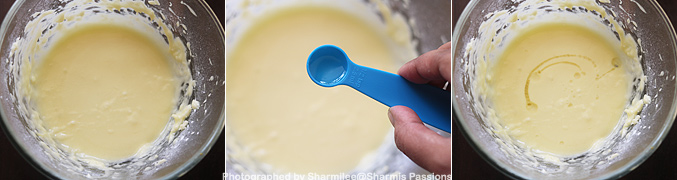
3.Now in another mixing bowl, add butter and powdered sugar. Cream together butter and sugar.

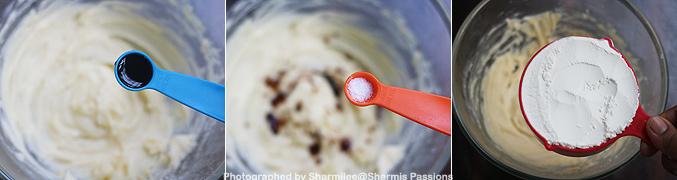
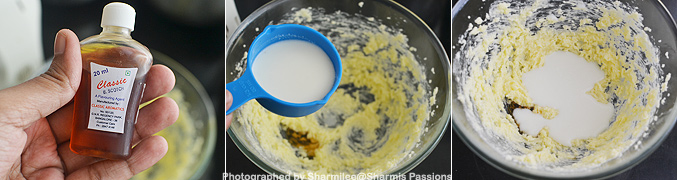
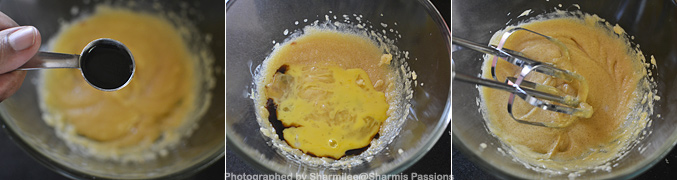
4.Whisk it well until creamy, I used electric handmixer. Then add an egg.

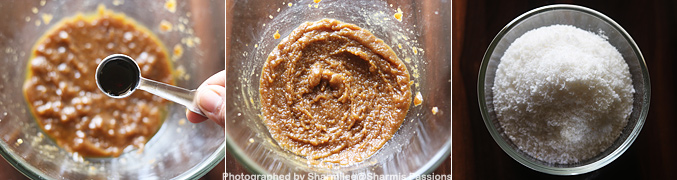
5.Whisk it for a minute, then add vanilla essence or any essence of your choice
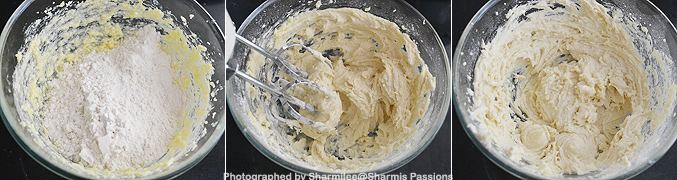
6.Now add flour mixture, combine and gather to form a soft dough.
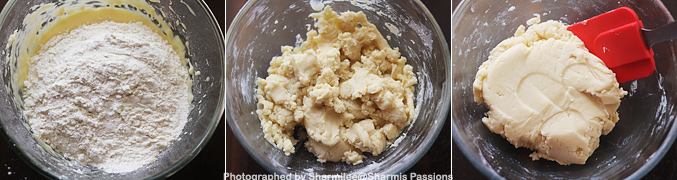
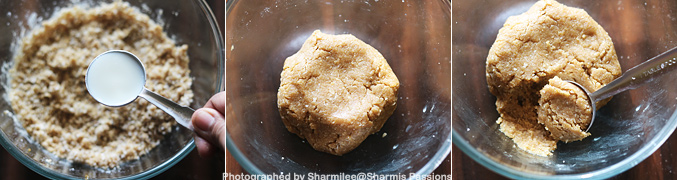
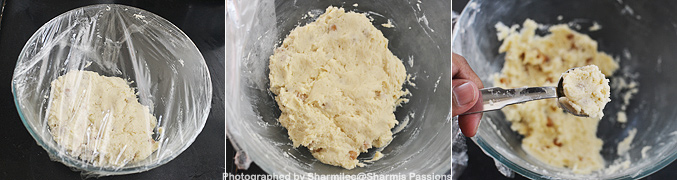
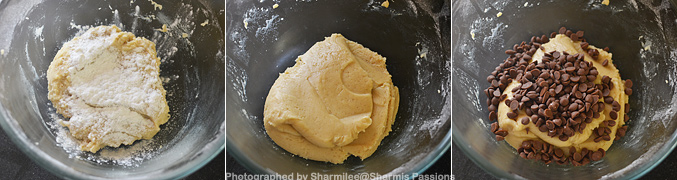
7.Now your basic cookie dough is ready. Cling wrap it and refrigerate. I took half of this dough for this candy cane cookies and used the other half for sugar cookies.
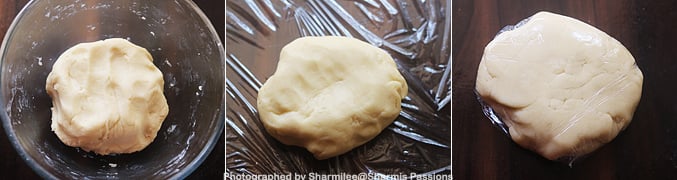
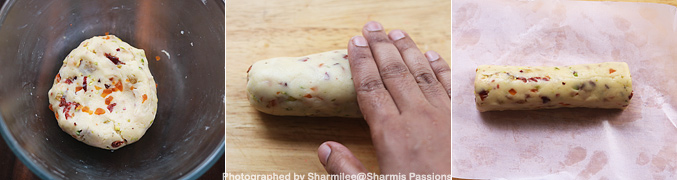
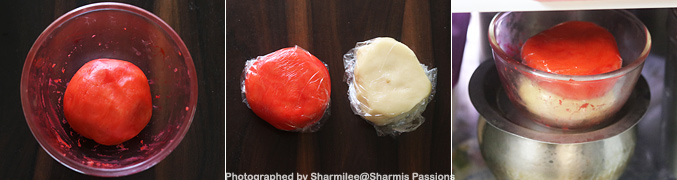
8.Divide the dough into 2. Take one portion add red food color, I used red rose liquid food color.
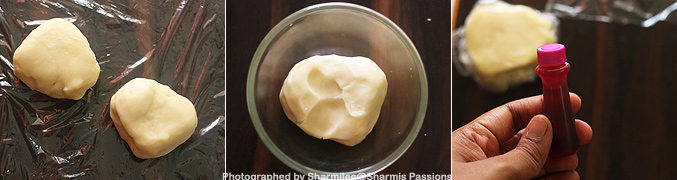
9.Mix well so that the color is even in the dough. Cling wrap both the dough separately and refrigerate at least for 20 minutes.
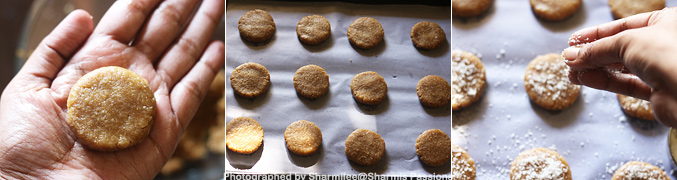
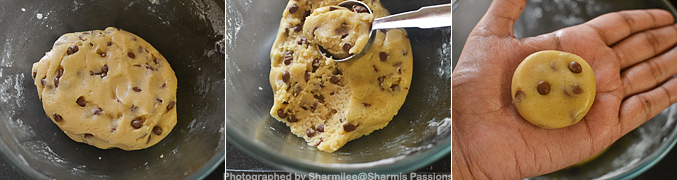
10.Now take the dough out pinch small pebble sized ball from each color. Now first take the plain color dough. Roll it with your fingers like this.
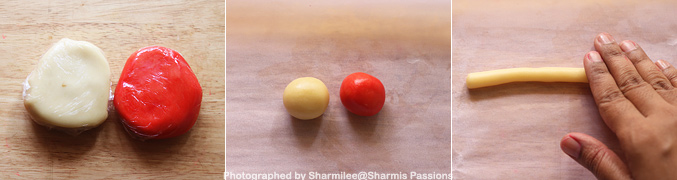
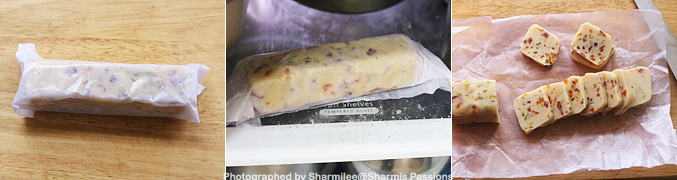
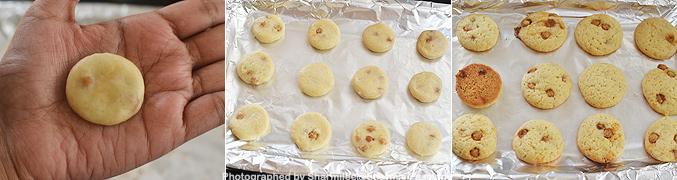
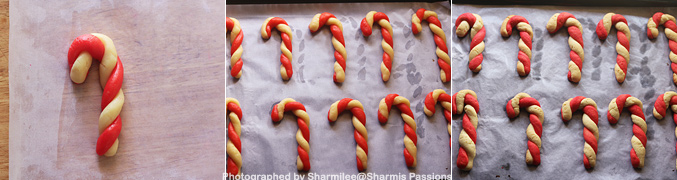
11.Repeat the same for red color too. Place both the ropes side by side, close to each other then twist and turn.
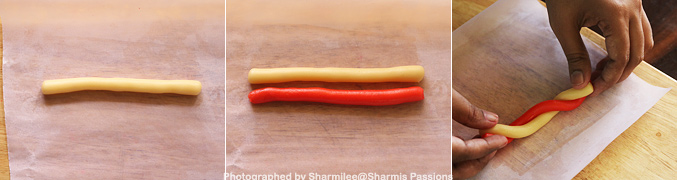
12.Twist and turn like this to get a spiral. Check out the video demonstration to get a clear idea. While you do this, preheat oven at 180 deg C for 10 minutes.
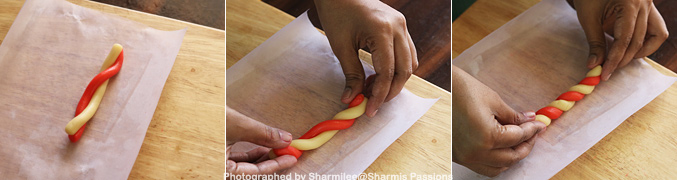
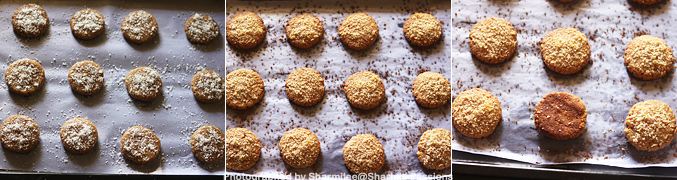
13.Bend one side to form cane shape.Repeat the process until the entire dough is finished. Arrange it in a baking tray with butter paper. Bake in preheated oven at 180 deg C for 10-12 minutes or until the edges start to brown.
Cool down completely then store in a clean airtight box.
Expert Tips
- Chilling the dough - I chill the dough before shaping, sometimes I chill in between too so ropes don't break.
- Shaping the ropes - do not not press too hard while rolling, gentle rolling gives smooth ropes and nice twists.
- Baking time - I keep eye on cookies, as soon edges start turning light golden, overbaking makes them hard fast.
- Color mixing - I usually mix color well in one half of dough so red looks even when twisted.
- Cookie size - I make thin ropes because they puff little, thinner ones keep shape neat.
Serving and Storage
Serve them with warm milk, tea or even pack them for gifting. This recipe goes good for dessert tables or small snack boxes. Store the cookies in airtight box once it cooled fully. It stays fresh for around a week at room temperature. If they soften later, you can warm for a minute to refresh.
FAQS
1.Can I skip the egg?
Yes you can, replace with little milk but the cookies might be slightly less soft.
2.Why did my ropes break while twisting?
Mostly the dough was too warm, refrigerate it for few minutes and try again.
3.Can I add gel food color?
Yes you can, gel gives a brighter color with very little quantity.
4.How to keep the cane shape intact?
You should chill the shaped cookies before baking, it helps them hold shape better.
5.Can I make this cookie ahead?
You can make the cookies and store them ahead. It stays well for a week .
If you have any more questions about this Candy Cane Cookies Recipe do mail me at sharmispassions@gmail.com. In addition, follow me on Instagram, Facebook, Pinterest, Youtube and Twitter .
Tried this Candy Cane Cookies Recipe? Do let me know how you liked it. Also tag us on Instagram @sharmispassions and hash tag it on #sharmispassions.
📖 Recipe Card

Candy Cane Cookies Recipe
Ingredients
- 1 and ½ cups all purpose flour / maida
- ⅓ cup chilled butter
- ¾ cup powdered sugar
- 1 egg at room temperature
- ½ teaspoon vanilla essence
- ⅛ teaspoon salt
- ½ teaspoon baking powder
- red food color as needed
Instructions
- Measure and add flour to a siever, then add baking powder and salt. Sieve it well for even mixing.
- Now in another mixing bowl, add butter and powdered sugar. Cream together butter and sugar.
- Whisk it well until creamy, I used electric hand mixer. Then add an egg.
- Whisk it for a minute, then add vanilla essence or any essence of your choice.
- Now add flour mixture, combine and gather to form a soft dough.
- Now your basic cookie dough is ready. Cling wrap it and refrigerate.
- I took half of this dough for this candy cane cookies and used the other half for sugar cookies.
- Divide the dough into two. Take one portion add red food color, I used red rose liquid food color.
- Mix well so that the color is even in the dough.
- Cling wrap both the dough separately and refrigerate at least for 20 minutes.
- Now take the dough out pinch small pebble sized ball from each color.
- Now first take the plain color dough. Roll it with your fingers like this.
- Repeat the same for red color too.
- Place both the ropes side by side, close to each other then twist and turn.
- Twist and turn like this to get a spiral. Check out the video demonstration to get a clear idea.
- While you do this, preheat oven at 180 deg C for 10 minutes.
- Bend one side to form cane shape.
- Repeat the process until the entire dough is finished.
- Arrange it in a baking tray with butter paper. Bake in preheated oven at 180 deg C for 10-12 minutes or until the edges start to brown.
- Cool down completely then store in a clean airtight box.
- Enjoy Candy Cane Cookies!
Notes
- Chilling the dough - I chill the dough before shaping, sometimes I chill in between too so ropes don't break.
- Shaping the ropes - do not not press too hard while rolling, gentle rolling gives smooth ropes and nice twists.
- Baking time - I keep eye on cookies, as soon edges start turning light golden, overbaking makes them hard fast.
- Color mixing - I usually mix color well in one half of dough so red looks even when twisted.
- Cookie size - I make thin ropes because they puff little, thinner ones keep shape neat.
Nutrition
The post Candy Cane Cookies Recipe appeared first on Sharmis Passions.