Reading view

There are new articles available, click to refresh the page.

Shotgun Shells Food: The Ultimate Guide to BBQ’s Viral Appetizer

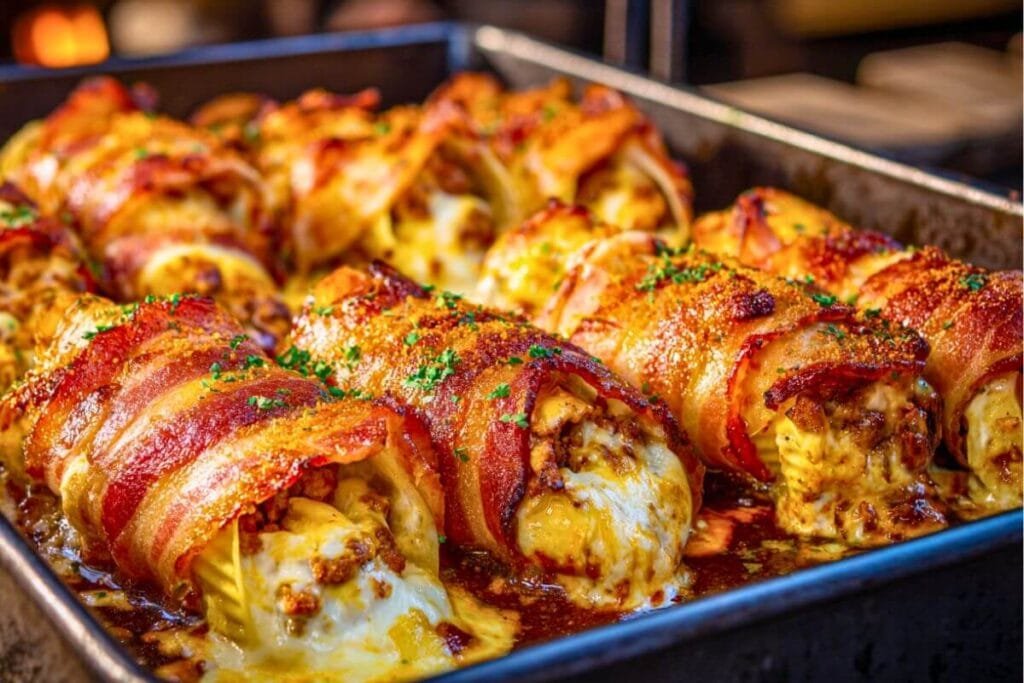
Shotgun shells food has exploded in popularity in the barbecue world, grabbing the attention of both home cooks and pitmasters. Shotgun shells are pasta tubes stuffed with seasoned ground meat and cheese, wrapped in bacon, and cooked until crispy—it’s a combo that packs a punch of flavor in every bite.

These bacon-wrapped treats look a lot like actual shotgun shells, but the only thing they shoot is flavor. The dish brings together the comfort of stuffed pasta and smoky barbecue, so it fits right in at tailgates, parties, or just a casual weekend cookout.

Some folks swear by the traditional smoked version, while others get creative with oven-baked or air-fried takes. Shotgun shells are flexible, both in how you make them and how you flavor them.

The real magic here is how easy it is to customize. You can switch up the filling—different meats, cheeses, spices—while the bacon outside gives you that crispy bite against the creamy, savory inside; this is a great shotgun shells recipe today.

Once you get the basic technique down, you can riff on this dish a hundred different ways. It’s honestly a great way to impress a crowd or just feed a bunch of hungry friends with some delicious BBQ shotgun shells.

Delicious shotgun shells food featuring pasta tubes stuffed with seasoned meat and cheese, wrapped in crispy bacon, and baked to perfection – a trending BBQ appetizer known as shotgun shells food.

Key Takeaways

  • Shotgun shells mix pasta, a seasoned meat filling, and a slice of bacon. bacon wrapper for a protein-packed appetizer, consider flipping the shells halfway through cooking for even browning.
  • You can smoke, bake, or air fry them, so it works for any kitchen setup.
  • They’re easy to prep ahead and customize, which makes them awesome for parties or meal planning.

What Are Shotgun Shells Food?

Shotgun shells food are pasta tubes stuffed with meat and cheese, then wrapped in bacon and cooked until crispy. The name comes from how much they look like shotgun shells, and people love serving them at parties for their bold flavors and fun presentation.

Origin of Shotgun Shells as Food

This dish started in the BBQ and smoking community, where pitmasters wanted to put a new spin on familiar ingredients. It’s a mashup of Italian stuffed pasta and classic American barbecue.

People started using big pasta tubes like manicotti or cannelloni as edible containers. Wrapping those stuffed tubes in bacon gave them a crispy outside and creamy inside—a pretty irresistible combo.

Social media and BBQ competitions made the trend take off. Pitmasters posted photos of their bacon-wrapped creations, and suddenly everyone wanted to try making them.

Modern recipes usually call for ground beef, sausage, and cream cheese in the filling. Some folks toss in jalapeños or other spices for a kick.

Why They Are Called Shotgun Shells

The name’s all about looks—the stuffed pasta tubes look just like shotgun shells, with that same cylindrical shape and one open end.

When you cook them right, the bacon tightens up around the pasta and keeps the tube shape. The bacon even forms little ridges that make them look even more like real shells.

The end of the bacon wrap can look like the brass base of a shotgun shell. That visual makes them a conversation starter at any get-together, especially when served with a delicious sauce and smoked flavor.

Food bloggers and recipe writers jumped on the name because it’s catchy and a little playful. It definitely sets this dish apart from regular stuffed pasta.

Popular Occasions and Serving Ideas

Smoked shotgun shells are perfect for tailgates and BBQ parties. Since you can eat them by hand, they’re great for outdoor events.

Best Serving Occasions:

  • Football game parties
  • Backyard BBQs
  • Potlucks
  • Holiday appetizer tables featuring baked shotgun shells recipe are always a hit.

They go well with classic BBQ sides like coleslaw or baked beans. Party trays often feature them next to smoked wings or sliders.

Hosts usually serve shotgun shells as appetizers before the main course. They’re rich and filling, so just a couple pieces will keep guests happy without spoiling dinner.

You can smoke, bake, or air fry them—each method gives a slightly different texture, but the main flavors stay front and center.

Essential Ingredients for Shotgun Shells

Getting shotgun shells right comes down to the pasta, meat, cheese, and seasonings, following a BBQ shotgun shells recipe for best results. Each part brings something to the table, and together they make this dish a favorite for groups, especially when stuffed into manicotti shells.

Manicotti Shells and Alternatives

Manicotti shells are the go-to for this recipe. They’re big, tube-shaped, and built for stuffing.

Traditional manicotti is ideal because it’s wide enough to fill up but tough enough to hold together on the smoker.

Cook the manicotti noodles just shy of done so they don’t fall apart when you stuff and wrap them.

If you can’t find manicotti, try jumbo shells or big rigatoni. You may need to tweak the cooking time for those.

After boiling, rinse the pasta in cold water to stop the cooking. That makes them easier to handle and keeps the pasta shells from turning mushy.

Best Meats for Filling

The meat filling is what makes shotgun shells so hearty. Ground beef and sausage together give you great flavor and texture.

Ground beef is a solid base. Go with 80/20 beef for a good mix of flavor and moisture.

Italian sausage adds extra seasoning and a bit of richness. Hot Italian sausage brings more heat, while mild is better for a crowd.

Breakfast sausage has a different spice blend and goes well with sharp cheeses.

Ground pork works as a swap for beef. It’s milder and lets other flavors stand out.

Chorizo gives a spicy, bold kick. Mix it with milder meats so it doesn’t take over.

Cheese Choices

Cheese makes the filling creamy and helps it stick together. The right mix is key for texture and flavor.

Cream cheese holds the filling together and keeps it moist.

Cheddar cheese brings sharp, tangy flavor. Sharp cheddar works better than mild if you want more taste.

Mozzarella cheese melts easily and gives you that classic cheese pull.

Monterey jack cheese is mild and melts well. It’s great blended with stronger cheeses.

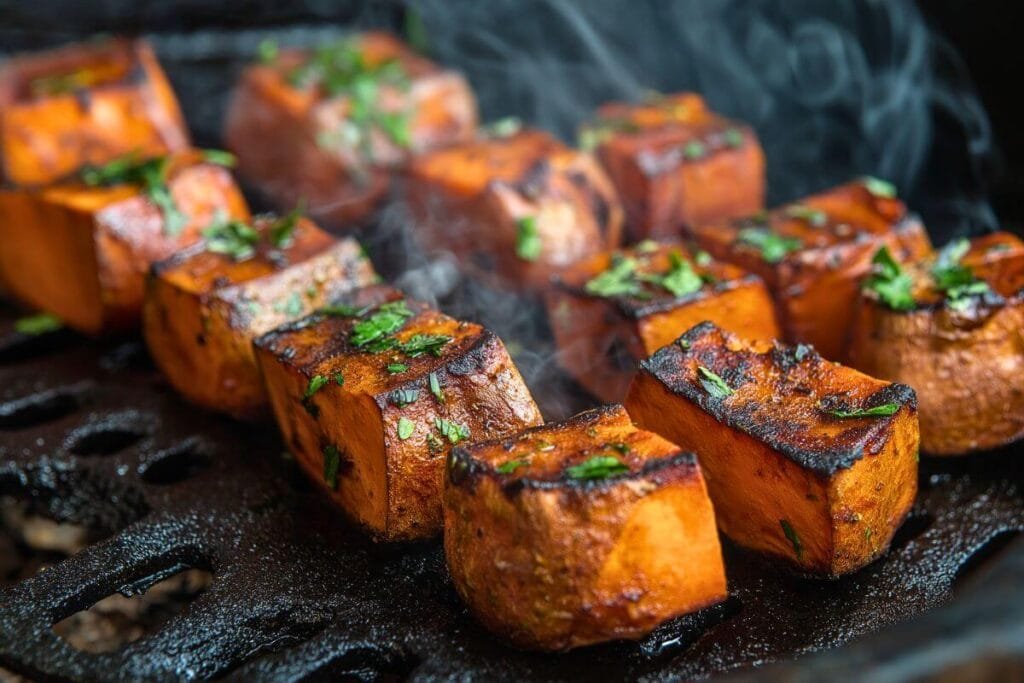
Gouda adds a smoky note that plays well with the bacon and smoke. Use just a little for extra depth.

Common Seasonings and Sauces

Seasonings turn basic ingredients into something crave-worthy. BBQ rubs and sauces finish things off.

Garlic powder gives savory depth without taking over. It mixes evenly through the meat.

Black pepper adds gentle heat and works with the smoky flavors. Fresh cracked is always better if you can swing it.

Red pepper flakes let you control the heat. Start small and adjust to taste, especially when preparing the mixture of ground beef.

Barbecue rub goes on the bacon-wrapped shells for extra flavor. Look for rubs that balance sweet and savory.

BBQ sauce gets brushed on near the end of cooking. It adds a shiny glaze and a bit of tangy sweetness.

Ranch dressing is a surprisingly popular dip. Some folks even prefer it to BBQ sauce.

How to Make Smoked Shotgun Shells

Making smoked shotgun shells is all about layering manicotti, meat filling, and bacon just right. You need to stuff, wrap, and let them rest before cooking.

Step-by-Step Assembly Instructions

Start by mixing a pound of ground sausage with half a cup of shredded cheese and some shredded mozzarella in a big bowl. Mix them well so the filling holds together.

Carefully stuff each manicotti shell with the meat mixture. The shells can break if you’re rough, so take it slow. Stuff from both ends—fill the pasta shells halfway from one side, then flip and finish from the other to soften the shells evenly.

Wrap each stuffed shell with a slice of thin bacon. Cover the shell without overlapping the bacon too much. Give the bacon a little stretch so it stays put.

Season the wrapped shells with your favorite rub or just salt and pepper; recipe tips can help elevate the taste.

Tips for Stuffing and Wrapping

A small spoon or piping bag makes stuffing easier than using your hands. Pack the filling in firmly but don’t overdo it, or the pasta might split.

When you wrap the bacon, start at one end and spiral it around to make sure the bacon is crispy all around. Thin bacon cooks better and gets crispier than thick-cut bacon.

Tuck the bacon ends under the shell to keep them from unraveling. Some people use toothpicks, but if you tuck it right, you usually don’t need them.

Try to keep the shells a similar size and make sure the bacon covers everything. That way, they cook evenly and look great when served.

Resting and Preparation for Cooking

Let the assembled shells rest in the fridge for at least six hours before cooking. This gives the meat time to soften the pasta a bit.

Put the shells on a wire rack or plate in the fridge. Resting them like this keeps the pasta from getting too crunchy and helps them cook evenly.

You can prep the shells up to two days ahead, ensuring they are uncooked manicotti shells for best results. Just store them in an airtight container or wrap them well so they don’t dry out.

Pull the shells out of the fridge about half an hour before you cook. Bringing them closer to room temp helps them cook more evenly. It really does make a difference.

Cooking Methods: Smoker, Oven, and Air Fryer

You can cook shotgun shells three main ways: smoke, oven, or air fryer. Each method has its own timing and temp. The smoker takes about 90 minutes at 275°F. The oven uses the same temp, and air fryers crank things up to 400°F for just 15-20 minutes. See what works best for you.

Smoking Shotgun Shells

Smoking shotgun shells brings out the richest flavor, with crispy bacon and that irresistible smoky edge. Preheat your smoker to 275°F before you get started.

Set the bacon-wrapped shells on a grill-safe baking sheet or a cast iron pan for oven baked perfection. Try to keep them over indirect heat—that way, you won’t risk burning the slice of bacon.

Cooking Timeline:

  • First 60 minutes: Smoke without opening
  • Glaze with BBQ sauce
  • Final 30 minutes: Continue smoking
  • Total cook time: 90 minutes

Use a meat thermometer and make sure the internal temperature hits 165°F. Applewood pellets work great for pork, but hickory or cherry are solid choices too.

In a charcoal smoker, keep the shells on the side away from the heat source. Drying screens help let the smoke circulate while keeping shells from slipping through the grates.

Oven-Baked Shotgun Shells

Oven-baked shotgun shells are a practical plan B if you don’t have a smoker handy. This approach mimics that slow-cooked, smoky vibe.

Preheat your oven to 275°F. Line a baking sheet with parchment paper—trust me, cleanup will be much easier.

Baking Process:

  • Place shells on middle rack
  • Bake 60 minutes uncovered
  • Brush with BBQ sauce
  • Bake additional 30 minutes

The bacon should be crispy, and the internal temp should read 165°F. Some folks recommend 325°F and baking on a wire rack for even more crispiness, ensuring the shells are stuffed properly.

Try adding liquid smoke to the meat filling for a deeper flavor. Let the shells cool about 10 minutes before serving—they’re piping hot.

Air Fryer Instructions

Air fryers seriously cut down on cook time and still deliver crunchy bacon. Preheat the air fryer to 400°F.

Line the basket with parchment paper. Glaze the raw shells with BBQ sauce before they go in.

Air Fryer Steps:

  • Cook 15-20 minutes at 400°F
  • Check internal temperature hits 165°F
  • Add a few minutes if the bacon needs more crunch
  • Glaze again after cooking

Most air fryers need about 20 minutes, but keep an eye on yours—it might run hotter or cooler. Flip or rotate the shells halfway through for even browning.

The high heat cooks everything fast, but you’ve got to watch closely to avoid burning; consider boiling the shells beforehand for a softer texture. Give them 10 minutes to rest so the filling sets up nicely.

Recipe Variations and Flavor Twists

Shotgun shells are surprisingly flexible. You can tweak the heat, swap in regional ingredients, or just play around with different meats and cheeses to make them your own.

Spicy and Mild Versions

Heat levels change a lot depending on what you put inside and how you prep them. Mild versions use ground beef and Monterey Jack cheese—good for kids or anyone who prefers less spice.

Mild Options: Consider adding jalapeno for those who enjoy a bit of heat.

  • Ground beef with cheddar cheese
  • Italian sausage with mozzarella
  • Cream cheese base for a cooling effect

Spicy Variations:

  • Hot Italian sausage with pepper jack cheese
  • Jalapeño peppers mixed into the filling
  • Serrano peppers for extra kick

Spicy versions use hot peppers and bold sausages for real punch. You can always dial the spice up or down by adjusting the amount of peppers.

Some cooks add cream cheese to balance the heat. That way, you get flavor without burning your mouth off.

Regional Flavor Modifications

Different regions toss in their favorite flavors and techniques. Mexican-inspired shells use chorizo, jalapeño, and Cajun spices for a south-of-the-border spin.

Regional Variations:

  • Mexican: Chorizo, pepper jack cheese, green chiles
  • Texas: Beef, spicy sausage, ranch flavor
  • Italian: Hot Italian sausage, mozzarella, garlic
  • Southern: Pulled pork, BBQ sauce glaze

Tex-Mex shells mix ground beef with green chiles and jalapeños, creating a delicious twist on traditional manicotti pasta. for a southwestern vibe. Italian versions go classic with ricotta and spinach, but you can also stuff the manicotti for a different twist.

Buffalo chicken brings in upstate New York flavors. Nashville hot chicken adds Tennessee heat and a touch of honey.

Alternative Meat and Cheese Combinations

Switching up the meat and cheese keeps things interesting, particularly when you wrap bacon around the filling. Gouda with sausage or ground beef gives a rich, nutty flavor.

Meat Options:

  • Ground venison for a gamey twist
  • Pulled pork leftovers
  • Brisket for deep smokiness
  • Buffalo chicken for something lighter

Cheese Combinations:

  • Four-cheese blend: cream cheese, ricotta, cheddar, mozzarella
  • Gouda with parmesan for depth
  • Monterey Jack and pepper jack for extra heat

Smoked sausage saves time and still tastes great when wrapped in bacon and smoked. Chorizo brings a Spanish-style kick and a little extra oil to the mix.

Venison is a solid choice if you hunt. Leftover barbecue meats like pulled pork or brisket make these shells a no-waste meal.

Serving, Storing, and Reheating Shotgun Shells

These bacon-wrapped shells taste best hot, paired with sides and sauces. Store leftovers for up to 4 days in the fridge. Gentle reheating keeps them crispy.

Best Sides and Dipping Sauces

BBQ sauce is a classic dip with shotgun shells—the smoky sweetness just works. Ranch gives a cool, creamy break from the richness.

Popular sides?

  • Baked beans
  • Coleslaw
  • Corn on the cob
  • Grilled veggies
  • Potato salad

Buffalo sauce, honey mustard, or chipotle mayo are fun too. These shells are a hit at barbecues, game days, or potlucks.

Serve them on a big platter with small bowls of sauces. Let guests pick their favorites. If you have a warming tray, use it to keep them hot longer.

How to Store Leftovers

Stash shotgun shells in the fridge for 3-4 days in an airtight container. Wait until they’re completely cool before storing to avoid sogginess.

Want to keep them longer? Freeze for up to 3 months in freezer-safe containers. Wrap each shell in plastic wrap, then toss them in a freezer bag.

Storage Tips:

  • Wipe off extra sauce before storing
  • Label containers with the date
  • Keep the fridge at 40°F or below
  • Don’t leave them out for more than 2 hours

Thaw frozen shells in the fridge overnight. Never refreeze shells you’ve already thawed—quality drops fast.

How to Reheat Smoked Shotgun Shells

Reheat in the oven at 350°F for about 10-15 minutes. Cover them with foil so they don’t dry out. This keeps the bacon crisp and heats everything evenly.

If you’re in a hurry, microwave a shell for 1-2 minutes. Make sure the middle gets to 165°F for safety.

Reheating Methods:

  • Oven: 350°F for 10-15 minutes (with foil)
  • Microwave: 1-2 minutes per shell
  • Air fryer: 350°F for 5-7 minutes

If you have a smoker, reheat at 350°F until hot. This adds a bit more smoky flavor. Always check that they’re heated through before serving.

Frequently Asked Questions

People usually ask about ingredients, cooking methods, and prep tips for shotgun shells. These appetizers need the right timing and temperature control to come out perfectly.

What ingredients are required to make a traditional shotgun shells recipe?

Classic shotgun shells use cannelloni or manicotti shells as the base. The filling is a mix of ground beef, Italian sausage, cream cheese, and shredded cheese.

Season with BBQ rub, minced garlic, and diced jalapeños. Wrap each stuffed shell with regular bacon.

The best recipes Use equal parts ground beef and sausage for balance, and consider adding jalapeno for an extra kick.

BBQ sauce goes on top for glazing. Some people add parmesan or even a little marinara for dipping.

How long should you cook shotgun shells in the oven to achieve optimal flavor?

Bake shotgun shells at 275°F for a total of 90 minutes. The first 60 minutes lets the bacon crisp up and the filling cook through.

After an hour, brush on BBQ sauce and bake another 30 minutes for a sticky glaze.

The shells are done when the internal temp hits 165°F. Use a meat thermometer for safety.

Let them cool for 10 minutes before serving so nobody burns their mouth and the filling can settle.

Can you provide tips for barbecuing shotgun shells to enhance their taste?

For gas grills, preheat to 275°F and set up for indirect heat. Set the shells on a grill-safe baking sheet or cast iron pan.

Cook for 60 minutes on the cooler side. This keeps the bacon from burning while the filling cooks.

After the first hour, glaze with BBQ sauce. Grill for 30 more minutes to caramelize the sauce.

Big Chief drying screens help air circulate around the shells, so they crisp up without falling through the grates.

What are the steps to smoke shotgun shells on a pit boss grill?

Set your Pit Boss grill to 275°F and use indirect heat zones. Lay the stuffed, bacon-wrapped shells onto a grill mat—don’t crowd them.

Smoking shotgun shells on a pellet grill takes about an hour for the first stage. Keep the shells away from direct flames or they’ll burn.

After that hour, brush on your first layer of BBQ sauce and let the delicious smoked shotgun shells absorb the flavor. Let them smoke for 30 more minutes so the flavors really settle in.

Use a probe thermometer to check the temperature inside the shells. You want the filling to hit 165°F, just to be safe.

Try apple or cherry wood pellets for a mild, sweet smoke. These woods complement pork and beef without drowning out the bacon.

Which meats and fillings are considered best for creating smoked shotgun shells?

Mix equal parts lean ground beef and Italian sausage for the filling. This combo gives you a nice balance of flavor and texture.

Smoked shotgun shells with five filling options show all sorts of meat mixtures. If you like heat, swap in spicy Italian sausage.

Cream cheese keeps everything moist inside, even after smoking. A Tex-Mex cheese blend melts well and adds a little twist.

If you can’t find Italian sausage, regular ground pork works fine. Just sprinkle in more BBQ rub for extra flavor.

Diced jalapeños bring a gentle kick. Fresh ones are better than canned—trust me, the flavor’s just brighter.

How does Meat Church’s method for preparing shotgun shells differ from standard recipes?

Meat Church leans heavily on their own BBQ rub blend when seasoning the filling. They really want that rub to work its way through the meat mixture.

They let the filled shells sit for a bit before wrapping them in bacon. That pause gives the flavors time to mingle and spread out.

They’re pretty adamant about temperature control. Keeping the smoker steady at 275°F helps everything cook evenly.

For glazing, they brush on sauce in thin layers. Several light coats of barbecue sauce seem to give a nicer caramelization than just slapping on one thick layer.

They also suggest certain woods for smoking. Honestly, fruit woods just play nicer with their rubs and bring out the best in the flavors.

Smoked Pulled Pork Essential Tips for Perfect Flavor and Tenderness

Smoked pulled pork is a classic BBQ dish people love for its rich flavor and tender texture. You slow-cook pork over wood or charcoal smoke until it pulls apart with barely any effort and melts in your mouth.

With the right tools, ingredients, and a few steps, anyone can make delicious, authentic smoked pulled pork You can easily make perfect pulled pork at home by following a simple recipe that highlights the difference between pork cuts.

Perfectly seasoned smoked pulled pork cooking low and slow on a grill with visible smoke and flame – ideal image for smoked pulled pork recipes and BBQ smoking techniques.

Choosing the best cut The cut of pork, like traeger pork butt, really matters for good results. The process is all about seasoning the meat, getting your smoker or grill ready, and letting time and smoke do their thing.

With a solid recipe and a few tips, smoked pulled pork can steal the show at any meal or backyard get-together.

Key Takeaways

  • The right cut and a few simple techniques make BBQ pulled pork tender and full of flavor.
  • Anyone can smoke pork at home with basic gear and ingredients.
  • Leftovers and creative toppings make pulled pork work in a ton of different meals, especially when you remove the pork from the grill.

Choosing the Best Cut of Pork

The cut of pork you use really shapes the flavor, texture, and moisture of smoked pulled pork. Some cuts have more marbling and tenderness, which is why home cooks and pitmasters tend to reach for them.

Pork Shoulder vs. Pork Butt

Pork shoulder and pork butt are the top picks for pulled pork, including options like traeger pulled pork. Both come from the pig’s front shoulder, but they’re a bit different in fat content and texture.

Pork shoulder Actually means the whole shoulder, which includes both the upper (Boston butt) and lower (picnic) cuts, highlighting the difference between pork shoulder options. Pork butt (Boston butt) is the upper part and has more marbling and connective tissue, so it gets super tender and juicy when you cook it low and slow, making it crucial to understand what’s the difference between pork cuts.

The picnic shoulder, the lower part, is leaner and has more bone. It’s still usable, but it’s usually not as moist or flavorful as the butt. That’s why Boston butt is almost always the go-to for pulled pork—it just hits that sweet spot of fat and collagen, especially in a bone-in pork dish.

Boston Butt Selection

When you’re picking out a Boston butt, aim for a cut between 6 to 8 pounds. That size of the pork cooks evenly and gives you plenty to serve without drying out.

Bone-in is better than boneless if you can get it—the bone helps with heat and gives extra flavor while smoking. Look for visible white streaks of fat (marbling); that’s what keeps the pork juicy after hours on the smoker.

Avoid meat that looks dry or barely has any fat. If you’re at the butcher, ask for a Boston butt that’s trimmed well but still has a nice fat cap.

Quick checklist for picking a Boston butt:

  • Bone-in, not boneless
  • 6 to 8 pounds
  • Plenty of marbling
  • Firm, pink meat

Trimming and Preparation

You need some fat for moisture, but too much fat blocks smoke and flavor. Trim off any thick or hard layers, especially on the outside, but leave about a 1/4-inch layer so the pork bastes itself as it cooks.

Remove any big pieces of sinew or silverskin—they don’t break down well while smoking. Pat the meat dry with paper towels so the rub sticks better.

Rub a generous layer of dry seasoning all over the roast. If you’ve got the time, let the seasoned pork rest in the fridge for several hours or overnight. That really helps the flavors soak in and gives you a nice bark later.

Essential Ingredients and Equipment

Smoked pulled pork relies on a few key things: a tasty dry rub, the right liquids to keep things moist, and some quality tools to make the job smoother. Nailing each part makes a big difference in flavor and tenderness.

Classic Dry Rub Ingredients

A good dry rub is the soul of smoked pulled pork. It brings out the pork’s natural flavor and adds that classic BBQ kick. Most rubs start with a base that complements the size of the pork you are using. brown sugar for sweetness, kosher salt for seasoning, and black pepper for a bit of bite.

Other regulars are garlic powder, onion powder, and smoked paprika for a deeper, smoky flavor. Paprika adds color and a mild peppery note, and Cumin is a key ingredient in many pork rub recipes. gives a hint of earthiness.

Pat or rub these spices all over the pork to form a crust as it cooks. Some folks add a thin layer of yellow mustard before the rub—it helps the spices stick and gives a little tang, just like in this guide.

Example dry rub for an 8-10 pound pork shoulder:

IngredientAmount
Brown sugar5 tbsp
Kosher salt2 tbsp of chili powder for added flavor.
Black pepper2 tbsp
Paprika2 tbsp
Garlic powder1 tbsp
Onion powder1 tbsp
Cumin1 tsp

Mix and stash any leftovers in a sealed container for next time.

Moisturizing Agents and Spritzes

Dry pulled pork is just sad. To keep things juicy, pitmasters use liquid spritzes and sometimes injections while smoking.

Apple juice and apple cider vinegar are classic spritzes—they add moisture and a gentle fruity note. Usually, people mix half apple juice and half of the time, it’s best to allow the pork to rest after cooking. apple cider vinegar in a spray bottle. Some stick with just the traeger pulled pork recipe for simplicity. apple cider or add a splash of water.

Once a bark forms, spritz the pork every hour. That keeps it moist and helps the smoke flavor soak in, enhancing the difference between pork cuts.

For even more juiciness, some folks inject a marinade before smoking. A classic injection might be apple juice, water, brown sugar, salt, and maybe a dash of chili powder to spice it up. soy sauce or Worcestershire sauce.

Inject right before cooking so the flavors spread deep into the meat. Wrapping the pork in heavy duty aluminum foil about halfway through—sometimes called the Texas Crutch—locks in moisture too.

Tools for Smoking

You don’t need a ton of fancy gear, but a few good tools make smoking pork way easier. The big one is a reliable smoker that holds low temps steady for hours. Wood chips or chunks (hickory or apple are great) bring that signature smoky flavor.

A solid meat thermometer is a must to know when the pork’s ready to pull—usually around 195–205°F. Heavy duty aluminum foil wrap the pork butt partway through or allow the pork to rest for optimal flavor.

Juicy smoked pulled pork slowly cooking over a smoky grill, showcasing a flavorful bark and tender texture – a perfect visual for smoked pulled pork preparation and BBQ techniques.

To shred pork shoulder fast and with less mess, grab a pork rub to enhance the flavor. bear claws or big forks. They make pulling the meat into bite-sized pieces a breeze.

Serve smoked pulled pork with barbecue sauce or bbq sauce on the side, so everyone can tweak the flavor. Plates, disposable gloves, and a big cutting board help keep things tidy when you’re serving up.

For a look at essential tools and steps, check out this guide to making smoked pulled pork.

Setting Up Your Smoker or Grill

Getting your smoker or grill ready is a big deal if you want the best pulled pork. The wood, grill type, and how you control the temp all change the flavor and texture of smoked pork shoulder.

Choosing Wood Chips and Flavor

The wood chips or pellets you use have a huge impact on taste. Hickory wood gives a bold, smoky flavor that goes great with pork shoulder. Apple wood is an excellent choice for smoking pork shoulder or butt. is milder and a little sweet, while cherry wood adds a subtle fruitiness.

Here’s a quick table for picking wood:

Wood TypeFlavor ProfileBest For
HickoryStrong, smoky, bacon-likeTraditional smoked pork
AppleMild, slightly sweetLighter pork flavors
CherryMild, fruityGentle smoke profile

Mixing woods can be fun for new flavors. Just make sure the chips are dry and stored right. Go easy—too much wood makes the meat taste bitter.

Using Pellet Grills and Traeger

Pellet grills like Traeger use compressed wood pellets for both heat and smoke. They keep temps steady and are super popular for smoking pork.

Set the grill to a low temp—usually 200-225°F—to smoke the pork for pulled pork. Preheat before adding the pork shoulder. Fruitwood or a blend of oak and hickory pellets bring out rich flavor.

Pellet grills heat evenly, so you don’t have to worry much about burning or dry meat. Wait to wrap the pork until you get a good bark. Honestly, pellet grills are easy to use, which makes them a solid pick for beginners and pros.

For more on pellet grilling, check out this guide on using a pellet grill for pulled pork.

Heat and Smoke Management

Keeping a steady temperature is everything for smoking meat. Most people stick to 225°F for hours until the pork shoulder gets tender.

Always use indirect heat—you want the pork to cook gently, not burn. Put the pork butt fat side up on the grate away from the direct flame.

Control airflow with the vents; it affects both temp and smoke. Too much airflow makes things too hot, so keep an eye on your thermometer while cooking the pork butt in foil.

Shoot for thin, blue smoke instead of thick white clouds. Heavy smoke gives the pork a harsh flavor. If you manage the heat and smoke well, you’ll get tasty, tender smoked pulled pork.

Step-by-Step Smoked Pulled Pork Recipe

Making smoked pulled pork means prepping a pork shoulder, seasoning it with a dry rub, smoking it low and slow, and then shredding the meat. Every step matters for tenderness, juiciness, and flavor—whether you’re piling it on sandwiches, tacos, or just eating it straight.

Thick, juicy smoked pulled pork on the grill with a rich bark and visible smoke – ideal visual for showcasing smoked pulled pork BBQ techniques and slow-cooking flavor.

Preparing the Pork

Start with a pork shoulder or “pork butt,” which comes from the upper part of the shoulder. This cut has a solid mix of meat and fat, so it’s perfect for slow cooking.

Trim off extra fat, but leave a thin layer to help keep things juicy while smoking. Using a sharp knife, lightly score the fat cap—this lets the seasoning work its way in.

Pat the meat dry with paper towels so the rub sticks better. If there’s a bone, just leave it in; it adds flavor and helps the pork cook evenly.

Some folks like to place the pork butt fat side up for better flavor. brine the pork for a few hours or overnight for extra moisture and flavor. A basic brine is usually water, salt, sugar, and maybe a few spices.

After brining, rinse and dry the pork before adding the rub. That way, the seasonings can stick and do their thing.

Applying the Dry Rub

The dry rub forms that flavorful “bark” on the outside. Mix together salt, black pepper, paprika, garlic powder, onion powder, and brown sugar—adjust the spices to your taste.

Rub the seasoning all over, making sure to get into every nook and cranny. Let the pork sit at room temperature for about 20 to 30 minutes so the rub can settle in and the temperature of the pork can rise slightly.

Some people wrap the seasoned pork in plastic and pop it in the fridge for a few hours or overnight. This gives the flavors a chance to really soak in.

Before you smoke it, bring the pork back near room temperature to help it cook evenly.

Smoking Process Overview

Preheat your smoker to 225-250°F. Use wood chips like hickory, apple, or cherry for a nice, balanced flavor.

Set the pork shoulder directly on the smoker grate, fat side up, so the fat melts down into the meat. Keep the temperature steady and toss in more wood chips as needed for a constant smoke.

Smoking takes about 1.5 to 2 hours per pound. For an 8-pound pork shoulder, you’re looking at 12 to 16 hours—yeah, it’s a commitment, but it’s worth it.

Go for an internal temperature of 195-205°F, ensuring the internal temperature reaches that range for optimal tenderness. At this point, the pork shreds easily and you might spot a pink “smoke ring” just under the bark. For a step-by-step breakdown of the pork butt recipe, see this. simple smoked pulled pork method.

Resting and Shredding the Pork

Once the pork hits the right temp, pull it from the smoker and wrap it in foil or butcher paper. Let it rest for at least 30 to 60 minutes so the juices can redistribute.

Pull the pork apart using forks, meat claws, or your hands if you don’t mind getting a little messy; this is key for enjoying pulled pork leftovers. Toss out any big pieces of fat or bone.

Mix the shredded pork with some of the cooking juices for max flavor and moisture. Serve right away or keep it warm for later.

Smoked pulled pork fits into all sorts of dishes, especially when made with smoked pork butt. pork recipes and dishes, so you’ve got plenty of options.

Serving Smoked Pulled Pork

Smoked pulled pork is a hit at gatherings or family dinners. The right buns and fresh sides like coleslaw make the meal even better.

Pulled Pork Sandwich Ideas

Pulled pork sandwiches are classic and super easy. Just pile the pork onto a bun, drizzle with BBQ sauce, and maybe add some crunchy coleslaw for a little kick.

Some folks throw in pickles or sliced onions for a tangy bite. Barbecue sauce options run from sweet to spicy, so it’s fun to offer a few choices on the side.

Pork also pairs well with mustard or vinegar-based dressings, especially if you’re into Southern flavors. For parties, sliders are a great way to mix things up, or try wraps and tacos with pulled pork, cabbage slaw, and veggies.

Leftover smoked meat makes awesome sandwiches for meal prep, too.

Choosing the Best Buns

The bun matters—a lot, especially when you slather the pork butt with your favorite sauce. Soft buns soak up the juices but don’t fall apart, so potato buns and brioche buns are both popular picks.

If you want a firmer bite, try Kaiser or ciabatta rolls, though they can be a bit chewy with tender pulled pork. Hamburger buns work fine too, as long as they’re fresh.

Toasting the bun a little helps keep things from getting soggy. Pretzel buns are a fun twist with a savory edge, and gluten-free buns are out there for those who need them, though they can be a bit dry sometimes.

Coleslaw and Sides

Coleslaw is a go-to side or topping for pulled pork sandwiches. Creamy coleslaw with mayo and vinegar brings richness, while a tangy vinegar-based slaw is lighter and cuts through the fatty pork.

Put the slaw on the side, or right on top of the meat for extra crunch. Other sides that work well: baked beans, mac and cheese, cornbread, or potato salad.

If you want to lighten things up, offer cucumber salad or grilled veggies. Chips or fries are great for casual get-togethers. Set out the sides so guests can build their own plates however they like, perhaps with leftover pulled pork.

Sauces and Toppings

Sauce is a big deal with smoked pulled pork—it can totally change the flavor. Toppings add texture, color, and a little excitement, making the dish pop.

Classic BBQ Sauces

Pulled pork usually comes with classic barbecue sauces that highlight smoky and tangy notes. Kansas City-style sauce is sweet and thick, made from tomatoes, brown sugar, and molasses.

Carolina sauce is vinegar-based, thin, and tangy. Some regions love a mustard-based sauce for a sharp, slightly spicy kick—especially in South Carolina.

Sauce StyleMain IngredientsFlavor Profile
Kansas CityTomato, brown sugar, molassesSweet, thick, and perfect for your traeger pork dishes.
CarolinaVinegar, spicesTangy, thin
Mustard (SC)Mustard, vinegar, and sugar can enhance the flavor of your smoked pork butt recipe.Sharp, spicy

Serve sauces on the side so everyone can add what they like. For more on regional sauces, check out this guide to Carolina-style pulled pork and sauces.

Homemade BBQ Sauce

Homemade BBQ sauce brings a personal touch and lets you control the flavors. You can whip up a simple one by mixing ketchup, vinegar, brown sugar, Worcestershire sauce, and some spices.

Some recipes mix BBQ sauce with apple juice, apple cider vinegar, water, and butter for a richer taste. Others add minced onion or garlic for an extra kick.

Making your own sauce means you skip the preservatives and can tweak the heat or sweetness. Here’s a homemade BBQ sauce for pulled pork that uses stuff you probably already have in your kitchen for making traeger pulled pork.

Creative Toppings

Toppings take pulled pork to the next level. Creamy coleslaw is a classic, adding crunch and freshness that balances out the rich meat.

Cheese, pickles, fried onions, or even kimchi can change things up. Jalapeños bring heat, and fresh herbs add brightness.

Sliced onions and sweet pickles are old favorites, but pineapple or bacon can be fun twists on smoked pork butt. Some folks get creative with international toppings like kimchi or spicy mayo for a unique combo. For a bunch of ideas, see this list of pulled pork sandwich toppings and creative toppings for traeger pulled pork.

Tips for Perfect Smoked Pulled Pork

Nailing smoked pulled pork comes down to keeping a steady temperature, getting the right texture, and dodging common mistakes. Every step affects the final flavor and tenderness.

Temperature Control

Keep the smoker around 225°F. This low, steady heat lets the pork shoulder break down slowly, turning tough fibers and fat into something tender.

Use a digital thermometer to track both the smoker’s temp and the meat’s internal temp. The pork’s ready when it hits 195–205°F and pulls apart easily.

Try not to open the smoker too much; you’ll lose heat and add time. Smoking with fruit woods like cherry or apple gives a sweet, rich smoke ring and boosts the flavor.

Texture and Juiciness

Great pulled pork is moist, soft, and shreds with barely any effort, making it a tasty pulled pork option for any meal. The fat marbling in pork butt keeps it juicy through the long cook.

Some people wrap the pork halfway through with foil or butcher paper to trap moisture and get a more tender result. Let the pork rest for at least 30 minutes before pulling.

If the pork turns out dry, it probably cooked too hot or didn’t rest long enough. For more tips on juicy pork, check this smoked pulled pork guide.

Common Smoking Mistakes

Rushing by cranking up the heat is a classic mistake—it dries out the meat and kills tenderness. Not watching the internal temp can lead to undercooked or overcooked pork.

Don’t add wet wood or too much at once, or you’ll get thick smoke and a bitter taste. Wrapping the pork too early or too late can mess with texture and the smoke ring. Cook times can vary, so patience is your best friend here. If you want more advice, these Here are some essential pitmaster smoking tips for achieving the perfect pulled pork. Traeger pulled pork recipes are worth a look.

Leftovers and Storage

Smoked pulled pork keeps well if you store it right. Using good reheating and storage methods keeps the meat tasty and safe to eat.

Reheating Smoked Pulled Pork

When you reheat smoked pulled pork, you want to keep it moist and full of flavor. The usual way? Toss the pork in a saucepan or oven dish, splash in some chicken broth or leftover juices, and cover it up tight.

Gently warm it on the stovetop or in the oven at a low temp—something like 300°F works well. Just heat it until it’s hot all the way through, but don’t let it dry out.

If you’re in a hurry or just have a small portion, microwaving works too, but it may not achieve the same tasty pulled pork results. Put the pork in a microwave-safe bowl, sprinkle with a bit of water or broth, cover it loosely, and zap it in short bursts, stirring between rounds.

Some folks love using a vacuum-sealed bag in a hot water bath (sous vide). This trick keeps the pork juicy and heats it evenly, ensuring you cook until the internal temperature is perfect.

Got frozen leftovers? Let the package of pork rub sit for a while to allow the flavors to develop. thaw in the fridge overnight before reheating. You’ll get the best texture that way, especially when using tender pulled pork. There are more tips in this community post about reheating if you’re curious.

Freezing and Storage Methods

For a few days’ storage, stash pulled pork in a sealed container or a heavy-duty zipper bag in the fridge. Try to press out as much air as possible to keep things fresher, longer.

If you want to freeze it, portion the pork into meal-sized servings. Wrap each in plastic wrap or foil, then seal it up in a freezer-safe bag—or use a vacuum sealer if you’ve got one.

Adding a splash of broth or leftover juices helps prevent freezer burn and keeps the pork from drying out. Frozen pulled pork holds up for about three months before the quality starts to slip.

Label each bag with the date so you can use the oldest leftover pulled pork first. Thaw the pork in the fridge overnight for the safest and most even results. If you want more ideas about packaging and freezing, check out this guide on proper storage.

Frequently Asked Questions

Getting smoked pulled pork right means paying attention to temperature, seasoning, wood choice, and the whole cooking process. Prepping the pork and watching the smoker closely usually leads to the best-tasting results.

What internal temperature should be reached for safe and tender smoked pulled pork?

Pulled pork needs to hit at least 195°F inside. That’s the magic number for breaking down the connective tissue so you can shred it easily.

Sure, pork is technically safe at 145°F, but it won’t pull apart until it gets up to 195-205°F. That’s just how it goes with barbecue.

What is the best wood or pellet type to use when smoking pulled pork on a pellet grill?

Hickory, apple, and cherry woods are top picks for pork. Hickory gives a bold smoky punch, while apple and cherry bring a sweeter, gentler flavor.

I like mixing hickory with a fruit wood for balance. Pellet grill fans often go for blends made just for pork shoulder or butt, and honestly, the results are pretty consistent.

Can you provide a rub recipe that enhances the flavor of smoked pulled pork?

Try a simple rub: kosher salt, coarse black pepper, brown sugar, paprika, garlic powder, and a pinch of cayenne. It’s straightforward but works every time.

Plenty of cooks just use salt, black pepper, and brown sugar. It’s a classic combo and, according to many, the best way to enjoy traeger pork. smoking enthusiasts, makes a great crust without overpowering the pork.

What are the key stages of cooking smoked pulled pork on a Traeger grill?

Start by seasoning the pork and letting it rest at room temperature for a bit. Pop it in your preheated Traeger at 225°F so it gets steady heat.

Once a nice bark forms and the inside hits around 160°F, wrap the pork butt in foil or butcher paper to retain moisture. Keep cooking until it reaches at least 195°F.

Let it rest before you pull it apart. That’s the trick for juicy meat.

How long does it typically take to smoke a pork butt for pulled pork?

If you smoke a pork butt at 225°F, plan for about 1.5 to 2 hours per pound. So, an 8-pounder? That’ll be 12 to 16 hours, give or take.

Things like meat size, fat content, and even the weather can mess with your timing. For more planning help, see this guide—it’s got some handy tips.

What is the 3:2:1 cooking method and can it be applied to making smoked pulled pork?

The 3:2:1 method shows up a lot when people talk about ribs. Basically, you smoke the meat for three hours, wrap it for two, then finish with sauce for the last hour.

Pulled pork needs a different approach. It cooks best low and slow, and you should only wrap it once a solid bark appears.

Trying the 3:2:1 method on pork butt or pork shoulder? Honestly, that’s not the way to go.

Smoked Sweet Potatoes Recipe: How to Perfect This Flavorful Side Dish

Smoked sweet potatoes bring a whole new level of flavor to this classic root veggie. Their natural sweetness mixes with a deep, smoky taste that’s just hard to beat.

Cooking sweet potatoes in a smoker makes them stand out as a side dish for just about any meal. The process is pretty straightforward, but the results can surprise even folks who love the usual baked or roasted versions.

With just a handful of basic ingredients, anyone can make smoked sweet potatoes that are creamy inside and have a lightly crisp skin, ideal for related recipes. They go with so many dishes and you can season them however you like, which makes them a fun option for cooks at any level.

If you follow the right steps, you’ll master this at home and probably impress a few friends or family members along the way.

Chunks of smoked sweet potatoes on a grill, seasoned and garnished with fresh herbs – a flavorful and healthy BBQ side dish perfect for smoked sweet potatoes recipes.

Key Takeaways

  • Smoked sweet potatoes are a simple way to add flavor to meals.
  • Creative seasonings and a no-fuss recipe bring out the best in this dish.
  • Good tips make cooking, storing, and serving smoked sweet potatoes a breeze.

What Are Smoked Sweet Potatoes?

Smoked sweet potatoes are just sweet potatoes cooked slow on a smoker, achieving the perfect internal temperature. This gives them a rounded, smoky flavor and a soft, tender texture.

Smoking boosts both taste and nutrition, and honestly, it’s a cool twist on a classic side.

Difference Between Sweet Potatoes and Yams

Sweet potatoes and yams aren’t the same thing, even though people mix up the names all the time. Sweet potatoes have thin, smooth skin and come in orange, white, or purple varieties.

Yams, on the other hand, usually have rough, dark brown skin and pale or white flesh. They’re starchier and not as sweet compared to other varieties of whole sweet potatoes. In most U.S. grocery stores, if you see “yam” on a label, it’s actually a sweet potato, which can be delicious in smoker recipes.

Sweet potatoes have more fiber, potassium, and antioxidants compared to real yams. These nutrients support heart health, digestion, and your immune system.

Benefits of Smoking Sweet Potatoes

Smoking sweet potatoes brings out their natural sugars and adds a smoky depth that you just can’t get from oven baking. The slow cook keeps the potatoes moist and soft.

They’re packed with fiber, potassium, and antioxidants, and those nutrients stick around through smoking, especially if you leave the skins on. The rich flavor goes great with toppings like cinnamon, maple butter, or roasted garlic butter, especially when paired with baked potatoes. You can check out more about smoked sweet potatoes at A Grill For All Seasons.

Smoking is handy if you’re already making meat or other dishes, so you can cook the potatoes at the same time. Smoked sweet potatoes are easy to slice, mash, or just serve whole as a tasty side.

Best Types of Sweet Potatoes for Smoking

Orange-fleshed sweet potatoes are the stars here—think Beauregard, Jewel, or Garnet. They’re easy to find and turn out soft and creamy after smoking.

These orange varieties have more sugar and moisture, which helps them caramelize and soak up the smoke, especially when cooked in an air fryer. Plus, they’re loaded with fiber and potassium.

White sweet potatoes work too, but they’re milder and a bit drier. If you want that classic rich flavor and creamy texture, stick with the orange ones. For more advice, swing by Hey Grill Hey.

Essential Ingredients for Smoked Sweet Potatoes

Great smoked sweet potatoes start with the right potatoes, good seasonings, and finishing touches for the smoke flavor. best results. Each step really does affect taste and texture, especially when you monitor the internal temperature with a thermometer.

Choosing Quality Sweet Potatoes

Pick sweet potatoes that are fresh and firm. Look for smooth skins without bruises or sprouts.

If they’re wrinkled or have soft spots, they’re probably older and won’t taste as sweet. Varieties like Jewel or Beauregard have deep orange flesh and a natural sweetness.

They hold up well in the smoker and keep their shape, especially when using larger sweet potatoes. Sweeter potatoes help you get that rich flavor everyone loves.

Try to grab potatoes that are about the same size so they cook evenly. Give them a good wash and scrub to get rid of dirt, but don’t peel them—the skin helps them hold together during smoking.

Seasoning and Spice Selection

Seasonings bring out the sweetness and add another layer of flavor. Most people stick with salt and pepper as a base. Olive oil helps the seasoning stick and keeps the skin soft.

If you want more flavor, toss in some cinnamon or smoked paprika. Cinnamon adds warmth, and smoked paprika gives a gentle smoky kick. Some folks like garlic powder or regular paprika for a savory note.

Here’s a quick spice mix you can try for your smoked turkey:

  • 1 tsp salt
  • ½ tsp black pepper
  • 1 tsp cinnamon or smoked paprika
  • ½ tsp garlic powder

Brush the potatoes with olive oil and sprinkle the mix on all sides. If you like bold flavors, add more; if you prefer subtle, go lighter. It’s all about what tastes good to you, including the use of hickory for a rich flavor.

Sauces, Glazes, and Toppings

The finishing touches really make smoked sweet potatoes pop. A pat of butter—salted or unsalted—is classic and adds a creamy finish.

Brown sugar or maple syrup give extra sweetness and glaze the potatoes during the last few minutes of cooking. Cinnamon maple butter or just a drizzle of maple syrup makes them taste almost like dessert, as you’ll see in a lot of Popular recipes for traeger smoked sweet potatoes are widely shared online..

If you want a savory vibe, try garlic butter sauce or a sprinkle of smoked paprika with olive oil. Mix and match toppings to find your favorite, including options like smoked turkey and compound butter, or even smoked chicken wings.

  • Butter and brown sugar for that classic combo
  • Maple syrup and cinnamon for deeper sweetness
  • Savory garlic butter for balance can be made with softened butter and herbs.

Each topping gives a different flavor and texture, so don’t be afraid to experiment.

Step-by-Step Guide to Smoking Sweet Potatoes

Smoking sweet potatoes brings out their sweetness and adds smoky depth. If you prep them right and get your Traeger grill set up, you’ll get tasty results every time.

Preparation and Prep Time

Start by washing and scrubbing the sweet potatoes really well. Leave the skins on for extra flavor and nutrients, as they are easily pierced with a fork.

Poke each potato a few times with a fork so steam can escape as they cook. Rub them with olive oil to help the skins crisp and keep them from drying out, ensuring they are easily pierced with a fork.

Add a sprinkle of salt or your favorite seasoning blend. Wrapping them in butcher paper or foil is optional, but it can help keep them moist—especially if you’re using charcoal or a pellet grill.

Prep only takes about 10 minutes. There’s no need to soak or marinate—just get them ready and toss them on the smoker or grill.

How to Smoke Sweet Potatoes on Different Grills

You can smoke sweet potatoes on pellet grills, charcoal grills, or gas grills. On a pellet grill (like a Traeger), set the temp and let the grill do its thing. Place the potatoes directly on the grill grates or use a baking tray if that’s easier.

For charcoal, set up indirect heat—push the coals to one side and put the potatoes on the cooler side. Add wood chunks or chips for more smoke. On a gas grill, turn on just some of the burners and keep the sweet potatoes away from direct flame. Use a smoker box or foil pouch with wood chips to get that smoky flavor.

Keep the potatoes in a single layer so they cook evenly. No matter the grill, close the lid while they cook for the best results. If you want more details for specific grills, check out these smoked sweet potatoes recipes.

Cook Time and Temperature

Set your smoker or pellet grill to 225°F to 250°F. At that temp, sweet potatoes usually take 2.5 to 3 hours, depending on size, which is a long time to cook but worth the wait.

If you’re in a hurry, bump the heat up to 275-300°F and start checking for doneness depending on the size. Test with a fork—they should feel soft all the way through; this indicates the sweet potatoes are done.

Don’t overcook, or they’ll get mushy. If you’re using a pellet grill, just keep the heat and smoke steady for best results.

They’re done when the inside hits about 205°F, perfect for a low and slow cooking method that takes a long time. For more details on timing and temps, check this guide.

Creative Seasoning and Flavor Techniques

Seasoning is where you can get creative. It can highlight the sweetness or give the potatoes a bold, savory kick.

Different spice blends and flavor combos let you go smoky, spicy, or sweet—whatever mood you’re in.

Savory Spice Blends

Smoked sweet potatoes pair well with hickory smoked pork for a delicious combination. herbs and spices like smoked paprika. This brings out the smoky notes, and a bit of cayenne pepper adds gentle heat, making it perfect for smoked chicken wings.

Salt and garlic powder balance the sweetness. Most folks rub the potatoes with olive oil before adding spices so everything sticks and crisps up nicely.

Here’s a classic savory blend you can try with smoked pork:

IngredientAmount
Smoked paprika1 teaspoon
Cayenne pepper¼ teaspoon
Garlic powder½ teaspoon
Kosher salt is essential when you season the sweet potatoes.To taste

Freshly ground black pepper adds a little more depth to your side dish recipes. For something fun, brush on a bit of maple syrup before serving or reheat them in the microwave for a quick side dish. bourbon before seasoning—the alcohol cooks off, but it leaves a richer flavor behind, especially when paired with a little butter.

Sweet and Spicy Combinations

To bring out the sweet notes, cooks usually reach for brown sugar or maple syrup. You can sprinkle either on the potatoes or use them to whip up a quick glaze.

This combo doesn’t just add sweetness—it gives a bit of caramel flavor too.

A classic sweet and spicy pairing? Brown sugar with a pinch of cayenne pepper. Some folks toss in pineapple chunks or a splash of pineapple juice for a tangy twist.

Pineapple keeps things fresh and helps cut through the spice or smoke.

Here’s a simple glaze you might try:

  • 2 tablespoons melted butter
  • 1 tablespoon maple syrup, which can enhance the flavor of larger sweet potatoes.
  • 1 tablespoon brown sugar
  • ⅛ teaspoon cayenne pepper

Mix these together and brush on the potatoes halfway through smoking. Don’t be afraid to tweak the spice or sweetness to fit your taste, especially when using softened butter.

For more ideas, check out smoked sweet potatoes with oil over the top. cinnamon maple butter or experiment with your own toppings.

Serving and Pairing Suggestions

Smoked sweet potatoes fit into all kinds of meals. Their natural sweetness and smoky flavor make them easy to pair with bold or simple dishes.

Smoked Sweet Potatoes as a Side Dish

They work great as a side, offering a flavorful swap for roasted sweet potatoes or fries. The soft texture and rich taste hold up well to herbs and spices.

Try topping with smoked chicken wings for a delicious twist. cinnamon maple butter or a dash of smoked paprika. For a savory spin, black pepper and sea salt do the trick.

They pair nicely with hearty dishes like lentil salad, curried chickpeas, or baked beans. For more side ideas, this guide covers plenty of options.

You can also slice and serve them with brown rice, quinoa, or a light salad for a balanced meal.

Pairing with Main Courses and Vegetables

Smoked sweet potatoes hold their own next to grilled meats like pulled pork, baby back ribs, smoked chicken legs, or BBQ chicken wings. Their sweetness balances out bold, smoky, or spicy mains. See more ideas in this BBQ pairing article.

They also go well with roasted veggies like asparagus, carrots, or broccoli. A simple green salad keeps things fresh.

For a vegetarian meal, toss smoked sweet potatoes with other roasted or grilled veggies, or serve them with a side of compound butter. Top with fresh herbs and a drizzle of olive oil for extra flavor and color.

Try serving them with a light basil vinaigrette, as suggested in this recipe pairing. There are plenty of ways to get creative—or just keep it classic.

Nutritional Benefits of Smoked Sweet Potatoes

Smoked sweet potatoes are loaded with vitamins, minerals, and fiber. They’re also naturally low in calories and work for gluten-free diets, especially when prepared as baked sweet potatoes.

Vitamins and Minerals

These potatoes are a solid source of vitamins A, C, and several B vitamins. One medium sweet potato can give you more than 100% of your daily vitamin A, which is great for vision and your immune system.

Vitamin C helps with skin health and healing. You’ll also get vitamin E, which acts as an antioxidant.

Smoked sweet potatoes have potassium, iron, and manganese. Potassium is key for heart health and fluid balance, while iron helps carry oxygen in your blood. They also offer smaller amounts of calcium and copper.

Key Nutrients Table

Nutrient% Daily Value (per medium sweet potato)
Vitamin AOver 100%
Vitamin C25-30%
Potassium20%
Iron4-8%
Calcium8%

Dietary Fiber and Antioxidants

Sweet potatoes are known for their fiber, which helps digestion and keeps you feeling full, especially when you place the sweet potatoes directly in the smoker. Fiber also slows sugar absorption, which helps control blood sugar levels, particularly when sweet potatoes are done.

They’re packed with antioxidants, especially beta-carotene, which gives them their orange color. These antioxidants protect your cells from free radical damage.

You’ll also find small amounts of vitamin E and vitamin C, both good for your immune system.

Low-Calorie and Gluten-Free Advantages

Smoked sweet potatoes are low in calories—about 100–120 for a medium one. They don’t have cholesterol or unhealthy fats.

Since sweet potatoes aren’t a grain, they’re naturally gluten-free. That makes them safe for people with celiac disease or gluten sensitivity.

You can swap them in for bread or pasta if you need to avoid gluten, especially in popular recipes featuring smoked potatoes. Want more details? Check out the nutrition in sweet potatoes here.

Storage and Reheating Tips

Smoked sweet potatoes last longer if you store and reheat them right, maintaining their delicious smoke flavor. Good storage keeps the texture and smoky flavor intact, especially when using a pellet smoker.

Best Practices for Leftovers

Once they’ve cooled, stash smoked sweet potatoes in an airtight container. Refrigerate them, and they’ll usually stay fresh for up to three days.

To keep them from drying out, wrap the potatoes in foil or plastic before sealing them in the container. If they’re sliced, lay the pieces in a single layer to ensure they finish cooking evenly.

Don’t leave smoked sweet potatoes at room temperature—it’s risky and shortens their shelf life, so ensure they reach an internal temperature before serving. For longer storage, freeze them.

Put portions in a freezer-safe bag, press out the air, and write the date on it.

Tip: If you’re freezing, let the potatoes cool all the way. Wrap each piece in foil before sealing it up. That helps them keep their flavor and texture.

How to Reheat While Preserving Smoky Flavor

To bring back that smoky taste, reheat smoked sweet potatoes in a 300°F oven. Wrap them in foil to keep in the moisture and bake for 15-20 minutes.

This method keeps the flavor and texture spot-on, allowing the smoke to penetrate deeply into the sweet potatoes. kitchen experts.

Microwaving is quicker but can make the potatoes softer. If you go this route, add a splash of water and cover with a damp paper towel.

Reheating Comparison Table

MethodTimeTextureFlavorBest For
Oven15-20 minsFirm, moistSmoky, richWhole or halved pieces
Microwave smoked potato2-3 minsSoft, tenderSlightly lessSmaller portions

Don’t reheat more than once—it dries out the sweet potatoes and kills the flavor. Always make sure they’re steaming hot before serving.

Frequently Asked Questions

Smoked sweet potatoes need some care with timing, temperature, and prep. The wood, cooking method, and steps all shape the flavor and texture.

What is the optimal smoking time for sweet potatoes at 225 degrees Fahrenheit?

Usually, sweet potatoes smoke at 225°F for about two hours. If they’re thick, give them up to 2.5 hours to get tender.

Keep the temperature steady so the smoky flavor really soaks in. You want soft flesh when you poke them with a fork. For more, see this guide on Smoking sweet potatoes at 225 degrees on a grill or smoker enhances their natural flavors..

How can one achieve a crisp texture when smoking sweet potato fries?

Cut sweet potatoes into fries and toss with a little oil. Spread them in a single layer so air and smoke can get around.

Smoke at 250–275°F to help the edges crisp up while ensuring the potatoes are cooked thoroughly. For extra crunch, finish under a broiler or on a hot grill.

Which wood chips pair best with sweet potatoes for smoking?

Apple, cherry, and pecan woods are all good picks. They add a gentle, sweet smoke that doesn’t overpower the potatoes.

I’d skip mesquite and hickory—they’re a bit too strong for sweet potatoes.

What are the preparation steps for a smoked sweet potato casserole?

Peel and dice your sweet potatoes. Smoke them until they’re tender, then mash with butter, brown sugar, and spices.

Spread the mix in a baking dish, top with marshmallows or pecans, and bake until the top is golden. You’ll get smoky flavor in every bite.

Can sweet potatoes be smoked effectively on a pellet grill, and if so, how?

Pellet grills work great for smoked sweet potatoes, ensuring they become fork tender. Preheat to 225°F, rub the potatoes with oil, and season if you like.

Put them right on the grate and smoke for about two hours. Pellet grills keep the heat and smoke nice and steady, which makes them super reliable for this job. See how it’s done for smoking sweet potatoes on a pellet grill.

Is it necessary to wrap sweet potatoes in foil while smoking for better results?

Wrapping sweet potatoes in foil helps them stay moist. But, honestly, it blocks most of that smoky flavor from soaking into the skin.

If you want more smoke and a firmer skin, just leave the potatoes unwrapped while they cook. Prefer a softer skin? Go ahead and wrap them in foil for at least part of the time.

❌