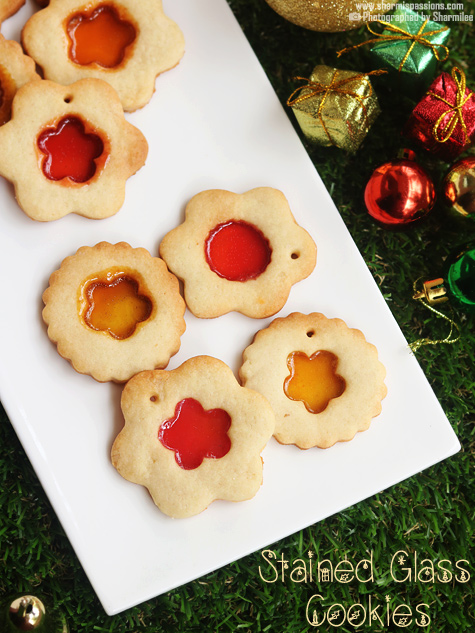
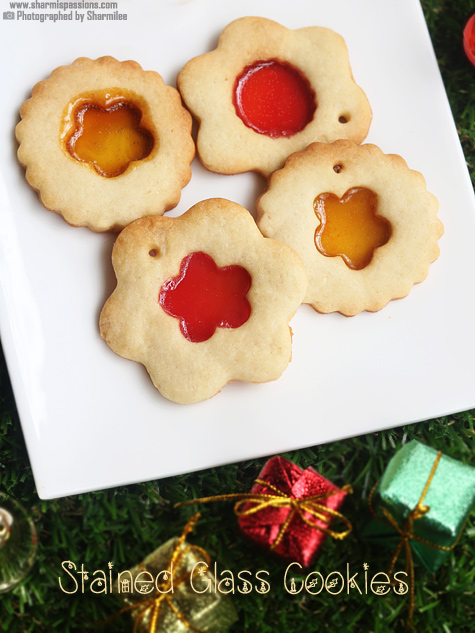
Stained Glass Cookies are such a cute and colorful treat, and sometimes I feel they look too pretty so you almost feel bad to bite into them. These come out slightly crisp at the edges with a soft bite inside, and that melted candy in the center gives the real glass like effect which kids get super excited about. Stained Glass Cookies are treat to eyes, heart & tummy and any time wonder snack. Stained Glass Cookies are a must try at home for its taste & for the joy of baking!
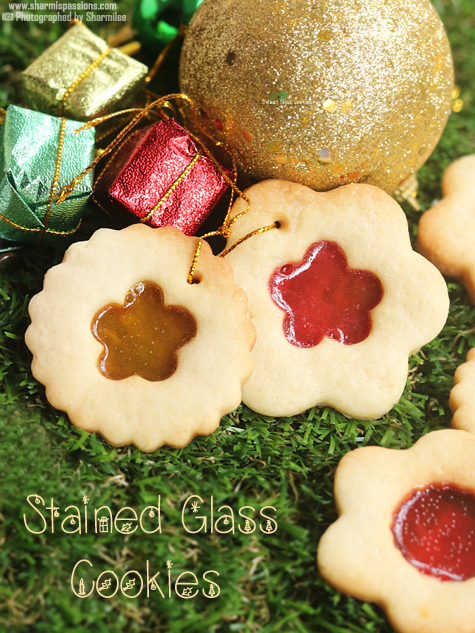
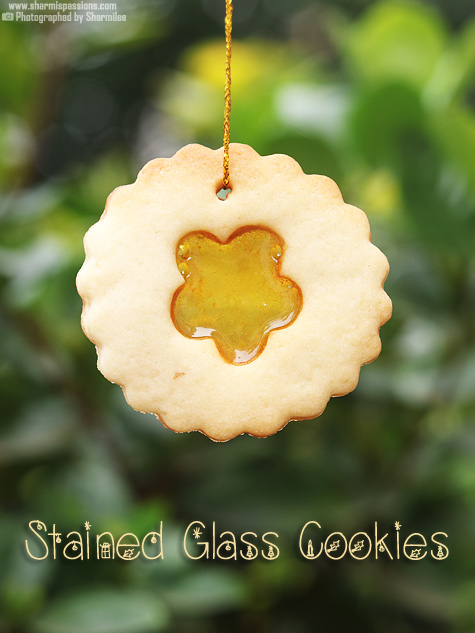
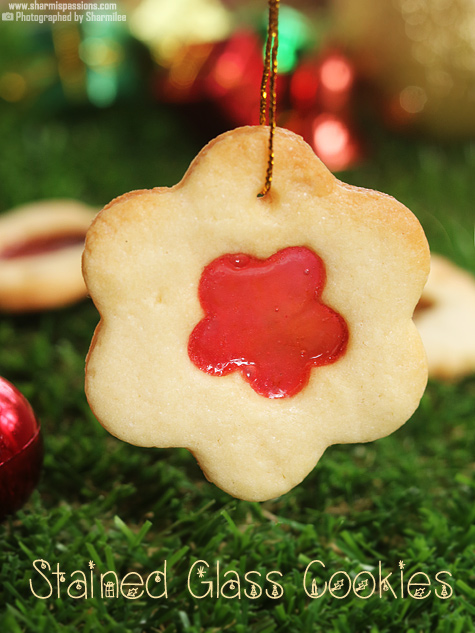
The best thing is the dough doesn't need any fancy steps or extra effort. The crushed candies melt nicely while baking and then set into a shiny centre once cooled. It goes so well with tea and also works like a sweet little edible gift. You can even hang them like ornaments if you poke a hole before baking.
[feast_advanced_jump_to]
About Stained Glass Cookies
Stained Glass Cookies are basically butter cookies made with a small cut out in the middle which we fill with crushed hard candies. Kids like it mainly for the colors and the glass effect. The vanilla in this recipe gives a nice bakery kind of feel and mixes well with the buttery dough. The dough also holds its shape pretty well since I usually chill it before rolling out.
This recipe uses a simple dough made using maida, powdered sugar and butter, so the flavor stays mild and sweet. I have used colored candies based on the theme, but you can mix any shades you want, each batch looks different and that's the fun part. Kids love helping with crushing the candies and filling the centres too.
You can go with any shapes like stars, flowers, hearts or whatever cutters you have. You just need one big cutter and one small cutter for the hollow part. The candies bubble slightly while baking and settle down beautifully after cooling. Sometimes I mix two candy colors for swirl patterns.
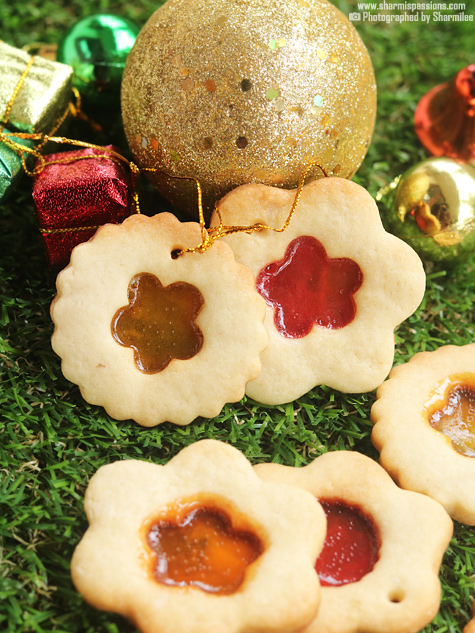
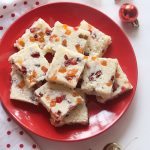
Stained Glass Cookies is a dream come true for me. Yes I had been eyeing these cookies for the past 2 years and this year somehow gained confidence and tried it.The hard candies are crushed to fill in the center holes and while baking it spread out giving the cookies a glossy look. I clicked the cookies to hearts content and loved these clicks too, I couldn't take my eyes off, aren't they looking pretty?!
I usually bake these during holidays or family get-togethers as it brightens up the whole box and tastes really nice with a warm drink too.
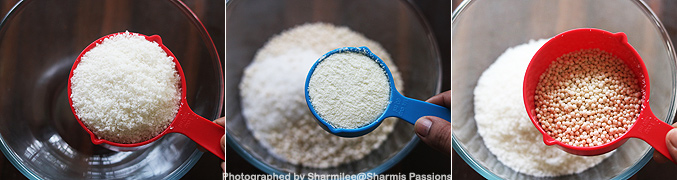
Stained Glass Cookies Ingredients
- Maida / all purpose flour - I have used this as the base for the dough. It gives smooth texture and holds shape well. You can replace half with wheat flour but cookie turns slightly dense.
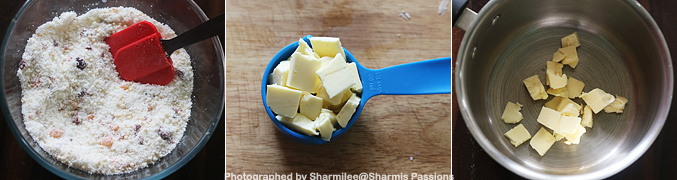
- Butter - This gives softness and flavor. I used room temperature butter so it mixes easily. Homemade butter also works.
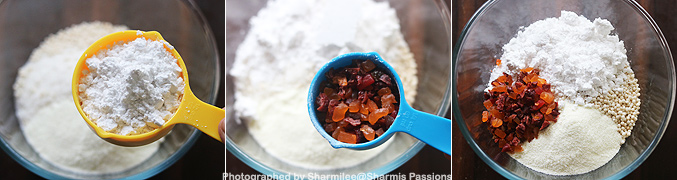
- Powdered sugar - I added powdered sugar for sweetness and also to make dough come together softly. Fine sugar works but powdered gives smoother dough.
- Vanilla essence - This gives a light flavor and bakery smell. You can skip if you prefer plain buttery taste.
- Hard colored candies - These form the stained glass centre. Use any brand or mix colors for fun patterns.
Why This Recipe Works
- It is very simple dough and easy even for beginners.
- Cookies look colorful and pretty without much hard work.
- You can choose any shape or candy color according to your theme.
- Centres turn crisp after cooling and taste so good.
- You can prepare the dough earlier and bake whenever needed.
Similar Recipes
How to make Stained Glass Cookies Step by Step
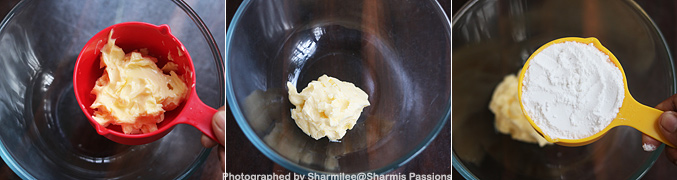
1.Measure and take butter in a mixing bowl, add powdered sugar to it
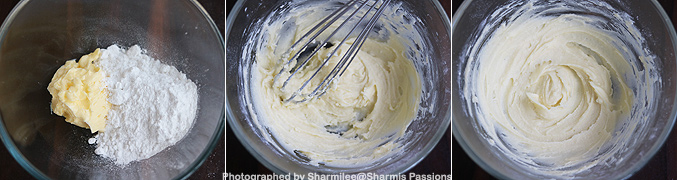
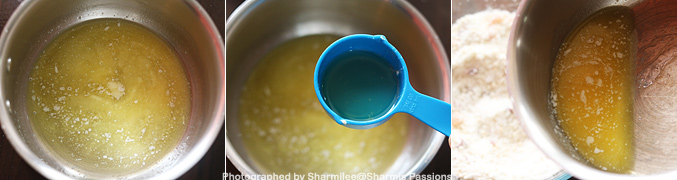
2.Whisk it well, I used my hand whisk, you can use electric mixer too. Whisk it until creamy and fluffy.
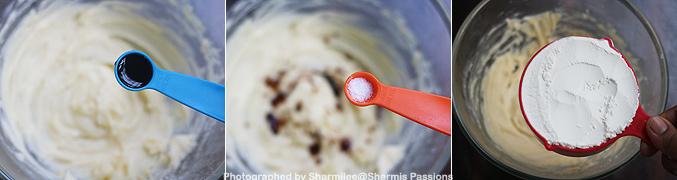
3.Now add vanilla essence and salt. Finally add in the flour
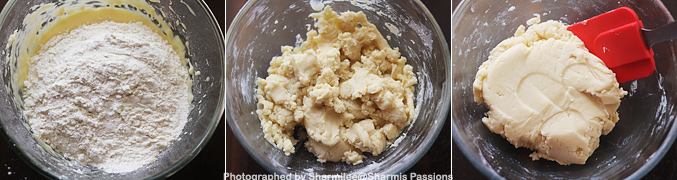
4.Mix with a spatula to form a dough.
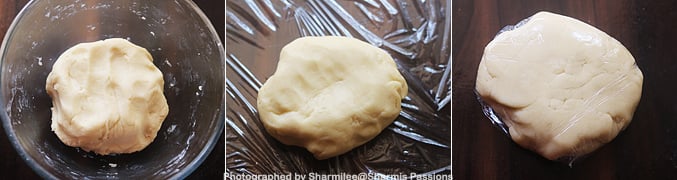
5.Now use your hands to roll into a ball, cling wrap it and refrigerate it
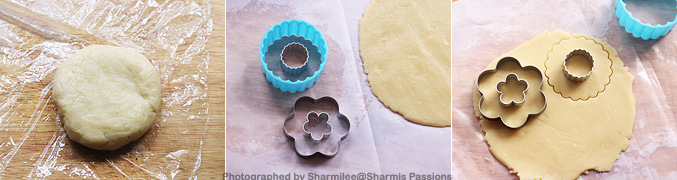
6.I used only half of the dough for this cookie. Take your cookie cutters, you need a bigger one and a smaller one like this. Roll out the dough slightly thin. Cut out using the cookie cutters.
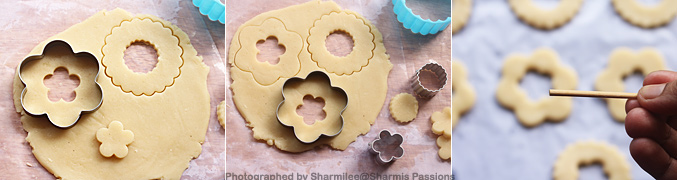
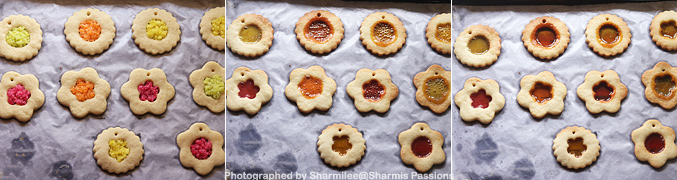
7.Remove the smaller flower.Now arrange it in a baking tray with parchment paper.Take a stick or toothpick. While you do this, Preheat oven at 180 deg C for 10 minutes.
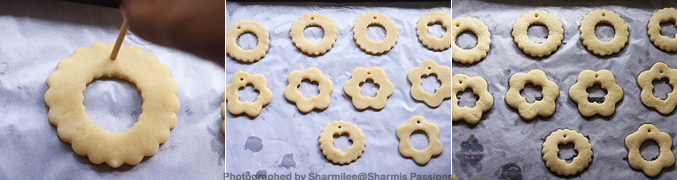
8.Prick holes a the top of each cookies, incase you want to hang these cookies for decoration.Slice the log. Keep the baking temperature for 12 minutes. Bake the cookies for the first 9 minutes.
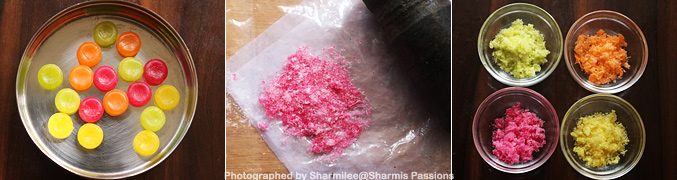
9.Take your candies, crush each color separately and keep it ready.
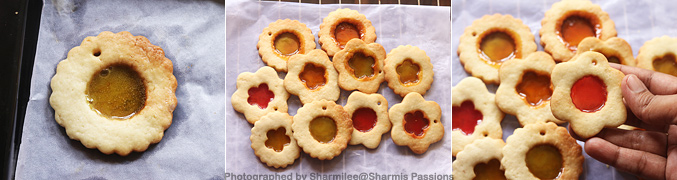
10.Now fill the holes with crushed candies,Bake for the remaining 3 minutes until it bubbles up. Let it cool down for few minutes.
11.Carefully remove the cookies and cool down in wirerack.
Cool down then store.
Expert Tips
- Chilling the dough - I make sure to chill well. I usually keep it for a while so cookies don't spread.
- Crushing candies - I always crush just before filling. Don't crush too early, they turn sticky later.
- Baking time - Bake cookies first without candies, and then add candy later so it doesn't burn.
- Thickness - I prefer thin and even thickness so roll slightly thin. If too thick, candy may not melt evenly in centre.
- Cooling - Let the cookies cool fully. The centers harden only after cooling. And don't touch the center immediately since it will be hot.
Serving and Storage
Serve the cookies with milk, tea or even hot chocolate. They look nice on festive plates or packed in small gift boxes also. Store the leftover cookies in a airtight box only after it cools down completely. It will stays fresh for almost a week when kept in room temperature.
FAQS
1.Can I skip chilling the dough?
You can skip, but the cookies may spread out and lose shape. Chilling makes it behave better while baking.
2.Why did my cookie centre look dull?
Sometimes the candy just needed few extra seconds in the heat, or maybe it was crushed too fine, so it didn't shine much.
3.Can I make the dough ahead?
Yes, the dough stays fine in the fridge for around 2-3 weeks, so you can prepare earlier also if you want.
4.What if the candy overflows?
That usually means the centre got a bit over-filled. Just reduce the candy a little next time.
5.Can I bake the candy along with the cookie?
You can, but it might get overcooked and lose color. Adding it in the last minutes gives better finish and texture.
If you have any more questions about this Stained Glass Cookies Recipe do mail me at sharmispassions@gmail.com. In addition, follow me on Instagram, Facebook, Pinterest, Youtube and Twitter .
Tried this Stained Glass Cookies Recipe? Do let me know how you liked it. Also tag us on Instagram @sharmispassions and hash tag it on #sharmispassions.
📖 Recipe Card
Print
Stained Glass Cookies Recipe
Stained Glass Cookies are such a cute and colorful treat, and sometimes I feel they look too pretty so you almost feel bad to bite into them. These come out slightly crisp at the edges with a soft bite inside, and that melted candy in the center gives the real glass like effect which kids get super excited about. Stained Glass Cookies are treat to eyes, heart & tummy and any time wonder snack. Stained Glass Cookies are a must try at home for its taste & for the joy of baking!
Course Baking
Cuisine American, French, Indian, Italian, Japanese, Mediterranean, Mexican
Keyword 30 mins recipes, all purpose flour recipes, Baking, baking recipes, butter recipes, cookie recipes, maida recipes, vanilla recipes
Prep Time 10 minutes minutes
Cook Time 20 minutes minutes
Servings 10 cookies
Calories 151kcal
Author Sharmilee J
Ingredients
- 1 cup levelled maida / all purpose flour
- ½ cup butter at room temperature
- ½ cup powdered sugar
- ½ teaspoon vanilla essence
- ⅛ teaspoon salt
- few colored hard candies
Instructions
Measure and take butter in a mixing bowl, add powdered sugar to it.
Whisk it well, I used my hand whisk, you can use electric mixer too. Whisk it until creamy and fluffy.
Now add vanilla essence and salt. Finally add in the flour.
Mix with a spatula to form a dough.
Now use your hands to roll into a ball, cling wrap it and refrigerate it.
I used only half of the dough for this cookie.
Take your cookie cutters, you need a bigger one and a smaller one like this.
Roll out the dough slightly thin.
Cut out using the cookie cutters.
Remove the smaller flower. Now arrange it in a baking tray with parchment paper. Take a stick or toothpick.
While you do this, preheat oven at 180 deg C for 10 minutes.
Prick holes a the top of each cookies, incase you want to hang these cookies for decoration. Slice the log.
Keep the baking temperature for 12 minutes, bake the cookies for the first 9 minutes.
Take your candies, crush each color separately and keep it ready.
Now fill the holes with crushed candies, bake for the remaining 3 mins until it bubbles up. Let it cool down for few minutes.
Carefully remove the cookies and cool down in wire rack.
Enjoy Stained Glass Cookies!
Notes
- Chilling the dough - I make sure to chill well. I usually keep it for a while so cookies don't spread.
- Crushing candies - I always crush just before filling. Don't crush too early, they turn sticky later.
- Baking time - Bake cookies first without candies, and then add candy later so it doesn't burn.
- Thickness - I prefer thin and even thickness so roll slightly thin. If too thick, candy may not melt evenly in centre.
- Cooling - Let the cookies cool fully. The centers harden only after cooling. And don't touch the center immediately since it will be hot.
Nutrition
Serving: 25g | Calories: 151kcal | Carbohydrates: 16g | Protein: 1g | Fat: 9g | Saturated Fat: 6g | Polyunsaturated Fat: 0.4g | Monounsaturated Fat: 2g | Trans Fat: 0.4g | Cholesterol: 24mg | Sodium: 102mg | Potassium: 17mg | Fiber: 0.3g | Sugar: 6g | Vitamin A: 284IU | Calcium: 5mg | Iron: 1mg
The post Stained Glass Cookies Recipe appeared first on Sharmis Passions.