Reading view

There are new articles available, click to refresh the page.

Complete Guide to Solventless/Non-solvent Cannabis Concentrates

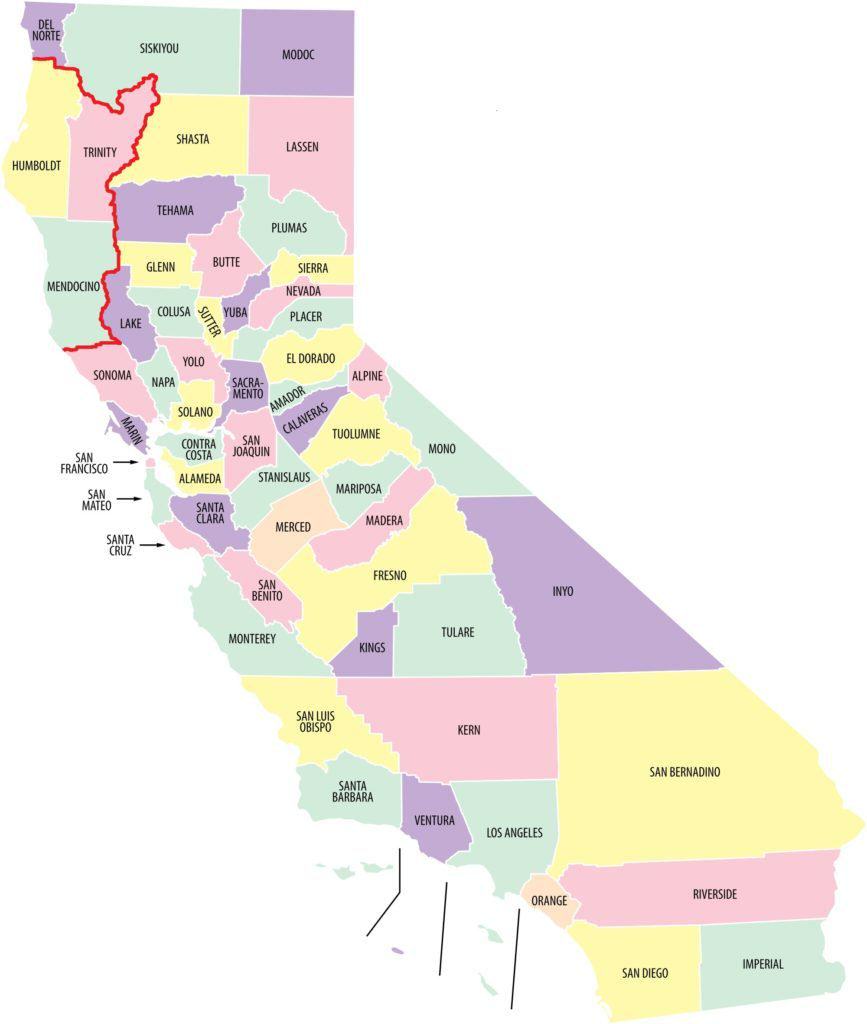
Nowadays, more and more people are being made aware of the benefits of consuming cannabis resin extracts or concentrates, which are more efficient, with higher purity and potency, and they have better flavour and give relief more quickly than smoking or vaping flowers. Indeed, in California, cannabis flowers currently make up just over half of the market (55% in the 2nd quarter of 2017.), with extracts making up the remaining 45%, and according to figures from Colorado, another beacon of legalisation in the US, the concentrate market is growing at an astounding rate, with sales increasing by 125% from 2015 to 2016, compared to an 11% rise in flower sales and a 53% rise in edibles.

Fresh frozen ice water hash (Photo: @hashcelona)

Fresh frozen ice water hash (Photo: @amc98)

Solvent, Non-solvent, Solventless, and Solvent-free. What’s the difference?

These terms are increasingly common to see in the menu in dispensaries or cannabis clubs, but they can cause some confusion, so let’s examine the real meaning behind them within the context of the cannabis world. Solvent extracts are those that are carried out using a (usually a hydrocarbon like purified butane gas) solvent to dissolve the active ingredients and separate them from the plant material. Solventless or non-solvent is a label applied to products that have been extracted mechanically, without the use of solvents. Now, here’s where it can get a bit confusing. Solvent-free is a term used to describe products that were originally extracted with a solvent but later distilled in a laboratory to remove any trace of solvent residue. So they started as solvent extracts but now are 100% free of any residual solvents, as opposed to a well-purged BHO, which will always contain a certain, however minuscule, amount of solvent.

[productes tipus=”fitxa” cat=”194″ nfitxes=”3″]

Solventless or Non-solvent Concentrates

These are extracts or concentrates produced without the use of a solvent, sometimes referred to as mechanical extractions, including hash, dry sift, bubble hash, and rosin. Many smokers and dabbers prefer to consume extracts for health reasons (especially those using medical cannabis), as opposed to solvent-based extracts; there’s no risk of inhaling any residue of potentially harmful solvents if the product isn’t properly purged. Solventless extractions have the added benefit of being almost completely safe to carry out at home, with no risk of burning or explosion from using flammable solvents and no need to invest in expensive equipment. While solvent extracts boast a higher purity overall, with quality material, skill, and patience it’s possible to achieve similar, or even better quality results using non-solvent techniques. (Although yields at this higher quality tend to be much lower than, for example, BHO, solventless devotees are undeterred and more than willing to take this loss in exchange for consuming clean, natural concentrates.)

The evolution of solventless concentrates is astounding (Photo: @hashcelona)

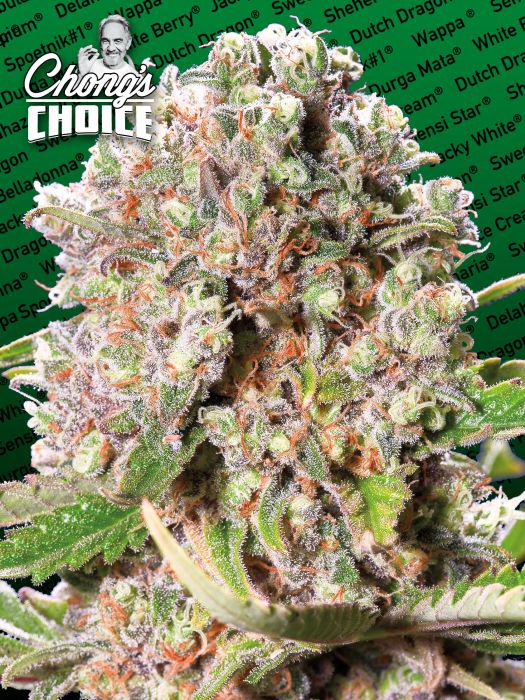
The evolution of solventless concentrates is astounding (Photo: @amc98)

Hash

When we talk of hash, we’re usually referring to dark block resin imported from hash-producing countries like Morocco, Lebanon, Pakistan, and Afghanistan. Hash has a very long history and is produced in large quantities using traditional methods that vary according to the country, but often involve drying plants in full sun and vigorous beating over fine screens to collect the resin heads. These are then heat-pressed into blocks for export. Quality can vary wildly, with the very finest blonde hashish commanding high prices in the coffee shops of Amsterdam. Most of what is produced, however, is of medium to low quality, has a very low THC content, from 6-17%, some CBD and very low terpene levels, with a typically generic and degraded terpene profile and containing much contamination in the form of plant matter as a result of the lively bashing the flowers receive as the farmers try to shake all the resin off the plants.

In the worst cases, imported hash has been found to contain such adulterants as henna, shoe polish, rubber, beeswax, animal dung, and pine resin, among other unsavoury substances added to increase the bulk or to make the hash softer and appear of a higher grade. Fortunately, the increase of home growing has reduced the demand for imported hash somewhat, and at the same time awareness of issues surrounding quality have increased in both import and export countries so, at least in Morocco, farmers and hash producers are beginning to change methods and export a much higher grade product, as you can read in our article Origins and evolution of Moroccan hash.

Imported hash tends to be dark in colour

Imported hash of varying quality

Charas

A traditional Indian method, this is possibly the simplest, most straightforward method of hash production, and one of the oldest. No equipment is required, as the process involves hand-rubbing live cannabis flowers (on the plant or freshly cut, not dried) to remove the resin. This results in a hash that is much more squidgy and soft than that beaten over screens and has a good reputation for high quality worldwide, especially for its higher terpene content. Charas is normally quite dark in colour and sold as balls or sticks, and traditionally would be smoked in a stone chillum by Sadhus, the Hindu monks, for whom it plays an important part in their rituals and religious practices. While it is made in other hash-producing countries, Indian charas is widely accepted as being the best quality, with different regions gaining a reputation for the standard of their products, with perhaps the most famous and demanded being Malana Cream from the Parvati Valley.

[productes tipus=”fitxa” cat=”591″ nfitxes=”3″]
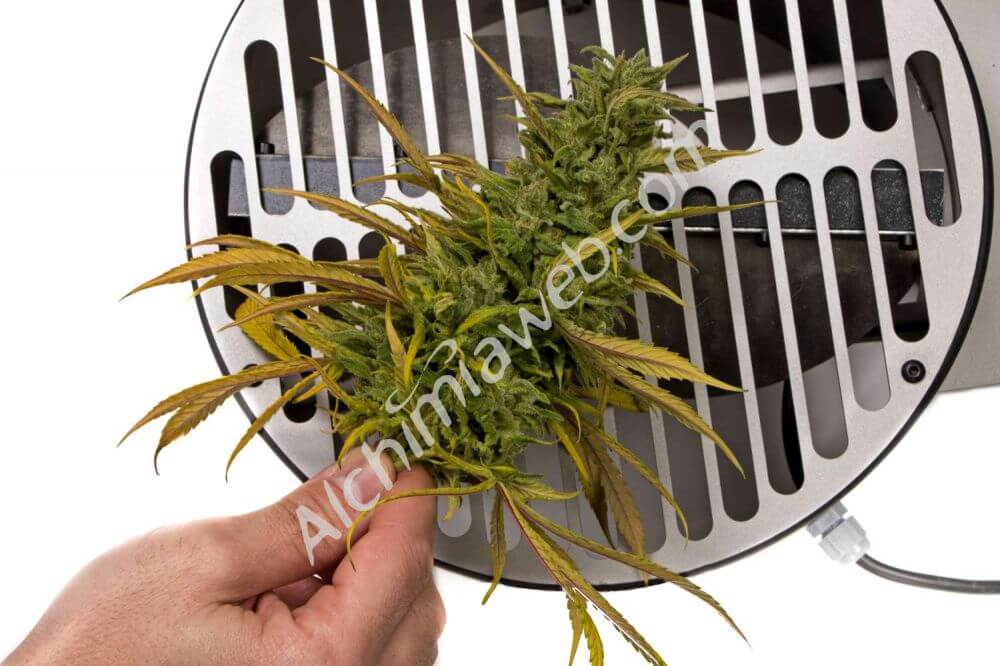
Dry Sift/Kief

This is hash made with light agitation of dried buds over a fine mesh screen, basically a refinement of the traditional sieving process updated to yield a much higher quality end product. Indeed, true connoisseurs consider the highest grade of dry sift to be the absolute pinnacle of extracts; this is static-cleaned dry sift, refined with the help of silkscreens and static electricity to contain 99% pure resin heads. Made under optimum conditions of temperature and humidity with expertly-grown flowers of selected genetics, this technique can produce an extract of astounding quality, light golden coloured with a sand-like texture and a terpene profile as near to the plant as possible, untouched by water or solvent. The big drawback of this technique is the small return achieved from the starting material at this quality, often as low as 2%!

Three kinds of dry sift extraction

Dry Sift, looking closely, you can observe the differing amounts of contaminant according to quality (Photos: @theenglishcut)

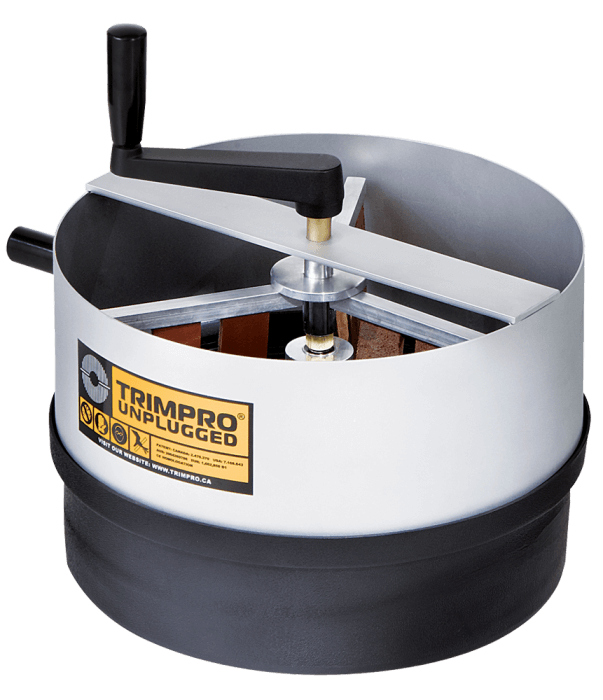
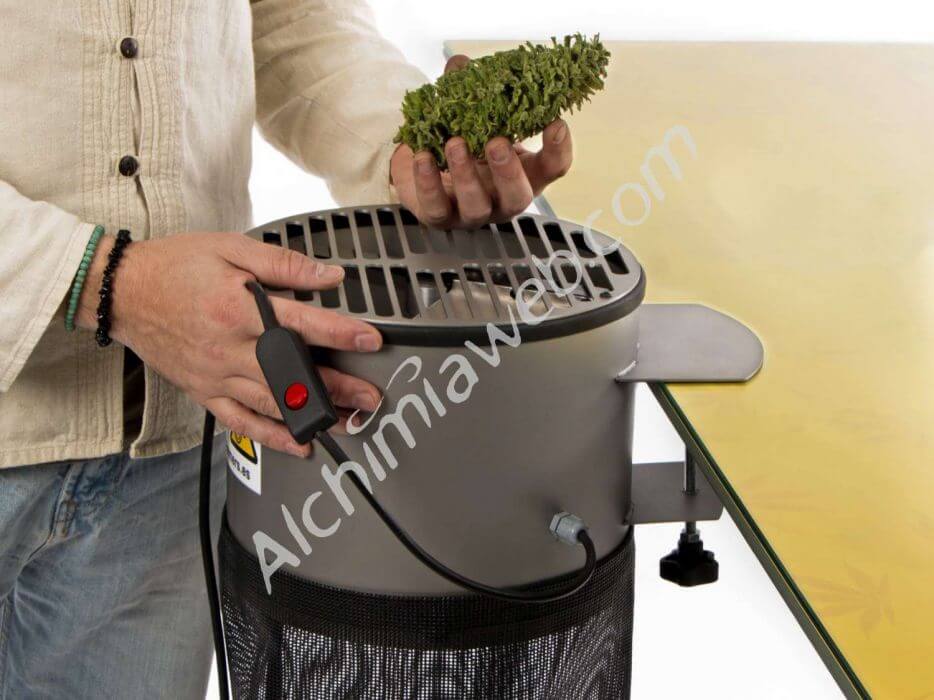
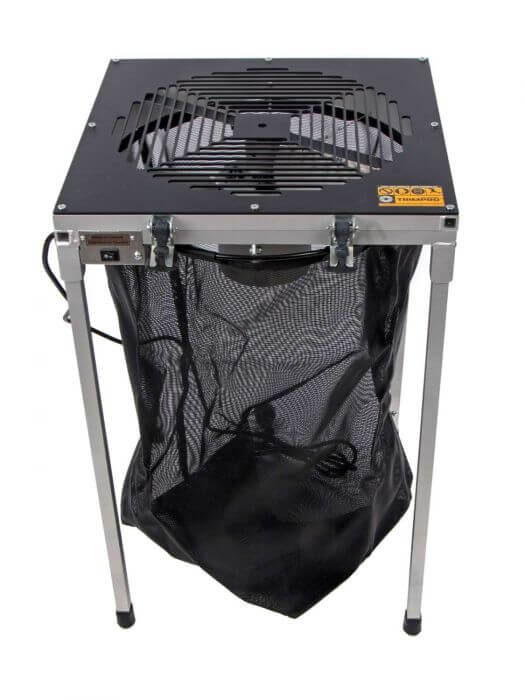
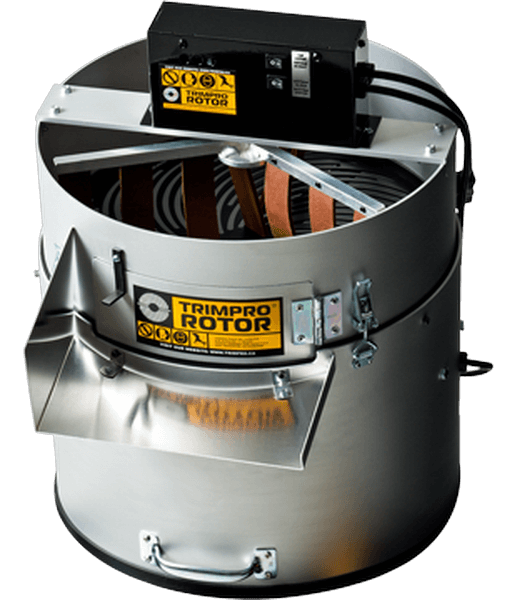
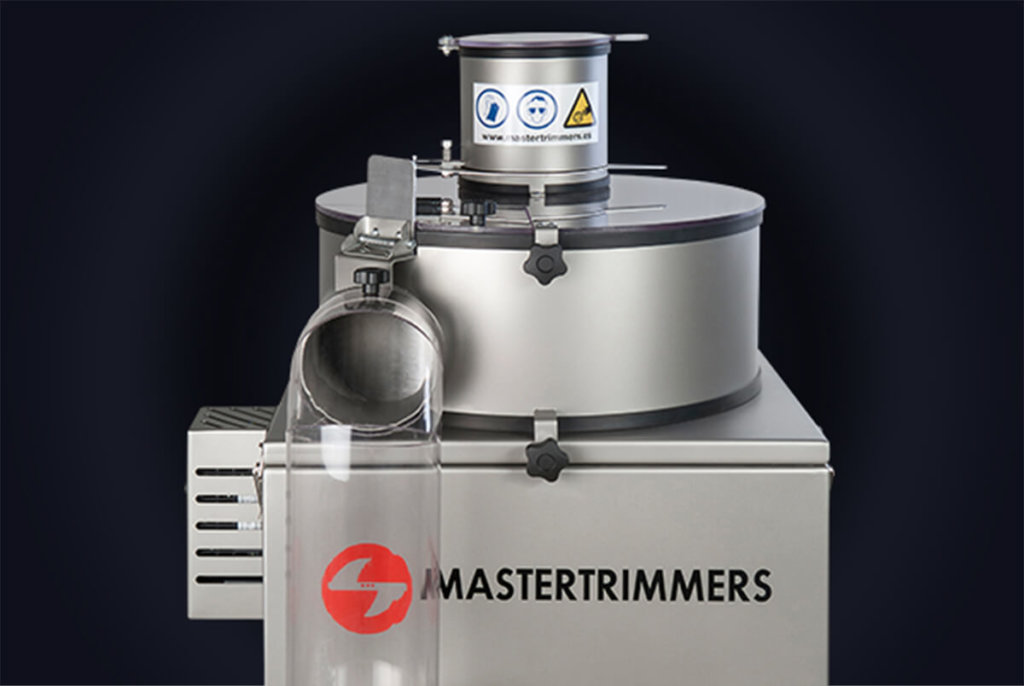
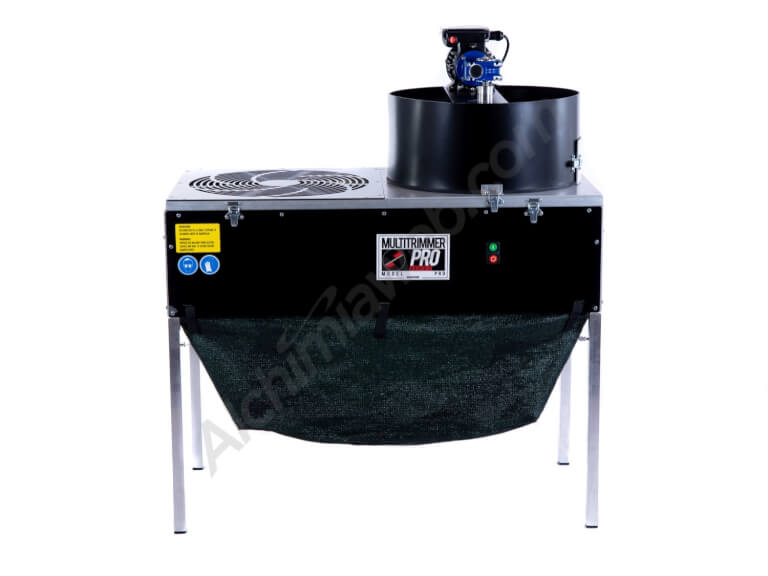
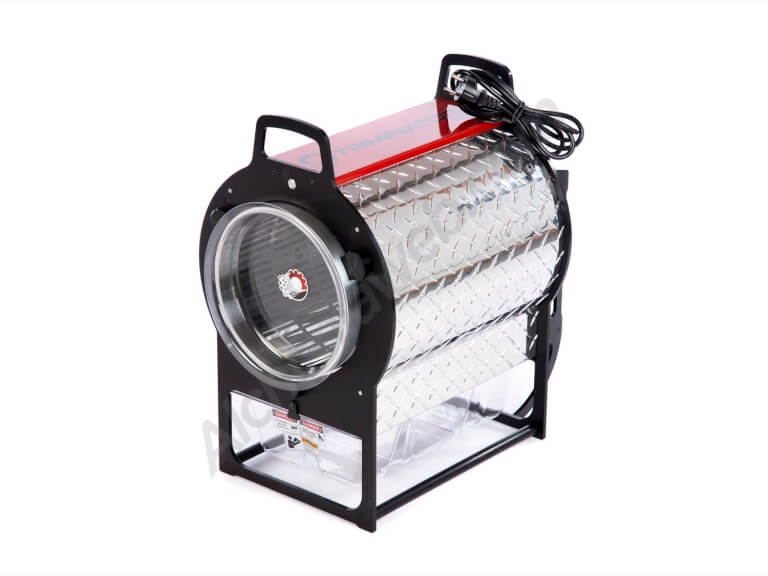
Much higher yields of dry sift can be achieved by using a tumbler machine fitted with a screen mesh drum to agitate the flowers or trimmed sugar leaves. Yields and purity will vary in relation to the quality of the material and the duration of the spin, with more and more contaminants being introduced to the hash as time passes and the vegetable matter breaks up from agitation. Most of the dry sift that is commercially available in dispensaries and clubs will be of this quality, denominated “farmers grade” with a THC content of anything from 30% to 50%, compared to connoisseur quality static dry sift which can reach as high as 75-80%, and is reflected in the premium price it commands, within reach of precious few. Good quality dry sift will be light coloured without any green tinge, and have the appearance of desert sand, and when pressed between finger and thumb should readily stick together and form a ball, rather than breaking up again, which would indicate a high content of vegetable matter such as trichome stalks and pistillate hairs. If you’re interested in trying it out for yourself, here’s a post about how to make dry sift.

Static Dry Sift

This is the purest form of dry hash, resin heads that have been subjected to a thorough cleaning process employing various screens and using static electricity in one form or another to remove anything apart from the trichomes, a long and laborious process that results in hashish of extraordinary quality but with very low yields indeed.

Dry Ice and Nitro hash

These two methods are basically super-cooled dry sift, where the material is exposed to extremely low temperatures (-78.5ºC in the case of dry ice, and much, much lower for liquid nitrogen) and then agitated on a mesh screen to separate trichome glands from leaf matter. These methods both have the advantage of being very fast processes, enabling a full extraction in a matter of minutes, and offering very good yields compared to regular dry sift. The disadvantage to these extractions, at least from the point of view of a hash connoisseur, is that the extreme temperatures being used lead to the leaf matter becoming so brittle that if not treated with utmost care, it can break down to form a fine dust that contaminates the result, often leading to hash with a green tint. We’ve written an article about how to make dry sift with dry ice. Please check the link!

Dry ice is a very fast method to separate resin

Dry ice is a very fast method of separating resin

Fresh Frozen dry sift

In the last year or so, some industry leaders have been experimenting with this method in an attempt to produce the most terpene-rich solventless extract possible, comparable to “Live Resin” a hugely popular form of BHO. Fresh frozen dry sift is made with freshly-harvested frozen buds, tumbled in a pollinator machine adapted for use in a sub-zero environment (a chest freezer or an industrial freezer unit) and dried via lyophilization in a freeze-drier after separation. This means that the cold chain is uninterrupted throughout the entire process of extraction and drying, resulting in total retention of terpenes and some of the most intensely flavoured extracts that this writer has ever had the pleasure of tasting.

Bubble Hash/Ice-o-lator/Water Hash/IWE (Ice Water Extract)

These are all terms used to describe the same product, cannabis resin extracted from the plant material using very cold water, ice cubes, and agitation. Buds or trim are stirred by hand or spun in a portable washing machine, then specially made mesh bags or screens are used to filter the water and separate the resin heads from the vegetable material and then further separate the trichomes according to size.

Like most things, the quality depends on the starting material used, and bubble hash can be of varying quality, with the lowest grade being dark brown pressed resin, little better in appearance and purity than import hash, but on the other hand, when well-cultivated flowers are extracted with the utmost care, the end result can be of the utmost quality, exquisite golden caviar approaching BHO and Rosin in appearance, terpene content and cannabinoid content. Indeed, many connoisseurs consider bubble hash to be the finest of all concentrates.

A selection of bubble hash or iceolator

Different types of bubble hash or IWE (Photos: @theenglishcut)

While we’re on the subject, it’s a good time to clear up an issue that is the source of frequent controversy and argument amongst extractors. The idea that water hash, bubble hash, or ice-o-lator is somehow not a solventless extract because it’s made with water, which is known by many as the universal solvent. Unarguably, H2O is indeed a solvent, and a great variety of things will dissolve in it. However, this mechanical separation technique involves employing water not as a solvent, but simply as a medium that allows us to create the perfect conditions in which to carry out the extraction by which the trichomes sink and the plant matter floats. At no point are the resin heads dissolved in the water for later recovery, and while a certain amount of water-soluble terpenes may be taken on by the water, this cannot in any way be considered a solvent extraction.

Fresh frozen bubble hash

Ice water extract made with freshly cut plants frozen immediately after harvest, this makes the most terpene-rich and therefore most intense-tasting hash, and while bubble hash made with dried and cured flowers may boast less flavour, it results in a more physically stable product that is far less likely to degrade during long-term storage. We did a head-to-head comparison between fresh frozen and bubble hash made with dried flowersCheck it out here.

There's no need to use solvents to get top grade resin concentrates (Photo: @hashcelona)

There’s no need to use solvents to get top-grade resin concentrates (Photo: @amc98)

Rosin

Possibly the newest method of solventless extraction, Rosin involves extracting a full-melt oil of high purity from flowers or hash using nothing more than heat and pressure. This method, in its current form, came to popularity around the spring of 2015 when Phil “Soilgrown” Salazar exposed the technique on Bubbleman’s weekly YouTube show Hash Church, showing just how easy it was to produce top-quality oil with as little equipment as a hair-straightening iron and some parchment paper. This revolution democratised oil production, placing it in the hands of anybody; no longer was it necessary to face the risks and dangers of butane extractions or to spend vast sums of money on closed-loop extraction systems to get high-grade resin products suitable for dabbing.

These days, the industry has expanded, and the market is full of rosin presses suitable for all pockets, from heavy-duty industrial presses capable of exerting more than 30 tons of pressure for the professionals, to small hand-held units ideal for beginners. The final texture of rosin can vary greatly from shatter to wax to budder to sauce, and this will depend on many factors, from the condition of the starting material, the genetics used, the temperature of the press, and the subsequent storage of the rosin. As a general rule, flower rosin will be tastier, while hash rosin will be more potent, but there will always be exceptions to this rule.

Flower Rosin

This is produced with cannabis buds, and the best results will come from flowers that have been dried but not cured for very long, as the longer the cure, the more the trichomes will oxidise and lend a darker colour to the extract. Unlike with BHO or Bubble Hash, it’s not really possible to process freshly-harvested buds and satisfactorily produce “Live Rosin”; the moisture content of recently-cut flowers is far too high to yield a stable product. Find out how to make it for yourself here.

Rosin in its various forms

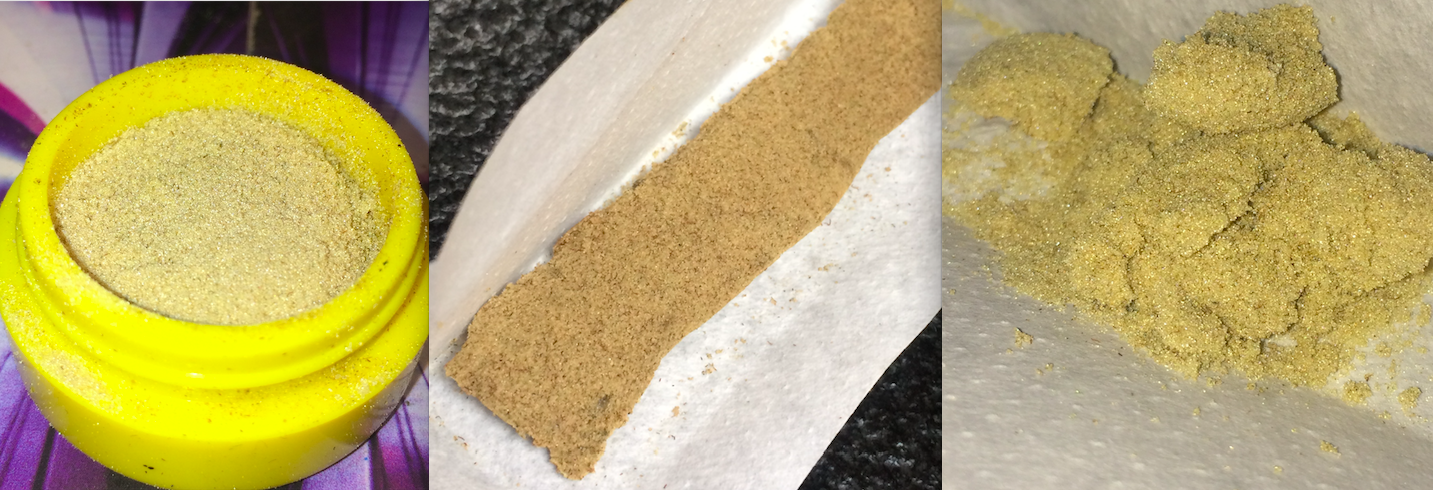
Rosin from flowers and hash (Photos: @theenglishcut)

Hash Rosin

As the name implies, this is Rosin pressed using Hashish as the starting material. and using some kind of filter, such as specially made rosin bags or coffee filters, to keep any plant matter contamination out of the extract. Because we’re dealing with a product that is already in a concentrated form, the yields obtained are typically much higher than for flower rosin. All kinds of hash can be pressed, though the yields and the quality obtained will depend entirely on the quality of the raw material, with street import hash producing around a 20-50% yield of dark oil with typically floral hash terpene profiles while a full-melt single-source bubble hash can produce yields of up to 90% of an almost transparent, golden/yellow colored oil with an aroma that’s very faithful to the original plant. One of the more recent novelties has been the introduction of “Live Rosin”, a term referring to rosin pressed from Fresh Frozen bubble hash, resulting in a very sappy and terpene-heavy extract. We’ve written an article detailing how to make your own Hash Rosin at homeCheck it out here.

Solventless THC-A

A new process that is still very much in its infancy, this is made by taking terpene-rich rosin and re-pressing it at a very low temperature (around 55-60ºC) through a 25-micron screen. This separates the rosin into two fractions: the filter will contain yellow/white crystal-textured THC-A and a high-terpene sauce will ooze out onto the parchment. While this may or may not result in 100% pure THC-A, it’s certainly an interesting product for those who prefer medicating with fully solventless extracts.

We hope this guide will be useful to better understand what solventless concentrates are and how they’re obtained.

Happy extracting!


Publications referenced for this article:

The post Complete Guide to Solventless/Non-solvent Cannabis Concentrates appeared first on Alchimia blog.

Temperatures for vaporising Cannabis

Cannabis vaporisers and temperature control

The increase in use of vaporisers that we’ve seen in recent years is in response to a growing demand on the part of the consuming public, not only the medicinal users, but also a growing number of recreational consumers who are more and more concerned for their health and who want to find alternatives to the traditional combustion of flowers or cannabis extractions.

As a result, the market is rapidly expanding, with the appearance of more and more devices for vaporising both dried herbs and resins, usually incorporating some kind of system to control either vaporisation temperature or battery voltage (or featuring both systems on the same device), giving the user total control over the temperature at which the product will vaporise.

Volcano Vaporiser

Our vaporiser must have a good temperature control system

This feature, which, as we discussed, is increasingly common in the majority of vaporisers, not only allows users to regulate the vaporisation temperature and, therefore, the vapour density and flavour, but also offers the possibility to have a fairly approximate idea of which compounds are reaching their boiling point and being vaporised, and those which are not.

This fact, which at first glance might seem of secondary importance, in fact directly affects the smell, taste, and effects of the cannabis we consume, so we must pay careful attention to temperature if we want to maximise the enjoyment of our vaporiser and take full advantage of its characteristics. Normally, cannabis concentrates are vaporised at somewhat higher temperatures than plant matter.

Also note that this feature is not only restricted to vaporisers, whether they are desktop or portable units, but also applies to electric nails, which usually feature a vaporisation surface of medical grade titanium or quartz that is fitted onto a bubbler and heated with an electrical element, reaching temperatures high enough to “dab” concentrates, offering total control over the temperature of the nail, where we place the resin to be vaporised.

Vaporite V-nail

Electric nails allow accurate temperature control

Cannabinoids, terpenes, flavonoids, and their boiling points

As we already know, cannabis flowers and extracts both contain a large number of active compounds, the best known of which are the cannabinoids, terpenes, and flavonoids, and also a very small number of toxic substances that can be vaporised at the same time if their boiling point is reached. Each of them has a different melting point and boiling point, so some compounds may not vaporise completely – or at all, if we’re operating the vaporiser at particularly low temperatures.

The melting point is the temperature at which a substance passes from a solid to a liquid state, while the boiling point is the temperature necessary for this substance to pass from a liquid to a gaseous state, that is, the temperature at which each substance will vaporise so that we can inhale it. In this way, we can have some control over the compounds that we are going to vaporise, depending on the selected temperature. For this reason, the temperature control is a vital tool in cannabis vaporisers, and it must work perfectly to give us real control over the compounds we want to inhale, particularly if we are using it for medicinal purposes.

[productes tipus=”fitxa” cat=”258″ nfitxes=”3″]

What follows is a list of the most important cannabinoids, terpenes, and flavonoids in cannabis, with their boiling points and main therapeutic properties, to give you a clear idea of which compounds are being vaporised at certain temperatures. We also include the main toxic substances released, also with their corresponding boiling points:

Cannabinoids:

  • Delta-9-tetrahidrocannabinol, Delta-9-THC: Boiling Point: 157ºC (314ºF). Analgesic, antiemetic (combats nausea and vomiting), antioxidant, anti-inflammatory, and euphoric properties. Formula: C21 H30 O2
  • Cannabidiol, CBD: Boiling Point: 160-180ºC (320-356ºF). Anxiolytic, analgesic, anti-inflammatory, antipsychotic, antioxidant and antispasmodic properties. Formula: C21 H30 O2
  • Cannabigerol, CBG: Boiling Point: Unknown. Anti-inflammatory, anti-fungal, and antibiotic properties. Formula: C21 H32 O2
  • Cannabinol, CBN: Boiling Point: 185ºC (365ºF). Antibiotic and sedative properties. Formula: C21 H26 O2
  • Cannabicromene, CBC: Boiling Point: 220ºC (428ºF). Anti-inflammatory, anti-fungal, and antibiotic properties. Formula: C21 H30 O2
  • Tetrahidrocannabivarin, THCV: Boiling Point: 220ºC (428ºF). Analgesic and euphoric properties. Formula: C19 H26 O2
  • Delta-8-tetrahidrocannabinol, Delta-8-THC: Boiling Point: 175-178ºC (347-352ºF). Antiemetic properties similar to THC, but more stable and less psychoactive. Formula: C21 H30 O2
Cannabinoids and their therapeutic applications

Cannabinoids and their therapeutic applications (Source: Cannabisconsciente.com)

Terpenes:

  • Terpineol: Boiling point: 217-218ºC (422-424ºF). Sedative, antibiotic, antioxidant, antimalarial properties, and an acetylcholinesterase inhibitor. Formula: C10 H18 O
  • Borneol: Boiling point: 210ºC (410ºF). Antibiotic properties. Formula: C10 H18 O
  • Linalool: Boiling point: 198ºC (388ºF). Sedative, antidepressant, and anxiolytic properties. Reinforces the immune system. Formula: C10 H18 O
  • P-Cymene: Boiling point: 177ºC (350ºF). Antibiotic and anti-candida properties. Acetylcholinesterase inhibitor. Formula: C10 H14
  • D-Limonene: Boiling point: 177ºC (350ºF). Antidepressant and anti-mutagenic properties. Reinforces the immune system. Formula: C10 H16
  • Eucalyptol (1,8-cineol): Boiling point: 176ºC (348ºF). Stimulant, antibiotic, antiviral, anti-inflammatory, and antinociceptive (pain reduction) properties. An acetylcholinesterase inhibitor increases cerebral blood flow. Formula: C10 H18 O
  • 3-Carene: Boiling point: 168ºC (334ºF). Anti-inflammatory properties. Formula: C10 H16
  • Myrcene: Boiling point: 166-168ºC (330-334ºF). Analgesic, anti-inflammatory, antibiotic, and anti-mutagenic properties. Formula: C10 H16
  • Pinene: Boiling point: 156ºC (312ºF). Anti-inflammatory, stimulant, bronchodilator, antibiotic, and anti-neoplastic properties. Acetylcholinesterase inhibitor. Formula: C10 H16
  • Caryophyllene: Boiling point: 119ºC (246ºF). Anti-inflammatory, antimalarial properties. Protects gastric mucus. Formula: C15 H24
  • Pulegone: Boiling point: 224ºC (435ºF). Sedative and antipyretic properties. Acetylcholinesterase inhibitor. Formula: C10 H16 O
  • Terpinen-4-ol: Boiling point: 209ºC (408ºF). Antibiotic properties, an acetylcholinesterase inhibitor. Formula: C10 H18 O
A few of the terpenes found in cannabis

Some of the terpenes found in cannabis

Flavonoids:

  • Quercetin: Boiling point: 250ºC (482ºF). Antioxidant, anti-mutagenic, antiviral, and anti-neoplastic properties. Formula: C15 H10 O7
  • Cannaflavine A: Boiling point: 182ºC (359ºF). Cyclooxygenase and 5-lipoxygenase inhibitor. Formula: C21 H20 O6
  • Apigenin: Boiling point: 178ºC (352ºF). Anxiolytic, anti-inflammatory, and oestrogenic properties. Formula: C15 H10 O5
  • Sitosterol: Boiling point: 134ºC (273ºF). Anti-inflammatory properties, an inhibitor of 5-alpha-reductase. Formula: C29 H50 O

Toxins:

  • Toluene: Boiling point: 110.6ºC (231ºF). It can cause drowsiness, loss of appetite, nausea, and mild dizziness. It is much less toxic than benzene. Formula: C6 H5 – C H3
  • Benzene: Boiling point: 200ºC (392ºF). Carcinogenic substance. Formula: C6 H6
  • Naphthalene: Boiling point: 218ºC (424ºF). It can cause drowsiness, loss of appetite, nausea, paleness, and mild dizziness. Possible carcinogenic substance. Formula: C10 H8
  • Carbon monoxide (CO) and smoke tars: Boiling point: 230ºC (446ºF), in other words, at the point of combustion. These are carcinogenic substances.

[productes tipus=”fitxa” cat=”569″ nfitxes=”3″]

Important aspects when vaporising cannabis

If we want to make the most of our vaporiser and take advantage of the properties of the substances that cannabis contains, then we must start with top-quality plant material. We can break it up with a grinder to achieve more homogeneous and efficient vaporisation, although we must also take into account the moisture content of the flower material.

Normally, if the material is very dry, somewhat lower temperatures are used, while in the case of being too wet, it can be difficult to vaporise the cannabinoids correctly. Advanced users then perform an initial heating of the material at about 138-148°C, at which temperature basically only flavonoids are vaporised while the plant material will dry considerably. In this way, it can be heated again to a higher temperature to vaporise all the cannabinoids and terpenes (which have, as we have seen, a higher boiling point), now with the correct texture and humidity to allow uniform and effective vaporisation.

Cannabis contains a great number of compounds

Cannabis contains a great variety of compounds

Another current vaping practice has to do with the type of effect being sought. Many users will vaporise Sativa-dominant cannabis strains during the day to obtain a stimulating, cerebral effect. Those who are aware of the different boiling points of the cannabinoids will already know that vaporising at lower temperatures (about 155-160°C) evaporates THC but not the other compounds with sedative and relaxing properties, so a cleaner, energising effect is achieved.

In contrast, those who consume to relax (usually in the evening) tend to prefer Indica-dominant varieties, which have a more narcotic and sedative effect than Sativas. To further enhance this particular characteristic of the Indica chemotype, these users will increase the vaporisation temperature (up to about 205-210ºC) to ensure that the compounds with relaxing properties will also be released.

Although this list can be very helpful when choosing the vaporisation temperature that suits us, we must remember that there are several factors that can cause boiling points to vary slightly. To begin with, these temperatures are taken at a certain atmospheric pressure, so it’s not the same to vaporise at sea level as at 4,000 meters. Another important aspect is the precision of the heating element of the vaporizer or electric nail that we are using. These devices (like almost any type of measuring instrument) have a range of precision; in other words, they always have a small margin of error of a few tenths of a degree (in quality devices) or of some degrees (in lower range devices). Logically, the more precise we want to be, the more we will strive to make this margin of error as small as possible.

The temperature control of the vaping device must be precise

The vaping device must offer precise temperature control

Also, don’t forget that at temperatures above 200°C, cannabis can begin to release traces of benzene, a carcinogenic substance that many users prefer to avoid by working at lower temperatures. Above this temperature, the plant material can begin to burn, depending to a large extent on the degree of humidity present in the flowers. At 230ºC, we can already see evidence of combustion, as plant tissues are burned and the toxic substances we talked about – like toluene, benzene, naphthalene, carbon monoxide, and tar – are released.

We hope that this article will help you to leave combustion behind you, put aside your pipe, bong, hookah, etc., and start to take full advantage of your vaporiser, which will allow you to benefit from the therapeutic properties of cannabinoids, terpenes, and flavonoids without the health risks that combustion involves.

Happy vaping!

The post Temperatures for vaporising Cannabis appeared first on Alchimia blog.

The best cannabis trimming machines

As every grower knows, the most time-consuming and labour-intensive part of the cannabis cultivation process is trimming the harvested buds. While a few small plants can be trimmed by hand with scissors in a reasonably short time, larger plants or greater numbers can be a gargantuan task and often call for the use of some kind of trimming machine if the harvest is to be carried out within the optimum time period.

Here at Alchimia Grow Shop, we understand this need and, as a result, we take care to offer a wide range of trimming machines to suit all situations and budgets. From the most basic, hand-operated manual trimmer to the most futuristic and high-specification machines, we’ve got something for everyone. In this article, we’ll take a look at the different options available and help to make it easier for you to decide which is the right trimmer for you.

Master Trimmer Pocket

Master Trimmer Pocket

Scissors

If you’re only harvesting a small plant or two, then there’s little point in investing in a machine of any sort when a simple pair of scissors will do the trick perfectly! Whether you choose spring-loaded clippers with straight blades or curved blades, or the classic bonsai clippers, you will find them just as useful for pruning and taking cuttings during cultivation as they will be for hand-trimming your buds.

Precision Bonzai scissors

Precision Bonzai scissors

Scissors are also great for giving machine-trimmed buds those last finishing touches when aiming for perfection. A good pair of scissors is an essential tool in every garden, with or without a trimming machine!

Manual trimmers

For growers who don’t need to trim a large number of plants but are short on time or prefer not to use scissors, a manual trimmer is a perfect choice. In addition to being virtually silent in operation, which can be crucial if discretion is of the utmost importance, they are highly portable and require no electricity, making them ideal for off-grid farms or guerrilla growers.

[productes tipus=”ficha” ids=”766,20179,4158″]

First, we have the SpinPro, a near-spherical, chrome-plated apparatus that will quickly and easily trim your freshly harvested and de-stalked buds with just a few turns of the hand crank, leaving them ready for drying. If your arm gets tired, you can opt for the Top Spinner with rotor, a very comfortable and practical solution to achieve an excellent manicure with minimal effort.

Trimpro Unplugged manual trimmer

Trimpro Unplugged manual trimmer

A step up in quality, but still offering fully manual operation, is the Trimpro Unplugged, a hand-operated trimmer from the Trimpro company. This machine also works by means of a crank on top of the trimmer, but as opposed to the SpinPro, the upper part of the trimmer is not covered, offering visual control of the process without having to open the machine to check if the buds are ready or not. Both these machines are designed to trim freshly harvested buds that have already been removed from the branches.

Simple cylindrical electric trimmers

If turning a hand crank for hours isn’t your thing, or if you just want to work at a faster rate, then a small electric trimmer may just be the thing for you. These machines consist of a metal drum that holds a motor turning a blade that sits just below a metal grill. To operate, take a branch of your freshly harvested plant and move it over the grill with a back-and-forth motion, combined with a gradual rotation of the branch to remove the excess leaves, which are collected in a mesh bag hanging below the drum.

Master Trimmer Pocket

Master Trimmer Pocket

Desktop Trimmers

The first two of these cylindrical machines, the 21.5cm diameter Trimpro Trimbox and the 25.4cm Master Trimmer Pocket, are designed to be clamped to any table, desk, or workbench, allowing operation anywhere that has a table and an electric socket. The Trimpro Trimbox offers the advantage that it can be upgraded to a worktable-style trimmer with the addition of a Trimbox workstation table kit.

Oruga Verde Trimmer-420

Oruga Verde Trimmer-420

The third machine in this class has a very similar overall design, but with the addition of short but sturdy legs that make the Eco Trimmer Oruga Verde a smaller version of a free-standing worktable trimmer, offering a slightly larger diameter, with a 26.5cm working surface. If that’s not enough, there is also a second, bigger version of this model in the form of the Oruga Verde Trimmer-420, which uses the same powerful motor but has a considerably larger diameter of 46cm, bringing it much closer to the full-size worktable trimmers in our next section…

Worktable trimmers

These machines are designed on the same principle as the trimmers in the previous category, but are larger, have more working area, and are a self-contained unit, mounted on legs to bring them up to a comfortable height and making it easier to deal with larger crops. The method of operation is the same as the smaller trimmers and involves taking a freshly-cut branch and moving it back and forth over the metal grill whilst slowly rotating the wrist, while the cut leaves are neatly collected in a mesh bag underneath.

Trimpro Original

Trimpro Original

Offering a bigger surface area than the small electric machines, worktable trimmers allow greater comfort while working as well as an increased workflow. The classic Trimpro Original has a top surface area of 45.5 x 45.5cm and stands nearly 70cm off the ground, while the Master Trimmer Standard is available in two sizes, the 50 x 50cm model which is capable of processing up to 9kg per hour, and the 75 x 75cm which can trim up to 22kg per hour and is even big enough to allow two people to trim together at the same time, working on opposite sides of the machine.

Automatic electric trimmers

While the electric trimming machines we’ve already mentioned have all been designed to work with whole branches being manipulated by the user, the next section in our guide deals with machines that automatically trim buds that have already been removed from the branches. With this type of automatic trimmer, the operation is as simple as placing the individual buds into the top of the drum, where they will be gently moved over the metal grill by rotating soft leather straps while the blade below the grill trims off the excess foliage. The finished flowers then exit from the machine automatically, ready to be collected and to start the drying process.

Trimpro Rotor Automatic Trimmer

Trimpro Rotor Automatic Trimmer

Trimpro Rotor and Trimpro Work Station

There are plenty of choices when it comes to automatic trimmers, starting with the Trimpro Rotor and its 40cm diameter drum that stands 60cm tall and can be converted to a full-height worktable trimmer with the optional Trimpro Work Station, adding to its versatility. The machine is fully adjustable, efficient at trimming and gentle in the way it treats the flowers, giving great quality results.

Master Trimmer Gentle and Master Trimmer Professional

The Master Trimmer brand has various interesting entries in this category, ranging from the Master Trimmer Gentle which is available in two sizes: 50 x 50cm, with a 180W motor and a work rate of 9kg per hour; and 75 x 75cm, with a 250W motor capable of trimming up to 25kg per hour, to the Master Trimmer Professional, a high-quality, 3-phase machine that is available in two sizes as well. The 50 x 50cm, 180W model can finish up to 12kg of buds per hour, while the 75 x 75cm 250W variant will trim an amazing 30kg per hour, replacing up to 17 people trimming with scissors!

Master Trimmer Professional

Master Trimmer Professional

Oruga Verde Multi-Trimmer M-1002 and M-1003-01-PRO

Oruga Verde has a couple of interesting products in this category too, with a standard automatic trimming machine, the Multi-Trimmer M-1002, which boasts a 200W motor, a 42.5cm blade, and the option to swap between two different grill sizes: 10mm or 6mm. The star of the Oruga Verde product line, however, has to be the Multi-Trimmer M-1003-01 PRO, essentially a double version of the M-1002, with two 200W motors, two blades, 7mm and 10mm grills, an automatic trimmer drum attachment, and enough room for as many as four people to work together at the same time!

Oruga Verde M-1003-01 PRO Bud Trimmer

Oruga Verde M-1003-01 PRO Bud Trimmer

Professional Tumbler trimmers

Up to this point, all the different machines we’ve looked at have been intended to carry out “wet trimming” or work exclusively with freshly-harvested plants. This next category of trimmers, however, has been conceived to trim dried buds, with some models having the capability to collect dry sift hash or to deal with fresh-cut flowers as well. It’s no exaggeration to say that they really are the Swiss Army knives of trimming machines!

Triminator Mini Dry

Triminator Mini Dry

Triminator Mini Dry

First in line is the Triminator Mini Dry, an easy-to-use, compact, and portable machine that, with its special metal drum and plastic blades, can trim between 1 and 2.2kg of dried buds per hour, in batches of 100g at a time. Specially designed to function without any lubricants to guarantee residue-free flowers at the end of the process, it is also available with the Triminator Kief kit, which collects all the trichome heads that fall from the buds as the machine works, allowing you to make dry sift hash as you trim.

Master Trimmer Tumbler 200

At the highest end of the trimming market, the Master Trimmer brand has assembled a formidable range of professional-quality machines that are perfectly at home in any large legal cultivation facility, be it for hemp production or for legal medicinal or recreational cannabis. Made of Stainless Steel and with a 5-year manufacturer’s guarantee, just like all their products, the Master Trimmer Tumbler 200 is capable of trimming up to 3kg per hour of dried buds or 12-14kg per hour of freshly-harvested flowers with its carbon steel blade. It is also available with an optional speed controller, allowing the user to vary the cutting rate to efficiently trim strains with different characteristics.

Master Trimmer Tumbler 500

Master Trimmer Tumbler 500

Master Trimmer Tumbler 500

Top of the range here is the Master Trimmer Tumbler 500, a seriously advanced piece of kit that can trim up to 9kg of dried flowers or 40kg of wet buds per hour, collecting the leaves in a separate vessel via suction. The blades can be set with such accuracy that the finished flowers have the same quality as hand-trimmed flowers. Perfect for very large grow facilities, up to four machines can be run in tandem, in combination with inlet and outlet conveyor belts, to increase workflow by up to 30% and improve quality control, offering a truly professional solution for the fast processing of large cannabis crops. Master Trimmer also offers this model with an optional trim filter that separates the larger leaves from the trim leaves covered in trichomes, which can then be used to make resin extractions, ensuring that nothing goes to waste.

Hopefully, with this article, we’ve helped give you an overview of the different choices available when shopping for a trimming machine. Now it’s up to you to decide which machine to buy, and then you’ll have to consider what to do with all the time you’ll save when you get one!

Happy trimming!

The post The best cannabis trimming machines appeared first on Alchimia blog.

The Emerald Triangle: Californian Cannabis & Tradition

What is the Emerald Triangle?

The Emerald Triangle refers to an area located on the northwest coast of the United States (northern California) and comprises Mendocino, Humboldt, and Trinity counties. To delve into the origins and traditions of cannabis cultivation in this region, we must go back to the 60s, during the Summer of Love in San Francisco. During the second half of the decade, and with the hippie counterculture as a backdrop, a good number of growers settled in this area in search of a place that would meet the ideal conditions for the outdoor cultivation of cannabis, namely isolation and a privileged climate.

Since then, the Emerald Triangle has been one of the main sources of cannabis supply to California. As of 1996, and after the approval of California’s Proposition 215 for medical cannabis, the production in these three counties shot up due to the increase in demand, reaffirming the Emerald Triangle as one of the main producing areas of the country.

Map of California showing the Emerald Triange

Map of California with the Emerald Triangle outlined in red

This region is often referred to as the Napa Valley (famous for its vineyards and the quality of its wine) or the Silicon Valley of cannabis, given the large proportion of the population devoted directly or indirectly to the cultivation of this plant, and also to the incredible quality of its produce, be it flowers or cannabis seeds. As we have said, this area has a series of characteristics that make it ideal for this activity: the population is scarce and widely dispersed, with large tracts of unpopulated land.

In addition, it enjoys an ideal climatology for growing cannabis, with great solar exposure, absence of strong winds, an excellent and fertile soil, and optimal temperatures. All this means that the cultivation and breeding of this plant has become, without doubt, one of the main and most profitable activities in this region, with excellent varieties of cannabis developed by local breeders.

[productes tipus=”fitxa” cerca=”mendo” nfitxes=”3″]

The Emerald Triangle, US capital of cannabis

In fact, it is estimated that this area, which includes the three counties, produces more cannabis than anywhere else in the country, and it has been speculated that it could be one of the most important production areas worldwide. Besides the high number of growers living there, every autumn, hundreds of people come to the Emerald Triangle looking for work harvesting cannabis; these are mostly itinerant trimmers, known as trimmigrants. However, this green rush is not limited to these three counties; indeed, it’s increasingly common to find trimmers looking for jobs in other neighbouring counties such as Sonoma or the aforementioned Napa.

The Emerald Triangle has its fair share of vineyards

The cultivation of wine grapes is also popular in the valleys and hills of the Emerald Triangle

All classes of people arrive constantly in the Emerald Triangle: backpackers, trimmers, growers, breeders, specialists in resin extractions… anyone who feels an affinity for some aspect of the plant will be at home in this area like. Not without reason, the profits that can be obtained, in particular for those who grow outdoors and don’t have to pay expensive electricity bills, are an incentive that can be difficult to turn down.

So the cannabis culture and industry grow ceaselessly in these three counties where the love for the plant has, for decades, been well-rooted in many families, many boasting third-generation growers. According to a 2014 report, cannabis was already turning over more money than traditional wine production, and there is now talk of creating a series of Denominations of Origin to distinguish the flowers grown in the different areas of the Triangle.

Although until recently the locations of the crops were chosen more for their capacity to keep crops hidden rather than on the quality of the soil and the microclimate, now thanks to the legalisation of cannabis, farmers are beginning to exploit the sites that are theoretically the best suited to cultivating cannabis: Mattole Valley (Humboldt), Bell Springs/Spyrock (Mendocino), Hayfork Valley (Trinity) or Mid Klamath (Humboldt and Trinity) are some of these areas.

The Emerald Triangle has a great climate for outdoor growing

A beautiful cannabis plant flowering in the Emerald Triangle (Photo: Brian Shamblen)

Past, present & future of the Emerald Triangle

The area saw a significant increase in population several decades ago. Many remote places were populated by young people who in the decades of the 60?s and 70?s wanted to return to the land to escape the social unrest of the time (for example, the Vietnam War) and have a more sustainable and ecological lifestyle. Groups like the Diggers, a community of activists from the Haight-Ashbury neighbourhood of San Francisco, were pioneers of cannabis cultivation in this area, followed by hundreds of young (and not so young) folk who simply looked for a different way of life.

Today, many of these activists who moved to the Emerald Triangle in the 1960s are still cultivating, as are their children and, in many cases, their grandchildren. The cultivation of cannabis in this area is already something of a tradition for the new generations, who view it as one of the daily activities carried out by local people to obtain economic sustenance, as well as the hundreds of people who continue to arrive at the end of each summer to work on the harvest. In addition, January 1, 2018, saw the legalization of the adult use of marijuana in California, which will allow many more growers and users to “come out of the closet.”

But what is the future of the Emerald Triangle among the growing wave of legalisation that more and more states in the US are experiencing? Will it hold its reputation as the largest cannabis producer in the country? The fact that growers in many other areas can carry out their activity freely and professionally could slightly demystify the products from the Triangle, although tradition, soil, climate, and the knowledge and experience of the nearly 20,000 growers in these three counties will surely mean their produce will continue to be considered among the best in the world.

Mendocino Skunk Chong's Choice by Paradise Seeds

The spectacular Mendocino Skunk from Paradise Seeds

Cannabis varieties originating in the Emerald Triangle

The counties of Mendocino, Humboldt, and Trinity are not only renowned for the quality of their herb, but also for the cannabis cultivars that have been created in this beautiful corner of the world. Here are just a few of them:

All that’s left is for us to encourage you to try some of these excellent genetics and, if you can afford it, choose the Emerald Triangle for your next holiday…or go and work for a local grower! You won’t be disappointed, we’re certain of it!

Best regards!

The post The Emerald Triangle: Californian Cannabis & Tradition appeared first on Alchimia blog.

How to use Metrop nutrient charts

In recent years, the Dutch fertiliser company Metrop Hydroponics has found a place in many gardens thanks to the spectacular results that can be achieved with its products, whether cultivating indoors, outdoors or in greenhouses. The range is simple to use, as it does not have as many products as other brands, with highly concentrated fertilisers and additives suitable for all types of growing mediums, from soil or coco to hydroponic or recirculation systems such as DWC or NFT.

Thus, Metrop products are ultra-concentrated, undissolved in water and completely biodegradable, which is important for the environment. Of course, their fertilisers contain all the macro and micronutrients necessary for outstanding development, both in the growth and flowering phase. So, without further ado, let’s check their products out first and then we will look at their growing charts for the most common substrates in cannabis cultivation.

Logotipo de metrop

Metrop logo

Metrop’s fertiliser and supplement range

As we already mentioned, Metrop’s range of fertilisers and stimulators is really easy to use, as it has been formulated in such a way that growers don’t need a large number of products to achieve healthy, balanced nutrition and, above all, to get great results at harvest time. Let’s take a look at each of the products and their main function before studying their cultivation charts.

Metrop principal nutrients range

  • MR1 Growth: This fertiliser is formulated for the vegetative phase of plants from seeds or clones that are going to grow for a few weeks before flowering. Its NPK is 10-40-20, being very rich in phosphorus and potassium, and is used during the growth and pre-flowering of plants (the first 2-3 weeks of flowering photoperiod). Metrop MR1 is a fertilizer made from a high-quality plant extract, which is used every irrigation in nutrient-poor systems (hydroponics and coco) and every 2-3 irrigations in nutrient-rich soils.
  • MR2 Flowering: In this case, we have the base fertiliser to use already in full bloom, after the stretching phase that plants undergo during the first 2-3 weeks of 12/12. With an NPK of 10-20-40, Metrop MR2 is very rich in phosphorus and especially potassium, two key elements to assure explosive flowering. It is also derived from plant extracts and is used at the same frequency as MR1, depending on the type of substrate and the nutrients contained in it.
  • Root+: This is a powerful root stimulator based on a cocktail of enzymes that promotes nutrient assimilation and better plant development. With Metrop Root+ you get more roots with a greater number of capillaries, which translates into more efficient uptake of nutrients and greater resistance to stress, pests and diseases. It is usually used in all irrigations during the first 3 weeks of growth.

[productes tipus=”fitxa” cerca=”metrop mr1″ nfitxes=”3″]

  • Calgreen: Calcium is one of the essential elements for plants, probably the fourth most important after nitrogen (N), phosphorus (P) and potassium (K). For this reason, Metrop Calgreen has been created, a mixture of nitrogen and calcium that provides everything the plant needs to strengthen its tissues, creating denser and heavier flowers. In addition, its use prevents the appearance of fungus and rot. The frequency of use is identical to that of the base fertilisers MR1 and MR2, although it is recommended to keep an eye on the dosage if you are using hard water (with a high initial EC).
Metrop MR2 is an efficient flowering fertiliser suitable for all types of substrate

Metrop MR2 is an efficient flowering fertiliser suitable for all types of substrate

  • MAM: Nutrition for mother plants, which can spend months in a vegetative state and undergo periodic pruning, is somewhat different from that of plants that will only grow for a few weeks and then flower. For this reason Metrop MAM has been created, a biomineral compound specifically formulated for the correct maintenance of mother plants. Its NPK is 20-20-8, ideal for plants that need a lot of nitrogen and phosphorus for the development of stems, leaves and roots.
  • AminoXtrem: Finally, this cocktail of amino acids and vitamins is the ideal complement to Metrop’s base fertilisers, providing an extra stimulus for plant growth and flowering. Metrop AminoXtrem is assimilated and acts very quickly, stimulating the production of enzymes and flowering hormones.

The Metrop range of additives and supplements

Enzymes: This biocatalyst, formulated with different enzymes, will keep our plants’ roots healthy and disease-free, boosting nutrient assimilation while helping to break down dead organic matter. In this way, Metrop Enzymes ensures proper nutrition while “cleaning” the substrate of dead roots and other residues, greatly improving both growth and flowering.

RhizoXtrem: In this case, we have a plant-based stimulator designed for maximum root growth thanks to the enzymes, vitamins, phytohormones and macro and micronutrients it contains. Thanks to Metrop RhizoXtrem, the development of root capillaries is maximised, and we all know the secret that a good harvest is born in the roots of the plant!

Metrop nutrient kits

Metrop also offers various varios fertiliser and additive kits to make things easier (and more economical) for its clients. Here they are:

  • Metrop Cutting Kit: Which consists of 3 specially formulated products to give a perfect start to seeds and cuttings: Metrop Substrate+, Metrop MR1 and Metrop RhizoXtrem.
  • Metrop Mother Kit: This kit is specially designed for the maintenance of mother plants, including MAM, Substrate+, Enzymes, Calgreen and MR1.
  • Metrop Starter Set 250ml: In this kit, we have everything you need for a grow from start to finish, in 250ml containers. The kit consists of MR1, MR2, Calgreen, Root+ and AminoXtrem.
  • Metrop Start Set 1L: Like the previous kit, this one has fertilisers and additives for an entire grow, although in this case they are supplied in 1 litre containers. Includes MR1, MR2, Calgreen, AminoXtrem, Root+ and Enzymes.

[productes tipus=”fitxa” ids=”7181,3594,14295″]

How to use Metrop nutrient charts

Now that we’ve seen the products that we are going to use over the next few months, let’s take a look at the quantities and frequency of application that Metrop recommends for each one of them, depending on the growing medium being used. Metrop offers 3 different charts: one for the main range of nutrients and valid for soil, coco and hydroponic systems without recirculation. The second is for additives, while the third chart is dedicated to systems such as DWC or NFT, where there is recirculation or reuse of the nutrient solution (the water with the nutrients returns to the tank after escaping through the drainage of the irrigation system, being reused). In addition, we will also see that their fertiliser for mother plants, MAM, has its own chart.

As usual, we have the weeks of vegetative growth (18 hours of light) and flowering (12 hours of light) on the left-hand side of the chart, while on the right-hand side, we find each of the products used with their corresponding dosage for each week. As you can see, Metrop has used a 10-week flowering period as a reference, with a final week of flushing in which only AminoXtrem and Enzymes are used. When growing varieties with shorter flowering periods, we only need to adapt the chart by removing weeks from the end of the chart, although always remembering that last final week of flushing.

*Important: Calgreen must be added to the deposit after mixing the rest of the products, never beforehand.

Metrop nutrient chart

Grow chart for Metrop products

Grow chart for Metrop products

As we can see, Metrop offers products and charts that are easy to use due to their easy dosage and small amounts of products. However, don’t be fooled, the results are great! The first thing we see is that during the growth phase we should use MR1, Root+, AminoXtrem and Calgreen. Once flowering has begun, we continue with this same nutrition during the pre-flowering phase (the first 2-3 weeks of the flowering photoperiod). At the end of this phase, we stop using Root+ and replace MR1 with MR2, the base fertiliser for this stage, a nutrient regime that we continue until the start of final root flushing (last week), where we water only with AminoXtrem. This chart is designed for soil, coco and hydroponic systems without recirculation.

Metrop DWC nutrient chart

Chart for DWC or recirculating hydroponic systems

Chart for DWC or recirculating hydroponic systems

The chart for DWC cultivation or recirculating hydroponic systems is practically identical to the previous one. We use the same products, although in this case, the dosages vary slightly. Once again, the last week of flushing is respected by watering only with AminoXtrem.

Metrop additive chart

Chart for the Metrop additives Enzymes & RhizoXtrem

Chart for the Metrop additives Enzymes & RhizoXtrem

Metrop nos presenta una tabla a parte con sus aditivos, Enzymes y RhizoXtrem. Como vemos, el primero deberá usarse durante todo el cultivo, desde la primera a la última semana de cultivo (incluyendo la semana de lavado final). En cambio, el uso de RhizoXtrem se limita a las fases de crecimiento y prefloración.

Metrop presents a separate table for its additives, Enzymes and RhizoXtrem. As we can see, the former should be used throughout the entire grow, from the first to the last week of cultivation (including the final week of flushing). On the other hand, the use of RhizoXtrem is limited to the growth and pre-flowering phases.

Metrop MAM chart

Chart for mother plant maintenance with Metrop products

Chart for mother plant maintenance with Metrop products

Finally, Metrop provides a chart for the maintenance of mother plants, including MAM, Root+, AminoXtrem and Calgreen. As we can see, the doses vary depending on whether we are dealing with normal plant growth or if we intend to take cuttings in a few days. The difference is the amount of MAM used, which we increase slightly a few days before taking the clones from the mother plant.

So that’s our summary of Metrop nutrition products and charts. As we have seen, it is a comprehensive range of nutrients and additives that are easy to use and provide amazing results that we’re sure many of you have already experienced for yourselves!

Happy growing!

The post How to use Metrop nutrient charts appeared first on Alchimia blog.

Deficiencies and excesses in Cannabis

Nutrient imbalance in cannabis plants?

In this post, we will focus on the macro and micro-nutrients necessary for the development of cannabis plants. These elements are available in the nutrients, so the chosen type of fertilizer and its correct use will lead us to a crop without deficiencies or excesses, thanks to properly planned and balanced feeding.

Different factors must be considered, so we’ll try to explain them simply so that all growers can dispel any doubts they may have about the nutrition of their cannabis plants.

Table of deficiencies and excesses

Table of deficiencies and excesses

What is a nutrient deficiency?

Deficiencies are often, although not as a general rule, a lack or inadequate supply of some nutritional element at a precise moment of the plant’s life.

To avoid deficiencies, plants must be fed with a complete fertilizer, specially designed for cannabis farming. pH level must be controlled, stabilized, and adjusted depending on the type of crop, either in hydroponic or soil crops, and for both potted and in-ground plants.

What is an excess of nutrients?

Excesses of nutrients are salt accumulations in the metabolism of the plants in a particular stage of their life. To avoid excesses when growing cannabis, we will have to use constant and balanced feeding adapted to each type of culture, substrate, and genetics. Each phenotype has its own needs, and knowing them ensures the best results and avoids nutritional issues.

[productes tipus=”fitxa” cat=”332″ nfitxes=”3″]

Macro-elements or Macro-nutrients

Nitrogen:

Nitrogen is the most required macro-element by cannabis plants throughout their life cycle.  A nitrogen deficiency can be easily detected when we observe chlorosis between the veins of the older, lower leaves. If the deficiency isn’t treated, the plant will suffer massive defoliation, and the growth will be seriously compromised.

An excess of nitrogen can be detected by the color and shape of the leaves of the plants. These become dark green and can adopt a claw-like form, curling down.

N deficiency

N deficiency

 Phosphorus:

Phosphorus is necessary at all life stages of the cannabis plant. The lack of this nutrient is detected in the leaves, which become blue-green and develop brown spots, along with slow growth. The veins and stems turn purple, and the leaves curl downwards, developing necrotic areas.

An excess of phosphorus usually causes a nutrient lockout, which, in turn, causes deficiencies of calcium, copper, iron, magnesium, and zinc.

P deficiency

P deficiency

Potassium:

Potassium plays the role of protector against diseases, actively participating in cellular development along with many other functions. With a lack of potassium, plants are more prone to getting all kinds of diseases.

The leaves turn dark green, spots appear, and they end up dying. An excess of potassium in plants acts by locking out other elements, resulting in a deficiency of magnesium, manganese, zinc, and iron.

K deficiency

K deficiency

[productes tipus=”fitxa” ids=”8494,309,4713″ nfitxes=”1″]

Secondary Nutrients

Magnesium:

Magnesium is a secondary nutrient essential for cannabis plants, which is used in large quantities during all phases of the plant’s life. Deficiencies of this nutrient are usual in soils with a pH value lower than 7.0. Magnesium is the central atom of the chlorophyll molecule, and it is also responsible for enhancing both the absorption of other nutrients and the creation of carbohydrates and sugars.

A magnesium deficiency is initially detected on the oldest, lower leaves, causing chlorosis between their veins, which turn dark green. As the deficiency advances, more and more young leaves are affected by dark spots and chlorosis. If the deficiency isn’t treated, the leaves will curve upwards and, in a few days, massive defoliation will affect the plant.

Mg deficiency

Mg deficiency

Sulfur: 

Sulfur is essential for the production of hormones and vitamins; it’s part of the amino acids and is directly involved in the flavor. A sulfur deficiency causes the oldest leaves to develop a lime-green, yellowish color. As the deficiency progresses, the leaves turn yellow while keeping their veins green, the petioles turn purple, and the stems become woody.

Most times, a deficiency of this trace element is usually preceded by a nutrient lockout caused by an excess of calcium or a pH level too high. The solution to this problem is to keep the PH between 5.5 and 6.0 by adding sulfur in ore form for quick assimilation. If a sulfur excess is produced, we should flush the roots.

S deficiency

S deficiency

Calcium:

Calcium is a very important element for cannabis plants since they need almost the same amount of macronutrients as calcium throughout their life. It’s essential for the creation and growth of cells. A Calcium deficiency causes slow plant growth, weak stems, and dark green leaves. To treat this deficiency, add some nutrients rich in calcium to the nutrient solution until the deficiency disappears.

An excess of calcium affects negatively to the overall growth of the plant, locking out other elements like potassium, magnesium, manganese, and iron. In hydroponic systems, an excess of calcium combined with sulfur causes precipitation in the form of plaster, which remains at the bottom of the tank and clogs the irrigation tubes. In this case, we should change the nutrient solution and carefully check Ca levels.

[productes tipus=”fitxa” ids=”4711,4026,12028″ nfitxes=”1″]

The most relevant micro-nutrients

Micro-nutrients are nutritive elements that act as catalysts in the metabolic processes of plants, also in the use of other elements. For the correct use of these nutrients, they should be present in small quantities dissolved in fertilizers.

Zinc:

Deficiencies of zinc will surely appear when growing weed with an excessively alkaline substrate. It acts as a catalyst for various auxins, enzymes, and is also essential for the growth of the stems. A zinc deficiency is also usually caused by a PH level higher than 7.0, producing chlorosis between the veins of the youngest leaves, which grow thinner, twisted, and finally dry out. During the bloom period, the development of new buds and leaves stops until this problem is solved.

To treat zinc deficiencies, we must feed the plant with micro-elements that contain zinc in a chelated form to ensure rapid absorption and recovery of the plant.

Zn deficiency

Zn deficiency

Iron:

Iron is a necessary nutritive element for plants since it’s directly related to the use of energy by sugars. It’s easy to find iron deficiencies in plants grown in alkaline soils. This deficiency tends to be present in soils with a PH level above 6.5. Early symptoms can be observed in the youngest leaves, which turn yellowish while keeping green veins. If the deficiency continues, the plant will suffer serious defoliation.

An iron deficiency can be preceded by a nutrient lockout caused by an excess of copper. Other elements like zinc or manganese can cause a null absorption of iron by the plants, which will, in turn, cause several deficiencies. To solve an iron deficiency, avoid watering with fertilizers that contain high concentrations of Mn, Zn, and Co, and also reduce the PH level of the nutrient solution to 6.0-6.5.

PH table and nutrient assimilation

Advanced Fe deficiency

Other micro-nutrients:

Boron: A boron deficiency causes the borders of the leaves to dry and brown, while the shoots are twisted. In the case of over-fertilization, the leaves suffer necrosis, causing severe defoliation on the plant.

Chlorine: A deficiency of this element is rare when using tap water. The leaves take a very characteristic bronzed color. The symptoms are the same in the case of an excess of chlorine.

Copper: This element is actively involved in the metabolism of the plant and the creation of carbohydrates, also helping in the production of sugars and proteins. In the case of a deficiency, this must be treated by watering with a mineral fertilizer rich in copper.

Excesses of copper, even slight ones, are very toxic. The first symptom is iron chlorosis along with overall slow growth of the plants.

PH table and nutrient assimilation

PH table and nutrient assimilation

Cobalt: It’s difficult to find deficiencies or excesses of cobalt since it is not very important for the development of the plant during its life cycle. When problems of deficiencies or excesses of this element happen, nitrogen will no longer be available for the plants.

Molybdenum: Finding deficiencies of this element in cannabis crops is also difficult since plants need it in very small quantities. When there is a lack of this element, nitrogen uptake is reduced, roots stop their growth, and leaves become twisted. An excess of this element causes plants to show deficiencies in copper and iron.

Silicon: Deficiencies of this mineral in cannabis plants are rare too. A deficiency is detectable by the deformation of new young leaves and an overall decrease in the final weight of the flowers.

The post Deficiencies and excesses in Cannabis appeared first on Alchimia blog.

The Origins of Diesel

Origins of Diesel cannabis strains

In recent years, Diesel strains have become, by their own merits, one of the most popular cannabis genetics, sought by growers and users both for their intense and special taste and for their strong effect, mainly caused by THC contents which can exceed 20% in most specimens. As it often happens in the world of cannabis, the exact origin of this genetics is uncertain, although one of the most commonly accepted theories tells us that it’s directly related to the Chemdog and, later, also to the OG Kush marijuana.

Therefore, to clarify the origins of Diesel, we need to know more about the mythical Chemdog strain – often called Chemdawg – and how it reached the East Coast of the United States.

OLYMPUS DIGITAL CAMERA

Sour Diesel develops spectacular calyxes

Grateful Dead and Chem cannabis

On the 6th or 7th of June 1991, during a concert of Grateful Dead at the Deer Creek Amphitheater in Noblesville, Indiana, a young breeder called Chemdog met Joebrand (alias Wonkanobe) and Pbud in the parking lot, who sold him a 500$ bag of a pot called Dog Bud (grown indoors near the California-Oregon border). Surprised by the quality of the buds, Chemdog asked them for their number, and they later agreed that they would send him a couple more bags to the East Coast.

According to Chemdog himself, one of these bags contained only sinsemilla, while he found 13 seeds in the other bag, to the surprise of Pbud and Joebrand, who had been buying these buds for more than a year without ever finding any seeds. The male parent of these seeds remains unknown, and even the possibility of self-pollination has been considered.

dinachem from dinafem

Dinachem, Dinafem’s version of Chemdog

That same year, Chemdog germinated 4 of these seeds; one of them was a male that was discarded (Chemdog was still very young, 17 years, and didn’t notice the potential of this plant) while the other three, which were females, were labeled as follows:

  • Chemdog (today known as ’91 Chemdog)
  • Chemdog “a” (today called Chemdog’s Sister)
  • Chemdog “b”

10 years later, in 2001, Chemdog and his girlfriend tried to germinate 3 more seeds, labeled as “c”, “d” and “e”. The “e” never sprouted, the “c” turned out to be mediocre, while the “d” has been preserved until today, known as Chemdog D or Chem D.

In 2006, Chemdog and Joebrand met again, and Joebrand got 4 of the last 6 seeds. He labeled them from #1 to #4 and kept the #4, which he called “Reunion pheno” since he considered it the most similar phenotype to the original genetics. If we are to believe this, Chemdog would still be keeping the last 2 seeds today.

Chemdog and his friends – most of them were underground breeders – developed several hybrids from the Chemdog marijuana. These ones became especially popular:

  • Giesel (Chem D x Massachusetts Super Skunk)
  • Bubble Chem (Chemdog’s Sister x Sag’s Blueberry)
  • Chemhaze (Chem D x ’93 NL#5/Haze, also called Dawg Daze)
  • Super Snowdawg (Bubble Chem x Super Skunk/Oregon Sno)
  • Chemdog D x Pbud (variedad old school de Colorado)

[productes tipus=”fitxa” cerca=”sour diesel” nfitxes=”3″]

OG Kush and Diesel cannabis

In 1992, JJ and Weasel met in New York City’s Central Park, and shortly afterwards, Weasel obtained the Massachusetts Super Skunk and the ’91 Chemdog from Chemdog, although he didn’t like this name and changed it to Diesel or New York City Diesel. Just a couple of years later, in 1995, the Original Diesel came in – also known as Underdawg, Diesel #1, Headband, or Daywrecker Diesel – a hybrid developed by Weasel from the ’91 Chemdog and a Massachusetts Super Skunk x Sensi Seeds Northern Lights cross.

Soon, the famous Sour Diesel – also called East Coast Sour Diesel, or simply ECSD – was created by accident when a whole crop of ’91 Chemdog was pollinated by DNL (Northern Lights x RFK Skunk/Hawaiian) or by Massachusetts Super Skunk (JJ-NYC).

chemdog feminized

Chemdog from Green House Seeds

There seems to be no relationship at all between the American Diesel lines and the New York City Diesel from Soma (so popular in Europe thanks to the Mandarin Cut), neither concerning the organoleptic traits nor to the effect, which is milder than American Diesel genetics.

We cannot tell this story without mentioning the OG Kush strain. There are several theories about its origins: for some people, it is simply a sister of the Sour Diesel. For others, it is a self-pollination of the ’91 Chemdog selected in the Lake Tahoe area in 1996. Finally, the third and most widely accepted theory (Kailua Kid from Sierra Seed Company) tells that it’d be a cross between a Chemdog clone and a Lemon Thai x Old World Paki Kush hybrid developed in Northern California; this theory would explain the “Kush” in the name of the variety, while the “OG” would probably mean “Ocean Grown” (grown near the ocean).

From here, different clones of the popular OG Kush were selected, kept and shared, such as the Tahoe Cut (introduced to the community by Swerve in the nineties), the San Fernando Valley or SFV cut (coming from the area with the same name) or the Raskal’s OG cut (also from the San Fernando area) among many others.

OG Kush bud in macro view

OG Kush Bud

Today, we can find a large number of hybrids developed from Diesel and OG Kush genetics, which gives us a hint about the quality of these strains, characterized by a very intense cerebral effect and an unmistakable blend of diesel, earthy, piney, and citric notes.

JJ-NYC is one of the breeders that has developed different varieties from the original genetics. He performed different tests with Hindu Kush and Afghani seeds from the Sensi Seeds Bank, developing a backcross called Double Dawg (Chemdog D x Afghani), which he backcrossed again, thus creating the Tres Dawg. Tres Dawg has been used for developing numerous hybrids of excellent quality, like Star Dawg (Chem 4 x Tres Dawg), White Dawg (The White x Tres Dawg) or Original New York City Diesel (’91 Chemdog x Tres Dawg). Rez from Reservoir Seeds has also used this genetics in his breeding projects, offering extraordinary versions like Sour Diesel IBL, mother plant of the renowned Riri cut, selected in France by Riri in 2006.

So, the next time someone mentions Diesel, you know it’s not just about potency and aroma, but about a story that began in the New York garages of the 1990s and ended up conquering gardens and dispensary windows around the world. A legendary strain that, like all good myths, lives on, mutating, inspiring… and leaving an aromatic trail impossible to ignore.

Happy harvest!

The post The Origins of Diesel appeared first on Alchimia blog.

Indoor cultivation during summer

Summer is already here and we’re sure that many of you already have a beautiful outdoor garden with plants in full growth. Perhaps you started growing from seeds, or maybe you keep mother plants and moved some clones outside in the last few weeks. However you start, outdoor cannabis cultivation in summer is usually relatively simple, as the weather is good and the plants develop splendidly as long as they have the correct nutrients and irrigation they need.

However, and those of you who keep mother plants indoors while you move clones outside you will know this well, growing indoors in summer can be a real nightmare! This is mainly due to the elevated temperatures that indoor grow rooms and tents can reach, which can not only get so high as to be incompatible with proper plant growth but can also increase pest pressure and other problems. Today we’d like to tell you a few tricks that will allow your indoor mother plants to spend the summer in comfort and be ready to provide all the clones you need once the indoor growing season begins.

Maintaining mother plants over summer can be complicated due to the heat

Maintaining mother plants over summer can be complicated due to the heat

Avoid heat stress in cannabis plants

We’ll start from a situation where we need to keep a few mother plants growing indoors during the summer and, of course, without using an air conditioning unit, which would make it really easy for us to maintain them correctly at constant temperatures of 24ºC! So, we find ourselves in the same situation as many growers, using a small basic room or grow tent without air conditioning, where we must keep our mother plants in the best possible conditions to be able to start the first indoor crop of the season once the cooler weather of late summer allows us to.

We’ll go over the various cultivation parameters to see what we can do to improve the state of the plants in each case and allow them to spend the summer in much less stressful conditions than if we carried on cultivating in exactly the same way that we would, for example, in winter. It’s worth remembering that we probably won’t achieve the same growth rate as in spring or autumn, but we will have healthy plants at the end of summer. After all, it’s much better to be able to get 10 good clones from a healthy plant than 15 from one in poor condition!

[productes tipus=”fitxa” cat=”476″ nfitxes=”3″]

Light and heat in indoor cultivation

As we know, aside from the ambient temperature, the main source of heat that indoor plants receive comes from the lighting system. If we grow with LED panels this probably won’t be an issue, but in the case of using discharge lamps such as metal halide (HM), sodium vapor (HPS) or ceramic halide (CMH), the heat emitted by these can become a real headache. If we have an electronic ballast that allows us to regulate the power of the lamp, it’s a good idea to set it to 50-60% of its capacity.

In summer, LED panels are an excellent alternative to discharge lamps

In summer, LED panels are an excellent alternative to discharge lamps

Of course, if our budget allows it, we can use LEDs in summer and discharge lamps during the rest of the year. We can opt for professional panels such as the Lumatek Zeus, or if we have a tighter budget, use the Slim LED by Farming Monkey for growth or the TLED bars from Secret Jardin. The latter are particularly useful, as they always spread the light very well and can be used as supplementary lighting on the sides of the grow space, or for seedlings and clones.

In short, the trick is either to replace our discharge lamps with LED panels or to lower their power output using an electronic ballast. In this second case, LEDs can often also be used as supplementary lighting if you don’t want to reduce the rate of growth and ensure that the plants receive more light. Finally, and in relation to lighting, we can lose a couple of hours of daily light without a problem by using a 16/8 photoperiod; the plants will continue in vegetative growth and won’t go into flower, and we’ll have two hours less with the lights on every day. It ought to go without saying, but we should always try to have the lights switched on at night and during the cooler hours of the morning or afternoon, always avoiding the hottest time of day outside (midday). These are only small details, but as you’ll see at the end of the post, everything adds up eventually!

Ventilation in the grow space

Ventilation plays an important role indoors, both evacuating the hot air from the grow to the outside and bringing fresh air inside. In addition, during summer, air-cooled Cooltube reflectors can be used for the lamps, which are connected to the extraction system and help to lower the temperature within the room or tent by a few degrees. The extraction can be left constantly connected and at full power, if a potentiometer or a climate control unit is available, especially during the hottest time inside the grow space.

Regarding the fresh air intake, we must try to take air from the coolest place possible, which might not be from outside the building but from another room. Indeed, and depending on the location of the grow space and how the air intake system is set up, it may be more recommendable to take air from inside a home than from outside. Keep in mind that a flow of hot air entering the grow space is the last thing we want!

Correctly adjusted temperature and humidity levels will encourage the plants' development

Correctly adjusted temperature and humidity levels will encourage the plants’ development

When positioning the fans that move air around inside the growing space, it’s important to place them so that the air does not blow directly onto the plants, which would cause excess transpiration. It is far better to focus them on the lamp and towards the air extraction intake, ensuring that the pocket of hot air that forms in the upper part of the room or tent is expelled more efficiently by the extractor.

Vapour Pressure Deficit – humidity and heat in the grow room

As you can see in much more depth in our article on temperature and humidity in cannabis cultivation, vapour pressure deficit or VPD is a key factor for the plants’ development, which also takes on special importance during the hottest months of the year. Broadly speaking, what we need to do is adjust the temperature and humidity to achieve the best possible development, which can be achieved by following the chart in the linked article at the end of this section.

[productes tipus=”ficha” ids=”11754,11957,9164″]

To give you a general idea, what we must do when temperatures skyrocket (as well as trying to lower them in other ways) is to balance humidity levels according to the temperature. In most cases, during the summer, we will have to increase the humidity inside the growing space so that the plants can cope with the high temperatures much better than if they were in a low-humidity environment.

However, since the high temperatures mean that we are unable to stop the extractor to raise the humidity, the best way to achieve this is by means of a humidifier, which we can connect to the same timer as the lamp so that it starts up whenever the lights come on. Depending on the size of the room or grow tent, a humidifier with a larger water tank will be needed (to allow it to run for at least 16-18 hours at a time).

Vapour pressure deficit (VPD) in cannabis cultivation

Irrigating cannabis in high temperatures

Logically, the higher the ambient temperature, the more irrigation our plants will need, since both their water consumption and their evaporation will be greater. It is therefore normal that we must water more frequently to prevent our plants from wilting. To give an example, the same mother plants grown in the same-sized container can require more than twice as much water on a hot summer’s day as they would on a winter one. As we can see, factors such as environmental temperature and humidity have a direct effect on the amount of water our plants consume.

If we have adjusted the VPD correctly, we will probably have fairly high humidity levels, so our plants won’t need as much water as if we weren’t using humidifiers to reach the VPD range we’re aiming for. If we don’t have the correct VPD, our plant will need watering more frequently, as the humidity will be lower and the plants will have less water in the environment.

Another important factor in summer is the water temperature. We must avoid at all costs watering with water that’s too warm! The ideal temperature of the irrigation water is always around 20ºC; with higher temperatures, the water loses oxygen rapidly, which can have a serious impact on the development of plants. At lower temperatures, certain nutrients cannot be assimilated, although we’re fairly sure that this won’t be a problem in summer!

Preventing pests in summer

Summer is usually the worst time of the year for the appearance of insect pest problems. Depending on your area, not all of them may appear, although we recommend that you don’t lower your guard and continue taking preventive measures against pests such as spider mites, thrips, or whiteflies. On the one hand, reducing the heat and increasing the humidity within the grow space will help us greatly, although using preventives such as potassium soap or neem oil on a regular basis is just as important.

Pests such as spider mites and thrips appear in summer

Pests such as spider mites and white flies appear in summer

Feeding cannabis plants in summer

Once again, we have two possible scenarios: if we’ve regulated the temperature and humidity to achieve an acceptable VPD range, our plants can continue to receive the same amount of nutrients that they would normally receive in, for example,  spring or autumn. We shouldn’t have any problems with salt buildup in the substrate since the irrigations will be relatively infrequent and the plants will have time to absorb most of the nutrients.

On the other hand, if we don’t have the VPD dialed in, our plants will require more irrigation, meaning that we should reduce the dose of nutrients provided in each watering. In this case, we’ll feed the plants using approximately 60% of the fertiliser dose used in spring, keeping a close eye on the plants to check for any nutrient deficiencies. If this is the case, we can slightly increase the amount of fertiliser added to the nutrient solution.

Products to reduce heat stress in plants

Finally, we’d like to recommend some of the products currently on the market that can help to protect your plants from high temperatures. As you can see, in many cases these additives are rich in silicon, a crucial element in the development of plant cell structure. These are some of the most commonly used today:

We hope that these simple tricks will mean that your indoor plants can spend a comfortable and stress-free summer without suffering too much from the high temperatures. Please don’t hesitate to share any tips of your own, as well as any questions or doubts that may arise… We’ll be happy to answer you, as always!

Happy growing!

The post Indoor cultivation during summer appeared first on Alchimia blog.

❌