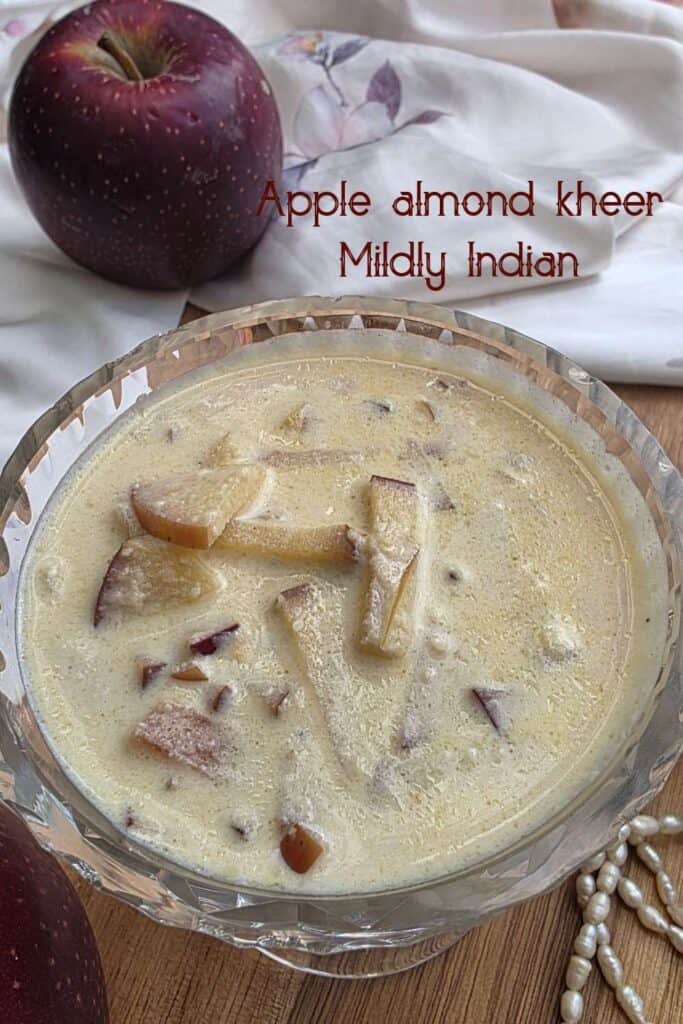
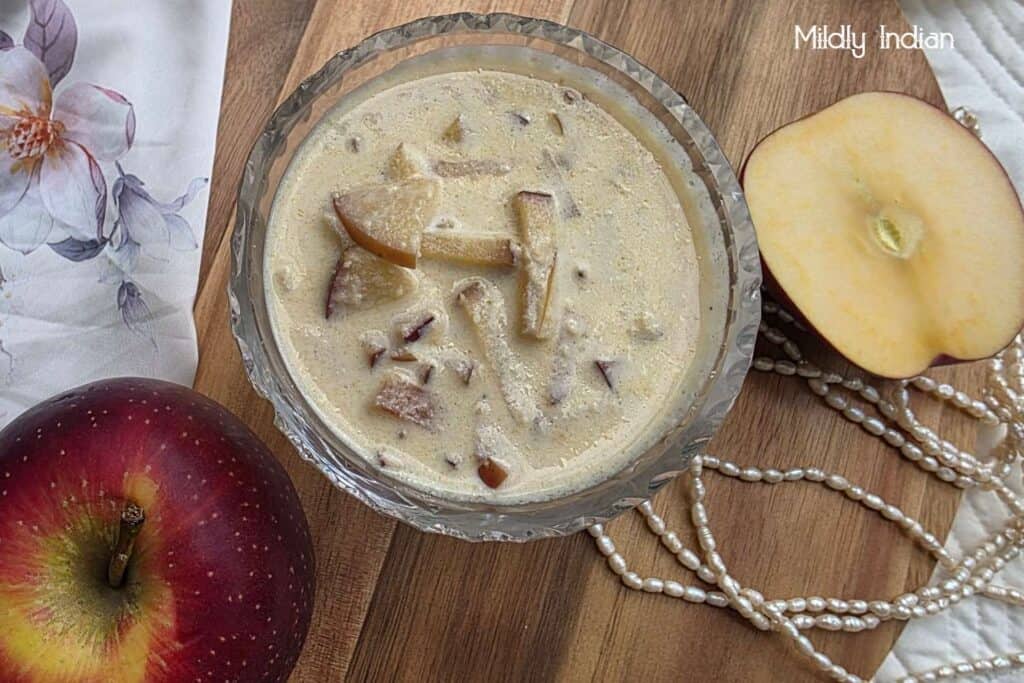
Apple almond kheer is a delightful no sugar added Indian style dessert fit for any festival. Flavoured and thickened with almond flour it is a quick and easy recipe that is perfect for beginners.
I am not good when it comes to viral recipe trials. By the time I decide buy the ingredients and try it, the trend is over!
Clearly,it needs much more devotion and promptness. So that is an area we shall leave it to the enthusiastic experts. However there is one recipe I have been wanting to try and was waiting for the apple season to come. Enjoy my version of the apple kheer with no added sugar.
What is apple kheer?
Made with full fat milk that’s slow cooks rice grits, kheer is a must try dessert. This is traditionally served in festivals and grand Indian weddings. We have added a whole collection of kheer in our post- Payasam pathaman and kheer
Apple kheer a fusion dessert that embodies the idea of a kheer but has apples and almond flour to flavour and thicken. It is not a super sweet version , rather one to share at dinners or home gatherings.
Is this diabetic friendly apple kheer?
I make this with no added sugar or sweetener, just the sweetness from the apples making it a bit more on the diabetic friendly Indian dessert side. Please be aware that the apples are sweet enough, so moderate the portion size.
Ingredients to make almond apple kheer
Apple: crunchy sweet apples are the base flavour for this kheer. Personally, I like pink lady or red apples to make this kheer. I would avoid tart green apples as they can be too sour and may split the milk.
Butter or ghee:To kick off the caramelization and the colour on the apples, unsalted bautter or a small amount of ghee is helpful.You can use coconut oil if you are making it vegan.
Almond flour: the almond flour gives a rabdi like feeling to the kheer. I use the blanched almond flour. If you don’t have these you can grind a few almonds or soak them and grind with the milk. Instead of almonds you can used any nuts of your preference like cashews, pistachios. Melon seeds or puffed makhana(lily seeds) powder also taste good and thicken the kheer easily.
Milk: full cream milk is best suited for this recipe. It has the right consistency and doesn’t easily split the milk when adding the sauteed apples. I would avoid almond milk to make this kheer among the plant based ones as it easily splits. You could use coconut or soy as well.
Sweetener: I have actually not added any in this recipe as the apples were super sweet and we like a mild sweetness for our kheer. You can add sugar as the milk boils. If adding jaggery syrup or maple syrup add it after you remove from heat. Alternatively date paste will be lovely in this kheer.
Spices: the common sweet spices used in Indian desserts are saffron and cardamom. I have used a few strands of saffron and powdered cardamom to finish the recipe.
Let’s make almond apple kheer
It does take a few steps to make this kheer, however, it is not a hard recipe to follow some absolutely recommend beginners to try it.
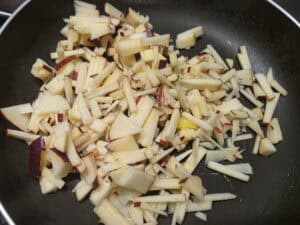
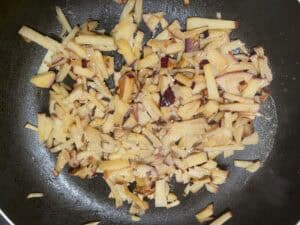
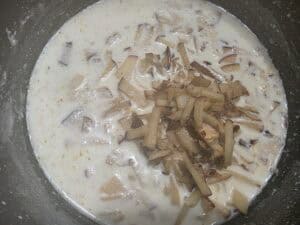
To prep the Apple: the Apple can be chopped like I have done or grated to have a smoother kheer. It is optional to peel the apple as this will be all about mouth feel. I leave the peels in as it gives a good bite. Once prepped add the apples to a pan with a touch of unsalted butter. On a low heat let this mix cook down and caramelize. Ensure that this is a low heat process. You can cover the apples for a minute if you feel they are dry. This captures the water from the juices allowing the apples to steam.
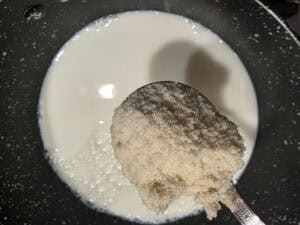
Boil the milk: in a separate sauce pan, boil the milk. As it bubbles and boils, stir in the almond flour.
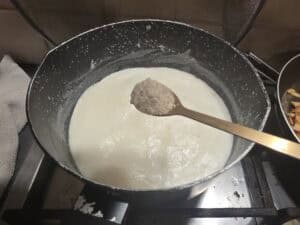
Thicken the milk the almond flour is the thickening agent. When the milk has started boiling and rising a bit, lower the heat to a simmer. Sprinkle the almond flour on the boiling milk. Stir well ensuring it is lump free. Let this cook down for about 5 to 6 minutes with stirring in between.
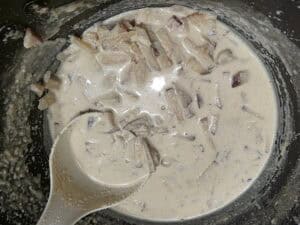
Add the apples: add the cooked apples into the mix and mix well. You can take off the heat at this point.
Flavouring the kheer: sprinkle cardamom powder and a few kesar strands and mix well. At this stage my kheer is done. If you prefer to add sugar or jaggery syrup do so at this stage and mix well.
Print
Apple almond kheer
Apple almond kheer is a delightful no sugar added Indian style dessert fit for any festival. Flavoured and thickened with almond flour it is a quick and easy recipe that is perfect for beginners.
Course Desserts
Cuisine Indian
Keyword almond flour recipes, easy Indian sweets, festival offerings, Ganesh chaturthi recipes, Indian desserts
Prep Time 15 minutes minutes
Cook Time 25 minutes minutes
Servings 4 people
Ingredients
to caramelize the apples
- 2 medium apples sweet variety
- 1 tsp ghee
to make the kheer
- 3 cups milk
- 2 tbsp almond flour.
- 1 small green cardamom
- 2-3 strands saffron
Instructions
Wash and chop the apples into small bits ( or grate them).
Add these into a frying pan along with a tsp of ghee.
Set this on a low heat and let this slowly cook and caramelize.
Saute this a few minutes once so it does not catch the bottom.
Into the saucepan add the milk and boil on a low heat.
Once it bubble up and boils stir in the almond flour with now lump and let this cook down on a simmer.
Add the cardamom and saffron at this stage.
When the almond flour swells and reaches a rabdi consistency, add the caramelized apples and remove from heat.
Mix well and let the kheer sit for 10 minutes.
You can serve the warm kheer at this point or cool and chill for later.
Is this a vegan kheer?
If you are using plant based milks the recipe can easily be turned vegan. Coconut milk or soy tastes good. For sauteeing and caramelizing the butter, coconut oil is best.
Can we make this with other fruits?
Of course you can change the fruits to make a variety of kheer. Mango ,jackfruit or plantain banana will be my first choice.
You can try dates and dried figs too. When using sweet dry fruits adjust the sugar accordingly.
Other quick try kheers
Sabudhana kheer
Sweet potato kheer
Mothichoor ladoo kheer
Rajgira kheer
Manipuri black rice kheer
Stay connected
When you try out this almond apple kheer, let us know in comments how much you liked it. Share it with family and friends.
Pin this link from here
See you in the next post