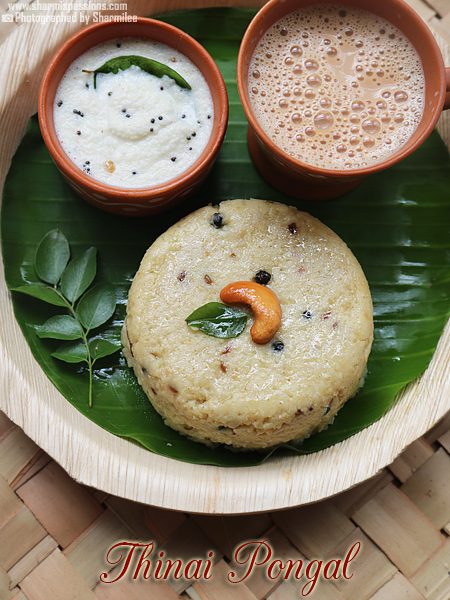
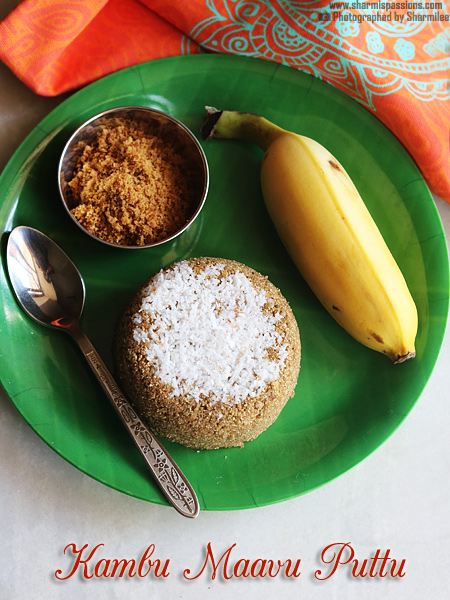
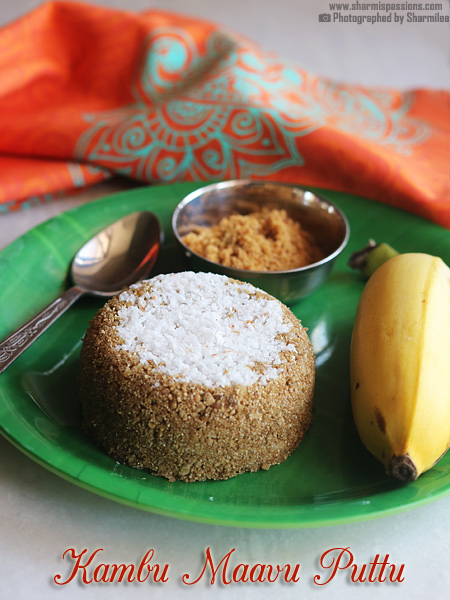
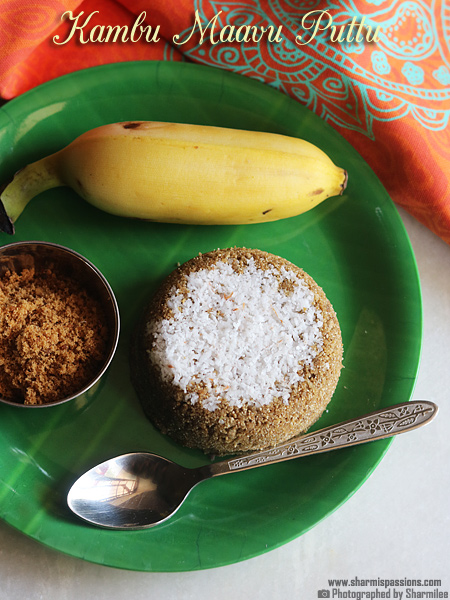
Reading view

There are new articles available, click to refresh the page.

Kambu Maavu Puttu

Kambu Maavu Puttu is a mild sweet dish made using pearl millet flour which is steamed and then mixed with sugar, coconut and ghee. This recipe has soft crumbly texture that melts easily in your mouth and gives nice nutty flavor from the millet. I make this when I want something simple but still healthy to eat, mostly for breakfast or even sometimes for light dinner.

kambu maavu puttu served

Kambu or Pearl millet is one of the traditional millet which people use since a long time in South Indian homes for many years. It is rich in iron, fiber and helps to keep the body cool during hot days. This is a nice way to include millets in daily diet, especially for people who are not used to it much. The taste is simple, mild and gives a good change from regular breakfast items.

[feast_advanced_jump_to]

About Kambu Maavu Puttu

Kambu Maavu Puttu is one of the simple millet based recipe that can be made in few easy steps. The flour is lightly roasted and then steamed till soft, then mixed with ghee and sugar to bring that smooth and moist texture. The combination of cane sugar and cardamom gives a soft sweetness and light aroma which makes it very comforting to eat.

This dish is quite popular in Tamil Nadu and few other South Indian places where people still use millets in regular cooking. The flavor of kambu is deep and little earthy, very different from rice puttu we make normally. This has mild taste that goes well with ghee and coconut. You can even try with jaggery instead of sugar for a more healthier version.

The texture of this puttu is not sticky or too dry, it stays soft and crumbly when mixed properly. It feels filling after you eat but still not heavy on stomach. You can have it for breakfast or sometimes for simple dinner also when you want something light and not spicy. It is one of those easy homely recipes that gives comfort without taking much time.

I usually make this on lazy morning or weekends when I do not want to cook much but still need something filling and tasty. My family always enjoy it with little extra spoon of ghee on top. It gives nice flavor and feels satisfying to eat.

kambu maavu puttu served

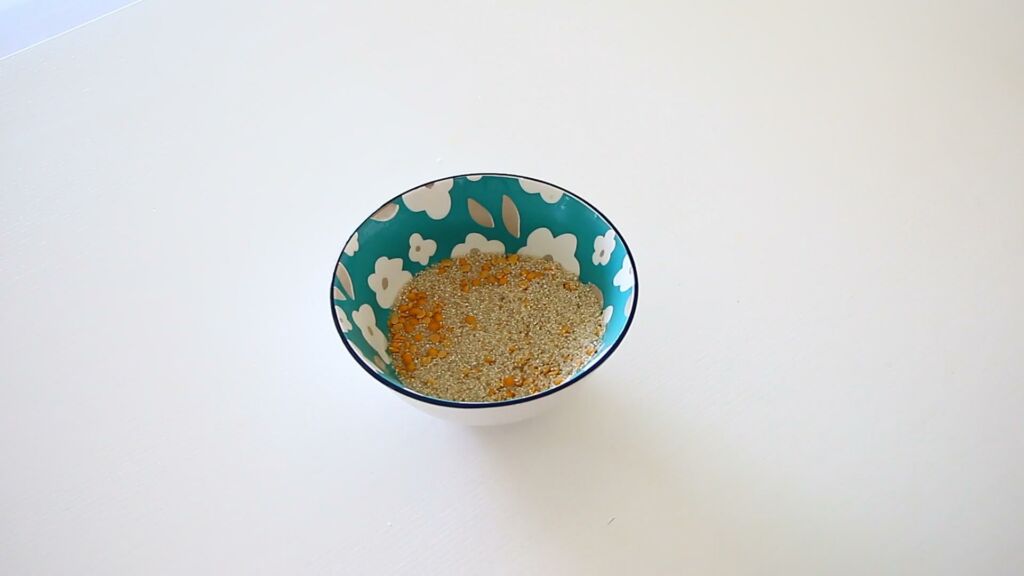
Kambu Maavu Puttu Ingredients

  • Kambu Maavu - I have used roasted kambu flour for this recipe, it gives nice nutty smell and deep flavor to the puttu. You can also use unroasted flour but better to dry roast little before steaming so the raw taste goes away.
  • Water - I added just enough to make the flour moist. It helps to hold the mixture little firm before steaming. Add slowly and mix well till it feels right when you press in hand.
  • Cane Sugar - I have used unrefined cane sugar, it gives mild sweetness and small golden shade to the dish. You can use jaggery also if you want stronger and more earthy taste.
  • Coconut - I have used fresh grated coconut, it gives moisture and tiny crunch in between. You can skip it if you do not like, but I feel it gives nice taste and fresh smell.
  • Cardamom Powder - I have added little cardamom powder for soft sweet smell and flavor balance.
  • Ghee - I used homemade ghee, it makes the puttu soft and rich. It gives that  aroma , better taste and smell.

Why This Recipe Works

  • This recipe is simple to make and uses only few basic ingredients.
  • It gives soft texture and gentle sweet flavor that both kids and elders like.
  • It is a healthy choice because it uses millet flour which is rich in iron and fibre.
  • You can easily adhust the sweetness or use jaggery for a traditional taste.
  • This recipe can be served warm or cold and still tastes nice and light.
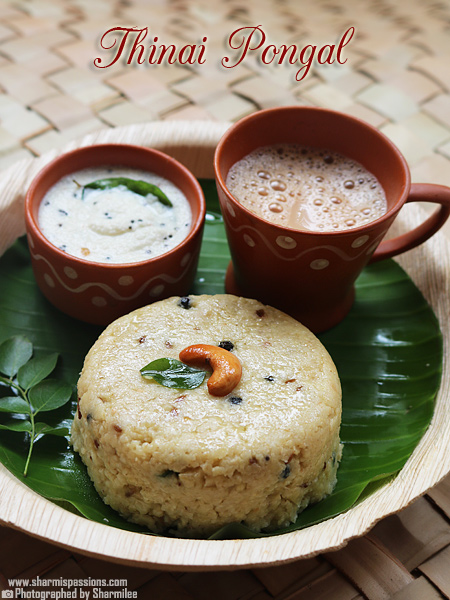
Similar Recipes

How to make Kambu Maavu Puttu Step by Step

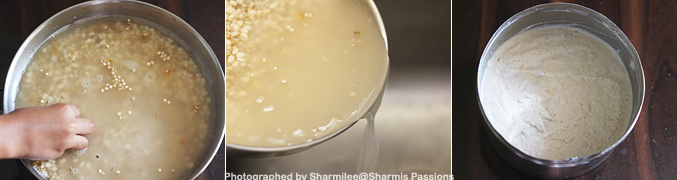
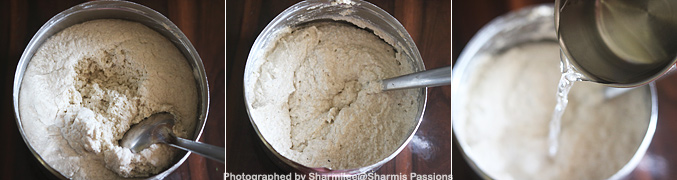
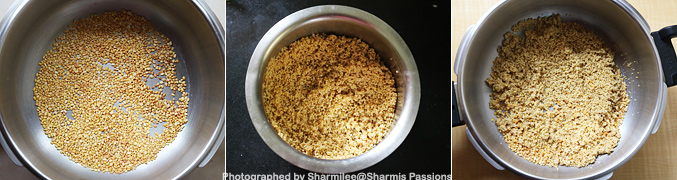
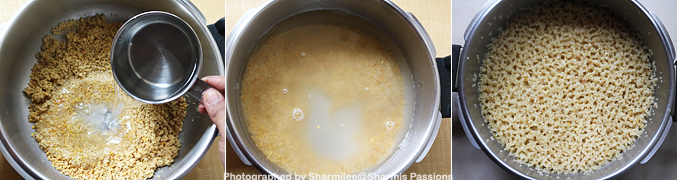
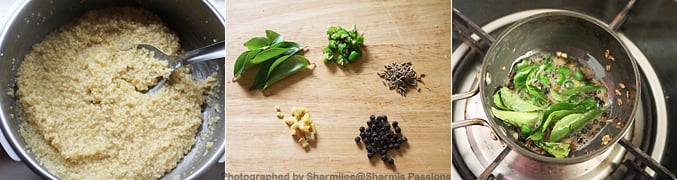
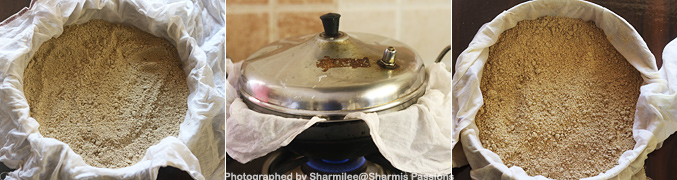
1.Dry roast the flour until aroma comes, my flour was already roasted so just roasted for a minute and proceeded. Now sprinkle water may 2 tablespoon.

how to make kambu maavu puttu step1

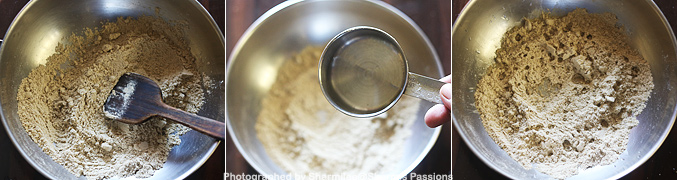
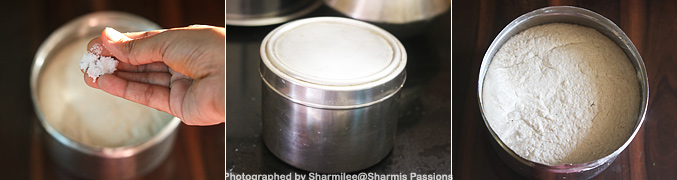
2.Mix well without any lumps, try to hold the flour tightly with your hands if it holds then this is the right consistency, stop adding water.

how to make kambu maavu puttu step2

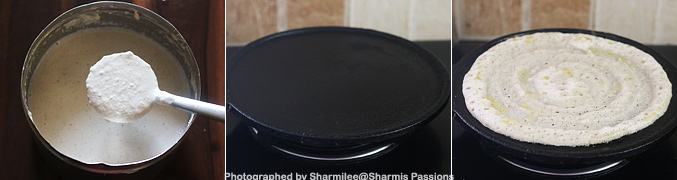
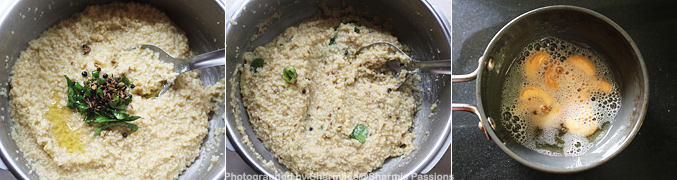
3.Transfer the flour to a steamer plate and steam for at least 15-20 minutes in low medium flame. The color of the flour must have changed by now.

how to make kambu maavu puttu step3

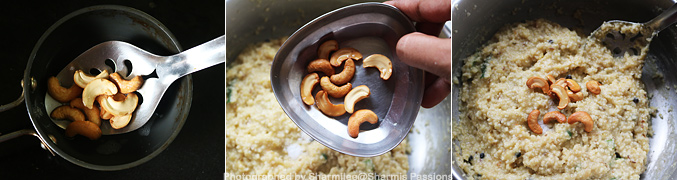
4.Transfer it to a mixing bowl add cane sugar, cardamom powder, ghee, sugar and salt. Mix well.
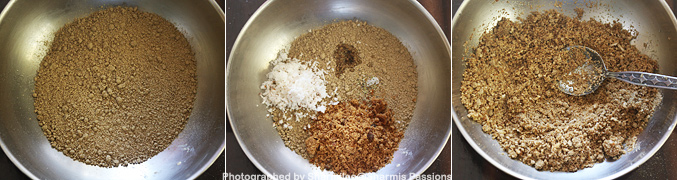
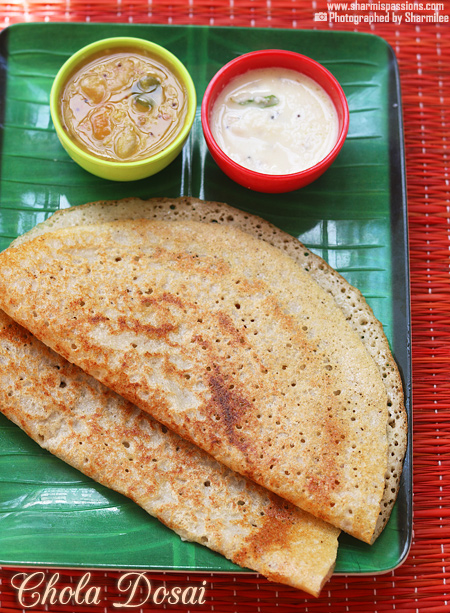
how to make kambu maavu puttu step4

Serve hot / warm!

kambu maavu puttu served

Expert Tips

  • Roasting- I usually dry roast the flour just for a minute to remove raw smell. It also helps to make soft puttu after steaming.
  • Adding water - Sprinkle little water at a time, mix gently and check by pressing the flour in your hand. If it holds shape, it is perfect.
  • Steaming time - I have steamed for around twenty minutes. The flour changes color slightly when cooked, that is when it is ready.
  • Mixing - After steaming, I add sugar, ghee, and coconut while it is still warm. It helps to absorb flavor and become moist.
  • Serving style - I sometimes shape the puttu using a small cup or bowl, it looks neat and easy to serve. You can just fluff and serve as it is also.

Serving and Storage

Serve this dish warm with small drizzle of melted ghee on top. It goes nice with banana or even one spoon of curd on side. Keep leftover in airtight box and store in fridge for one day. When serving again, heat it little so the ghee melts and the puttu turn soft again.

FAQS

1.Can I use jaggery?

Yes you can, just melt jaggery with small amount of water and filter once before mixing with the steamed flour. It gives dark color and rich taste to the puttu.

2.Is this good for kids?

Yes it is mild and healthy. You can mash it well and reduce sugar slightly if making for small kids.

3.Can I skip coconut?

You can skip, but coconut gives little moisture and nice freshness, so I feel it tastes better with it.

4.How to find the flour is cooked?

After steaming the flour will look slightly darker and the raw smell will go off. If it feels sticky while touching, steam for few more minutes.

5.Can I make this in large batch?

Yes you can make in bigger quantity also. Just steam in two rounds and mix gently after cooking so it stay soft and fluffy.

kambu maavu puttu served

If you have any more questions about this Kambu maavu puttu recipe do mail me at sharmispassions@gmail.com. In addition, follow me on InstagramFacebookPinterest ,Youtube and Twitter .

Tried this Kambu maavu puttu recipe? Do let me know how you liked it. Also tag us on Instagram @sharmispassions and hash tag it on #sharmispassions.

📖 Recipe Card

29184667023 c56ed1a52f o
Print

Kambu Maavu Puttu Recipe

Kambu Maavu Puttu is a mild sweet dish made using pearl millet flour which is steamed and then mixed with sugar, coconut and ghee. This recipe has soft crumbly texture that melts easily in your mouth and gives nice nutty flavor from the millet. I make this when I want something simple but still healthy to eat, mostly for breakfast or even sometimes for light dinner.
Course Breakfast, dinner
Cuisine Indian
Keyword 30 mins recipes, millet recipes, puttu recipes, recipes
Prep Time 10 minutes
Cook Time 20 minutes
Total Time 30 minutes
Servings 1
Calories 531kcal
Author Sharmilee J

Ingredients

  • ½ cup kambu maavu / bajra flour
  • water as needed
  • ¼ cup cane sugar
  • 2 tablespoon coconut
  • 1 tiny pinch cardamom powder
  • 2 teaspoon ghee
  • 1 tiny pinch salt

Instructions

  • Dry roast the flour until aroma comes,my flour was already roasted so just roasted for a minute and proceeded.
  • Now sprinkle water may 2 tablespoon.
  • Mix well without any lumps, try to hold the flour tightly with your hands if it holds then this is the right consistency, stop adding water.
  • Transfer the flour to a steamer plate and steam for at least 15-20 minutes in low medium flame. The color of the flour must have changed by now.
  • Transfer it to a mixing bowl add cane sugar,cardamom owder,ghee,sugar and salt.
  • Mix well. Serve Kambu Maavu Puttu hot / warm!

Notes

  • Roasting- I usually dry roast the flour just for a minute to remove raw smell. It also helps to make soft puttu after steaming.
  • Adding water - Sprinkle little water at a time, mix gently and check by pressing the flour in your hand. If it holds shape, it is perfect.
  • Steaming time - I have steamed for around twenty minutes. The flour changes color slightly when cooked, that is when it is ready.
  • Mixing - After steaming, I add sugar, ghee, and coconut while it is still warm. It helps to absorb flavor and become moist.
  • Serving style - I sometimes shape the puttu using a small cup or bowl, it looks neat and easy to serve. You can just fluff and serve as it is also.

Nutrition

Serving: 125g | Calories: 531kcal | Carbohydrates: 131g | Protein: 14g | Fat: 19g | Saturated Fat: 11g | Polyunsaturated Fat: 3g | Monounsaturated Fat: 4g | Cholesterol: 26mg | Sodium: 16mg | Potassium: 400mg | Fiber: 1g | Sugar: 51g | Vitamin C: 0.3mg | Calcium: 52mg | Iron: 10mg

The post Kambu Maavu Puttu appeared first on Sharmis Passions.

Sorghum Dosa | Chola Dosai | Jowar Dosa

Sorghum Dosa is a light and healthy dosa made using sorghum, rice and urad dal. It comes soft in middle and little crisp at edges, making it so good to have for breakfast or even dinner. The flavor is mild, earthy and comforting with that small nutty taste from sorghum.

sorghum dosa served with sambar and chutney

You can make this dosa as it fills the tummy but still feels light. Sorghum, also called cholam, is rich in fiber and iron, and it keeps you full for long time. It's one nice way to include millets in daily food without feeling too plain or healthy. You can even use the same batter for idli also, which makes it more helpful.

[feast_advanced_jump_to]

About Sorghum Dosa

Sorghum Dosa or Chola Dosa is a South Indian style dosa made with sorghum, rice and urad dal. The ingredients are soaked, ground smooth then left to ferment overnight. After fermentation, the batter becomes soft and bit airy which helps dosa to turn light and slightly crisp.

This dosa tastes little different from regular dosa but has nice earthy flavor that goes so well with chutney and sambar. When cooked well, the dosa turns golden at edges and stays soft in center. I feel the taste of this dosa is mild and homely.

There are few variations also. You can also use cholam flour for quick version but I like to soak and grind whole grain, it gives better texture and that fresh aroma after cooking. You can even mix other millets like varagu or thinai along with cholam for a change in taste and flavor.

Sorghum is also known as Jowar in Hindi, we call it Cholam in Tamil, It is also called as white millet. This is a good source of dietary fiber, it is gluten-free, high in protein, cholesterol free millet. I usually make this on weekends or when I feel to eat something simple and healthy. It takes some soaking time but very less effort otherwise.

sorghum dosa served with sambar and chutney

Sorghum Dosa Ingredients

  • Sorghum (Cholam) - I used whole cholam grain here. It gives earthy taste and soft texture after fermentation. You can use sorghum flour also but dosa will come little dense.
  • Idli Rice - I add idli rice along with sorghum to get that light crispness and proper spreading texture. It balances the dosa taste well.
  • Urad Dal - I used whole urad dal as it gives soft texture and good fermentation. You can use split dal too but whole gives better result.
  • Fenugreek Seeds - I add few methi seeds while soaking. It helps in fermentation and gives light flavor and nice color to dosa.
  • Oil - I used few drops of oil while making dosa. It makes dosa golden and helps in easy lifting. You can use gingelly oil for more flavor.

Similar Recipes

How to make Sorghum Dosa Step by Step

1.Measure all the ingredients and soak it in a wide bowl with enough water till immersing level. Soak this for at least 3-4 hours.

how to make sorghum dosa step1

2.Rinse it well, mittu is helping me with this, then wash it well at least twice. Then grind it to a thickish batter with little water. The batter consistency should be neither thick nor thin. I grinded it in my wet grinder, you can do it mixer too but grinder is recommended.

how to make sorghum dosa step2

3.Add required salt, mix it and keep it undisturbed for it to ferment. Leave it in warm place for at least 8 hours, I left it overnight. See the fermented batter the next day, it has raised well.

how to make sorghum dosa step3

4.You can see the tetxure, mix it once then add water to make the batter thin.

how to make sorghum dosa step4

5.Adjust and add water till it is in pour-able and spreadable consistency. Heat a dosa tawa, if you sprinkle water it should give shh sound then the tawa is hot, now add 2 small ladle full of batter and spread it in concentric circles. Drizzle oil over the sides and in the middle.

how to make sorghum dosa step5

6.Cook till it becomes golden in the center and the edges starts lifting up, flip to other side and cook for 2 minutes turn again flip over and fold it. Remove from tawa and Serve.

how to make sorghum dosa step6

Serve hot with chutney and sambar.

Expert Tips

  • Soaking- I soak everything for 3 to 4 hours as it helps in smooth grinding and soft dosa.
  • Fermentation - Batter needs at least 8 hours of resting. Keep it in warm place, in cold weather it may take little longer.
  • Consistency - The consistency should be slightly thick while grinding. Later you can add water to get pouring consistency.
  • Tawa Heat - Make sure tawa is hot before spreading batter. When you sprinkle water, it should make small sizzling sound.
  • Oil - I drizzle little oil on the sides while cooking. It makes dosa crisp and adds nice flavor too.

Serving and Storage

Serve this hot with coconut chutney or sambar. I drizzle small spoon of ghee or gingelly oil on top, it gives nice flavor and little shine too. This dosa tastes best when served hot and hot. If you have leftover batter, keep it in fridge, it stays good for two days.

FAQS

1.Can I make with ready made flour?

Yes, you can use the flour, but dosa will not be as soft as made with whole grains.

2.Can I skip rice?

You can, but dosa may turn bit thick and not spread easily. Rice helps with softness and texture.

3.Why my batter did not ferment well?

Maybe weather was cold. Keep it near stove or warm area for few more hours.

4.Can I make idli with same batter?

Yes, just keep batter thick and you can make soft idlis also.

5.How long can I store the batter?

You can keep in fridge up to 2 days. Mix well before making dosa again.

sorghum dosa served with sambar and chutney

If you have any more questions about this Sorghum Dosa do mail me at sharmispassions@gmail.com. In addition, follow me on InstagramFacebookPinterest ,Youtube and Twitter .

Tried this Sorghum Dosa? Do let me know how you liked it. Also tag us on Instagram @sharmispassions and hash tag it on #sharmispassions.

📖 Recipe Card

28297722923 caf9272a30 o
Print

Sorghum Dosa Recipe | Chola Dosa Recipe

Sorghum Dosa is a light and healthy dosa made using sorghum, rice and urad dal. It comes soft in middle and little crisp at edges, making it so good to have for breakfast or even dinner. The flavor is mild, earthy and comforting with that small nutty taste from sorghum.
Course Breakfast
Cuisine Indian
Keyword 30 mins recipes, corn recipes, Dinner recipe, dosa batter, dosa recipes, tiffin recipes
Prep Time 1 day
Cook Time 10 minutes
Total Time 1 day 10 minutes
Servings 10 dosas
Calories 115kcal
Author Sharmilee J

Ingredients

  • 1 cup sorghum cholam
  • ½ cup idli rice
  • ¼ cup whole urad dal
  • 1 teaspoon fenugreek seeds
  • salt to taste
  • oil for making dosas

Instructions

  • Measure all the ingredients and soak it in a wide bowl with enough water till immersing level. Soak this for at least 3-4 hours.
  • Rinse it well, then wash it well at least twice.
  • Then grind it to a thickish batter with little water. The batter consistency should be neither thick nor thin. I grinded it in my wet grinder, you can do it mixie too but grinder is recommended.
  • Add required salt, mix it and keep it undisturbed for it to ferment.
  • Leave it in warm place for at least 8 hours, I left it overnight. See the fermented batter the next day, it has raised well.
  • You can see the texture, mix it once then add water to make the batter thin.
  • Adjust and add water till it is in pour-able and spreadable consistency.
  • Heat a dosa tawa, if you sprinkle water it should give shh sound then the tawa is hot, now add 2 small ladle full of batter and spread it in concentric circles. Drizzle oil over the sides and in the middle.
  • Cook till it becomes golden in the center and the edges starts lifting up, flip to other side and cook for 2 minutes turn again flip over and fold it. Remove from tawa and serve.
  • Serve Chola Dosa hot with chutney and sambar.

Notes

  • Soaking- I soak everything for 3 to 4 hours as it helps in smooth grinding and soft dosa.
  • Fermentation - Batter needs at least 8 hours of resting. Keep it in warm place, in cold weather it may take little longer.
  • Consistency - The consistency should be slightly thick while grinding. Later you can add water to get pouring consistency.
  • Tawa Heat - Make sure tawa is hot before spreading batter. When you sprinkle water, it should make small sizzling sound.
  • Oil - I drizzle little oil on the sides while cooking. It makes dosa crisp and adds nice flavor too.

Nutrition

Serving: 25g | Calories: 115kcal | Carbohydrates: 24g | Protein: 4g | Fat: 1g | Saturated Fat: 0.1g | Polyunsaturated Fat: 0.3g | Monounsaturated Fat: 0.2g | Sodium: 2mg | Potassium: 81mg | Fiber: 2g | Sugar: 0.01g | Vitamin A: 0.5IU | Vitamin C: 0.2mg | Calcium: 12mg | Iron: 1mg

The post Sorghum Dosa | Chola Dosai | Jowar Dosa appeared first on Sharmis Passions.

Millet Pongal Recipe

Millet Pongal is a simple and comforting dish, especially when it is healthy, filling and still light on tummy. This recipe is made by cooking millet along with moong dal, then tempered with pepper, cumin, curry leaves and a little drizzle of ghee and roasted cashews. The taste is mild and soothing, with soft texture and nice aroma coming from ghee and spices.

millet pongal served with chutney and coffee

You can make this for breakfast or even for dinner. It is also a really good way to include millets in daily meal. Millets are full of fiber, helps in digestion and keeps you full for long time, so I always try to use them in my recipes whenever I can.

[feast_advanced_jump_to]

About Millet Pongal

Millet Pongal is a simple South Indian dish made with millets like thinai, varagu or samai. Here I have used thinai also called as foxtail millet. It turns soft after cooking and mixes really well with moong dal. The pongal comes out creamy, soft and little sticky just like ven pongal that we make with rice.

The flavor of pongal comes mainly from tempering. Freshly crushed pepper, cumin seeds, curry leaves and ginger gives such nice aroma. I feel this pongal tastes best when served hot with little drizzle of ghee on top. It is mild, simple and gives that homely comfort feel every time.

You can also make this using other millets. Varagu will give little grainy texture, while samai turns more soft. You can add one more spoon of ghee or little bit of coconut while tempering for rich taste. Each millet has its own taste and charm.

I usually make this on weekends or when I want eat something light and still feel full. It takes very less effort, and taste is always comforting. A bowl of hot millet pongal with chutney and sambar is my idea of simple happy food.

millet pongal served with chutney and coffee

Millet Pongal Ingredients

  • Thinai (Foxtail Millet) - I have used thinai here, it cooks soft and gives a light nutty flavor. You can try other millets too like varagu or samai, it also works good.
  • Moong Dal - I used moong dal as it gives that creamy soft base and blends well with millet. I usually roast it lightly to bring nice smell and taste.
  • Water - I add enough water to make the pongal soft and gooey. It may look watery first but it thickens as it cools down.
  • Ghee - I have used ghee both for tempering and also while serving. It gives rich flavor and that smooth finish. You can add more if you like stronger ghee taste.
  • Cashews - I fried cashews in ghee till golden and added. It gives crunch and small nutty taste here and there.
  • Tempering - I used little oil and ghee for tempering, with crushed pepper, jeera, curry leaves, slit green chilli, finely chopped ginger and a small pinch of hing. It gives lovely aroma, mild spice and freshness to the pongal all together. You can use coconut oil instead of oil if you want different flavor.

Why This Recipe Works

  • This recipe is simple and easy, no fancy ingredients.
  • It is healthy and feels light for breakfast or dinner.
  • You can make it using any millet available and still get same soft texture.
  • It uses very less ghee and oil so it is good for health and digestion.
  • The taste is mild and comforting, perfect for all age people.

Similar Recipes

How to make Millet Pongal Step by Step

1.Dry roast moong dal till golden brown. Transfer to pressure cooker, then Rinse the millet well, drain water and add it to cooker.

how to make millet pongal step1

2.Add water and pressure cook for 3-4 whistles in medium flame. Switch off.

how to make millet pongal step2

3.Once pressure releases, mash up rice and dal well with a ladle. It will look goey at this stage but will start to thicken with time. Now get ready with the tempering items. Heat oil in a pan - add the items listed under ' temper' let it splutter.

how to make millet pongal step3

4.Add the tempered items to the pongal, add required salt mix well. Fry cashews in ghee till golden brown.

how to make millet pongal step4

5.Add fried cashews to the pongal. Give a quick stir, I added little more salt as it was too less when I tasted it.

how to make millet pongal step5

Serve hot with a drizzle of ghee on top along with chutney and sambar.

millet pongal served with chutney and coffee

Expert Tips

  • Roasting - I roast moong dal till it turns light golden in color. This step gives nice flavor and avoids that raw smell.
  • Water Amount - I add little more water than usual rice pongal because millet absorbs water very fast. Even if it looks watery first, it will turn thick later once it cools a bit.
  • Tempering - I always do tempering separately and add it to the cooked pongal at last. This keeps the flavors fresh and not burnt.
  • Adding Ghee - I add ghee while doing tempering and also again just before serving. It gives lovely aroma and keeps the pongal moist and soft.
  • Serving Hot - I always serve it hot else it becomes dry soon. If it turns dry, you can sprinkle little hot water and mix, it will become soft again.

Serving and Storage

Serve this hot or warm with coconut chutney or sambar. You can also drizzle little ghee on top, it gives good flavor and shine on top. This dish is best when not or warm. If you have leftover, keep it in closed container in fridge.

It stays good for one day. While reheating, sprinkle little water and heat till soft again. Do not store for long as millet tends to dry fast.

FAQS

1.Can I use any millet?

Yes, you can use varagu, samai or kuthiraivali also works well. Texture may change little but taste will be good.

2.Can I skip moong dal?

I do not suggest skipping dal because it gives creamy soft texture. Without it pongal may turn dry.

3.Can I add veggies in pongal?

Yes, you can add small chopped carrot, beans or peas. It makes pongal colorful and more healthy.

4.Can I make this without pressure cooker?

Yes you can, just cook it in open pot but it will take little longer time. Keep stirring so it does not stick.

5.Why my pongal becomes dry after some time?

Millet absorbs water fast, so it becomes dry when cool. Just sprinkle hot water and mix well before serving again.

millet pongal served with chutney and coffee

If you have any more questions about this Millet Pongal do mail me at sharmispassions@gmail.com. In addition, follow me on InstagramFacebookPinterest ,Youtube and Twitter .

Tried this Millet Pongal? Do let me know how you liked it. Also tag us on Instagram @sharmispassions and hash tag it on #sharmispassions.

📖 Recipe Card

28731857810 2046bb3f76 o
Print

Millet Pongal Recipe

Millet Pongal is a simple and comforting dish, especially when it is healthy, filling and still light on tummy. This recipe is made by cooking millet along with moong dal, then tempered with pepper, cumin, curry leaves and a little drizzle of ghee and roasted cashews. The taste is mild and soothing, with soft texture and nice aroma coming from ghee and spices.
Course Breakfast, dinner
Cuisine Indian
Keyword 30 mins recipes, 30 mins rice recipes, pongal, pongal recipes, recipes
Prep Time 5 minutes
Cook Time 15 minutes
Total Time 20 minutes
Servings 2
Calories 349kcal
Author Sharmilee J

Ingredients

  • ½ cup thinai arisi
  • ¼ cup moong dal
  • 3 cups water
  • 5 whole cashews
  • 1 teaspoon ghee
  • salt to taste

To Temper:

  • 1 teaspoon oil
  • ½ teaspoon pepper whole or crushed roughly
  • ½ teaspoon jeera whole or crushed roughly
  • few curry leaves
  • 1 green chillies
  • ½ teaspoon ginger chopped finely
  • teaspoon hing

Instructions

  • Dry roast moong dal till golden brown. Transfer to pressure cooker, then rinse the millet well, drain water and add it to cooker.
  • Add water and pressure cook for 3-4 whistles in medium flame. Switch off.
  • Once pressure releases, mash up rice and dal well with a ladle. It will look gooey at this stage but will start to thicken with time.
  • Now get ready with the tempering items…Heat oil in a pan - add the items listed under ' temper' let it splutter.
  • Add the tempered items to the pongal, add required salt mix well. Fry cashews in ghee till golden brown.
  • Add fried cashews to the pongal. Give a quick stir , I added little more salt as it was too less when I tasted it .
  • Serve Millet Pongal hot with a drizzle of ghee on top along with chutney and sambar.

Notes

  • Roasting - I roast moong dal till it turns light golden in color. This step gives nice flavor and avoids that raw smell.
  • Water Amount - I add little more water than usual rice pongal because millet absorbs water very fast. Even if it looks watery first, it will turn thick later once it cools a bit.
  • Tempering - I always do tempering separately and add it to the cooked pongal at last. This keeps the flavors fresh and not burnt.
  • Adding Ghee - I add ghee while doing tempering and also again just before serving. It gives lovely aroma and keeps the pongal moist and soft.
  • Serving Hot - I always serve it hot else it becomes dry soon. If it turns dry, you can sprinkle little hot water and mix, it will become soft again.

Nutrition

Serving: 100g | Calories: 349kcal | Carbohydrates: 55g | Protein: 13g | Fat: 9g | Saturated Fat: 2g | Polyunsaturated Fat: 2g | Monounsaturated Fat: 3g | Trans Fat: 0.01g | Cholesterol: 6mg | Sodium: 104mg | Potassium: 141mg | Fiber: 8g | Sugar: 2g | Vitamin A: 59IU | Vitamin C: 3mg | Calcium: 34mg | Iron: 3mg

The post Millet Pongal Recipe appeared first on Sharmis Passions.

Millet Nellikai rasam sadam

Millet Nellikai rasam sadam – Healthy one pot rasam sadam recipe using millets – Amla | gooseberry rasam sadam recipe with full video

One-pot rasam sadam is always my go-to comfort meal, especially during this winter season. I posted Rasam sadam recipe in Jeyashris kitchen many years back. This recipe is adapted from my Nellikai rasam. I tried this using millet to make it healthy. As amla | gooseberry | nellikai is in season, let’s make the most of it during the right season.

Nellikai is very rich in Vitamin C, and many people find it difficult to eat it raw as it is very sour. Rather than making pickles, you can make rasam or try out this Rasam Sadam using nellikai. For most South Indians, rasam is a staple and comfort food. Pair it with any favorite vegetable curry and a sutta appalam | roasted papad and enjoy the hot rasam rice.

I have posted so many varieties of rasam recipes in Jeyashris kitchen. You can check out, Paruppu rasam, Lemon rasam, Cauliflower rasam, Kandanthippili rasam


Nellikai rasam sadam
Print

Healthy one pot rasam sadam recipe using Indian Gooseberry
Course Main Course
Cuisine Indian, South Indian
Keyword one pot meal, South Indian rasam recipes
Prep Time 10 minutes
Cook Time 25 minutes
Total Time 35 minutes
Servings 2
Author Jeyashri suresh

Ingredients

  • 1/2 cup millet I used Barnyard millet, you can use little millet, promos millet ,foxtail millet or quinoa too
  • 1/4 cup Toor dal can use moong dal too
  • 1/2 tsp turmeric powder
  • Salt as needed
  • 2 tsp ghee
  • 2 tsp oil
  • 1 tsp mustard seeds
  • 2 pinches asafoetida
  • 3-4 cups of Water

To grind

  • 3 amla | Nellikai| Gooseberry
  • 1 tomato
  • Few coriander stems
  • Few curry leaves
  • 6-7 garlic cloves
  • 1 tbsp coriander seeds |Dhaniya seeds
  • 1 tbsp whole black pepper
  • 2 tsp cumin seeds
  • Few coriander leaves

Instructions

  • Wash and soak the millet and toor dal in 3 cups of water for 10 mins
  • Grind all the ingredients mentioned under ‘To grind’ Do not water while grinding
  • In a pressure cooker add 1 tsp ghee and 2 tsp oil
  • Add the mustard seeds and asafoetida
  • once the mustard cracked add the ground paste to this
  • Cook for 2 minutes
  • Add turmeric powder and salt
  • Mix well and add the soaked millet dal mixture along with the water
  • cover the cooker and cook for 3-4 whistles
  • Once the pressure is released open and add 1 tsp of ghee
  • Mix well
  • Add finely chopped coriander leaves
  • Serve hot

Video

Notes

1. You can use any variety of millet. Do not use Ragi or jowar or bajra
2. You can use raw rice or Seeraga samba rice. In that case use 4 cups of water
3. If you feel the consistency is slightly thick you can add 1/2 cup of piping hot water to this just before serving. Mix well and serve
4. Instead of coriander seeds, pepper and cumin you can add 2 tsp of rasam podi or sambar podi
5. Millet Nellikai rasam sadam pairs well with simple papad or any curry or poriyal
  • Wash and soak the millet and toor dal in 3 cups of water for 10 mins.
  • Grind all the ingredients mentioned under ‘To grind’ Do not water while grinding.
  • In a pressure cooker add 1 tsp ghee and 2 tsp oil.
  • Add the mustard seeds and asafoetida.
  • once the mustard is cracked add the ground paste to this.
nellikai rasam sadam
  • Cook for 2 minutes
  • Add turmeric powder and salt.
millet nellikai rasam sadam
  • Mix well and add the soaked millet dal mixture along with the water.
Millet rasam sadam
  • cover the cooker and cook for 3-4 whistles
  • Once the pressure is released open and add 1 tsp of ghee
  • Mix well.
rasam sadam recipe
  • Add finely chopped coriander leaves
  •  Serve hot.
  • Notes
  • 1. You can use any variety of millet. Do not use Ragi or jowar or bajra
  •  2. You can use raw rice or Seeraga samba rice. In that case, use 4 cups of water
  • 3. If you feel the consistency is slightly thick you can add 1/2 cup of piping hot water to this just before serving. Mix well and serve
  • 4. Instead of coriander seeds, pepper, and cumin you can add 2 tsp of rasam podi or sambar podi
  • 5. Millet Nellikai rasam sadam pairs well with simple papad or any curry or poriyal.
Nellikai rasam sadam

The post Millet Nellikai rasam sadam appeared first on Jeyashri's Kitchen.

Saamai Paal Payasam Recipe | Indian Millet Dessert Recipe

Looking for a wholesome, traditional dessert that’s both delicious and nourishing? This Saamai Paal Payasam is just what you need! Made with little millet, milk, and natural sweeteners, this creamy kheer is a perfect blend of taste and health. Whether you're celebrating a festival or just craving a comforting sweet treat, this recipe is a must-try. It’s simple to prepare, packed with nutrients, and has a rich, comforting flavor that keeps you coming back for more!

A bowl of creamy Saamai Paal Payasam (Little Millet Kheer) garnished with roasted cashews and raisins, served warm in a traditional bowl.

Saamai Paal Payasam is often made during South Indian festivals like Pongal, Navaratri, and Tamil New Year. It's also a popular choice for poojas and special family occasions, especially when people want a healthy, millet-based sweet.

This was inspired by my pal payasam recipe on this site.

[feast_advanced_jump_to]

Ingredients

These ingredients were chosen to create a simple, wholesome, and flavorful dessert. Little millet is a nutritious grain that’s light and easy to digest, making it perfect for payasam. Milk adds richness and creaminess, while sugar provides the right amount of sweetness. Cardamom powder brings a fragrant touch of warmth, and ghee-roasted cashews add a delicious crunch and aroma that elevate the overall dish.

  • Ingredients:
  • Cardamom powder
  • Little millet (Samai)
  • Milk
  • Cashews
  • Ghee (clarified butter)
  • Sugar

See recipe card for quantities.

Instructions

  1. Pour the milk into a pan and place it on the stove. Stir occasionally until the milk comes to a boil. 
  1. Meanwhile, rinse the saamai (little millet) thoroughly and keep it ready.
  1. In a separate pan, heat the ghee and fry the cashews until they turn golden brown.
  1. Add the roasted cashews to the payasam and mix well. Remove the payasam from the heat.
  1. When the milk starts to boil, add the rinsed saamai and mix well. Keep the flame on medium and stir occasionally.
  1. Allow the saamai to cook as the milk gradually reduces to half its original quantity. This slow reduction enhances the flavor and gives the payasam a rich texture, often making cardamom powder optional. It takes about 20 minutes for the saamai to cook fully and the milk to thicken. Once the saamai is cooked, add the sugar and mix well. Let the kheer simmer for another 5 minutes before turning off the heat.

Substitutions

  • Vegan: Replace dairy milk with coconut milk, almond milk, or any plant-based milk to make this payasam completely vegan. Use coconut oil instead of ghee for roasting cashews.
  • Low Sugar: Substitute regular sugar with jaggery powder or natural sweeteners like maple syrup or stevia to reduce refined sugar content.
  • Gluten-Free: Saamai (little millet) is naturally gluten-free, making this recipe safe for gluten-sensitive diets. Just be sure to use pure, uncontaminated ingredients.
  • Nut-Free: If you have nut allergies, skip the cashews or replace them with seeds like pumpkin or sunflower seeds for a similar crunch.

Variations

  • Festive Twist: Add a pinch of nutmeg or cinnamon along with cardamom for warm, festive flavors. Garnish with fresh rose petals or edible dried fruits for a beautiful presentation.
  • Health Boost: Stir in some finely grated carrots or shredded coconut for extra nutrients and texture. You can also use jaggery instead of sugar for a more natural sweetness.

Storage

Store the payasam in an airtight container in the refrigerator. It will stay fresh for 2-3 days. Before serving, gently reheat on low heat and stir well—add a splash of milk if it has thickened too much.

This payasam is not recommended for freezing, as the texture can change and become grainy or watery when thawed.

Top Tips

Here are some top tips for making perfect Saamai Paal Payasam:

  • Rinse the little millet thoroughly to remove any impurities before cooking.
  • Cook the millet slowly in boiling milk on medium heat for a creamy texture.
  • Stir occasionally to prevent the millet from sticking to the bottom of the pan.
  • Allow the milk to reduce well—it enhances the flavor and thickens the payasam naturally.
  • Roast cashews in ghee until golden brown for a rich, nutty crunch.
  • Add sugar gradually and adjust sweetness to your taste.
  • Use fresh cardamom powder for the best aroma and flavor.
  • Serve warm or chilled, depending on your preference.
  • Avoid freezing to keep the texture intact.
  • For a special touch, garnish with saffron strands or dried rose petals

Related

Looking for other recipes like this? Try these: 

Recipe Card

A bowl of creamy Saamai Paal Payasam (Little Millet Kheer) garnished with roasted cashews and raisins, served warm in a traditional bowl.
Print

Saamai Paal Payasam Recipe | Little Millet Kheer Recipe

Saamai Paal Payasam is a traditional South Indian dessert made with little millet, milk, and sweet spices. This creamy and comforting kheer is not only delicious but also packed with nutrients, making it a wholesome treat perfect for festivals and special occasions. Its mild sweetness and rich texture make it a favorite among all ages.
Course Payasam/Kheer
Cuisine Indian, South Indian, Tamil Nadu
Prep Time 5 minutes
Cook Time 30 minutes
Total Time 35 minutes
Servings 4 people
Calories 120kcal
Author Sowmya Venkatachalam

Ingredients

  • ¼ Cup Little Millet (Samai)
  • 2 Cups Milk
  • 6-7 Cashews
  • 1 teaspoon Ghee (Clarified butter)
  • ¼ Cup Sugar
  • ¼ teaspoon Cardamom Powder

Instructions

  • Pour the milk into a pan and place it over medium heat. Stir occasionally until the milk begins to boil. Meanwhile, rinse the saamai thoroughly and set it aside.
    2 Cups Milk
  • When the milk starts to boil, add the rinsed saamai and mix well. Reduce the heat to medium and stir occasionally. Allow the saamai to cook while the milk reduces to half its original quantity. This slow reduction enhances the flavor and texture, often making cardamom powder optional. It will take about 20 minutes for the saamai to cook fully and the milk to thicken. Once the saamai is cooked, add sugar and stir well. Let the kheer simmer for another 5 minutes before removing it from the heat.
    ¼ Cup Little Millet (Samai), ¼ teaspoon Cardamom Powder, ¼ Cup Sugar
  • In a separate pan, heat the ghee and fry the cashews until they turn golden brown. Add the roasted cashews to the payasam and mix well. Remove the payasam from the heat.
    1 teaspoon Ghee (Clarified butter), 6-7 Cashews
  • The delicious Saamai Paal Payasam (Little Millet Kheer) is now ready to serve! 

Notes

  1. We can soak few saffron strands in warm milk and add it to get a nice color
  2. Little millet cooks faster and hence I have added it directly in milk. If you want, we can cook the little millet in water separately and add it to milk later

Nutrition

Serving: 1Cups | Calories: 120kcal | Carbohydrates: 15g | Protein: 5g | Fat: 5g

The post Saamai Paal Payasam Recipe | Indian Millet Dessert Recipe appeared first on Subbus Kitchen.

Millet Vegetable soup

Millet Vegetable soup, a healthy vegetable soup recipe using Indian Millet. Millet Vegetable soup recipe with full video and step-by-step pictures.

This is a one-pot healthy soup recipe using millet. Soups are very much loved by everyone at home. I wanted to incorporate millet into the everyday meal. Usually, we add corn flour as a thickener in making soups. Here we are adding Indian millet, this not only gives the thickness but also makes it very healthy.

What Millet works well for Soups?

Kodo millet, Little millet, Barnyard millet, foxtail millet, and Proso millet work well for soups. You can use millet flour in the last if you don’t get whole millet. I have tried Ragi flour in a vegetable soup and posted it in the blog too.

Recently I did a cookery Demo in Hongkong, themed millet recipes, to promote the goodness of Indian millet among the local people. The event was organised by Indian Embassy. I will share the recipe for the 2 dishes which I showcased at that event.

Also check out, the complete collection of Millet recipes from Jeyashris kitchen.

Millet vegetable soup
Print

Millet vegetable soup recipe

Healthy millet vegetable soup recipe
Course Soup
Cuisine Indian
Keyword millet recipes, Soup recipes
Prep Time 10 minutes
Cook Time 20 minutes
Total Time 30 minutes
Servings 4
Author Jeyashri suresh

Ingredients

  • 1 cup veggies*
  • 3 tbsp millet I used little millet
  • 5 cloves of garlic
  • 1 tsp butter
  • 2-3 cups of water
  • Salt to taste
  • Pepper powder to taste
  • *I used carrot beans and peas

Instructions

  • In a pan or pressure cooker, add the butter and add the garlic cloves.
  • If you are not a garlic lover or want to make this on a fasting day, add 1 bay leaf instead of garlic cloves.
  • Saute the garlic for 2 minutes and add the chopped veggies.
  • Wash the millet and keep it. I used little millet, you can use any millet of your choice.
  • Saute for a minute and add the washed millet.
  • Add 1 cup of water to this.
  • I transferred this to a pressure cooker and cooked for 2 whistles.
  • Once the pressure cooker got released, take out and allow this cool completely.
  • If you used bay leaf, discard the by leaf.
  • Grind this into a smooth paste.
  • Add 1-2 cups of water to adjust the consistency.
  • Transfer this to a pan.
  • Add salt and pepper to this.
  • Allow this to boil for a minute.
  • Healthy Millet soup is ready.
  • Serve hot.

Video

Notes

  1. You can use broccoli, cauliflower, pumpkin (white and yellow), and turnip in this soup.
 
2. If you don’t get Indian millet in your place, use quinoa, Oats instead of Millet.
 
3. You can use any variety of millet (kodo millet, proso millet, barnyard millet ) for making this millet vegetable soup.
  • In a pan or pressure cooker, add the butter and add garlic cloves.
  • If you are not a garlic lover or want to make this on a fasting day, add 1 bay leaf instead of garlic cloves.
  • Saute the garlic for 2 minutes.
millet vegetable soup
  • Now add the chopped veggies.
Millet vegetable soup
  • Wash the millet and keep it. I used little millet, you can use any millet of your choice.
Millet vegetable soup
  • Saute for a minute and add the washed millet.
  • Add 1 cup of water to this.
millet vegetable soup
  • I transferred this to a pressure cooker and cooked for 2 whistles.
  • Once the pressure cooker got released, take it out and allow it this cool completely.
  • If you used bay leaf, discard the bay leaf.
millet vegetable soup
  • Grind this into a smooth paste.
  • Add 1-2 cups of water to adjust the consistency.
  • Transfer this to a pan.
millet vegetable soup
  • Add salt and pepper to this.
  • Allow this to boil for a minute.
  • Healthy Millet soup is ready.
Millet vegetable soup
  • Serve hot.
Millet vegetable soup
  1. You can use broccoli, cauliflower, pumpkin(both white and yellow), and turnip in this soup.
  2. If you don’t get Indian millet in your place, use quinoa instead of Millet.
  3. You can use any variety of millet (kodo millet, proso millet, barnyard millet ) for making this millet vegetable soup.

The post Millet Vegetable soup appeared first on Jeyashri's Kitchen.

Instant Ragi Dosa – how to make Instant Ragi Dosa, Finger Millet Dosa

how to make Instant Ragi Dosa ?

Finger Millet is a nutritious grain which is staple food in most of the South India. This Ragi Dosa also know as Finger Millet Dosa and Nachni Dosa. Instant ragi dosa made with homemade sprouted ragi flour is a healthy breakfast/Dinner for babies, toddlers and kids. Lets see how to prepare Instant Ragi Dosa with simple steps

Ingredients:

  • Ragi flour – 1 cup
  • Water to mix ragi flour
  • Salt to taste

For seasoning:

  • Oil – 3 spoons
  • Mustard seeds – ½ tea spoon
  • Chana dal – 1 spoon
  • Big Onion – 1 (finely chopped)
  • Red chilli – 1 no
  • Curry leaves – 1 sprig

Steps to cook instant ragi dosa:

  1. Take a bowl add one cup of ragi flour, required salt then mix well and keep it aside.
  2. Turn on the stove. place a fry pan when it is heated add oil, after one minute add mustard seeds when it is splutters add chana dal fry for a second.
  3. Now add finely chopped onion fry till it become transparent, then add red chilli and curry leaves then fry for a minute then switch off the stove.
  4. Next take a ragi mixture in bowl add these fried item into ragi flour.
  5. This is time to add required water in to ragi flour then mix well.
  6. Ragi dosa batter should be in not thick and not thin consistency.
  7. Switch on the stove place a dosa tawa, when it is heated sprinkle some water and pour the instant ragi dosa batter and make dosa.
  8. Turn other side and cooked well both sides of ragi dosa.
  9. Healthy, easy and instant ragi dosa is ready to serve.
  10. Serve this ragi dosa with tomato chutney and coconut chutney etc.,
  11. More millet recipes from Famous Indian Recipes | kambu curd rice | Varagu Arisi Ven Pongal | Ragi murukku recipe | varagu rice dosa | Ragi vada |

Tips:

  • Here I used simple method to cook easy and healthy ragi dosa version and anyone can try it.
  • We can also prepare ragi dosa with curd. but i tried instant ragi dosa without curd.
  • Some people like to have ragi dosa with rice flour. Here i shared instant ragi dosa without rice flour. Even some people trying ragi dosa with urad dal.

Ragi dosa health benefits

  • Loaded with Calcium
  • Helps in Controlling Diabetes
  • Reverts Skin Ageing
  • Battles Anemia
  • Relaxes the Body
  • Helps in Weight Loss

The post Instant Ragi Dosa – how to make Instant Ragi Dosa, Finger Millet Dosa appeared first on Famous Indian Recipes.

Foxtail Millet Sweet Pidi Kozhukattai Recipe

Foxtail Millet Sweet Pidi Kozhukattai Recipe : I have been making Millet based kozhukattai recipes for a couple of years on festive occasions. And this Foxtail Millet Sweet Pidi Kozhukattai is one among them. I am posting a recipe in blog after few months of break. So I was pulling myself to post this recipe...

Read More

❌