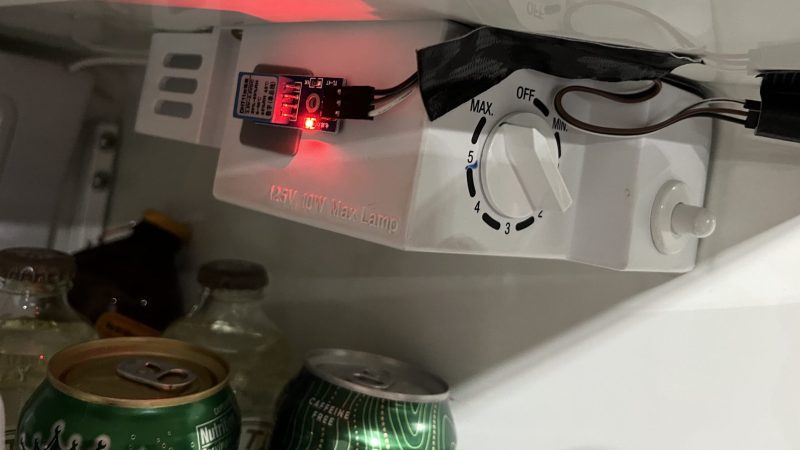
[Rick] had a problem. His garage refrigerator was tasked with a critical duty—keeping refreshing beverages at low temperature. Unfortunately, it had failed—the condenser was forever running, or not running at all. The beverages were either frozen, or lukewarm, regardless of the thermostat setting. There was nothing for it—the controller had to be rebuilt from scratch.
Thankfully, [Rick]’s junk drawer was obliging. He was able to find an Arduino Uno R4, complete with WiFi connectivity courtesy of the ESP32 microcontroller onboard. This was paired with a DHT11 sensor, which provided temperature and humidity measurements. [Rick] began testing the hardware by spitting out temperature readings on the Uno’s LED matrix.
Once that was working, the microcontroller had to be given control over the fridge itself. This was achieved by programming it to activate a Kasa brand smart plug, which could switch mains power to the fridge as needed. The Uno simply emulated the action of the Kasa phone app to switch the smart plug on and off to control the fridge’s temperature, with the fridge essentially running flat out whenever it was switched on. The Uno also logs temperature to a server so [Rick] can make sure temperatures remain in the proper range.
Wi-Fi! It’s everywhere, and yet you can’t really see it, by virtue of the technology relying on the transmission of electromagnetic waves outside the visual spectrum. Never mind, though, because you can always build yourself a Wi-Fi analyzer to get some insight into your radio surroundings, as demonstrated by [moononournation].
The core of the build is the ESP32-C5. The popular microcontroller is well-equipped for this task with its onboard dual-band Wi-Fi hardware, even if the stock antenna on most devboards is a little underwhelming. [moononournation] has paired this with a small rectangular LCD screen running the ILI9341 controller. The graphical interface is drawn with the aid of the Arduino_GFX library. It shows a graph of access points detected in the immediate area, as well as which channels they’re using and their apparent signal strength.
If you’re just trying to get a basic read on the Wi-Fi environment in a given locale, a tool like this can prove pretty useful. If your desires are more advanced, you might leap up to tinkering in the world of software defined radio. Video after the break.
There are lots of switches that you can use with your smarthome. Some might not be compatible with the wiring in your house, while others are battery powered and need attention on the regular. [Willow Herring] came across some nice self-powered versions that were nonetheless locked to a proprietary hub. Reverse engineering ensued!
[Willow] was using a range of smart home products from Quinetic, including the aforementioned self-powered switches. However, she couldn’t stand using them with the Quinetic hub, which was required to get them functioning with the brand’s relays and in-line switch relays. It all came down to the buggy smartphone app that was supposed to lace everything together, but never worked quite right. Instead, she set about deciphering the language the switches speak so they could be paired with other smarthome systems.
[Cameron Gray] had done some work in this area, which proved a useful starting point, though it didn’t enable the use of the switches with the various types of Quinetic relays. [Willow] decided to try and learn more about the system, starting with a CC1101 radio module hooked up to a ESP8266. Some tinkering around with expected message lengths started bearing fruit, and soon enough the format of the messages became clear.
Before long, [Willow] had figured out how to get the whole system talking to MQTT and Home Assistant, without compromising their ability to operate independently. Code is on Github for those eager to tinker further.
The idea behind the site is simple—it’s a place to discover and share unique little tools and accessories for use with Wago’s line of electrical connectors. Most are 3D printed accessories that make working with Wago connectors easier. There are some fun and innovative ideas up there, like an ESP8266 development kit that has a Wago connector for all the important pins, as well as a tool for easily opening the lever locks. Perhaps most amusing, though, is the project entitled “Hide Your Wago From Americans”—which consists of a 3D-printed wire nut lookalike designed to slide over the connectors to keep them out of view. There’s also a cheerful attempt at Wago art, that doesn’t really look like anything recognizable at all. Oh well, they can’t all be winners.
It’s great to see Wago so openly encouraging creativity among those that use its products. The sharing of ideas has been a big part of the 3D printing movement, and Wago isn’t the first company to jump on the bandwagon in this regard. If you’ve got some neat Wago hacks of your own, you can always let us know on the tipsline!
During World War II, as the Allies planned the invasion of Normandy, there was one major hurdle to overcome—logistics. In particular, planners needed to guarantee a solid supply of fuel to keep the mechanized army functional. Tanks, trucks, jeeps, and aircraft all drink petroleum at a prodigious rate. The challenge, then, was to figure out how to get fuel over to France in as great a quantity as possible.
War planners took a diverse approach. A bulk supply of fuel in jerry cans was produced to supply the initial invasion effort, while plans were made to capture port facilities that could handle deliveries from ocean-going tankers. Both had their limitations, so a third method was sought to back them up. Thus was born Operation Pluto—an innovative plan to simply lay fuel pipelines right across the English channel.
Back in the 1940s, undersea pipelines were rather underexplored technology. However, they promised certain benefits over other methods of shipping fuel to the continent. They would be far more difficult to destroy by aerial attack compared to surface ships or floating pipelines. An undersea pipeline would also be less likely to be damaged by rough sea conditions that were typical in the English Channel.
The idea was granted the codename PLUTO—for Pipe-Line Under The Ocean. Development began as soon as 1942, and the engineering challenges ahead were formidable. The Channel stood a good twenty miles wide at its narrowest point, with strong currents, variable depths, and the ever-present threat of German interference. Any pipeline would need to withstand high pressure from the fuel flowing inside, resist corrosion in seawater, and be flexible enough to handle the uneven seabed. It also needed to be laid quickly and surreptitiously, to ensure that German forces weren’t able to identify and strike the pipelines supplying Allied forces.
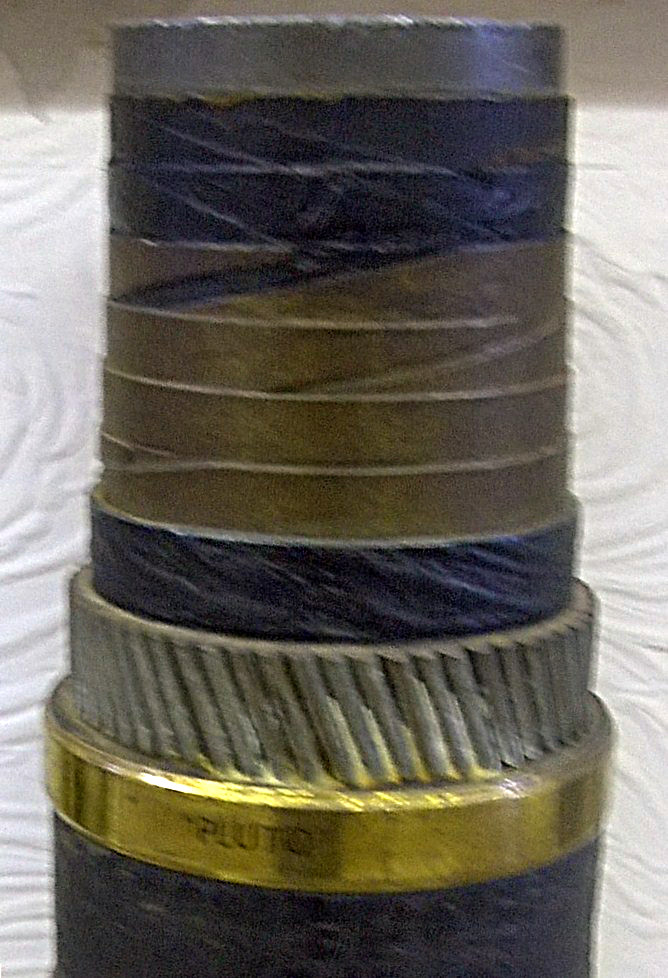
A sectioned piece of HAIS pipeline. Note the similarities to then-contemporary undersea cable construction. Credit: Geni, CC BY-SA 3.0
The first pipe developed as part of the scheme was HAIS. It was developed by Siemens Brothers and was in part the brainchild of Clifford Hartley, then Chief Engineer of Anglo-Iranian Oil and an experienced hand at delivering fuel pipelines in tough conditions. Thus the name—which stood for Hartly-Anglo-Iranian-Siemens. It used a 2-inch diameter pipe of extruded pipe to carry the fuel, surrounded by asphalt and paper doused in a vinyl-based resin. It was then wound with a layer of steel tape for strength, and then further layered with jute fiber and more asphalt and paper. The final layers were an armored sheath of galvanized steel wires and a canvas outer cover. The techniques used were inspired by those that had proved successful in the construction of undersea telegraph cables. As designed, the two-inch diameter pipe was intended to flow up to 3,500 imperial gallons of fuel a day when running at 500 psi.
HAIS pipe was produced across several firms in the UK and the US. Initial testing took place with pipe laid across the River Medway. Early efforts proved unsuccessful, with leaks caused by lead from the central core pushing out through the steel tape layer. The steel tape wraps were increased, however, and subsequent testing over the Firth of Clyde was more successful. Trials pushed the pipe up to 1,500 psi, showing that up to 250,000 liters of fuel could be delivered per day. The pipeline also proved robust, surviving a chance attack by a German bomb landing nearby. The positive results from testing led to the development of a larger 3-inch verison of the HAIS pipe to support even greater flow.
By this point in the war, however, supplies were becoming constrained on all sides. In particular, lead was becoming scarce, which spurred a desire for a cheaper pipe design to support Operation PLUTO. Thus was born HAMEL, named after engineers Bernard J. Ellis and H.A. Hammick, who worked on the project.
The HAMEL design concerned a flexible pipe constructed out of mild steel, at 3-½ inches in diameter. Lengths of the pipe were produced in 40-foot segments which would then be resistance welded together to create a longer flexible pipeline that could be laid on the seafloor. The steel-based pipe was stiffer than the cable-like HAIS, which caused an issue—it couldn’t readily be coiled up in a ship’s hold. Instead, giant floating drums were constructed at some 40 feet in diameter, nicknamed “Conundrums.” These were to be towed by tugs or hauled by barges to lay the pipeline across the Channel. Testing took place by laying pipelines to the Isle of Wight, which proved the concept was viable for deployment.
Beyond the two types of pipeline, a great deal of work went into the supporting infrastructure for the project. War planners had to build pumping stations to feed the pipelines, as well as ensure that they could in turn be fed fresh fuel from the UK’s network of fuel storage facilities and refineries. All this had to be done with a certain level of camouflage, lest German aircraft destroy the coastal pumping stations prior to the British invasion of the continent. Two main stations at Sandown and Dungeness were selected, and were intended to be connected via undersea pipe to the French ports of Cherbourg and Ambleteuse, respectively. The Sandown-Cherbourg link was to be named Bambi, while the Dungeness-Ambleteuse link would be named Dumbo, referencing further Disney properties since the overall project was called Pluto.
The Big Dance
On D-Day, the initial landings and immediate securing of the beachhead would run on pre-packaged fuel supplies in jerry cans and drums. The pipelines were intended to come later, ensuring that the Allied forces had the fuel supplies to push deep into Europe as they forced back the German lines. It would take some time to lay the pipelines, and the work could only realistically begin once the initial ports were secure.
A map indicating the Bambi and Dumbo pipelines between England and France. Notably, the Dumbo pipelines were run to Boulogne instead of the original plan of Ambleteuse. Credit: public domain
Bambi was intended to go into operation just 75 days after D-Day, assuming that Allied forces had managed to capture the port of Cherbourg within eight days of the landings. This process instead took 21 days due to the vagaries of war. Efforts to lay a HAIS pipeline began as soon as 12 August 1944, just 67 days after D-Day, only to fail due to an anchor strike by an escort destroyer. The second effort days later was scuppered when the piping was wound up in the propeller of a supporting craft. A HAMEL pipelaying effort on 27 August would also fail thanks to barnacles jamming the massive Conundrum from rotating, and while cleaning efforts freed it up, the pipeline eventually broke after just 29 nautical miles of the 65 nautical mile journey.
It wasn’t until 22 September that a HAIS cable was successfully installed across the Channel, and began delivering 56,000 imperial gallons a day. A HAMEL pipe was then completed on the 29 September. However, both pipes would fail just days later on October 3 as pressure was increased to up the rate of fuel delivery, and the Bambi effort was cancelled. Despite the great efforts of all involved, the pipelines had delivered just 935,000 imperial gallons, or 3,300 long tons of fuel—a drop in the ocean relative to what the war effort required.
A Conundrum pictured as it was towed to Cherbourg to lay a HAMEL pipeline as part of Operation Bambi. Credit: public domain
Dumbo would prove more successful, perhaps with little surprise that the distances involved were shorter. The first HAIS pipeline was completed and operational by 26 October. The pipeline was redirected from Dungeness to Boulogne instead of the original plan to go to Ambleteuse thanks to heavy mining by the Germans, and covered a distance of 23 nautical miles. More HAIS and HAMEL pipelines followed, and the pipeline would later be extended to Calais to use its rail links for delivery further inland.
A total of 17 pipelines were eventually laid between the two coasts by the end of 1944. They could deliver up to 1,300 long tons of fuel per day—soon eclipsing the Bambi efforts many times over. The HAMEL pipelines proved somewhat unreliable, but the HAIS cable-like pipes held up well and none broke during their use until the end of the war in Europe. The pipelines stuck to supplying petrol, while initial plans to deliver other fuels such as high-octane aviation spirit were discarded.
Once a key piece of war infrastructure, now a small part of a thrilling minigolf course. Credit: Paul Coueslant, CC BY-SA 2.0
Overall, Operation Pluto would deliver 370,000 long tons of fuel to support Allied forces, or about 8 percent of the total. The rest was largely delivered by oceangoing tankers, with some additional highly-expensive aerial delivery operations used when logistical lines were stretched to their very limits. Bulk fuel delivery by undersea pipeline had been proven possible, but perhaps not decisively important when it came to wartime logistics.
A small section of pipeline left over from Operation Pluto at Shanklin Chine on the Isle of Wight. Credit: Crookesmoor, CC BY SA 3.0
Arguments as to the value of the project abound in war history circles. On the one hand, Operation Pluto was yet another impressive engineering feat achieved in the effort to bring the war to an end. On the other hand, it was a great deal of fuss and ultimately only delivered a moderate portion of the fuel needed to support forces in theatre. In any case, there are still lingering reminders of Operation Pluto today—like a former pumping station that has been converted into a minigolf course, or remnants of the pipelines on the Isle of Wight.
Since World War II, we’ve seen precious few conflicts where infrastructure plays such a grand role in the results of combat. Nevertheless, the old saying always rings true—when it comes to war, amateurs discuss tactics, while professionals study logistics.
Assuming you’re not stuck in a prison cell without windows, you could feasibly keep track of the moon and tides by walking outside and jotting things down in your notebook. Alternatively, you could save a lot of hassle by just building this moon and tide clock from [pjdines1994] instead.
The build is based on a Raspberry Pi Pico W, which is hooked up to a real-time clock module and a Waveshare 3.7-inch e-paper display. Upon this display, the clock draws an image relevant to the current phase of the moon. As the write-up notes, it was a tad fussy to store 24 images for all the different lunar phases within the Pi Pico, but it was achieved nonetheless with a touch of compression. As for tides, it covers those too by pulling in tide information from an online resource.
It’s specifically set up to report the local tides for [pjdines1994], reporting the high tide and low tide times for Whitstable in the United Kingdom. If you’re not in Whitstable, you’d probably want to reconfigure the clock before using it yourself. Unless you really want to know what’s up in Whitstable, of course. If you so wish, you can set the clock up to make its own tide predictions by running local calculations, but [pjdines1994] notes that this is rather more complicated to do. The finished result look quite good, because [pjdines1994] decided to build it inside an old carriage clock that only reveals parts of the display showing the moon and the relevant tide numbers.
We’ve featured some other great tide clocks before, like this grand 3D printed design. If you’ve built your own arcane machine to plot the dances of celestial objects, do be sure to let us know on the tipsline!
We’ve all been there. You’ve found a beautiful piece of older hardware at the thrift store, and bought it for a song. You rush it home, eager to tinker, but you soon find it’s just not working. You open it up to attempt a repair, but you could really use some information on what you’re looking at and how to enter service mode. Only… a Google search turns up nothing but dodgy websites offering blurry PDFs for entirely the wrong model, and you’re out of luck.
These days, when you buy an appliance, the best documentation you can expect is a Quick Start guide and a warranty card you’ll never use. Manufacturers simply don’t want to give you real information, because they think the average consumer will get scared and confused. I think they can do better. I’m demanding a new two-tier documentation system—the basics for the normies, and real manuals for the tech heads out there.
Give Us The Goods
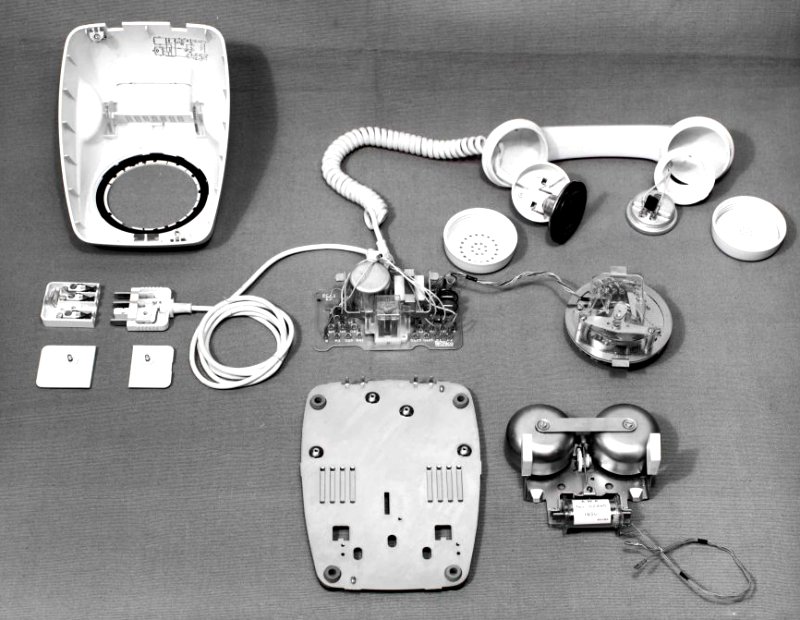
Once upon a time, appliances came with real manuals and real documentation. You could buy a radio that came with a full list of valves that were used inside, while telephones used to come with printed circuit diagrams right inside the case. But then the world changed, and a new phrase became a common sight on consumer goods—”NO USER SERVICABLE PARTS INSIDE.” No more was the end user considered qualified or able to peek within the case of the hardware they’d bought. They were fools who could barely be trusted to turn the thing on and work it properly, let alone intervene in the event something needed attention.
This attitude has only grown over the years. As our devices have become ever more complex, the documentation delivered with them has shrunk to almost non-existent proportions. Where a Sony television manual from the 1980s contained a complete schematic of the whole set, a modern smartphone might only include a QR code linking to basic setup instructions on a website online. It’s all part of an effort by companies to protect the consumer from themselves, because they surely can’t be trusted with the arcane knowledge of what goes on inside a modern device.
This sort of intensely technical documentation was the norm just a few decades ago.
Some vintage appliances used to actually have the schematic printed inside the case for easy servicing. Credit: British Post Office
It’s understandable, to a degree. When a non-technical person buys a television, they really just need to know how to plug it in and hook it up to an aerial. With the ongoing decline in literacy rates, it’s perhaps a smart move by companies to not include any further information than that. Long words and technical information would just make it harder for these customers to figure out how to use the TV in the first place, and they might instead choose a brand that offers simpler documentation.
This doesn’t feel fair for the power user set. There are many of us who want to know how to change our television’s color mode, how to tinker with the motion smoothing settings, and how to enter deeper service modes when something seems awry. And yet, that information is kept from us quite intentionally. Often, it’s only accessible in service manuals that are only made available through obscure channels to selected people authorised by OEMs.
Two Tiers, Please
Finding old service manuals can be a crapshoot, but sometimes you get lucky with popular models. Credit: Google via screenshot
I don’t think it has to be this way. I think it’s perfectly fine for manufacturers to include simple, easy-to-follow instructions with consumer goods. However, I don’t think that should preclude them from also offering detailed technical manuals for those users that want and need them. I think, in fact, that these should be readily available as a matter of course.
Call it a “superuser manual,” and have it only available via a QR code in the back of the basic, regular documentation. Call it an “Advanced Technical Supplement” or a “Calibration And Maintenance Appendix.” Whatever jargon scares off the normies so they don’t accidentally come across it and then complain to tech support that they don’t know why their user interface is now only displaying garbled arcane runes. It can be a little hard to find, but at the end of the day, it should be a simple PDF that can be downloaded without a lot of hurdles or paywalls.
I’m not expecting manufacturers to go back to giving us full schematics for everything. It would be nice, but realistically it’s probably overkill. You can just imagine what that would like for a modern smartphone or even just a garden variety automobile in 2025. However, I think it’s pretty reasonable to expect something better than the bare basics of how to interact with the software and such. The techier manuals should, at a minimum, indicate how to do things like execute a full reset, enter any service modes, and indicate how the device is to be safely assembled and disassembled should one wish to execute repairs.
Of course, this won’t help those of us repairing older gear from the 90s and beyond. If you want to fix that old S-VHS camcorder from 1995, you’re still going to have to go to some weird website and risk your credit card details over a $30 charge for a service manual that might cover your problem. But it would be a great help for any new gear moving forward. Forums died years ago, so we can no longer Google for a post from some old retired tech who remembers the secret key combination to enter the service menu. We need that stuff hosted on manufacturer websites so we can get it in five minutes instead of five hours of strenuous research.
Will any manufacturers actually listen to this demand? Probably, no. This sort of change needs to happen at a higher level. Perhaps the right to repair movement and some boisterous EU legislation could make it happen. After all, there is an increasing clamour for users to have more rights over the hardware and appliances they pay for. If and when it happens, I will be cheering when the first manuals for techies become available. Heaven knows we deserve them!
Want to know if somebody is lying? It’s always so hard to tell. [dbmaking] has whipped up a fun little polygraph, otherwise known as a lie detector. It’s nowhere near as complex as the ones you’ve seen on TV, but it might be just as good when it comes to finding the truth.
The project keeps things simple by focusing on two major biometric readouts — heart rate and skin conductivity. When it comes to the beating heart, [dbmaking] went hardcore and chose an AD8232 ECG device, rather than relying on the crutch that is pulse oximetry. It picks up heart signals via three leads that are just like those they stick on you in the emergency room. Skin conductivity is measured with a pair of electrodes that attach to the fingers with Velcro straps. The readings from these inputs are measured and then used to determine truth or a lie if their values cross a certain threshold. Presumably, if you’re sweating a lot and your heart is beating like crazy, you’re telling a lie. After all, we know Olympic sprinters never tell the truth immediately after a run.
Does this work as an actual, viable lie detector? No, not really. But that’s not just because this device isn’t sophisticated enough; commercial polygraph systems have been widely discredited anyway. There simply isn’t an easy way to correlate sweating to lying, as much as TV has told us the opposite. Consider it a fun toy or prop to play with, and a great way to learn about working with microcontrollers and biometric sensors.
A mosquito has a very finely tuned proboscis that is excellent at slipping through your skin to suck out the blood beneath. Researchers at McGill University recently figured that the same biological structure could also prove useful in another was—as a fine and precise nozzle for 3D printing (via Tom’s Hardware).
Small prints made with the mosquito proboscis nozzle. Credit: research paper
To achieve this feat, the research team harvested the proboscis from a female mosquito, as only the female of the species sucks blood in this timeline. The mosquito’s proboscis was chosen over other similar biological structures, like insect stingers and snake fangs. It was prized for its tiny size, with an inside diameter of just 20 micrometers—which outdoes just about any man-made nozzle out there. It’s also surprisingly strong, able to resist up to 60 kPa of pressure from the fluid squirted through it.
Of course, you can’t just grab a mosquito and stick it on your 3D printer. It takes very fine work to remove the proboscis and turn it into a functional nozzle; it also requires the use of 3D printed scaffolding to give the structure additional strength. The nozzle is apparently used with bio-inks, rather than molten plastic, and proved capable of printing some basic 3D structures in testing.
Amusingly, the process has been termed 3D necroprinting, we suspect both because it uses a dead organism and because it sounds cool on the Internet. We’ve created a necroprinting tag, just in case, but we’re not holding our breath for this to become the next big thing. At 20 um, more likely the next small thing.
Playing the drums requires a lot of practice, but that practice can be incredibly loud. A nice workaround is presented by [PocketBoy], in converting an acoustic kit to electronic operation so you can play with headphones instead.
A sensor installed inside a floor tom.
It might sound like a complicated project, but creating a basic set of electronic drums can actually be quite simple if you’ve already got an acoustic kit. You just need to damp all the drums and cymbals to make them quieter, and then fit all the individual elements with their own piezo sensors. These are basically small discs that can pick up vibrations and turn them into electricity—which can be used to trigger an electronic drum module.
[PocketBoy]’s build started with a PDP New Yorker kit, some mesh heads to dull the snares and toms, and some low-volume cymbals sourced off Amazon. Each drum got a small piezo element, which was soldered to a 6.5mm jack for easy hookup. They’re installed inside the drums on foam squares with a simple bracket system [PocketBoy] whipped up from hardware store parts. A DDrum DDti interface picks up the signals from the piezo elements and sends commands to an attached PC. It’s paired with Ableton 12 Lite, which plays the drum sounds as triggered by the drummer.
[PocketBoy] notes it’s a quick and dirty setup, good for quiet practice but not quite gig-ready. You’d want to probably just run it as a regular acoustic kit in that context, but there’s nothing about the conversion that prevents that. Ultimately, it’s a useful project if you find yourself needing to practice the drums quietly and you don’t have space for a second electric-only kit. There’s lots of other fun you can have with those piezos, too. Video after the break.
How I’m getting away with a drumset in an apartment building! Mesh heads + DIY triggers + Plain wash cloth + Stick Rods + DDTI DDrum Trigger i/o into Ableton. I need a better snare sample but this thing is whisper quiet! #drums#beginner#acoustics#fyp#drumtok
Asbestos is a nasty old mineral. It’s known for releasing fine, microscopic fibers that can lodge in the body’s tissues and cause deadly disease over a period of decades. Originally prized for its fire resistance and insulating properties, it was widely used in all sorts of building materials. Years after the dangers became clear, many countries eventually banned its use, with strict rules around disposal to protect the public from the risk it poses to health.
Australia is one of the stricter countries when it comes to asbestos, taking great pains to limit its use and its entry into the country. This made it all the more surprising when it became apparent that schools across the nation had been contaminated with loose asbestos material. The culprit was something altogether unexpected, too—in the form of tiny little tubes of colored sand. Authorities have rushed to shut down schools as the media asked the obvious question—how could this be allowed to happen?
Hiding In Plain Sight
Australia takes asbestos very seriously. Typically, asbestos disposal is supposed to occur according to very specific rules. Most state laws generally require that the material must be collected by qualified individuals except in minor cases, and that it must be bagged in multiple layers of plastic prior to disposal to avoid release of dangerous fibers into the environment. The use, sale, and import of asbestos has been outright banned since 2003, and border officials enforce strict checks on any imports deemed a high risk to potentially contain the material.
Colored sand is a popular artistic medium, used regularly by children in schools and households across Australia. Via: ProductSafety.gov.au
Thus, by and large, you would expect that any item you bought in an Australian retailer would be free of asbestos. That seemed to be true, until a recent chance discovery. A laboratory running tests on some new equipment happened to accidentally find asbestos contamination in a sample of colored sand—a product typically marketed for artistic use by children. The manager of the lab happened to mention the finding in a podcast, with the matter eventually reaching New Zealand authorities who then raised the alarm with their Australian counterparts. This led to a investigation by the Australian Competition and Consumer Commission (ACCC), which instituted a national safety recall in short order.
The response from there was swift. At least 450 schools instituted temporary shutdowns due to the presence or suspected presence of the offending material. Some began cleanup efforts in earnest, hiring professional asbestos removalists to deal with the colored sand. In many cases, the sand wasn’t just in sealed packaging—it had been used in countless student artworks or spilled in carpeted classrooms. Meanwhile, parents feared the worst after finding the offending products in their own homes. Cleanup efforts in many schools are ongoing, due in part to the massive spike in demand for the limited asbestos removal services available across the country. Authorities in various states have issued guidelines on how to handle cleanup and proper disposal of any such material found in the workplace.
Over 87 retailers have been involved in a voluntary recall that has seen a wide range of colored sand products pulled from shelves.
At this stage, it’s unclear how asbestos came to contaminate colored sand products sold across the country, though links have been found to a quarry in China. It’s believed that the products in question have been imported into Australia since 2020, but have never faced any testing regarding asbestos content. Different batches have tested positive for both tremolite and chrysotile asbestos, both of which present health risks to the public. However, authorities have thus far stated the health risks of the colored sand are low. “The danger from asbestos comes when there are very, very fine fibres that are released and inhaled by humans,” stated ACCC deputy chair, Catriona Lowe. “We understand from expert advice that the risk of that in relation to these products is low because the asbestos is in effect naturally occurring and hasn’t been ground down as such to release those fibres.”
Investigations are ongoing as to how asbestos-containing material was distributed across the country for years, and often used by children who might inhale or ingest the material during use. The health concerns are obvious, even if the stated risks are low. The obvious reaction is to state that the material should have been tested when first imported, but such a policy would have a lot of caveats. It’s simply not possible to test every item that enters the country for every possible contaminant. At the same time, one could argue that a mined sand product is more likely to contain asbestos than a box of Hot Wheels cars or a crate of Belgian chocolates. A measured guess would say this event will be ruled out as a freak occurrence, with authorities perhaps stepping up random spot checks on these products to try and limit the damage if similar contamination occurs again in future.
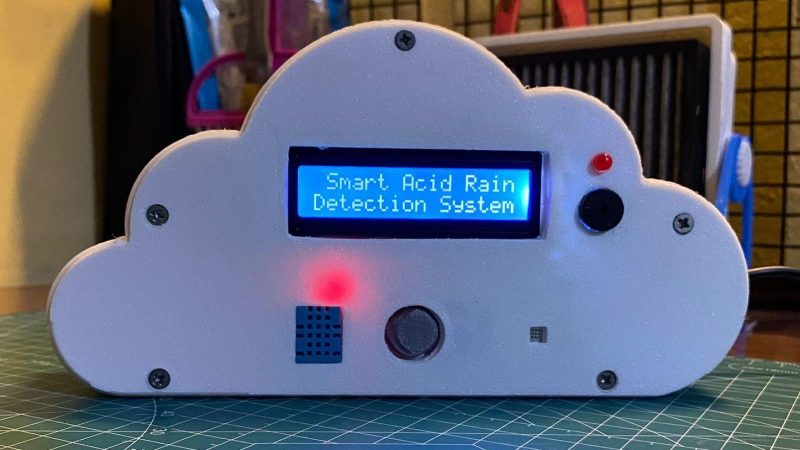
Acid rain sucks, particularly if you run a fancy university with lots of lovely statues outside. If you’d like to try and predict when it’s going to occur, you might like this project from [Mohammad Nihal].
When rain is particularly acidic, it’s usually because of the combination of sulfur dioxide or nitrogen dioxide and moisture in the atmosphere. This combination ends up making sulfuric acid or nitric acid that then falls to the ground as precipitation. The low-pH rain that results can harm ecosystems, melt statues, and just generally give everyone a hard time.
[Mohammed] decided to try and predict acid rain by building a simple device based on an Arduino Nano. It records SO2 levels with an MQ-136 gas sensor, and NO2 levels with an unspecified MEMS-based sensor. There’s also a DHT11 temperature & humidity sensor in the mix, which is important since moisture content plays a role. The Arduino reads these sensors and uses a simple predictive algorithm to create an “Acid Rain Risk Score” that is displayed on a 16×2 character LCD. It’s all wrapped up in a fun 3D printed enclosure that looks like a cloud.
There are some limitations to the device. Namely, it doesn’t necessarily have a great read on atmospheric SO2 and NO2 levels in the atmosphere, particularly at altitudes where rain is formed, because the sensor sits inside the device indoors. However, the basic concept is there, and improvements could certainly be made with some upgrades and further research.
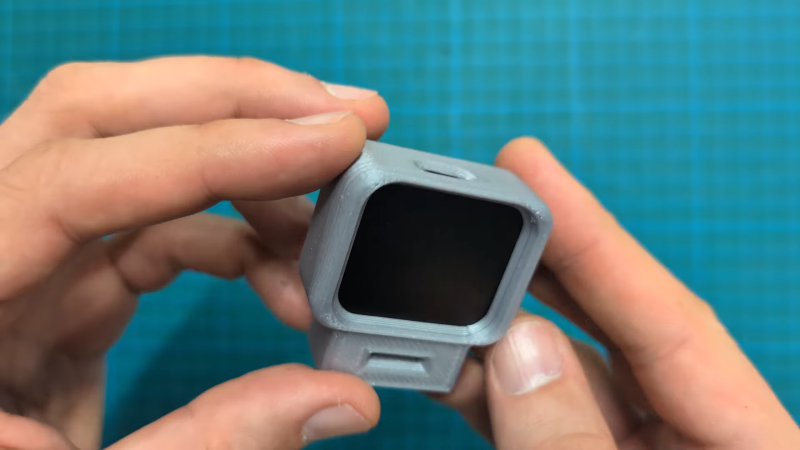
Few of us keep big old cathode ray tubes in the house anymore, but we can still appreciate the form factor of the classic TV. Indeed, the Tinytron from [t0mg] is a neat little tchotchke in this vein — a miniature TV that you could just about fit on a keyring.
[t0mg] wanted this project to be quick and easy to put together. It starts with an ESP32-S3-LCD-1.69 from Waveshare. It’s an all-in-one dev module which combines the microcontroller with a small screen right out of the box. You just have to solder a single six pin header to hook it up with an SD card reader and battery, and you’re done with the electronics. Even the case is a cinch to build, with four 3D printed components that can be spat out of a Prusa MK4S in just half an hour. Programming it can be done via a web browser. Just about the only thing it’s missing is a speaker — this TV is video only.
To watch things on the Tinytron, you just have to prepare them properly and drop them on the SD card. [t0mg] provides a web page for transcoding the video files, although you can do it yourself locally with ffmpeg if you prefer.
If you’re looking for a silly gift for a TV-obsessed friend, you could probably whip up a Tinytron in a couple hours or less. It reminds us of another great project, the tiny Simpsons replica TV that endlessly plays the greatest cartoon on Earth.
It’s easy to build big wooden furniture if you have a massive industrial CNC router, but few of us are so lucky. However, you can still build sizable stuff with a smaller router if you know what you’re doing. [Aribabox] shares some useful tricks and techniques for building large workshop cabinets on smaller machines.
The key to doing this well is modularity. [Aribabox] shows off how to build excellent workshop drawers in pieces using a stackable design. Rather than having to cut out one huge side panel to cover the whole stack of drawers, each drawer can have its own side panel that easily fits on a smaller router. They can then be stacked into a stout assembly that still does its job perfectly well. Assuming your CNC router is trued up properly, you can whip up a lot of furniture quickly, just assembling everything with screws. You’ll still be able to work faster and make bigger things easier on a big machine, but a small machine can do a lot more than you think.
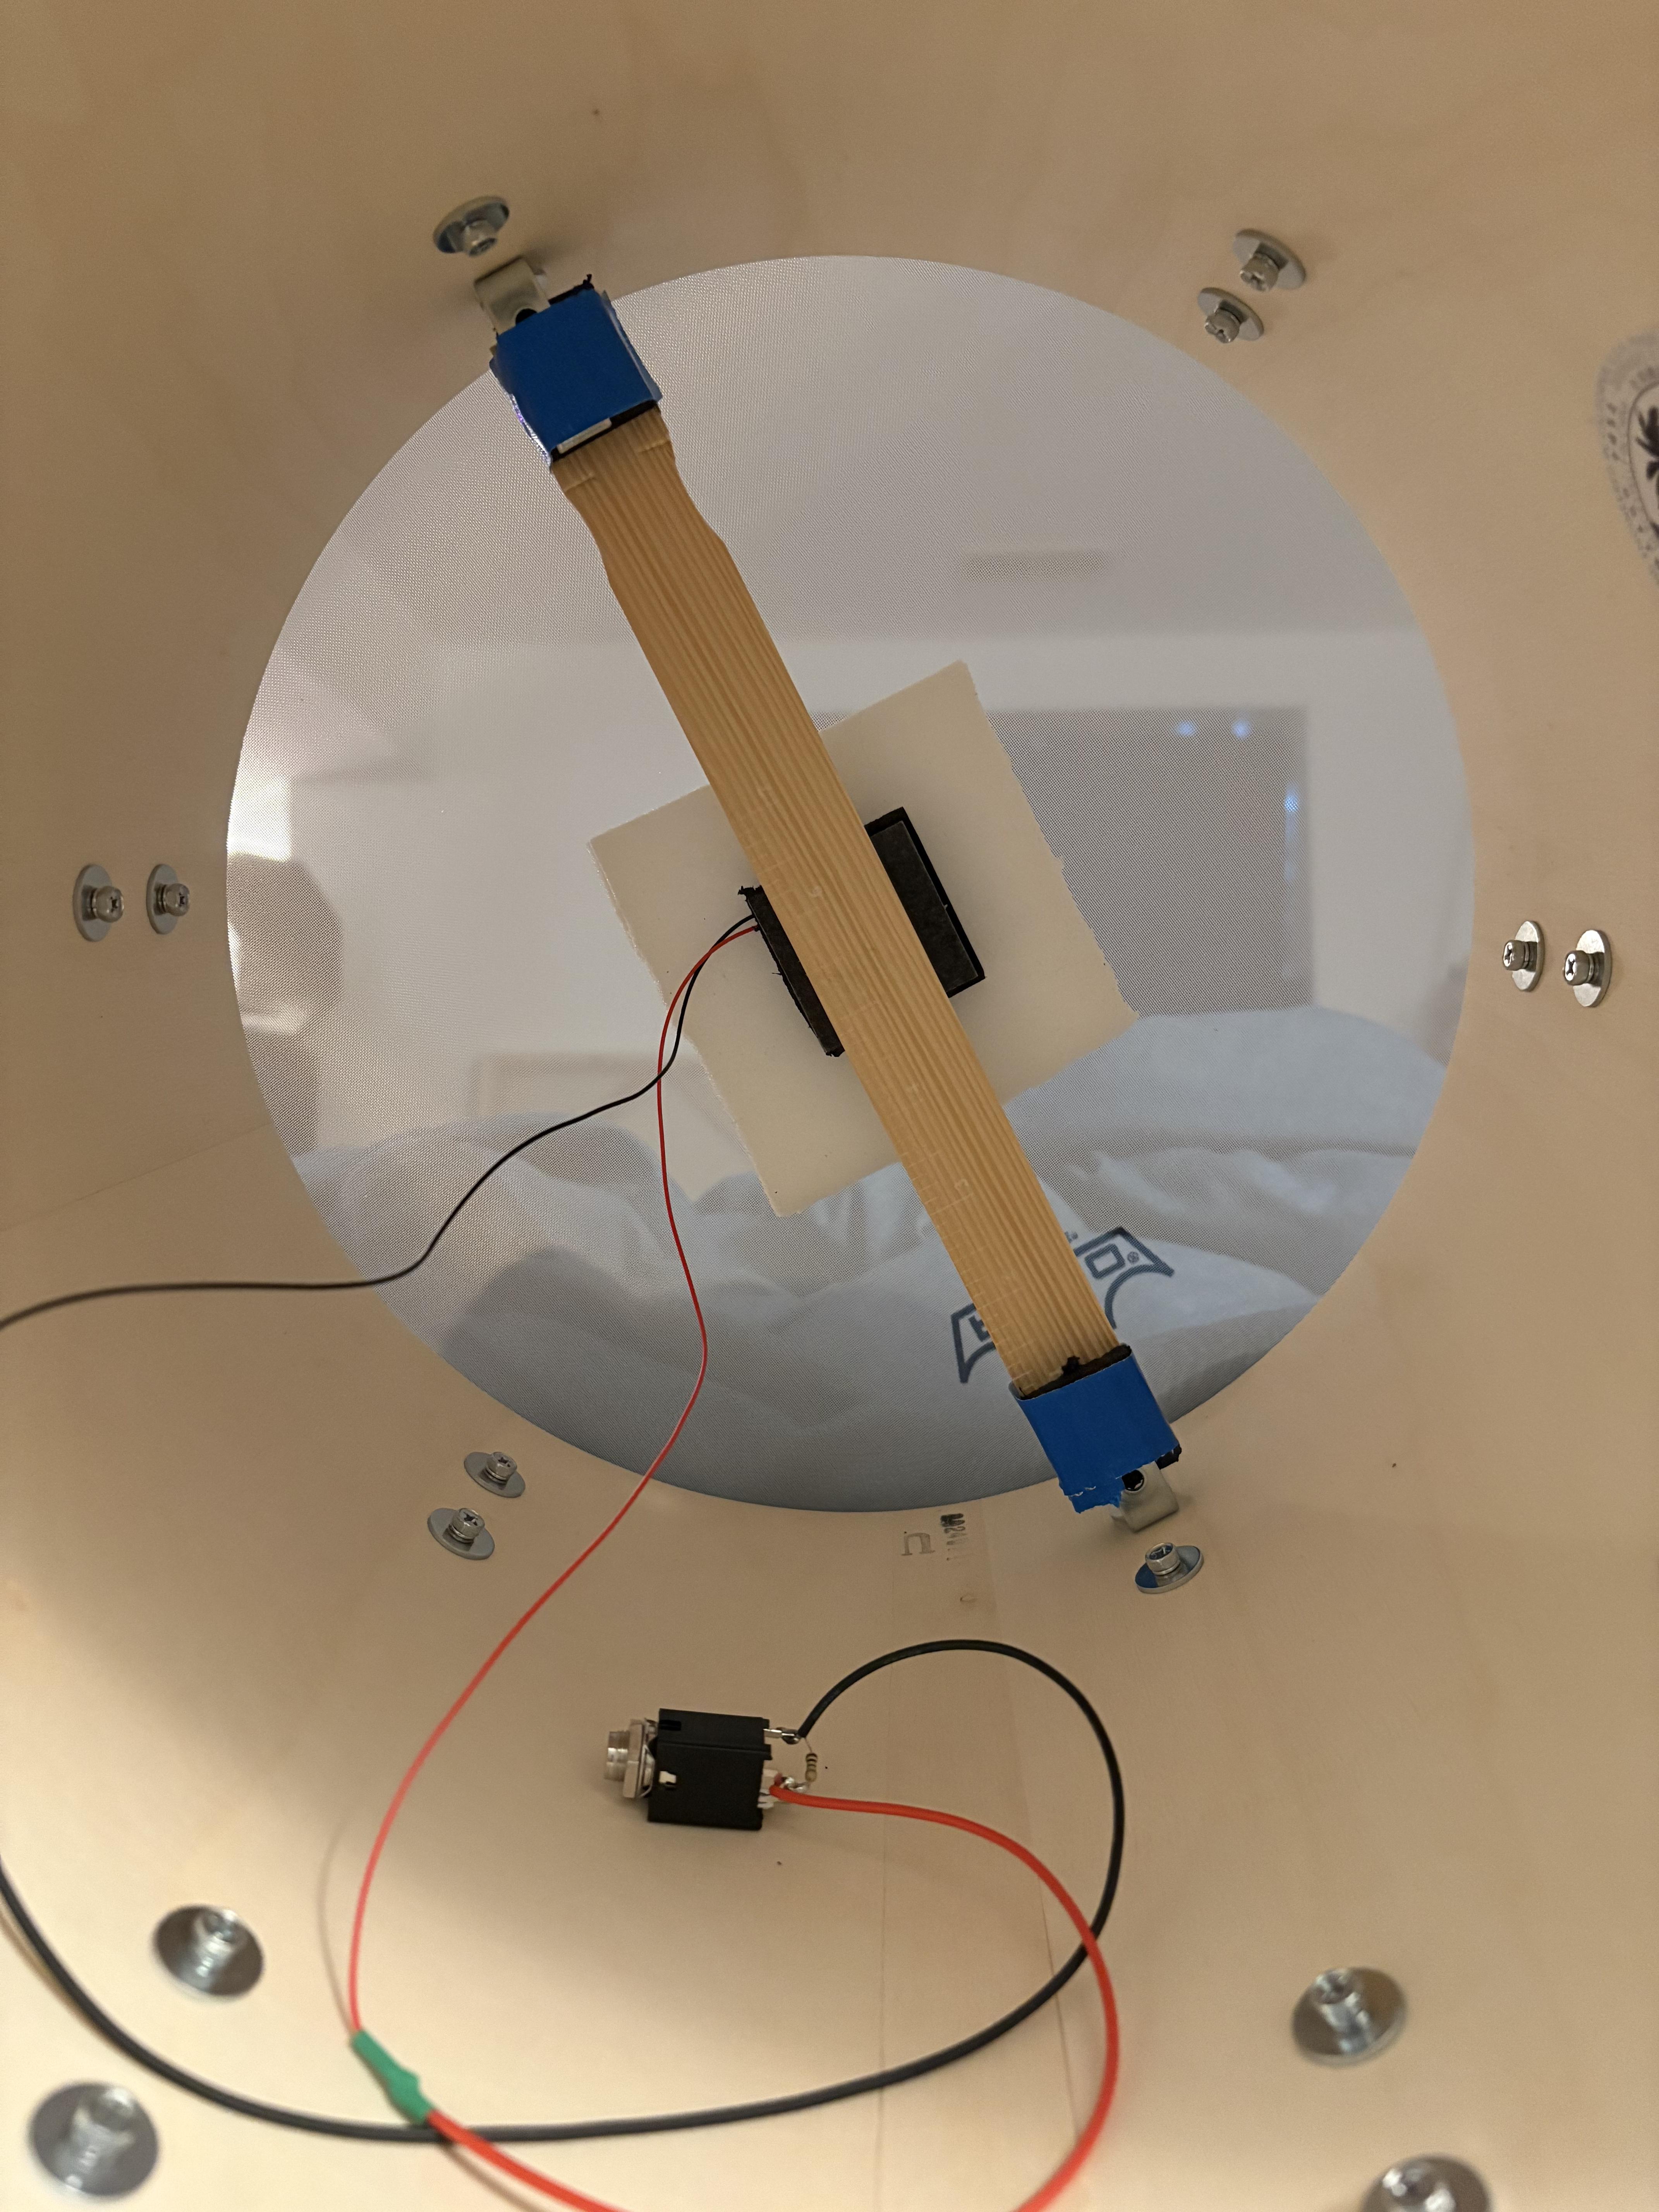
The first step was to make the holographic segment displays, because they’re not really something you can just buy off the shelf. [mosivers] achieved this by using a kit from LitiHolo, which enables you to create holograms by shooting a laser at special holographic film. Only, a few upgrades were made to use the kit with a nicer red diode laser that [mosivers] had on hand for better performance. The seven-segment layouts were carefully recorded on to the film to form the basic numerals of the clock, such that illuminating the films from different angles would light different segments of the numeral. It’s quite involved, but it’s explained well in the build video.
As for the timekeeping side of things, an ESP32 was used, setup to query a network time server to stay accurate. The microcontroller then commands a series of LEDs to light up as needed to illuminate the relevant segments of the holographic film to show the time.
Ultimately, [mosivers] built a cool clock with a look you won’t find anywhere else. It’s a lot more work than just wiring up some classic seven-segment LEDs, but we think the result is worth it. If you fancy other weird seven-segment builds, though, we’ve got plenty of others in the till.
There are a few major companies out there building colorful LED panels you can stick on your wall for aesthetic purposes. Most commercial options are pretty expensive, and come with certain limitations in how they can be controlled. [Smart Solutions For Home] has whipped up a flexible DIY design for decorating your walls with light that is altogether more customizable.
In this case, the DIY light panels ape the hexagonal design made popular by brands like Nanoleaf. In this case, each hexagon panel runs an ESP32 microcontroller, which controls a series of WS2812 addressable LEDs. This allows each panel to glow whatever color you like, and they’re arranged in an XY grid to enable you to light individual panels with a range of different geometric effects. The benefit of having a full microcontroller on each panel is that they can act quite independently—each one able to be used as a smart light, an notification display, or even as a physical button, all integrated with Home Assistant.
If you’re a fan of DIY smart home products, these might be right up your alley. They’re supremely flexible and customizable, and can do a lot of things that commercial versions can’t easily replicate. Just don’t ignore the fact that they require a considerable amount of assembly, what with the custom PCBs, 3D printed enclosures, and front diffusers to deal with. That’s just the way the LED wall crumbles.
We’ve seen other similar builds before, too. Why? The simple fact is that a lot of people want cool glowy panels on their wall without having to pay through the nose for them.
The usual input device for playing a synthesizer is the good old piano keyboard. However, you don’t have to stick to such pedestrian interfaces when making music. [Daisy] has a fun build that shows us how to put together a ribbon synth that makes wonderful little noises.
Naturally, the heart of the build is a ribbon potentiometer (also known as soft pots). It’s essentially a touch sensitive strip that changes in resistance depending on where you touch it. You can slide your finger up and down to vary the output continuously; in musical contexts, they can behave rather like a fretless instrument. [Daisy] employs one of these potentiometers in such a role by hooking it up to a Daisy Seed microcontroller board, which reads it with an analog-to-digital converter (ADC). The resistance values are used to vary the pitch of a dual-saw synthesizer programmed in the plugdata framework.
We’ve featured some other great ribbon synths over the years, too, like this tribute to the Eowave Persephone. They’re not the ideal choice for those that prefer their notes on pitch, but they’re beautifully fun to play with when you’re getting a little more experimental.
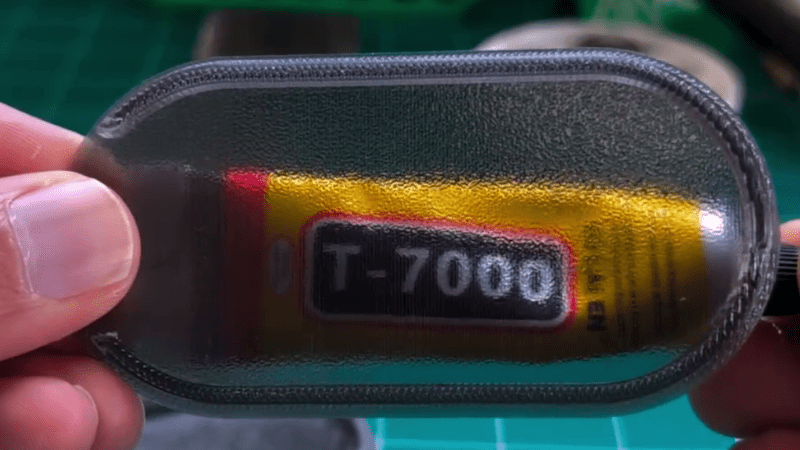
PETG filament can be had in a variety of colors, just like any other. You can even get translucent or transparent forms if you want to print something vaguely see-through. But if you’re looking for a bit more visually impressive, you might like to pick up a few tips from [Tej Grewal] on making sure your prints come out as clear as possible.
Standard print settings aren’t great for transparency.
It all comes down to pathing of the 3D printer’s hot end. If it’s zigzagging back and forth, laying down hot plastic in all different orientations from layer to layer, you’re going to get a hazy, ugly, result that probably doesn’t look very see-through at all.
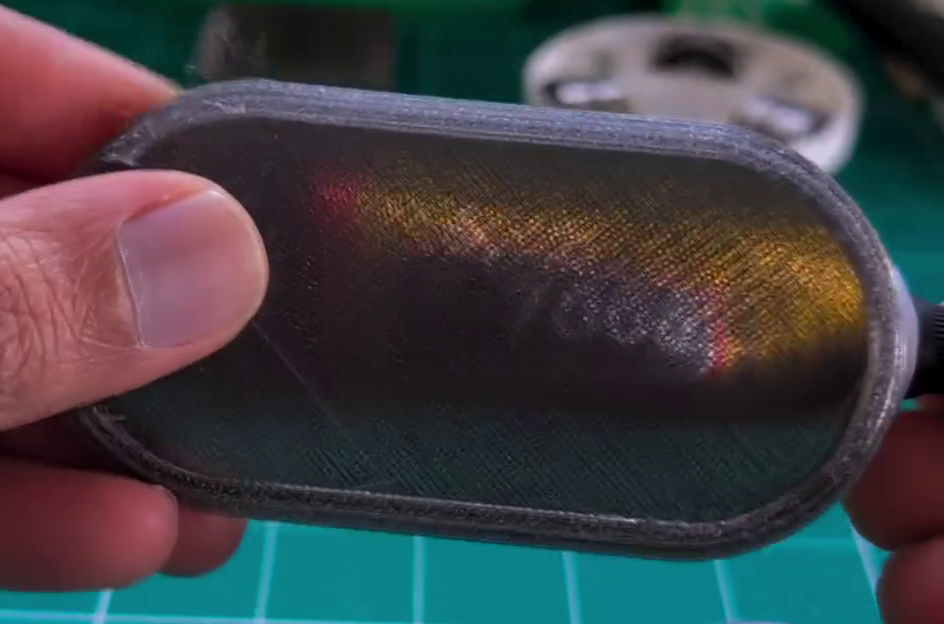
However, you can work around this by choosing slicer settings that make the tool pathing more suitable for producing a clearer part. [Tej] recommends going slow — as little as 20 mm/s during printing. He also states that removing top and bottom shells and setting wall loops to 1 can help to produce a part that’s entirely infill. Then, you’ll want to set infill to 100% and the direction to 0 or 90 degrees. This will ensure your hot end is just making long, straight strokes for layer after layer that will best allow light to pass through. You’ll also want to maximize nozzle flow to avoid any unsightly gaps or bubbles in your print.
[Tej] demonstrates the technique by creating a cover for a display. By using the settings in question, he creates a far more transparent plate, compared to the original part that has an ugly zig-zagging haze effect. You’re not going to get something optically clear this way; the final results are more lightly frosted, but still good.
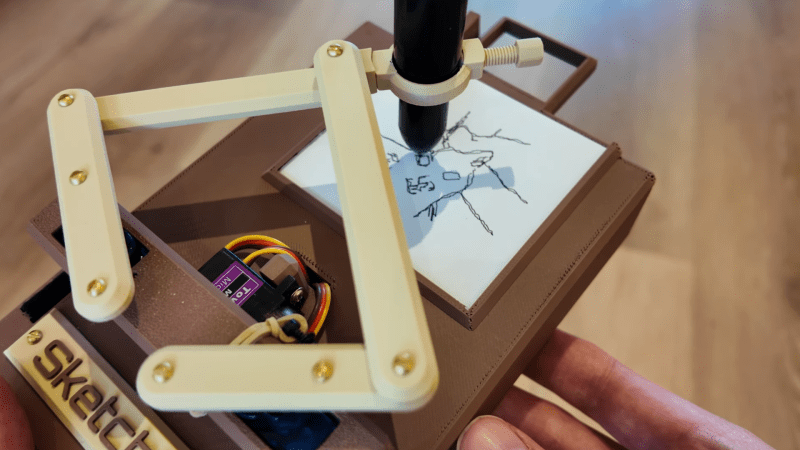
These days, everyone’s got a million different devices that can take a passable photo. That’s not special anymore. A camera that draws what it sees, though? That’s kind of fun. That’s precisely what [Jens] has built—an instant sketch camera!
The sketch camera looks like a miniature drawing easel, holding a rectangular slip of paper not dissimilar in size to the Polaroid film of old. The 3D-printed frame rocks a Raspberry Pi controlling a simple pen plotter, using SG90 servos to position the drawing implement and trace out a drawing. So far, so simple. The real magic is in the image processing, which takes any old photo with the Pi camera and turns it into a sketch in the first place. This is achieved with the OpenCV image processing library, using an edge detection algorithm along with some additional filtering to do the job.
If you’ve ever wanted to take Polaroids that looked like sketches when you’re out on the go, this is a great way to do it. We’ve featured some other great plotter builds before, too, just few that are as compact and portable as this one. Video after the break.
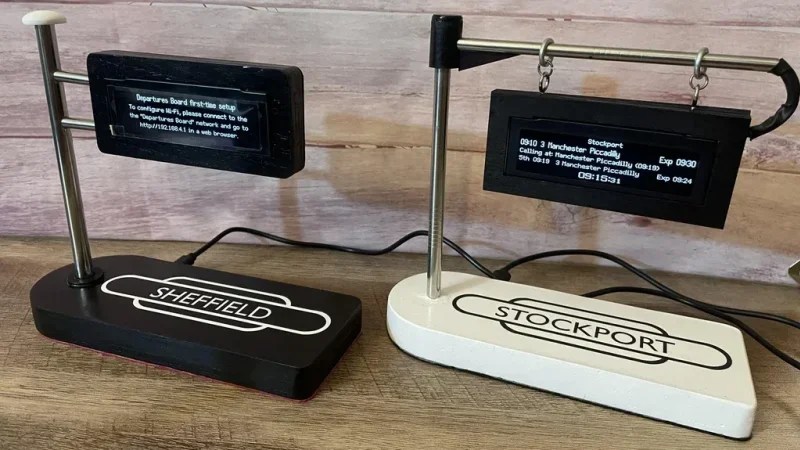
The build is based on the work of [gadec-uk]—who developed a train information display some time ago. It’s based around an ESP32 D1 Mini, paired with a 256 x 64 OLED screen to display relevant train information. It accesses a National Rail API for train status information—known as the Darwin LDBWS (Live Departure Board Webservice). Configuration is via a web GUI hosted by the ESP32 itself.
[eastfamilyreddish] took the concept further by adapting this hardware into a more pleasing form. The ESP32 and OLED screen are built into a neat little hanging sign setup that apes one you might expect to see at a real railway station. You might expect that 3D printing was involved, but instead, this was achieved with lasercut parts and resin casting to create something with a beautiful finish. They even went so far as to include a wireless phone charging module in the base, making the device extra useful to really earn its place on the desktop.