Shahi Tukda is a popular Mughlai Dessert which is loved by everyone all over India and other parts of the world. This is truly a royal dessert that melts in your mouth very similar to double ka meetha. This rich indulgent sweet combines fried bread, sugar syrup, Rabri and chopped nuts. Shahi Tukda Recipe Shahi...
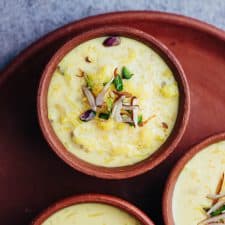
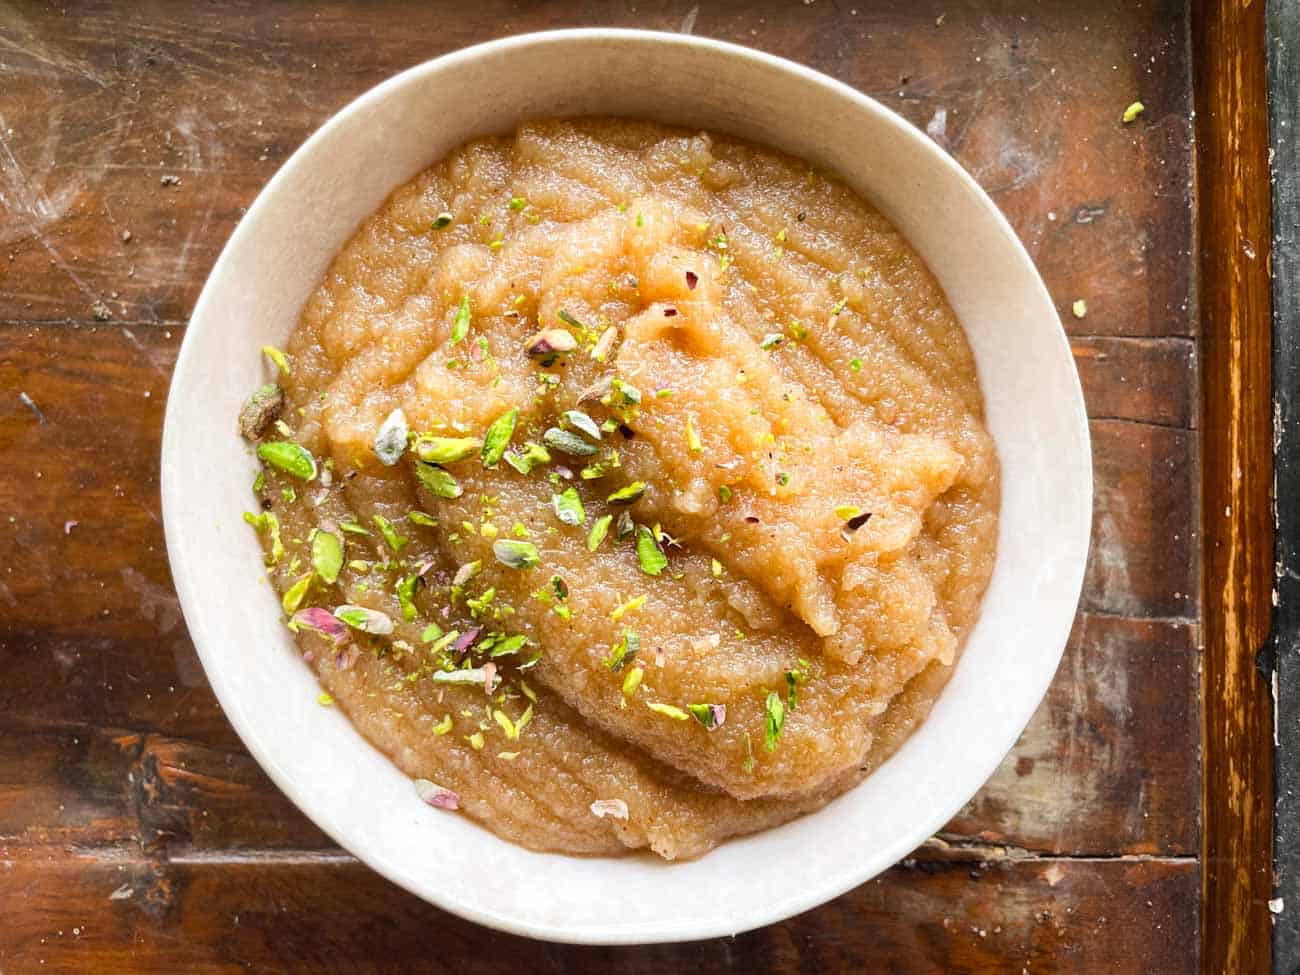
Learn how to make simple & delicious Godhuma Rava Payasam recipe with video tutorial and detailed step by step photos. This nutty, aromatic Wheat Rava Payasam is perfect for festivals, celebrations or whenever you crave a quick wholesome sweet! Godhuma Rava Payasam is a delicious, traditional South Indian dessert made with Samba wheat rava, cooked...
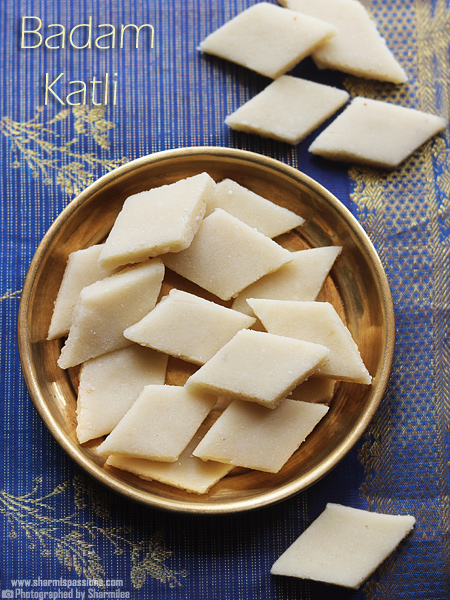
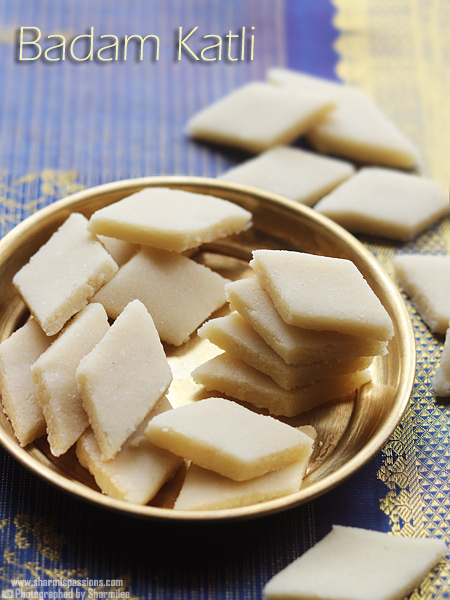
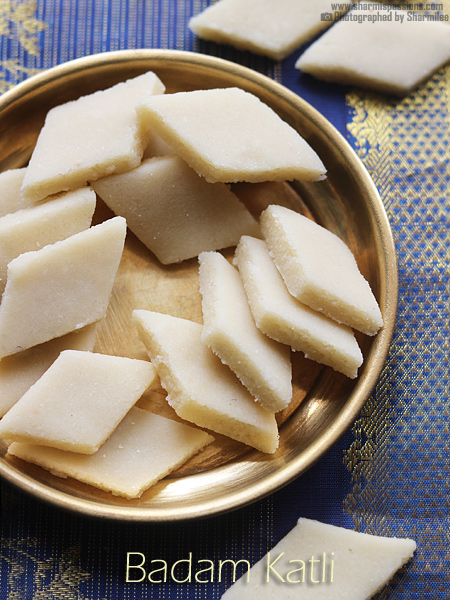
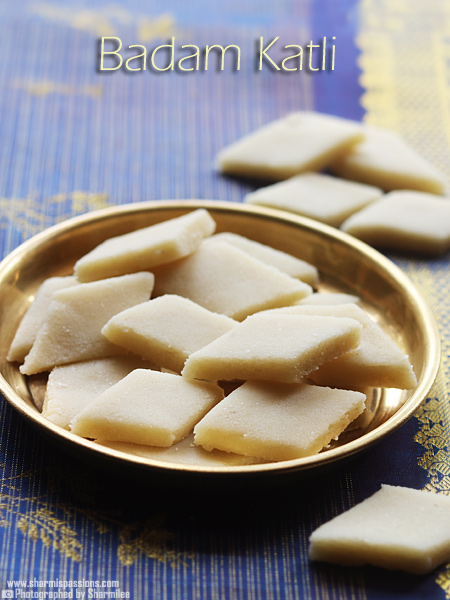
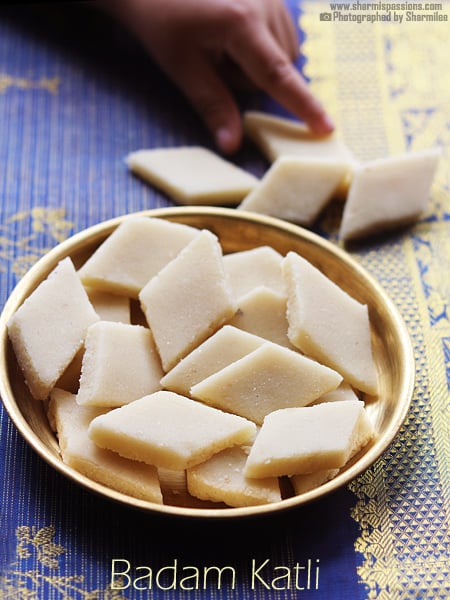
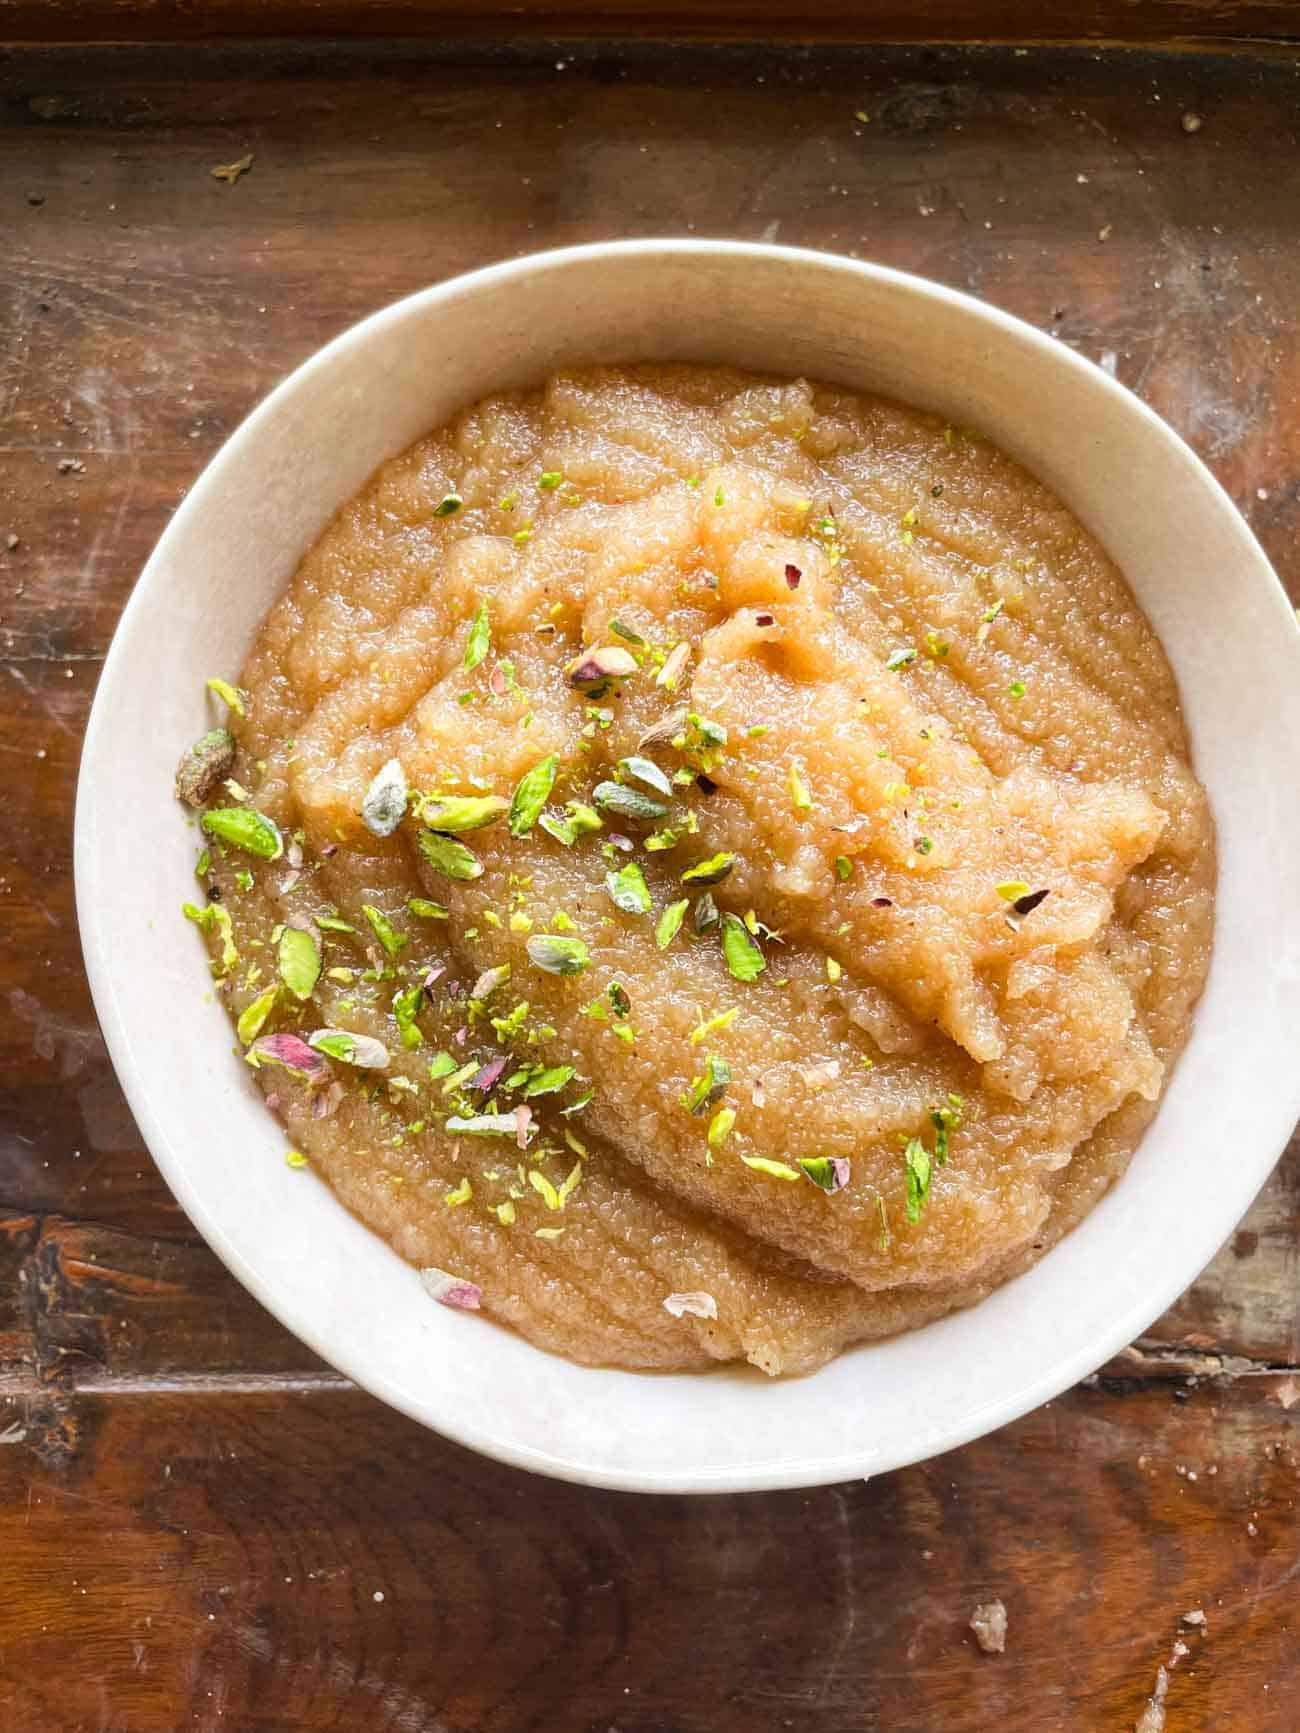
Badam Katli is a soft, rich sweet made by cooking powdered almonds along with sugar syrup till it turns into a smooth dough then cutting into pices. This recipe has mild nutty flavor from the almonds and the gentle sweetness makes it a sweet that almost everyone at home will enjoy without any fuss. Once you cut them into those thin diamond shapes, it gives that festival feeling instantly.
This sweet needs only few simple ingredients but still the taste comes out really good when made in the right way. It feels light, not too sugary, and has that soft melt-in-mouth feel which is the best part. Homemade version also tastes better most of the times, as you can adjust the sweetness and softness just the way you prefer.
[feast_advanced_jump_to]
About Badam Katli
Badam Katli is made by soaking almonds, peeling the skin and grinding it to a semi-fine powder. This almond powder is cooked with a plain sugar syrup till it all comes together into a smooth flexible dough. The flavor mainly comes from the almonds only, so even without adding many extra flavors it tastes already nice on its own.
The texture stays soft but slightly firm too. It should roll out smooth but not sticky, so it holds the shape neatly when you cut it. The sweetness remains mild which makes it good even for people who prefer light sweets. The natural pale cream color from almonds gives the katli a clean and neat look.
You can find many variations in different homes. Some add little ghee for more shine, while some add tiny bit of rose essence. Few also use milk while grinding but that reduces the shelf life. You can roll the dough thin for katli or keep it slightly thick and cut as barfi squares.
I usually make Badam Katli during festival month or when I want a simple sweet that still feels rich. I enjoy the part where you roll the dough between butter paper because it gives smooth finish. Even kids like this sweet because it is soft and not too sugary. Homemade version is always more fresh and tastes great too.
Badam Katli Ingredients
Badam / Almonds - I have used whole almonds and soaked them to remove the skin. It gives soft nutty taste and blends easily into a powder. You can use store bought almond flour also if your mixer is not strong enough, but fresh almonds gives better flavor.
Sugar - I used regular white sugar for this sweet. It melts fast and gives the right sweetness without making the katli heavy. You can add little more if you like sweeter version but I prefer mild sweetness.
Water - I add water only for dissolving sugar. It helps form the syrup which later binds with the almond powder. Do not add extra water or the dough becomes too soft.
Cardamom Powder - I just use a small pinch for light aroma, blends well with almond taste and gives mild fragrance.
Ghee - I use for greasing the paper, it helps the dough prevent from sticking to the paper.
Butter Paper - I have use this for rolling gives smooth finish. It makes the shaping part more easy and the dough spreads neat without giving small cracks.
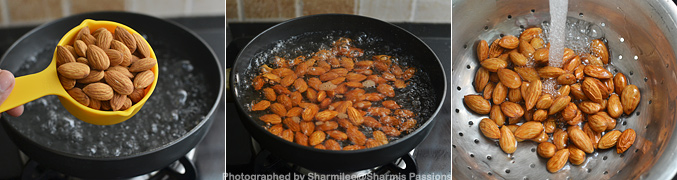
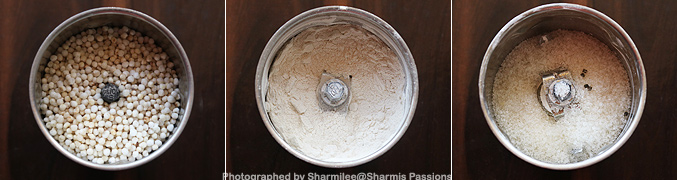
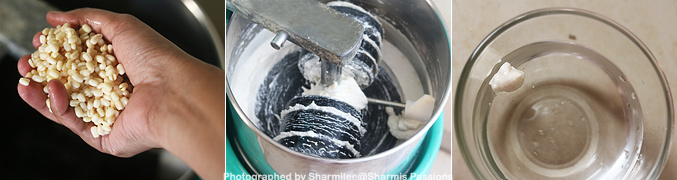
1.Boil 1 cup water, when it starts to boil rigorously measure and add badams. Let it cook for 3 minutes. Switch off and rinse it in cold water.
2.Now remove the skin, it will easily peel off. You know who did it for me?! Yes mittu neatly peeled the skin for all the almonds. Measure your ingredients and keep it ready. If your are badams are refrigerated, then bring to room temperature and then proceed. Ensure your mixer is completely dry. Transfer badams to a mixer
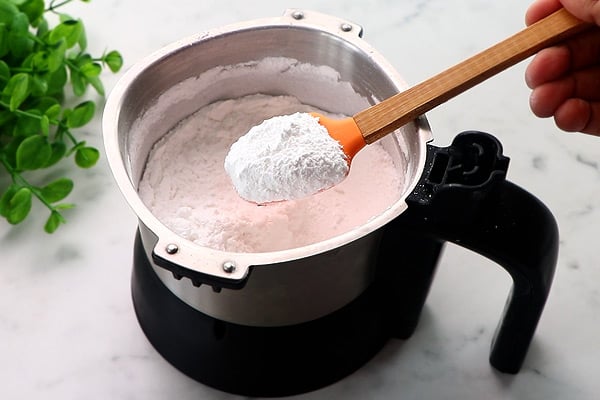
3.Grind it to a semi fine powder. Don't overdo as the badams will leave out oil and the whole mixture will turn sticky. See my badam powder was this coarse. Set aside.
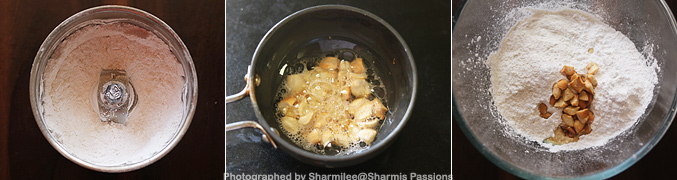
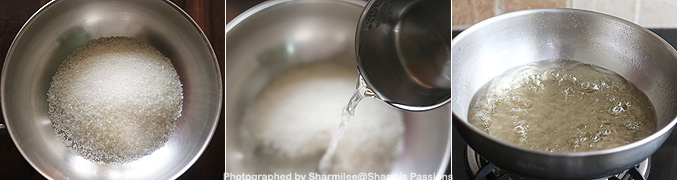
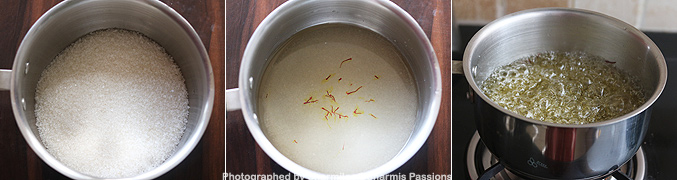
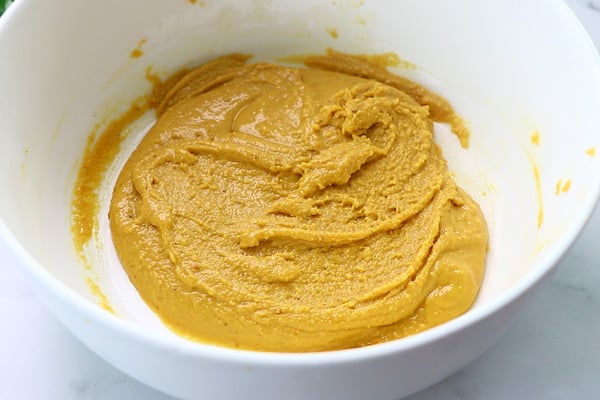
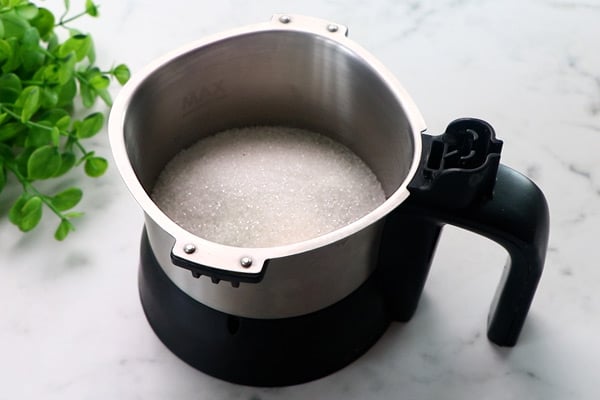
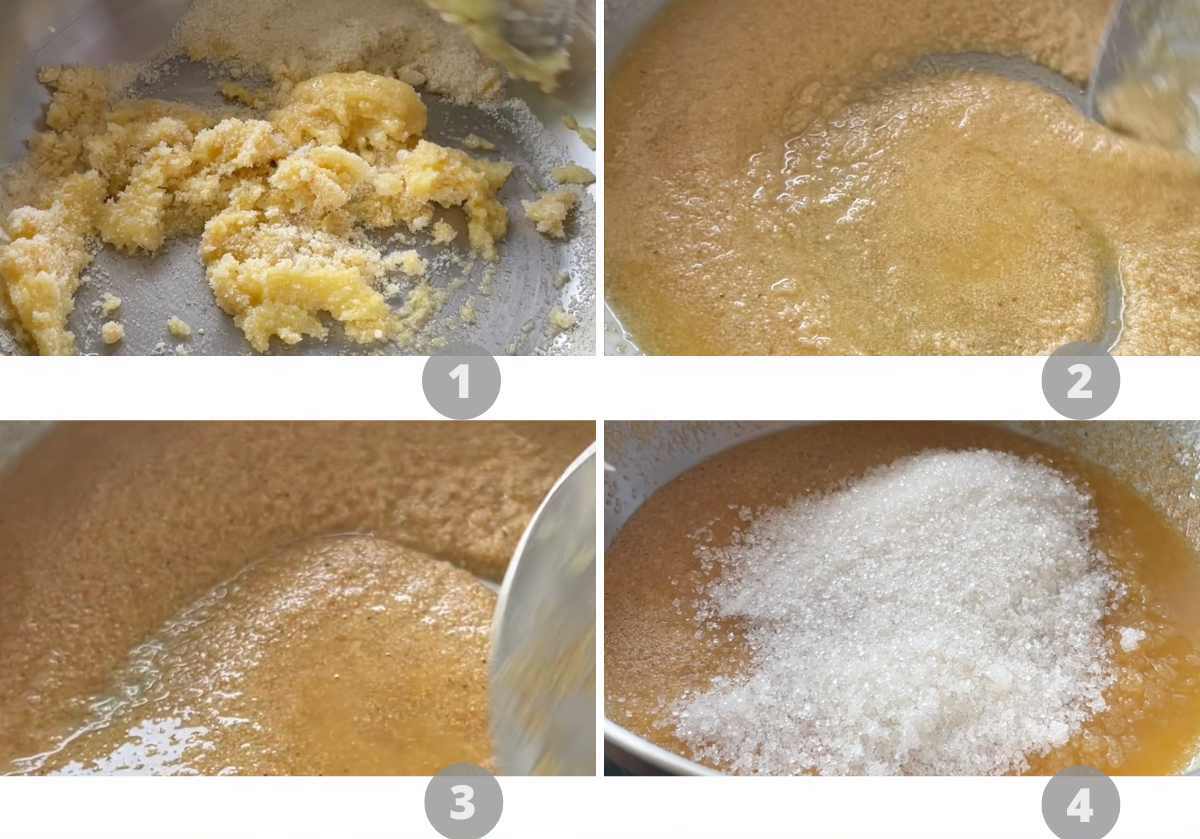
4.Take sugar in a thick bottomed kadai, Now add water. Stir in till sugar dissolves.
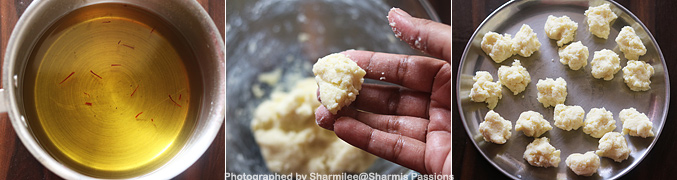
5.Then it starts to bubble up. Once the sugar completely dissolves and it starts to bubble up, add the badam mixture.
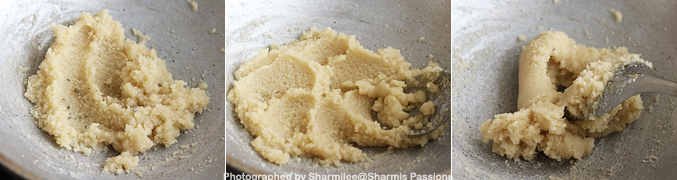
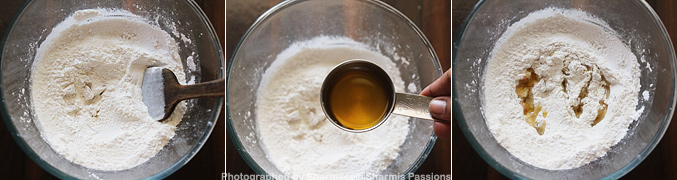
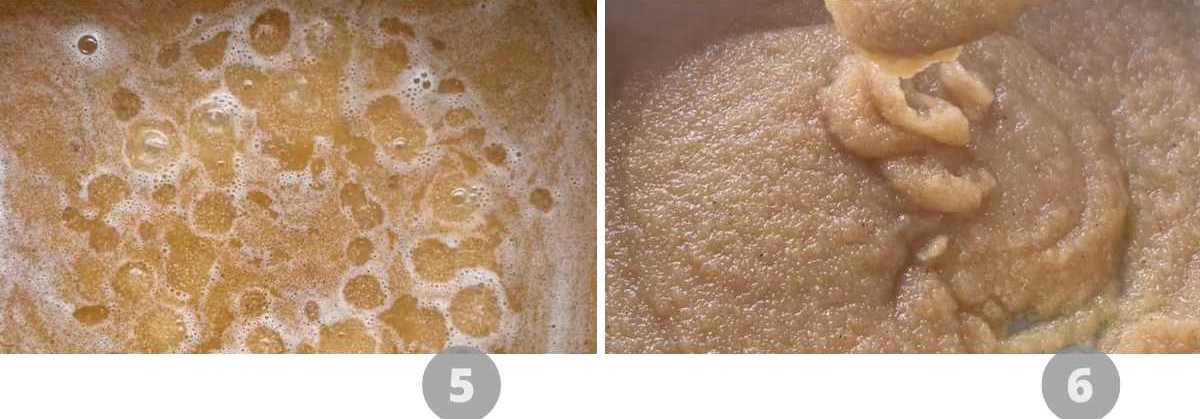
6.Keep stirring in low flame.
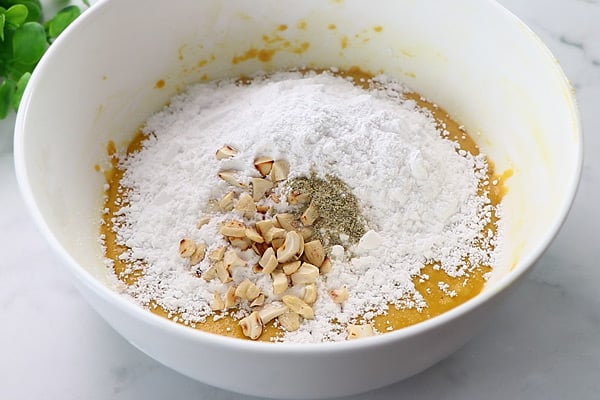
7.Add cardamom powder, keep stirring. Scrape the sides and keep cooking.
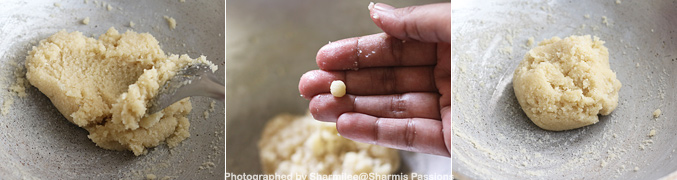
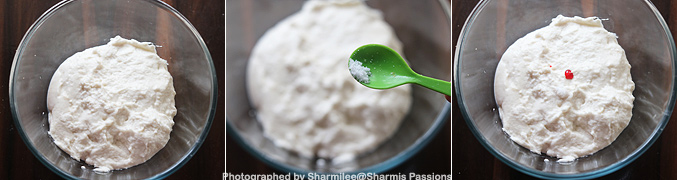
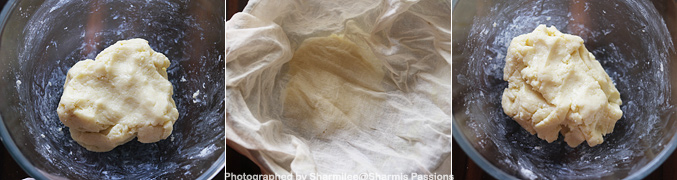
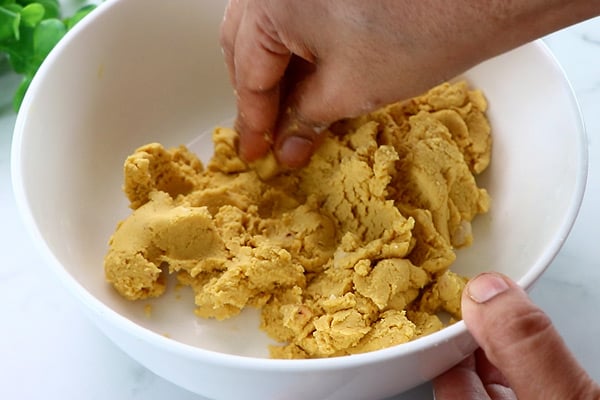
8.It will become dry and starts rolling like this. It should be like a flexible dough. The dough should be slightly dry, but should be soft and flexible so switch off accordingly. You can even try rolling a tiny ball, if it forms then that's the correct consistency. It took me around 12 minutes for forming the dough. Switch off and let it cool down for 5 minutes.
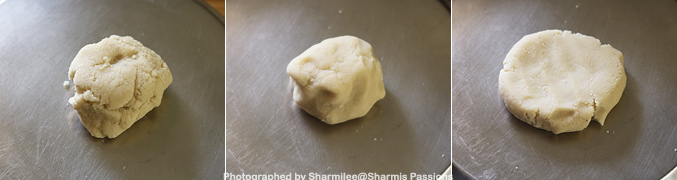
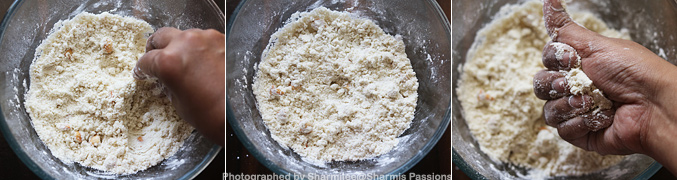
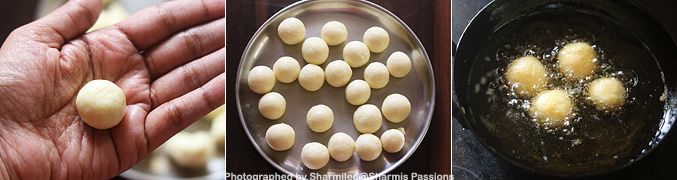
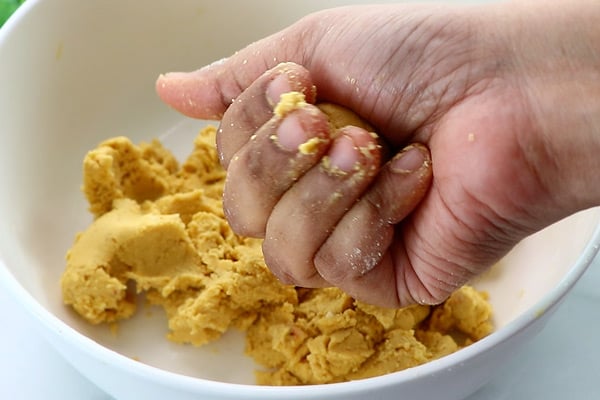
9.When its still warm, knead it well. If you feel the mixture is dry add ½ teaspoon ghee and then knead it. I didn't use as it was easy for me to gather and knead. Place the dough on a plate.
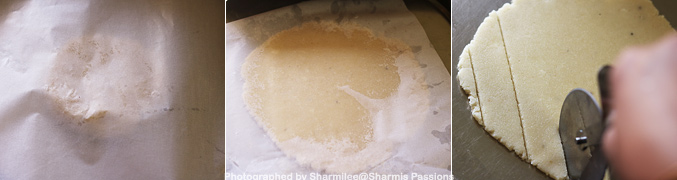
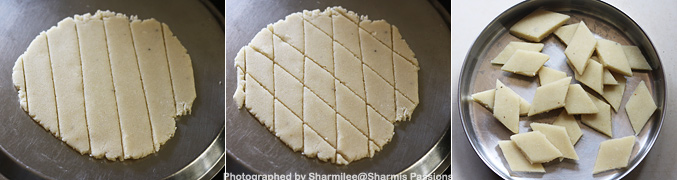
10.Now lay a butter paper over it, slightly apply ghee. Now start rolling with a chapathi roller to ¼ inch thick. And cut into diamonds.
11.First draw vertical lines then cross it to form diamond shapes. Now you have the liberty to enjoy the edge uneven pieces :)Now separate the pieces. I collected the extras, kneaded rolled again and cut into pieces, this way you can eliminate the uneven edge pieces.
Cool down and store in airtight container.
Expert Tips
Soaking - I usually soak almonds in hot water for few minutes so the skin peels off easily. This makes the powder smooth and prevents grainy texture.
Grinding - I always grind in short pulses. If you grind too much the almonds release oil and become pasty, so better to keep it semi fine and little coarse.
Sugar Syrup - I keep the flame low when making the syrup. It does not need any string consistency, only needs to dissolve completely and turn slightly thick.
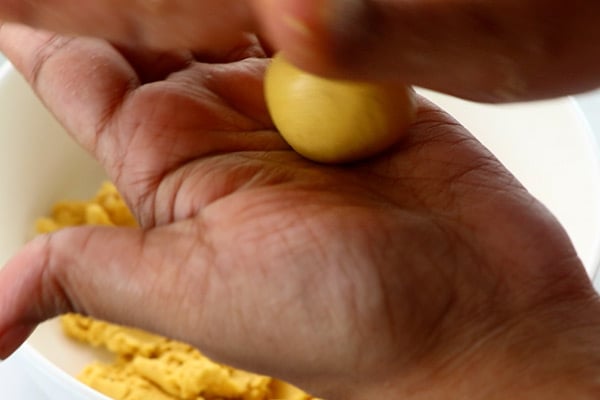
Dough Stage - I usually take small pinch from the pan and try rolling a tiny ball. If it forms without sticking too much, then the dough is ready to switch off.
Kneading Warm Dough - I knead the dough when it is still warm as it becomes soft and flexible. If it turns dry, I just add half teaspoon ghee and knead again.
Rolling Evenly - I roll between butter papers because it helps to spread evenly without cracks. It also gives smooth clean finish on top which looks neat.
Serving and Storage
Serve Badam Katli with any festive meal or simple evening tea. It pairs well with other sweets like laddu or kaju katli too. You can store leftover katli in airtight box for four to five days at room temperature.
If you want to keep longer, you can refrigerate but I usually prefer finishing it fresh as the taste stays better. When stacked properly it does not stick much and stays firm.
FAQS
1.Can I use almond flour?
Yes use almond flour. Just make sure it is fine and fresh so the dough comes smooth.
2.Why did my dough turn too sticky?
It usually means syrup cooked little less. You can put the mixture back on low flame and cook few minutes more.
3.Can I add saffron?
Yes you can add few strands soaked in warm milk. It gives light yellow shade and mild aroma.
4.Why did my katli break while cutting?
The dough may be too dry. You can knead with few drops ghee and roll again to fix it.
5.Can I use jaggery?
I don't suggest as it changes taste and texture. White sugar gives proper soft finish.
If you have any more questions about this Badam Katli Recipe do mail me at sharmispassions@gmail.com. In addition, follow me on Instagram, Facebook, Pinterest, Youtube and Twitter .
Tried this Badam Katli Recipe? Do let me know how you liked it. Also tag us on Instagram @sharmispassions and hash tag it on #sharmispassions.
Badam Katli is a soft, rich sweet made by cooking powdered almonds along with sugar syrup till it turns into a smooth dough then cutting into pieces. This recipe has mild nutty flavor from the almonds and the gentle sweetness makes it a sweet that almost everyone at home will enjoy without any fuss. Once you cut them into those thin diamond shapes, it gives that festival feeling instantly.
Boil 1 cup water, when it starts to boil rigorously measure and add badams. Let it cook for 3 minutes. Switch off and rinse it in cold water.
Now remove the skin, it will easily peel off the badams.
Measure your ingredients and keep it ready .Ensure your mixer is completely dry. Transfer badams to a mixer.
Grind it to a semi fine powder. Don't overdo as the badams will leave out oil and the whole mixture will turn sticky. Badam powder should be coarse. Set aside.
Take sugar in a thick bottomed kadai, now add water. Stir in till sugar dissolves.
Then it starts to bubble up. Once the sugar completely dissolves and it starts to bubble up, add the badam mixture. Keep stirring in low flame.
Add cardamom powder, keep stirring. Scrap the sides and keep cooking.
It will become dry and starts rolling into a flexible dough.
The dough should be slightly dry, but should be soft and flexible so switch off accordingly. You can even try rolling a tiny ball, if it forms then that's the correct consistency. It took me around 12 minutes for forming the dough.
Switch off and let it cool down for 5 minutes.
When its still warm, knead it well. If you feel the mixture is dry add ½ teaspoon ghee and then knead it. I didn't use as it was easy for me to gather and knead. Place the dough on a plate.
Now lay a butter paper over it, slightly apply ghee. Now start rolling with a chapathi roller to ¼ inch thick. And cut into diamonds.
First draw vertical lines then criss cross it to form diamond shapes. Now you have the liberty to enjoy the edge uneven pieces 🙂 Now separate the pieces.
I collected the extras, kneaded rolled again and cut into pieces, this way you can eliminate the uneven edge pieces.
Cool down and store in airtight container. Enjoy Badam Katli / Badam Barfi!
Notes
Soaking - I usually soak almonds in hot water for few minutes so the skin peels off easily. This makes the powder smooth and prevents grainy texture.
Grinding - I always grind in short pulses. If you grind too much the almonds release oil and become pasty, so better to keep it semi fine and little coarse.
Sugar Syrup - I keep the flame low when making the syrup. It does not need any string consistency, only needs to dissolve completely and turn slightly thick.
Dough Stage - I usually take small pinch from the pan and try rolling a tiny ball. If it forms without sticking too much, then the dough is ready to switch off.
Kneading Warm Dough - I knead the dough when it is still warm as it becomes soft and flexible. If it turns dry, I just add half teaspoon ghee and knead again.
Rolling Evenly - I roll between butter papers because it helps to spread evenly without cracks. It also gives smooth clean finish on top which looks neat.
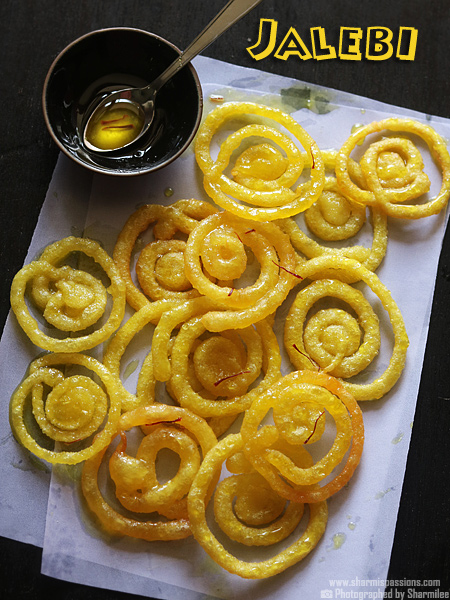
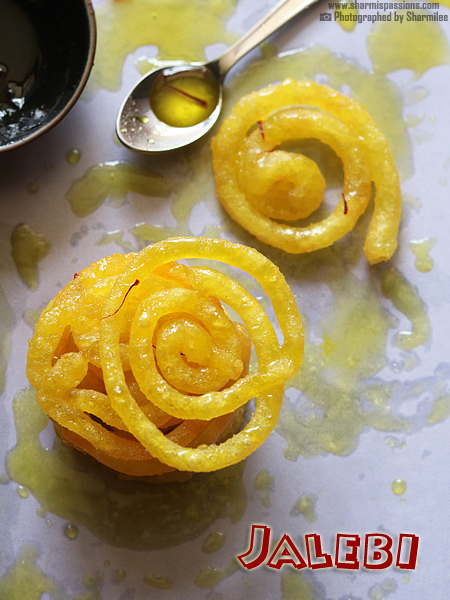
Jalebi is a juicy sweet made by pouring a fermented maida batter into hot oil in concentric circles, frying it until crisp and dipping it inside sugar syrup. It is mostly made during festive seasons and special occasions. Sweet jalebi with syrup is perfect for celebration or even just a small treat at home. The smell of hot jalebi frying in oil itself makes you feel so happy.
This dessert is little tricky but really worth trying at home. The batter ferments overnight and gives that nice tangy flavor which is very special for jalebis. The sugar syrup coats each jalebi well making it soft inside and crisp outside. It is one of those sweets everyone likes, and honestly looks so pretty on the plate also.
[feast_advanced_jump_to]
About Jalebi
Jalebi is a sweet made using maida and little besan along with a hint of yogurt and baking powder. Then it is poured in hot oil in small concentric circles, fried until crisp and dunked straight into warm sugar syrup. You can add pinch of cardamom or saffron too for extra aroma.
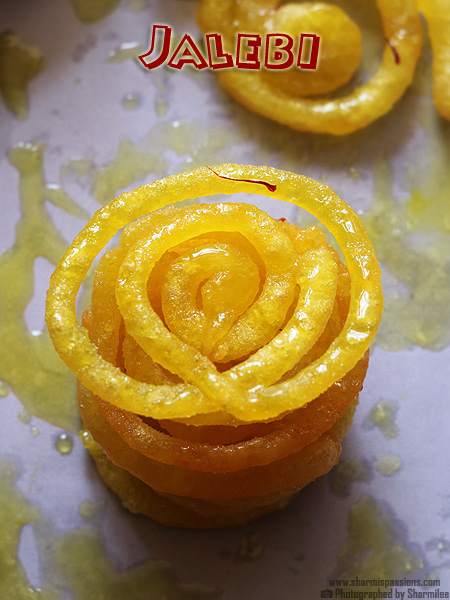
The texture comes crispy outside and soft inside, almost falling in love the second you take one bite. The sugar syrup gives sweetness and that glossy look which makes jalebi very tempting. It is usually golden yellow in color and you can make plain or add saffron for more flavor.
The taste is sweet and little tangy because of fermentation, and that combo is really lovely for dessert lovers. Sometimes after sitting few minutes in syrup it actually tastes more tasty and juicy. Making jalebi takes some time but the result always feels worth it. The batter must be thick but still pourable, otherwise it won't hold shape.
I usually make jalebi during special days or whenever I feel like something celebratory at home. I love dipping it in warm syrup so it stays juicy. It is fun to make with family too, drawing circles in oil and watching them puff slightly, it gives that festive mood instantly.
Jalebi Ingredients
Maida (all-purpose flour) - I use it for the batter, it gives soft inside and slightly chewy texture. You can mix little atta if you want mild wheat flavor.
Besan flour - I add small amount to help batter hold shape and give little nutty flavor.
Baking powder - I add a small pinch for slight puffiness while frying.
Baking soda - Tiny pinch helps batter rise, gives crisp outer layer. Don't add more else batter becomes loose.
Sour curd / yogurt - I add for fermentation and tangy flavor. It also helps batter get small bubbles after resting overnight.
Water - I added lukewarm water little by little to get batter thick yet pourable. Too thin batter will not hold shape while making jalebi.
Oil - I deep fry in heavy bottom pan, level enough to immerse jalebi. Can use ghee for richer taste.
Sugar - I use it for making the syrup, it makes the jalebi sweet and little sticky. The syrup should be thick but not too much thick.
For the syrup - I put a little yellow color or sometimes turmeric for getting the shade, saffron and cardamom for nice smell, and rose essence for light fragrance. Lemon juice helps the syrup from turning grainy.
Why This Recipe Works
This makes crispy outside and soft inside jalebis.
It's tangy from fermented batter and sweet from syrup.
It has golden color and perfect shape make it look beautiful for occasions.
It can be prepared in advance as batter ferments overnight.
Simple ingredients but gives professional style sweet at home.
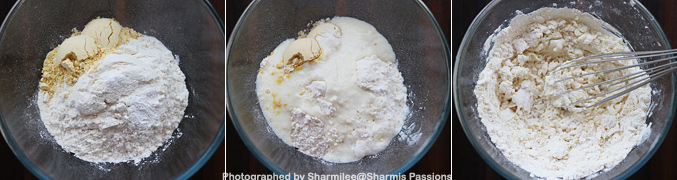
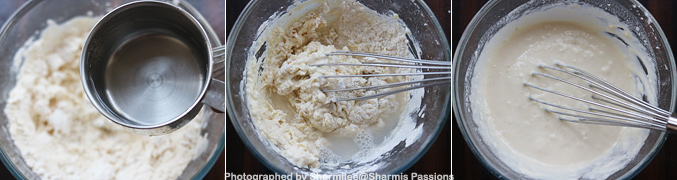
1.In a mixing bowl - take maida, besan flour, baking powder, baking soda, sour yogurt, mix it with a whisk.
2.Then add water little by little to form a thickish batter more like idli batter consistency.
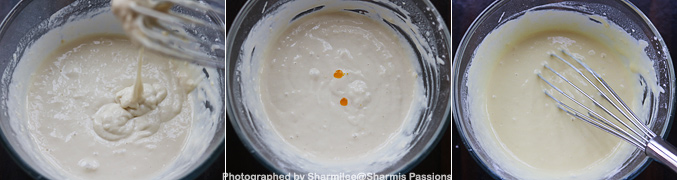
3.It should be pourable but very thick, Add food color, mix it well, Make sure there are no lumps.
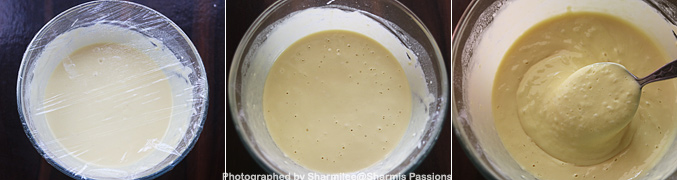
4.Cling wrap it and set aside for at least 12-15 hours or overnight preferably in a warm place. Next day morning if you check there will be small bubbles seen as shown. Mix well, when you mix you can see the fermented batter, even the smell will be different. Set aside. It may be slightly runny the next day.
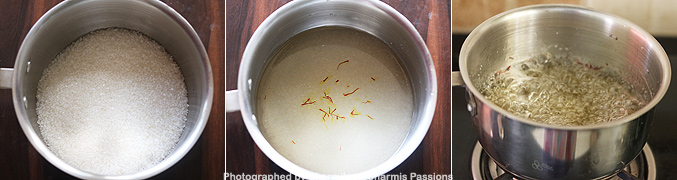
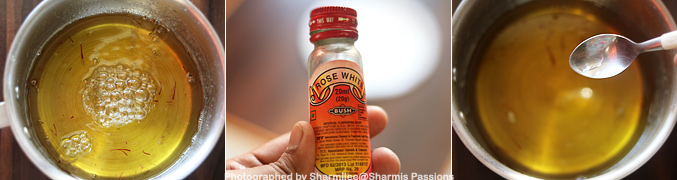
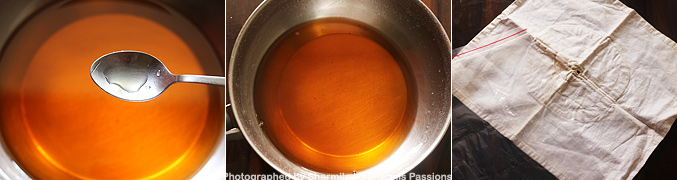
5.Take sugar in a pan - add water and saffron let it boil
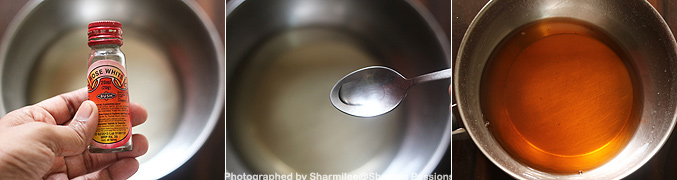
6.When it forms a thick sticky syrup switch off, Add food color and rose essence.
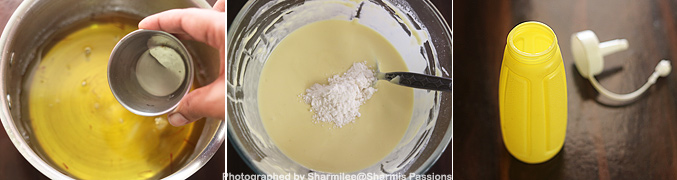
7.Add lemon juice to prevent from crystallization. I added 2 teaspoon maida flour(do not add more) as I found the batter a bit runny, this step is purely optional, if your batter is thick you don't need to add flour. Now take a sauce bottle or zip lock or whichever is suitable for you.
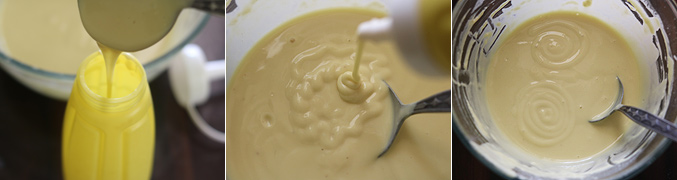
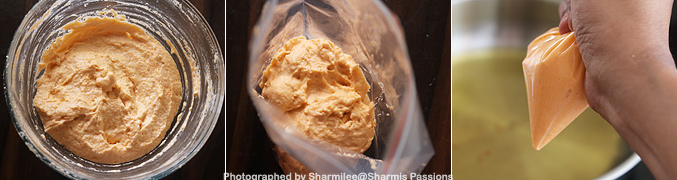
8.Fill the sauce bottle with the batter. Check by drawing concentric circles on the batter itself, just for practice.
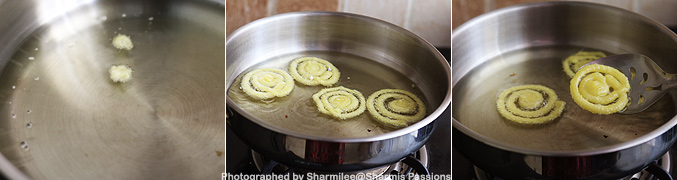
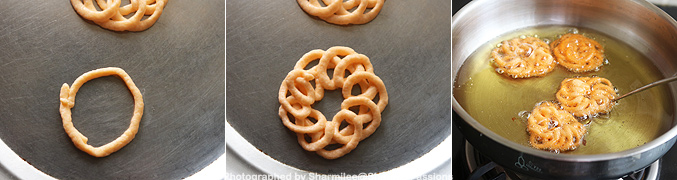
9.Heat oil in a flat heavy bottomed pan(the level of oil should be just right for the jalebis to immerse) - try pouring few drops it should rise immediately without sticking and changing color then the oil temperature is perfect. Now start drawing small concentric circles. Deep fry, turn over and cook on both sides until slightly golden and crisp. Drain for few seconds.
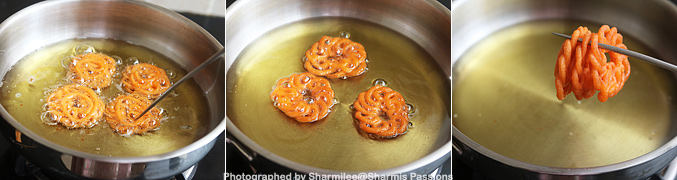
10.Immediately add it to the sugar syrup, dip it for few seconds, press it with a fork for the jalebis to dunk in, turn over and press again. Remove the jalebi from oil and immediately add it to get the syrup evenly coated put them in the sugar syrup. Remove and place it in a plate. Then store. I got a big container full.
I love it when it still warm, juicy yummy jalebis!!!
Expert Tips
Ferment batter - I keep batter in warm place overnight. Bubbles show it is ready and smell becomes slightly tangy.
Batter consistency - Thick but pourable like idli batter. Too thin batter spreads and won't hold shape.
Frying oil - I keep in low-medium flame works best. Test with few drops first, should rise without changing color quickly.
Making shapes - I used thin-holed nozzle or sauce bottle. Draw small circles, do not overcrowd in pan or stick.
Serving warm - I serve immediately after dipping in syrup. Leftover can keep at room temp or fridge, warm slightly before serving.
Serving and Storage
Serve jalebi warm or slightly cooled. Goes well alone or with rabri. Leftover jalebi can keep in airtight container at room temperature for few hours or in fridge. While serving again, warm little so syrup mixes back and jalebi stays soft inside.
FAQS
1.Can I skip food color?
Yes, jalebi will be pale. Can use pinch turmeric if you want golden color.
2.Can I make batter less hours?
Better to ferment 12 hours, else jalebi will not get tangy and bubbles.
3.Can I add more baking soda?
No, too much makes batter porous and jalebi loose.
4.Can I fry on high flame?
No, jalebi will burn outside and stay raw inside. Use low-medium flame.
5.Can I store in fridge?
Yes, airtight container 1-2 days. Warm slightly before serving.
If you have any more questions about this Jalebi Recipe do mail me at sharmispassions@gmail.com. In addition, follow me on Instagram, Facebook, Pinterest, Youtube and Twitter .
Tried this Jalebi Recipe? Do let me know how you liked it. Also tag us on Instagram @sharmispassions and hash tag it on #sharmispassions.
Jalebi is a juicy sweet made by pouring a fermented maida batter into hot oil in concentric circles, frying it until crisp and dipping it inside sugar syrup. It is mostly made during festive seasons and special occasions. Sweet jalebi with syrup is perfect for celebration or even just a small treat at home. The smell of hot jalebi frying in oil itself makes you feel so happy.
In a mixing bowl - take maida, besan flour, baking powder, baking soda, sour yogurt, mix it with a whisk.
Then add water little by little to form a thickish batter more like idli batter consistency.
It should be pourable but very thick. Add food color, mix it well, make sure there are no lumps.
Cling wrap it and set aside for at least 12-15 hours or overnight preferably in a warm place.
Next day morning if you check there will be small bubbles seen. Mix well, when you mix you can see the fermented batter, even the smell will be different. Set aside. It may be slightly runny the next day.
Making Sugar Syrup
Take sugar in a pan - add water and saffron let it boil
When it forms a thick sticky syrup switch off, add food color and rose essence.
Add lemon juice to prevent from crystallization. I added 2 teaspoon maida flour (do not add more) as I found the batter a bit runny, this step is purely optional, if your batter is thick you don't need to add flour. Now take a sauce bottle or zip lock or whichever is suitable for you.
Making Jalebis:
Fill the sauce bottle with the batter. Check by drawing concentric circles on the batter itself, just for practice.
Heat oil in a flat heavy bottomed pan (the level of oil should be just right for the jalebis to immerse) - try pouring few drops it should rise immediately without sticking and changing color then the oil temperature is perfect.
Now start making small concentric circles in oil with the batter. Deep fry, turn over and cook on both sides until slightly golden and crisp. Drain for few seconds.
Immediately add it to the sugar syrup, dip it for few seconds, press it with a fork for the jalebis to dunk in, turn over and press again.
Remove the jalebi from oil and immediately add it to get the syrup evenly coated put them in the sugar syrup. Remove and place it in a plate. Store in an air tight container. Enjoy Jalebi!
Notes
Ferment batter - I keep batter in warm place overnight. Bubbles show it is ready and smell becomes slightly tangy.
Batter consistency - Thick but pourable like idli batter. Too thin batter spreads and won't hold shape.
Frying oil - I keep in low-medium flame works best. Test with few drops first, should rise without changing color quickly.
Making shapes - I used thin-holed nozzle or sauce bottle. Draw small circles, do not overcrowd in pan or stick.
Serving warm - I serve immediately after dipping in syrup. Leftover can keep at room temp or fridge, warm slightly before serving.
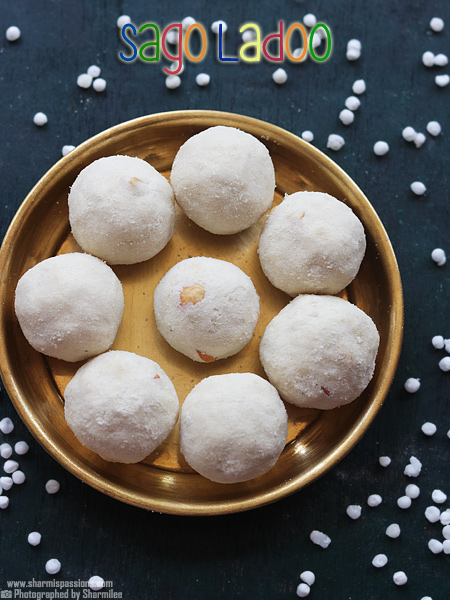
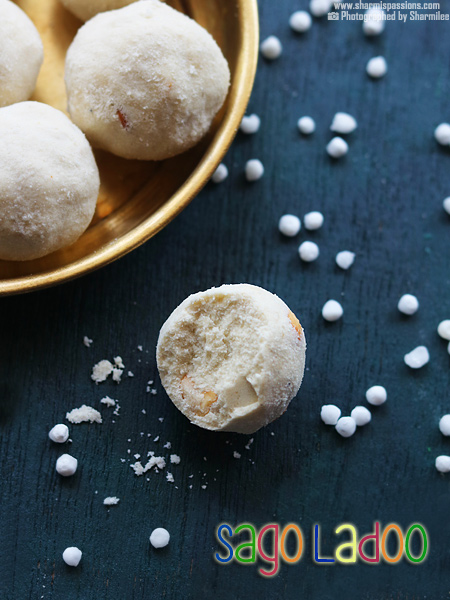
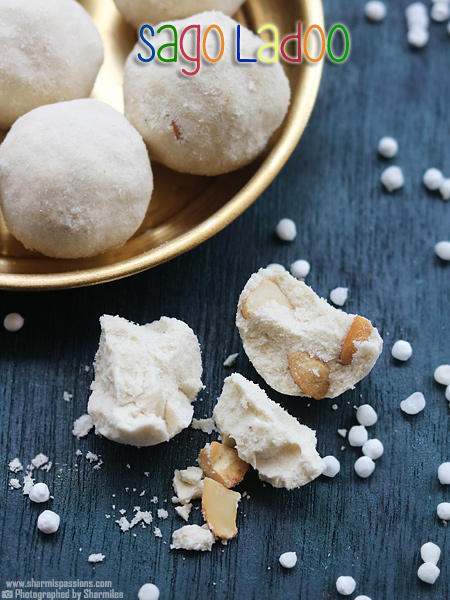
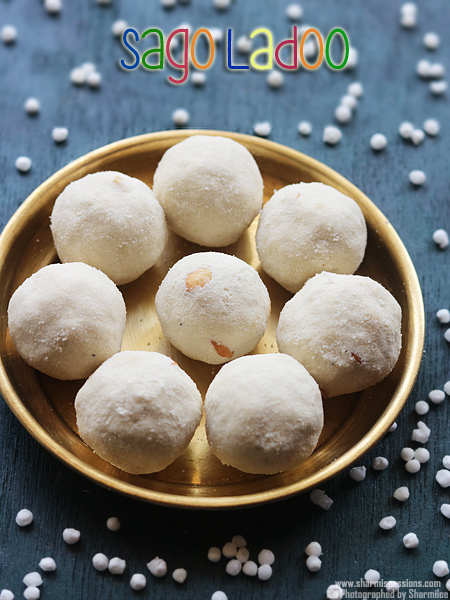
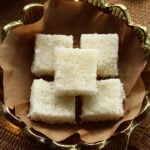
Sabudana Ladoo is a quite easy to make sweet made using simple ingredients. This has mild sweet taste and soft texture that melts in your mouth when you bite. These ladoos are perfect for festival time or even when you feel to make something quick and different. The small pearls of sago gives a light crunch and coconut adds nice flavor to it.
This is a lovely sweet to try when you run out of rice flour or regular ingredients for other ladoos. It takes less time and gives good quantity also. I like how ghee binds everything well and makes the ladoos smell so good. Each bite feels light, rich and full of flavor. You can make them easily in small batch too.
[feast_advanced_jump_to]
About Sabudana Ladoo
Sabudana Ladoo or Sago Laddu is a traditional Indian sweet but not very common compared to other ladoos. It is made by dry roasting sago till puffed and grinding it to powder. Then sugar, coconut and fried cashews are added along with melted ghee to form soft balls.
This ladoo has a nice aroma from roasted sago and ghee. The coconut in this recipe gives body and mild taste that balance the sweetness. Also cashews adds crunch and cardamom brings traditional smell. The best part is it stays soft even after few days because ghee keeps it moist. It is light and not very heavy to eat, so perfect for small snack or treat.
You can use desiccated or fresh coconut, anything you have at home works fine. Desiccated coconut gives longer shelf life while fresh ones gives little more flavor. It is important to roast sago in low flame patiently else it will remain hard inside. Once powdered and mixed, shaping ladoos is very easy.
I usually make this when I want something quick during festive season. I like to make small ladoos and serve with tea or just after meal. The texture is so unique from other sweets and my family also likes the mild taste. It stays good for few days so I keep few in jar always.
Sabudana Ladoo Ingredients
Sabudana (Sago) - I added white sago, it turns crisp when roasted nicely. It gives light crunch and acts as main base for the ladoo. You can use small size sago so it roasts even without getting burnt.
Sugar - I used normal white sugar and made it into fine powder for smooth texture. It gives mild sweetness and helps to bind all things together.
Cardamom - I used one cardamom pod for light aroma. You can use cardamom powder also if you already have at home.
Cashews - I fried few broken cashews in ghee and mixed. It gives crunchy bite and rich taste. You can add raisins or almonds too if you like some mix texture.
Ghee - I melted ghee to bind the ladoo and make it shiny. Just add little by little while mixing so that the texture stays soft and not oily.
Coconut - I added desiccated coconut for nice flavor and light aroma. You can also use fresh grated coconut if you like more rich taste and soft feel.
Why This Recipe Works
This recipe is very easy and use few ingredients which are mostly available.
Sago gives nice crisp bite and light nutty flavor after roasting.
It does not need any sugar syrup or tricky cooking step.
Ghee make the ladoos soft, aromatic and give rich taste.
It stay fresh for many days and perfect during festival or for quick sweet craving.
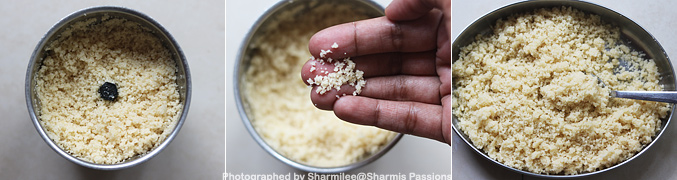
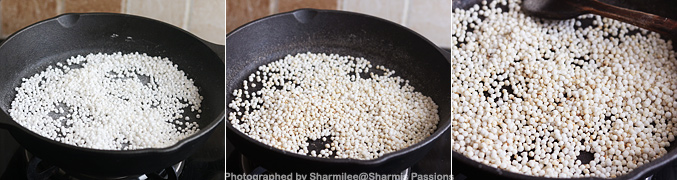
1.Dry roast sago in low flame.Roast until it becomes golden and puffs up a bit, it will take at least 20 minutes. You can see a closer look at this.
2.Cool down then transfer to a mixer jar. Powder it and transfer to a mixing bowl. Now add sugar and cardamom.
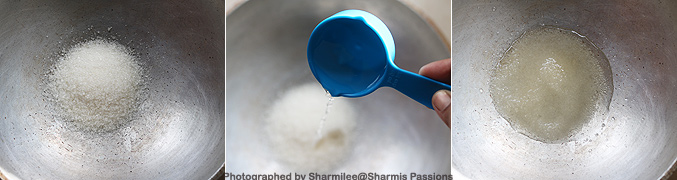
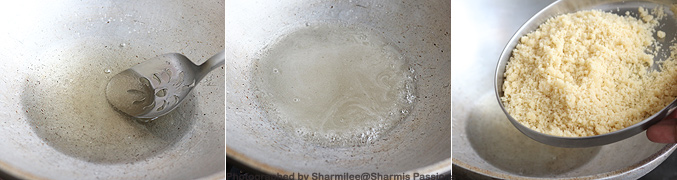
3.Powder it fine, transfer to mixing bowl, add desiccated coconut. Now add a teaspoon of ghee and fry broken cashews until golden brown, transfer to mixing bowl.
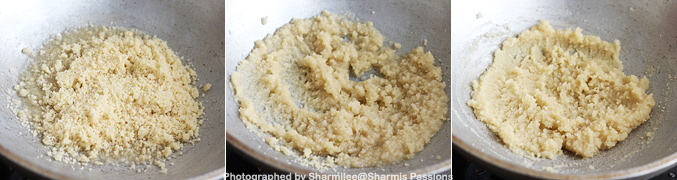
4.Mix well. Now add ghee little by little and keep mixing.
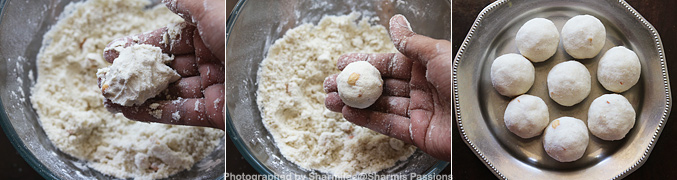
5.Mix it well with your hands, break the lumps and keep mixing. Start rolling balls. If you press like this.
6.it should hold together without falling. This is the right consistency. Form balls by holding tight. Shape all the ladoos and arrange it in a plate. Set aside for sometime then store in a clean container.
Keeps well for a week in room temperature itself.
Expert Tips
Roast sago - I have roasted sago in low flame till it puffed slightly. This step is important else it will stay hard after grinding.
Add ghee - I usually add melted ghee little by little while mixing. If you add all together it becomes too greasy.
Powder fine - I have powdered sago and sugar separately to make it smooth. Coarse powder makes ladoo break easily.
Mix by hand - I prefer mixing with hands to feel the texture and break any lumps before shaping ladoos.
Shape while warm - I have noticed shaping becomes easier when mixture still little warm. Once it cools too much, it becomes dry.
Serving and Storage
Serve Sabudana Ladoo as sweet snack or after meal dessert. It goes well with a cup of tea also. Store the ladoos in airtight jar at room temperature. It stays good for about a week. If you are using fresh coconut, keep in fridge and use within 3 to 4 days.
FAQS
1.Can I use nylon sago?
No, I will not suggest nylon type. Use white regular sago as it roasts well and gives right texture.
2.Why my ladoos not holding shape?
It means mixture needs little more ghee. Add few drops warm ghee and try shaping again.
3.Can I use jaggery?
Yes, you can but melt and strain it before adding. The taste will change slightly.
4.Can I skip coconut?
Yes, you can skip or reduce it. Ladoo will still come good but flavor will be less rich.
5.How long it stays good?
If stored in dry container it stays good for one week. If using fresh coconut keep refrigerated and use soon.
If you have any more questions about this Sabudana Ladoo Recipe do mail me at sharmispassions@gmail.com. In addition, follow me on Instagram, Facebook, Pinterest ,Youtube and Twitter .
Tried this Sabudana Ladoo Recipe? Do let me know how you liked it. Also tag us on Instagram @sharmispassions and hash tag it on #sharmispassions.
Sabudana Ladoo is a quite easy to make sweet made using simple ingredients. This has mild sweet taste and soft texture that melts in your mouth when you bite. These ladoos are perfect for festival time or even when you feel to make something quick and different. The small pearls of sago gives a light crunch and coconut adds nice flavor to it.
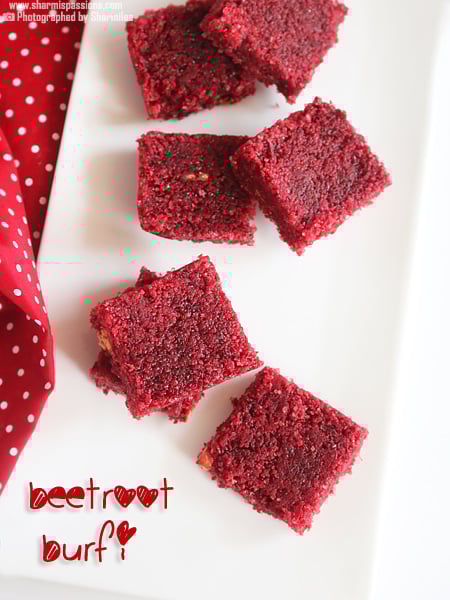
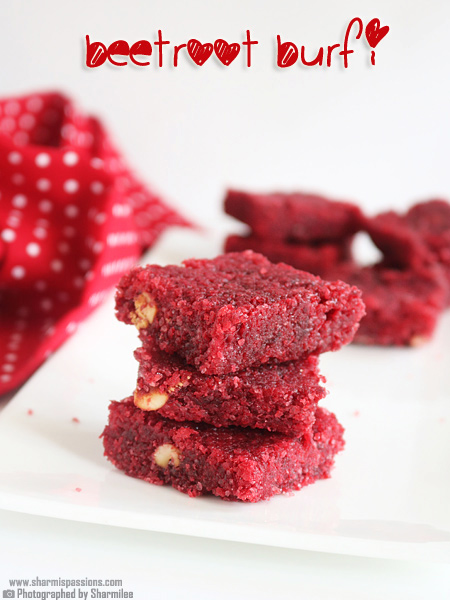
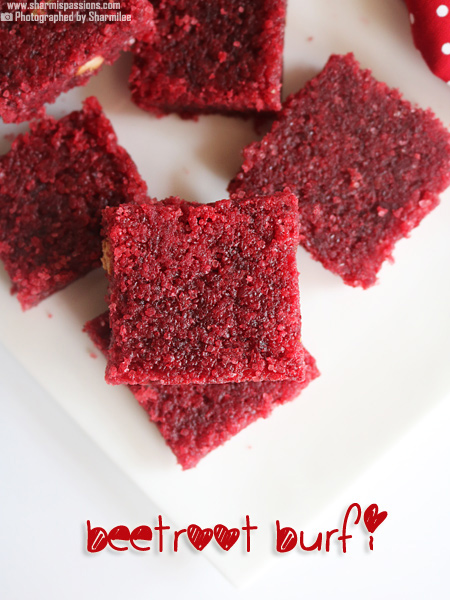
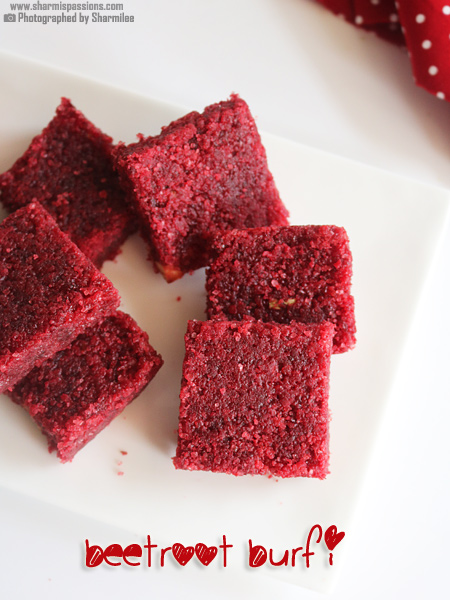
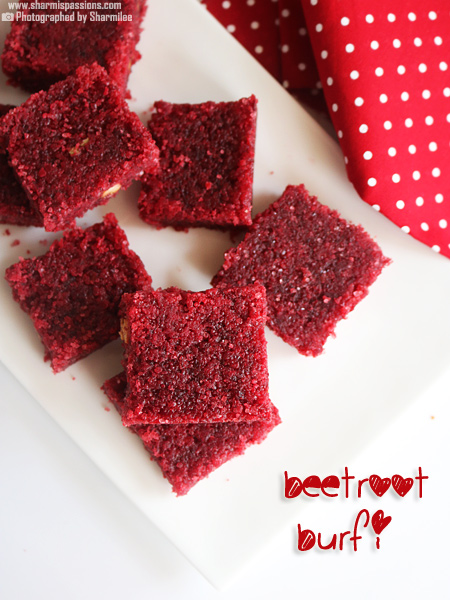
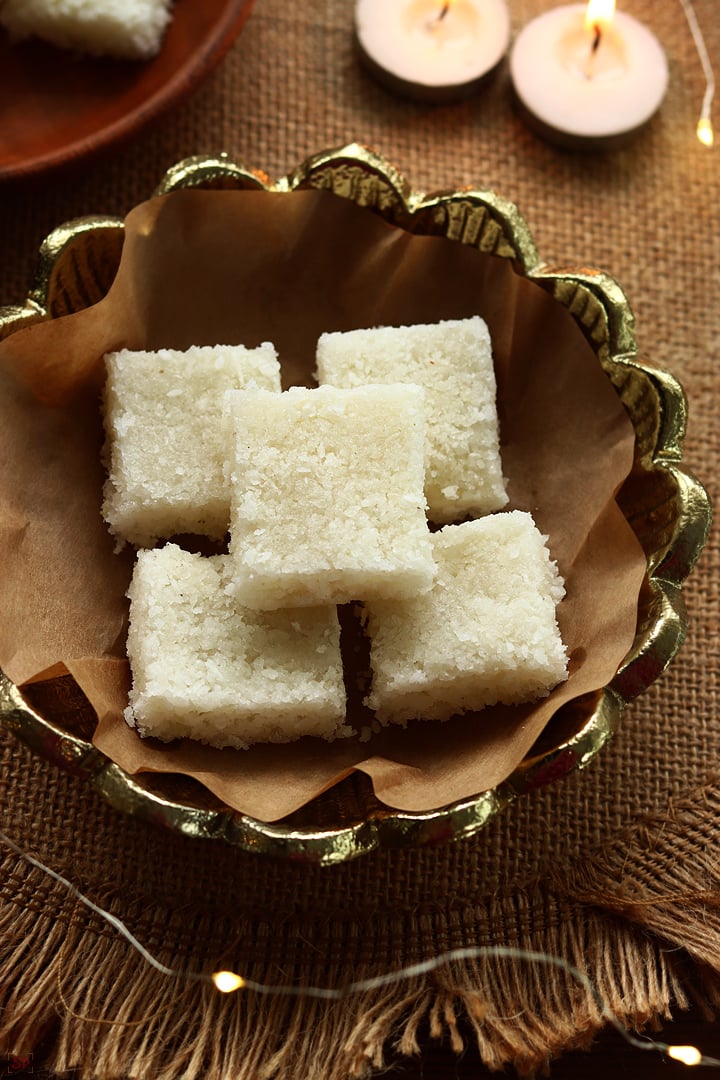
Beetroot Barfi is a quick burfi made using beetroot, coconut, sugar and ghee. It has soft texture and little chewy taste that feels rich. The natural color from beetroot makes it bright pink and very pretty to look. It is also little healthy as beetroot has iron and fiber which gives some goodness too.
This sweet is simple and easy to make, you just need few basic things that are mostly at home. It takes less than half hour and gives perfect result each time. I like how coconut gives mild sweetness and beetroot adds earthy flavor. The ghee makes it glossy and soft which melts so nicely when we eat.
[feast_advanced_jump_to]
About Beetroot Barfi
Beetroot Barfi is an easy sweet recipe which has lovely bright color without using any artificial color. The base is made with grated beetroot and coconut cooked together till it becomes thick. Sugar gives shine and ghee add richness to make texture soft. It is bit chewy and moist but not sticky, which make it delicious.
I have used just sugar and ghee to make it simple. Many add condensed milk or milk powder but I feel this version is more fresh and light. Beetroot gives natural sweetness so it needs less sugar also. The aroma of cardamom at the end makes it more pleasant and traditional.
You can try few changes also like adding few drops of rose essence or a spoon of milk while cooking if you want it more soft. Even some add nuts or dry fruits for bite. The color and texture depends on how much time we cook, so you need to stop at the right stage.
I usually make this for Diwali or when guests come. I love the color so much it looks so bright among other sweets. Also kids eat without any complaints as it tastes sweet and soft. I like it warm because it feels juicy and fresh at that time.
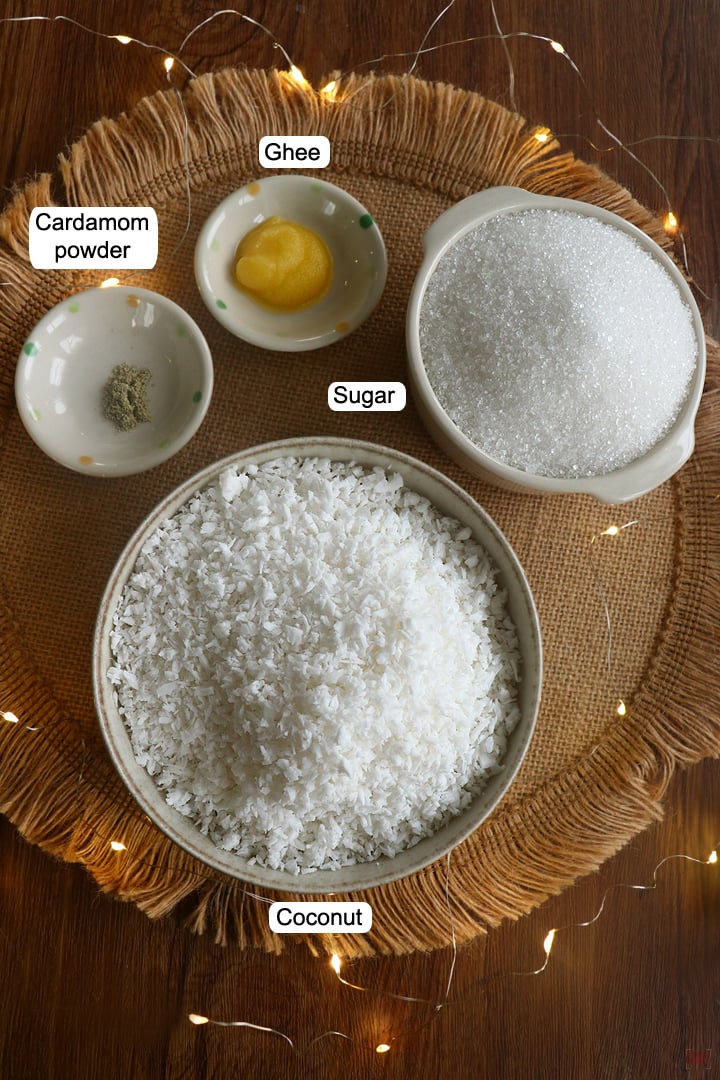
Beetroot Barfi Ingredients
Beetroot - I used fresh beetroot for natural color. It is grated finely so it cooks evenly and gives smooth texture. You can use any small tender beetroot for better taste.
Coconut - I grated coconut which gives mild flavor and make the barfi soft and thick. You can also use frozen.
Sugar - This adds mild sweetness. You can adjust as per your taste or even try brown sugar also.
Cashews - I have fried broken cashews in ghee to add small crunch. You can use almonds also or skip nuts if you like soft barfi.
Ghee - I used homemade ghee which gives rich taste and glossy look. You can use store one also, it helps to avoid sticking while cooking.
Cardamom Powder - I added for nice aroma and light flavor. You can also use rose essence or saffron if you want different flavor.
Why This Recipe Works
This recipe is very simple and no need to check sugar syrup stage.
It uses only basic ingredients which mostly available in kitchen.
Beetroot gives bright natural color, so no need for any food color.
Coconut and ghee gives rich soft texture and keeps it moist.
It cooks very quick and perfect for festival or sudden sweet craving.
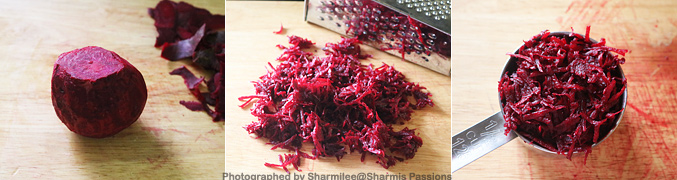
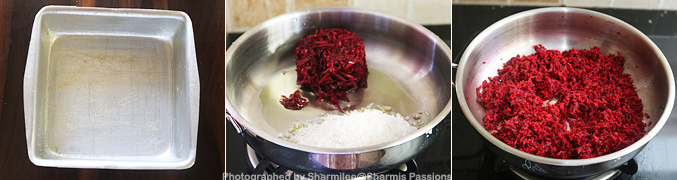
1.Peel off the skin, trim the edges and grate beetroot. Measure grated beets and set aside.
2.Now measure grated coconut, set aside. Now take ghee.
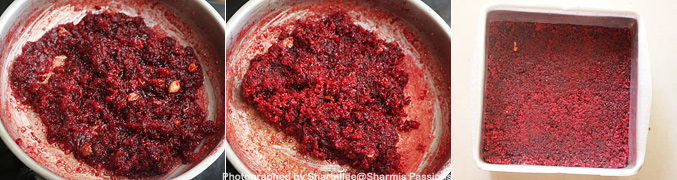
3.Grease a plate / tray with ghee and keep it ready. Now add beets and coconut, saute.
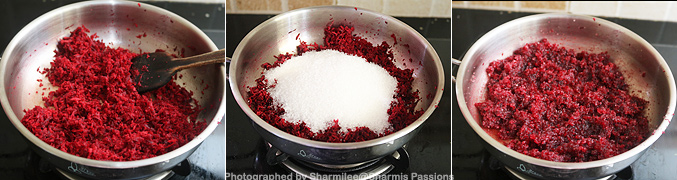
4.Saute till raw smell leaves, this will take at least 10 minutes in low flame. Now add sugar, the mixture will turn goey.
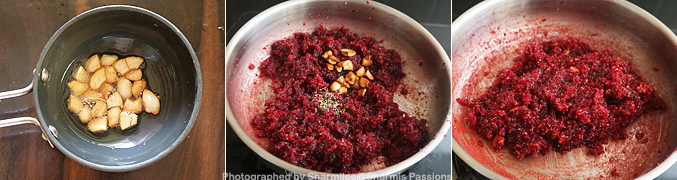
5.Add little ghee, roast the broken cashews till golden brown and keep aside. By now the mixture would have thickened. It will start coming together.
6.Keep stirring continuously in low flame, it will start to bubble at the edges. Look at the small bubbles at the edges.
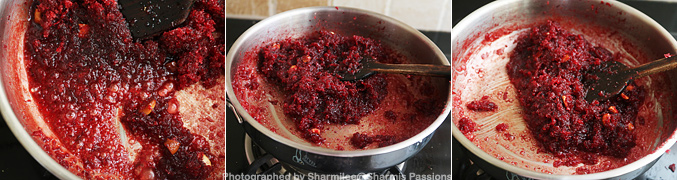
7.Keep stirring for few more minutes, once it is thick and starts to leave the sides of the panic will also look little dry this is the perfect stage, Transfer the mixture to the tray, flatten it using a flat bottomed bowl.
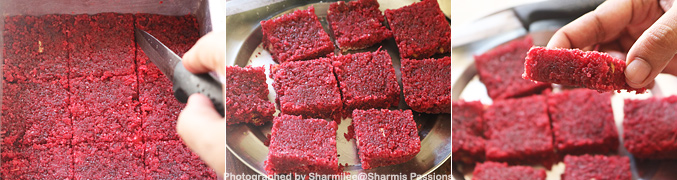
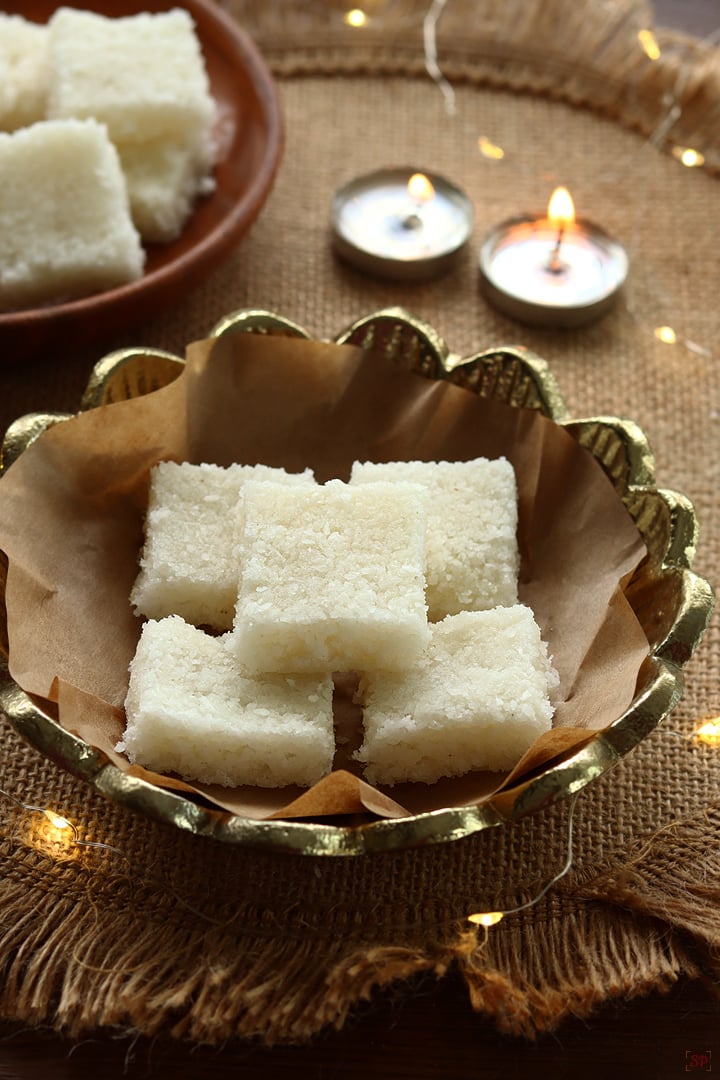
8.Cut into squares when its still warm. Cool down completely then store it in airtight container.
I love it when it still warm, juicy yummy burfis!!!
Expert Tips
Even cooking - I have used fine grater for beetroot, it helps to cook fast and mix smooth with coconut without lumps.
Roast properly - I usually roast beetroot and coconut till raw smell leaves before adding sugar else it will taste little raw later.
Do not overcook - I have noticed if you cook longer, the mixture turns dry and barfi becomes hard. Stop when it leaves sides of pan.
Use thick pan - I have used heavy bottom pan to avoid burning. Keep flame low after sugar is added as it may stick soon.
Cut when still warm - I usually mark pieces when the mixture is still warm. Once cold it gets firm and difficult to cut evenly.
Serving and Storage
Serve Beetroot Barfi warm or at room temperature. This goes well for Diwali, pooja or small family celebration. You can store in airtight container for 3 to 4 days. Keep in fridge for longer use. Before eating again, keep outside for few minutes so it turns soft again.
FAQS
1.Can I use dry coconut?
Yes you can use dry one, but soak it in little warm water first to make it soft before grinding.
2.Why my barfi turned hard?
Maybe you cooked it for too long. Next time take it off from flame once mixture start leaving the sides of pan.
3.Can I use jaggery?
Yes you can, it will give dark color and strong taste. But barfi may become little sticky in texture.
4.Can I skip ghee?
I will not suggest skipping it, because ghee give nice aroma and soft bite. You can reduce the amount little if you want.
5.How long it stays fresh?
It stay good for 3 days outside and around 5 days in fridge.
If you have any more questions about this Beetroot Barfi Recipe do mail me at sharmispassions@gmail.com. In addition, follow me on Instagram, Facebook, Pinterest, Youtube and Twitter .
Tried this Beetroot Barfi Recipe? Do let me know how you liked it. Also tag us on Instagram @sharmispassions and hash tag it on #sharmispassions.
Beetroot Barfi is a quick burfi made using beetroot, coconut, sugar and ghee. It has soft texture and little chewy taste that feels rich. The natural color from beetroot makes it bright pink and very pretty to look. It is also little healthy as beetroot has iron and fiber which gives some goodness too.
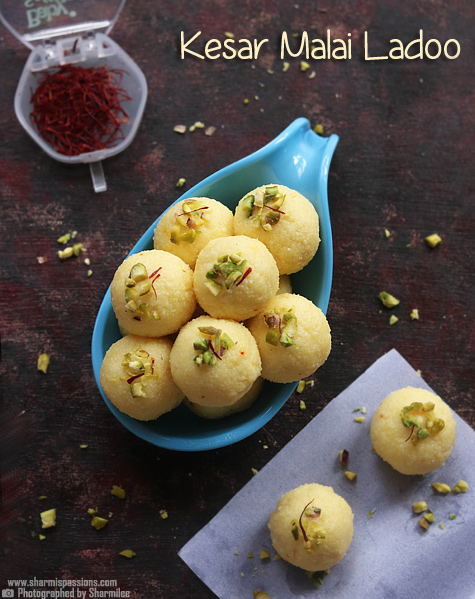
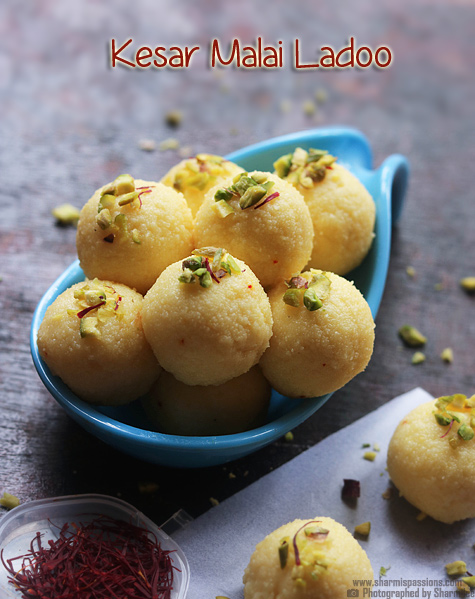
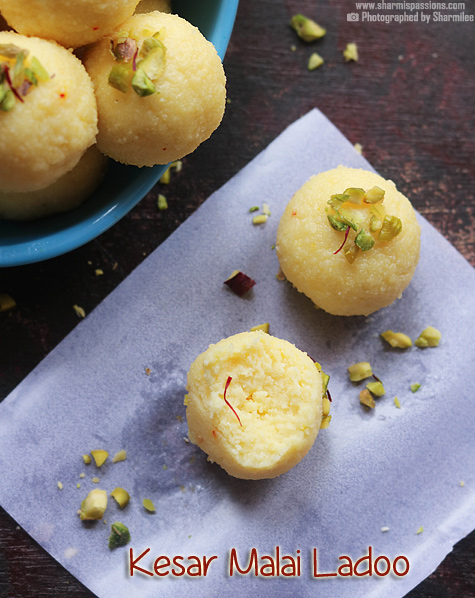
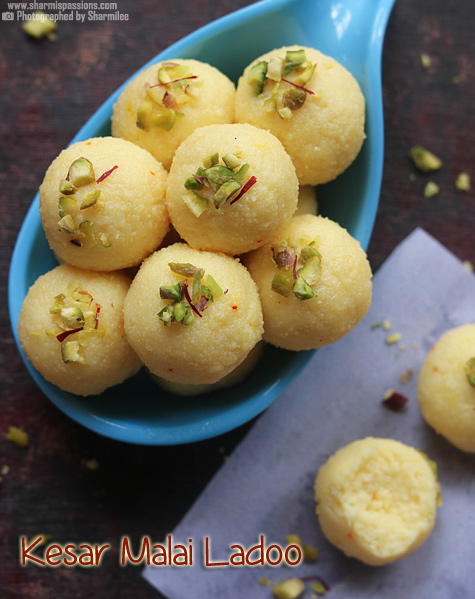
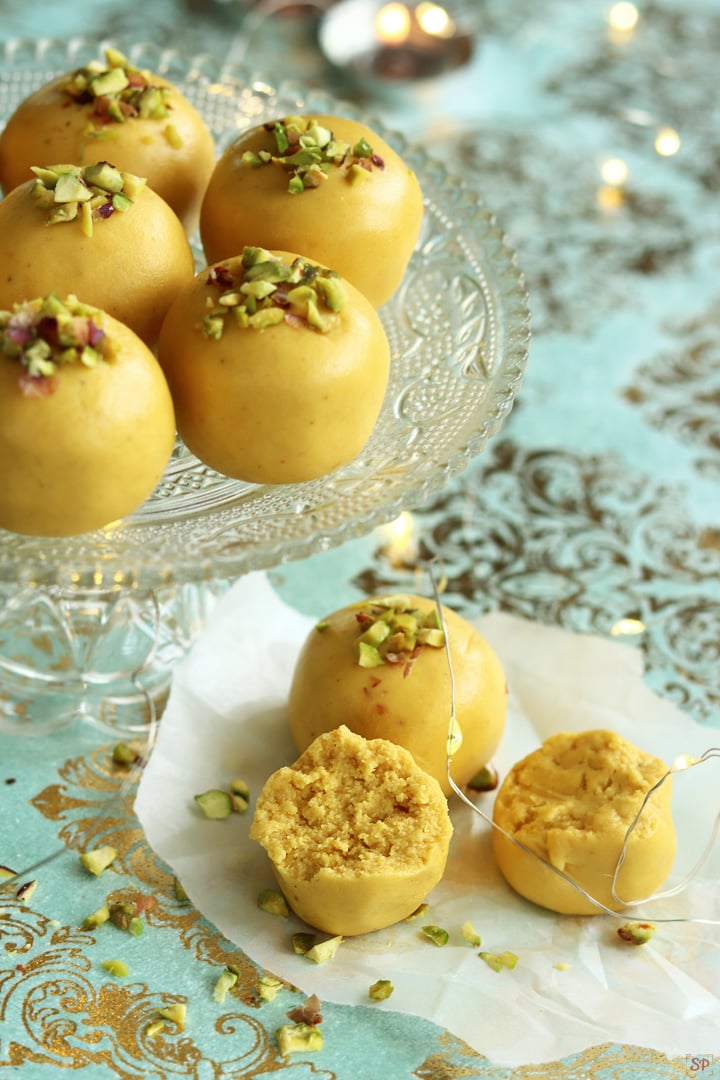
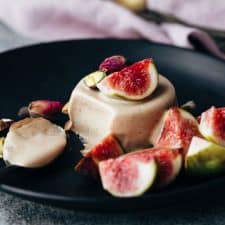
Malai Ladoo is a soft, melt in the mouth sweet made using paneer and condensed milk as main ingredients. It has smooth texture with a yummy taste and a hint of cardamom and rose essence that makes it very special. These ladoos are quick to make and needs only few ingredients from the pantry.
This sweet is often made for family get-togethers or when we want something rich but simple and easy to make. The texture is so soft and light, it just melts as soon you take one bite. The natural milk flavor mixed with saffron gives mild sweetness which feels very comforting. It's one of those sweets which even beginners can try.
[feast_advanced_jump_to]
About Malai Ladoo
Malai Ladoo is one of the simplest milk sweets that gives rich festive taste without much effort. It is made using fresh paneer that is mixed with condensed milk and cooked till it turns thick and dough like. Then we make small soft balls and roll them in chopped nuts for crunch and color.
The word malai means cream and that's exactly what this sweet feel like. It's soft, creamy and so rich even with small bite. Condensed milk gives the sweetness and richness while saffron adds golden shade and aroma. Some people add milk powder or coconut flakes for twist, but honestly the basic version taste best.
Malai Ladoo is perfect if you want quick sweet without deep frying or sugar syrup. It gets ready in one pan and stays good for few days in fridge. You can also flavor with kewra water or skip essence completely.
I usually make this when I got some leftover paneer. It's my quick fix sweet recipe which never fails. Even kids love it for its mild sweetness and soft bite.
Malai Ladoo Ingredients
Paneer - I used fresh homemade paneer, it gives nice soft texture to the ladoo. You can use store one too, just soak it in warm water for few minutes before grinding.
Condensed milk - Gives sweetness and creamy feel. It helps to bind everything well, so no need to add extra sugar.
Ghee - I just used a little for greasing and flavor. You can skip if using non-stick but ghee always gives nice aroma.
Pistachios - I used for garnish and crunch. Almonds or cashews also works.
Cardamom powder - For light aroma and flavor. If it is not there, few drops cardamom essence will do.
Rose essence - I add few drops for floral smell, but can skip if you don't like.
Saffron - Gives lovely golden color and taste. If not available, small pinch of turmeric can be used but flavor will change.
Why This Recipe Works
This is a simple recipe with only few ingredients.
It has soft creamy texture that tastes rich and smooth.
It is made in one pan, no sugar syrup or frying.
You can make ahead and store for few days, perfect for small parties.
It is perfect sweet for beginners, gives great result always.
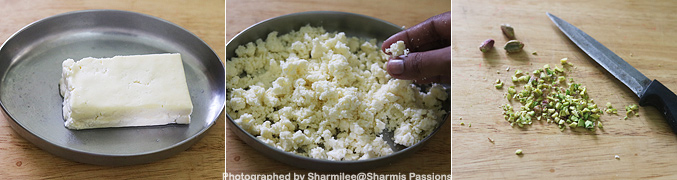
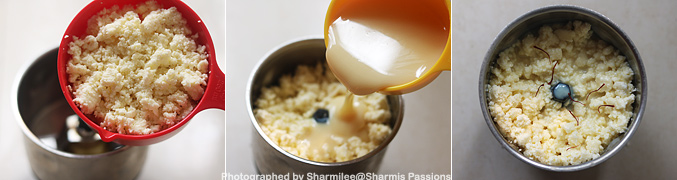
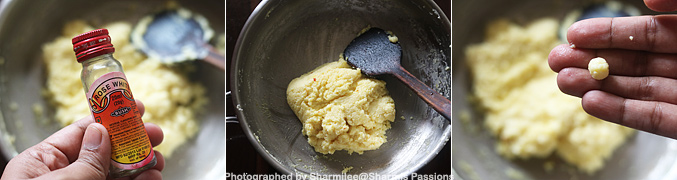
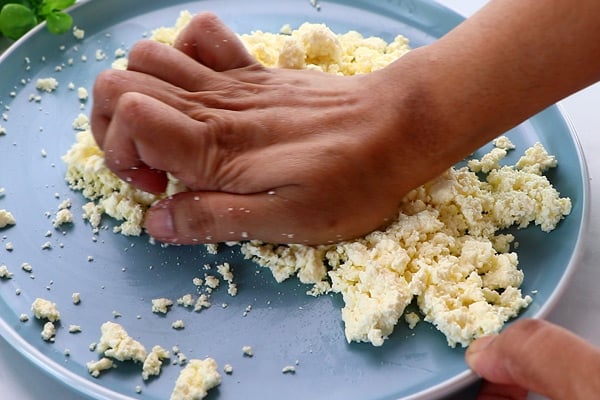
1.Take paneer, crumble it well with your hands, Set aside. Chop the pistachios
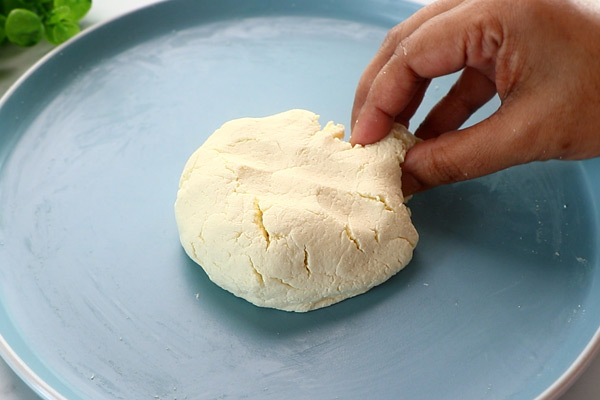
2.In the mixer jar, add crumbled paneer, add condensed milk and saffron
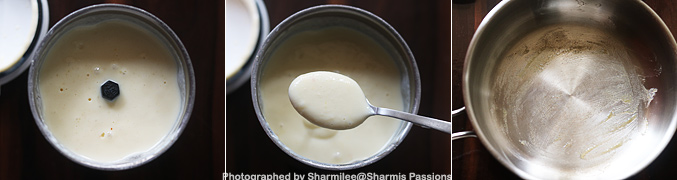
3.Grind it to a fine paste, it will be creamy but will have a slight coarse texture when you touch and see. Now grease the pan with ghee. If you use nonstick pan then no need to grease.
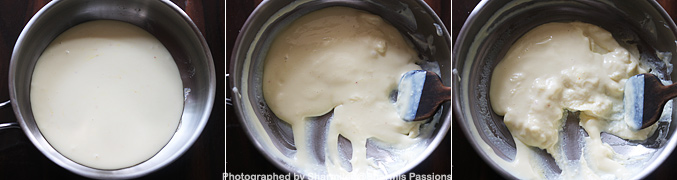
4.Add the paste and start cooking in low flame. In few minutes, it will start to thicken. Keep stirring continuously.
5.Keep cooking until it becomes thick, it will start to roll and textured like below.
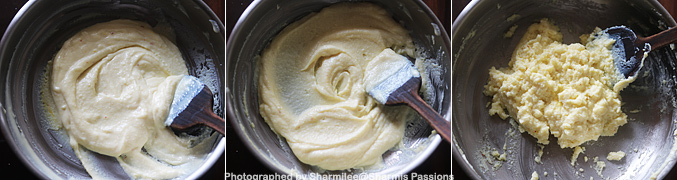
6.When it starts to leave the sides of the pan, add rose essence, cardamom powder and give a quick mix. Pinch a tiny portion, roll and see if it forms a ball, then switch off.
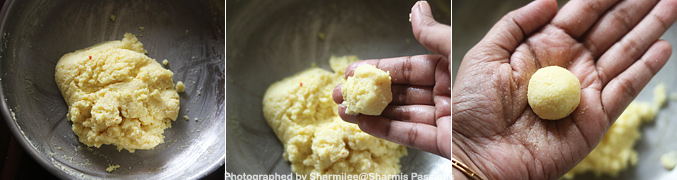
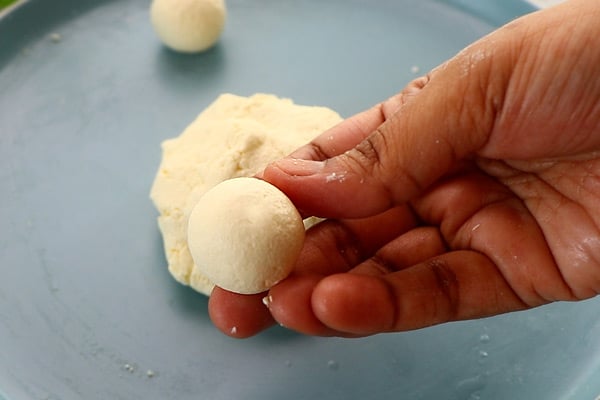
7.It will not be completely dry, it will still be moist. Let it cool down for sometime. When it is still warm, make small balls. It will be moist at this stage but will become firm after cooling down.
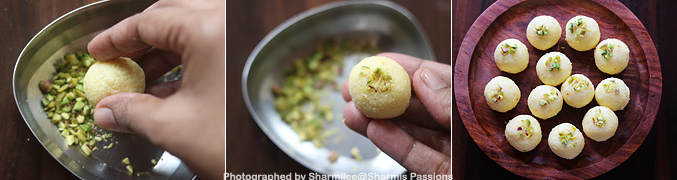
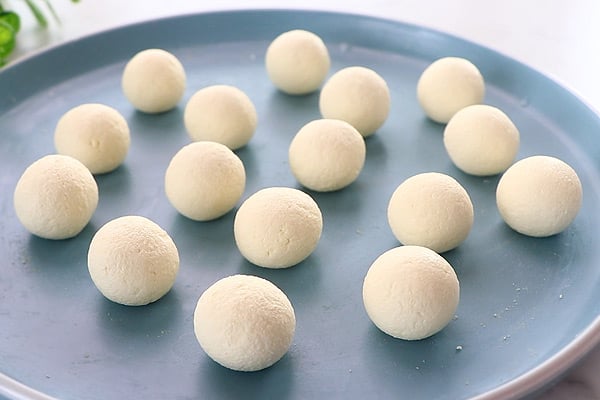
8.Dip each ball into the nuts mixture and arrange it in a plate.
Cool down and store in airtight container.
Expert Tips
Paneer - I use soft and fresh paneer for best result. If the paneer feels bit dry or hard, I just soak it in warm water for few minutes before blending, it makes it turn more soft.
Cooking consistency - Cook the mixture on low flame till it starts leaving the sides of the pan but still feels little moist. Don't overcook it, otherwise the ladoo will turn bit hard once cooled.
Sweetness level - Condensed milk itself gives enough sweetness, but if you prefer more sweet taste, you can sprinkle little sugar while cooking.
Flavor variation - You can customize with the flavors. Add few drops of kewra essence or saffron soaked in the warm milk for richer aroma.
Shaping - I make the ladoos when the mixture is still warm so it rolls easily. If it feels sticky, just apply a few drops of ghee on hands while rolling them.
Serving and Storage
Serve Malai Ladoo as a soft creamy dessert after meal or with other sweets during festive time. It also tastes nice with evening tea or when you crave something milky. Store them in airtight box and keep inside fridge, they stays good for 3 to 4 days. Bring them to room temperature before eating so the texture turns soft again.
FAQS
1.Can I use store bought paneer?
Yes, just soak in warm water before using so it becomes soft and blend nicely.
2.Can I skip saffron?
Yes, you can skip it. The color will be white but taste still good.
3.Why my ladoo turned little hard?
That happens when cooked bit more. Next time switch off earlier when mixture still moist.
4.Can I use milk instead of condensed milk?
Yes, but then shelf life reduces. You can use half milk and half condensed milk too.
5.Can I store longer?
You can just refrigerate them up to 4 days. Don't keep outside long since it has milk.
If you have any more questions about this Malai Ladoo Recipe do mail me at sharmispassions@gmail.com. In addition, follow me on Instagram, Facebook, Pinterest, Youtube and Twitter .
Tried this Malai Ladoo Recipe? Do let me know how you liked it. Also tag us on Instagram @sharmispassions and hash tag it on #sharmispassions.
Malai Ladoo is a soft, melt in the mouth sweet made using paneer and condensed milk as main ingredients. It has smooth texture with a yummy taste and a hint of cardamom and rose essence that makes it very special. These ladoos are quick to make and needs only few ingredients from the pantry.
Take paneer, crumble it well with your hands, set aside.
Chop the pistachios.
In the mixer jar, add crumbled paneer, add condensed milk and saffron.
Grind it to a fine paste, it will be creamy but will have a slight coarse texture when you touch and see.
Now grease the pan with ghee. If you use nonstick pan then no need to grease.
Add the paste and start cooking in low flame. In few minutes, it will start to thicken. Keep stirring continuously.
Keep cooking until it becomes thick, it will start to roll and get textured.
When it starts to leave the sides of the pan, add rose essence, cardamom powder and give a quick mix.
Pinch a tiny portion, roll and see if it forms a ball, then switch off.
It will not be completely dry, it will still be moist. Let it cool down for sometime.
When it is still warm, make small balls. It will be moist at this stage but will become firm after cooling down.
Roll each ball into the nuts mixture and arrange it in a plate.
Cool down and store Malai Ladoo in an airtight container.
Notes
Paneer - I use soft and fresh paneer for best result. If the paneer feels bit dry or hard, I just soak it in warm water for few minutes before blending, it makes it turn more soft.
Cooking consistency - Cook the mixture on low flame till it starts leaving the sides of the pan but still feels little moist. Don't overcook it, otherwise the ladoo will turn bit hard once cooled.
Sweetness level - Condensed milk itself gives enough sweetness, but if you prefer more sweet taste, you can sprinkle little sugar while cooking.
Flavor variation - You can customize with the flavors. Add few drops of kewra essence or saffron soaked in the warm milk for richer aroma.
Shaping - I make the ladoos when the mixture is still warm so it rolls easily. If it feels sticky, just apply a few drops of ghee on hands while rolling them.
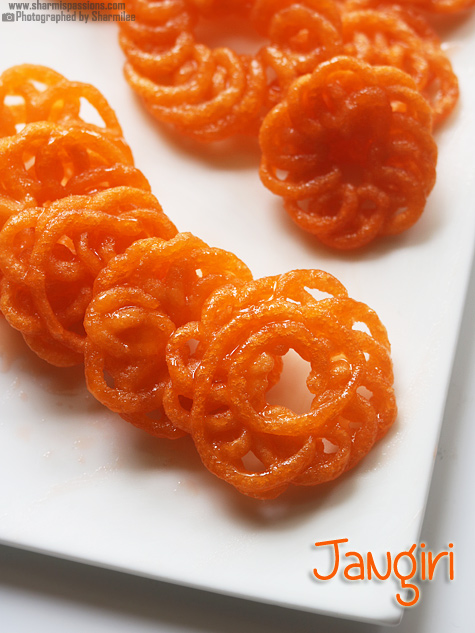
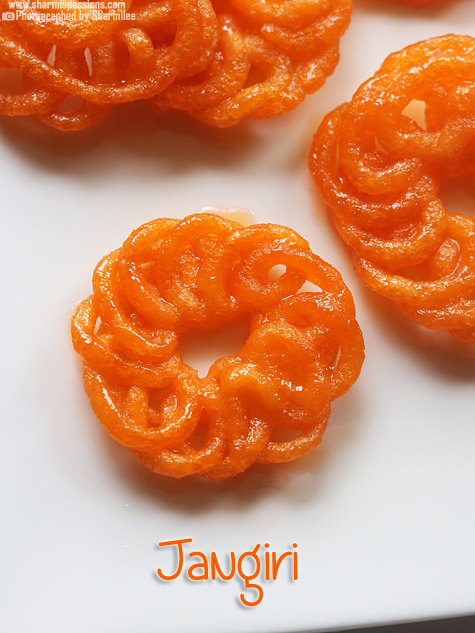
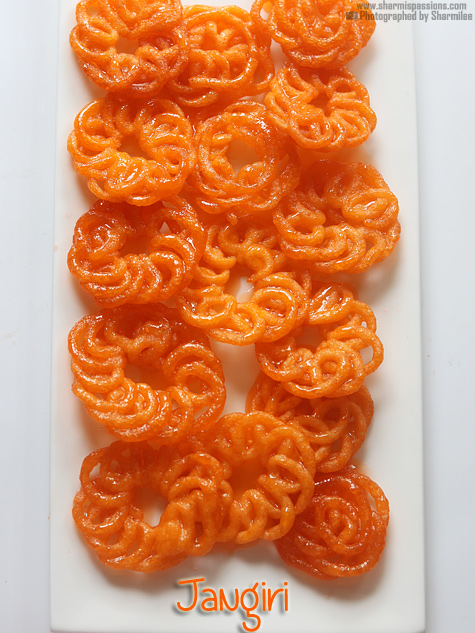
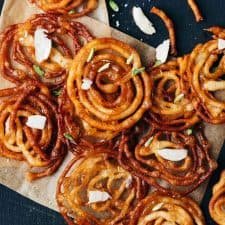
Jangri is a crispy and soft sweet that has a beautiful bright orange color and shiny look which makes it very eye catching on any festive table. It is made by squeezing a smooth urad dal batter into hot oil and soaking it in sugar syrup. This makes jangri crisp on the outside, more soft and chewy inside.
It has that light crunch when you bite and soon turns soft with the syrup sweetness. It is often prepared during family gatherings or special festivals when we wish to make something classic and beautiful. Though it looks difficult, with a bit of patience and right consistency it turns out really perfect.
[feast_advanced_jump_to]
About Jangri
Jangri is a very old South Indian sweet which many of us have grown up seeing in sweet shops displayed in glass cases. It is sometimes confused with jalebi but both are different in taste and ingredients. Jangri is made using urad dal batter while jalebi is made using maida and fermented batter.
The sugar syrup gives jangri its main sweetness, it should be slightly sticky and aromatic with rose essence or cardamom. The color is usually bright orange which looks beautiful and festive. The texture is soft, juicy and it stays like that for many hours if soaked properly.
Over time there are many small variations seen, some people add little rice flour for extra crispness, while some add ghee in syrup for more aroma. Few make them mini sized and some prefer the big round ones. The method remains almost same but what matters is the consistency of batter and syrup which decides the final result.
I usually prepare jangri when I have some relaxed weekend or when we plan a family get together. It takes little time and focus but it gives so much happiness to see those golden rings floating and soaking in syrup.
Jangri Ingredients
Urad dal - I have used whole urad dal without skin, it gives the soft and fluffy texture for the batter. You can use split urad dal also but the batter may not be that smooth.
Idli rice - I add little idli rice for giving slight crispness to jangri and to help it hold shape. You can skip it if you like more soft texture.
Orange food color - I use this for giving that bright traditional color. You can skip or use natural food color like saffron water.
Sugar - I add white sugar for the syrup, it gives a shiny glaze and light sweetness. You can try jaggery syrup version for a earthy taste.
Rose essence - I add few drops in syrup to give a pleasant floral smell. You can use cardamom powder if you want more Indian touch.
Lemon juice - I add to the syrup to stop crystallization and to keep syrup smooth. You can even use vinegar in very small amount.
Oil - I have used refined oil for deep frying. You can mix little ghee for extra flavor and aroma.
Why This Recipe Works
This recipe is simple once you understand the batter and syrup consistency.
The jangris stay soft and juicy for long time as syrup coats evenly.
You can control sweetness and color as per your preference.
The urad dal gives perfect spongy and light texture inside.
It is a nice sweet to prepare ahead and serve for any special meal or festival.
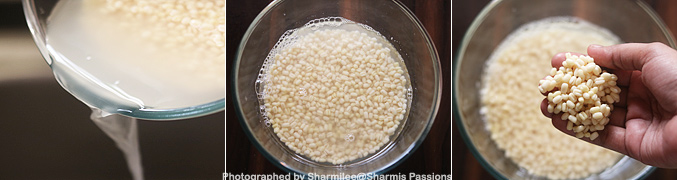
1.Rinse rice and urad dal twice, then soak for 2 hours.
2.Then grind it in a wet grinder with very little water. Grind it to a thick batter like medu vada batter. Scrape the sides every now and then. Grind it for atleast 30-40 minutes. When you take a pinch of the batter and put it in water, it should float that's the right consistency. The batter should be more like butter very smooth and light.
3.Look at the batter fluffy and smooth.Take it a mixing bowl, add salt and food color to it.Set aside.
4.In parallel make the sugar syrup - Take sugar in a wide bottomed pan ,add water to it and let it boil. When it becomes thick and sticky start checking for string consistency. When it is half string that is it will start to form 1 string but will not stand that is the stage we are looking for, switch off.
5.Add rose essence and food color.
6.Then add lemon juice, Set aside. The syrup will be sticky, it will thicken with time, to avoid crystallization we are adding lemon juice. Now get ready with your piping bag or zip lock cover or jangiri cloth. Amma gave this cloth but I was comfortable using zip lock only so used it.
7.Mix the batter well for the color and salt to be mixed evenly. Take a zip lock cover fill it with the batter, cut a small hole.
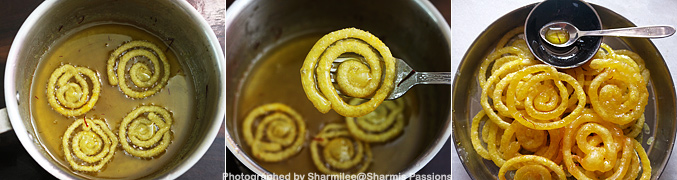
8.First I tried in a plate, it is not bad right?! Heat oil, oil temperature is very important it should not smoking hot, it should be hot. Squeeze and draw patterns, do not crowd much.
9.I used my paniyaram ladle to flip. You can use a skewer or wooden chopstick too .Flip over and cook. Deep fry till both sides are slightly crisp but color should not change. Drain and remove from oil.
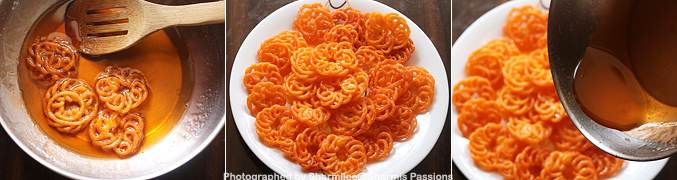
10.Quickly add to warm syrup for 3-5 minutes for each batch, then drain and arrange it in a plate. Repeat the process till the entire batter finishes. Finally after all the jangiris are fried, you can pour the remaining syrup over the jangiris.
Enjoy!
Expert Tips
Batter consistency - The batter should be thick but smooth, when dropped in water it should float. This is the key for good jangri.
Oil temperature - Keep oil hot but not smoking. I usually lower flame while drawing the shapes and increase slightly while frying.
Syrup texture - Make sure syrup is in half string consistency. If thick it will not soak properly, if thin jangri will turn soggy.
Drawing shapes - If you are not confident, practice on plate first then try in oil. Even if shape is not perfect, taste will be the same.
Soaking time - Keep each batch in syrup for 3 to 5 minutes. I turn them once or twice to let syrup absorb evenly.
Serving and Storage
Serve jangri as a sweet treat after meals or along with evening tea. It looks beautiful in serving plate and can also be packed as homemade gift. Store leftover jangri in a airtight container after it cool down fully. It stays good for 2 to 3 days in room temperature or you can keep in fridge for few more days. If kept in fridge, warm it little before serving to get that soft fresh taste again.
FAQS
1.Can I make jangri without food color?
Yes, you can use saffron or turmeric water for mild natural color, though the traditional bright orange look will be missing.
2.Why my jangri is not soft?
The syrup might have gone too thick or batter could be over beaten. Try using half string syrup next time.
3.Can I grind the batter in mixie instead of grinder?
Yes you can, but the texture may be little coarse. If using mixie, add few drops water at a time and grind patiently.
4.Can I make jangri a day before serving?
Yes you can prepare one day before and keep covered. It actually tastes better next day as syrup sets well.
5.Why my jangri lost shape in oil?
The batter may be loose or oil too hot. Make batter slightly thick and regulate flame while frying.
If you have any more questions about this Jangri Recipe do mail me at sharmispassions@gmail.com. In addition, follow me on Instagram, Facebook, Pinterest ,Youtube and Twitter .
Tried this Jangri Recipe? Do let me know how you liked it. Also tag us on Instagram @sharmispassions and hash tag it on #sharmispassions.
Jangri is a crispy and soft sweet that has a beautiful bright orange color and shiny look which makes it very eye catching on any festive table. It is made by squeezing a smooth urad dal batter into hot oil and soaking it in sugar syrup. This makes jangri crisp on the outside, more soft and chewy inside.
Rinse rice and urad dal twice, then soak for 2 hours. Then grind it in a wet grinder with very little water.
Grind it to a thick batter like medu vada batter. Scrap the sides every now and then. Grind it for at least 30-40 minutes. When you take a pinch of the batter and put it in water, it should float that's the right consistency. The batter should be more like butter very smooth and light.
Take it a mixing bowl, add salt and food color to it. set aside.
Making Sugar Syrup:
Take sugar in a wide bottomed pan, add water to it and let it boil. When it becomes thick and sticky start checking for string consistency. When it is half string (that is it will start to form a string but will not stand), switch off.
Add rose essence and food color. Then add lemon juice, set aside. The syrup will be sticky, it will thicken with time, to avoid crystallization we are adding lemon juice.
Making Jangri:
Now get ready with your piping bag or zip lock cover or jangri cloth.
Mix the batter well for the color and salt to be mixed evenly. Take a zip lock cover fill it with the batter, cut a small hole.
Heat oil, oil temperature is very important it should not smoking hot, it should be hot. Squeeze and draw patterns, do not crowd much.
I used my paniyaram ladle to flip. You can use a skewer or wooden chopstick too. Flip over and cook. Deep fry till both sides are slightly crisp but color should not change. Drain and remove from oil.
Quickly add to warm syrup for 3-5 minutes for each batch, then drain and arrange it in a plate. Repeat the process till the entire batter finishes. Finally after all the jangiris are fried, you can pour the remaining syrup over the jangiris.
Offer Jangris to God if you are making for Diwali and enjoy!
Notes
Batter consistency - The batter should be thick but smooth, when dropped in water it should float. This is the key for good jangri.
Oil temperature - Keep oil hot but not smoking. I usually lower flame while drawing the shapes and increase slightly while frying.
Syrup texture - Make sure syrup is in half string consistency. If thick it will not soak properly, if thin jangri will turn soggy.
Drawing shapes - If you are not confident, practice on plate first then try in oil. Even if shape is not perfect, taste will be the same.
Soaking time - Keep each batch in syrup for 3 to 5 minutes. I turn them once or twice to let syrup absorb evenly.
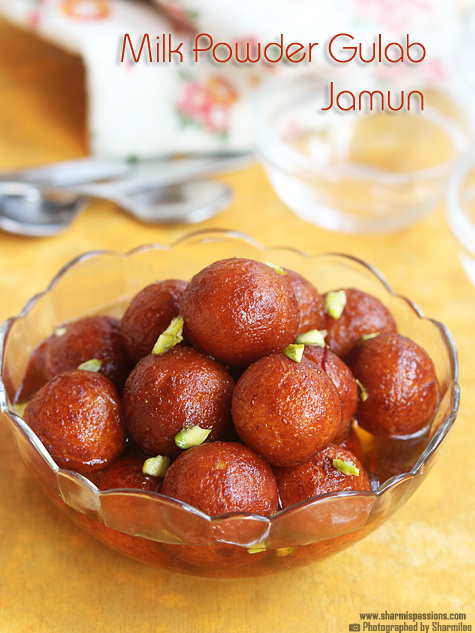
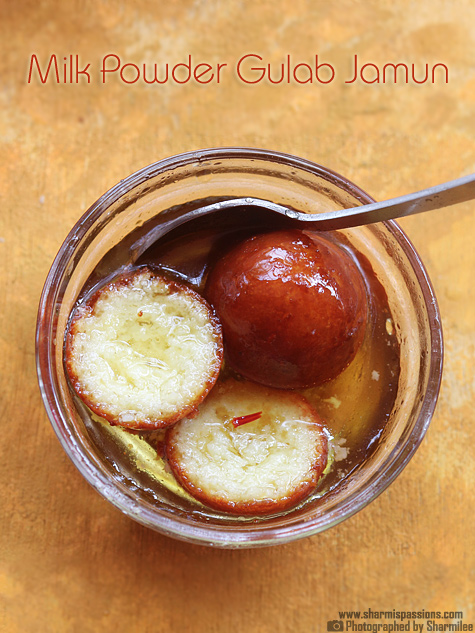
Milk Powder Gulab Jamun is one of the easiest sweets to make when sudden guests arrive or festival vibe hits home. It looks rich and tastes almost same like the traditional khoya jamun. Soft balls made from milk powder dough are fried until golden brown and soaked in sugar syrup. Every bite just melts inside the mouth with that sweet milky flavor.
You do not need to run behind khoya or condensed milk. Just simple ingredients from the kitchen, few steps and you get perfect Gulab Jamuns that look and taste same like bakery ones. When warm jamuns soak in syrup, it feels like magic happening in pot. I have been making this version quite often as it saves time and gives that authentic feel.
[feast_advanced_jump_to]
About Milk Powder Gulab Jamun
Milk Powder Gulab Jamun is a delicious alternate made using milk powder, ghee, little maida and rava. The dough is formed soft, fried slowly till golden brown and then soaked in light sugar syrup. The texture comes very soft and juicy if you follow the right steps.
Many of us hesitate to make Gulab Jamun at home thinking it is complicated, but honestly it is not. The trick is in getting the dough right and controlling oil temperature. I have spoiled few batches in early days but once I learnt the right flame and syrup consistency, it became my favorite sweet to make at home.
The sugar syrup is made with sugar, saffron and little rose essence which gives it mild fragrance. The jamuns soak beautifully if the syrup is warm when we drop them in. I always give 2 to 3 hours resting time so that every jamun become soft inside. The best part is it stays soft even next day when reheated slightly.
I still remember my first successful batch, I was so happy that I shared it with neighbors immediately. Now it has become a regular sweet during Diwali or any celebration.
Milk Powder Gulab Jamun Ingredients
Milk powder - I have used one cup milk powder for this. It gives the main body and soft milky taste to the jamuns. You can use any good brand, it will work fine.
Ghee - I used homemade ghee, it gives nice aroma and rich flavor to the dough. You can also use store bought one if you like, but homemade always taste more better.
Oil - I add little oil along with ghee so that the dough stays soft and not dry after frying. You can use any cooking oil which has no strong smell.
Fine sooji (rava) - I use fine sooji as it gives light texture and helps jamuns to hold shape well. You should always soak it before adding to dough.
Maida (plain flour) - I add little maida as binding agent which gives smooth finish. If you skip it, jamuns may break while frying in oil.
Baking powder - I always add just a small pinch, it helps to make jamuns soft and fluffy. You should not add more else it changes taste.
Milk - I use milk to bring the dough together. Add little at a time, only till it gathers nicely, not too much.
Sugar - I use white sugar for making syrup. It gives clear syrup and perfect sweetness that balance well.
Saffron - I add few strands for nice color and beautiful smell to syrup. It is optional but gives lovely touch.
Rose essence - I like to add few drops at the end, it gives very nice flavor that lift up the whole sweet. You can skip if you not prefer strong smell.
Oil (for frying) - I use fresh oil and always fry in medium low flame so jamuns get even brown color.
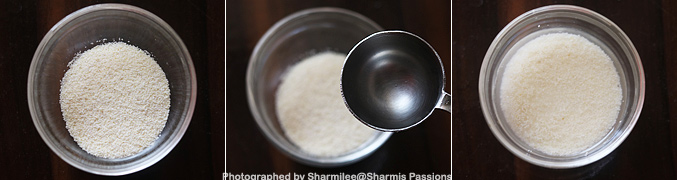
1.Take sooji/rava in bowl, add water to it and keep aside for 10 minutes
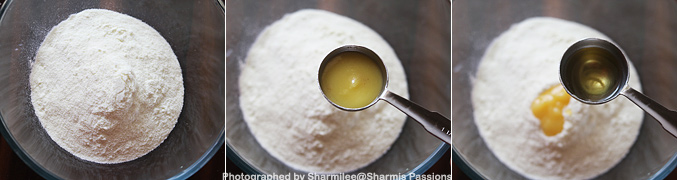
2.In a mixing bowl - add milk powder, ghee and oil
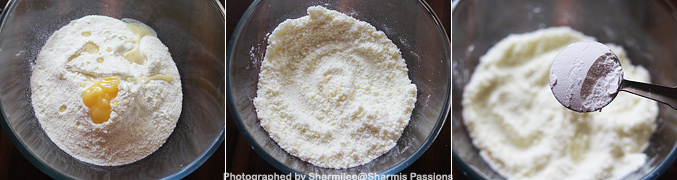
3.Mix well with your fingers, don't use your, don't knead just mix with your finger tips for even distribution of oil and ghee. Now add maida.
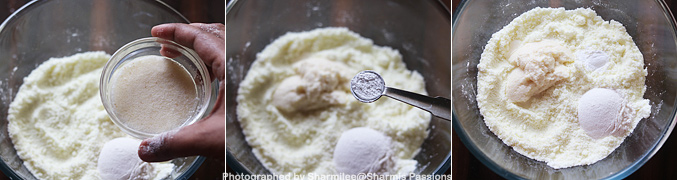
4.Then soaked rava, baking powder.
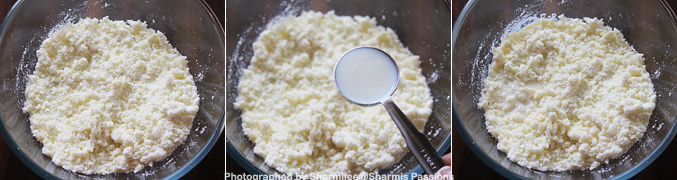
5.Now again mix well with your fingers, Now add a tablespoon of milk first if it gathers then don't add more. Else add another tablespoon .
6.Gather to form a sticky dough, Now keep covered with a cloth for 10 minutes. After 10mins you will have a dough like this.
7.To make the sugar syrup : Take sugar, water and saffron in a pan mix well. Then heat it up and let it boil for at least 10-12 minutes in medium flame. It may take some time so meanwhile you can continue making the jamun balls. Stir the syrup in between. When the sugar syrup starts turning sticky switch off.
8.The syrup should be sticky and the consistency should look like oil, add rose essence and Switch off and set aside. Now roughly pinch the dough and keep in a separate plate.
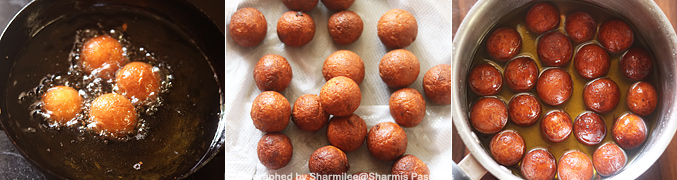
9.Roll smoothly without any cracks. Don't apply pressure while rolling and also don't roll them tight, the balls should be smooth. The jamuns will grow in size so make small sized balls. Heat oil in a kadai not smoking hot, just hot enough to fry, - when you put a small pinch it will should immediately come up with changing color that is the right stage. When oil is hot, keep in medium low flame drop few jamuns(may be 3-4) at a time, Roll the jamuns with a ladle when its getting cooked in the oil for even cooking and coloring.
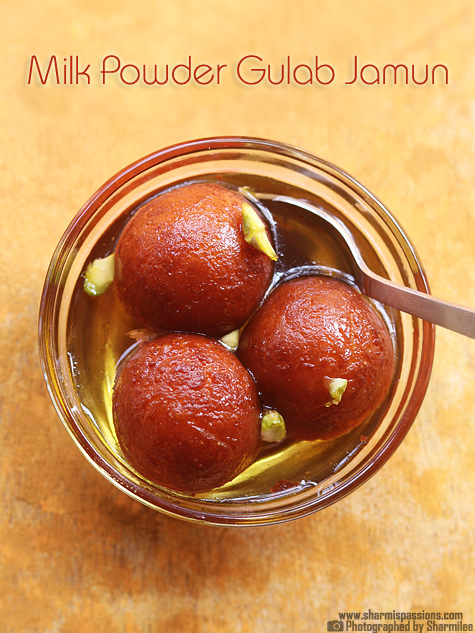
10.Fry in low flame till golden brown. Drain in tissue and immediately add it to warm sugar syrup. Cover and let it rest for 2 hours for the jamuns to absorb the sugar syrup well.
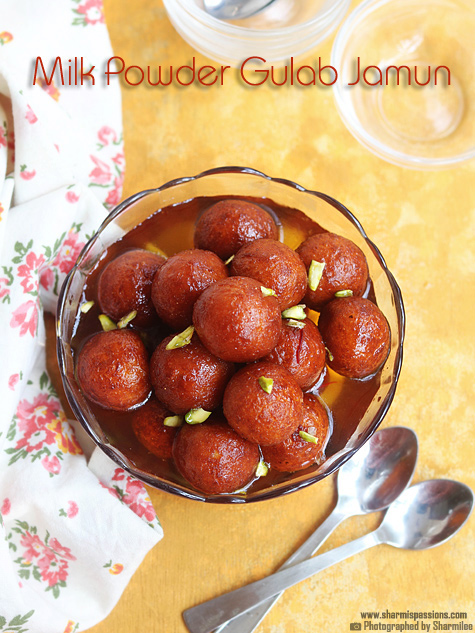
Garnish with any nuts of your choice.
Expert Tips
Dough Texture - The dough has be soft and little bit sticky, it should not be too dry. If it looks dry, sprinkle few drops of milk and mix it again gently.
Do Not Overknead - I only mix gently using fingers. If you knead too much, jamuns will turn bit hard after frying.
Oil Temperature - Keep oil hot but not smoking. Drop a small piece first to check, it should come up slowly without changing colour very fast.
Sugar Syrup Consistency - The syrup should be little sticky like oil, not string consistency. Warm syrup helps jamuns to absorb well and stay juicy.
Resting Time - Always soak jamuns for 2 to 3 hours before serving. It makes them turn fully soft and juicy when you eat.
Serving and Storage
Serve them warm or in room temperature as you like. You can also garnish with some chopped pistachios or almonds on top for nice look and taste. It pairs well with vanilla ice cream too for a fusion touch.
Store leftovers in airtight box inside fridge. Just warm lightly before serving again, they stay soft even after two days.
FAQS
1.Can I skip baking powder?
Better not skip. It helps jamuns stay soft and prevents them from turning dense.
2.Why my jamuns cracked while frying?
The dough may be dry or you rolled it too tight. Add few drops of milk next time and roll smooth.
3.My jamuns turned brown fast but raw inside, why?
This happens if the oil is too hot. Fry in medium low flame for even cooking.
4.Can I add cardamom?
Yes, cardamom powder gives good smell too. You can add either one.
5.How long can I store Gulab Jamun?
It keeps well for 3 to 4 days in fridge. Just warm it them lightly before serving.
If you have any more questions about this Milk Powder Gulab Jamun Recipe do mail me at sharmispassions@gmail.com. In addition, follow me on Instagram, Facebook, Pinterest, Youtube and Twitter .
Tried this Milk Powder Gulab Jamun Recipe ? Do let me know how you liked it. Also tag us on Instagram @sharmispassions and hash tag it on #sharmispassions.
Milk Powder Gulab Jamun is one of the easiest sweets to make when sudden guests arrive or festival vibe hits home. It looks rich and tastes almost same like the traditional khoya jamun. Soft balls made from milk powder dough are fried until golden brown and soaked in sugar syrup. Every bite just melts inside the mouth with that sweet milky flavor.
Take sooji / rava in bowl, add water to it and keep aside for 10 minutes.
In a mixing bowl - add milk powder,ghee and oil.
Mix well with your fingers, don't use your, don't knead just mix with your finger tips for even distribution of oil and ghee. Now add maida.
Then soaked rava,baking powder.
Now again mix well with your fingers, now add a tablespoon of milk first if it gathers then don't add more, else add another tablespoon .
Gather to form a sticky dough, now keep covered with a cloth for 10mins. After 10mins you will have a dough.
Making Sugar Syrup:
To make the sugar syrup : Take sugar, water and saffron in a pan mix well.
Then heat it up and let it boil for at least 10-12 minutes in medium flame. It may take some time so meanwhile you can continue making the jamun balls.
Stir the syrup in between. When the sugar syrup starts turning sticky switch off.
The syrup should be sticky and the consistency should look like oil, add rose essence, switch off and set aside.
Jamun Making:
Now roughly pinch the dough and keep in a separate plate.
Roll smoothly without any cracks. Don't apply pressure while rolling and also don't roll them tight, the balls should be smooth. The jamuns will grow in size so make small sized balls.
Heat oil in a kadai not smoking hot, just hot enough to fry, - when you put a small pinch it will should immediately come up with changing color that's the right stage.
When oil is hot, keep in medium low flame drop few jamuns (may be 3-4) at a time, roll the jamuns with a ladle when its getting cooked in the oil for even cooking and coloring.
Fry in low flame till golden brown. Drain in tissue and immediately add it to warm sugar syrup.
Cover and let it rest for 2 hours for the jamuns to absorb the sugar syrup well.
Garnish Milk Powder Gulab Jamun with any nuts of your choice.
Notes
Dough Texture - The dough has be soft and little bit sticky, it should not be too dry. If it looks dry, sprinkle few drops of milk and mix it again gently.
Do Not Over knead - I only mix gently using fingers. If you knead too much, jamuns will turn bit hard after frying.
Oil Temperature - Keep oil hot but not smoking. Drop a small piece first to check, it should come up slowly without changing color very fast.
Sugar Syrup Consistency - The syrup should be little sticky like oil, not string consistency. Warm syrup helps jamuns to absorb well and stay juicy.
Resting Time - Always soak jamuns for 2 to 3 hours before serving. It makes them turn fully soft and juicy when you eat.
Learn to make Easy Motichoor Ladoo recipe with a detailed video tutorial and step by step photos. A failproof, beginner friendly recipe that guarantees soft, decadent, and delicious ladoos perfect for any festival or celebration. Soft, rich, and bursting with flavor of ghee and saffron, Motichoor Ladoo is one of the most popular and favorite...
Learn how to make Instant Milk recipe with a detailed video tutorial and step by step photos. Quick, easy and irresistibly delicious milk sweet comes together in just 10 minutes - perfect for Diwali or any festive celebration! Diwali is here and it is my most favorite time of the year. I love making elaborate...
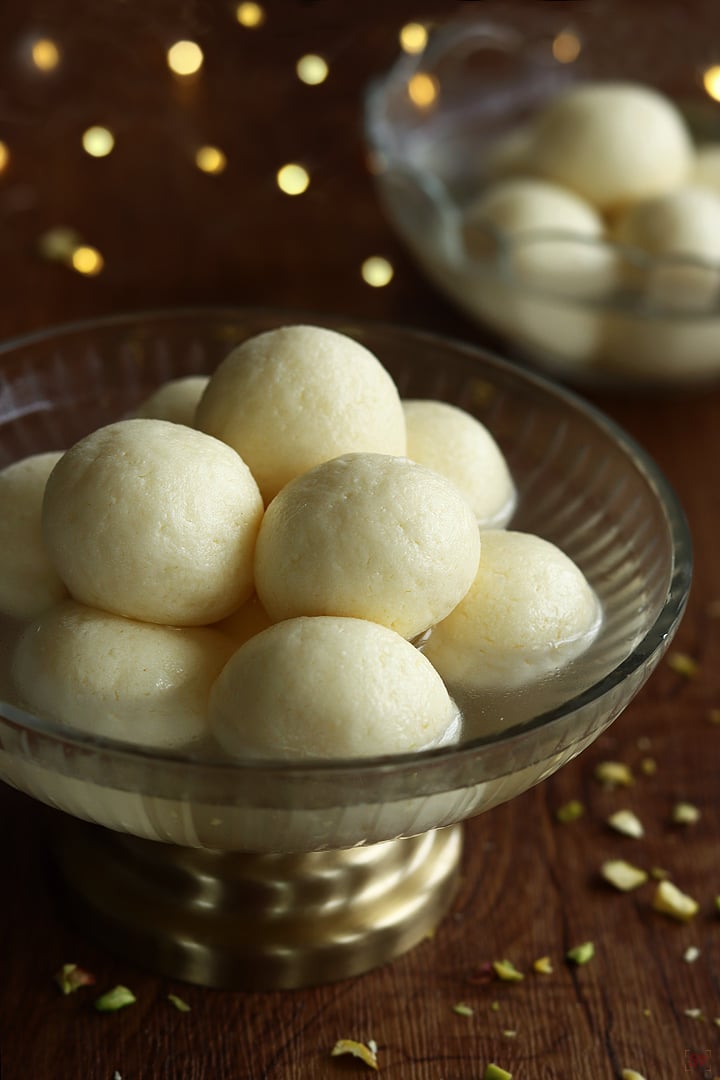
Rasgulla is a popular Indian sweet that is made for special occasions & Diwali across India but relished almost every other day after meal in Bengal. This recipe has a mild sweet taste, and when you bite, the juicy soft texture feels really nice. And yes making these rasgullas at home need some patience, but once you see them turning spongy in syrup, the effort feels worth it. Learn to make easy and perfect spongy rasgulla with the help of step by step pictures and video.
This sweet dish is often served after lunch or dinner as an after meal dessert. Unlike ghee loaded sweets, rasgulla never feels heavy, so even if stomach is already full, you can still enjoy one or two. It is made using very simple ingredients like milk, vinegar, sugar and cardamom.
[feast_advanced_jump_to]
About Rasgulla
RAsgulla literally means ' syrup filled balls'. Rasgulla is made by curdling milk then separating chenna(paneer or Indian cottage cheese). Then the separated chenna is kneaded and shaped into smooth balls which is cooked in sugar syrup till they turn light and spongy.
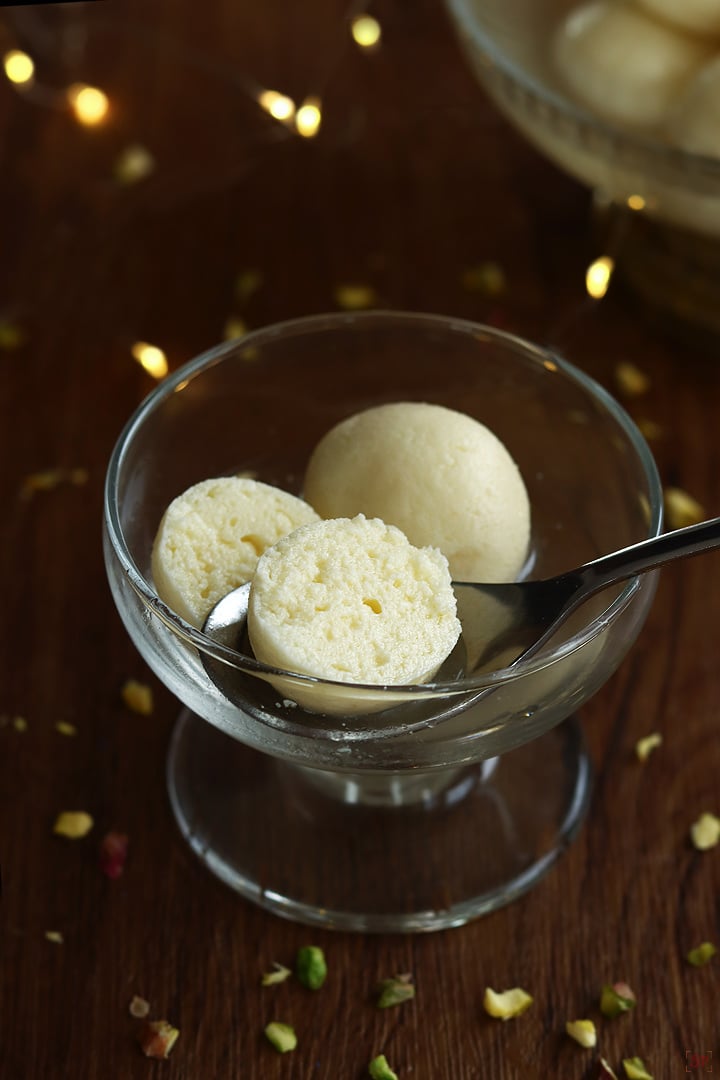
Rasgulla is one of the most loved sweets across India. These are soft when pressed, and fully soaked in sugar syrup inside. The syrup is thin, lightly sweet with cardamom or sometimes rose essence, giving a gentle flavor. That balance makes rasgulla different from heavy milk sweets and keeps it refreshing even after a full meal.
Each rasgulla soaks syrup fully, so every bite feels juicy but never sticky. The pure white round look also makes it very tempting to see, and many people serve it chilled which makes the taste even better. The only main care is making smooth chenna, because that decides how soft the rasgullas will come. Once chenna is perfect, rest is easy to handle.
There are many versions too. You can fill dry fruits inside, or use saffron or rose water in the syrup, and there is a famous version called chhena poda which is baked, it has a caramel taste. Each style has its own charm, but still this classic white rasgulla is the most loved.
I usually make rasgulla during festive days and sometimes even on weekends when we want a sweet. It is easy to serve, everyone at home enjoys. Mittu is fond of rasgulla and demands it during special occasions especially her birthday. Gugu loves rasmalai so make it with few of them just for him. I love rasmalai more than rasgulla but can easily gulp few rasgullas too.
Rasgulla Video
Rasgulla Ingredients
Milk - I have used full cream milk as it gives rich and soft chenna. I would recommend using only full fat milk or any thick milk. Traditionally buffalo milk is used.
Vinegar, water - Vinegar is mixed with water to curdle milk. This helps to make chenna soft and not rubbery.
Sugar - I have used white sugar for making syrup, it makes rasgulla sweet and juicy, you can also adjust sugar depending on your taste.
Cardamom powder - I just added 3 small cardamom. You can even add few drops rose essence if you like the flavor.
Why This Recipe Works
This recipe is simple with very few ingredients, so anyone can try at home.
The rasgullas turn soft and spongy if the tips are followed properly.
You can serve them chilled which makes it very refreshing after a meal.
This recipe works well for casual family after meal desserts.
You can just flavor the syrup in many ways, making it a versatile recipe.
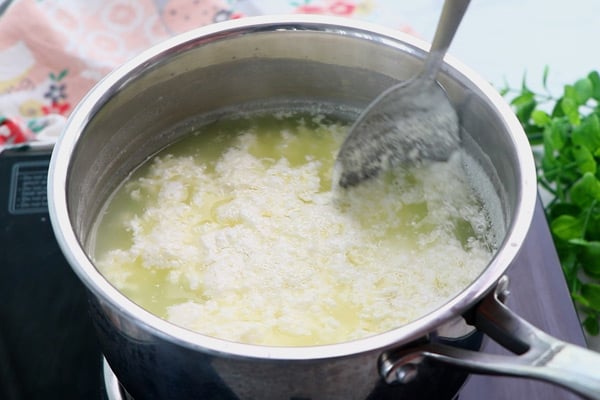
1.To a sauce pan add 1 liter milk. Stir and boil for a minute. Switch off and let it rest for 2-3 minutes.
2.To a small bowl add 2 tablespoon vinegar, 2 tablespoon water, mix it well and set aside.
3.Now add vinegar water solution little by little and stir gently. Now the flame is off, this helps to slowly curdle milk and the resulting chenna is so soft.
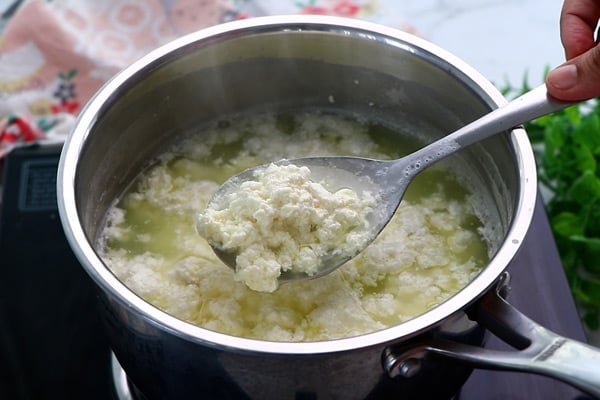
4.Now whey water(green liquid) and chenna(white solid) separates.
5.Now it is curdled completely. Switch off.
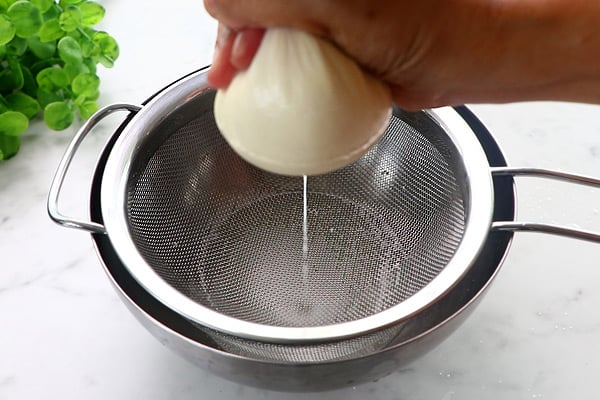
6.Transfer this to a cloth placed on a strainer. Keep a bowl underneath to collect the whey water. You can use this whey water for kneading chapathi dough or for curdling milk again.
7.Rinse it with water well.
8.Squeeze excess water.
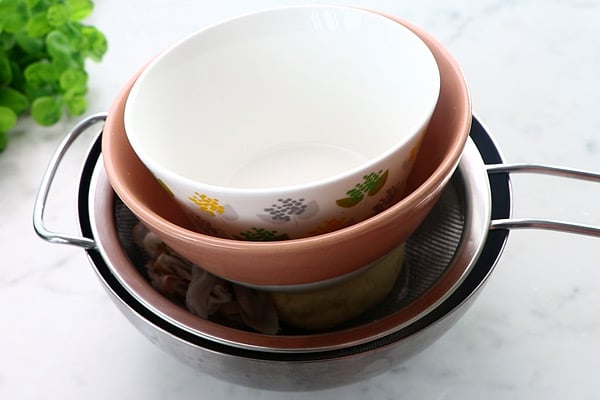
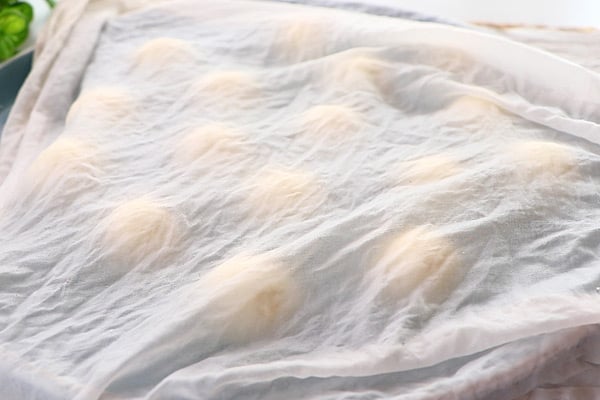
9.Roll and place it on the strainer. Keep 2 bowls on it. Do not keep heavy weight. Set aside for 10 minutes.
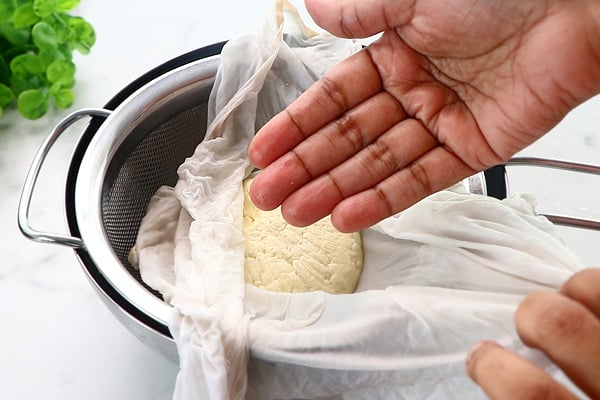
10.Now open, moisture should be still there slightly, it should not be dry.
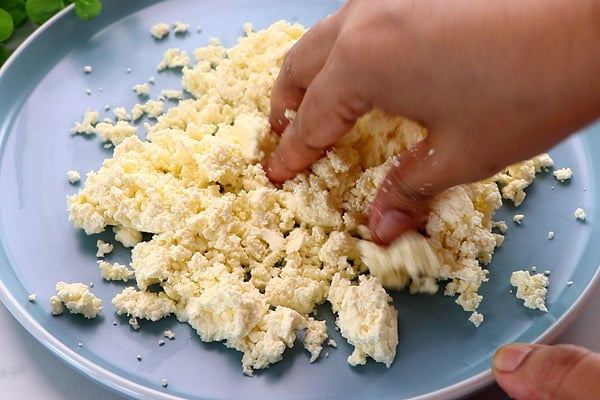
11.Transfer the prepared chenna to a wide plate crumble it first.
12.Knead it well using your palm like shown.
13.Knead for 10 minutes or until the texture changes.
14.At one stage it will gather to a mass without sticking. Make a dough like this. Pinch a small portion.
15.Roll between your palms gently and smoothly.
16.It is ready, Repeat to finish.
17.All the balls are made and ready!
18.Cover it with a wet cloth to avoid drying.
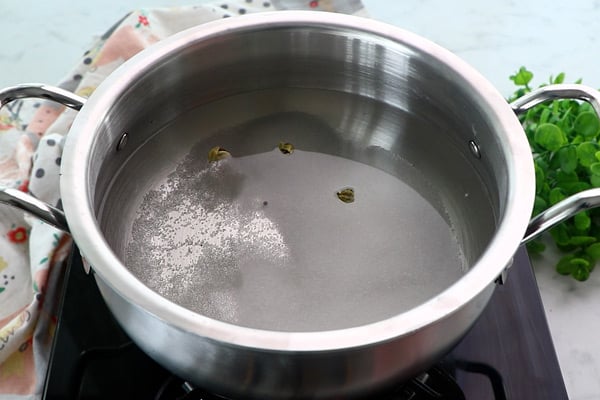
19.To a wide pot add 1 and ½ cups sugar along with 4 cups water and 3 small cardamom.
20.Stir until sugar dissolves completely. Let it boil for 5 minutes.
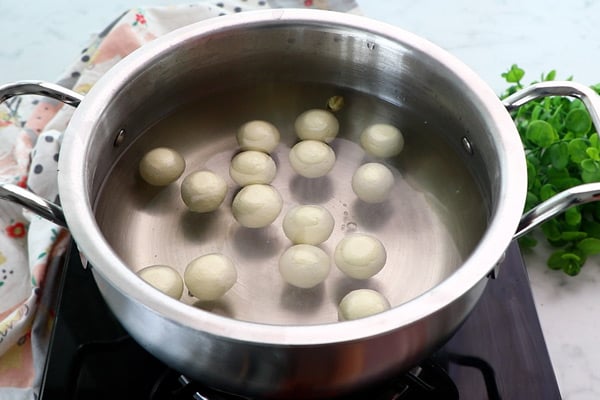
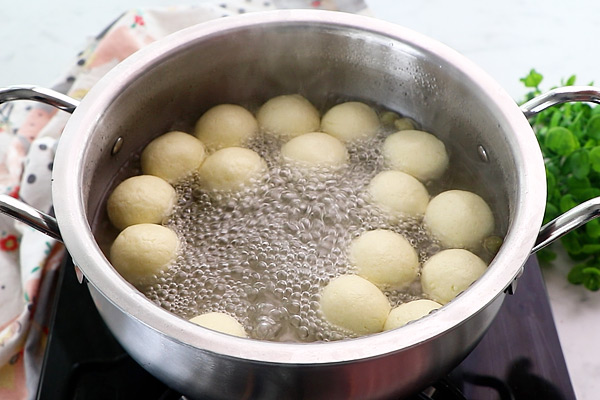
21.Give a quick mix. Add the prepared balls slowly.
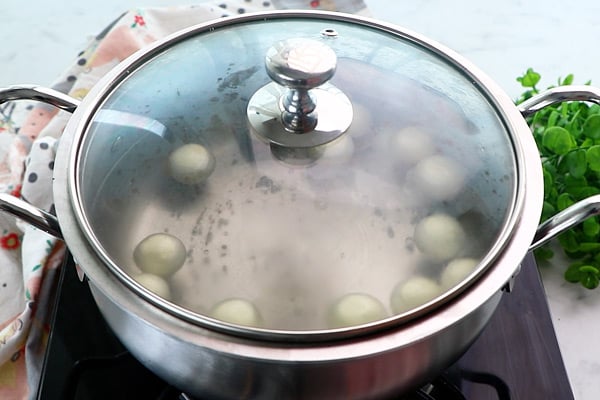
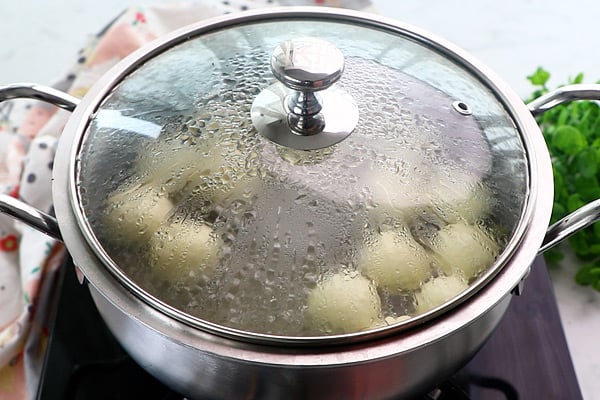
22.Cook covered in high heat for 10 minutes.
23.You can see through the glass that it is doubled in size.
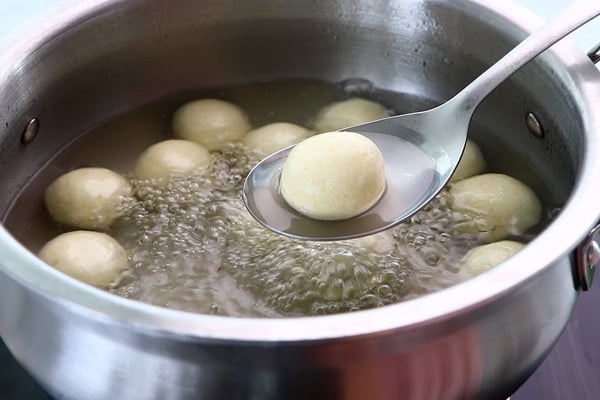
24.Now open slightly stir and cook covered in medium heat again for 5 minutes.
25.Rasgulla is ready!
Chill for minimum 30 minutes in fridge then serve!
Expert Tips
Vinegar solution - Vinegar when mixed with water is more concentrated and makes chenna soft.
Preparing chenna - Boil milk give a quick stir and switch off, let it rest for few minutes before adding vinegar solution. Add vinegar, water mixture little by little and stir gently.
Kneading - I usually knead for at least 7-10 minutes till dough becomes smooth, this is what make rasgullas smooth and crack free. Make sure you do not over knead then fat will get released.
Shapecarefully - The balls must be smooth without cracks, I roll them gently in my palm for uniform shape.
Sugar syrup - I always use wide vessel so balls have enough space to double in size, don't overcrowd else the shape would change.
Cooking time - Do not overcook as rasgullas may turn hard, I keep them covered on high flame for about 10 minutes then in medium heat for 3-5 minutes.
Chilling - Let rasgullas rest in syrup before serving, I usually chill them in fridge few hours for best taste.
Retain shape - You can dip the rasgullas in ice cubes with chilled water to retain its shape.
Serving and Storage
Serve rasgulla chilled straight from the fridge with some sugar syrup and garnish with pistachios. It also tastes nice when served plain without garnish. You can store leftovers in fridge for 3 to 4 days. Always keep them soak in sugar syrup, do not leave them dry as they will shrink.
FAQS
1.Can I add lemon juice?
Yes you can, but vinegar and water gives a more neutral flavor while lemon leaves a faint aftertaste even after rinsing.
2.What milk should we use to make Rasgulla?
Always use full fat or full cream milk for best results. You can use cows milk too but make sure it is thick. Always make sure to use only fresh milk. Traditionally buffalo milk is used.
3.How much time should we knead chenna?
It depends on the time and pressure applied while kneading. For me it took around 10 minutes to get the perfect texture. The dough should become pastey and soft making it easy to roll this is the perfect time to stop.
4.What is the consistency of sugar syrup?
Sugar syrup should be watery so no need to check for any consistencies. Just dissolve sugar, cook for 5 minutes then start adding the chenna balls.
5.How to check if rasgulla is cooked?
You can see the chenna balls will double in size after getting cooked. Cook covered for 10 minutes in high heat then give a light mix and cook covered again for 3-5 minutes.
6.Why is my rasgulla rubbery?
If you overcook then your rasgulla will turn rubbery. You cannot fix overcooked rasgulla so the only way is to use it for making rasmalai.
7.How long these last?
They stay good for about 3 to 4 days when stored in fridge with sugar syrup.
If you have any more questions about this Rasgulla Recipe do mail me at sharmispassions@gmail.com. In addition, follow me on Instagram, Facebook, Pinterest ,Youtube and Twitter .
Tried this Rasgulla Recipe? Do let me know how you liked it. Also tag us on Instagram @sharmispassions and hash tag it on #sharmispassions.
Rasgulla is a popular Indian sweet that is made for special occasions & Diwali across India but relished almost every other day after meal in Bengal. This recipe has a mild sweet taste, and when you bite, the juicy soft texture feels really nice. And yes making these rasgullas at home need some patience, but once you see them turning spongy in syrup, the effort feels worth it. Learn to make easy and perfect spongy rasgulla with the help of step by step pictures and video.
To a sauce pan add 1 liter milk. Stir and boil for a minute. Switch off and let it rest for 2-3 minutes.
To a small bowl add 2 tablespoon vinegar, 2 tablespoon water, mix it well and set aside.
Now add vinegar water solution little by little and stir gently. Now the flame is off, this helps to slowly curdle milk and the chenna is so soft.
Now whey water(green liquid) and chenna(white solid) separates.
Now it is curdled completely. Switch off.
Transfer this to a cloth placed on a strainer. Keep a bowl underneath to collect the whey water. You can use this for kneading chapathi dough or for curdling milk again.
Rinse it with water well.
Squeeze excess water.
Roll and place it on the strainer. Keep 2 bowls on it. Do not keep heavy weight. Set aside for 10 minutes.
Now open, moisture should be there, it should not be dry.
Transfer the prepared chenna to a wide plate crumble it first.
Knead it well using your palm like shown.
Knead for 10 minutes or until the texture changes.
At one stage it will gather to a mass without sticking. Make a dough like this. Pinch a small portion.
Roll between your palms gently and smoothly.
It is ready, Repeat to finish.
All the balls are made and ready!
Cover it with a wet cloth to avoid drying.
To a wide pot add 1.5 cups sugar along with 4 cups water, 3 cardamom.
Stir until sugar dissolves completely. Let it boil for 5 minutes.
Give a quick mix. Add the prepared balls slowly.
Cook covered in high heat for 10 minutes.
You can see through the glass it is doubled.
Now open slightly stir and cook covered in medium heat again for 5 minutes.
Rasgulla is ready!
Video
Notes
Vinegar solution - Vinegar when mixed with water is more concentrated and makes chenna soft.
Preparing chenna - Boil milk give a quick stir and switch off, let it rest for few minutes before adding vinegar solution. Add vinegar, water mixture little by little and stir gently.
Kneading - I usually knead for at least 7-10 minutes till dough becomes smooth, this is what make rasgullas smooth and crack free. Make sure you do not over knead then fat will get released.
Shapecarefully - The balls must be smooth without cracks, I roll them gently in my palm for uniform shape.
Sugar syrup - I always use wide vessel so balls have enough space to double in size, don't overcrowd else the shape would change.
Cooking time - Do not overcook as rasgullas may turn hard, I keep them covered on high flame for about 10 minutes then in medium heat for 3-5 minutes.
Chilling - Let rasgullas rest in syrup before serving, I usually chill them in fridge few hours for best taste.
Retain shape - You can dip the rasgullas in ice cubes with chilled water to retain its shape.
Besan Ladoo is an easy and quick sweet made using besan flour, ghee, sugar, nuts and cardamom powder. This ladoo has a nice aroma and soft melt in the mouth texture. Besan Ladoo is a traditional sweet popular in India and made for Diwali & special occasions. Learn to make perfect Besan ke Laddu with the help of step by step pictures and video.
The ladoo making process is very easy but needs little patience while roasting. Don't roast in high flame else it will get burnt or taste raw. Once you get the right texture, these laddus turn out soft, aromatic and really delicious. Even kids like it so much and it stays good for many days, so it is nice for gifting also.
[feast_advanced_jump_to]
About Besan Ladoo
Besan Ladoo is made by slowly roasting besan in ghee till it turns golden brown and gives that nice nutty aroma all over the kitchen. Then it is mixed with sugar and shaped into smooth round balls. It tastes rich and has that perfect melt in mouth feel.
The flavor of roasted besan along with ghee, sugar and cardamom gives that comfort feeling which makes you want to eat more. This sweet is usually made during festive times or for family occasions.
It is a simple traditional sweet made using very few ingredients but the taste is so good. The main secret is in roasting besan in low flame until it reaches the desired texture. Adding cardamom powder lifts the flavor more and makes it smell so divine.
Every family have their own recipe for besan ladoo. Some people add little rava for crunchiness, some adds powdered nuts for texture. I mostly adds roasted cashews for crunch and cardamom powder for extra flavor.
The ghee gives nice aroma and helps in shaping the ladoos easily without breaking. Besan Ladoo is a flavorful and aromatic ladoo, just melts in your mouth. It is quick and easy to make and also one of the most popular ladoo recipes.
I make Besan Ladoo often on special days or whenever I crave for something sweet and simple. This is one of the easy and quick diwali sweet recipes with no prior soaking/grinding etc.
It is very easy yet delicious, melt in the mouth ladoo recipe, and one more thing is that it had no consistency check like other sweets and thats another good news and it cannot flop at all. So what are you waiting bookmark and makeit for diwali and surprise your loved ones!
Besan Ladoo Video
Besan Ladoo Ingredients
Besan flour - I used fine besan. You can use coarse besan that is available in market. Roast slowly in low flame to get that perfect texture and nice golden color.
Sugar - I have used fine powdered sugar, it gives sweetness and mix well with roasted besan. Don't use normal sugar, it won't blend smooth.
Ghee - I used homemade ghee for rich aroma and soft texture. This adds nice flavor and helps ladoo hold its shape. You can add little more ghee if mixture feels dry.
Cardamom powder - I always add cardamom powder, it gives mild sweet aroma and lifts the flavor and taste.
Cashews - I chopped it fine dry roasted and added to ladoo mixture. It gives nice crunch in every bite.
Pistachios - I added chopped pistachios on top for look and taste.
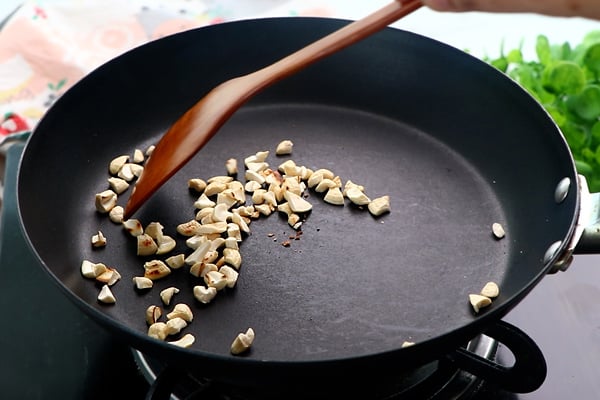
1.Dry roast 2 tablespoon cashews finely chopped for 2 minutes, transfer to a bowl and set aside.
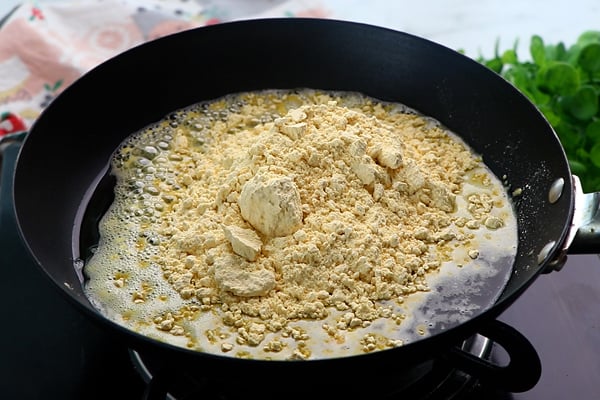
2.Heat ¼ cup + 1 tablespoon ghee add 1 cup besan flour.
3.Roast it in low flame until color changes. Keep stirring continuously to avoid burning at the bottom. First it will look crumbly like this.
4.Keep roasting and after few minutes it will become moist like this.
5.After few more minutes it will become runny and loose - do not panic this is the consistency we want. Switch off immediately.
6.Transfer to a mixing bowl, mix with a spatula and cool down completely. Cooling down completely is an important step.
7.Add ½ cup sugar to a mixer jar.
8.Grind it fine. If you want your ladoo to have a slightly coarse texture grind it slightly coarse.
9.Add powdered sugar along with roasted cashews and ¼ teaspoon cardamom powder. Make sure you add powdered sugar only after the mixture cools down completely.
10.Mix it well.
11.Start shaping - first pinch a portion and shape by closing the fingers and fist.
12.Then roll between your palms.
13.Ladoo is shaped and ready.
14.Repeat to finish other ladoos too. Add chopped pistachios on top and slightly press to keep it intact.
Besan ladoo is ready!
Expert Tips
Roasting besan - Roast only in low flame. Keep stirring else it may get burnt and taste bitter. You will know it is done when it turns golden and changes texture it will become loose and runny like shown.
Sugar - Make sure to add powdered sugar only after mixture cools down completely. If you add when it is hot, sugar will melt and make the mixture loose.
Ghee - Add ¼ cup + 1 tablespoon ghee which will be perfect. If it is still dry add 1 teaspoon extra.
Additions - You can add some chopped almonds or pista for extra richness. Little roasted sooji can also be added for a light grainy texture.
Storage - I store it in clean airtight box. This can be stored fresh for 10 to 12 days at room temperature.
Serving and Storage
Serve this sweet as dessert after meals or on any festive days. It taste really good with a cup of warm milk too. I store it in a airtight container after it cool down fully. It stays soft, aromatic and fresh for more than a week.
FAQS
1.Why does my ladoo taste raw?
It means the besan was not roasted properly. Always roast in low flame till the raw smell leaves.
2.Can I use jaggery?
Yes, you can use fine powdered jaggery also. But make sure it is clean before mixing. But traditionally white sugar is only used.
3.Why my ladoo not holding shape?
Add little more melted ghee and mix again. Shape when mixture is warm.
4.My mixture does not turn loose while roasting like shown, What should I do?
Add 1-2 teaspoon extra ghee after around 10-12 minutes of roasting and it will become runny in consistency.
How long can I store these laddoos?
They keep well for more than a week in airtight container. For longer shelf life, refrigerate.
If you have any more questions about this Besan Ladoo Recipe do mail me at sharmispassions@gmail.com. In addition, follow me on Instagram, Facebook, Pinterest, Youtube and Twitter .
Tried this Besan Ladoo Recipe? Do let me know how you liked it. Also tag us on Instagram @sharmispassions and hash tag it on #sharmispassions.
Besan Ladoo is an easy and quick sweet made using besan flour, ghee, sugar, nuts and cardamom powder. This ladoo has a nice aroma and soft melt in the mouth texture. Besan Ladoo is a traditional sweet popular in India and made for Diwali & special occasions. Learn to make perfect Besan ke Laddu with the help of step by step pictures and video.
Dry roast 2 tablespoon cashews finely chopped for 2 minutes, transfer to a bowl and set aside.
Heat ¼ cup + 1 tablespoon ghee add 1 cup besan flour.
Roast it in low flame until color changes. Keep stirring continuously to avoid burning at the bottom. First it will look crumbly like this.
Keep roasting and after few minutes it will become moist like this.
After few more minutes it will become runny and loose - do not panic this is the consistency we want. Switch off immediately.
Transfer to a mixing bowl, mix with a spatula and cool down completely. Cooling down completely is an important step.
Add ½ cup sugar to a mixer jar.
Grind it fine. If you want your ladoo to have a slightly coarse texture grind it slightly coarse.
Add powdered sugar along with roasted cashews and ¼ teaspoon cardamom powder. Make sure you add powdered sugar only after the mixture cools down completely.
Mix it well.
Start shaping - first pinch a portion and shape by closing the fingers and fist.
Then roll between your palms.
Ladoo is shaped and ready.
Repeat to finish other ladoos too. Add chopped pistachios on top and slightly press to keep it intact.
Besan ladoo is ready!
Video
Notes
Roasting besan - Roast only in low flame. Keep stirring else it may get burnt and taste bitter. You will know it is done when it turns golden and changes texture it will become loose and runny like shown.
Sugar - Make sure to add powdered sugar only after mixture cools down completely. If you add when it is hot, sugar will melt and make the mixture loose.
Ghee - Add ¼ cup + 1 tablespoon ghee which will be perfect. If it is still dry add 1 teaspoon extra.
Additions - You can add some chopped almonds or pista for extra richness. Little roasted sooji can also be added for a light grainy texture.
Storage - I store it in clean airtight box. This can be stored fresh for 10 to 12 days at room temperature.
If you've been following my recipes, you know I love giving classic Indian sweets a simple, modern twist. Makhana Burfi is a perfect example! Soft, cardamom-and-rose infused, and effortlessly luxurious, this easy Indian dessert blends the nutty richness of kaju katli with the tropical sweetness of coconut burfi. The roasted makhana gives this burfi a […]
Chai tiramisu cake has a delicious, moist, chai-infused cake with layers of cardamom cream dusted with a cocoa-chai topping. It is an absolutely fabulous fusion dessert perfect for Diwali or any special occasion! (soy-free with gluten-free or nut-free option)
We’re actually making a super quick cake for this chai tiramisu, instead of using ladyfingers. The rich, creamy textures of the cake and cardamom cream give you the decadence of tiramisu without any eggs or dairy needed.
You can make this with vegan ladyfingers, if you can find those, or you can use vegan cake rusks. Cake rusks are like plain biscotti available in Indian stores, and they work well as a substitute for ladyfingers. Just soak them in the chai, and use them for layering. Or, you can make this simple cake with just a few ingredients.
I heard you about wanting a cake that used a cream topping that didn’t need a freezer to set. The cardamom cream for this chai tiramisu cake sets up thick and spreadable at room temperature, no freezer needed.
Whether you make the cake from scratch or use one of the substitutions, this incredibly delicious chai tiramisu is a hit at any dinner party. It also freezes well, so you can make it ahead. Just thaw it overnight in the fridge.
Why You’ll Love Chai Tiramisu
quick, easy, moist, delicious cake soaked in flavorful milk chai
rich, decadent cardamom cream that sets up with no freezer needed
Coconut Burfi is a delicious melt in the mouth sweet made by cooking coconut along with sugar, ghee and flavored with cardamom powder. Coconut Burfi is also known as Thengai Barfi in Tamil and Nariyal ki Barfi in Hindi. Coconut Burfi is one of the quickest and easiest sweets that you can make for Diwali. It is a beginner friendly sweet that you can try during festivals like Diwali.
Coconut Burfi popularly known as Thengai burfi or Thenga barfi is hubby's favorite sweet and is one of my MIL's specialty. To me she makes the best coconut burfi I have tasted so far, flaky, not too hard and perfect. Coconut Burfi is made at home during Diwali and on special occasions as it is quiet easy to make.
[feast_advanced_jump_to]
About Coconut Burfi
Burfi or Barfi is an Indian fudge which can be soft or hard. Coconut Burfi is a traditional Indian sweet made using coconut, ghee, sugar and cardamom powder with the addition of nuts which is optional. This sweet is popularly known as Thengai barfi or Nariyal barfi and one of the festive sweets that even beginners can try.
Coconut Burfi is a delightful dessert that you can make for gifting purpose too. I learnt this recipe from my MIL who is an expert in making coconut burfi. This sweet can be made in many ways though the ingredients are almost the same. This recipe I've shared here is very easy and quick to make which comes together in just 20 minutes.
The burfi is popular because it is melt in the mouth, simple and easy to make. It is one of the sweets I learnt to make during my initial stages of cooking. This is the traditional way of making coconut burfi with just coconut, sugar and ghee as main ingredients.
It is one of the fuss-free and quick sweet that you can prepare. It takes just 20 minutes from scratch and one of the easy sweets that even beginners can try. So what are you waiting for?! Do try this easy and quick sweet for this Diwali and enjoy!
Coconut - You can use fresh coconut. Cut into pieces and blend in mixer to make it fine. Fresh coconut is best to use, but you can replace fresh coconut with desiccated coconut though the taste will vary.
Sugar - Use white granulated sugar, you can alternatively use jaggery too.
Ghee- Use pure ghee for nice aroma.
Cardamom powder - Cardamom powder is added very little as the main flavor is from coconut.
How to make Coconut Burfi Step by Step
1.Take coconut pieces and add it to mixer.
2.Grind it until slightly fine. You can use freshly grated coconut too.
3.Now measure 1 cup coconut and ¾ cup sugar, set aside.
4.Brush little ghee in a tray and keep it ready.
5.Add 1 teaspoon ghee to a pan add 1 cup coconut. Saute for 2 minutes until moisture leaves.
6.Add ¾ cup sugar to a pan along with ⅓ cup water.
7.Stir well until sugar dissolves completely.
8.Let the syrup boil. Keep stirring and checking in between.
9.Check for 1 string consistency. The string should not break in half it should stand for a second. If it breaks in half then its ½ string so cook for few more seconds to get 1 string consistency.
10.At this stage add sauteed coconut along with ¼ teaspoon cardamom powder.
11.Mix it well. Keep cooking in low flame.
12.Add 1 tablespoon ghee. Mix well and cook until it becomes thick.
12.Cook until it becomes thick but in slightly flowing consistency more like thick halwa consistency.
13.Now immediately transfer the mixture to the greased tray.
14.Level it well using a spatula. Add nuts if you like. Set aside for 15 minutes.
15.When it is still warm mark pieces using a knife. It will look moist at this stage. Let it set at room temperature for 1 hour minimum.
16.This is after an hour, now the burfi is set completely. When you touch and see - it should not stick and will be hard. Cut into squares and remove.
Coconut Burfi is ready! Store in a clean dry container.
Expert Tips
Coconut - While scrapping the coconut take care not to scrap too deep. Discard the brown part use only the white flesh part.
Pulsing - You can either grate coconut fine and use it but in that case also the shreds will be big so you can pulse it in mixer until slightly fine then use it.
Roasting - Roasting coconut increases shelf life so I would recommend roasting.
Sugar syrup - Testing the sugar syrup is not that difficult, First the sugar syrup becomes very sticky only then single string consistency is reached. If you are a first timer check it every now and then till the desired consistency is reached.
Single string consistency - the string should stand for a second that is the perfect consistency.
Consistency - While pouring it may look sticky and flowing but when set it will harden and become perfect burfis. When the desired stage is reached, immediately transfer it to the greased tray.
Marking pieces - Make sure you cool them only for 10-15 minutes then mark the pieces. But make sure to do the marking when it is still warm. Let it set for at least 1 hour then cut into pieces.
Serving & Storage
Coconut Burfi keeps well in room temperature for about a week and in fridge for 2 weeks. Serve it with any savory snack and tea or coffee.
FAQS
1.What is the alternate to fresh coconut?
Fresh coconut is best to use for coconut burfi however you can use desiccated coconut or dried coconut flakes too.
2.What others can I add as variation?
You can add chopped ghee cashews fried cashews or even raisins. For a variation you can add tutti frutti at the last stage, mix and switch off.
3.How long does coconut burfi stay good?
Coconut burfi stays good for 3-5 days in room temperature and in fridge for about 10 days.
4.Why did my burfi is not hard and set?
If you have missed the one string sugar consistency and undercooked the mixture may turn like halwa and will not set.
5.The mixture breaks, I am not able to make squares?
Burfi breaks is because the mixture is overcooked and the sugar consistency has passed the next stage.
If you have any more questions about this Coconut Burfi Recipe do mail me at sharmispassions@gmail.com. In addition, follow me on Instagram, Facebook, Pinterest ,Youtube and Twitter .
Tried this Coconut Barfi Recipe? Do let me know how you liked it. Also tag us on Instagram @sharmispassions and hash tag it on #sharmispassions.
Coconut Burfi is a delicious melt in the mouth sweet made by cooking coconut along with sugar, ghee and flavored with cardamom powder. Coconut Burfi is also known as Thengai Barfi in Tamil and Nariyal ki Barfi in Hindi. Coconut Burfi is one of the quickest and easiest sweets that you can make for Diwali. It is a beginner friendly sweet that you can try during festivals like Diwali.
Grind it until slightly fine. You can use freshly grated coconut too.
Now measure 1 cup coconut and ¾ cup sugar, set aside.
Brush little ghee in a tray and keep it ready.
Add 1 teaspoon ghee to a pan add 1 cup coconut. Saute for 2 minutes until moisture leaves.
Add ¾ cup sugar to a pan along with ⅓ cup water.
Stir well until sugar dissolves completely.
Let the syrup boil. Keep stirring and checking in between.
Check for 1 string consistency. The string should not break it should stand for a second.
At this stage add sauteed coconut along with ¼ teaspoon cardamom powder.
Mix it well. Keep cooking in low flame.
Add 1 tablespoon ghee. Mix well and cook until it becomes thick.
Cook until it becomes thick but in slightly flowing consistency more like thick halwa consistency.
Now immediately transfer the mixture to the greased tray.
Level it well using a spatula. Add nuts if you like. Set aside for 15 minutes.
When it is still warm mark pieces using a knife. It will look moist at this stage. Let it set at room temperature for 1 hour minimum.
This is after an hour, now the burfi is set completely. When you touch and see it should not stick and will be hard.
Cut into squares.
Coconut burfi is ready!
Video
Notes
Coconut - While scrapping the coconut take care not to scrap too deep. Discard the brown part use only the white flesh part.
Pulsing - You can either grate coconut fine and use it but in that case also the shreds will be big so you can pulse it in mixer until slightly fine then use it.
Roasting - Roasting coconut increases shelf life so I would recommend roasting.
Sugar syrup - Testing the sugar syrup is not that difficult, First the sugar syrup becomes very sticky only then single string consistency is reached. If you are a first timer check it every now and then till the desired consistency is reached.
Single string consistency - the string should stand for a second that is the perfect consistency.
Consistency - While pouring it may look sticky and flowing but when set it will harden and become perfect burfis. When the desired stage is reached, immediately transfer it to the greased tray.
Marking pieces - Make sure you cool them only for 10-15 minutes then mark the pieces. But make sure to do the marking when it is still warm. Let it set for at least 1 hour then cut into pieces.
If you are looking for unique Diwali Sweets Recipes this season, here are 45 dishes for you to choose from! From traditional Diwali mithais to fusion Indian desserts, this list has something for every mood and vibe 🪔
A special Diwali party means super special desserts. In fact, I’m thinking of a fabulous dessert table where you have a variety of desserts for guests to choose from – panna cotta, Indian mithais, cakes, cheesecakes etc.
And that’s exactly why I’ve put together this list. Most of these desserts are really easy to make, have flavours that aren’t common but still familiar and they look stunning on the table. Diwali sweets don’t have to be the same old anymore. Give them a unique twist this year for a more fun Diwali!
Masala Chai Panna Cotta will be the perfect finish to a holiday dinner. Flavored with chai tea, whole spices like cinnamon, cloves, nutmeg and vanilla, its rich, creamy and really elegant. Make it for thanksgiving, Christmas, or even Diwali – this dessert leave your guests asking for seconds.
Super easy recipe for a festive chocolate rice kheer pudding made without condensed milk but still really creamy. Perfect for your Diwali dessert table or any other Indian festival. Actually you won’t need a reason to make this one!
Healthy quinoa apple kheer is a low calorie Indian festival dessert, full of fiber and nutrition and a perfect way to celebrate Diwali or Dussehra with your family!
An Indian fusion dessert that combines the gooey textures of tres leches cake and our favorite Indian mithai rasmalai – this is a dessert you need to try at least once!
This Rasmalai Sandwich is the crunchy, crispy, and healthy version of the Bengali rasmalai. This is a really simple recipe that comes together with just pantry staples and tastes like a party in your mouth ✨
Fresh and zesty meets the sweetness of milky pudding in this Orange Makhana Pudding. A super simple Diwali dessert that's sweet, creamy and citrus-y and looks gorgeous on the table!
This Saffron Milk Pudding Bites has a fun creamy, jelly-like texture and a warm, cosy flavor. It's an easy-peasy mithai that smells and tastes of Diwali 🪔
This rose kacha golla is a super moist and delicious variant of the popular Bengali sweet, sandesh. It's floral notes and melt-in-mouth texture will make this your favorite Diwali mithai ✨
A delicious winter dessert where seasonal red carrots are simmered in milk and sugar till they turn into a fudgy consistency. Also called carrot pudding, it’s even more amazing when served with vanilla ice cream.
Here's the short and sweet way to make delicious Instant Rabdi! I’m showing you how to cut the time to make rabri in half with some paneer and condensed milk.
Thin and crispy jalebis are everyone’s undoing. Make them at home now with easy step by step instructions that’ll give you the best homemade jalebis every single time. Perfect for festivals like Diwali and Holi when you want a feast that doesn’t take ages to make.
Coconut Barfi is one of the easiest Indian desserts that only need 5 ingredients and 30 minutes. Who would've thought making mithai at home would be so easy!
This easy rice kheer or chawal ki kheer is probably the most popular Indian dessert there is. Made with long grained basmati rice and sweetened with condensed milk, it’s simple enough that you can make it often, and elegant enough to serve to guests!
Puran Poli is a sweet, stuffed flatbread thats popular all over India. The key is to make a very soft dough so that the final parathas are really soft and pliable.
Creamy, fruity, tropical, and loaded with texture, this mango sago is THE ultimate summer dessert. The best part? It's insanely easy to make and calls for minimal ingredients!
A sweet treat that's actually good for you – this healthy chocobar ice cream is creamy, nutty, chocolate-y, and made with the most clean, wholesome ingredients!
This classic vanilla panna cotta recipe is an elegant and easy dessert. Most people think panna cotta will have a lengthy process because the results are so amazing, but this needs five simple ingredients and twenty minutes to put together. Make sure to use the best quality gelatin for great results.
Cassata is so easy to make at home. I'm showing you to make it, customize it and add a layer of cheesecake because cheesecake makes everything better! This is better than store bought cassata ice cream and you won't believe how easy it is.
Easy eggless pineapple mousse is a delicious, make ahead dessert that will be a crowd pleaser! With minimum prep, these pineapple mousse cups are ready in minutes and have a gorgeous creamy texture.
5 Ingredient White and Dark Chocolate Rose Pistachio Bark
White and Dark Chocolate Rose Pistachio Bark looks beautiful and complicated but takes a total of 5 ingredients, 20 minutes and 5 steps to make. Also perfect for homemade gifting!
Self saucing eggless chocolate pudding cake has a crinkly top, a moist cakey texture and a pool of chocolate sauce. Made very quickly in the microwave, truly decadent, we love serving this with vanilla ice cream on top!
Light and Airy this eggless chocolate mousse just needs five ingredients and fifteen minutes from start to finish. Its a quick dessert that'll satisfy all those cravings!
Lavender white chocolate truffles are fragrant, creamy white chocolate bites that are perfect for the festive season and holidays! Use them to serve as mini desserts, or for gifting.
No Bake Strawberry Cheesecake Jars are creamy, made with fresh strawberries and have a creamy, mousse like texture that’s absolutely delicious! Make these for valentines day or take them to a picnic because these are so easily transportable, or just serve these individual cheesecake jars at a party.
This is a simple recipe for eggless, whole wheat carrot cake which is soft, moist and fluffy! Easy to make at home, and perfect as a dessert or tea time snack!
Mango Panna Cotta is a gorgeous two-layered dessert that'll wow everybody. It's the perfect cold, summer dessert. This dessert is so versatile because the mango layer can be replaced with berries, kiwis and many other fruits
Extremely easy recipe for Passion Fruit flavored single serving cheesecake in a jar which uses only 8 ingredients, are portable and look beautiful at parties.
These eggless churros are a total flavor and texture delight! Made from simple ingredients in under 30 minutes, this is a delicious and fun dessert you just need to try!
I promise you, all these Diwali dessert recipes will surely take your festivities a notch higher. But be sure to make extras because it all disappears really fast!
I would love to see your Diwali party tables so don’t forget to share pictures over on my IG @my_foodstory.
Carrot Sheera is a warm, comforting Indian dessert that turns the simplest ingredients into something truly festive. Made with fine semolina, ghee, and sweet grated carrots, this quick halwa comes together in under 30 minutes and instantly fills the kitchen with the most inviting aroma. It's homely yet celebratory; the kind of sweet that feels […]
My mum’s sooji halwa is special because it’s got this gorgeous caramel-ly nuttiness that comes from roasting the semolina (sooji) in ghee. You’ll never make it any other way!
There is nothing that screams Indian festivities quite like sooji halwa does (okay and maybe also Malpua, Rabdi and Kheer!), and I think this recipe is really special. There’s a gorgeous caramel-like glaze on this suji halwa that coats every little bit of sooji – it’s my mum’s trick and the only way I like to make it now!
The magic lies in patiently roasting the sooji in ghee for 20-25 minutes till the colour changes from white to a deep brown. That deep, toasty flavour combined with the smooth, melt-in-your-mouth texture makes it an instant family favourite. Whether it’s a festival, puja, or just a sweet craving on a weeknight, this halwa is just the thing to make and it that always hits the spot!
Sooji (Semolina/Rava) – The star ingredient; use fine sooji for a smooth texture and rich flavour. Bombay sooji works best here because the grains are neither too big nor too small. Bansi rawa will also work.
Besan (Gram Flour) – Adds depth and enhances the nutty aroma.
Ghee – The key to flavour and richness — use good quality ghee for best results.
Sugar – Balances the nutty flavour with sweetness.
Water – Helps cook the semolina into a soft, smooth halwa.
Nuts (Almonds/Pistachios) – For crunch and garnish.
How to make sooji halwa
1. In a pan, roast the sooji and besan together over low flame, stirring continuously for 5-6 minutes. Add the ghee and continue cooking on low flame.
2. Stir constantly until the mixture changes to a light chocolate brown colour and becomes fragrant.
3. Continue roasting until the brown becomes a little deeper and darker.
4. Add the sugar and mix it in.
5. Slowly pour in the water while stirring continuously. Increase the flame. Be cautious as the mixture may bubble and splutter.
6. Keep stirring until the halwa thickens, and you see ghee starting to ooze out from the sides. Garnish with slivered pistachios or almonds.
Frequently Asked Questions
Which is the best type of sooji to make halwa?
For a smooth, melt-in-the-mouth halwa, use Bombay sooji (fine semolina). For a nuttier, coarser texture with more bite, use Bansi rava. Both work, it just depends on the texture you prefer!
Can I replace sugar with jaggery for this recipe?
Yes! Jaggery gives the halwa a deep, earthy sweetness and a slightly different colour. Just make sure to melt and strain the jaggery first (to remove impurities) before adding it in.
Why is my sooji halwa lumpy?
This happens if water is added too quickly. Always add water slowly while stirring continuously to prevent lumps.
Can I make this halwa without ghee?
You can use butter or oil, but I’d really suggest you don’t! The ghee is what makes this Sooji Halwa!
Is Sooji Halwa the same as Sheera or Rava Kesari?
They’re variations of the same dish. Rava Kesari includes saffron or food color, while sheera may include milk instead of water.
Can I make sooji halwa ahead of time?
Yes! Store in the fridge for up to 2–3 days. Reheat with a splash of water or milk to soften.
Can I reduce the sugar?
Absolutely, feel free to adjust to taste. Just remember that less sugar means less stickiness in texture.
Richa’s Top Tips
Don’t skimp on the ghee. That’s where the flavor and that glistening texture come from.
Always roast sooji on medium heat — too high and it will burn, too low and it won’t develop flavour.
Bombay sooji works best here because the grains are neither too big nor too small. Bansi rawa will also work.
Be patient and pay attention. Be prepared to spend half an hour in the kitchen. Sooji can burn pretty quickly or brown unevenly if not stirred often. So keep stirring every minute or so for the best, even results.
Remember the halwa will thicken as it cools, so take it off the heat slightly before your desired consistency.
Add the sugar before the water or the sugar will caramelize and harden when it hits the water.
The consistency should be thick but runny. If its too thick, it’ll start to become gloopy.
Serve warm, garnished with almonds, cashews, or pistachios.
Add saffron strands soaked in warm milk for colour and aroma.
Storage Tips
Store in an airtight container and refrigerate for up to 2-3 days. Reheat with a splash of water or milk to soften.
One bite of this Sooji Halwa and you’ll understand exactly why I can’t stop raving about it! It’s warm, rich, comforting – everything I’d want in a dessert (and honestly just the thing for this festive season!) I hope you give this one a try <3
Make sure to send me your recreations over on my IG @my_foodstory, I loveee to see them!!
Also check out my Navratri recipes round up for all the inspo you need this festive season ❤️
Watch How To Make Sooji Halwa Video
LOVE THIS RECIPE? Subscribe to my newsletter and be the first to receive all new recipes!
In a pan, roast the sooji and besan together over low flame, stirring continuously for 5-6 minutes.
1 Cup Sooji or Semolina, 1 1/2 tablespoons Besan or Gram Flour
Add the ghee and continue cooking on low flame, stirring constantly until the mixture changes to a light chocolate brown color and becomes fragrant.
1/2 Cup plus 1 tablespoon Ghee or Clarified Butter
Add the sugar and mix it in. Slowly pour in the water while stirring continuously. Increase the flame. Be cautious as the mixture may bubble and splutter.
3/4 Cup Sugar, 3 Cups Water
Keep stirring until the halwa thickens, and you see ghee starting to ooze out from the sides.
Being a daily consumer of chia seeds, I had to try this viral Tiramisu chia pudding to see if it’s worth all the hype at all! So I tried it and, lo behold, it is so damn good that I have to now repeat it frequently!
If you ask me to name one dessert among the universe of all desserts that I can have without thinking twice then that has to be a classic Italian Tiramisu!
But yes, that will be in a parallel universe where I wouldn’t worry about consuming excess calories that come free of cost with the delicious taste of a generous serving of Tiramisu!
With all that love and affection towards Tiramisu, I also jumped into the bandwagon of a spin-off of Tiramisu made with the cult favorite of all fitness enthusiasts these days!
Chia seeds! So here I present my version of the viral Tiramisu chia pudding!
What is Tiramisu chia pudding?
If you love to watch cooking/recipe videos, I am sure you have come across this viral recipe in your feed many times already!
Just in case this is something new to you and I have the privilege to introduce you to this current social trend, then let me decode it for ya!
First, let’s see what Tiramisu is and then we can figure out its connection with the Tiramisu chia pudding!
A classic Tiramisu has multiple layers of classic lady finger biscotti soaked in freshly brewed coffee with alternating thick layers of whipped up mascarpone cheese in between two layers of lady fingers.
The final layer of mascarpone is dusted with a generous amount of cocoa powder. Then the assembled Tiramisu is chilled in the refrigerator overnight to set things up.
This also allows the flavors of coffee and cocoa to mingle with each other resulting into a mind-blowing no-bake dessert making you fall in love with it instantly!