Guava salad recipe – Easy to make Guava salad recipe with easily available ingredients – Guava salad recipe with a short YouTube video
Guava | கொய்யாப் பழம் in Tamil, is a tropical fruit rich in fiber, Vitamin C, and antioxidants. Salads are a favorite at home. As we enjoy guava fruit as it is, I thought of trying out a salad made with the fruit. I used semi-ripe ( more on the raw side) guava for making this guava salad.
I have used feta cheese in this salad; it is completely optional. However, I highly recommend adding feta cheese as it elevates the taste to a different level. After I posted the video on Instagram, many of my readers tried it and sent me pictures. It was a super hit at everyone’s home.
If you are a person who doesn’t like eating fruits as it is, do try this interesting version of guava salad.
Add salt, chaat masala, 1 finely chopped green chili, red chili powder and lemon juice.
Mix everything well
Add thinly sliced carrot, guava, boiled chickpeas and mix well.
Add 2 tbsp feta cheese (optional)
Mix well
Guava salad is ready
Video
Notes
1. You can add thinly sliced cucumber to the salad2. During non-guava season, you can use thinly sliced apple or pineapple also3. Feta cheese gives a nice taste to the guava salad
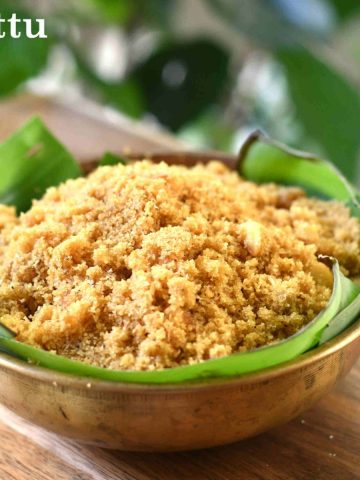
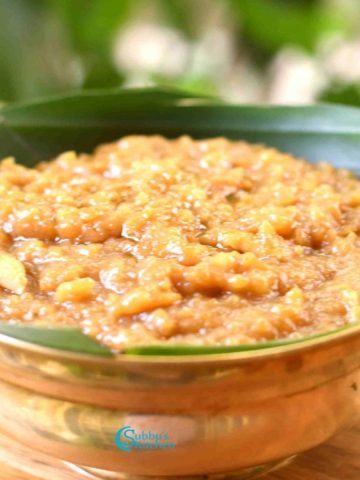
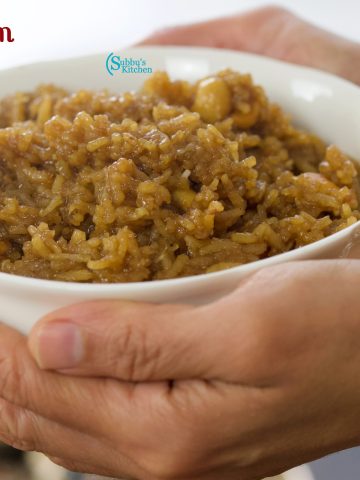
This Mixed Dal Sweet Sundal is a traditional South Indian prasadam made with a wholesome blend of dals, jaggery, and a hint of ghee. It carries the perfect balance of nutrition and sweetness, making it both festive and satisfying. With its rich flavor, soft texture, and divine aroma, this sundal is a cherished recipe during Navratri and other special occasions—one that will instantly win hearts at the very first bite.
This Mixed Dal Sweet Sundal is a cherished South Indian prasadam, especially prepared during Navratri, Varalakshmi Viratham, and other festive occasions. Made with a wholesome blend of dals, jaggery, and a touch of ghee, it carries the perfect balance of nutrition and sweetness. With its rich flavor, soft texture, and divine aroma, this sundal brings a festive charm to any celebration—symbolizing abundance, devotion, and the joy of tradition in every bite.
[feast_advanced_jump_to]
Ingredients
Chana dal
Green Moong dal
Cow Peas
Jaggery
Grated coconut
Cardamom
Ghee
This recipe uses a blend of lentils—chana dal, green moong, cow peas —to create a protein-rich base that is hearty yet soft when cooked. Jaggery is added for natural sweetness, balancing the earthy flavors of the dals while keeping the dish wholesome. A touch of ghee enhances aroma and richness, while cardamom brings in a warm, festive fragrance. Finally, a sprinkle of fresh coconut ties it all together, giving the sundal its traditional South Indian character.
Instructions
Take Cowpeas, Green Moong and Chana dal in a pan.
Dry roast the dals in a pan until aromatic, then set them aside.
Transfer the roasted dals to a vessel and add fresh water to soak them.
Place the vessel inside the pressure cooker
Secure the pressure cooker lid with the whistle. Pressure cook the roasted dals for about three to five whistles, until soft.
Open the pressure cooker once the pressure is fully released. If excess water remains after cooking, strain it and keep the dals aside.
In a sauce pan, add grated jaggery with a little water and allow it to dissolve completely.
Strain the jaggery syrup into another pan and bring it to a boil.
Once the jaggery syrup is starts to boil, add the cooked dals and stir well.
Keep the flame on medium and cook, stirring gently, until the jaggery is fully incorporated into the dals.
Mix in ghee, cardamom powder, and grated coconut, blending everything evenly.
The delicious Mixed Dal Sweet Sundal is now ready to be offered as neivedhyam or served warm.
Substitutions
Dals: If some lentils aren’t available, you can swap with other split dals like masoor dal or green moong dal. Just ensure the total quantity remains similar.
Jaggery: Can be replaced with brown sugar or coconut sugar if jaggery is unavailable, though the flavor will be slightly different.
Ghee: For a lighter version, unsalted butter or coconut oil can be used.
Cardamom: If unavailable, a small pinch of cinnamon powder or nutmeg can give a warm, aromatic flavor.
Grated Coconut:Desiccated coconut or coconut flakes can be used as an alternative.
Variations
Dry Fruit Mix: Add chopped cashews, almonds, and raisins for extra texture and richness.
Single Dal Version: Use only one type of dal, like chana dal or moong dal, for a simpler, quicker version.
Cardamom-Free: Skip cardamom and use a pinch of nutmeg or cinnamon for a different flavor profile.
Coconut-Free: Omit grated coconut and drizzle a little ghee on top before serving for richness.
Mini Sundal Cups: Serve the sweet sundal in small, bite-sized cups or molds for festive offerings or kids’ treats.
Storage
Room Temperature: Store in an airtight container for up to 1 day.
Refrigerator: Keep in a sealed container for 2–3 days. Reheat gently on low flame or in the microwave before serving.
Freezer: Not recommended, as the texture may change after freezing.
Top Tip
If you're going to make this recipe, make sure to follow this top tip!
Dry roast the dals properly before cooking to enhance their flavor and aroma. While cooking with jaggery, keep the flame on medium and stir gently to prevent sticking or burning. This ensures the sundal has a smooth, cohesive texture and rich, balanced sweetness—perfect for neivedhyam or serving.
Mixed Dal Sweet Sundal is a traditional South Indian sweet prasadam made with a blend of protein-rich dals, jaggery, ghee, and aromatic cardamom. Soft, flavorful, and lightly sweet, this sundal is perfect for Navratri offerings, festive occasions, or as a wholesome dessert. Quick to prepare and rich in taste, it’s a must-try for anyone who loves authentic South Indian sweets.
Course Accompaniment, Festival Recipes, Snack, Sundal
Cuisine Indian, South Indian, Tamil Brahmin, Tamil Nadu
Prep Time 5 minutesminutes
Cook Time 20 minutesminutes
Total Time 25 minutesminutes
Servings 4people
Calories 105kcal
Author Sowmya Venkatachalam
Equipment
1 Heavy Bottomed Pan
1 Pressure Cooker
1 Sauce Pan
Ingredients
¼cupSplit Bengal Gram (Channa Dal / Kadalaparuppu)
¼cupGreen Gram (Pachai Payiru)
¼cupKaramani (Black-eyed pea)
¼cupGrated Jaggery
2teaspoonGhee (Clarified butter)
2teaspoonGrated Coconut
1pinchCardamom Powder
Instructions
Take Cowpeas, Green Moong and Chana dal in a pan. Dry roast the dals in a pan until aromatic, then set them aside.
¼ cup Green Gram (Pachai Payiru), ¼ cup Karamani (Black-eyed pea), ¼ cup Split Bengal Gram (Channa Dal / Kadalaparuppu)
Dry roast the dals in a pan until aromatic, then set them aside.
Transfer the roasted dals to a vessel and add fresh water to soak them.
Place the vessel inside the pressure cooker, secure the lid with the whistle, and cook until done.
Pressure cook the roasted dals for about three whistles, until soft.If excess water remains after cooking, strain it and keep the dals aside.
If excess water remains after cooking, strain it and keep the dals aside.
In a sauce pan, add grated jaggery with a little water and allow it to dissolve completely.
¼ cup Grated Jaggery
Strain the jaggery syrup into another pan and bring it to a boil.
Once the jaggery syrup is starts to boil, add the cooked dals and stir well.
Keep the flame on medium and cook, stirring gently, until the jaggery is fully incorporated into the dals.
Mix in ghee, cardamom powder, and grated coconut, blending everything evenly.
The delicious Mixed Dal Sweet Sundal is now ready to be offered as neivedhyam or served warm.
Video
Notes
Tips for Perfect Mixed Dal Sweet Sundal:
Roast the dals lightly before soaking to enhance their aroma and bring out a nutty flavor.
Soak the dals adequately so they cook evenly and achieve a soft, melt-in-mouth texture.
Use a pressure cooker to cook the dals until soft. After roasting and soaking, place the dals in the cooker with fresh water, secure the lid, and cook for 3–4 whistles on medium heat. This ensures the dals are tender and ready to absorb the jaggery syrup without becoming mushy.
Dissolve jaggery completely in a little water before adding it to the cooked dals to prevent lumps.
Cook on medium flame while mixing jaggery with the dals to avoid sticking or burning.
Add ghee at the end to enrich the flavor and give the sundal a glossy, luscious finish.
Use freshly grated coconut for authentic taste and texture; desiccated coconut can be used in a pinch.
Serve warm or at room temperature for best taste; the flavors intensify if left for a few hours.
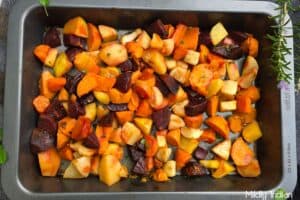
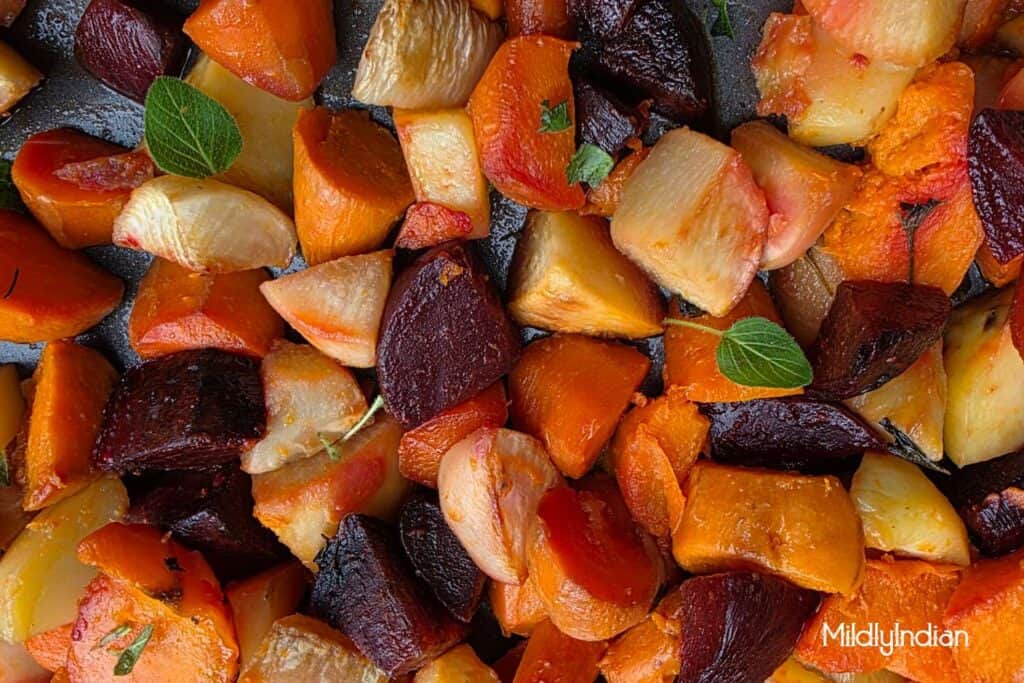
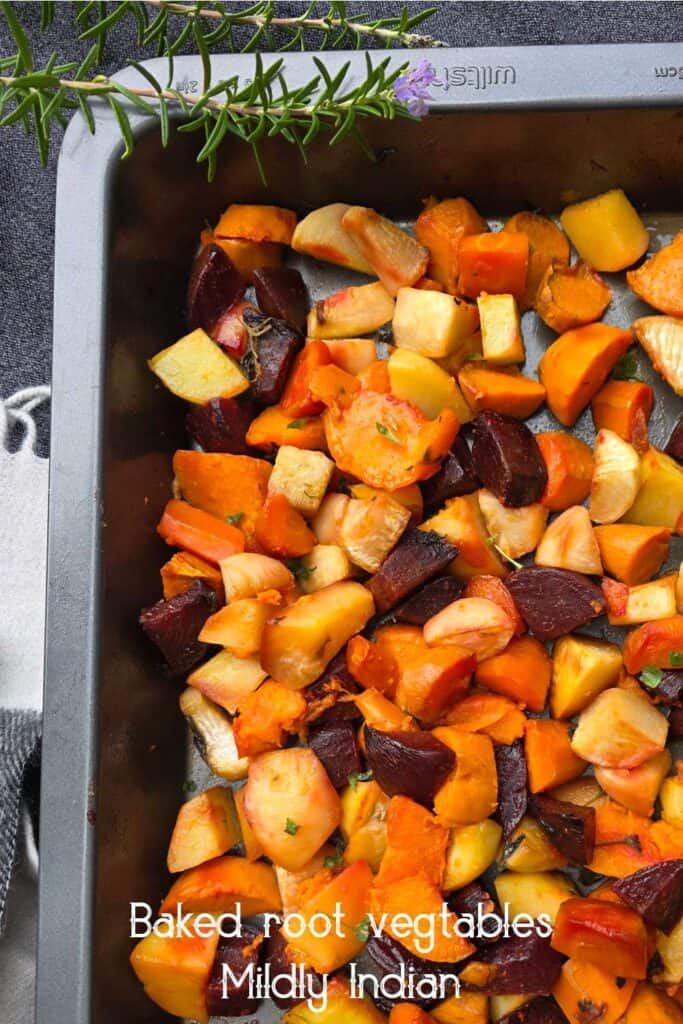
Why would you skip a platterful of colourful vegetables, that are a perfect side, salad or morning hash? Enjoy the starchy bites of roasted goodness.
It is a small respite from the numerous Indian festivals and the chill in the air is still hanging around. Therefore a perfect time to get that platter or baked root vegetables out. I like baked root vegetables a bit more than pan roasted ones for the following reasons
They are one pot so much less effort.
The starchier sweetness improves your baking adding a ton more cozy feeling.
When I bake my kitchen is warm at the same time.
It is a recipe that you can do as a big batch with minimal prep and have all week long in the fridge.
It pairs well with pasta, rice or any grains,can be rolled as wraps or made into a salad.
Ingredients for baked root vegetables.
The vegetables: the baked vegetable tray is one recipe that allows you so much flexibility in terms of what you can have. You can make it as colourful as you like or as monochrome as you prefer. Here is a list of vegetables I like to throw into the tray.
Sweet potatoes
Carrot
Turnip
Potato
Radish
Swedes
Beetroot
For roasting: Olive oil, salt and herbs are the ones that work. The herbs I have chosen is rosemary and oregano. You can use thyme or basil as well.
Lets make baked root vegetables
The baked vegetables is the best use of a roasting tray.
Prep the vegetables: choose starchy tough vegetables to start with. Wash thoroughly. Cut them into big chunks or dices as you prefer. Keep the beets separately. The carrots, potato sweet potato, radish, parsnip, swedes, turnip can all go together.
Coat them in flavours. Since the vegetables are going to be soft and bland, it is best to coat them with flavours. Sprinkle salt, pepper abd drizzle oil and toss them well. For flavours I prefer to add fresh study herbs that just dont burn away. Rosemary, oregano and thyme are my first choice. Go with what feels natural to you. You can replace the pepper with chilli flakes if you like the heat. Lets the vegetable mix sit while you preheat the oven Ensure that the beets are coated and kept separate.
Bake: preheat the oven at 180 degrees for 10 minutes. Place the vegetables on a roasting tray. Spread them out evenly. Poke in pieces of beets into the gaps so they cook along. Roast the vegetables for 35 to 40 minutes at 180 degrees Celsius on heat both from up and down. Half way through the time, flip the vegetables over to ensure even roasting. After about 35 minutes the vegetables will be ready and fork tender. Remove from heat and direct to the table. Or cool and proceed for storage.
Meal prep and storage
The baked root vegetables are wonderful to add bulk to any meal or in the lunch box.
Is this a vegan recipe?
Baked root vegetable is an excellent vegan platter. It is filling, a mix of good healthy fibre and carbs and perfect for any vegan meal.
How to make baked root vegetables into a salad?
Once you have the baked veggies in meal prep you can have a hearty salad with it. For the dressing I prepare a generous mix of lemon and lime juice with some pepper and salt. Then you need some freshness. Chop up some tomatoes, a cucumber and handful of oregano, mint and parsley. Add all this into the mixing bowl with double the quantity of baked vegetables. Pour the dressing over it. Toss well and serve immediately. They are great sides to meals and double up as salads. You can add a bunch to your breakfasts to as hash.
How do you ensure the beets don’t leech the colour all over?
There are a couple of ways you can achieve this. If you peel chop and place the beets separately, then place them on the tray to bake it will have zero leaching. Another method is to ensure you add the beets right at the end, a quick toss in the oil and salt and straight into the oven.
Hope you enjoy making this batch of low effort baked root vegetables. When you make your batch using this recipe, do share your thoughts and improvements in the comments below. Pin this for later. Stay subscribed see you in the next post.
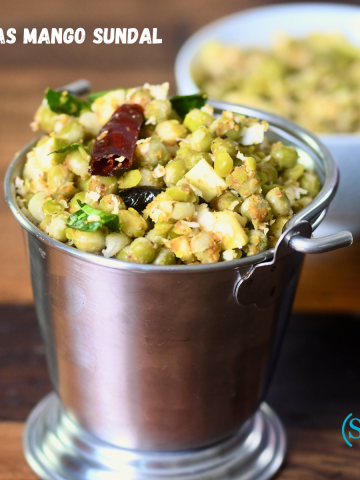
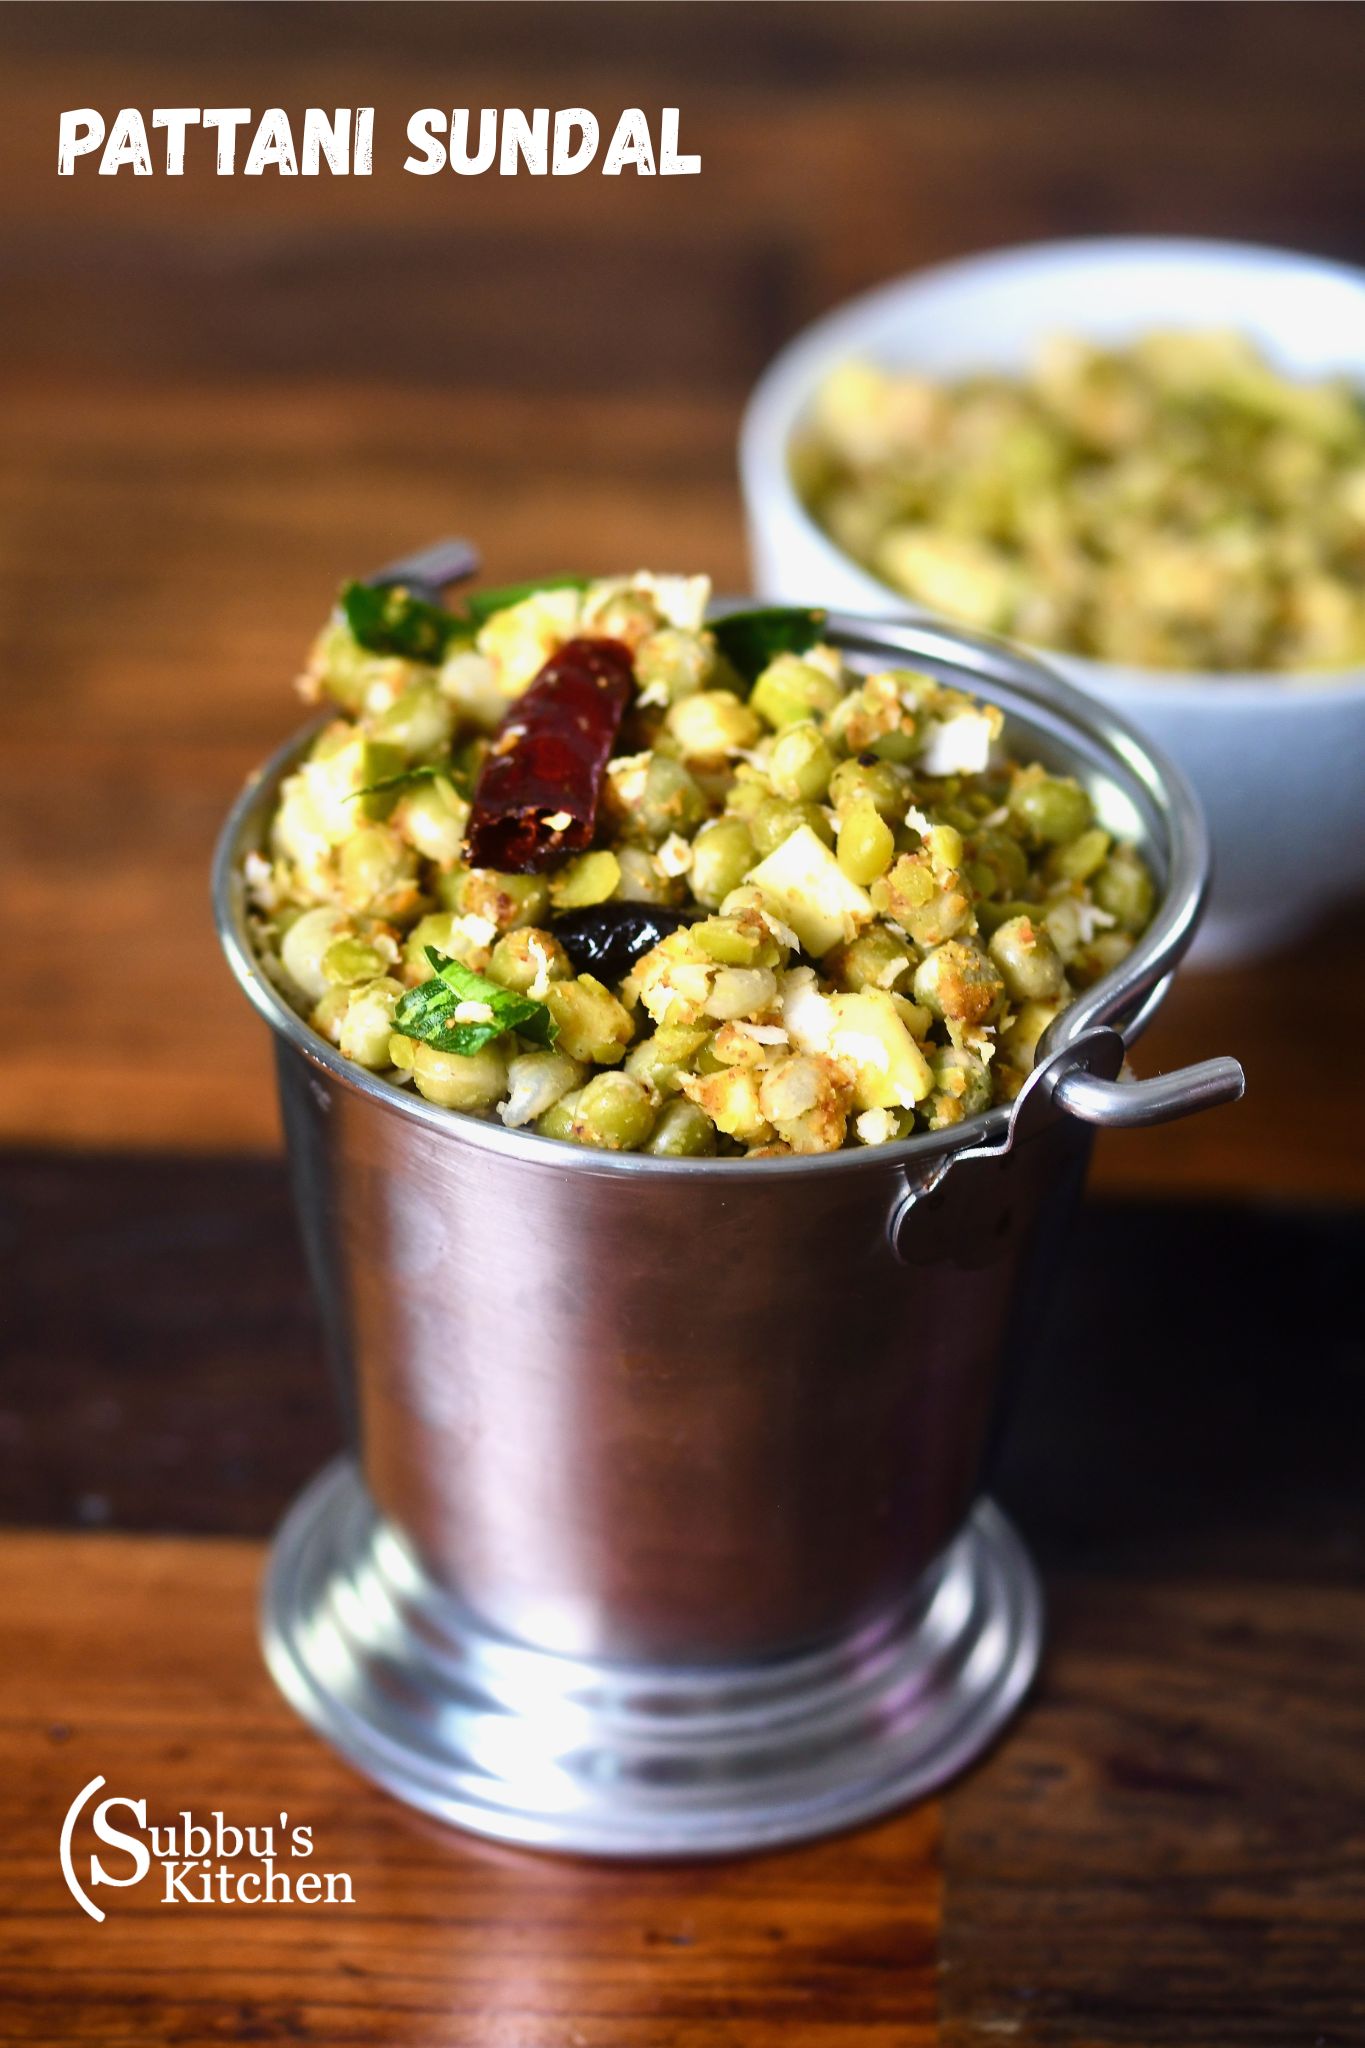
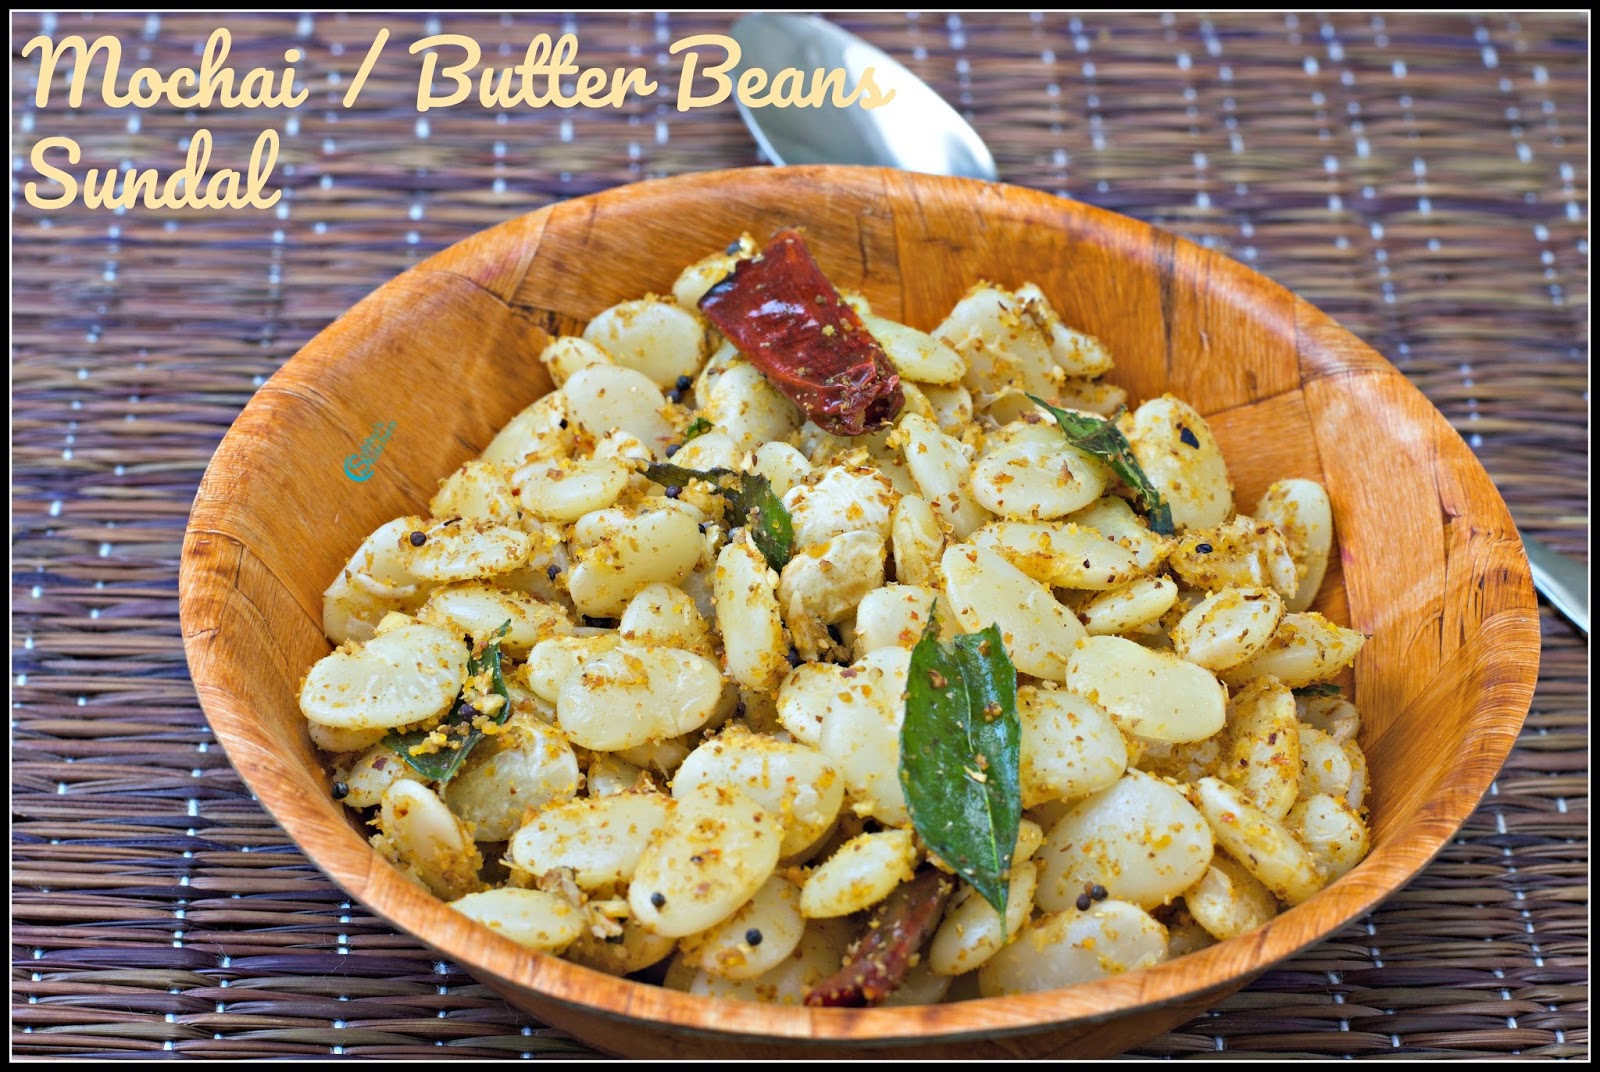
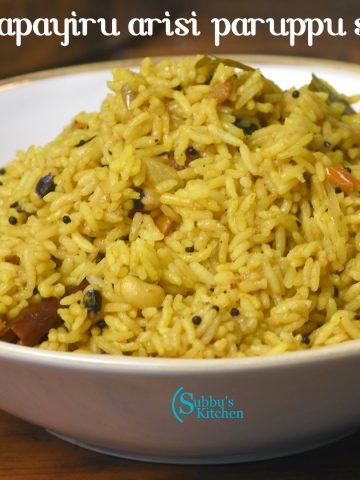
Peas Mango Sundal (Pattani Sundal, also known as Thengai Mangai Pattani Sundal) is one of the most popular sundal varieties, especially enjoyed along the buzzing beaches of Chennai. Made with perfectly cooked dry green peas sautéed in a simple mustard, curry leaves, and red chili tempering, this dish gets a delicious lift from tangy raw mango and freshly grated coconut. The sourness of mango, the subtle sweetness of coconut, and the earthy richness of peas come together to create a healthy, flavorful, and protein-packed salad. While it’s a festive favorite, this sundal is also perfect as a wholesome snack or as the protein portion of a regular lunch box.
Peas Mango Sundal – a healthy, tangy, and protein-rich sundal made with peas, raw mango, and coconut.
[feast_advanced_jump_to]
Ingredients
Each ingredient in this sundal plays a distinct role in creating its signature flavour, texture, and nutritional profile. Green peas provide a firm, protein-rich base with a gentle sweetness. Raw mango adds a tangy brightness, cutting through the richness and giving a refreshing contrast. Grated coconut lends a mild sweetness and creaminess, making the sundal more textured and satisfying. The tempering ingredients—mustard seeds, red chili, curry leaves, and asafoetida (hing)—bring warmth, aroma, and a slight heat; while sundal powder builds extra spice & earthy depth. Together, these ingredients deliver a dish that’s colorful, balanced, healthy, and very moreish.
Wash and soak the pattani/peas overnight in plenty of water.
The next day, drain the soaked water, add fresh water, add salt and take it to pressure cooker
pressure cook the soaked peas with salt for about 3 whistles, or until soft but not mushy.
Check if the peas are cooked until soft. If there is excess water, drain it out.
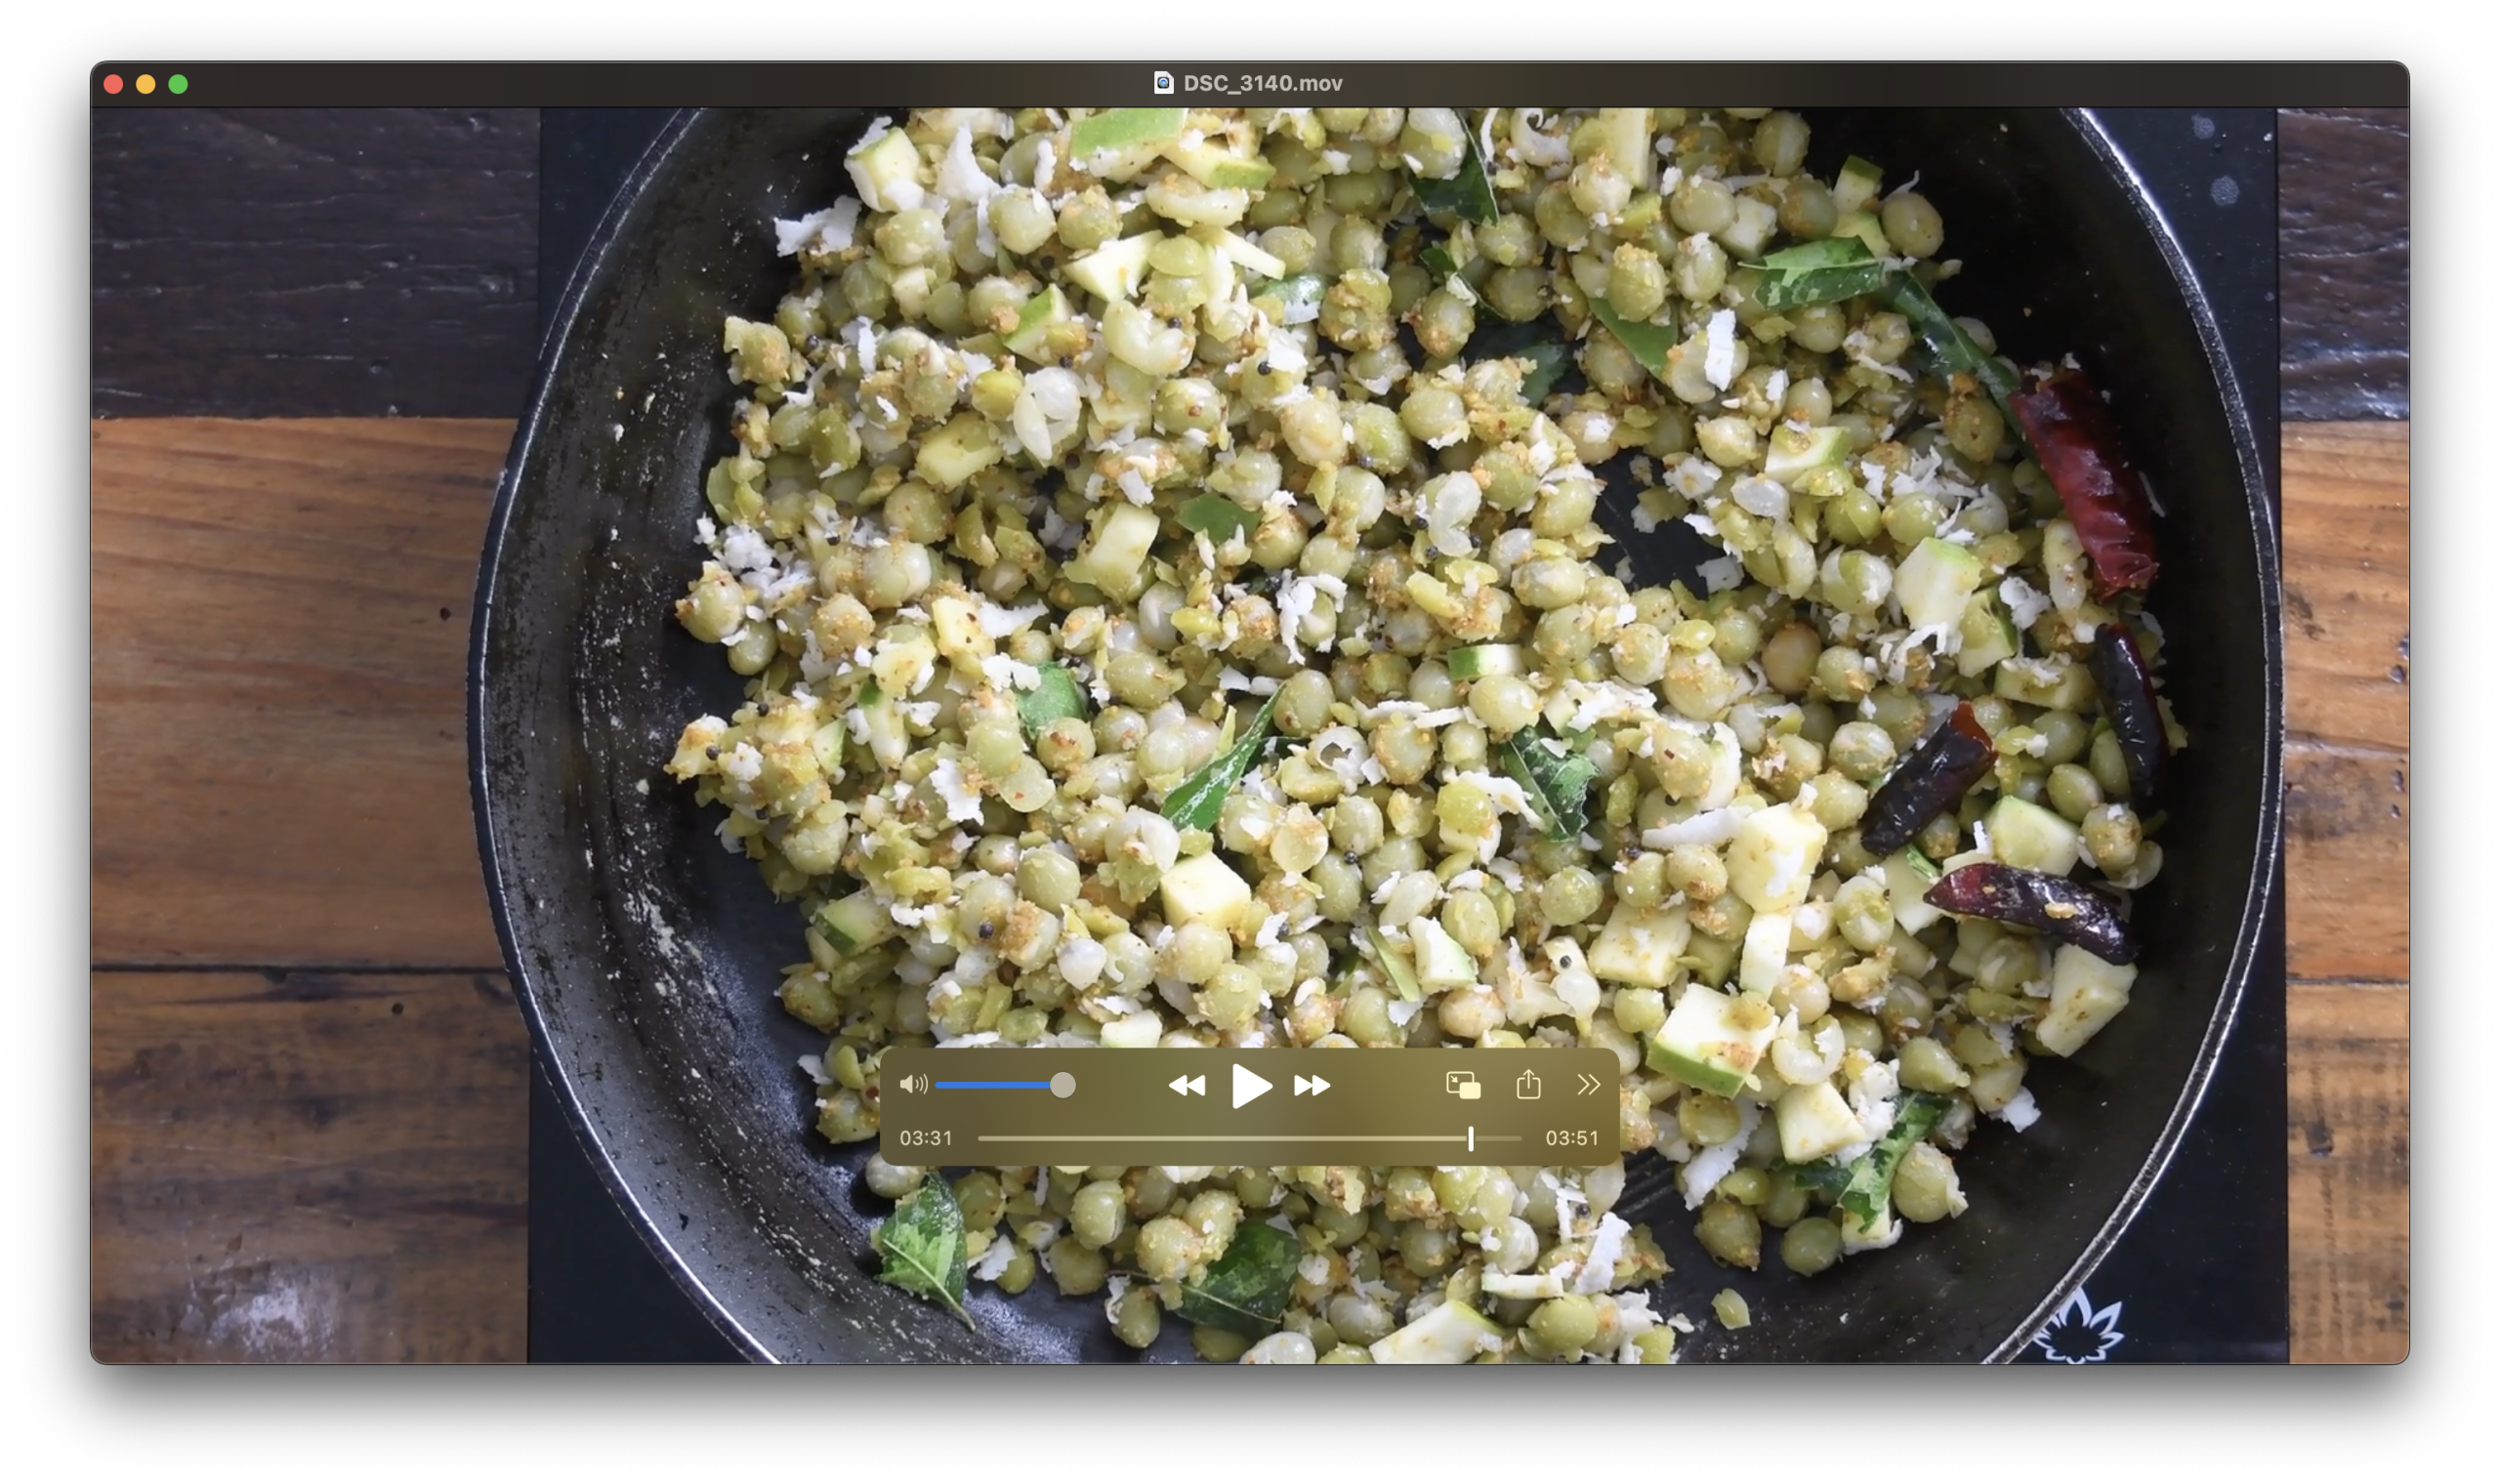
Heat oil in a pan. Add mustard seeds and let them splutter. Then add a pinch of hing, curry leaves, and broken red chili. Sauté for 5 seconds.
Add the cooked peas to the pan, and mix everything well.
Add Sundal powder and gently mix with peas
Add finely chopped mango
Stir in the grated coconut. Mix thoroughly so the flavors blend.
Keep the sundal on low flame for 2 minutes, stirring gently. Remove from heat. Your delicious Peas Mango Sundal is ready! Perfect for neivedhyam during festivals or as a healthy snack.
Hint: Always soak the peas overnight for best results—this helps them cook evenly and become soft without turning mushy. If you’re short on time, you can also do a quick soak by adding the peas to hot water for 3–4 hours.
Substitutions
Vegan: This sundal is naturally vegan—no substitutions needed.
Gluten-Free: Already gluten-free, making it a great option for those avoiding gluten.
Low-Oil / Whole-Food Plant-Based: Reduce the oil in the tempering or use a quick dry-roast tempering method to make it lighter.
Low-Sodium: Cook the peas without salt and add a squeeze of lemon instead of raw mango for flavor balance.
Even if you don’t personally follow these diets, chances are some of your friends or family do—and this recipe is versatile enough to accommodate them.
Variations
Spicy: Add chili flakes or finely chopped green chilies while tempering to give the sundal a lively kick.
Deluxe: Toss in extra grated coconut, roasted nuts, or crispy fried onions for richness and crunch.
Kid-Friendly: Mix in soft mashed potato or lightly crushed plain crackers for added texture that kids will enjoy.
Optional Additions: While this recipe is traditionally made without onion (perfect for neivedhyam/prasadam), you can add finely chopped onions or sautéed garlic for a regular everyday version if not preparing it as an offering.
This way, you can cater to different tastes, dietary preferences, or occasions while still honoring the traditional preparation.
Storage
Store the sundal in an airtight container in the fridge. It stays fresh for 2–3 days. Because of the raw mango and grated coconut, this sundal does not freeze well, as freezing can change the texture and flavor of both the peas and mango. For best taste, always prepare fresh or consume within a few days.
Top Tip
If you're going to make this recipe, make sure to follow this top tip!
Don’t overcook the peas! They should be soft but still hold their shape to give the sundal a nice texture. Overcooked peas can turn mushy and make the dish less appealing. Also, add the raw mango and coconut at the end to preserve their freshness and flavor.
Peas Mango Sundal is a traditional South Indian snack made with protein-rich peas, tangy raw mango, and fresh grated coconut. Lightly tempered with mustard seeds, curry leaves, and red chili, this sundal is perfect for festivals, prasadam, or a healthy protein-rich lunchbox addition. It’s naturally vegan, gluten-free, and packed with flavor.
Soak the peas – Wash and soak the pattani/peas overnight in plenty of water.
1 Cup Dry Whole Green Peas
Cook the peas – The next day, drain the soaked water, add fresh water, salt and pressure cook the peas with salt for about 3 whistles or until soft but not mushy. Drain excess water if needed.
1 teaspoon Salt
Prepare tempering – Heat oil in a pan. Add mustard seeds and let them splutter. Then add a pinch of hing, curry leaves, and broken red chili. Sauté for 5 seconds.
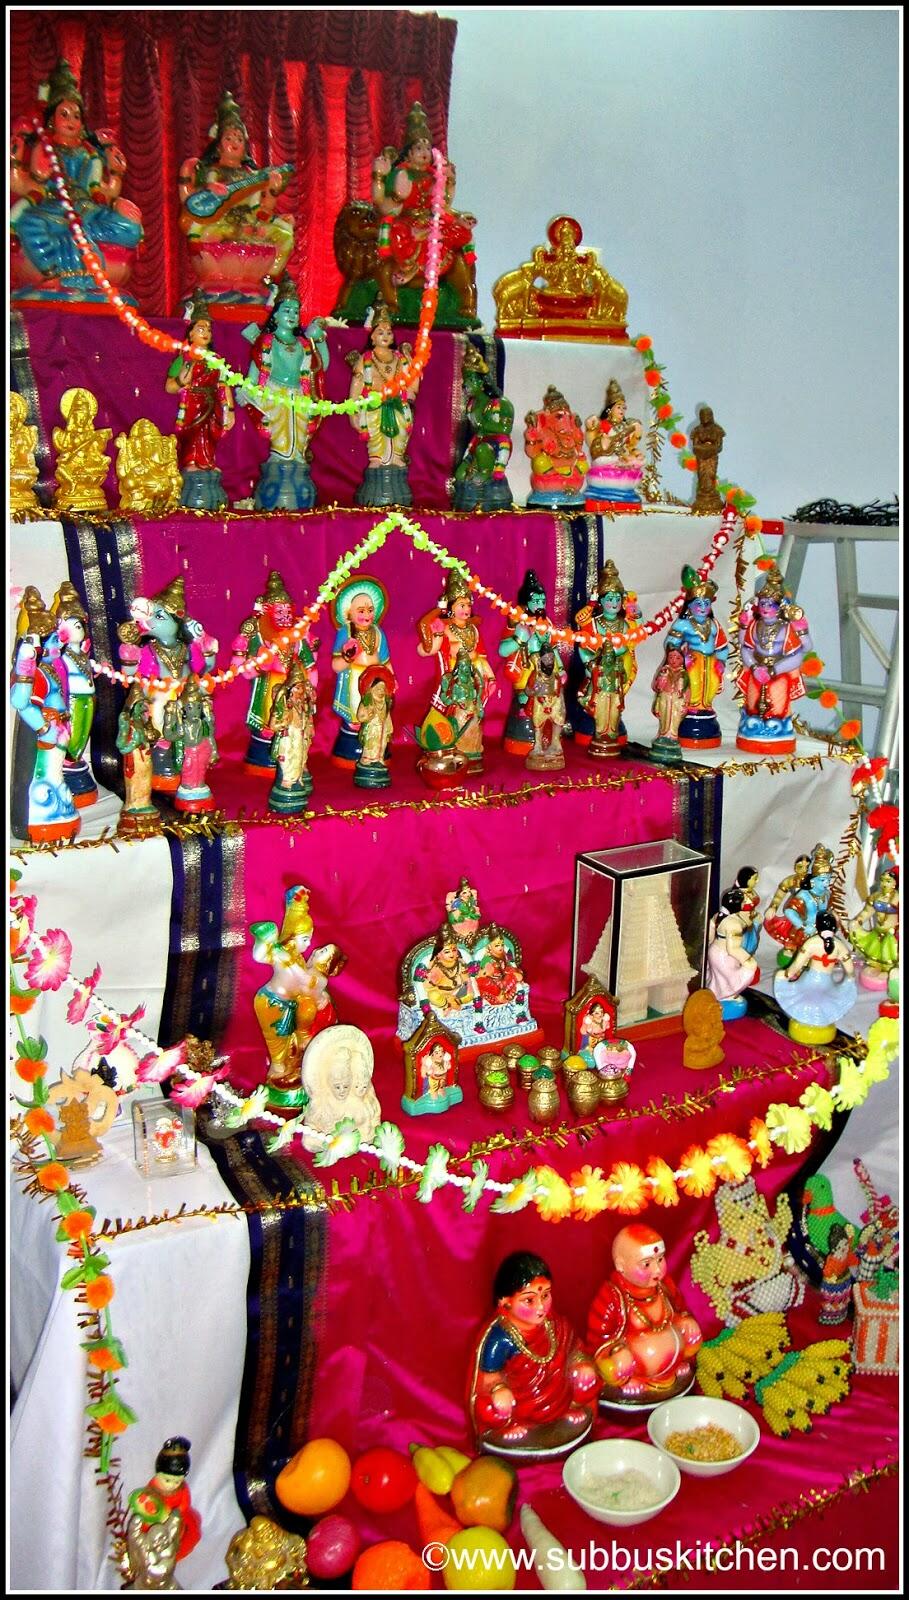
Navratri, also known as Dasara, is one of the most vibrant and devotional festivals celebrated across India. Over nine days (culminating in Vijayadashami), devotees worship Goddess Durga in her various forms with prayers, rituals, and special food offerings (neivedhyam). In the southern states, especially Tamil Nadu, Andhra Pradesh, and Karnataka, the festival is marked by the tradition of Golu—beautifully arranged steps adorned with dolls and idols, where families welcome relatives, friends, and neighbors to celebrate together.
Festive Navratri Golu setup with dolls and idols beautifully arranged on decorated steps.
Food plays a central role in Navratri, with each day featuring special dishes prepared for offering to the Goddess and then shared with guests. This collection brings together a wide variety of traditional Navratri recipes across different categories:
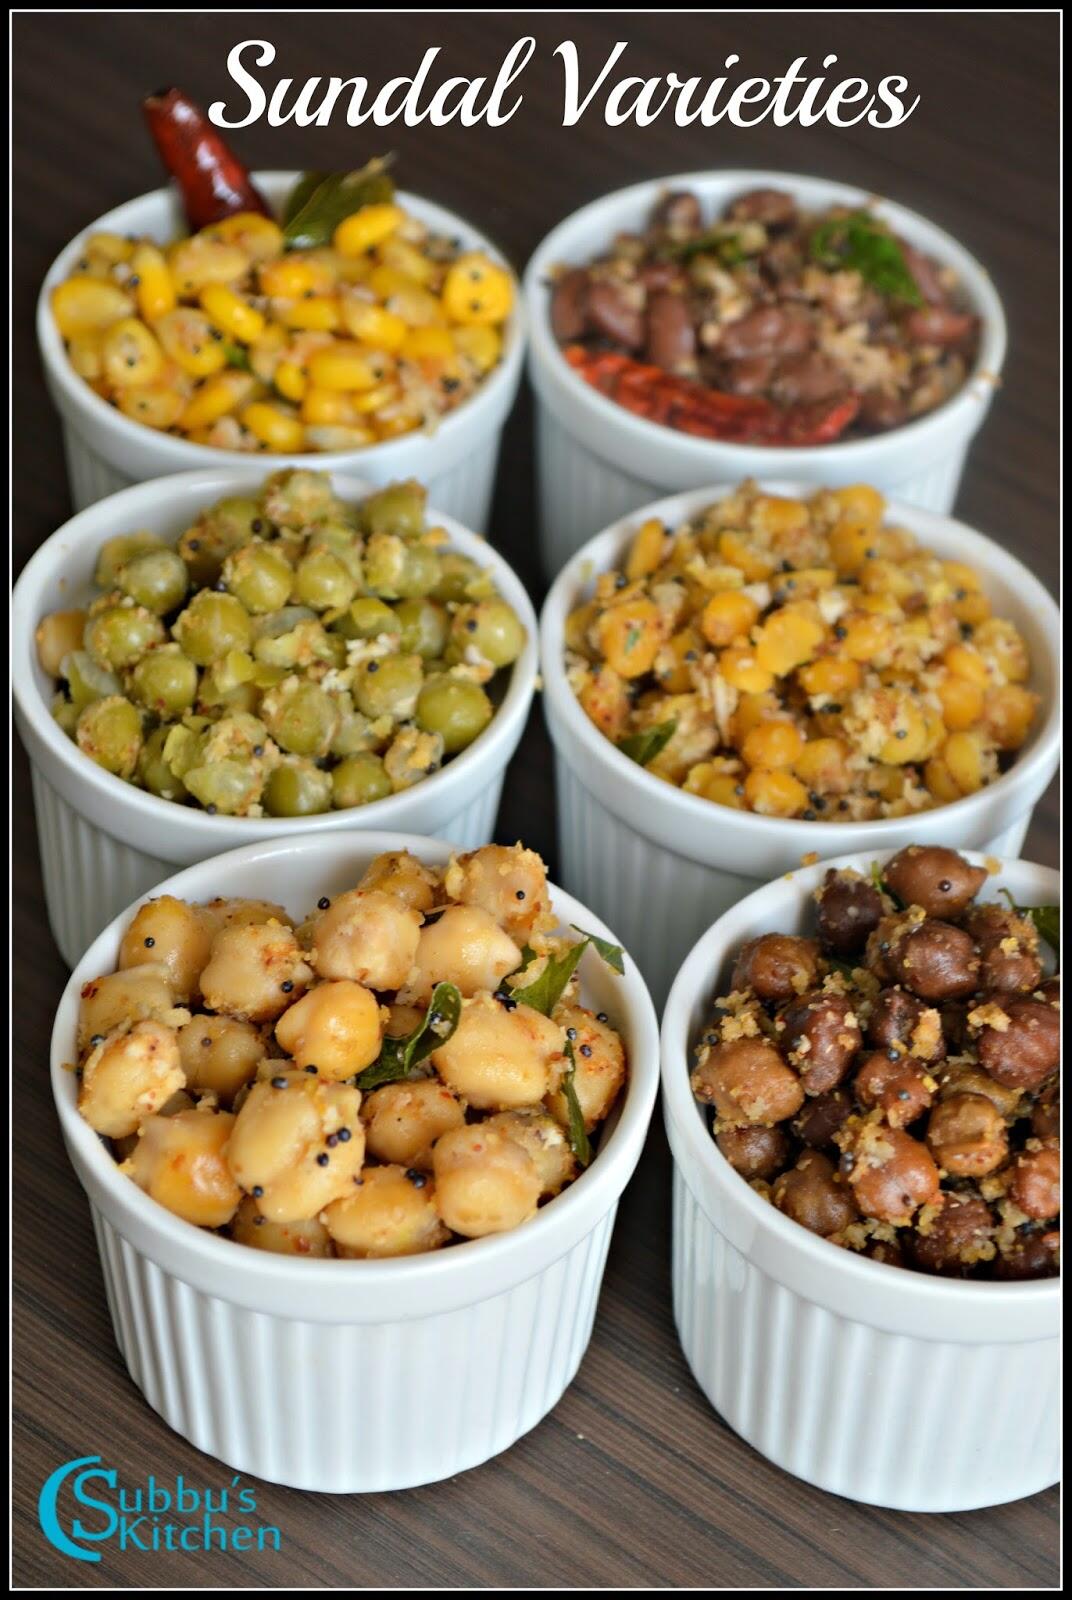
Sundal Recipes – A signature dish of Navratri, sundals are made with legumes, pulses, and lentils. A new variety is prepared each day for offering and then distributed as prasadam to guests visiting the Golu.
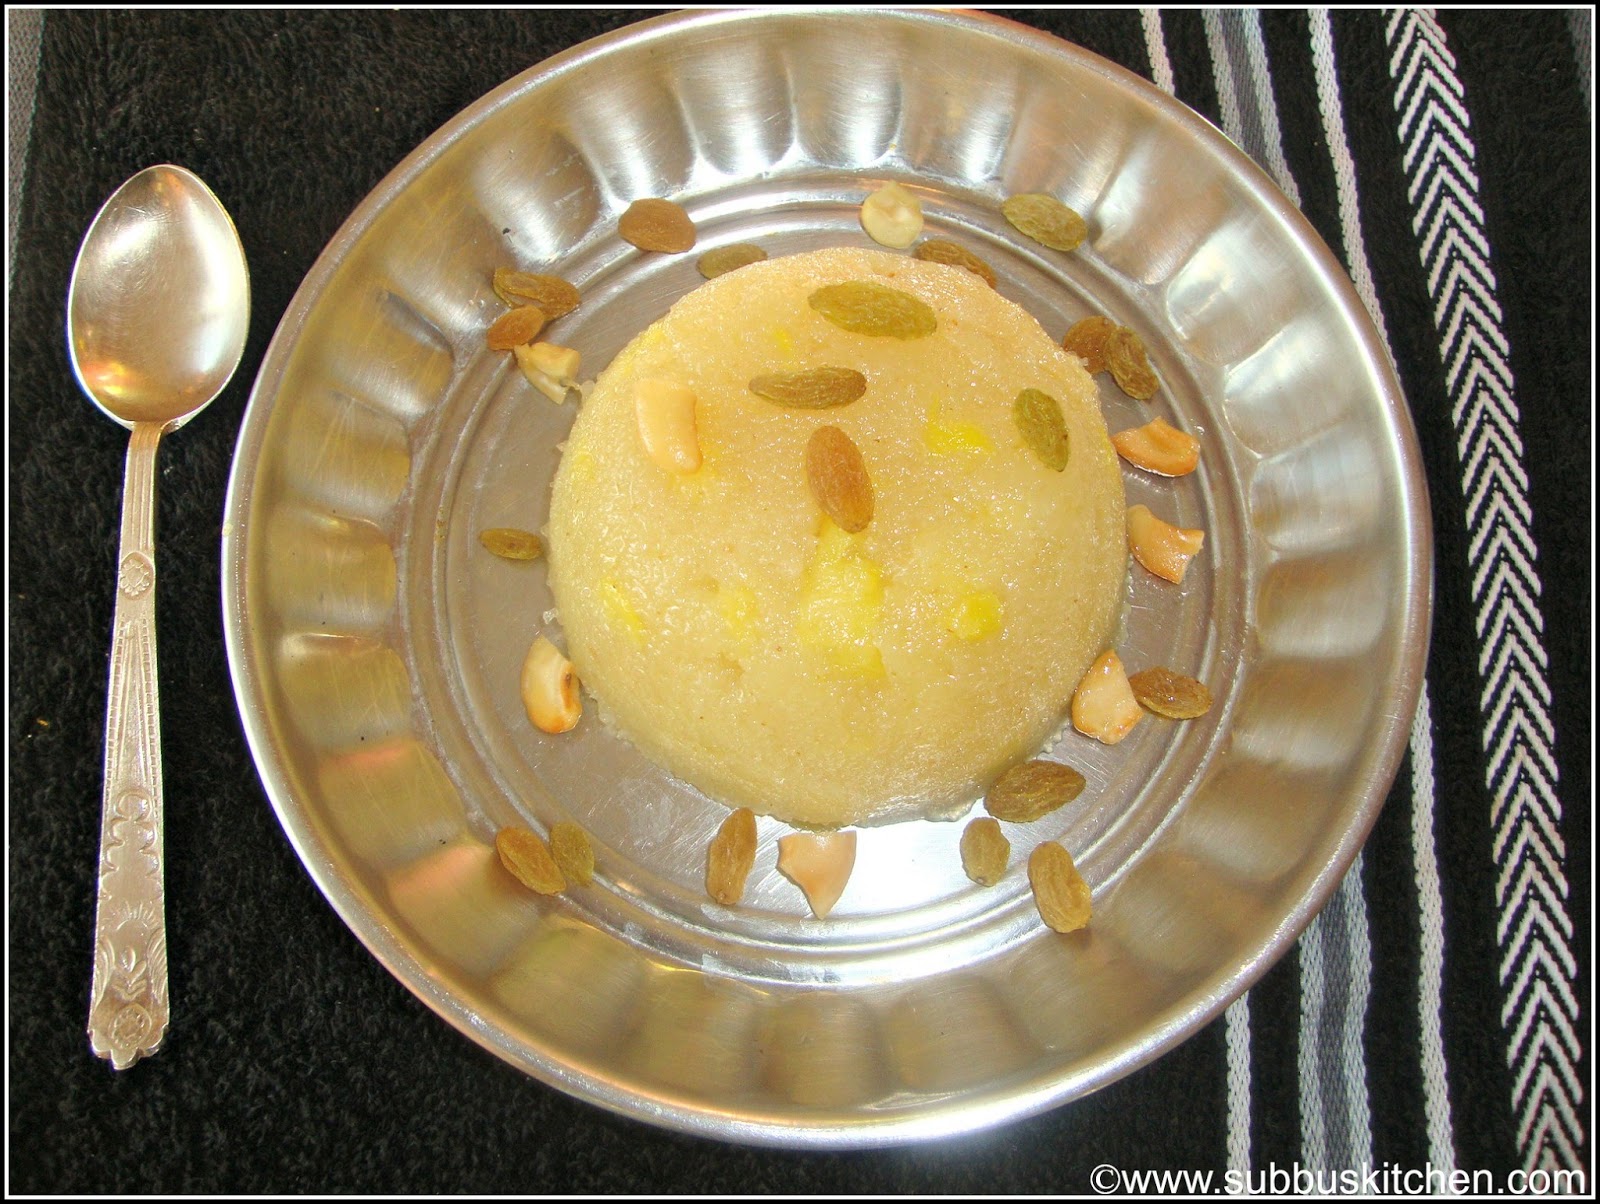
Sweet Recipes – Festive favorites like kheer (payasam), appam, kesari, puttu, and more are prepared to add sweetness and joy to the celebrations.
Snack & Tiffin Recipes – Crispy vada, festive poori, wholesome sabudana thalipeeth, and other special snacks are also made during Navratri to offer and enjoy with family.
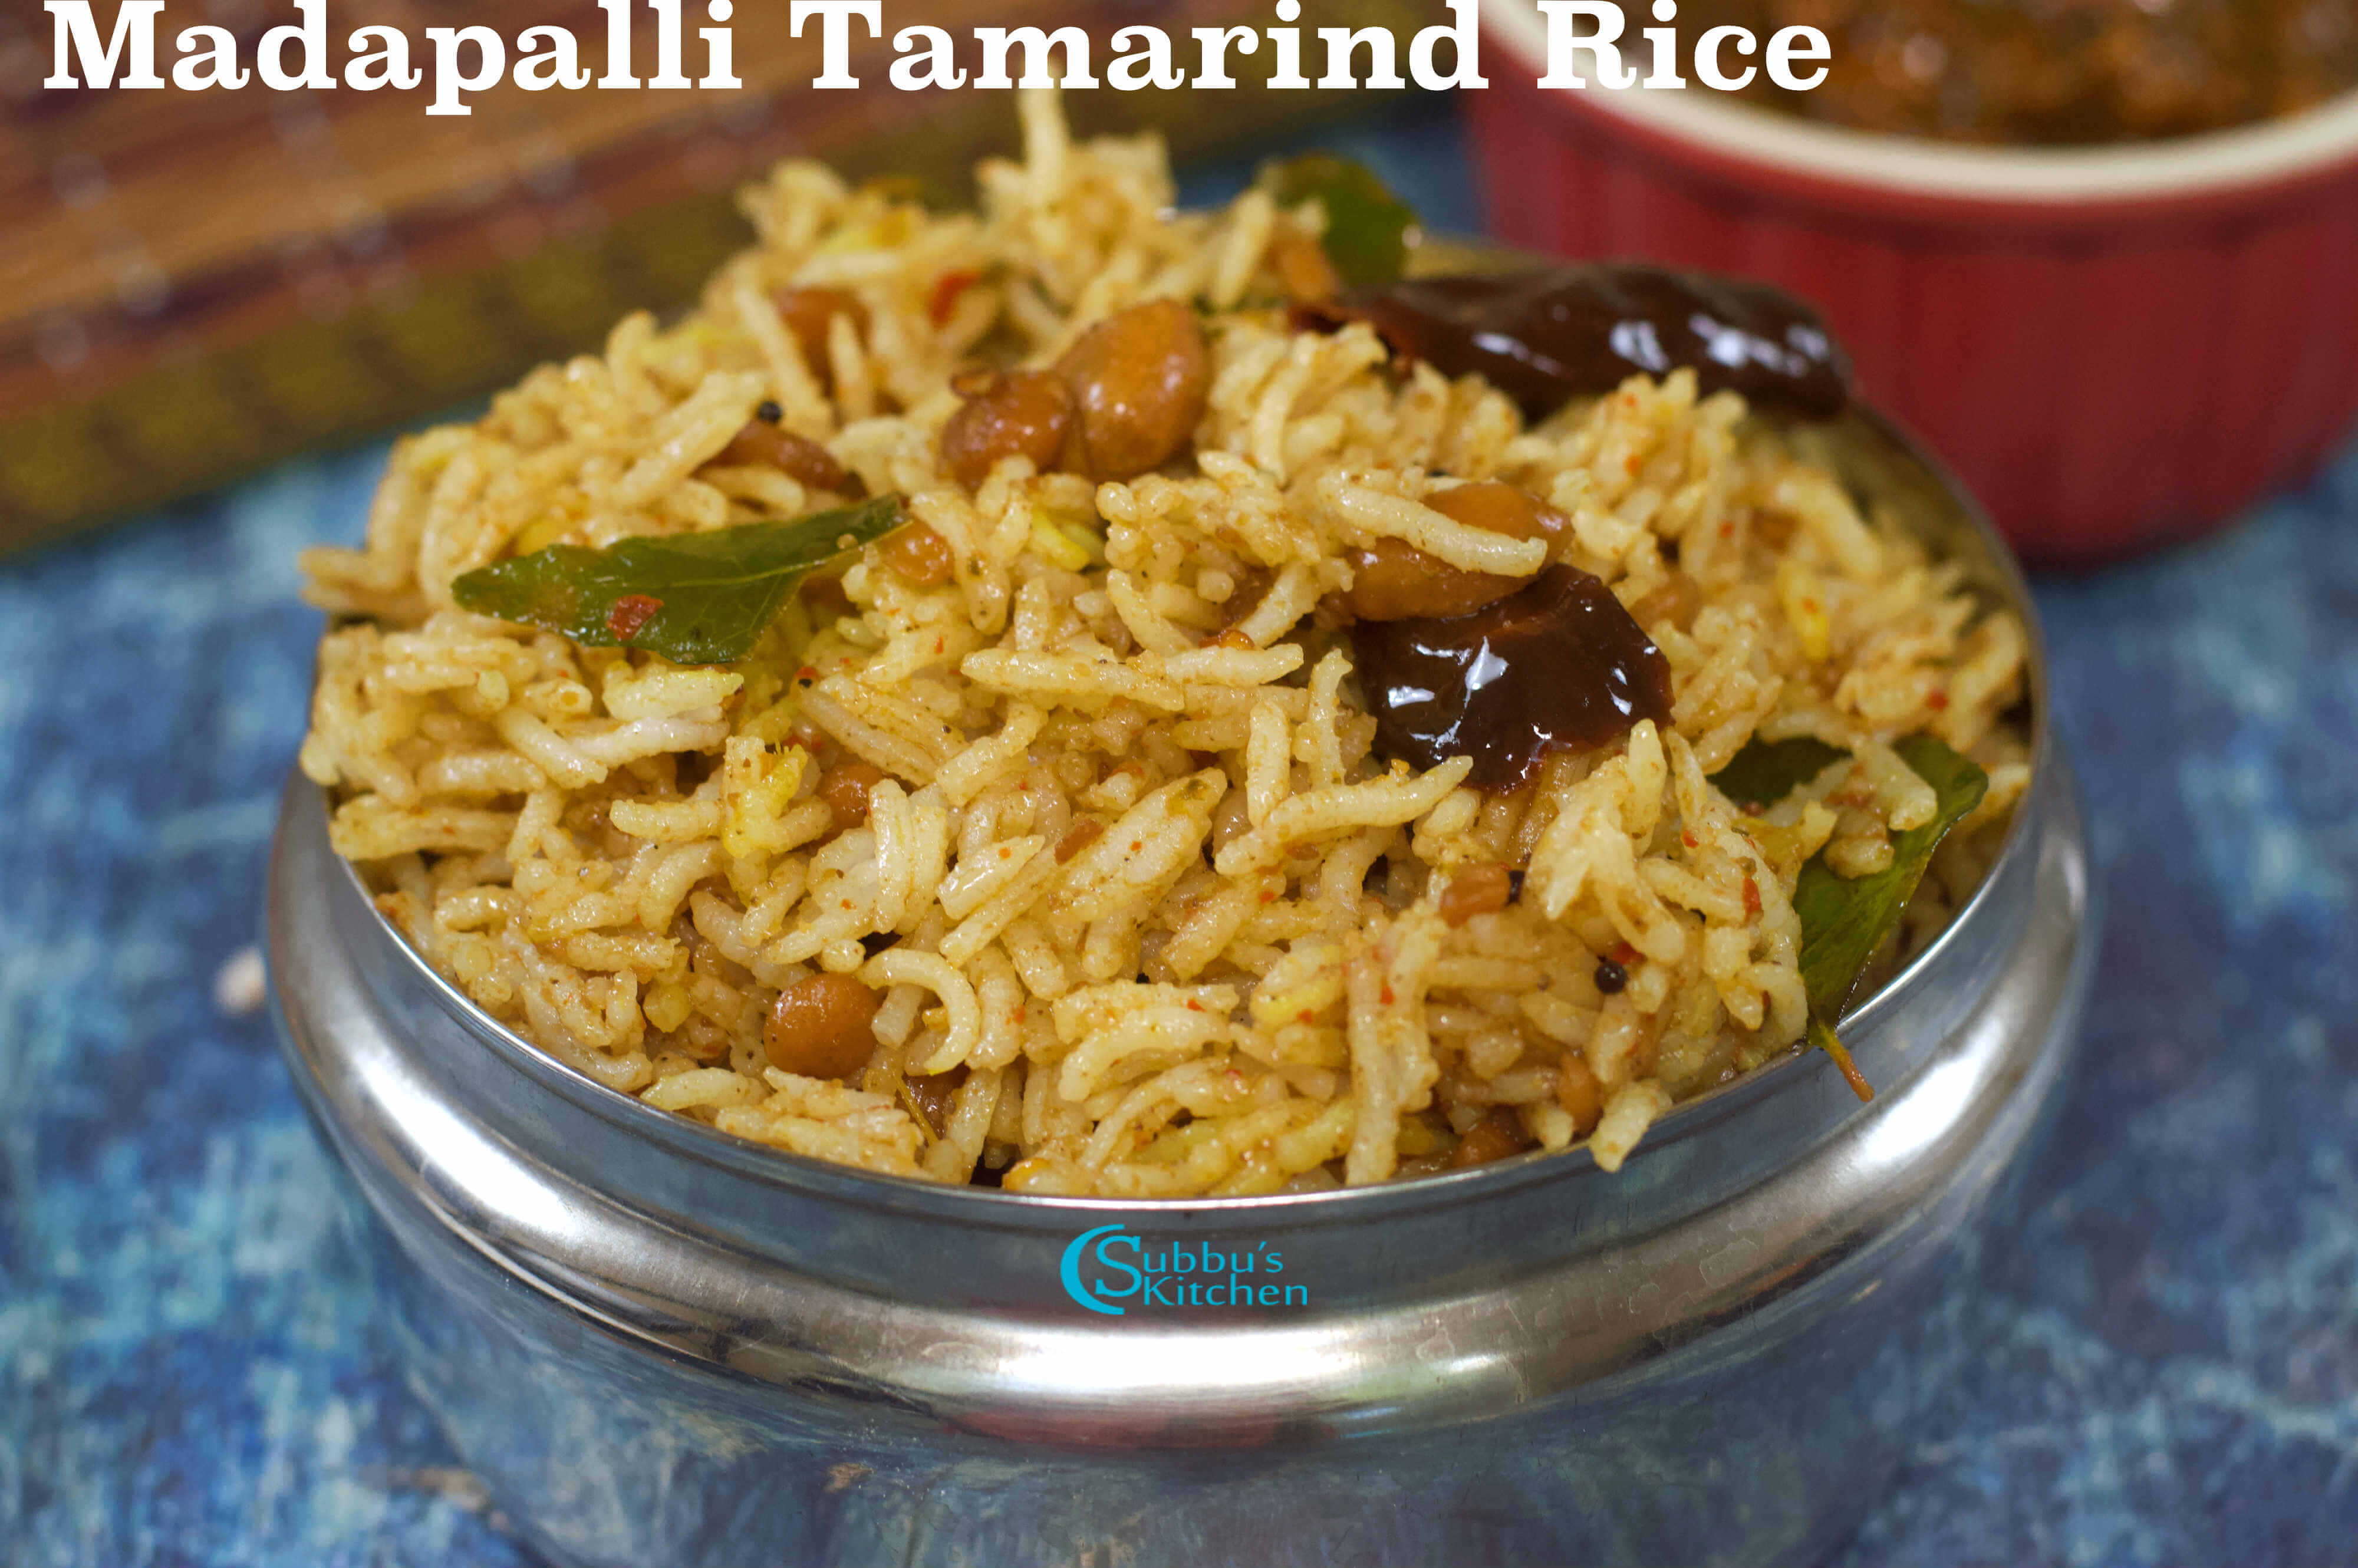
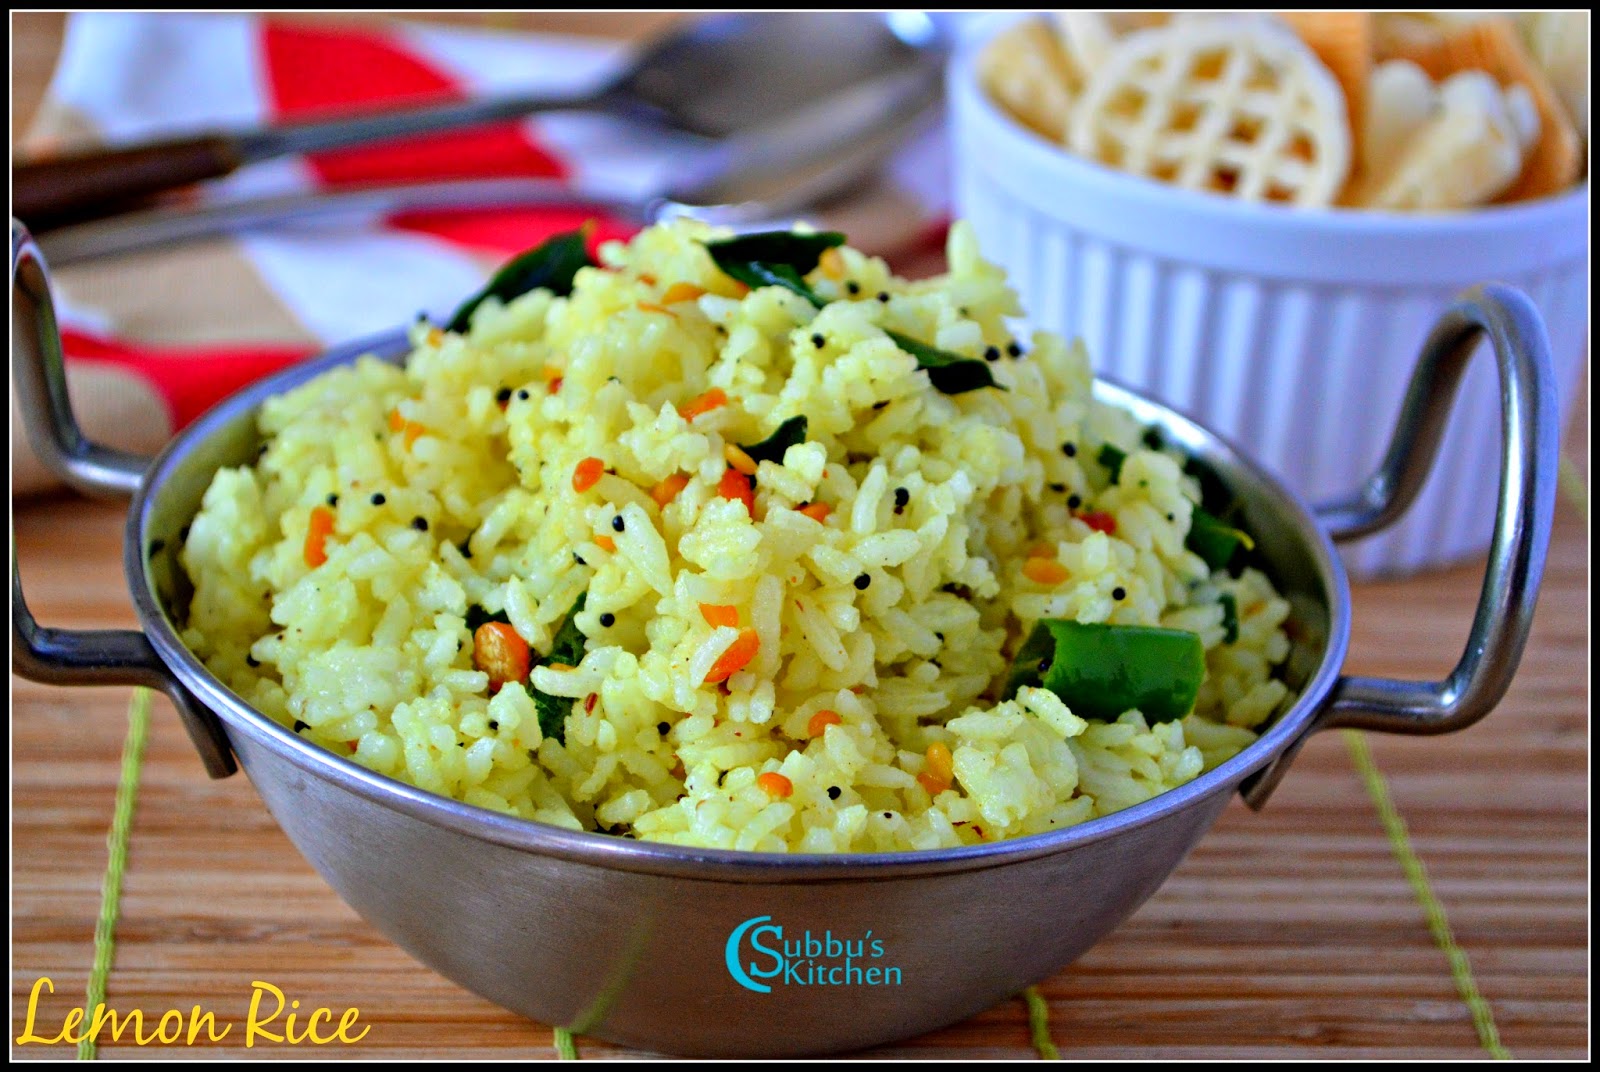
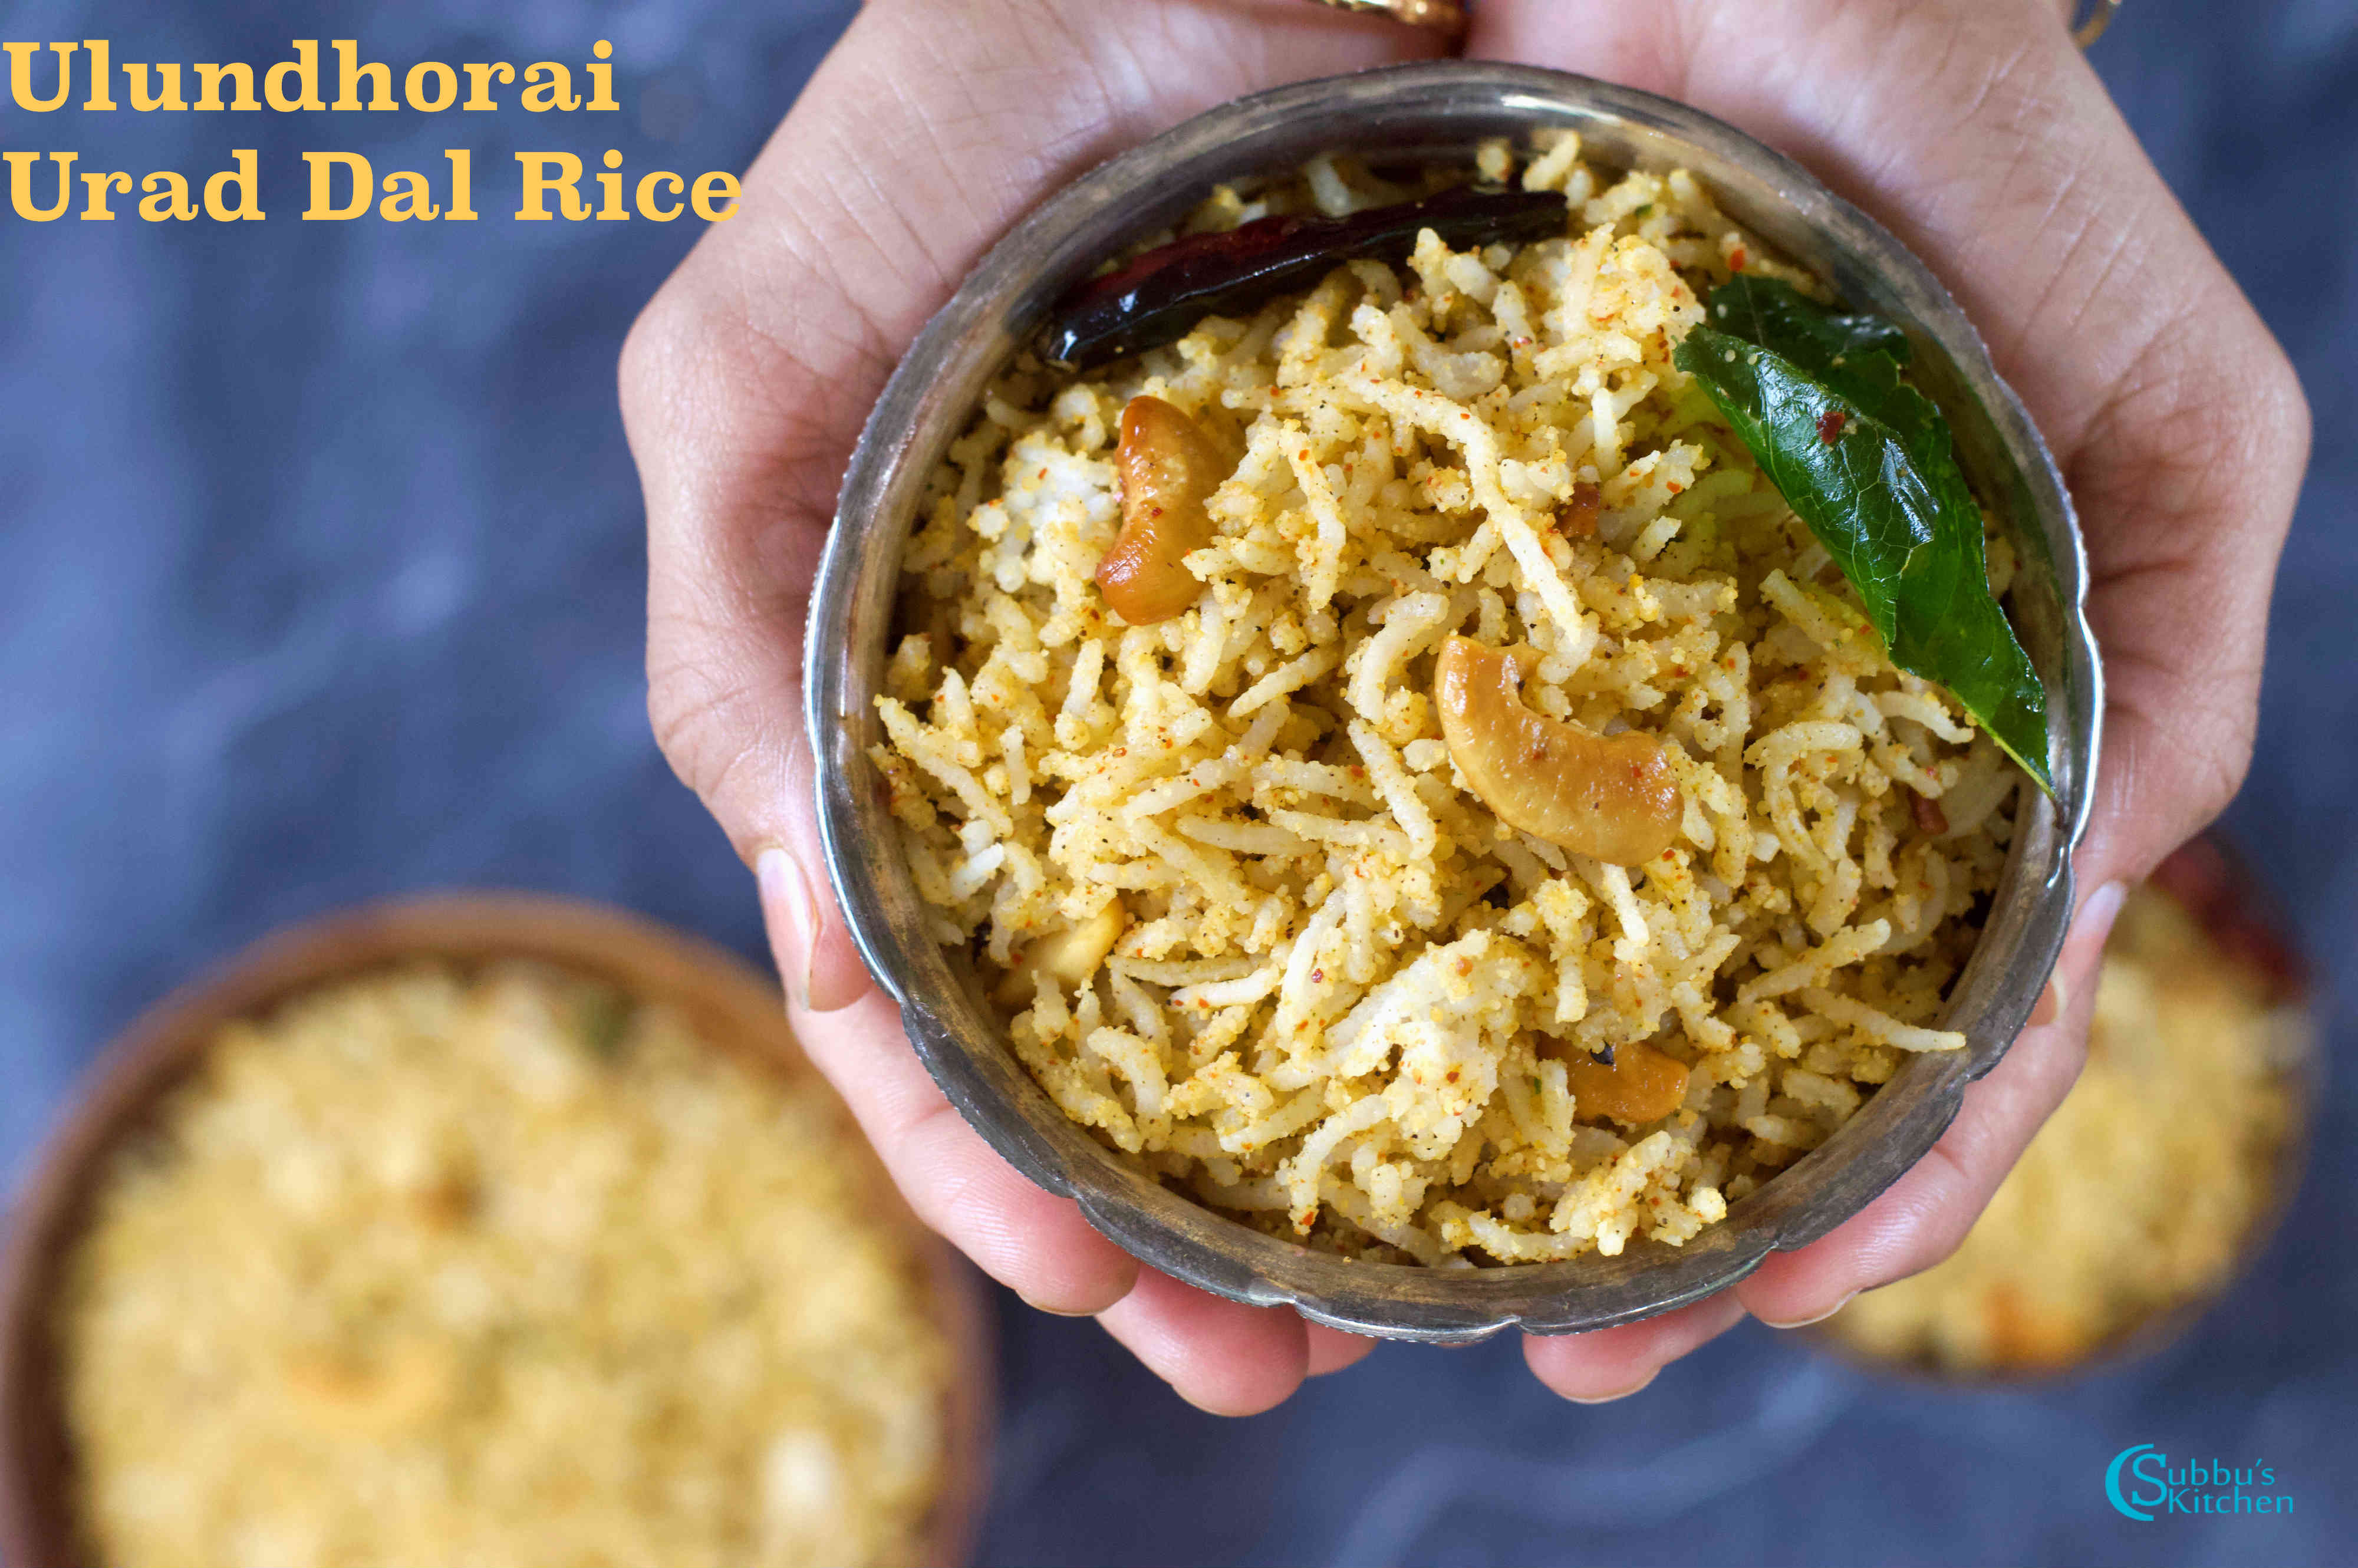
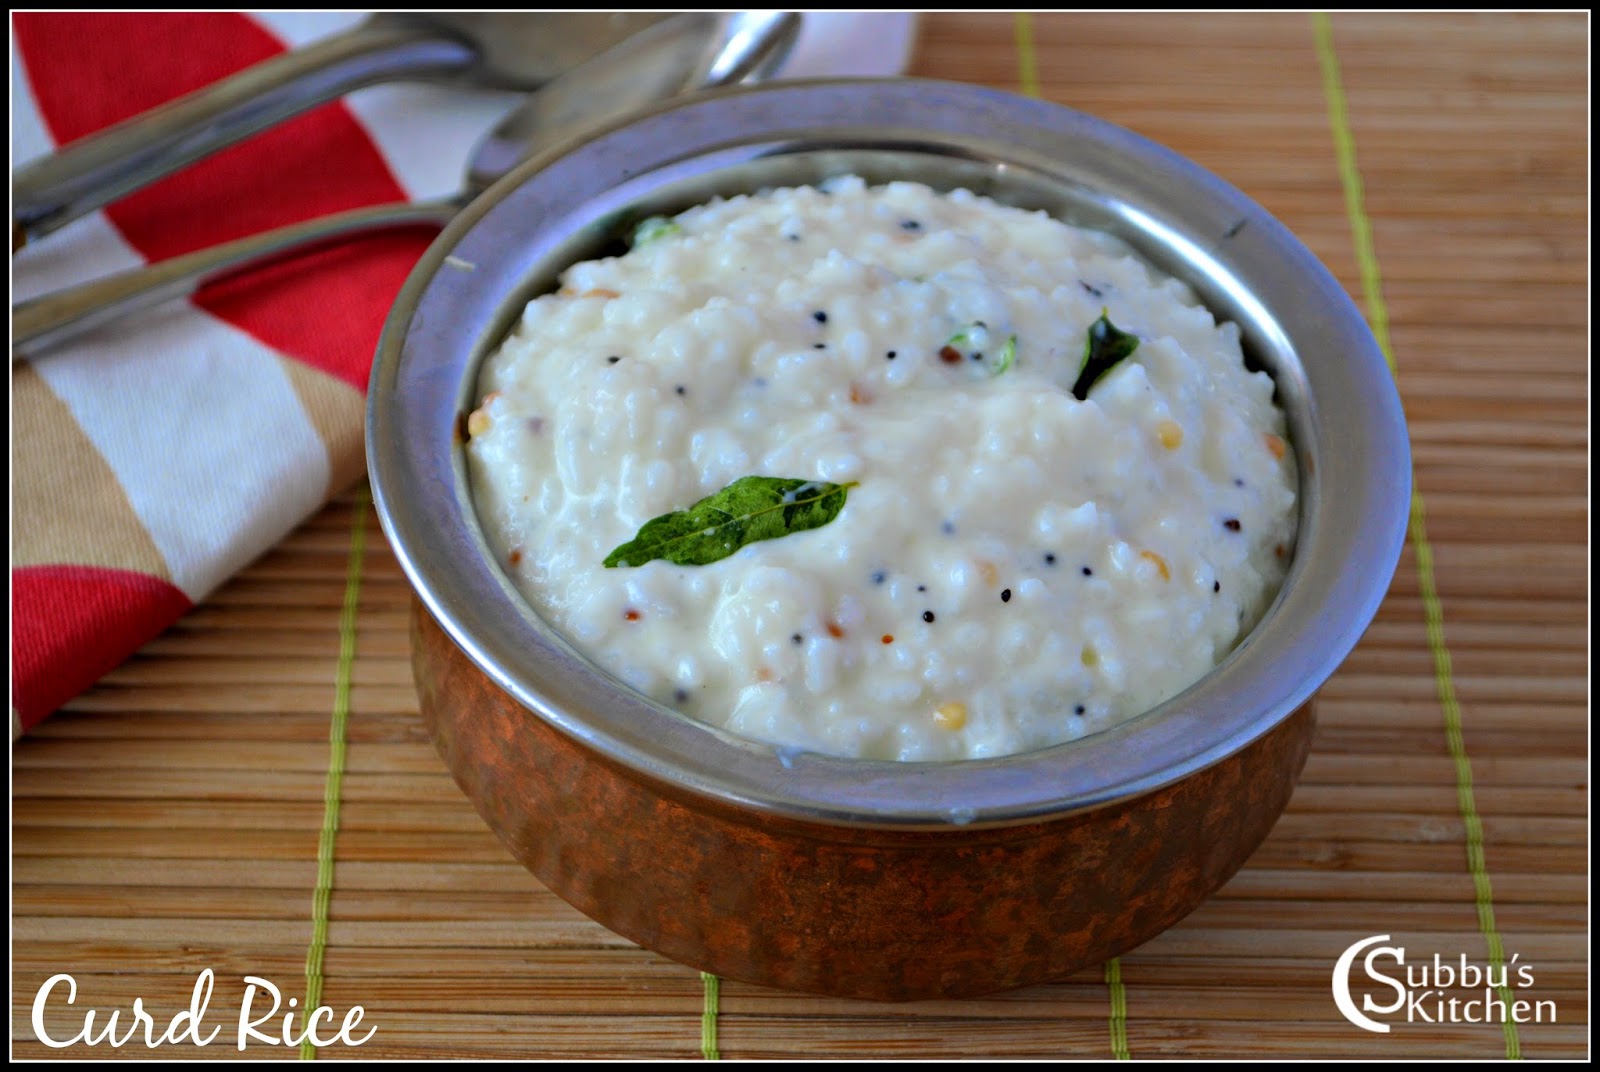
Variety Rice Recipes – Traditional rice dishes such as lemon rice, coconut rice, puliyodharai, and other flavorful varieties are prepared without onion or garlic, keeping them pure for offering.
Each of these dishes carries the spirit of devotion, tradition, and togetherness. Explore the recipes below and celebrate this Navratri with authentic flavors and heartfelt offerings.
[feast_advanced_jump_to]
Navratri Sundal Recipes for Golu
Sundal is one of the most popular offerings during Navratri and Golu celebrations. Different varieties of sundal are prepared each day as neivedhyam (offering) to the Goddess, and then shared with friends, relatives, and neighbors who come to view the Golu display.
This special collection is dedicated to Navratri recipes, with a focus on sundals. Below, you will find a variety of traditional sundal recipes to prepare and enjoy during the festival.
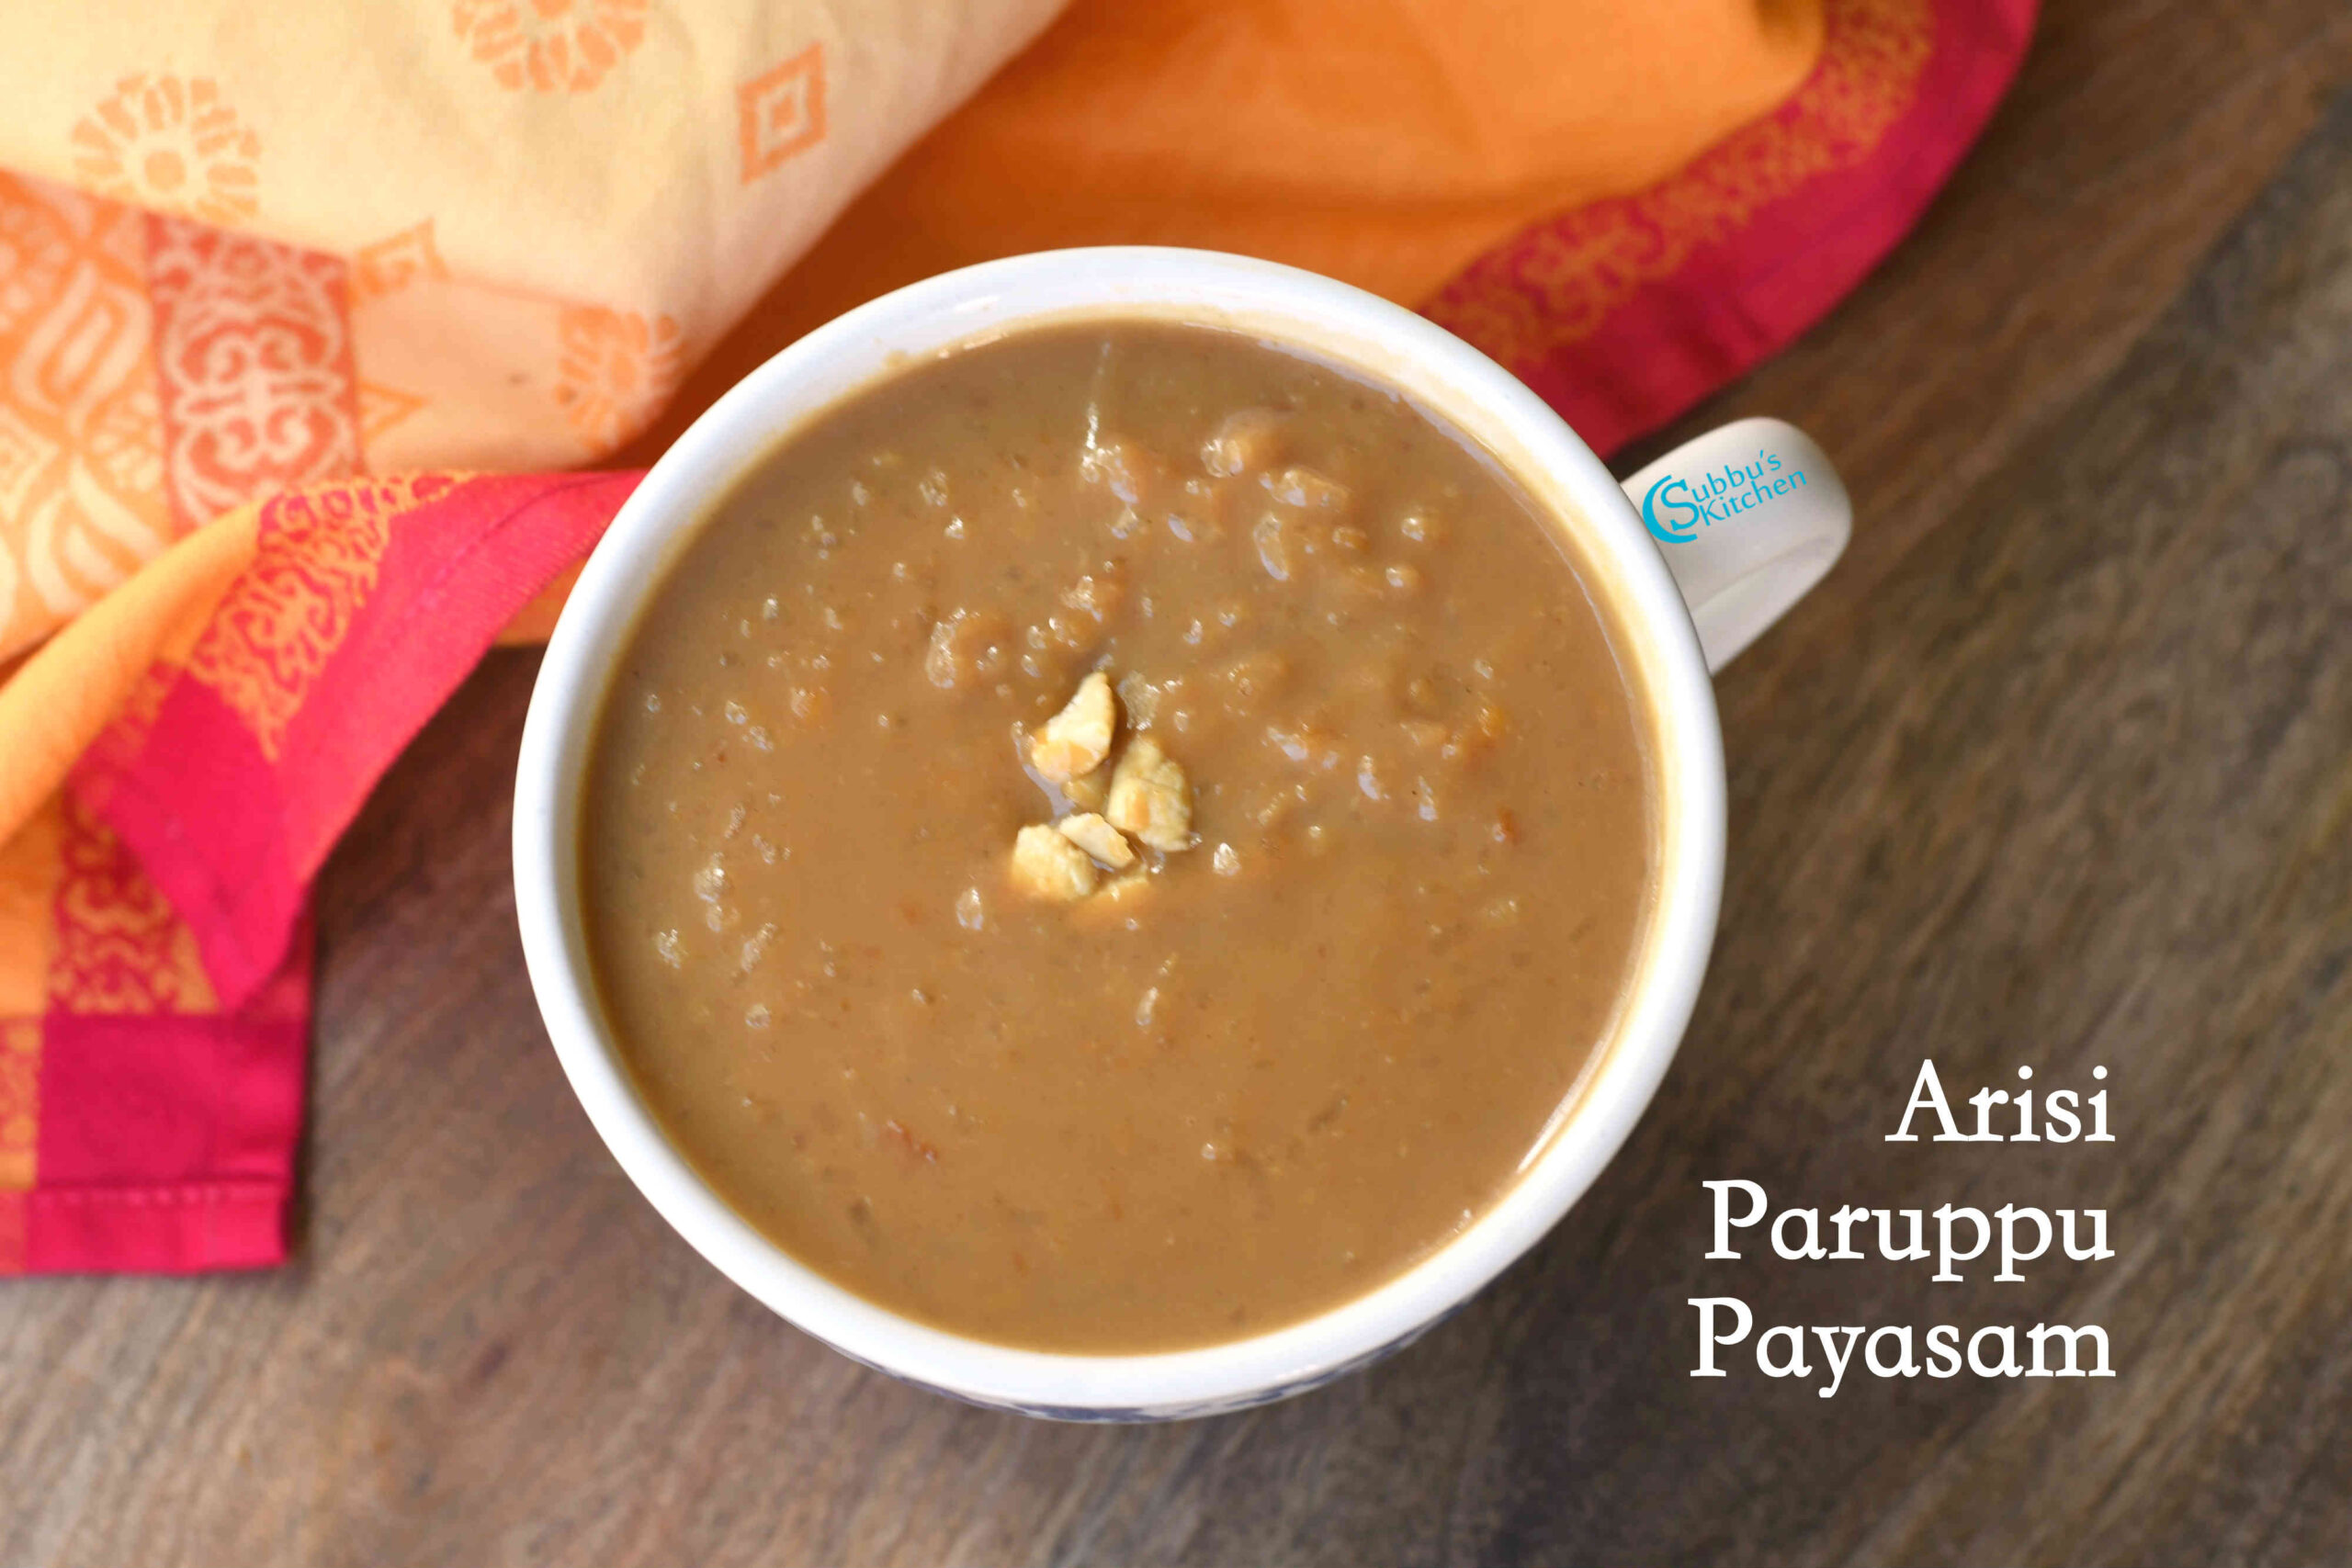
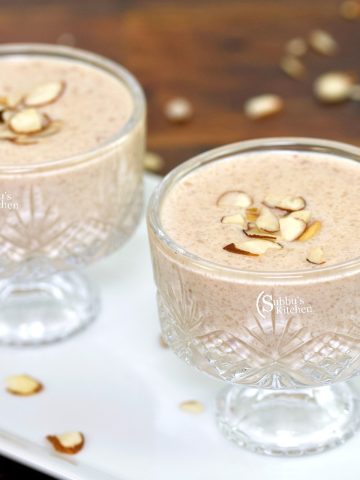
Sweets hold a special place in Navratri celebrations, adding joy and festivity to the occasion. Along with sundals, families prepare a variety of delicious sweets as neivedhyam for the Goddess and to share with guests. Traditional favorites include creamy kheer (payasam), soft and fluffy appam, melt-in-the-mouth kesari, festive puttu, and many more delightful treats.
This collection brings together popular Navratri sweet recipes that are simple to make and perfect for offering to the Goddess, as well as sharing with friends and family. Explore the recipes below and add sweetness to your Navratri celebrations
Apart from sundals and sweets, a variety of traditional snack and tiffin-style dishes are also prepared during Navratri. Crispy and flavorful vada, festive poori, wholesome sabudana thalipeeth, and many such recipes are commonly made as offerings to the Goddess and enjoyed with family and friends.
This collection brings together some of the most popular Navratri snack recipes that are both satisfying and festive, perfect for adding variety to your celebrations
Variety rice dishes are another important part of Navratri offerings. Traditional favorites like lemon rice, coconut rice, puliyodharai (tamarind rice), and other classic rice varieties are prepared with devotion and offered to the Goddess. As these are meant for neivedhyam, they are made without onion or garlic, keeping them pure and satvik.
This collection brings together delicious and authentic Navratri rice recipes that are simple to prepare, flavorful, and perfect for sharing with family and friends during the festive season.
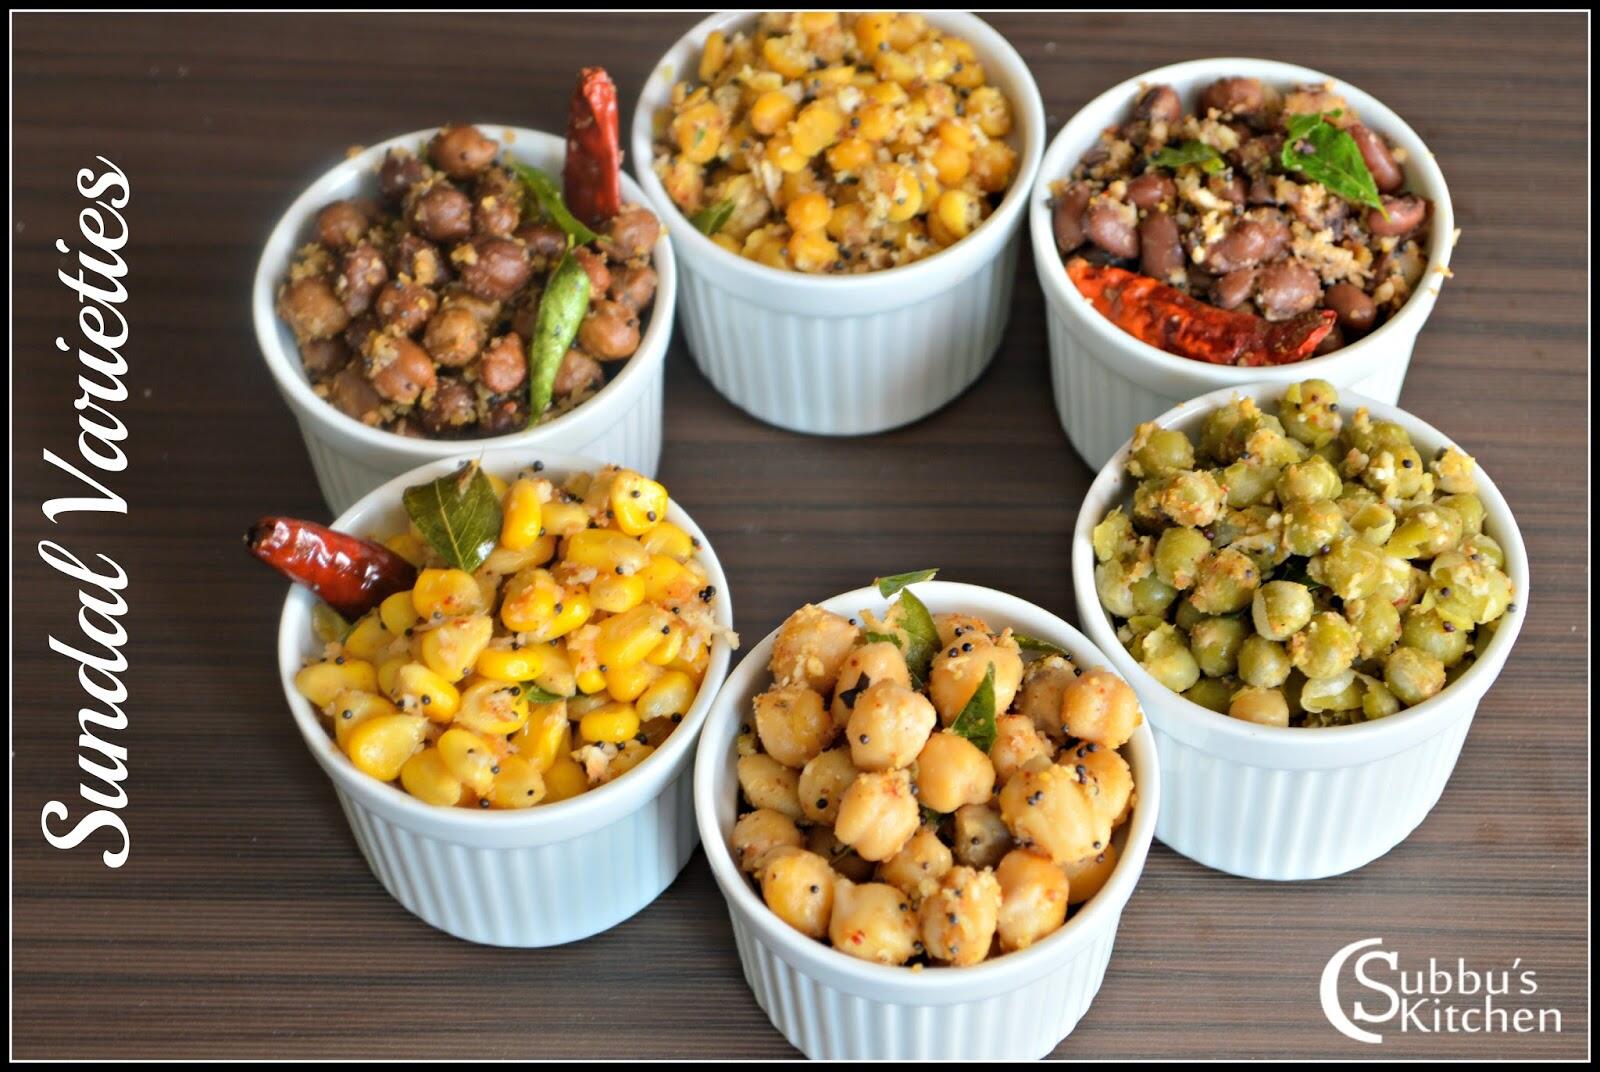
Navaratri is a time of devotion, celebration, and of course, delicious prasadam offerings! One of the most loved traditions is preparing a variety of Sundal recipes each day as an offering to the Goddess. In this collection of Navaratri Sundal Recipes, you’ll find a delightful assortment of healthy, protein-rich, and flavor-packed sundals made with different legumes and lentils. Each recipe is simple to follow, nourishing, and perfect not just for festivals but also as wholesome snacks for any day. Keep reading—you’re about to discover sundal varieties that are fan-freaking-fantastic and guaranteed to make your Navaratri even more special!
Wholesome and protein-rich Sundal varieties prepared for Navaratri prasadam and festive offerings.
Sundal & Navaratri
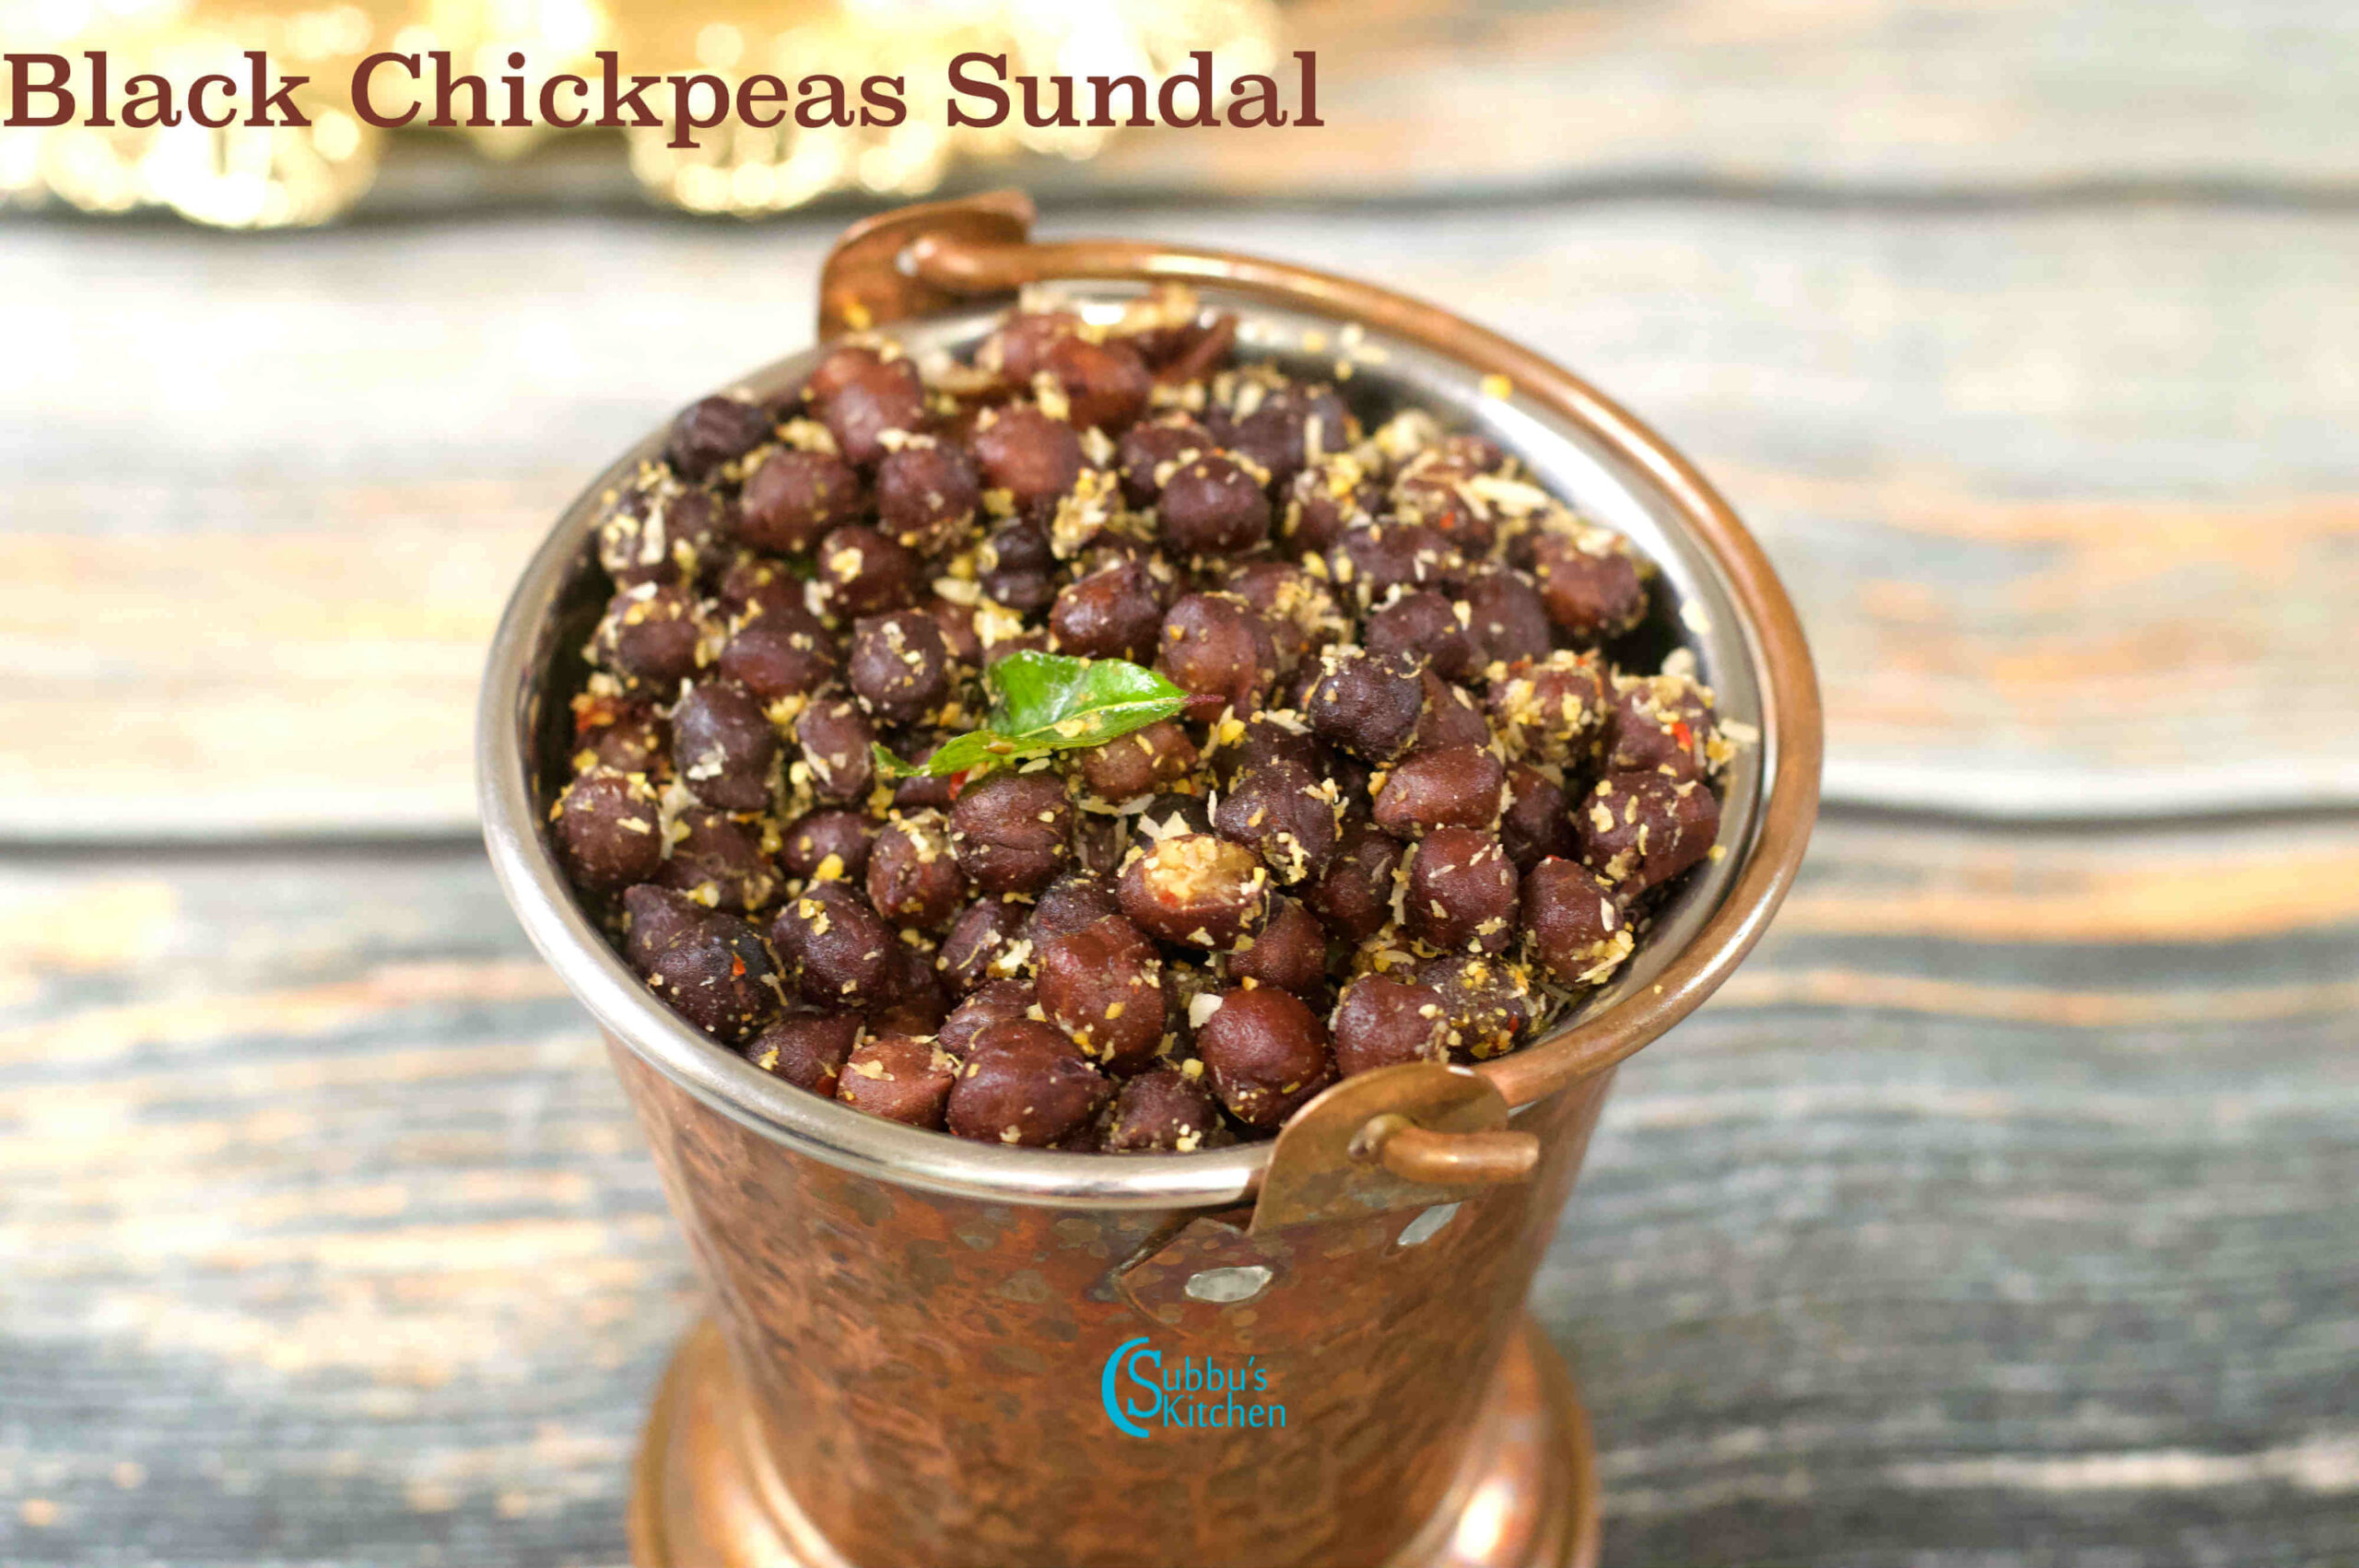
Navratri and Sundal are truly inseparable. The moment we think of Navratri, Sundal instantly comes to mind—and vice versa! Sundal, made with cooked pulses, is an essential prasadam during this festival and is offered on all the Golu days. Traditional sundal varieties include chickpeas, chana dal, peanuts, moong dal, green gram dal, karamani (cowpeas), mochai (field beans), dry green peas (pattani), sweet corn, and the colorful Navratna sundal. There are also delicious sweet versions made with cowpeas, moong dal, or a mix of dals.
Each day of Navratri, we prepare Sundal along with sweet puttu, rice varieties, or payasam as neivedhyam, which is then shared with our guests who visit our Golu and receive thamboolam. Offering neivedhyam first to the Goddess and then distributing it to family and friends not only fills our homes with joy but also brings the divine blessings of all three Goddesses, along with the goodwill of our elders.
Sundal Preparation
Making Sundal is simple and fuss-free. Legumes are usually soaked overnight, then cooked until soft yet not mushy, and finally tempered with mustard seeds, curry leaves, red or green chilies, and a touch of asafoetida. If red chilies are used for tempering, hing enhances the flavor beautifully, while with green chilies, ginger can be added instead for a fresh kick. A generous garnish of freshly grated coconut completes the dish.
Though Sundal is traditionally prepared as prasadam during festivals, it is not limited to those occasions. Sundal can be enjoyed any day as a wholesome salad, and you can even enrich it with fresh vegetables. For festivals, onions are usually avoided, but when preparing Sundal as a salad, chopped onions make a tasty addition too.
Sundal Powder
Many of us have the custom of preparing Sundal Powder (or Curry Powder) at home, especially during Navratri, so that a spoonful can be added to cooked lentils or beans to enhance their flavor. Typically, Sundal is tempered with red or green chilies, which gives a mild spiciness. However, for those who love bolder flavors and find plain Sundal a little bland, this special masala podi is the perfect way to add an extra punch of spice and aroma.
Peanut Sundal is a wholesome, protein-rich South Indian snack that combines the nutty goodness of boiled peanuts with a flavorful tempering of spices and fresh coconut. Light, nutritious, and naturally delicious, it is a popular choice during Navratri as well as a guilt-free evening snack any time of the year. This quick and easy recipe is proof that simple ingredients can come together to create something fan-freaking-fantastic!
In South India, Peanut Sundal holds a special place during festivals, especially duringNavratriwhen different varieties of sundal are prepared each day as offerings (neivedyam) to the Goddess. It’s one of the many sundal recipes that devotees enjoy sharing with friends and family after daily puja rituals. Beyond Navratri, peanut sundal is also made during temple festivals, community gatherings, and as a healthy evening snack at home. Thanks to its protein-rich peanuts and light seasoning, it’s both festive and everyday-friendly—a dish that beautifully blends tradition with wholesome eating.
[feast_advanced_jump_to]
Ingredients
Each component in this Peanut Sundal is carefully chosen to deliver a perfect balance of flavor, texture, tradition, and nutrition:
Raw peanuts anchor the recipe with heartiness and protein, making this snack both filling and nutritious.
Red chili adds just the right heat—bright, bold, and traditional—for a lively taste without overwhelming the other flavors.
Salt brings overall depth and seasoning, ensuring every bite is balanced.
Grated coconut (whether fresh or coarsely ground) brings a creamy sweetness and chewy texture that enhances the dish’s comforting character.
Sundal powder, a spice blend often used in festival offerings, layers in an additional aromatic complexity and festive note, especially fitting for Navratri and celebratory occasions.
Oil, mustard seeds, and curry leaves—these form the quintessential South Indian tempering that infuses the dish with that signature fragrance and umami, creating a flavorful punch with minimal effort.
Together, these ingredients converge to make a dish that’s visually appealing, spiritually meaningful, and a true celebration of South Indian culinary heritage.
Raw peanuts
Red chili
Salt
Grated coconut
Sundal powder
Oil
Mustard seeds
Curry leaves
See recipe card for quantities.
Instructions
Wash the peanuts thoroughly and soak them overnight to soften. If you forget to soak them in advance, simply soak in hot water for a few hours as a quicker alternative.
Drain the soaked water, add fresh water, and pressure cook the peanuts until they are tender yet firm, allowing for 3 whistles.
Once the pressure has fully released, open the cooker and remove the peanuts. Drain any remaining water and set the cooked peanuts aside, ready for tempering.
Heat a little oil in a pan until hot. Add the mustard seeds and let them crackle, releasing their nutty aroma. Toss in fresh curry leaves and red chili, stirring well to combine the flavors.
Add the cooked peanuts to the tempering and sprinkle in a pinch of salt. Stir well so the spices coat each peanut evenly, turning the humble legume into a flavorful, festive dish.
(Optional) Stir in a little sundal powder for warmth and spice. This special blend gives the sundal its traditional, celebratory touch and makes it distinct from an everyday peanut snack.
Finally, fold in freshly grated coconut.
Your protein-rich Peanut Sundal is now ready to serve!”
Variations
Spice Level: Adjust the number of red chilies or add a pinch of chili powder to suit your guests’ heat preference.
Nut Mix: Combine peanuts with roasted chickpeas or cashews for a richer texture and flavor.
Coconut Options: Use toasted coconut instead of fresh for a nutty aroma, or omit it for a lower-fat version.
Tempering Variations: Add a few curry leaves and dried red chilies crushed together for a more aromatic South Indian flavor, or a small pinch of asafoetida (hing) for a traditional temple-style taste.
Top Tip
Don’t overcook the peanuts! They should be tender yet still hold their shape, so they have a satisfying bite. Overcooking can make them mushy and affect the texture of the sundal.
Peanut Sundal is a protein-packed South Indian snack made with tender boiled peanuts, aromatic spices, curry leaves, and fresh coconut. Quick to prepare and full of flavor, it’s perfect for Navratri, festive occasions, or a healthy anytime snack.
Wash the peanuts thoroughly and soak them overnight to soften. If you forget to soak them in advance, simply soak in hot water for a few hours as a quicker alternative.
1 cup Raw Peanuts
Drain the soaked water, add fresh water, Salt and pressure cook the peanuts until they are tender yet firm, allowing for 3 whistles.
1 teaspoon Salt
Once the pressure has fully released, open the cooker and remove the peanuts. Drain any remaining water and set the cooked peanuts aside, ready for tempering.
Heat a little oil in a pan until hot. Add the mustard seeds and let them crackle, releasing their nutty aroma. Toss in fresh curry leaves and red chili, stirring well to combine the flavors.
1 teaspoon Oil, 1 teaspoon Mustard seeds, few Curry leaves, 1 nos Red Chili
Add the cooked peanuts to the tempering. Stir well so the spices coat each peanut evenly, turning the humble legume into a flavorful, festive dish.
(Optional) Stir in a little sundal powder for warmth and spice. This special blend gives the sundal its traditional, celebratory touch and makes it distinct from an everyday peanut snack.
2 teaspoon Sundal Powder
Finally, fold in freshly grated coconut. The delicious Peanut sundal/Verkadalai Sundal is ready for neivedhyam on Navrathri festival as well as for a healthy evening snack
2 teaspoon Grated Coconut
Video
Notes
If you don't have sundal powder, you can just add chili powder or Sambar powder
Soak the Peanuts Properly: Soak overnight for best results. If short on time, soak in hot water for a few hours to soften them.
Don’t Overcook: Pressure cook just until tender but still firm. Overcooked peanuts can become mushy and affect the texture.
Fresh Coconut: Use freshly grated coconut for the best flavor and subtle sweetness. Toasted coconut can be used for a nuttier aroma.
Tempering is Key: Make sure the oil is hot before adding mustard seeds. The crackle is essential to release their flavor.
Adjust Spice: Modify the number of red chilies or add a pinch of chili powder according to your heat preference.
Enhance Flavor: Adding a pinch of hing (asafoetida) or a dash of lemon juice at the end can elevate the flavor profile.
Serve Fresh: Sundal tastes best immediately after tempering. If storing, reheat lightly in a pan before serving.
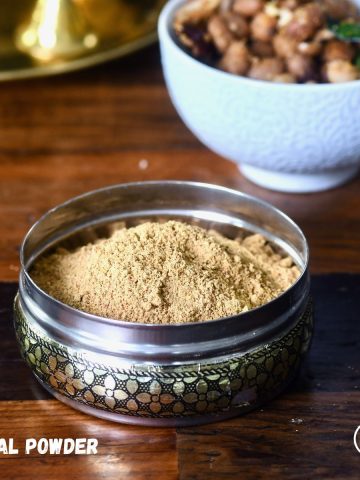
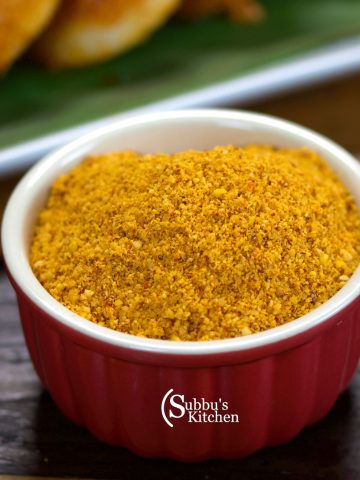
Sundal Powder is a simple yet essential spice blend in a South Indian kitchen. Made with just a few ingredients – coriander seeds, Bengal gram dal (kadalai paruppu), and red chilies – this aromatic powder instantly elevates the taste of both poriyal and sundal varieties.
A spoonful of freshly ground Sundal Powder not only enhances flavor but also adds a warm, nutty aroma to everyday dishes. Since it has a good shelf life, many households prepare it in bulk, store it in an airtight container, and use it whenever required.
When cooking with Sundal Powder, remember to adjust the amount of additional spice, as this blend already contains red chilies. With this handy homemade powder, you can turn a simple poriyal or sundal into a flavorful and wholesome dish in minutes!
Aromatic and flavorful Sundal Powder, made with roasted coriander, dals, and red chilies – the perfect seasoning for traditional sundal dishes.
Sundal Powder is popular throughout the year, but it becomes especially significant during Navratri. Since sundal is a traditional prasadam offered on all nine days of Golu, having this spice mix ready makes festival cooking much easier and quicker. Instead of measuring and roasting spices each day, you can simply add a spoonful of Sundal Powder to instantly enhance the flavor of different sundal varieties.
Beyond Navratri, this powder is also handy for everyday cooking. It can be sprinkled into poriyals (vegetable stir-fries) or added to quick sundal preparations made for evening snacks, special poojas, or when unexpected guests arrive.
[feast_advanced_jump_to]
Ingredients
The ingredients for Sundal Powder are carefully chosen to balance flavor, aroma, and texture. Coriander seeds bring a fresh, earthy fragrance, while Bengal gram dal (Kadalai Paruppu) adds body, nuttiness, and a slightly roasted taste. Red chilies provide the right amount of heat and spice, making the powder vibrant and flavorful. Together, these three simple ingredients create a versatile spice mix that enhances any sundal or poriyal.
Coriander Seeds
Bengal Gram Dal (Kadalai Paruppu)
Red Chilies
See recipe card for quantities.
Instructions
Heat a pan and dry roast the coriander seeds, channa dal, and red chilies on medium flame. Roast until the dal turns golden brown and gives off a nutty aroma.
Transfer the roasted ingredients to a plate and allow them to cool completely.
Once cooled, add them to a mixer jar and grind into a fine powder.
Store the Sundal Powder in an airtight container. It stays fresh for weeks and can be used to enhance the flavor of any poriyal or sundal variety.
Substitution
Channa Dal (Bengal Gram Dal): You can replace it with toor dal (pigeon peas) or urad dal (black gram dal) for a slightly different flavor. Each gives a unique nuttiness.
Red Chilies: If you don’t have whole dried red chilies, substitute with red chili powder. Start with a small amount and adjust to taste.
Coriander Seeds: These are key to the aroma, but if unavailable, you can use a smaller quantity of cumin seeds as a backup (though the flavor will change slightly).
Milder Version: Reduce the red chilies or use byadgi chilies for color with less heat.
Spice Boost: Add a few black peppercorns or a pinch of hing (asafoetida) while roasting to deepen the flavor.
Variations
Sundal Powder with Coconut: Add a few tablespoons of dry grated coconut while roasting for a richer, slightly sweet flavor. This version pairs well with sweet corn sundal.
Spicy Sundal Powder: Increase the number of red chilies or include a few peppercorns for a bolder, spicier mix.
Aromatic Twist: Add a small piece of cinnamon or a couple of cloves along with the coriander seeds to give the powder a subtle festive aroma.
Urad Dal Sundal Powder: Replace channa dal with urad dal for a slightly different nuttiness and texture.
Multi-purpose Powder: Include a teaspoon of cumin seeds along with the coriander seeds—this makes the powder suitable not just for sundal, but also for poriyal and kootu.
Storage
Store the Sundal Powder in an airtight container to maintain its aroma and flavor.
Keep it in a cool, dry place, away from direct sunlight or moisture.
When stored properly, the powder can stay fresh for 4–6 weeks at room temperature.
For longer shelf life, you can store it in the refrigerator, which can extend freshness up to 3 months.
Always use a dry spoon to scoop out the powder to prevent clumping or spoilage.
Bring the rich flavors of South Indian cuisine to your kitchen with this aromatic Tanjore-style spice powder. Roasted coriander seeds, chana dal, and red chilies are ground to a fine powder, creating a versatile mix that adds depth to curries, rasams, and rice dishes. Easy to make, store, and use anytime!
Course Home made Powders / Masala
Cuisine Indian, South Indian, Tamil Brahmin, Tamil Nadu
Prep Time 5 minutesminutes
Cook Time 10 minutesminutes
Total Time 15 minutesminutes
Servings 100grams
Calories 6.5kcal
Author Sowmya Venkatachalam
Equipment
Heavy Bottomed Pan
Ingredients
¼cupCoriander seeds
2tablespoonSplit Bengal Gram (Channa Dal / Kadalaparuppu)
6nosRed Chili
Instructions
Heat a pan and dry roast the coriander seeds, channa dal, and red chilies on medium flame. Roast until the dal turns golden brown and gives off a nutty aroma.
Transfer the roasted ingredients to a plate and allow them to cool completely.
Once cooled, add them to a mixer jar and grind into a fine powder.
Store the Sundal Powder in an airtight container. It stays fresh for weeks and can be used to enhance the flavor of any poriyal or sundal variety.
Video
Notes
Tips for Making Sundal Powder
Roast on Low to Medium Flame: Dry roast the coriander seeds, channa dal, and red chilies slowly to prevent burning and to release maximum aroma.
Even Roasting: Stir continuously to ensure that the dal and spices are evenly roasted and get a uniform golden color.
Cool Completely Before Grinding: Grinding while warm can cause the powder to become sticky. Let the roasted ingredients cool fully for a fine, smooth powder.
Use Fresh Ingredients: Fresh coriander seeds and channa dal give the powder a stronger, nutty flavor. Avoid stale or old pulses.
Adjust Spice Level: Since red chilies are already in the powder, taste before adding extra chili to your sundal or poriyal.
Grind in Batches: For larger quantities, grind in small batches for a more even texture.
Storage Matters: Always use an airtight container and keep it in a cool, dry place to maintain freshness and aroma.
Optional Enhancements: For a subtle flavor twist, add a few peppercorns, a pinch of hing (asafoetida), or a tiny piece of cinnamon while roasting.
Versatile Use: This powder isn’t just for sundal—sprinkle it on poriyals, kootus, or even roasted vegetables for an instant flavor boost.
Vegetable salad is a simple and easy peasy no dressing salad recipe. It is a fuss free and a straight forward recipe which doesn’t require any cooking nor salad dressing. Serve it on its own, mix it with greens, or use it as part of a sandwich or wrap filling.
Vegetable salad made in the simplest way with fresh colorful vegetables and basic seasonings and herbs With plenty of fresh colorful vegetables, this is what makes the vegetable salad more healthier and nourishing.
All you need to do is just dice or chop the ingredients, season it and toss them together. Ready in minutes, this salad features nutritious ingredients and flavorful herbs which are sure to refresh you.
A vegetable salad can be made in many different ways – with raw, boiled, steamed or grilled vegetables. Whatever ways it is made, a vegetable salad is great for your body as it increases the intake of veggies in your diet
In the simplest form it is simply slice or chopped raw vegetables tossed with basic seasoning and herbs.
This is one salad which is made regularly at my home. I prefer this simple raw vegetable salad seasoned with just salt and pepper and herbs like chilli, lemon, coriander and mint. I am not very much fan of salad with dressings. I make them once in a while but this simple vegetable salad is my go to salad for everyday consumption.
This is a much healthier, delicious and at the same time super refreshing no-cook salad. This crisp, crunchy and fresh vegetable salad features the following ingredients.
INGREDIENTS TO MAKE SIMPLE VEGETABLE SALAD
Cucumber – Used the regular cucumber here. Recommend to use young and tender cucumbers to avoid matured seeds. You can use the English cucumber.
Carrot – The recipe uses orange carrot. You can use the red variety one, whichever is available to you.
Cabbage – Regular variety of cabbage is used. You can use red cabbage or napa cabbage or other variety cabbage whichever is available to you. Apart from cabbage you can also use iceberg lettuce, green lettuce, red lettuce, romaine lettuce, arugula etc
Onion – Used the regular onion. You can also use red onions and spring onions.
Tomato – Used regular tomato. You can use cherry tomatoes as well
Green Chilli
Ginger
Crushed Peppercorns
Salt
Lemon Juice
Coriander Leaves – Used coriander leaves. You can add in some mint leaves if available. 8 haven’t used as it was not available in my pantry.
HOW TO MAKE VEGETABLE SALAD
This section shows how to make blueberry sauce with step-by-step photos and details about the technique with video tutorial. For full ingredients measurements, see the recipe card below.
I made a simple video of this easy vegetable salad recipe for my readers which I have shared below. Please do watch to know how I made this delicious recipe. If you liked the video please do SUBSCRIBE to my channel if you haven’t yet. Also like, share and comment on it! It will mean a lot to me and really motivate me to come up and shoot more videos for my readers. As always looking forward to your feedbacks!
VEGETABLE SALAD RECIPE VIDEO TUTORIAL
INSTRUCTIONS TO MAKE SIMPLE VEGETABLE SALAD
First wash all the vegetable and peel them.
Slice them one by one. I prefer the vegetables little bigger chunks or pieces. You can dice slice or chopped them as per your preference.
Peel the ginger and chopped them. You can use a grater and grate it.
Crush the peppercorns in a mortar pestle.
Chopped the green chilli and coriander leaves.
In a large mixing bowl add in the vegetables, ginger, crushed peppercorn, green chilli, coriander leaves, salt and squeeze in the lemon juice. (Please note if you’re serving the salad later then add the salt and lemon juice when you’re about to serve)
Toss them together and serve. Enjoy!
NOTES AND TIPS:
* You can use vegetables of your choice. * Some recommended vegetables which you can use apart the one used in the recipe are cauliflower, beetroot, turnip, radish, sweetcorn, green lettuce, iceberg lettuce, kale, rocket leaves, mint etc. * You can also add blanched broccoli. * You can use salad dressing of your choice. * Storing this salad after mixing the ingredients is not recommended as the vegetables tends to release water which salad turns soggy and losses its crunch. * You can also add boiled, steamed or grilled chicken if you want to make it a non veg version.
Vegetable salad is a simple and easy peasy no dressing salad recipe. It is a fuss free and a straight forward recipe which doesnt require any cooking nor salad dressing. Serve it on its own, mix it with greens, or use it as part of a sandwich or wrap filling.
Course Appetizer, Side Dish
Cuisine American
Keyword easy and simple vegetable salad, fresh veggies salad, healthy salad, no cook salad, salad, salad without dressing
Prep Time 15 minutesminutes
Cook Time 0 minutesminutes
Total Time 15 minutesminutes
Servings 4
Author Akum Raj Jamir
Equipment
chopping board
Mixing bowl
Ingredients
1NediumCucumber
1MediumCarrot
1Cup or small bowlCabbage
1MediumOnion
1Medium Tomato
2LargeGreen chilli
½InchGinger
½Teaspoon Peppercorn
1Teaspoon SaltOr as per taste
½Of largeLemon
¼CupCoriander leaves chopped
Instructions
First wash all the vegetable and peel them.
Slice them one by one. I prefer the vegetables little bigger chunks or pieces. You can dice slice or chopped them as per your preference.
Peel the ginger and chopped them. You can use a grater and grate it.
Crush the peppercorns in a mortar pestle.
Chopped the green chilli and coriander leaves.
In a large mixing bowl add in the vegetables, ginger, crushed peppercorn, green chilli, coriander leaves, salt and squeeze in the lemon juice. (Please note if you're serving the salad later then add the salt and lemon juice when you're about to serve)
Toss them together and serve. Enjoy!
Video
Notes
You can use vegetables of your choice.
Some recommended vegetables which you can use apart the one used in the recipe are cauliflower, beetroot, turnip, radish, sweetcorn, green lettuce, iceberg lettuce, kale, rocket leaves, mint etc.
You can also add blanched broccoli.
You can use salad dressing of your choice.
Storing this salad after mixing the ingredients is not recommended as the vegetables tends to release water which salad turns soggy and losses its crunch.
You can also add boiled, steamed or grilled chicken if you want to make it a non veg version.
Well, if you make this simple vegetable salad recipe I’ll be glad if you take out some time and rate the recipe and leave a feedback in the comments box below. You can also snap a photo and tag Akum Raj Jamir on Facebook and akumrajjamir on Instagram with hashtag #atmykitchen. I would love to see your creations.
Thank you so much for stopping by my blog. I hope you liked the recipe. Your valuable feedbacks are always welcome, I love hearing from you guys and always do my best to respond to each and every one of you.
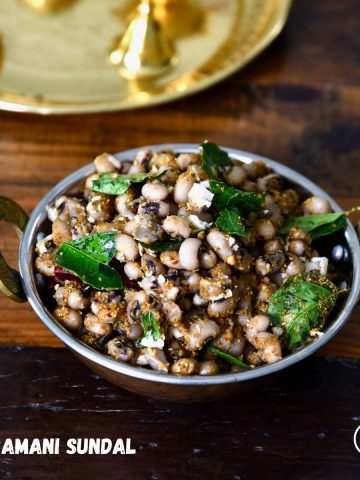
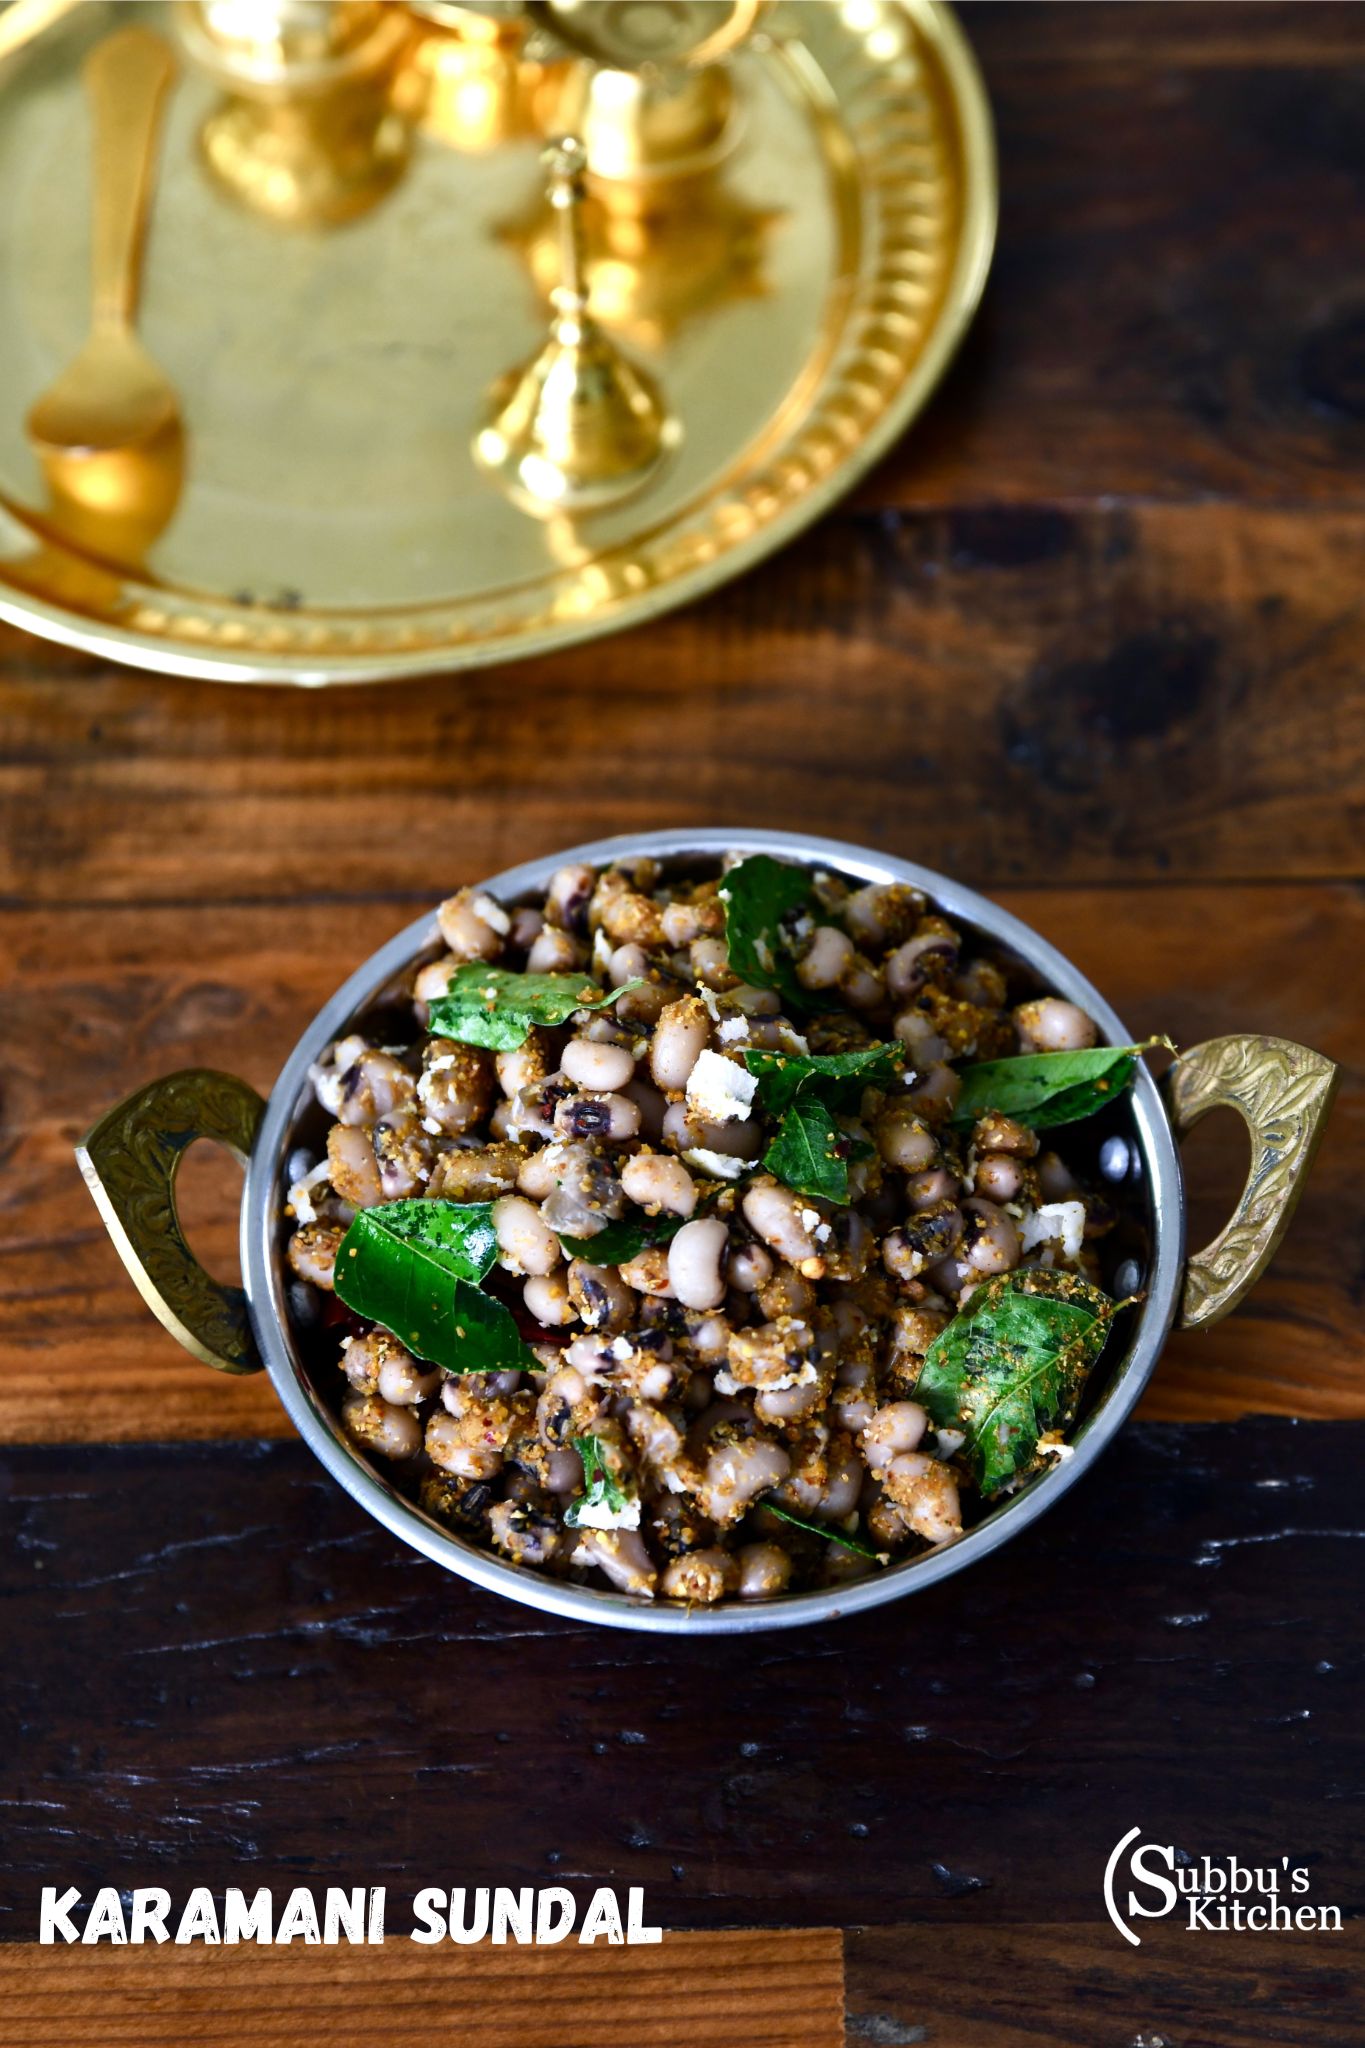
Looking for a protein-packed South Indian snack that’s wholesome, flavorful, and incredibly easy to whip up? Say hello to karamani sundal, a festival favorite made with black-eyed peas, coconut, and a gentle tempering of spices. It’s the perfect balance of hearty and light, with just the right kick to keep you coming back for more. Whether you’re preparing it for Navratri or simply craving a healthy bite, this fan-freaking-fantastic recipe will win you over in minutes!
Karamani sundal is especially popular during Navratri, when different varieties of sundal are prepared as offerings (prasadam) for the goddess and shared with friends and family. Each day of Navratri is often celebrated with a unique type of sundal, making karamani (black-eyed peas) one of the cherished variations. Beyond festivals, it’s also enjoyed as a healthy snack or light evening tiffin in South Indian households. Packed with protein and flavored with coconut and spices, it’s both nourishing and comforting—perfect for fasting days, festive gatherings, or simply as a guilt-free bite anytime of year.
[feast_advanced_jump_to]
Ingredients
Each ingredient in karamani sundal has a purpose. Black-eyed peas (karamani) form the protein-rich base, making it hearty and wholesome. Freshly grated coconut adds natural sweetness and texture, balancing the earthiness of the legumes. Curry leaves, mustard seeds, green chili, and hing bring that unmistakable South Indian flavor profile, while a drizzle of coconut oil ties everything together with a rich, traditional aroma. Together, they create a dish that’s simple yet deeply flavorful, perfect for both festive offerings and everyday snacking.
Karamani (black-eyed peas)
Fresh grated coconut
Red chili
Curry leaves
Mustard seeds
Hing (asafoetida)
Coconut oil
Salt
See recipe card for quantities.
Instructions
Wash and Soak the karamani (black-eyed peas) overnight.
The next day, drain the water and add fresh water to the peas. Pressure cook the karamani with a teaspoon of salt until they are soft, allowing only 2–3 whistles to ensure they remain firm and not mushy.
Once the pressure has fully released, open the cooker and drain the excess water from the cooked karamani using a strainer.
Heat coconut oil in a pan. Add mustard seeds, and once they begin to splutter, toss in the broken red chili, curry leaves, and a pinch of hing. Sauté for a few seconds until fragrant.
Add the cooked karamani (black-eyed peas) to the pan and mix well so the tempering coats the legumes evenly.
(Optional) - Add 2 teaspoon of Sundal Powder and give it a good mix. This will give good aroma and spice.
Stir in the freshly grated coconut and give everything a gentle mix.
Your delicious Karamani (Perum Payiru) Sundal is now ready! Serve it warm as a healthy snack or offer it as Neivedhyam during the Navratri festival.
Substitutions
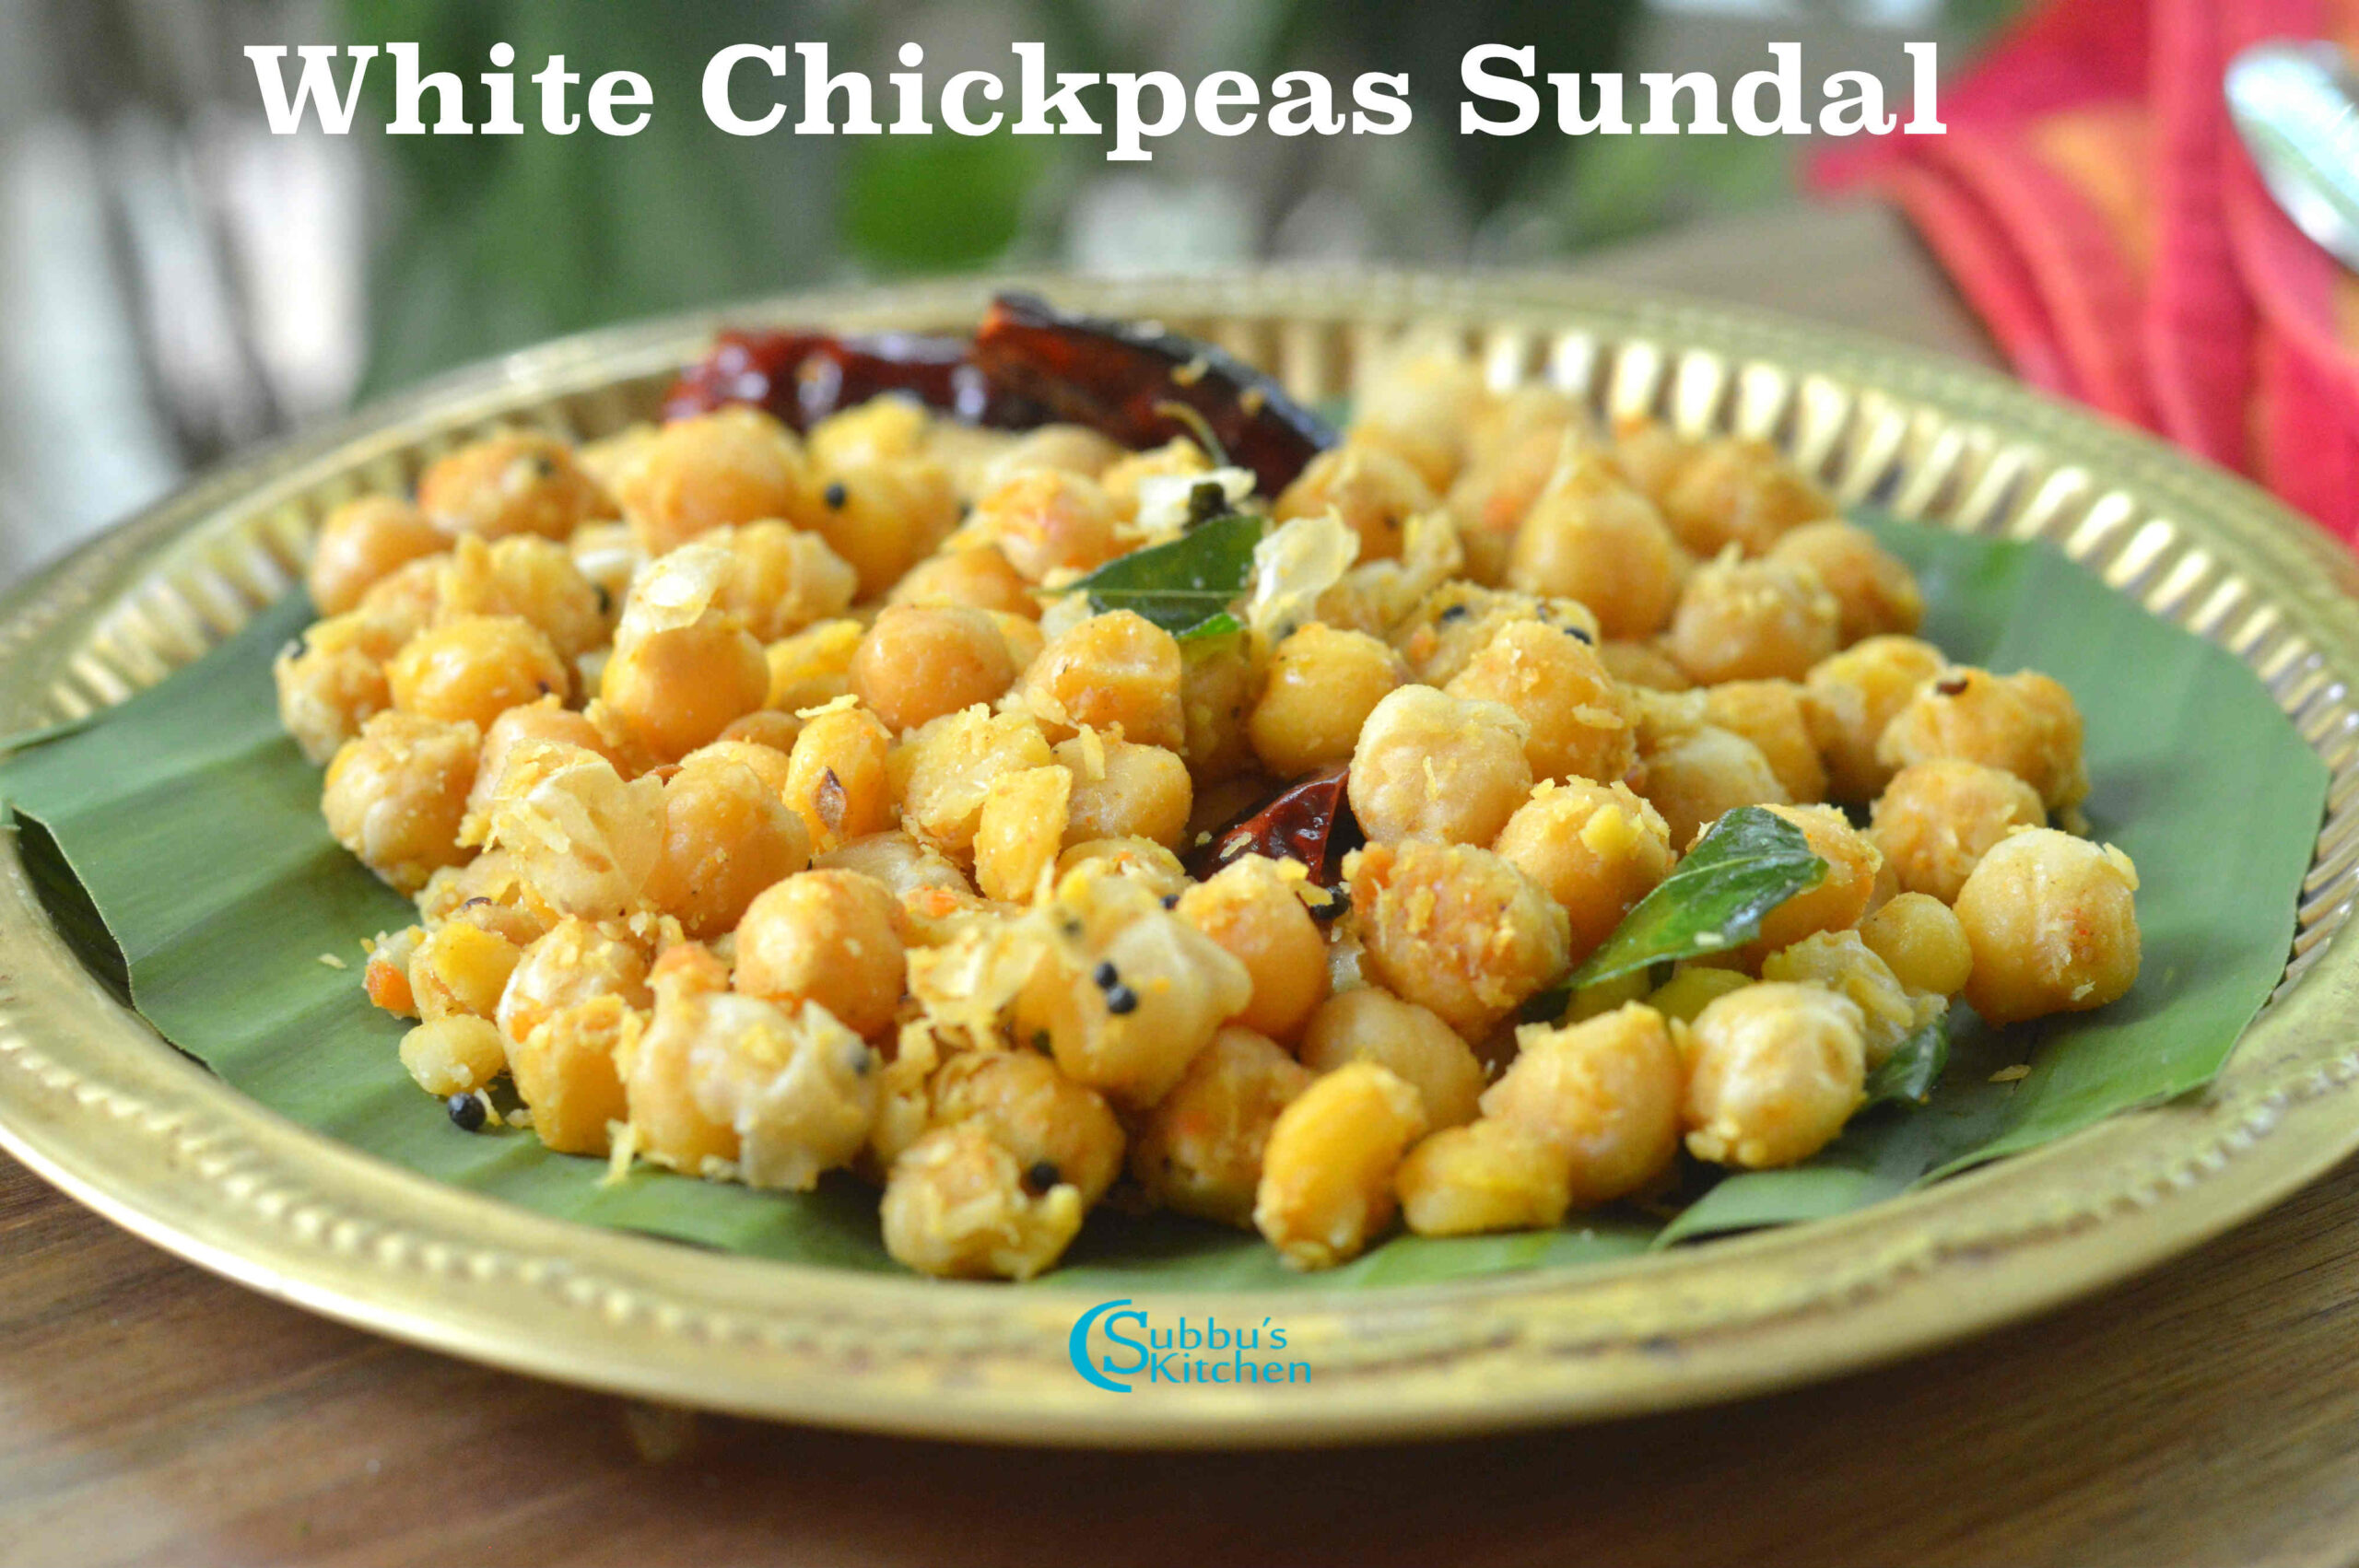
Legumes: If you don’t have karamani (black-eyed peas), you can easily swap them with other legumes such as white chana (chickpeas), green gram (moong beans), or rajma (kidney beans). Each will give a slightly different texture but still taste delicious.
Coconut: Fresh grated coconut is traditional, but if it’s not available, you can use frozen grated coconut (thawed) or even a small spoon of unsweetened desiccated coconut in a pinch.
Oil: Coconut oil adds authentic South Indian flavor, but you can substitute with sesame oil or sunflower oil if you prefer a milder taste.
Spice: If you like more heat, add a slit green chili along with the tempering. For a kid-friendly version, skip the red chili altogether.
Hing (Asafoetida): If you don’t have hing, you can leave it out or use a pinch of garlic powder for a different but still flavorful aroma.
Variations
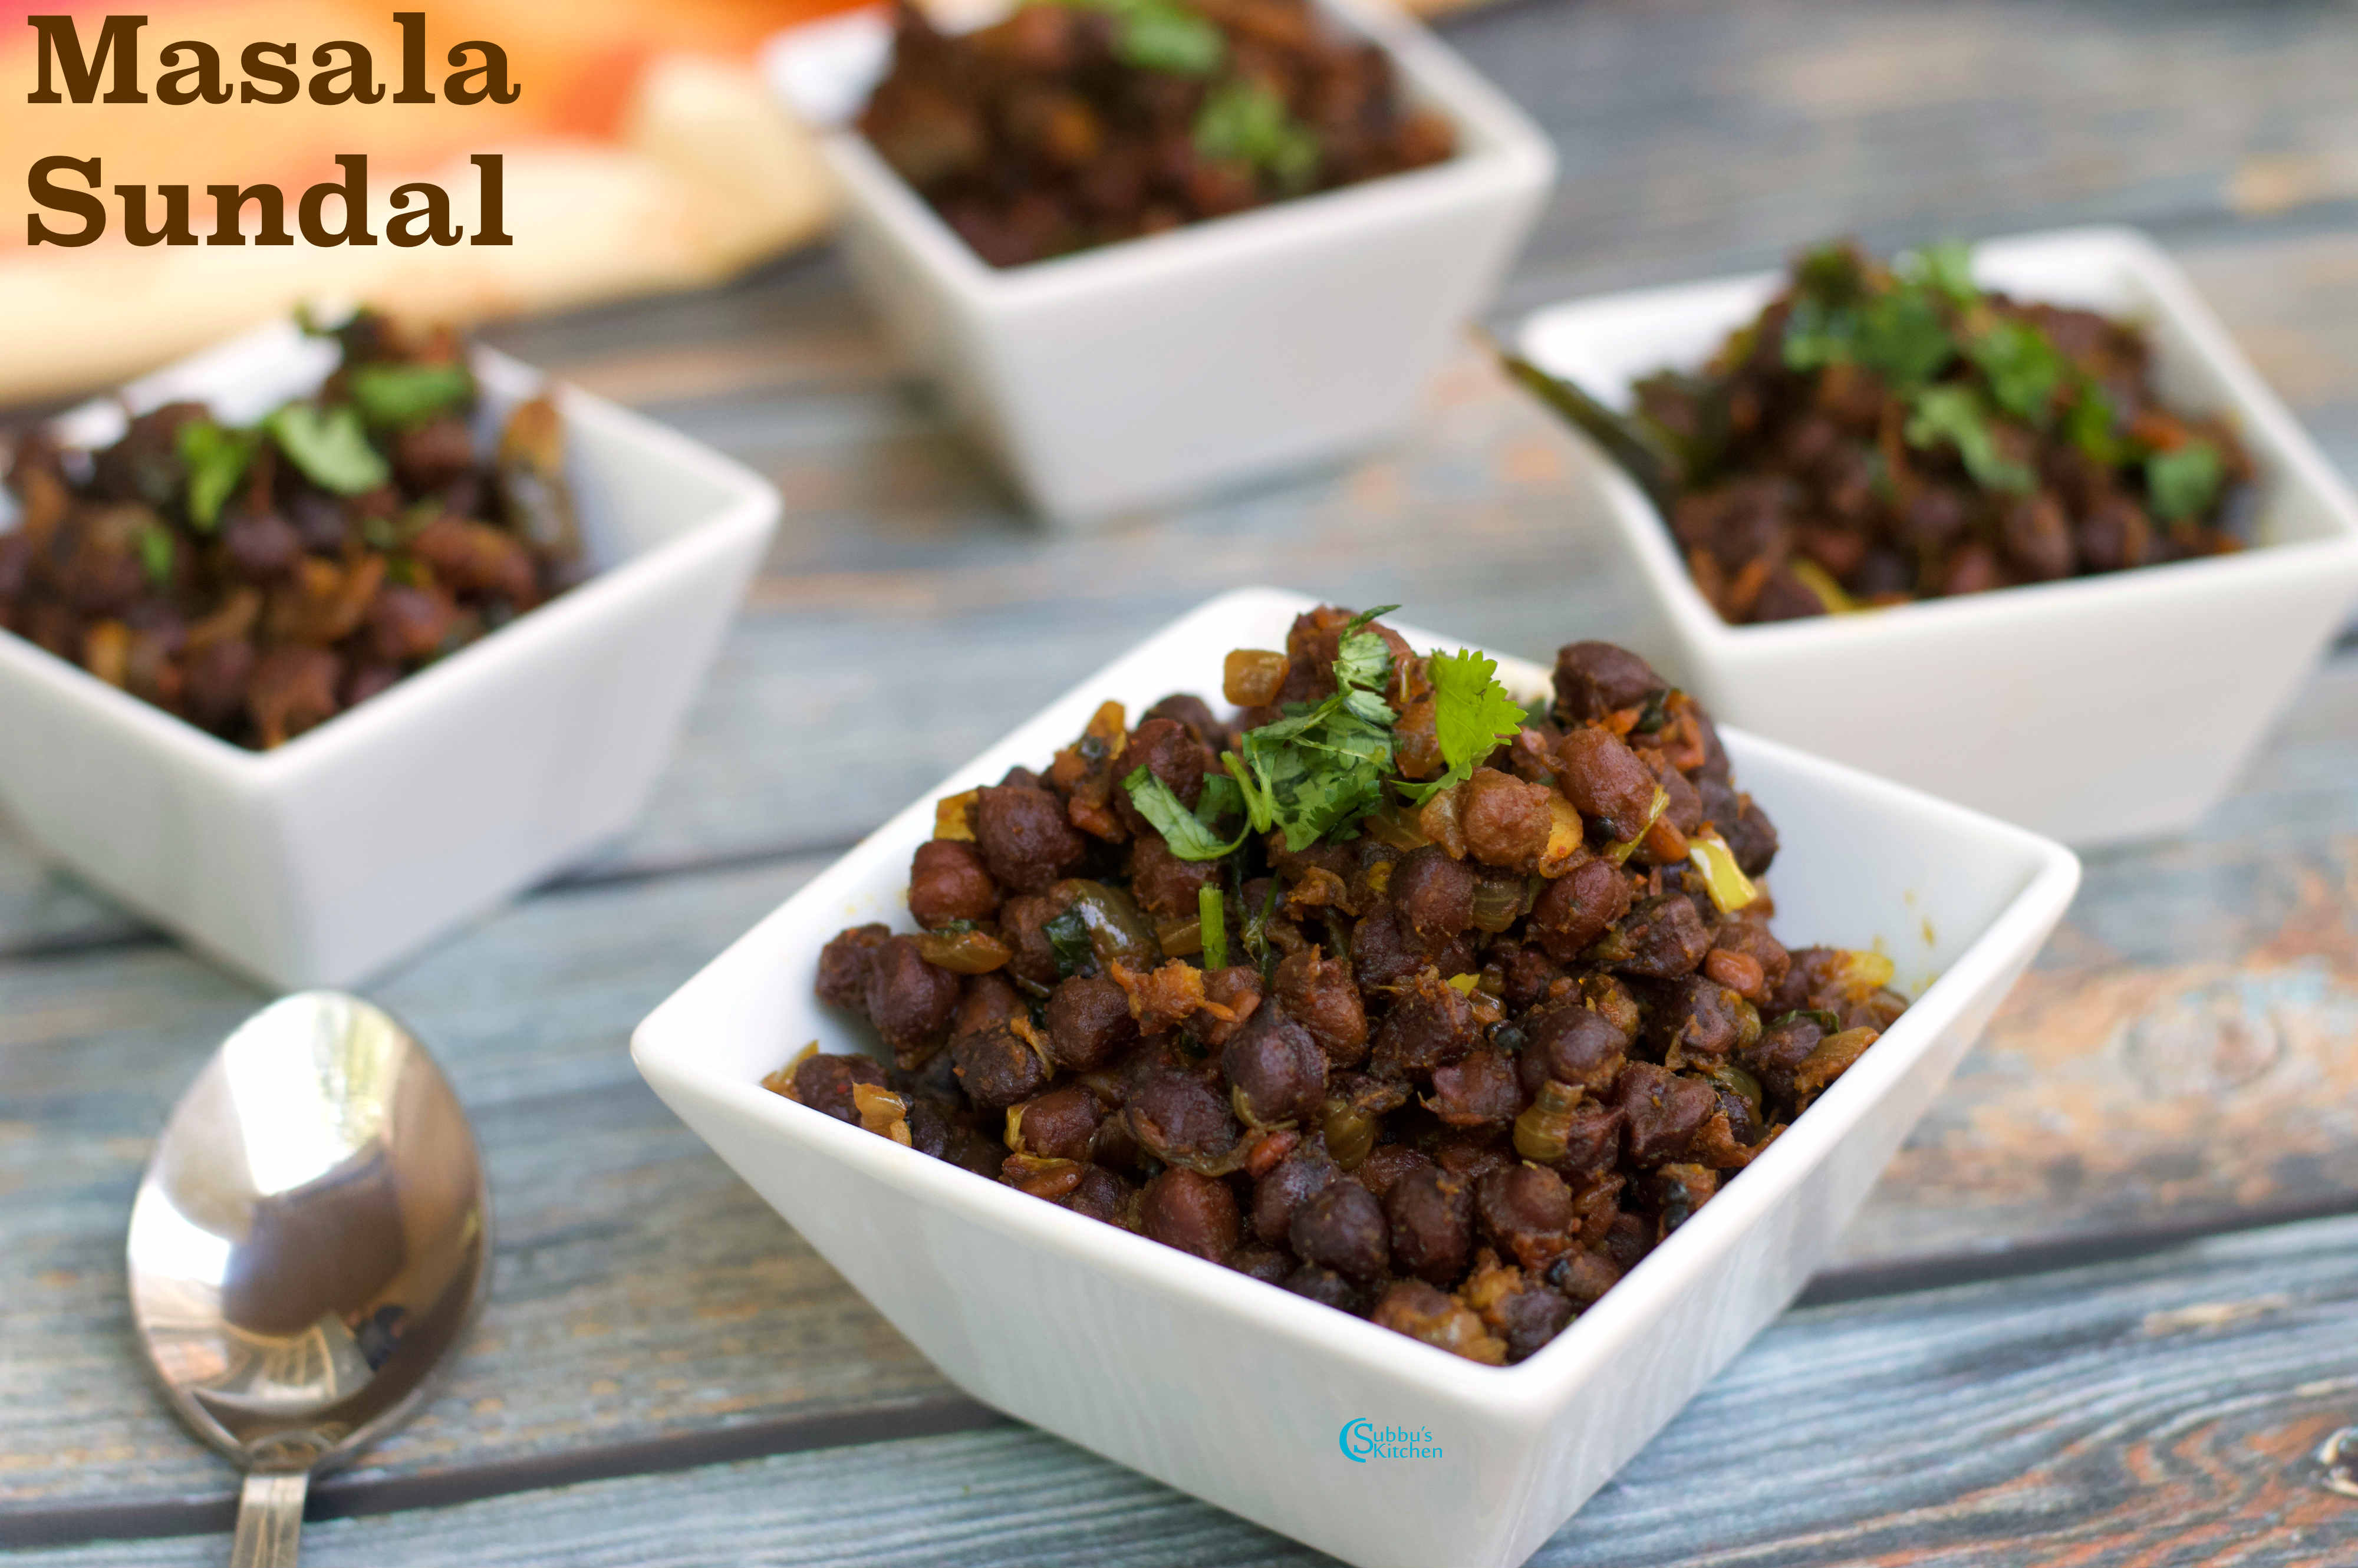
Masala Sundal: Add a spoon of freshly ground sundal podi or rasam powder along with the tempering for a spicier, more robust flavor.
Tangy Twist: Squeeze in a few drops of fresh lemon juice just before serving to give the sundal a refreshing brightness.
Vegetable Boost: Mix in finely chopped cucumber, carrots, or raw mango for a salad-style sundal that’s colorful, crunchy, and extra nutritious.
Sweet Sundal: For a festive twist, replace the tempering with a light jaggery syrup and grated coconut to make a mildly sweet version, often enjoyed during Navratri.
Sprouted Sundal: Use sprouted karamani instead of boiled for an even healthier, protein-packed option.
Storage
Room Temperature: Karamani sundal stays fresh for up to 6–8 hours at room temperature, making it perfect for serving during festivals or as a prasadam.
Refrigeration: Store any leftovers in an airtight container in the refrigerator for up to 2 days.
Reheating: Gently warm it on the stovetop or in the microwave before serving. If it feels a bit dry, sprinkle a teaspoon of water or coconut oil to freshen it up.
Freezing: Not recommended, as the texture of the beans and coconut changes after thawing.
Top Tip
For perfectly textured karamani sundal, make sure the black-eyed peas are cooked but still firm—they should hold their shape and not turn mushy. Also, toast the coconut lightly before mixing it in to enhance its aroma and give the sundal an extra layer of flavor.
Karamani Sundal Recipe | Easy South Indian Black Eyed Peas Sundal
Karamani Sundal is a classic South Indian snack made with black-eyed peas, lightly tempered with mustard seeds, curry leaves, and hing, then finished with freshly grated coconut. Protein-rich, flavorful, and mildly spiced, it’s a favorite during Navratri festivals and also makes a wholesome everyday snack.
Course Healthy Recipes, Salad
Cuisine Indian, South Indian, Tamilnadu
Prep Time 5 minutesminutes
Cook Time 15 minutesminutes
Soaking Time 8 hourshours
Total Time 20 minutesminutes
Servings 4people
Calories 108kcal
Author Sowmya Venkatachalam
Equipment
1 Pressure Cooker
Ingredients
1CupKaramani (Black-eyed pea)
1nosRed Chili
1teaspoonSaltAs Needed
1PinchAsafoetida (Asafetida / Hing)
1tablespoonGrated Coconut
2teaspoonSundal Powder (Optional)
For Tempering
1teaspoonOil
1teaspoonMustard Seeds
1sprigCurry Leaves
Instructions
Soak the karamani (black-eyed peas) overnight. The next day, drain the water and add fresh water to the peas. Pressure cook the karamani with a teaspoon of salt until they are soft, allowing only 2–3 whistles to ensure they remain firm and not mushy.
1 Cup Karamani (Black-eyed pea), 1 teaspoon Salt
Heat coconut oil in a pan. Add mustard seeds, and once they begin to splutter, toss in the broken red chili, curry leaves, and a pinch of hing. Sauté for a few seconds until fragrant.
The egg salad sandwich appears to be a quick, simple, and satisfying dinner. It mixes soft toasted bread slices, a mayonnaise-based creamy sauce, and sliced cooked eggs. This is a great recipe for people who enjoy a simple meal. You can easily adjust the ingredients by using whatever vegetables or sauces you have on hand. ...
No party is complete without food and drink. Lots of people choose to meet up by the beach for a day of fun in the sun but what sorts of food should people be eating? Read More ...
If you’re a recent convert to vegetarianism – or even if you’ve been doing it for life – one area holds a particular challenge: finding vegetarian food on the go. That’s true whether you’re eating Read More ...
It’s an adventure to find tastes and components that give the body life and the plate colour. Here are 6 ideas to create a nutritious dinner. Making a nutritious diner is similar to creating an Read More ...
Our hot tropical summer demands a cool & refreshing salad to start our every meal and this smashed cucumber salad is just the perfect one to fit in! Plus it gives us the much needed spicy kick that we Indians always crave for!
Since the time I have started my lifelong fitness journey, I don't remember a single meal that I have started without a large bowl of fresh salad! Whatever season it may be!
And now it has been a default part of our daily meals!
On regular days, we start our meals with a generous serving of freshly cut cucumber, tomatoes, carrots, beetroot and whatever other seasonal salad we can source.
Then on a fine day I stumbled upon this unique cucumber salad which the internet was going nuts over! Smashed cucumber salad!
A smashed salad? Really? Am I reading it right?
Well it turned out that I was reading it right and therefore was no way other than trying it myself and see why it is going so viral!
What is smashed cucumber salad?
I am sure you have seen multiple viral videos of smashed cucumber salad on various platforms, so I guess I do not need to explicitly describe what this salad actually means!
If you haven't seen it, you can check out my video of this viral salad here or below!
I don’t know how this trend started or who got the idea of smashing the cucumbers before tossing them in that incredible chilli oil dressing.
But whoever brought this into existence, we must thank them for their innovation!
The cracks created due to the smashing absorb the spicy salad dressing beautifully making the salad taste insanely addictive!
And that’s what has made this salad viral; I am completely ignoring the weird satisfaction we get from smashing the cucumbers!
You must try this at least once to get a taste of this smashed magic!
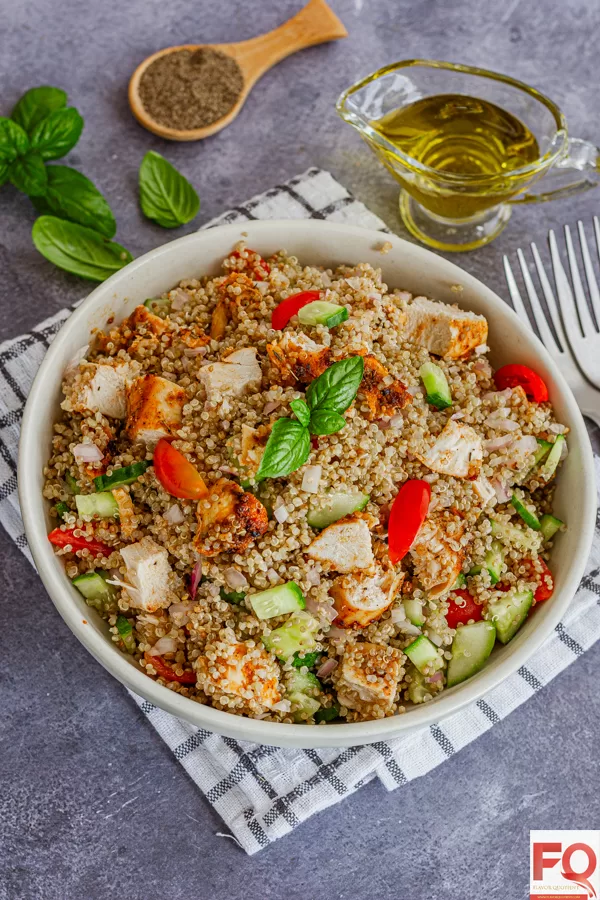
Quinoa is loaded with all the good things that you must consume for your healthy body; this quinoa salad with chicken is one level up with high protein & loads of fiber and your body & soul will thank you for it !
Quinoa is one of the staples in my meal plans. I have started including this whole grain into my healthy diet a couple of years back and since then there is no looking back.
Quinoa is a new entrant in the Indian kitchens and thanks to its many health benefits, it has quickly become popular among fitness enthusiasts like me!
If you also are looking for different ways of cooking and enjoying quinoa, you have arrived at the right page! I know it can be a bit confusing when you first start with this grain.
To have a great quinoa dish, you first need to make sure you are cooking the quinoa right - fluffy & non-sticky. But unfortunately, cooking quinoa is not something that we can learn to cook from our moms!
But don’t worry! Here you will get to know the perfect step-by-step process of how to cook the quinoa perfectly!
What is new in my quinoa salad with chicken?
I had shared a creamy no-mayo quinoa chicken salad a few months ago which was made with a yogurt based salad dressing.
So of course I have to offer something new this time for you all! And hence comes my quinoa salad with chicken which is infused with a simple yet immensely flavorful dressing.
You just need 4 ingredients to make this very basic salad dressing and I am sure you already have used this dressing in many of your salads if you are a pro-salad lover like me!
All you need is a good quality extra virgin olive oil which is the key flavor base of this quinoa salad with chicken. Then add a good drizzle of fresh lemon juice topping it off with salt & pepper!
Give the dressing a good whisk and voila! You have got your beautiful refreshing salad dressing that’s perfect for any summer salad!
You can use a mason jar too to shake up this easy dressing and use as much or as little as you prefer, saving up the rest for later use!
Crispy rice salad recipe: Imagine fried-rice meets garden-fresh salad with a flavour packed tangy spicy ginger dressing. I am in love with this crispy rice salad!
This crispy rice salad takes plain leftover rice, roasts it into shatter-crisp morsels, and tosses everything in a zingy pickled-ginger dressing. It’s naturally vegan, gluten-free, meal-prep friendly, and done in about half an hour. Let me show you why this crispy rice salad recipe has become my go-to “viral crunch” fix!
Why You’ll Love This Recipe
Big texture payoff: oven-baked rice shards + roasted chickpeas deliver serious crunch without deep-frying.
Leftover hero: a clever way to revive day-old rice and pantry staples.
Meal-prep approved: dressing and crunchy bits stay crisp for up to 3 days is perfect for grab-and-go lunches.
Allergy-friendly: dairy-free, gluten-free and easily nut-free or soy-free.
Meal Prep Approved – All the ingredients can be meal prepped easily in air tight containers and can be quickly tossed together in morning too!
Ingredients & Smart Swaps
1. The Tangy Dressing
Pickled-ginger juice (3 Tbsp)- For Bright acidity, mild heat. If you do not have pickled ginger you can swap with Rice-vinegar + ½ tsp grated ginger
Maple syrup (1 Tbsp)– To Balances heat. If you do not have pickled ginger you can swap with Agave or date syrup.
Gochujang powder (1 tsp)- Korean chili kick. Chili crisp flakes or smoked paprika
Sea salt (½ tsp)– Rounds flavours. Kosher salt
2. Crispy Rice & Chickpeas
Cooked, chilled rice (1 cup)- Day-old jasmine or basmati works best. Brown rice for extra fibre.
Chickpeas (1/4 cup, cooked)- Added protein, roasts alongside rice. White beans, lentils, or omit for nut-free.
3. Fresh Salad Bits
Lettuce, chopped (1 cup) – romaine or little gem hold crunch.
Radish, thinly sliced (¼ cup) – peppery bite.
Cherry tomatoes, halved (½ cup) – sweetness.
Grapes, sliced (¼ cup) – optional pop of juicy contrast.
Chickpeas (1/2 cup, cooked)- Added protein, add while mixing salad.
Dietary note: everything I used in this crispy rice salad recipe is naturally gluten-free. I suggest you must double-check your mustard and gochujang labels to ensure no hidden wheat.
Toast Rice: Option A – Sheet-Pan Oven Method (Default)
Pre-heat & prep: 200 °C / 400 °F. Line a sheet pan with parchment.
Spread: Scatter chilled rice in a single, loose layer; heap the soaked chickpeas on one side.
Roast: 20–30 min, stirring halfway, until the rice turns golden and audibly crisp and the chickpeas blister.
Cool completely: This sets the crunch! Scrape rice shards off the tray.
Option B – Air-Fryer Variation (12 min)
Set air-fryer to 190 °C / 375 °F.
Spray the basket lightly with oil; add rice and chickpeas in a shallow layer.
Air-fry 6 min, shake, then another 5-6 min until crisp.
Mix the Dressing
Whisk pickled-ginger juice, maple syrup, mustard, salt and gochujang powder until syrupy.
Assemble the salad
Toss the chopped lettuce, sliced radish, tomatoes, boiled chickpeas, sliced grapes into a large mixing bowl.
Pour the prepared dressing and mix to coat everything evenly.
Next, top with crispy rice over salad before serving and enjoy.
Pro Tips for Maximum Crunch
Cold rice only: warm rice steams and turns soggy.
Don’t overcrowd: air gaps = even browning.
Let it cool: rice crisps further as it dries; patience pays.
Oil mist (optional): a light spray helps caramelise without deep-fry grease.
Batch big, store separate: keep crunchy bits in an airtight jar; combine when ready.
Recipe Notes and Tips
Using cold rice is easy as it turns put crispier in comparison to freshly cooked rice which has more moisture.
Is better to keep the dressing, crispy rice and chopped veggies separate and toss them together before eating for best texture. This is helpful for packing lunchboxes and meal prepping too!
Tasty Variations
Thai “Nam Khao” vibe: Swap maple syrup for palm sugar, add 2 Tbsp lime juice & torn mint + cilantro.
Protein power: Fold in ½ cup edamame or baked tofu cubes.
Fruit swap: Summer peaches or mango in place of grapes.
Nut-free: Omit chickpeas; use sunflower seeds toasted with rice.
If You like this recipe and made it Please rate the recipe. It helps us to reach more people. For the Latest updates Subscribe to Rekha’s Whatsapp. You can follow me onInstagram, Facebook, Youtube, Pinterestfor more food inspirations.
Ultra-crunchy rice clusters, juicy veggies and a tangy pickled-ginger dressing. Learn two fool-proof ways to make this viral crispy rice salad (vegan + GF).Make the most of leftover rice with this crispy rice salad.
🔥 Craving BIG crunch without frying? Make this baked CRISPY RICE SALAD in under 30 minutes! Sweet-spicy orange-ginger dressing, roasted chickpeas, juicy gra...
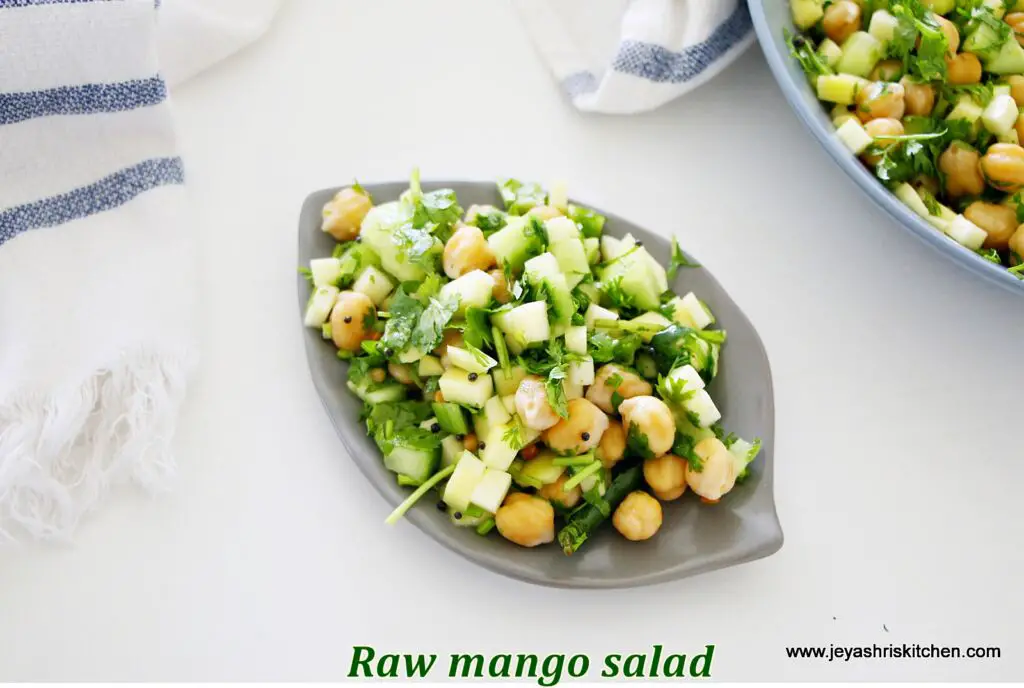
Mango malli salad | Raw mango salad – Easy to make Raw mango salad recipe with short video and step-by-step pictures.
I mostly add raw mango to all my salads in this raw mango season. We all love the crunch and tanginess of the raw mango in salads. I recently tried this random, easy raw mango salad and named it Mango Malli Salad. I wanted to share this refreshing raw mango salad recipe on Jeyashris kitchen. If you are not following Jeyashri’s Kitchen on Instagram, facebook and Youtube please do follow to get more healthy recipe updates
I have provided more options in the notes section for making this mango malli salad. Make the most of this mango season and enjoy the fresh produce. Coriander leaves are a must-ingredient in this refreshing salad.
Keyword Healthy salad, Mango recipes, no onion garlic recipes
Prep Time 15 minutesminutes
Cook Time 2 minutesminutes
Total Time 17 minutesminutes
Servings 2
Author Jeyashri suresh
Ingredients
½cupraw mangocut into small cubes
½cupcucumbercut into small cubes
½cupboiled chickpeas
¼cupfinely chopped coriander leaves
2tspoil
1tspmustard seeds
1tspurad dal
2slit green chilis
Salt as needed
Instructions
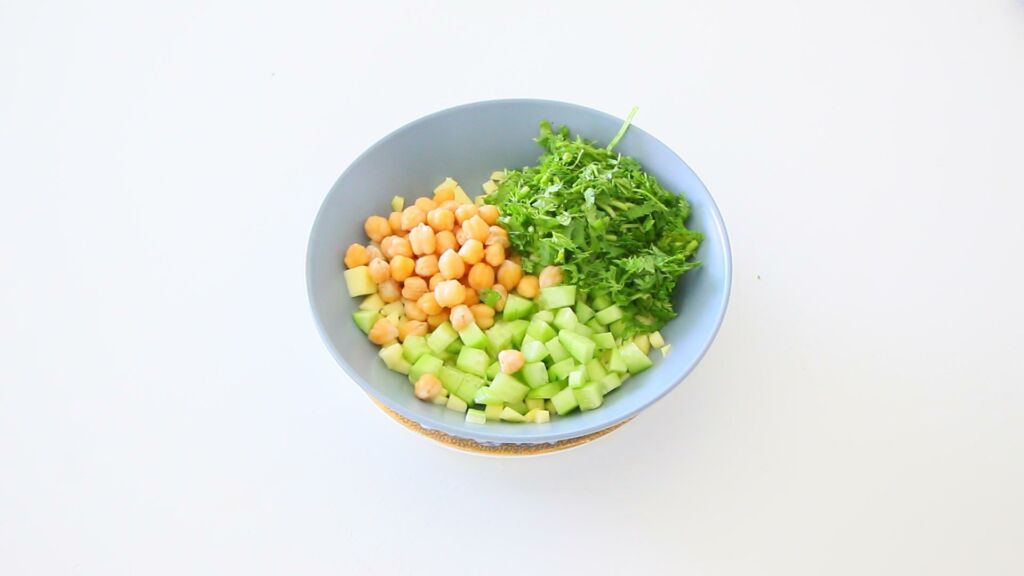
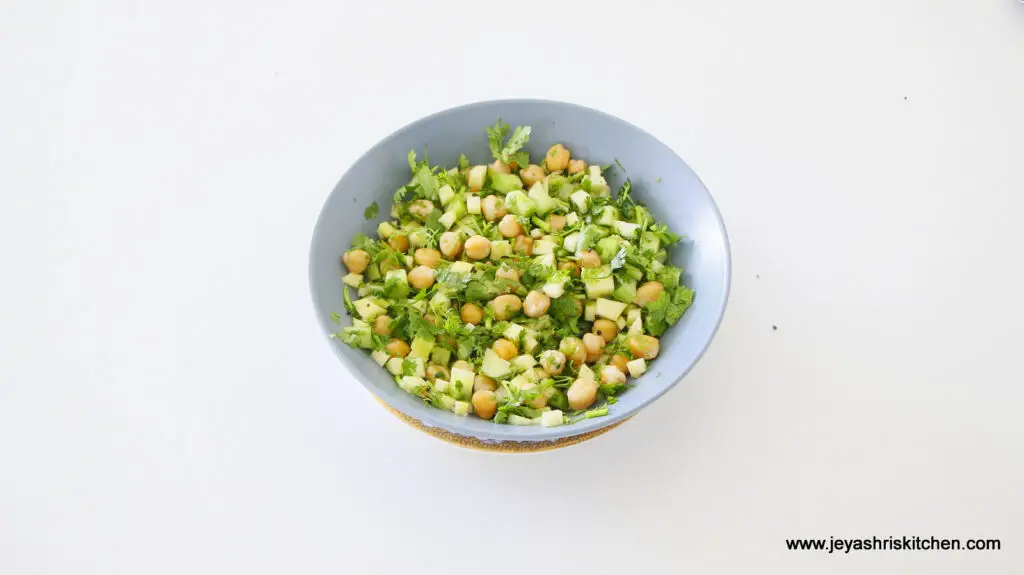
In a bowl add chopped raw mango, cucumber, boiled chickpeas and chopped coriander leaves.
Add salt
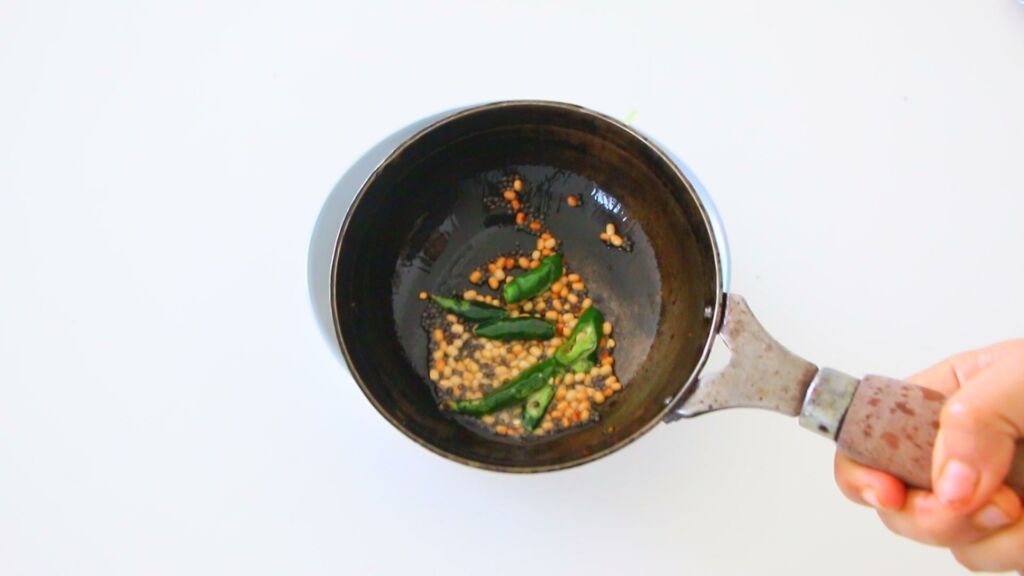
Temper with mustard seeds, urad dal and green chillis 2 tsp oil.
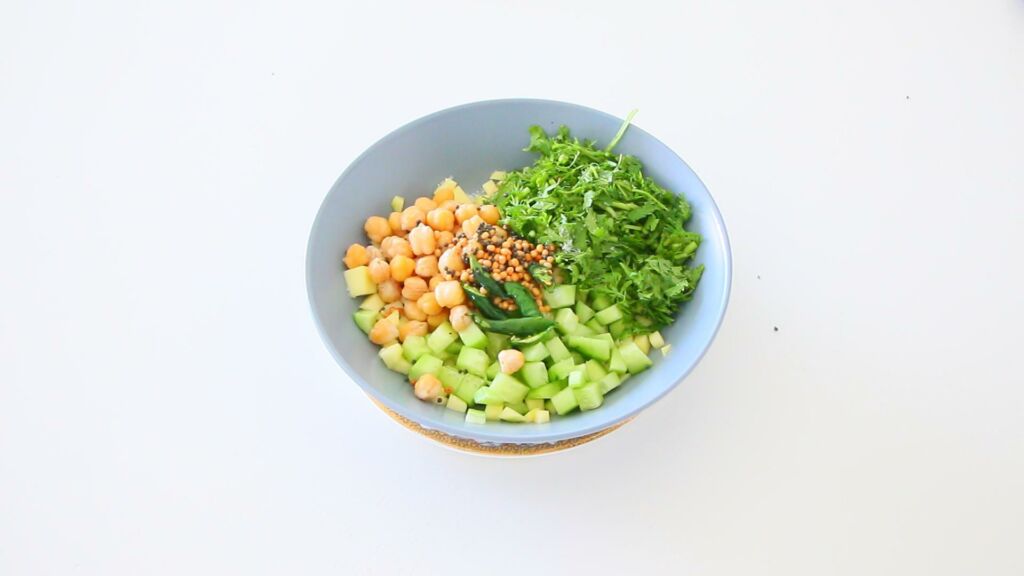
Add to the bowl
Mix well
Mango malli salad is ready
Notes
1. Instead of chickpeas, you can add roasted peanuts or boiled peanuts.2. You can add cooked white peas or black beans, or boiled rajma to the salad.3. Do not alter the quantity of coriander leaves, which gives a fantastic flavour to the salad. 4. You can add some pomegranate arils to the Mango Malli salad | Raw mango salad
In a bowl, add chopped raw mango, cucumber, boiled chickpeas, and chopped coriander leaves.
Add salt.
Temper with mustard seeds, urad dal and green chilies 2 tsp oil.
Add to the bowl.
Mix well.
Mango malli salad is ready.
Notes:
Instead of chickpeas you can add roasted peanuts or boiled peanuts.
You can add cooked white peas or black beans, or boiled rajma to the salad.
Do not alter the quantity of coriander leaves, which gives a fantastic flavour to the salad
You can add some pomegranate arils to the Mango Malli salad | Raw mango salad.
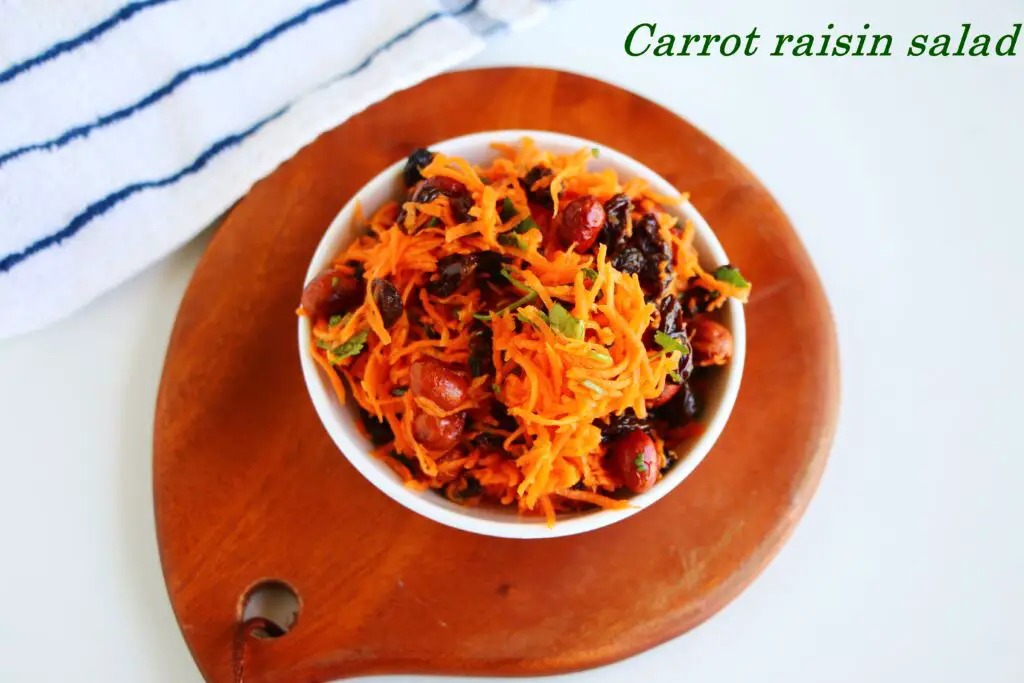
Carrot raisin salad – Easy to make healthy carrot raisin salad recipe – A simple no onion no garlic salad recipe with full video and step by step recipes
I have heard about this salad combo of carrot and raisins, but in the original version, they add mayonnaise and other ingredients. I want to make this carrot raisin salad in my style. This can be made and served for any parties or during any festival get- together like Navaratri, varalakshmi nombu.
This carrot raisin salad can be made using easily available ingredients at home. The addition of raisins, green chili and orange juice contributes to a burst of flavours in the mouth. If you are a salad lover like me, you will enjoy this salad.
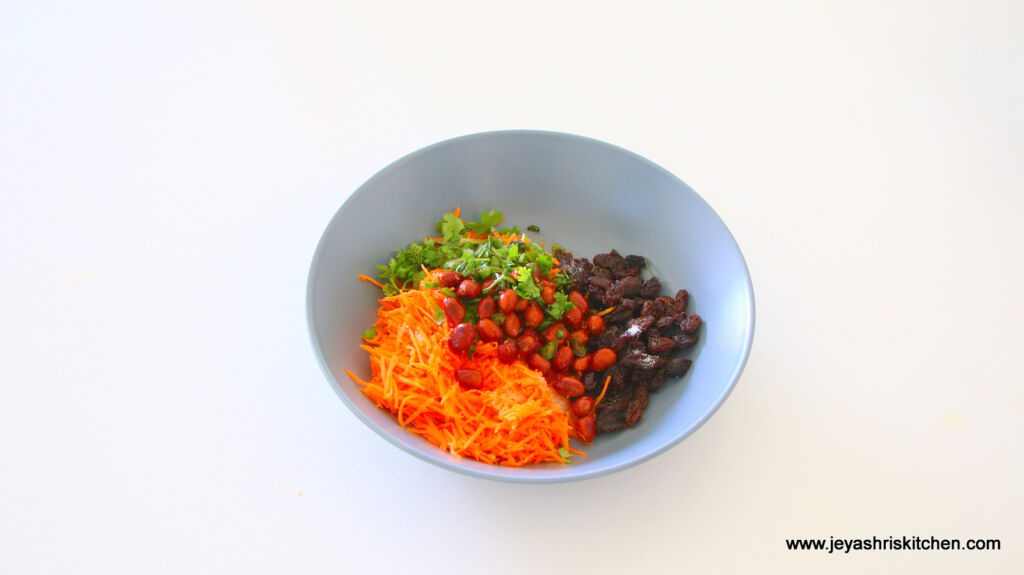
In a bowl add 1 cup grated carrots. I used 2 small carrots.
Add the raisins
Now add the chopped coriander leaves
Add salt as needed
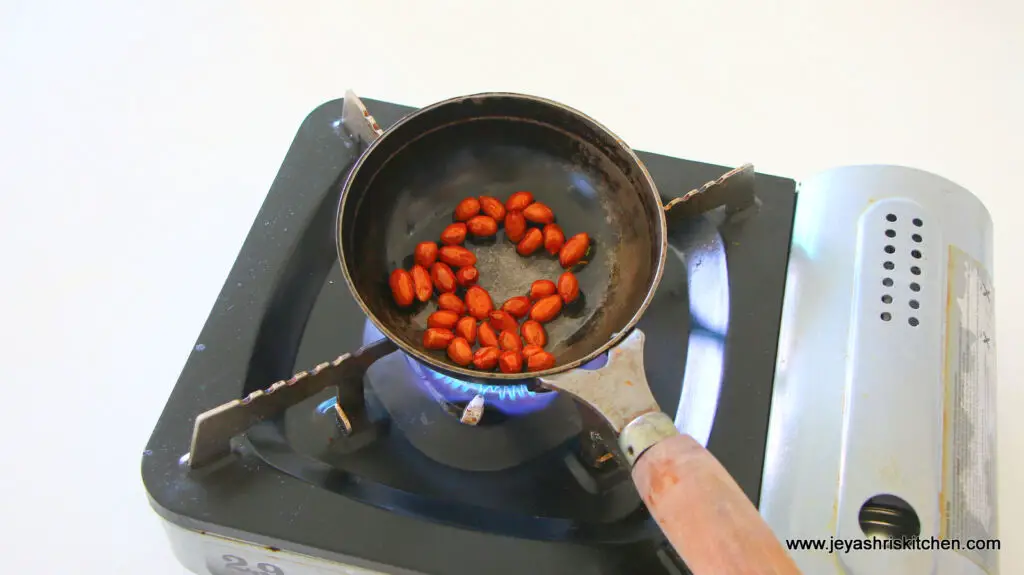
In a pan add 2 tsp oil and add the peanuts
Roast them in medium flame
Once they begin to turn crisp add the finely chopped green chilis
Saute for few seconds
Switch off
Transfer it to the bowl.
Add the orange juice or lemon juice
Mix well evenly
Carrot raisin salad is ready to serve.
You can pack this to lunch box as well.
Video
Notes
1. Roasted peanuts gives a nice crunch to the salad, you can replace that with boiled peanuts and make a no oil recipe too. 2. Carrot and Orange pairs well, so you can add orange juice instead of lemon juice.3. Carrot raisin salad is a perfect one for parties and get togethers.
In a bowl add 1 cup grated carrots. I used 2 small carrots.
Add the raisins
Now add the chopped coriander leaves
Add salt as needed.
In a pan add 2 tsp oil and add the peanuts
Roast them in a medium flame
Once they begin to turn crisp add the finely chopped green chilis
Saute for a few seconds
Switch off.
Transfer it to the bowl.
Add the orange juice or lemon juice
Mix well evenly
Carrot raisin salad is ready to serve.
You can pack this to lunch box as well.
Notes
Roasted peanuts give a nice crunch to the salad, you can replace that with boiled peanuts and make a no-oil recipe too
Carrot and Orange pair well, so you can add orange juice instead of lemon juice.
Carrot raisin salad is a perfect one for parties and get- togethers.


 For the Dressing:
 For the Crispy Rice:
 For the Salad: