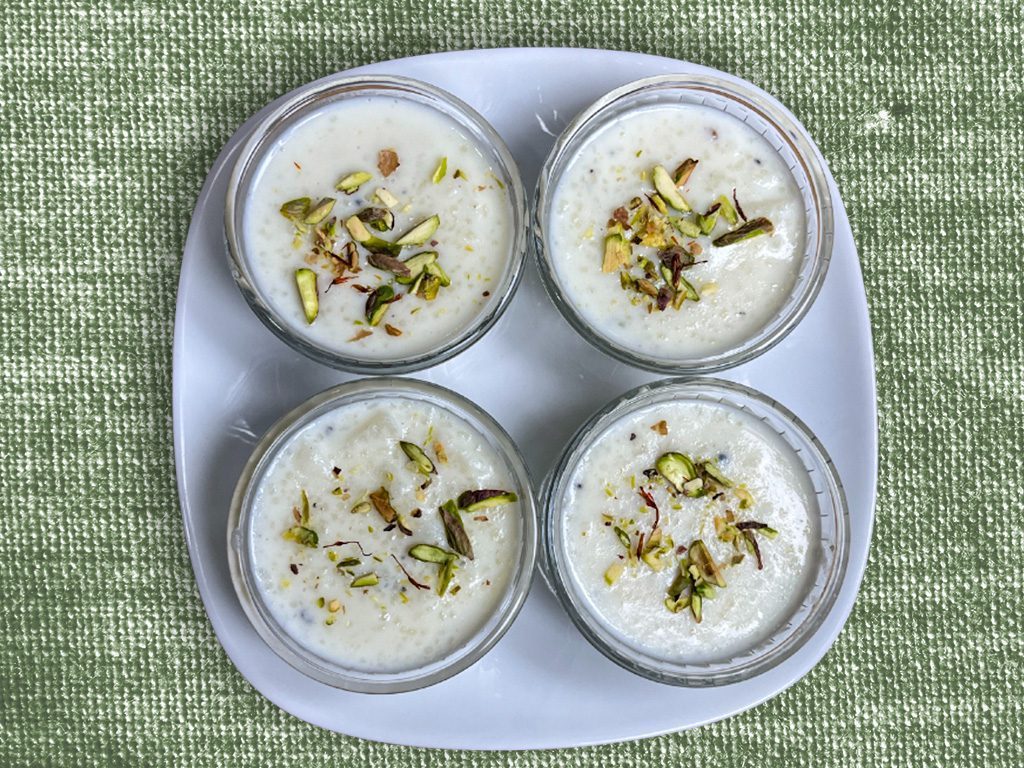
❌

Reading view

There are new articles available, click to refresh the page.

Falooda Paan Shots

These Falooda Paan Shots are everything you love about Indian desserts– fun, colourful, and bursting with flavour πŸ’š

falooda paan shots served on a white platter

Some desserts make people smile the moment they lay their eyes on them and these Paan Falooda Shots do exactly that. They look colourful, festive, and are bursting with that nostalgic paan flavour we all love after a big Indian meal.Β 

If you’re putting together a festive spread soon, these pair beautifully with our Masala Chai Panna Cotta for a modern twist, or Rasmalai Cake, if you want something rich and indulgent alongside. This recipe is simple to make, easy to serve, and 100% guaranteed to impress.Β 

Ingredients for Paan Falooda Shots

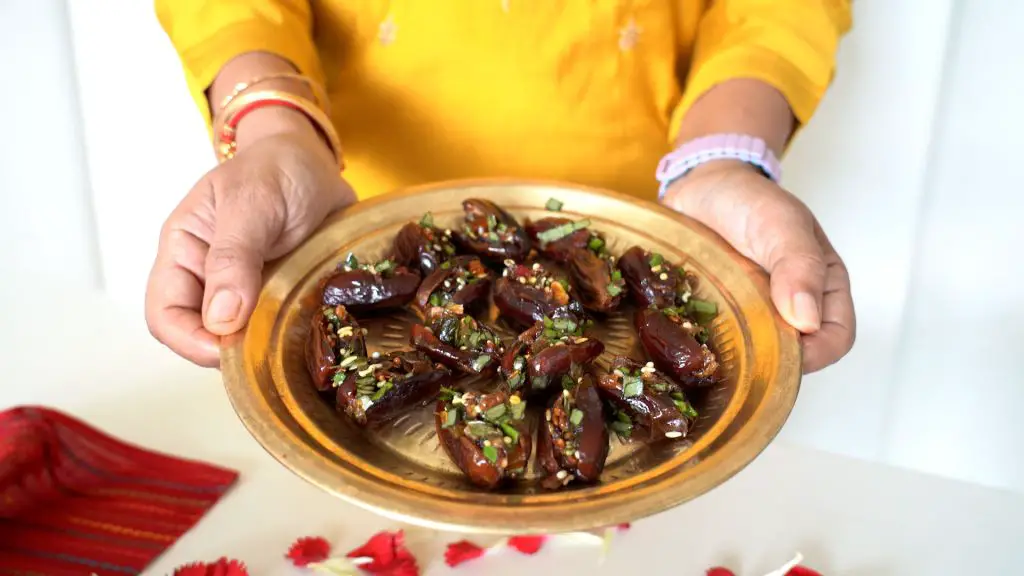
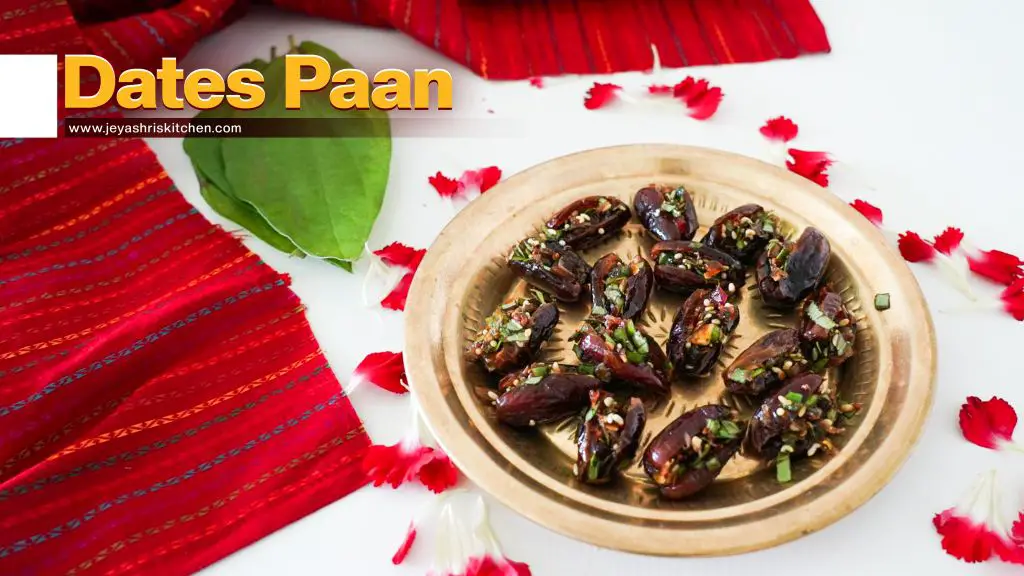
  • Paan Leaves: The heart of the recipe that’s responsible for the vibrant green color, and fresh, minty, slightly bitter flavoursΒ 
  • Gulkand and Saunf: Give the drink its signature sweetness and a floral, paan-shop-style aroma.
  • Vanilla Ice Cream: Makes the paan milk smooth, creamy, and perfectly balanced.
  • Sabja Seeds: Also known as basil seeds.Soaked until they puff up for a fun, chewy falooda texture.
  • Vermicelli: For added texture
  • Cardamom Powder: For warmth, fragrance, and to lift the flavour.
  • Rose Petals and Crushed Pistachios: For garnishΒ 

Richa’s Top Tips

  • Blend smooth: Make sure the paan milk is blended really well so you don’t get bits of leaf while sipping.
  • Don’t skip soaking: Let the sabja seeds sit in water for at least 10 minutes to an hour till they puff up properly.
  • Layer neatly: Spoon each layer carefully so the shots look pretty and don’t mix too soon.
  • Chill before serving: Keep the paan milk in the fridge for a bit, it tastes way better cold.

Frequently Asked Questions

Can I replace sabja seeds with chia seeds?

Yes, you can. Chia seeds have a similar texture once soaked, though they’re slightly less chewy than sabja.

What if I don’t have paan leaves?

You can skip them and still make a tasty falooda using gulkand, saunf, and cardamom for a similar flavour.

Can I make this without ice cream?

Yes, use chilled milk and a spoon of condensed milk for sweetness. It’ll be a little lighter but still creamy and delicious.

Storage Tips

  • Fridge: Store paan milk in an airtight glass bottle for up to 2 days. Keep it chilled and shake well before using.
  • Freezer: You can freeze the paan milk for up to a week in small airtight containers. Thaw in the fridge and blend again before using.
  • Room temperature: Avoid leaving assembled shots out for more than 30 minutes. The ice cream will melt and the layers will lose their texture.

Serving Ideas

Paan Falooda Shots are a total showstopper on any dessert table, bright, festive, and fun to serve. Here are a few ways to make them shine even more:

  • After Paneer Tikka Skewers – A refreshing, sweet bite to end a spicy, savory meal.
  • With Savoury Snacks – A classic combination for your indulgent festive parties

For more such recipes check out some more Unique Diwali Sweets Recipes, perfect for planning your next celebration spread!

Did You Know?

Paan leaves have been part of Indian tradition for centuries not just as a mouth freshener but as a symbol of hospitality and celebration. They’re packed with antioxidants and are said to help with digestion, which is why you’ll often find paan served after a big meal.Β 

a close up image of paan falooda shots served on a white platter

ConclusionThese paan falooda shots are all about fun, flavor, and celebration, a little desi, a little fancy, and a lot of delicious. They’re easy to put together yet feel festive enough for any celebration. If you make them, share your version on Instagram @my_foodstory, I’d love to see how you serve yours!

Watch Falooda Paan Shots Recipe Video

falooda paan shots served on a white platter
Print

Falooda Paan Shots

These Paan Falooda Shots are everything you love about Indian desserts– fun, colourful, and bursting with flavour πŸ’š
Course Desserts
Cuisine Indian
Diet Vegetarian
Prep Time 2 minutes
Cook Time 5 minutes
Total Time 7 minutes
Servings 8 Falooda Shots
Calories 81kcal
Author Richa

Ingredients

For paan milk

  • 6 paan leaves Betel leaves
  • 1 teaspoon saunf
  • 1 tablespoon gulkand
  • Β½ teaspoon elaichi powder
  • 3 scoops vanilla icecream
  • 6 ice cubes
  • 1-2 tablespoons milk

For Faloods shots

  • 8 shot glasses
  • Β½ cup soaked sabja sweet basil seeds
  • Β½ cup cooked vermicelli
  • ΒΌ cup vanilla icecream
  • 1 tablespoon dried rose petals
  • 1 tablespoon crushed pista

Instructions

  • Chop off the stalk & thickest part of the vein from paan leaves as it tastes pungent/bitter.
    6 paan leaves
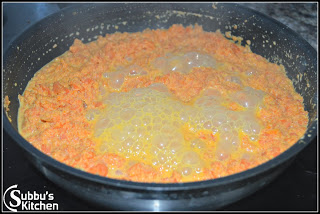
  • Add all the ingredients for paan milk to a blender and blend till smooth.
    1 teaspoon saunf, 1 tablespoon gulkand, Β½ teaspoon elaichi powder, 3 scoops vanilla icecream, 6 ice cubes, 1-2 tablespoons milk
  • Add 2 teaspoons of sabja seeds to a shot glass, add 1 teaspoon of vermicelli as the second layer, fill ΒΎ of the glass with paan milk. Add a teaspoon of vanilla icecream, garnish with a few rose petals & crushed pista. Repeat the same for all the shot glasses and serve immediately.
    Β½ cup soaked sabja, Β½ cup cooked vermicelli, ΒΌ cup vanilla icecream, 1 tablespoon dried rose petals, 1 tablespoon crushed pista, 8 shot glasses

Video

Nutrition

Calories: 81kcal | Carbohydrates: 9g | Protein: 2g | Fat: 4g | Saturated Fat: 1g | Polyunsaturated Fat: 3g | Monounsaturated Fat: 1g | Trans Fat: 0.01g | Cholesterol: 2mg | Sodium: 9mg | Potassium: 71mg | Fiber: 4g | Sugar: 1g | Vitamin A: 32IU | Vitamin C: 0.4mg | Calcium: 82mg | Iron: 1mg

This article was researched and written by Harita Odedra.

The post Falooda Paan Shots appeared first on My Food Story.

Firecracker Crispy Potato

Firecracker Crispy Potato is the most PERFECT snack to serve if you’re hosting this festive season! It’s a fun, crunchy appetizer that’s bursting with Indo-Chinese flavors, and ready in no time.Β 

firecracker crispy potato balls served on a white plate with a dip

Meet my ultimate party trick: Firecracker Crispy Potatoes! These crunchy, golden bites are bursting with Indo-Chinese flavours and wrapped to look like little firecrackers πŸŽ‰Β Β 

The filling combines a spicy, aromatic potato, paneer, and Schezwan sauceΒ  filling, rolled in thin samosa sheets, and fried (or air-fried!) till crisp and irresistible. Perfect for Diwali, house parties, or even along with your evening chai, these crispy potatoes are fun to make, look super impressive, and taste even better.Β 

These are one of those instantly hit unique recipes just like my Achari Paneer Naan Bombs and Papad Bowl Katori Chaat which you have got to try as well! For more festive snack ideas, check out my Diwali Recipes Round-Up which is my OG hosting guide!

Crispy Potato Ingredients Overview

Filling Base – Potatoes and paneer
Aromatics – Garlic, ginger, onions, green chillies, and capsicum for a fragrant, spicy punch.
Sauces – Homemade Schezwan sauce, and soy sauce bring the signature Indo-Chinese heat and umami.
Binders – Oats powder or cornflour to make the coating batter and hold everything together.
Wrappers – Thin samosa sheets rolled around the filling for that firecracker look + crunch.
Oil – For deep frying or brushing if air-frying.

Richa’s Top Tips

  • Don’t overfill, make sure to make a lemon-sized ball for easy wrapping.
  • Make sure to cut the samosa sheets in 2 for the perfect bite-size firecrackers.Β 
  • Work in batches for even frying and perfect crispness.
  • Want to prep ahead? Shape and freeze the rolls and fry straight from frozen when ready.

Frequently Asked Questions

Can I air-fry instead of deep frying?

Yes! Air-frying still gives you that crisp texture but with less oil. Just make sure to brush lightly with oil for an even golden crust.

What can I use instead of samosa sheets?

Spring roll wrappers could alternatively work well here, just cut them into thin strips.

Can I make these ahead of time?

Absolutely! Shape and store them in the fridge for up to a day, or freeze for longer. Fry or air-fry just before serving for best results.

Serving Ideas

a close up image of firecracker crispy potato balls to showcase it's texture

Crispy, spicy, and full of fun, these Firecracker Potatoes are guaranteed to light up your snack table. Quick to make, endlessly addictive, and bursting with flavour – they’re the perfect bite for your next festive get-together!

Recreate this and send me pictures of your festive spread over on my IG @my_foodstory!Β 

Watch Firecracker Crispy Potato Recipe Video

a close up image of firecracker crispy potato balls to showcase it's texture
Print

Firecracker Crispy Potato

A fun, crunchy appetizer that’s bursting with Indo-Chinese flavors, and ready in no time, this Firecracker Crispy Potato is the ultimate Diwali party snack of this season!!
Course Snacks & Appetisers
Cuisine Indian
Diet Vegetarian
Prep Time 5 minutes
Cook Time 10 minutes
Total Time 15 minutes
Servings 12 firecracker potatoes
Calories 176kcal
Author Richa

Equipment

Ingredients

  • 2 tablespoons groundnut oil or any neutral flavored oil divided (+ β…“ cup oil for deep frying)
  • 2 tablespoons finely chopped garlic
  • 1 tablespoon finely chopped ginger
  • ΒΌ cup finely chopped onions
  • 1 green chilli finely chopped
  • ΒΌ cup finely chopped capsicum
  • 4 medium potatoes boiled, peeled & mashed – approx. 2 cups
  • Β½ cup grated paneer
  • 1 tablespoon + 1 teaspoon schezwan sauce
  • 2 teaspoons light soy sauce
  • Β½ teaspoon salt
  • Β½ teaspoon crushed pepper
  • ΒΌ cup oats powder or cornflour
  • ΒΌ cup cornflour
  • ΒΌ cup + 2 tablespoons water
  • 10 samosa sheets cut into 3mm wide x 6-7 cm long, strips

Instructions

Potato-paneer filling

  • Heat 3 tablespoons of oil in a pan or kadai, add garlic, ginger and saute for a few seconds on high until fragrant. Add green chillies, onions, capsicum & saute for 2-3 minutes till onions turn translucent. Add mashed potatoes, paneer, schezwan sauce, soy sauce, salt, pepper, oats powder and saute for a few seconds till the sauces get absorbed well. Set aside to cool.

Samosa sheet strips

  • Cut each samosa sheet into 2 & cut out 3mm wide x 6-7 cm long strips. Transfer the strips to a plate.

Making firecracker potatoes

  • Mix cornflour in water to make the coating batter. Take approx. 2 tablespoons of the potato mix and make lemon sized balls. (You may grease your hands with oil if needed) set aside. Dip each ball in the coating batter, roll on the samosa sheet strips, dip again into the coating batter and roll again on the samosa sheet strips to form a fire cracker (watch video for more details) and set aside. Coating & rolling ensures that the strips stick well & firecrackers hold shape, so do not skip it. Repeat the same process for rest of the balls.

Deep frying method

  • Heat β…“ cup of oil in a deep kadai or pot and deep fry the firecracker potatoes on medium heat till they turn crisp & golden. Do not overcrowd the kadai so they get fried well. Fry in batches and set aside.

Airfrying method

  • Preheat the airfryer at 140C and brush the basket/tray with oil. place the firecracker potatoes, gently brush or drizzle oil on them. Air fry at 140C for 12-15 minutes & at 190C for 3 minutes till they turn golden brown and crisp.
  • Serve immediately as they stay crisp when hot.

Video

Nutrition

Calories: 176kcal | Carbohydrates: 28g | Protein: 5g | Fat: 5g | Saturated Fat: 2g | Polyunsaturated Fat: 1g | Monounsaturated Fat: 1g | Cholesterol: 8mg | Sodium: 275mg | Potassium: 342mg | Fiber: 2g | Sugar: 1g | Vitamin A: 22IU | Vitamin C: 18mg | Calcium: 69mg | Iron: 1mg

This article was written and researched by Navya Khetarpal.

The post Firecracker Crispy Potato appeared first on My Food Story.

Korean Crispy Lotus Stem

Crispy, sticky, and the perfectΒ  amount of spicy, this Korean-style crispy lotus stem has an addictive crunch & comes covered in glossy gochujang glaze that makes every bite impossible to stop at one.

close up image of Korean crispy lotus stem to show it's thin and crispy texture

Lotus stem, also known as lotus root, might not be something you cook often, but this dish might just change that. Every bite is a mix of crunch, spice, and a glossy red glaze that makes it oh-so-special. There’s a little heat, a touch of sweetness, and a whole lot of flavor that sneaks up on you in the best way.

If you want to bring a surprise element to your Diwali party table with familiar flavours in new textures, then crispy lotus stem recipe is it. Make it a part of your charcuterie board, or serve it as is with some mayo or my garlicky yogurt dip for an appetiser that truly feels like the star of the evening!Β Β 

Ingredients for Crispy Lotus Stem

  • Lotus Stem: The hero of the dish. Thinly sliced for even cooking. You can find it fresh or frozen in most Indian or Asian stores, both online and offline (I get mine from BlinkIt).
  • Oil: A neutral one like sunflower or canola oil.
  • Aromatics: Finely chopped ginger and garlic for flavor and aroma.Β 
  • Sauce Base: Seasame seeds, gochujang (Korean chilli paste), gochugaru (Korean chilli flakes), soy sauce, and oyster sauce bring in that signature Korean heat and umami depth.
  • Sweetness & Balance: A drizzle of honey rounds out the spice, while a splash of water helps create that glossy, sticky coating.
  • Garnish: Spring onion greens for crunch, freshness, and a little visual pop right before serving.

Richa’s Top Tips

  • Slice lotus stem evenly: Thin, uniform slices make all the difference. Thicker ones stay chewy instead of crisping up.
  • Dry well: After soaking, pat the lotus stems completely dry so they don’t steam in the air fryer. This is an important to step to achieve crispy results.
  • Don’t overcrowd: Give the slices space in the basket so hot air can move around freely.
  • Balance the sauce: Taste before adding all the gochujang and gochugaru. Adjust spice and sweetness to your liking.
  • Toss just before serving: Add the sauce only when you’re ready to eat, so the stems stay crisp and don’t go soggy.

Frequently Asked Questions

What is a lotus stem?

Lotus stem or lotus root is the edible root of the lotus plant. It has a mild flavor and a crisp, slightly starchy texture that stays crunchy even after cooking.

What does lotus stem taste like?

It’s mildly sweet, with a crunch similar to water chestnuts or bamboo shoots. When fried or stir-fried, it develops a lovely nutty bite.

My lotus stem turned chewy. What went wrong?

They were likely sliced too thick or not air-fried long enough. Keep the slices thin and dry them well before cooking for maximum crispiness.

Can I make this without gochujang?

Yes! Mix red chilli paste with a little soy sauce, vinegar, and sugar for a quick substitute. It won’t taste exactly the same but will still give you a bold, flavorful glaze.

Storage Tips

  • Fridge: Store leftovers in an airtight container for up to 2 days. The lotus stem will soften slightly but still taste great.
  • Freezer: Not recommended, as the sauce and texture of lotus stem don’t hold well once thawed.
  • Reheating: Reheat in an air fryer or a hot pan for a few minutes to bring back some crispness. Avoid microwaving, as it makes the stems soggy.
  • Make ahead: You can air fry the lotus stem slices in advance and store them separately. Toss them in the sauce just before serving to keep them crunchy.

Serving Ideas

These crispy lotus stems are great on their own, but even better when you pair them with the right dishes. Try one of these easy combos:

Customisation Ideas

  • Add crunch with peanuts – Toss in roasted peanuts at the end for extra texture and a nutty twist.
  • Make it milder – Use fewer green chillies or replace gochugaru with Kashmiri chilli powder for a gentler heat that still keeps the colour.
  • Add sesame oil – A small drizzle at the end deepens the nutty flavour and adds a beautiful gloss to the sauce.
  • Try a fusion twist – Replace gochujang with schezwan sauce for an Indo-Chinese version that’s just as bold.
  • Use different veggies – If lotus stem isn’t easily available, try the same recipe with baby corn, mushrooms, or cauliflower florets for a similar crisp bite.

Did You Know?

Lotus stems are nature’s own little engineering marvels. Each slice has a honeycomb of air channels that help the plant breathe underwater, and those same pockets give it that irresistible crunch when cooked. The stem stays crisp even after frying or simmering, which is why chefs across Asia love using it for texture. Plus, lotus stems have been part of traditional medicine for centuries, said to cool the body and boost digestion.

close up image of Korean crispy lotus stem to show it's thin and crispy texture

So go ahead and make this crispy Korean-style lotus stem at home. And if you try it, don’t forget to tag me on Instagram @my_foodstory so I can see your beautiful plates!

Watch Korean Crispy Lotus Stem Recipe Video

close up image of Korean crispy lotus stem to show it's thin and crispy texture
Print

Korean Crispy Lotus Stem

Crispy, crunchy, sweet, sticky, and spicy, this Korean Crispy Lotus Stem is a medley of flavors and textures that come together quickly and alleviate a boring meal in minutes!
Course Snacks & Appetisers
Cuisine Korean
Diet Vegetarian
Prep Time 5 minutes
Cook Time 16 minutes
Total Time 21 minutes
Servings 4 persons
Calories 126kcal
Author Richa

Equipment

Ingredients

  • 275 gms lotus stems approx. 3 cups, sliced very thin
  • 2 teaspoons cooking oil

For stir fry

  • 1 tablespoon sunflower oil or any neutral flavored cooking oil
  • 1 teaspoon finely chopped ginger
  • 1 teaspoon finely chopped garlic
  • 1 teaspoon sesame seeds
  • 2 Β½ teaspoons gochujang korean chilli paste
  • 1 teaspoon gochugaru korean chilli powder
  • ΒΎ teaspoon soy sauce
  • 1 ΒΌ teaspoons oyster sauce
  • 1 tablespoon honey
  • 2 tablespoons water
  • 1 tablespoon finely chopped spring onion greens

Instructions

Air frying lotus stems

  • Wash & soak the lotus stem slices in water for 5 minutes to remove the soil in them. Drain and dry well on a kitchen cloth.
  • Pre-heat the airfryer to 170C and brush the basket with oil.
  • Take the lotus stem slices in a wide bowl, drizzle oil and toss well so they get coated uniformly.
  • Add to the air fryer basket. Do not pile or clump a lot of slices at one place as they stick together & do not get fried well.
  • Air fry for 16 minutes at 170C while brushing with oil once every 6 minutes.

Sauce

  • Add sesame seeds, gochujang, gochugaru, soy sauce, oyster sauce, honey, water to a bowl & give a good mix

Stir fry

  • Heat oil in a pan, add ginger, garlic & saute on high for a few seconds till fragrant.
  • Add the sauce & let it cook for 2 minutes till it thickens.
  • Add air fried lotus stems & toss for 2 minutes to get them well coated with sauce.
  • Garnish with spring onion greens.

Video

Nutrition

Calories: 126kcal | Carbohydrates: 18g | Protein: 2g | Fat: 6g | Saturated Fat: 1g | Polyunsaturated Fat: 1g | Monounsaturated Fat: 4g | Trans Fat: 0.01g | Sodium: 122mg | Potassium: 422mg | Fiber: 4g | Sugar: 5g | Vitamin A: 170IU | Vitamin C: 31mg | Calcium: 42mg | Iron: 1mg

This article was researched and written by Harita Odedra.

The post Korean Crispy Lotus Stem appeared first on My Food Story.

Dates paan recipe

Dates paan recipe – Must try paan recipe for this festival season. No cook dates paan recipe using betal leaves | Vethalai, gulkand, and other easily available ingredients.

Usually, I make one paan dish for all my guests when I host any big gatherings at home. This year, when we had Maha Periyava Paduka Pooja at home, I made this Dates paan for my guests. It was a huge hit among all. Our friend who runs a restaurant here got so impressed, asked me to make dates paan for a big event hosted at their restaurant. Yet another huge hit.

I also made this for Varalakshmi Pooja and everyone loved it. As Navaratri is approaching, I thought of sharing this recipe with you all. So that you can make this for the guests. All you need is good-quality dates, tutti frutti, gulkand, and store-bought Mukhwas. You can make this in advance and store it in the refrigerator.

Jeyashri’s kitchen has a huge collection of Navaratri recipes. Check out Navaratri Combo recipe for guests, Navaratri sweets and snacks combo, Navaratri neivedyam combo, Navaratri neivedyam combo ideas

Also check out our other Paan recipes for this festival season, Paan ladoo, Paan ice cream, paan phirni, Paan shots

Dates Paan
Print

Dates paan recipe

No cook paan leaves stuffed dates paan, perfect for the festival season
Course Dessert
Cuisine Indian
Keyword Festival recipes, Navratri recipes, paan leaves,
Prep Time 20 minutes
Cook Time 0 minutes
Total Time 20 minutes
Servings 18 pieces
Author Jeyashri suresh

Ingredients

  • 3 paan leaves | vethalai| betel leaves
  • 18 Pitted dates
  • 2 tbsp gulkand | rose petal jam
  • 2 tbsp tutti fruiti
  • 2 tbsp mukhwas | mouth freshner

Instructions

  • I used this mixed mukhwas for this
  • In a bowl add the mukhwas, you can add sweetened fennel seeds, jeera mittai, supari
  • I used 4 varieties
  • Add 2 tbsp tutti fruiti
  • Add 2 tbsp Gulkand | Rose petal jam
  • Wash the paan leaves well and pat dry them. Take out the stem part and finely chop it. I used 3 medium sized paan leaves, do not add more
  • Mix well
  • Filling is ready
  • Take one pitted dates
  • Stuff little filling into it
  • Close it
  • Repeat for the rest
  • Dates paan is ready

Video

Notes

1. You can add finely chopped or pulsed nuts and seeds to this dates paan filling.Β 
2. This can be stored in the refrigerator for 5-7 days.
3. I have once added slightly crushed M & M and skipped the mukhawas. Kids enjoyed this version.
4. Use firm dates for making this dates paan recipe.
  • I used this mixed mukhwas for this.
Dates paan
  • In a bowl, add the mukhwas
  • I used 4 varieties
  • Add 2 tbsp tutti frutti
  • Add 2 tbsp Gulkand | Rose petal jam
  • Add 3 finely chopped paan leaves.
Dates paan
  • Mix well
  • Filling is ready.
Dates paan recipe
  • Take one pitted date
  • Stuff a little filling into it
Dates paan
  • Close it
  • Repeat for the rest
  • Dates paan is ready.
Dates paan

Notes:

  • You can add finely chopped or pulsed nuts and seeds to this dates paan filling
  • This can be stored in the refrigerator for 5-7 days.
  • I have once added slightly crushed M&M and skipped the mukhawas. Kids enjoyed this version.
  • Use firm dates for making this dates paan recipe.
Dates Paan

The post Dates paan recipe appeared first on Jeyashri's Kitchen.

Carrot Kheer

Print

Carrot Kheer

Kheer is one of the most traditional and loved sweets found all over India. Over the years, I’ve made videos on many variations of kheer, each with its own unique charm, although Rice Kheer remains the most traditional. Once, my friends served me Carrot Kheer. While it was delicious, I felt something was missingβ€”a certain balance of flavors that I couldn’t quite pinpoint. After experimenting a few times, I finally developed a simple yet delicious version of Carrot Kheer that I’m happy with.
Some of my younger friends, who usually avoid kheer, were pleasantly surprised when I served it to them as pudding. They loved it!
What I love most about Carrot kheer is that it can be made with just a few simple ingredients, yet the result is always rich and flavorful. This version, in particular, is delightful with its creamy texture and subtle sweetness.
Course Dessert
Cuisine Indian
Keyword Dessert
Prep Time 10 minutes
Cook Time 30 minutes
Servings 4 people

Ingredients

  • 3 cups shredded carrots, divided
  • 4 cups milk, divided
  • β…“ cup sugar
  • ΒΌ tsp crushed green cardamom
  • 2 tbsp sliced almonds

Instructions

  • Before shredding the carrot, it should be washed and peel, peeling is an important of preparation. Blend 1 cup of shredded carrots with 1 cup of milk into a fine paste.
  • Bring the remaining milk to a boil over low to medium heat in a saucepan. To prevent the milk from sticking, wet the pan with a little water before adding the milk.
  • Once the milk boils, add the shredded carrots and carrot paste. Continue boiling for about 15 minutes over low to medium heat, stirring occasionally. Scrape the sides of the pan to prevent sticking and browning.
  • Cook until the carrots are tender, and the milk has reduced by about half, becoming creamy. Stir often to avoid burning.
  • Add sugar, cardamom, almonds, and cashews, and let the mixture simmer for a few more minutes.
  • Turn off the heat.
  • As the kheer cools, it will thicken in texture.

Notes

Enjoy!Β To serve as a pudding, you should cook the kheer for 2 to 3 more minutes to thicken it, bringing it to a pudding-like texture.

Carrot Kheer (Carrot Paayasam): A Delicious Twist on a Timeless Indian Sweet | Manjula’s Kitchen

Introduction to Carrot Kheer

Kheer is one of the most cherished and traditional sweets in Indian cuisine, with its creamy, sweet, and flavorful profile making it a favorite during festivals and special occasions. Carrot Kheer, also known as Carrot Payasam, offers a delightful twist to the traditional rice-based kheer, adding a unique layer of flavor and texture with shredded carrots. Over the years, kheer has seen many variations, and this version brings the earthy sweetness of carrots into the creamy goodness of milk and sugar. With just a few simple ingredients, this Carrot Kheer delivers a rich and flavorful dessert that’s perfect for any occasion.

Cultural and Traditional Importance

Kheer holds a special place in Indian households, especially during festivals such as Diwali, Holi, and Raksha Bandhan. It is often served as an offering to deities and enjoyed as a dessert after meals. While Rice Kheer is the most traditional form, Carrot Kheer adds a refreshing twist by incorporating a vegetable into the dessert, making it both nutritious and flavorful. The vibrant color of the carrots combined with the rich texture of milk creates an aesthetically pleasing and indulgent treat that is sure to impress your family and friends.

Although Carrot Kheer may not be as well-known as its rice counterpart, it is quickly gaining popularity for its unique taste and simplicity. This version strikes the perfect balance of sweetness and creaminess, making it a must-try for those looking to experiment with traditional Indian sweets.

Recipe Variations from Manjula’s Kitchen

While Carrot Kheer is a delightful dessert on its own, you can explore other variations of kheer or similar milk-based sweets from Manjula’s Kitchen:

  • Rice Kheer: The classic, most traditional form of kheer made with rice, milk, and sugar.
  • Sabudana Kheer: A delicious variation using tapioca pearls, commonly served during fasting periods.
  • Vermicelli Kheer (Seviyan Kheer): Made with thin vermicelli noodles, this version offers a unique texture to the traditional kheer.
  • Badam Burfi (Almond Candy): Rich and creamy, this version uses almonds to create a decadent dessert that’s both healthy and delicious.

Health Benefits and Dietary Considerations

Carrot Kheer offers a nutritious alternative to traditional kheer, with the inclusion of carrots providing a good source of vitamins, fiber, and antioxidants. Carrots are rich in vitamin A, which promotes eye health and boosts immunity, making this kheer not only delicious but also beneficial for overall wellness. Additionally, milk provides calcium and protein, while the nuts add healthy fats, making this dessert a well-rounded treat.

This kheer can be easily adjusted for various dietary preferences. For a vegan option, you can substitute dairy milk with almond or coconut milk. The natural sweetness of the carrots also allows for a reduction in added sugar if you prefer a lighter dessert.

Serving Suggestions

Carrot Kheer can be served warm or chilled, depending on your preference. Its vibrant color and rich flavor make it an attractive addition to any festive meal. For an even more indulgent experience, you can serve Carrot Kheer with a sprinkle of extra chopped nuts, such as almonds or pistachios, for added crunch and richness.

If you want to serve Carrot Kheer as a pudding, cook it for a few more minutes to achieve a thicker, more pudding-like consistency. This version pairs wonderfully with Gulab Jamun or Rasgulla for a complete Indian dessert platter.

Conclusion

Carrot Kheer is a simple yet luxurious dessert that offers a modern twist on the traditional Indian sweet. With its creamy texture, vibrant color, and subtle sweetness, this dessert is sure to become a favorite at your dinner table. Whether you’re celebrating a festival or simply want to treat yourself to something special, this Carrot Kheer recipe is a must-try. Explore the other kheer variations on Manjula’s Kitchen to discover even more delicious ways to enjoy this timeless dessert.

Frequently Asked Questions (FAQs)

  • What is the difference between Carrot Kheer and Rice Kheer?
    • Carrot Kheer uses shredded carrots as the main ingredient, while Rice Kheer is made with rice. Both versions are cooked in milk and flavored with sugar and cardamom, but Carrot Kheer offers a more vibrant color and slightly different texture.
  • Can I make Carrot Kheer vegan?
    • Yes, you can easily make Carrot Kheer vegan by using plant-based milk like almond or coconut milk instead of dairy milk.
  • What are some other variations of kheer I can try?
    • You can try Rice Kheer, Sabudana Kheer, Vermicelli Kheer, or Badam Kheer, each offering unique flavors and textures while still being deliciously creamy and satisfying.
  • How do I serve Carrot Kheer as a pudding?
    • To serve Carrot Kheer as a pudding, cook it for 2-3 extra minutes to achieve a thicker consistency, similar to a pudding. You can serve it warm or chilled
  • How long can I store Carrot Kheer?
    • Carrot Kheer can be stored in an airtight container in the refrigerator for up to 2-3 days. Reheat it gently before serving if you prefer it warm.

The post Carrot Kheer appeared first on Manjula's Kitchen.

πŸ’Ύ

Discover Carrot Kheer: a creamy Indian dessert featuring grated carrots simmered in milk, flavored with cardamom, garnished with nuts.

Exotic Rice Pudding

kheer recipe
Print

Exotic Rice Pudding with a Secret Ingredient

Kheer is a traditional, delicious dessert, often referred to as rice pudding. To make kheer, you don’t need any special occasionβ€”just treat yourself. Kheer has many variations. Traditionally, it is made with rice and milk, but rice can be replaced with different vegetables, fruits, or lentils.
I have done many videos and posts on Manjula's Kitchen website and YouTube channel related different kheer recipes. This time, I decided to make rice kheer with a new twist. Petha is a candy-like treat made with ash gourd or winter melon, and it is readily available in Indian grocery stores.
Adding Petha gives a very refreshing twist to kheer. My friends couldn't believe it, and all of them enjoyed it. For many years i've been experimenting various indian rice recipes, and today made one more change to the rice, and they kept asking about it, amazed that it was indeed rice. This recipe is very easy and takes less time than traditional kheer.
Petha Rice Kheer is a fruity twist on the favorite Indian dessert, Rice Kheer. It is an easy recipe but feels like you have spent a lot of time.
Course Dessert
Cuisine Indian
Keyword Kheer, petha
Popular YouTube
Prep Time 5 minutes
Cook Time 25 minutes
Servings 4 people

Ingredients

  • 3 cups whole milk
  • Β½ cup rice cooked
  • Β½ cup thinly sliced Petha, available in Indian grosser
  • 2 tbsp almond powder, preferred blanched almond powder
  • 3 tbsp sugar
  • ΒΌ tsp cardamom crushed
  • 2 tbsp sliced pistachios for garnishing

Instructions

  • Blend the rice with half a cup of milk until the rice looks like pearls; do not make it into a paste, as this is a very important part of this recipe.
  • Heat a pan on medium-low and add 2 tablespoons of water, ensuring the surface of the pan is wet. Add the blended rice, milk, thinly sliced patha, and almond powder. Increase the heat to medium-high, bring the milk to a boil, then lower the heat to medium-low. Cook for about 15 minutes, stirring occasionally and cleaning the sides to prevent the milk from burning.
  • Add sugar and cardamom and cook for a few more minutes. Remember, as the kheer (pudding) comes to room temperature, it will thicken slightly. If needed, add a bit more milk and bring it to a boil once more. At this point, you can also adjust the sugar.
  • The kheer is ready. Serve it chilled and garnish with sliced pistachios.

Notes

About Rice Kheer, or pudding
Different part of India Kheer is made different, in north kheer is made using any long grain rice.
In South part of India, it is known Rice Payasm and they use short grain rice, ghee and Jaggery.Β 
In Bangel is known as Payesh with rice and date palm jaggery.Β 
One thing common they all use different nuts of their choice.

Discover the Exotic Rice Pudding with a Secret Ingredient

Kheer, often referred to as rice pudding, is a beloved traditional Indian dessert. While it is typically made with rice and milk, variations using different vegetables, fruits, or lentils/indian daal are also popular. This patha rice kheer recipe introduces a unique twist by incorporating Petha, a candy-like treat made from ash gourd or winter melon, readily available in Indian grocery stores. This addition brings a refreshing flavor to the classic kheer, making it a delightful treat for any occasion.

The Essence of Patha Rice Kheer

The essence of petha rice kheer lies in its creamy texture and the subtle sweetness of petha. The combination of cooked rice, milk, almond powder, and thinly sliced petha creates a rich and flavorful pudding. This Indian rice pudding is further enhanced with the aromatic hint of cardamom and the crunch of pistachios.

Origin and Popularity

Kheer is a traditional dessert enjoyed across India, known for its versatility and rich flavors. Each region has its own variation of kheer. In North India, it is made with long grain rice, while in South India, it is known as Rice Payasam, made with short grain rice, ghee, and jaggery. In Bengal, it is called Payesh, made with rice and date palm jaggery. Despite these regional differences, the use of nuts and a creamy base remains common.

Why You’ll Love This Recipe

  • Unique and Refreshing: The addition of patha gives a refreshing twist to traditional kheer.
  • Easy to Make: Simple ingredients and quick preparation.
  • Delicious and Nutritious: Combines the goodness of milk, rice, and nuts.
  • Perfect for Any Occasion: Ideal for festive celebrations or as a special treat.

Variations of Indian Desserts

Exploring Manjula’s Kitchen reveals a treasure trove of other delicious Indian dessert recipes that you might enjoy alongside your patha rice kheer. Here are some related dishes that you might find interesting:

  1. Mango Cheesecake: A creamy and fruity cheesecake made with fresh mangoes
  2. Gulab Jamun: Deep-fried milk-solid-based balls soaked in a fragrant sugar syrup.
  3. Kheer: A traditional rice pudding made with milk, sugar, and flavored with cardamom and saffron.
  4. Rasgulla: Soft and spongy cheese balls soaked in sugar syrup.
  5. Seviyan Kheer: A sweet and creamy dessert made with vermicelli noodles, milk, and sugar called seviyan kheer.

Serving Suggestions

Petha rice kheer can be enjoyed in various ways:

  • As a Dessert: Serve chilled for a refreshing end to your meal.
  • For Festive Occasions: Perfect for festivals like Diwali, Holi, or religious ceremonies.
  • With Tea or Coffee: Enjoy as a sweet treat with your afternoon tea or coffee.
  • Garnished with Nuts: Add a garnish of sliced pistachios or other nuts for extra flavor and crunch.

Tips and Tricks

To perfect your petha rice kheer recipe, consider these helpful tips:

  • Blend Rice Correctly: Blend the rice with milk until it looks like pearls; avoid making it into a paste.
  • Use Fresh Patha: Fresh patha provides the best flavor and texture, but it is available in Indian grocery stores.
  • Balance Sweetness: Adjust the amount of sugar to suit your taste preference.
  • Serve Chilled: This kheer is best enjoyed chilled for the most refreshing experience.

FAQs

Can I Use Other Vegetables Instead of Petha?

Yes, you can experiment with other vegetables or fruits to create different variations of kheer.

How Long Does Petha Rice Kheer Last?

Store petha rice kheer in an airtight container in the refrigerator for up to 3 days. Reheat gently before serving.

Is Petha Rice Kheer Gluten-Free?

Yes, this recipe is naturally gluten-free as it is made with rice and milk.

Can I Make This Recipe Vegan?

Yes, you can use plant-based milk and a vegan sweetener to make a vegan version of this recipe.

What Can I Serve with Petha Rice Kheer?

Petha rice kheer pairs well with Indian breads like puri or paratha, or you can enjoy it on its own as a sweet treat.

Desserts recipes:

The post Exotic Rice Pudding appeared first on Manjula's Kitchen.

πŸ’Ύ

Explore the ultimate rice pudding recipe with a twist. Our secret ingredient adds a unique flavor that will leave you wanting more.

Carrot Halwa | Gajar Ka Halwa

Carrot Halwa, also known as Gajar Ka Halwa, is a classic Indian dessert that holds a special place in every festive celebration and family gathering. Made with freshly grated carrots, milk, sugar, and a generous touch of ghee, this rich and aromatic dessert is slow-cooked to perfection, allowing the natural sweetness of the carrots to shine through.

Often garnished with crunchy nuts and fragrant cardamom, Carrot Halwa is a delightful treat that blends simplicity and indulgence. Whether served warm in winter or chilled in summer, this dessert is a favorite across generations. At Subbus Kitchen, we bring you a step-by-step recipe to recreate this timeless delicacy in your own home with ease.

Close-up of Carrot Halwa served in a bowl, garnished with chopped nuts, showcasing its rich orange color and creamy texture.

Carrot Halwa, or Gajar Ka Halwa, is especially popular during the winter months in India when fresh, juicy red carrots are in season, making it the perfect time to prepare this warm and comforting dessert. It is also a staple during festive occasions and celebrations such as Diwali, Holi, and weddings, where traditional sweets hold a central place. Additionally, it is a cherished treat for harvest festivals like Lohri and Makar Sankranti, making it a versatile and beloved dish that shines during special moments and colder seasons.

We can make Carrot Halwa in the Instant Pot as well. It pairs well with a dollop of fresh cream or a drizzle of condensed milk for added creaminess. Some enjoy it alongside puris (deep-fried Indian bread) for a festive breakfast or dessert.

[feast_advanced_jump_to]

Ingredients

The ingredients for making Carrot Halwa are simple yet come together to create a rich and flavorful dessert.

  • Fresh, tender red carrots are the star of this dish, grated finely to ensure a smooth texture.
  • Full-fat milk is essential for cooking the carrots to a creamy consistency, while sugar adds the perfect level of sweetness.
  • Ghee (clarified butter) lends a luxurious aroma and richness, making the halwa irresistibly flavorful.
  • Cardamom powder enhances the dessert with its warm, fragrant notes, while a mix of chopped nuts like almonds, cashews, and pistachios add a delightful crunch.

These wholesome ingredients blend harmoniously to create this timeless Indian dessert. See recipe card for quantities.

Instructions

See below the recipe with step by step instructions along with pictures .

Carrot Halwa_step 1
  1. Peel the carrots and rinse them thoroughly under running water.
Carrot Halwa_step 2
  1. The next step is to grate the carrots. I’m using a mixer grinder for this process. Start by chopping the peeled carrots into thin circular slices to make them easier to blend in the mixer. Alternatively, you can use a traditional grater to shred the carrots manually.
carrot halwa_step 3
  1. Grate the carrots in a mixer grinder using the grating blade that typically comes with modern mixers. Use the pulse function, giving it a pulse or two at regular intervals, to achieve evenly grated carrots without overprocessing.
carrot halwa_step 5
  1. Transfer the grated carrots and milk into a vessel, then place it in a pressure cooker. Cook the mixture for 2-3 whistles, allowing the carrots to soften and absorb the milk's flavor.
carrot halwa_step 5
  1. Once the pressure has released, carefully remove the cooked carrot vessel from the pressure cooker. You may notice excess milk remaining, which will be cooked further to achieve the desired consistency.
carrot halwa_step 6
  1. Heat a heavy-bottomed pan and transfer the cooked grated carrot and milk into it. If you use a non-stick pan, you can stir the mixture at regular intervals, unlike traditional iron or indium pans (Illupu Chatti in Tamil), which require continuous stirring. Keep the flame at medium-high and allow the milk and carrot mixture to thicken as the milk reduces.
carrot halwa_step 7
  1. Once the milk is almost absorbed, add sugar to the mixture and stir well. Adjust the sugar according to your preferenceβ€”use ΒΎ cup for a milder sweetness or more if you prefer a sweeter halwa. Adding sugar will cause the carrot halwa mixture to dilute slightly, so patience is key. Stir the mixture continuously over low flame, allowing the sugar to dissolve completely and the halwa to thicken again to the desired consistency.
carrot halwa step 8
  1. Next, add cardamom powder and ghee to the halwa and continue stirring. Add ghee in the regular intervals and keep stirring until the mixture starts to leave the sides of the pan. The halwa should come together into a ball-like consistency without sticking to the pan. In a separate pan, heat a small amount of ghee and fry the cashews until golden. Add the fried cashews, along with finely chopped almonds (badam) and pistachios (pista), to the carrot halwa and mix well. Finally, remove the halwa from the flame and transfer it to a plate for serving.

Top Tip

For the best Carrot Halwa, always use fresh, tender carrots, as they provide a naturally sweet flavor and soft texture. Grate the carrots evenly to ensure uniform cooking, and cook them slowly with full-fat milk to enhance the dish’s creamy richness. Once the sugar is added, stir continuously over a low flame to prevent sticking and achieve the perfect consistency. Adding ghee generously not only enriches the flavor but also gives the halwa its signature aroma. Finally, fry the nuts separately in ghee and mix them in at the end to maintain their crunch and enhance the overall taste. Patience is key to achieving the perfect Carrot Halwa!

Substitutions

  • For aΒ veganΒ version of Carrot Halwa, the most important substitutions are to replace dairy milk with plant-based milk, such as almond, coconut, or oat milk.
  • For a dairy-free fat option, substitute ghee with coconut oil or a vegan butter alternative. These swaps maintain the creamy texture and rich flavor of the traditional recipe while making it suitable for those avoiding animal products.

Serving Suggestions

To makeΒ Carrot HalwaΒ more suited to your dinner guests or fit into different cultural cuisines, consider the following ideas:

See this spicy version of this recipe on my website! (placeholder for in-content link)

  • For special occasions like Diwali or Thanksgiving, serve the Carrot Halwa alongside other traditional desserts likeΒ gulab jamunΒ orΒ kheerΒ to create a sweet, memorable spread. You can also serve it warm with a scoop ofΒ vanilla ice creamΒ to add a modern touch.
  • Add a handful ofΒ raisinsΒ and a sprinkle ofΒ cinnamonΒ for a warm, sweet flavor profile that pairs beautifully with the natural sweetness of the carrots. You can also top the dish with choppedΒ pistachiosΒ and a drizzle ofΒ rose waterΒ for an aromatic touch

Storage

To storeΒ Carrot HalwaΒ properly, follow these steps:

  1. Cool Before Storing:
    Allow the carrot halwa to cool completely to room temperature before storing. This prevents condensation inside the container, which can affect its texture.
  2. Refrigeration:
    Place the cooled carrot halwa in anΒ airtight containerΒ and store it in the refrigerator. It will stay fresh for up toΒ 4-5 days. When ready to serve, gently reheat it on the stove or in the microwave, adding a little milk or water to restore its creamy consistency.
  3. Freezing:
    If you want to store carrot halwa for a longer period, freeze it. Transfer the cooled halwa to aΒ freezer-safe containerΒ orΒ zip-lock bag, making sure to remove as much air as possible. It can be stored in the freezer forΒ 2-3 months. To reheat, thaw it overnight in the refrigerator, then warm it on the stovetop, adding milk as needed to restore its original texture.
  4. Avoid Storing with Nuts:
    If you plan to freeze the halwa, it’s best to store it without the fried nuts, as they can lose their crunch over time. You can add fresh fried cashews, almonds, or pistachios when reheating.

By following these storage methods, your Carrot Halwa will maintain its flavor and texture for a longer period!

Top Tip

Here are some key tips for makingΒ Carrot HalwaΒ well:

  1. Use Fresh, Sweet Carrots:
    The quality of the carrots directly affects the flavor. Opt for fresh, tender, and naturally sweet carrots, preferably red carrots if available, as they give a richer color and taste.
  2. Grate the Carrots Evenly:
    Ensure the carrots are grated uniformly for consistent cooking. A mixer with a grating blade can speed up the process while achieving an even texture.
  3. Slow Cooking is Key:
    Cook the carrot and milk mixture on aΒ medium-low heat. Slow cooking allows the milk to reduce and the carrots to absorb all the flavors, creating a creamy and flavorful texture. Avoid rushing this step.
  4. Stir Continuously:
    Once sugar is added, stir the halwa continuously on low heat. This helps prevent it from sticking to the pan and ensures an even texture. Be patient, as the mixture will thicken over time.
  5. Use Ghee for Authentic Flavor:
    Ghee adds a rich, aromatic flavor to the halwa that is key to its authenticity. Don’t skimp on the ghee, as it enhances the dish's taste and gives it a smooth, melt-in-your-mouth texture.
  6. Adjust Sweetness to Your Preference:
    Customize the sweetness based on your preference or your guests' tastes. If you like it sweeter, you can add more sugar; if you prefer a milder sweetness, use less sugar or a natural sweetener.
  7. Add Nuts at the End:
    Fry the cashews, almonds, and pistachios separately in ghee and add them at the end. This preserves their crunch and ensures they don’t lose texture while cooking in the halwa.
  8. Patience for the Right Consistency:
    Carrot Halwa takes time to cook and thicken properly. Be patient and allow the milk to reduce fully. The halwa should reach a consistency where it starts to come together like a ball without sticking to the pan.

By following these tips, you’ll ensure your Carrot Halwa turns out rich, flavorful, and perfectly textured every time!

Related

Looking for other recipes like this? Try these:

Recipe Card to make Carrot Halwa

Carrot Halwa | Gajar Halwa
Print

Carrot Halwa | Gajar Ka Halwa

Discover the rich and delicious Carrot Halwa (Gajar Ka Halwa) recipe! This traditional Indian dessert made with grated carrots, milk, sugar, and ghee is a perfect balance of sweetness and spice. Enjoy it as a festive treat or a comforting dessert, and explore tips for customizing it to fit different diets and preferences.
Course Sweet Varieties
Cuisine Indian, Tamilnadu
Prep Time 15 minutes
Cook Time 1 hour
Total Time 1 hour 15 minutes
Servings 5 people
Calories 275kcal
Author Sowmya Venkatachalam

Equipment

  • Pressure Cooker

Ingredients

  • Β½ kg Carrot
  • 1 cup Sugar
  • 6 tablespoon Ghee (Clarified butter)
  • 2 cups Milk
  • 1 teaspoon Cardamom Powder
  • 10 nos Cashew
  • 1 tablespoon Almond Slivered

Instructions

Preparing Carrots

  • Peel the carrots and rinse them thoroughly under running water.
    Β½ kg Carrot
  • The next step is to grate the carrots. I’m using a mixer grinder for this process. Start by chopping the peeled carrots into thin circular slices to make them easier to blend in the mixer. Alternatively, you can use a traditional grater to shred the carrots manually.
  • Grate the carrots in a mixer grinder using the grating blade that typically comes with modern mixers. Use the pulse function, giving it a pulse or two at regular intervals, to achieve evenly grated carrots without overprocessing.
  • Transfer the grated carrots and milk into a vessel, then place it in a pressure cooker. Cook the mixture for 2-3 whistles, allowing the carrots to soften and absorb the milk's flavor.
    2 cups Milk
  • Once the pressure has released, carefully remove the cooked carrot vessel from the pressure cooker. You may notice excess milk remaining, which will be cooked further to achieve the desired consistency.
  • Heat a heavy-bottomed pan and transfer the cooked grated carrot and milk into it. If you use a non-stick pan, you can stir the mixture at regular intervals, unlike traditional iron or indium pans (Illupu Chatti in Tamil), which require continuous stirring. Keep the flame at medium-high and allow the milk and carrot mixture to thicken as the milk reduces.
  • Once the milk is almost absorbed, add sugar to the mixture and stir well. Adjust the sugar according to your preferenceβ€”use ΒΎ cup for a milder sweetness or more if you prefer a sweeter halwa. Adding sugar will cause the carrot halwa mixture to dilute slightly, so patience is key. Stir the mixture continuously over low flame, allowing the sugar to dissolve completely and the halwa to thicken again to the desired consistency.
    1 cup Sugar
  • Next, add cardamom powder and ghee to the halwa and continue stirring. Add ghee in the regular intervals and keep stirring until the mixture starts to leave the sides of the pan. The halwa should come together into a ball-like consistency without sticking to the pan. In a separate pan, heat a small amount of ghee and fry the cashews until golden. Add the fried cashews, along with finely chopped almonds (badam) and pistachios (pista), to the carrot halwa and mix well. Finally, remove the halwa from the flame and transfer it to a plate for serving.
    1 teaspoon Cardamom Powder, 10 nos Cashew, 1 tablespoon Almond, 6 tablespoon Ghee (Clarified butter)

Nutrition

Serving: 1cup | Calories: 275kcal | Carbohydrates: 35g | Protein: 5.6g | Fat: 13g | Saturated Fat: 7g | Cholesterol: 30mg | Sodium: 103mg | Potassium: 443mg | Fiber: 2.2g | Sugar: 30g
    Carrot Halwa | Gajar Halwa

    The post Carrot Halwa | Gajar Ka Halwa appeared first on Subbus Kitchen.

    Air Fryer Karasev Recipe

    Karasev Recipe is my first air fryer based recipe in the blog. This air fried karasev is absolutely delicious, crispy and came out perfect like the deep fried ones. I have made so many batches and planning to do one more batch before this Diwali 2021…This gluten free and vegan snack can be eaten as...

    Read More

    Bournvita Burfi Video Recipe

    chocolate burfi, bournvita burfi, boost burfi, bournvita barfi, bournvita barfee, boost barfi, boost barfee, chocolate barfi, chocolate barfee, gram flour chocolate burfi, besan chocolate barfi, besan bournvita barfi, besan bournvita burfi, gram flour chocolate barfi, gram flour chocolate barfee, chick pea flour chocolate burfi, chana dal flour chocolate burfi, chana dal flour chocolate fudge, gluten free chocolate fudge, gluten free fudge, bournvita barfi video recipe, bournvita barfi recipe, bournvita burfi recipeBournvita Burfi, a melt in mouth Indian delicacy and you wouldn’t stop with just one 😁. The recipe uses Bournvita, gram flour, ghee and sugar as main ingredients. Instead of chocolate I use Bournvita, the chocolate based health drink powder to make this burfi and hence the name. Do check the β€œVariations” in the below...

    Read More

    Garlic Ribbon Pakoda | Garlic Ribbon Murukku Recipe

    Garlic ribbon pakoda

    Every year during Diwali I make Ribbon pakoda / Ola pakoda without fail. Usually I make it adding hing. This year, I made ribbon pakoda adding garlic. It turned out so flavourful and crunchy than my usual ones. So I am planning to try this version every year during Diwali.

    Generally Garlic ribbon pakoda is prepared by grinding soaked red chilli and garlic cloves to a paste and added to the rice flour. In this method, garlic pieces and red chilli won’t grind properly. So I followed a different method as suggested by Happy homemaker – Tamil YouTube channel video. Thank you so much Jaya. Your tip worked out so well.

    Its so easy to make and stays good for a month if handled properly. Friends, lets see how to make this yummy Garlic ribbon murukku recipe with step by step pictures and a short video.

    Link for Shorts video :Β https://youtube.com/shorts/gIpyFljMqS8?feature=share

    Check out my other DIWALI SNACKS RECIPES too.


    Β Garlic ribbon murukku

    Garlic ribbon pakoda / Garlic ribbon murukku recipe


    Garlic ribbon pakoda / Garlic ribbon murukku recipe

    Garlic ribbon pakoda / Garlic ribbon murukku recipe for Diwali snacks.


    Β 
    Cuisine: Indian
    Category: Snacks
    Serves: 1/2 kg
    Prep time: 10 Minutes
    Cook time: 20 Minutes
    Total time: 30 Minutes
    Β 


    INGREDIENTS
    1 cup = 250ml
    • Store bought rice flour or Idiyappam flour - 1 cup
    • Besan flour or Roasted gram flour / pottukadalai maavu - 1/2 cup
    • Melted butter - 1 tbsp
    • Sesame seeds - 1 tsp
    • Salt - as needed
    • Red chilli powder - 1 tsp
    • Water - as needed
    • Cooking oil - to deep fry
    To grind
    • Garlic cloves - 10
    HOW TO MAKE GARLIC RIBBON PAKODA
    1. In a wide bowl,sieve rice flour and besan flour.
    2. Add salt, sesame seeds and Kashmiri chilli powder to it. Mix well.
    3. In a mixie jar, take the garlic cloves and add a handful of rice flour mix to it.
    4. This helps to grind garlic to a powder without any grits. Add the garlic mix to the rice flour mix.
    5. Lastly add melted butter and mix well and spread evenly.
    6. Add water and make a thick dough. Take the ribbon pakoda mould and grease with oil.
    7. Fill the dough. Heat oil and drop a pinch of dough. If it rises to the top immediately, oil temperature is right.
    8. Squeeze the murukku press over the hot oil and deep fry ribbon pakoda in both the sides till bubbles cease. Remove from oil and drain in a tissue paper.
    9. Store in an air tight box once it cools down. Stays good for a month.
    METHOD - STEP BY STEP PICTURES
    • In a wide bowl, sieve the rice flour and besan flour. You can use roasted gram dal flour instead of besan flour. Add Kashmiri red chilli powder, salt and sesame seeds to it. Mix well and set aside.

    • In a mixie jar, take the garlic cloves without skin and add a handful of above said mixed rice flour to the garlic cloves. Grind well to a smooth powder. ( Tip : Adding rice flour to the garlic cloves helps in even grinding of garlic pieces without any grits. I got this tip from β€œHappy homemaker – Tamil YouTube channel video”. Thanks Jaya for this nice tip.Β 
    • Garlic ribbon pakoda
    • Add this ground garlic powder to the rice flour and mix well. Lastly add the melted butter and spread it well with your hands. Try to hold little quantity of flour after mixing. You should be able to hold the shape but it should crumble when you drop it. This shows fat content is enough for the dough.
    • Garlic ribbon pakoda
    • Take the ribbon pakoda mould along with the murukku press. Grease with oil and fill the dough. Heat oil to deep fry and check the oil temperature by dropping a pinch of dough. If it rises to the top immediately, oil temperature is just right.
    • Garlic ribbon pakoda
    • Now lower the flame to medium. Hold the murukku press over the hot oil and squeeze it in a circular manner to make ribbon pakoda. Cook till bubbles cease in one side. Flip over and cook the other side till bubbles cease and turns golden in color.

    • Remove and drain in a tissue paper. Break the ribbon pakoda into pieces and store in an air tight box. It stays good for a month.
    • Garlic ribbon pakoda

      Enjoy !

    Note

    • For variations, you can use roasted gram dal instead of besan flour.
    • You can use 2 tbsp of hot oil instead of butter.
    • Deep fry ribbon pakoda till the bubbles and Sshh sound ceases.
    • Store in the box after it comes to room temperature. Do not store when hot because it will sweat and becomes soggy.

    Try this easy, yummy Garlic ribbon pakoda and enjoy for this Diwali !

    Garlic ribbon pakoda


    Ulundu Murukku | Urad Dal Mururkku Recipe | Ulundhu Murukku

    urad dal murukku

    Last year I bookmarked this super crispy and white colored Ulundu murukku / Urad dal murukku recipe from Sakthi samayal Youtube channel.Β  For this year Diwali, I started my sweets and snacks preparation with Instant doodh peda with milk powder and this super white, crunchy Urad dal murukku / Ulundu murkku.Β 

    For every diwali, we make thenkuzhal murukku at home by using Idiyappam flour and roasted urad dal flour. We all love it. But this ulundu murukku is prepared by pressure cooking urad dal, ground to a smooth paste and then added to store bought dry rice flour.Β  There is no need to use idiyappam flour as well. It comes out so well even in the first attempt. In fact, I loved this murukku. I am sure I will make this murukku every year for Diwali. But one thing, this murukku absorbs some oil when compared with thenkuzhal. As we are using boiled Urad dal, this murukku absorbs little oil. So it won't come out dry.Β  But there is no compromise in taste, flavor and crunchiness when compared with our thenkuzhal.Β 

    Don’t worry even if you are a beginner. You will get it perfect if you follow the steps given below. Lets see how to make this crunchy urad dal chakli / ulundu murukku with step by step pictures.

    Check out my other murukku recipes too.


    Ulundu murukku


    Ulundu murukku recipe / Urad dal murukku


    Ulundu murukku recipe / Urad dal murukku

    Ulundu murukku recipe - Urad dal murukku for Diwali


    Β 
    Cuisine: Indian
    Category: Snacks
    Serves: 25
    Prep time: 10 Minutes
    Cook time: 5 Minutes
    Total time: 15 Minutes
    Β 


    INGREDIENTS
    1 cup = 250ml
    • Store bought rice flour - 1.5 cups
    • White, round urad dal -1/2 cup
    • Melted butter - 1 tsp
    • Hing/ Asafetida - 1/2 tsp
    • Cumin seeds - 1 tsp
    • Salt - as needed
    • Water - 1 cup + extra
    • Cooking oil - to deep fry
    HOW TO MAKE URAD DAL MURUKKU / ULUNDU MURUKKU
    1. Wash and pressure cook urad dal adding 1 cup of water in low flame for 2 whistles.
    2. Drain the excess water and grind urad dal to smooth paste.
    3. Sieve rice flour in a wide bowl. Add cumin seeds, hing, salt and butter.
    4. Mix well. Add urad dal paste and mix till crumbly. Sprinkle little water and make non sticky dough.
    5. Fill the dough in murukku press. Squeeze and make shapes in the back of ladle.
    6. Drop in hot oil and deep fry both the sides till bubbles cease. Remove and drain in a tissue paper.
    7. Cool down and store in a tight box. Stays good for 2 weeks.
    METHOD - STEP BY STEP PICTURES
    • Wash the urad dal and take in a pressure cooker. Add 1 cup of water and pressure cook in low flame for 2 whistles.
    • ulundhu murukku
    • Open the cooker after the steam is released. Drain the excess water if any and grind the urad dal to smooth paste like butter. You can add little water while grinding if needed.
    • ulundhu murukku
    • In a wide bowl, sieve the rice flour. Crush cumin seeds slightly and add to the rice flour. Add salt, hing and melted butter. Mix well.
    • ulundhu murukku
    • Add urad dal paste and mix well till crumbly. Add little water to make a smooth, non sticky dough. Cover the dough with a wet cloth till use.
    • ulundhu murukku
    • Take the murukku press with 3 or 5 holes mould. Fill the murukku press with the dough. Squeeze and shape murukku in the back of ladle.
    • ulundhu murukkuΒ 
    • Heat oil to deep fry. Drop a pinch of dough to check oil temperature. If it rises to the top immediately, drop 2 to 3 murukku and fry both the sides in medium flame till bubbles cease and murukku settles down in the bottom of oil. Make sure you cook in medium flame to make white colored murukku. Cooking in high flame makes the murukku golden brown in color. If the oil is too hot, switch off the flame. Bring it to correct temperature and then proceed frying.
    • ulundhu murukkuΒ 
    • Remove the murukku and drain excess oil in a tissue paper. Store in an air tight box after it cools down. Stays good for 2 weeks. Enjoy !
    • ulundhu murukku

    Note

    • I used 1 cup of water for 1/2 cup of urad dal for pressure cooking.
    • I also used around 1/4 cup of water while grinding urad dal to smooth paste. So please adjust this quantity based on the need.
    • Do not fry this murukku in high flame because color changes to golden brown. Always cook in low to medium flame.


    Try this easy, yummy, ulundu murukku for this Diwali and enjoy !

    ulundhu murukku recipe


    Β 

    Β 

    ❌