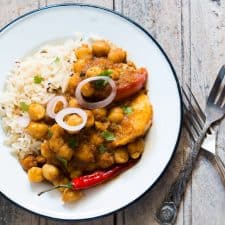
Spinach and Chickpea Curry | Chole Palak
I bet you’ve never had chole this way before! It combines the comfort of chole with the goodness of spinach to make this delicious Spinach and Chickpea Curry or Chole Palak that will make you want to lick your bowl clean!

Eating your winter greens has never been this delicious and this Spinach and Chickpea Curry aka chole palak is so delicious that it will make even non palak lovers fall in love! I was so excited when testing this recipe, because believe me, it’s amazing how much flavor this curry packs in just 25 minutes!
Save this for when you’re too tired to think, meal prep for the week ahead, or even when you want to feel like you’re eating something nourishing without sacrificing taste. If you love the classic Pindi Chole, it’s time you give this variation a shot.
Jump to section: Chickpea Spinach Curry
Ingredients for Chickpea and Spinach Curry
- Chickpeas (Chana): The star of the dish. Soaked overnight or at least 8 hours
- Oil: Any neutral oil works; sunflower, canola, or vegetable oil
- Whole Spices: Jeera (cumin seeds), bay leaf, black and green cardamoms, cinnamon, and cloves bring warmth and depth to the base.
- Aromatics: Finely chopped ginger, garlic, onions, and green chilli add layers of flavour and that essential punch.
- Spice Powders: Coriander powder, cumin powder, turmeric, red chilli powder, chole masala, and salt create the masala base that makes this curry so deeply flavourful.
- Tomatoes: Finely chopped and cooked down until mushy, they add tanginess and body to the gravy.
- Spinach (Palak) and Coriander Leaves: Blanched and blended into a bright green puree that keeps the curry fresh, vibrant, and packed with nutrients.
- Finishing Touches: Garam masala and roasted kasuri methi (dried fenugreek leaves) go in at the end for an extra layer of aroma.
Richa’s Top Tips
- Soak your chickpeas properly: Overnight soaking is best, but if you’re short on time, at least give them 8 hours. Well-soaked chickpeas cook evenly and turn soft without falling apart.
- Don’t skip the ice bath for spinach: Blanching the spinach and immediately dunking it in ice water locks in that bright green colour. It’s the difference between a dull, brownish curry and one that looks as good as it tastes.
- Cook the masala well: Let the tomatoes break down completely and until the oil starts to separate from the spices before adding the chickpeas. This step builds the flavour base, so don’t rush it.
- Adjust the consistency at the end: The curry thickens as it sits, so add a splash of water if it looks too thick. You want a gravy that coats the back of a spoon but still flows nicely.
Frequently Asked Questions
Yes, you can! Thaw it completely, squeeze out the excess water, and blend it into a puree. Fresh spinach gives you a brighter colour and flavour, but frozen works in a pinch and saves you the blanching step.
Spinach turns dark when it’s overcooked or not cooled quickly enough after blanching. The ice bath is key, it stops the cooking process immediately and locks in that vibrant green colour. Skip it, and you’ll end up with a dull, olive-toned curry.
Absolutely! Methi (fenugreek leaves) will give you a slightly bitter, earthy flavour that’s delicious with chole. Kale works too, though it’s a bit tougher, so blanch it a little longer. Amaranth leaves or mustard greens are also great options if you want to switch things up.
Cook the spinach puree for a good 3-4 minutes after adding it so it absorbs all the masala and thickens up. If it’s still too thin, let it simmer uncovered for a bit longer. The curry should have a thick, coating consistency, not a soupy one.
Storage Tips
- Fridge: Store leftover chickpea spinach curry in an airtight container for up to 3 days. The flavours actually deepen over time, so day-two chole palak often tastes even better than freshly made.
- Freezer: This curry freezes beautifully for up to 2 weeks. Let it cool completely before transferring to freezer-safe containers. Thaw overnight in the fridge before reheating.
- Reheating: Warm it gently on the stovetop with a splash of water to loosen the gravy. You can also microwave it, but stovetop reheating keeps the texture better and lets you adjust the consistency as needed.
Serving Ideas
This chickpea and spinach curry is delicious on its own, but it really shines when you pair it with the right sides. Here are some easy combinations that work beautifully:
- With Jeera Rice: The mild, aromatic rice lets the curry take center stage and soaks up all that delicious gravy.
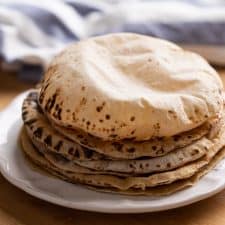
- With Rotis or Parathas: Perfect for mopping up every last bit of that spinach gravy. Nothing beats tearing off a piece of warm roti and scooping up the chole.
- With Naan: Soft, pillowy naan is great if you want something a little richer to go with the curry.
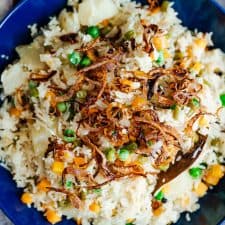
- With Pulao: A lightly spiced pulao complements the earthy, spiced flavours of the chole palak without overwhelming it.
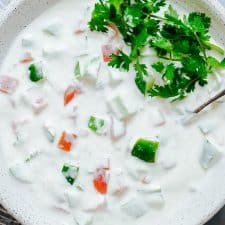
- With Raita: A cooling cucumber or boondi raita on the side balances out the warmth of the spices.
- With Pickles and Papad: Add some pickles and crispy papad for that full Indian meal experience.
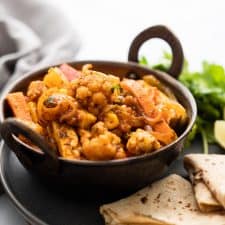
Customisation Ideas
- Add paneer for extra protein: Toss in some cubed paneer at the end for a richer, more filling curry. It soaks up the gravy beautifully and adds a creamy texture.
- Make it creamier: Stir in a tablespoon or two of cream or coconut milk right before serving for a silkier, more indulgent gravy.
- Dial down the heat: Skip the green chilli or use less red chilli powder if you prefer a milder curry. You’ll still get all the flavour without the fire.
- Try it with other greens: Swap spinach for methi (fenugreek), amaranth, or even a mix of greens for a different flavour profile that’s just as delicious.

Why You’ll Love This Curry
Spinach and chickpeas are a powerhouse combination when it comes to nutrition. Spinach is packed with iron, and chickpeas are loaded with protein and fiber, making this curry a complete, balanced meal in one bowl. The best part? The vitamin C from the tomatoes actually helps your body absorb the iron from the spinach more effectively. So not only does this chole palak taste comforting, it’s also working behind the scenes to nourish you in all the right ways.
This chole palak is comfort food at its best, and I hope it becomes a regular in your kitchen. If you make it, I’d love to see how it turns out, tag me on Instagram @my_foodstory!
Watch Spinach and Chickpea Curry Recipe Video

Spinach and Chickpea Curry | Chole Palak
Equipment
Ingredients
- ½ cup white chick peas chana (soaked overnight or for 8 hours) (refer note.1)
- 3 tablespoons oil
- 1 teaspoon jeera
- 1 bay leaf
- 1 black cardamom
- 1 inch cinnamon dalchini
- 2 cloves
- 2 green cardamoms
- 2 teaspoons finely chopped ginger
- 1 tablespoon finely chopped garlic
- ¾ cup finely chopped onions 2 medium onions
- 1 green chilli finely chopped
- 1 tablespoon coriander powder
- 1 teaspoon cumin powder
- ½ teaspoon turmeric powder
- 1 teaspoon chole masala
- 1 teaspoon red chilli powder
- 1 teaspoon salt
- ½ cup + 2 tablespoons finely chopped tomatoes 2 medium tomatoes
- 3 ¼ cups + 2 tablespoons water divided
- ½ teaspoon garam masala
- ½ teaspoon roasted & crushed kasuri methi
- 3 cups tightly packed palak 150 gms
- ½ cup coriander leaves & stems
Instructions
Cooking chana:
- Heat oil in a pressure cooker, add jeera and once it crackles, add bay leaf, black & green cardamoms, cinnamon, cloves & saute for 8-10 seconds.3 tablespoons oil, 1 teaspoon jeera, 1 bay leaf, 1 black cardamom, 1 inch cinnamon, 2 cloves, 2 green cardamoms
- Add ginger, garlic and saute on high for a few seconds till fragrant. Add onions & fry till they turn golden brown.2 teaspoons finely chopped ginger, 1 tablespoon finely chopped garlic, ¾ cup finely chopped onions, 1 green chilli
- Add spice powders – coriander, cumin, turmeric, red chilli, chole masala, salt, tomatoes and cook on low for 3-4 minutes till the tomatoes are mushy.1 tablespoon coriander powder, 1 teaspoon cumin powder, ½ teaspoon turmeric powder, 1 teaspoon chole masala, 1 teaspoon red chilli powder, 1 teaspoon salt, ½ cup + 2 tablespoons finely chopped tomatoes
- Add soaked chick peas, give a good mix, add 1 ¼ cups of water, cover the lid of the pressure cooker and cook on high till the first whistle, on low for 20 minutes or 4-5 whistles till the chick peas are cooked well.½ cup white chick peas, 3 ¼ cups + 2 tablespoons water
Making palak puree:
- Heat a pot with 2 cups of water, bring to a boil, add palak, coriander leaves. Immediately switch off the flame, and cover the pot. Let this sit for 2 minutes. In the meanwhile, prepare a bowl with water and ice cubes in it. Strain the palak & coriander leaves and dump them in the ice water. The leaves will immediately get a bright green color. Let them sit for half a minute, strain, and grind to a fine paste.3 cups tightly packed palak, ½ cup coriander leaves & stems
Making chole palak:
- Open the pressure cooker, Add garam masala, kasuri methi, mix and cook for 2-3 minutes.½ teaspoon garam masala, ½ teaspoon roasted & crushed kasuri methi
- Add palak puree and cook for 3-4 minutes till the puree absorbs all the masalas. You may add 1-2 tablespoons of water to adjust the consistency to a thick gravy and serve.
Video
Notes
- ½ cup of soaked chick peas yields approx. 1 ⅓ cups.
- Leftovers will stay good for 2-3 days when refrigerated in an airtight container.
Nutrition
This article was researched and written by Harita Odedra.
The post Spinach and Chickpea Curry | Chole Palak appeared first on My Food Story.


 and rice. Make extras because everyone will want seconds! #indian #curry #recipe #coconut #eggs")

 and rice. Make extras because everyone will want seconds! #indian #curry #recipe #coconut #eggs")