If you wanna live with just one pasta recipe for the rest of your life then that has to be the recipe of this marry me shrimp pasta! This is the undisputed winner of best pasta ever!
If you are looking for a fail-proof family friendly pasta recipe for the upcoming holiday season, then I have the absolutely right one for you today!
Look no further and lock this marry me shrimp pasta in your menu and trust me it will become the showstopper of your dinner table!
The spin-off of the iconic marry me chicken, this marry me shrimp pasta is no less in its glory and for shrimp lovers like me this is an ultimate pasta dish which will keep reappearing on our dinner table!
What is Marry Me Shrimp Pasta?
I was literally intrigued by the name of this pasta! So I had to research it! Legend has it that this pasta is so good that it could inspire a marriage proposal—hence the quirky name!
Well, the cooking enthusiast in me had to test it for herself if it is really THAT good! Even though I do not have any upcoming proposal ideas on my mind!
And I thank my stars I did!
This marry me shrimp pasta is one such phenomenal recipe that anyone can hardly resist its addictiveness no matter how hard she/he has programmed themselves not to overeat!
Baked potatoes need no introduction! But if you wanna witness a gorgeous makeover of your everyday baked potatoes then these baked parmesan potato bites are gonna blow your mind instantly thanks to their insane flavor and addictive crispiness!
Thanksgiving just got over and I am sure you all are now geared up with the preparation for the upcoming holiday season!
Family meal planning is one crucial component of this preparation which is why I will try to help here as best as I can!
So today I have a fantastic recipe for you! The stunning baked parmesan potato bites! This not only works perfectly as a side with your meats but also is a crowd pleaser in almost every get together!
Have you ever met anyone who doesn’t like potatoes? That too crispy baked potatoes! I guess not! Hence it’s an absolute win-win!
What are Baked Parmesan Potato Bites?
Potatoes are loved by all around the globe with hardly any exception! This is such a versatile ingredient that you can never go wrong with it!
If you are in a foreign land and not familiar with their cuisine, all you need is a bag of potatoes, because I am sure every culture has its own unique recipe of potato as their comfort food!
My baked parmesan potato bites can be one of your comfort foods too as, simply put, these are crispy potatoes baked to perfection with melty as well as cheesy parmesan sticking to them!
When you plan to bake or roast some of this global vegetable, this recipe of baked parmesan potato bites will come in super-handy!
The baby potatoes used in this dish become incredibly addictive with all their crispiness and phenomenal flavors from the classic parmesan cheese that you will keep reaching out one after another even after you are full!
Trust me, I have been there even though I take extra care not to overeat in any meal!
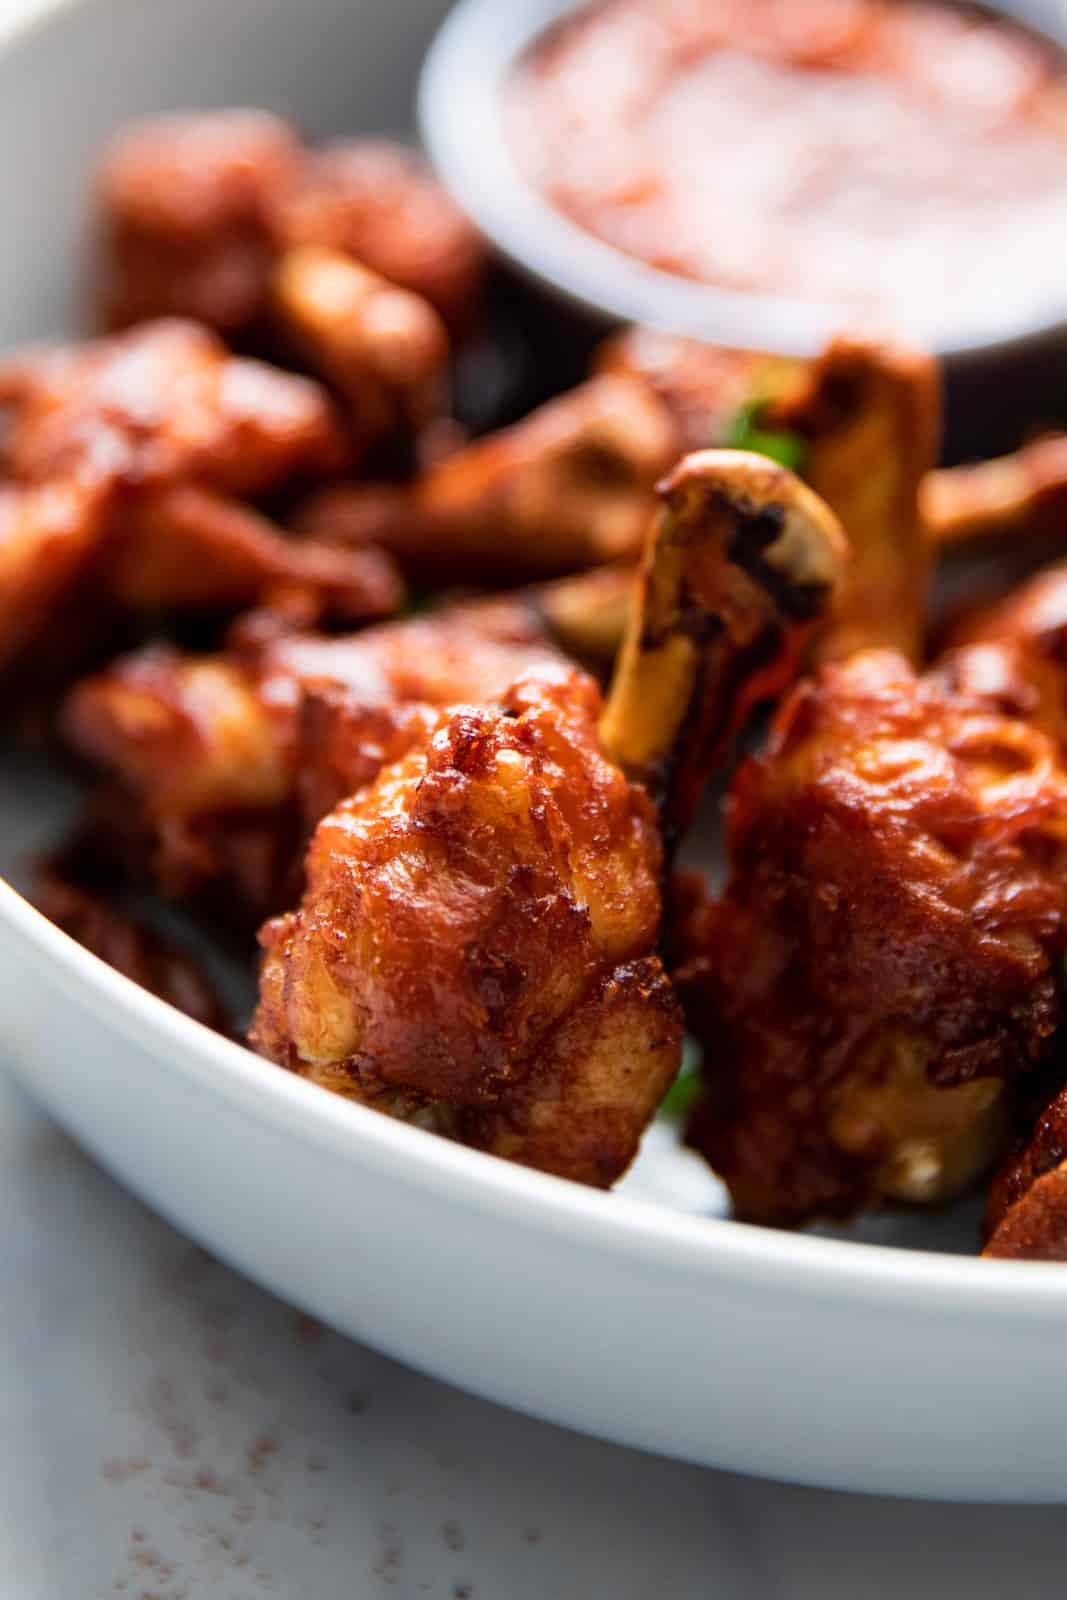
The irresistible combination of mildly sweet & mildly spicy in Gochujang spice paste makes these sticky Korean Gochujang chicken wings absolutely addictive and simply unputdownable! Try these at your own risk!
I had shared my Gochujang chicken thighs recipe a few months ago and it went viral instantly! But honestly I knew it would! We have also been making our Gochujang chicken on repeat!
So it is high time now that I share my next favorite recipe using Gochujang so that you can keep relishing this classic Korean paste in maximum ways possible!
Welcome Gochujang chicken wings!
Sticky, sweet, savory & spicy - these Gochujang chicken wings possess all that you desire for in a phenomenal chicken wings recipe!
The best part of my Gochujang chicken wings is that they are made in the air fryer which means making these Gochujang chicken wings is as hassle-free as it can possibly be!
What are Gochujang chicken wings?
Gochujang is a classic Korean condiment that is very commonly used in Korean cooking. It is a fermented red chilli paste containing many other ingredients and sold as a concentrated thick paste in a tub.
Earlier, about 7 to 8 years ago, it was not easily available in India.
I got my first tub of Gochujang long back from my lovely cousin who lives in Malaysia as I have been experimenting with my cooking skills a lot back then (Well, I still do!)!
With the increasing cultural exchanges through social media and people being open to try new things, such authentic cooking ingredients from around the world are being easily found in Indian supermarkets nowadays. Thank God for that!
Now that you understand what Gochujang is, you can quickly make out what Gochujang chicken wings are!
When you coat your chicken wings with this tempting Gochujang paste along with a few other ingredients and air fry them to perfection you get one of the most delicious chicken wings of all time!
If you wanna make restaurant style classic chicken kalmi kabab, you are at the right page! This delicious yet easy chicken kalmi kabab is a must-have recipe in your repertoire! I love smoky kababs the most if you wanna know what’s my favorite Indian food! Well, historically the kababs may not have an Indian origin, […]
Smoky Flavor Secrets Every Backyard Cook Should Know There’s something about a deep, rich, smoky flavor that makes backyard cooking feel more satisfying. Whether you’re grilling, slow-cooking, or experimenting over a small fire pit, that subtle mix of aroma and depth brings out the best in meats, vegetables, and even sauces. You don’t need a […]
Crispy Honey Chilli Potatoes are a super addictive snack – fried chilli potato fingers are tossed in a sesame honey chilli sauce that’s sweet and spicy and will give you sticky fingers that you’ll be lickingclean!
Let’s just say we ate these straight from the wok.
If you have ever eaten honey chilli potatoes, what really stands out is how crisp these potatoes are, in spite of being tossed in the sauce. They retain their signature crunch and that’s really what this recipe is all about.
I really went all out to achieve that texture and taste but without all the excess oil, so hello to the crispiest honey chilli potatoes made healthier in the air fryer! But don’t worry, this does not the change the texture at all; everything’s still crispy, crunchy, but it’s sooo much healthier that you’ll want to eat it all the time!
The key to making super crispy honey chilli potatoes is to air fry the potato fingers twice. Air frying or deep frying them only once results in potatoes that don’t hold their shape and get soggy after a few minutes.
So the potatoes are first coated in a dry mixture, air fried or deep fried till they are almost cooked and then cooled for a bit. They are then coated in a second coating of batter and fried again till they are really crisp outside and cooked perfectly inside. This is a similar technique that a lot of people use to make French fries.
The last step is to coat them in a sesame honey chilli sauce that adds an extra layer of texture and is sweet and spicy.
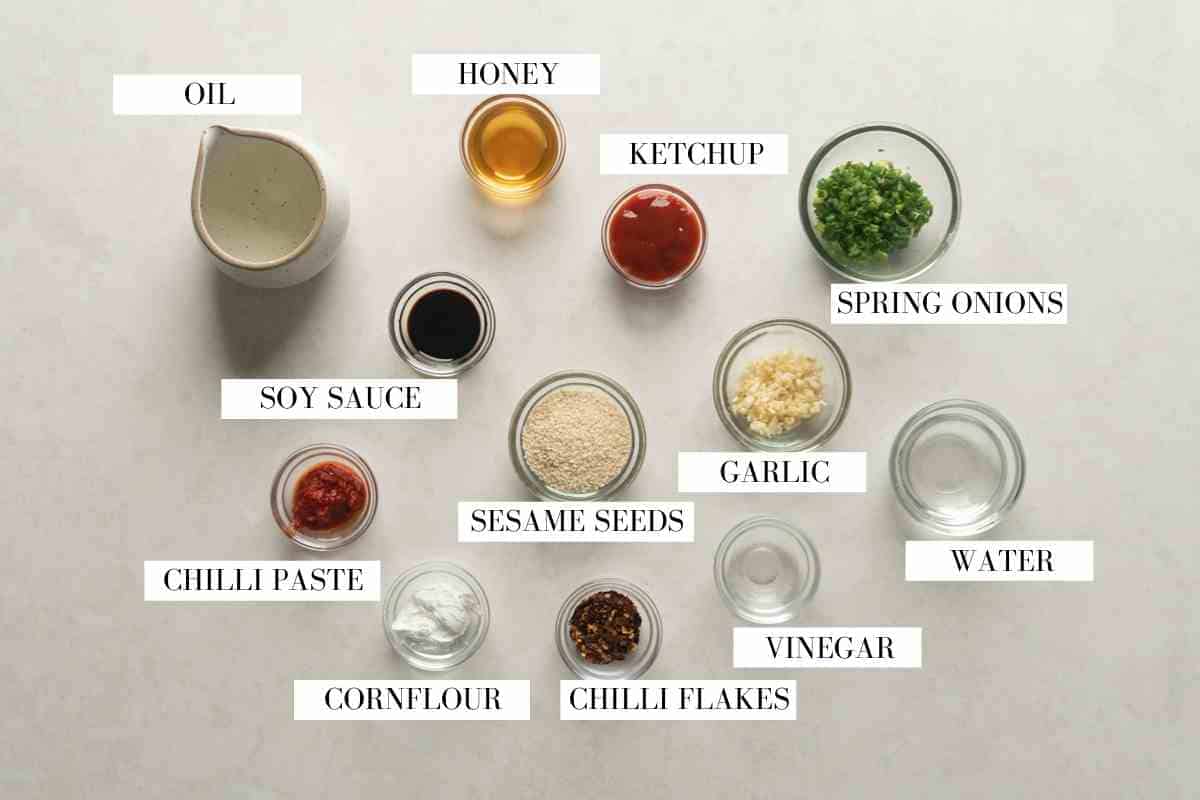
Ingredients for Chilli Potatoes
Here’s what you’ll need for batter frying these potatoes:
Potatoes: Use old potatoes. Cut into 1/3 inch thickness, approx 2-3 inches long. Ideally cut them all the same size so they cook at the same time
Chilli Paste: Basically ground chillies made by soaking dried red chillies in hot water for 10-15 minutes and grinding to a paste
Chilli Powder: Ground red chilli powder, different from ‘chili powder’ that you get in the U.S. which is a seasoning mix
The honey chilli sauce is really addictive. Its sweet, spicy, sticky and like a coating on the potatoes.
Garlic: Finely chopped – lots of it because flavour bomb!
Honey: Plain honey, flavoured will not work well here
Ketchup: It has the perfect balance and umami
Soy sauce: Light soy sauce to add saltiness and rich flavour
Chilli Paste and Chilli Flakes: To pack in some heat. If you are not a fan, reduce both the quantities in the sauce
Sesame Seeds: They add flavour and crunch and stick to the potatoes because of the sauce
Cornflour: Thickening agent. You can substitute with potato starch or tapioca starch
Vinegar: To add some acidity and balance
Richa’s Top Tips
It’s important to cut the potato fingers into a uniform size so that they cook evenly while frying. I like to cut them into 1/4 inch to 1/3 inch thickness
The temperature of the oil should be between 175C to 180C for frying the potato fingers.
You will need approximately two cups oil for deep frying, and you can use the same oil for the second frying
You may adjust the quantity of honey as per your taste.
A wok is the best way to coat the potatoes in sauce, because it provides enough space to toss them around, but if you don’t have one, feel free to use a frying pan
Serving Ideas
Honey Chilli Potatoes make an incredibly addictive Indo-Chinese appetizer, but they’re also super versatile. Here are a few ways to enjoy them:
As a Party Starter: Serve them hot, straight from the wok, as part of your Indo-Chinese spread.
With Fried Rice or Noodles: Pair with Veg Fried Rice, Hakka Noodles, or even Schezwan Rice for a restaurant-style combo.
Loaded Lettuce Cups: Spoon the crispy potatoes into crunchy lettuce leaves for a fun bite-sized party snack.
Wrap or Roll: Stuff into a tortilla or roti with some extra sauce and spring onions for an easy fusion wrap.
Once you try making these crispy honey chilli potatoes at home, there’s no going back! I have made these as snack for the family, as a party appetiser, as well as a side dish. And let me tell you, each time they’ve disappeared within minutes!
If you make this dish, don’t forget to send me pictures over on my IG @my_foodstory. I love seeing you guys make my recipe!
Watch the Recipe Video:
LOVE THIS RECIPE? Subscribe to my newsletter and be the first to receive all new recipes!
Crispy Honey Chilli Potatoes are a super addictive Indo-Chinese snack that usually deep fried, but we've made healthier in the air fryer without compromising on taste or flavor. It's sweet and spicy and will give you sticky fingers that you'll be licking to get every last bit of sauce!
4-5Potatoes450 grams, peeled and cut into fingers (1/3-1/2 inch thick, 2 -3 inches long), refer to Note 1
Oil for brushing/deep fryingrefer to Note 2
First Coating:
2teaspoonChilli powder
1teaspoonGarlic Paste
1teaspoonRed Chilli Paste
3tablespoonCorn Flour
3tablespoonAll Purpose Flour
1tablespoonSalt
Second Coating:
⅓cupAll Purpose Flour
⅓cupCorn Flour
¼teaspoonBlack Pepper
¼cupWater
For the Sauce:
2tablespoonOil
1tablespoonGarlicfinely chopped
1teaspoonRed Chilli Flakes
3tablespoonWhite Sesame Seeds
1teaspoonVinegar
2teaspoonsSoy Sauce
2tablespoonTomato Ketchup
2-3tablespoonsHoney
2teaspoonsRed Chilli Paste
1/4cupWater
1 teaspoonCorn Flour
2tablespoonSpring Onionchopped (green part only)
Instructions
Prepping
Wash potato fingers well in running water and set aside. This removes any extra starch in the potatoes.
First coating
Mix together corn flour, all purpose flour, chilli powder, chilli paste and salt. Coat the potato fingers evenly with this flour mix.
First frying of potato fingers
For deep frying
Heat oil in a wok or karahi and deep fry the potato fingers in batches till the potato is half cooked. It’s important that you drop one potato finger at a time into the oil so they don’t stick together (watch video above to see how to do this). Remove potato fingers on a tissue lined plate and let them cool.
For air frying
Preheat the air fryer at 180C, brush the air fryer mesh with oil, place potato fingers on the mesh with some gap between them so they do not stick together (watch video to know how to do this). Brush with oil and air fry for 4 minutes just until they are half cooked. Transfer to a plate and repeat the same for the rest of the potato fingers.
For second coating
Make a medium thick batter with all purpose flour, corn flour and pepper powder by adding just a few tablespoons of water to make a thick batter. Add the half done fries and gently toss so the fries are coated with the batter.
Second frying of potato fingers
For deep frying
Heat oil in a wok or karahi and deep fry the potato fingers in hot oil till crisp and golden. Drain on kitchen paper and keep aside.
For air frying
Brush the air fryer mesh with oil, place the potato fingers on the mesh with some gap in between so they do not stick together. Brush with oil and air fry at 200 C for 6 minutes, flip once and air fry at 200C for 2 minutes till they turn golden and crisp. Transfer to a plate and repeat the same for the rest of the potato fingers.(important to note that the air fried potato fingers must be used immediately in the stir fry and served hot as they tend to turn soggy & chewy later)
Honey chilli stir fry
Heat 2 tablespoons of oil in another wok, add chopped garlic and stir fry for a few seconds. Add chili flakes, sesame seeds and saute for another minute to toast them. Add vinegar, soy sauce, ketchup, honey and the red chilli paste and stir together.
Mix 1 teaspoon corn flour with 1/4 cup water to make a slurry and add this to the honey- vinegar mixture in the wok and stir for a few seconds till it thickens.
Add the fried potato fingers and spring onion greens and toss together so that they are coated evenly in sauce.
Switch off the flame and serve immediately garnished with some more sesame seeds and spring onion greens.
Video
Notes
It’s important to cut the potato fingers in a uniform size so they cook evenly while frying.
The temperature of the oil should be between 165C to 175C for frying the potato fingers.
You will need approximately two cups oil for deep frying, and you can use the same oil for the second frying
You may adjust the quantity of honey as per your taste.
air fried potato fingers must be used immediately in the stir fry and served hot as they tend to turn soggy & chewy later.
A wok is the best way to coat the potatoes in sauce, because it provides enough space to toss them around, but if you don’t have one, feel free to use a frying pan.
These smoked chicken wings, with crispy skin and juicy meat, make a crowd-pleasing appetizer. Perfect for game days, backyard parties, family gatherings, tailgating, or weeknight dinners. The 0-400 method is a simple technique that I’ve found consistently produces crispy wings without much fuss. This approach gives you restaurant-quality wings at home using ingredients I had […]
The versatility of soup can be such a beautiful thing. It can be made with four ingredients or 40, completed in 15 minutes or simmered over several hours. In summertime soups are served deliciously chilled, like a supremely refreshing gazpacho — but most of the time they are steaming hot and soul satisfying, like this twice-medicated vegetable soup. With the addition of infused olive oil, this recipe is a keeper.
A hearty soup, a simple salad and some crusty bread make for a fabulous winter meal. Vegetable soup is as simple to make as it is delicious. Just fill a sauce pot with any combination of vegetables, some liquid to cover, a bunch of your favorite fresh herbs and spices, maybe a can of your favorite legume and simmer. Nine times out of 10, it’ll be tasty. And if it’s not, add some shredded cheese, some sour cream and maybe some sriracha.
To add some protein, consider adding firm tofu cubes, sliced cooked sausage, cooked chicken or bacon crisps.
Vegetable Soup / Serves 8-10
Ingredients
2-3 tablespoonscanna-olive oil 2 cups shredded cabbage 2 medium carrots, peeled and sliced 1 large onion, sliced 1 cup green beans, trimmed and cut in pieces 1 cup grape tomatoes (cut in half if large) 3 garlic cloves, peeled and minced 5 ounces kale, rinsed, dried, stacked and sliced 1 cup corn, frozen ½ cup peas, frozen 2 quarts water 2 cans beans (1 can white northern, 1 can pinto) rinsed and drained
Medicated Garlic Croutons
Ingredients
2 tablespoonscanna-oil 1 cup bread cubes 4 tablespoons Parmesan cheese
Directions
1. Heat the canna-olive oil in a large saucepan. Sauté the cabbage, carrots, onion, green beans, grape tomatoes, garlic and kale. Sauté for 8 to 10 minutes.
2. Add the corn and peas and stir. Add the water, followed by the rinsed beans. Allow to simmer for 35 to 40 minutes.
3. Heat the remaining canna-olive oil in a small sauté pan. Cook the bread cubes until golden brown.
4. Divide the soup into bowls, top with croutons and shave the Parmesan over the bowls of soup.
I fired up my stick burner for this one — real wood, real smoke, and a Cajun kick that just works on turkey. This recipe’s got a bunch of solid tips for cooking a juicy bird, no matter what flavors you like to use. If you’re after that true smoked turkey look and taste, this is how you do it.
Simple Cajun smoked turkey cooked over real wood and charcoal — full of smoke, spice, and tips for a juicy bird every time.
Ingredients
1 whole turkey, thawed
1 bottle Malcom’s Bird Brine
1 bottle Malcom’s King Craw Cajun Seasoning
Meat Bag (optional)
Water (enough to completely submerge turkey)
1 stick butter
1 cup chicken broth
1 stalk celery, cut into chunks
1 medium onion, quartered
1 head garlic, smashed
Cooking spray or oil (for coating the skin)
Chicken Rack (optional)
Instructions
Brine the Bird
Start with a completely thawed turkey. In a large Meat Bag or food-safe container, mix Malcom’s Bird Brine with 1 gallon of water. (For turkeys 12-14lbs or less, use 1/2 bottle. For turkeys over 14lbs, use entire bottle).
Submerge the turkey and add more water as needed to cover it completely. Tie the bag up tight and refrigerate for 24 hours.
Brining helps the meat stay juicy and pull flavor deep inside — it’s one step you don’t want to skip.
Prep the Turkey
After at least 24 hours, remove the turkey from the brine and pat it completely dry with paper towels.
Stuff the cavity with celery, onion, and garlic.
Tuck the wings and tie the legs so everything cooks evenly and the tips don’t burn.
Make the Injection (optional)
Mix 1 stick of butter, 1 cup chicken broth and about 2 tablespoons Malcom’s King Craw Cajun Seasoning.
Stir to combine. Inject the mixture into the breast, thighs, and wings, distributing evenly. Season the Skin
Spray or rub the outside of the turkey with cooking spray or oil — this helps crisp the skin and gives the seasoning something to stick to.
Generously coat the bird with Malcom’s King Craw Cajun Seasoning (or your fave turkey seasoning).
Smoke the Turkey
Fire up your smoker for indirect cooking and add your favorite wood (hickory and pecan work great). Run the pit around 275°F. Place the turkey on the smoker breast side up.
Protect the Turkey
When the skin has the color you want — that deep golden-brown Cajun look — spray the outside again with cooking spray and loosely tent with foil to prevent over-darkening.
Continue cooking until the breast hits 160°F internal and the dark meat reaches about 175°F.
Rest and Serve
Remove the turkey from the pit and let it rest for at least 20-30 minutes before carving. This lets the juices redistribute and keeps the meat tender.
Notes
Don’t skip the dry step. The drier the skin, the better it browns and crisps up.
Use a meat thermometer. It’s the only way to nail that perfect doneness.
Color control: On a stick burner, smoke runs heavy — so tent the turkey once the color looks good. You want mahogany, not black.
Flavor variations: Swap Malcom’s King Craw Cajun Seasoning for your favorite turkey seasoning — classic poultry blends, garlic and herb, or a buttery savory rub all work great with this same process.
Every turkey cooks a little different, but if you take your time and let the smoke do the work, you’ll end up with one you’re proud to carve. That’s the kind of bird everyone remembers.
If you’ve been looking for a tofu recipe that actually makes you want to eat tofu, this is it. A mix of spice, crunch, and that sweet-salty Indo-Chinese glaze – it’s everything you could want in one bowl.
If you’ve been putting off eating tofu because you’re not sure how to make it taste good, this Kung Pao Tofu recipe is going to change that. Crispy, golden tofu tossed in a glossy, spicy-sweet sauce with peanuts and peppers will turn any skeptic into a fan.
Kung Pao Tofu is the perfect mix of heat, tang, and texture that makes every bite exciting. If you’re feeling inspired to try more, you might also loveSweet Chili Tofu Stir Fry for something sticky and bright, or Soondubu Jjigae (Korean Soft Tofu Stew) for a cozy night-in kind of meal. But first, let’s get into this fiery, flavor-packed Kung Pao Tofu.
Here’s everything you need to bring this bold, spicy-sweet tofu dish together:
Tofu: Firm or extra-firm tofu works best here. It holds its shape and crisps up beautifully in the air fryer or pan
Light and dark soy sauces: Light soy is used in the marinade to add saltiness and umami to the tofu, while both light and dark soy sauces are used in the kung pao sauce to add umami, saltiness, and that authentic Indo-Chinese color
Rice Vinegar: Adds a hint of sourness to the dish
Oyster sauce: Perfect to add a little sweetness and umami. Can be replaced with Hoisin sauce if you are a vegetarian
Honey: Gives the dish a sweet, sticky glaze authentic to Indo-Chinese cooking. Can be replaced with maple syrup too
Corn flour: To coat the tofu evenly and make it crisp
Salt and sugar: For balance and seasoning
Oil: I have used a mix of sunflower oil and toasted sesame oil (for a lovely nutty flavor) for this recipe
Spices: Pepper powder, whole black pepper, dried red chillies, and sichuan pepper for a fiery kick
Aromatics: Garlic, ginger, and spring onion whites for flavor and aroma
Roastes peanuts: For some added crunch and texture
To Finish: Cornflour slurry to thicken the sauce, and a handful of chopped spring onion greens for freshness and color.
Richa’s Top Tips
Use an air fryer: The air fryer makes this recipe a solid winner with less oil, more crunch. Just remember to give the tofu some space in the basket so it cooks evenly.
Don’t skip the prep boil: Briefly boiling tofu in salted water seasons it from the inside and gives it a firmer, bouncier texture that holds up perfectly in the sauce.
Keep the stir-fry quick: Once the sauce hits the pan, everything moves fast. Have your tofu, peanuts, and spring onions ready before you start so nothing burns.
Adjust the heat your way: The spice level is totally flexible, use fewer dried chillies or skip the Sichuan pepper if you prefer mild, or add extra for a fiery kick.
Finish strong: A drizzle of sesame oil right at the end brings out that nutty, restaurant-style flavor and makes everything taste a little extra special.
Frequently Asked Questions
What is Kung Pao flavor like?
Kung Pao flavor is a mix of spicy, tangy, and slightly sweet. It’s got that umami kick from soy sauce and some heat from Sichuan peppers and dried chillies to warm you up without being overwhelming.
What is Kung Pao made of?
Traditional Kung Pao dishes use a combination of chillies, garlic, ginger, peanuts, and a soy-based sauce that’s thickened slightly for that glossy, sticky coating. This tofu version keeps all the same flavors but swaps the chicken for crispy tofu.
Can I make Kung Pao Tofu without an air fryer?
Absolutely. You can pan-fry the tofu in a little oil, the key is to make sure the tofu is well-marinated and cooked until the edges are crisp before tossing it in the sauce.
Is Kung Pao Tofu healthy?
Yes, especially when air-fried! Tofu is high in protein and low in saturated fat, while the dish itself uses minimal oil and plenty of natural flavor from spices and aromatics. Just go easy on the sauce if you’re watching sodium or sugar intake.
Can I make this kung pao tofu recipe vegan?
Absolutely, you can! Simply swap honey with maple syrup and oyster sauce with hoisin sauce for a vegan version.
Storage Tips
Fridge: You can store leftover Kung Pao Tofu in an airtight container for up to 3 days.
Freezer: It’s best to freeze the sauce and tofu separately if possible. The tofu may lose its crispness once thawed but will still taste great when reheated. Store in freezer-safe containers for up to 1 month. Thaw overnight in the fridge before reheating.
Reheating Tip: If you want to revive that just-cooked crunch, pop the tofu pieces into the air fryer for 3–4 minutes before mixing them back into the reheated sauce.
Avoid: Leaving cooked tofu out at room temperature for more than 2 hours, as the sauce contains soy and sugar, which can spoil quickly in warm conditions.
Serving Ideas
Here are some serving ideas, all of which pair beautifully with the sweet-spicy, nutty flavors of this dish:
Veg Fried Rice: A classic pairing! The mild, savory notes of fried rice balance out the punchy Kung Pao sauce perfectly.
Egg Fried Rice: Adds a little richness and protein for a wholesome, balanced meal.
Garlic Noodles: The garlicky aroma and soft noodles soak up that glossy Kung Pao sauce beautifully.
Crispy Veg Nuggets: Serve them alongside Kung Pao Tofu for a crunchy, crowd-pleasing appetiser combo.
Add a veggie overload: Toss in broccoli florets, zucchini, or snap peas for extra crunch and color. They soak up the Kung Pao sauce beautifully while keeping the dish vibrant and fresh.
Go nuts (in the best way): Swap peanuts with cashews or almonds for a richer bite. Lightly toast them before adding to the stir-fry for a deeper flavor.
Try a protein remix: If you’re not in a tofu mood, swap it with paneer for a more Indian-style version or use tempeh for a chewier texture that still holds up to the sauce.
Make it saucier: If you love extra gravy with your rice or noodles, double the sauce ingredients and add a splash of water or stock while cooking to thin it slightly.
Kung Pao Tofu proves tofu doesn’t have to be bland, it can be bold, satisfying, and genuinely addictive when cooked right. Once you try it, you’ll probably find yourself making it again and again (and maybe even skipping takeout altogether).
If you make this Kung Pao Tofu, don’t forget to tag @my_foodstory on Instagram, I’d love to see your version and how you make it your own!
This kung pao tofu recipe is easily the most delicious way to eat tofu. It's spicy, tangy, sweet, and has is a flavor and texture bomb. This recipe is a total must-try!
2tablespoonssunflower oil or any neutral flavoured oil
1teaspoontoasted sesame oil
4dried red chilliesbroken into 2
1tablespoon+ 1 teaspoon finely chopped garlic
2teaspoonsfinely chopped ginger
4spring onion whitesthinly sliced
1teaspoonsichuan peppercrushed
¼cupgroundnuts roasted and de-skinned
Other
1teaspooncornflour mixed in ¾ cup water to make a slurry
1tablespooncooking oiladditional ¼ cup cooking oil if deep frying
¼cupfinely chopped spring onion greens
Instructions
Prepping tofu
Heat water in a pot with salt and when it boils, add tofu, cook on low for 2 minutes, take off the heat and rest for 5 minutes. Drain water and set aside to cool for 10 minutes. Discard the water.
500 gms tofu, 4 cups water, 1 ¼ teaspoon salt
Marinating tofu
Take tofu in a bowl, add all ingredients listed under marinade, give a good toss and set aside.
Pre-heat air fryer at 180 C. brush the airfryer basket with oil. Place the marinated tofu with some gap between each other and air fry at 180C for 5 minutes, brush oil, DO NOT FLIP and air fry at 190 C for 4 minutes. Air fry them in batches and set aside. It’s important to wait for 4-5 minutes until the fried tofu cools a bit to remove them easily from the basket as they stick to the basket when they are too hot.
1 tablespoon cooking oil
Deep Frying tofu
Heat oil in a wok or kadai and once it’s medium hot, drop the marinated tofu & fry on medium heat for 2-3 minutes or until they turn golden and crisp. Fry them in batches and set aside.
1 tablespoon cooking oil
Kung pao sauce
Take all the ingredients mentioned under kung pao sauce in a bowl & mix to combine well. Set aside.
Heat oil & toasted sesame oil in a wok, add garlic, ginger, red chillies, spring onion whites and saute on high for 30 seconds until fragrant. Add sichuan pepper, groundnuts and toss them once. Add kung pao sauce and cook for 2 minutes. Add cornflour slurry while stirring continuously and cook for 2 minutes(see note 2). Add the fried tofu, spring onion greens and toss to combine well. Serve.
2 tablespoons sunflower oil or any neutral flavoured oil, 1 teaspoon toasted sesame oil, 4 dried red chillies, 1 tablespoon + 1 teaspoon finely chopped garlic, 2 teaspoons finely chopped ginger, 4 spring onion whites, 1 teaspoon sichuan pepper, ¼ cup groundnuts roasted and de-skinned, 1 teaspoon cornflour mixed in ¾ cup water to make a slurry, ¼ cup finely chopped spring onion greens
Video
Notes
Tofu is prepped in this way to season them well, so do not skip it.
Cornflour slurry forms lumps if it is not stirred continuously.
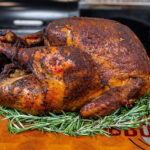
This smoked turkey is all about big flavor and perfect texture — juicy meat with crispy, bite-through skin. The secret isn’t complicated: a simple brine, a good dry, and steady heat on the pit.
Once the bird soaks up that flavor, I let the skin dry out, season it from top to bottom, and smoke it low and slow over pecan wood. The result is golden skin that crackles when you slice and meat so tender it practically drips juice.
Serve it hot off the board for Thanksgiving dinner and show off what a real smoked turkey should taste like.
Juicy, smoky, and crisped to perfection — this smoked turkey is everything a holiday bird should be. Tender, flavorful, and kissed with just the right amount of smoke — it’s turkey done right.
Ingredients
1 whole turkey (12–18 lbs), thawed
HowToBBQRight Ultimate Brine Kit
OR
1 bottle Malcom’s Bird Brine
1 bottle Killer Hogs AP Seasoning
1 bottle Malcom’s King Craw Cajun Seasoning
Meat Bag
Water (enough to completely submerge turkey)
1 stalk celery, cut into chunks
1 medium onion, quartered
1 apple, quartered
3 cloves garlic, smashed
Cooking spray or oil (for coating the skin)
Chicken Rack (optional)
Instructions
Brine the Turkey
Mix one bottle of Bird Brine with 1 gallon of water until dissolved. Place the turkey in a large brining bag or container and pour the brine mixture over the bird. Add enough cold water to completely submerge.
Seal the bag (or cover the container) and refrigerate for 24 hours. For larger turkeys (over 16 lbs), brine up to 48 hours.
Dry and Prep
Remove the turkey from the brine and discard the liquid. Pat the skin completely dry with paper towels—this is key to getting crispy skin.
Stuff the Cavity
Place the celery, onion, apple and garlic (use whatever aromatics you like) inside the cavity.
Tie the legs together and tuck the wing tips underneath so the turkey cooks evenly.
Oil and Season
Lightly coat the entire surface of the turkey with cooking spray or oil.
Season the backside first with a medium coat of Killer Hogs AP Seasoning, followed by a medium coat of Malcom’s King Craw Cajun Seasoning.
Flip the turkey onto a rack and repeat on the top side with the same layers of seasoning.
Smoke the Turkey
Preheat your smoker or grill to 275°F using pecan pellets (or your preferred wood).
Place the turkey on the pit, centered for even airflow, and cook until the internal temperature in the deepest part of the breast reaches 160°F.
Rest and Serve
Remove the turkey from the smoker and rest for 20 minutes. The internal temperature will carry over to about 165°F in the breast and 175°F in the dark meat.
That’s how you smoke a turkey that comes out juicy every single time — with golden, crispy skin and that rich, smoky flavor you can only get from cooking it low and slow. Keep it simple, trust the process, and you’ll carve into the best turkey you’ve ever put on the table.
A hearty, comforting and fulfilling soup that you must try this winter season is the classic restaurant style chicken noodle soup which is a one pot wonder that will keep you full for the entire night!
Winter is just round the corner and so is the craving for that soulful bowl of warm soup that will perfectly fit the bill as a one pot meal!
So here I come with my homemade chicken noodle soup that not only looks gorgeous but can also give the restaurant version a run for its money in terms of its flavors and taste!
Try it once and you will know why I am saying what I am saying!
What is chicken noodle soup?
Asian chicken noodle soup is a widely popular soup and I am not surprised at all! If a single dish can work as an entree as well as main course, who wouldn’t love it?
I made this a week before Diwali when we were feeling a little under the weather; we loved it so much that we immediately decided to prepare it for our little blog and share it with ya’all!
The best thing about this soup recipe is that you won’t need a long list of ingredients; just the basic aromatics, chicken & noodles and you are ready to whip up the most comforting soup of the season!
The most delicious vegetarian Pumpkin Pie, the best I've baked to date, probably the easiest filling ever with fresh pumpkin puree. This eggless pie was a 10/10, the buttery pastry from scratch a winner too.
The running joke in my family – which I unabashedly perpetuate – is that I’m of German descent – though, admittedly, my blood runs Irish green. Despite that, I do love German cuisine, especially, this time of year when there’s a cool nip in the air and an increasing amount of Octoberfest beer on the shelves of my local package goods store.
Knowing my penchant for all-things-Teutonic (and relating to the aforementioned running joke), my sister recently bought me a Sauerkraut-making-kit thinking that; a) it’ll be fun; b) the end result will be better than store-bought and; c) it’s so easy that even I could do it!
Having no alternative, I accepted the challenge – and in sharing my experience here, perhaps you will too.
What ingredients do I need for homemade sauerkraut?
Just cabbage and kosher salt. Use about 2% salt by the cabbage’s weight (e.g., 640 g cabbage → ~13 g salt). :contentReference[oaicite:0]{index=0}
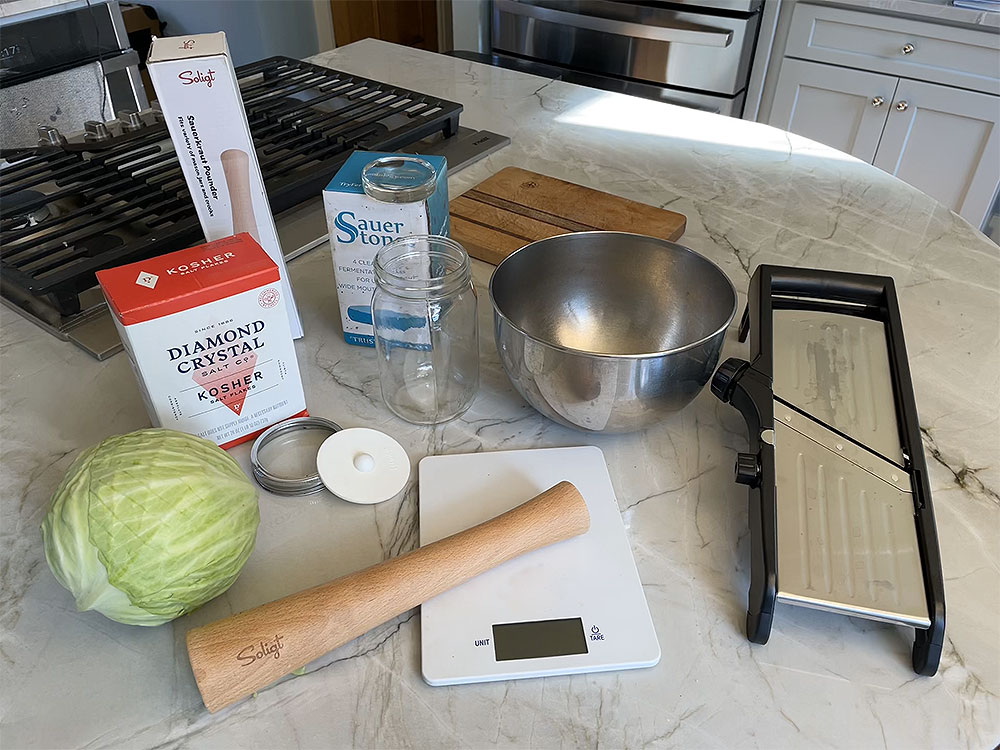
What basic tools do I need?
A mixing bowl, scale, jar (e.g., Ball jar), fermentation lid, weights (or a small pinch bowl), and a muddler. A mandoline or sharp knife works for slicing. :contentReference[oaicite:1]{index=1}
How do I prep the cabbage?
Shred or slice to your preferred thickness, then massage with the 2% salt until it turns slightly watery (about 2–5 minutes). :contentReference[oaicite:2]{index=2}
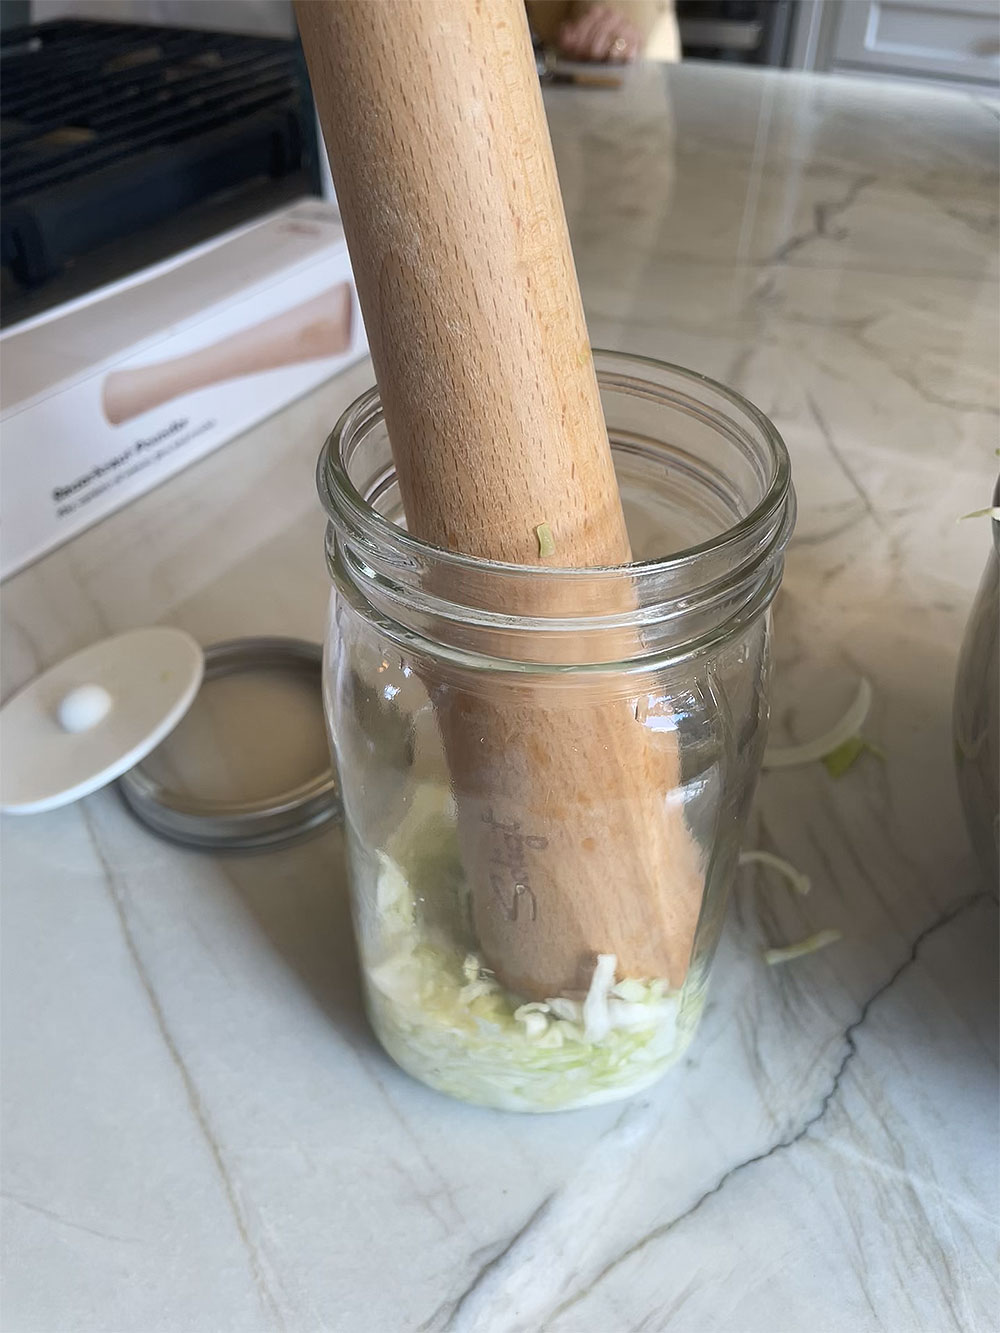
How do I pack the jar and keep the cabbage submerged?
Pack cabbage into the jar a little at a time and tamp with a muddler until the brine rises above the cabbage. Add weights (or a pinch bowl) to keep it submerged, then fit the fermentation lid. :contentReference[oaicite:3]{index=3}
How long should I ferment it—and when is it ready?
About two weeks at room temp is typical, but start tasting every few days and stop when the flavor is where you like it. :contentReference[oaicite:4]{index=4}
Smoked Hot Honey Pork Belly is the ultimate combo of rich smoke, sweet heat, and sticky glaze. I start with thick-cut slabs of pork belly, smoke them low and slow at 275°F, then finish with a buttery hot honey-vinegar BBQ glaze that caramelizes perfectly.
The result? Tender, glossy bites that melt in your mouth. Great for appetizers, tailgates, or any time you want bold BBQ flavor straight from the pit.
Smoked pork belly finished with a buttery hot-honey glaze – sweet heat, rich smoke, snack-worthy flavor.
Ingredients
1 whole pork belly (4–5 lbs total), split into two smaller slabs
Killer Hogs Hot BBQ Rub, for coating the pork belly
1 stick (½ cup) unsalted butter
¼ cup hot honey
½ cup Killer Hogs Vinegar Sauce
Instructions
Pit Temp: 275°F indirect
Final Internal Temp: 202°F
Prep the Pork Belly
Trim any thin edges or loose fat so both slabs cook evenly. Split the pork belly in half for easier handling and appetizer-sized portions.
Season
Apply a generous coat of Killer Hogs Hot BBQ Rub to all sides — top, bottom, and edges. Pat the rub in gently so it sticks.
Fire Up the Grill
Set your pit to cook at 275°F. – For charcoal, build a two-zone fire (coals on one side, cool zone on the other). – For pellet grills, hold a steady 275°F. Cook the pork belly on the indirect side of the pit.
Smoke
Place both slabs on the cool side of the grill. Let them cook about 1½ hours until the surface turns a deep mahogany color.
Check Internal Temperature
Continue cooking until the pork belly reaches 202°F internal. At that point, the fat will be fully rendered and the meat tender and jiggly.
Make the Hot Honey Glaze
In a small saucepan or foil pan, combine: – 1 stick butter – ¼ cup hot honey – ½ cup Killer Hogs Vinegar Sauce Warm until smooth
Glaze and Finish
Place each slab in a small foil “boat” to catch drips. Brush on a heavy coat of the hot honey glaze every 20–30 minutes until it caramelizes into a sticky layer. (Optional: a light dusting of rub over the glaze at the very end can deepen the bark, but it’s not required.)
Rest and Slice
Let the pork belly rest 10–15 minutes before slicing so it holds together. Cut into thick slices or bite-size cubes and serve right off the board.
That’s it — pork belly turned into a show-stopper: slow smoked until the fat’s silky, then glazed with sticky hot honey and butter for sweet-heat perfection. Slice it, serve it, and watch it disappear.
Cooking pasta is quite easy when you do it the right way. It should be cooked soft but not mushy, and have that little bite in the middle, that's the right texture which makes pasta taste great. You can mix it with sauce, veggies or just toss with some olive oil and herbs. It cooks fast and makes it as a filling meal even on busy days.
Pasta is simple to make and don't need many things. It does not take long time to get ready and everyone in the family likes it. When cooked right, it will not stick or turn mushy. You can use it for salads, baked pasta or just with some seasoning and cheese. Kids love this anytime.
[feast_advanced_jump_to]
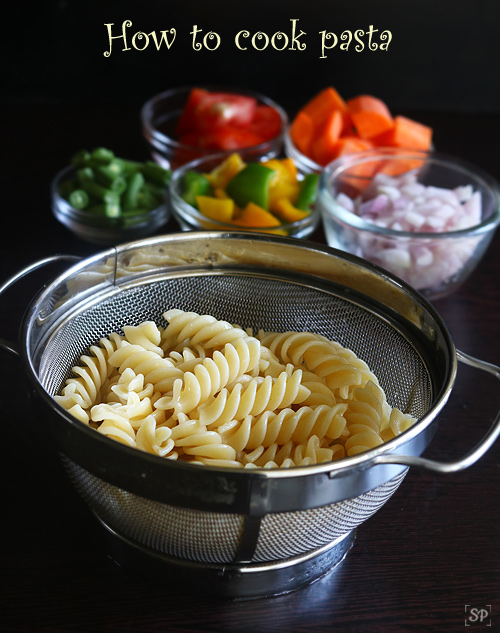
About How to Cook Pasta
Pasta is one of the most common dishes used in different ways. It is made by boiling in water along with some salt and a few drops of oil. Once it gets cooked right, you can mix with any sauce or just toss plain. There are many shapes like fusilli, penne and macaroni, but all can be cooked with same method.
The right texture of pasta is what makes it nice to eat. It should be soft but little firm inside, what we call 'al dente'. If you cook more, it becomes sticky and heavy. If less, it stays hard. So stirring well and checking in between helps to get that correct doneness. It make them nice and fluffy.
You can make it fresh and mix whatever sauce or topping you like. It is also healthy because you can control oil and salt. It fits well for lunch, dinner or even for lunch box. Sometimes I cook extra pasta and keep it in fridge, it helps when you want to fix dinner fast later.
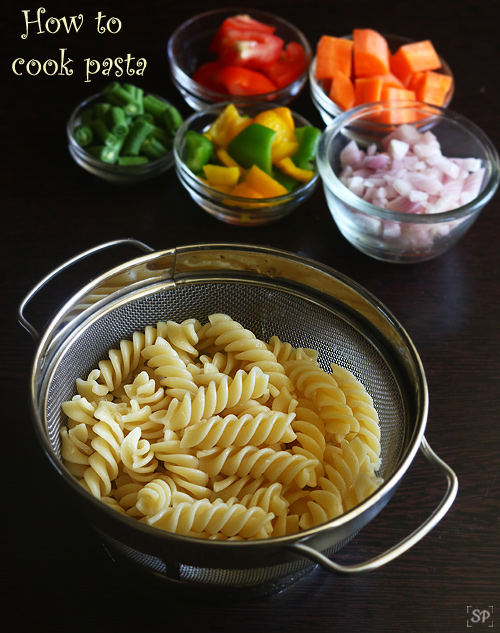
I make pasta many times, especially on weekends or when I feel lazy to cook big meal. After draining I just add few drops of oil to keep it separate. This small step keeps pasta soft even after cooling. I have used fusilli pasta here, you can use any type of pasta of your choice like penne, macaroni, shell, disc etc.
Pasta making is a time saving all-rounder recipe which will be nourished anytime by the entire family. Pasta cooking at home is made easy with this recipe. Pasta is generally cooked, tossed in sauce / veggies and seasoned with herbs / spices.
Video
How to Cook Pasta Ingredients
Pasta - I add fusilli for this recipe but penne, macaroni or spaghetti also works good. You can use any type you want.
Water - I used enough water so pasta cooks perfectly and don't stick. You can use more water if you want.
Oil - I used few drops of oil while boiling. You can use olive oil or any cooking oil you use. It helps pasta non sticky.
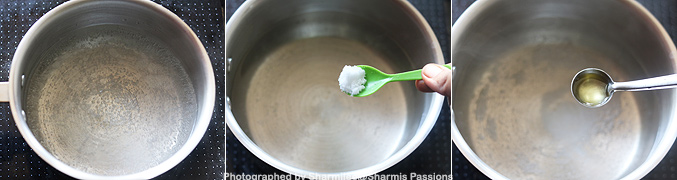
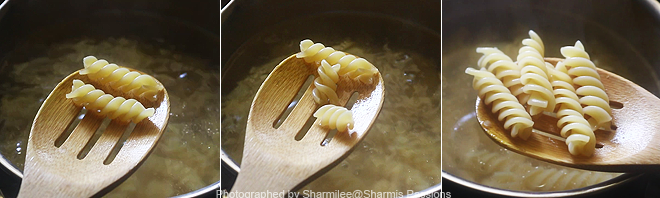
1.Take water in a sauce pan, add salt and oil to it. Boil it.
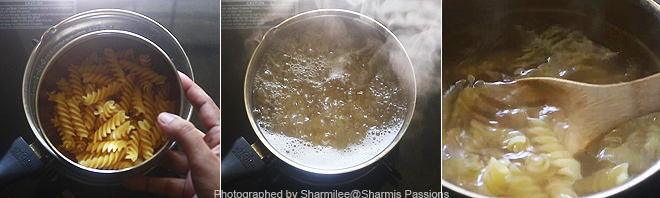
2.When it starts to boil, add the pasta and cook in medium flame. Stir in between
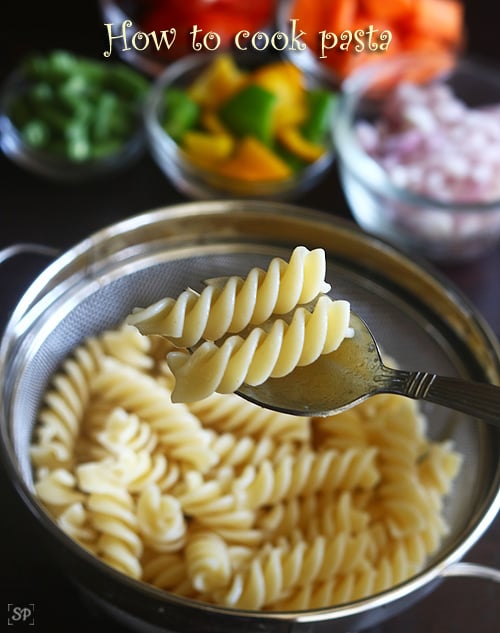
3.Keep cooking and make sure you stir in between. Cook until it becomes soft but not mushy. It should have the crunch to bite at the same time it will slightly bend ,thats the right stage. Cut with a spoon to check. Switch off and drain water.
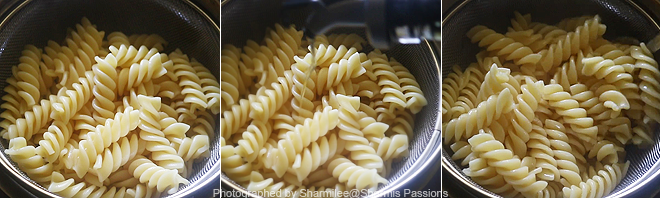
4.Rinse it well in running water. Strain, drizzle oil fluff it up and now its ready. So you can use it for your recipes.
Cooked pasta ready!
Expert Tips
Stir often - I usually stir pasta in between while cooking, this helps it not stick to bottom or to each other.
Check texture - Always check in between if pasta is soft but still has little firmness inside. Overcooked pasta will turn mushy.
Rinse after cooking - After draining I rinse pasta in normal running water, it removes extra starch and stops overcooking.
Add oil after draining - Adding few drops of oil after draining keeps pasta separate and easy to toss later.
Salt - I added salt to give light flavor and season the pasta. You can use normal or sea salt, both are fine.
Serving and Storage
Serve this with any sauce you like such as tomato, white, or even just simple olive oil and herbs. It also taste good with vegetables, cheese or used for baked pasta dishes. You can also mix it cold for salad type dishes.
Keep leftover pasta in a box in fridge for 1-2 days. Add few drops of oil and mix before storing so it will not stick.
FAQS
1.Can I use any type of pasta?
Yes, you can use any type like penne, macaroni, fusilli or spaghetti. Only the cooking time may change little.
2.Should I add oil while boiling?
Adding oil is not must but I prefer few drops so pasta does not stick together.
3.Can I make pasta before and store it?
Yes, you can boil and keep it in fridge for 1-2 days. Just fluff before mixing with sauce.
4.How do know that it is cooked?
When you bite, it should be soft but little firm in middle. That is called al dente and perfect.
5.What if I overcook pasta?
Overcooked pasta becomes sticky and too soft. So always check near the end to avoid that.
If you have any more questions about this How to Cook Pasta do mail me at sharmispassions@gmail.com. In addition, follow me on Instagram, Facebook, Pinterest ,Youtube and Twitter .
Tried this How to Cook Pasta? Do let me know how you liked it. Also tag us on Instagram @sharmispassions and hash tag it on #sharmispassions.
Cooking pasta is quite easy when you do it the right way. It should be cooked soft but not mushy, and have that little bite in the middle, that's the right texture which makes pasta taste great. You can mix it with sauce, veggies or just toss with some olive oil and herbs. It cooks fast and makes it as a filling meal even on busy days.
Course Breakfast, dinner, Lunch, Main Course
Cuisine Indian, Indo Chinese, Italian
Keyword 30 mins recipes, easy pasta recipes, fusili pasta recipes, fusilli pasta recipes, pasta, pasta recipes, penne pasta recipes
Prep Time 5 minutesminutes
Cook Time 10 minutesminutes
Total Time 15 minutesminutes
Servings 2
Calories 167kcal
Author Sharmilee J
Ingredients
1 and ½cupspastaI used fusilli variety
3cupswater
salt as needed
few drops oil
Instructions
Take water in a sauce pan, add salt and oil to it.Boil it.
When it starts to boil, add the pasta and cook in medium flame.Stir inbetween.
Keep cooking and make sure you stir inbetween.Cook until it becomes soft but not mushy.It should have the crunch to bite at the same time it will slightly bend,thats the right stage.Switch off and drain water.
Rinse it well in running water.Strain,Drizzle oil, mix well.Then fluff it up and use it for your recipes.
Cooked pasta ready!
Video
Notes
Stir often - I usually stir pasta in between while cooking, this helps it not stick to bottom or to each other.
Check texture - Always check in between if pasta is soft but still has little firmness inside. Overcooked pasta will turn mushy.
Rinse after cooking - After draining I rinse pasta in normal running water, it removes extra starch and stops overcooking.
Add oil after draining - Adding few drops of oil after draining keeps pasta separate and easy to toss later.
Salt - I added salt to give light flavor and season the pasta. You can use normal or sea salt, both are fine.
A quick and easy plum compote with a hint of cinnamon. This easy plum compote is incredibly simple and easy to make with only a few ingredients. It is the perfect topping for.your desserts, pancakes, waffles, cakes, ice cream and more.
This homemade plum compote is bursting with fresh plum flavor! It is sweet, slightly sour from the natural sourness of plum and lime, and a beautiful flavor from cinnamon. This plum compote is so delicious and all you need are a few ingredients and less than 15 minutes to make this delicious plum compote.
Create a cozy fall treat with this delightful plum compote. Enjoy it warm or chilled as a delicious topping or filling to your favorite breakfast or dessert.
This easy plum compote is made with fresh plum, sugar, lemon juice, cinnamon and water. This easy 5 ingredient plum compote is sweet, chunky, and bursting with beautiful flavor. It’s a perfect topping for pancakes, cakes, waffles, yogurt, ice cream and more.
If you’ve not yet tried or attempted to make your own plum compote, you can try out this recipe and I am sure you will love it!
INGREDIENTS TO MAKE EASY PLUM COMPOTE
This section explains what all ingredients is used in making the easy plum compote, how to use or choose certain ingredients and substitution options. For measurements, see the recipe card below.
PLUM – Fresh plums are used here, but frozen berries will work just as well. You can use any variety of plums available with you.
LEMON JUICE – Freshly squeezed lemon juice is used. It also add a bright flavor as well as a boost of natural pectin to help thicken the blueberry sauce.
CINNAMON – I’ve used cinnamon powder. You can also use cinnamon stick. You can discard the as stick once the compote is ready. Cinnamon gives it a nice hint of spice that’s great for fall. SUBSTITUTION – You can use vanilla extract or essence or can totally skip it.
SUGAR – Sugar is used to slightly sweeten the sauce and balance the tartness from the lemon and the plum. You can add the sugar as per the sweetness of your plum, especially if the plums are off-season and not very sweet. SUBSTITUTION – You use maple syrup to sweeten the compote but you can also use honey for a non-vegan version if you’d like.
WATER – Very less water is used to cook the plum.
HOW TO MAKE EASY PLUM COMPOTE
This section shows how to make blueberry sauce with step-by-step photos and details about the technique with video tutorial. For full ingredients measurements, see the recipe card below.
I made a simple video of this easy plum compote recipe for my readers which I have shared below. Please do watch to know how I made this delicious recipe. If you liked the video please do SUBSCRIBE to my channel if you haven’t yet. Also like, share and comment on it! It will mean a lot to me and really motivate me to come up and shoot more videos for my readers. As always I’m looking forward to your feedback!
STEP BY STEP PICTORIAL INSTRUCTIONS TO MAKE EASY PLUM COMPOTE
Wash the plum and pat them dry with clean kitchen towel.
Now roughly chop the plum into medium pieces.
Add in the plum pieces, water, sugar and cinnamon powder in a sauce pan. Bring it to a boil over high heat.
Reduce the heat to medium and cover the pan. Cook for about 8-10 minutes or until the plum is tender and mixture is syrupy. We prefer the compote with some chunks.
Note: If you prefer a mashed texture, use a potato masher or the back of the ladle to mash the plum as it cooks.
Add in the lenon juice and give a quick stir.
Remove pan from heat and allow to cool down completely.
Transfer the plum compote onto a sterilized jar. Store in a refrigerator for longer shelf life and use a clean spoon on every serving.
NOTES: ● You can also use frozen plums. ● Lemon juice is optional. ● Use beautifully ripe plums as you’ll get the best flavour that way. ● Use sugar as per the sweetness of your plums. You can add more if your plums are not very sweet. ● A pinch of salt can he added to enhance the flavor of the compote. ● Cinnamon is optional ● You can also use maple syrup or honey for the sweetner. ● You can also add some lemon zest for the extra punch of flavor. ● Refrigerate the compote for longer shelf life. ● You can follow the same recipe and make other fruit compote – blueberry, cranberry, raspberry, black currant, mulberry etc. ● Store in clean jars and refrigerate for longer shelf life.
A quick and easy plum compote with a hint of cinnamon. This easy plum compote is incredibly simple and easy to make with only few ingredients. It is the perfect topping for.your desserts, pancakes, waffles, cakes, ice cream and more.
Course Condiment
Cuisine American
Keyword filling for cakes, sauce, spread
Prep Time 5 minutesminutes
Cook Time 10 minutesminutes
Total Time 15 minutesminutes
Servings 300Grams
Author Akum Raj Jamir
Equipment
sauce pan
Ingredients
300Grams Plum
60mlWater (¼ cup)
50 Grams Sugar(¼ cup)
¼Teaspoon Cinnamon powder Or 1 medium stick
1Tablespoon Lemon juice (15 ml)
Instructions
Wash the plum and pat them dry with clean kitchen towel.
Now roughly chop the plum into medium pieces.
Add in the plum pieces, water, sugar and cinnamon powder in a sauce pan. Bring it to a boil over high heat.
Reduce the heat to medium and cover the pan. Cook for about 8-10 minutes or until the plum is tender and mixture is syrupy. We prefer the compote with some chunks.
Note: If you prefer a mashed texture, use a potato masher or the back of the ladle to mash the plum as it cooks.
Add in the lenon juice and give a quick stir.
Remove pan from heat and allow to cool down completely.
Transfer the plum compote onto a sterilized jar. Store in a refrigerator for longer shelf life and use a clean spoon on every serving.
Video
Notes
You can also use frozen plums.
Lemon juice is optional.
Use beautifully ripe plums as you’ll get the best flavour that way.
Use sugar as per the sweetness of your plums. You can add more if your plums are not very sweet.
A pinch of salt can he added to enhance the flavor of the compote.
Cinnamon is optional
You can also use maple syrup or honey for the sweetner.
You can also add some lemon zest for the extra punch of flavor.
Refrigerate the compote for longer shelf life.
You can follow the same recipe and make other fruit compote – blueberry, cranberry, raspberry, black currant, mulberry etc.
Store in clean jars and refrigerate for longer shelf life.
HOW TO USE PLUM COMPOTE
Speaking of serving, plum compote can be used in many ways. You will love homemade plum compote with many recipes too. It’s the perfect topping for so many things! Here’s are some listed below. But I’m sure you’ll find lots of other ways to enjoy it as well. ● Use as fillings in tarts, apple pie, cinnamon rolls, buns etc ● Pour it over ice cream, pancakes, waffles, toast etc. ● Drizzle it over cakes ● Spread it over cake filling in layer cakes and pastry cakes. ● Stir it into milkshakes. ● Drizzle it over brownies and cakes. ● Layered it in trifle. ● Pour into decorated jars and give it as a gift for the holidays or just like that.
WHAT IS THE SHELF LIFE OF THIS EASY PLUM COMPOTE ?
This easy plum compote will last for upto to 3-4 weeks in refrigerator. You can store your homemade plum compote in a sterilized jar preferably glass jar in the refrigerator. Use a clean spoon everytime you serve them.
Well, if you make this easy plum compote recipe I’ll be glad if you take out some time and rate the recipe and leave a feedback in the comments box below. You can also snap a photo and tag Akum Raj Jamir on Facebook and akumrajjamir on Instagram with hashtag #atmykitchen. I would love to see your creations.
Thank you so much for stopping by my blog. I hope you liked the recipe. Your valuable feedbacks are always welcome, I love hearing from you guys and always do my best to respond to each and every one of you.
Chicken Lollipops are everyone’s favourite party starter for a reason. And making them at home is so much easier than you think!
If there’s one appetiser that never lets you down, it’s Chicken Lollipop. Crispy edges, juicy meat, and that hint of spice that hits just right. There’s a reason you will find it at every celebration, from family get-togethers to late-night takeout orders.
With this recipe you can bring that crunchy, flavourful magic straight to your kitchen. I usually serve this with my homemade schezwan sauce, or Thai sweet chilli sauce, but it tastes really good with ketchup, mayo, or any other dip of your choice.
Chicken Lollipops: These are the middle segments of chicken wings that are trimmed into a “lollipop” shape.
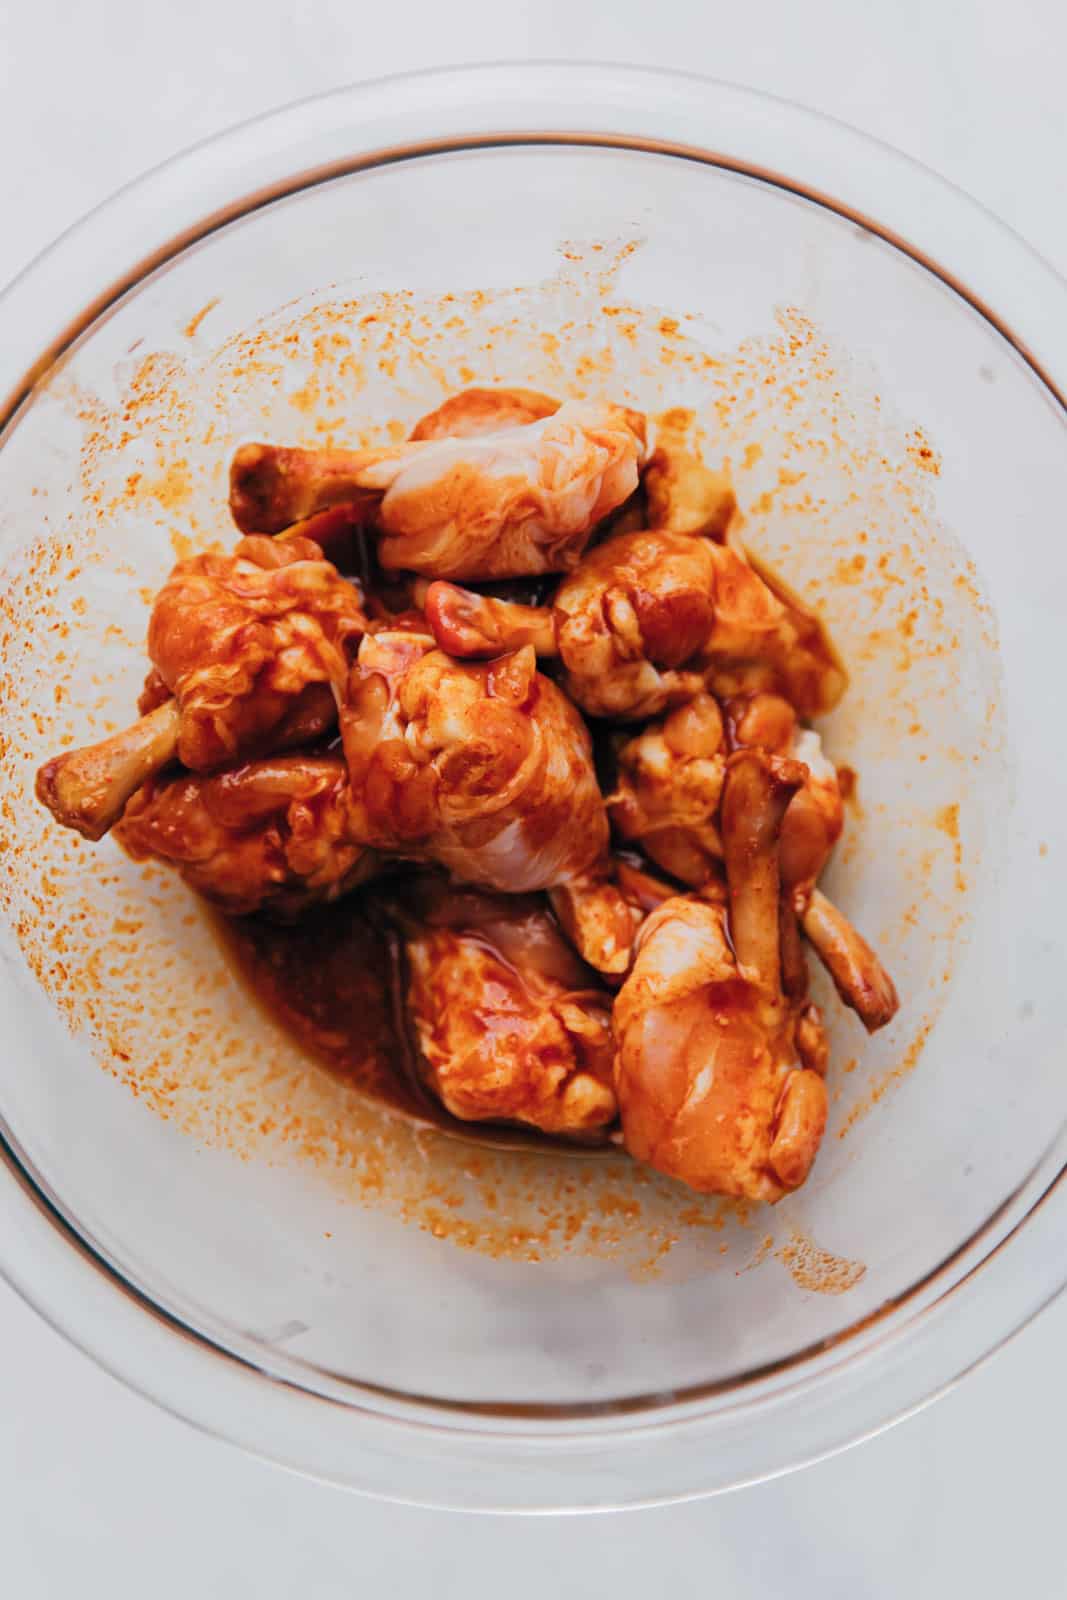
Marinade: A mix of soy sauce, red chilli sauce, vinegar, tomato ketchup, chilli powder, garlic paste, and salt.
Batter: Cornflour, all-purpose flour, and rice flour make a light, crisp coating.
Egg: Helps the batter stick to the chicken while frying.
Oil: Use any neutral oil with a high smoke point, like sunflower or vegetable oil, for frying.
Ginger Paste: Adds warmth and a sharp kick.
Frequently Asked Questions
What are Chicken Lollipops made of?
They’re made using the middle segment of chicken wings. The meat is cut and pushed down to one end to form a “lollipop” shape that’s easy to hold and perfect for snacking.
What cut is a Chicken Lollipop?
It’s the mid-joint or “drumette” part of the wing. You can trim it yourself or buy them ready-made from most butcher shops or supermarkets.
Can I make this recipe in an air fryer instead of deep frying?
Yes! Lightly brush the lollipops with oil and air fry them at 200°C for 10–12 minutes, flipping halfway through. They’ll still be crispy and juicy with much less oil.
How can I make it spicier or milder?
For extra heat, add a pinch of red chilli flakes or a splash of hot sauce to the batter. To make it milder, use Kashmiri chilli powder instead of regular chilli powder, it gives colour without too much spice.
Is Chicken Lollipop healthy?
Like most fried foods, it’s best enjoyed in moderation. For a lighter version, you can air fry or bake them and skip the second fry step.
Richa’s Top Tips
Marinate long enough: Even 30 minutes makes a difference, but if you have time, let the chicken rest in the fridge for a few hours. The flavours go deeper, and the meat stays juicier after frying.
Use rice flour for crunch: Don’t skip it! It’s the secret to that light, crispy texture that stays crunchy even after a few minutes.
Keep the oil hot but steady: Around 175–180°C is perfect. Too hot and the coating burns before the chicken cooks; too low and the lollipops turn soggy.
Double fry for extra crispiness: If you’re making these ahead for a party, fry them once to cook through, and again for a minute just before serving.
Storage Tips
Fridge: Store leftover chicken lollipops in an airtight container for up to 2 days. Reheat them in an air fryer or oven at 180°C for 4–5 minutes to bring back some of the crispiness.
Freezer: You can freeze marinated or fried (but un-sauced) lollipops for up to a month. To reheat, let them thaw in the fridge overnight and air fry or deep fry for a few minutes before serving.
Room Temperature: If you’re serving them later the same day, keep them loosely covered on the counter for no more than 2 hours to maintain their texture.
Serving Ideas
Chicken Lollipops fit right into any setting, from game nights to festive dinners. Here are a few delicious ways to serve them:
With Schezwan Sauce: The classic combo that never fails, spicy, tangy, and just the right amount of heat.
With Noodles: Serve alongside Hakka Noodles for that restaurant-style experience right at home.
With Drinks: They pair beautifully with chilled drinks, mocktails, soft drinks, or even iced tea, balancing out the spice with a bit of freshness.
Customisation Ideas
Turn it saucy: Instead of serving them dry, coat the fried lollipops in a quick honey–garlic glaze or toss them in a sweet chilli sauce for a sticky, glossy finish.
Make it cheesy: Add a little grated mozzarella or processed cheese to the batter for a melty surprise once you bite in.
Try a fusion twist: Swap the usual Indo-Chinese flavour with peri-peri or tandoori masala for something new but equally addictive.
Experiment with the coating: Use crushed cornflakes or breadcrumbs in the batter for an extra layer of crunch that holds up longer.
And there you have it, crispy, juicy Chicken Lollipops that taste just like your favourite restaurant ones, maybe even better. Once you nail this recipe, it’ll easily become your go-to for parties, weekends, or those days when you’re craving a little indulgence.
If you give this a try, tag @my_foodstory on Instagram, I’d love to see how they turn out in your kitchen!
Make chicken lollipop at home with this detailed, easy to follow recipe. These lollipops are crunchy, juicy and taste just as good as takeout! Plus when you make them at home, no more soggy lollipops.
Whisk together soy sauce, red chilli sauce, vinegar, tomato ketchup, red chilli powder, garlic paste, salt in a bowl and toss the chicken lollipops in it. Marinade for half an hour.
In the same bowl, add cornflour, all purpose flour, rice flour, egg and ginger paste and mix well to create a thick batter and coat the lollipops in it.
Heat about two inches oil in a wok or kadhai to 350F/ 176C. Add the battered lollipops one by one to the oil in such a way that the meat is at the bottom and the bone is on top (watch the video to see how I do it). Fry these on medium high heat till golden brown – approx 3-4 minutes.
Take these out on a tissue paper to blot out any excess oil and serve hot with schezwan sauce.
Video
Notes
Cutting chicken lollipop: Chicken lollipops are prepared using the middle segment of the chicken wing. You can watch this video to learn how to do this at home or just buy them pre-prepared from the store.
Marinade: marinade for at least 30 minutes. For the best results, marinate the chicken in the refrigerator overnight. Remove the chicken from the refrigerator 10 minutes prior to frying.
Oil temperature: Ensure the oil is at 350F/ 176C for frying the chicken. This temperature is ideal for perfectly cooked crispy chicken.
Make these in advance: You can also make these ahead by frying them once and storing them for a couple of hours. When ready to serve, heat the oil to about 400F/204C and flash fry the lollipops for the second time for just a minute. This will give it a super crispy coating and you’ll have hot chicken lollipops ready to go.
The hearty soulful soup that will soothe your soul this winter while also serving you as a one pot meal is this restaurant style creamy corn and shrimp chowder!
Soup season has officially started and I can't keep calm! I mean, I love soup and that too those ones that double up as a one pot meal with all the goodness packed in a single bowl!
Today's recipe of creamy corn and shrimp chowder is exactly that dreamy soup recipe which will not only fill your tummy but also calm your soul on a chilly wintery night!
There is already a nip in the air in my city especially from evening onwards and I get drawn towards the hearty soups for my dinner during this winter-round-the-corner-but-not-there-yet season!
This shrimp chowder has been on my bucket list since ages and I finally served it on our dinner table last week after perfecting the recipe for you all and us too!
I'm sure you guys will love it as much as we did as soon as you give it a try; so what are you waiting for? Hurry up!
Let’s get cooking!
What is shrimp chowder?
If you are not familiar with chowder, let me then first decode it for ya!
Chowder is a soup primarily made of seafood with lots of veggies, potatoes being one of the key components. The soup broth of chowder is of creamy consistency thanks to milk and cream.
Even though the chowder broth is creamy, it is still quite light on your tummy and that’s a fantastic reason to include this insanely flavorful soup in your weekly meals this season!
The creamy corn and shrimp chowder is a one pot wonder which will serve you as a fancy and delicious dinner on the wintery nights!
This hearty soulful soup is full of incredible flavors, thanks to shrimps, rewarding you with a fancy meal right at the comfort of your home!
Some days, you just need a one-pan wonder that makes you feel good without making a mess. That’s where this Basil Fried Rice comes in–light, aromatic, and ready in minutes.
If you’re like me and could happily eat fried rice every other day, you’ll love how quick this Basil Fried Rice is to make. It’s light, herby, and feels fresher than the usual Indo-Chinese stir-fries.
A handful of basil, some leftover rice, and ten minutes in the kitchen, that’s all it takes to make this comforting bowl of Basil Fried Rice. The mix of garlicky aroma and fresh basil instantly lifts your mood and turns old plain rice into something crave-worthy. And if fried rice is your thing, you should also check out my Veg Fried Rice or Egg Fried Rice recipe next, they’re just as easy, just as delicious.
Rice: Use cooked basmati or long-grain rice. Day-old rice works best since it’s a bit firm and doesn’t turn mushy while stir-frying.
Basil: Fresh Thai basil is key here. It brings a lovely fragrance and peppery flavor that makes this dish special.
Veggies: Finely chopped carrots and baby corn add crunch and color. Feel free to add beans, bell peppers, or peas if you have them on hand.
Aromatics: Garlic gives the rice its signature stir-fry aroma.
Seasoning: Just salt and pepper to keep it simple.
Oil: Any neutral oil works well. Sunflower or vegetable oil keeps the flavors balanced.
Richa’s Top Tips
Use day-old rice: Freshly cooked rice tends to clump together. Cold, leftover rice gives you that perfect, non-sticky fried rice texture.
High heat is key: Cook everything on high heat to get that signature smoky, restaurant-style flavor.
Don’t overdo the basil: A little goes a long way. Add it right at the end so it stays bright and aromatic.
Add soy sauce sparingly: If you decide to season further, start with a light splash, too much can overpower the basil.
Chop small, cook fast: Keep the veggies finely chopped so they cook quickly and blend well with the rice.
Frequently Asked Questions
What’s the difference between Thai fried rice and basil fried rice?
Thai fried rice uses soy sauce or fish sauce for seasoning, while basil fried rice gets most of its flavour from fresh Thai basil and garlic. It’s a little spicier and more aromatic.
Can I use regular basil instead of Thai basil?
You can, but Thai basil has a stronger, slightly peppery flavour that really makes this dish stand out. Regular basil will give a milder, more Italian-style taste.
Can I add chicken, shrimp, or tofu?
Absolutely! Stir-fry your protein first, then mix it in with the rice and basil at the end. It turns this quick side into a full meal.
Why is my fried rice sticky?
That usually happens if the rice is freshly cooked and still warm. Use cold, day-old rice for the best texture, it stays fluffy and doesn’t clump.
Is basil fried rice healthy?
Yes, especially when you use minimal oil and load it up with veggies or lean protein. Thai basil also has antioxidant and anti-inflammatory benefits.
Storage Tips
Fridge: You can let the fried rice cool completely before transferring it to an airtight container. It’ll stay fresh for up to 3 days.
Freezer: Basil fried rice freezes well for up to a month. Portion it into freezer-safe containers, thaw overnight in the fridge, and stir-fry again for a few minutes before serving.
Reheating: Cook it in a pan with a splash of water or oil to bring back that just-cooked texture.
Serving Ideas
Basil Fried Rice is one of those dishes that goes with just about anything — here are a few ways to make it shine:
With Chilli Paneer: The spicy, tangy sauce of Chilli Paneer pairs perfectly with the freshness of basil rice.
Add Protein: Toss in some pan-fried tofu, prawns, or shredded chicken to turn it into a hearty meal.
More Veggies: Throw in bell peppers, mushrooms, or snap peas for extra crunch and colour.
Make it Spicier: Stir in a spoonful of homemade Chilli Oil or finely chopped Thai chillies for that fiery edge.
Fried Egg on Top: A sunny-side-up egg makes this feel like comfort food with a little extra flair.
Saucy Twist: Drizzle some soy sauce or a dash of fish sauce at the end for a deeper umami flavour.
And there you have it, a quick, flavourful Basil Fried Rice that tastes just as good as your favourite takeout version (maybe even better). It’s fresh, fragrant, and endlessly adaptable, whether you want to keep it veggie-loaded or toss in some protein.
If you give it a try, don’t forget to tag@my_foodstory on Instagram. I’d love to see how your version turns out!