Thirukarthigai, also known as Karthigai Deepam, is one of the oldest and most sacred Tamil festivals, celebrated in the Tamil month of Karthigai on the auspicious Pournami (Full Moon) day. It is a festival of light, devotion, and divine protection, where homes are adorned with rows of glowing oil lamps symbolizing prosperity and spiritual awakening.
Throughout the entire month of Karthigai, families light lamps at the entrance of their homes. On the day of Thirukarthigai/Karthigai Deepam, the whole house is beautifully illuminated, creating a divine and uplifting atmosphere.
One of the most iconic places associated with this festival is Thiruvannamalai, world-renowned for its spectacular Karthigai Deepam celebrations.
Rows of glowing oil lamps lit for the auspicious Thirukarthigai / Karthigai Deepam festival.
The Legend Behind Thirukarthigai / Karthigai Deepam
According to Hindu scriptures, Lord Brahma and Lord Vishnu once fell into an ego-driven argument, each claiming superiority. To humble them and restore harmony, Lord Shiva appeared as an infinite pillar of fire (Jyothi Sthambam) and challenged them:
“Whoever finds the beginning or end of this fire is the greatest.”
Brahma transformed into a swan (Annam) and flew upward.
Vishnu took the form of Varaha (boar) and dug deep into the earth.
Despite their divine powers, neither could find the beginning nor end of Shiva’s fiery form. Realizing their mistake, they surrendered their ego and prayed with devotion. Lord Shiva then revealed himself to them.
This divine appearance as a pillar of endless fire is commemorated as Thirukarthigai / Karthigai Deepam.
Thiruvannamalai Deepam – The Holy Fire Hill
Thiruvannamalai in Tamil Nadu is the spiritual epicenter of Karthigai Deepam. Lord Shiva is believed to have manifested as Arunachala Hill, a form of Agni (fire).
Tiruvannamalai and Arunachala both mean “holy fire hill.”
The Shiva Linga here is the Agni Linga, representing the fire element.
Devotees light tiny oil lamps at home which symbolize miniature Jyothi Lingas.
Every year, lakhs of devotees gather to witness the Mahadeepam, lit atop the sacred hill—a mesmerizing sight symbolizing divine brilliance and protection.
Spiritual Significance of Thirukarthigai
Karthigai Deepam represents
The victory of light over darkness
Removal of ignorance and ego
Infinite nature of God (Ananta Jyothi)
Protection, prosperity & spiritual growth
Homes are decorated with rows of lamps to invoke Lord Shiva’s Jyothi Swarupam—the form of divine light.
Festival Days
Day 1:Appa Karthigai
Day 2:Vadai Karthigai
Devotees prepare and offer traditional neivedhyam such as Pori, Adhirasam, Vella Seedai, Vetrilai-Pakku, and fruits.
In South Tamil Nadu and Kerala, sisters light the sacred Gajalakshmi Vilakku (Elephant Lamp) to pray for the well-being and longevity of their brothers.
Why Do We Light the Elephant Lamp (Gajalakshmi Vilakku) on Karthigai?
A touching traditional story explains this practice:
A king once had a single daughter who grew up with a beloved elephant. She treated the elephant as her own brother. After marriage, she deeply missed him. Every Karthigai Deepam, she lit an elephant-shaped lamp, prayed for her brother, and offered:
Tender coconut
Milagu Adai (elephant-leg sized)
Pori
Adhirasam
Vella Seedai
This devotional practice later became part of the traditional Karthigai rituals. Today, lighting the Gajalakshmi Vilakku symbolizes:
There’s something magical about the aroma of freshly melted jaggery and crispy puffed rice coming together during Karthigai Deepam. This Pori Urundai Recipe is rooted deeply in tradition, especially with the use of Aval Pori or Nel Pori as neivedhyam offerings for Thirukarthigai/Karthigaideepam. The combination of jaggery syrup, cardamom, and coconut pieces creates a nostalgic sweetness that families look forward to every year. While many prepare them as neatly shaped balls, some households—especially in Tirunelveli and Nagercoil—simply mix the pori with the jaggery syrup and offer it as is. Whether you follow the custom of making pori urundai alone or also prepare Milagu Adai, Vellai Appam, and Vella Seedai, this recipe carries the warmth, authenticity, and festive spirit of the season. Happy Karthigai Deepam to you and your family!
Nel Pori Urundai
Pori Urundai holds a cherished place in South Indian homes, especially during the auspicious festival of Karthigai Deepam (also known as Thirukarthigai).
[feast_advanced_jump_to]
Ingredients
Aval Pori / Nel Pori (puffed rice)
Grated Jaggery
Finely sliced / chopped Coconut pieces
Cardamom powder
Each of these ingredients plays an essential role in creating the perfect Pori Urundai:
Puffed rice (Aval Pori / Nel Pori): This provides the light, airy base. Its delicate crunch contrasts beautifully with the sticky jaggery syrup, giving the urundai its signature texture.
Jaggery: This is the sweetener and binder — when boiled to just the right consistency, jaggery syrup coats the puffed rice and helps hold everything together. It also provides a warm, caramel-like depth of flavor that feels very traditional.
Coconut pieces: Lightly dry-fried coconut adds a toasty richness and a subtle chewiness. Frying removes moisture so that the coconut stays crisp even after mixing, which elevates both texture and flavor.
Cardamom powder: This spice gives a fragrant, floral aroma that cuts through the sweetness and lifts the overall flavor profile. It’s a small but powerful ingredient that makes the urundai feel festive and aromatic.
See recipe card for quantities.
Instructions
Heat a pan and add the finely chopped coconut pieces. Dry roast them on a low flame until they turn deep brown and all the moisture evaporates.
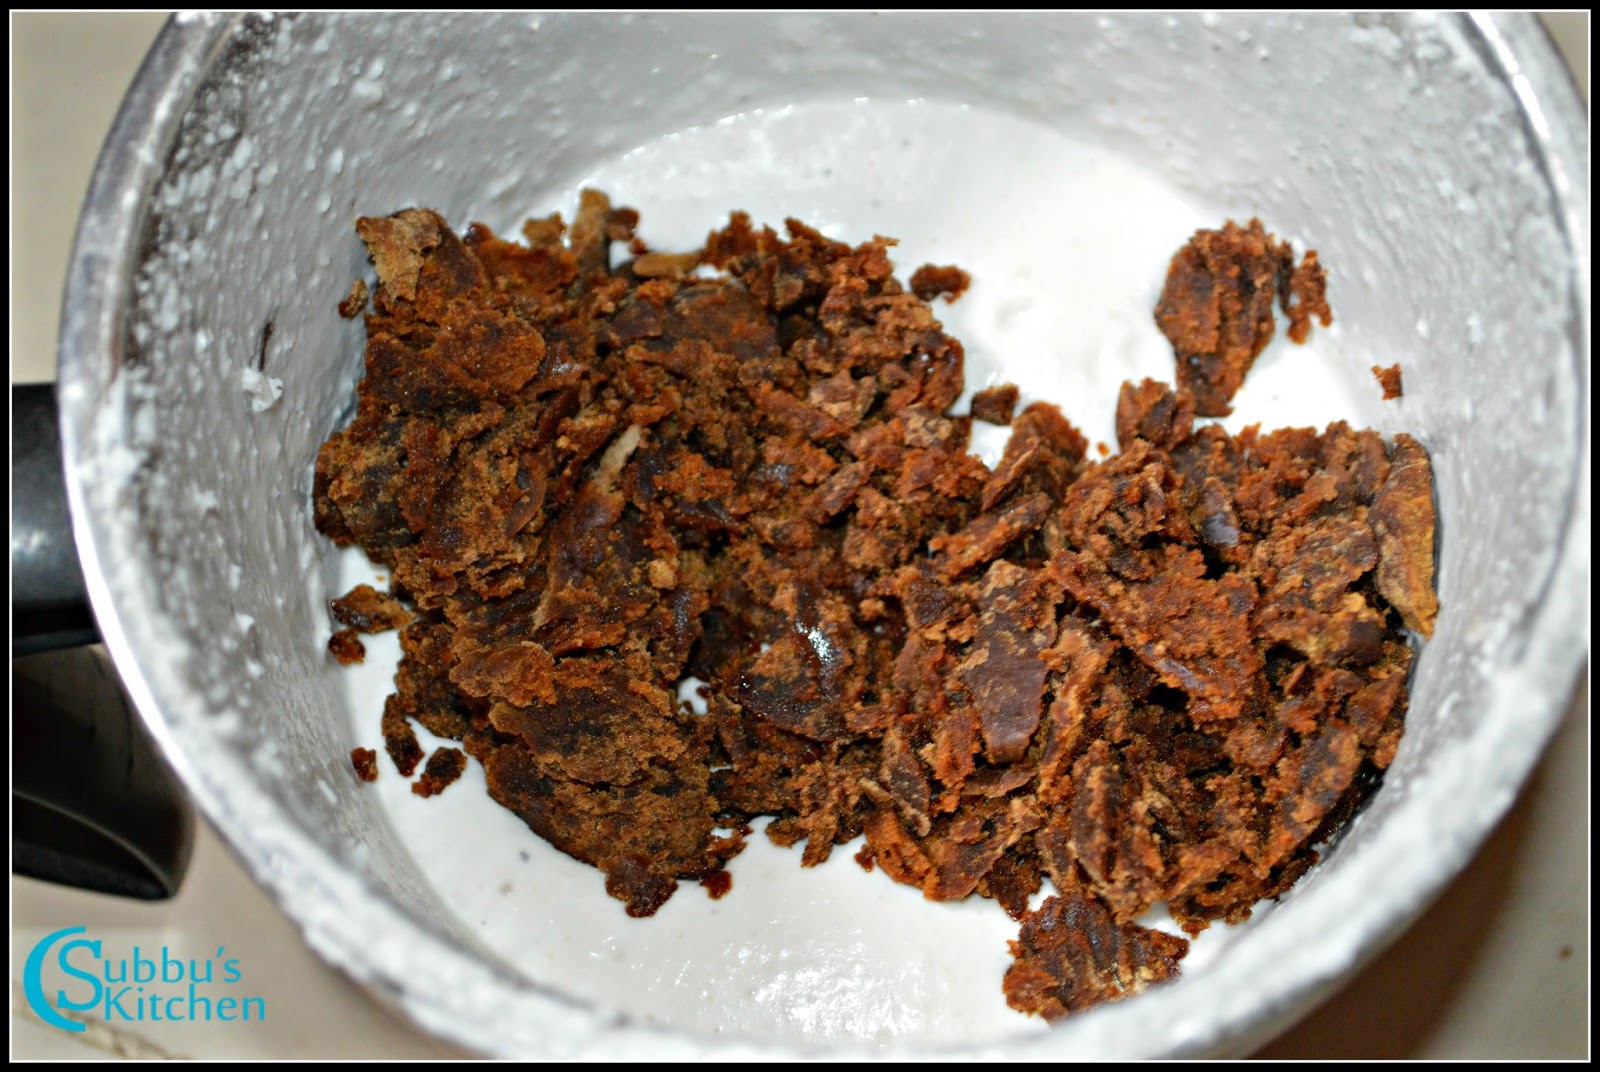
Add the grated jaggery to a pan
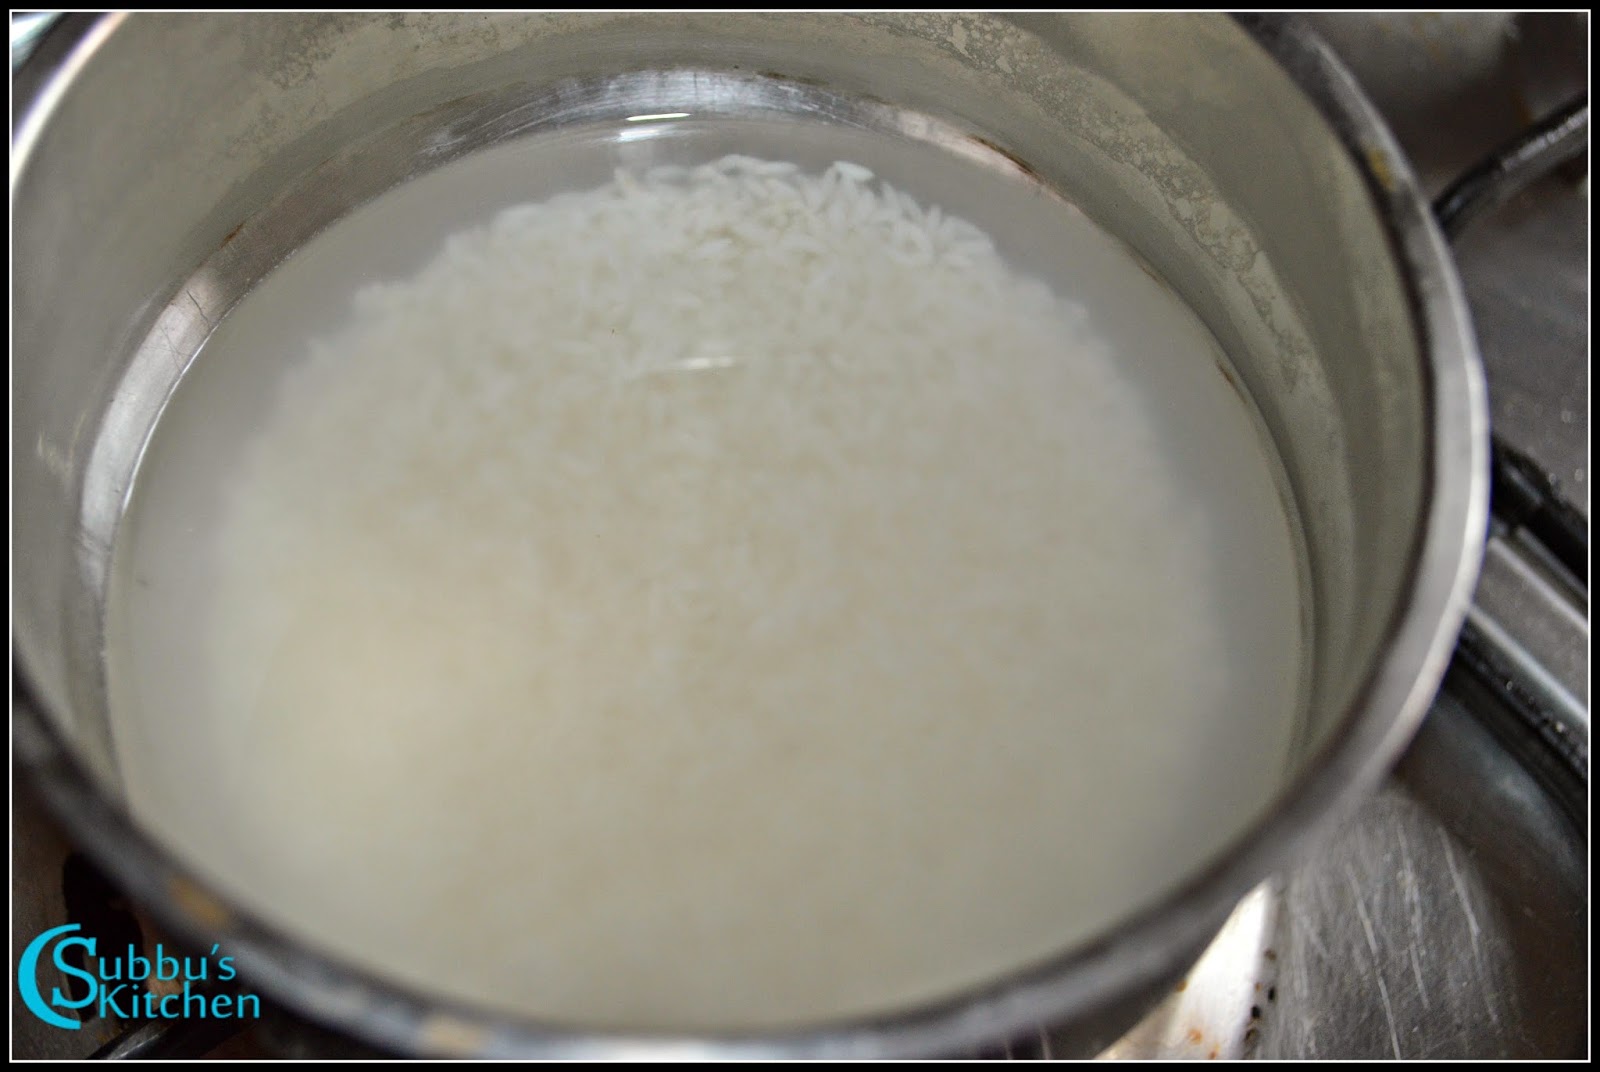
Add ½ cup of water and heat it on a low flame, allowing the jaggery to melt completely into the water.
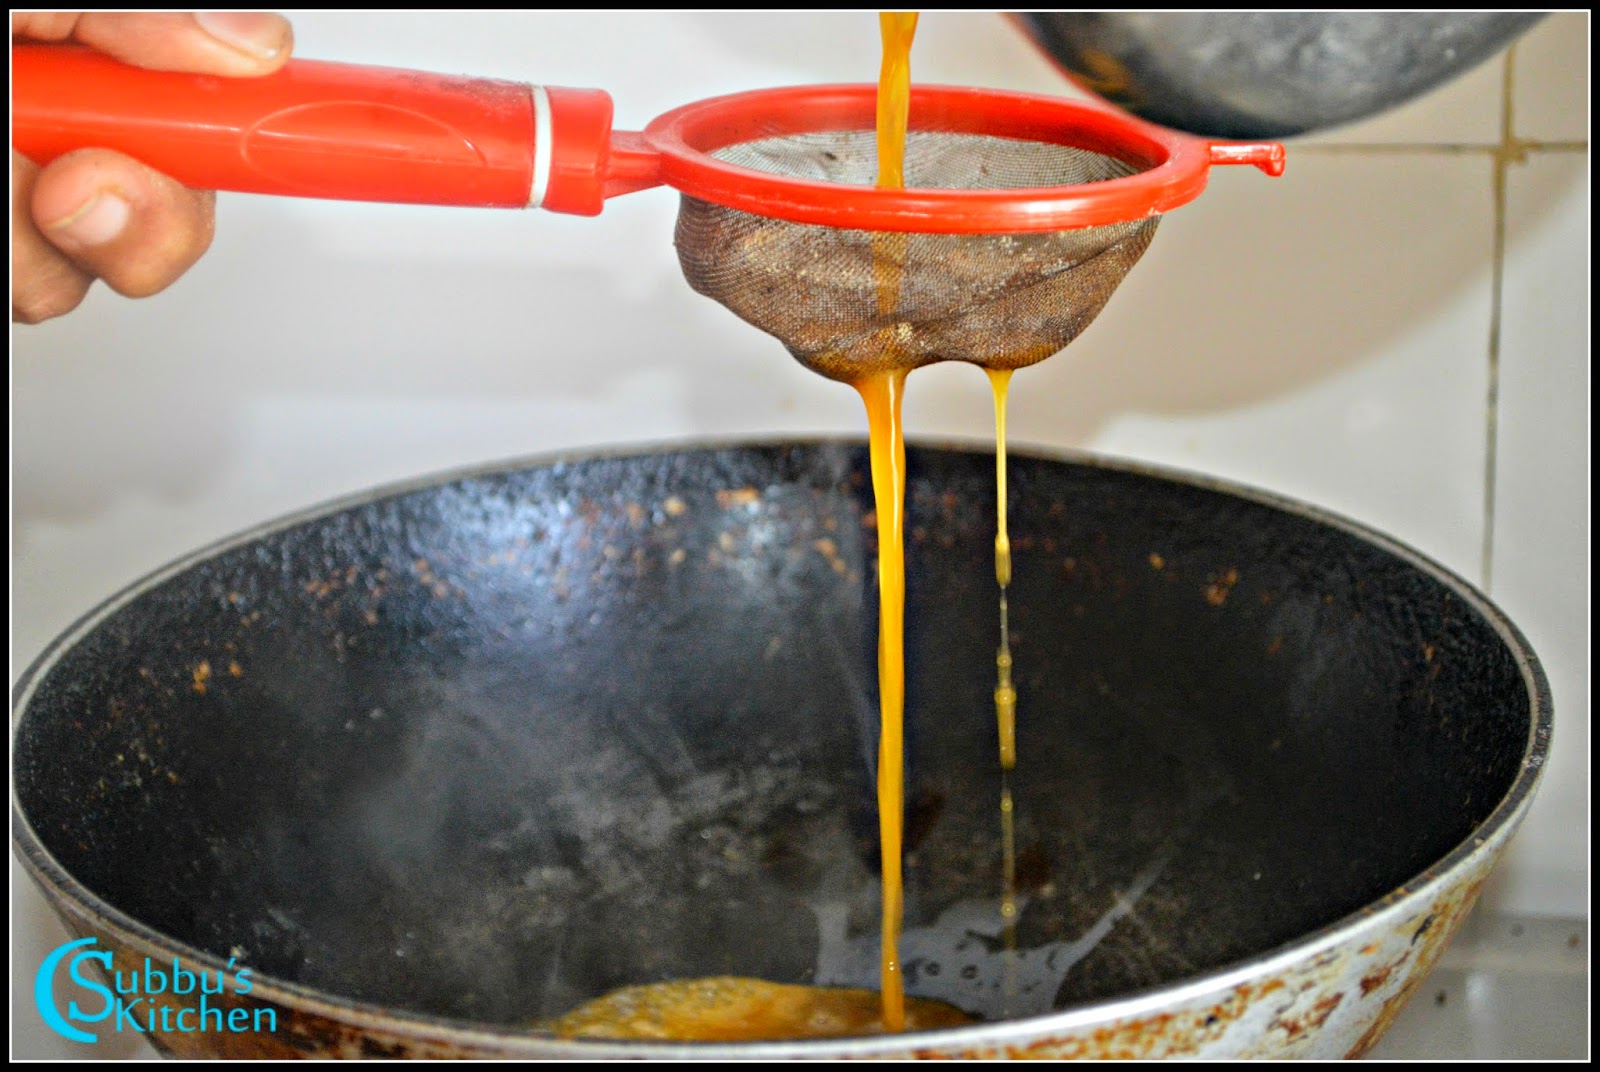
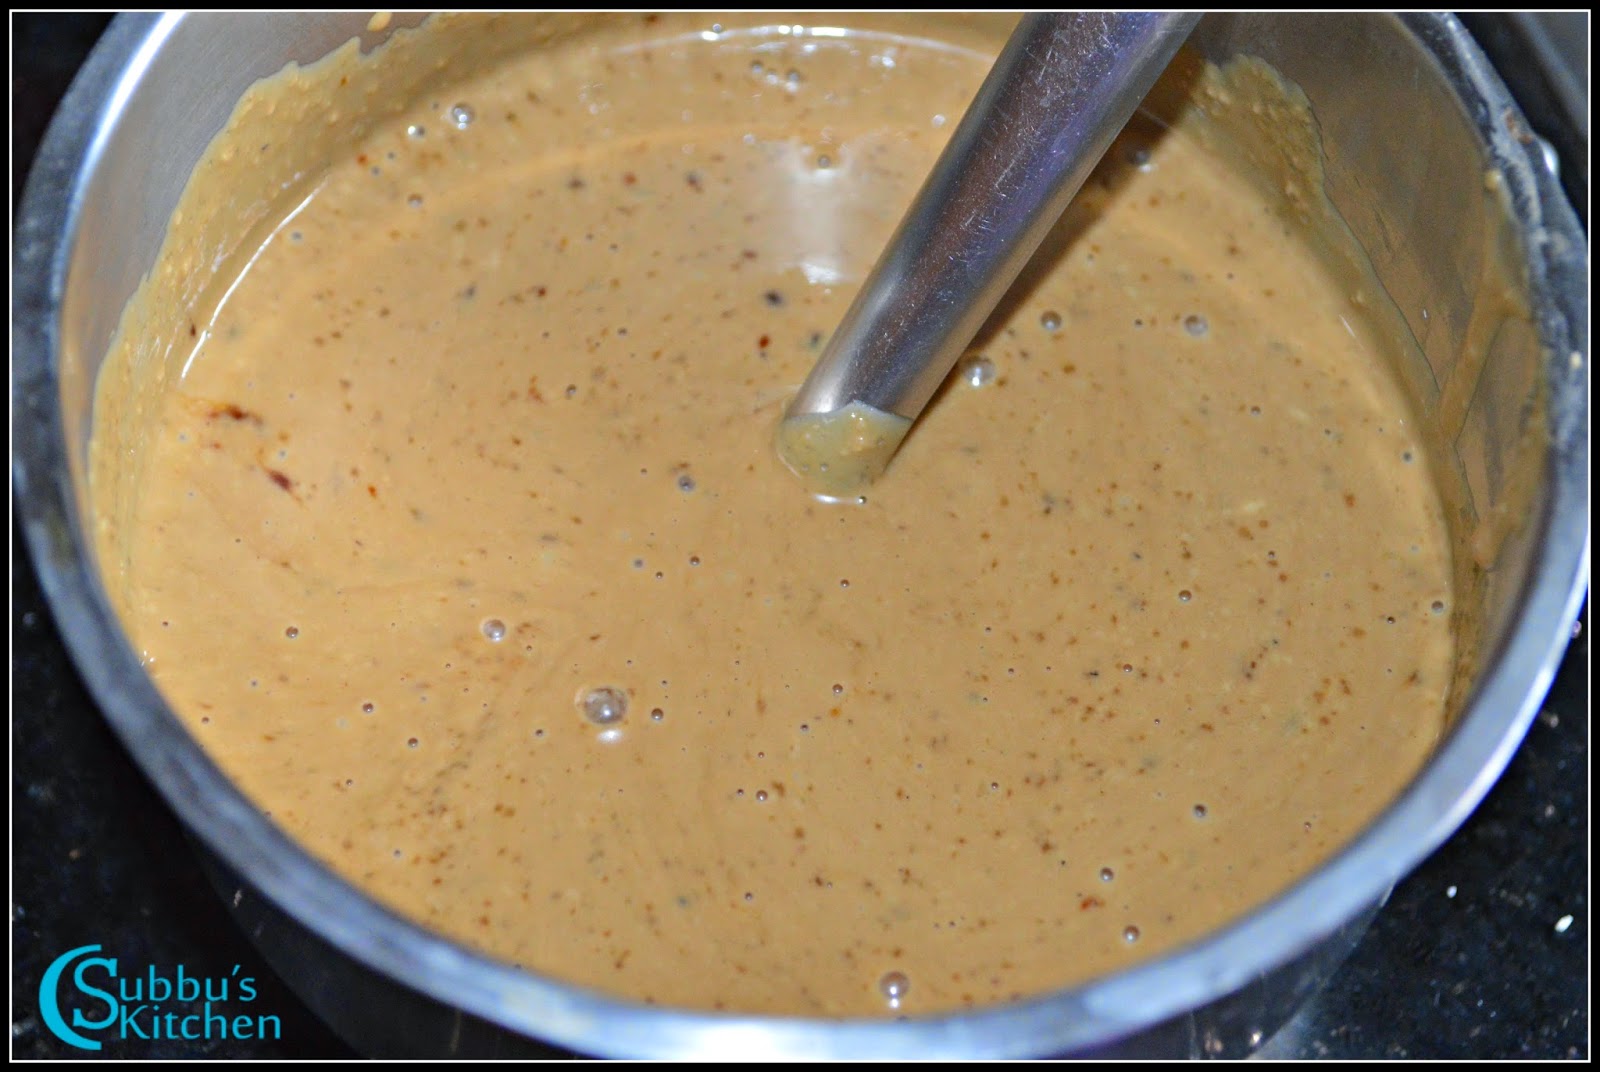
Once the jaggery has fully dissolved, strain the syrup to remove any impurities such as dirt or sand.
Return the strained jaggery syrup to the pan and boil it again, stirring continuously until it reaches stone consistency.
To check, drop a small amount of the syrup into a bowl of water—it should not dissolve, and you should be able to form a soft ball. The syrup should be firm enough to hold its shape but not too hard. When you drop this ball onto a steel plate, you should hear a distinct tapping sound, indicating the syrup has reached the perfect consistency.
When you take a portion of the jaggery syrup from the bowl, you should be able to roll it into a soft ball. It should also produce a light tapping sound when dropped onto a plate or surface. This indicates that the jaggery syrup has reached the perfect consistency.
Add the cardamom powder and the fried coconut pieces to the jaggery syrup, and stir well to combine. Remove the pan from the flame, then immediately add the Nel Pori or Aval Pori.
Gently mix the Aval or Nel Pori with the jaggery syrup until well coated.
Transfer the mixture onto a plate and spread it evenly.
Once the pori mixture has cooled enough to handle, start shaping it into balls with your hands. If the mixture feels too hot or sticky, lightly dust your palms with rice flour to make the process easier.
Alternatively, you can shape the mixture into paruppu thengai as shown in the picture below. Repeat the same procedure for the other variety of Pori.The delicious Aval & Nel Pori orundai is now ready for neivedhyam.
Hint: Make sure the jaggery syrup reaches the right stone consistency before mixing with the puffed rice—this ensures the Pori Urundai holds its shape. If the mixture is too sticky to handle, lightly dust your palms with rice flour for easy shaping.
Variations
Nutty – add roasted cashews, almonds, or pistachios along with the coconut pieces for a crunchy, festive twist.
Sesame – mix in roasted sesame seeds with the puffed rice and jaggery syrup for a nutty flavor and added health benefits.
Dry Fruit – include finely chopped raisins, dates, or dried figs to make the sweet richer and more indulgent.
Coconut Milk – replace part of the water in the jaggery syrup with coconut milk for a creamier, aromatic variation.
Healthy / Millet – swap puffed rice with puffed millets like foxtail millet or ragi for a fiber-rich and wholesome version.
Storage
Allow the Pori Urundai balls to cool completely before storing. Keep them in an airtight container at room temperature for up to 7–10 days. For longer shelf life, store in the refrigerator for up to 2 weeks, and bring to room temperature before serving to retain their crispness.
Top Tip
Ensure the jaggery syrup reaches the perfect stone consistency before mixing with the puffed rice—this is key for shaping the pori urundai without it falling apart. Test by dropping a small amount of syrup in water; it should form a soft ball that holds its shape.
FAQ
What is the difference between Aval Pori and Nel Pori?
Aval Pori is puffed rice made from flattened rice flakes, while Nel Pori is traditional puffed rice. Both can be used interchangeably in this recipe with the same method.
How do I know when the jaggery syrup is ready?
The syrup is ready when it reaches stone consistency. Drop a small amount in water—it should form a soft ball that holds its shape but is not too hard. You should also hear a light tapping sound if dropped on a plate.
Can I shape the pori mixture without rice flour?
Yes, if the mixture has cooled enough and isn’t too sticky, you can shape it with your hands. If it sticks, lightly dust your palms with rice flour for easier handling.
Can I use alternative sweeteners instead of jaggery?
Traditional jaggery gives the authentic taste and texture, but you can try palm sugar or brown sugar as a substitute. Note that the flavor will vary slightly, and the syrup consistency may require adjustment.
Aval Pori and Nel Pori are the two traditional neivedhyam dishes prepared on the auspicious occasion of Thirukarthigai/Karthigaideepam. Puffed rice mixed with jaggery syrup along with cardamom and coconut pieces, is a wonderful sweet dish.
Course Festival Recipes, Sweet
Cuisine Indian, South Indian, Tamil Nadu
Prep Time 10 minutesminutes
Cook Time 20 minutesminutes
Total Time 30 minutesminutes
Servings 6people
Calories 70kcal
Author Sowmya Venkatachalam
Equipment
Heavy Bottomed Pan
Ingredients
4CupsAval Pori / Nel Pori (Puffed Rice)1 Cup - 250ml
1CupGrated Jaggery
2tablespoonFinely Sliced Coconut
1teaspoonCardamom Powder
Instructions
Heat a pan and add the finely chopped coconut pieces. Dry roast them on a low flame until they turn deep brown and all moisture has evaporated—this step is essential to ensure the crispness of the Pori Urundai. You’ll notice the coconut pieces start to crackle and burst slightly when perfectly roasted. Once done, set the fried coconut aside.
2 tablespoon Finely Sliced Coconut
Add the grated jaggery to a pan and pour in ½ cup of water. Heat on low flame until the jaggery melts completely.
1 Cup Grated Jaggery
Once dissolved, strain the jaggery syrup to remove any impurities like dirt or sand.
Return the strained jaggery syrup to the pan and boil it again, stirring continuously until it reaches stone consistency. To check, drop a small amount of syrup into water—it should not dissolve and should form a soft ball. The ball should be firm enough to hold its shape but not too hard. When dropped onto a steel plate, it should make a light tapping sound. This indicates the jaggery syrup has reached the perfect consistency for making Pori Urundai.
Add cardamom powder and the fried coconut pieces to the syrup and mix well. Remove from heat.
1 teaspoon Cardamom Powder
Add the Aval or Nel Pori to the syrup and mix thoroughly until the puffed rice is well coated.
4 Cups Aval Pori / Nel Pori (Puffed Rice)
Transfer the mixture to a plate and spread evenly. Allow it to cool slightly.
Once the pori mixture has cooled enough to handle, shape it into balls using your hands. If the mixture feels too hot or sticky, lightly dust your palms with rice flour to make shaping easier. Alternatively, you can shape the mixture into paruppu thengai cones.
Repeat the same procedure for the other variety of Pori.
The delicious Aval & Nel Pori orundai is now ready for neivedhyam.
Video
Notes
You can lightly dust your hands with rice flour to easily shape the pori mixture into round ladoos. For easier binding, you can increase the jaggery to 2 cups for every 4 cups of puffed rice—this ratio helps the Pori Urundai hold its shape perfectly.
In our families Milagu Adai also one of the neyvedhyam for Thirukarthigai. As per the mythological story a princes has to leave an elephant which she considered as her brother when she gets married and move to her husbands place. So for every Thirukarthigai/Karthigai deepam occasion, elephant lamp(Gajalakshmi vilaku) and she will prepare tender coconut, elephant leg size milagu Adai, and few more dishes and keep them as neivedhyam for this festival.
We can make this Adai in normal occasions for breakfast or for dinner.Serve with Chutney or Jaggery.
Milagu Adai | Thirukarthigai Adai is an offering to God we make on the auspicious occasion of Thirukarthigai Deepam.
Course Breakfast, Evening Tiffen
Cuisine Indian, South Indian, Tamilnadu
Prep Time 10 minutesminutes
Cook Time 30 minutesminutes
Soaking Time 2 hourshours
Total Time 40 minutesminutes
Servings 4Adai
Calories 197kcal
Author Sowmya Venkatachalam
Ingredients
1CupRaw Rice
¼CupWhole Urad Dal
¼CupToor Dal (Pigeon pea)
¼CupSplit Bengal Gram (Channa Dal / Kadalaparuppu)
1teaspoonPeppercorns
1teaspoonSaltAs Needed
aPinchAsafoetida (Asafetida / Hing)
2tablespoonGrated Coconut
FewCurry Leaves
Instructions
Soak the rice with all the dhals in water for 2 hours to 3 hours.
Drain the rice and dhals and grind it in mixer to a coarse paste. The adai flour should not be very smooth. ransfer this to a bowl and mix the pepper salt, hing, curry leaves and grated coconut.
The consistency should be slightly thicker than our normal dosa batter.
Heat the thawa and pour 1 ladle of flour and spread evenly and cook the adai on both the sides till the adai is crisp
Serve the tasty adai along with Jaggery.
Video
Notes
If you make this on normal days, we can add onion.
For Festivals, we need to use Raw Rice, for normal occasions, we can use parboiled rice
Soak the rice with all the dhals in water for 2 hours to 3 hours. Drain the rice and dhals and grind it in mixer to a coarse paste. The adai flour should not be very smooth. ransfer this to a bowl and mix the pepper salt, hing, curry leaves and grated coconut. The consistency should be slightly thicker than our normal dosa batter.
Heat the thawa and pour 1 ladle of flour and spread evenly and cook the adai on both the sides till the adai is crisp
Vella Seedai, also known as Sweet Seedai, holds a significant place as a neivedhyam dish during both the Krishna Jayanthi and Thirukarthigai festivals. This delectable treat is a deep-fried sweet creation crafted from a blend of rice flour, urad dal flour, and jaggery. What sets Vella Seedai apart is its delightful combination of a crispy outer shell and a melt-in-your-mouth interior, offering a truly unique flavor and texture.
During Krishna Jayanthi, alongside Vella Seedai, offerings like Uppu Seedai, Aval Puttu, and Nei Appam hold immense importance as Prasad offerings to Lord Krishna. In our quest for perfection in preparing Vella Seedai, we've gathered some invaluable tips to ensure your sweet seedai turns out just right.
Tips for making Vella Seedai:
Texture of flours: Rice flour and Urad dal flour should be smooth without any lumps. Pass the flours through the sieve twice to ensure there are no lumps in the flours.
Homemade rice flour Vs Store bought rice flour: I have used store bought rice flour in this recipe. Usually for Prasad we prepare rice flour at home and use that. Follow the link to see how to prepare homemade Rice flour. We can also use store bought rice flour.
Roasting Rice Flour: Whether its Store bought or home made rice flour, we need to dry roast the rice flour till its warm. We don't need to roast till it change to red. Just roast till the flour feels warm in your hands.
Ratio of Flours: The ratio of rice flour to urad dal flour is 1 Cup : 1 tbsp. We just need 1 tablespoon of urad dal flour, but grinding 1 tablespoon of roasted urad dal in mixer grinder is hard. Lesser quantity doesn't get grind to smooth powder usually. So dry roast ½ cup of urad dal and grind it to smooth powder. Use only 1 tablespoon of urad dal for 1 cup of rice flour. Rest of the urad dal flour you can use it for making Uppu Seedai, thattai and thenkuzhal.
Jaggery Syrup Consistency: There is not particular consistency like one-string for this Vella Seedai. We just need to melt the jaggery and bring it to rolling boil. Then strain the jaggery and add it to flours.
Butter: Soften the butter at room temperature and add it to flours. Do not add cold butter or melted butter.
Consistency of dough: While we prepare vella seedai dough, knead it to a smooth dough using the strained jaggery juice. If you feel the jaggery syrup is not enough to make a dough, try sprinkling water and knead it to dough.
Allow the dough balls to dry for 5 mins before adding in hot oil.
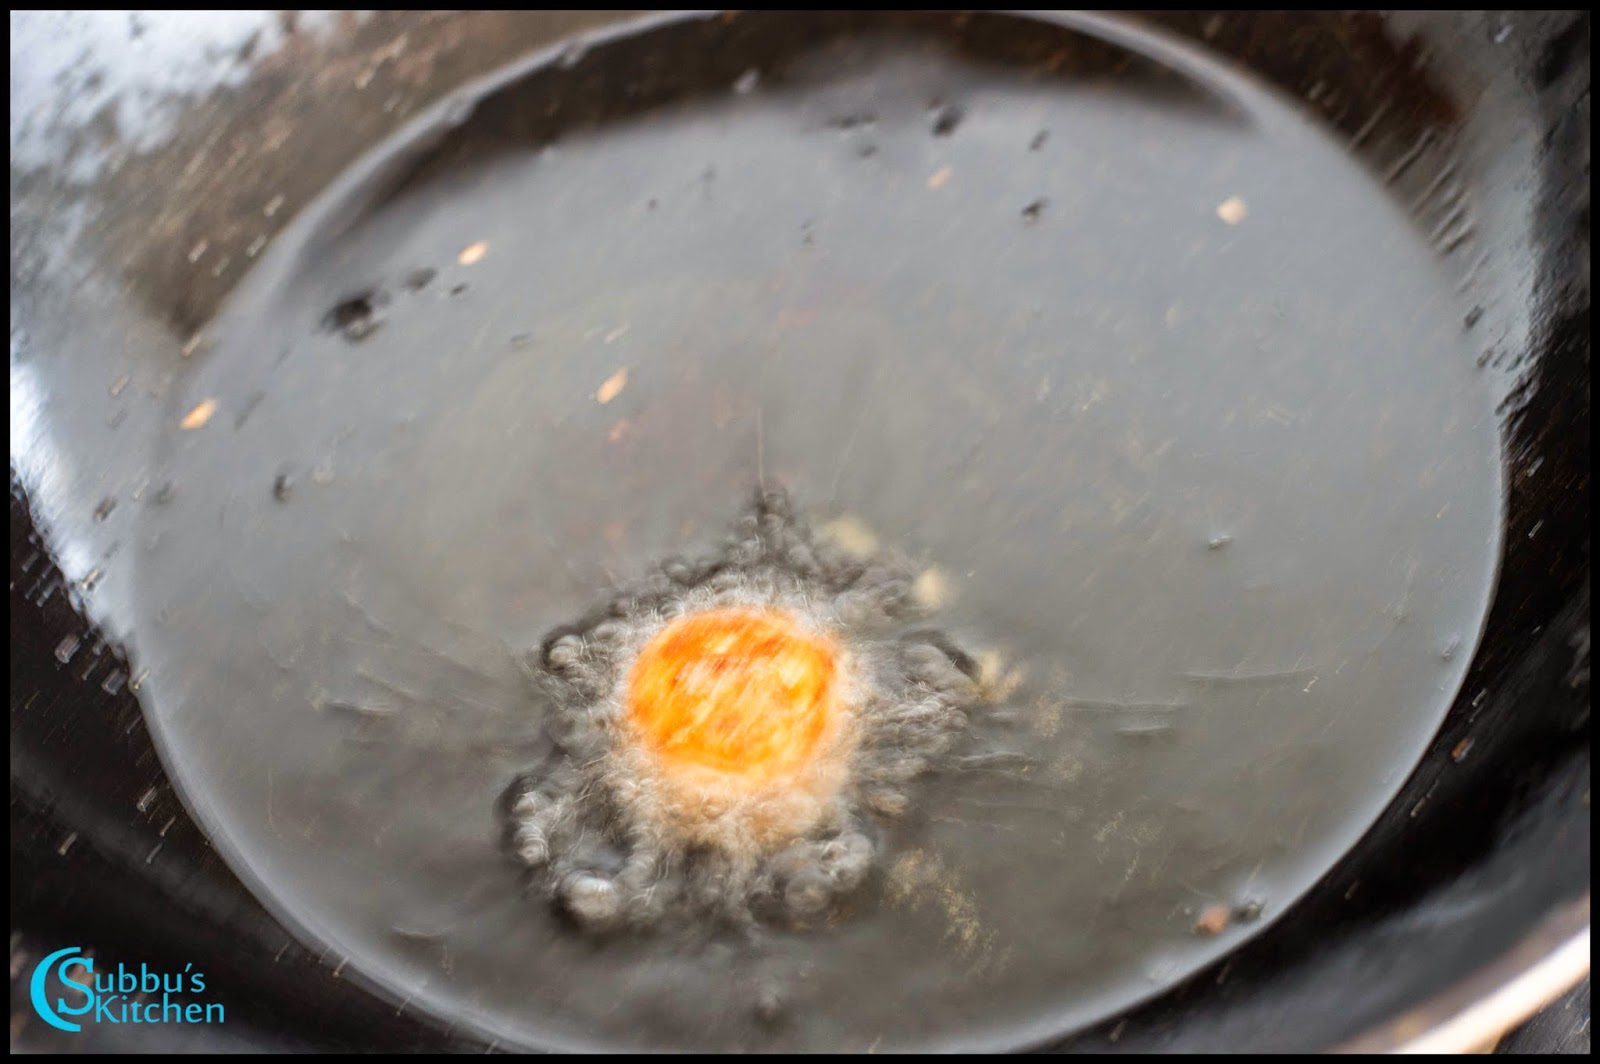
Deep Frying: Ensure the oil is hot enough before dropping the vella seedai. Once the oil is hot, add 1 vella seedai ball and ensure its not splitting in oil. Do not panic if it splits, just adjust the dough by adding little roasted rice flour and then once again roll into ball and vella seedai will not split in oil.
Oil Temperature: We need to maintain right temperature of oil while frying. After adding vella seedai balls in oil, keep the flame in low and fry till the vella seedai becomes golden brown color. Between the batches adjust the flame to medium to ensure the oil is at right temperature.
Discover the sweet magic of Vella Seedai, a cherished treat for Krishna Jayanthi and Thirukarthigai festivals. Crispy on the outside, melt-in-the-mouth inside – explore the secrets to perfecting this divine sweet delight. Learn tips for flawless Vella Seedai preparation and relish its unique flavor and texture
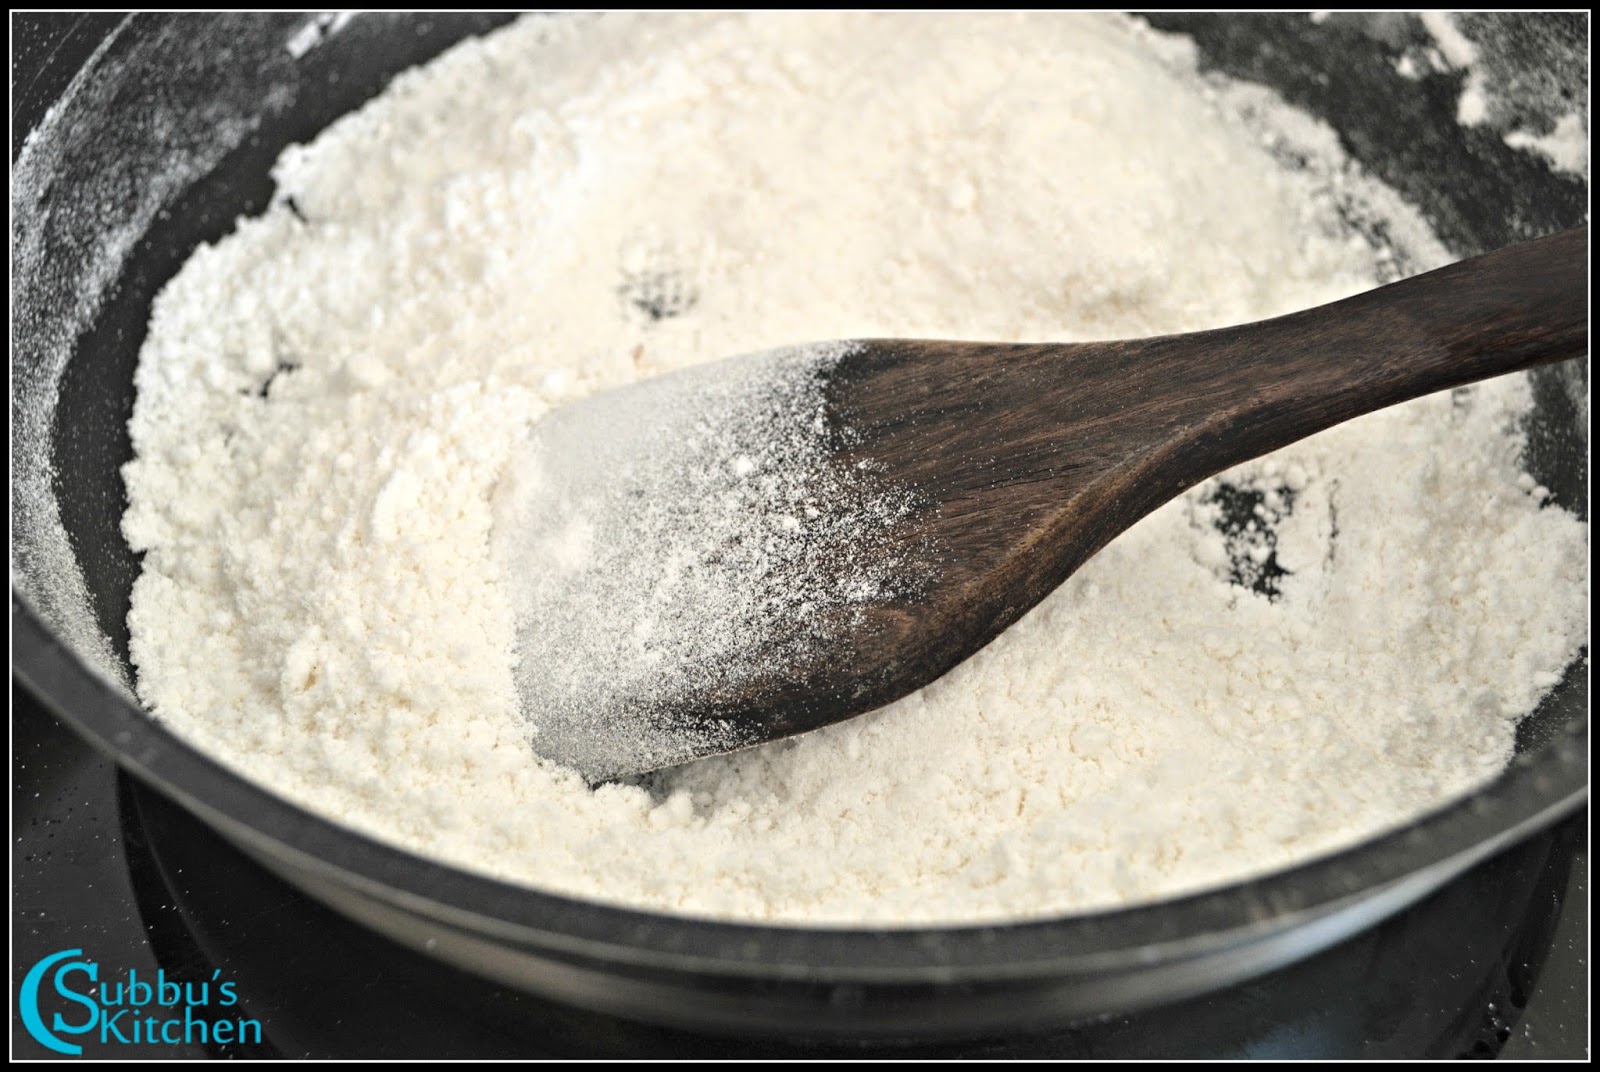
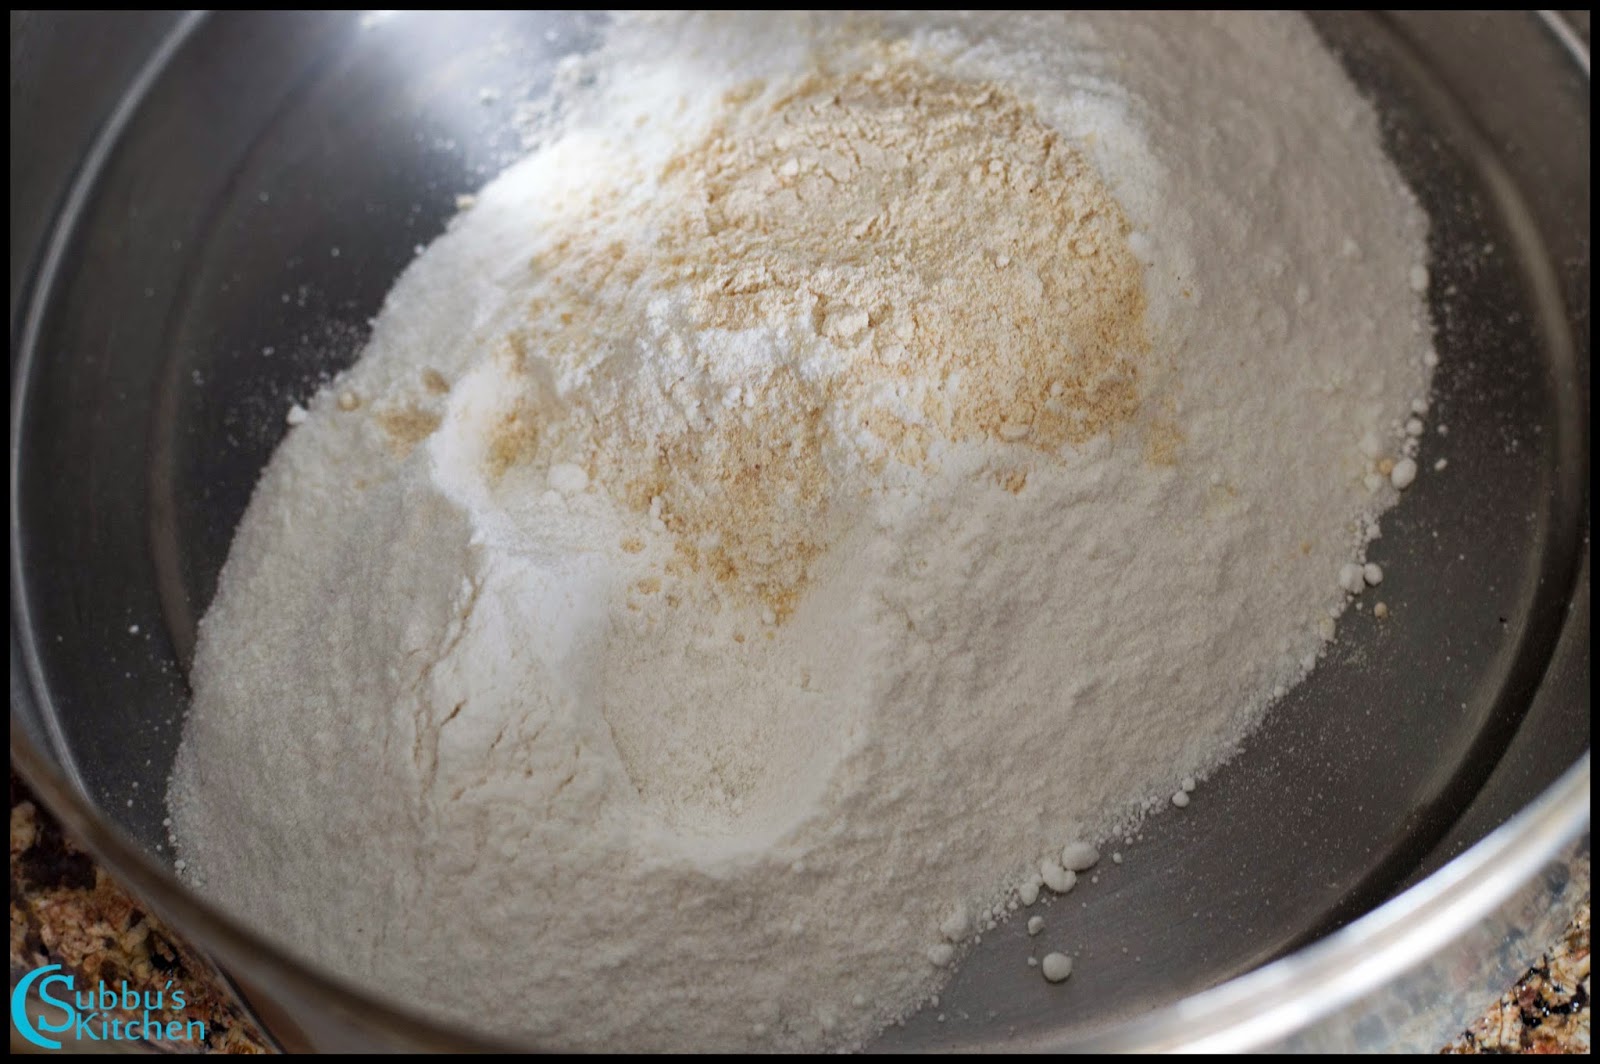
Prepare the rice flour as given in the link here. Heat a pan and dry roast the rice flour in low flame for couple of minutes. Do not fry the rice flour till they become over burnt. Just heat the flour till they are hot and if you take a pinch of rice flour you should be able to draw or put little kolam. Take the roasted rice flour in a mixing bowl along with uriddal flour. Dry roasting is an important step in vella sedai preparation. Do not use freshly ground rice flour as it contain some moisture which will make the seedai to burst. You can also use store bought rice flour. IF you are using store bought rice flour, then dry roast it for couple of minutes and then sieve it and again dry roast it for another couple of minutes without burning the rice flour.
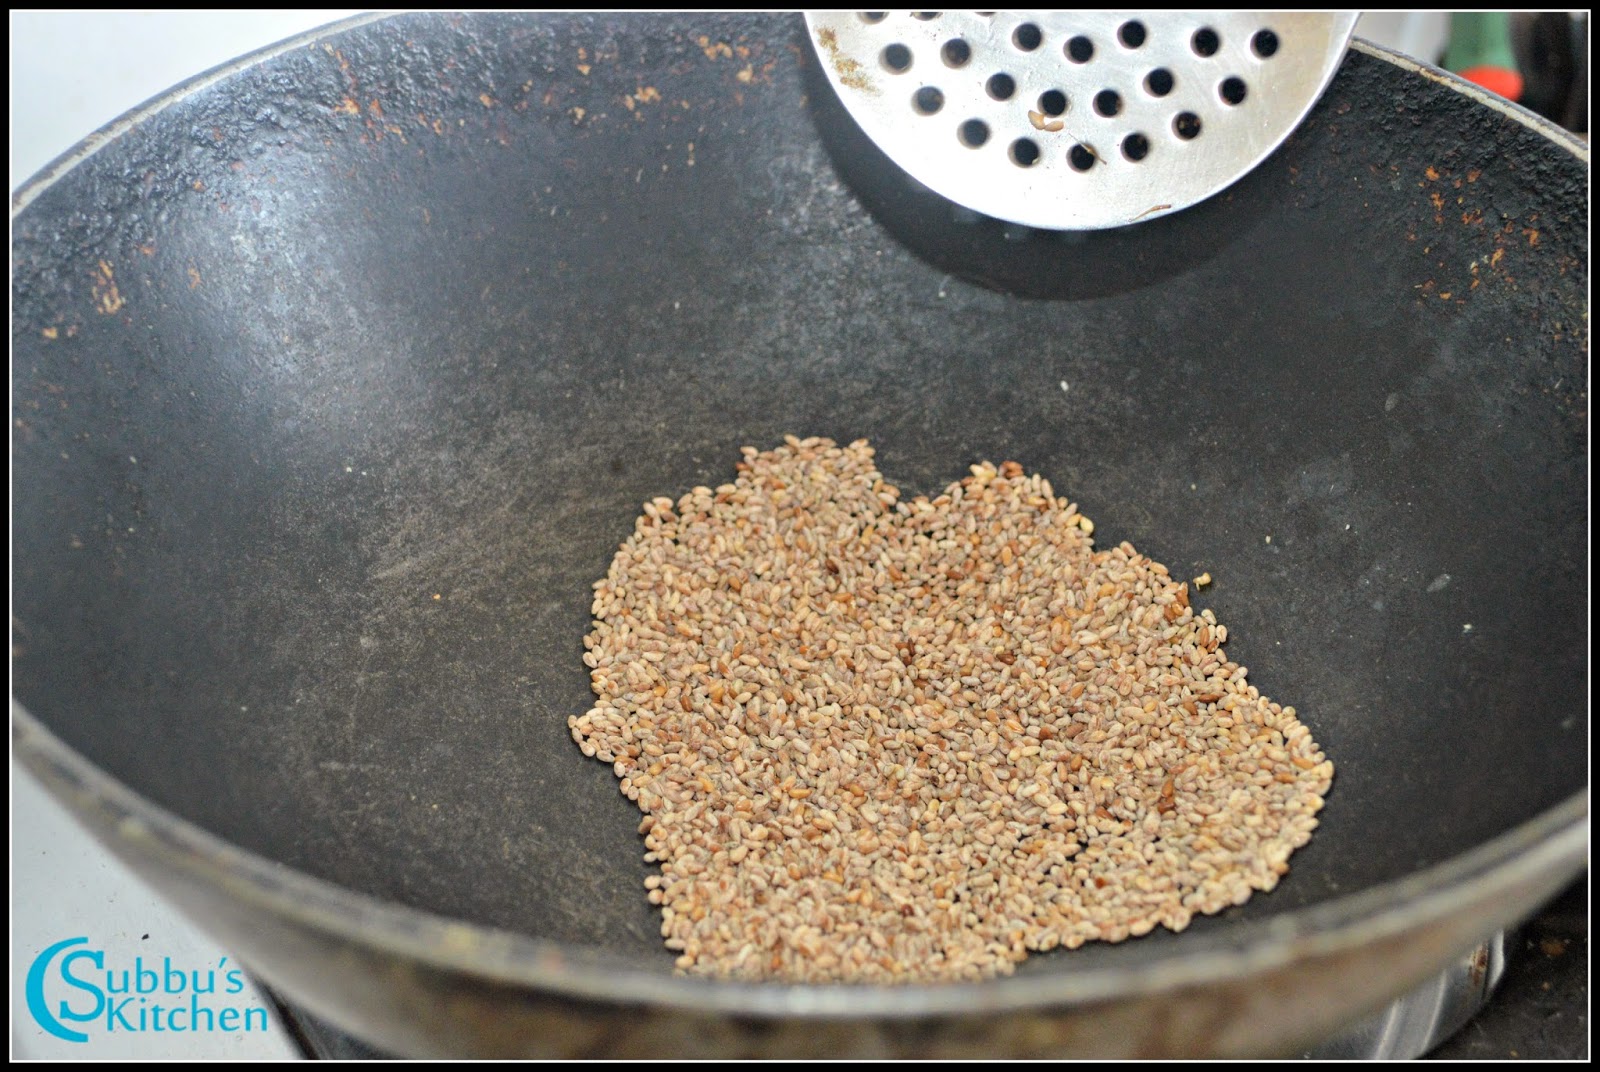
Prepare Sesame & Coconut
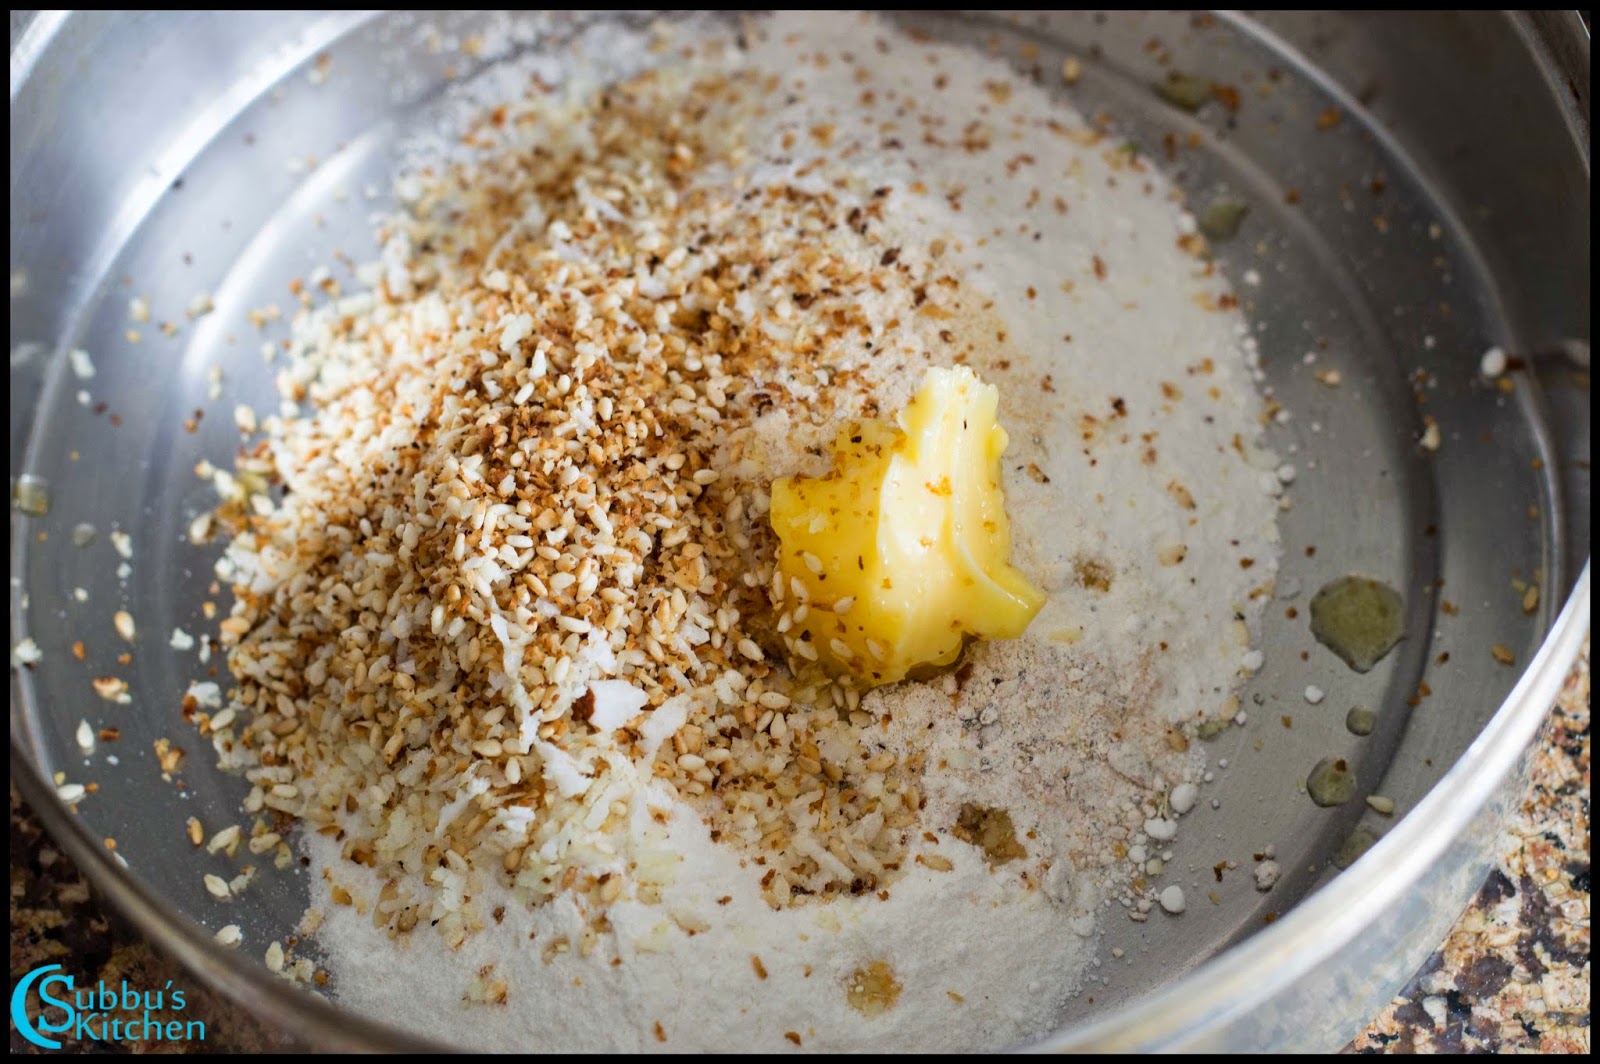
Take a pan, add sesame seeds and grated coconut and dry fry them till they become golden brown color. Add these fried sesame seeds and grated coconut to the rice flour along with butter. The butter should be in room temperature. Mix everything well.
Making Jaggery Syrup
Take grated jaggery in a bowl and add water just to soak the jaggery. I have added 2 tablespoon of water. Allow the jaggery to boil till it is dissolved. Pass this jaggery juice through a strainer to get rid of sand and other impurities
Add the strained jaggery juice to a pan and keep in flame till it comes a rolling boil. We don’t need any string or solid consistency. Add this jaggery juice to the rice flour and mix the rice flour well with a ladle or spoon. Make it to a right dough. If the dough is loose and soft then the seedai will dissolve in hot oil. So when you get a tough pliable dough then stop adding the jaggery syrup. Sometimes we might end up with dry dough where we may need to again sprinkle warm water and make it little soft. If the dough is too dry, then also the seedai will start to dissolve in oil. I have add 2 teaspoon of water to make the dough little soft.
Deep Frying Process
Make gooseberry sized balls out of the seedai dough. Keep it aside for few minutes before dropping in hot oil. Heat oil in a pan. When the oil is hot enough, just drop a single seedai ball into the oil and in low flame deep fry them. Check if the seedai is not getting dissolved or not getting burst in the oil. If it does we may need to alter the seedai mixture.
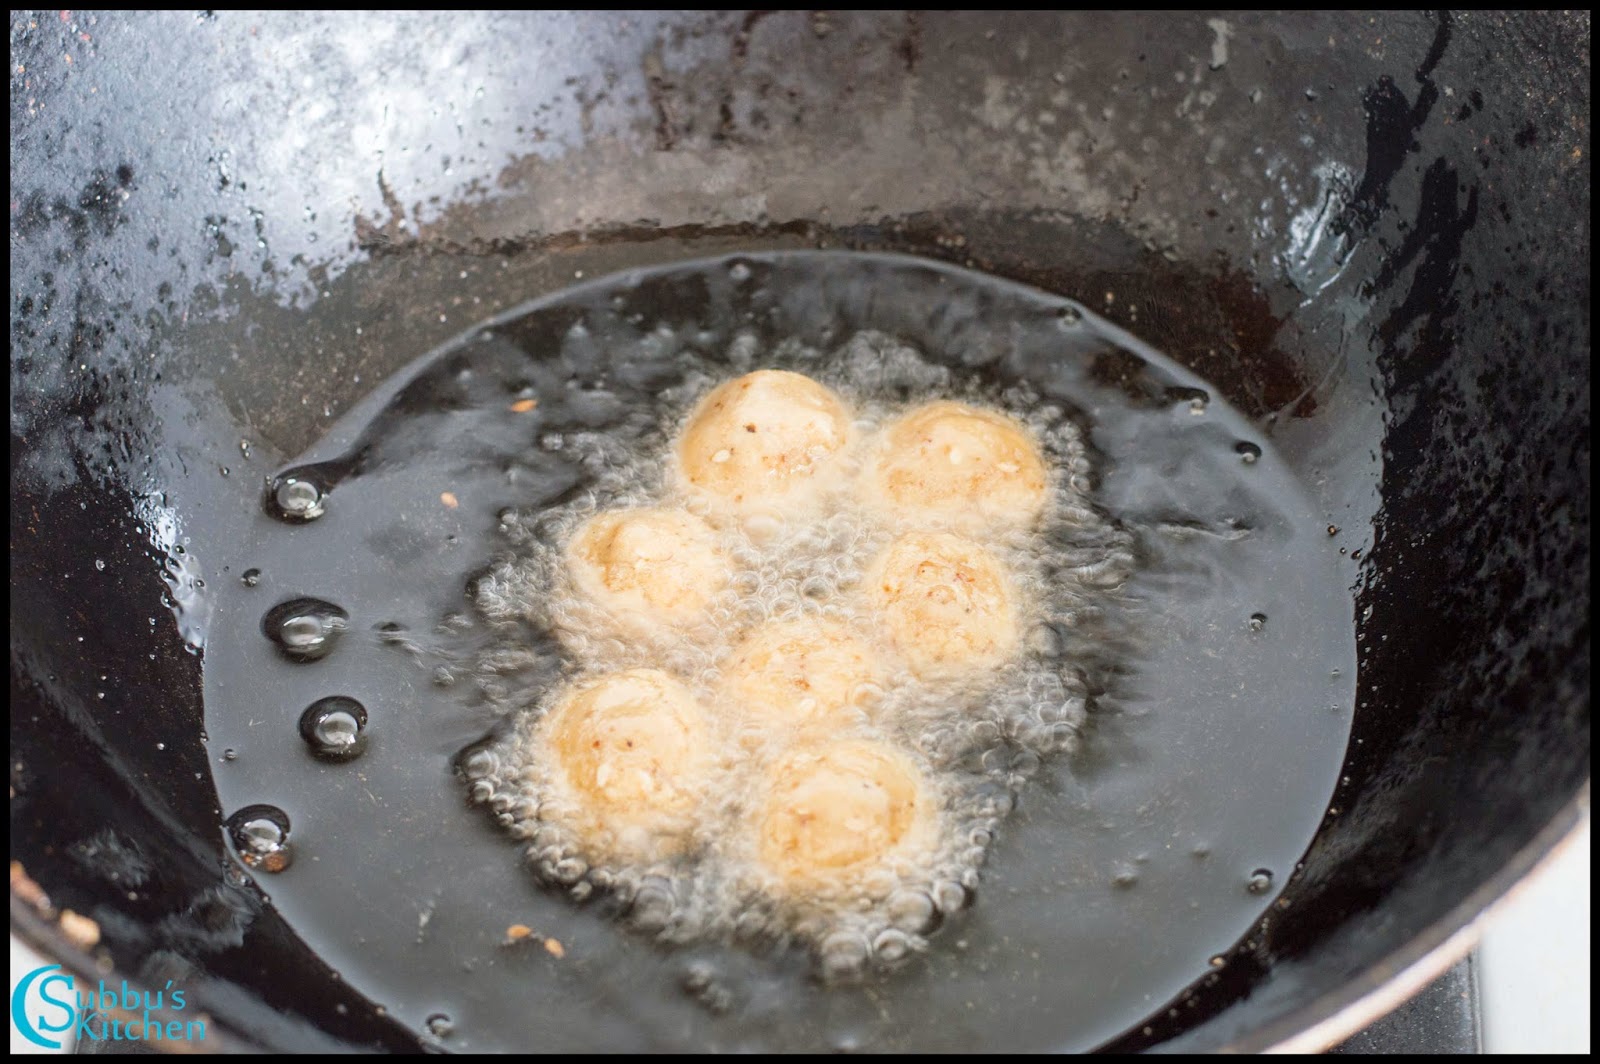
When you are sure that the seedai is not getting dissolved or burst, then drop 4-5 seedai in one batch and in low flame deep fry them till the seedai are crispy and light golden brown color.
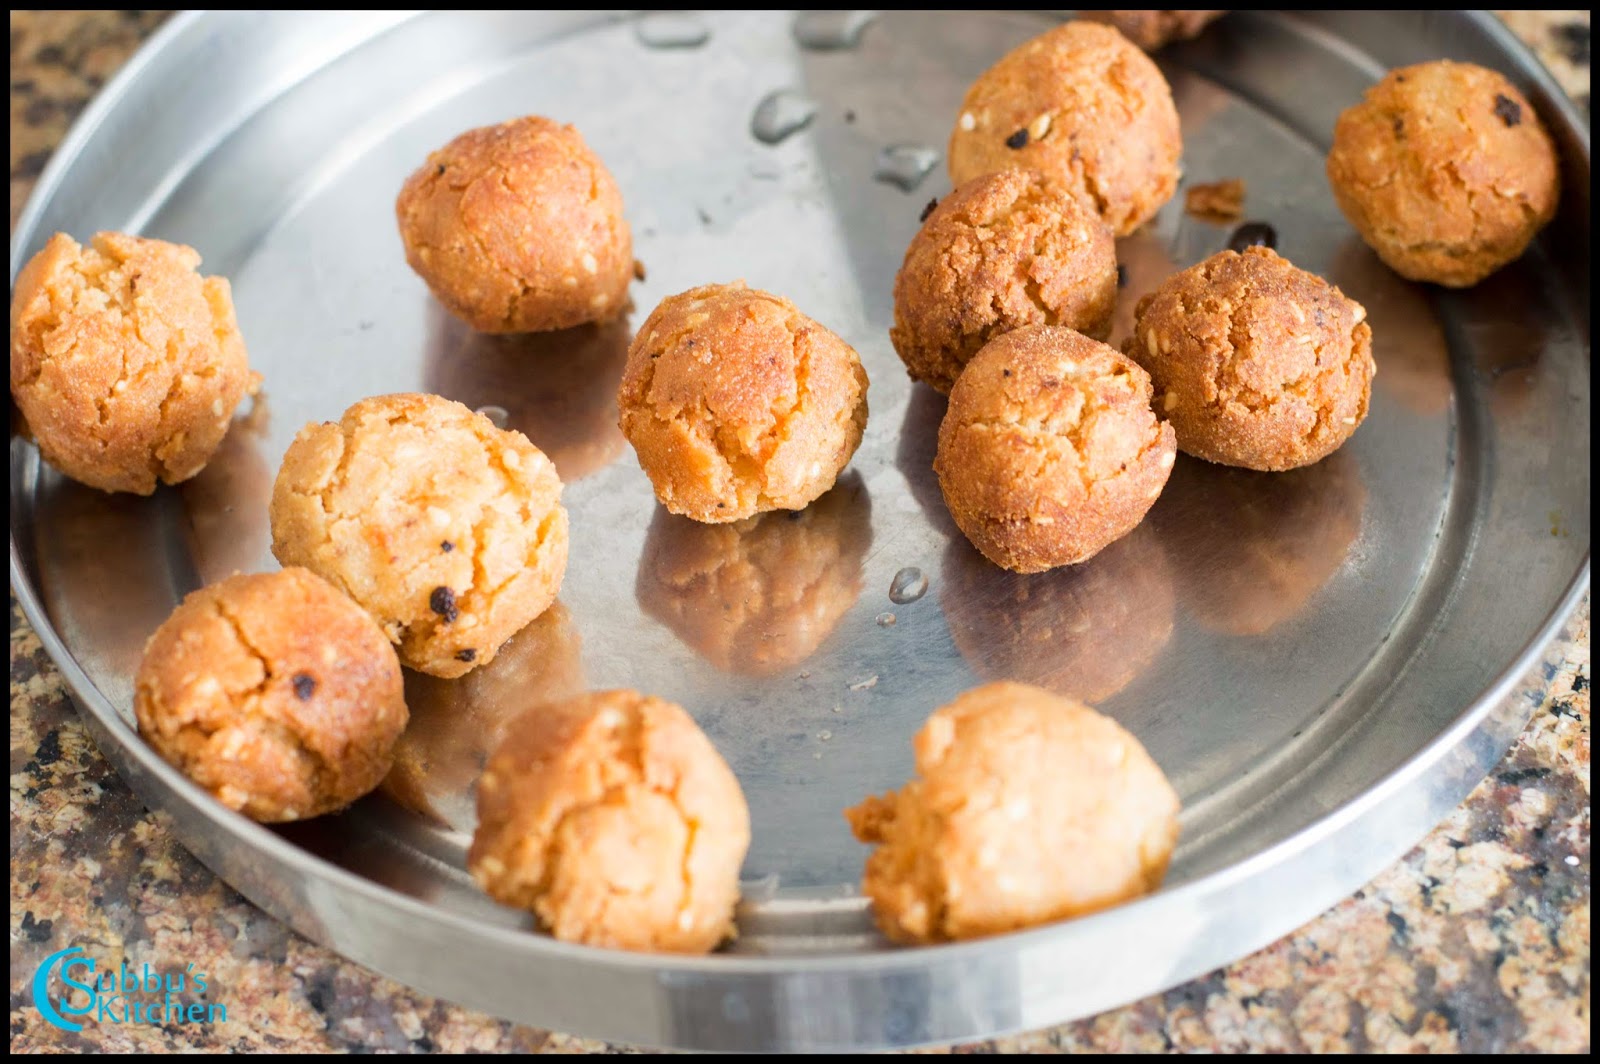
Remove the crispy seedai from flame and place it in a paper towel to drain the excess oil
Yummy and crispy vella seedai is now ready for neivedhyam or for serving.
Video
Notes
If the seedai is getting dissolved, it may be because of very dry ball and in that case, we need to sprinkle warm water little by little and make the dough little soft
If the dough is already very soft, then sprinkle rice flour little by little and mix well.
If the seedai is bursting, then it may be due to the very coarse rice flour or uriddal flour.
Prepare the rice flour as given in the link here. Heat a pan and dry roast the rice flour in low flame for couple of minutes. Do not fry the rice flour till they become over burnt. Just heat the flour till they are hot and if you take a pinch of rice flour you should be able to draw or put little kolam. Take the roasted rice flour in a mixing bowl along with uriddal flour. Dry roasting is an important step in vella sedai preparation. Do not use freshly ground rice flour as it contain some moisture which will make the seedai to burst. You can also use store bought rice flour. IF you are using store bought rice flour, then dry roast it for couple of minutes and then sieve it and again dry roast it for another couple of minutes without burning the rice flour.
Take a pan, add sesame seeds and grated coconut and dry fry them till they become golden brown color. Add these fried sesame seeds and grated coconut to the rice flour along with butter. The butter should be in room temperature. Mix everything well.
Take grated jaggery in a bowl and add water just to soak the jaggery. I have added 2 tablespoon of water. Allow the jaggery to boil till it is dissolved. Pass this jaggery juice through a strainer to get rid of sand and other impurities
Add the strained jaggery juice to a pan and keep in flame till it comes a rolling boil. We don't need any string or solid consistency. Add this jaggery juice to the rice flour and mix the rice flour well with a ladle or spoon. Make it to a right dough. If the dough is loose and soft then the seedai will dissolve in hot oil. So when you get a tough pliable dough then stop adding the jaggery syrup. Sometimes we might end up with dry dough where we may need to again sprinkle water and make it little soft. If the dough is too dry, then also the seedai will start to dissolve in oil. I have add 2 teaspoon of water to make the dough little soft.
Make gooseberry sized balls out of the seedai dough. Keep it aside for few minutes before dropping in hot oil. Heat oil in a pan. When the oil is hot enough, just drop a single seedai ball into the oil and in low flame deep fry them. Check if the seedai is not getting dissolved or not getting burst in the oil. If it does we may need to alter the seedai mixture.
Seedai is getting dissolved, it may be because of very dry ball and in that case, we need to sprinkle warm water little by little and make the dough little soft
If the dough is already very soft, then sprinkle rice flour little by little and mix well.
Seedai is bursting, then it may be due to the very coarse rice flour or uriddal flour.
When you are sure that the seedai is not getting dissolved or burst, then drop 4-5 seedai in one batch and in low flame deep fry them till the seedai are crispy and light golden brown color.
Remove the crispy seedai from flame and place it in a paper towel to drain the excess oil
Yummy and crispy vella seedai is now ready for neivedhyam or for serving.
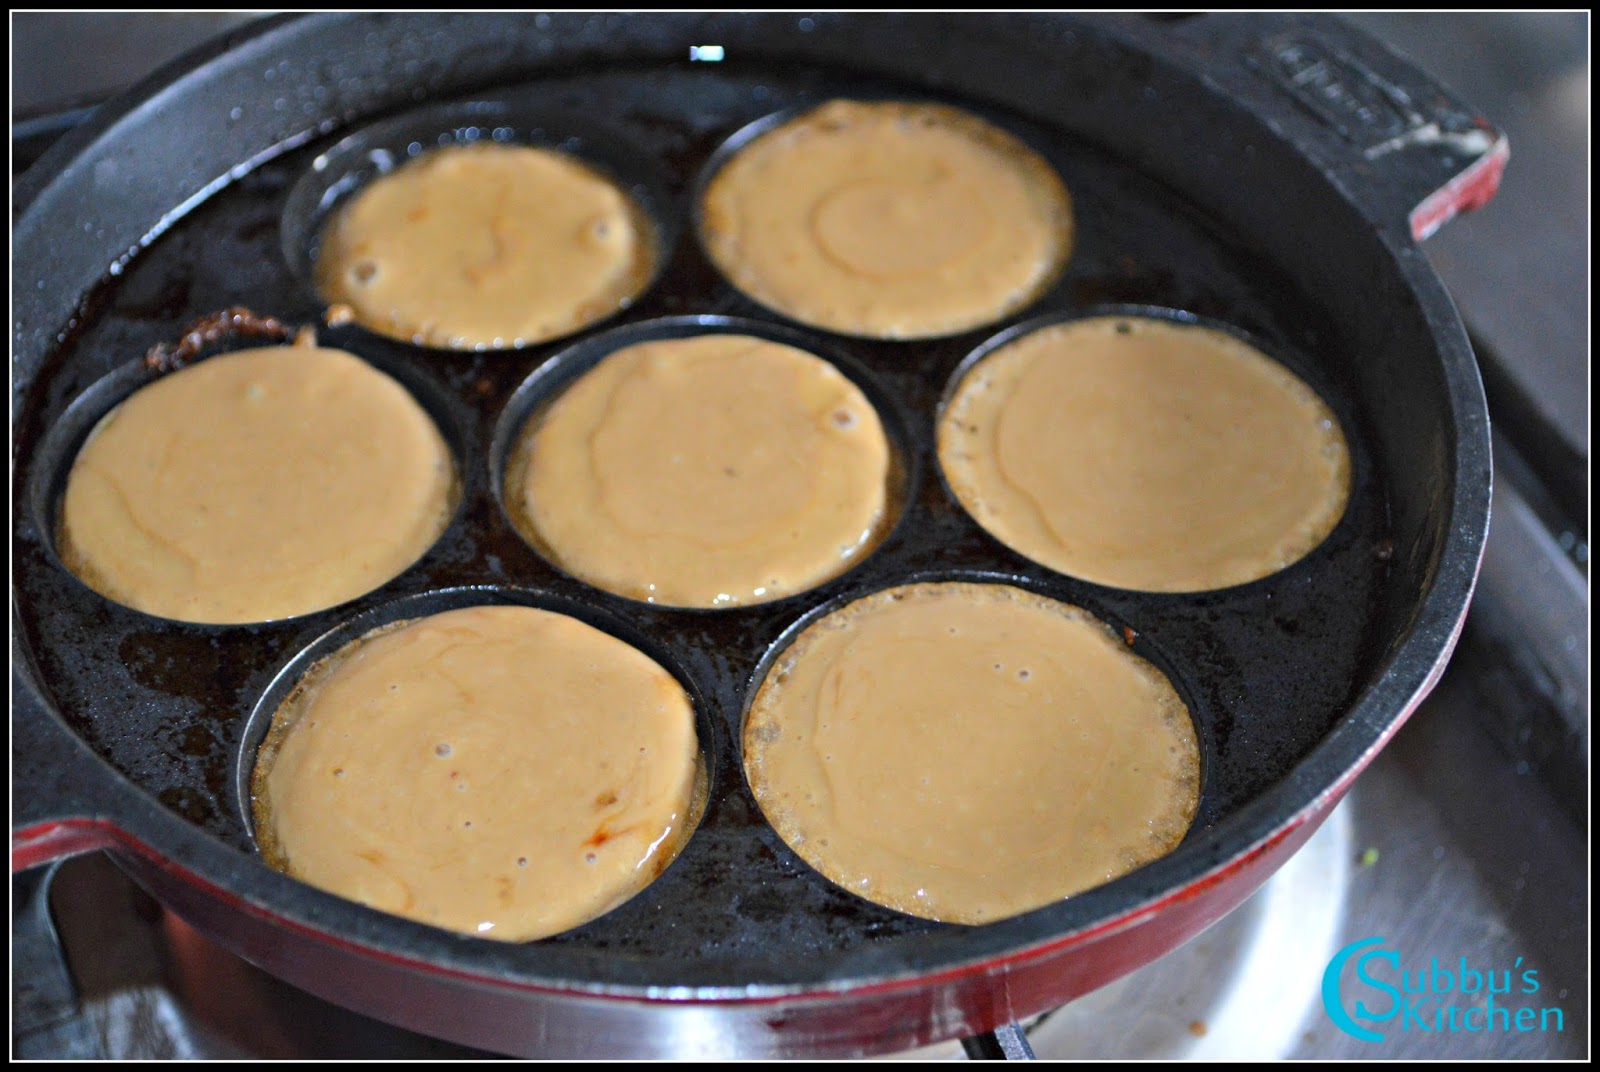
Appam holds a special place as a neivedhyam dish during the Krishna Jayanthi festival, especially in the evening when we invite Lord Krishna into our homes. Nei Appam, a renowned delicacy from Kerala, is a popular choice for various occasions, including Avani Avittam, Karthigai Deepam, and other auspicious events. It also serves as a delightful evening or after-school snack for children.
The key ingredients in Appam are rice and jaggery. Initially, rice is ground to a thick consistency, and then jaggery juice is added to create the Appam batter. If the batter becomes too thin, a small amount of wheat flour can be used to adjust the consistency. It's worth noting that Appam can also be made with wheat flour and jaggery alone, omitting the rice flour. Nei Appam is a straightforward neivedhyam offering suitable for any festival or auspicious occasion.
You may also want to try :
Rava Appam - Rava Appam is a sweet which can be made instantly. We usually make this for the Karthigai Deepam. Unlike the conventional appam, Rava appam doesn't require soaking and grinding process. It's quick, easy and tasty.
Vellai Appam - Vellai Appam is a traditional prasad made for special occasions/festivals like "Karthigai Deepam" or Diwali. Vellai Appam is deep fried rice crepes.
Aval Kesari - Aval Kesari is similar to our conventional Kesari but made using Aval (Poha / Flattened Rice). This Kesari is quick to make with few available ingredients. This can be served as neivedhyam for the Gokhulashtami. This can also be served as a dessert for any festivals /occassions
A delightful South Indian sweet treat! Explore the secrets to crafting these golden, ghee-infused rice flour sweet, perfect for festive occasions. Discover the unique flavor and fluffy texture of Nei Appam in this culinary journey.
Course Festival, Sweet
Cuisine Indian, Kerala, Tamil Nadu
Prep Time 5 minutesminutes
Cook Time 25 minutesminutes
Rice Soaking Time 1 hourhour
Total Time 1 hourhour30 minutesminutes
Servings 25Appam
Calories 100kcal
Author Sowmya Venkatachalam
Equipment
Paniyaram Pan
Ingredients
1cupRaw Rice1 cup = 250 ml
1cupJaggerygrated
2tablespoonGrated Coconut
2nosBananasmall size
¼teaspoonCardamom Powder
1pinchBaking Sodaoptional
Instructions
Rinse the rice twice and Soak the raw rice in water for an hour. After 1 hour, drain the water and add it to the mixer
Grind it in mixer to a fine paste without adding water. Now add grated coconut, banana, cardamom powder to the mixer
Grind it to a fine paste. Finally add jaggery and give a pulse or two. If you grind it more, the jaggery will dilute the appam batter. Now our appam batter is ready.
Now a days we have appakarai(Non stick Appam pan) which makes our job easier. Keep the nonstick appam pan in the flame and add little ghee to each kuzhi. When the pan is hot, take a small ladle and fill ¾th of each hole with the batter.
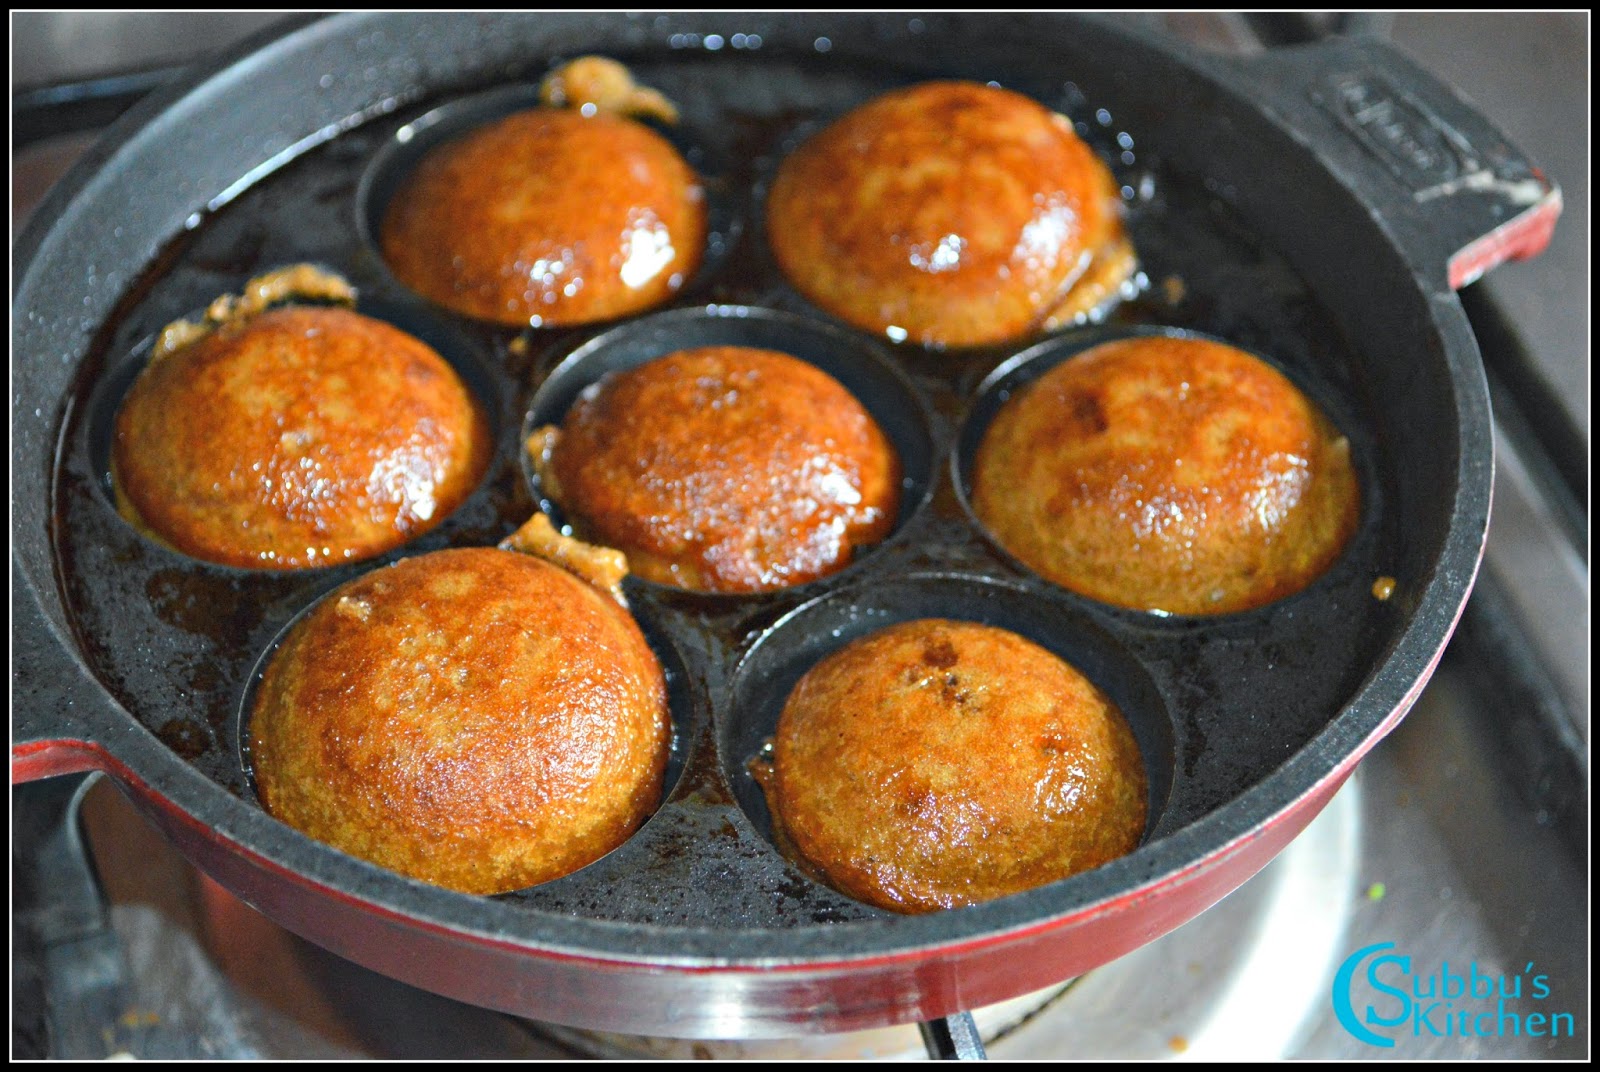
Let the Appam cook for a while and then when it turns golden brown color, remove the appam from the oil, and place it in a paper towel to drain excess oil. Repeat the above steps for the rest of the flour
The yummy Appam is ready for neivedhyam and for serving
Video
Notes
Cooking soda helps in making appam softer and fluffy. We can also alternate with eno salt or we can also ignore this as this is only optional.
If the appam starts to break in the oil, add 2 teaspoon of wheat flour or rice flour to the ground appam flour and then try again
We used to get good quality jaggery few years back which do not need any straining of sand or stones. But nowadays most of the jaggery has stones or sand in it. So instead of grinding jaggery with the rice flour, we can add jaggery to pan and add just a teaspoon of water and allow it to dissolve and when the jaggery gets dissolved, we can strain the jaggery and add it to the rice batter and mix well. This way we can get rid of the stones.
Always first add ghee before pouring appam batter in each mould. that way the batter will not stick to bottom and after it gets cooked, it will automatically float so we can flip and cook on other side
Rinse the rice twice and Soak the raw rice in water for an hour. After 1 hour, drain the water and add it to the mixer
Grind it in mixer to a fine paste without adding water. Now add grated coconut, banana, cardamom powder to the mixer
Grind it to a fine paste. Finally add jaggery and give a pulse or two. If you grind it more, the jaggery will dilute the appam batter. Now our appam batter is ready.
Now a days we have appakarai(Non stick Appam pan) which makes our job easier. Keep the nonstick appam pan in the flame and add little ghee to each kuzhi. When the pan is hot, take a small ladle and fill ¾th of each hole with the batter. Let the Appam fry for a while and then when it turns golden brown color, remove the appam from the oil, and place it in a paper towel to drain excess oil. Repeat the above steps for the rest of the flour
The yummy Appam is ready for neivedhyam and for serving
Appam
Note: If the appam starts to break in the oil, add 2 teaspoon of wheat flour or rice flour to the ground appam flour and then try again
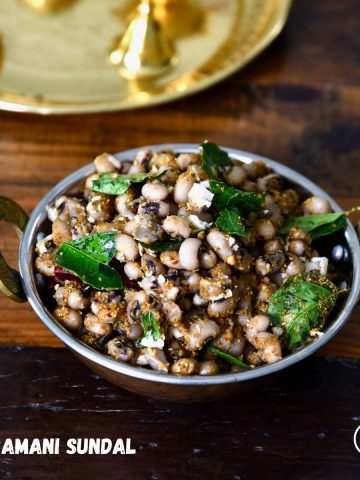
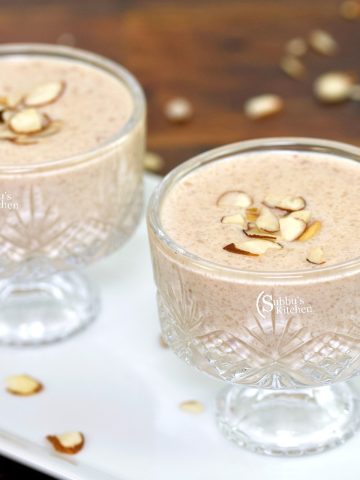
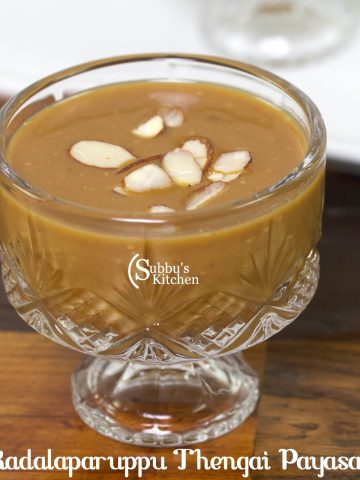
This Mixed Dal Sweet Sundal is a traditional South Indian prasadam made with a wholesome blend of dals, jaggery, and a hint of ghee. It carries the perfect balance of nutrition and sweetness, making it both festive and satisfying. With its rich flavor, soft texture, and divine aroma, this sundal is a cherished recipe during Navratri and other special occasions—one that will instantly win hearts at the very first bite.
This Mixed Dal Sweet Sundal is a cherished South Indian prasadam, especially prepared during Navratri, Varalakshmi Viratham, and other festive occasions. Made with a wholesome blend of dals, jaggery, and a touch of ghee, it carries the perfect balance of nutrition and sweetness. With its rich flavor, soft texture, and divine aroma, this sundal brings a festive charm to any celebration—symbolizing abundance, devotion, and the joy of tradition in every bite.
[feast_advanced_jump_to]
Ingredients
Chana dal
Green Moong dal
Cow Peas
Jaggery
Grated coconut
Cardamom
Ghee
This recipe uses a blend of lentils—chana dal, green moong, cow peas —to create a protein-rich base that is hearty yet soft when cooked. Jaggery is added for natural sweetness, balancing the earthy flavors of the dals while keeping the dish wholesome. A touch of ghee enhances aroma and richness, while cardamom brings in a warm, festive fragrance. Finally, a sprinkle of fresh coconut ties it all together, giving the sundal its traditional South Indian character.
Instructions
Take Cowpeas, Green Moong and Chana dal in a pan.
Dry roast the dals in a pan until aromatic, then set them aside.
Transfer the roasted dals to a vessel and add fresh water to soak them.
Place the vessel inside the pressure cooker
Secure the pressure cooker lid with the whistle. Pressure cook the roasted dals for about three to five whistles, until soft.
Open the pressure cooker once the pressure is fully released. If excess water remains after cooking, strain it and keep the dals aside.
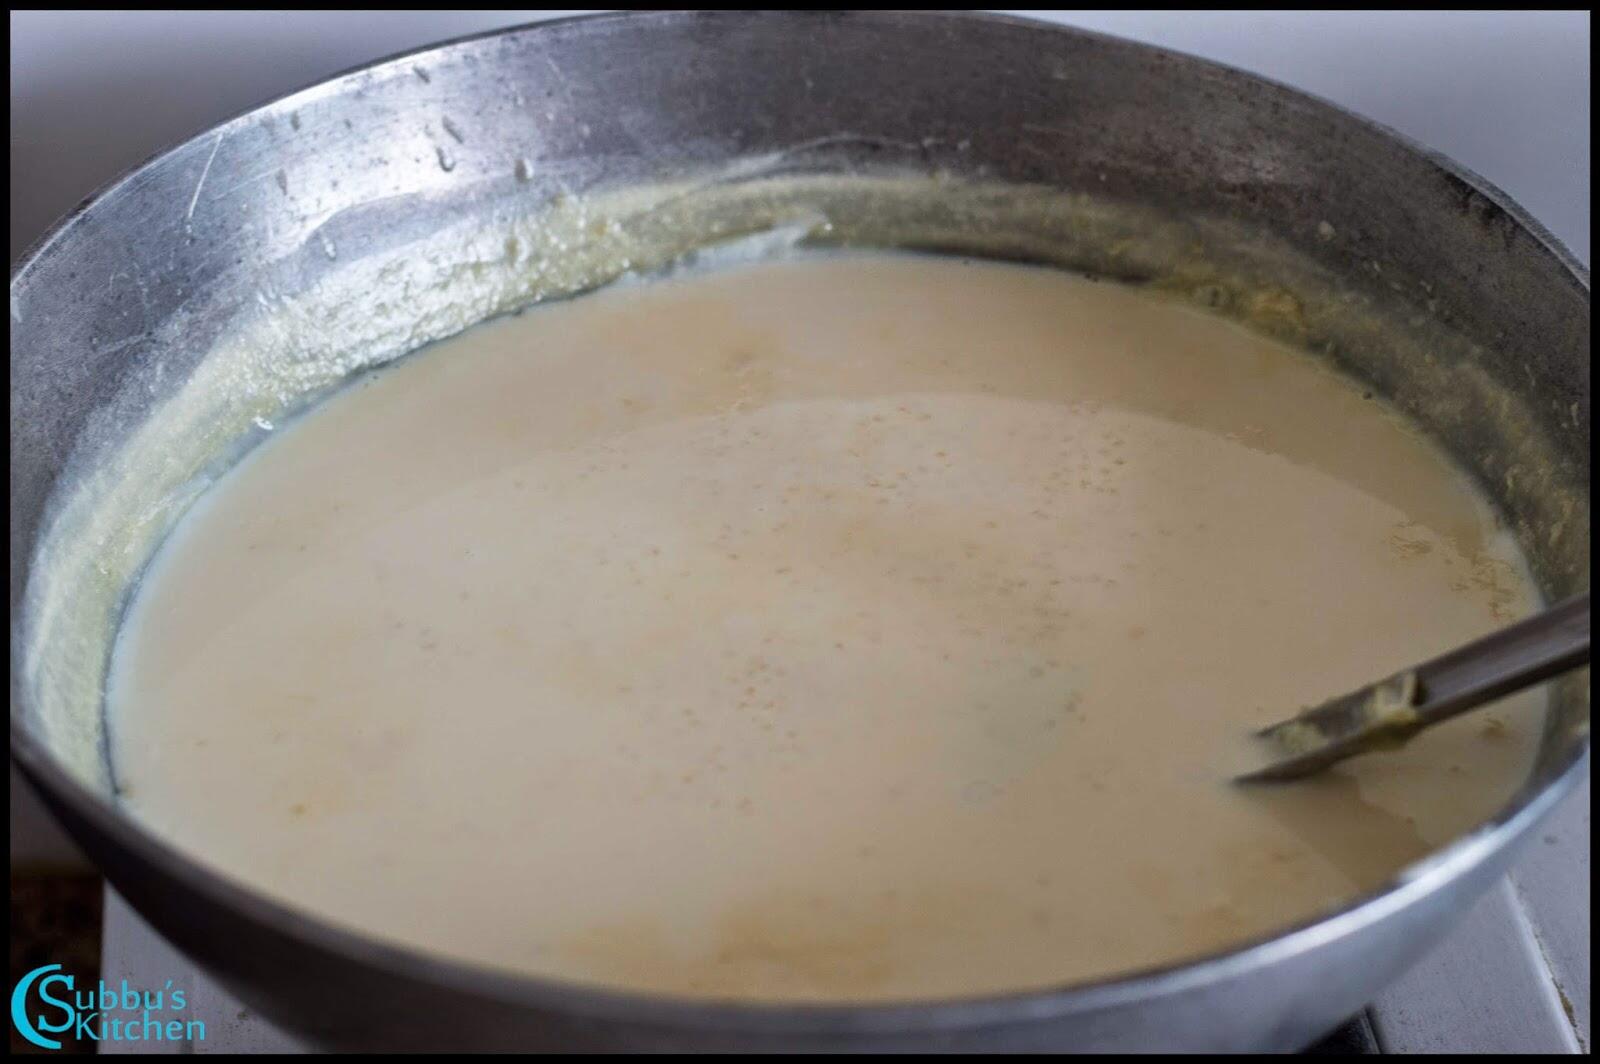
In a sauce pan, add grated jaggery with a little water and allow it to dissolve completely.
Strain the jaggery syrup into another pan and bring it to a boil.
Once the jaggery syrup is starts to boil, add the cooked dals and stir well.
Keep the flame on medium and cook, stirring gently, until the jaggery is fully incorporated into the dals.
Mix in ghee, cardamom powder, and grated coconut, blending everything evenly.
The delicious Mixed Dal Sweet Sundal is now ready to be offered as neivedhyam or served warm.
Substitutions
Dals: If some lentils aren’t available, you can swap with other split dals like masoor dal or green moong dal. Just ensure the total quantity remains similar.
Jaggery: Can be replaced with brown sugar or coconut sugar if jaggery is unavailable, though the flavor will be slightly different.
Ghee: For a lighter version, unsalted butter or coconut oil can be used.
Cardamom: If unavailable, a small pinch of cinnamon powder or nutmeg can give a warm, aromatic flavor.
Grated Coconut:Desiccated coconut or coconut flakes can be used as an alternative.
Variations
Dry Fruit Mix: Add chopped cashews, almonds, and raisins for extra texture and richness.
Single Dal Version: Use only one type of dal, like chana dal or moong dal, for a simpler, quicker version.
Cardamom-Free: Skip cardamom and use a pinch of nutmeg or cinnamon for a different flavor profile.
Coconut-Free: Omit grated coconut and drizzle a little ghee on top before serving for richness.
Mini Sundal Cups: Serve the sweet sundal in small, bite-sized cups or molds for festive offerings or kids’ treats.
Storage
Room Temperature: Store in an airtight container for up to 1 day.
Refrigerator: Keep in a sealed container for 2–3 days. Reheat gently on low flame or in the microwave before serving.
Freezer: Not recommended, as the texture may change after freezing.
Top Tip
If you're going to make this recipe, make sure to follow this top tip!
Dry roast the dals properly before cooking to enhance their flavor and aroma. While cooking with jaggery, keep the flame on medium and stir gently to prevent sticking or burning. This ensures the sundal has a smooth, cohesive texture and rich, balanced sweetness—perfect for neivedhyam or serving.
Mixed Dal Sweet Sundal is a traditional South Indian sweet prasadam made with a blend of protein-rich dals, jaggery, ghee, and aromatic cardamom. Soft, flavorful, and lightly sweet, this sundal is perfect for Navratri offerings, festive occasions, or as a wholesome dessert. Quick to prepare and rich in taste, it’s a must-try for anyone who loves authentic South Indian sweets.
Course Accompaniment, Festival Recipes, Snack, Sundal
Cuisine Indian, South Indian, Tamil Brahmin, Tamil Nadu
Prep Time 5 minutesminutes
Cook Time 20 minutesminutes
Total Time 25 minutesminutes
Servings 4people
Calories 105kcal
Author Sowmya Venkatachalam
Equipment
1 Heavy Bottomed Pan
1 Pressure Cooker
1 Sauce Pan
Ingredients
¼cupSplit Bengal Gram (Channa Dal / Kadalaparuppu)
¼cupGreen Gram (Pachai Payiru)
¼cupKaramani (Black-eyed pea)
¼cupGrated Jaggery
2teaspoonGhee (Clarified butter)
2teaspoonGrated Coconut
1pinchCardamom Powder
Instructions
Take Cowpeas, Green Moong and Chana dal in a pan. Dry roast the dals in a pan until aromatic, then set them aside.
¼ cup Green Gram (Pachai Payiru), ¼ cup Karamani (Black-eyed pea), ¼ cup Split Bengal Gram (Channa Dal / Kadalaparuppu)
Dry roast the dals in a pan until aromatic, then set them aside.
Transfer the roasted dals to a vessel and add fresh water to soak them.
Place the vessel inside the pressure cooker, secure the lid with the whistle, and cook until done.
Pressure cook the roasted dals for about three whistles, until soft.If excess water remains after cooking, strain it and keep the dals aside.
If excess water remains after cooking, strain it and keep the dals aside.
In a sauce pan, add grated jaggery with a little water and allow it to dissolve completely.
¼ cup Grated Jaggery
Strain the jaggery syrup into another pan and bring it to a boil.
Once the jaggery syrup is starts to boil, add the cooked dals and stir well.
Keep the flame on medium and cook, stirring gently, until the jaggery is fully incorporated into the dals.
Mix in ghee, cardamom powder, and grated coconut, blending everything evenly.
The delicious Mixed Dal Sweet Sundal is now ready to be offered as neivedhyam or served warm.
Video
Notes
Tips for Perfect Mixed Dal Sweet Sundal:
Roast the dals lightly before soaking to enhance their aroma and bring out a nutty flavor.
Soak the dals adequately so they cook evenly and achieve a soft, melt-in-mouth texture.
Use a pressure cooker to cook the dals until soft. After roasting and soaking, place the dals in the cooker with fresh water, secure the lid, and cook for 3–4 whistles on medium heat. This ensures the dals are tender and ready to absorb the jaggery syrup without becoming mushy.
Dissolve jaggery completely in a little water before adding it to the cooked dals to prevent lumps.
Cook on medium flame while mixing jaggery with the dals to avoid sticking or burning.
Add ghee at the end to enrich the flavor and give the sundal a glossy, luscious finish.
Use freshly grated coconut for authentic taste and texture; desiccated coconut can be used in a pinch.
Serve warm or at room temperature for best taste; the flavors intensify if left for a few hours.
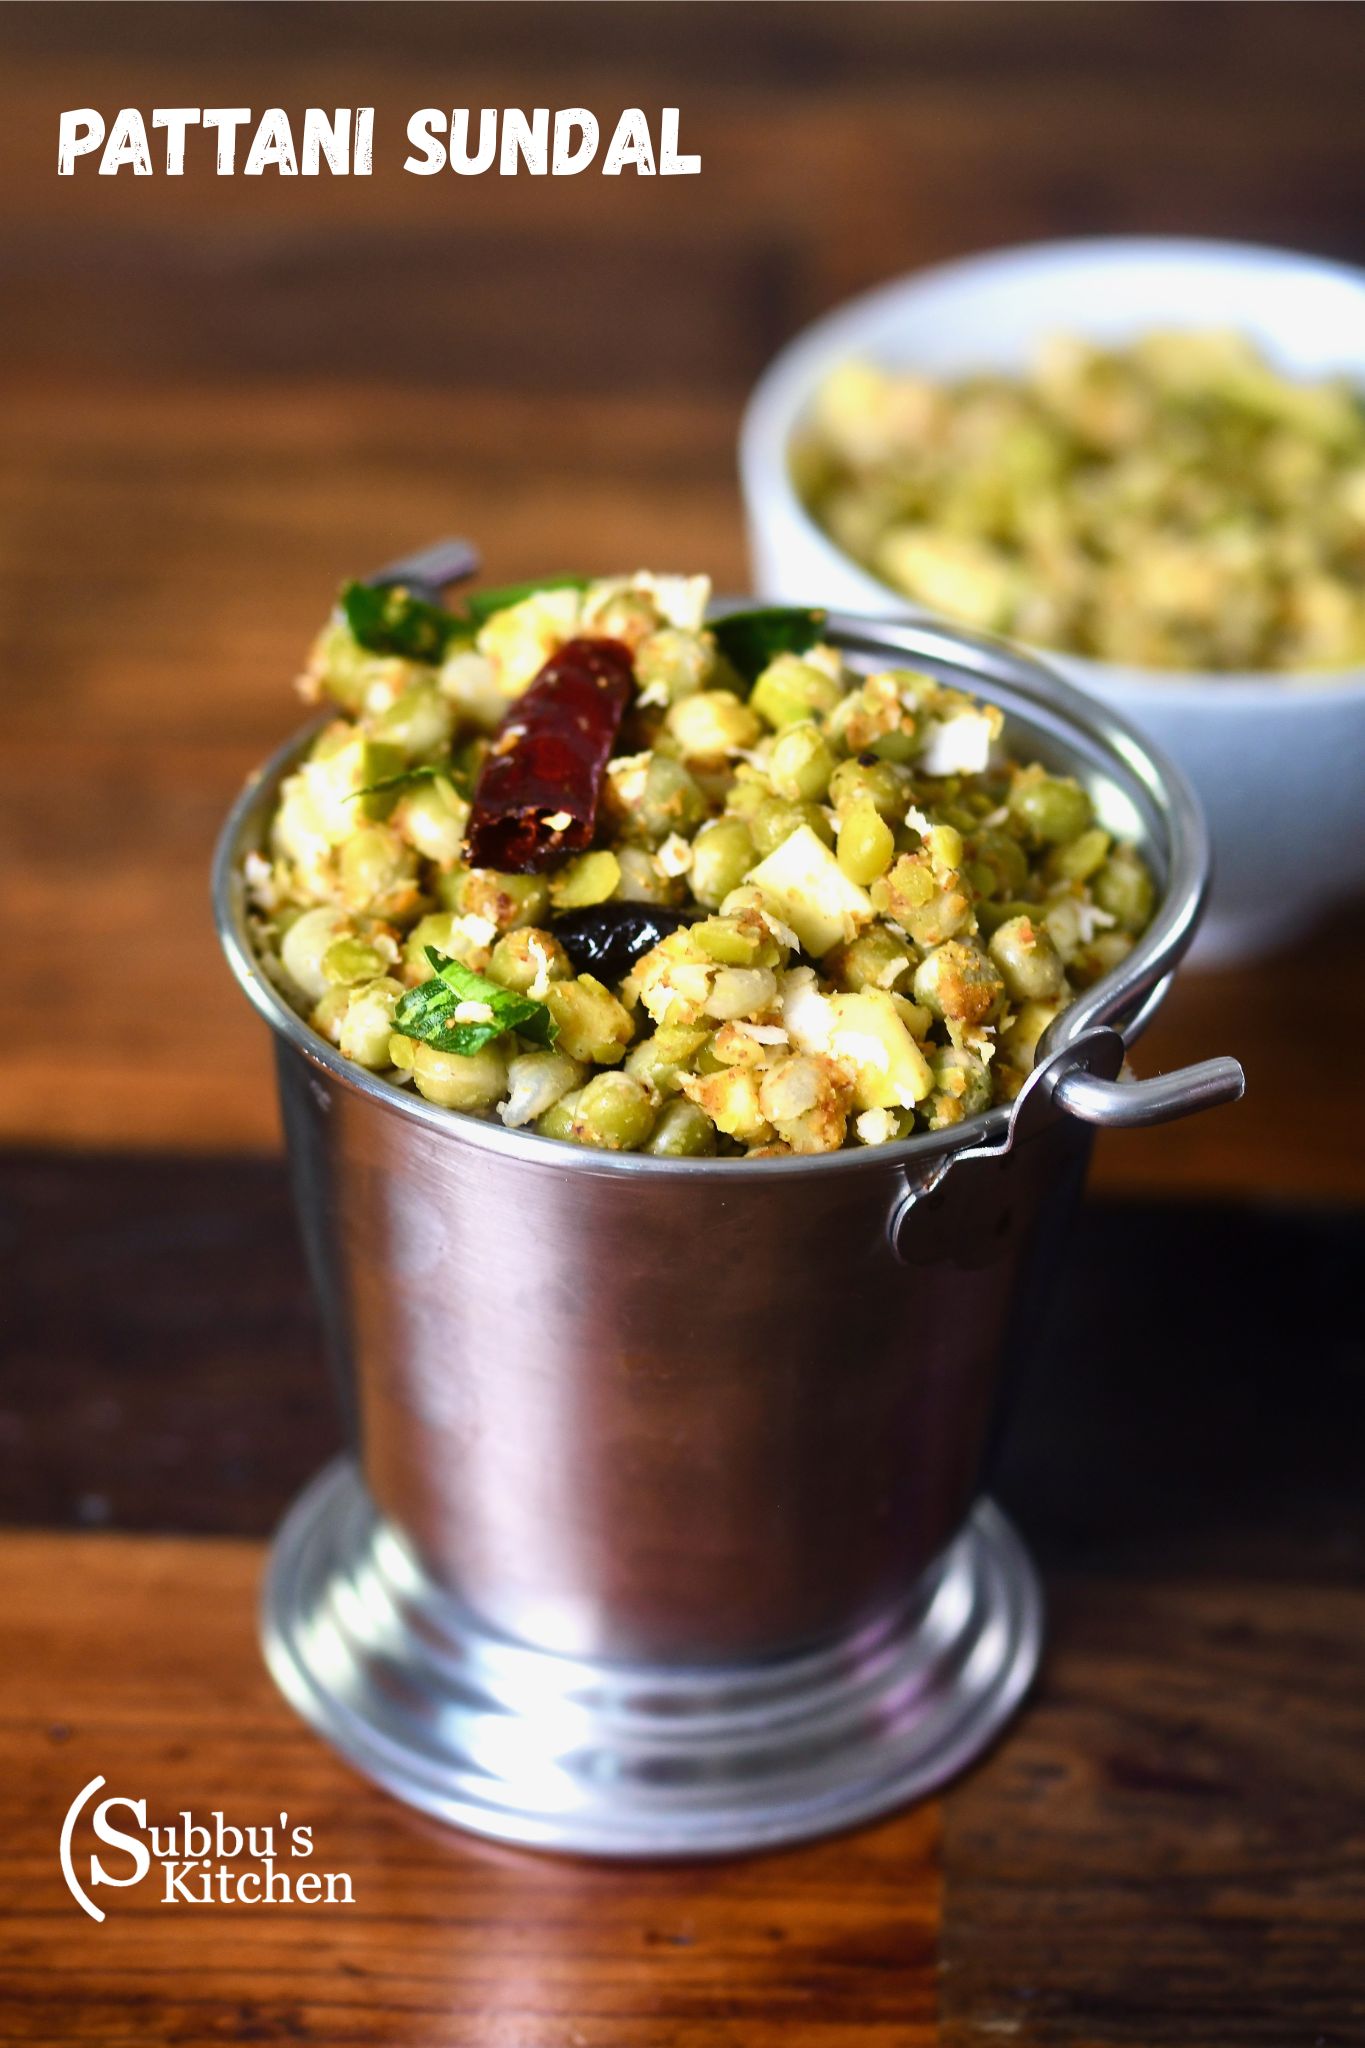
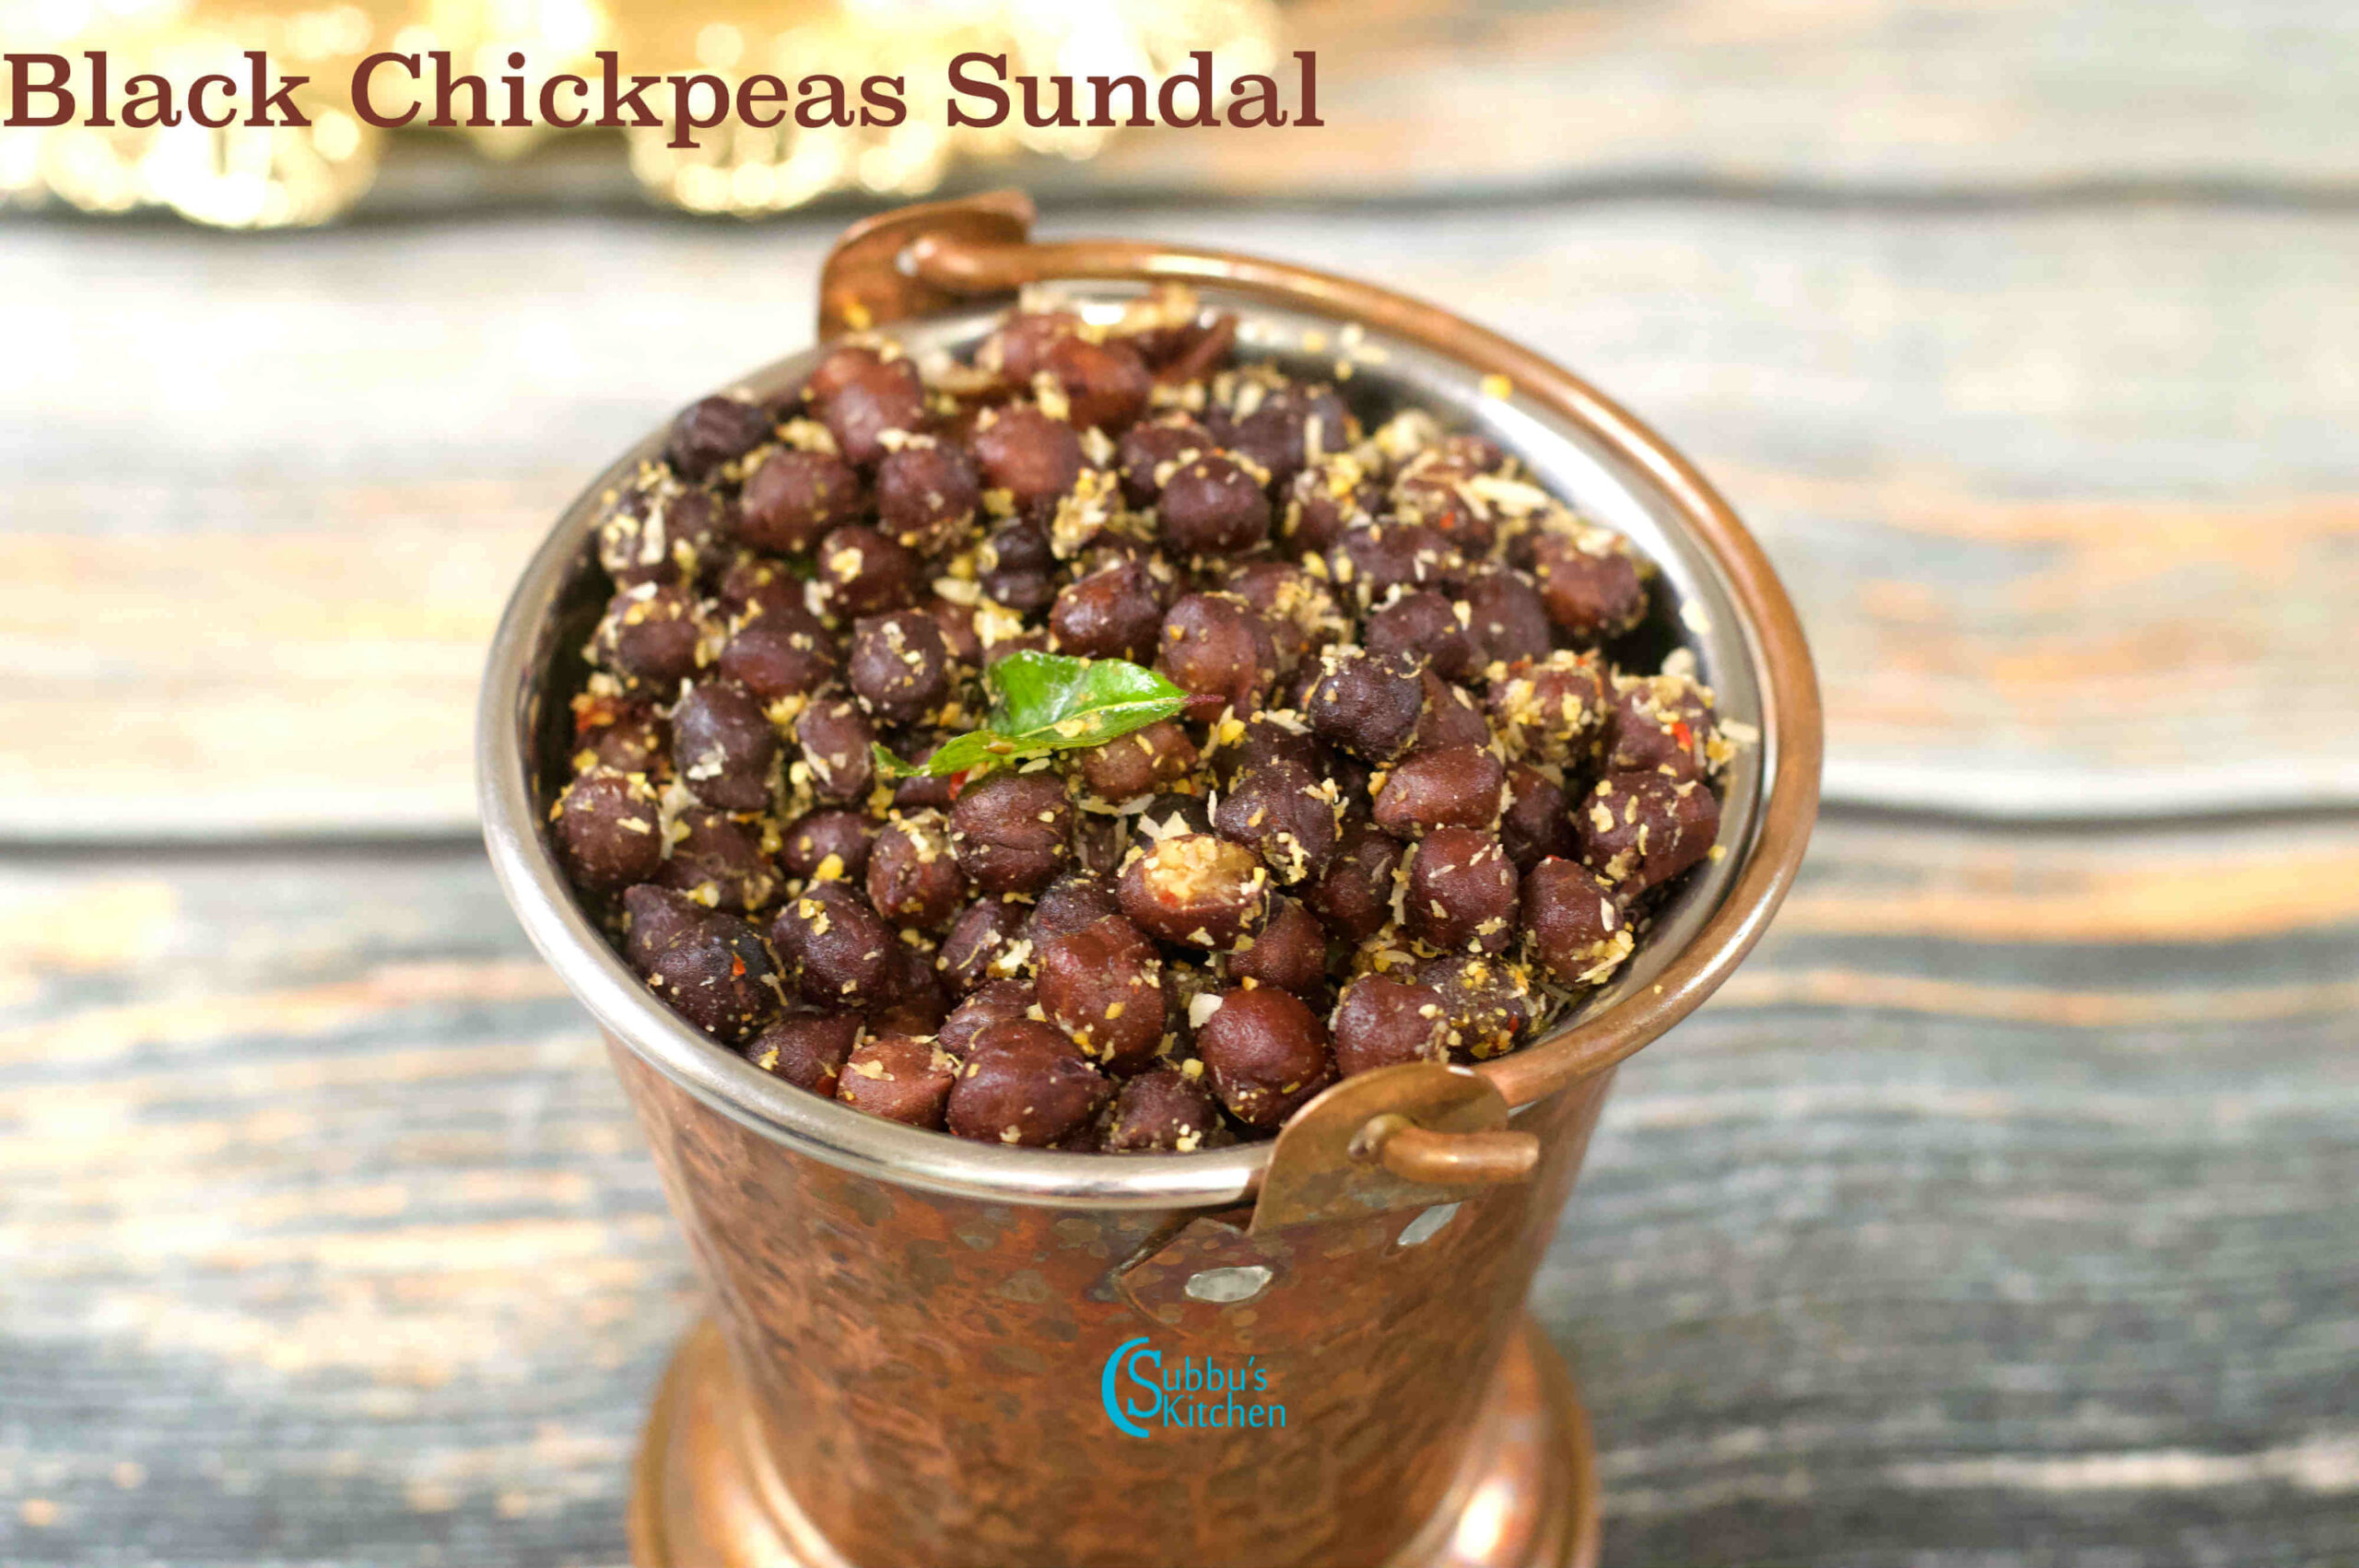
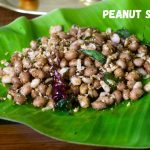
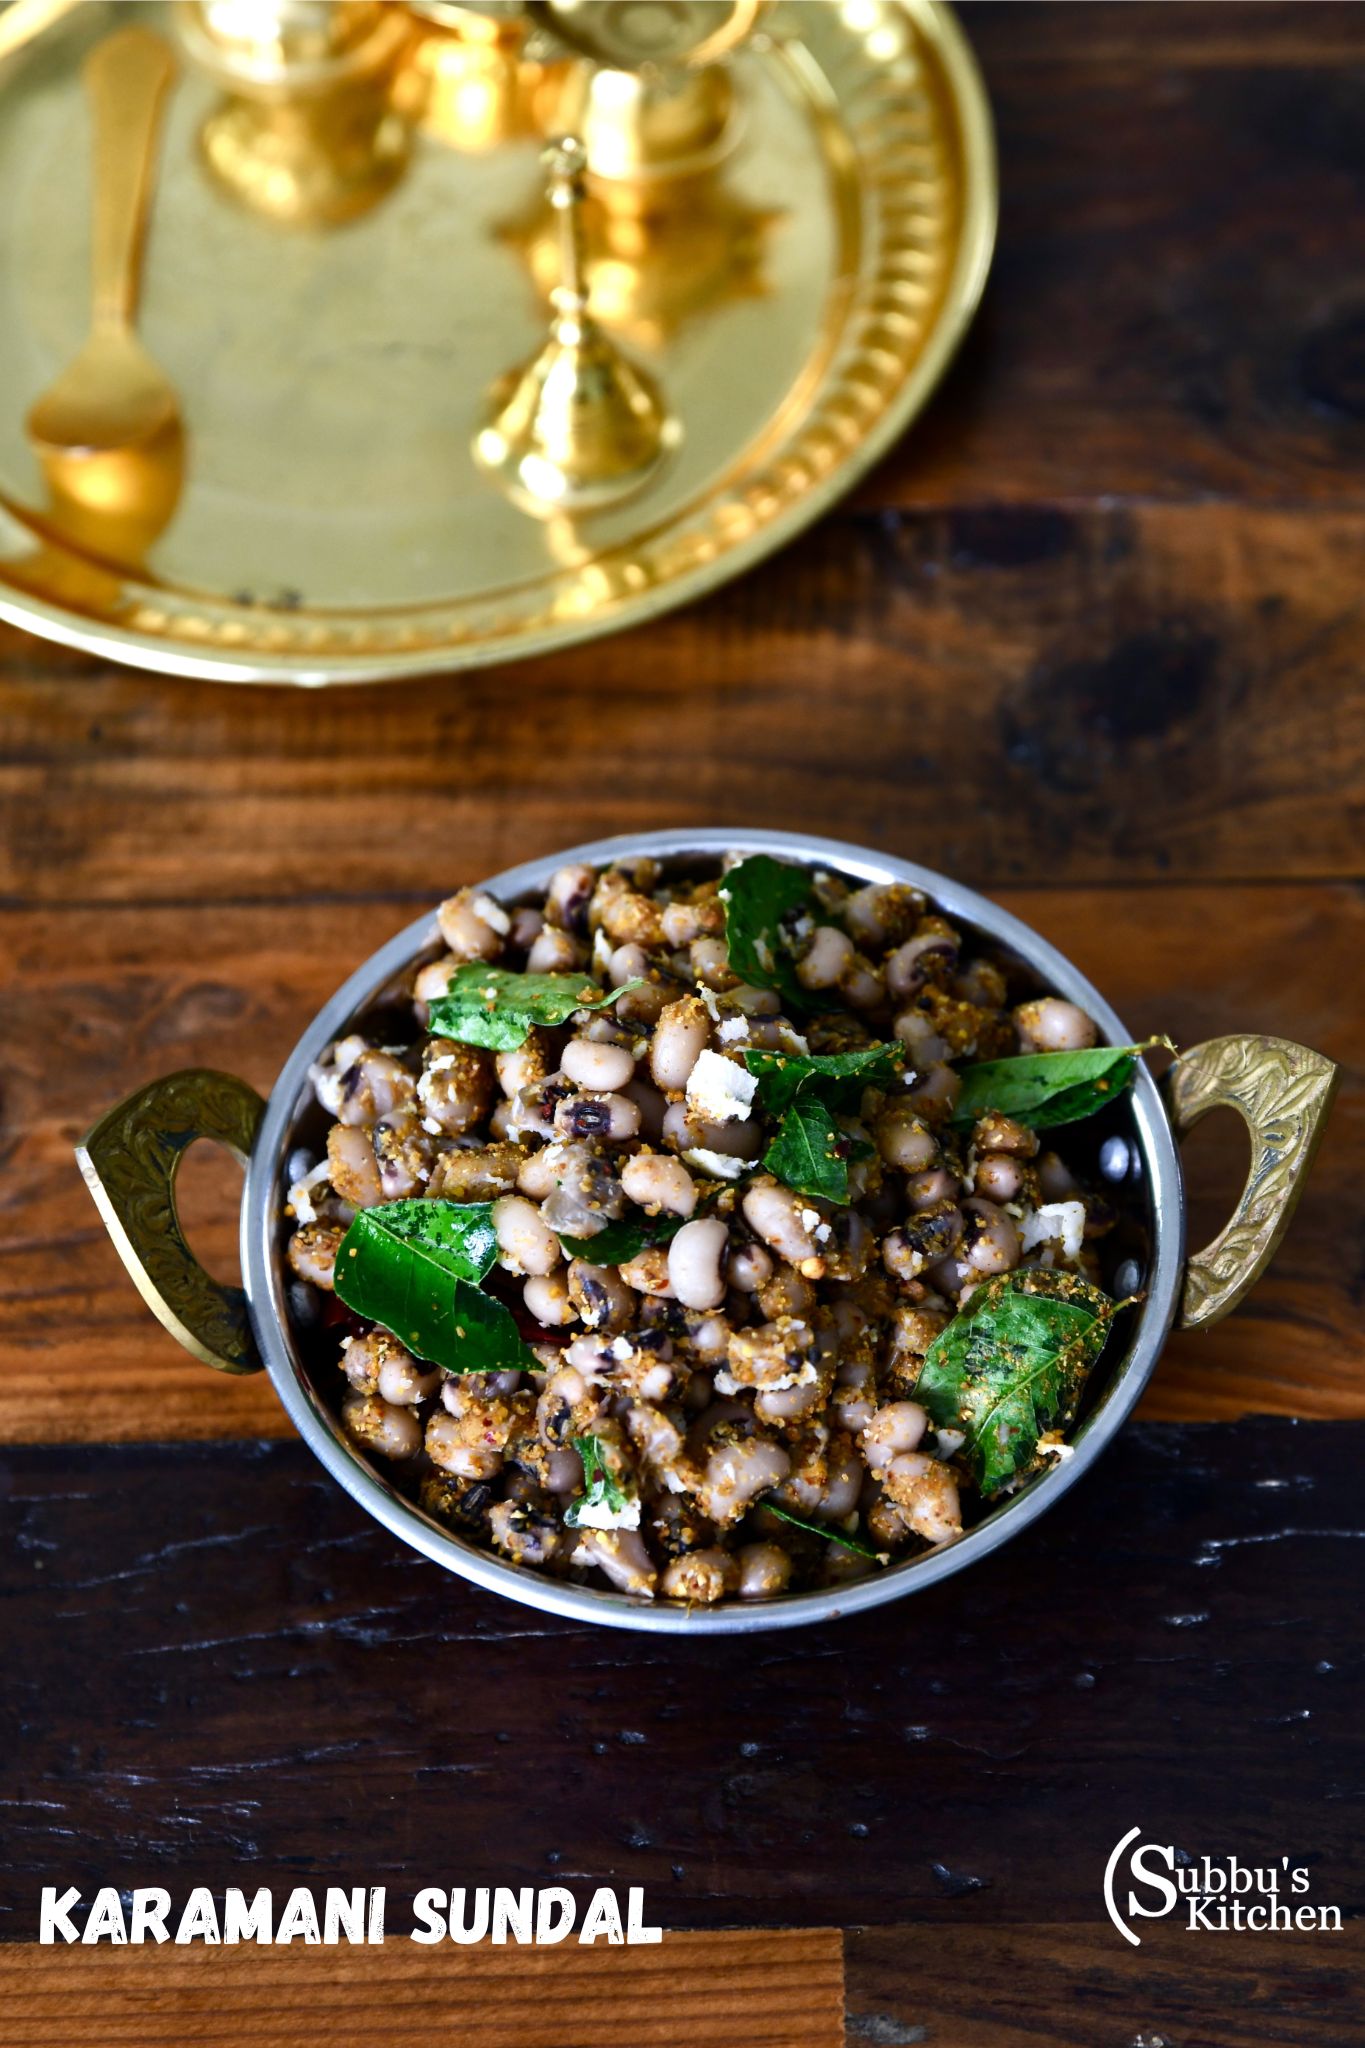
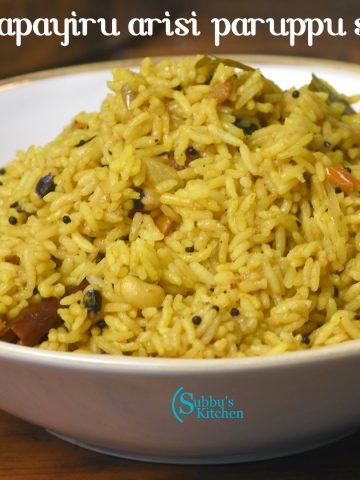
Peas Mango Sundal (Pattani Sundal, also known as Thengai Mangai Pattani Sundal) is one of the most popular sundal varieties, especially enjoyed along the buzzing beaches of Chennai. Made with perfectly cooked dry green peas sautéed in a simple mustard, curry leaves, and red chili tempering, this dish gets a delicious lift from tangy raw mango and freshly grated coconut. The sourness of mango, the subtle sweetness of coconut, and the earthy richness of peas come together to create a healthy, flavorful, and protein-packed salad. While it’s a festive favorite, this sundal is also perfect as a wholesome snack or as the protein portion of a regular lunch box.
Peas Mango Sundal – a healthy, tangy, and protein-rich sundal made with peas, raw mango, and coconut.
[feast_advanced_jump_to]
Ingredients
Each ingredient in this sundal plays a distinct role in creating its signature flavour, texture, and nutritional profile. Green peas provide a firm, protein-rich base with a gentle sweetness. Raw mango adds a tangy brightness, cutting through the richness and giving a refreshing contrast. Grated coconut lends a mild sweetness and creaminess, making the sundal more textured and satisfying. The tempering ingredients—mustard seeds, red chili, curry leaves, and asafoetida (hing)—bring warmth, aroma, and a slight heat; while sundal powder builds extra spice & earthy depth. Together, these ingredients deliver a dish that’s colorful, balanced, healthy, and very moreish.
Wash and soak the pattani/peas overnight in plenty of water.
The next day, drain the soaked water, add fresh water, add salt and take it to pressure cooker
pressure cook the soaked peas with salt for about 3 whistles, or until soft but not mushy.
Check if the peas are cooked until soft. If there is excess water, drain it out.
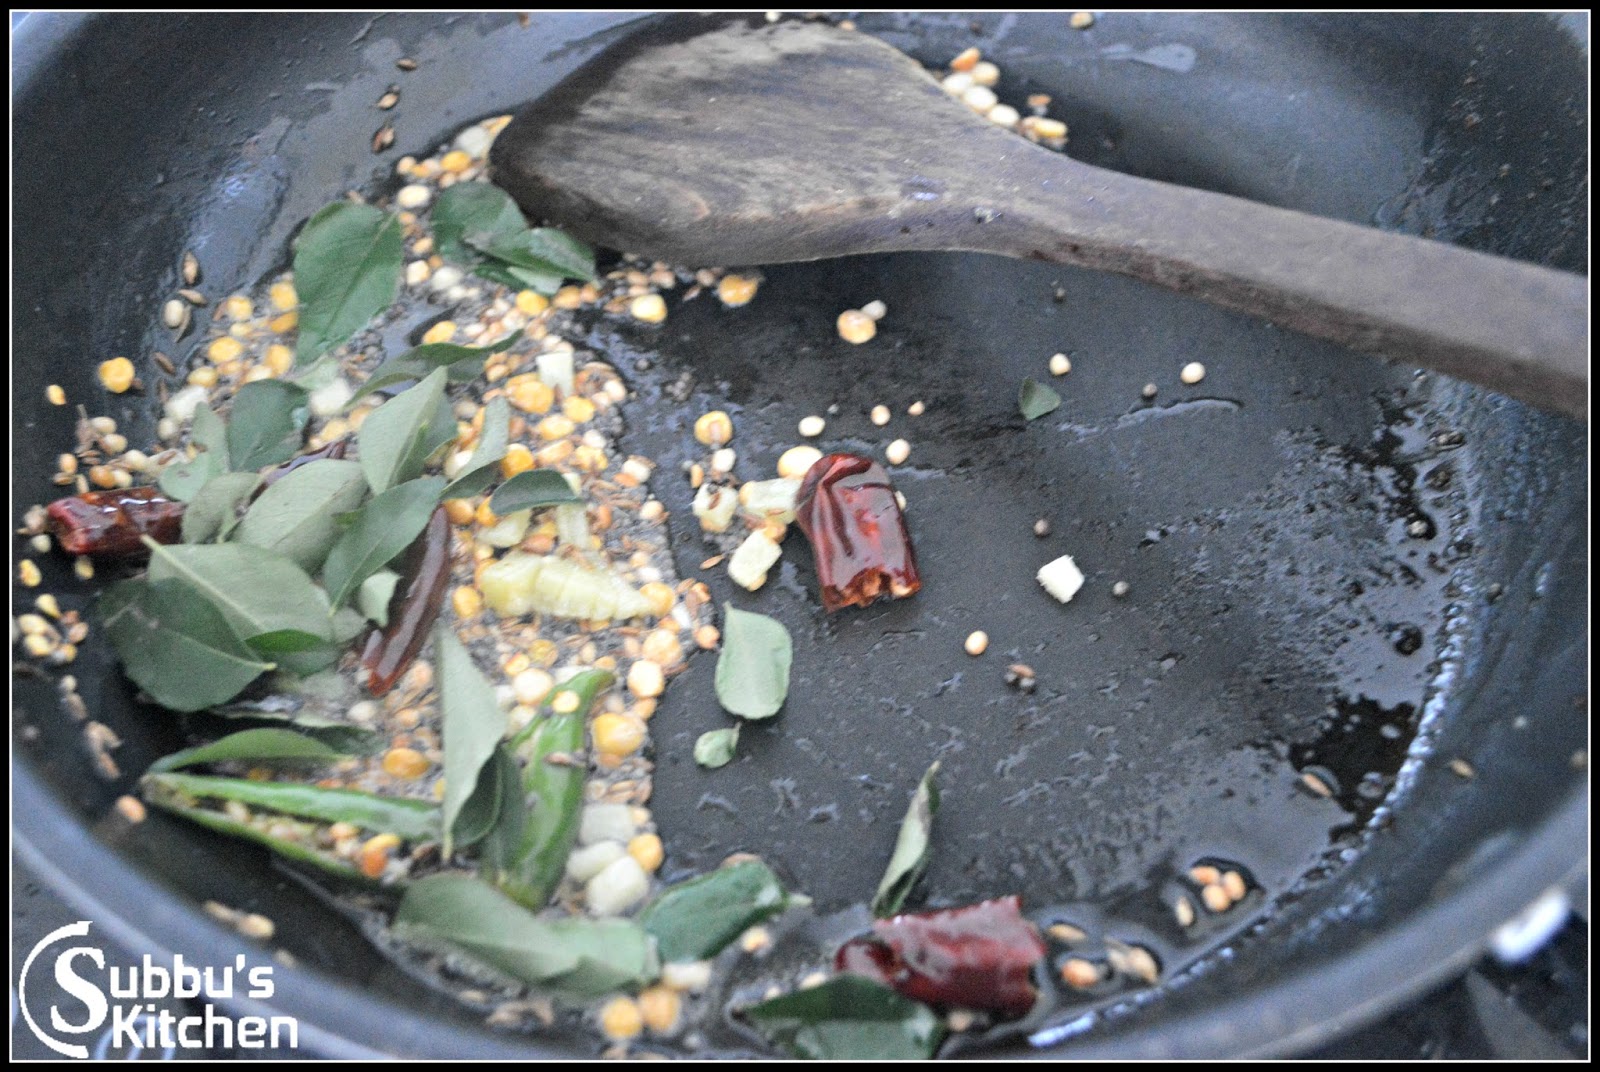
Heat oil in a pan. Add mustard seeds and let them splutter. Then add a pinch of hing, curry leaves, and broken red chili. Sauté for 5 seconds.
Add the cooked peas to the pan, and mix everything well.
Add Sundal powder and gently mix with peas
Add finely chopped mango
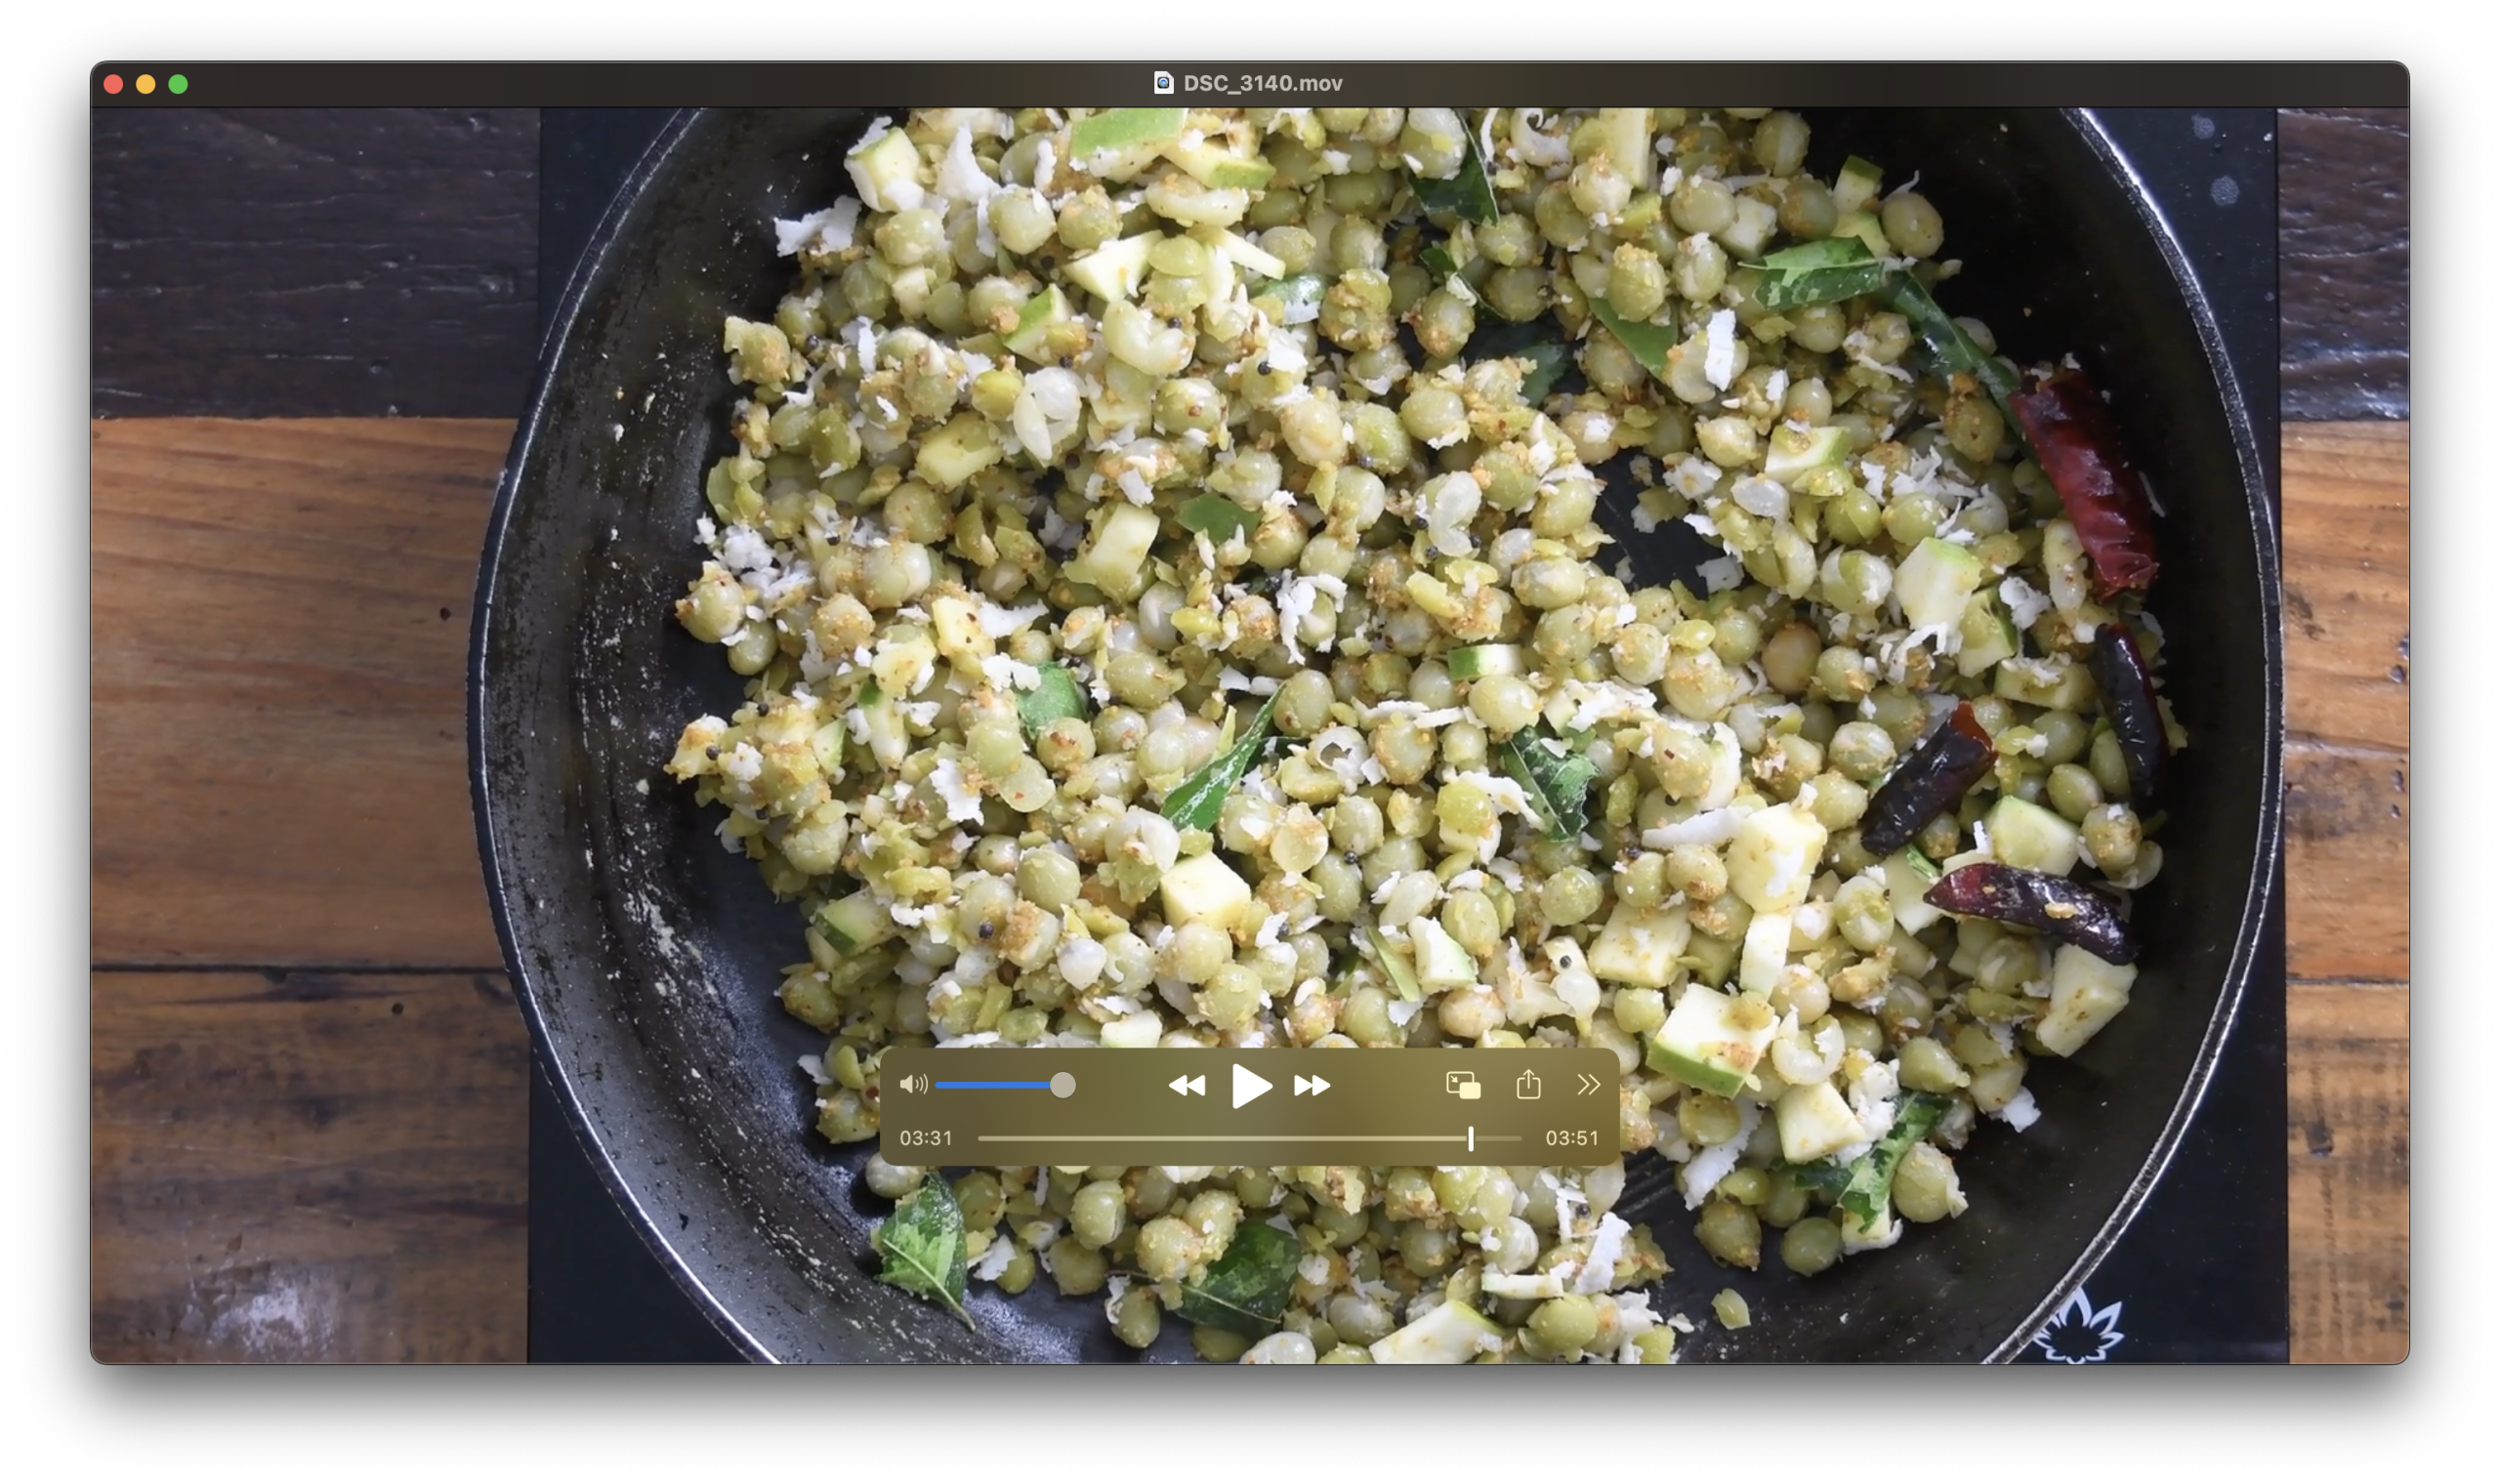
Stir in the grated coconut. Mix thoroughly so the flavors blend.
Keep the sundal on low flame for 2 minutes, stirring gently. Remove from heat. Your delicious Peas Mango Sundal is ready! Perfect for neivedhyam during festivals or as a healthy snack.
Hint: Always soak the peas overnight for best results—this helps them cook evenly and become soft without turning mushy. If you’re short on time, you can also do a quick soak by adding the peas to hot water for 3–4 hours.
Substitutions
Vegan: This sundal is naturally vegan—no substitutions needed.
Gluten-Free: Already gluten-free, making it a great option for those avoiding gluten.
Low-Oil / Whole-Food Plant-Based: Reduce the oil in the tempering or use a quick dry-roast tempering method to make it lighter.
Low-Sodium: Cook the peas without salt and add a squeeze of lemon instead of raw mango for flavor balance.
Even if you don’t personally follow these diets, chances are some of your friends or family do—and this recipe is versatile enough to accommodate them.
Variations
Spicy: Add chili flakes or finely chopped green chilies while tempering to give the sundal a lively kick.
Deluxe: Toss in extra grated coconut, roasted nuts, or crispy fried onions for richness and crunch.
Kid-Friendly: Mix in soft mashed potato or lightly crushed plain crackers for added texture that kids will enjoy.
Optional Additions: While this recipe is traditionally made without onion (perfect for neivedhyam/prasadam), you can add finely chopped onions or sautéed garlic for a regular everyday version if not preparing it as an offering.
This way, you can cater to different tastes, dietary preferences, or occasions while still honoring the traditional preparation.
Storage
Store the sundal in an airtight container in the fridge. It stays fresh for 2–3 days. Because of the raw mango and grated coconut, this sundal does not freeze well, as freezing can change the texture and flavor of both the peas and mango. For best taste, always prepare fresh or consume within a few days.
Top Tip
If you're going to make this recipe, make sure to follow this top tip!
Don’t overcook the peas! They should be soft but still hold their shape to give the sundal a nice texture. Overcooked peas can turn mushy and make the dish less appealing. Also, add the raw mango and coconut at the end to preserve their freshness and flavor.
Peas Mango Sundal is a traditional South Indian snack made with protein-rich peas, tangy raw mango, and fresh grated coconut. Lightly tempered with mustard seeds, curry leaves, and red chili, this sundal is perfect for festivals, prasadam, or a healthy protein-rich lunchbox addition. It’s naturally vegan, gluten-free, and packed with flavor.
Soak the peas – Wash and soak the pattani/peas overnight in plenty of water.
1 Cup Dry Whole Green Peas
Cook the peas – The next day, drain the soaked water, add fresh water, salt and pressure cook the peas with salt for about 3 whistles or until soft but not mushy. Drain excess water if needed.
1 teaspoon Salt
Prepare tempering – Heat oil in a pan. Add mustard seeds and let them splutter. Then add a pinch of hing, curry leaves, and broken red chili. Sauté for 5 seconds.
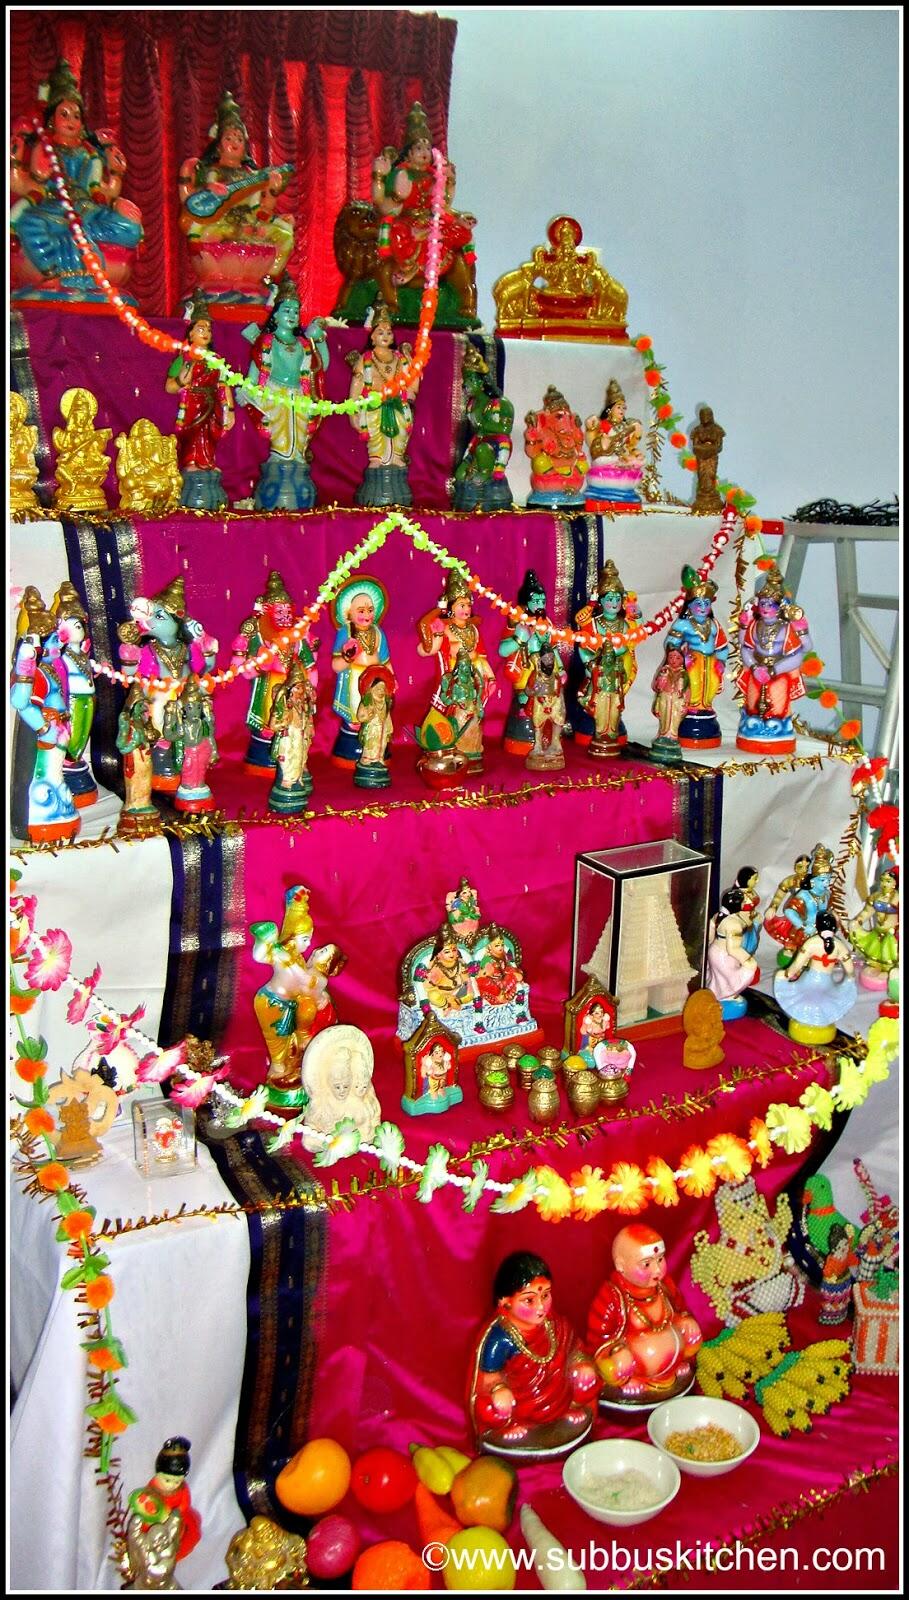
Navratri, also known as Dasara, is one of the most vibrant and devotional festivals celebrated across India. Over nine days (culminating in Vijayadashami), devotees worship Goddess Durga in her various forms with prayers, rituals, and special food offerings (neivedhyam). In the southern states, especially Tamil Nadu, Andhra Pradesh, and Karnataka, the festival is marked by the tradition of Golu—beautifully arranged steps adorned with dolls and idols, where families welcome relatives, friends, and neighbors to celebrate together.
Festive Navratri Golu setup with dolls and idols beautifully arranged on decorated steps.
Food plays a central role in Navratri, with each day featuring special dishes prepared for offering to the Goddess and then shared with guests. This collection brings together a wide variety of traditional Navratri recipes across different categories:
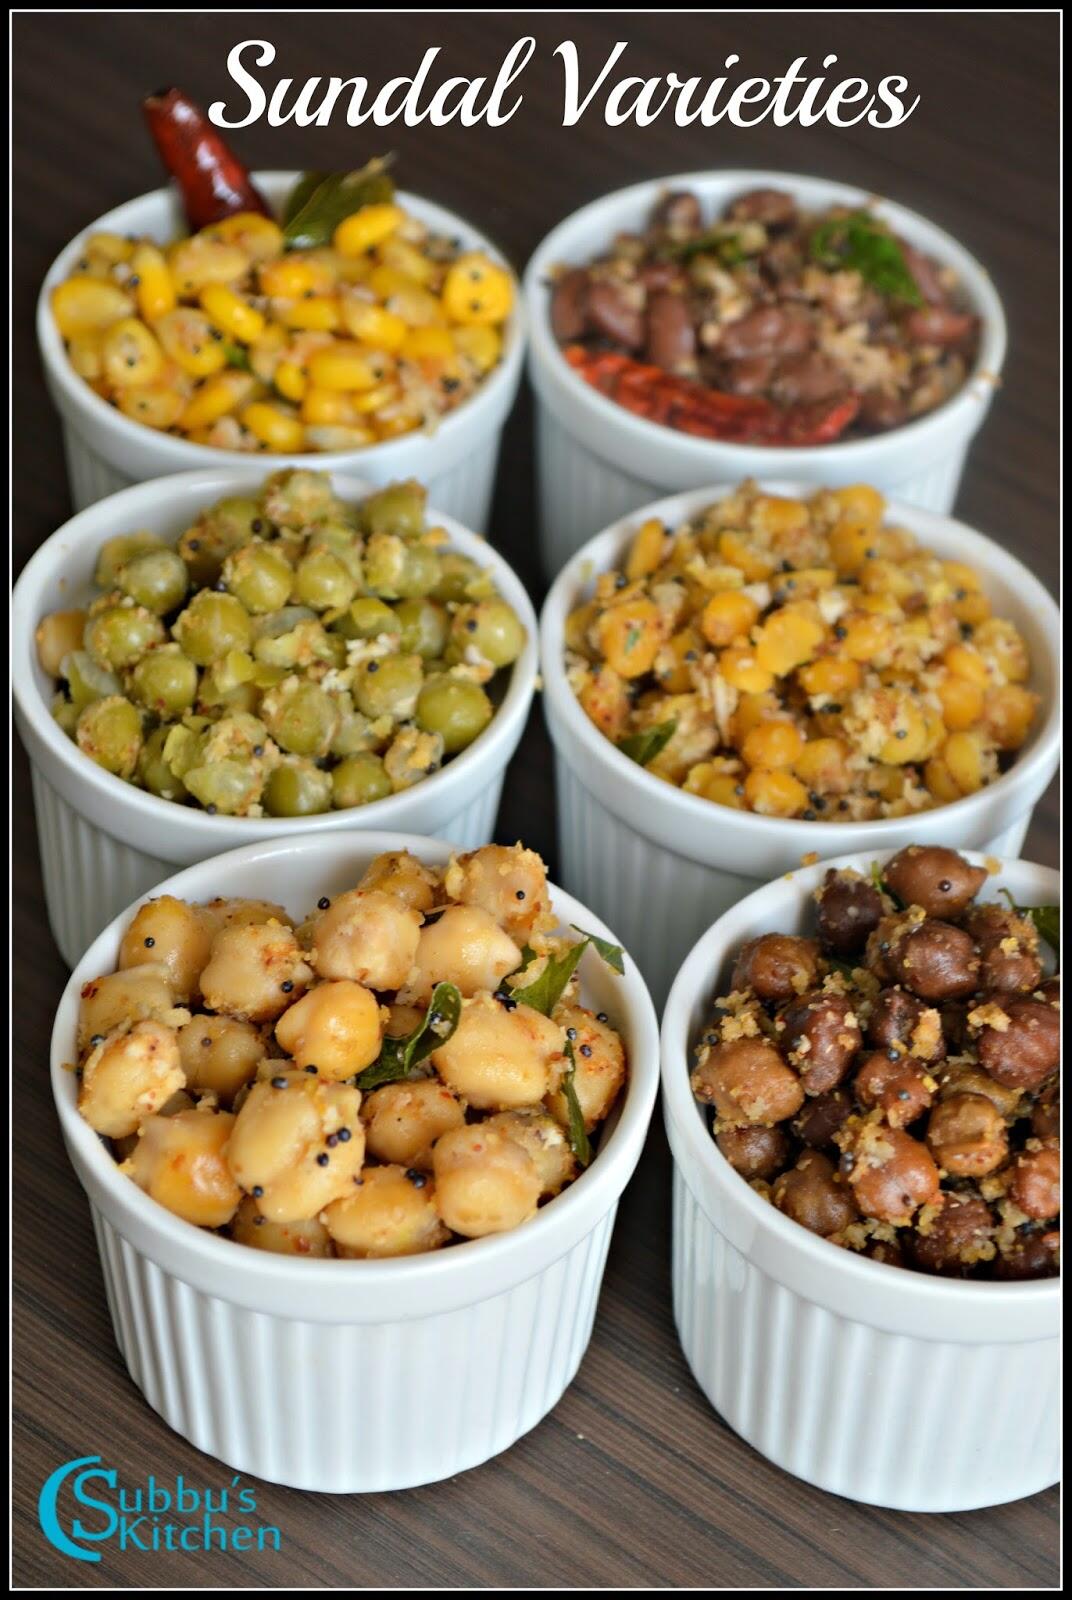
Sundal Recipes – A signature dish of Navratri, sundals are made with legumes, pulses, and lentils. A new variety is prepared each day for offering and then distributed as prasadam to guests visiting the Golu.
Sweet Recipes – Festive favorites like kheer (payasam), appam, kesari, puttu, and more are prepared to add sweetness and joy to the celebrations.
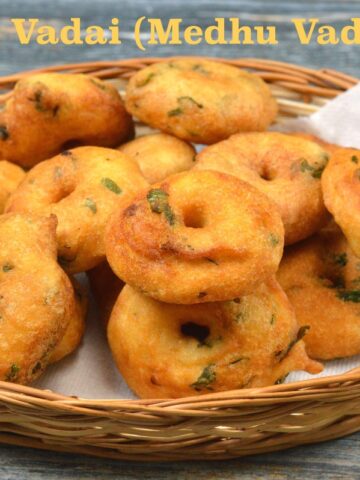
Snack & Tiffin Recipes – Crispy vada, festive poori, wholesome sabudana thalipeeth, and other special snacks are also made during Navratri to offer and enjoy with family.
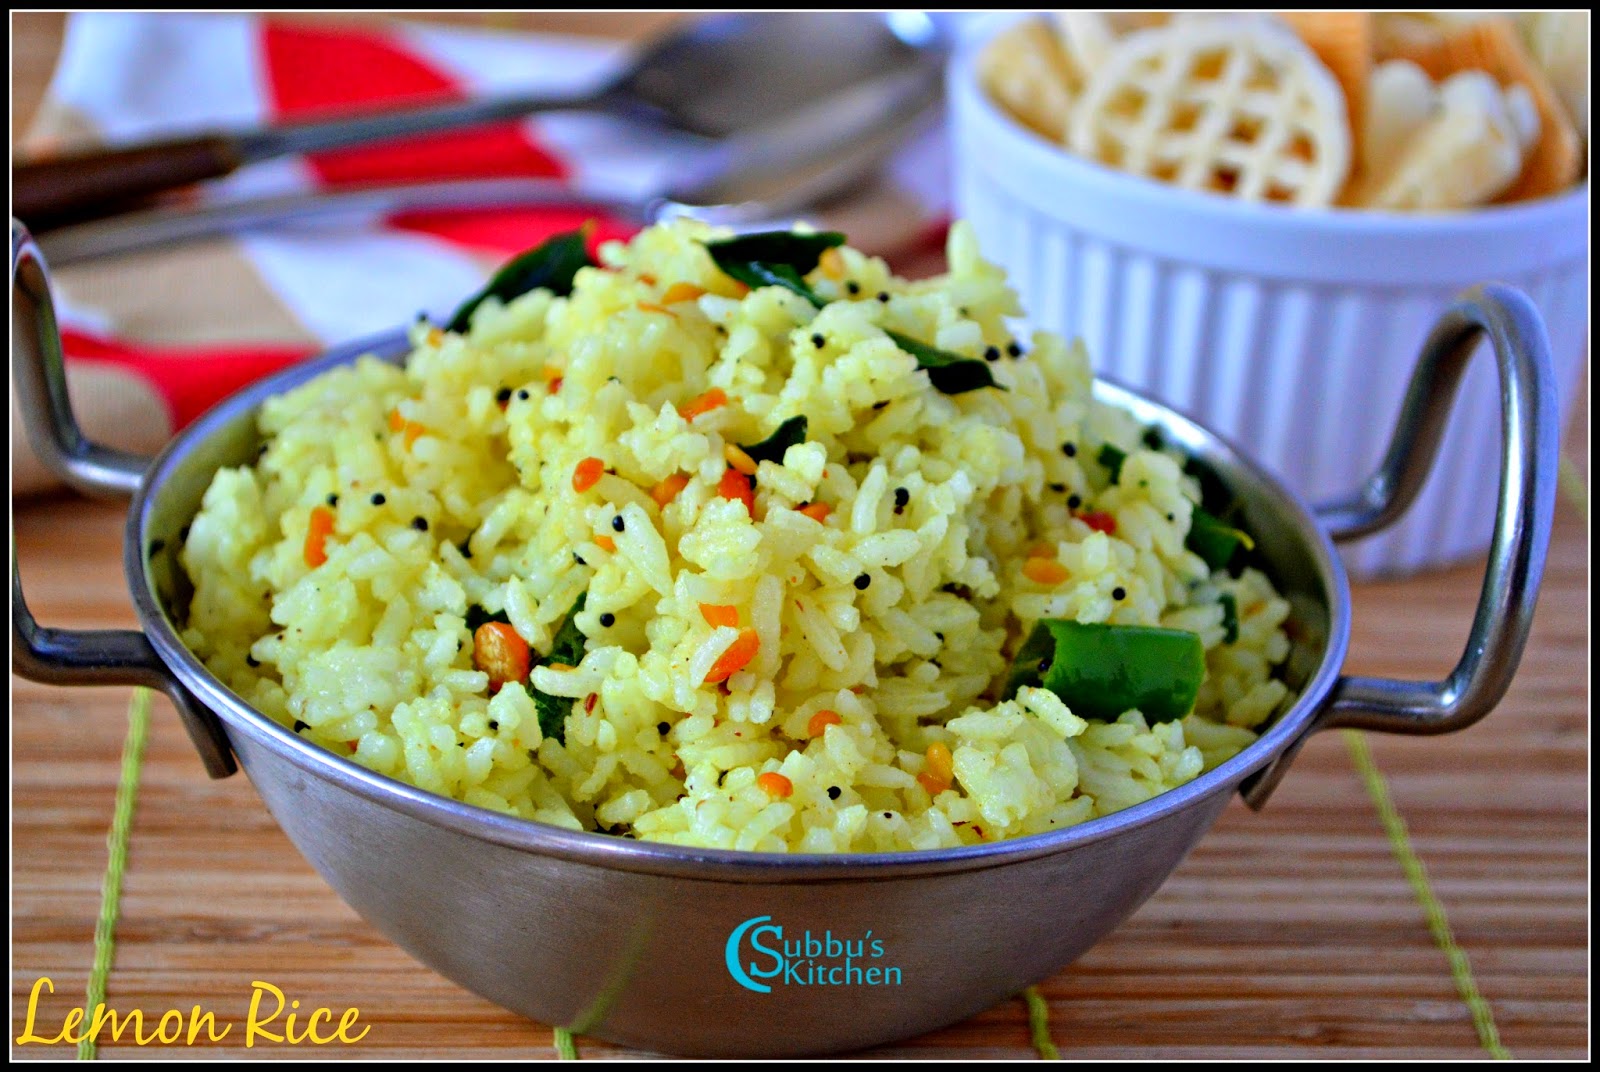
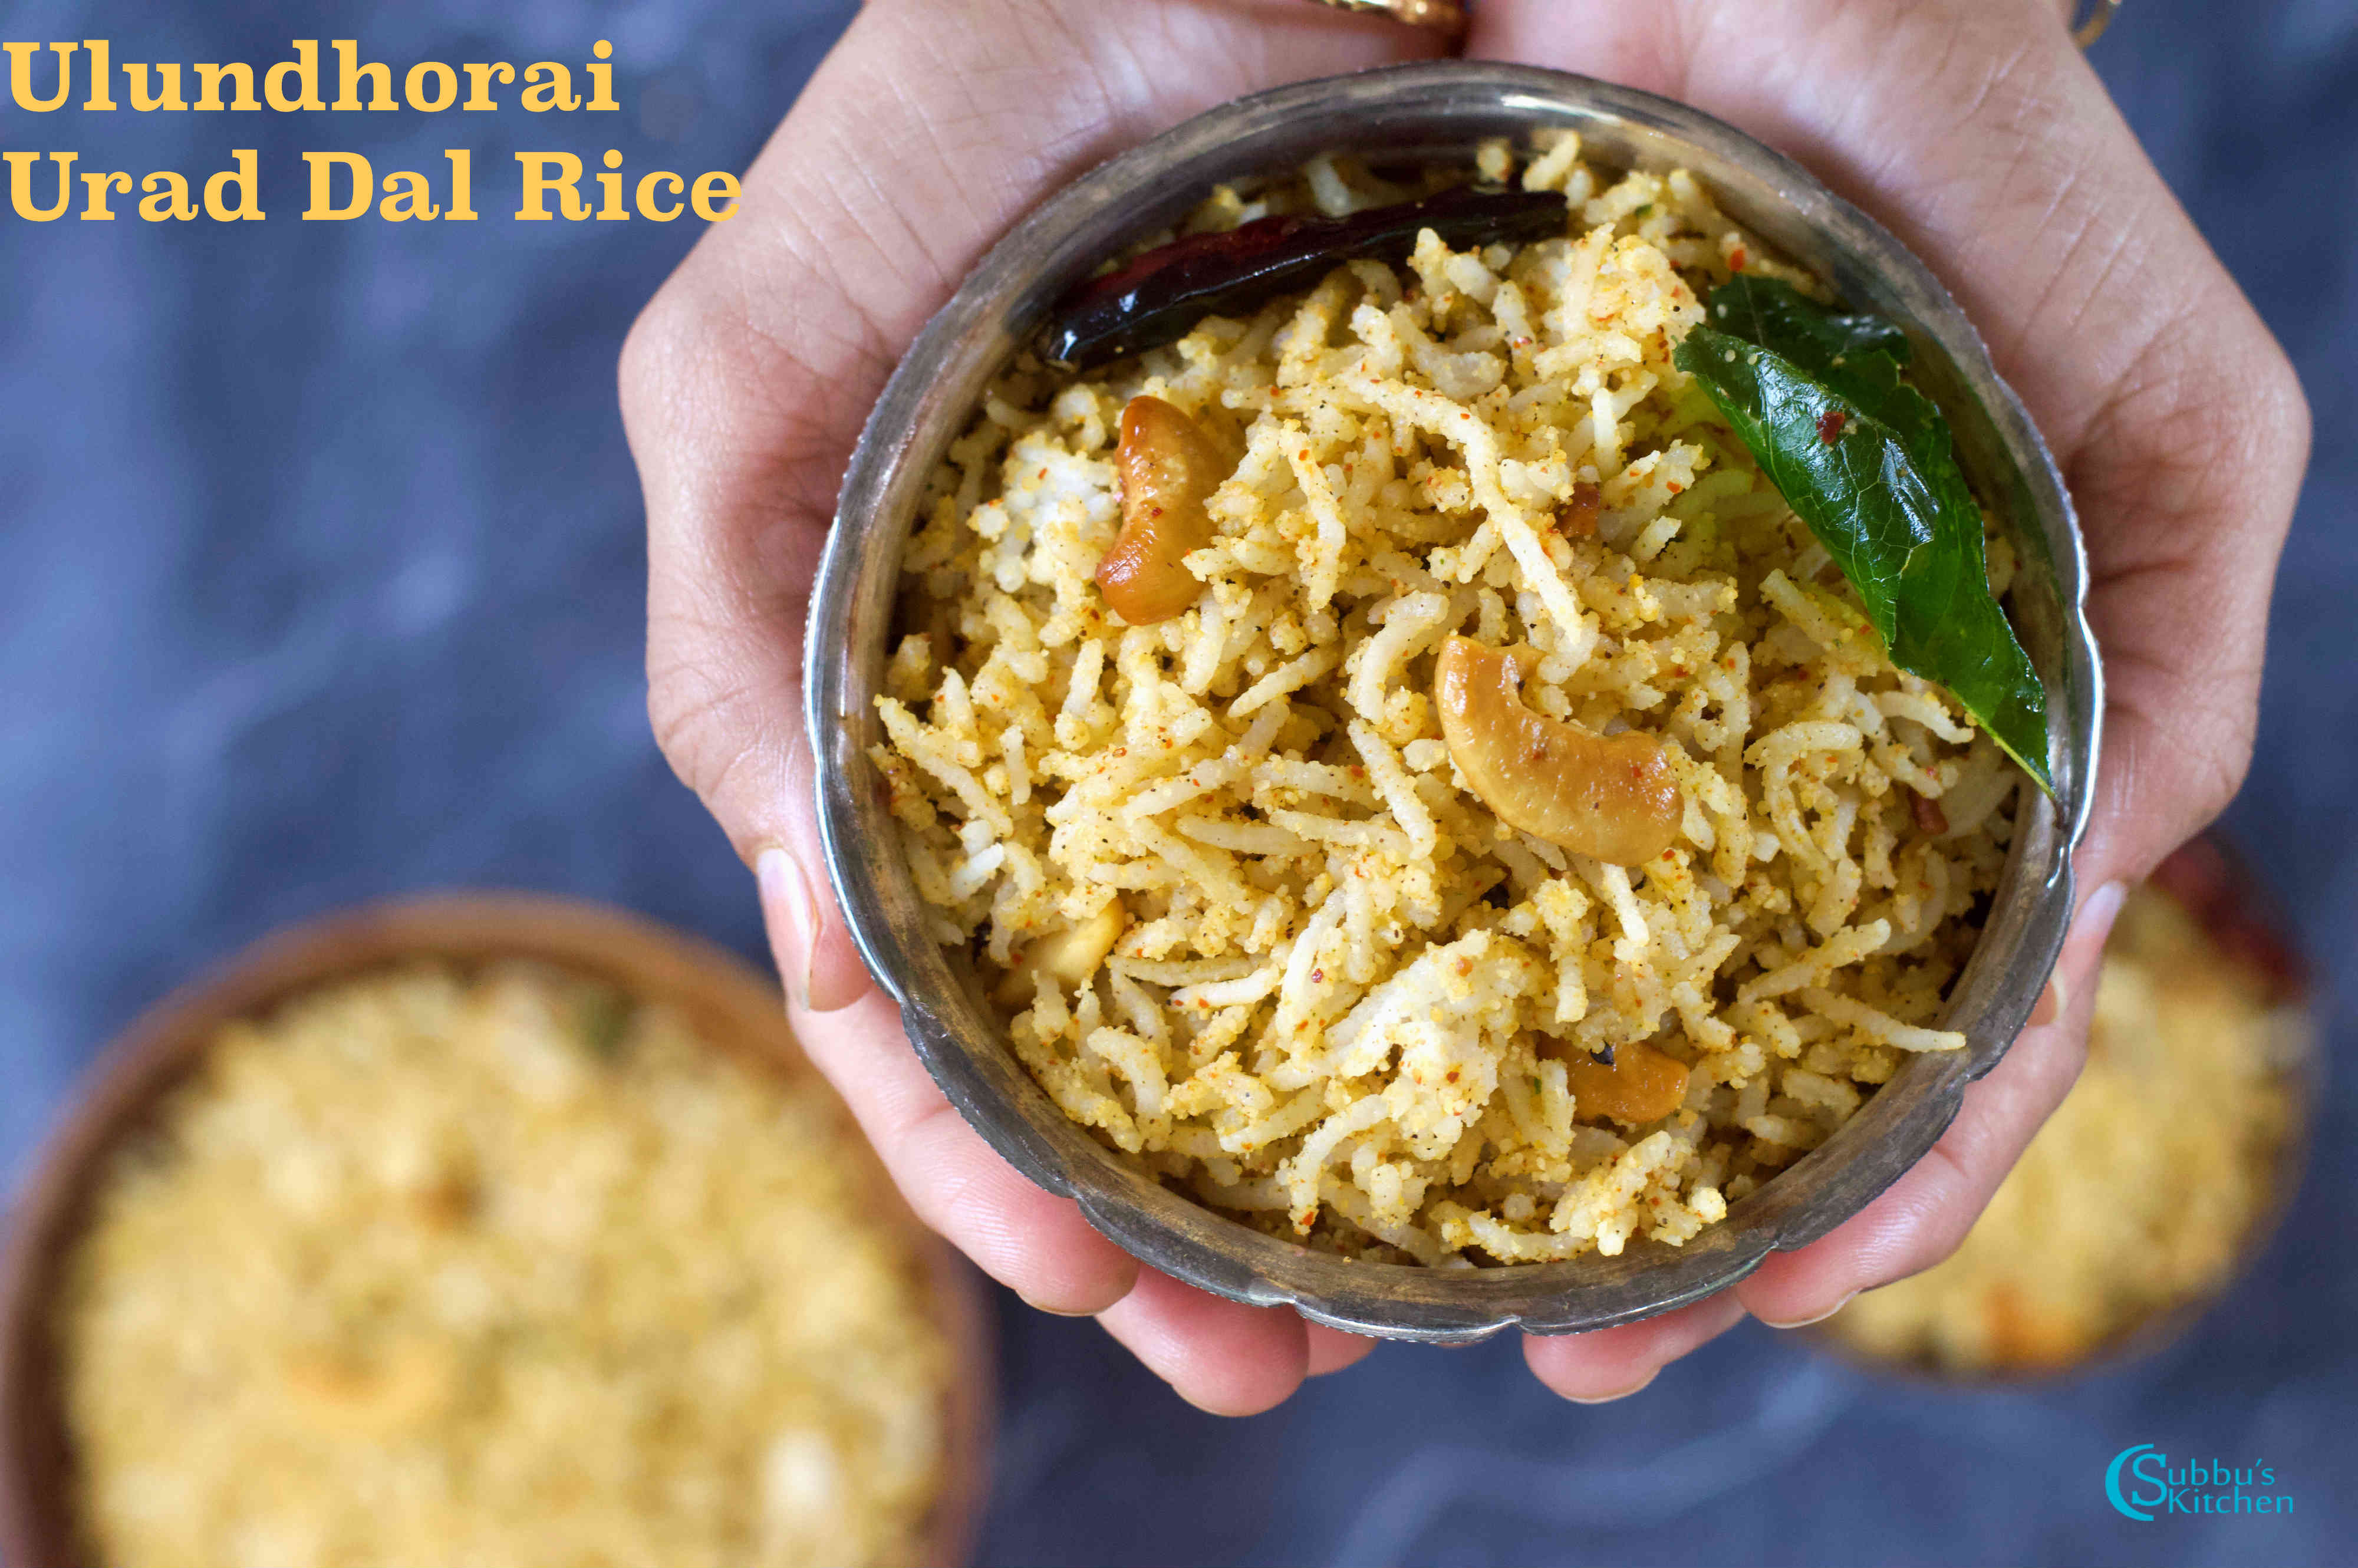
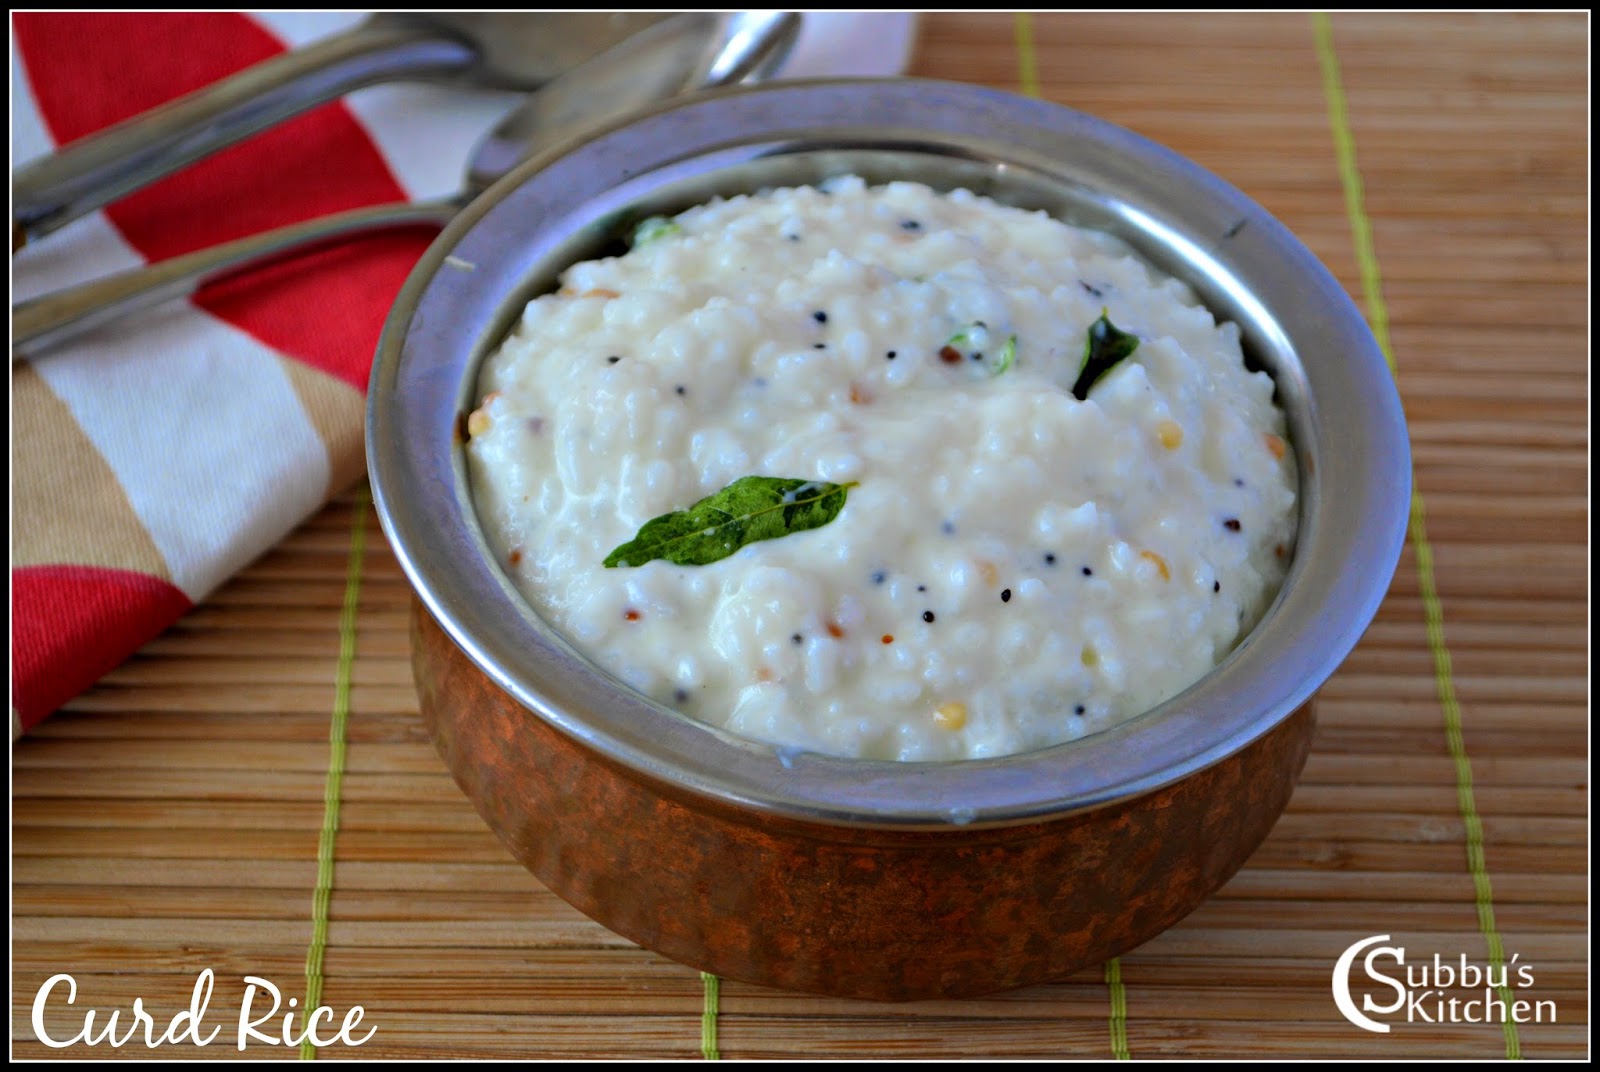
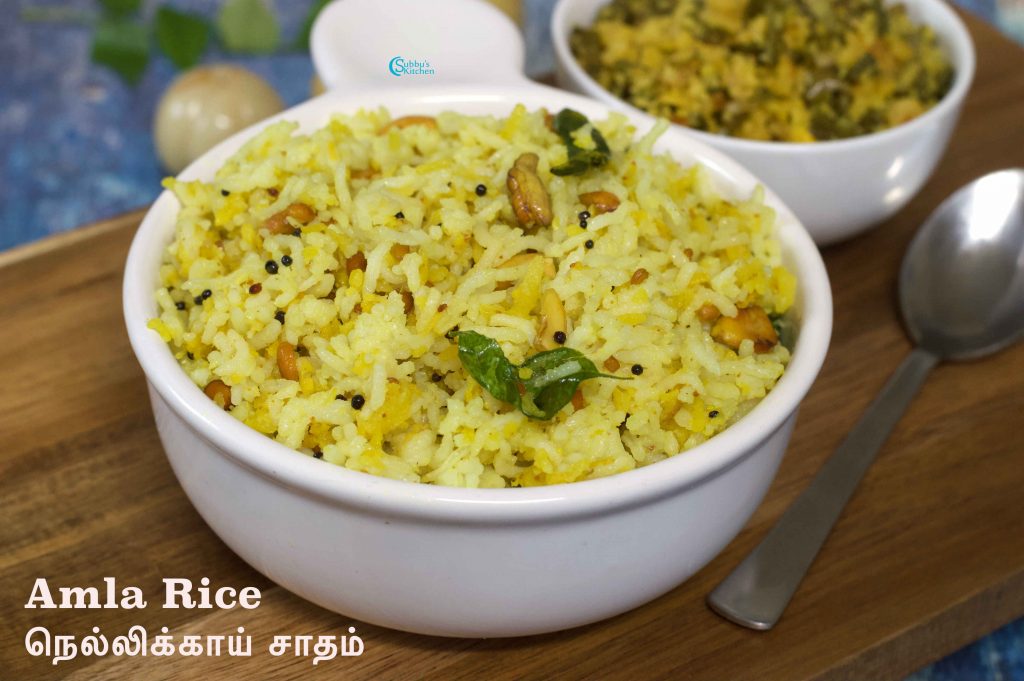
Variety Rice Recipes – Traditional rice dishes such as lemon rice, coconut rice, puliyodharai, and other flavorful varieties are prepared without onion or garlic, keeping them pure for offering.
Each of these dishes carries the spirit of devotion, tradition, and togetherness. Explore the recipes below and celebrate this Navratri with authentic flavors and heartfelt offerings.
[feast_advanced_jump_to]
Navratri Sundal Recipes for Golu
Sundal is one of the most popular offerings during Navratri and Golu celebrations. Different varieties of sundal are prepared each day as neivedhyam (offering) to the Goddess, and then shared with friends, relatives, and neighbors who come to view the Golu display.
This special collection is dedicated to Navratri recipes, with a focus on sundals. Below, you will find a variety of traditional sundal recipes to prepare and enjoy during the festival.
Sweets hold a special place in Navratri celebrations, adding joy and festivity to the occasion. Along with sundals, families prepare a variety of delicious sweets as neivedhyam for the Goddess and to share with guests. Traditional favorites include creamy kheer (payasam), soft and fluffy appam, melt-in-the-mouth kesari, festive puttu, and many more delightful treats.
This collection brings together popular Navratri sweet recipes that are simple to make and perfect for offering to the Goddess, as well as sharing with friends and family. Explore the recipes below and add sweetness to your Navratri celebrations
Apart from sundals and sweets, a variety of traditional snack and tiffin-style dishes are also prepared during Navratri. Crispy and flavorful vada, festive poori, wholesome sabudana thalipeeth, and many such recipes are commonly made as offerings to the Goddess and enjoyed with family and friends.
This collection brings together some of the most popular Navratri snack recipes that are both satisfying and festive, perfect for adding variety to your celebrations
Variety rice dishes are another important part of Navratri offerings. Traditional favorites like lemon rice, coconut rice, puliyodharai (tamarind rice), and other classic rice varieties are prepared with devotion and offered to the Goddess. As these are meant for neivedhyam, they are made without onion or garlic, keeping them pure and satvik.
This collection brings together delicious and authentic Navratri rice recipes that are simple to prepare, flavorful, and perfect for sharing with family and friends during the festive season.
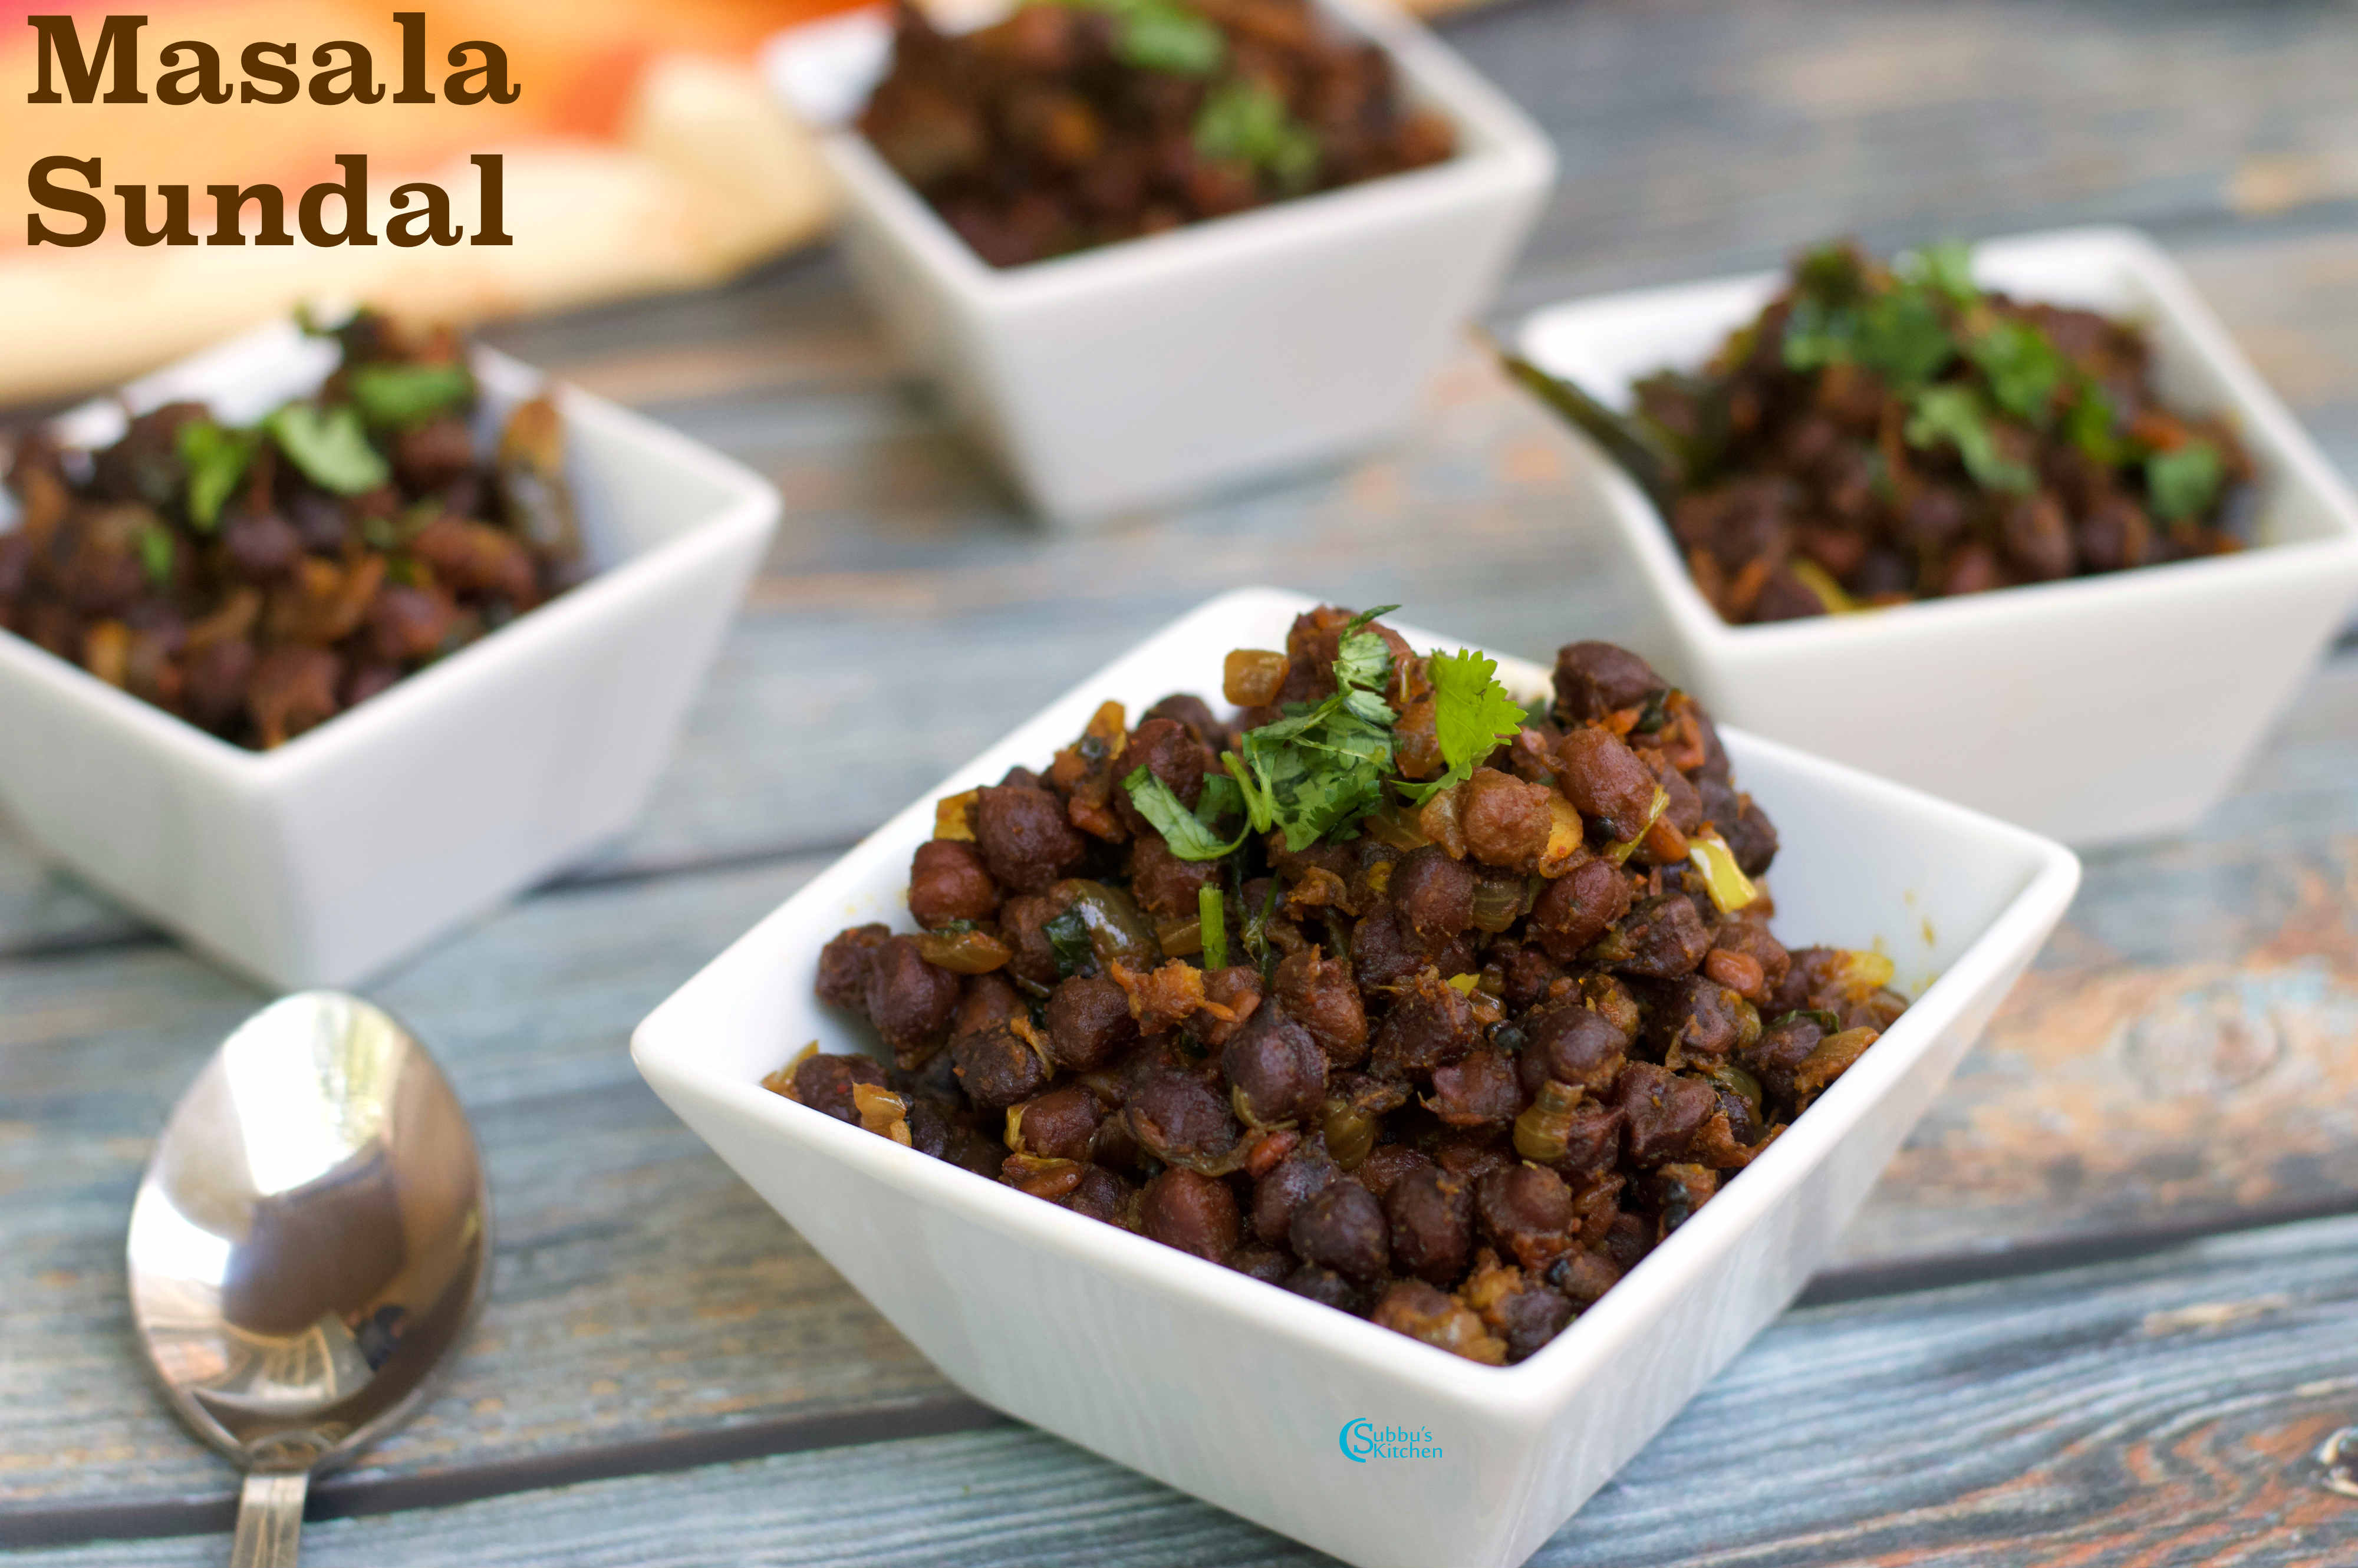
Navaratri is a time of devotion, celebration, and of course, delicious prasadam offerings! One of the most loved traditions is preparing a variety of Sundal recipes each day as an offering to the Goddess. In this collection of Navaratri Sundal Recipes, you’ll find a delightful assortment of healthy, protein-rich, and flavor-packed sundals made with different legumes and lentils. Each recipe is simple to follow, nourishing, and perfect not just for festivals but also as wholesome snacks for any day. Keep reading—you’re about to discover sundal varieties that are fan-freaking-fantastic and guaranteed to make your Navaratri even more special!
Wholesome and protein-rich Sundal varieties prepared for Navaratri prasadam and festive offerings.
Sundal & Navaratri
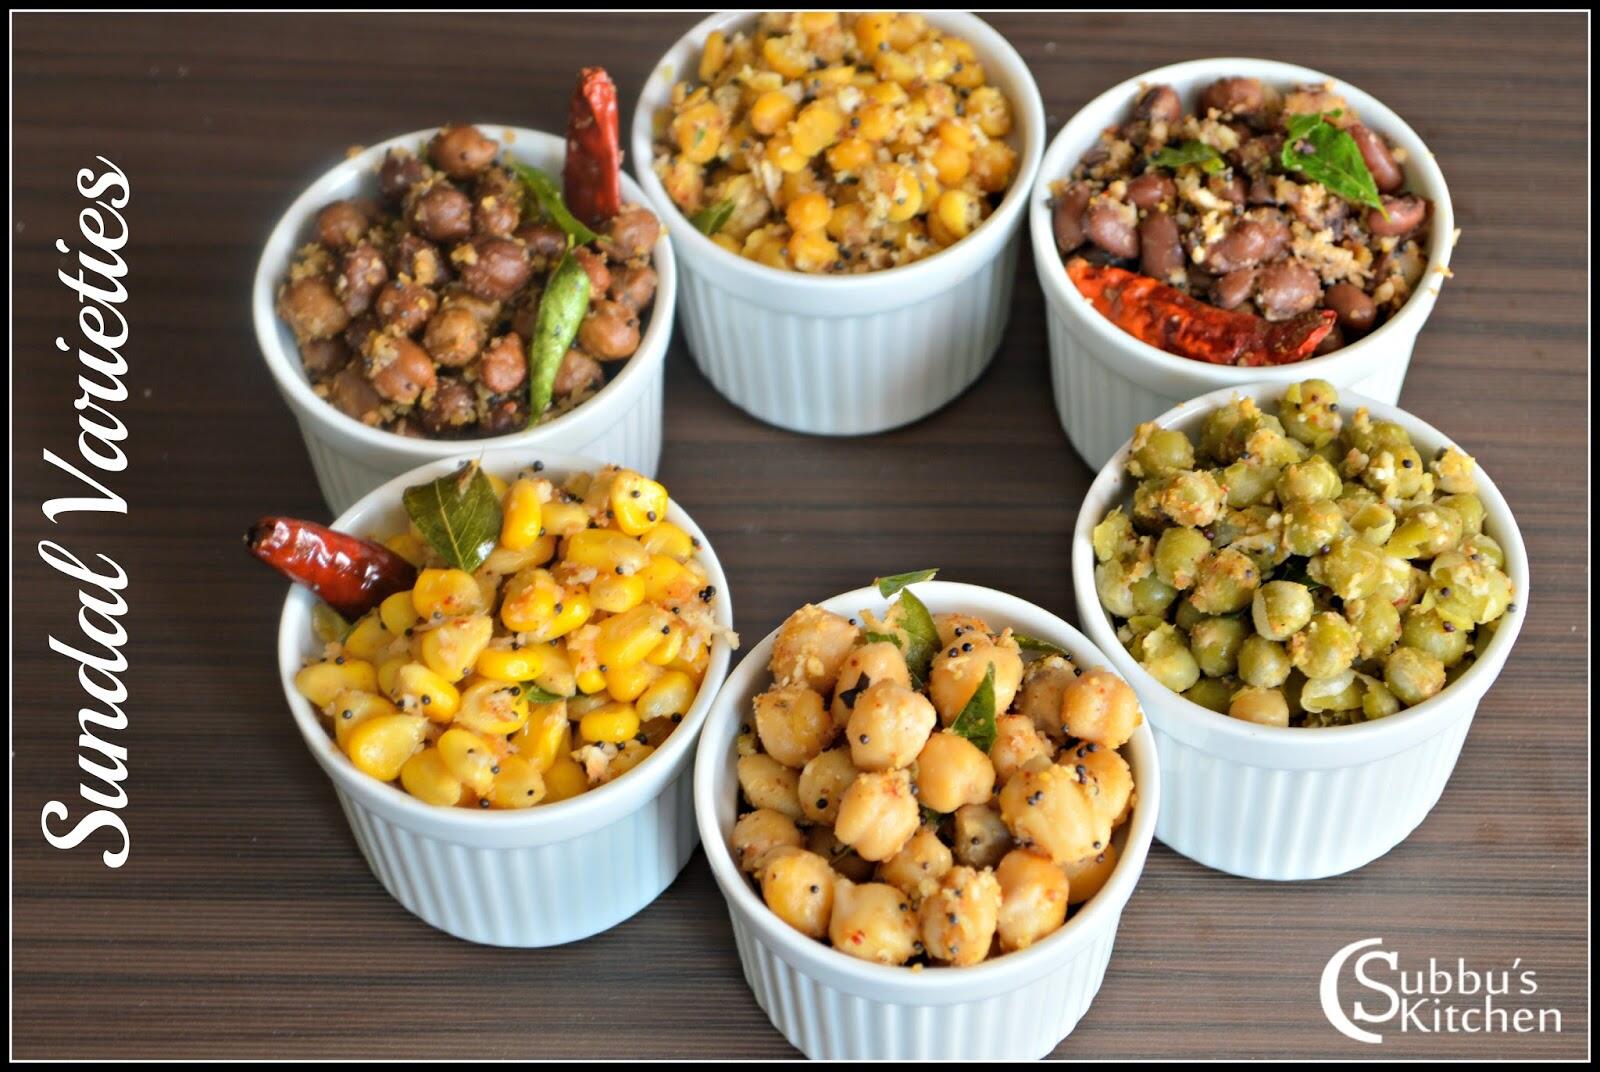
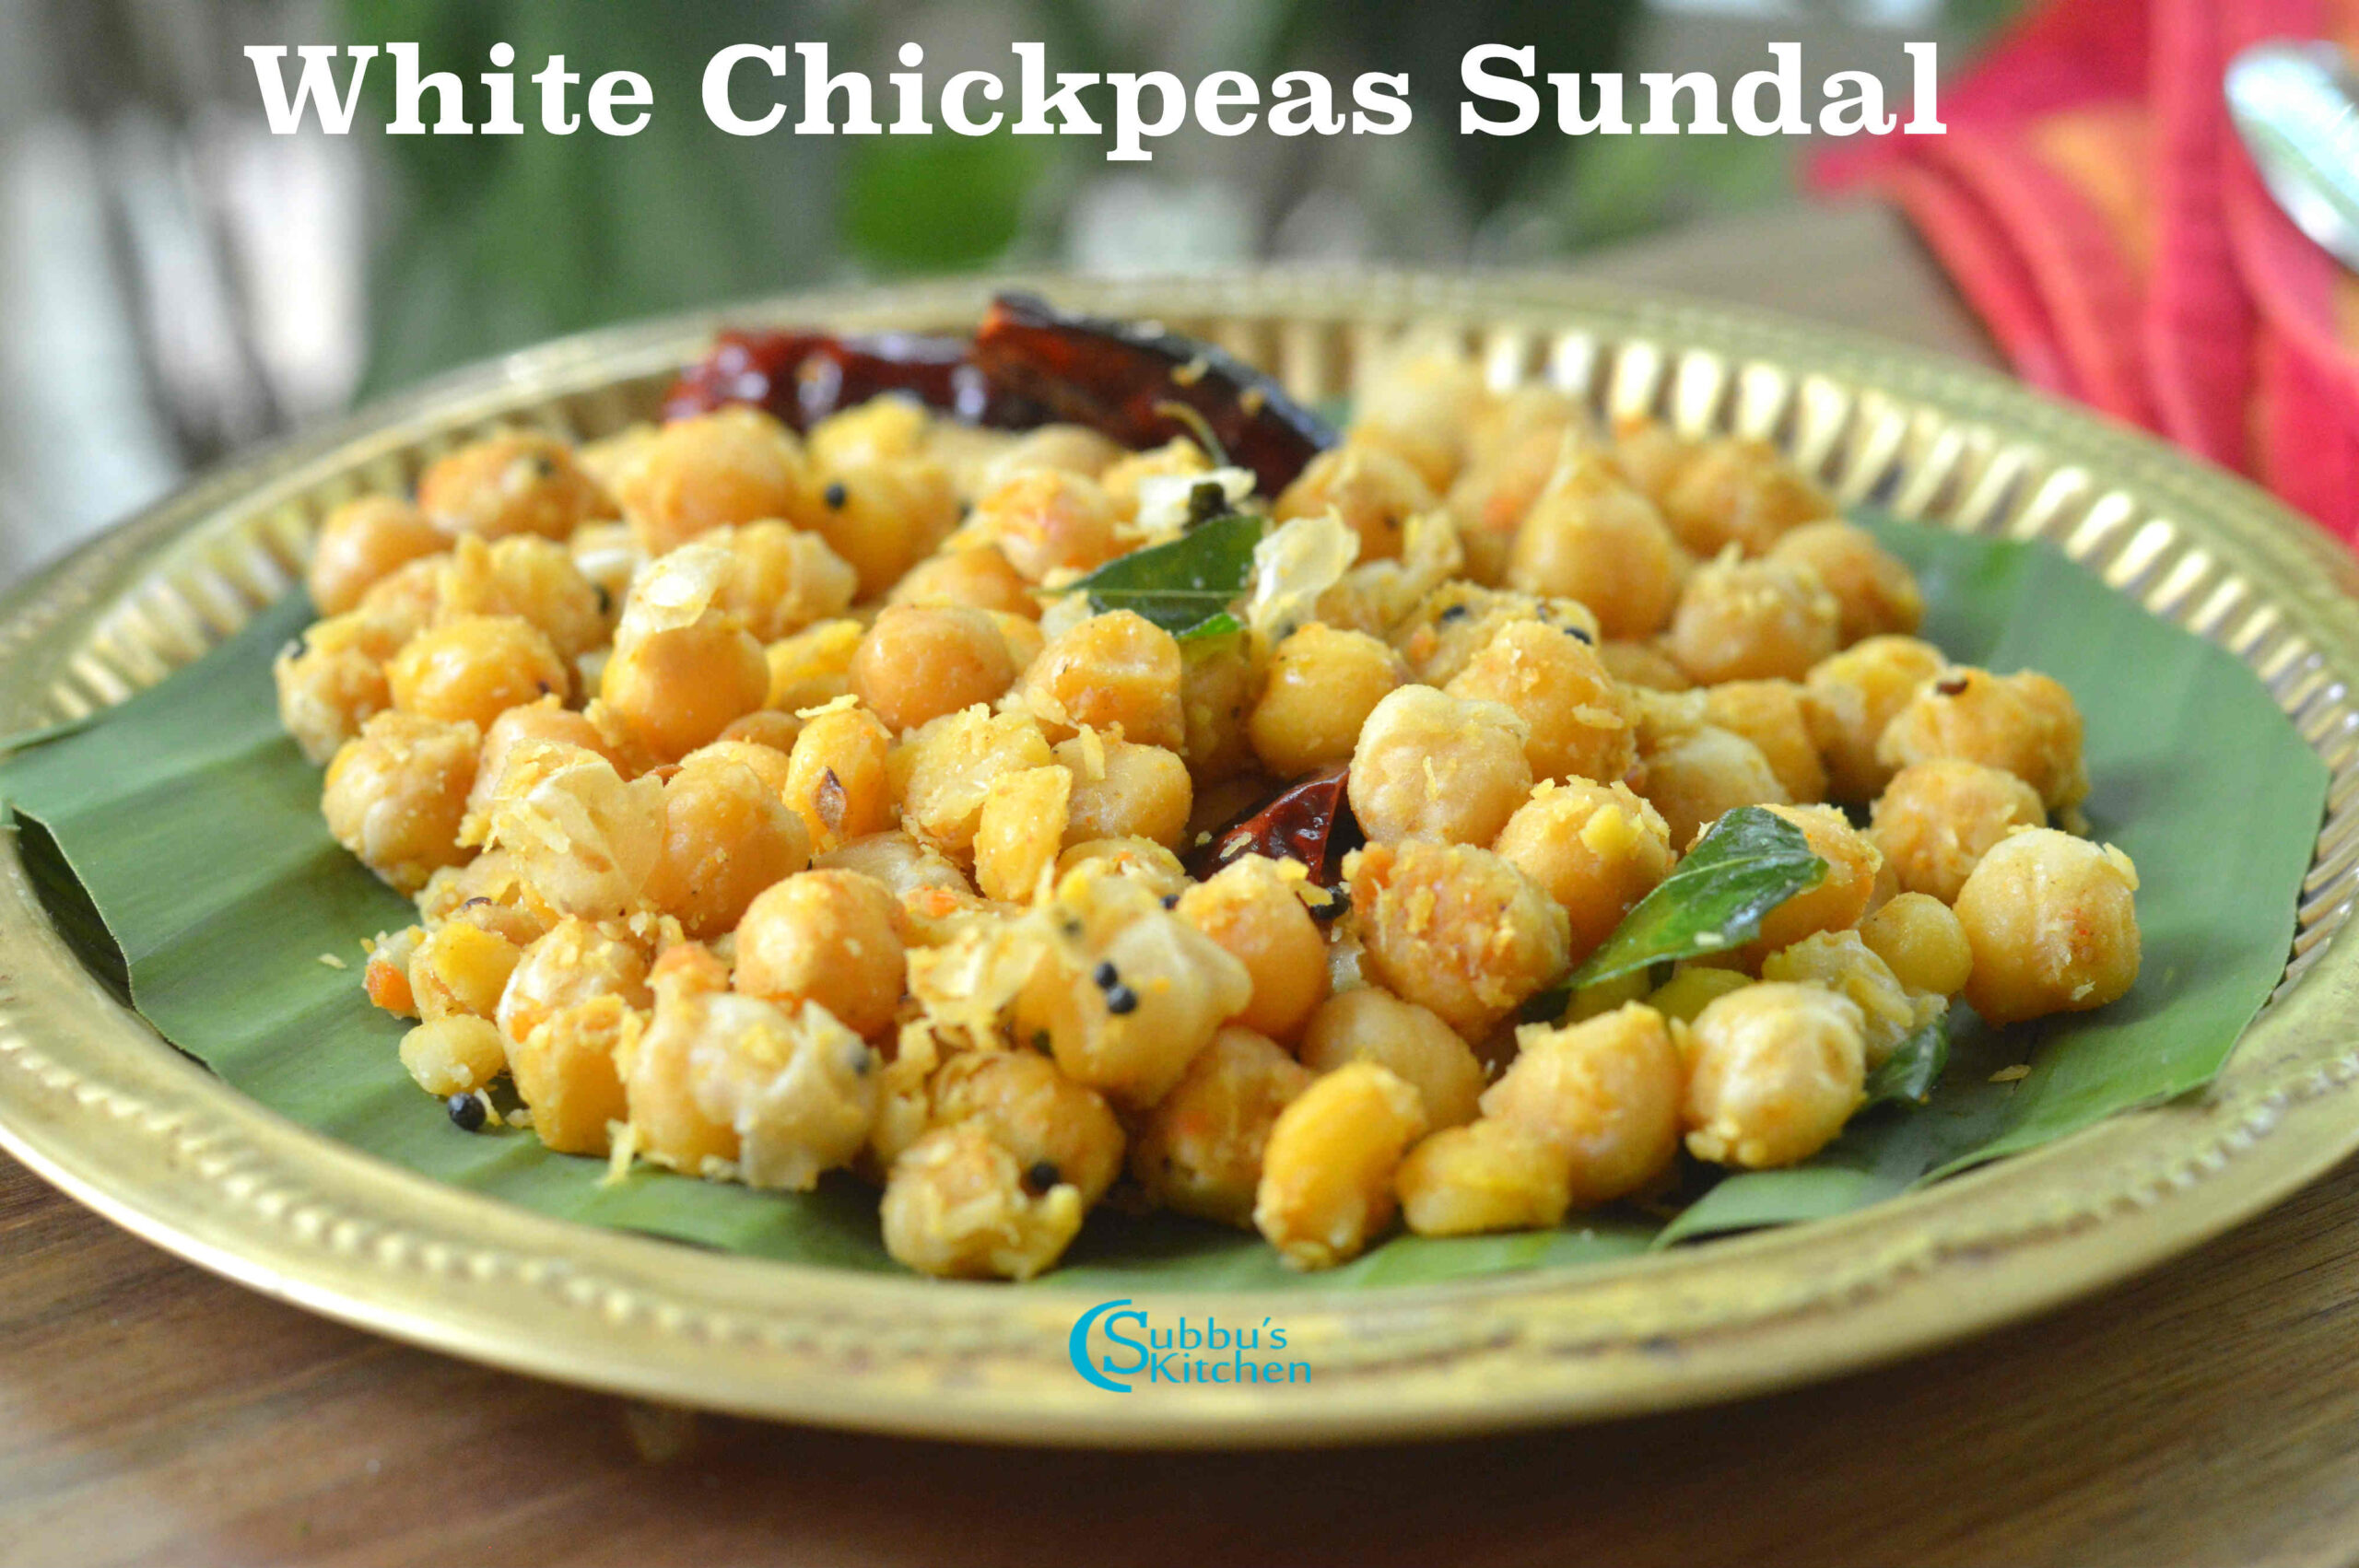
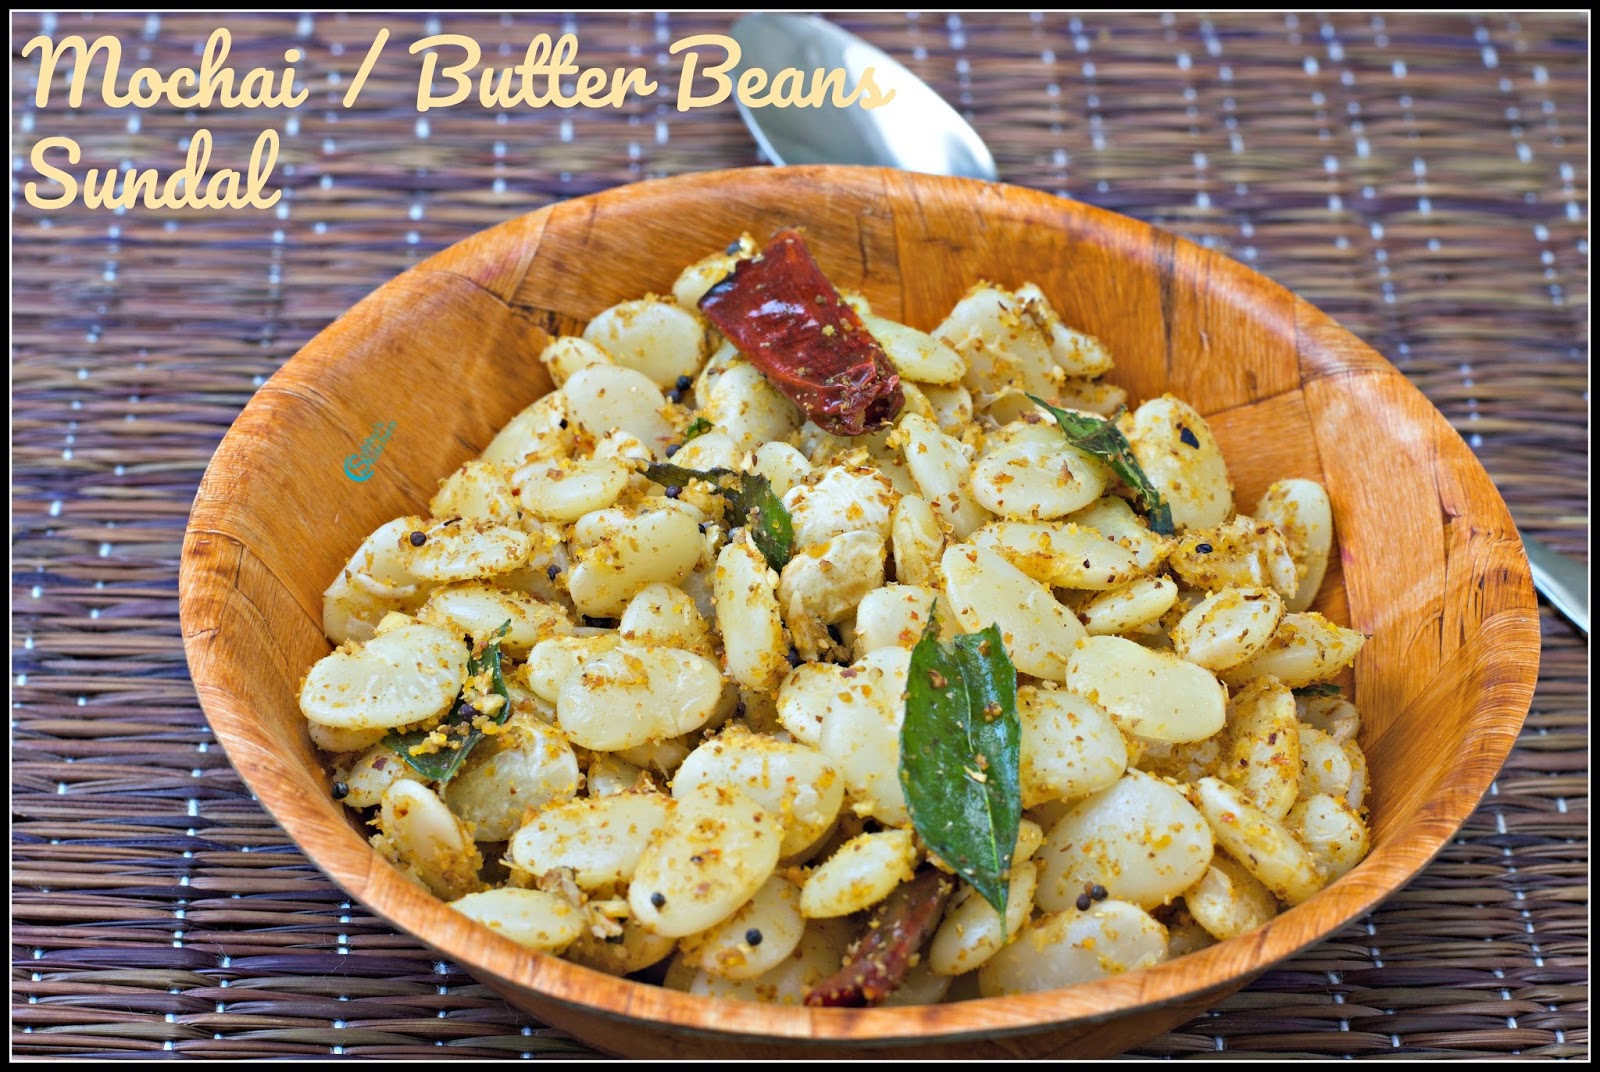
Navratri and Sundal are truly inseparable. The moment we think of Navratri, Sundal instantly comes to mind—and vice versa! Sundal, made with cooked pulses, is an essential prasadam during this festival and is offered on all the Golu days. Traditional sundal varieties include chickpeas, chana dal, peanuts, moong dal, green gram dal, karamani (cowpeas), mochai (field beans), dry green peas (pattani), sweet corn, and the colorful Navratna sundal. There are also delicious sweet versions made with cowpeas, moong dal, or a mix of dals.
Each day of Navratri, we prepare Sundal along with sweet puttu, rice varieties, or payasam as neivedhyam, which is then shared with our guests who visit our Golu and receive thamboolam. Offering neivedhyam first to the Goddess and then distributing it to family and friends not only fills our homes with joy but also brings the divine blessings of all three Goddesses, along with the goodwill of our elders.
Sundal Preparation
Making Sundal is simple and fuss-free. Legumes are usually soaked overnight, then cooked until soft yet not mushy, and finally tempered with mustard seeds, curry leaves, red or green chilies, and a touch of asafoetida. If red chilies are used for tempering, hing enhances the flavor beautifully, while with green chilies, ginger can be added instead for a fresh kick. A generous garnish of freshly grated coconut completes the dish.
Though Sundal is traditionally prepared as prasadam during festivals, it is not limited to those occasions. Sundal can be enjoyed any day as a wholesome salad, and you can even enrich it with fresh vegetables. For festivals, onions are usually avoided, but when preparing Sundal as a salad, chopped onions make a tasty addition too.
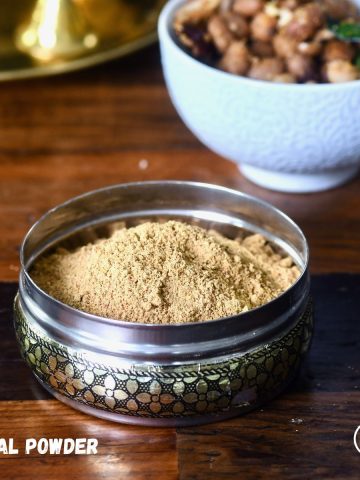
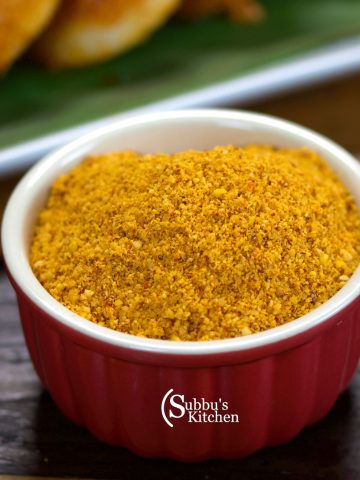
Sundal Powder
Many of us have the custom of preparing Sundal Powder (or Curry Powder) at home, especially during Navratri, so that a spoonful can be added to cooked lentils or beans to enhance their flavor. Typically, Sundal is tempered with red or green chilies, which gives a mild spiciness. However, for those who love bolder flavors and find plain Sundal a little bland, this special masala podi is the perfect way to add an extra punch of spice and aroma.
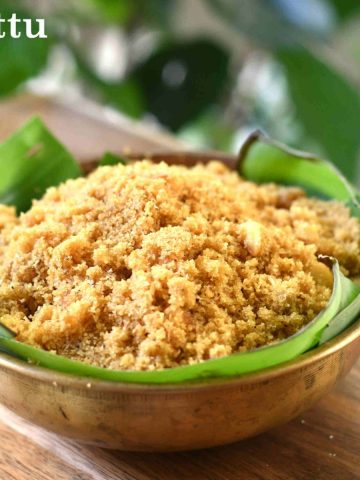
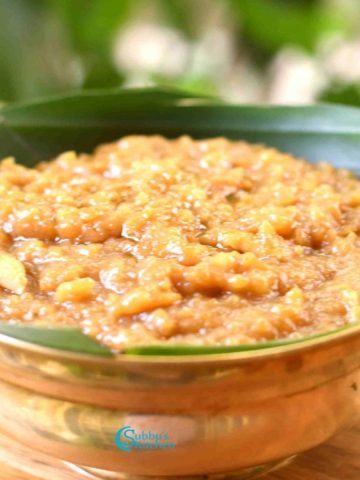
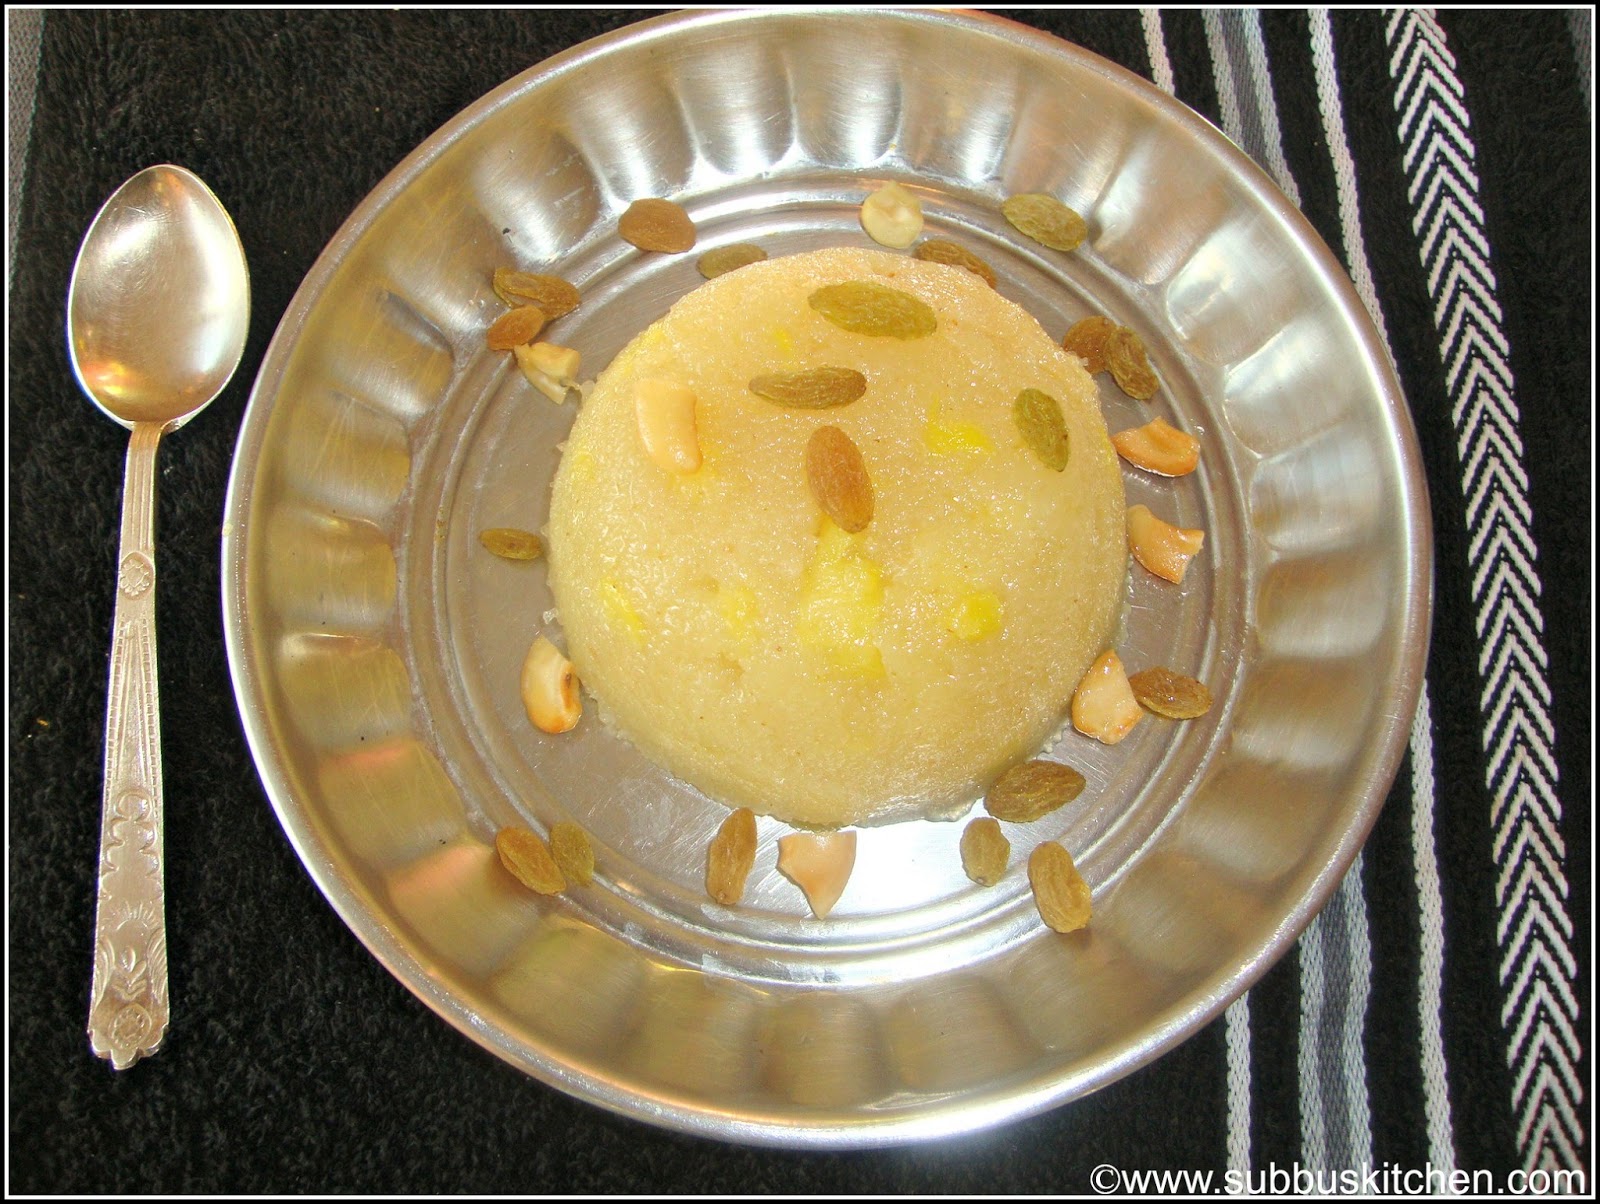
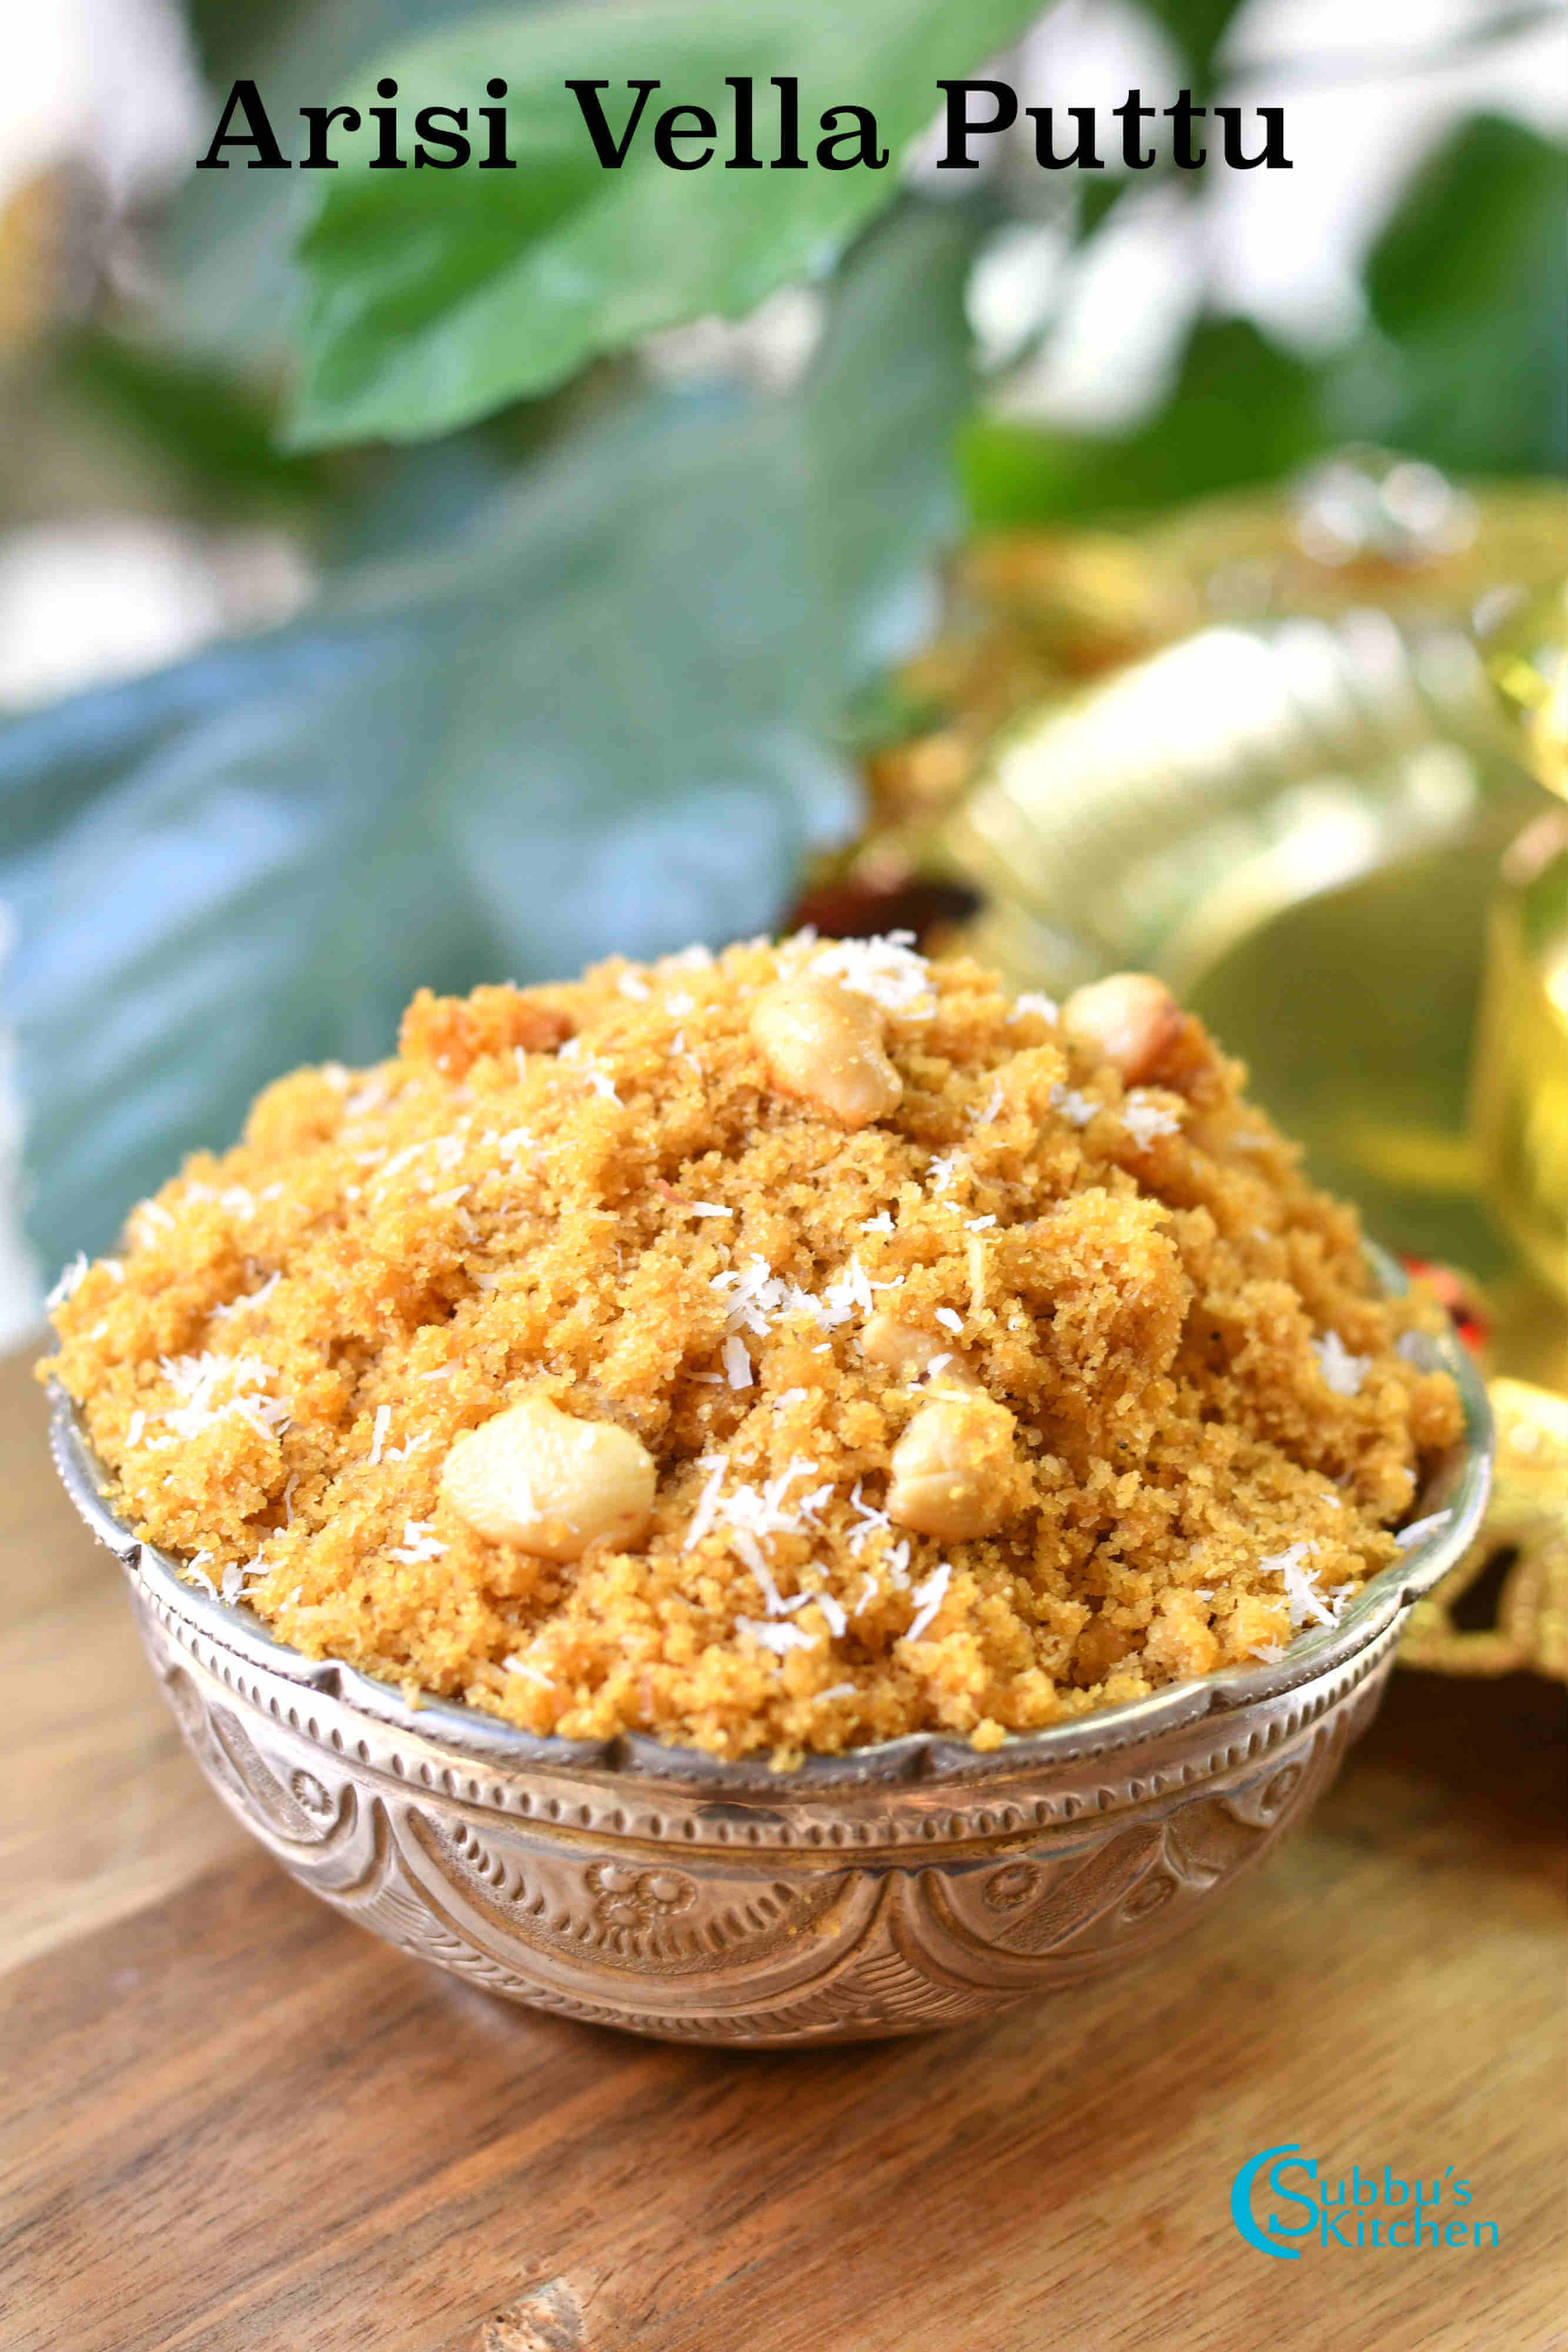
Sweet Rice Jaggery Puttu (Arisi Vella Puttu) is a classic Navratri delicacy that’s as divine as it is delicious. Soft, fluffy rice flour blends with rich jaggery and a hint of ghee to create a sweet that melts in your mouth and fills the home with festive aromas. In my hometown, this dish is a must for Navratri Fridays, a celebration I treasure deeply for its devotion to the Goddesses, the joy of arranging Golu, and the endless sharing of sundals and sweets with friends and family. If you’re looking for a traditional recipe that’s both authentic and irresistible, you’ve found it right here!
Authentic South Indian Arisi Vella Puttu – a sweet rice and jaggery delicacy prepared during Navratri Fridays.
This is my Periamma’s signature recipe. My mother-in-law makes Sweet Rice Jaggery Puttu (Arisi Vella Puttu) in a slightly different way—she soaks the rice, dries it, grinds it into a fine powder, then roasts the flour until golden brown. The flour is then steam-cooked, crumbled, and finally mixed into the jaggery syrup until it forms soft crumbles. This method works well, but I personally find the recipe I’ve shared below to be more authentic and perfectly consistent.
Ingredients
Each ingredient plays a specific, essential role in creating the authentic flavor and texture of Sweet Rice Jaggery Puttu / Arisi Vella Puttu:
Raw Rice gives the base—once lightly fried then steam‐cooked, it’s ground or crumbled to the perfect “beach sand” texture that makes puttu distinct.
Jaggery provides natural sweetness with rich caramel and molasses undertones, much more flavorful than refined sugar for this dish.
Grated Coconut adds moisture, texture, and a mild sweetness that balances the jaggery. It also gives that traditional South Indian touch.
Cashews bring crunch and richness. Fried in ghee, they offer contrast to the soft crumbled rice.
Cardamom adds aromatic warmth and a hint of spice that complements both jaggery and coconut beautifully.
Ghee enhances all the flavors, adding its signature buttery richness and carrying the aroma of the other ingredients.
Water, Turmeric Powder, Salt are trickier but no less important—even in small amounts. The water is used to help steam-cook the rice flour to the right consistency. Turmeric adds a gentle golden hue (plus subtle warmth), and a pinch of salt intensifies the sweetness without making it overt.
See recipe card for quantities.
Instructions
Wash the raw rice 2–3 times to remove excess starch, then soak it in water for 30 minutes.
After soaking, drain the rice completely using a strainer.
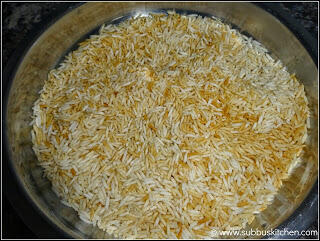
Heat a pan, add about ¼ of the soaked rice, and roast it over medium flame. .
Stir continuously with a spatula to ensure even roasting. After 5 minutes, the rice will begin to sputter and turn slightly golden brown. Remove and set aside
Again add the next ¼th quantity and repeat the process till all the rice are fried nicely and we get a nice aroma. In the same way complete the rest of the rice also in two batches. The reason why we are doing in batches is to make sure that the rice is being fried uniformly without getting over burn.
Allow the rice to cool off and grind it along with cardamom to a nice and smooth powder.
Heat ¾ cup of water with turmeric and a pinch of salt until just warm.Place the rice flour in a wide plate or bowl. Sprinkle the warm water little by little, mixing as you go.
The right consistency is called “Pidicha Pidikamudiyanum, vita udhiranum”—when pressed tightly in your palm, the flour should hold its shape, but when dropped, it should crumble apart. Do not add too much water.
Grease idli plates with a little oil. Place a fistful of the moistened rice flour in each mold and steam for 12 minutes.
Once cooked, allow the rice flour dumplings to cool. Using a sieve with a rawa plate, gently press the steamed flour through with your hands. The texture should resemble fine beach sand.
Heat a teaspoon of ghee in a pan, add cashews, and fry until golden. Remove and set aside.
In the same pan, add grated coconut and roast until golden. Set aside.
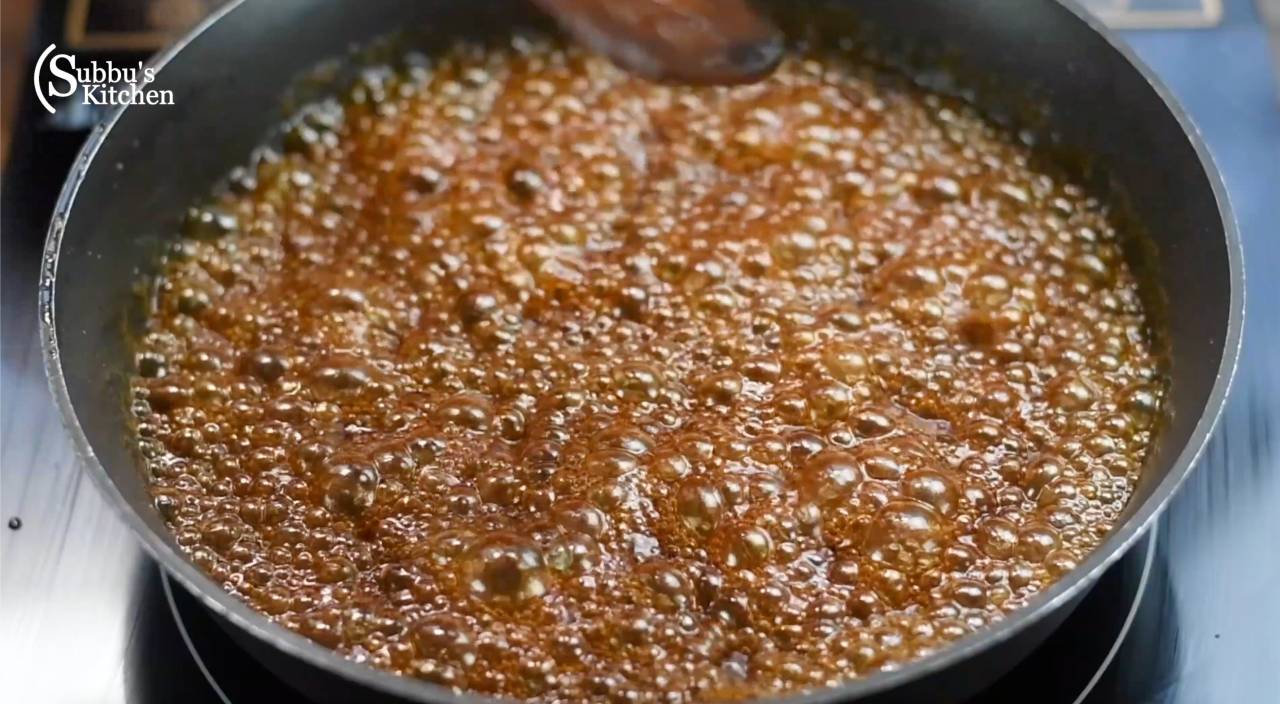
Add grated jaggery with 1 tablespoon of water to the pan. Once it melts completely, strain to remove impurities. Return the strained jaggery syrup to the pan and boil until it reaches “stone consistency.” To test: drop a little syrup into water. If it doesn’t dissolve and can be rolled into a soft ball between your fingers, it’s ready.
Add the sieved, steamed rice flour to the jaggery syrup and mix well.
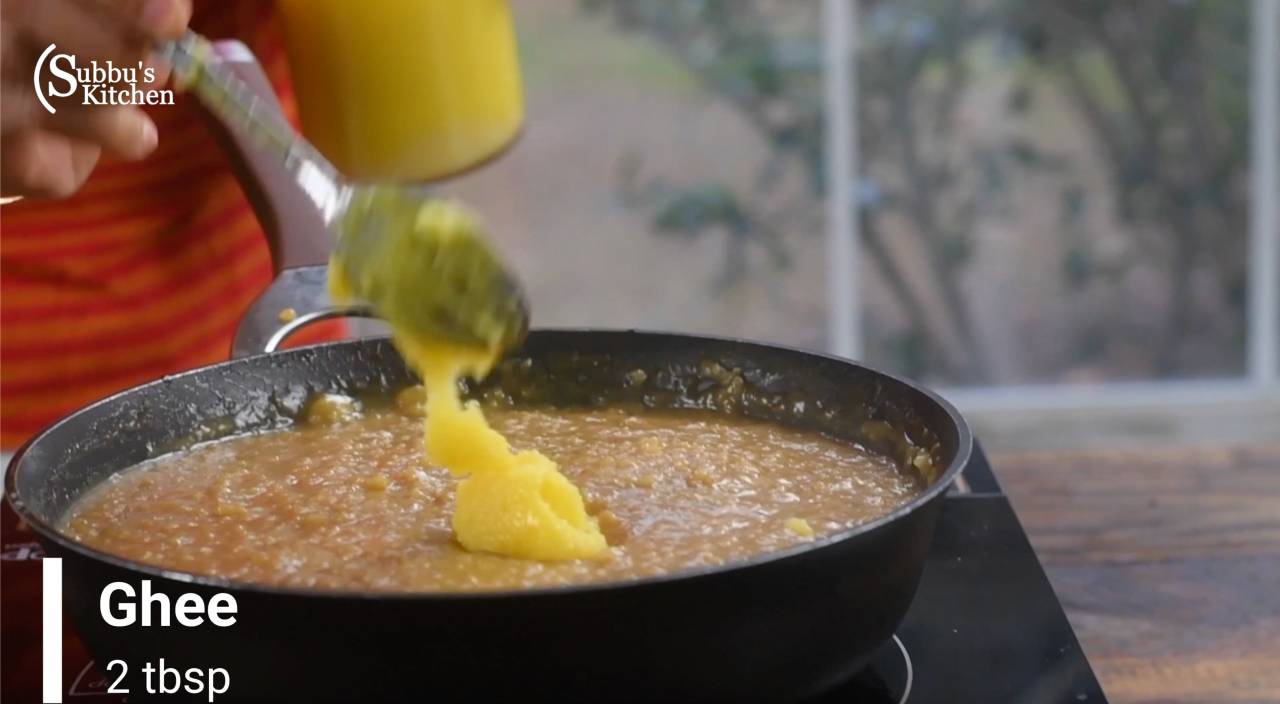
Stir in the ghee, fried coconut, and cashews.
Your soft, flavorful Sweet Rice Jaggery Puttu (Arisi Vella Puttu) is now ready—perfect as a Navratri neivedhyam or a festive sweet to enjoy with your family.
Hint : For best results, always focus on the texture of the puttu—it should feel like soft, moist beach sand. If the flour is too dry, it won’t bind, and if too wet, it will turn lumpy. Steam in small batches for even cooking, and use freshly grated coconut for authentic flavor.
Storage
Store the prepared puttu in an airtight container at room temperature for up to 1 day.
For longer storage, refrigerate in a covered container. It will stay fresh for 2–3 days. Before serving, gently reheat by steaming for a few minutes or warming in a microwave to restore softness.
Top Tip
If you're going to make this recipe, make sure to follow this top tip!
The key to perfect puttu is texture—it should resemble soft, crumbly beach sand. Do not over-steam the rice flour, and add water gradually when mixing to achieve the right consistency. Also, test the jaggery syrup carefully—reaching the right “stone consistency” ensures the puttu holds together without becoming sticky. Following these steps guarantees a melt-in-the-mouth, authentic traditional sweet every time.
Sweet Rice Jaggery Puttu, also known as Arisi Vella Puttu, is a traditional South Indian sweet made with roasted rice flour, jaggery, coconut, and cardamom. Steamed to a soft, crumbly “beach sand” texture, this melt-in-the-mouth delicacy is a festive favorite for Navratri Fridays and makes a perfect neivedhyam or dessert.
Course Sweet
Cuisine Indian, South Indian
Prep Time 20 minutesminutes
Cook Time 40 minutesminutes
Total Time 1 hourhour
Servings 4people
Calories 208kcal
Author Sowmya Venkatachalam
Ingredients
1cupRaw Rice
¾cupJaggery
2tablespoonGrated Coconut
10nosCashews
2nosCardamom
2tablespoonGhee (Clarified butter)
¾cupWater
½teaspoonTurmeric Powder
1pinchSalta pinch
Instructions
Prepare the Rice Flour
Wash the raw rice 2–3 times to remove excess starch. Soak for 30 minutes.
1 cup Raw Rice
Drain completely using a strainer.
Heat a pan, add ¼ of the rice, and roast over medium flame. Stir continuously until it sputters and turns slightly golden. Remove and set aside.
Repeat with the remaining rice in 3 more batches to ensure even roasting. In the same way complete the rest of the rice also in two batches. The reason why we are doing in batches is to make sure that the rice is being fried uniformly without getting over burn.
Allow to cool, then grind with cardamom to a fine powder.
Steam Cook the Rice Flour
Heat ¾ cup of water with turmeric and salt until warm.
½ teaspoon Turmeric Powder, 1 pinch Salt, ¾ cup Water
Place the rice flour in a bowl and sprinkle warm water little by little, mixing well. The consistency should be “Pidicha Pidikamudiyanum, vita udhiranum”—firm when pressed, crumbly when released.
Grease idli plates with oil. Place a fistful of moistened rice flour in each mold and steam for approximately 12 minutes.
Once the rice flour is steam-cooked, remove it and allow it to cool slightly. Place a rawa sieve over a bowl and add the steamed rice flour dumplings. Using your hands, gently spread and press the flour through the sieve, breaking it down into fine, crumbly pieces. The cooked rice flour should have a soft, beach-sand-like texture.
Prepare the Jaggery Syrup
Heat 1 teaspoon ghee in a pan. Fry cashews until golden and set aside.
2 tablespoon Ghee (Clarified butter)
In the same pan, roast grated coconut until golden. Set aside.
2 tablespoon Grated Coconut
In the same pan, add the grated jaggery with 1 tablespoon of water and bring it to a boil. Once the jaggery has completely dissolved, strain it to remove any impurities or sand.
¾ cup Jaggery
Return the strained syrup to the pan, add cardamom powder and continue boiling until it thickens and reaches a stone consistency. To test, drop 2–3 drops of the syrup into a cup of water—if it doesn’t dissolve and can be rolled into a soft ball between your fingers, the syrup is ready.
2 nos Cardamom
Combine Everything
Add the steamed rice flour to the jaggery syrup and mix well.
Stir in ghee, fried coconut, and cashews.
10 nos Cashews
Serve warm as Sweet Rice Jaggery Puttu (Arisi Vella Puttu)—a perfect Navratri neivedhyam or festive sweet.
Video
Notes
Tips for Perfect Sweet Rice Jaggery Puttu
Roast Rice in Batches: Always roast the soaked rice in small portions to ensure even cooking and avoid burning.
Check Rice Flour Texture: After steaming, sieve the rice flour carefully. The final texture should resemble soft, crumbly beach sand for the authentic puttu feel.
Add Water Gradually: When mixing water into the rice flour, add it slowly to reach the perfect consistency—firm enough to hold in a fist but crumbly when released.
Test Jaggery Syrup: Achieving the right “stone consistency” in jaggery syrup is key. Test by dropping a little in water; it should form a soft ball without dissolving.
Use Fresh Coconut: Freshly grated coconut gives the best flavor and aroma. Lightly roasting it adds a subtle nutty taste.
Don’t Oversteam: Overcooked rice flour will become mushy and lose the signature crumbly texture. Steam just until cooked through.
Serve Immediately: Puttu tastes best fresh and warm. If storing, reheat by steaming briefly to restore softness.
Customize Nuts and Flavor: Add cashews, almonds, or raisins for extra crunch, and cardamom or a pinch of saffron for aroma.
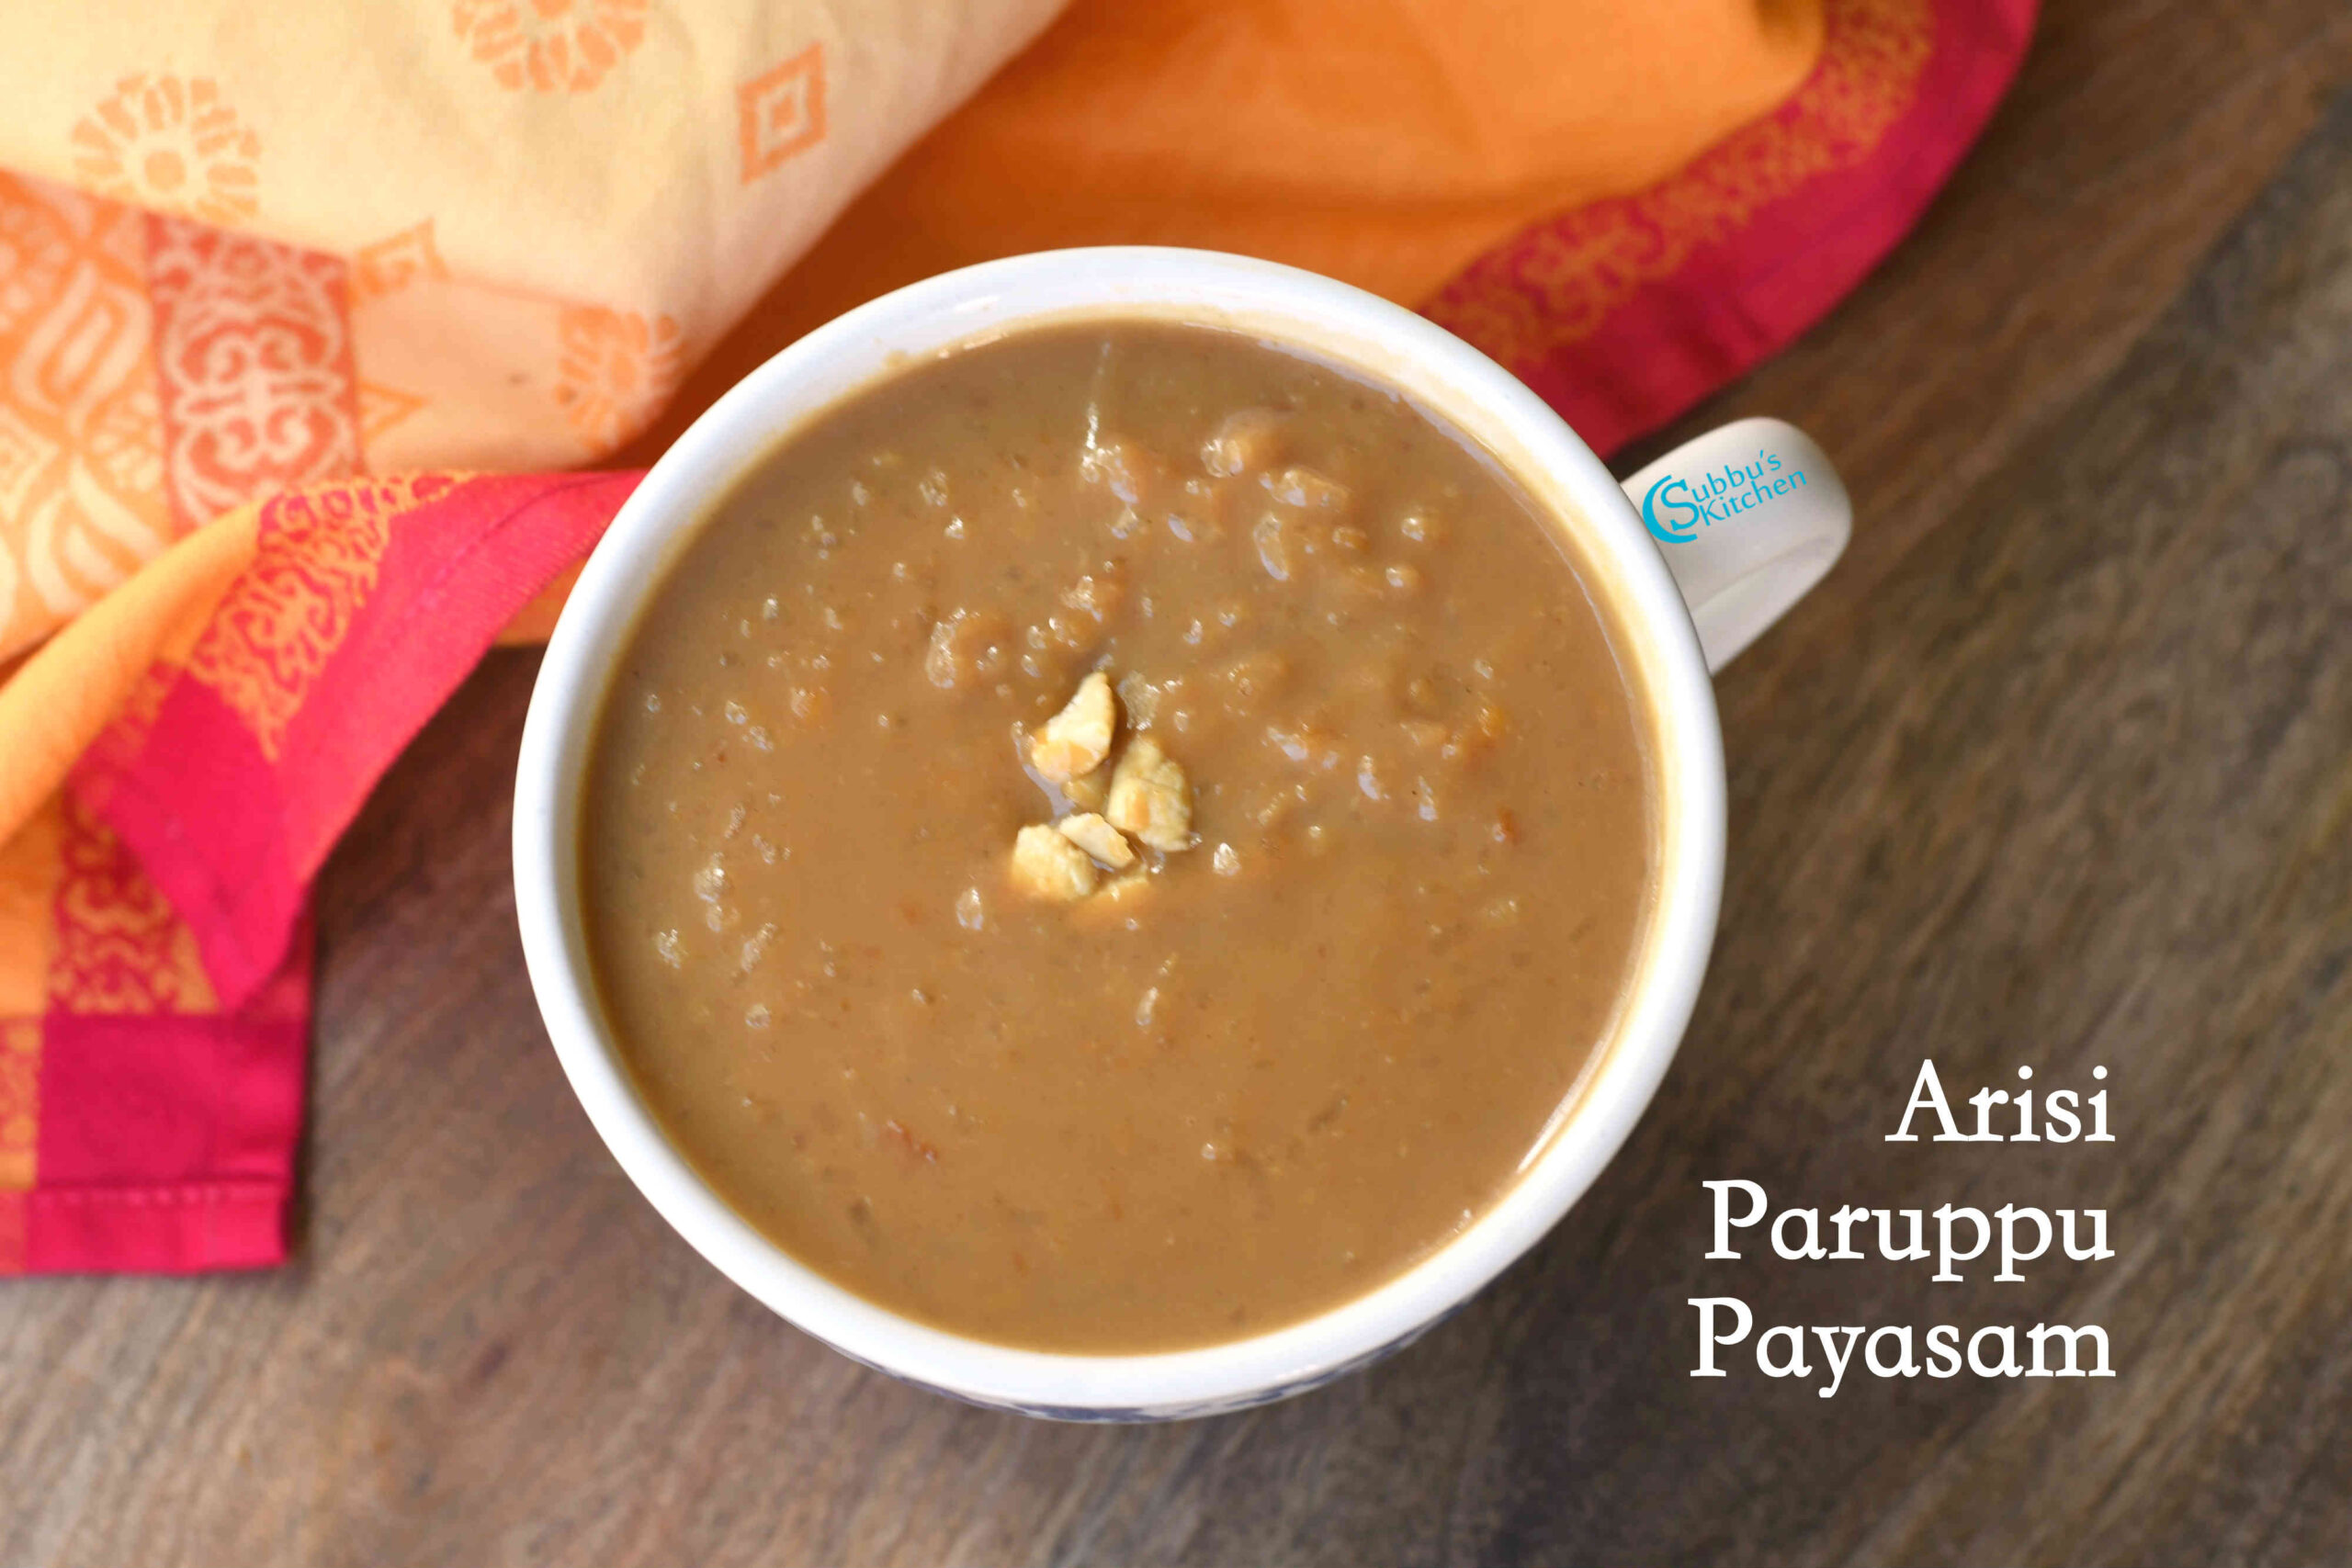
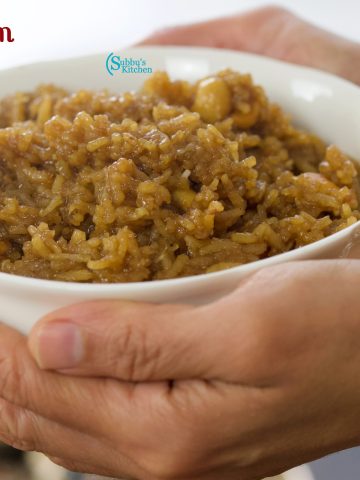
There’s something truly magical about the aroma of ghee, jaggery, and cardamom wafting through the kitchen — it instantly feels like a celebration. Sakkarai Pongal, a traditional South Indian sweet dish made with rice, moong dal, and jaggery, is not just food, but an offering of love and devotion during festivals like Pongal and Navratri. Soft, melt-in-your-mouth, and rich with the flavor of ghee-roasted cashews and raisins, this recipe is a heartwarming treat you’ll want to enjoy well beyond festive days.
Creamy and aromatic Sakkarai Pongal, a festive sweet made with rice, moong dal, jaggery, and ghee.
Sakkarai Pongal is deeply tied to special occasions and festivals in South India, especially Tamil Nadu. Here’s the cultural and seasonal background you can use as content:
Harvest Festival (Thai PongalThai Pongal Festival and Recipes): Sakkarai Pongal is the star dish of the Pongal festival, celebrated in January to thank the Sun God for a bountiful harvest. It’s cooked in new clay pots, often outdoors, and allowed to boil over — symbolizing abundance and prosperity.
Temple Prasadam: It’s also a very popular prasadam (offering) in temples, especially in Vaishnavite temples like Srirangam, where it is served to devotees.
Other Festivals & Occasions: Apart from Thai Pongal, it is also prepared during Navratri,Aadi Perukku, Vaikunta Ekadashi, and other auspicious days. Families make it at home as an offering to deities and then enjoy it together.
So while it can be made any time of year, it is most beloved during festivals, temple offerings, and auspicious beginnings.
[feast_advanced_jump_to]
Ingredients
Every ingredient in Sakkarai Pongal plays a purpose that contributes to its signature taste and texture:
Rice and moong dal form the creamy, porridge-like base—when cooked and mashed together, they offer both body and smooth consistency, essential for the dish's comforting character.
Jaggery, the unrefined cane sugar, imparts a deep, molasses-like sweetness unique to traditional South Indian sweets—a flavor profile that refined sugars simply can’t replicate.
Ghee envelopes the dish in richness and aroma, making the texture luxuriously silky and elevating every bite.
Cardamom, along with optional edible camphor, clove, and nutmeg, lend fragrant warmth and a touch of divine, almost ritualistic flavor—especially when the dish is made as prasadam (offering).
Cashews and raisins introduce a delightful contrast in texture—nutty and slightly chewy—rounding out the dish with pops of buttery crunch and sweet bursts.
Each component has been carefully chosen not just for flavor, but for tradition, mouthfeel, and the harmonious balance that makes this humble sweet dish feel like a festive celebration in every spoonful.
See recipe card for quantities.
Instructions
Heat a pan and dry roast the moong dal until it turns slightly golden and releases a nutty aroma. Set it aside.
In a strainer, add the roasted moong dal and rice. Rinse them well two to three times.
Transfer the washed rice and dal to a pressure cooker, add water, and mix well.
Pressure cook for 5–6 whistles, until the mixture becomes soft and mushy. Traditionally, in temples and during festive occasions, the rice and dal are slow-cooked in open pots, giving a smoky flavor. For everyday cooking at home, pressure cooking is quicker and convenient. Once cooked, mash the mixture well and set aside.
In a saucepan, add jaggery with a little water. Heat until the jaggery melts completely. Set this aside.
Heat ghee in a heavy-bottomed pan, strain the jaggery syrup, and add it to the pan.
Allow the jaggery syrup to come to rolling boil.
When the syrup begins to boil, add the mashed rice and dal mixture.
Reduce the flame to low and stir in milk (optional). Milk adds richness but shortens the shelf life to about a day. If preparing in advance, skip the milk. Important: never add milk directly to the jaggery syrup, as it will curdle—always add it after mixing in the rice-dal mixture.
Stir continuously until the rice-dal mixture absorbs the jaggery syrup and reaches a slightly thick consistency.
Add the remaining ghee and cardamom powder, mixing well. Keep on low flame for a few more minutes.
In a separate small pan, heat ghee and roast cashews and raisins until golden. Add them to the pongal and mix gently. Your delicious Sakkarai Pongal is ready to be offered as neivedhyam or enjoyed warm with family!
???? Hint: When melting jaggery, always strain the syrup before adding it to the rice-dal mixture. This helps remove any impurities and ensures your pongal stays smooth, clean, and glossy.
Variations
Gluten-Free: Since it’s made with rice, dal, and jaggery, Sakkarai Pongal is naturally gluten-free. Just make sure your jaggery is pure and not processed with additives.
Vegan Option: Traditionally, this recipe uses ghee and sometimes milk. To make it vegan, replace ghee with coconut oil or vegan butter, and skip the milk (or use almond/coconut milk for richness).
Storage
Pongal made without milk can be kept at room temperature for up to 12–18 hours in a cool place. Pongal made with milk should be consumed within 6–8 hours, as it spoils quickly.
Store in an airtight container to maintain freshness and aroma.
Keep at room temperature for up to 1 day.
Refrigerate for up to 2–3 days.
Reheat gently on low flame before serving.
Avoid prolonged storage to preserve the soft, creamy texture and flavor.
Top Tip
If you're going to make this recipe, make sure to follow this top tip!
Jaggery Ratio: Use a rice + dal to jaggery ratio of 1.25:2.5. For 1 cup rice and ¼ cup moong dal, add 2.5 cups grated jaggery. This ensures the sweetness is balanced — not too bland, not too overpowering.
Jaggery Quality Matters: The color and aroma of your pongal depends on the type of jaggery. Paagu vellam gives a darker, richer brown consistency than regular jaggery.
Cooking Rice & Dal: Add an extra ½ cup of water and allow additional whistles in the pressure cooker to ensure the rice and dal are completely soft and mushy.
Milk is Optional: Adding milk while cooking makes the pongal creamier and richer in flavor, but it’s not necessary.
Strain Jaggery Syrup: Jaggery can contain impurities like sand. Always dissolve and strain the jaggery syrup before adding it to the rice-dal mixture.
Ghee in Syrup: Adding a bit of ghee to the jaggery syrup is optional, but it enhances the richness and aroma of the pongal.
Consistency Tips: Milk can be used to adjust consistency. Once milk is added, keep the flame low to avoid curdling or breaking the pudding.
Sakkarai Pongal is a traditional South Indian sweet dish made with rice, moong dal, jaggery, ghee, and cardamom. Creamy, aromatic, and lightly sweet, this festive dessert is perfect for Pongal, Navratri, or temple offerings. Enhanced with roasted cashews and raisins, it’s soft, melt-in-your-mouth, and easy to make at home with this foolproof recipe.
Course Festival Recipes, Sweet
Cuisine India, South Indian, Tamil Brahmin, Tamil Nadu
Prep Time 5 minutesminutes
Cook Time 25 minutesminutes
Total Time 30 minutesminutes
Servings 6people
Calories 220kcal
Author Sowmya Venkatachalam
Equipment
Pressure Cooker
Heavy Bottomed Pan
Ingredients
1cupRaw Rice1 cup = 250 ml
¼cupMoong dal
2½cupsGrated Jaggery
¼teaspoonCardamom Powder
1tablespoonCashews
1pinchPachai KarpooramOptional
1tablespoonRaisinsOptional
3teaspoonGhee (Clarified butter)
2teaspoonGhee (Clarified butter)for tempering
4½cupsWater
½cupMilk(optional)
Instructions
Roasting and Cooking the Dal + Rice
Heat a pan and dry roast ¼ cup of moong dal until it turns golden and releases a fragrant aroma. Set aside.
¼ cup Moong dal
In a strainer, take 1 cup of rice and the roasted moong dal. Rinse 2–3 times until the water runs clear.
1 cup Raw Rice
Add 4.5 cups of water and mix well.
4½ cups Water
Pressure cook the rice and dal mixture for 5–6 whistles until soft and mashable. Traditionally, in temples and at weddings, this mixture is slow-cooked on the stove to impart a smoky aroma, but for home cooking, a pressure cooker works perfectly. Once cooked, mash the rice and dal thoroughly and set aside.
Preparing the Jaggery Syrup
In a saucepan, combine 2.5 cups of grated jaggery with ¼ cup of water. Heat gently until the jaggery melts completely and dissolves. Set aside.
2½ cups Grated Jaggery
Heat 3 teaspoon of ghee in a heavy-bottomed pan. Strain the melted jaggery and add it to the pan.
3 teaspoon Ghee (Clarified butter)
When the jaggery syrup comes to a rolling boil, add the mashed rice and dal mixture.
Keep the flame very low and stir in ½ cup of milk (optional). Milk adds richness, but if used, the shelf life of the dish is limited to 1 day. Never add milk directly to the jaggery syrup, as it may curdle — always add it after the rice-dal mixture. Also add the Pacha Karpooram and mix well.
½ cup Milk, 1 pinch Pachai Karpooram
Finishing Pongal
Stir the mixture well to incorporate the rice and dal with the jaggery syrup. Add the remaining ghee and ¼ teaspoon of cardamom powder, and continue stirring on low flame until the pongal thickens slightly.
¼ teaspoon Cardamom Powder
In a separate pan, heat 2 teaspoon of ghee and roast cashews and raisins until golden brown. Add them to the pongal and give a final gentle stir.
The scrumptious Sakarai Pongal is ready for neivedhyam or to serve!
Video
Notes
???? Tips for Perfect Sakkarai Pongal
Jaggery Ratio: Use a rice + dal to jaggery ratio of 1.25:2.5. For 1 cup rice and ¼ cup moong dal, add 2.5 cups grated jaggery. This ensures the sweetness is balanced — not too bland, not too overpowering.
Jaggery Quality Matters: The color and aroma of your pongal depends on the type of jaggery. Paagu vellamgives a darker, richer brown consistency than regular jaggery.
Cooking Rice & Dal: Add an extra ½ cup of water and allow additional whistles in the pressure cooker to ensure the rice and dal are completely soft and mushy.
Milk is Optional: Adding milk while cooking makes the pongal creamier and richer in flavor, but it’s not necessary.
Strain Jaggery Syrup: Jaggery can contain impurities like sand. Always dissolve and strain the jaggery syrupbefore adding it to the rice-dal mixture.
Ghee in Syrup: Adding a bit of ghee to the jaggery syrup is optional, but it enhances the richness and aroma of the pongal.
Consistency Tips: Milk can be used to adjust consistency. Once milk is added, keep the flame low to avoid curdling or breaking the pudding.
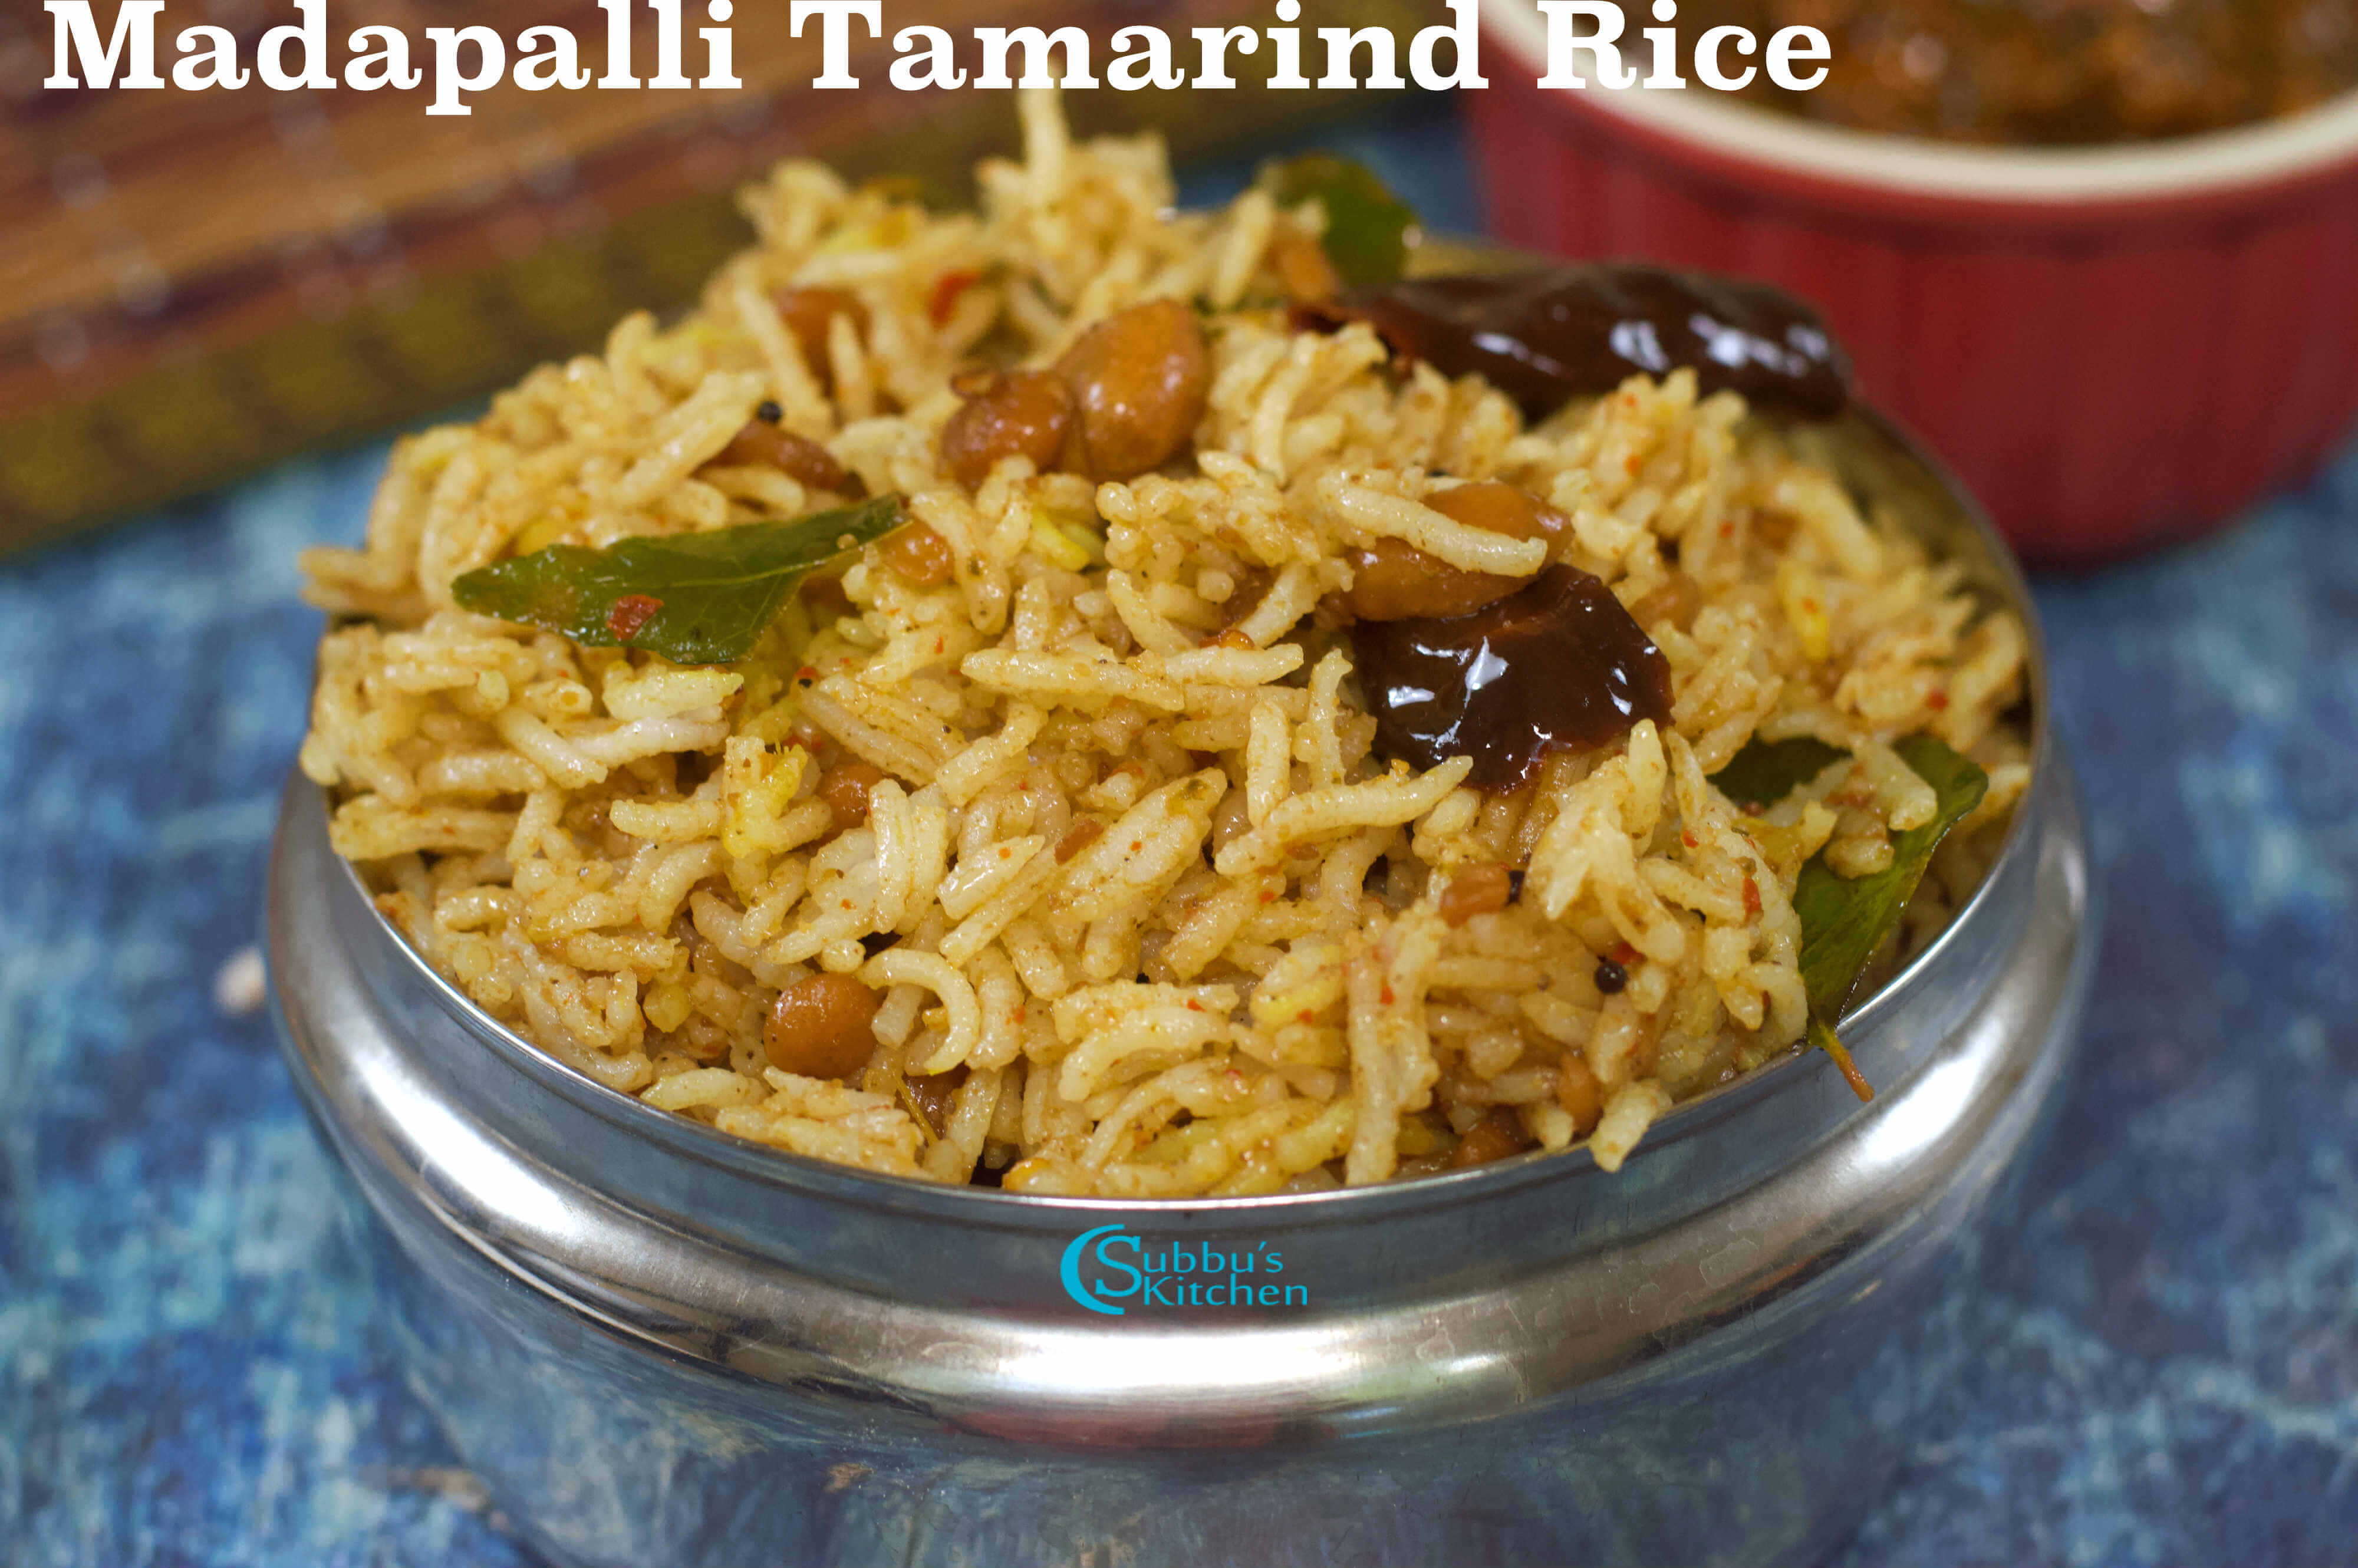
Madapalli Puliyodharai | Temple Style Tamarind Rice is not just food – it’s a divine experience. This humble yet soul-satisfying rice dish is one of the most cherished prasads offered in Vishnu and Hanuman temples across the world. While many of us prepare tamarind rice at home, nothing truly compares to the unique flavor, aroma, and spiritual essence of temple-style puliyodharai. I was fortunate to learn this authentic recipe from a friend whose family is closely associated with the Divyadesams around Sirkazhi, where the madapalli (temple kitchen) recipes are preserved with utmost devotion. The result is a tangy, aromatic, and utterly addictive dish that tastes just like the puliyodharai served in Tirumala Madapalli—an offering so divine, it lingers in your memory long after the last bite.
Madapalli Puliyodharai is a temple staple and is served as prasad year-round, but it gains extra significance during Vaikunta Ekadasi, Purattasi Saturdays (dedicated to Lord Venkateswara), Hanuman Jayanthi, and other major temple festivals. In many homes, it’s also a go-to offering for Navaratri, Aadi Perukku, and special pujas, since it keeps well without refrigeration and is perfect for distributing as prasadam to devotees. The long shelf life of tamarind rice makes it a traditional favorite for festivals, temple gatherings, and travel food too.
[feast_advanced_jump_to]
What’s Special about Temple Puliyodharai?
We’ve all wondered why temple prasad tastes so irresistibly delicious. In most large temples, there is a dedicated madapalli (temple kitchen) where prasadam is prepared fresh in large quantities every single day. I truly believe that the divine blessings infused in the cooking make the prasadam extra special. Beyond that, the process itself adds to the magic—cooking in traditional uruli (large bronze vessels) over an open flame imparts a subtle smoky flavor, elevating the taste of rice, pongal, or any other prasadam served in temples. It’s this unique combination of devotion, tradition, and technique that makes temple-style puliyodharai so unforgettable.
Ingredients
Every component of Madapalli Puliyodharai is thoughtfully chosen to craft that revered, temple-style flavor:
Tamarind brings the essential tang that makes this rice both soul-soothing and vibrant.
A balanced mix of dal, spices, and asafoetida in the spice powder adds depth, aroma, and a savory complexity that’s far more nuanced than basic seasonings.
The first tempering, with sesame oil, legumes, peanuts, and chilies, contributes rich texture, gentle heat, and an inviting nuttiness that gives the dish its crunchy, golden charm.
The second tempering—mustard seeds, turmeric, and curry leaves in aromatic oil—adds layers of fragrance, warmth, and a final burst of flavor.
Sesame oil isn’t just any cooking medium; its distinctive nutty aroma is critical to that authentic temple fragrance.
Cooked rice, ideally soft yet firm (Ponni or Sona Masoori), acts as the canvas for these bold flavors.
Together, this ensemble of ingredients produces a temple-style puliyodharai that's savory, tangy, aromatic, and textured—perfect for prasadam, festivals, or a soul-hugging meal.
See recipe card for quantities.
Instructions
Soak the tamarind in warm water for about 10 minutes and extract a thick juice. Alternatively, you can dissolve 2 tablespoons of tamarind paste in 1 cup of water and set it aside.
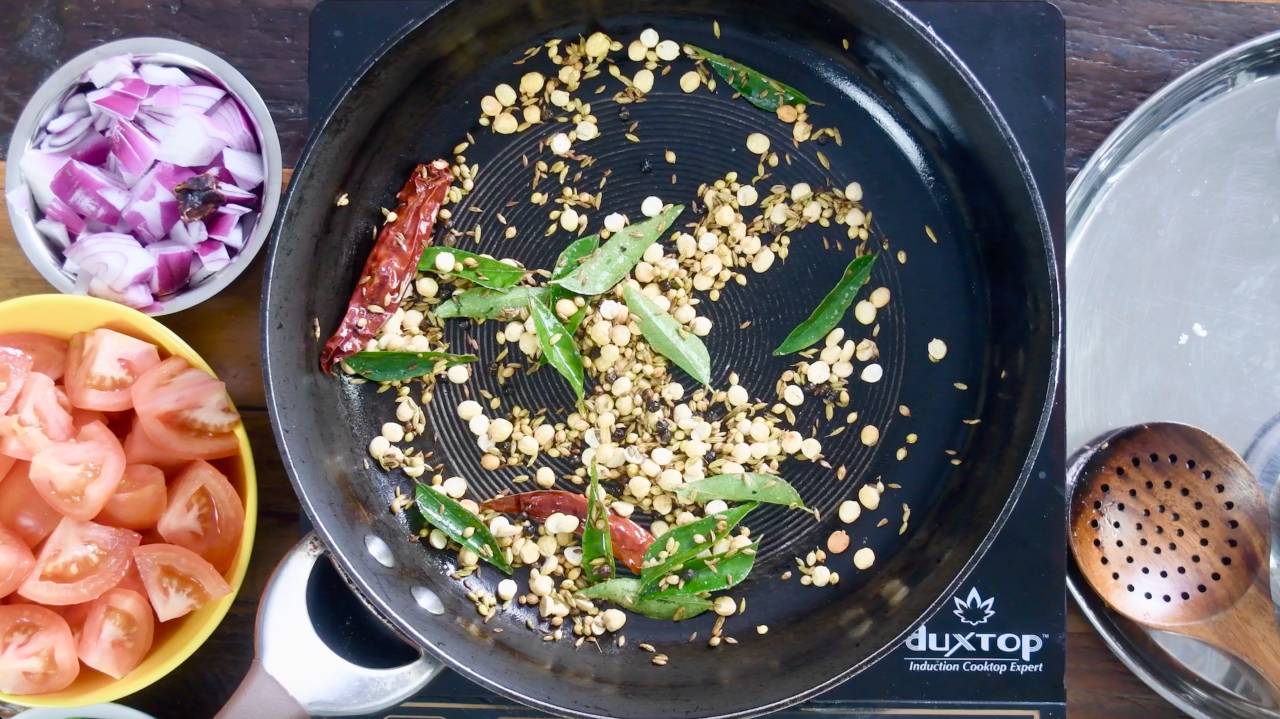
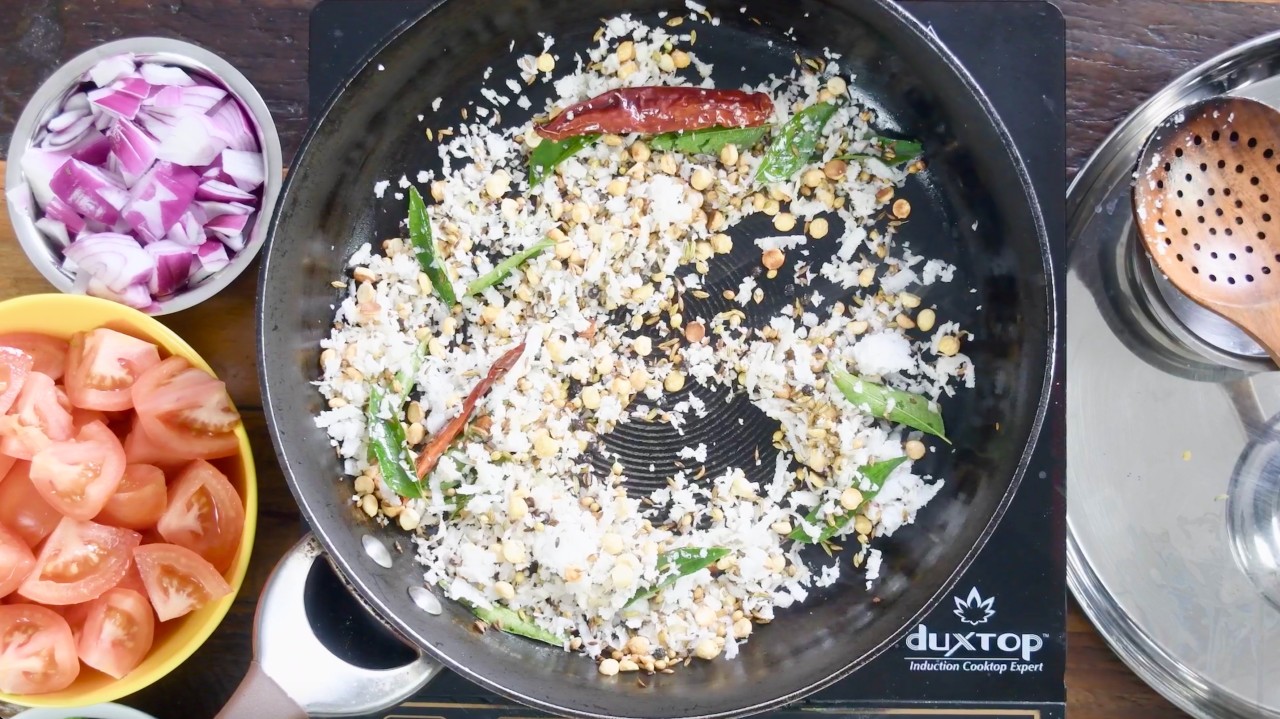
Heat a pan and dry roast all the ingredients—urad dal, channa dal, fenugreek seeds, peppercorns, red chilies, asafoetida, and curry leaves—until the dals turn golden brown and release a fragrant aroma..
Allow the roasted mixture to cool completely, then transfer it to a mixer jar and grind into a fine powder. Set this spice powder aside for later use.
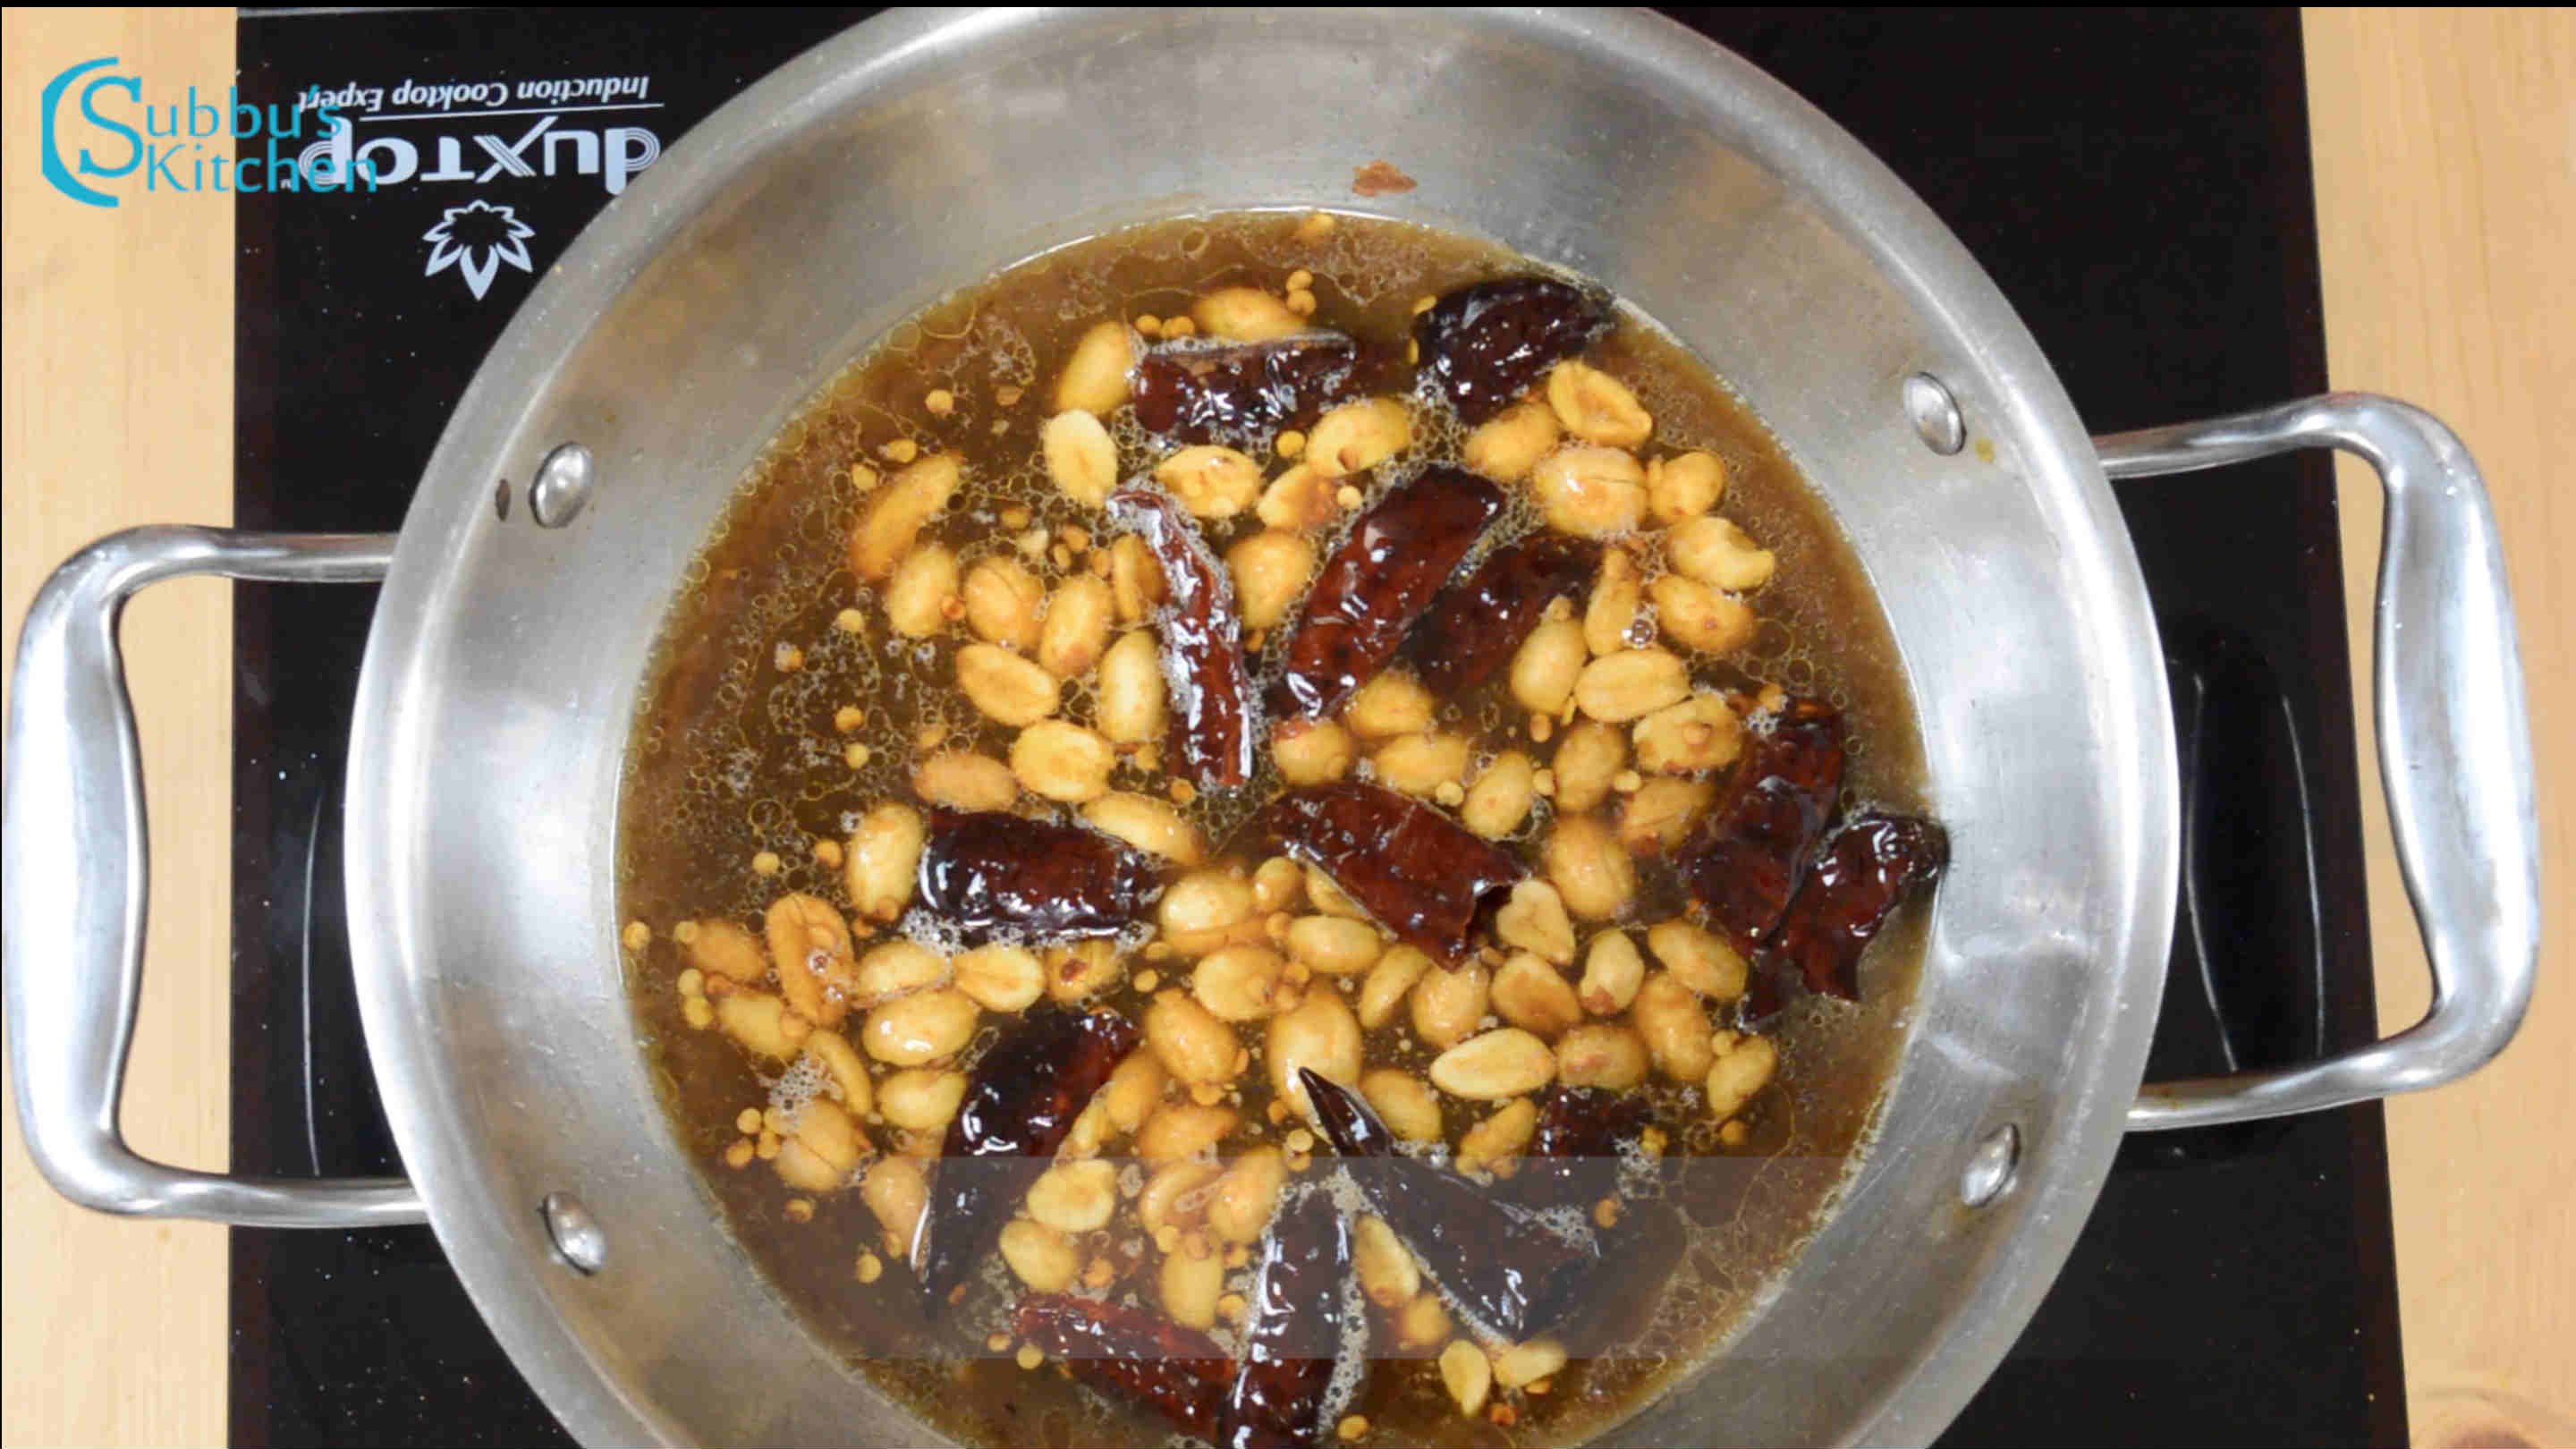
Heat oil in a pan. Once hot, add split urad dal, channa dal, peanuts, curry leaves, asafoetida, and red chilies. Sauté until the dals turn golden brown and aromatic.
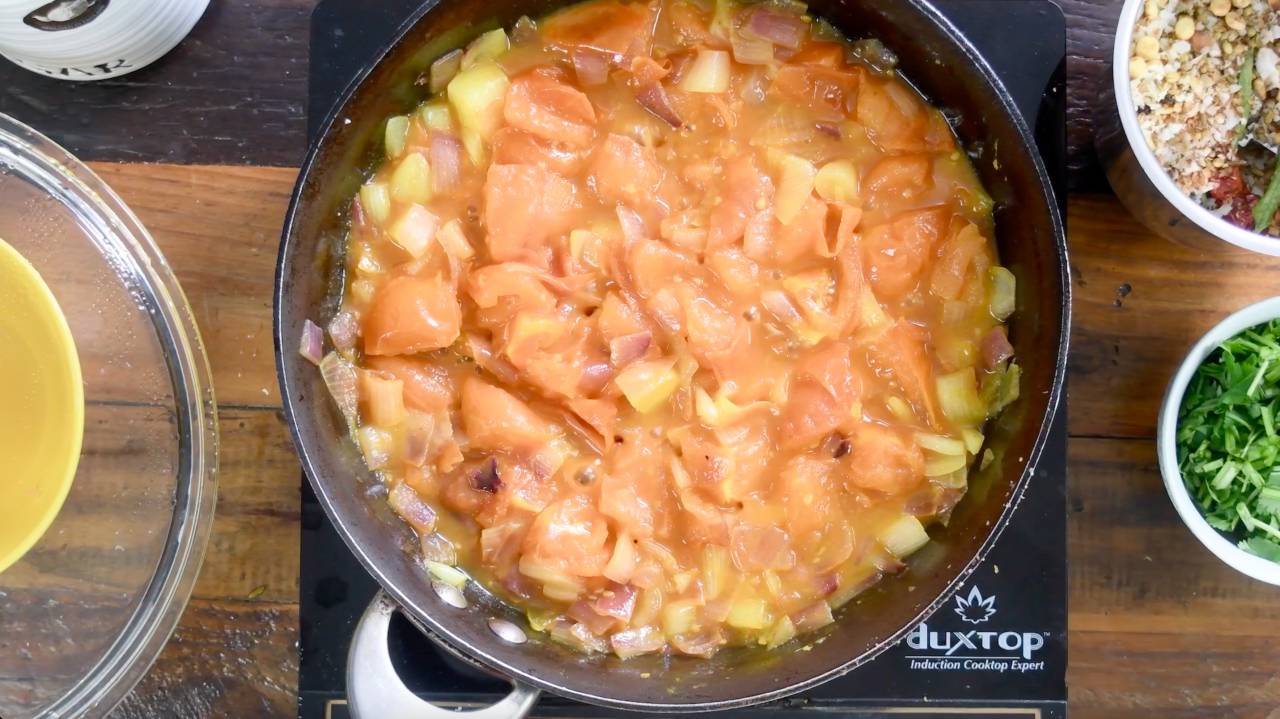
Add the tamarind juice along with salt and let it boil for about 10 minutes.
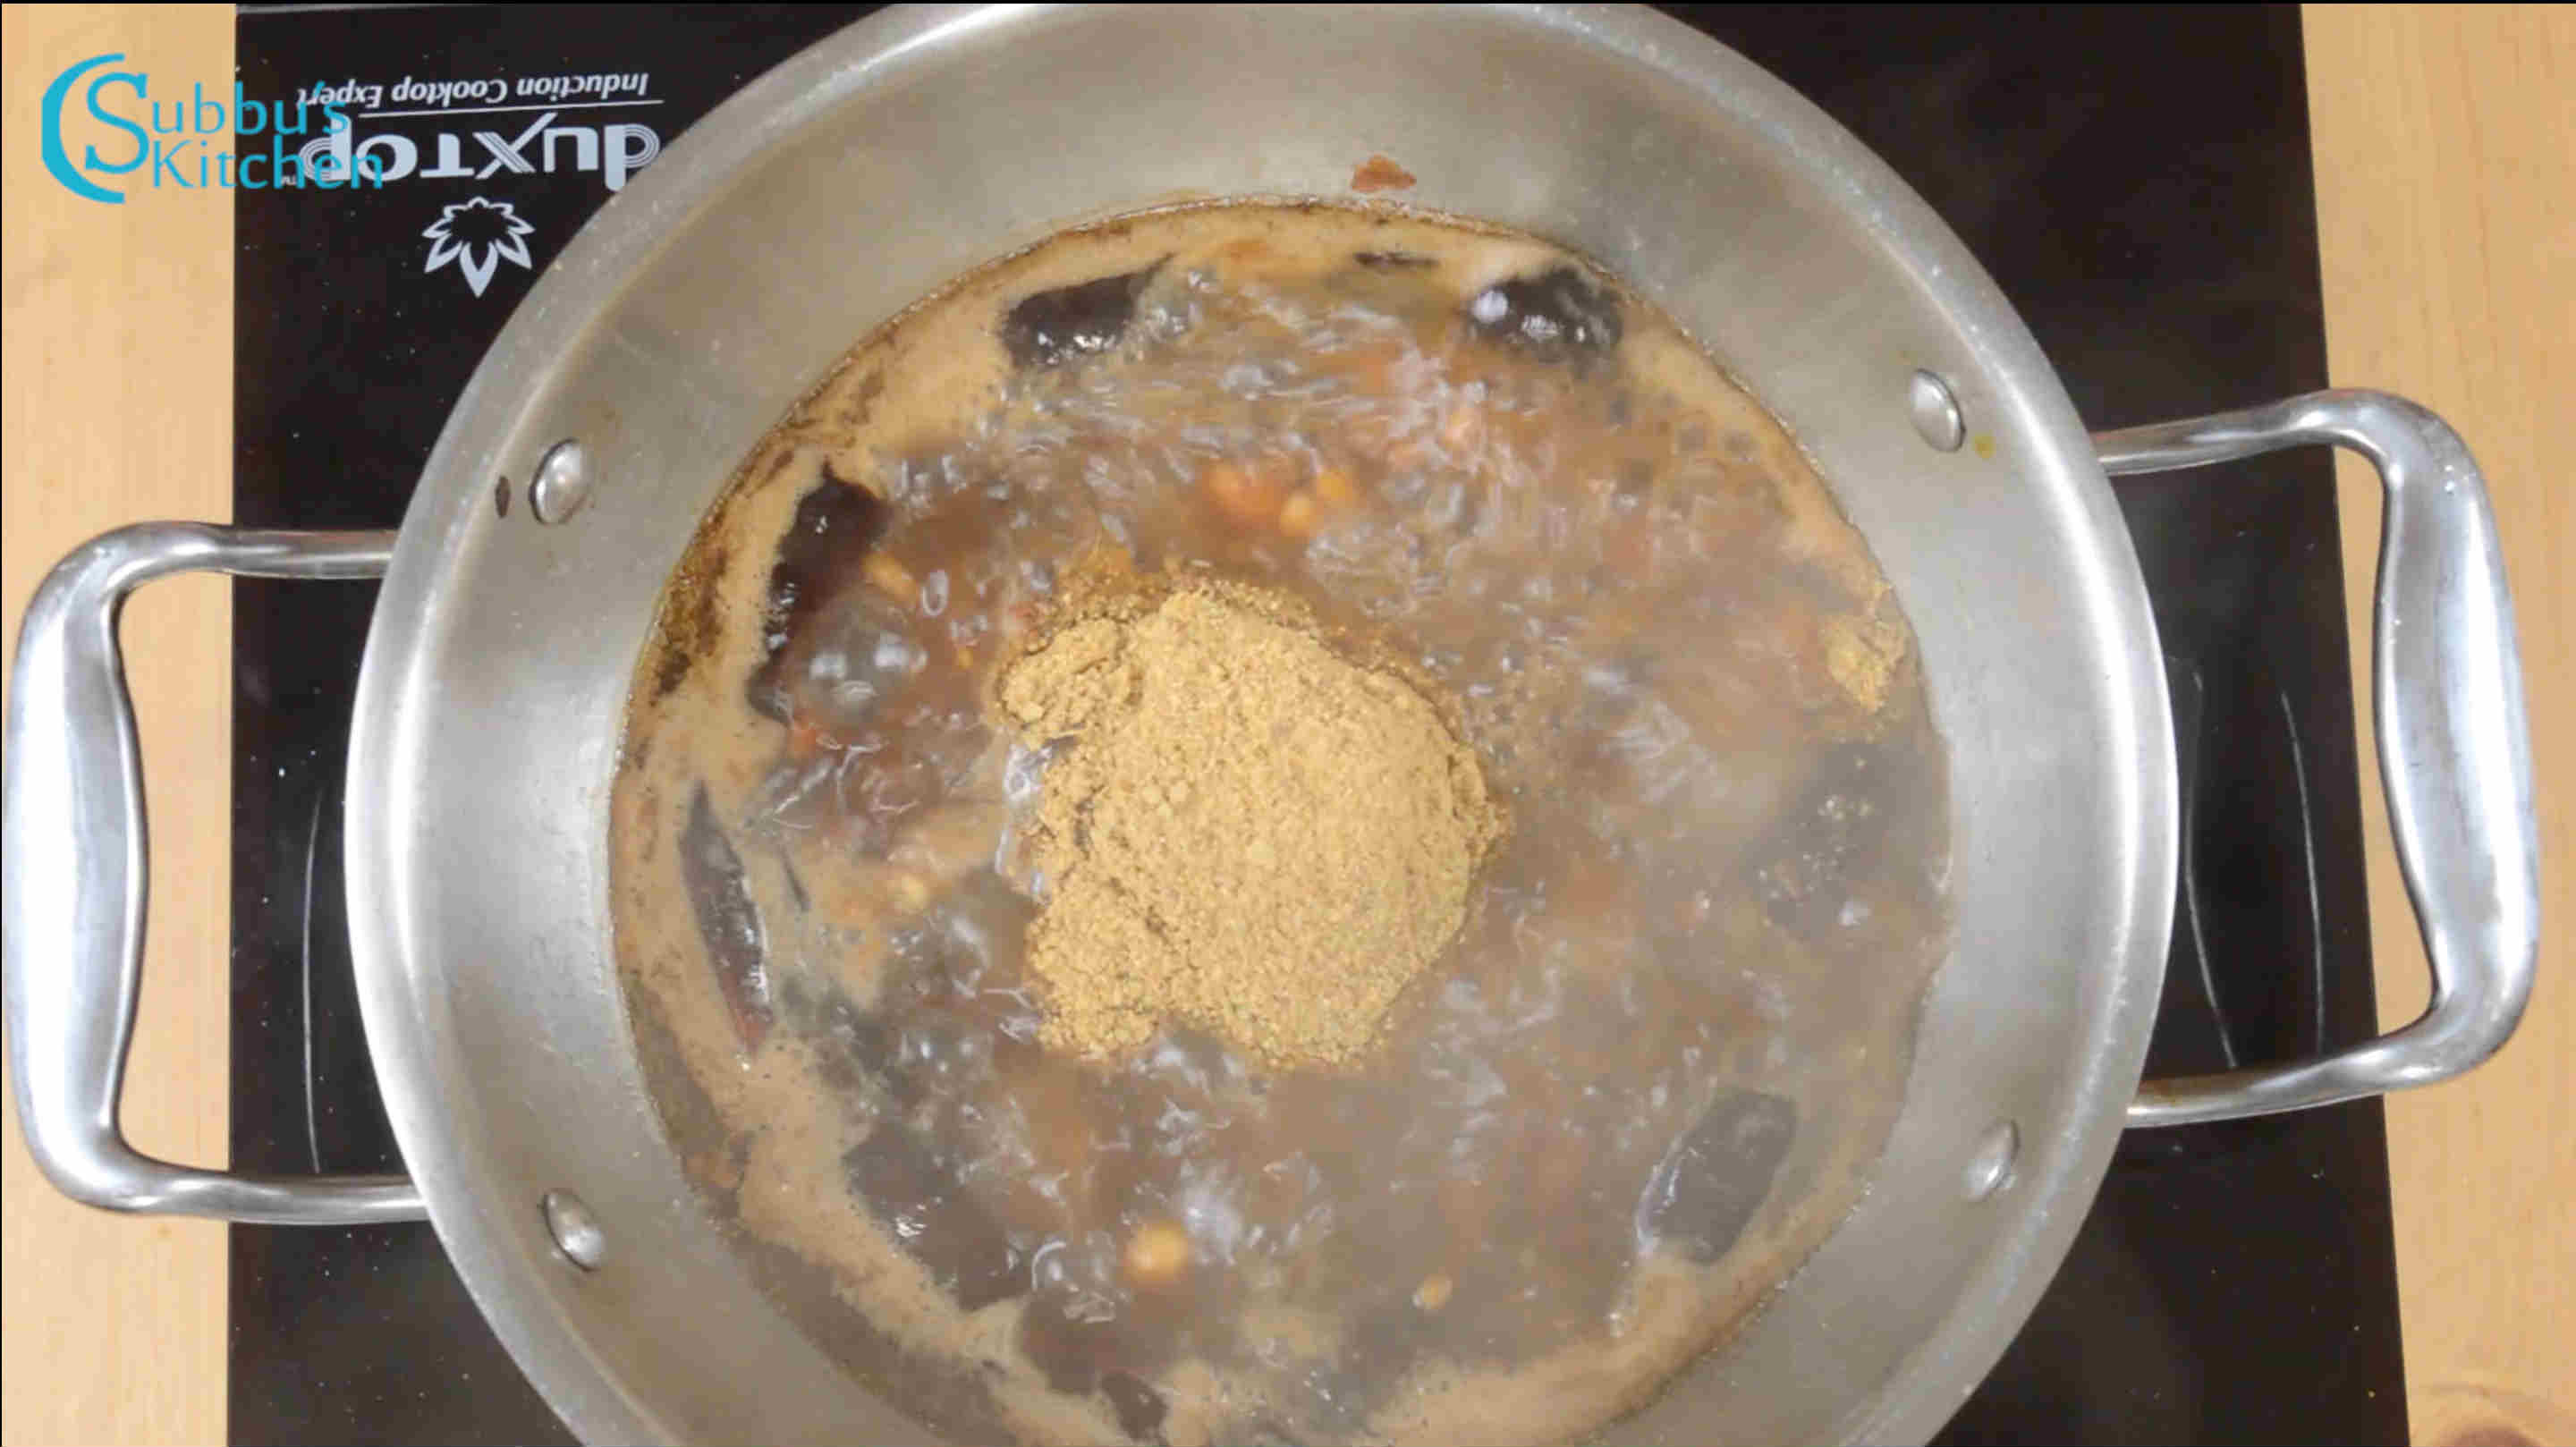
After it has reduced slightly, add the prepared spice powder and mix well. Stir continuously to ensure the powder blends smoothly with the tamarind base—otherwise, lumps may form.
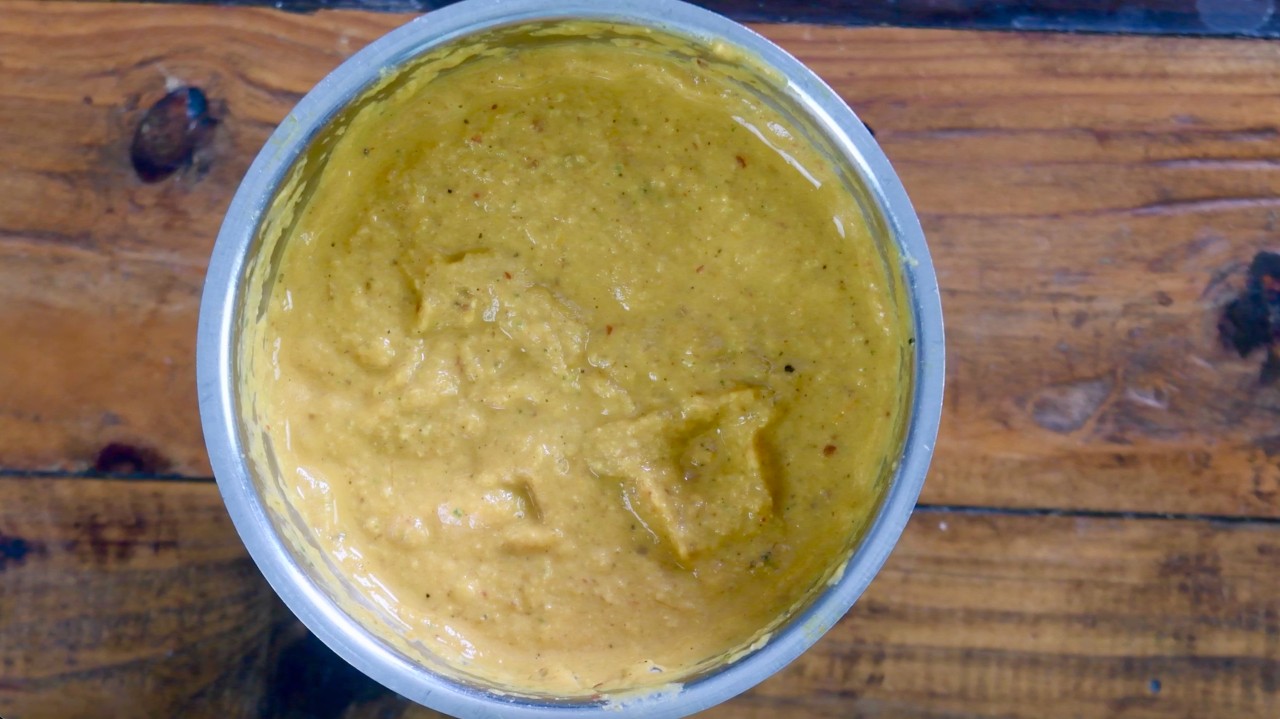
Keep stirring and allow the mixture to simmer on a low flame until it thickens into a paste. Once the Puliyodharai mix reaches a thick consistency, switch off the flame.
Step 2: Form into ball shape with your hands
Heat oil in another pan and add mustard seeds. Allow them to crackle. Next, add turmeric powder and curry leaves, mix briefly, and switch off the flame.
Pour this tempering over the Puliyodharai mixture. Your delicious Madapalli Puliyodharai is now ready to serve!
Spread the cooked rice in a wide plate or bowl. Add a little salt and sesame oil—keep in mind that the Puliyodharai mix already contains salt, so just about ¼ teaspoon is enough—and mix gently. Spoon in 3–4 tablespoons of the Puliyodharai mixture and fold it into the rice carefully.
Your Temple Style Tamarind Rice is now ready to serve!”
Hint: When preparing the spice powder, ensure you roast the dals and spices evenly on medium heat. This brings out the aroma and prevents any bitterness. Also, always stir continuously when mixing the Puliyodharai paste with the spice powder to avoid lumps.
A spicier variant from Andhra Pradesh, this version incorporates green chilies and ginger, offering a zesty kick. It's quick to prepare and perfect for lunchboxes.
In this Karnataka-style tamarind rice, dry coconut (kopra) and mustard seeds are added to the spice mix, creating a distinct flavor profile. It's a delightful twist on the traditional recipe.
For a quick fix, this recipe uses raw tamarind and red chili paste mixed directly with hot rice, eliminating the need for boiling tamarind. It's ideal for busy days or travel.
Storage
Store the Puliyodharai paste in an airtight container in the refrigerator. It will stay fresh for up to 5–6 days.
Keep the cooked rice separate from the paste if storing longer, and combine just before serving to maintain the best texture and flavor.
This dish does not freeze well, as the texture and taste of tamarind rice may change upon thawing.
For best results, always reheat gently on a low flame or in a microwave before serving.
Top Tip
If you're going to make this recipe, make sure to follow this top tip!
The secret to a perfect temple-style Puliyodharai lies in roasting the spice ingredients evenly and stirring continuously when mixing the spice powder with the tamarind juice. This prevents lumps, brings out the full aroma of the spices, and ensures a smooth, flavorful paste. Also, simmer gently on low heat—overcooking can make the paste too thick or bitter.
Experience the authentic taste of Madapalli Puliyodharai | Temple Style Tamarind Rice, a tangy, aromatic dish served as prasadam in Vishnu and Hanuman temples. This temple-style tamarind rice is made with a unique blend of roasted spices, tempering, and freshly cooked rice, delivering the exact flavor and aroma you would find in temple kitchens. Perfect for festive occasions, special pujas, or a soul-satisfying meal, this recipe brings the divine taste of temple prasadam right to your home.
Course Festival, Rice Varieties
Cuisine Indian, South Indian, Tamil Nadu
Prep Time 20 minutesminutes
Cook Time 30 minutesminutes
Total Time 50 minutesminutes
Servings 4people
Calories 270kcal
Author Sowmya Venkatachalam
Equipment
1 Heavy Bottomed Pan
1 Mixer Grinder
Ingredients
1Lemon SizeTamarindor 2 Tablespoon Tamarind Paste
1½teaspoonSaltAdjust to your taste
For Spice Powder
1teaspoonUrad Dal
1teaspoonSplit Bengal Gram (Channa Dal / Kadalaparuppu)
½teaspoonFenugreek seeds
1teaspoonPeppercorns
10Red Chili
1PinchAsafoetida (Asafetida / Hing)
1sprigCurry leaves
First Tempering
3tablespoonSesame Oil
2teaspoonSplit Urad Dal
2teaspoonSplit Bengal Gram (Channa Dal / Kadalaparuppu)
1tablespoonPeanuts
6nosRed Chili
1pinchAsafoetida (Asafetida / Hing)
Second Tempering
1tablespoonSesame Oil
1teaspoonMustard Seeds
½teaspoonTurmeric Powder
1sprigCurry Leaves
Tamarind Rice
2Cups Cooked Rice
½teaspoonSaltadjust to your taste
1teaspoonSesame Oil
1sprigCurry Leaves
Instructions
Prepare Tamarind Juice
Soak the tamarind in warm water for about 10 minutes and extract thick juice. Alternatively, dissolve 2 tablespoons of tamarind paste in 1 cup of water and set aside.
1 Lemon Size Tamarind
Make the Spice Powder
Heat a pan and dry roast urad dal, channa dal, fenugreek seeds, peppercorns, red chilies, asafoetida, and curry leaves until the dals turn golden brown and aromatic.
Sauté until the dals turn golden brown and aromatic.
Cook Tamarind Base
Add the tamarind juice and salt to the pan and bring it to a boil for about 10 minutes.
1½ teaspoon Salt
Stir in the prepared spice powder gradually, mixing continuously to avoid lumps.
Simmer on very low flame until the mixture thickens into a paste. Switch off the flame once thick.
Second Tempering
In another small pan, heat sesame oil and add mustard seeds. Allow them to crackle.
1 tablespoon Sesame Oil, 1 teaspoon Mustard Seeds
Add turmeric powder and curry leaves, mix briefly, and switch off the flame.
½ teaspoon Turmeric Powder, 1 sprig Curry Leaves
Pour this tempering over the Puliyodharai mixture
Assemble with Rice
Spread the cooked rice in a wide plate or bowl.
2 Cups Cooked Rice
Add ¼ teaspoon of salt and a little sesame oil, mixing gently.
½ teaspoon Salt, 1 teaspoon Sesame Oil
Add 3–4 tablespoons of Puliyodharai mixture and fold gently into the rice. Add more if desired, mixing carefully to coat the rice evenly.
Temple Style Tamarind Rice is now ready to serve!
Video
Notes
Tips for Perfect Madapalli Puliyodharai
Use fresh tamarind – Fresh tamarind or good-quality paste gives the best tangy flavor. Avoid overly processed tamarind pastes as they can be too sweet or diluted.
Roast the spices properly – Dry roast the dals and spices until golden and aromatic; under-roasting can make the spice powder bland.
Mix spice powder slowly – Always stir continuously when adding the spice powder to tamarind juice to avoid lumps.
Simmer on low heat – Allow the Puliyodharai paste to thicken gently; high heat may make it bitter.
Use freshly cooked rice – Slightly firm, warm rice absorbs the flavors better. Avoid rice that’s too soft or overcooked.
Tempering makes a difference – Don’t skip the second tempering with mustard, turmeric, and curry leaves—it adds authentic temple aroma.
Adjust tanginess and spice – Taste and tweak tamarind or red chili according to preference.
Storage tip – Store paste and rice separately for best results if making ahead; recombine before serving.
Peanut Sundal is a wholesome, protein-rich South Indian snack that combines the nutty goodness of boiled peanuts with a flavorful tempering of spices and fresh coconut. Light, nutritious, and naturally delicious, it is a popular choice during Navratri as well as a guilt-free evening snack any time of the year. This quick and easy recipe is proof that simple ingredients can come together to create something fan-freaking-fantastic!
In South India, Peanut Sundal holds a special place during festivals, especially duringNavratriwhen different varieties of sundal are prepared each day as offerings (neivedyam) to the Goddess. It’s one of the many sundal recipes that devotees enjoy sharing with friends and family after daily puja rituals. Beyond Navratri, peanut sundal is also made during temple festivals, community gatherings, and as a healthy evening snack at home. Thanks to its protein-rich peanuts and light seasoning, it’s both festive and everyday-friendly—a dish that beautifully blends tradition with wholesome eating.
[feast_advanced_jump_to]
Ingredients
Each component in this Peanut Sundal is carefully chosen to deliver a perfect balance of flavor, texture, tradition, and nutrition:
Raw peanuts anchor the recipe with heartiness and protein, making this snack both filling and nutritious.
Red chili adds just the right heat—bright, bold, and traditional—for a lively taste without overwhelming the other flavors.
Salt brings overall depth and seasoning, ensuring every bite is balanced.
Grated coconut (whether fresh or coarsely ground) brings a creamy sweetness and chewy texture that enhances the dish’s comforting character.
Sundal powder, a spice blend often used in festival offerings, layers in an additional aromatic complexity and festive note, especially fitting for Navratri and celebratory occasions.
Oil, mustard seeds, and curry leaves—these form the quintessential South Indian tempering that infuses the dish with that signature fragrance and umami, creating a flavorful punch with minimal effort.
Together, these ingredients converge to make a dish that’s visually appealing, spiritually meaningful, and a true celebration of South Indian culinary heritage.
Raw peanuts
Red chili
Salt
Grated coconut
Sundal powder
Oil
Mustard seeds
Curry leaves
See recipe card for quantities.
Instructions
Wash the peanuts thoroughly and soak them overnight to soften. If you forget to soak them in advance, simply soak in hot water for a few hours as a quicker alternative.
Drain the soaked water, add fresh water, and pressure cook the peanuts until they are tender yet firm, allowing for 3 whistles.
Once the pressure has fully released, open the cooker and remove the peanuts. Drain any remaining water and set the cooked peanuts aside, ready for tempering.
Heat a little oil in a pan until hot. Add the mustard seeds and let them crackle, releasing their nutty aroma. Toss in fresh curry leaves and red chili, stirring well to combine the flavors.
Add the cooked peanuts to the tempering and sprinkle in a pinch of salt. Stir well so the spices coat each peanut evenly, turning the humble legume into a flavorful, festive dish.
(Optional) Stir in a little sundal powder for warmth and spice. This special blend gives the sundal its traditional, celebratory touch and makes it distinct from an everyday peanut snack.
Finally, fold in freshly grated coconut.
Your protein-rich Peanut Sundal is now ready to serve!”
Variations
Spice Level: Adjust the number of red chilies or add a pinch of chili powder to suit your guests’ heat preference.
Nut Mix: Combine peanuts with roasted chickpeas or cashews for a richer texture and flavor.
Coconut Options: Use toasted coconut instead of fresh for a nutty aroma, or omit it for a lower-fat version.
Tempering Variations: Add a few curry leaves and dried red chilies crushed together for a more aromatic South Indian flavor, or a small pinch of asafoetida (hing) for a traditional temple-style taste.
Top Tip
Don’t overcook the peanuts! They should be tender yet still hold their shape, so they have a satisfying bite. Overcooking can make them mushy and affect the texture of the sundal.
Peanut Sundal is a protein-packed South Indian snack made with tender boiled peanuts, aromatic spices, curry leaves, and fresh coconut. Quick to prepare and full of flavor, it’s perfect for Navratri, festive occasions, or a healthy anytime snack.
Wash the peanuts thoroughly and soak them overnight to soften. If you forget to soak them in advance, simply soak in hot water for a few hours as a quicker alternative.
1 cup Raw Peanuts
Drain the soaked water, add fresh water, Salt and pressure cook the peanuts until they are tender yet firm, allowing for 3 whistles.
1 teaspoon Salt
Once the pressure has fully released, open the cooker and remove the peanuts. Drain any remaining water and set the cooked peanuts aside, ready for tempering.
Heat a little oil in a pan until hot. Add the mustard seeds and let them crackle, releasing their nutty aroma. Toss in fresh curry leaves and red chili, stirring well to combine the flavors.
1 teaspoon Oil, 1 teaspoon Mustard seeds, few Curry leaves, 1 nos Red Chili
Add the cooked peanuts to the tempering. Stir well so the spices coat each peanut evenly, turning the humble legume into a flavorful, festive dish.
(Optional) Stir in a little sundal powder for warmth and spice. This special blend gives the sundal its traditional, celebratory touch and makes it distinct from an everyday peanut snack.
2 teaspoon Sundal Powder
Finally, fold in freshly grated coconut. The delicious Peanut sundal/Verkadalai Sundal is ready for neivedhyam on Navrathri festival as well as for a healthy evening snack
2 teaspoon Grated Coconut
Video
Notes
If you don't have sundal powder, you can just add chili powder or Sambar powder
Soak the Peanuts Properly: Soak overnight for best results. If short on time, soak in hot water for a few hours to soften them.
Don’t Overcook: Pressure cook just until tender but still firm. Overcooked peanuts can become mushy and affect the texture.
Fresh Coconut: Use freshly grated coconut for the best flavor and subtle sweetness. Toasted coconut can be used for a nuttier aroma.
Tempering is Key: Make sure the oil is hot before adding mustard seeds. The crackle is essential to release their flavor.
Adjust Spice: Modify the number of red chilies or add a pinch of chili powder according to your heat preference.
Enhance Flavor: Adding a pinch of hing (asafoetida) or a dash of lemon juice at the end can elevate the flavor profile.
Serve Fresh: Sundal tastes best immediately after tempering. If storing, reheat lightly in a pan before serving.
Sundal Powder is a simple yet essential spice blend in a South Indian kitchen. Made with just a few ingredients – coriander seeds, Bengal gram dal (kadalai paruppu), and red chilies – this aromatic powder instantly elevates the taste of both poriyal and sundal varieties.
A spoonful of freshly ground Sundal Powder not only enhances flavor but also adds a warm, nutty aroma to everyday dishes. Since it has a good shelf life, many households prepare it in bulk, store it in an airtight container, and use it whenever required.
When cooking with Sundal Powder, remember to adjust the amount of additional spice, as this blend already contains red chilies. With this handy homemade powder, you can turn a simple poriyal or sundal into a flavorful and wholesome dish in minutes!
Aromatic and flavorful Sundal Powder, made with roasted coriander, dals, and red chilies – the perfect seasoning for traditional sundal dishes.
Sundal Powder is popular throughout the year, but it becomes especially significant during Navratri. Since sundal is a traditional prasadam offered on all nine days of Golu, having this spice mix ready makes festival cooking much easier and quicker. Instead of measuring and roasting spices each day, you can simply add a spoonful of Sundal Powder to instantly enhance the flavor of different sundal varieties.
Beyond Navratri, this powder is also handy for everyday cooking. It can be sprinkled into poriyals (vegetable stir-fries) or added to quick sundal preparations made for evening snacks, special poojas, or when unexpected guests arrive.
[feast_advanced_jump_to]
Ingredients
The ingredients for Sundal Powder are carefully chosen to balance flavor, aroma, and texture. Coriander seeds bring a fresh, earthy fragrance, while Bengal gram dal (Kadalai Paruppu) adds body, nuttiness, and a slightly roasted taste. Red chilies provide the right amount of heat and spice, making the powder vibrant and flavorful. Together, these three simple ingredients create a versatile spice mix that enhances any sundal or poriyal.
Coriander Seeds
Bengal Gram Dal (Kadalai Paruppu)
Red Chilies
See recipe card for quantities.
Instructions
Heat a pan and dry roast the coriander seeds, channa dal, and red chilies on medium flame. Roast until the dal turns golden brown and gives off a nutty aroma.
Transfer the roasted ingredients to a plate and allow them to cool completely.
Once cooled, add them to a mixer jar and grind into a fine powder.
Store the Sundal Powder in an airtight container. It stays fresh for weeks and can be used to enhance the flavor of any poriyal or sundal variety.
Substitution
Channa Dal (Bengal Gram Dal): You can replace it with toor dal (pigeon peas) or urad dal (black gram dal) for a slightly different flavor. Each gives a unique nuttiness.
Red Chilies: If you don’t have whole dried red chilies, substitute with red chili powder. Start with a small amount and adjust to taste.
Coriander Seeds: These are key to the aroma, but if unavailable, you can use a smaller quantity of cumin seeds as a backup (though the flavor will change slightly).
Milder Version: Reduce the red chilies or use byadgi chilies for color with less heat.
Spice Boost: Add a few black peppercorns or a pinch of hing (asafoetida) while roasting to deepen the flavor.
Variations
Sundal Powder with Coconut: Add a few tablespoons of dry grated coconut while roasting for a richer, slightly sweet flavor. This version pairs well with sweet corn sundal.
Spicy Sundal Powder: Increase the number of red chilies or include a few peppercorns for a bolder, spicier mix.
Aromatic Twist: Add a small piece of cinnamon or a couple of cloves along with the coriander seeds to give the powder a subtle festive aroma.
Urad Dal Sundal Powder: Replace channa dal with urad dal for a slightly different nuttiness and texture.
Multi-purpose Powder: Include a teaspoon of cumin seeds along with the coriander seeds—this makes the powder suitable not just for sundal, but also for poriyal and kootu.
Storage
Store the Sundal Powder in an airtight container to maintain its aroma and flavor.
Keep it in a cool, dry place, away from direct sunlight or moisture.
When stored properly, the powder can stay fresh for 4–6 weeks at room temperature.
For longer shelf life, you can store it in the refrigerator, which can extend freshness up to 3 months.
Always use a dry spoon to scoop out the powder to prevent clumping or spoilage.
Bring the rich flavors of South Indian cuisine to your kitchen with this aromatic Tanjore-style spice powder. Roasted coriander seeds, chana dal, and red chilies are ground to a fine powder, creating a versatile mix that adds depth to curries, rasams, and rice dishes. Easy to make, store, and use anytime!
Course Home made Powders / Masala
Cuisine Indian, South Indian, Tamil Brahmin, Tamil Nadu
Prep Time 5 minutesminutes
Cook Time 10 minutesminutes
Total Time 15 minutesminutes
Servings 100grams
Calories 6.5kcal
Author Sowmya Venkatachalam
Equipment
Heavy Bottomed Pan
Ingredients
¼cupCoriander seeds
2tablespoonSplit Bengal Gram (Channa Dal / Kadalaparuppu)
6nosRed Chili
Instructions
Heat a pan and dry roast the coriander seeds, channa dal, and red chilies on medium flame. Roast until the dal turns golden brown and gives off a nutty aroma.
Transfer the roasted ingredients to a plate and allow them to cool completely.
Once cooled, add them to a mixer jar and grind into a fine powder.
Store the Sundal Powder in an airtight container. It stays fresh for weeks and can be used to enhance the flavor of any poriyal or sundal variety.
Video
Notes
Tips for Making Sundal Powder
Roast on Low to Medium Flame: Dry roast the coriander seeds, channa dal, and red chilies slowly to prevent burning and to release maximum aroma.
Even Roasting: Stir continuously to ensure that the dal and spices are evenly roasted and get a uniform golden color.
Cool Completely Before Grinding: Grinding while warm can cause the powder to become sticky. Let the roasted ingredients cool fully for a fine, smooth powder.
Use Fresh Ingredients: Fresh coriander seeds and channa dal give the powder a stronger, nutty flavor. Avoid stale or old pulses.
Adjust Spice Level: Since red chilies are already in the powder, taste before adding extra chili to your sundal or poriyal.
Grind in Batches: For larger quantities, grind in small batches for a more even texture.
Storage Matters: Always use an airtight container and keep it in a cool, dry place to maintain freshness and aroma.
Optional Enhancements: For a subtle flavor twist, add a few peppercorns, a pinch of hing (asafoetida), or a tiny piece of cinnamon while roasting.
Versatile Use: This powder isn’t just for sundal—sprinkle it on poriyals, kootus, or even roasted vegetables for an instant flavor boost.
Lemon Rice is a vibrant and comforting South Indian dish, loved for its refreshing citrus flavor and aromatic tempering of spices. Cooked rice is infused with freshly squeezed lemon juice, curry leaves, green chilies, and a touch of turmeric, creating a dish that is both simple and irresistibly flavorful. It’s a staple in many households, often prepared for festivals, special occasions, or as a wholesome everyday meal that can be enjoyed on its own or paired with accompaniments like papad, pickle, or any poriyal like Potato fry.
Tangy, refreshing, and packed with flavor – this South Indian Lemon Rice is a perfect comfort meal for any day!
Lemon Rice is a beloved part of South Indian cuisine and is often prepared as a quick, refreshing meal year-round. It holds a special place during festivals and religious occasions, particularly in Tamil Nadu and Karnataka, where it is commonly made for Aadi Perukku(a festival dedicated to rivers and water bodies). It is also one of the most popular prasadam (temple offerings), as its tangy, non-perishable nature makes it ideal for distribution. Beyond festivals, Lemon Rice is a go-to dish for travel, picnics, and packed lunches because it stays fresh for hours and tastes even better as the flavors meld over time.
Perfect Pairings for Lemon Rice
If you're packing this for a lunch box, Lemon Rice with lady’s finger fry (okra) as an ideal accompaniment that brings texture and flavor contrast
For a flavorful twist, try Masala Lemon Rice, which elevates the classic with freshly ground masala spices. It plays beautifully with any stir-fry vegetables or papad—especially if you’re craving something crunchy
Want to swap the base entirely? The Lemon Sevai(lemon-seasoned rice noodles) uses the same vibrant tempering as Lemon Rice but delivers a different mouthfeel—perfect if you're in the mood for something lighter or a little change in texture
[feast_advanced_jump_to]
Ingredients
These carefully chosen ingredients make Lemon Rice irresistibly flavorful. Tangy lemon brightens the dish, turmericadds color and subtle earthiness, while mustard seeds, dals, peanuts, and asafoetida create a crunchy, aromatic tempering. Curry leaves and chilies add freshness and mild heat, and a touch of sesame oil ties all the flavors together for a vibrant, comforting South Indian classic.
Lemon
Cooked rice
Turmeric powder
Salt
Fenugreek powder
Sesame oil
Mustard seeds
Split urad dal
Split Bengal gram (channa dal)
Peanuts
Asafoetida (hing)
Curry leaves
Green chili
Red chili
See recipe card for quantities.
Instructions
Cut the lemons in half and squeeze out the juice. Add salt to the lemon juice and set it aside. Spread the cooked rice on a broad plate and allow it to cool slightly.
In a heavy-bottomed pan, heat the gingelly (sesame) oil. Add the mustard seeds and let them sputter. Then add the split urad dal, channa dal, peanuts, red chili and curry leaves. Add a pinch of hing (asafoetida). Fry until the dals turn golden brown.
Add the chopped green chilies and turmeric powder, then remove the pan from heat
Gently fold in the cooked rice, salt, and fenugreek powder, taking care not to mash the grains.
Finally, pour in the lemon juice, adjust salt to taste, and mix gently until everything is well combined.
Serve with Papad, fryums or stir-fry vegetables.
Spice-up the Lemon Rice
Roasted Fenugreek & Red Chili Paste: Dry roast ¼ teaspoon of fenugreek seeds with 2 red chilies, grind them, and mix into the rice. This adds a rich, aromatic flavor that elevates the dish.
Fresh Masala for Masala Lemon Rice: Add freshly prepared masala to transform your Lemon Rice into a flavorful Masala Lemon Rice. Follow our recipe here for step-by-step instructions.
Crunchy Peanuts: Toss in fried peanuts to give the rice a satisfying crunch and nutty depth.
Chilies for Flavor & Spice: Use a combination of red and green chilies to enhance both the heat and aroma.
Ginger Twist: Finely chopped ginger can be added in place of asafoetida (hing) for a unique flavor and refreshing taste.
Top Tip
Here are expert tips to make your Lemon Rice truly shine:
Use cooled or day-old rice: Prevents clumping and keeps grains fluffy.
Temper spices in hot oil: Mustard seeds, dals, and chilies release maximum aroma and flavor.
Add lemon juice last: Preserves the bright, tangy flavor without overpowering the dish.
Optional crunch: Toss in fried peanuts for added texture.
Ginger twist: Finely chopped ginger can replace hing for a fresh, zesty note.
Tangy & Flavorful Lemon Rice | Easy South Indian Recipe
Lemon Rice is a classic South Indian dish bursting with tangy, zesty flavors and aromatic spices. Made with fluffy cooked rice, fresh lemon juice, turmeric, and a flavorful tempering of mustard seeds, dals, peanuts, curry leaves, and chilies, it’s quick to prepare and perfect for everyday meals, lunch boxes, or festive occasions. Add a few fried peanuts or a touch of fresh ginger to elevate the taste and texture. Light, refreshing, and utterly satisfying, this Lemon Rice is a must-try comfort food that everyone will love.
Course Rice Varieties
Cuisine Indian, South Indian, Tamil Nadu
Prep Time 5 minutesminutes
Cook Time 20 minutesminutes
Total Time 25 minutesminutes
Servings 2people
Calories 300kcal
Author Sowmya Venkatachalam
Equipment
1 Heavy Bottomed Pan
Ingredients
1nos Lemon
1CupCooked Rice1 Cup - 250ml
¼teaspoonTurmeric Powder
1teaspoonSaltadjust to your taste
¼teaspoonFenugreek Powder
For Tempering
2tablespoonSesame Oil
1teaspoonMustard seeds
½teaspoonSplit Urad Dal
2teaspoonSplit Bengal Gram (Channa Dal / Kadalaparuppu)
1tablespoonPeanuts
¼teaspoonAsafoetida (Asafetida / Hing)
1sprigCurry Leaves
2nosGreen Chili
1nosRed Chili
Instructions
Cut the lemons in half and squeeze out the juice. Add salt to the lemon juice and set it aside.
1 nos Lemon, 1 teaspoon Salt
Spread the cooked rice on a broad plate and allow it to cool slightly.
1 Cup Cooked Rice
In a heavy-bottomed pan, heat the gingelly (sesame) oil. Add the mustard seeds and let them sputter. Then add the split urad dal, channa dal, peanuts, red chili and curry leaves. Add a pinch of hing (asafoetida). Fry until the dals turn golden brown.
2 tablespoon Sesame Oil, 1 teaspoon Mustard seeds, ½ teaspoon Split Urad Dal, 2 teaspoon Split Bengal Gram (Channa Dal / Kadalaparuppu), 1 tablespoon Peanuts, ¼ teaspoon Asafoetida (Asafetida / Hing), 1 nos Red Chili, 1 sprig Curry Leaves
Add the chopped green chilies and turmeric powder, then remove the pan from heat. Gently fold in the cooked rice, salt, and fenugreek powder, taking care not to mash the grains.
¼ teaspoon Turmeric Powder, 2 nos Green Chili, ¼ teaspoon Fenugreek Powder
Finally, pour in the lemon juice, adjust salt to taste, and mix gently until everything is well combined.
Your delicious Lemon Rice is ready to serve! Pair it with appalam/papad or vadam for the perfect meal.
Video
Notes
Tips for the Perfect Lemon Rice
You can use any type of rice—Sona Masoori, Ponni Arisi, or even Basmati—to make Lemon Rice.
Add finely chopped ginger for a fresh, zesty twist.
Leftover rice works perfectly for this recipe, making it a great way to use up rice from previous meals.
For a pop of color and extra nutrition, optionally add grated carrot.
The amount of lemon juice depends on the tanginess of your lemons. Taste the rice and adjust accordingly. The flavor may be strong initially, but it mellows as it sits.
For an extra layer of spice, dry roast ¼ teaspoon fenugreek seeds with 2 red chilies, grind, and add to the rice.
You can also add masala during tempering to make a more aromatic, masala-style Lemon Rice.
Looking for a protein-packed South Indian snack that’s wholesome, flavorful, and incredibly easy to whip up? Say hello to karamani sundal, a festival favorite made with black-eyed peas, coconut, and a gentle tempering of spices. It’s the perfect balance of hearty and light, with just the right kick to keep you coming back for more. Whether you’re preparing it for Navratri or simply craving a healthy bite, this fan-freaking-fantastic recipe will win you over in minutes!
Karamani sundal is especially popular during Navratri, when different varieties of sundal are prepared as offerings (prasadam) for the goddess and shared with friends and family. Each day of Navratri is often celebrated with a unique type of sundal, making karamani (black-eyed peas) one of the cherished variations. Beyond festivals, it’s also enjoyed as a healthy snack or light evening tiffin in South Indian households. Packed with protein and flavored with coconut and spices, it’s both nourishing and comforting—perfect for fasting days, festive gatherings, or simply as a guilt-free bite anytime of year.
[feast_advanced_jump_to]
Ingredients
Each ingredient in karamani sundal has a purpose. Black-eyed peas (karamani) form the protein-rich base, making it hearty and wholesome. Freshly grated coconut adds natural sweetness and texture, balancing the earthiness of the legumes. Curry leaves, mustard seeds, green chili, and hing bring that unmistakable South Indian flavor profile, while a drizzle of coconut oil ties everything together with a rich, traditional aroma. Together, they create a dish that’s simple yet deeply flavorful, perfect for both festive offerings and everyday snacking.
Karamani (black-eyed peas)
Fresh grated coconut
Red chili
Curry leaves
Mustard seeds
Hing (asafoetida)
Coconut oil
Salt
See recipe card for quantities.
Instructions
Wash and Soak the karamani (black-eyed peas) overnight.
The next day, drain the water and add fresh water to the peas. Pressure cook the karamani with a teaspoon of salt until they are soft, allowing only 2–3 whistles to ensure they remain firm and not mushy.
Once the pressure has fully released, open the cooker and drain the excess water from the cooked karamani using a strainer.
Heat coconut oil in a pan. Add mustard seeds, and once they begin to splutter, toss in the broken red chili, curry leaves, and a pinch of hing. Sauté for a few seconds until fragrant.
Add the cooked karamani (black-eyed peas) to the pan and mix well so the tempering coats the legumes evenly.
(Optional) - Add 2 teaspoon of Sundal Powder and give it a good mix. This will give good aroma and spice.
Stir in the freshly grated coconut and give everything a gentle mix.
Your delicious Karamani (Perum Payiru) Sundal is now ready! Serve it warm as a healthy snack or offer it as Neivedhyam during the Navratri festival.
Substitutions
Legumes: If you don’t have karamani (black-eyed peas), you can easily swap them with other legumes such as white chana (chickpeas), green gram (moong beans), or rajma (kidney beans). Each will give a slightly different texture but still taste delicious.
Coconut: Fresh grated coconut is traditional, but if it’s not available, you can use frozen grated coconut (thawed) or even a small spoon of unsweetened desiccated coconut in a pinch.
Oil: Coconut oil adds authentic South Indian flavor, but you can substitute with sesame oil or sunflower oil if you prefer a milder taste.
Spice: If you like more heat, add a slit green chili along with the tempering. For a kid-friendly version, skip the red chili altogether.
Hing (Asafoetida): If you don’t have hing, you can leave it out or use a pinch of garlic powder for a different but still flavorful aroma.
Variations
Masala Sundal: Add a spoon of freshly ground sundal podi or rasam powder along with the tempering for a spicier, more robust flavor.
Tangy Twist: Squeeze in a few drops of fresh lemon juice just before serving to give the sundal a refreshing brightness.
Vegetable Boost: Mix in finely chopped cucumber, carrots, or raw mango for a salad-style sundal that’s colorful, crunchy, and extra nutritious.
Sweet Sundal: For a festive twist, replace the tempering with a light jaggery syrup and grated coconut to make a mildly sweet version, often enjoyed during Navratri.
Sprouted Sundal: Use sprouted karamani instead of boiled for an even healthier, protein-packed option.
Storage
Room Temperature: Karamani sundal stays fresh for up to 6–8 hours at room temperature, making it perfect for serving during festivals or as a prasadam.
Refrigeration: Store any leftovers in an airtight container in the refrigerator for up to 2 days.
Reheating: Gently warm it on the stovetop or in the microwave before serving. If it feels a bit dry, sprinkle a teaspoon of water or coconut oil to freshen it up.
Freezing: Not recommended, as the texture of the beans and coconut changes after thawing.
Top Tip
For perfectly textured karamani sundal, make sure the black-eyed peas are cooked but still firm—they should hold their shape and not turn mushy. Also, toast the coconut lightly before mixing it in to enhance its aroma and give the sundal an extra layer of flavor.
Karamani Sundal Recipe | Easy South Indian Black Eyed Peas Sundal
Karamani Sundal is a classic South Indian snack made with black-eyed peas, lightly tempered with mustard seeds, curry leaves, and hing, then finished with freshly grated coconut. Protein-rich, flavorful, and mildly spiced, it’s a favorite during Navratri festivals and also makes a wholesome everyday snack.
Course Healthy Recipes, Salad
Cuisine Indian, South Indian, Tamilnadu
Prep Time 5 minutesminutes
Cook Time 15 minutesminutes
Soaking Time 8 hourshours
Total Time 20 minutesminutes
Servings 4people
Calories 108kcal
Author Sowmya Venkatachalam
Equipment
1 Pressure Cooker
Ingredients
1CupKaramani (Black-eyed pea)
1nosRed Chili
1teaspoonSaltAs Needed
1PinchAsafoetida (Asafetida / Hing)
1tablespoonGrated Coconut
2teaspoonSundal Powder (Optional)
For Tempering
1teaspoonOil
1teaspoonMustard Seeds
1sprigCurry Leaves
Instructions
Soak the karamani (black-eyed peas) overnight. The next day, drain the water and add fresh water to the peas. Pressure cook the karamani with a teaspoon of salt until they are soft, allowing only 2–3 whistles to ensure they remain firm and not mushy.
1 Cup Karamani (Black-eyed pea), 1 teaspoon Salt
Heat coconut oil in a pan. Add mustard seeds, and once they begin to splutter, toss in the broken red chili, curry leaves, and a pinch of hing. Sauté for a few seconds until fragrant.
Looking for a wholesome, traditional dessert that’s both delicious and nourishing? This Saamai Paal Payasam is just what you need! Made with little millet, milk, and natural sweeteners, this creamy kheer is a perfect blend of taste and health. Whether you're celebrating a festival or just craving a comforting sweet treat, this recipe is a must-try. It’s simple to prepare, packed with nutrients, and has a rich, comforting flavor that keeps you coming back for more!
Saamai Paal Payasam is often made during South Indian festivals like Pongal, Navaratri, and Tamil New Year. It's also a popular choice for poojas and special family occasions, especially when people want a healthy, millet-based sweet.
These ingredients were chosen to create a simple, wholesome, and flavorful dessert. Little millet is a nutritious grain that’s light and easy to digest, making it perfect for payasam. Milk adds richness and creaminess, while sugar provides the right amount of sweetness. Cardamom powder brings a fragrant touch of warmth, and ghee-roasted cashews add a delicious crunch and aroma that elevate the overall dish.
Ingredients:
Cardamom powder
Little millet (Samai)
Milk
Cashews
Ghee (clarified butter)
Sugar
See recipe card for quantities.
Instructions
Pour the milk into a pan and place it on the stove. Stir occasionally until the milk comes to a boil.
Meanwhile, rinse the saamai (little millet) thoroughly and keep it ready.
In a separate pan, heat the ghee and fry the cashews until they turn golden brown.
Add the roasted cashews to the payasam and mix well. Remove the payasam from the heat.
When the milk starts to boil, add the rinsed saamai and mix well. Keep the flame on medium and stir occasionally.
Allow the saamai to cook as the milk gradually reduces to half its original quantity. This slow reduction enhances the flavor and gives the payasam a rich texture, often making cardamom powder optional. It takes about 20 minutes for the saamai to cook fully and the milk to thicken. Once the saamai is cooked, add the sugar and mix well. Let the kheer simmer for another 5 minutes before turning off the heat.
Substitutions
Vegan: Replace dairy milk with coconut milk, almond milk, or any plant-based milk to make this payasam completely vegan. Use coconut oil instead of ghee for roasting cashews.
Low Sugar: Substitute regular sugar with jaggery powder or natural sweeteners like maple syrup or stevia to reduce refined sugar content.
Gluten-Free: Saamai (little millet) is naturally gluten-free, making this recipe safe for gluten-sensitive diets. Just be sure to use pure, uncontaminated ingredients.
Nut-Free: If you have nut allergies, skip the cashews or replace them with seeds like pumpkin or sunflower seeds for a similar crunch.
Variations
Festive Twist: Add a pinch of nutmeg or cinnamon along with cardamom for warm, festive flavors. Garnish with fresh rose petals or edible dried fruits for a beautiful presentation.
Health Boost: Stir in some finely grated carrots or shredded coconut for extra nutrients and texture. You can also use jaggery instead of sugar for a more natural sweetness.
Storage
Store the payasam in an airtight container in the refrigerator. It will stay fresh for 2-3 days. Before serving, gently reheat on low heat and stir well—add a splash of milk if it has thickened too much.
This payasam is not recommended for freezing, as the texture can change and become grainy or watery when thawed.
Top Tips
Here are some top tips for making perfect Saamai Paal Payasam:
Rinse the little millet thoroughly to remove any impurities before cooking.
Cook the millet slowly in boiling milk on medium heat for a creamy texture.
Stir occasionally to prevent the millet from sticking to the bottom of the pan.
Allow the milk to reduce well—it enhances the flavor and thickens the payasam naturally.
Roast cashews in ghee until golden brown for a rich, nutty crunch.
Add sugar gradually and adjust sweetness to your taste.
Use fresh cardamom powder for the best aroma and flavor.
Serve warm or chilled, depending on your preference.
Avoid freezing to keep the texture intact.
For a special touch, garnish with saffron strands or dried rose petals
Saamai Paal Payasam Recipe | Little Millet Kheer Recipe
Saamai Paal Payasam is a traditional South Indian dessert made with little millet, milk, and sweet spices. This creamy and comforting kheer is not only delicious but also packed with nutrients, making it a wholesome treat perfect for festivals and special occasions. Its mild sweetness and rich texture make it a favorite among all ages.
Course Payasam/Kheer
Cuisine Indian, South Indian, Tamil Nadu
Prep Time 5 minutesminutes
Cook Time 30 minutesminutes
Total Time 35 minutesminutes
Servings 4people
Calories 120kcal
Author Sowmya Venkatachalam
Ingredients
¼CupLittle Millet (Samai)
2CupsMilk
6-7Cashews
1teaspoonGhee (Clarified butter)
¼CupSugar
¼teaspoonCardamom Powder
Instructions
Pour the milk into a pan and place it over medium heat. Stir occasionally until the milk begins to boil. Meanwhile, rinse the saamai thoroughly and set it aside.
2 Cups Milk
When the milk starts to boil, add the rinsed saamai and mix well. Reduce the heat to medium and stir occasionally. Allow the saamai to cook while the milk reduces to half its original quantity. This slow reduction enhances the flavor and texture, often making cardamom powder optional. It will take about 20 minutes for the saamai to cook fully and the milk to thicken. Once the saamai is cooked, add sugar and stir well. Let the kheer simmer for another 5 minutes before removing it from the heat.
¼ Cup Little Millet (Samai), ¼ teaspoon Cardamom Powder, ¼ Cup Sugar
In a separate pan, heat the ghee and fry the cashews until they turn golden brown. Add the roasted cashews to the payasam and mix well. Remove the payasam from the heat.
1 teaspoon Ghee (Clarified butter), 6-7 Cashews
The delicious Saamai Paal Payasam (Little Millet Kheer) is now ready to serve!
Notes
We can soak few saffron strands in warm milk and add it to get a nice color
Little millet cooks faster and hence I have added it directly in milk. If you want, we can cook the little millet in water separately and add it to milk later
Looking for a light and tasty dessert that's a little different? Try Cucumber Kheer! This South Indian sweet, also known as Vellarikkai Payasam, is made with cucumber, milk, and a hint of cardamom. It’s cool, creamy, and perfect for hot days or special occasions. This easy recipe is sure to surprise and delight—give it a try and see how delicious cucumber can be in a dessert!
Cucumber Kheer (Vellarikkai Payasam) is a light and cooling dessert, perfect for the hot summer months. It's sometimes made during festivals like Tamil New Year, Navaratri, or family poojas when a simple and refreshing sweet is preferred. Its mild, soothing taste also makes it a great choice for those following a satvik or Ayurvedic diet.
[feast_advanced_jump_to]
Ingredients
This refreshing Cucumber Kheer combines grated cucumber with semolina and sago for a smooth, satisfying texture. Sweetened condensed milk and sugar bring the perfect sweetness, while cardamom powder adds a lovely aroma. Ghee-roasted cashews and raisins add a rich, crunchy contrast, and a splash of milk ties everything together into a creamy, delicious dessert.
Grated cucumber
Semolina (Sooji/Rawa)
Sago (Sabudana/Jevvarasi)
Sweetened condensed milk
Sugar
Cardamom powder
Raisins
Cashews
Milk
Ghee
See recipe card for quantities.
Instructions
Rinse the sago thoroughly and soak it in water for 30 minutes.
Wash, peel, and grate the cucumber. Set aside 1 cup of the grated cucumber.
After soaking for half an hour, drain the water from the sago. Place a saucepan over medium heat, add the soaked sago along with fresh water, and cook until the sago becomes soft.
Heat ghee in a pan, then add the broken cashews and raisins. Sauté them until the cashews turn golden brown. Remove the roasted cashews and raisins and transfer them to a separate bowl or plate.
In the same pan, add the semolina and roast it until it releases a pleasant aroma and turns a light golden brown.
Pour ½ cup of hot water into the pan to cook the semolina.
When the semolina is half-cooked, add the grated cucumber to the pan and stir thoroughly.
Add the milk and sugar to the pan and cook the mixture until the cucumber is tender.
When the cucumbers are fully cooked and tender, add the cooked sago and condensed milk. Stir well and simmer on low heat for 5 minutes. Then, add cardamom powder along with the roasted cashews and raisins, and remove from the heat. You can also add unsweetened khoya for extra richness and flavor in this payasam.
The delicious and refreshing Cucumber Kheer (Vellarikkai Payasam) is now ready to serve!
Variations
Fruit-Enhanced Kheer: Add chopped fruits like pineapple, mango, or pomegranate seeds for extra sweetness and texture.
Spiced Cucumber Kheer: Add a pinch of saffron or a small piece of cinnamon stick while cooking for more depth of flavor.
Nutty Delight: Include a mix of nuts such as almonds, pistachios, and walnuts along with cashews for extra crunch.
Rose-Flavored Kheer: Add a teaspoon of rose water or garnish with edible rose petals for a floral twist.
Cucumber and Carrot Kheer: Mix grated carrot with cucumber for a colorful and nutritious version.
Storage
Refrigerate: Store the cucumber kheer in an airtight container in the refrigerator. It will stay fresh for up to 2-3 days.
Avoid room temperature: Since it contains milk, avoid leaving it out at room temperature for more than 2 hours to prevent spoilage.
Stir before serving: The kheer may thicken or separate slightly when chilled—just give it a good stir and, if needed, add a little warm milk to loosen it up before serving.
Do not freeze: Freezing is not recommended as the texture may change and become watery when thawed.
Top Tip
Use fresh, firm cucumbers for the best texture and flavor. Avoid overripe or watery ones.
Grate the cucumber just before cooking to keep the kheer fresh and prevent it from becoming watery.
Roast the semolina lightly to bring out a nutty aroma without burning it.
Soak sago well and cook it properly until soft to avoid any crunchiness.
Adjust the sweetness by tasting as you go—cucumber is naturally mild, so balance is key.
Use cardamom powder for that classic fragrant touch; you can also add a pinch of saffron for extra aroma.
Roast cashews and raisins in ghee until golden to add a rich, crunchy contrast.
Cook on low flame after adding milk and condensed milk to avoid curdling.
Serve chilled or at room temperature for a refreshing dessert.
If the kheer thickens too much after refrigeration, stir in a little warm milk before serving.
Cucumber Kheer (Vellarikkai Payasam) is a light and refreshing South Indian dessert made with grated cucumber, semolina, sago, milk, and sweetened condensed milk. Flavored with cardamom and garnished with roasted cashews and raisins, this creamy payasam is perfect for hot days and festive occasions. It’s easy to prepare, mildly sweet, and has a unique cooling taste that surprises and delights.
Course Payasam/Kheer
Cuisine Indian Cuisine, Indian Recipes, South Indian Recipes
Prep Time 30 minutesminutes
Cook Time 30 minutesminutes
Servings 4people
Calories 220kcal
Author Sowmya Venkatachalam
Equipment
1 Heavy Bottomed Pan
1 Vegetable Grater
1 Mixing Bowl
Ingredients
1CupCucumberGrated
2tablespoonSemolina (Sooji / Rava)
¼cupJavvarasi (Sago / Sabudana)
½CupCondensed Milk
¼CupSugar
¼teaspoonCardamom Powder
10nosRaisins
10nosCashews
¼cupMilk
1tablespoonGhee
Instructions
Rinse the sago thoroughly and soak it in water for 30 minutes.
¼ cup Javvarasi (Sago / Sabudana)
Wash, peel, and grate the cucumber. Set aside 1 cup of the grated cucumber.
1 Cup Cucumber
After soaking for half an hour, drain the water from the sago. Place a saucepan over medium heat, add the soaked sago along with fresh water, and cook until the sago becomes soft.
Heat ghee in a pan, then add the broken cashews and raisins. Sauté them until the cashews turn golden brown. Remove the roasted cashews and raisins and transfer them to a separate bowl or plate.
10 nos Cashews, 1 tablespoon Ghee, 10 nos Raisins
In the same pan, add the semolina and roast it until it releases a pleasant aroma and turns a light golden brown.
2 tablespoon Semolina (Sooji / Rava)
Pour ½ cup of hot water into the pan to cook the semolina.
When the semolina is half-cooked, add the grated cucumber to the pan and stir thoroughly.
Add the milk and sugar to the pan and cook the mixture until the cucumber is tender.
¼ teaspoon Cardamom Powder, ¼ cup Milk, ¼ Cup Sugar
When the cucumbers are fully cooked and tender, add the cooked sago and condensed milk. Stir well and simmer on low heat for 5 minutes. Then, add cardamom powder along with the roasted cashews and raisins, and remove from the heat. You can also add unsweetened khoya for extra richness and flavor in this payasam.The delicious and refreshing Cucumber Kheer (Vellarikkai Payasam) is now ready to serve!
If you're looking for a light, flavorful snack that’s as fun to make as it is to eat, this Khandvi recipe is about to become your new favorite. These delicate, golden rolls made from gram flour and yogurt are soft, tangy, and topped with a sizzling tempering of mustard seeds, green chilies, and fresh coconut. Whether you're a seasoned home cook or a curious beginner, my step-by-step guide will walk you through mastering this iconic Gujarati snack—no fuss, just fan-freaking-fantastic results. Let’s roll!
This Khandvi recipe was inspired by my Dhokla recipe (another steamed Gujarati favorite you’ll love). The soft, tangy rolls pair beautifully with my Green Chutney for a bright, flavorful contrast. Trust me—serve them together, and you’ve got an irresistible combo that’ll disappear fast from any snack table.
[feast_advanced_jump_to]
Ingredients
These ingredients were carefully chosen to balance flavor, texture, and authenticity in this classic Khandvi recipe. Besan(gram flour) provides the smooth, protein-rich base, while yogurt adds the signature tanginess that makes Khandvi so addictive. Turmeric brings both color and a mild earthy flavor, and asafoetida (hing) enhances digestion and adds a subtle savory depth. The tempering of mustard seeds, green chilies, and curry leaves elevates the dish with a burst of aroma and crunch, while a garnish of grated coconut and fresh coriander brings freshness and visual appeal. These simple yet powerful ingredients come together to create a snack that's light, flavorful, and uniquely satisfying.
Gram flour (besan)
Yogurt
Water
Turmeric powder
Asafoetida (hing)
Salt
Oil
Mustard seeds
Green chilies
Curry leaves
Grated coconut
Fresh coriander leaves
See recipe card for quantities.
Instructions
Cut a sheet of aluminum foil into a rectangular shape, preferably around 30 cm x 45 cm, and set it aside. This will be used to spread the cooked Khandvi batter into thin layers. Alternatively, you can use a clean granite countertop, the back of a steel plate, or any smooth flat surface—but I prefer aluminum foil for easy handling. In a mixing bowl, combine the gram flour (besan), yogurt, water, turmeric powder, asafoetida (hing), and salt.
Whisk everything together until smooth and lump-free.
Heat a pan over low flame and pour in the Khandvi batter. Stir continuously to avoid lumps. As the mixture cooks, it will begin to thicken and release steam.
Keep stirring until it reaches a smooth, spreadable consistency.
Once the gram flour batter is fully cooked, it will become thick. To check if it's ready, spread a small spoonful of the mixture onto a greased plate using a spatula. Let it cool for a minute, then try to roll it. If it rolls smoothly without sticking or breaking, the consistency is perfect, and you can switch off the flame. If it doesn't roll properly, continue stirring and cooking the batter for a few more minutes.
Once done, switch off the flame but keep stirring for another minute to prevent sticking. Then, immediately spread the thickened Khandvi mixture onto the prepared aluminum foil.
Using a flat stainless steel spatula, quickly spread the cooked Khandvi mixture into a thin, even layer on the foil. This step can be a bit tricky—speed is important, as the mixture thickens further as it cools and becomes difficult to spread.
Once the layer has cooled slightly (about 5 minutes), cut it into broad vertical strips, as shown in the picture.
Trim the uneven edges to ensure all the Khandvi strips are of equal size.
Then, gently roll each rectangular strip into tight spirals. Repeat the process for the remaining strips.
Sprinkle the grated coconut and chopped coriander leaves over the rolled Khandvi. In a small pan, heat some oil and add the mustard seeds. Once they begin to splutter, add a pinch of asafoetida (hing) and the slit green chilies. Sauté for about 5 seconds, then remove from the heat.
Drizzle this tempering over the Khandvi rolls for added flavor.
Variations
Paneer-Stuffed Khandvi: Add a layer of grated paneer mixed with spices (like cumin, chili powder, or chaat masala) before rolling for a protein-packed twist.
Spinach Khandvi: Blend a handful of spinach leaves into the yogurt before mixing the batter for a pop of green color and added nutrition.
Sweet & Spicy Khandvi: Add a pinch of sugar to the batter and top with a sweet chutney drizzle for a balanced flavor that hits all the notes.
Microwave Khandvi: Short on time? Cook the batter in the microwave in short bursts (30–60 seconds), stirring in between until it thickens.
Gluten-Free Hing-Free Version: Omit asafoetida or use a certified gluten-free hing to accommodate gluten sensitivities.
Jain Khandvi: Skip hing and yogurt if needed—use non-dairy yogurt and no root vegetables or spices that are not Jain-compliant.
Top Tip
Work quickly while spreading the batter! Khandvi sets fast once off the heat—so have your foil, plate, or countertop prepped and ready. The thinner you spread it, the smoother and easier it is to roll. Speed + even spreading = perfect rolls every time.
Khandvi is a popular Gujarati snack made from gram flour (besan) and yogurt, seasoned with turmeric and tempered with mustard seeds, curry leaves, and green chilies. These delicate, silky rolls are soft, tangy, and melt in your mouth—perfect as an appetizer or teatime snack. This recipe guides you through making perfect, thin rolls every time, with helpful tips for spreading, rolling, and tempering.
Course Appetizer, Chaat, Evening Tiffen
Cuisine Indian Cuisine, Indian Recipes, North Indian
Prep Time 10 minutesminutes
Cook Time 20 minutesminutes
Servings 4people
Calories 150kcal
Author Sowmya Venkatachalam
Equipment
1 Heavy Bottomed Pan
1 Mixing Bowl
1 Aluminium Foil
1 Spatula
Ingredients
½cupGram Flour (Besan / Chickpea Flour)
½cupCurd (Plain Yogurt)
¾cupWater
½teaspoonSalt
1PinchAsafoetida (Asafetida / Hing)
½teaspoonTurmeric Powder
2tablespoonCoriander Leaves
2teaspoonGrated Coconut
For Tempering
1tablespoonOil
1teaspoonMustard seeds
3nosGreen ChiliFinely Chopped
1PinchAsafoetida (Asafetida / Hing)
Instructions
Cut a sheet of aluminum foil into a rectangular shape, preferably around 30 cm x 45 cm, and set it aside. This will be used to spread the cooked Khandvi batter into thin layers. Alternatively, you can use a clean granite countertop, the back of a steel plate, or any smooth flat surface—but I prefer aluminum foil for easy handling.
In a mixing bowl, combine the gram flour (besan), yogurt, water, turmeric powder, asafoetida (hing), and salt. Whisk everything together until smooth and lump-free.
½ cup Gram Flour (Besan / Chickpea Flour), ½ cup Curd (Plain Yogurt), ¾ cup Water, 1 Pinch Asafoetida (Asafetida / Hing), ½ teaspoon Turmeric Powder, ½ teaspoon Salt
Heat a pan over low flame and pour in the Khandvi batter. Stir continuously to avoid lumps. As the mixture cooks, it will begin to thicken and release steam. Keep stirring until it reaches a smooth, spreadable consistency.
Once the gram flour batter is fully cooked, it will become thick. To check if it's ready, spread a small spoonful of the mixture onto a greased plate using a spatula. Let it cool for a minute, then try to roll it. If it rolls smoothly without sticking or breaking, the consistency is perfect, and you can switch off the flame. If it doesn't roll properly, continue stirring and cooking the batter for a few more minutes. Once done, switch off the flame but keep stirring for another minute to prevent sticking. Then, immediately spread the thickened Khandvi mixture onto the prepared aluminum foil.
Using a flat stainless steel spatula, quickly spread the cooked Khandvi mixture into a thin, even layer on the foil. This step can be a bit tricky—speed is important, as the mixture thickens further as it cools and becomes difficult to spread. Once the layer has cooled slightly (about 5 minutes), cut it into broad vertical strips, as shown in the picture.
Trim the uneven edges to ensure all the Khandvi strips are of equal size. Then, gently roll each rectangular strip into tight spirals. Repeat the process for the remaining strips.
Sprinkle the grated coconut and chopped coriander leaves over the rolled Khandvi. In a small pan, heat some oil and add the mustard seeds. Once they begin to splutter, add a pinch of asafoetida (hing) and the slit green chilies. Sauté for about 5 seconds, then remove from the heat. Drizzle this tempering over the Khandvi rolls for added flavor. Your delicious Khandvi is now ready to serve!
If you're looking for a flavorful, tangy, and comforting South Indian curry, Thakkali Kuzhambu is the perfect dish for you! This rich and aromatic tomato-based gravy is infused with roasted spices, coconut, and tamarind, creating a delicious balance of heat and tanginess. Whether paired with soft idlis, crispy dosas, or even steamed rice, this Tomato Kurma is sure to become a family favorite. Keep reading to discover the secret to making the most flavorful and authentic Thakkali Kuzhambu right at home!
Thakkali Kuzhambu is a staple in South Indian households and is enjoyed year-round. However, it is especially popular during the monsoon and winter seasons, as its tangy and spicy flavors provide warmth and comfort. It is also a go-to dish when fresh vegetables are scarce, as it relies primarily on pantry staples like tomatoes, tamarind, and spices.
This was inspired by my other recipe on this site, and it can be paired with Idli, Dosa or even Rice.
[feast_advanced_jump_to]
Ingredients for Thakkali Kuzhambu
A well-prepared Thakkali Kuzhambu starts with the right blend of ingredients, each adding depth and richness to the dish. Ripe tomatoes form the base, giving the gravy its signature tangy flavor. Tamarind enhances the tartness, balancing the spice and sweetness naturally present in the tomatoes. Onions add a subtle sweetness and savory depth, while a blend of cumin, fennel, black pepper, and coriander seeds provides warm, earthy notes. Dried red chilies and red chili powder contribute heat, which can be adjusted to taste. Roasted channa dal helps thicken the gravy, while grated coconut adds a creamy texture. Mustard seeds and curry leaves temper the dish with their bold, aromatic flavors, and a final touch of gingelly (sesame) oil enhances its authenticity. Together, these ingredients create a well-balanced, flavorful Thakkali Kuzhambu that pairs beautifully with idli, dosa, or rice.
Tomatoes
Tamarind
Onions
Cumin seeds
Fennel seeds
Black pepper
Coriander seeds
Dried red chilies
Red chili powder
Roasted channa dal
Grated coconut
Mustard seeds
Curry leaves
Gingelly (sesame) oil
Turmeric powder
Salt
Water
See recipe card for quantities.
Instructions
Heat oil in a pan. Add fennel seeds, cumin seeds, black pepper, coriander seeds, red chili, roasted channa dal, and curry leaves. Sauté for 1-2 minutes until fragrant over a medium flame.
Now, add grated coconut and tamarind. Sauté until the coconut turns golden brown, then transfer the mixture to a mixer grinder.
Heat oil in a pan over medium heat. Once hot, add chopped onions and sauté until translucent. Then, add chopped tomatoes, turmeric powder, and salt, mixing well. Cover and cook until the tomatoes turn soft and mushy. Transfer the mixture to a mixer grinder.
Once the ingredients have cooled, grind them into a smooth paste and set it aside.
Heat oil in a pan over medium heat. Once hot, add mustard seeds and let them splutter. Then, add fennel seeds and curry leaves, stirring well to combine.
Add the ground spice paste to the pan and mix well. Add water to adjust the consistency, then add red chili powder and salt. Stir to combine and let the mixture cook on medium flame for about 5 minutes.
Finally, sprinkle chopped coriander leaves and turn off the stove.
Serve the dish with hot idli or dosa.
Substitutions
Thakkali Kuzhambu is naturally vegetarian and gluten-free, making it a great choice for those with dietary restrictions. Since the recipe uses whole spices and fresh ingredients without any wheat-based thickeners, it fits well into a gluten-free diet. If you're vegan, simply ensure you're using plant-based oils like gingelly (sesame) oil instead of ghee or butter. For those following a low-carb or keto diet, you can reduce the amount of onions and skip the roasted channa dal, which adds some carbohydrates. Instead, use a little extra coconut for thickness while keeping the flavors intact. This dish is also adaptable for satvik (no onion & garlic) diets by omitting onions and garlic. The flavors remain deliciously rich by slightly increasing the amount of tomatoes and coconut for balance. No matter your dietary preference, Thakkali Kuzhambu is a versatile and satisfying dish that can be enjoyed by everyone!
Variations
One of the best things about Thakkali Kuzhambu is its versatility! Whether you love bold spices, need a kid-friendly version, or want to add extra protein, this dish can be easily adapted to suit your preferences. Below are some creative ways to tweak this flavorful tomato-based curry:
Spicy Lovers 🌶️ – Add extra red chili powder, green chilies, or a drizzle of spicy garlic oil for more heat.
Kid-Friendly 👶 – Reduce spice, blend the gravy smooth, and top with crushed potato chips for a fun twist.
Protein-Packed 💪 – Add boiled chickpeas, crumbled paneer, or tofu for extra nutrition.
Coconut-Free Option 🌿 – Replace coconut with cashew or almond paste for a creamy texture.
Deluxe & Creamy ✨ – Stir in coconut milk or fresh cream and garnish with crispy onions or toasted cashews.
Refrigeration: Store leftover Thakkali Kuzhambu in an airtight container in the refrigerator for up to 3 days. The flavors deepen over time, making it even more delicious the next day!
Reheating: Warm the kuzhambu on the stovetop over low heat, adding a little water if it has thickened. You can also microwave it in short intervals, stirring in between.
Make-Ahead Tip: Prepare the spice paste in advance and store it in the refrigerator for 4-5 days or freeze it in portions for quick meal prep.
Avoid Metal Containers: Use glass or BPA-free plastic containers for storage to prevent any reaction with the acidic tomato base.
With these storage tips, you can enjoy Thakkali Kuzhambu fresh and flavorful anytime! 🍛✨
Top Tip
Here are some tips to make a delicious Thakkali Kuzhambu:
Use Ripe Tomatoes: For a rich, tangy flavor, always use ripe, juicy tomatoes. They add the perfect balance of sweetness and acidity to the gravy.
Roast the Spices: Lightly roast the spices like mustard seeds, fennel seeds, and cumin to bring out their full flavors before adding them to the gravy.
Tamarind: Use fresh tamarind pulp for a more authentic taste. If using tamarind extract, make sure to adjust the quantity based on its strength.
Add Gingelly Oil: Cooking Thakkali Kuzhambu with gingelly (sesame) oil enhances the dish’s authentic taste, giving it a richer flavor.
Adjust Spice Level: You can adjust the spice level by adding more or less red chili powder or dried red chilies, depending on your preference.
Cook the Tomatoes Well: Make sure to cook the tomatoes thoroughly until they turn soft and mushy for a smoother consistency in the gravy.
Let it Simmer: Allow the kuzhamu to simmer for a few extra minutes on low heat for the spices to meld together and intensify the flavors.
Garnish: Finish with a generous sprinkle of fresh coriander leaves for a burst of freshness.
Consistency: Adjust the water to get the desired consistency. For a thicker gravy, reduce the water; for a thinner consistency, add more.
These tips will help you achieve a flavorful and authentic Thakkali Kuzhambu. Enjoy!
Thakkali Kuzhambu is a tangy and flavorful South Indian tomato-based curry, perfect with idli or dosa. Made with ripe tomatoes, onions, tamarind, and aromatic spices, it has a rich, slightly thick consistency. The blend of mustard seeds, curry leaves, and gingelly oil enhances its authentic taste, making it a deliciously comforting accompaniment.
Course Accompaniment
Cuisine South Indian Recipes, Tamilnadu
Prep Time 15 minutesminutes
Cook Time 30 minutesminutes
Total Time 45 minutesminutes
Servings 4people
Calories 84kcal
Author Sowmya Venkatachalam
Equipment
1 Mixer Grinder
1 Heavy Bottomed Pan
Ingredients
For Spice Paste
1tablespoonCooking Oilpreferably Gingely Oil
1teaspoonFennel Seeds
1teaspoonJeera
1tablespoonCoriander seeds
1teaspoonWhole black pepper
2nosRed Chili
2tablespoonSplit Bengal Gram (Channa Dal / Kadalaparuppu)
1sprigCurry leaves
¼cupGrated Coconut
1small candy sizeTamarind
For the Kuzhambu
2tablespoonCooking Oilpreferably Gingely Oil
1nosOnionbig size, chopped roughly
4nosTomatobig size, chopped roughly
¼teaspoonTurmeric Powder
1teaspoonSalt
Tempering
1tablespoonCooking Oilpreferably Gingely Oil
1teaspoonMustard seeds
1teaspoonFennel Seeds
1sprigCurry leaves
1teaspoonRed Chili Powder
1teaspoonSalt
1handfulCoriander Leaveschopped
Instructions
Heat oil in a pan. Add fennel seeds, cumin seeds, black pepper, coriander seeds, red chili, roasted channa dal, and curry leaves. Sauté for 1-2 minutes until fragrant over a medium flame.
1 tablespoon Cooking Oil, 1 teaspoon Fennel Seeds, 1 teaspoon Jeera, 1 tablespoon Coriander seeds, 1 teaspoon Whole black pepper, 2 nos Red Chili, 2 tablespoon Split Bengal Gram (Channa Dal / Kadalaparuppu), 1 sprig Curry leaves
Now, add grated coconut and tamarind. Sauté until the coconut turns golden brown, then transfer the mixture to a mixer grinder.
¼ cup Grated Coconut, 1 small candy size Tamarind
Heat oil in a pan over medium heat. Once hot, add chopped onions and sauté until translucent. Then, add chopped tomatoes, turmeric powder, and salt, mixing well. Cover and cook until the tomatoes turn soft and mushy. Transfer the mixture to a mixer grinder.
2 tablespoon Cooking Oil, 1 nos Onion, 4 nos Tomato, ¼ teaspoon Turmeric Powder, 1 teaspoon Salt
Once the ingredients have cooled, grind them into a smooth paste and set it aside.
Heat oil in a pan over medium heat. Once hot, add mustard seeds and let them splutter. Then, add fennel seeds and curry leaves, stirring well to combine.
Add the ground spice paste to the pan and mix well. Add water to adjust the consistency, then add red chili powder and salt. Stir to combine and let the mixture cook on medium flame for about 5 minutes.
1 teaspoon Red Chili Powder, 1 teaspoon Salt
Finally, sprinkle chopped coriander leaves and turn off the stove. Serve the dish with hot idli or dosa.
1 handful Coriander Leaves
Video
Notes
Here are some tips to make a delicious Thakkali Kuzhambu:
Use Ripe Tomatoes: For a rich, tangy flavor, always use ripe, juicy tomatoes. They add the perfect balance of sweetness and acidity to the gravy.
Roast the Spices: Lightly roast the spices like mustard seeds, fennel seeds, and cumin to bring out their full flavors before adding them to the gravy.
Tamarind: Use fresh tamarind pulp for a more authentic taste. If using tamarind extract, make sure to adjust the quantity based on its strength.
Add Gingelly Oil: Cooking Thakkali Kuzhambu with gingelly (sesame) oil enhances the dish’s authentic taste, giving it a richer flavor.
Adjust Spice Level: You can adjust the spice level by adding more or less red chili powder or dried red chilies, depending on your preference.
Cook the Tomatoes Well: Make sure to cook the tomatoes thoroughly until they turn soft and mushy for a smoother consistency in the gravy.
Let it Simmer: Allow the kuzhamu to simmer for a few extra minutes on low heat for the spices to meld together and intensify the flavors.
Garnish: Finish with a generous sprinkle of fresh coriander leaves for a burst of freshness.
Consistency: Adjust the water to get the desired consistency. For a thicker gravy, reduce the water; for a thinner consistency, add more.
These tips will help you achieve a flavorful and authentic Thakkali Kuzhambu. Enjoy!


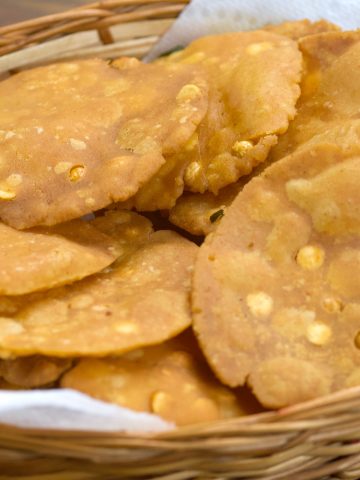
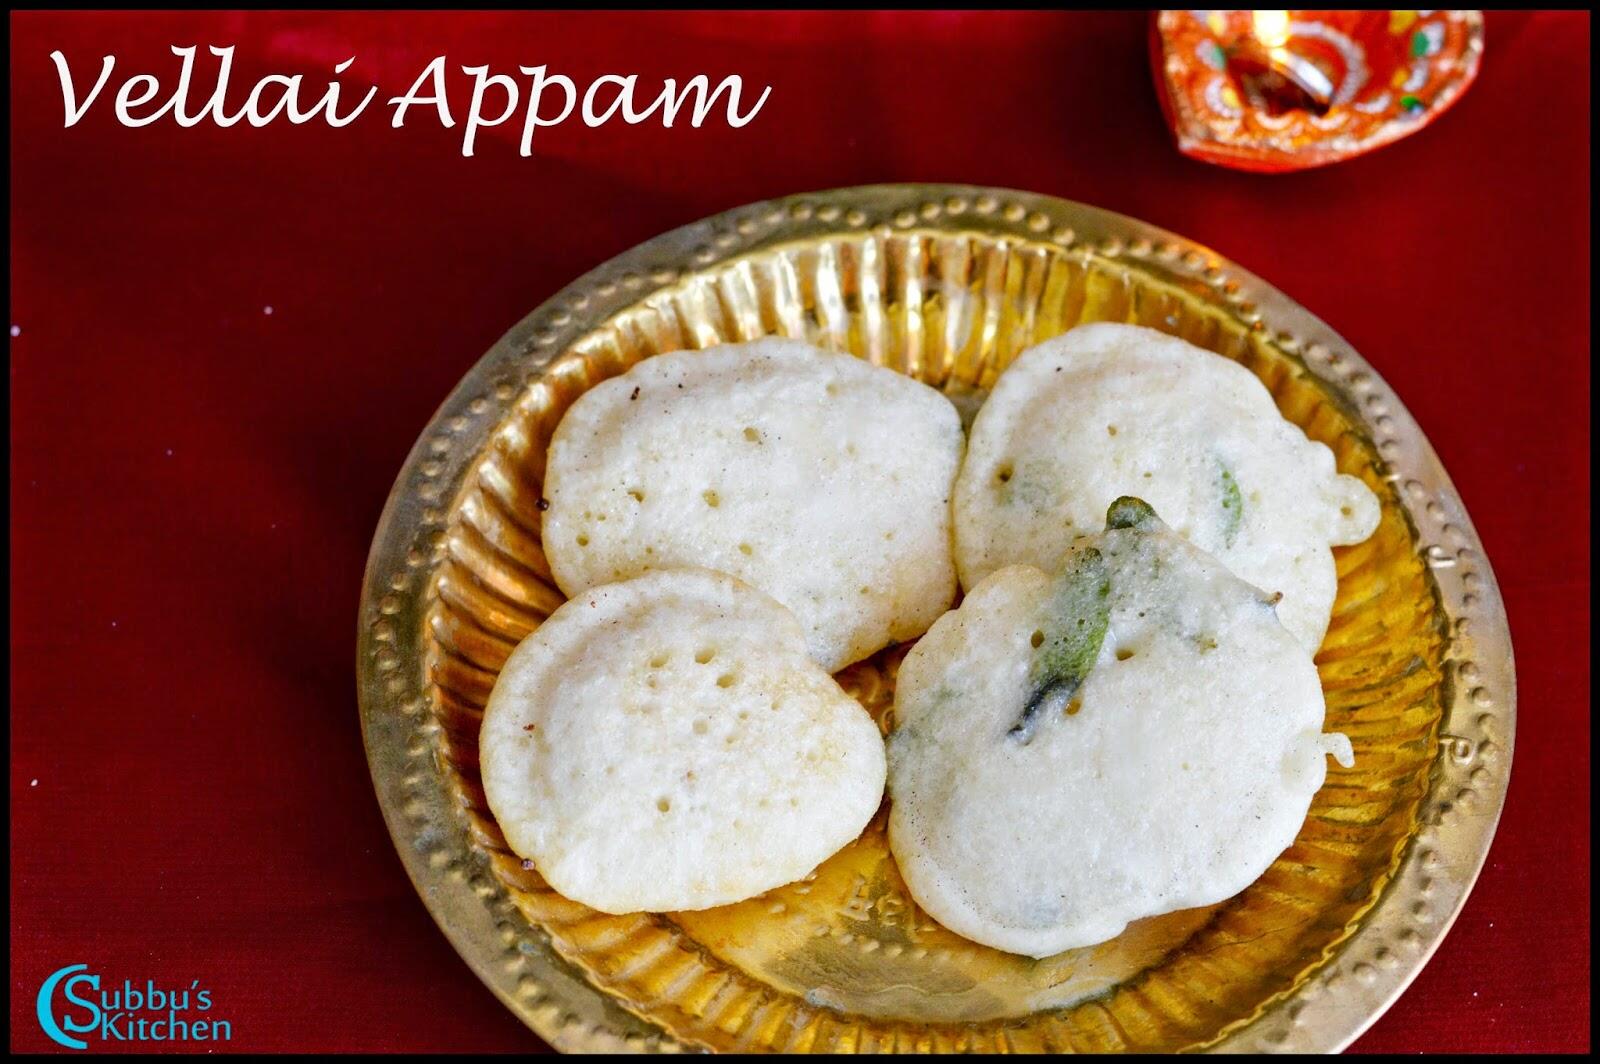


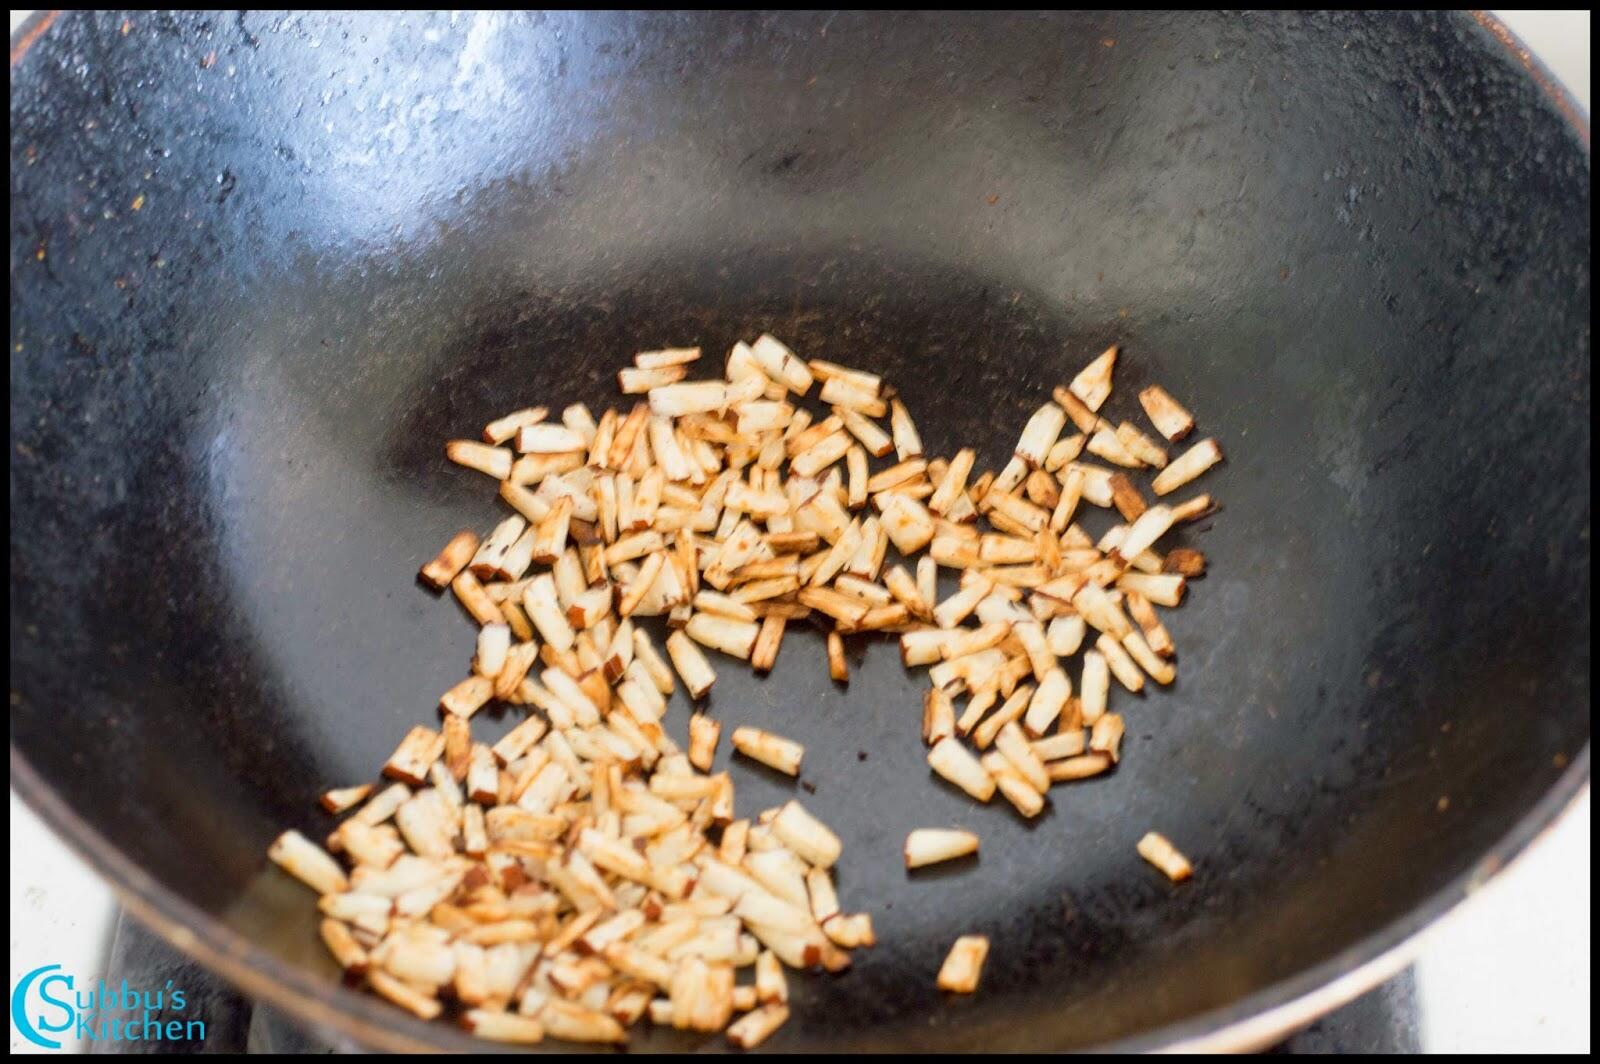
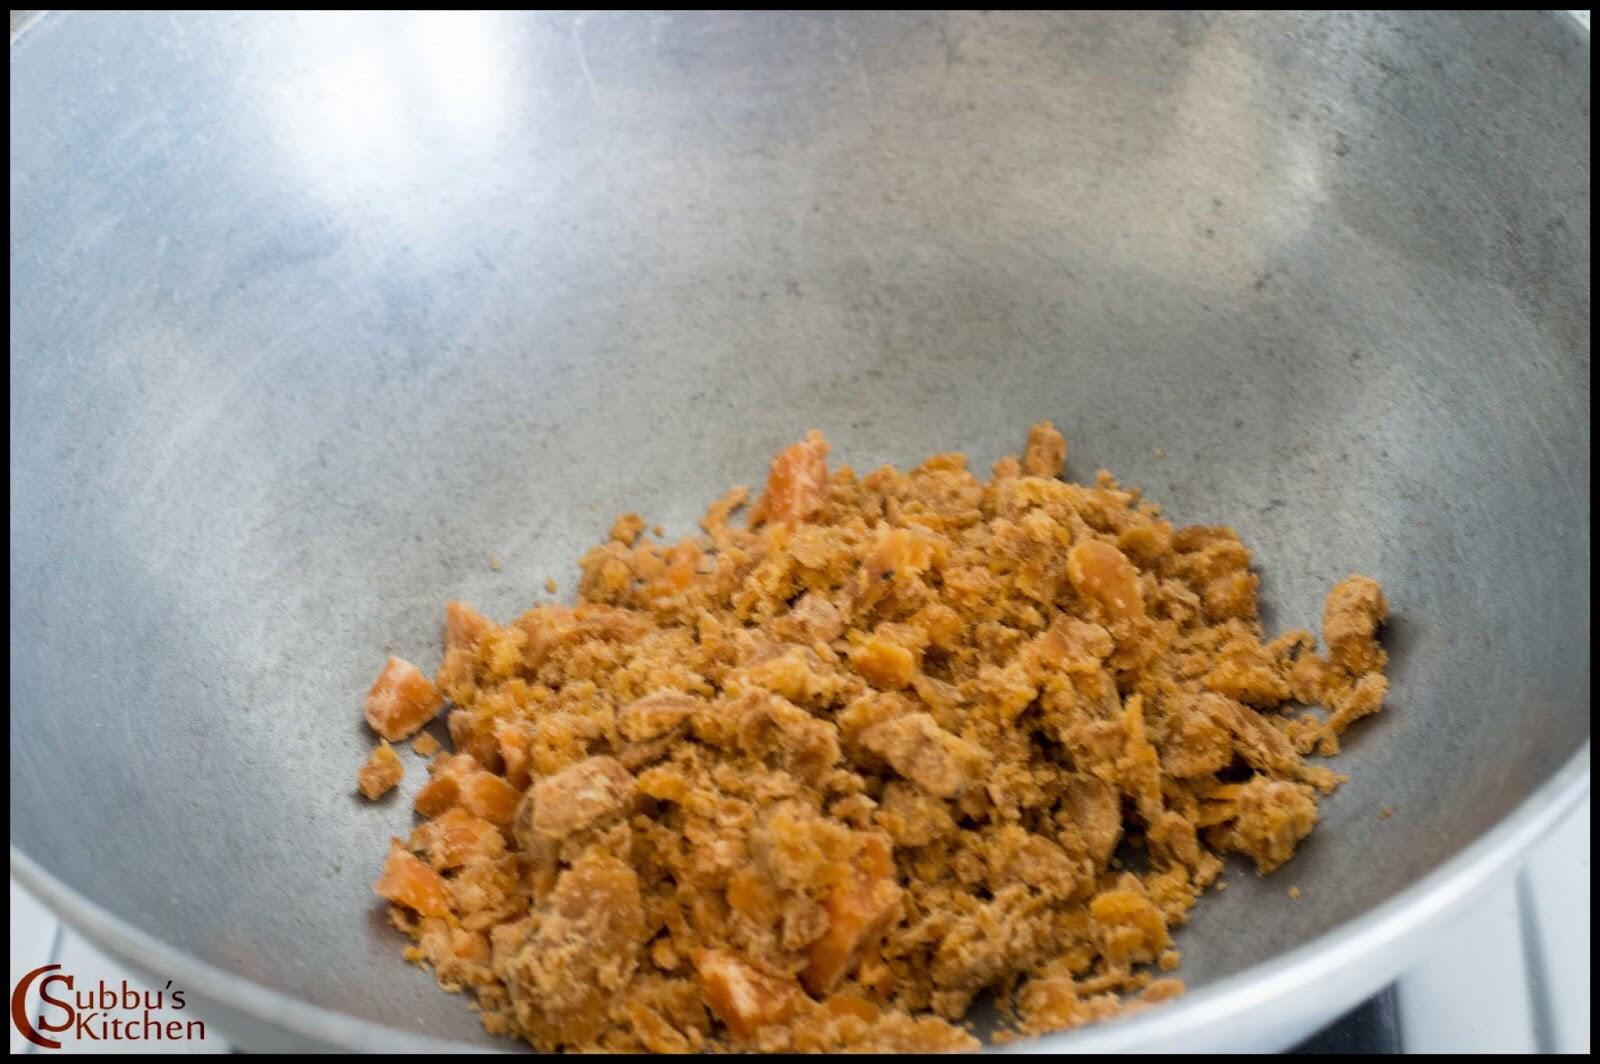
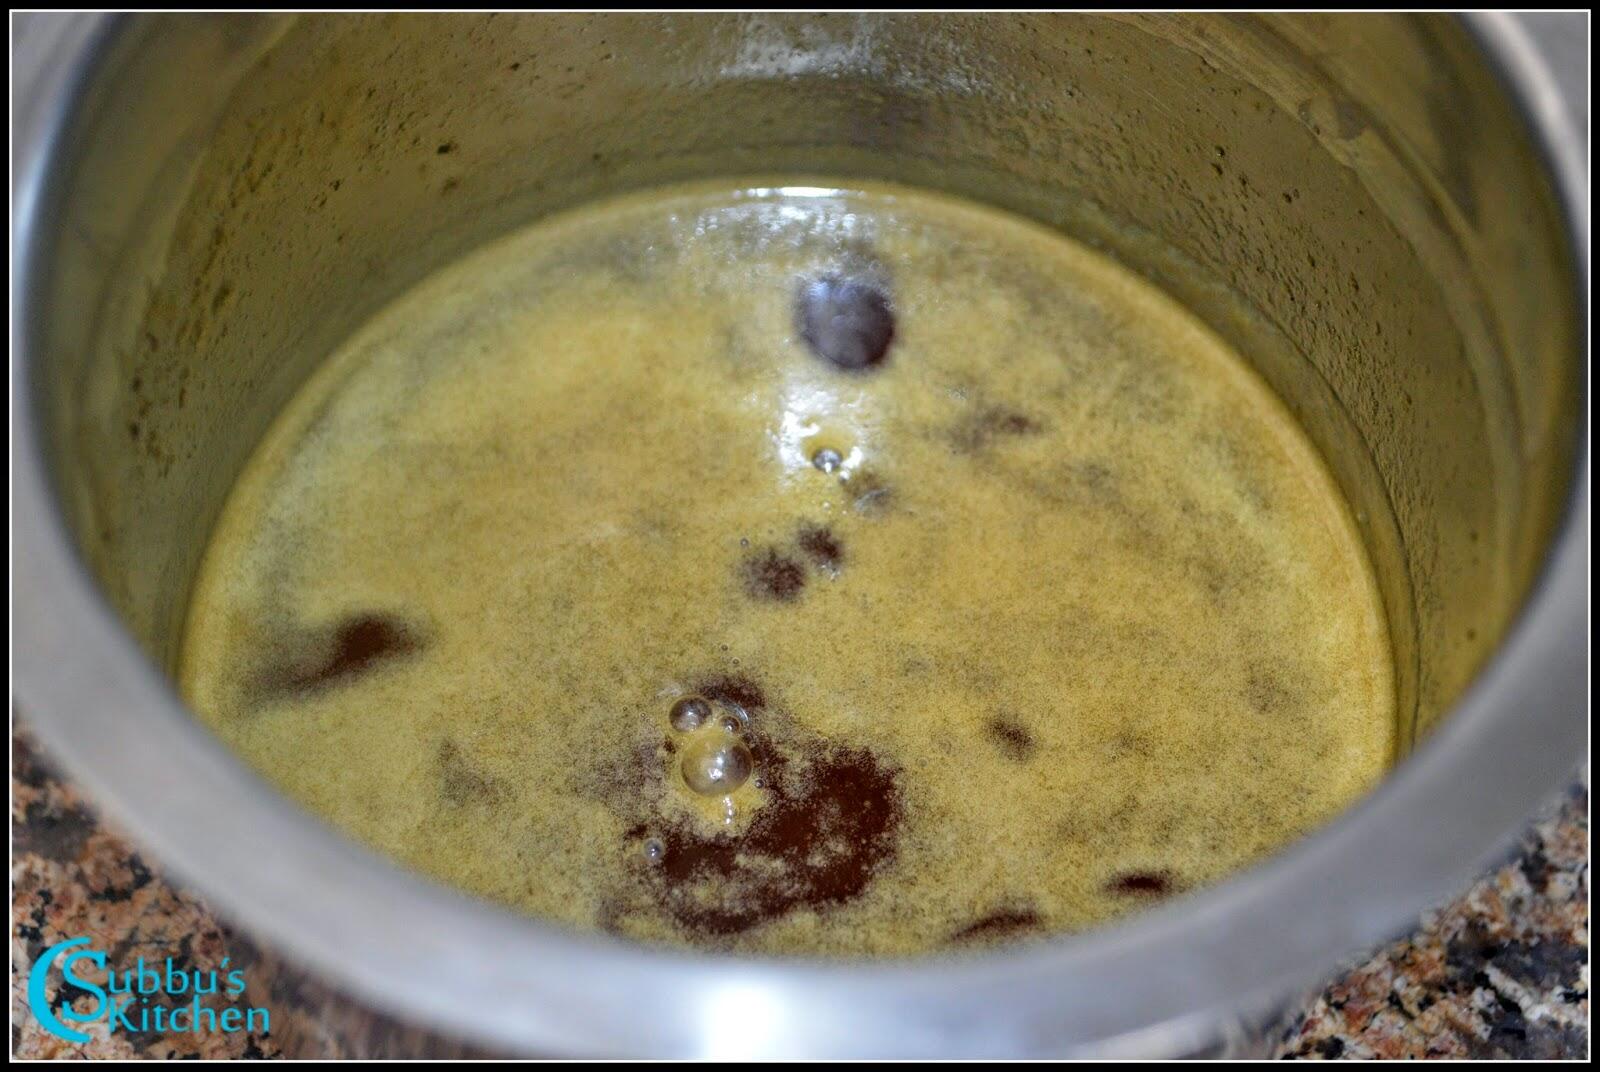
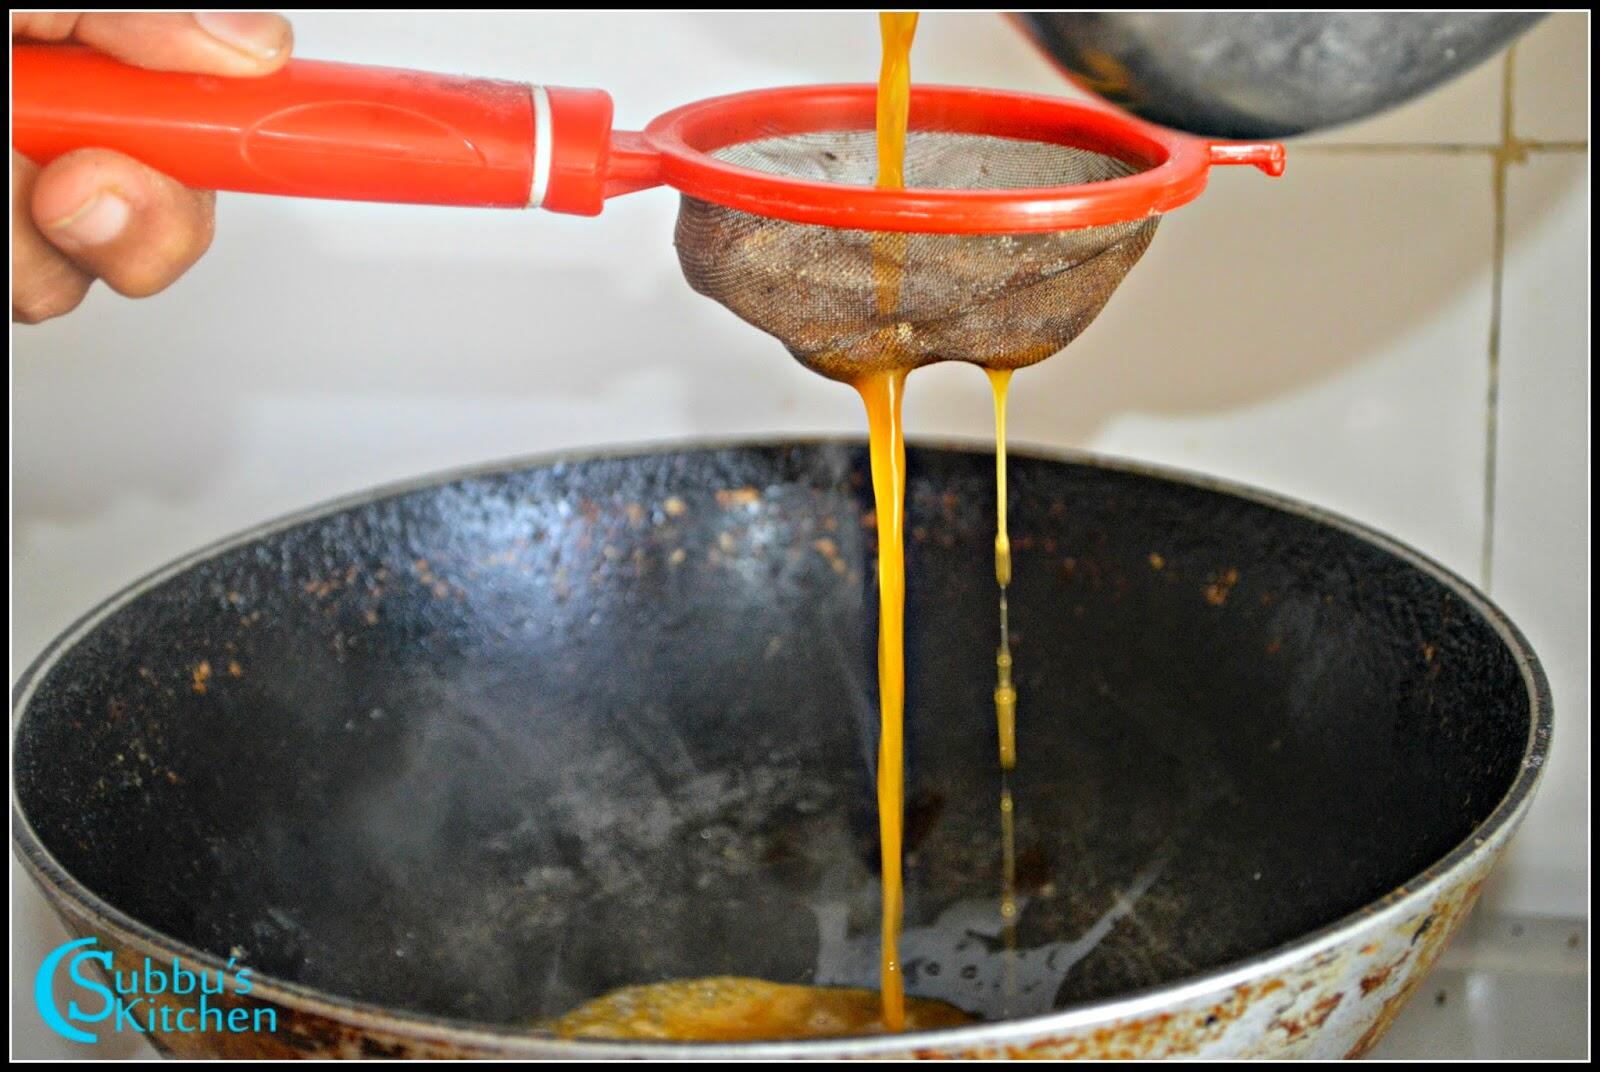
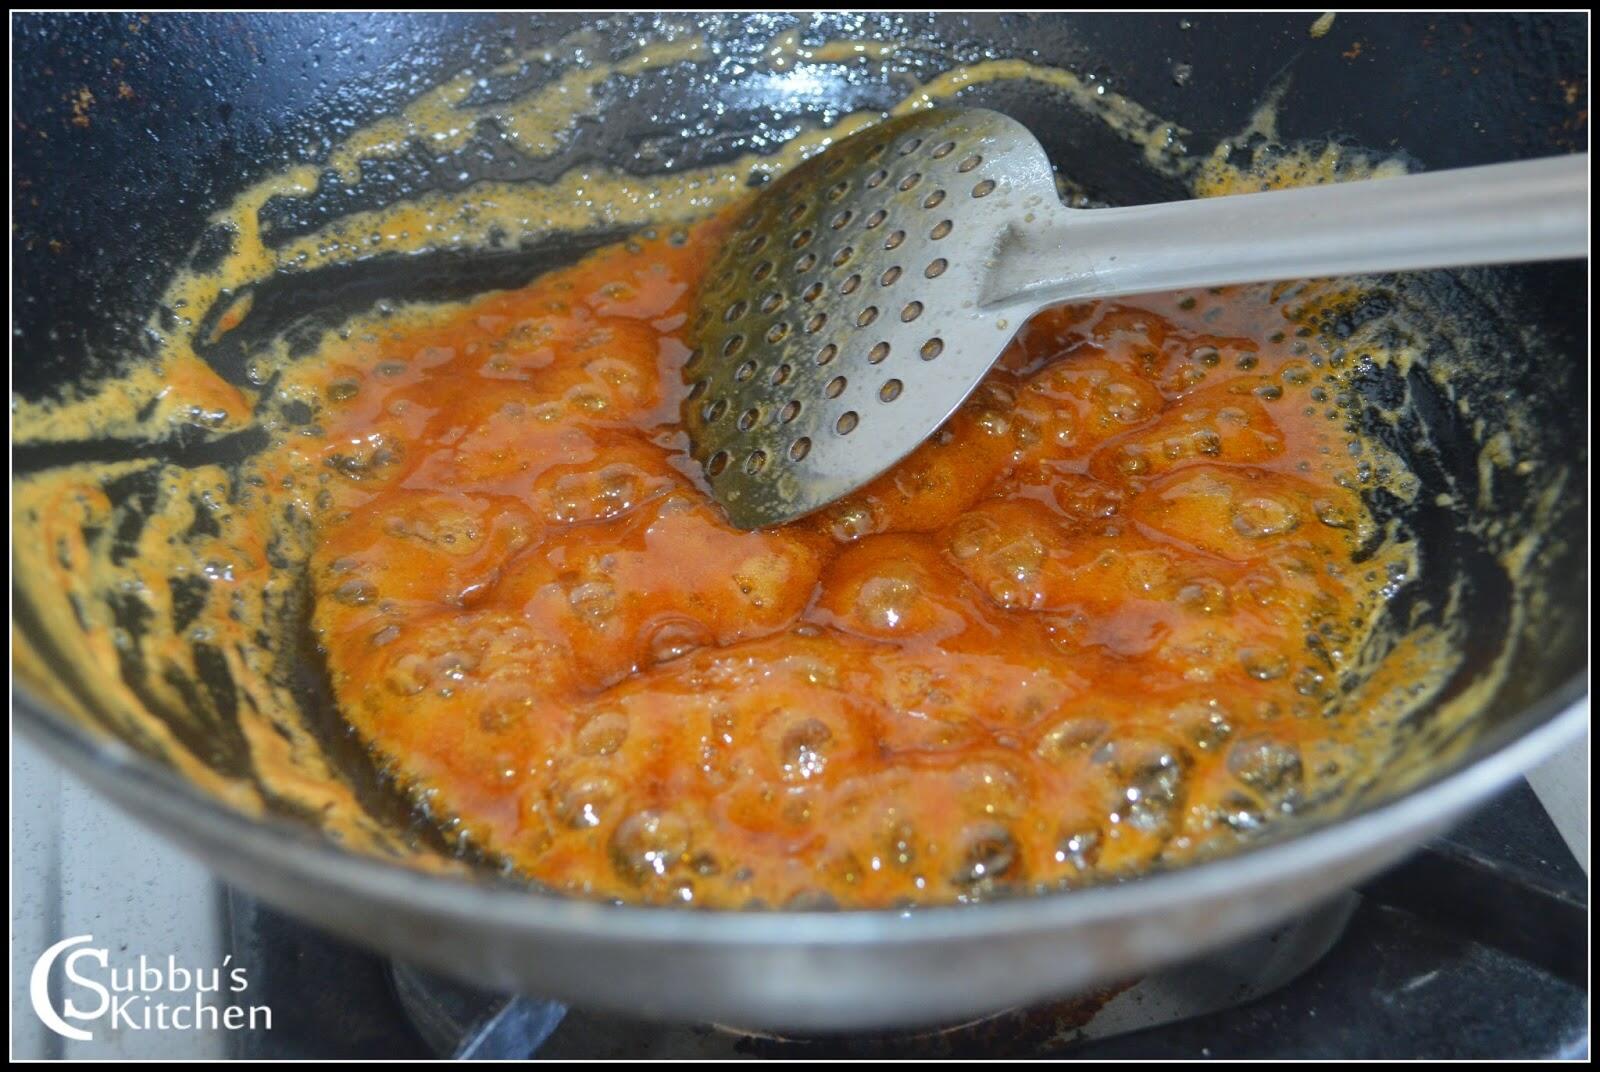
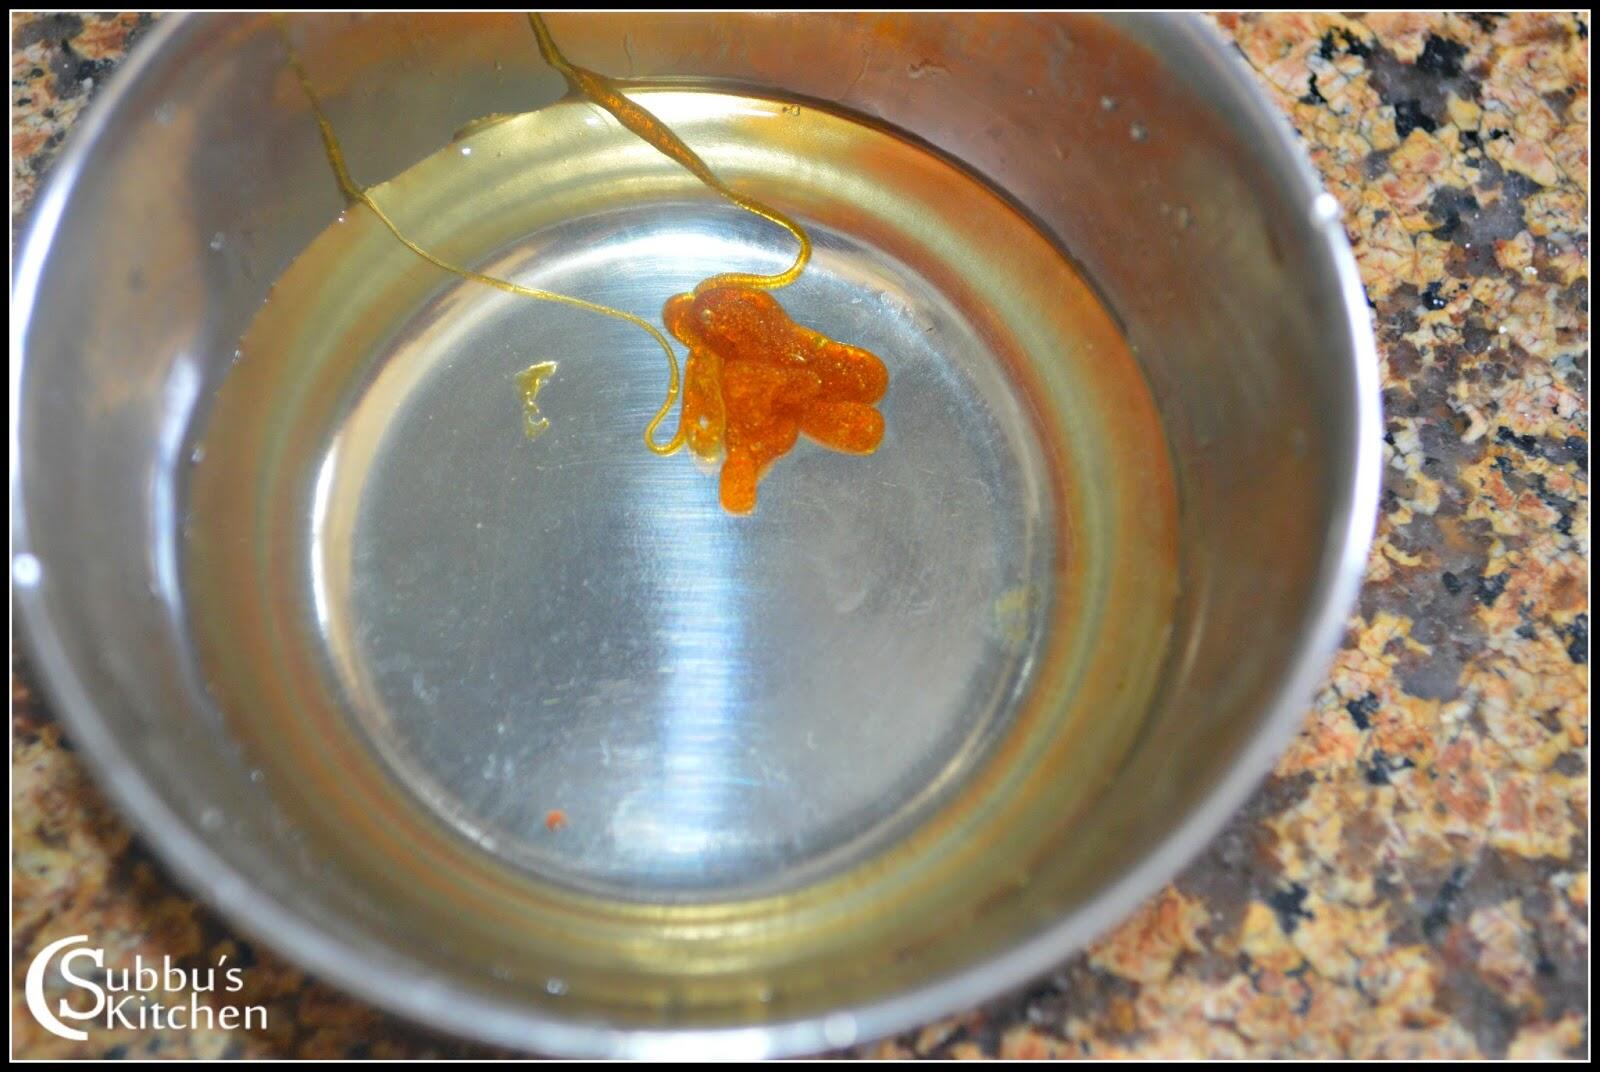
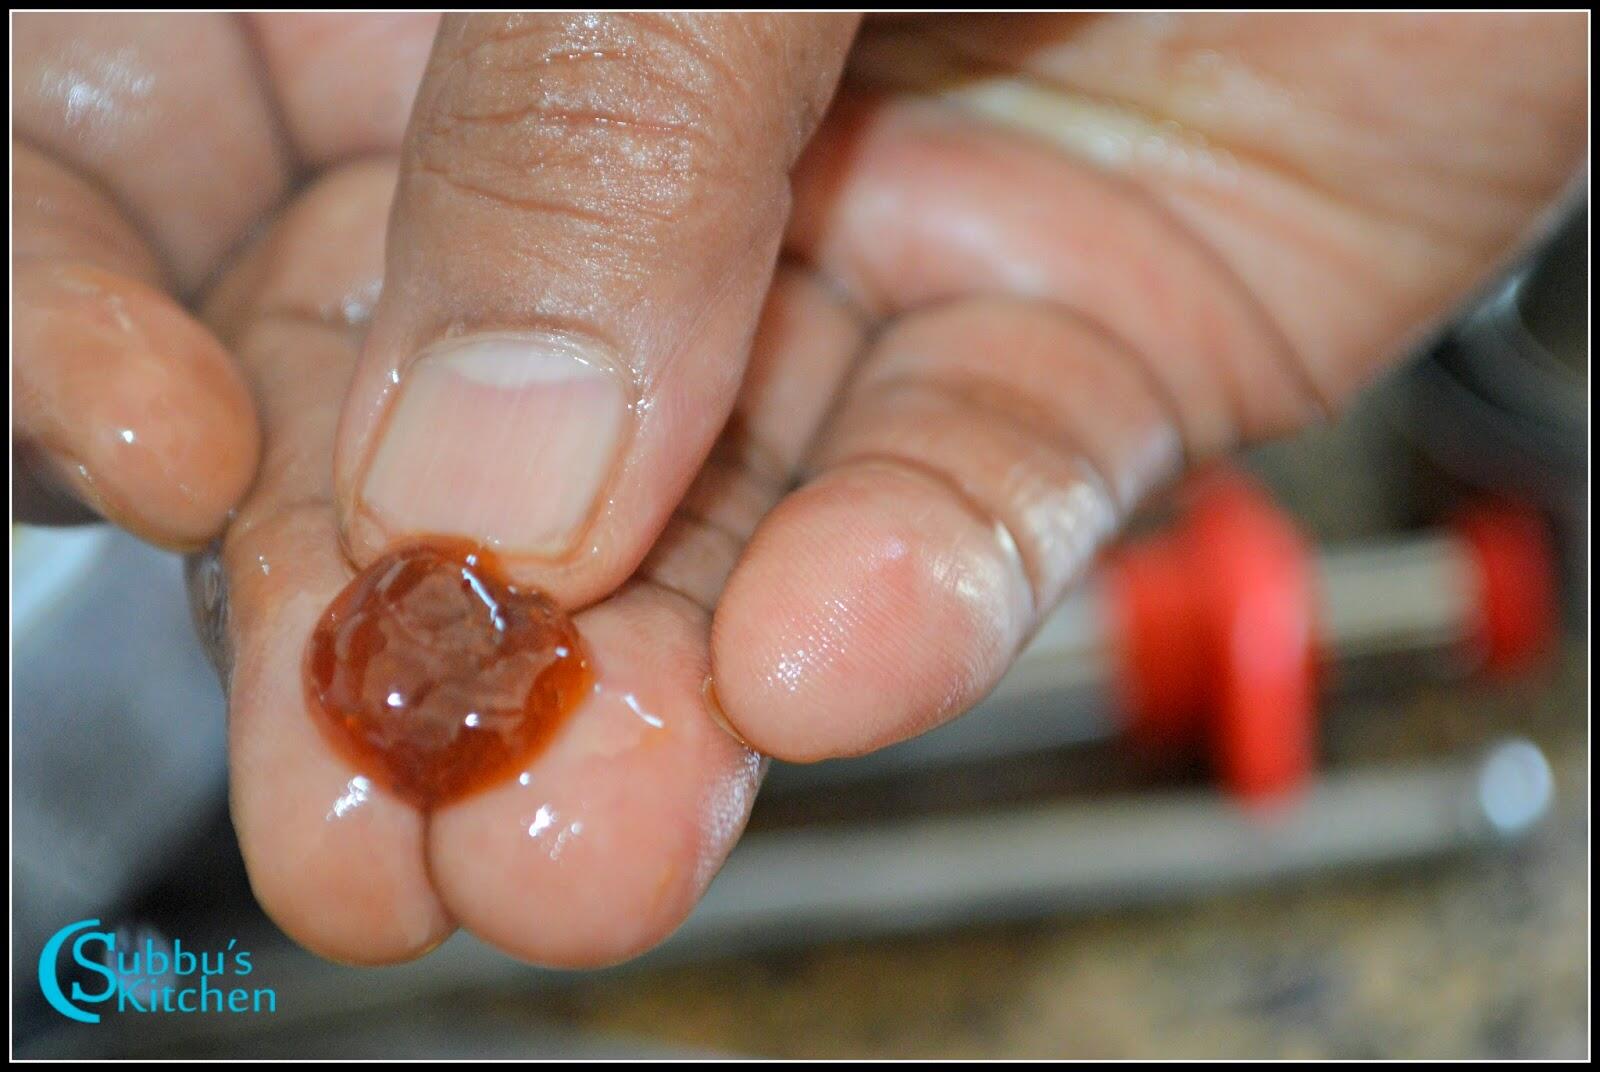
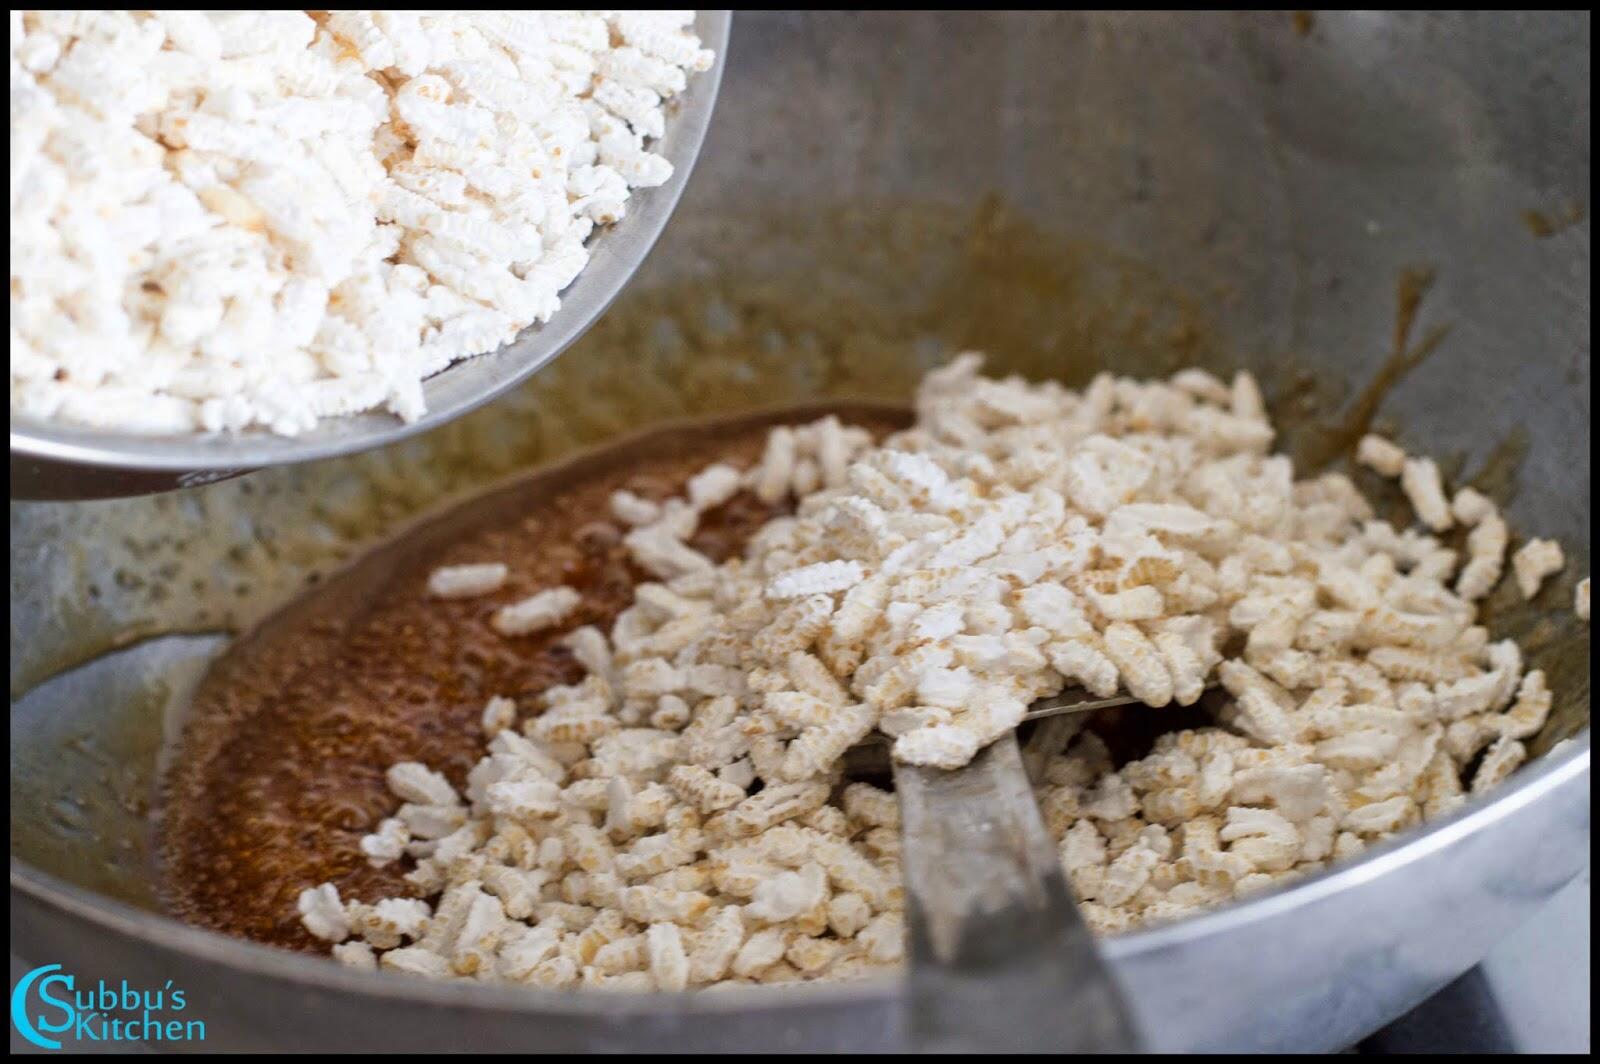
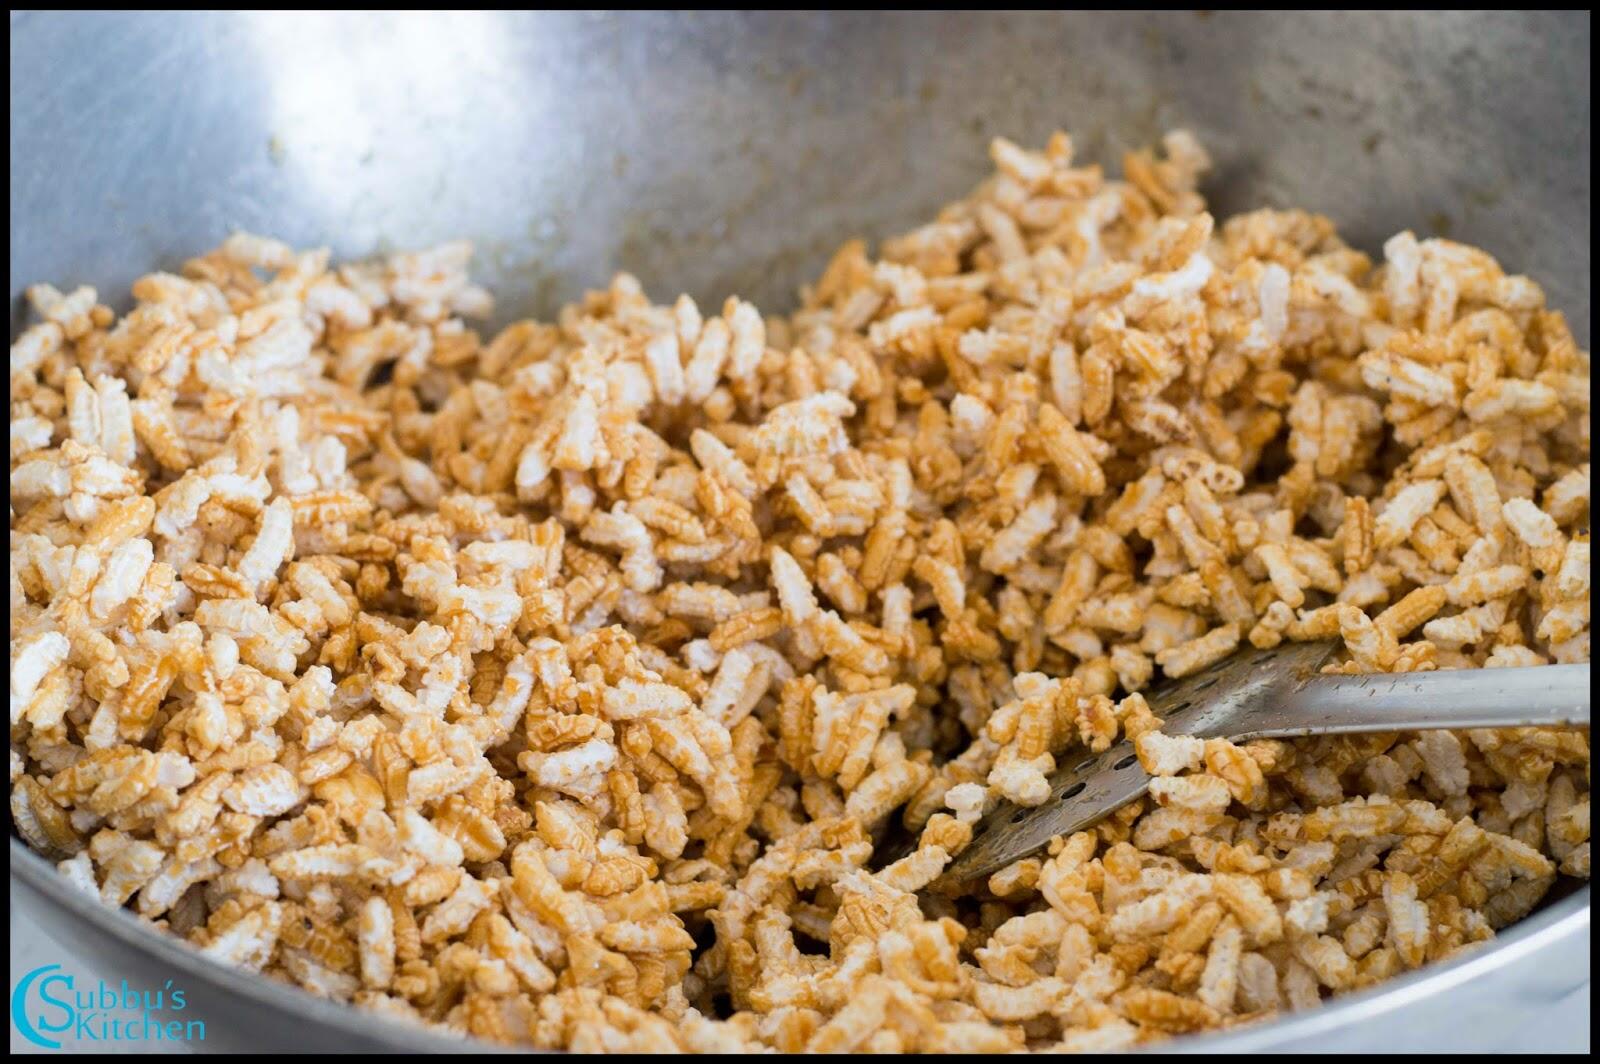
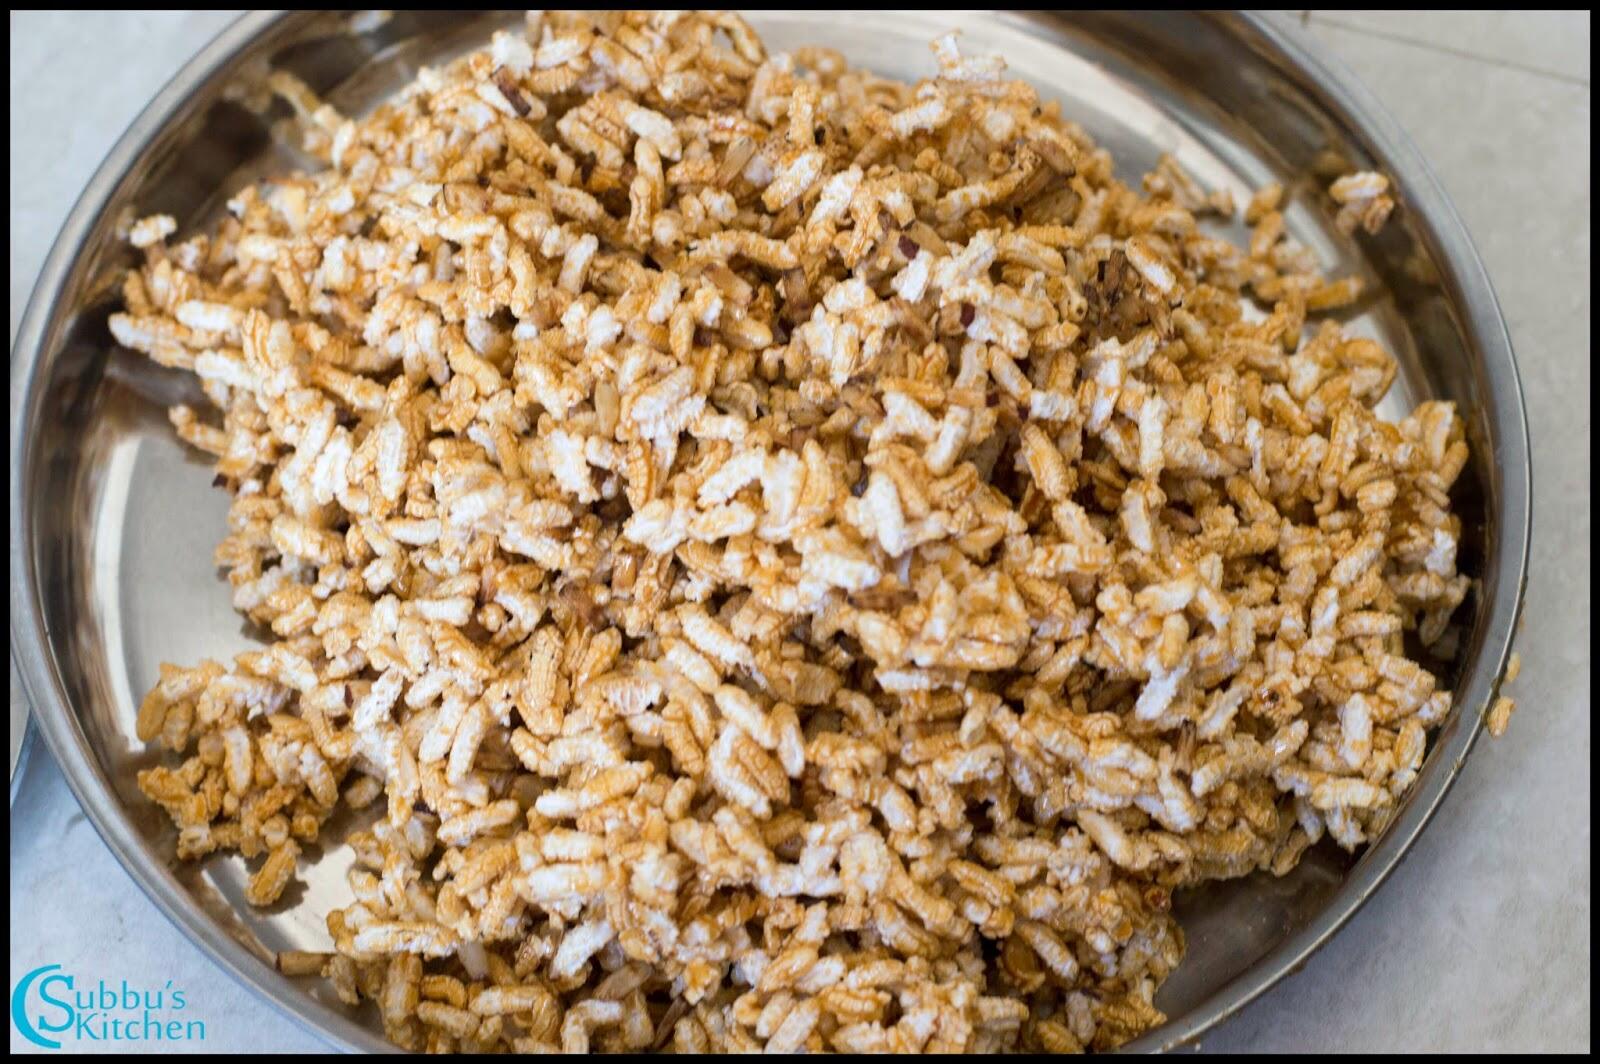
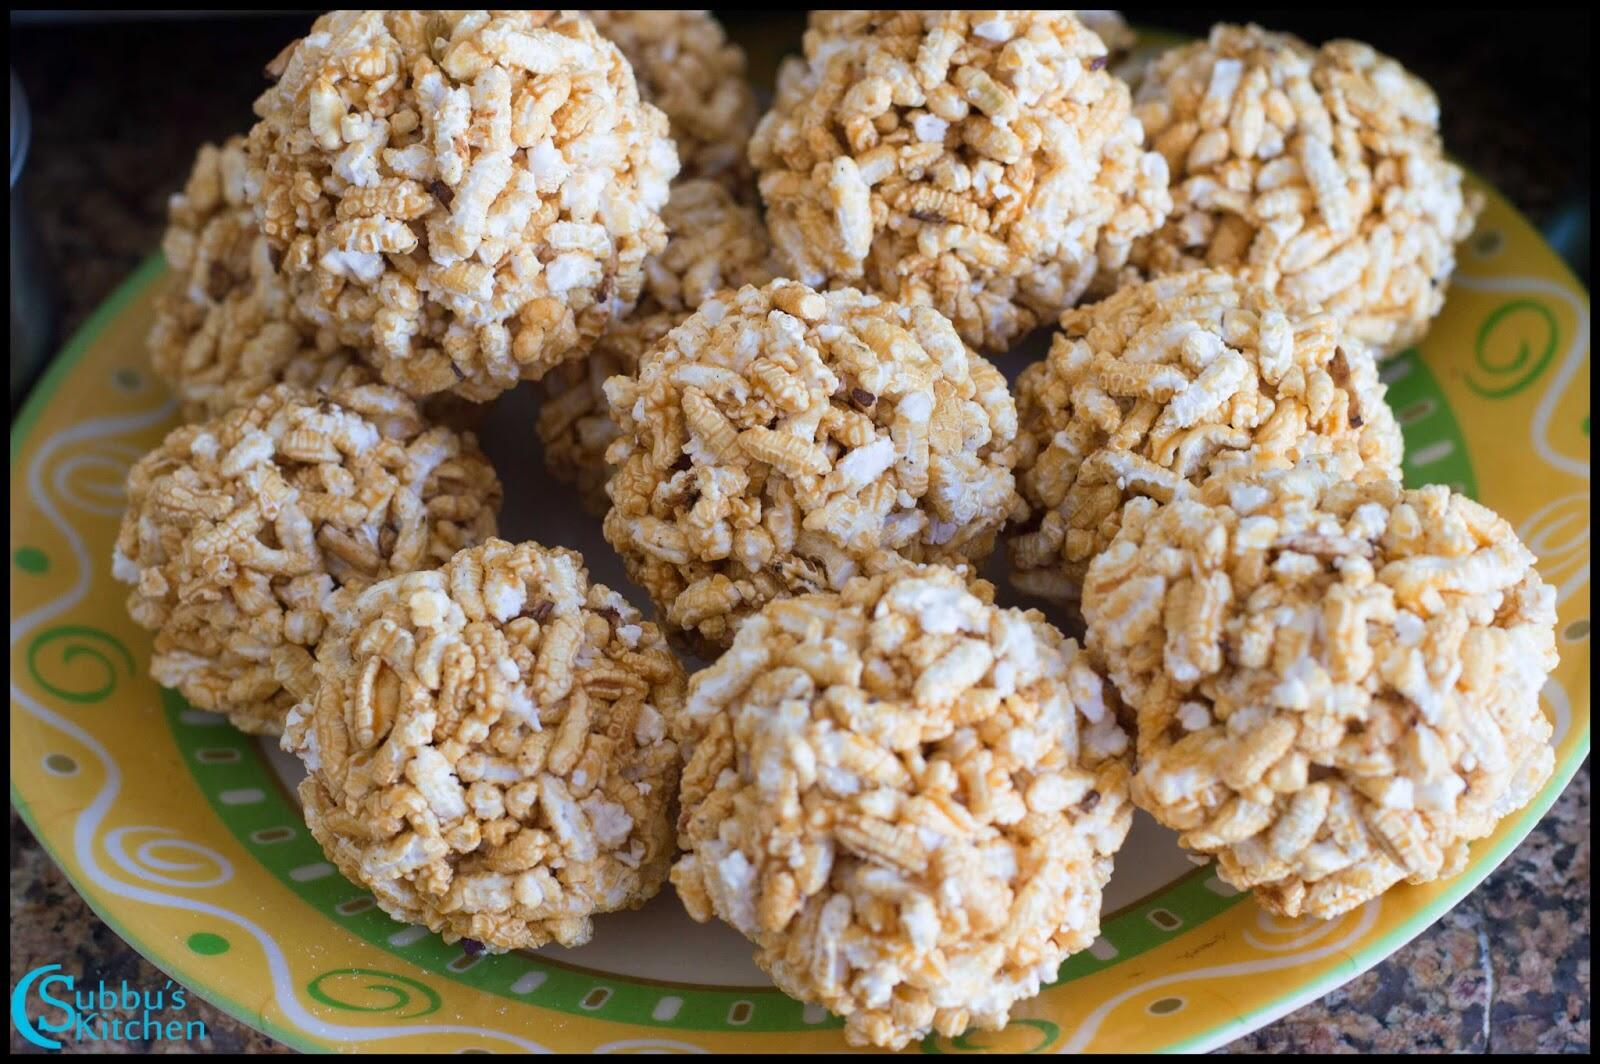
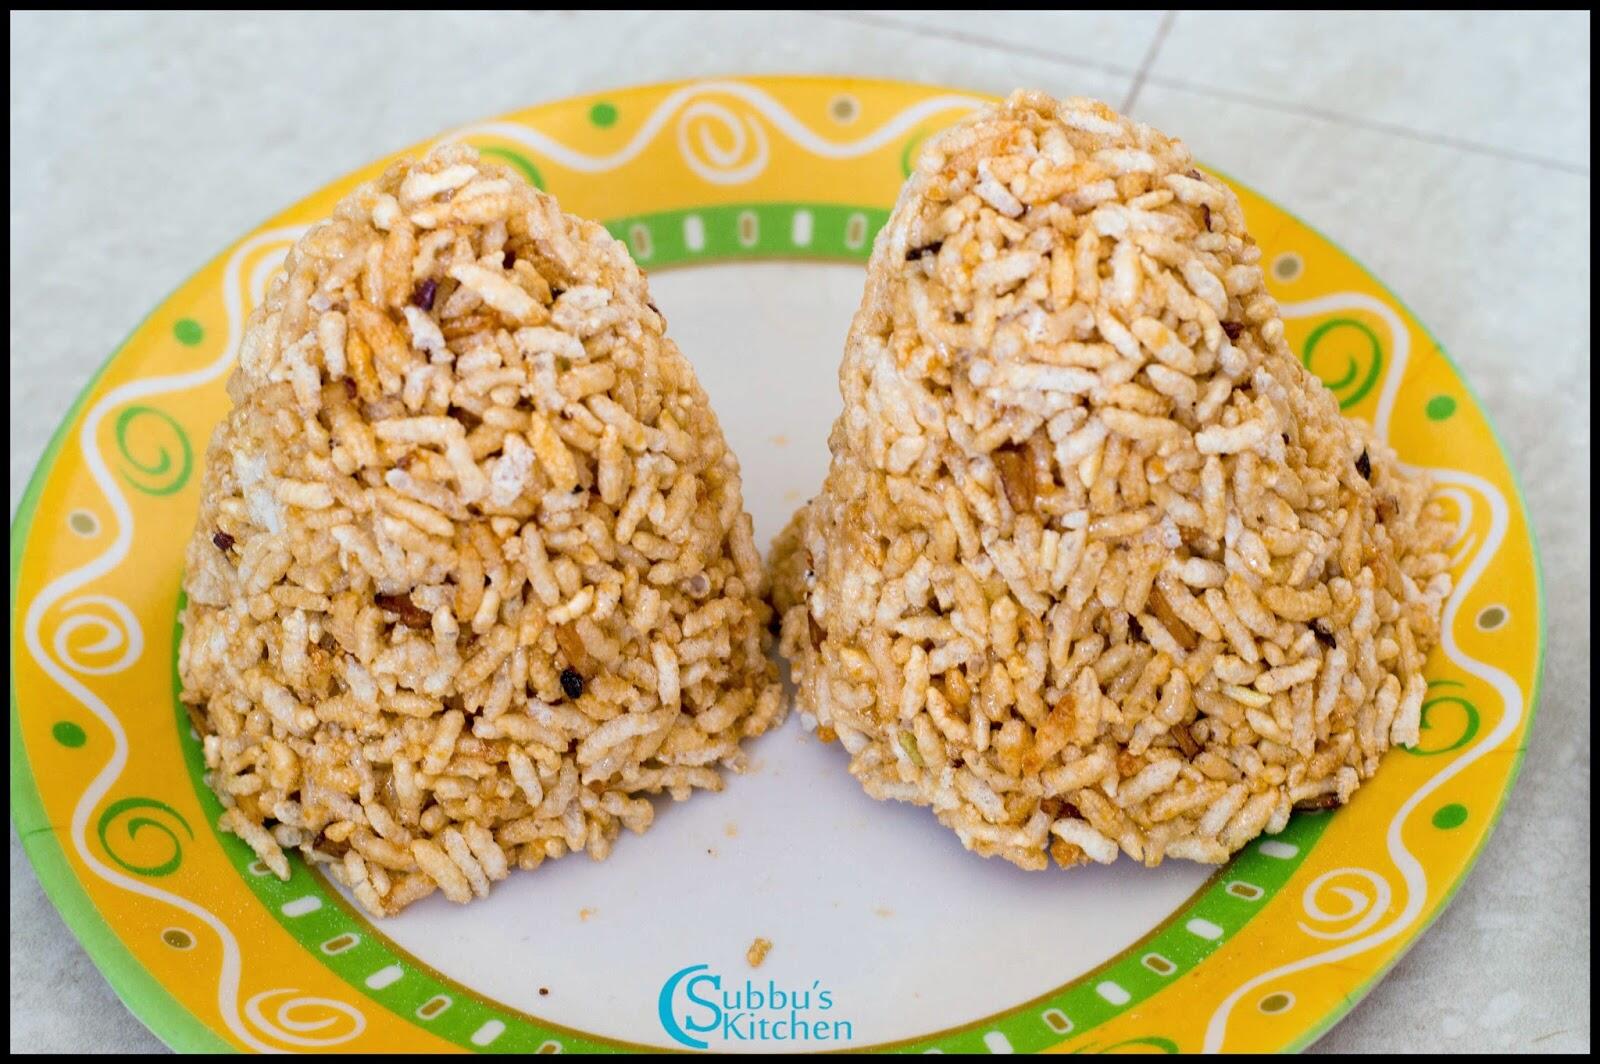

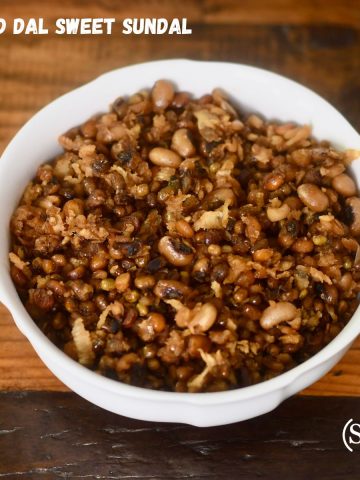
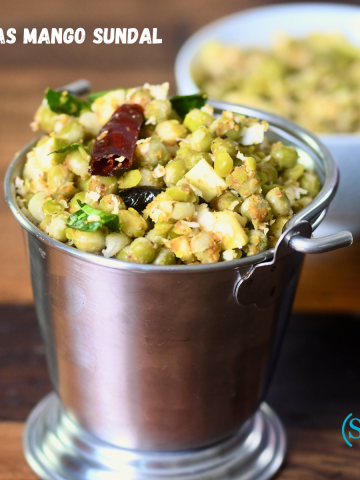

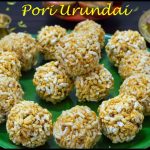

")


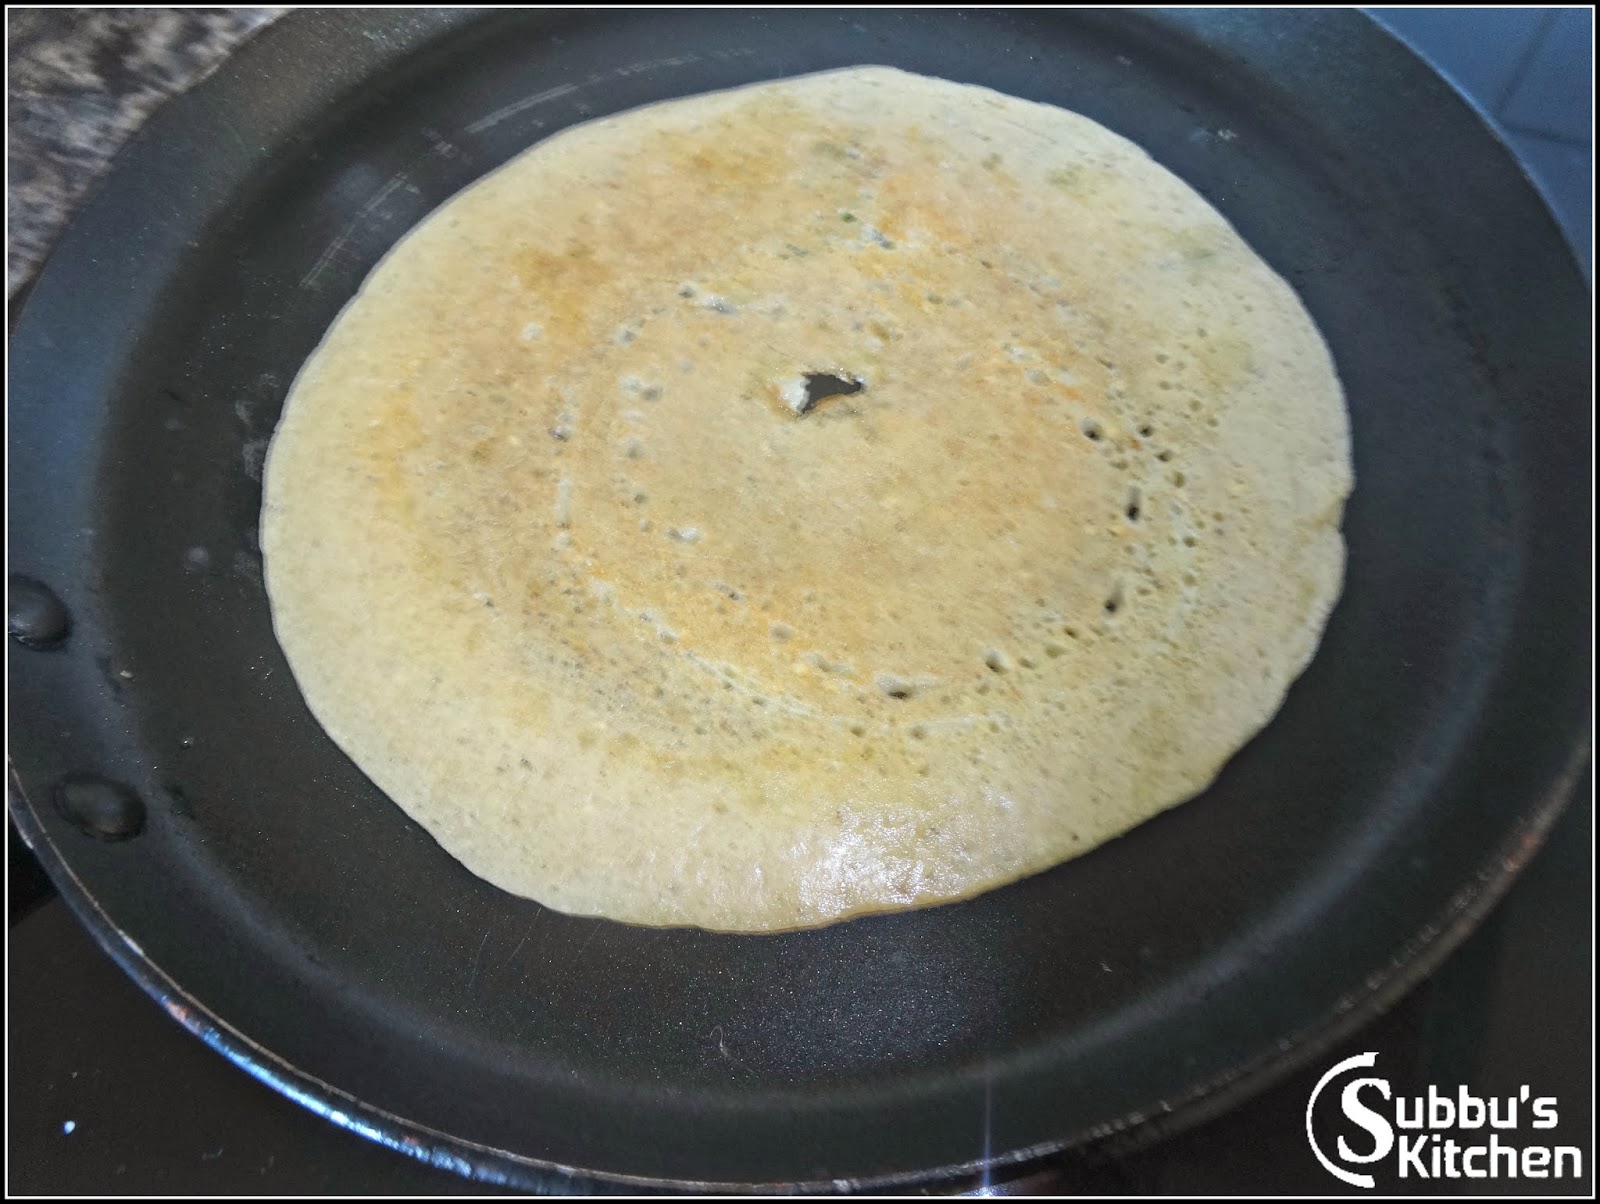
")