Normal view

There are new articles available, click to refresh the page.
Before yesterdayMain stream

Marion Stokes Fought Disinformation with VCRs

20 January 2026 at 10:00

You’ve likely at least heard of Marion Stokes, the woman who constantly recorded television for over 30 years. She comes up on reddit and other places every so often as a hero archivist who fought against disinformation and disappearing history. But who was Marion Stokes, and why did she undertake this project? And more importantly, what happened to all of those tapes? Let’s take a look.

Marion the Librarian

Marion was born November 25, 1929 in Germantown, Philadelphia, Pennsylvania. Noted for her left-wing beliefs as a young woman, she became quite politically active, and was even courted by the Communist Party USA to potentially become a leader. Marion was also involved in the civil rights movement.

Marion Stokes on the set of her public access television show, Input.
Marion on her public-access program Input. Image via DC Video

For nearly 20 years, Marion worked as a librarian at the Free Library of Philadelphia until she was fired in the 1960s, which was likely a direct result of her political life. She married Melvin Metelits, a teacher and member of the Communist Party, and had a son named Michael with him.

Throughout this time, Marion was spied on by the FBI, to the point that she and her husband attempted to defect to Cuba. They were unsuccessful in securing Cuban visas, and separated in the mid-1960s when Michael was four.

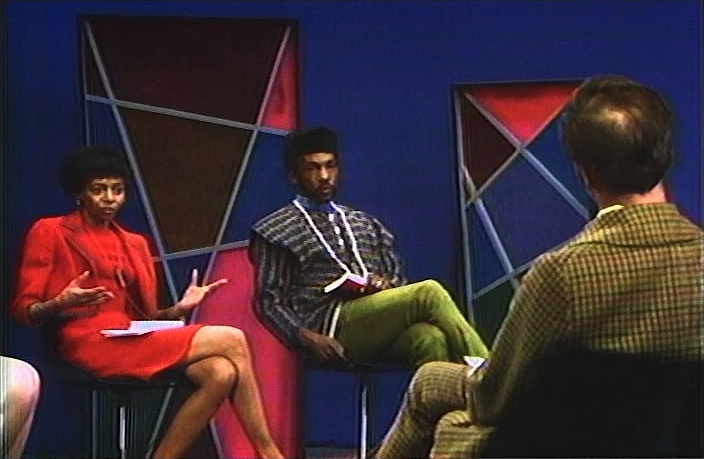
Marion began co-producing a Sunday morning public-access talk show in Philadelphia called Input with her future husband John Stokes, Jr. The focus of the show was on social justice, and the point of the show was to get different types of people together to discuss things peaceably.

Outings Under Six Hours

Marion’s taping began in 1979 with the Iranian Hostage Crisis, which coincided with the dawn of the twenty-four-hour news cycle. Her final tape is from December 14, 2012 — she recorded coverage of the Sandy Hook massacre as she passed away.

In 35 years of taping, Marion amassed 70,000 VHS and Beta-max tapes. She mostly taped various news outlets, fearing that the information would disappear forever. Her time in the television industry taught her that networks typically considered preservation too expensive, and therefore often reused tapes.

But Marion didn’t just tape the news. She also taped various programs such as The Cosby Show, Divorce Court, Nightline, Star Trek, The Oprah Winfrey Show, and The Today Show. Some of her collection includes 24/7 coverage of news networks, all of which was recorded on up to eight VCRs: 3-5 were going all day every day, and up to 8 would be taping if something special was happening. All family outings were planned around the six-hour VHS tape, and Marion would sometimes cut dinner short to go home and change the tapes.

People can’t take knowledge from you.  — Marion Stokes

You might be wondering where she kept all the tapes, or how she could afford to do this, both financially and time-wise. For one thing, her second husband John Stokes, Jr. was already well off. For another, she was an early investor in Apple stock, using capital from her in-laws. To say she bought a lot of Macs is an understatement. According to the excellent documentary Recorder, Marion own multiples of every Apple product ever produced. Marion was a huge fan of technology and viewed it as a way of unlocking people’s potential. By the end of her life, she had nine apartments filled with books, newspapers, furniture, and multiples of any item she ever became obsessed with.

In addition to the creating this vast video archive, Marion took half a dozen daily newspapers and over 100 monthly periodicals, which she collected for 50 years. This is not to mention the 40-50,000 books in her possession. In one interview, Marion’s first husband Melvin Metelits has said that in the mid-1970s, the family would go to a bookstore and drop $800 on new books. That’s nearly $5,000 in today’s money.

Why Tapes? Why Anything?

It’s easy to understand why she started with VHS tapes — it was the late 1970s, and they were still the best option. When TiVo came along, Marion was not impressed, preferring not to expose her recording habits to any possible governments. And she had every right to be afraid, with her past.

Those in power are able to write their own history.  — Marion Stokes

As for the why, there were several reasons. It was a form of activism, which partially defined Marion’s life. The rest I would argue was defined by this archive she amassed.

Marion started taping when the Iranian Hostage Crisis began. Shortly thereafter, the 24/7 news cycle was born, and networks reached into small towns in order to fill space. And that’s what she was concerned with — the effect that filling space would have on the average viewer.

Marion was obsessed with the way that media reflects society back upon itself. With regard to the hostage crisis, her goal was trying to reveal a set of agendas on the part of governments. Her first husband Melvin Metelits said that Marion was extremely fearful that America would replicate Nazi Germany.

The show Nightline was born from nightly coverage of the crisis. It aired at 11:30PM, which meant it had to compete with the late-night talk show hosts. And it did just fine, rising on the wings of the evening soap opera it was creating.

To the Internet Archive

When Marion passed on December 14, 2012, news of the Sandy Hook massacre began to unfold. It was only after she took her last breath that her VCRs were switched off. Marion bequeathed the archive to her son Michael, who spent a year and half dealing with her things. He gave her books to a charity that teaches at-risk youth using secondhand materials, and he says he got rid of all the remaining Apples.

A screen capture of the Marion Stokes video collection on the Internet Archive.
Image via The Internet Archive

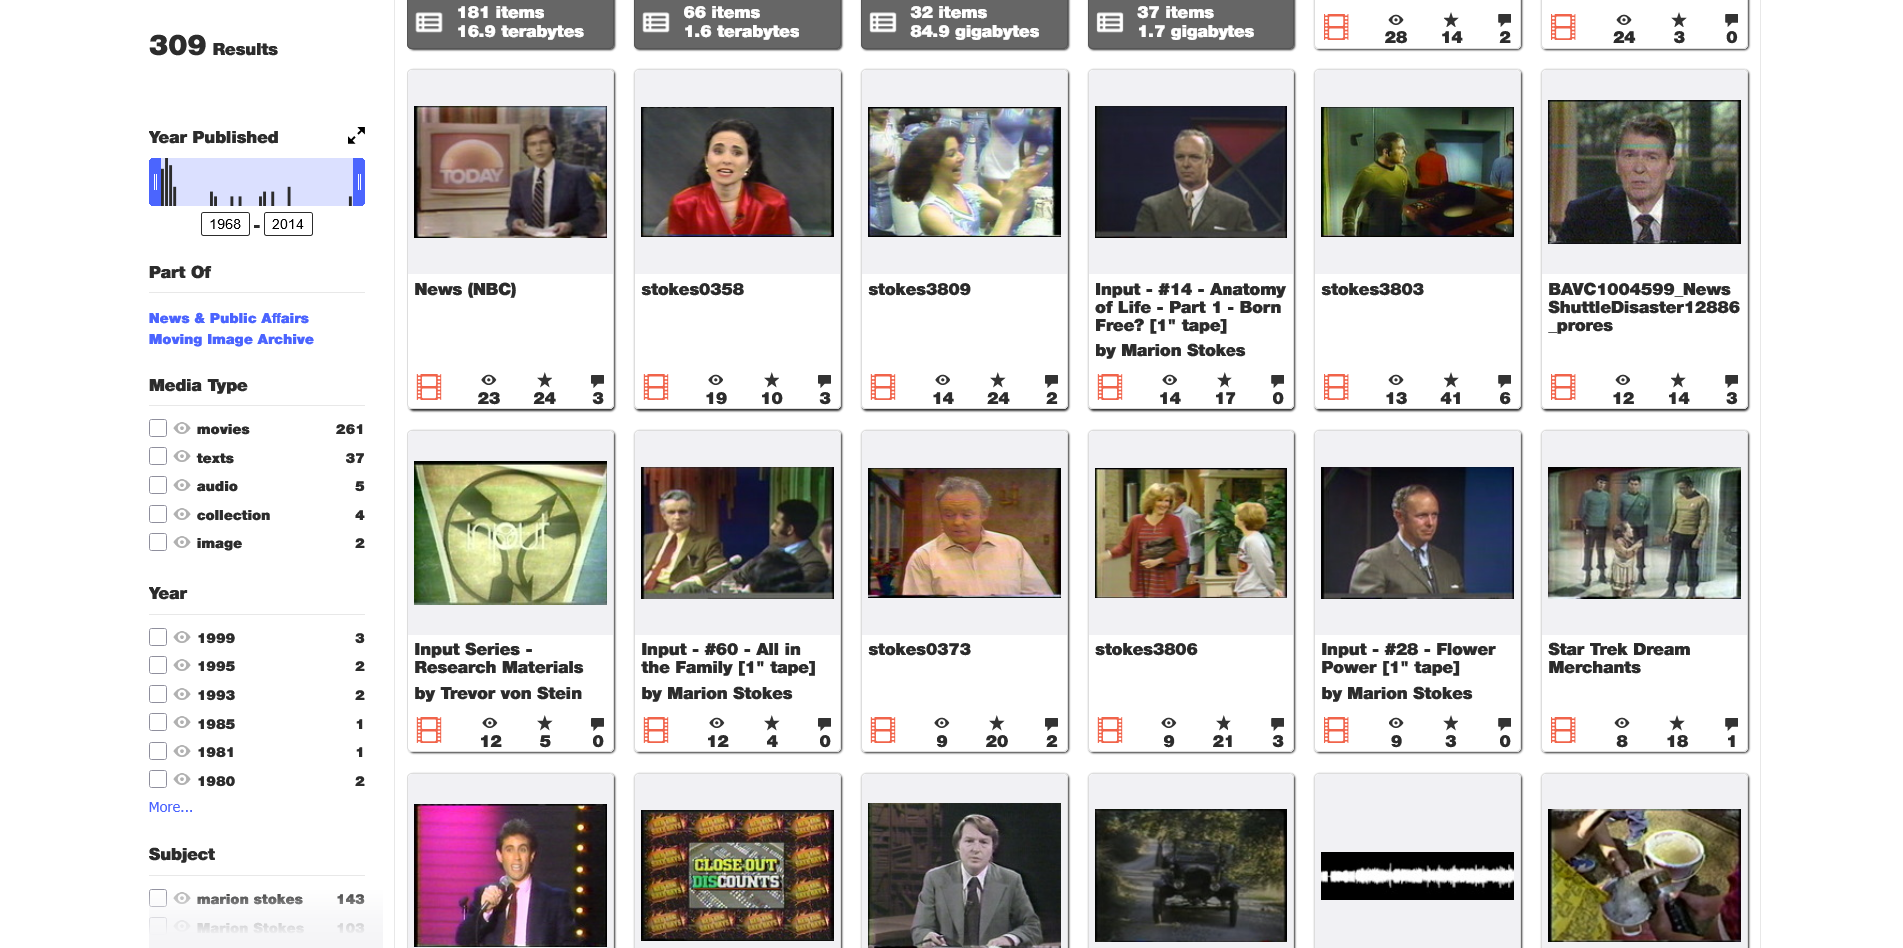
But no one would take the tapes. That is, until the Internet Archive heard about them. The tapes were hauled from Philadelphia to San Francisco, packed in banker’s boxes and stacked in four shipping containers.

So that’s 70,000 tapes at let’s assume six hours per tape, which totals 420,000 hours. No wonder the Internet Archive wasn’t finished digitizing the footage as of October 2025. That, and a lack of funding for the massive amount of manpower this must require.

If you want to see what they’ve uploaded so far, it’s definitely worth a look. And as long as you’re taking my advice, go watch the excellent documentary Recorder on YouTube. Check out the trailer embedded below.

Main and thumbnail images via All That’s Interesting

Keebin’ with Kristina: the One with the Ball-Joint Keyboard

19 January 2026 at 13:00
Illustrated Kristina with an IBM Model M keyboard floating between her hands.

Get a handle on this bad boy! Okay, so those voids are really more for airing out your palms, I’d imagine, because palm sweat sure is real — you should see the pads of my Kinesis. This kind of looks like two sawed-off machine guns kissing, and I mean that in the best possible and non-violent way.

Image by [ntc490] via reddit
So, [ntc490] has been on Team Special Keyboard for eight years now and decided it was time to design one. The goal was to make something semi-portable, super ergo, and as easy/cheap to build as possible, which, honestly, that sounds like one of those pick-two situations.

And yet, pricing (oh yeah, this is gonna be A Thing You Can Buy) will be around $115-155, depending upon whether you want the base kit, or the add-ons, too, minus switches and key caps.

So let’s get into the particulars here. As you can see, there are key wells and thumb clusters, inspired by other keyboards including your bog standard Maltrons, Kinesis Advantages and more modern, open-source takes like the Dactyl. [ntc490] loves the key well-thumb cluster combination, and I do, too (hello from the Glove80). And miraculously, the keys are hot-swappable via sockets.

Two hands rest on a joined split keyboard with keywells and tenting. The two halves are on ball joints and connect in the middle.
Image by [ntc490] via reddit
That novel tenting mechanism is adjustable, rugged, and portable. You can tent it near-vertical, lay it flat, or take it apart if you wish. The thing is modular for future expansion options such as wrist rests and displays.

Inside, you’d find direct wiring to the GPIOs, so I’m gonna guess that those are RP2040 clones in there. There’s no PCB, no diodes, no matrices to debug.

So please do go visit the thread if this keyboard appeals to you at this price point. I love it, but I would need more rows of keys, personally. The top reddit comment mentions this as well, and [ntc490] says that because the thing is modular, it can easily accommodate more keys in both the wells and the thumb clusters. I seriously want one of these. Just with a few more keys.

Open-Sourcing the Ultimate Portable Split

Remember [kleshwong]’s PSKEEB5 from a couple of Keebins ago, right before Christmas? He was going to open-source it if there was enough interest? Well, it seems that [kleshwong] decided to do it anyway and has since provided some new videos if you want to build one for yourself.

Image by [kleshwong] via GitHub
The first one covers the reasoning behind the reconsideration as well as the BOM and the case. The next video is the complete soldering tutorial, which clocks in at a very watchable fifteen minutes. Finally, [kleshwong] spends another fifteen on assembly and flashing the thing.

As a refresher, this thing has some really neat features like swing-out tenting feet, a pair of trackpoints, rotary encoders, and a carrying case that doubles as a laptop stand.

For the internals, any nice!nano-compatible boards will do. You’ll also need Kailh hot-swap sockets, among other things, naturally. If you have any trouble sourcing like the trackpoints for instance, you’re in luck, because [kleshwong] recently opened an online store. Go forth and build the ultimate portable split!

The Centerfold: Glove80 Looks Good In Wood

I’m using my MoErgo Glove80 pretty hardcore these days, driving them all crazy down at the library. But hey, it’s quieter than the big, echo-y Kinesis Advantage, even though they both have browns.

Once I saw the upcoming Go60 by MoErgo, though, I knew I simply needed wooden palm rests for the Glove80. So, over the course of two days, my father-in-law and I fabricated these fetching zebrawood rests, first from pink foam, then from poplar, and finally from book-matched zebra. I think we have a real conversation piece here.

Do you rock a sweet set of peripherals on a screamin’ desk pad? Send me a picture along with your handle and all the gory details, and you could be featured here!

Historical Clackers: a 3D-Printed Index Typewriter!

I was sorry to hear that [Keenan Finucan] had to submit this twice in order to get my attention. But here we are, with what is probably the world’s first 3D-printed index typewriter. So, why is this filed under Historical Clackers? Because I said so, and because it’s based on a real antique index typewriter, the AEG Mignon Model 4. This first model of Mignon was designed between 1901-1903 by German company AEG. Mignons were produced until 1932.

A 3D printed version of the AEG Mignon 4 index typewriter!
Image by [Keenan Finucan] via Thingiverse
I suppose I don’t have to explain what an index typewriter is at this point. Besides, it seems pretty obvious in this design, but maybe I’m biased. Essentially it’s like a label maker, the old ka-chunk kind. You squeeze out one character at a time, then you move the index to the next character.

I think this looks fabulous overall, and I rather like the way the index is laid out, which is decidedly non-alphabetical and, surprisingly, does not mirror the AEG index.

[Keenan] reports that thanks to months of work and revisions, this project is as accessible and repeatable as possible. You don’t even need any glue, and non-printed items are at a minimum. You will need a minimum XYZ build volume of 250 x 210 220 mm, TPU or other flexible filament, some springs, a bit of coat hanger wire, and a universal 1/2″ typewriter ribbon, which is pretty widely available.

Finally, $2K Keyboard Computer Is a Return to Form

Alright coders, designers, and engineers: this elegant hunk of metal is for you. What we’ve got here is Caligra’s c100 Developer Terminal. Described as a “computer for experts”, this is not meant for scrolling social media, although what developer can get through the day without a reddit break or three?

A keyboard-computer hybrid for the modern era. Picture shows the keyboard and the business part separated, with the cover off of the business part to show off the storage compartment.
Image via Yanko Design

Let’s talk about that body. It’s entirely CNC-milled from a solid block of aluminium, which makes me think of the Icebreaker keyboard we saw here almost exactly a year ago. Both double as handy bludgeoning devices, but this one is decidedly more attractive. The bead-blasted finish of the c100 does simultaneously evoke modern and industrial design, so I’ll agree with Yanko on that note.

The coolest part is half-evident in the picture I chose. There’s a central magnetic pivot structure, and this lets you detach and fold the thing up even smaller, without any external hinges.

Close-up of the left side of the c100, showing the texture of the case.
Note the fuzzy texture. Image via Yanko Design

I thought the storage compartment gimmicky at first, but I’ve grown to like the idea of having a place for pens and whatnot. Yanko almost threatens to call it subversive in the face of what tech companies probably do not want you doing: opening the thing up. You are supposed to tinker with this one.

For some reason, the num pad is on the left, though I suppose this solves the distance-to-mouse problem. Yanko says the design uses Fitts’ law to accelerate task management, and this is supposed to explain why the keys are clustered the way they are. Basically, the placement of each key has been optimized for both speed an minimal hand movement. The wired mouse looks a bit uncomfortable, however.

This thing ships with Workbench OS, which is Linux-based and built specifically for technical work. There are no pop-ups in Workbench OS, which sounds amazing. So I would think that c100 is for writers, too, provided the keyboard clacks nicely.


Got a hot tip that has like, anything to do with keyboards? Help me out by sending in a link or two. Don’t want all the Hackaday scribes to see it? Feel free to email me directly.

Keebin’ with Kristina: the One with the Cheap-O Keyboard

12 January 2026 at 13:00
Illustrated Kristina with an IBM Model M keyboard floating between her hands.

All right, I’ll cut to the chase: Cheap03xD is mainly so cheap because the PCB falls within a 10 x 10 cm footprint. The point was to make a very affordable keyboard — all the parts come to ~40 Euro (~$47). So it would seem that [Lander03xD_] succeeded.

A 36-key, no-frills split keyboard whose PCBs fit in a 10 x 10 cm footprint.
Image by [Lander03xD_] via reddit
Cheap03xD is all the things — 36-key, split, column-staggered, wireless, hot-swappable, and uses ZMK. The batteries are easily replaceable, and no they don’t get in the way.

Those are MMD Princess silent switches, which I wouldn’t choose, but [Lander03xD_] is taking this board to the office, so I get it. They sure are a nice shade of pink, anyway, and they go really well with the pastels of the DSA keycaps and the bezel.

One cool thing to note is that the PCBs are reversible, like the ErgoDox. This isn’t [Lander03xD_]’s first board, and it won’t be the last.

Now, let’s talk batteries. [Saixos] pointed out that the design doesn’t appear to include a protection circuit. In case you can’t tell from where you’re sitting, those are nice!nano clones that [Lander03xD_] is using, and they expect a protection circuit.

[Lander03xD_] is going to look through the docs and see what’s what. The goal is not to have any daughter boards, so this may take some rethinking.

Via reddit

Arc Raiders Keyboard Looks the Part

So Arc Raiders is this cool-looking, stripe-logoed, multiplayer extraction shooter that just came out a couple of months ago for all the platforms. It’s not something I could personally play as it’s way too immersive (read: time-consuming), but it definitely looks good, much like this keyboard that [RunRunAndyRun] designed to play it.

A rusty, industrial-looking one-handed keyboard for the left hand.
Image by [RunRunAndyRun] via reddit
Having enjoyed the game with a game pad for a couple of weeks, [RunRunAndyRun] longed for the precision of a keyboard and mouse. The only problem was that his stock of split keyboards all lack a number row.

No matter; just make a new one. Why not? This rustic beauty runs on the Waveshare RP2040 Zero. The case was 3D printed on a Prusa Mk4, which you’d never know unless you blew up the picture. And then [RunRunAndyRun] gave it that nice patina using Panduro hobby acrylics and a bit of weathering powder.

For now, it’s working pretty well, though [RunRunAndyRun] is still perfecting the keymap. If you’d like to build one yourself, the STLs are available here, and the firmware is on GitHub.

Thanks for the tip, [John]!

The Centerfold: Witch’s Brew

A beautiful concave split with a rad paint job.
Image by [CaptLynx] via reddit
This stunning beauty, Witch’s Brew, was created by [CaptLynx] with the Cosmos keyboard configurator. Doesn’t sound familiar? It’s the one that uses a scan of your hand to create your ultimate comfort. This keyboard is a custom build for a commission. I must say, as much as I dislike the work of Jackson Pollock, I do absolutely love the spatter on those keycaps.

Do you rock a sweet set of peripherals on a screamin’ desk pad? Send me a picture along with your handle and all the gory details, and you could be featured here!

Historical Clackers: the Keystone

The Keystone typewriter, a minimal design with no enclosure to speak of.
Image via The Antikey Chop

This spartan beauty was named after the state in which it was made, Pennsylvania. Manufactured between 1898 and 1903, the Keystone was invented by William Prehn Quentell.

Quentell was living in Kansas City, MO when he first applied for a patent, and later moved to the east coast. At the time, the machine was nameless. The patent looks nothing like the finished product pictured here, but the genesis of the key feature of this “poor man’s Hammond” is there — the swinging type sector.

What this means is that the Keystone has its type on a half wagon wheel, which is evident in the patent drawing. The glyphs are molded around the outside edge of the wheel, which gets rotated into the correct position with each keystroke. This type wheel could be easily changed out for different fonts.

Patent image of the Keystone, which looks like a replica of the Hammond here.
Image via Google Patents

To imprint the paper, a spring-driven hammer strikes from behind, pushing the paper and ribbon against the type wheel. The paper is loaded into a cylindrical holder in the rear, and unfurls as one types.

So, why was it a poor man’s Hammond? Well, for one, the patent image looks like a Hammond. But the poor part is felt the hardest in the makeup of the typewriter.

In the early Keystone examples, the carriage rails were made of pig iron. Why? It’s a simple case of lateral integration. The factory that was retrofitted to manufacture the machine had previously been the Lochiel iron mill, a producer of pig iron. They were just using up old stock, I imagine.

The Keystone featured two Shift keys on the left, one for Caps and one for Figures. It was a comparatively inexpensive at $40, and then later, $35 (around $1,200 today).

Production was supposed to begin in May of 1898. But by June of ’99, “the company has been unable to fill the orders which are piling up at the works.” Sounds like your average Kickstarter. Quentell was already working on his next project by 1902, the Postal typewriter.

Finally, a Keyboard That Charges Your Phone

So this article mainly centers on the new little Blackberry-esque number from Clicks which might just be my next phone, except that it doesn’t actually telephone. Clicks is meant to be your second phone, the one you use for emailing and such. You can pre-order it for $399 if you put a $199 deposit down before February 27th. If you decide to drop the full four hundo as an early bird, you’ll get two additional back covers, which slightly change the look of the phone.

A phone in portrait and landscape mode with the Clicks keyboard attached.
Image by Clicks via TechCrunch

But I’d like to talk about the add-on Power Keyboard for smart phones that Clicks is also dropping at CES this year. Do you miss your Sidekick? Well, here’s a sliding keyboard with multiple positions for differently-sized smart phones, tablets, and even smart TVs. (Because forget typing with the remote control.)

It uses a 2,150 mAh battery and attaches via MagSafe or Qi2, but it also can be used with the case on. When paired with a smart TV, you just use it by itself. Honestly, it looks kind of hard to type on without the phone for support. But I don’t use the smart features of my TV, so whatever.

Honestly, I will probably start by getting the keyboard, which is $79 for early birds through their site, and $109 later on. Pre-orders started a week ago, so I guess I should get on that.


Got a hot tip that has like, anything to do with keyboards? Help me out by sending in a link or two. Don’t want all the Hackaday scribes to see it? Feel free to email me directly.

Hackaday Podcast Episode 352: Visualizing Sound, and Windows 11 Is a Dog

9 January 2026 at 12:00

This week, Hackaday’s Elliot Williams and Kristina Panos met up over coffee to bring you the latest news, mystery sound results show, and of course, a big bunch of hacks from the previous seven days or so.

On What’s That Sound, Kristina had no idea what was going on, but [Flippin’ Heck] knew it was a flip dot display, and won a Hackaday Podcast t-shirt! Congratulations!

After that, it’s on to the hacks and such, with not one but two ways of seeing sound.  We also take a look at benchmarking various Windows releases against each other on 12-year-old hardware.

We also talk about painting on floppies and glitching out jpegs in a binary text editor. Finally, we discuss the history and safety of autopilot, and take a look at the humble time clock.

Check out the links below if you want to follow along, and as always, tell us what you think about this episode in the comments!

Download in DRM-free MP3 and savor at your leisure.

Where to Follow Hackaday Podcast

Episode 352 Show Notes:

News:

What’s that Sound?

  • Congrats to [Flippin’ Heck] who knew this was a flip dot display!

Interesting Hacks of the Week:

Quick Hacks:

Can’t-Miss Articles:

The Time Clock Has Stood the Test of Time

8 January 2026 at 10:00

No matter the item on my list of childhood occupational dreams, one constant ran throughout: I saw myself using an old-fashioned punch clock with the longish time cards and everything. I now realize that I have some trouble with the daily transitions of life. In my childish wisdom, I somehow knew that doing this one thing would be enough to signify the beginning and end of work for the day, effectively putting me in the mood, and then pulling me back out of it.

But that day never came. Well, it sort of did this year. I realized a slightly newer dream of working at a thrift store, and they use something that I feel like I see everywhere now that I’ve left the place — a system called UKG that uses mag-stripe cards to handle punches. No it was not the same as a real punch clock, not that I have experience with a one. And now I just want to use one even more, to track my Hackaday work and other projects. At the moment, I’m torn between wanting to make one that uses mag-stripe cards or something, and just buying an old punch clock from eBay.

I keep calling it a ‘punch clock’, but it has a proper name, and that is the Bundy clock. I soon began to wonder how these things could both keep exact time mechanically, but also create a literal inked stamp of said time and date. I pictured a giant date stamper, not giant in all proportions, but generally larger than your average handheld one because of all the mechanisms that surely must be inside the Bundy clock. So, how do these things work? Let’s find out.

Bundy’s Wonder

Since the dawn of train transportation and the resulting surge of organized work during the industrial revolution, employers have had a need to track employees’ time. But it wasn’t until the late 1880s that timekeeping would become so automatic.

An early example of a Bundy clock that used cards, made by National Time Recorder Co. Ltd. Public domain via Wikipedia

Willard Le Grand Bundy was a jeweler in Auburn, New York who invented a timekeeping clock in 1888. A few years later, Willard and his brother Harlow formed a company to mass-produce the clocks.

By the early 20th century, Bundy clocks were in use all over the world to monitor attendance. The Bundy Manufacturing Company grew and grew, and through a series of mergers, became part of what would become IBM. They sold the time-keeping business to Simplex in 1958.

Looking at Willard Le Grand Bundy’s original clock, which appears to be a few feet tall and demonstrates the inner workings quite beautifully through a series of glass panels, it’s no wonder that it is capable of time-stamping magic.

Part of that magic is evident in the video below. Workers file by the (more modern) time clock and operate as if on autopilot, grabbing their card from one set of pockets, inserting it willy-nilly into the machine, and then  tucking it in safely on the other side until lunch. This is the part that fascinates me the most — the willy-nilly insertion part. How on Earth does the clock handle this? Let’s take a look.

Okay, first of all, you probably noticed that the video doesn’t mention Willard Le Grand Bundy at all, just some guy  named Daniel M. Cooper. So what gives? Well, they both invented time-recording machines, and just a few years apart.

The main difference is that Bundy’s clock wasn’t designed around cards, but around keys. Employees carried around a metal key with a number stamped on it. When it was time clock in or out, they inserted the key, and the machine stamped the time and the key number on a paper roll. Cooper’s machine was designed around cards, which I’ll discuss next. Although the operation of Bundy’s machine fell out of fashion, the name had stuck, and Bundy clocks evolved slightly to use cards.

Plotting Time

You would maybe think of time cards as important to the scheme, but a bit of an afterthought compared with the clock itself. That’s not at all the case with Cooper’s “Bundy”. It was designed around the card, which is a fixed size and has rows and columns corresponding to days of the week, with room for four punches per day.

One image from William Le Grand Bundy's patented time clock.
An image from Bundy’s patent via Google Patents

Essentially, the card is mechanically indexed inside the machine. When the card is inserted in the top slot, it gets pulled straight down by gravity, and goes until it hits a fixed metal stop that defines vertical zero. No matter how haphazardly you insert the card, the Bundy clock takes card of things. Inside the slot are narrow guides that align the card and eliminate drift. Now the card is essentially locked inside a coordinate system.

So, how does it find the correct row on the card? You might think that the card moves vertically, but it’s actually the punching mechanism itself that moves up and down on a rack-and-pinion system. This movement is driven by the timekeeping gears of the clock itself, which plot the times in the correct places as though the card were a piece of graph paper.

In essence, the time of day determined the punch location on the card, which wasn’t a punch in the hole punch sense, but a two-tone ink stamp from a type of bi-color ribbon you can still get online.

There’s a date wheel that selects the row for the given day, and a time cam to select the column. The early time clocks didn’t punch automatically — the worker had to pull a lever. When they did so, the mechanism would lock onto the current time, and the clock would fire a single punch at the card at the given coordinates.

Modern Time

Image via Comp-U-Charge

By the mid-century, time clocks had become somewhat simpler. No longer did the machine do the plotting for you. Now you put them in sideways, in the front, and use the indicator to get the punch in the right spot. It’s not hard to imagine why these gave way to more modern methods like fingerprint readers, or in my case, mag-stripe cards.

This is the type of time clock I intend to buy for myself, though I’m having trouble deciding between the manual model where you get to push a large button like this one, and the automatic version. I’d still like to build a time clock, too, for all the finesse and detail it could have by comparison. So honestly, I’ll probably end up doing both. Perhaps you’ll read about it on these pages one day.

❌
❌