Normal view

There are new articles available, click to refresh the page.
Before yesterdayMain stream

New Browser-based CAD System is Best Friends With Triangle Meshes

4 December 2025 at 04:00

Who’s interested in a brand new, from-scratch boundary representation (BREP) kernel? How about one that has no topological naming problem, a web-native parametric CAD front end to play with, and has CAD-type operations making friends with triangle meshes? If you’re intrigued, check out [mmiscool]’s BREP project.

Functioning (let alone feature-filled, or efficient) CAD systems are not a software project we see a whole lot of. Ones that represent models as genuine BREP structures but cleverly use mesh-based operations where it makes sense? Even less so.

In theory, CAD programs are simple: allow a user to define features, keep track of what they are and how they relate to one another, and perform operations on them as requested. In practice, it’s significant work. Chains of operations and dependencies easily become complex, volatile things and there is really no room for error.

Read [Arya Voronova]’s best practices for using FreeCAD to get a few hints as to what goes on behind the scenes in a modern CAD program, and the kinds of challenges the back end has to deal with, like the topological naming problem (TNP). A problem [mmiscool]’s implementation completely avoids, by the way.

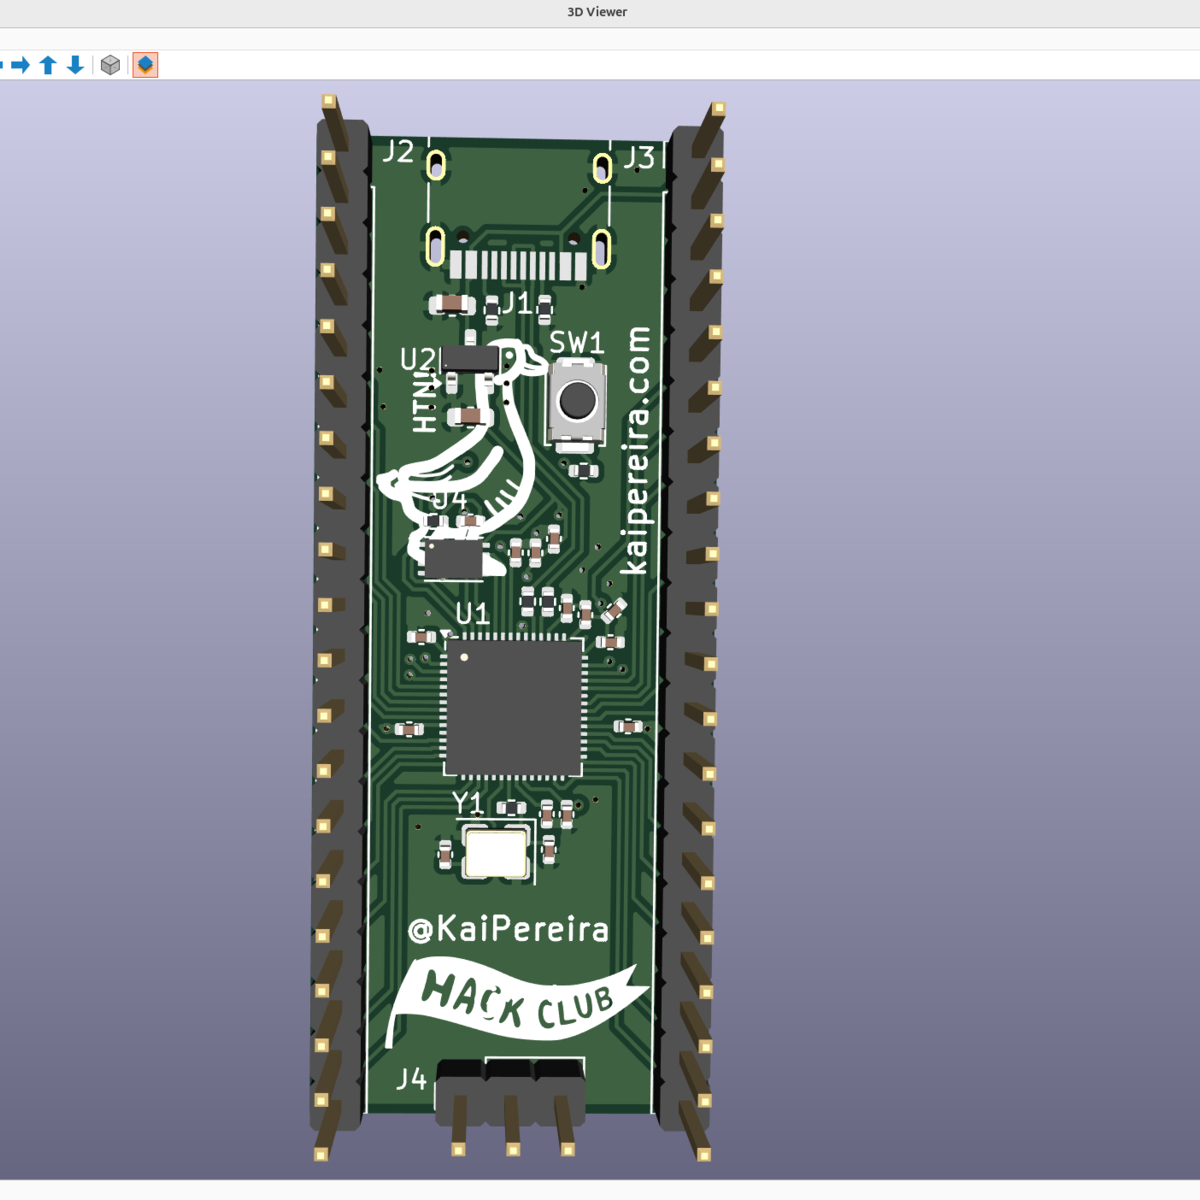
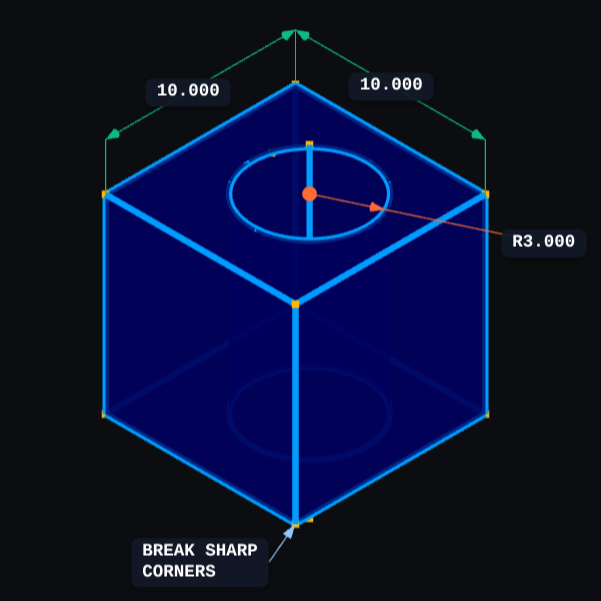
There is a live demo at BREP.io which acts as a playground for the state of the project. You can get started by clicking the + button towards the top on the left panel to add features and operations to the history (like add a cube, then add chamfers or fillets, or extrude a face, and so on).

[mmiscool] points out that all computation is done client-side; even complex operations like fillets, lofts, and multi-body booleans execute directly in the browser with no need to be offloaded to a back end. BREP’s development is being documented on Hackaday.io and there is a video embedded below that gives an overview. Why don’t you give it a spin?

How To Design 3D Printed Pins that Won’t Break

1 December 2025 at 11:30

[Slant 3D] has a useful video explaining some thoughtful CAD techniques for designing 3D printed pins that don’t break and the concepts can be extended to similar features.

Sure, one can make pins stronger simply by upping infill density or increasing the number of perimeters, but those depend on having access to the slicer settings. If someone else is printing a part, that part’s designer has no actual control over these things. So how can one ensure sturdier pins without relying on specific print settings? [Slant 3D] covers two approaches.

The first approach includes making a pin thick, making it short (less leverage for stress), and adding a fillet to the sharp corner where the pin meets the rest of the part. Why? Because a rounded corner spreads stress out, compared to a sharp corner.

Microfeatures can ensure increased strength in a way that doesn’t depend on slicer settings.

Those are general best practices, but there’s even more that can be done with microfeatures. These are used to get increased strength as a side effect of how a 3D printer actually works when making a part.

One type of microfeature is to give the pin a bunch of little cutouts, making the cross-section look like a gear instead of a circle. The little cutouts don’t affect how the pin works, but increase the surface area of each layer, making the part stronger.

A denser infill increases strength, too. Again, instead of relying on slicer settings, one can use microfeatures for a similar result. Small slots extending down through the pin (and going into the part itself) don’t affect how the part works, but make the part sturdier. Because of how filament-based 3D printing works, these sorts of features are more or less “free” and don’t rely on specific printer or slicer settings.

[Slant 3D] frequently shares design tips like this, often focused on designing parts that are easier and more reliable to print. For example, while printers are great at generating useful support structures, sometimes it’s better and easier in the long run to just design supports directly into the part.

An Online Repository for KiCad Schematics

By: Ian Bos
28 November 2025 at 10:00

In the desktop 3D printing world, we’re fortunate to have multiple online repositories of models that anyone can load up on their machine. Looking to create a similar experience but for electronic projects, [Mike Ayles] created CircuitSnips — a searchable database of ready-to-use KiCad schematics available under open source licenses.

Looking for reference designs for LiPo chargers? CircuitSnips has you covered. Want to upload your own design so others can utilize it? Even better. Currently, there are over four thousand circuits on CircuitSnips, although not all have been put there purposely. To get the project off the ground, [Mike] scrapped GitHub for open source KiCad projects. While this doesn’t run afoul of the licensing, there’s a mechanism in place for anyone who wants to have their project removed from  the repository.

To scrape the depths of GitHub, [Mike] had to simplify the text expression for the KiCad projects using a tool he’s since released. For anyone so inclined, he’s even put the entire site on GitHub for anyone who wants to try their hand at running it locally.

CircuitSnaps fills a very specific space to post your circuit diagrams, but if you’re looking for somewhere to host your complete designs, we can’t fail to mention Hackaday’s own repository for hardware projects and hacks!

KiDoom Brings Classic Shooter to KiCad

27 November 2025 at 01:00

As the saying goes: if it has a processor and a display, it can run DOOM. The corollary here is that if some software displays things, someone will figure out a way to make it render the iconic shooter. Case in point KiDoom by [Mike Ayles], which happily renders DOOM in KiCad at a sedate 10 to 25 frames per second as you blast away at your PCB routing demons.

Obviously, the game isn’t running directly in KiCad, but it does use the doomgeneric DOOM engine in a separate process, with KiCad’s PCB editor handling the rendering. As noted by [Mike], he could have used a Python version of DOOM to target KiCad’s Python API, but that’s left as an exercise for the reader.

Rather than having the engine render directly to a display, [Mike] wrote code to extract the position of sprites and wall segments, which is then sent to KiCad via its Python interface, updating the view and refreshing the ‘PCB’. Controls are as usual, though you’ll be looking at QFP-64 package footprints for enemies, SOIC-8 for decorations and SOT-23-3 packages for health, ammo and keys.

If you’re itching to give it a try, the GitHub project can be found right here. Maybe it’ll bring some relief after a particularly frustrating PCB routing session.

MicroCAD Programs CAD

26 November 2025 at 07:00

We love and hate OpenSCAD. As programmers, we like describing objects we want to 3D print or otherwise model. As programmers, we hate all the strange things about OpenSCAD that make it not like a normal programming language. Maybe µCAD (or Microcad) is the answer. This new entry in the field lets you build things programmatically and is written in Rust.

In fact, the only way to get it right now is to build it from source using cargo. Assuming you already have Rust, that’s not hard. Simply enter: cargo install microcad. If you don’t already have Rust, well, then that’s a problem. However, we did try to build it, and despite having the native library libmanifold available, Rust couldn’t find it. You might have better luck.

You can get a feel for the language by going through one of the tutorials, like the one for building a LEGO-like shape. Here’s a bit of code from that tutorial:


use std::geo2d::*;
use std::ops::*;

const SPACING = 8mm;

op grid(columns: Integer, rows: Integer) {
@input
.translate(x = [1..columns] * SPACING, y = [1..rows] * SPACING)
.align()
}

sketch Base(
columns: Integer,
rows: Integer,
width: Length,
height: Length
) {
thickness = 1.2mm;
frame = Frame(width, height, thickness);
struts = Ring(outer_d = 6.51mm, inner_d = 4.8mm)
.grid(columns = columns-1, rows = rows-1);
frame | struts;
}

There are proper functions, support for 2D sketches and 3D objects, and even a VSCode extension.

Will you try it? If we can get it to build, we will. Meanwhile, there’s always OpenSCAD. Even TinkerCAD can do some parametric modeling.

Making Actually Useful Schematics in KiCad

21 November 2025 at 19:00
Schematic of a voltage divider

[Andrew Greenberg] has some specific ideas for how open-source hardware hackers could do a better job with their KiCad schematics.

In his work with students at Portland State University, [Andrew] finds his students both reading and creating KiCad schematics, and often these schematics leave a little to be desired.

To help improve the situation he’s compiling a checklist of things to be cognisant of when developing schematics in KiCad, particularly if those schematics are going to be read by others, as is the hope with open-source hardware projects.

In the video and in his checklist he runs us through some of the considerations, covering: visual design best practices; using schematic symbols rather than packages; nominating part values; specific types of circuit gotchas; Design for Test; Design for Fail; electric rule checks (ERC); manufacturer (MFR), part number (MPN), and datasheet annotations for Bill of Materials (BOM); and things to check at the end of a design iteration, including updating the date and version number.

(Side note: in the video he refers to the book The Visual Display of Quantitative Information which we have definitely added to our reading list.)

Have some best practices of your own you would like to see on the checklist? Feel free to add your suggestions!

If you’re interested in KiCad you might like to read about what’s new in version 9 and how to customize your KiCad shortcut keys for productivity.

A Quick Primer On TinkerCAD’s New Features

By: Lewin Day
18 November 2025 at 11:30

TinkerCAD had its first release all the way back in 2011 and it has come a long way since then. The latest release has introduced a raft of new, interesting features, and [HL ModTech] has been nice enough to sum them up in a recent video.

He starts out by explaining some of the basics before quickly jumping into the new gear. There are two headline features: intersect groups and smooth curves. Where the old union group tool simply merged two pieces of geometry, intersect group allows you to create a shape only featuring the geometry where two individual blocks intersect. It’s a neat addition that allows the creation of complex geometry more quickly. [HL ModTech] demonstrates it with a sphere and a pyramid and his enthusiasm is contagious.

As for smooth curves, it’s an addition to the existing straight line and Bézier curve sketch tools. If you’ve ever struggled making decent curves with Bézier techniques, you might appreciate the ease of working with the smooth curve tool, which avoids any nasty jagged points as a matter of course.

While it’s been gaining new features at an impressive rate, ultimately TinkerCAD is still a pretty basic tool — it’s not the sort of thing you’d expect to see in the aerospace world or anything. ut it’s a great way to start whipping up custom stuff on your 3D printer.

The Value of a Worked Example

15 November 2025 at 10:00

I was looking over the week’s posts on Hackaday – it’s part of my job after all – and this gem caught my eye: a post about how to make your own RP2040 development board from scratch. And I’ll admit that my first thought was “why would you ever want to do that?” (Not a very Hackaday-appropriate question, honestly.) The end result will certainly cost more than just buying a Pi Pico off the shelf!

Then it hit me: this isn’t a project per se, but rather [Kai] was using it as an test run to learn the PCB-production toolchain. And for that, replicating a Pico board is perfect, because the schematics are easily available. While I definitely think that a project like this is a bit complicated for a first PCB project – I’d recommend making something fun like an SAO – the advantage of making something slightly more involved is that you run into all of the accompanying problems learning experiences. What a marvelous post-complete-beginner finger exercise!

And then it hit me again. [Kai]’s documentation of everything learned during the project was absolutely brilliant. It’s part KiCAD tutorial, part journal about all the hurdles of getting a PCB made, and just chock-full of helpful tips along the way. The quality of the write-up turns it from being just a personal project into something that can help other people who are in exactly the same boat, and I’m guessing that’s a number of you out there.

In the end, this was a perfect Hackaday project. Yes, it was “too simple” for those who have made their 30th PCB design. (Although I’d bet you could still pick up a KiCAD tip or two.) And yes, it doesn’t make economic sense to replicate mass-market devices in one-off. And of course, it doesn’t need that fun art on the board either. But wrap all these up together, and you get a superbly documented guide to a useful project that would walk you through 95% of what you’ll need to make more elaborate projects later on. Superb!

Surely you do “finger exercises” too. Why not write them up, and share the learning? And send them our way – we know just the audience who will want to read it.

This article is part of the Hackaday.com newsletter, delivered every seven days for each of the last 200+ weeks. It also includes our favorite articles from the last seven days that you can see on the web version of the newsletter. Want this type of article to hit your inbox every Friday morning? You should sign up!
❌
❌